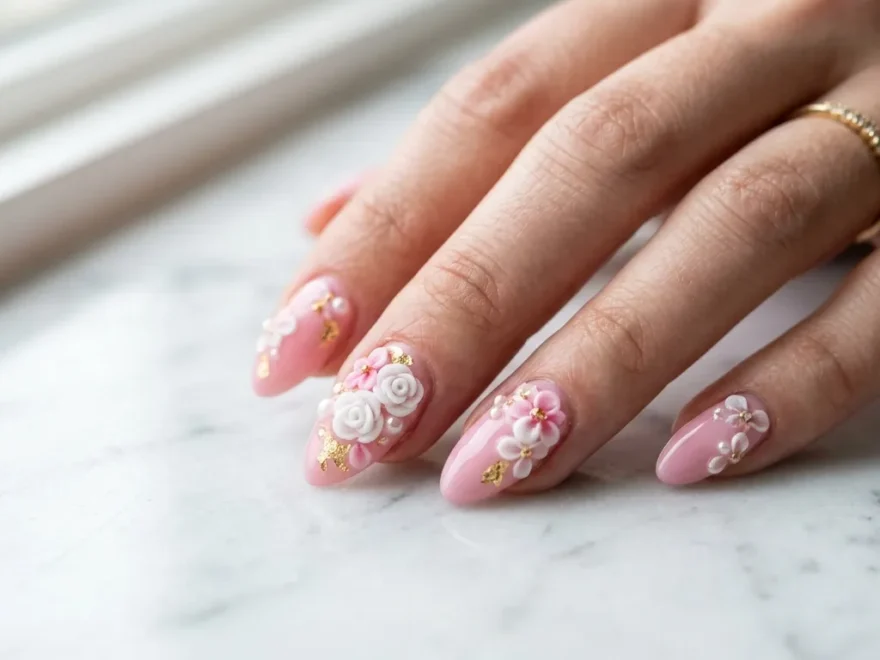
1. Classic Rose Gel Flowers on French Tips
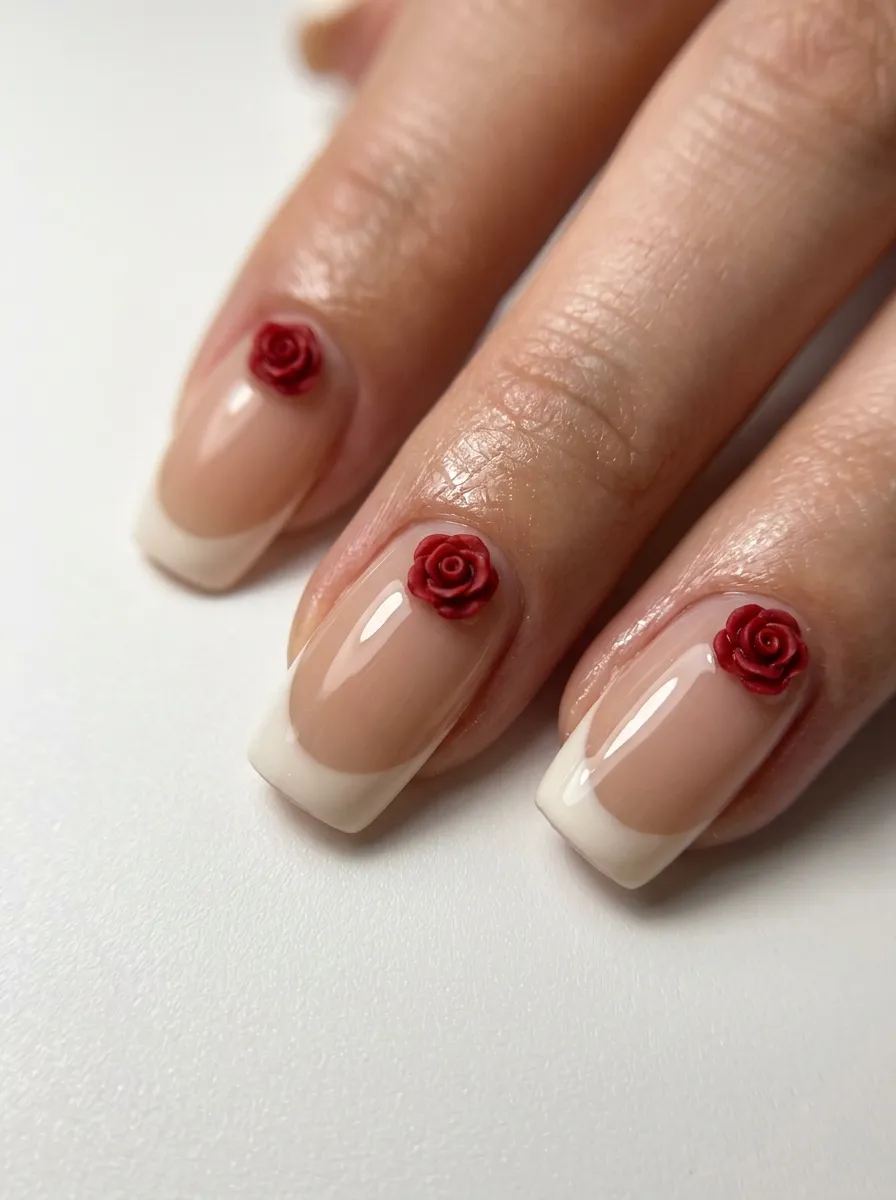
A rose on a French tip is a timeless pairing. The clean white line at the tip keeps things classic, while the tiny rose adds a romantic touch. You only need one rose per nail, usually placed near the cuticle or off to one corner. Start with a nude or soft pink base coat. Once the French tip is set, roll a small ball of red or pink gel and shape it into rounded petal layers with a dotting tool. Build the petals from the center outward, curling the edges slightly for a real look. Cure each layer under your lamp before adding the next. Budget tip: you don’t need a full flower kit. A single tube of colored gel and an old makeup brush trimmed short can shape decent petals. If you’re new to this, practice on a nail wheel first. Most beauty supply stores sell them for a few dollars. This design works well for weddings, anniversaries, or any time you want an elegant, put-together look without covering every nail in detail. Keep the rest of your nails plain to let the roses stand out as the star of the set.
2. Daisy Chain Accent Nails
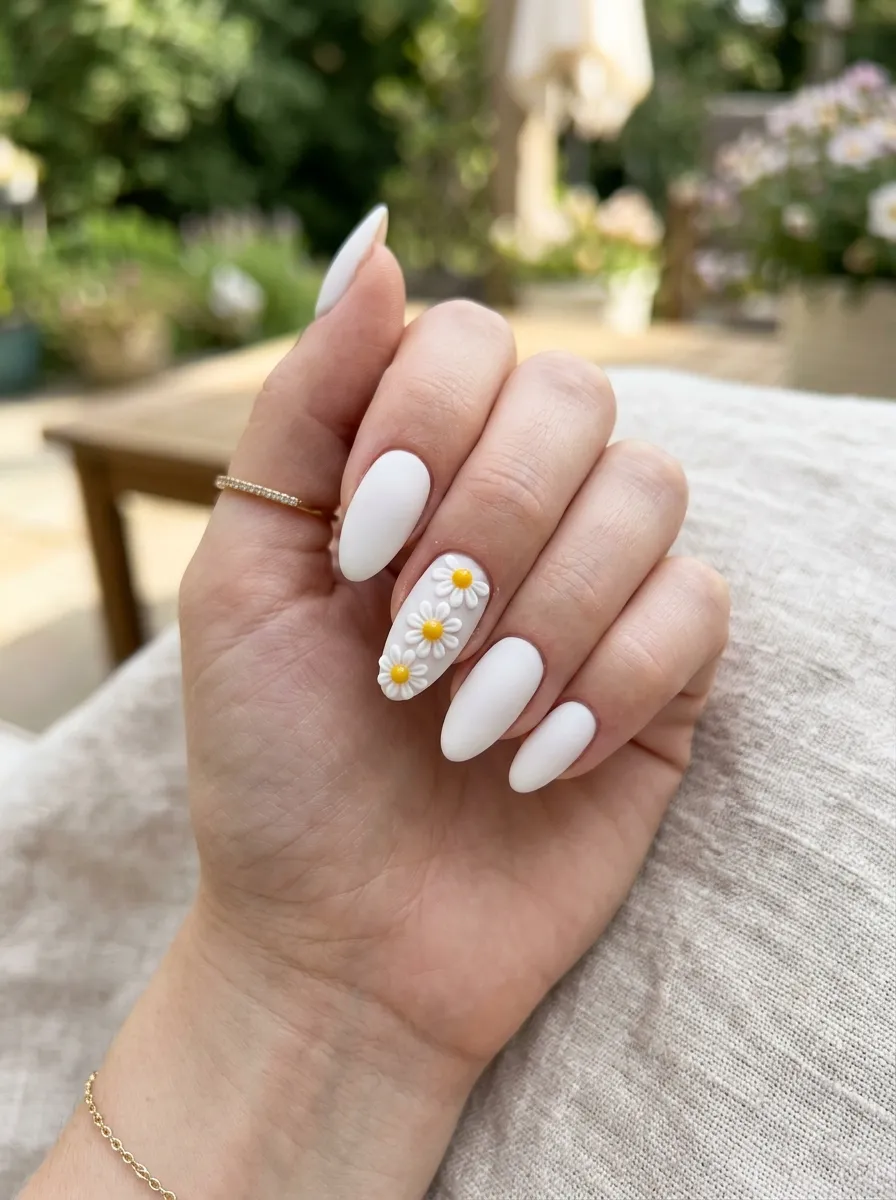
Daisies are one of the easiest flowers to shape in gel, which makes them perfect for beginners. Each petal is just a small oval, so you don’t need advanced sculpting skills. Pick one nail per hand as your accent, then line up three or four tiny daisies in a row or scattered pattern. Use white gel for the petals and a dot of yellow in the center for that classic daisy look. A short, flat brush helps keep each petal even. Cure between petals so they hold their shape instead of blending together. Budget tip: buy a basic white and yellow gel duo instead of a full color set. These two shades alone can create daisies, and you can add a green gel line for stems if you want a fuller design. This look pairs nicely with summer outfits, festival looks, or a casual weekend manicure. It also photographs well, since the contrast between white petals and a colored base makes the flowers pop in pictures. Try it with a soft blue or lilac base for a fresh, playful combination that still feels simple to wear every day.
3. Cherry Blossom Petals in Pastel Pink
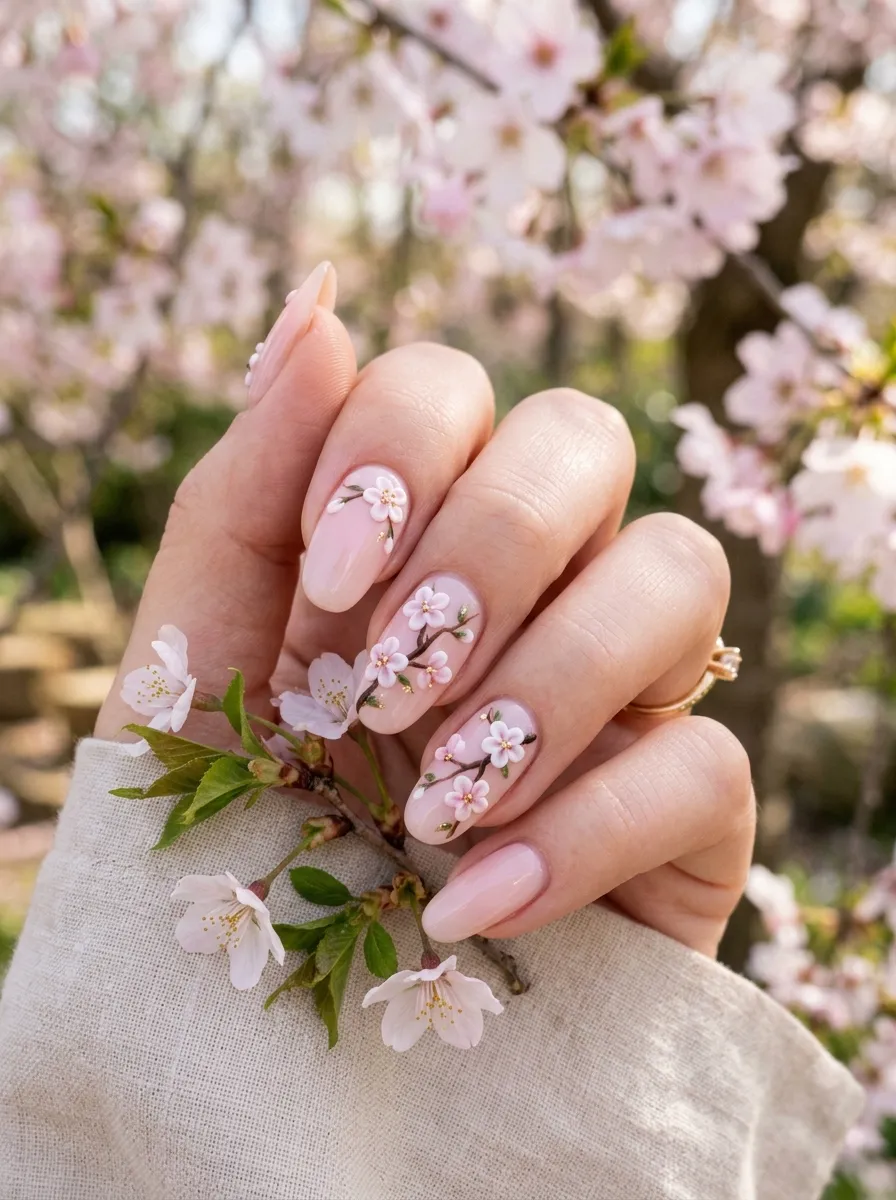
Cherry blossoms bring a soft, dreamy feel to any manicure. Each flower has five small rounded petals with a slight notch at the tip, which gives it that recognizable blossom shape. Use a pale pink or blush gel for the petals and a thin brown line for the branch running across one or two nails. Add tiny dots in a darker pink at the center of each blossom for depth. This design works beautifully as a gradual scatter, with more blossoms near the base and fewer toward the tip. Budget tip: you can skip buying a specialty brush and use a regular fine liner brush for the branch lines, since they just need to be thin and slightly curved. If your gel colors are limited, mix a drop of white into pink gel to get a lighter blossom shade. This look is popular in spring and works well for graduations, garden parties, or anyone drawn to Japanese-inspired nail art. Keep the branch lines a little uneven and organic rather than perfectly straight, since real branches curve and bend, and that small detail makes the whole design look more natural.
4. Sunflower Statement Nail
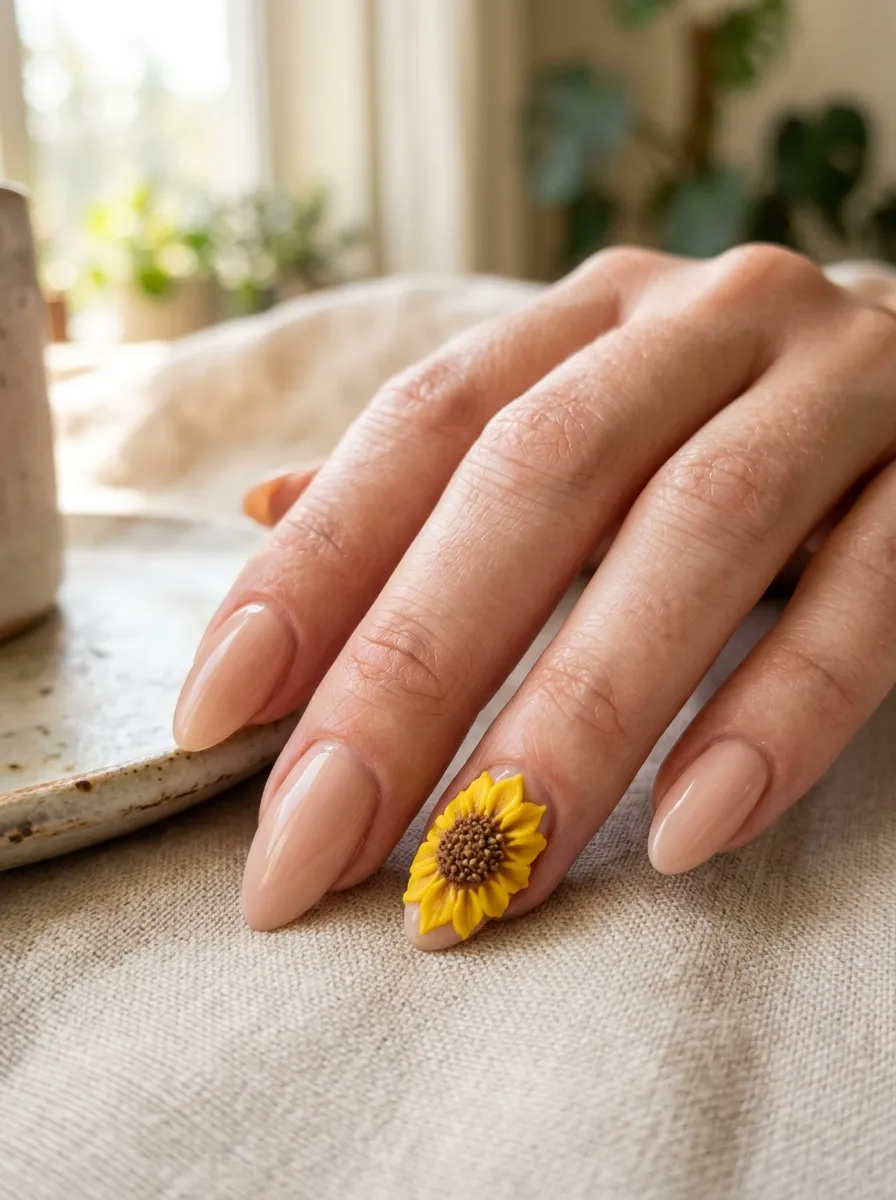
Sunflowers make a bold, cheerful statement without needing every nail covered in detail. Choose one nail as your feature and build a single large flower that takes up most of the nail bed. Start with yellow gel petals arranged in a circle, slightly overlapping each other. Then fill the center with brown gel and use a dotting tool to add small texture bumps, mimicking the seed pattern of a real sunflower. This center detail is what makes the flower look believable instead of flat. Budget tip: you don’t need special texture tools for the center. The tip of a toothpick works fine for pressing small dots into the brown gel before curing. Keep the remaining nails a soft nude or light green to complement the sunflower without competing with it. This design suits late summer and fall, and it works well for outdoor events, county fairs, or anyone who wants a cheerful pop of color on just one nail. Sunflowers also tend to be more forgiving for beginners, since slightly uneven petals still read as a full, natural bloom rather than a mistake.
5. Tiny Wildflower Meadow Design
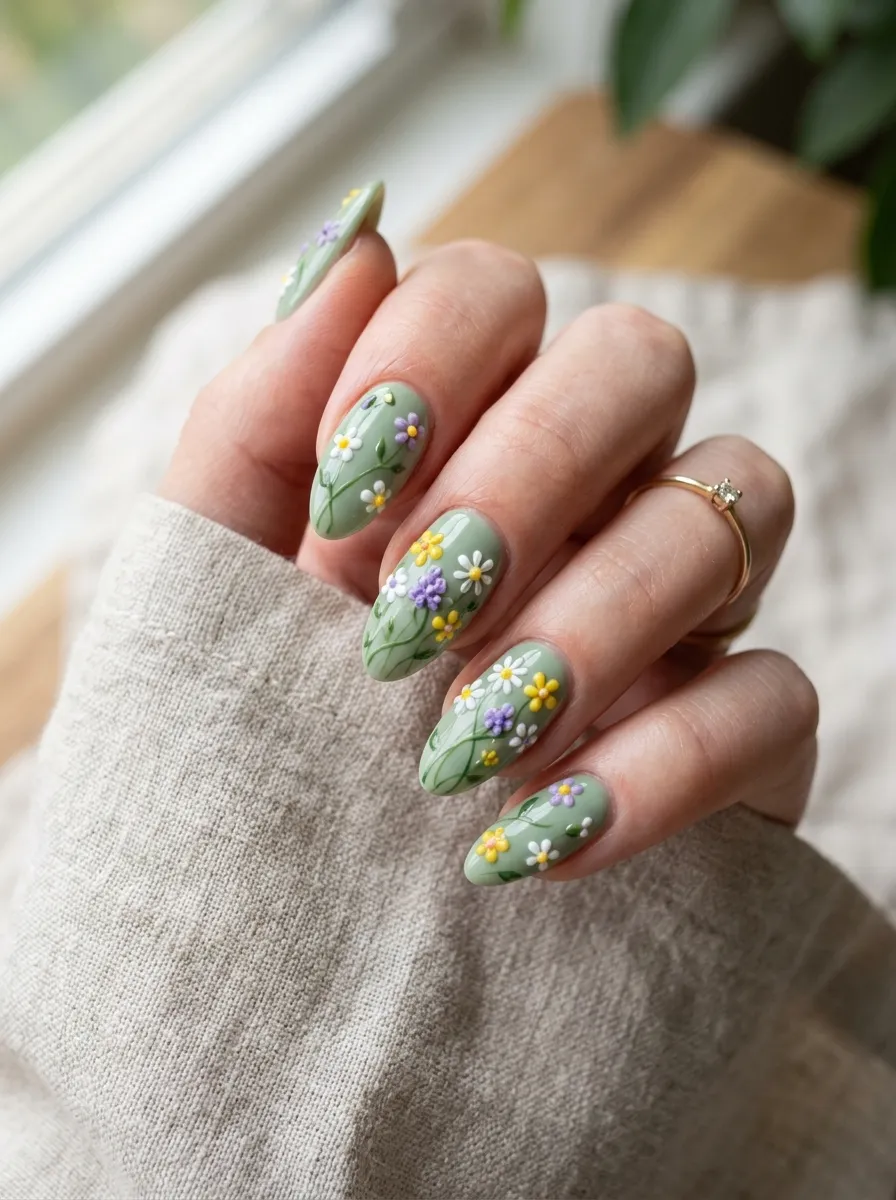
A wildflower meadow design covers the nail in small, mismatched blooms instead of one large flower. This is a great option if you want a full, detailed look without repeating the same flower shape over and over. Mix two or three tiny flower types, like a simple five-petal daisy, a small round bud, and a tiny star shape, scattered across a green or nude base. Thin stem lines in green gel connect the flowers loosely, similar to grass and stems in a real field. Budget tip: use leftover gel colors from other manicures instead of buying new shades. Wildflower designs look better with a slightly random color mix anyway, so mismatched leftovers actually work in your favor. Keep the flowers small, no bigger than a grain of rice, so you can fit several on one nail without crowding it. This style suits spring and summer, and it pairs well with sundresses, outdoor weddings, or a casual day out. Because the flowers are tiny and scattered, small imperfections blend into the overall pattern instead of standing out, which makes this a forgiving design for practicing your gel flower skills.
6. Lavender Sprig 3D Nails
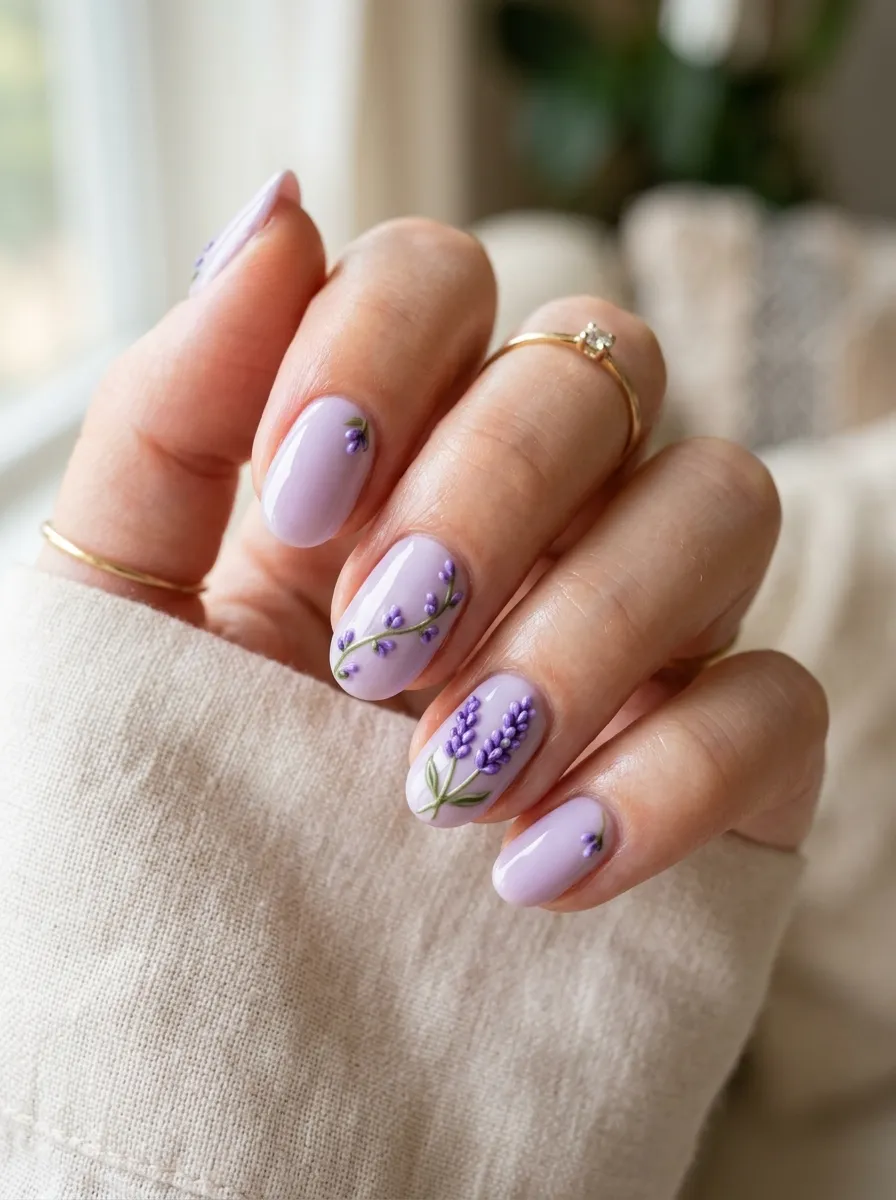
Lavender sprigs bring a calm, cottage-garden feel to your nails. Instead of shaping full flowers, you create a row of tiny purple dots along a thin green stem, mimicking the way lavender buds cluster together. Start by painting a thin curved green line up the side of the nail for the stem. Then add small purple dots along the stem, getting slightly smaller as they reach the top. This gradual sizing gives the sprig a realistic, tapered look. Budget tip: a dotting tool in two sizes is all you need here, and many beauty stores sell a set of five for under ten dollars. If you don’t have one, the rounded end of a bobby pin works as a substitute for smaller dots. This design suits a soft lilac, sage, or nude base and looks elegant without being fussy. It’s a good choice for baby showers, garden parties, or anyone who wants a subtle floral touch rather than a bold statement flower. Lavender sprigs also work nicely as a border along the cuticle line if you want the flowers to frame the nail instead of covering the center.
7. Hibiscus Tropical Flower Nails
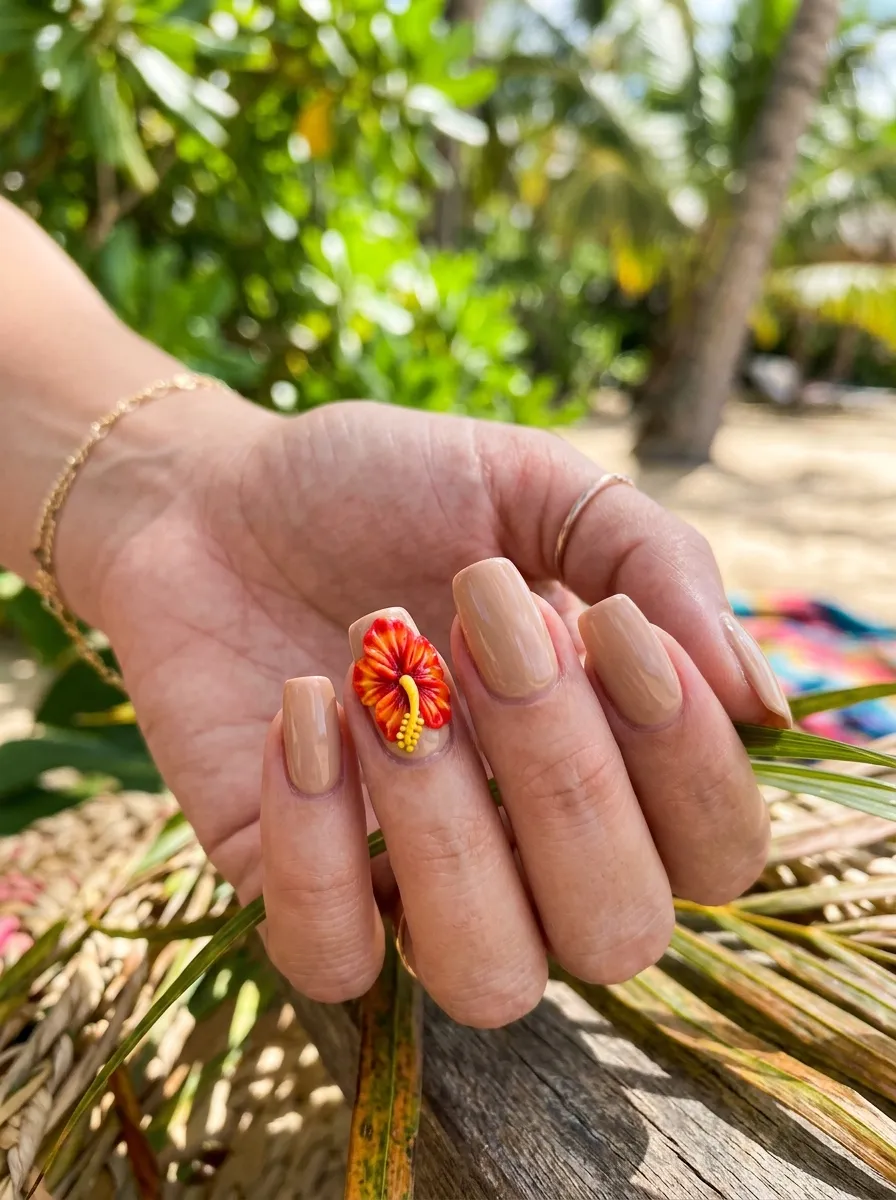
Hibiscus flowers bring a bold tropical energy to any manicure. The petals are wide and slightly ruffled, and the flower usually has a long curled center piece called a stamen that extends past the petals. Use a warm red or orange gel for the five petals, layering them with a slightly darker shade near the base for depth. For the center, roll a thin line of yellow gel and curl it upward before curing, creating that signature hibiscus stamen look. Budget tip: if curling the stamen feels tricky at first, practice shaping it on a spare nail tip before committing to your real nail. It only takes a couple of tries to get the curl right. Pair this flower with a tan, coral, or white base to keep the tropical feel consistent. This design suits beach vacations, summer parties, or anyone craving a bright, warm color palette. Since hibiscus flowers are naturally bold and slightly imperfect in shape, small variations between petals still look believable, which makes this a fun design to experiment with color combinations like pink and yellow or orange and red.
8. Ombre Rose Petals
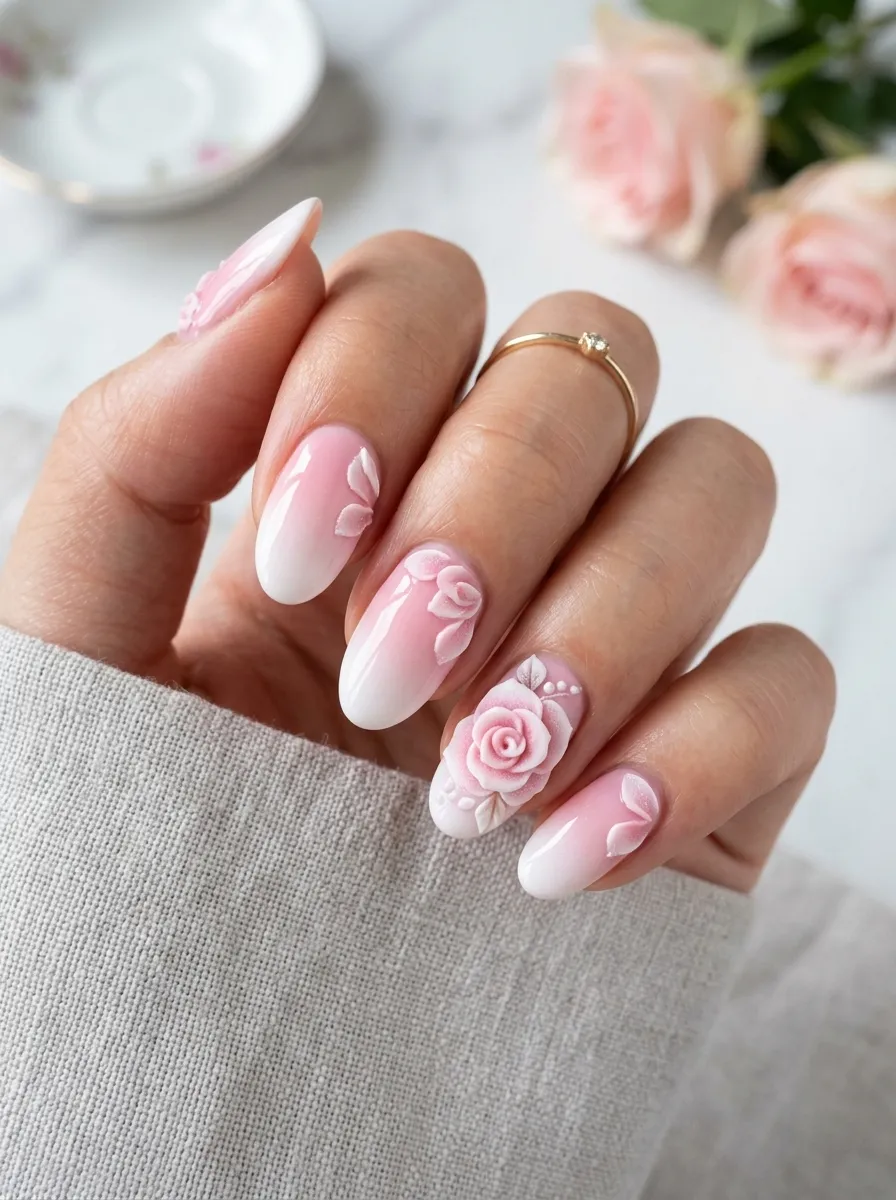
Ombre rose petals combine two trends in one manicure: gradient color and dimensional flowers. The base nail fades from a deeper pink at the cuticle to white or pale pink at the tip. The rose petals then follow that same fade, using a slightly darker gel near the base of the flower and lighter gel toward the outer petals. This creates a soft, blended look that feels more advanced than it actually is. Budget tip: you can create the ombre base with a makeup sponge instead of buying an airbrush system. Dab two gel polish shades onto the sponge and press it onto the nail before curing, then go over it with topcoat. The rose petals on top hide any small blending imperfections underneath. This design works well for weddings, date nights, or anytime you want a soft, romantic look with a bit more detail than a plain manicure. Because the color transition draws the eye first, the rose shaping doesn’t need to be perfect, which makes this a good next step once you’ve practiced basic rose petals on a solid background.
9. White Lily Bridal Nails
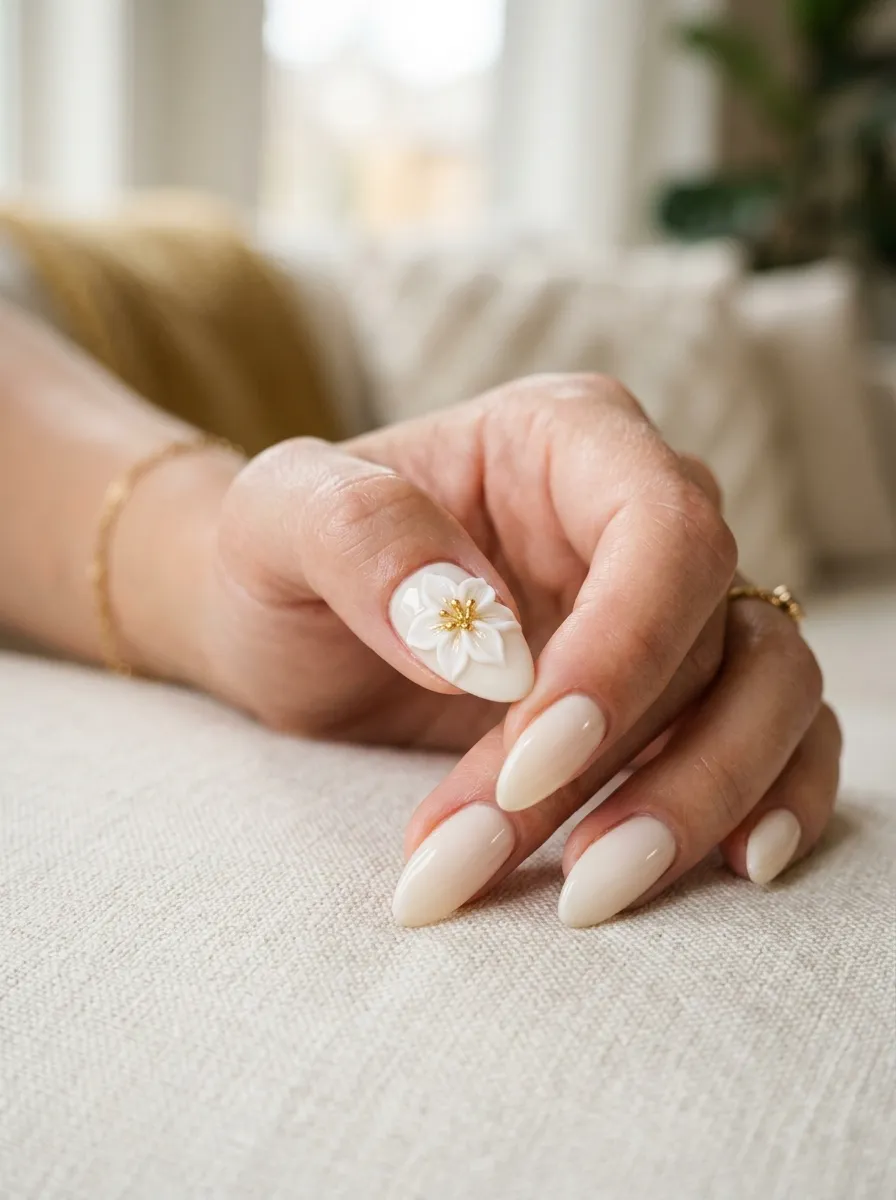
White lilies bring an elegant, bridal quality to nail art. The petals are long and pointed rather than round, which sets this flower apart from roses or daisies. Shape each petal by pulling the gel into a slight point at the tip using a fine brush, then curve the petal edges outward slightly for a natural open look. Five to six petals per flower is standard. Add a small cluster of tiny gold or yellow dots in the center to represent the stamen. Budget tip: white gel can look flat on its own, so mix in the tiniest drop of pale yellow or cream to give the petals a warmer, more natural white instead of a stark, plastic-looking white. Use this design on an ivory or soft champagne base for a cohesive bridal look. Lilies work well as a single accent flower on the ring finger, paired with plain, glossy nails on the rest of the hand. This style suits weddings, engagement photos, or formal events where you want elegant detail without an overly busy design. The pointed petal shape also makes lilies a nice contrast if you’re mixing flower types across your nails.
10. Peony Ruffle Petals
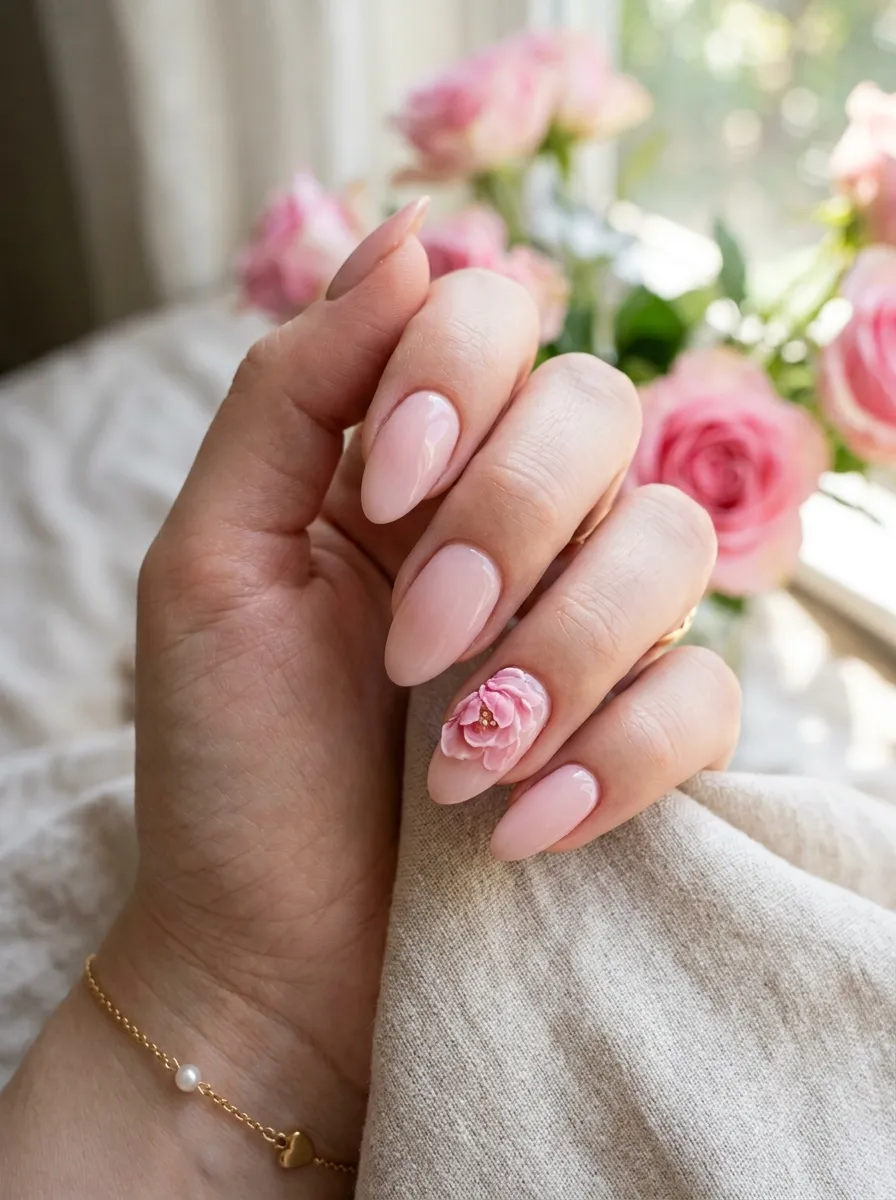
Peonies are known for their full, ruffled petals, and recreating that texture in gel takes a bit more layering than simpler flowers. Instead of smooth, flat petals, use a thin brush to add small ridges and folds into each petal before curing, mimicking the crinkled look of real peony petals. Build the flower in layers, starting with three or four larger petals at the base and adding smaller, tighter petals toward the center. This layering is what gives the peony its full, rounded shape. Budget tip: you don’t need a dedicated ruffle tool for this. The edge of an old, slightly worn nail brush can create small texture lines when dragged lightly through wet gel before curing. Use a blush pink, dusty rose, or soft coral for a realistic peony color. This design suits spring weddings, Mother’s Day, or any occasion calling for a romantic, detailed manicure. Because peonies have so many layered petals, this design takes a bit longer than others on this list, but the payoff is a manicure that looks noticeably more detailed and worth the extra time.
11. Poppy Red Accent Flower
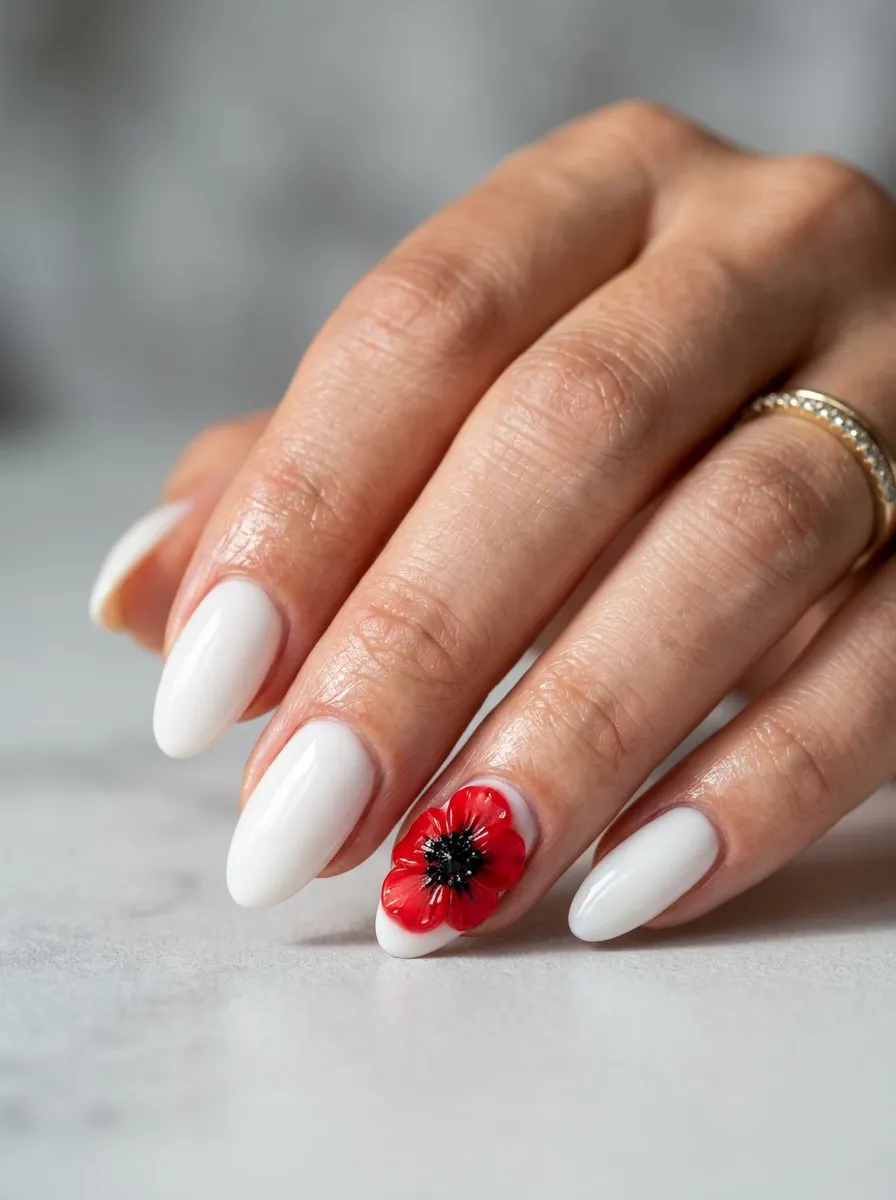
Poppies are a striking choice when you want one bold flower instead of a scattered pattern. The petals are wide, thin, and slightly wrinkled, with a dark, almost black center that creates strong contrast. Use a bright red gel for four to five petals, keeping them thin and slightly uneven at the edges for a realistic, papery look. The center is where poppies stand out: use black or deep brown gel and add small texture dots around the middle to mimic the seed pod. Budget tip: a single bottle of red gel and a small pot of black gel are all you need for this design, making it one of the more affordable statement flowers on this list. Pair the poppy with a crisp white or soft gray base to let the red really stand out. This design works well for summer, Remembrance Day nail art, or anyone who wants a single eye-catching flower rather than a full floral set. Because the contrast between red and black does most of the visual work, the petal shaping doesn’t need to be perfectly symmetrical to look effective.
12. Baby’s Breath Cluster Nails
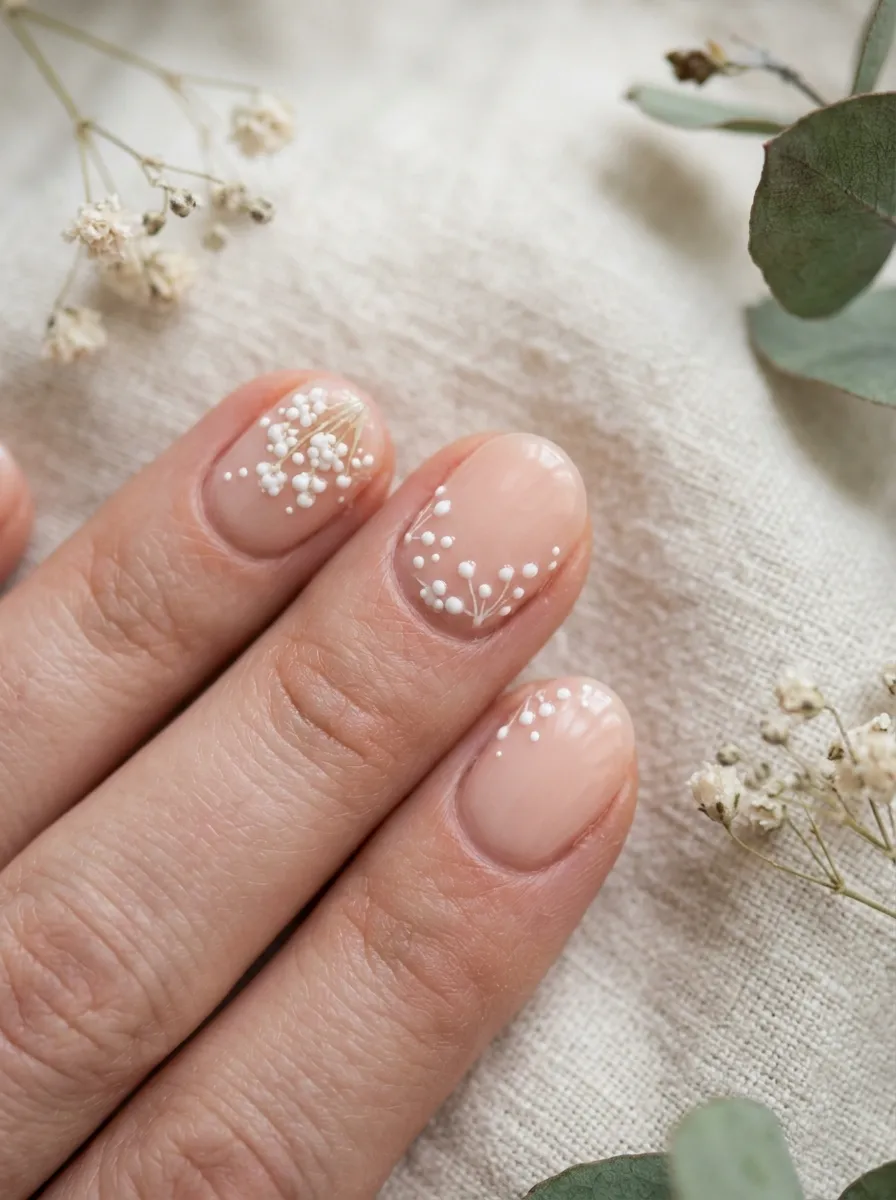
Baby’s breath is one of the simplest florals to recreate, since it’s really just small clusters of tiny white dots. This makes it an easy design for beginners or for anyone short on time. Using a small dotting tool, place three to five tiny white dots close together in small clusters across the nail, leaving space between each cluster so they don’t blend into one solid shape. Vary the cluster sizes slightly for a more natural, airy look. Budget tip: this design barely uses any gel, so a single small pot of white gel can last through several manicures. It’s a great way to practice dot control before moving on to more detailed flowers. Use a nude, soft pink, or pale gray base to let the delicate white clusters stand out without overwhelming the nail. This design suits weddings, everyday wear, or anyone who wants a subtle floral touch that still reads as intentional nail art. Baby’s breath also pairs nicely as a filler between larger flowers if you’re building a fuller floral design and need something small to balance out the empty spaces.
13. Orchid Elegance Design
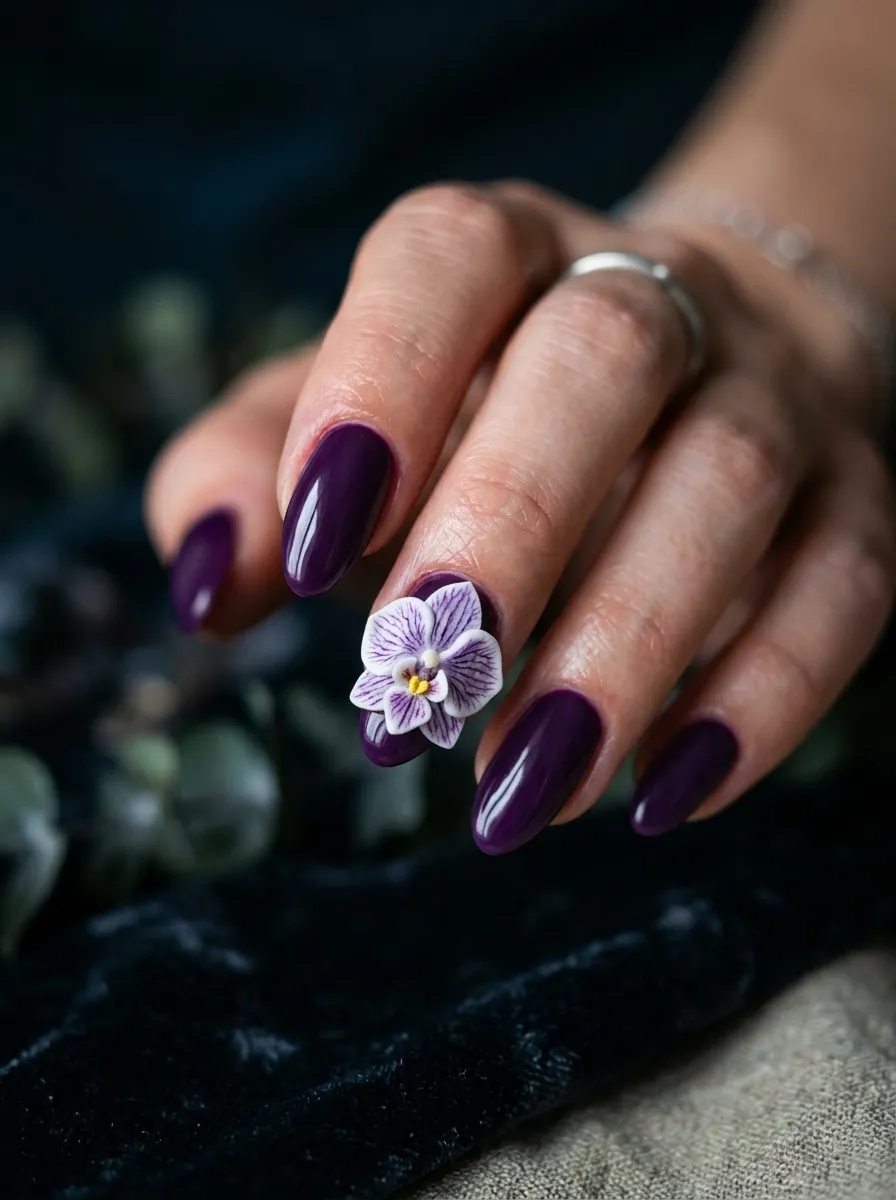
Orchids have a distinct, slightly asymmetrical petal shape that makes them stand out from rounder flowers like roses or peonies. The center petal is usually wider and marked with small dots or fine lines, while the surrounding petals curve outward at slightly different angles. Use a soft lavender or white gel for the petals, then add small purple dots or thin lines on the center petal using a fine liner brush. This detail is what gives the orchid its recognizable look. Budget tip: practice the center petal marking on a nail wheel first, since getting the fine lines right takes a few tries. Once you’re comfortable, it goes quickly. Pair the orchid with a deep purple, black, or white base for a striking contrast. This design suits date nights, formal events, or anyone who wants a slightly more advanced flower to add to their nail art skills. Orchids work especially well as a single statement nail, since the detail in the center petal draws attention even without covering the whole nail in flowers.
14. Marigold Golden Bloom
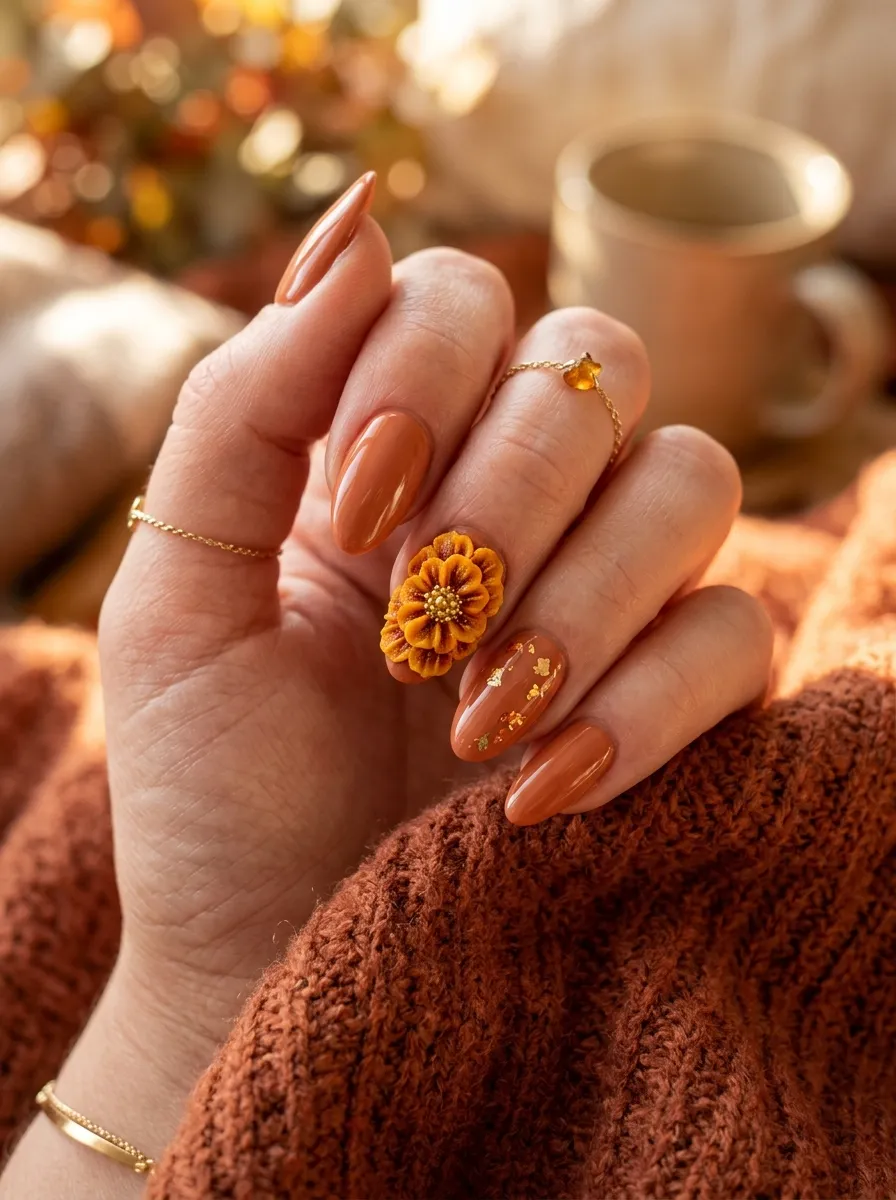
Marigolds bring warm, golden tones that work especially well for fall manicures. The petals are small, tightly packed, and slightly ruffled, similar to a mini pom-pom shape. Build the flower by layering small orange and gold petals in a tight circular pattern, starting from the outer edge and working inward until the center is filled with short, ruffled petals. Unlike a rose or daisy, marigolds don’t have a visible flat center, so keep adding small petal layers until the whole flower looks full. Budget tip: two gel shades, a warm orange and a golden yellow, are enough to create depth without buying a large color set. Alternate the shades slightly as you layer for a richer, more dimensional look. Use this flower on a terracotta, rust, or cream base for an autumn-ready manicure. This design suits fall festivals, Thanksgiving gatherings, or anyone drawn to warm color palettes. Because marigolds are naturally dense and layered, small gaps or uneven petals tend to disappear into the overall texture, making this a forgiving flower for practicing layered petal work.
15. Forget-Me-Not Blue Florals
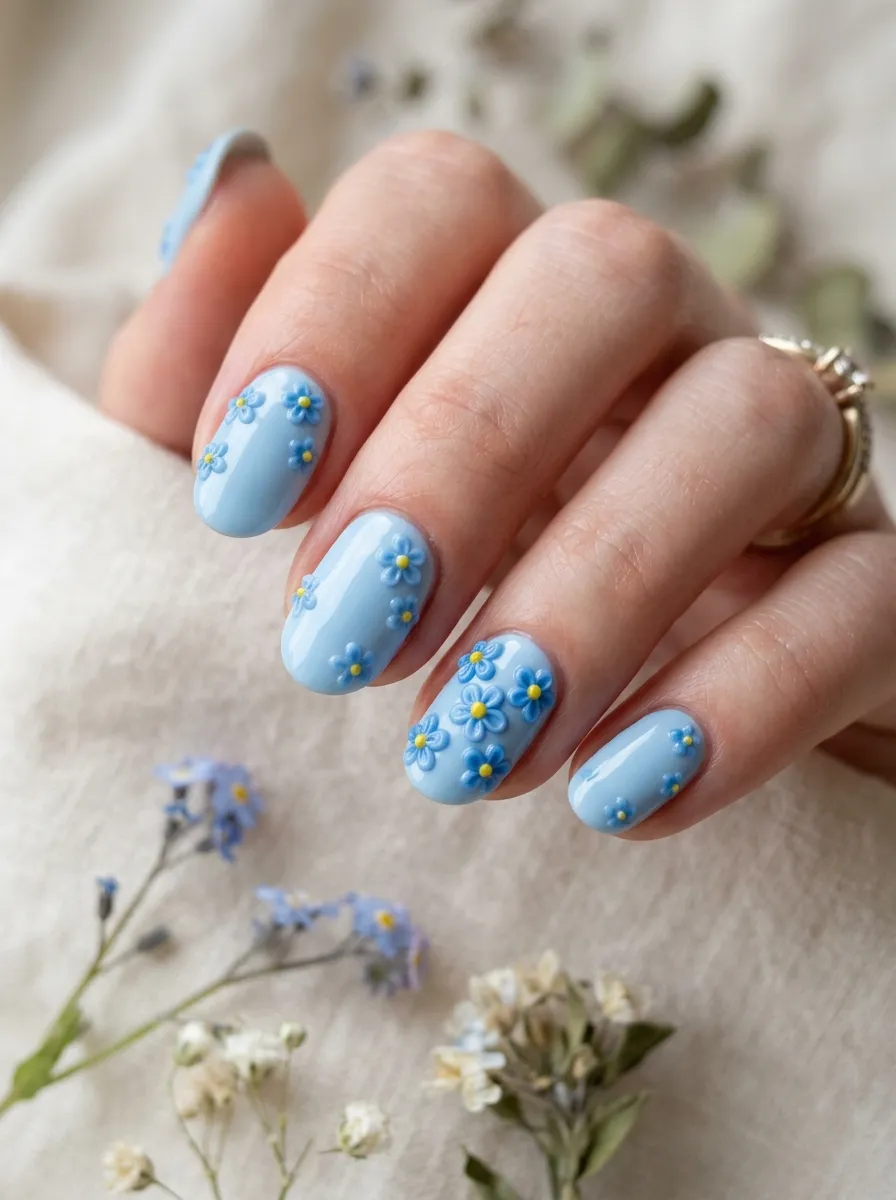
Forget-me-nots are tiny, five-petal flowers with a small yellow center, and their small size makes them perfect for a delicate, scattered look. Each flower is made of five small rounded petals in a soft blue gel, arranged in a circle around a tiny yellow dot center. Because the flowers are so small, you can fit several across one nail for a fuller design, or space them out for a more minimal look. Budget tip: a fine dotting tool is really all you need here, since each petal is just a small dot pressed and slightly flattened before curing. This is a great design for using up small amounts of leftover blue and yellow gel from other manicures. Use a soft blue, white, or pale gray base to keep the overall look light and airy. This design suits everyday wear, baby showers, or anyone who wants a subtle floral pattern that doesn’t take hours to complete. Forget-me-nots also work nicely mixed in with other tiny flowers, like daisies or baby’s breath, if you want a varied wildflower-style manicure without much extra effort.
16. Magnolia White Bloom
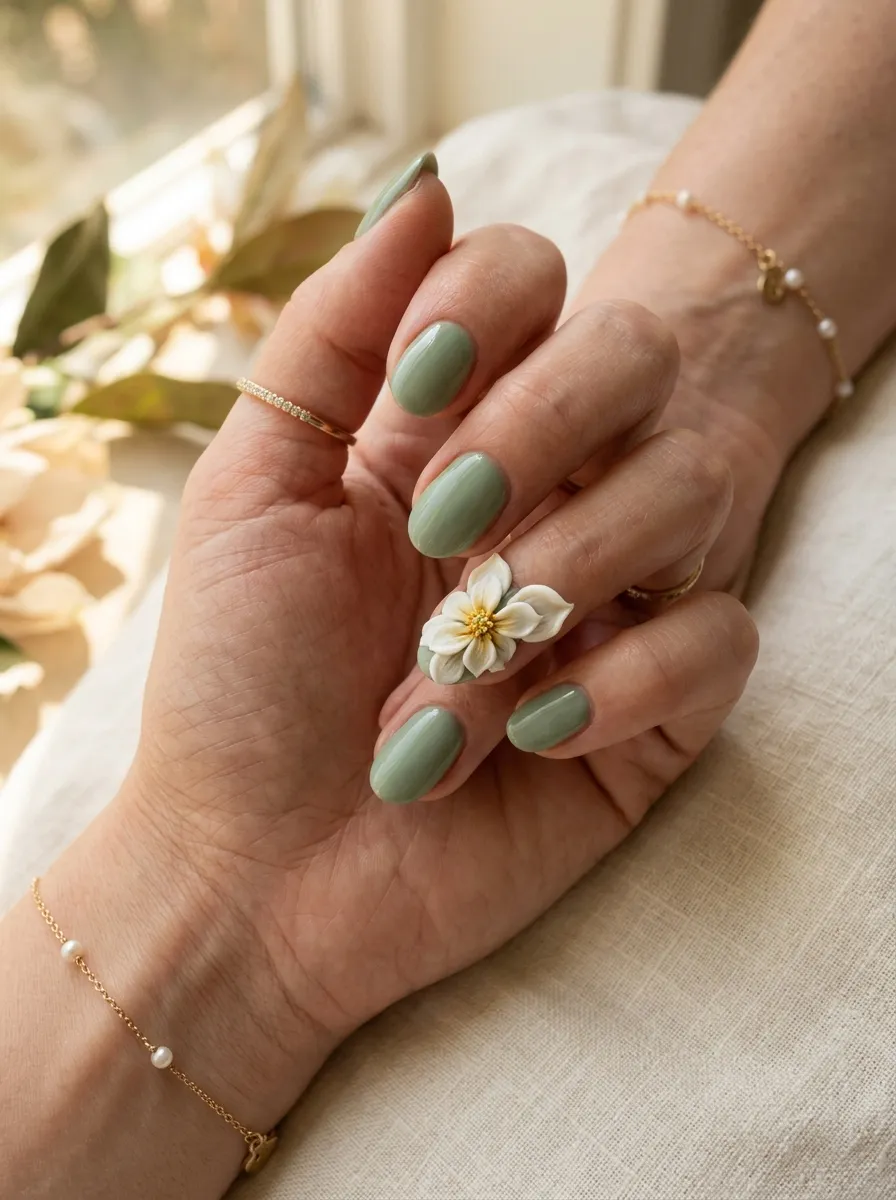
Magnolias have wide, curved petals that open up in a relaxed, slightly cupped shape, giving them a soft and elegant look. Unlike tighter flowers like roses, magnolia petals stay more open and spaced apart, so you’ll usually see five to six petals with visible gaps between them. Use a white or cream gel, adding a soft pink blush near the base of each petal for a natural gradient. Shape the petals wide and slightly curved rather than pointed, curling the tips outward gently before curing. Budget tip: white and cream gel can be mixed from polishes you likely already own, so this design doesn’t require buying new colors for most people. Pair the magnolia with a soft green or sage base to mimic the look of magnolia leaves. This design suits spring, Mother’s Day, or anyone who wants an elegant, larger flower without the dense layering that peonies or marigolds require. Because the petals are meant to look loose and open rather than tightly packed, small gaps between petals actually add to the natural, relaxed look of this flower.
17. Tulip Spring Nails
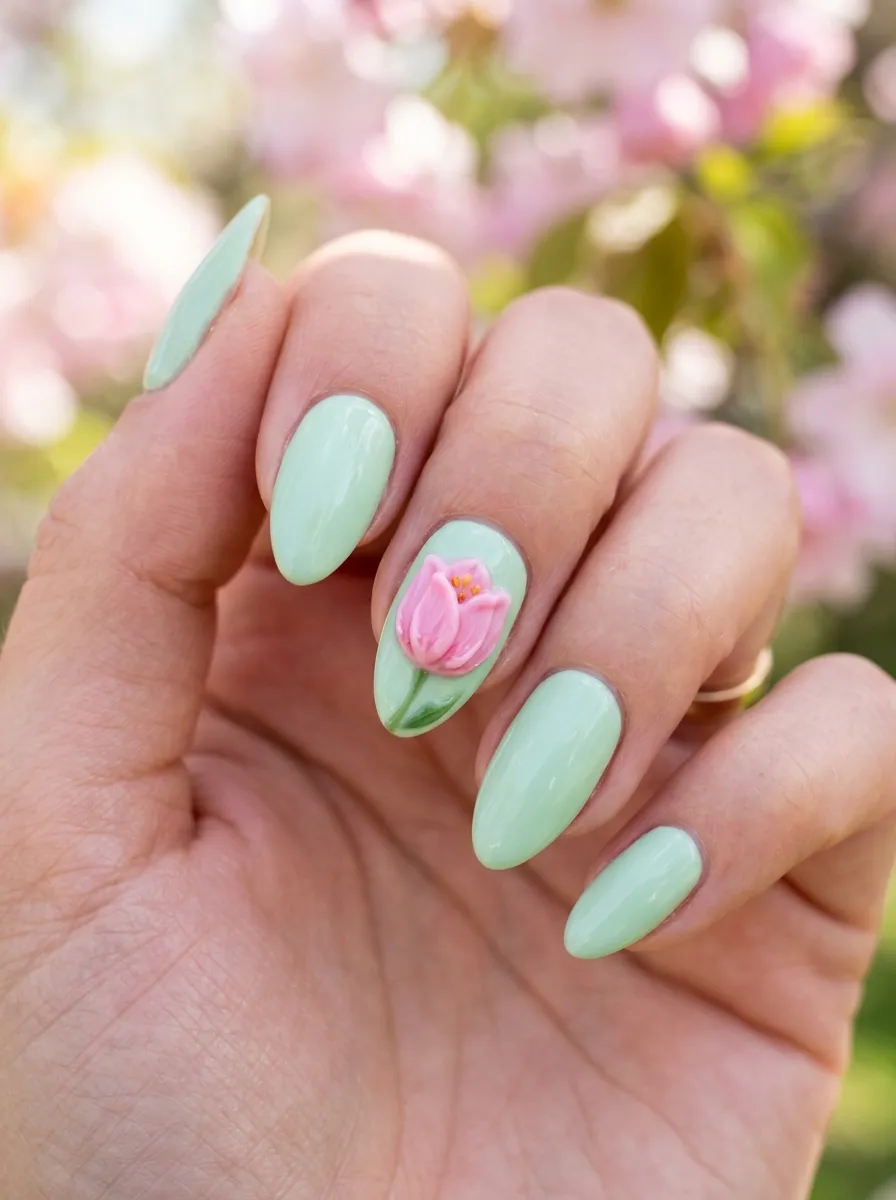
Tulips have a simple, closed cup shape that makes them one of the more beginner-friendly flowers on this list. Instead of individual separate petals, you’re really shaping one rounded form with a slightly pointed top and a subtle curve on each side. Use pink, red, or yellow gel, building the cup shape with a rounded base that narrows slightly toward the top. Add one or two thin lines down the front of the flower to suggest where the petals would naturally separate, without fully detailing each one. Budget tip: because tulips are shaped as one simple form rather than multiple petals, this design uses less gel and less time than most others on this list, making it a good option when you’re short on both. Pair the tulip with a soft green or pastel yellow base and add a thin green stem line beneath the flower. This design suits spring, Easter, or anyone who wants a clean, simple floral look. Tulips also work well repeated across all ten nails in different colors for a cheerful, uniform spring set.
18. Cherry Blossom Branch Wraparound
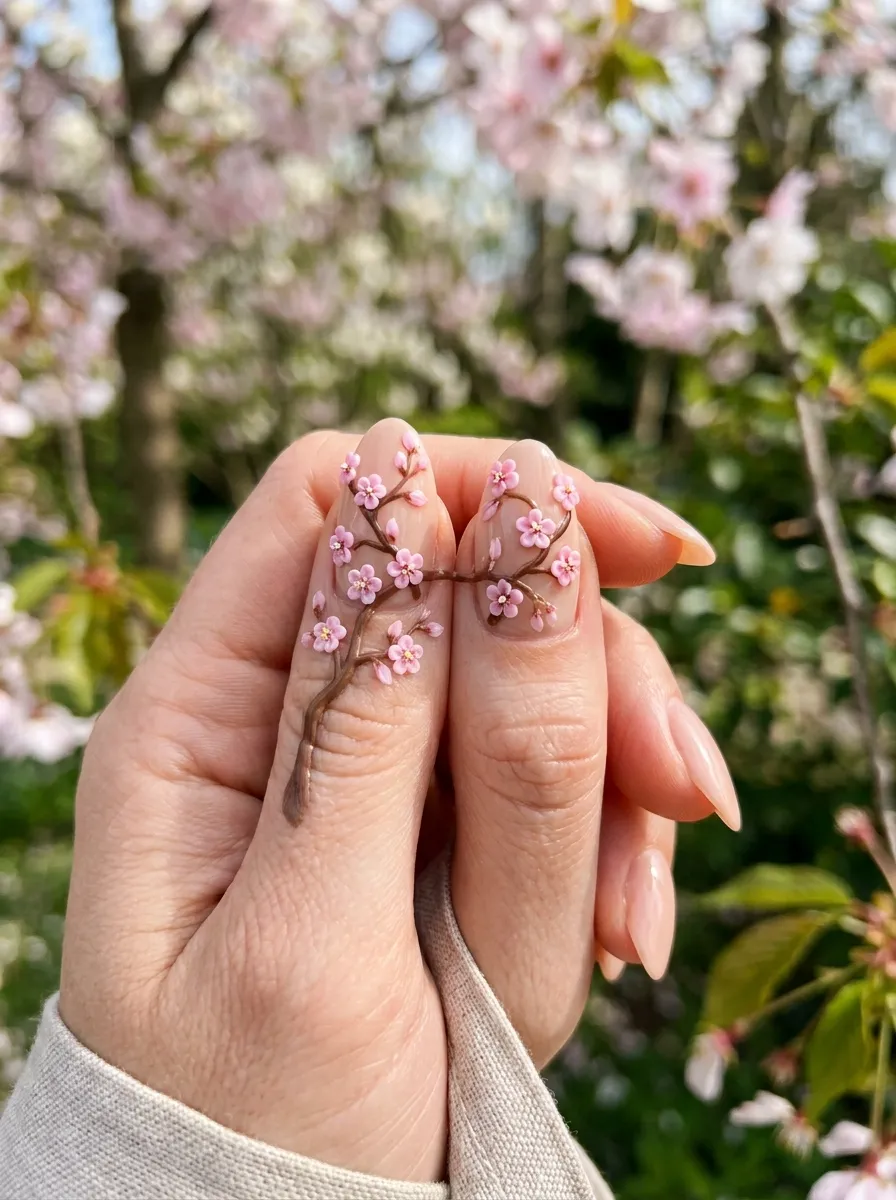
A wraparound branch design connects two or more nails with a single continuous branch line, so the flowers only make full sense when your fingers are placed together. Start by painting a thin brown branch that begins on one nail and continues onto the next, curving naturally rather than running in a straight line. Add small pink cherry blossoms along the branch, clustering more flowers near the curves and fewer along the straight sections. Budget tip: plan the branch placement before applying any gel by sketching it lightly with a striping brush dipped in polish remover, which wipes away easily if you need to adjust the line. This avoids wasting gel on a branch placement you’re not happy with. Use a nude or soft pink base across the connected nails so the branch and blossoms stand out clearly. This design suits spring, Mother’s Day, or photos where your hands will be shown together, like an engagement announcement. Wraparound designs take more planning than single-nail flowers, but they create a noticeably more artistic, cohesive look across your whole hand.
19. Chrysanthemum Fall Nails
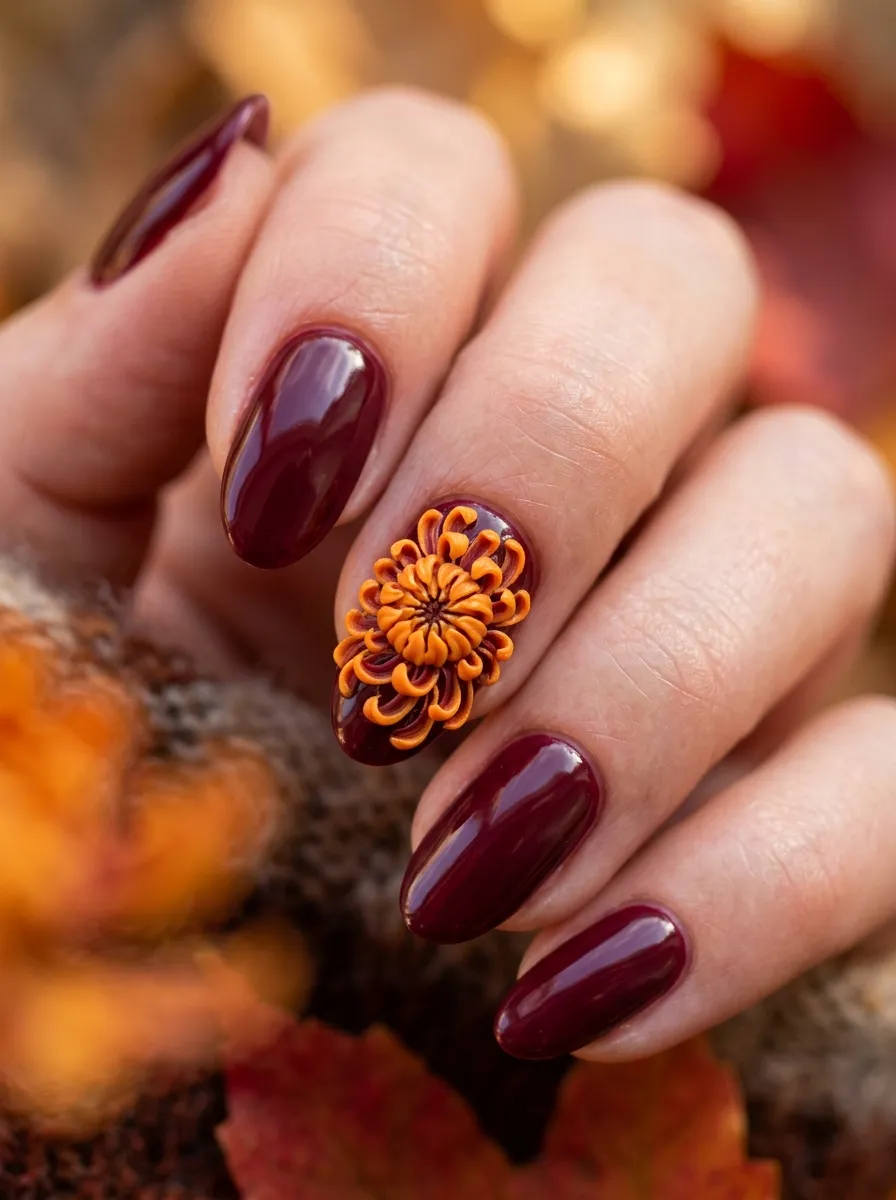
Chrysanthemums have many thin, slightly curled petals radiating out from a small center, giving them a fuller and busier look compared to simpler flowers like daisies or tulips. Build this flower by adding thin petal strokes in a circular pattern, working from the outer edge inward, and curling each petal slightly at the tip using a fine brush before curing. Use warm tones like burgundy, orange, or deep red for a fall-appropriate palette. Because there are so many petals, this design takes patience, but the payoff is a rich, textured flower that looks noticeably more detailed than others on this list. Budget tip: you don’t need a specialty fine liner for the petals. A regular nail art brush with the bristles trimmed to a finer point works just as well and costs less. Pair the chrysanthemum with a deep burgundy, brown, or cream base for a cohesive autumn manicure. This design suits fall weddings, holiday gatherings, or anyone who wants a rich, detailed statement flower during cooler months. Take breaks between petal layers if your hand gets tired, since this one is more time intensive than most.
20. Camellia Winter White
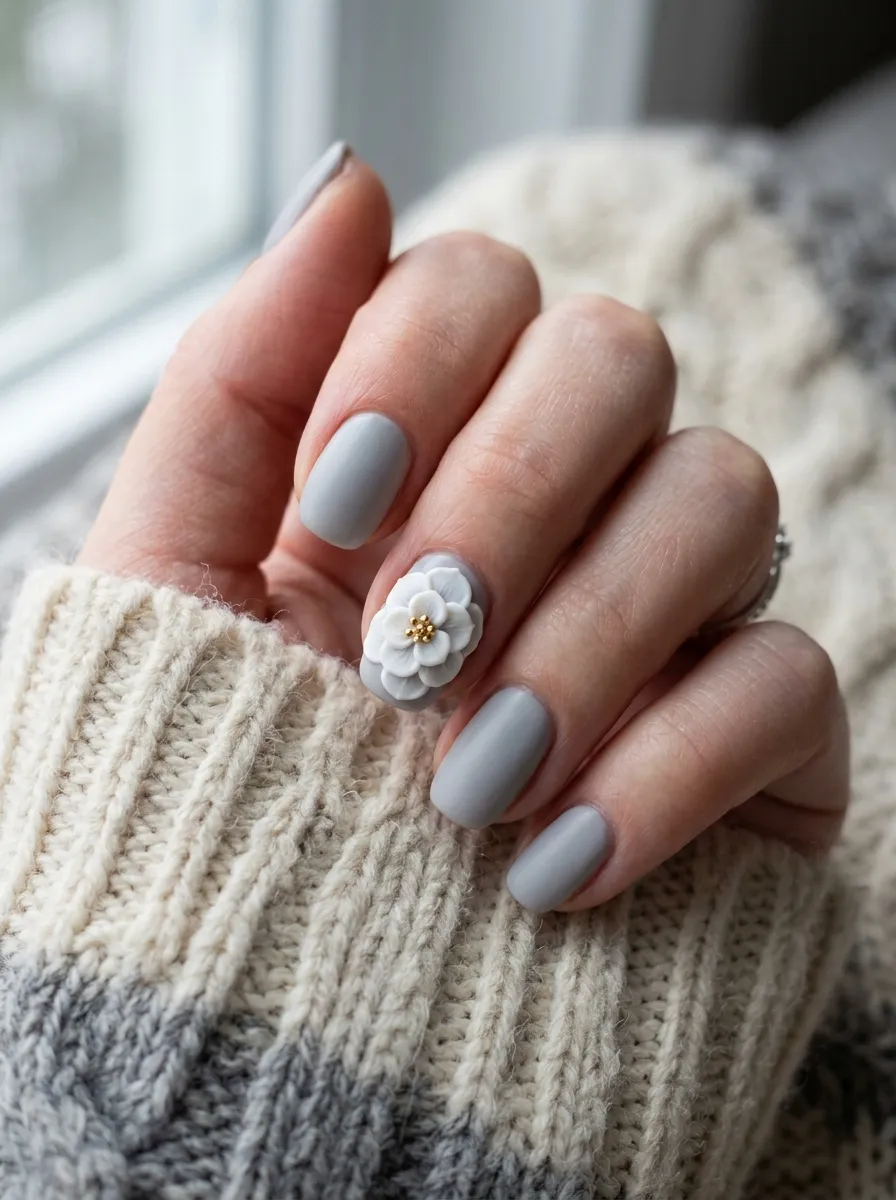
Camellias have rounded, overlapping petals arranged in neat layers, giving them a slightly more structured look than looser flowers like magnolias. Build the flower with five to six rounded petals in the first layer, then add a second, smaller layer of petals on top, slightly offset from the first so they overlap. Use white or soft cream gel, and consider adding a faint blush of pink near the center for subtle depth. Budget tip: shaping rounded petals is easier with a small ball tool instead of a flat brush, and many nail art starter kits already include one, so check what you have before buying anything new. Pair the camellia with a soft gray, white, or icy blue base for a cool, winter-appropriate palette. This design suits holiday parties, winter weddings, or anyone who wants an elegant flower that doesn’t rely on bright color to stand out. Because the petals overlap in neat layers, this design has a slightly more polished, structured look compared to wilder florals like poppies or wildflowers, making it a good option for formal occasions.
21. Gardenia Glossy Petals
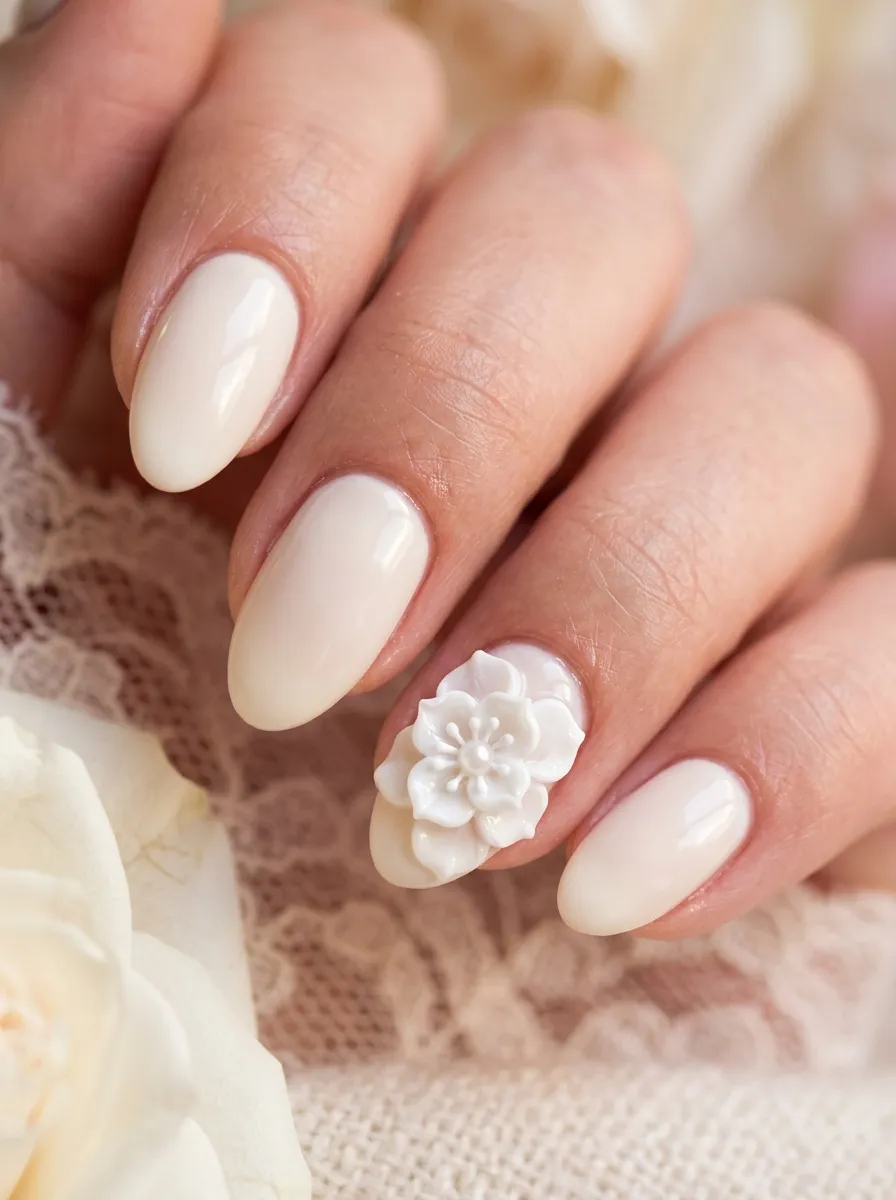
Gardenias have thick, glossy white petals arranged in a spiral pattern, with the outer petals opening flat while the inner petals stay more tightly curled. Start the flower from the center, adding two or three tightly curled small petals, then build outward with progressively larger, flatter petals. Keep the gel slightly thicker than usual for this flower, since gardenia petals have a fuller, waxier look compared to thinner flowers like poppies. Budget tip: a thick, gloss-finish topcoat applied over the finished flower helps mimic the naturally shiny surface of real gardenia petals without needing a specialty gel. Use an ivory or soft cream base to keep the focus on the flower’s texture and shape rather than color contrast. This design suits weddings, anniversaries, or anyone who wants a romantic, all-white floral look. Gardenias take a bit of practice to get the spiral petal placement right, so consider practicing the center curl on a nail wheel before attempting it on your actual nail, since that inner section is the trickiest part of the whole design.
22. Iris Purple Accent
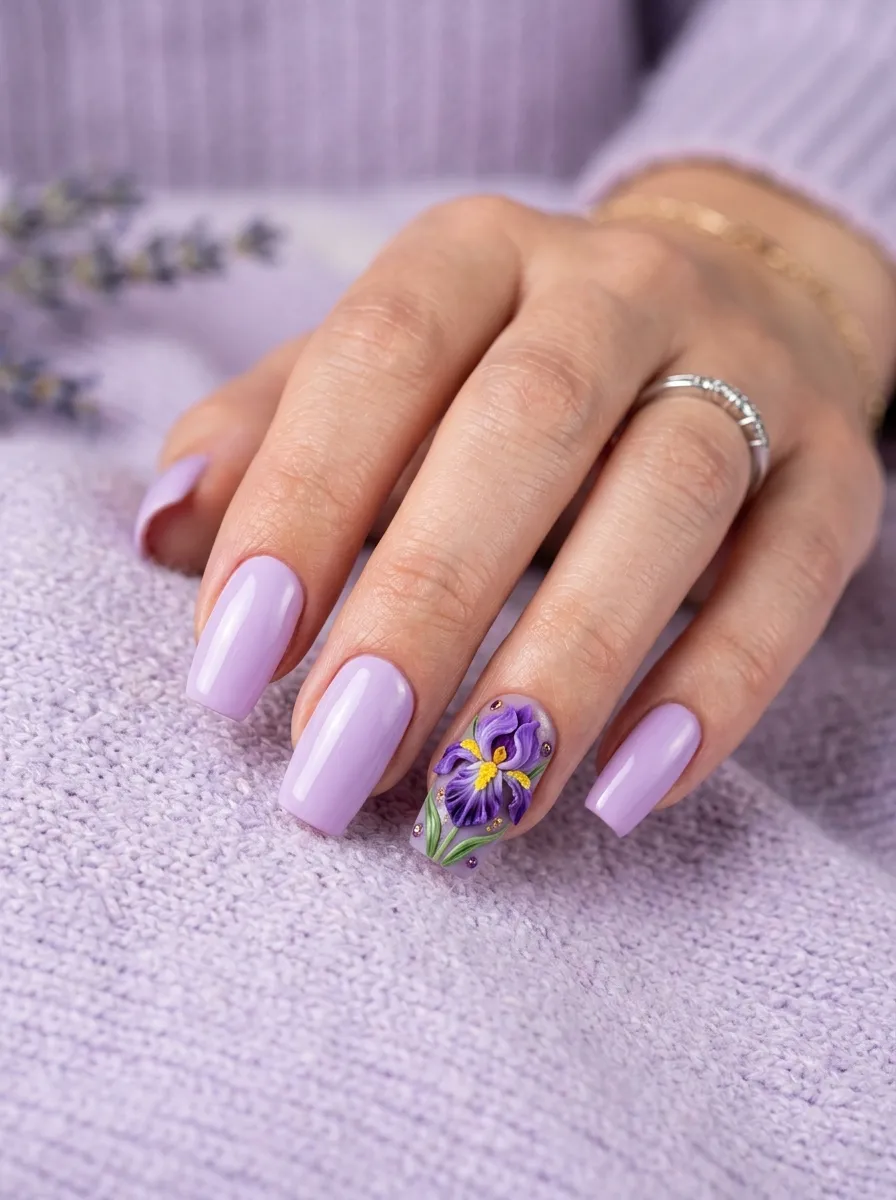
Irises have a distinct shape with some petals standing upright and others curving downward, which sets them apart from more symmetrical flowers. Build three upright petals in a deep purple gel, keeping them narrow and slightly pointed at the top. Then add three more petals curving outward and down, using a slightly lighter purple or blue shade for contrast. Finish with a small streak of yellow gel at the base of the downward petals, which mimics the natural marking found on real iris flowers. Budget tip: this design uses two shades of purple plus a small amount of yellow, so you can often get away with polishes you already have rather than buying gel specifically labeled for nail art. Pair the iris with a soft lilac, white, or gray base to let the purple tones stand out. This design suits spring events, garden parties, or anyone who wants a slightly more unusual flower shape compared to common choices like roses or daisies. The mix of upright and downward petals also makes irises a good option if you want a taller, more dramatic flower on a single accent nail.
23. Carnation Ruffled Petals
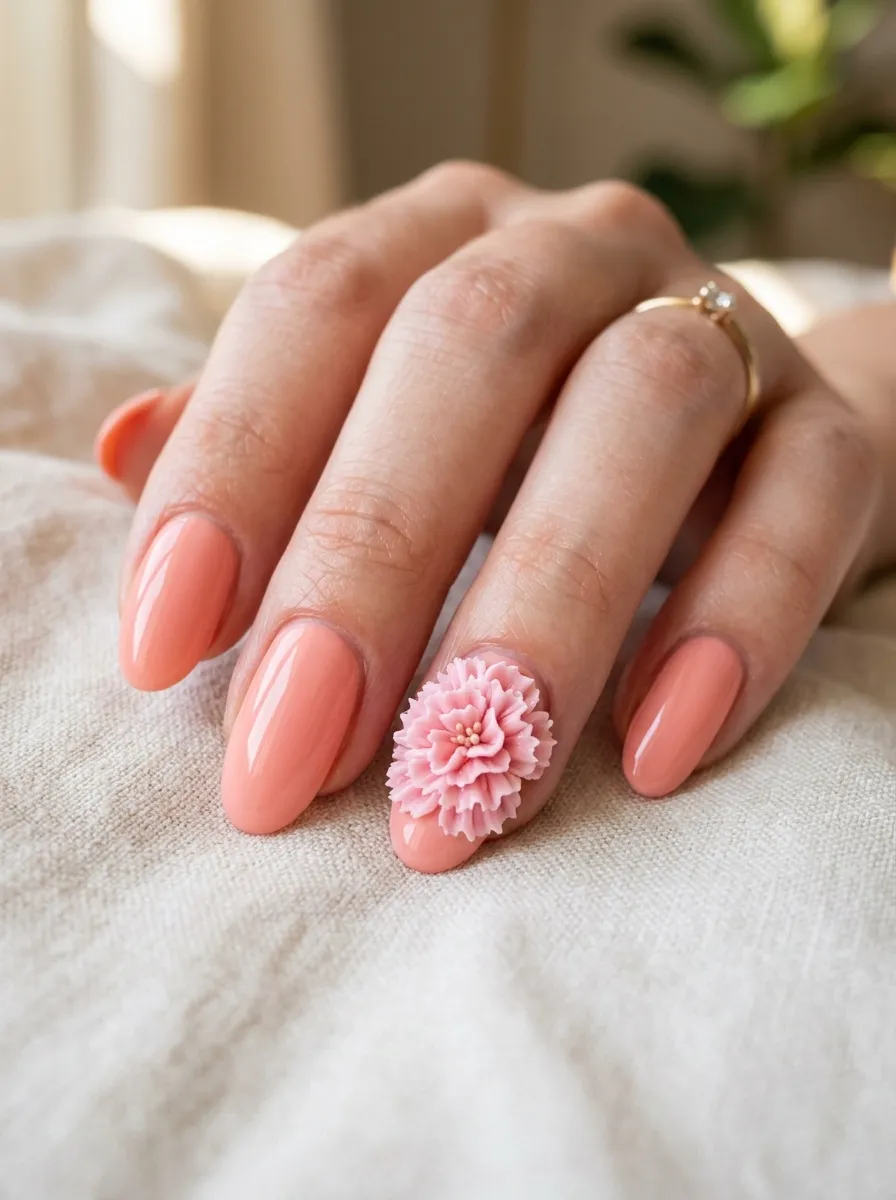
Carnations have a distinct fringed, ruffled edge on each petal, which gives the whole flower a textured, slightly frilly look. Instead of smooth petal edges, use the tip of a fine brush to add small jagged notches along the edge of each petal before curing, mimicking the naturally torn look of real carnation petals. Layer several rounds of these ruffled petals in a tight circular pattern, working from the outside in, similar to building a marigold but with rougher, more textured edges. Budget tip: practice the fringed edge technique on a spare nail tip first, since getting the jagged texture right takes a couple of tries before it starts looking natural instead of messy. Use a coral, soft pink, or red gel for a classic carnation look. This design suits Mother’s Day, since carnations are a traditional gift flower for that occasion, as well as birthdays or any casual, cheerful manicure. Because the fringed texture naturally hides small imperfections, this is a forgiving flower to practice on once you’ve gotten comfortable with basic rounded petal shapes.
24. Water Lily Pond Nails
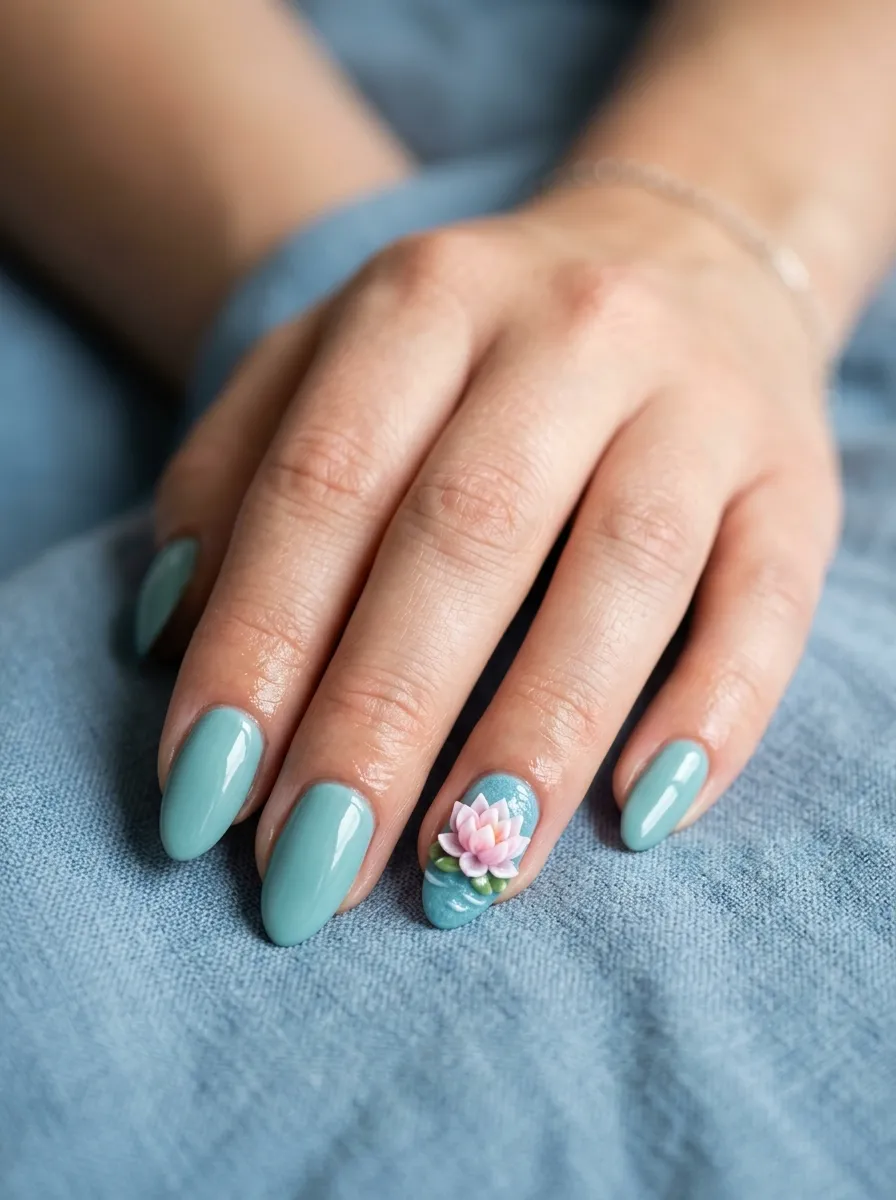
Water lilies have wide, pointed petals that open flat, often shown floating on a textured blue or teal background to suggest water. Build the base nail in a soft teal or blue gel, adding subtle texture with a fine brush to mimic gentle ripples. Then shape the flower with pointed pink or white petals arranged in a flat, open circle, slightly smaller petals layered in the center for depth. This design works especially well as a single statement nail rather than repeated across all ten fingers, since the water background needs some space to read clearly. Budget tip: you can create the rippled water texture using the same striping brush you use for petal lines, just dragged in soft curved strokes across the wet gel before curing. Use a teal, blue, or seafoam base to set the pond scene. This design suits summer, tropical vacations, or anyone who wants a nature-inspired manicure that goes beyond a simple flower on a plain background. Water lilies also pair nicely with small dimensional gel leaves if you want to build out the pond scene further.
25. Rosebud Mini Clusters
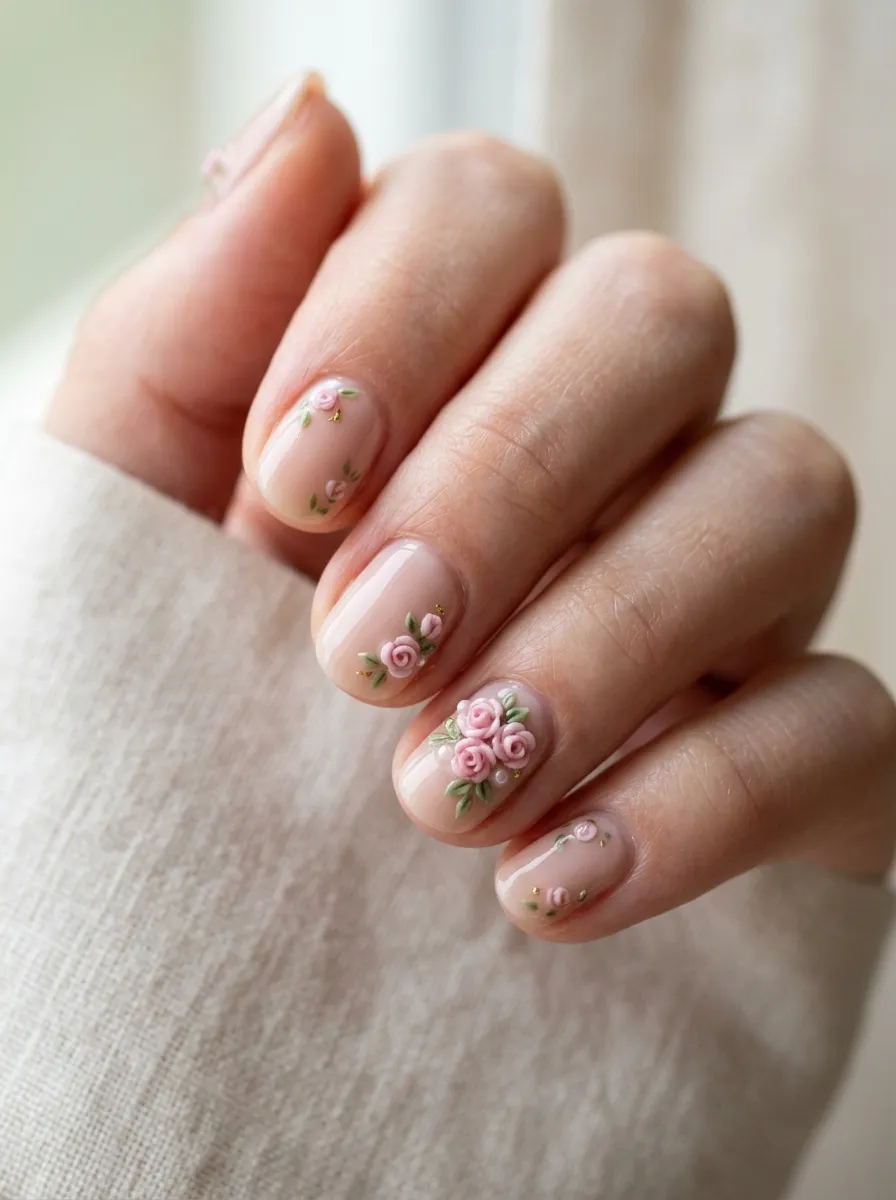
Rosebuds are a smaller, simpler version of a full rose, making them a good choice when you want floral detail without committing to a large flower. Each bud is just a tight spiral of two or three small petal layers, rolled inward rather than opened flat like a full bloom. Cluster two or three rosebuds together near the base of the nail, leaving the rest of the nail plain for a clean, balanced look. Budget tip: because each rosebud uses so little gel, this design is one of the most economical on this list and works well if you’re trying to stretch a small gel collection across several manicures. Use a soft pink, red, or dusty rose gel for a classic look, or try an unexpected color like sage green for something different. This design suits everyday wear, work settings, or anyone who wants floral detail that still feels understated. Rosebud clusters also make a nice addition to a French tip or ombre base if you want to combine two design ideas without overcrowding the nail.
26. Jasmine Vine Trailing Flowers
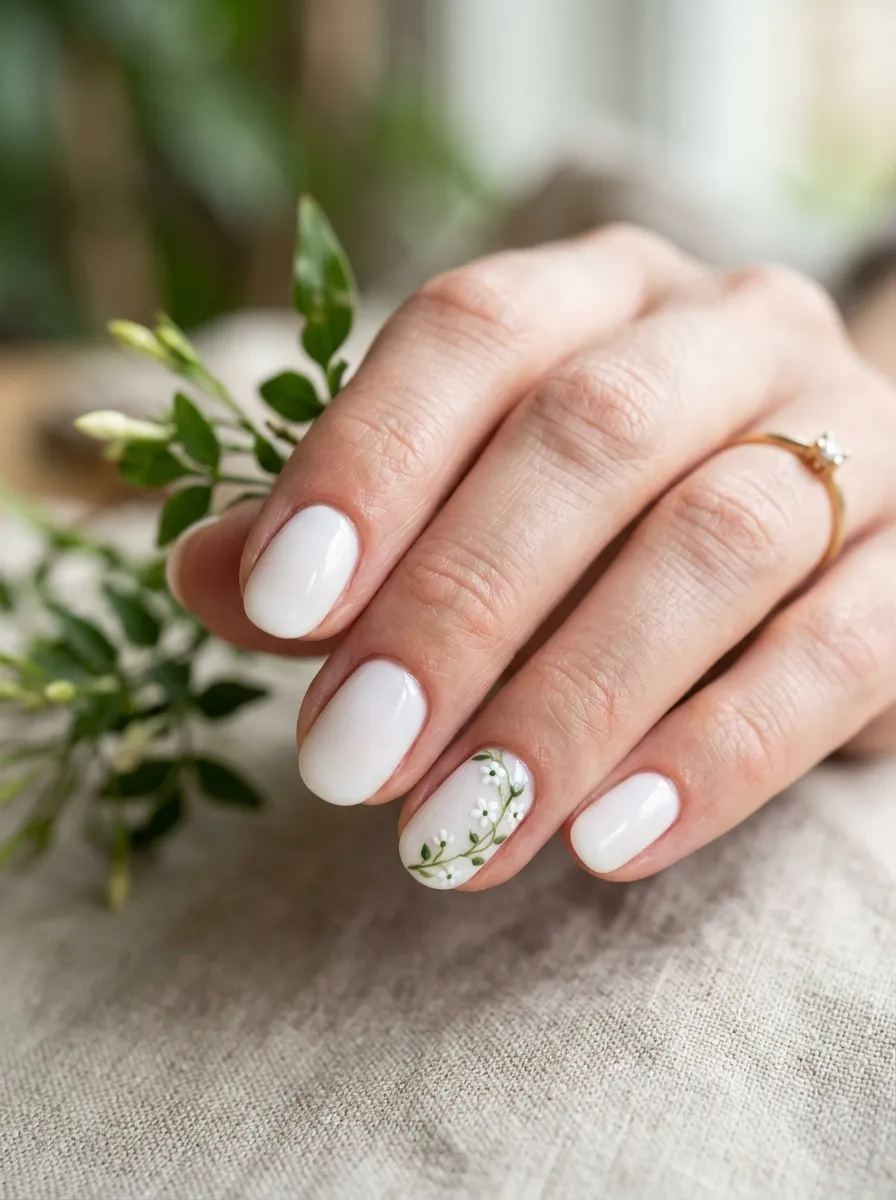
A jasmine vine design uses a thin curving green line as a base, with small white star-shaped flowers scattered along its length, similar to how jasmine grows along a trellis. Start by painting a thin green vine line along one side of the nail, adding small curved offshoot lines for visual interest. Then add tiny five-petal white flowers along the vine, spacing them unevenly for a natural, trailing look rather than a uniform pattern. Budget tip: this design uses very little gel overall, since both the vine and flowers are small and thin, making it a good choice if you’re working with a limited color palette or trying to make a small gel collection last longer. Use a soft white, cream, or pale green base to keep the vine and flowers as the clear focal point. This design suits spring, garden-themed events, or anyone who wants a delicate, trailing floral pattern instead of a single centered flower. Jasmine vines also work nicely running across the nail diagonally rather than straight up and down, which can make the design feel more natural and less structured.
27. Wildrose Two-Tone Petals
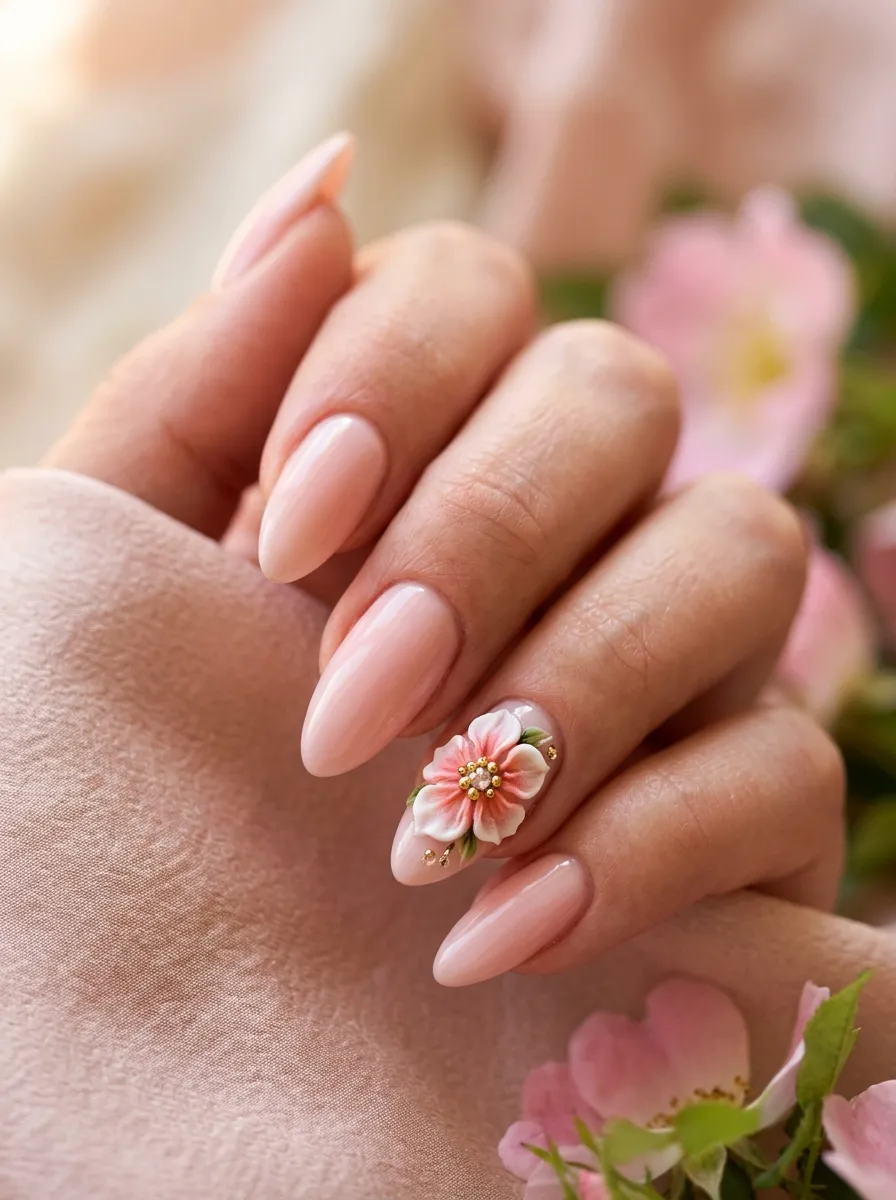
Wildroses have simple, open petals compared to the tighter spiral of a classic rose, and using two tones on each petal adds depth without much extra effort. Shape five rounded, slightly cupped petals in a light pink gel, then add a small streak of white or deeper pink toward the base of each petal before curing, blending the two colors slightly where they meet. Finish with a small yellow center made of tiny dots to represent the stamen. Budget tip: this two-tone effect works with almost any two shades you already own, so it’s a good way to experiment with color combinations without buying new gel. Use a blush, soft pink, or nude base to complement the flower’s tones. This design suits everyday wear, casual outings, or anyone who wants a flower with a bit more color depth than a single solid shade. Because wildrose petals are meant to look loose and slightly imperfect rather than tightly structured, this is a forgiving design to practice blending two gel colors together before trying more advanced multi-tone flowers.
Conclusion
3D gel flowers give you a simple way to turn a plain manicure into something that feels personal and detailed. You don’t need a professional setup or years of practice to get started. A few basic tools, some leftover gel colors, and a little patience are enough to try most of the designs on this list. Start with easier shapes like daisies, tulips, or baby’s breath if you’re new to gel flowers, then work up to more detailed options like peonies or chrysanthemums once you feel comfortable. Pick one flower that matches the season, the occasion, or simply the mood you’re in, and let it be the focal point of your next manicure. Whether you recreate these at home or bring a picture to your nail tech, these 27 ideas give you plenty of room to find a style that fits your taste and budget.