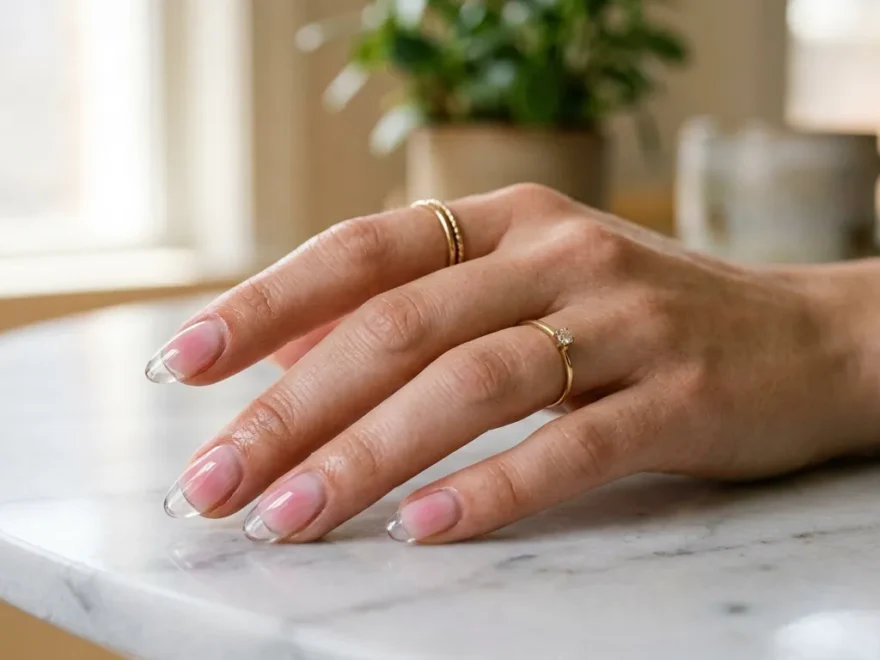
Pink aura nails have taken over manicure inspiration boards, and it’s easy to see why. The soft, cloud-like blur of color sitting at the center of the nail feels dreamy without trying too hard. Whether you love a barely there blush or a loud fuchsia glow, this style bends to fit your mood and your budget. You don’t need a salon appointment or a huge kit of polishes to try it at home. A sponge, a couple of pink shades, and some patience are often all it takes. Below you’ll find 24 aura nail pink designs ideas that range from soft and simple to bold and glittery, each one with a practical way to recreate it yourself. If you’re also exploring Beach Nail Ideas, ocean-inspired blues, sandy neutrals, tropical palm designs, seashell accents, and sun-kissed ombré effects create a fresh, vacation-ready manicure that perfectly captures the carefree spirit of summer.
1. Soft Pink Cloud Aura Nails
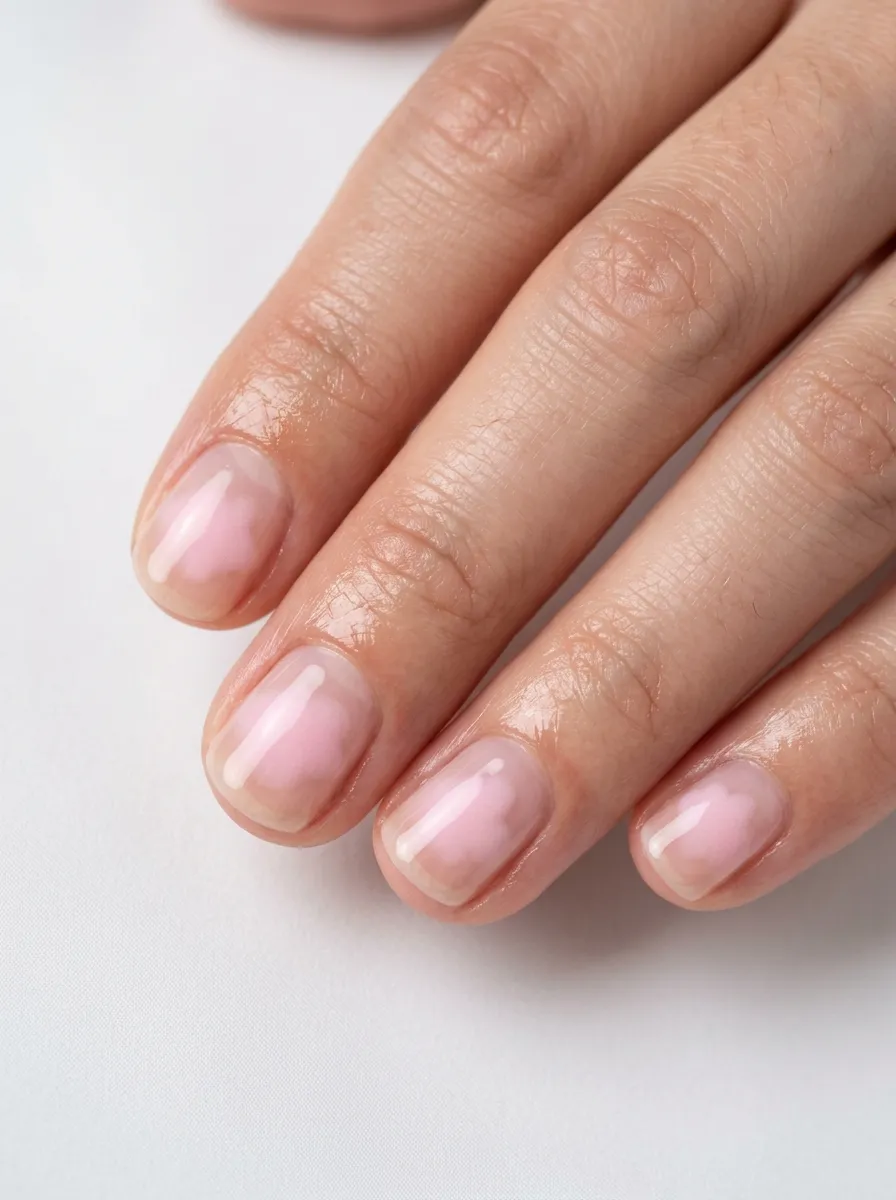
This is the gentlest version of the trend and a great place to start if you’re new to aura nails. The color sits in a soft round shape near the cuticle or center of the nail, then fades out until it disappears into bare nail or clear polish. Grab a light pink polish, a makeup sponge, and a base coat. Dab a small amount of polish onto the sponge, then press it onto the nail in short taps instead of one solid stroke. Move the sponge slightly each time so the edges blur naturally. Less product gives you a softer glow, so start light and build up if needed. This look works well for office settings or anywhere you want color without looking flashy. A drugstore polish in a pale rose shade costs a few dollars and can create this same effect at home. Clean up any smudges around the cuticle with a small brush dipped in nail polish remover. Finish with a glossy topcoat to seal everything in and give the color a soft sheen instead of a flat finish.
2. Hot Pink Neon Aura Swirls
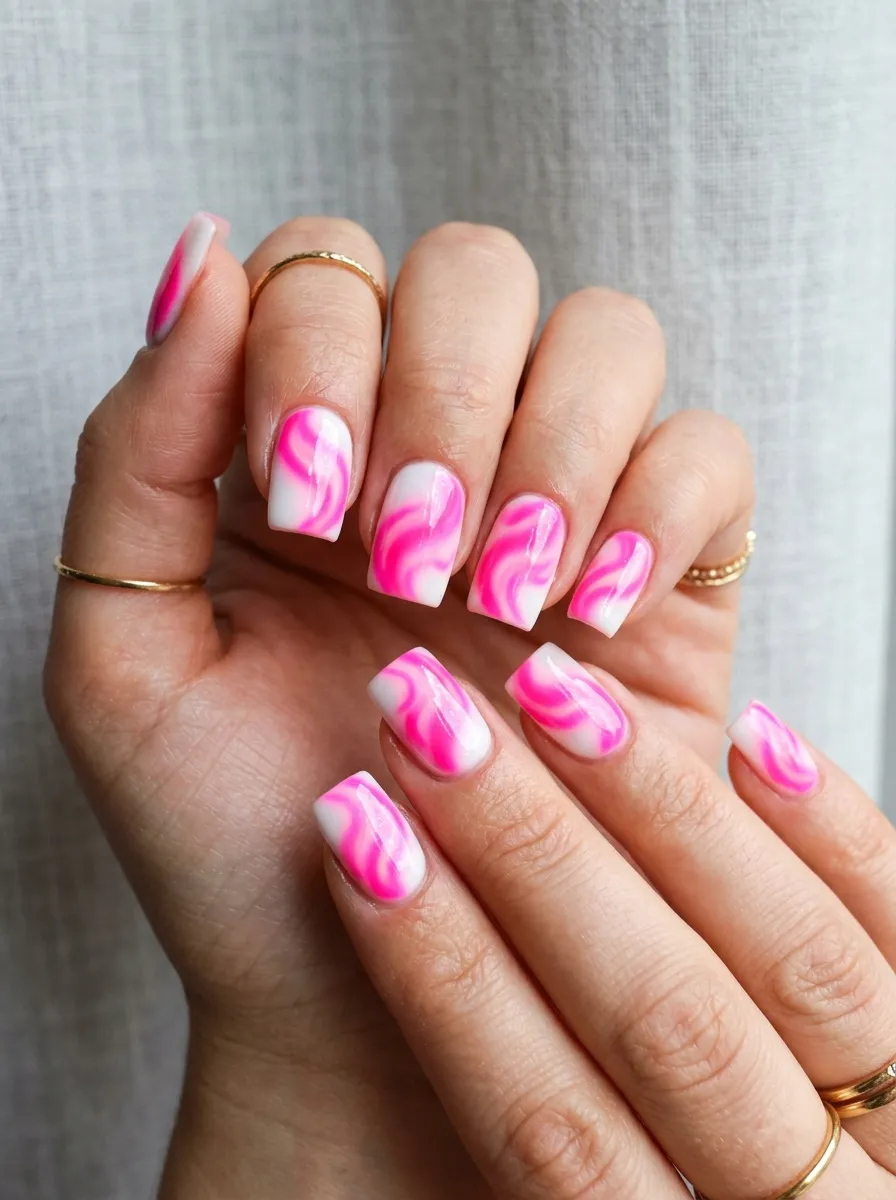
If soft pastels feel too quiet for you, this version turns the volume all the way up. Neon pink polish creates a punchy, eye catching aura that photographs well and stands out in a crowd. Start with a white or light base so the neon color pops instead of looking muddy. Use a small dotting tool or a thin brush to swirl the pink polish in loose circular motions rather than straight lines. The swirls don’t need to be perfect. In fact, uneven, organic shapes tend to look more natural than symmetrical ones. Neon polishes are usually affordable and widely available at beauty supply stores, so this look won’t stretch your budget. If you want extra brightness, apply two thin coats instead of one thick one, letting each layer dry between applications. A matte topcoat can tone down the shine for a modern look, while a glossy one keeps things bold. This design works especially well for summer, beach trips, or anytime you want your nails to do the talking.
3. Baby Pink and White Aura Combo
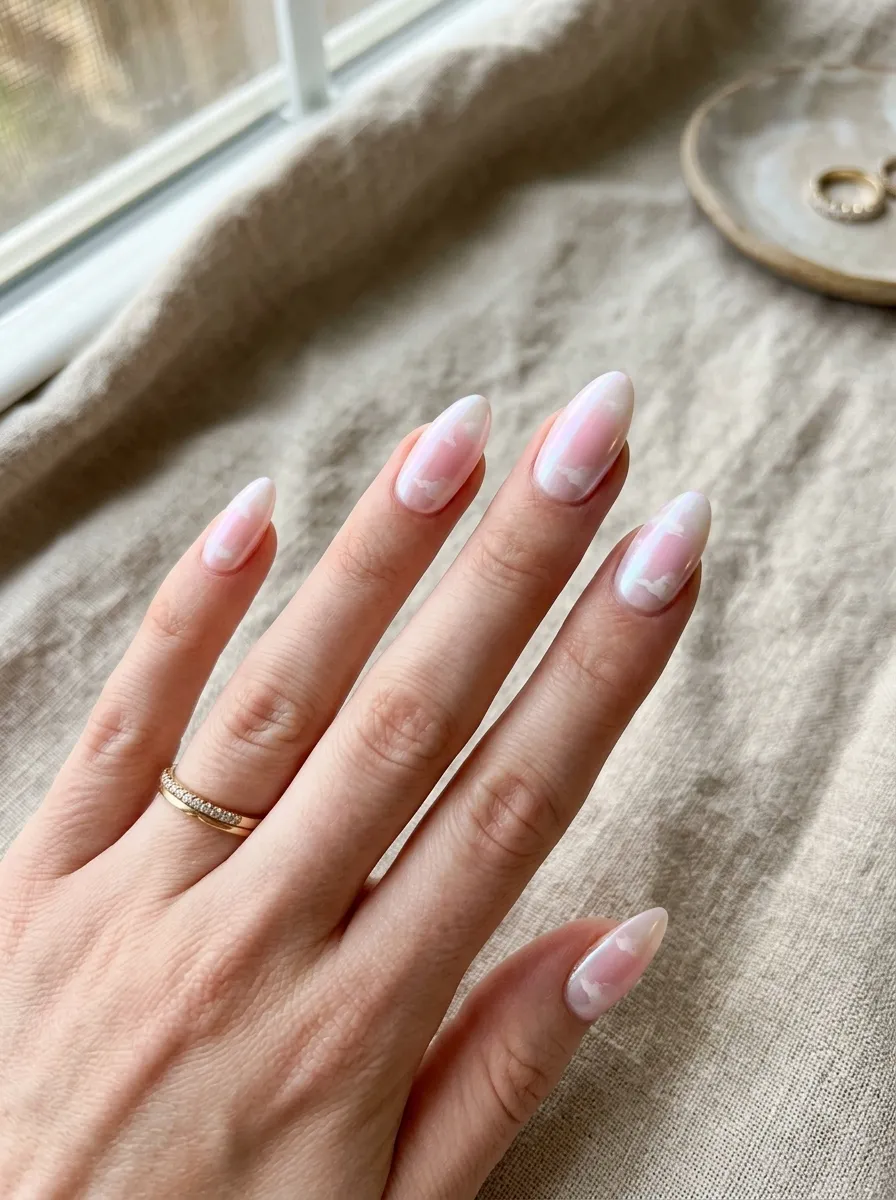
Pairing baby pink with white creates a soft, milky look that feels clean and put together. The two colors work together instead of competing, giving the nail a gentle, almost cloud like appearance. To try this at home, apply a sheer pink base first and let it dry completely. Then use a small sponge to dab white polish over the center or tip of the nail, followed by a light dab of pink over the same area while the white is still slightly wet. This lets the colors mix softly at the edges without turning muddy. Keep a cotton swab dipped in remover nearby for quick cleanup around the cuticle line. This design suits weddings, everyday wear, or anyone who prefers a quieter, more polished look. Both polishes are common drugstore shades, so the whole look can be done for less than the price of a coffee run. A glossy topcoat gives it a soft sheen that looks similar to a professional gel manicure without the extra cost or salon visit.
4. Pink and Lavender Dreamy Aura
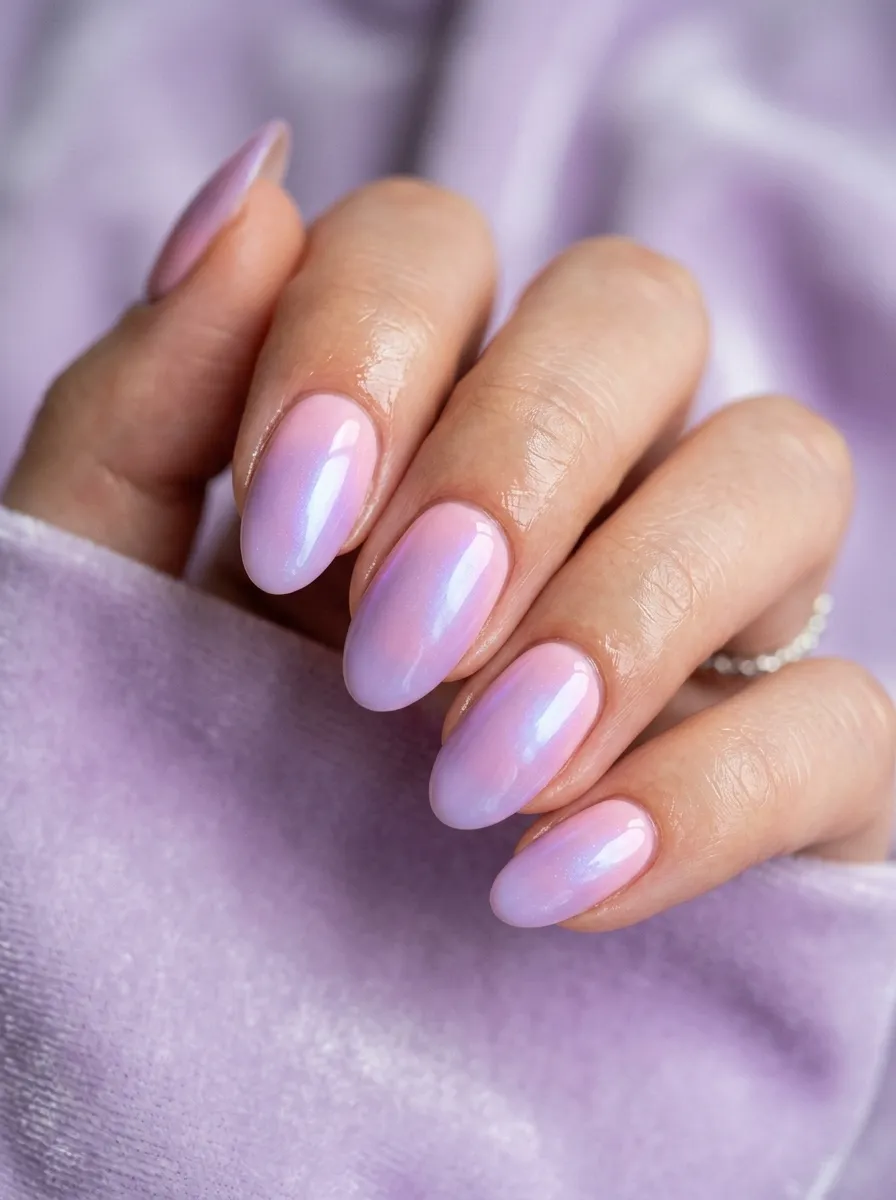
Pink and lavender together create a soft, almost sunset like glow that feels calming to look at. The two shades sit close on the color wheel, so they mix smoothly instead of clashing. Start with a clear or pale base coat, then use a sponge to apply a small patch of pink near the cuticle. While that’s still tacky, add a touch of lavender just above it and gently dab where the two colors meet so they merge into a soft gradient. Practice on a plastic nail wheel first if you’re worried about getting the placement right the first time. This combo works nicely for spring or any season when you want a color that feels light but not overpowering. Both pink and lavender polishes are easy to find in most drugstore lines, keeping this an affordable option. If the colors turn slightly gray where they overlap, don’t worry. That soft blur is part of what makes aura nails look natural instead of painted with hard lines.
5. Rose Gold Shimmer Aura Nails
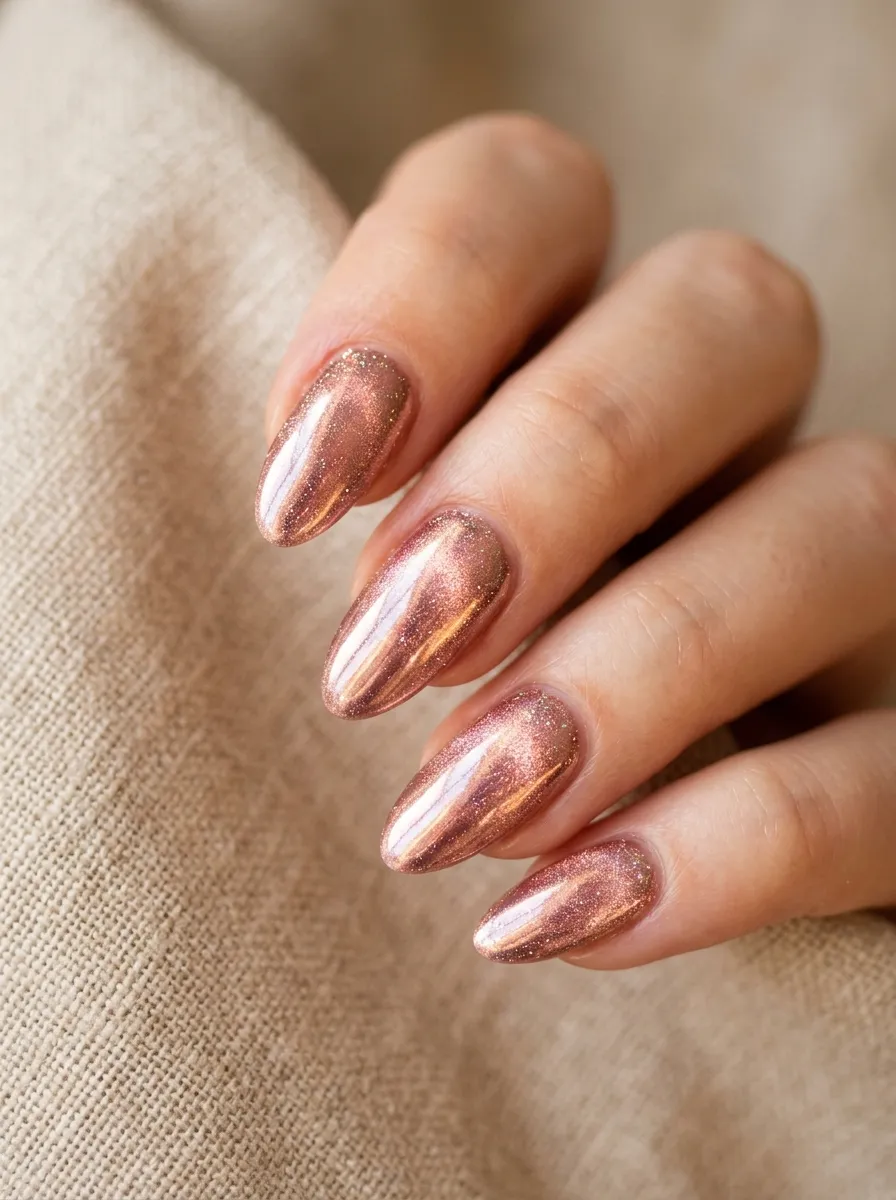
Rose gold adds a metallic warmth to the usual pink aura look, making it feel a little more dressed up. The shimmer catches light differently depending on the angle, which gives the nail a subtle glow instead of a flat color. To recreate this, use a pink polish with fine gold shimmer or mix a plain pink with a gold glitter topcoat. Dab the color onto the nail using a sponge, focusing the shimmer near the center for the brightest effect. Let each layer dry fully before adding the next, since shimmer polishes can smudge easily while wet. This style works well for holidays, birthdays, or any event where you want your nails to catch a little extra light. Rose gold polishes are widely sold and don’t usually cost more than standard shades. If you don’t own a shimmer polish, layering a plain pink with a sheer gold glitter can create a similar effect for less money. A high shine topcoat helps the metallic flecks stand out even more under normal lighting.
6. Pink Ombre Aura Fade
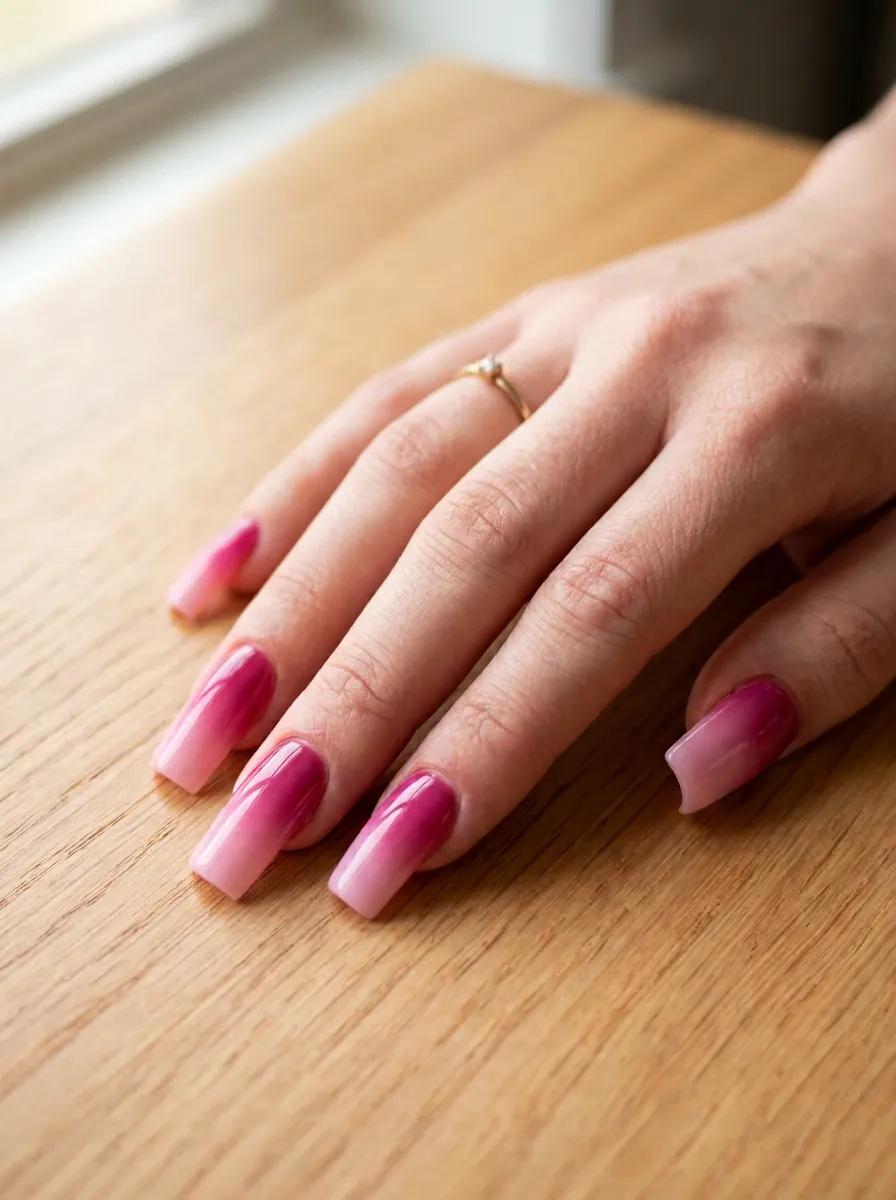
An ombre aura fade moves through several shades of pink across a single nail, creating a smooth gradient instead of one flat color. This design takes a bit more patience but doesn’t require any special tools beyond a sponge and a few polish shades. Pick three pink polishes ranging from dark to light. Apply the darkest shade near the cuticle, the medium shade in the middle, and the lightest near the tip, letting the edges overlap slightly. Use the sponge to dab where the colors meet so they fade into each other instead of showing a hard line. Wipe the sponge between colors to avoid muddying the shades. This look works for almost any occasion and can be adjusted from soft and subtle to bold and dramatic just by changing which pinks you choose. Many drugstore brands sell mini polish sets in shade families, which makes this an affordable way to get several pinks at once. Finish with a glossy topcoat to smooth out any texture from the sponging process.
7. Bubblegum Pink Aura Splash
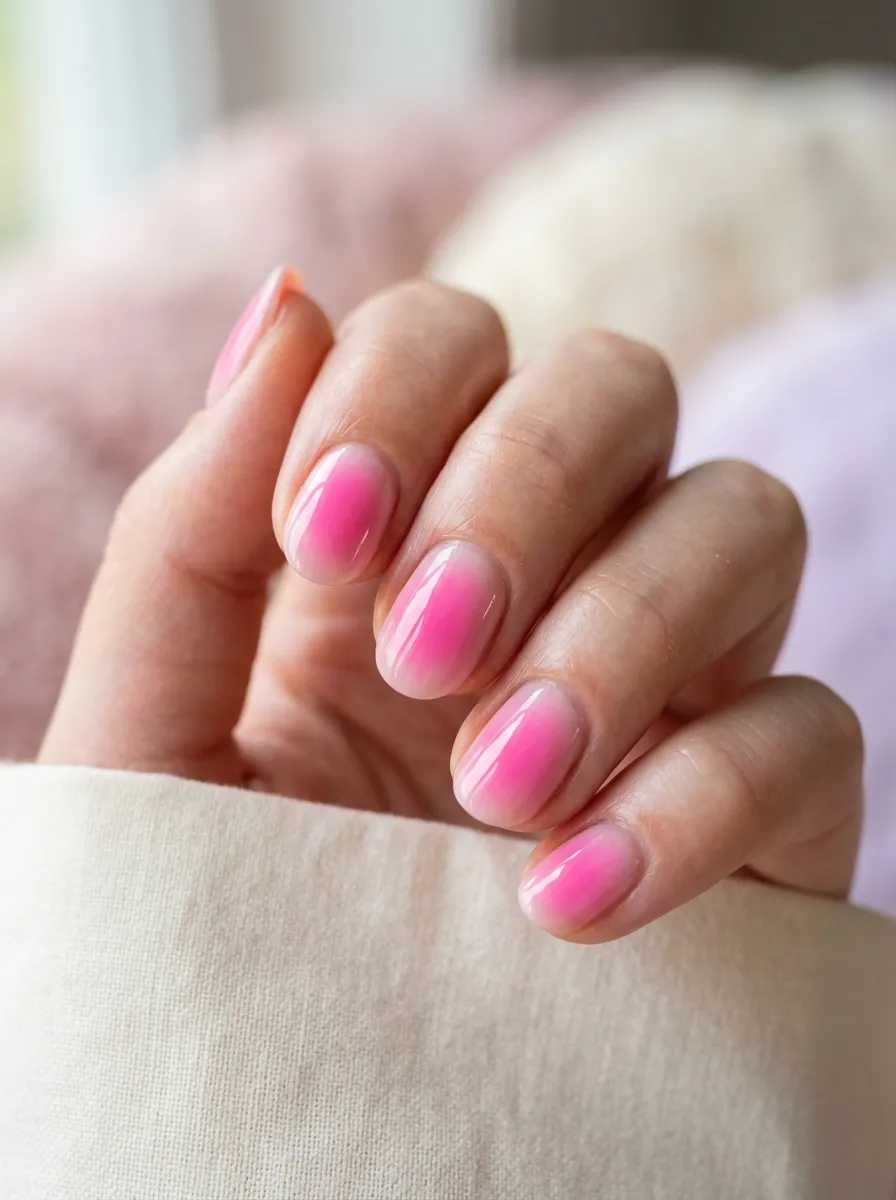
Bubblegum pink brings a playful, youthful energy to the aura trend. It’s brighter than a blush pink but softer than neon, sitting right in the middle for a fun, wearable look. Apply a white or clear base first, then use a sponge to dab bubblegum pink polish in a rounded splash shape near the center of the nail. Keep the edges soft by tapping lightly instead of pressing hard. This design pairs nicely with a small glossy dot or two of white polish added on top for extra dimension, almost like a bubble shape. It’s a fun option for teens, festivals, or anyone who wants their nails to feel a little lighthearted. Bubblegum pink shades are common in almost every drugstore polish line, so this look costs very little to try. If you make a mistake, a thin brush dipped in remover can clean up the edges without redoing the whole nail. A glossy topcoat gives this design its shiny, candy like finish.
8. Pink and Silver Chrome Aura
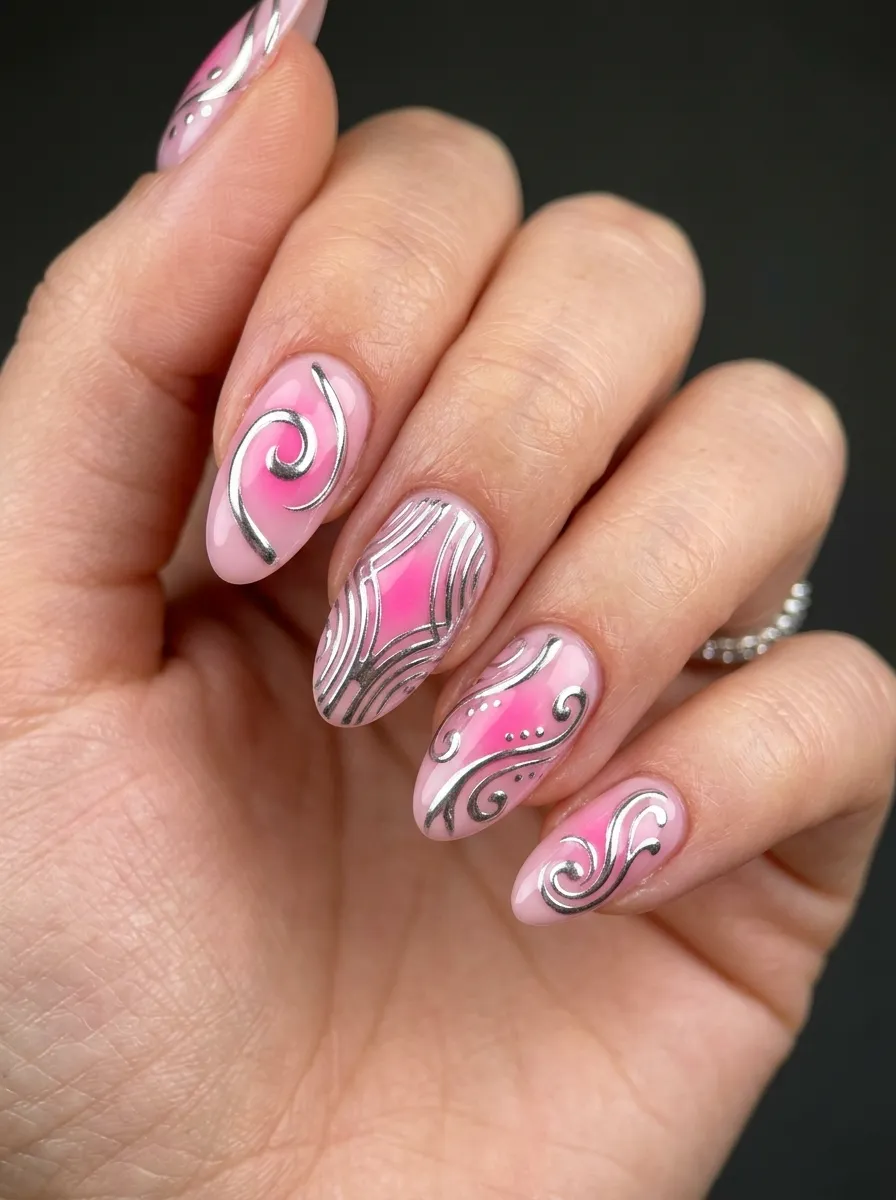
Chrome powder adds a mirror like shine that turns a simple pink aura into something that looks a lot more expensive than it actually is. The trick is layering the chrome only in certain areas instead of covering the whole nail. Start with a pink aura base using the sponge method from earlier tips. Once fully dry, use a small applicator or cotton swab to rub silver chrome powder over a small section, usually near the tip or center. The chrome only sticks well over a non tacky, fully cured surface, so patience here matters. Seal everything with a glossy topcoat to lock the shimmer in place. Chrome powder kits are inexpensive and one small jar can last through dozens of manicures. This design works well for date nights, parties, or anytime you want a little extra shine. If chrome powder isn’t available, a silver glitter topcoat dabbed lightly in the same spot can give a similar reflective effect for less effort.
9. Dusty Rose Matte Aura
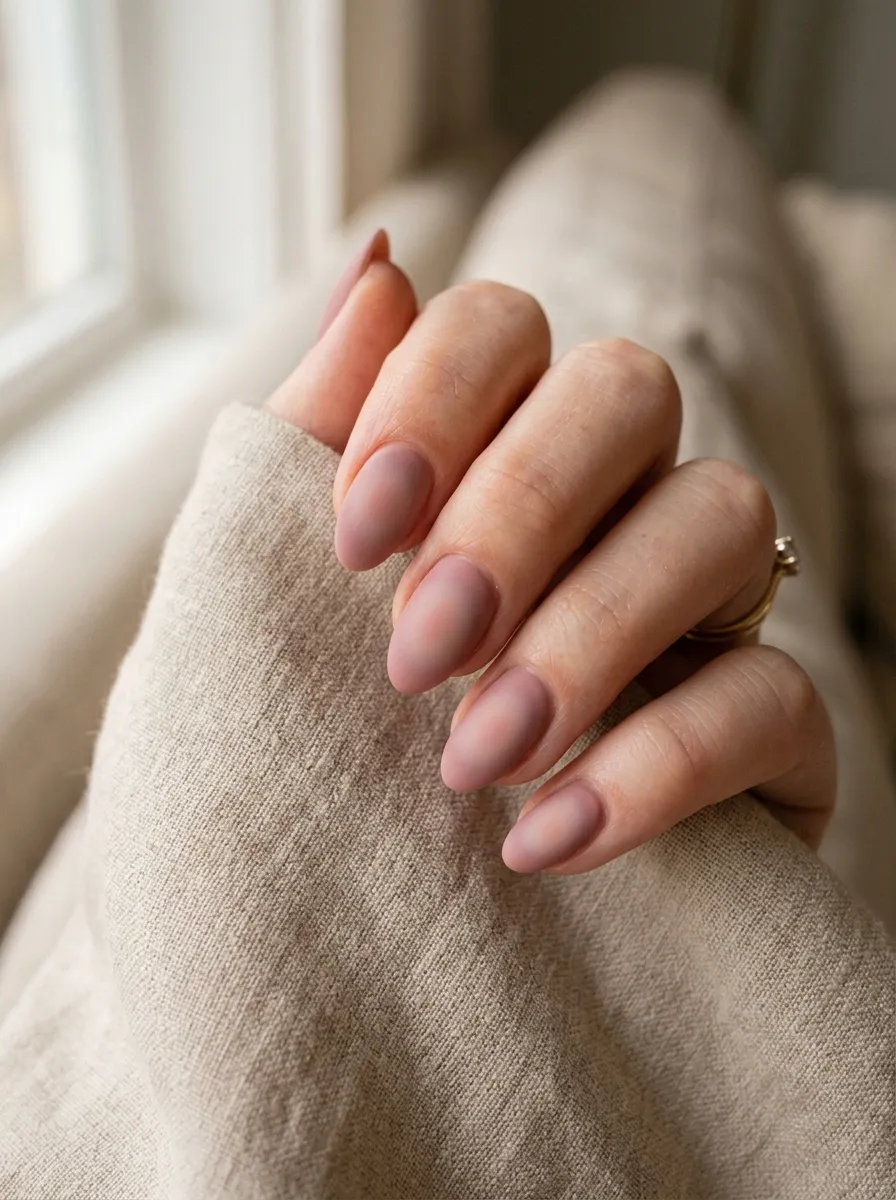
Matte finishes give the pink aura trend a completely different mood. Instead of shine, the focus is on texture and a soft, muted color palette. Dusty rose works especially well here because its grayish pink undertone already feels a little worn in and cozy. Apply the aura using the usual sponge technique with a dusty rose polish, then finish with a matte topcoat instead of a glossy one. The matte coat flattens the shine and gives the nail a velvety look that feels different from typical manicures. This style suits fall and winter especially well, though it works year round for anyone who prefers a quieter finish. Matte topcoats are sold separately and are usually a one time purchase that lasts through many manicures. If your matte topcoat starts to feel sticky over time, a fine dusting of translucent powder can restore the flat finish. This design pairs nicely with simple, neutral outfits and works for both casual days and low key evening plans.
10. Pink and Peach Sunset Aura
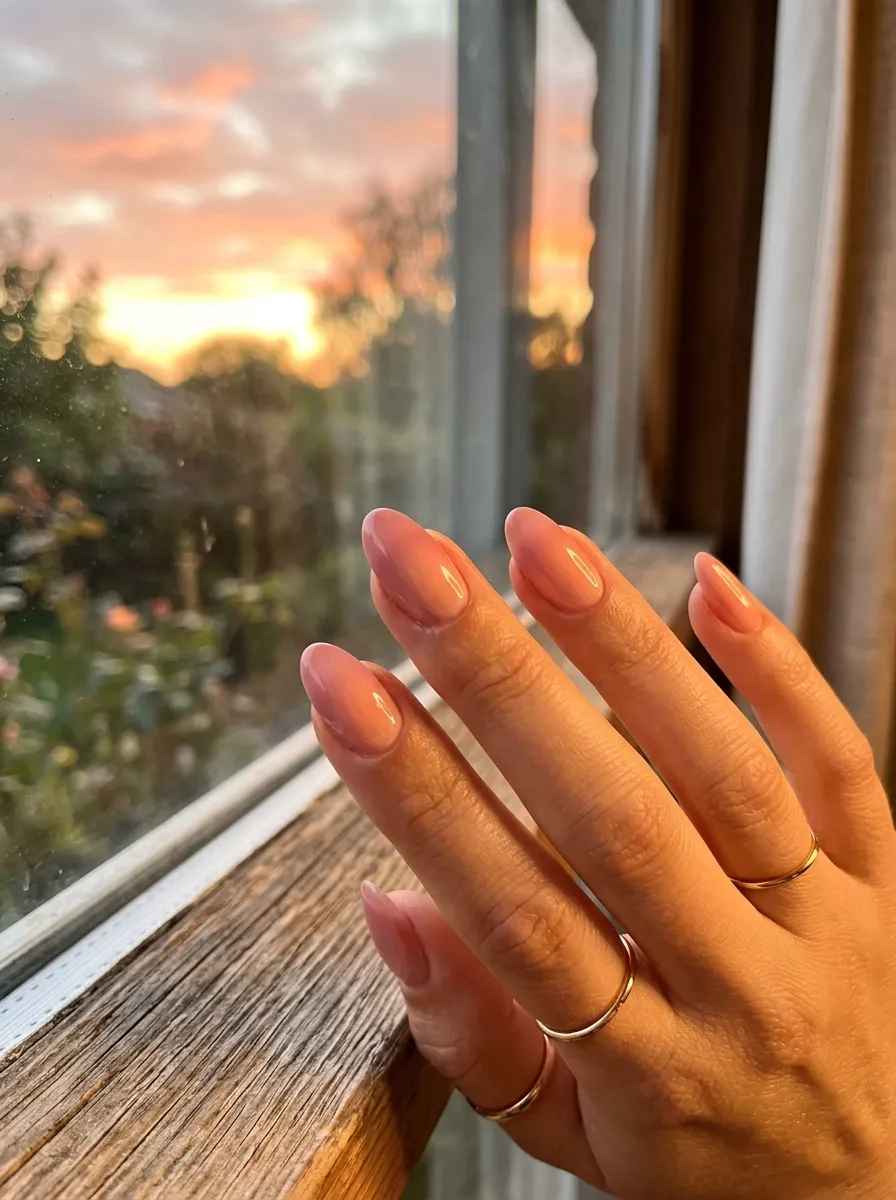
This combination borrows from sunset colors, mixing warm peach with cooler pink for a glow that feels warm and inviting. The two shades sit close enough on the color wheel to mix smoothly without turning muddy. Apply a peach polish near the tip of the nail and a pink polish near the cuticle, then use the sponge to gently dab where they meet so the two tones merge. Keep the meeting point soft rather than sharp for the most natural looking result. This design works especially well in warmer months or for beach and vacation themed manicures. Both peach and pink polishes are common shades found in almost every drugstore collection, keeping the cost low. If you want to add extra warmth, a thin gold shimmer topcoat over the peach section can mimic the look of actual sunset light. This style pairs nicely with tan or bronzed skin tones and works for both short and long nail shapes without needing any special tools beyond a basic sponge.
11. Hot Pink and Orange Aura Glow
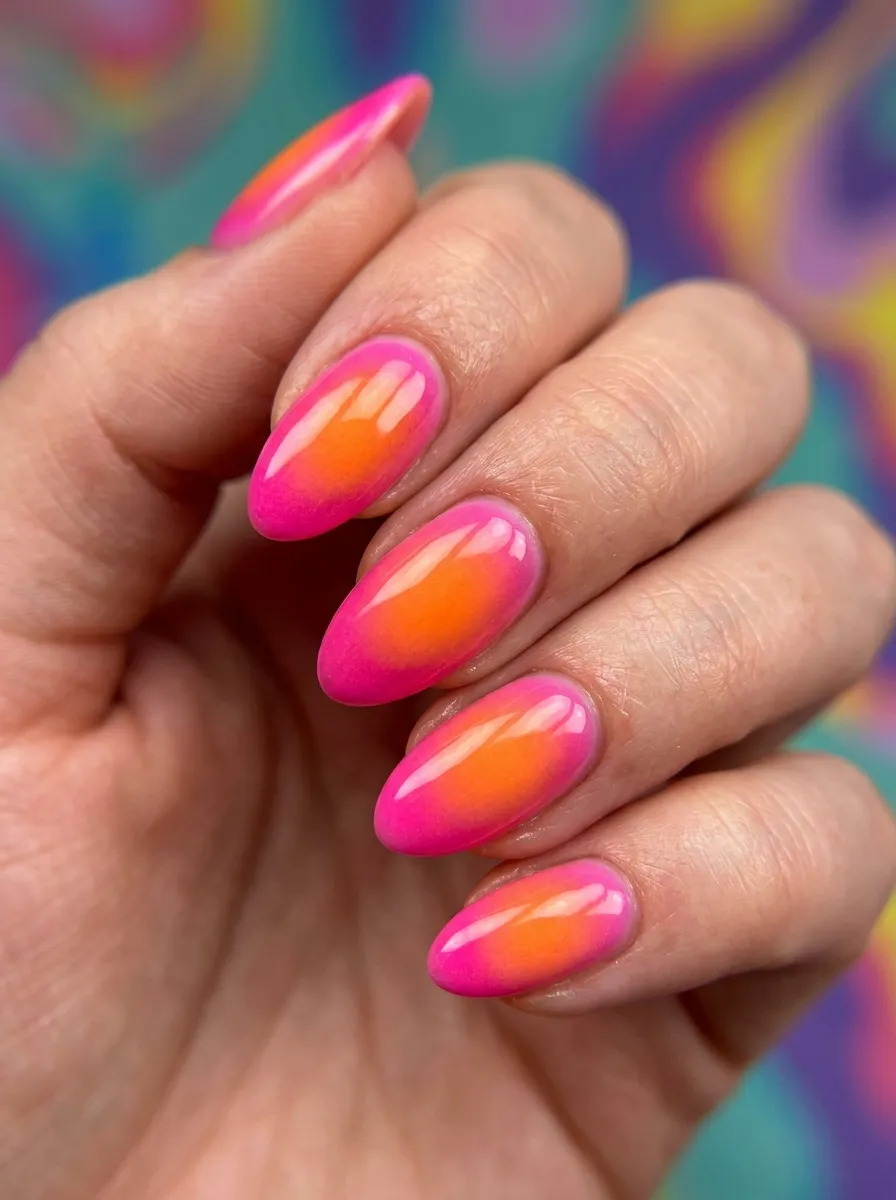
For something bolder, hot pink paired with orange creates a warm, high energy look that stands out immediately. The contrast between the two shades gives the design more visual movement than a single color aura. Apply hot pink near the cuticle and orange near the tip, then use the sponge to work the middle section where the two colors overlap. Because both shades are strong, a little goes a long way, so build up slowly rather than applying too much at once. This design works well for summer festivals, pool days, or anyone who wants nails that feel fun and energetic. Both hot pink and orange polishes are inexpensive and widely available, making this an easy budget friendly option. If the mix looks too orange or too pink in certain spots, a clean sponge with a tiny dab of white can soften the line where they meet. A glossy topcoat helps both bright shades look even more saturated once the design is finished and fully dry.
12. Pastel Pink Marble Aura
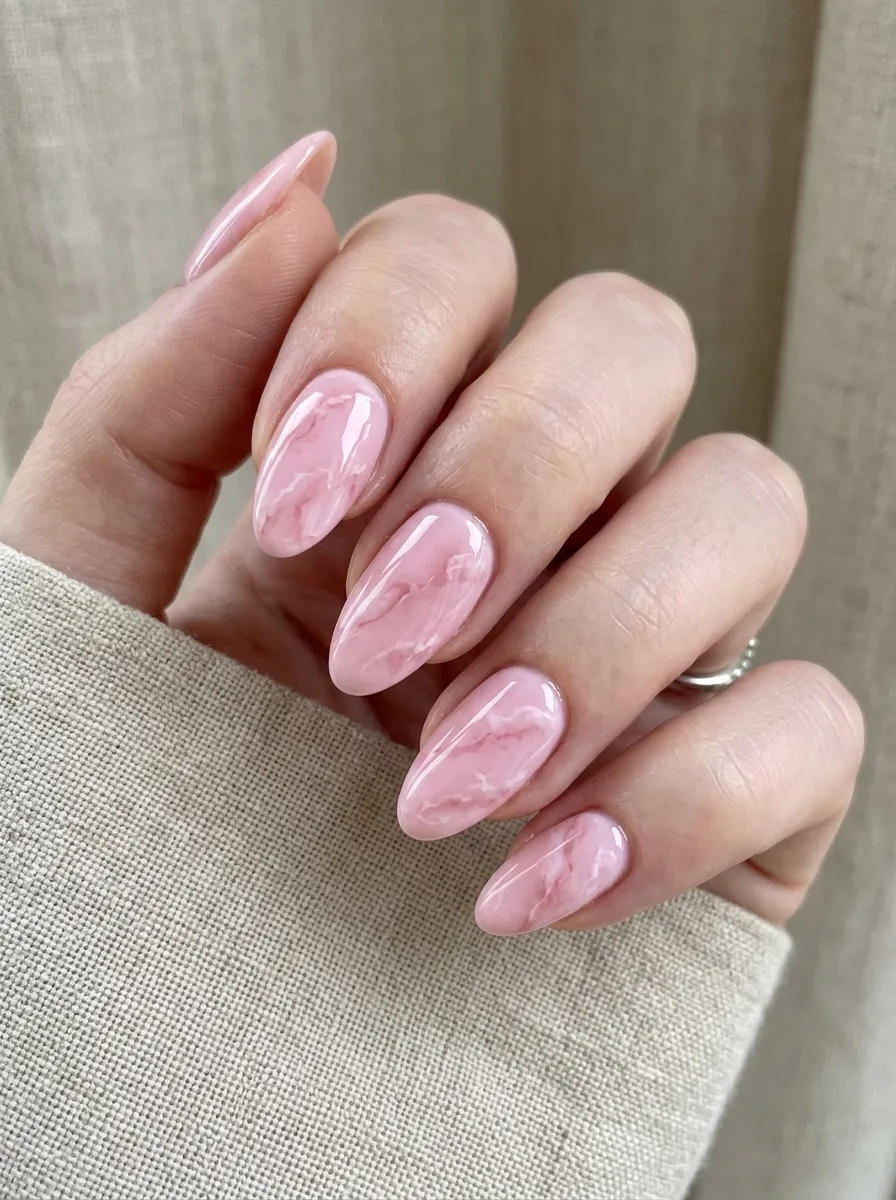
Marble effects add texture and movement to the aura trend, mimicking the look of polished stone instead of a simple color fade. Pastel pink works especially well here since it keeps the design soft rather than harsh. Apply a light pink base, then use a thin brush dipped in white polish to draw a few uneven, wavy lines across the nail while the base is still slightly wet. Drag a clean brush lightly through the lines to soften them into a marbled pattern. Practicing this on a plastic wheel first can help you get comfortable with the technique before trying it on your actual nails. This design suits weddings, formal events, or anyone who wants a manicure that looks a little more detailed without visiting a salon. All you need is a light pink polish, white polish, and a thin nail art brush, which usually costs very little. A glossy topcoat gives the marble pattern a polished, stone like shine once everything has dried completely.
13. Pink Galaxy Aura with Glitter
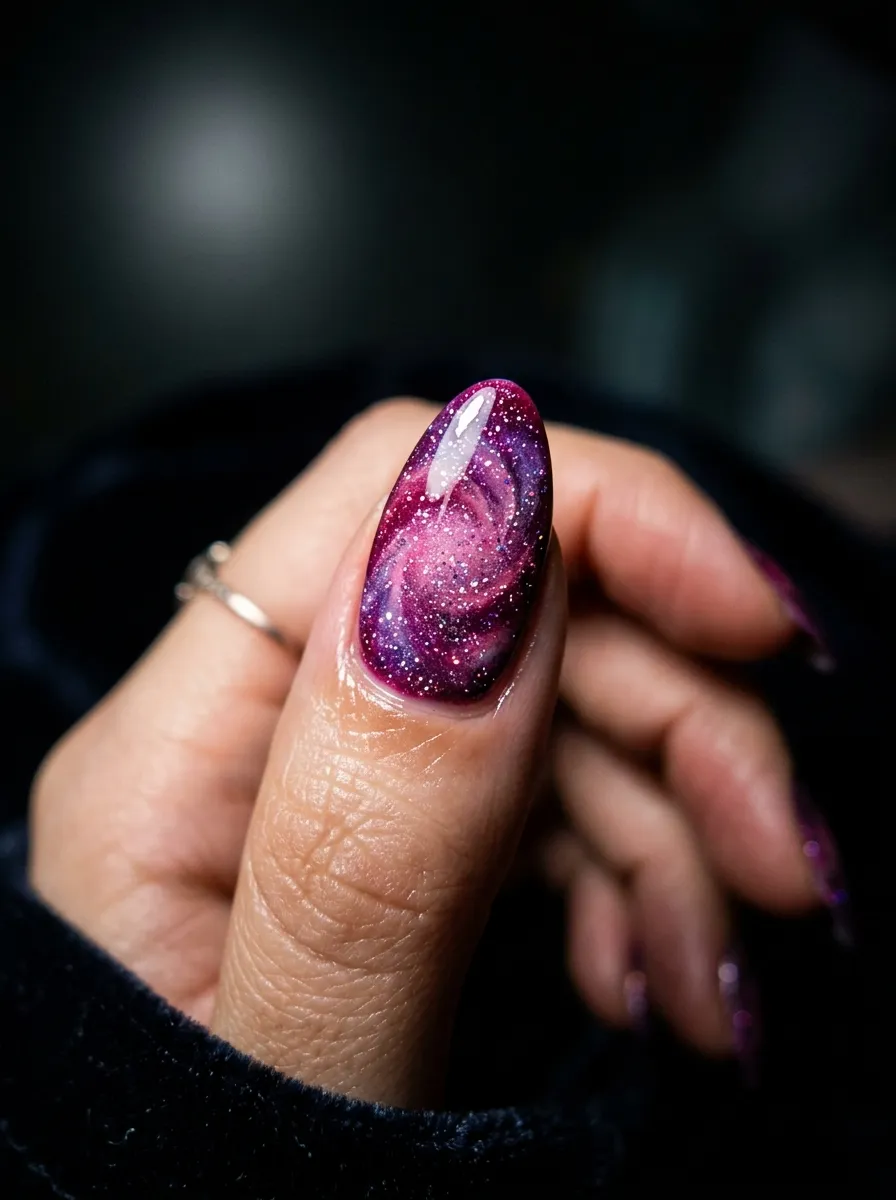
Galaxy inspired aura nails combine deep pink tones with scattered glitter to mimic the look of a night sky. This design feels a little more dramatic than a soft pastel aura, making it a fun choice for special occasions. Start with a dark pink or magenta base near the center of the nail, fading into black or deep purple near the edges using the sponge method. Once dry, use a thin brush to add small dots of fine silver or white glitter scattered randomly across the design, similar to stars. Keep the placement uneven since perfectly spaced dots tend to look less natural. This style works well for parties, holidays, or nighttime events where you want your nails to catch light in a dramatic way. A basic glitter polish and two or three dark shades are all that’s needed, and most of these items already exist in a typical polish collection. Seal the design with a thick glossy topcoat to lock the glitter in place and prevent it from catching on clothing or hair.
14. Millennial Pink Smoky Aura
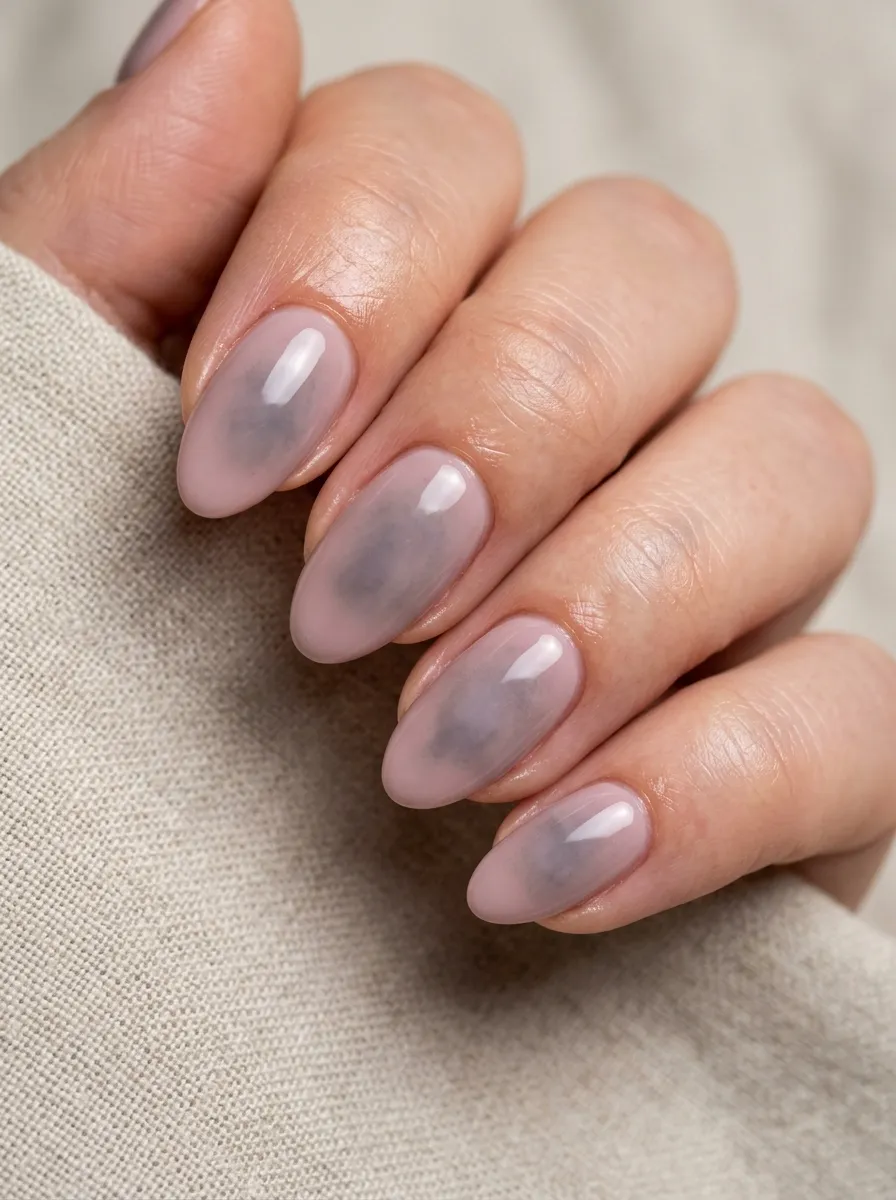
Millennial pink brings a slightly grayish, muted tone to the aura trend, giving it a calm, understated feel. Pairing it with a smoky gray center adds depth without making the design feel busy. Apply the millennial pink shade around the edges of the nail using the sponge technique, then dab a small amount of gray polish near the center while the pink is still slightly wet, blending the two where they meet. The result should look soft and slightly hazy rather than sharply divided. This design fits well with minimalist styles and neutral wardrobes, making it a practical everyday option. Millennial pink polishes are widely available and often already part of a basic polish collection, so this look doesn’t require buying anything new for many people. If the gray looks too heavy in the center, a light sponge of pink over the top can soften it back down. A glossy topcoat finishes the look, though a matte topcoat also works well if you prefer a quieter, more subdued shine.
15. Pink and Blue Cotton Candy Aura
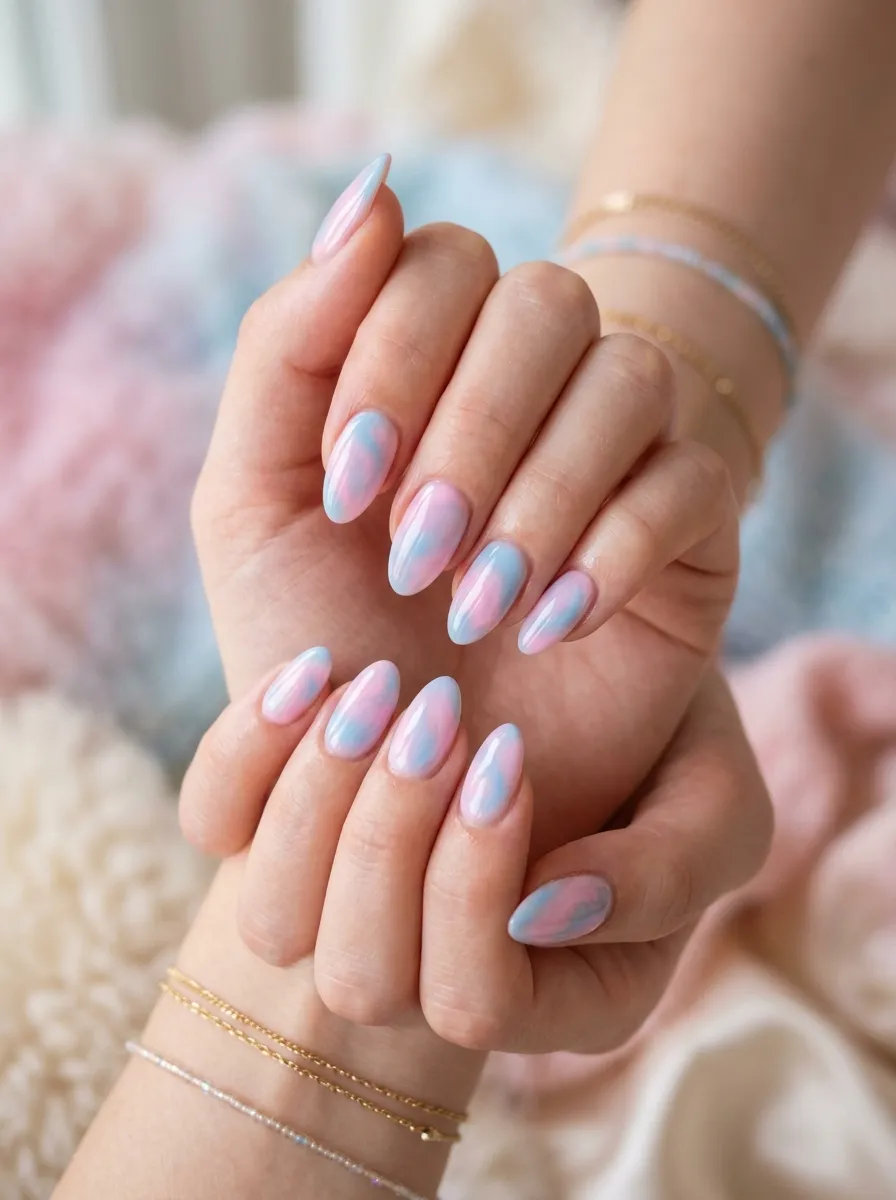
This design pulls inspiration straight from cotton candy, mixing soft pink and light blue in a way that feels sweet and lighthearted. The two pastel shades create a gentle contrast without looking too busy. Apply pink near one side of the nail and blue near the other, using the sponge to gently dab where the colors meet in the middle so they merge into a soft lavender toned patch at the center. Keep the application light rather than heavy for the softest, most cloud like effect. This design works especially well for spring, summer, or any occasion that calls for a playful, cheerful manicure. Both pastel pink and pastel blue polishes are inexpensive and commonly found in seasonal drugstore collections. If you want extra texture, a few small dots of white polish scattered across the design can mimic little sugar specks. A glossy topcoat gives the finished look its soft shine, making the whole design feel a little like dessert on your fingertips.
16. Fuchsia Pink Bold Aura
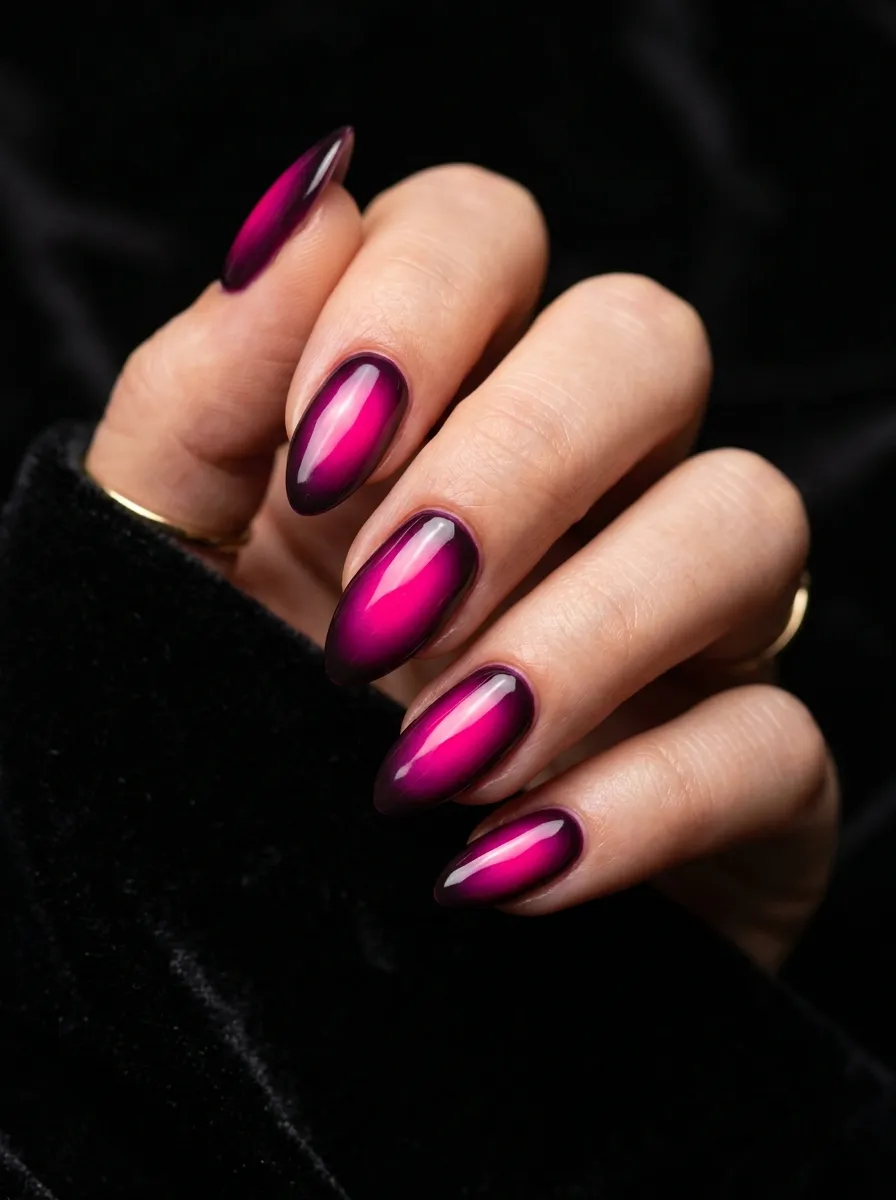
Fuchsia takes the pink aura trend and turns it into a statement rather than a subtle accent. This deep, saturated shade works best when applied with confidence rather than restraint. Start with a white or nude base so the fuchsia looks bright instead of dull, then use the sponge to build up the color in the center of the nail with two or three light layers. Let each layer dry before adding the next to avoid streaking. This design suits date nights, celebrations, or anyone who wants their manicure to be the first thing people notice. Fuchsia polishes are a common shade across almost every brand, so finding an affordable option shouldn’t be difficult. If the color looks patchy in certain spots, a final thin layer applied straight from the bottle, rather than the sponge, can even things out. A glossy topcoat makes the fuchsia look even richer and gives the whole manicure a polished, finished appearance that holds up well throughout the week.
17. Pink Aura with Gold Flecks
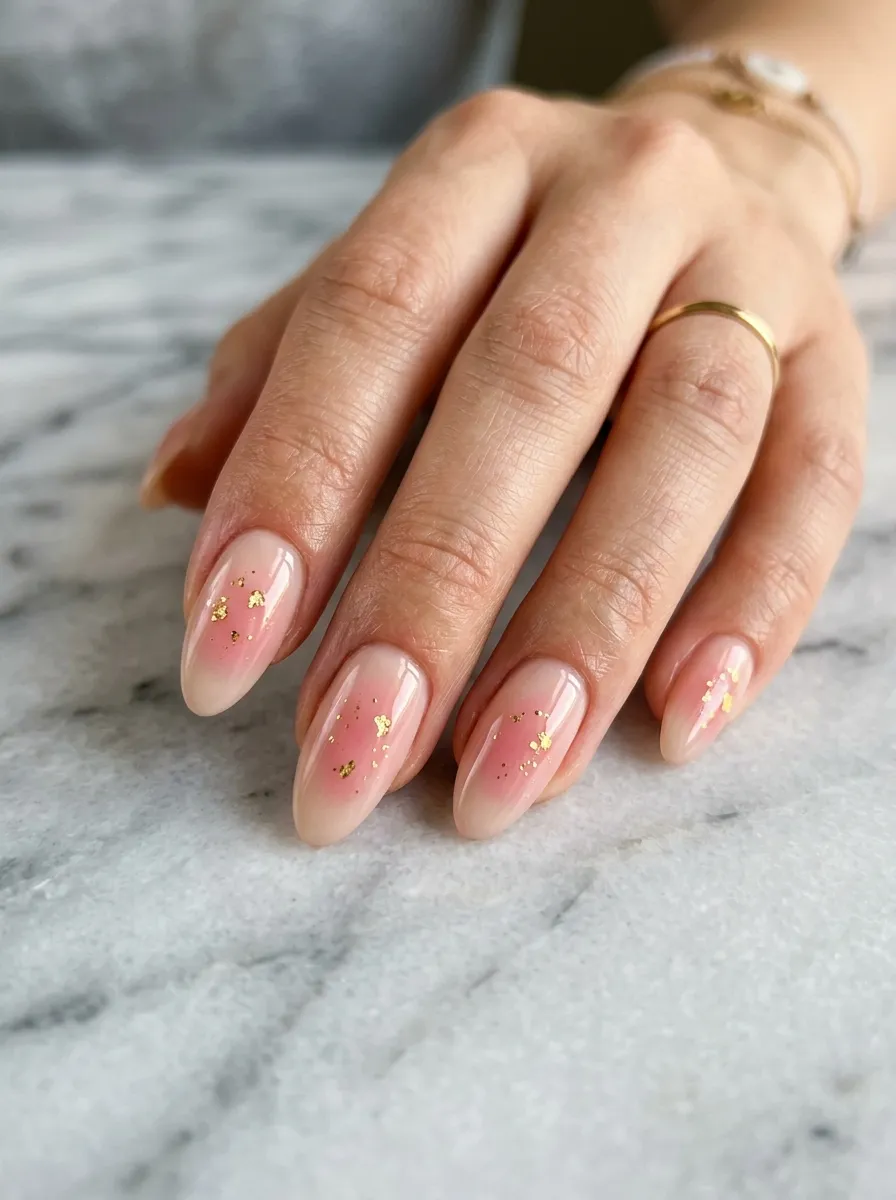
Adding gold flecks to a simple pink aura gives the design a little extra detail without much extra effort. The gold catches light in small bursts rather than covering the whole nail, which keeps the look elegant instead of busy. Apply your pink aura base using the sponge method, then once dry, use a thin brush or toothpick dipped in gold polish to add a few small dots and flecks scattered near the center of the design. Keep the placement random and sparse for the most natural effect. This design works nicely for weddings, holidays, or any event where you want a manicure that feels a little more dressed up. Gold polish or gold leaf flakes are inexpensive and a small container can last through many manicures. If gold polish isn’t available, a fine gold glitter topcoat dabbed lightly in the same area can create a similar sparkle. Finish with a glossy topcoat to seal the gold flecks in place and keep them from lifting or catching on fabric.
18. Barbie Pink Aura Statement
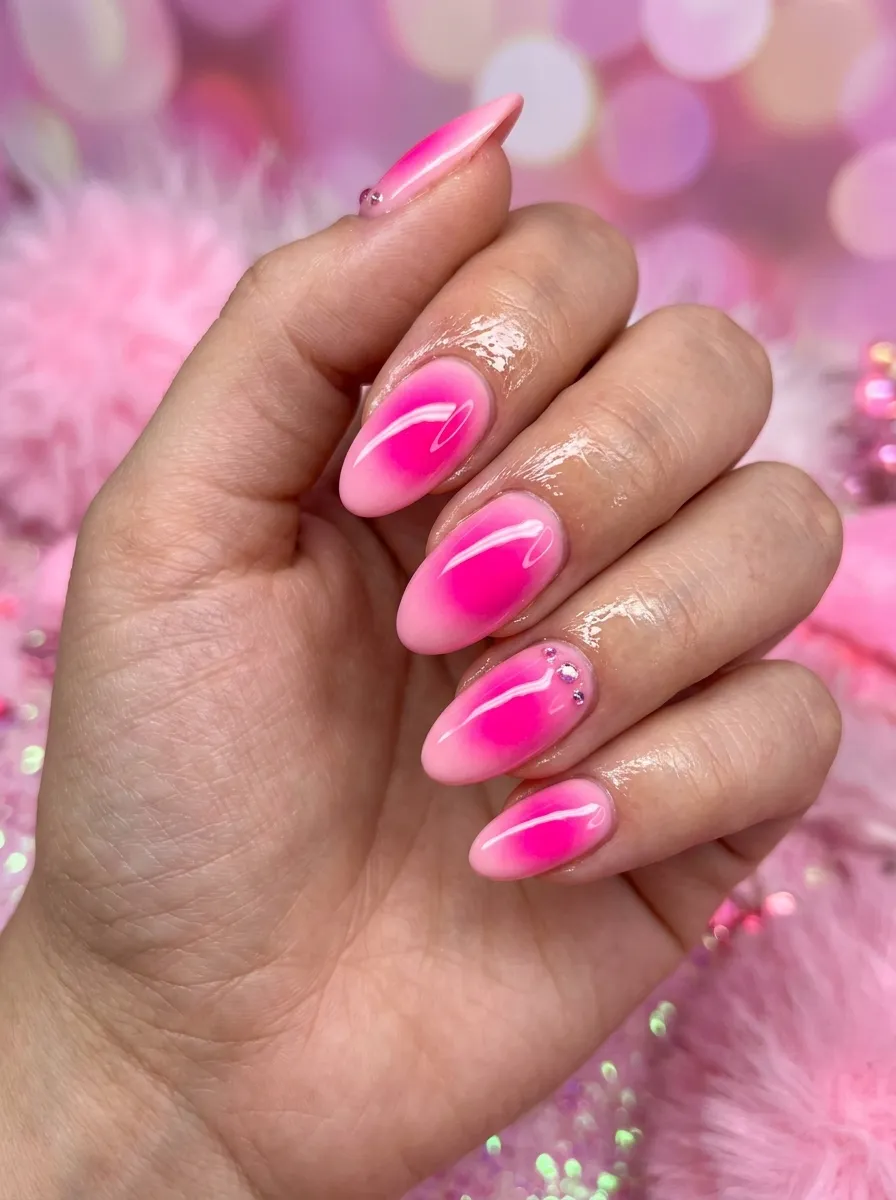
Barbie pink is loud, bright, and impossible to miss, making it a fun choice for anyone who wants their nails to feel like a statement. This shade works best against a white or light base so the pink appears as vibrant as possible. Apply the color in the center of the nail using the sponge technique, building up two or three light coats for full opacity. Because the shade is so bright, even small imperfections tend to stand out, so take your time with each layer and let it dry before continuing. This design pairs well with playful outfits, themed parties, or simply as a mood booster on an ordinary day. Barbie pink polishes are widely sold and rarely expensive, making this an easy trend to try without spending much. If you want to soften the intensity slightly, a light dusting of white polish around the edges can ease the change in color. A glossy topcoat keeps the color looking bright and gives the whole manicure a fun, candy like shine.
19. Pink and White French Aura Tips
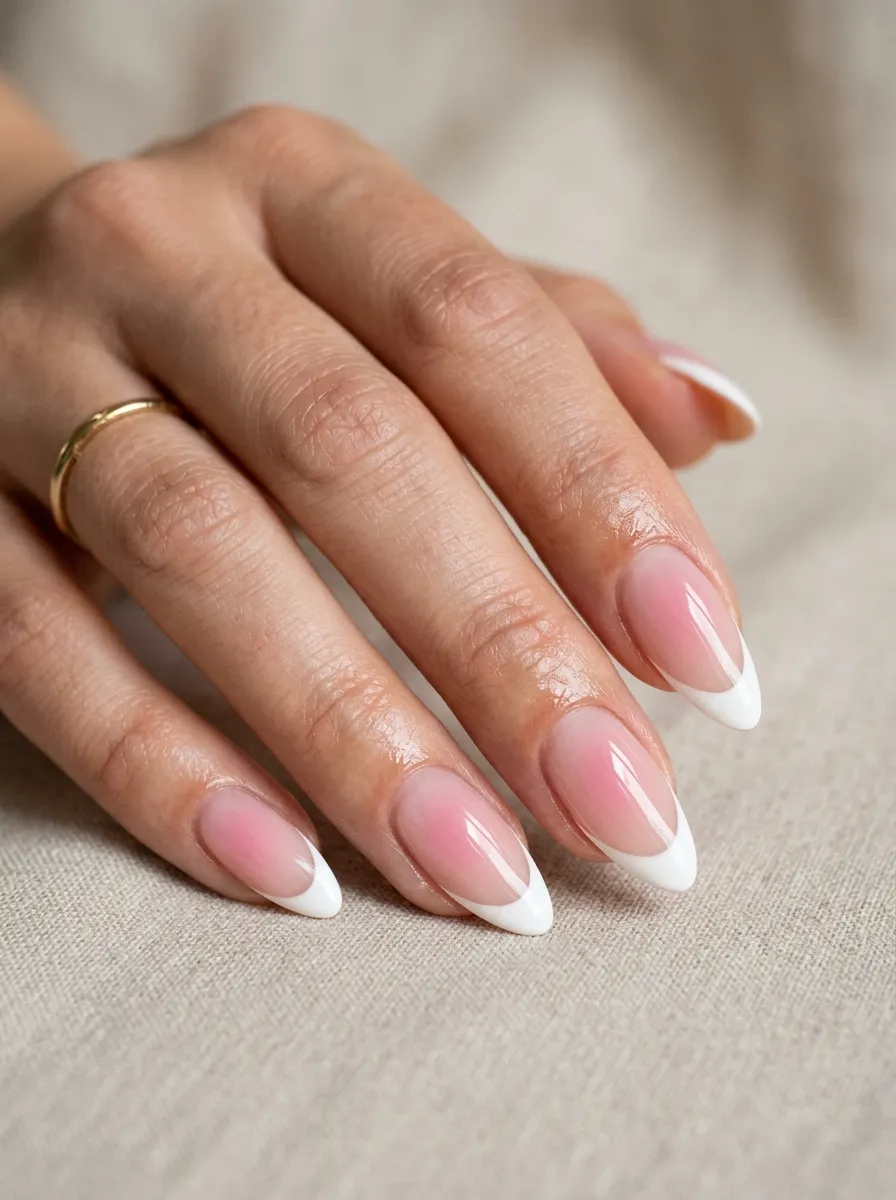
This design mixes the classic French manicure with the softer, cloud like look of aura nails. Instead of a hard white line at the tip, the pink aura fades gently into the white for a more relaxed take on a familiar style. Apply a white polish to the tip of the nail using a thin brush or French tip guide sticker for a clean edge. Once dry, use a sponge to dab pink polish near the cuticle, letting it fade toward the middle so it softly meets the white tip. This combination works for almost any occasion, from weddings to everyday wear, since it keeps one foot in a classic style while still feeling current. French tip guide stickers are inexpensive and reusable, making this an affordable way to get clean lines without a steady hand. If the two colors meet with a harsh line, a clean sponge can gently blur the area until it looks softer. A glossy topcoat completes the polished, classic look.
20. Blush Pink Aura Minimalist
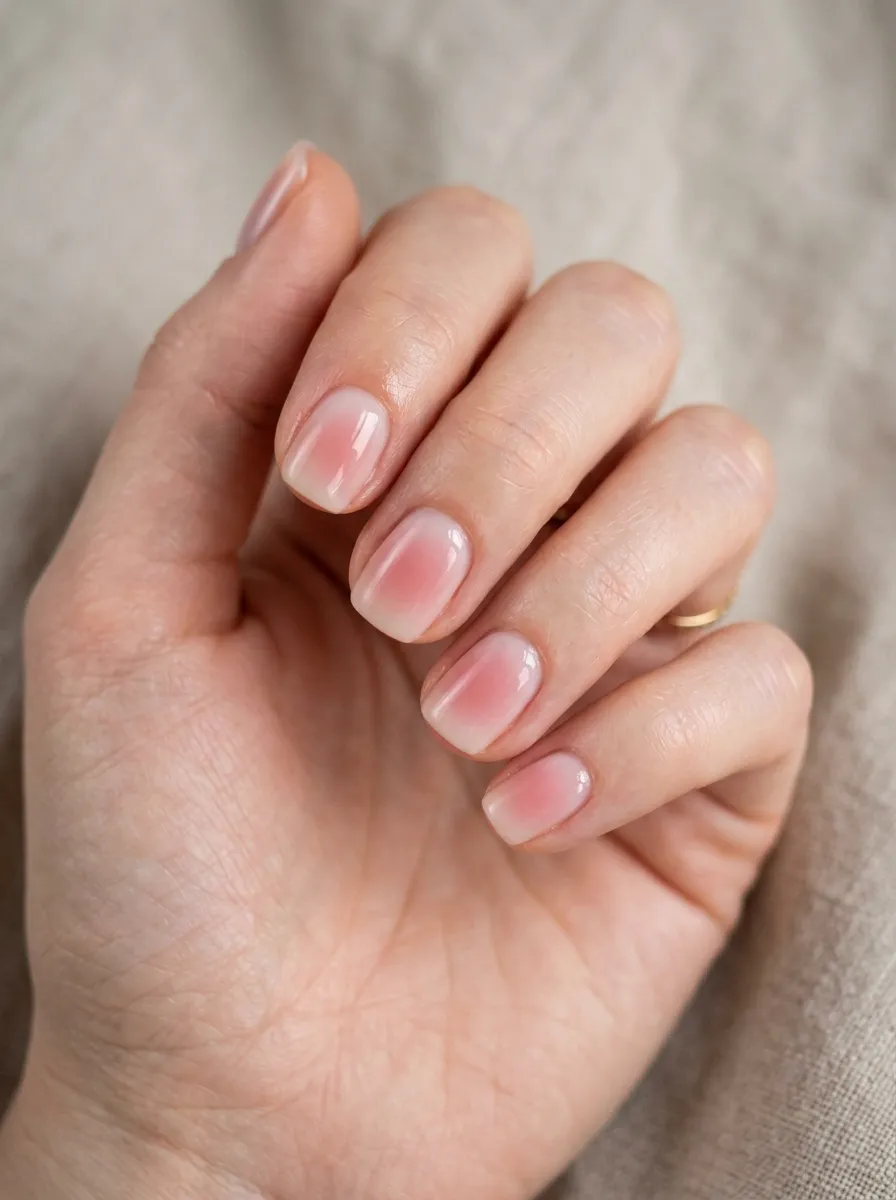
For anyone who prefers a quieter manicure, blush pink offers the softest version of the aura trend. The color barely shows at all in some lighting, giving the nail a natural, my nails but better appearance. Apply a small amount of blush pink polish near the cuticle using the sponge, keeping the color light and mostly sheer. Let it fade into bare nail or a clear base rather than covering the whole nail. This design suits workplaces, interviews, or any setting where a bold manicure might feel out of place. It also works well for those who prefer low maintenance nails that still look intentional. Blush pink polish is one of the most common shades sold, often found in basic starter sets for very little money. If the color looks too faint, adding one more light layer with the sponge can build it up slightly without losing the soft effect. A glossy topcoat gives this minimalist look a healthy, natural shine that mimics the appearance of well cared for nails.
21. Pink Aura with Heart Accents
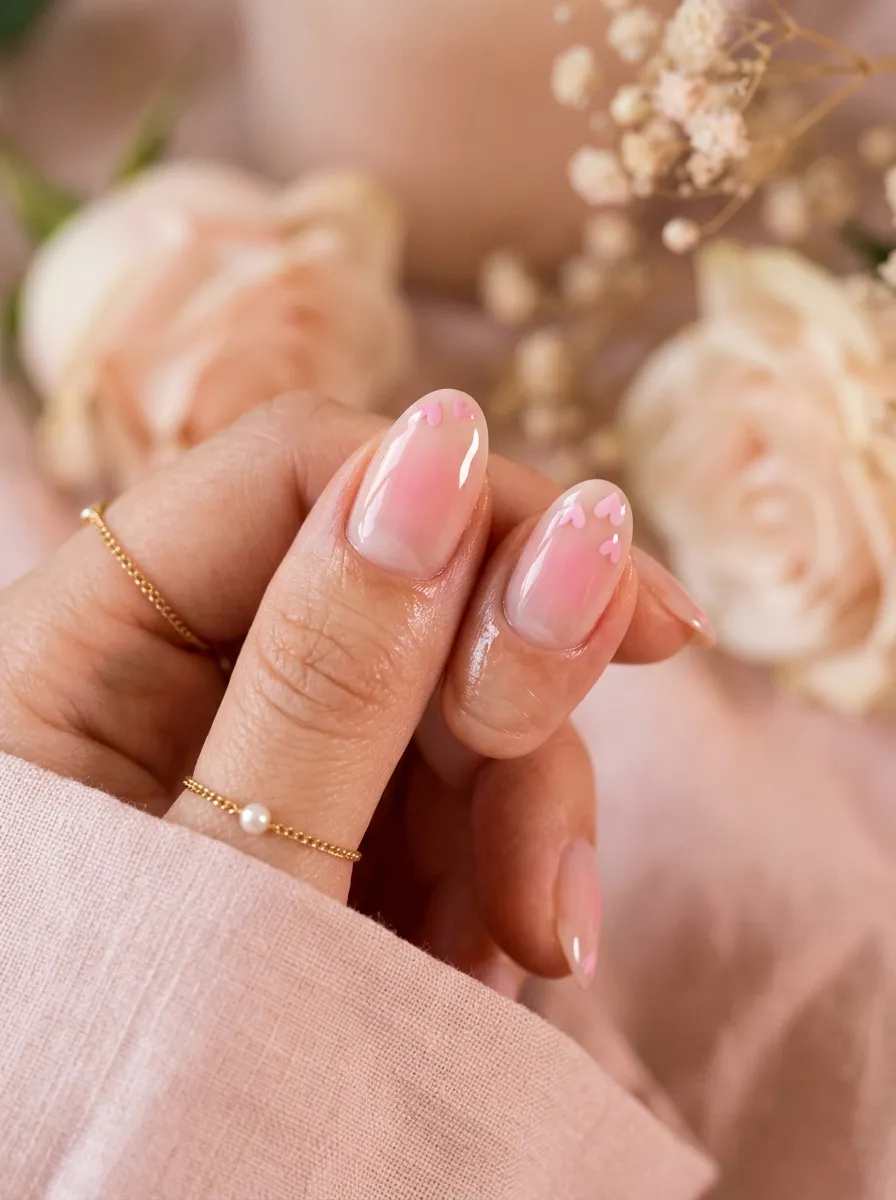
Adding small heart accents to a pink aura design brings a playful, romantic touch that works especially well around Valentine’s Day or anniversaries. The hearts don’t need to be perfect to look charming, since a slightly imperfect shape often adds to the handmade feel. Start with your pink aura base using the sponge method, then once dry, use a thin brush or a toothpick dipped in white or red polish to paint one or two small hearts near the tip of the nail. Keep the hearts small and simple, focusing on shape rather than fine detail. This design suits date nights, gifts for friends, or simply adding a little extra personality to an existing manicure. A basic thin nail art brush costs very little and can be reused for many future designs. If your first heart doesn’t turn out well, a cotton swab dipped in remover can wipe it away without disturbing the rest of the design. A glossy topcoat seals everything in place and gives the hearts a shiny, polished finish.
22. Watermelon Pink Aura Nails
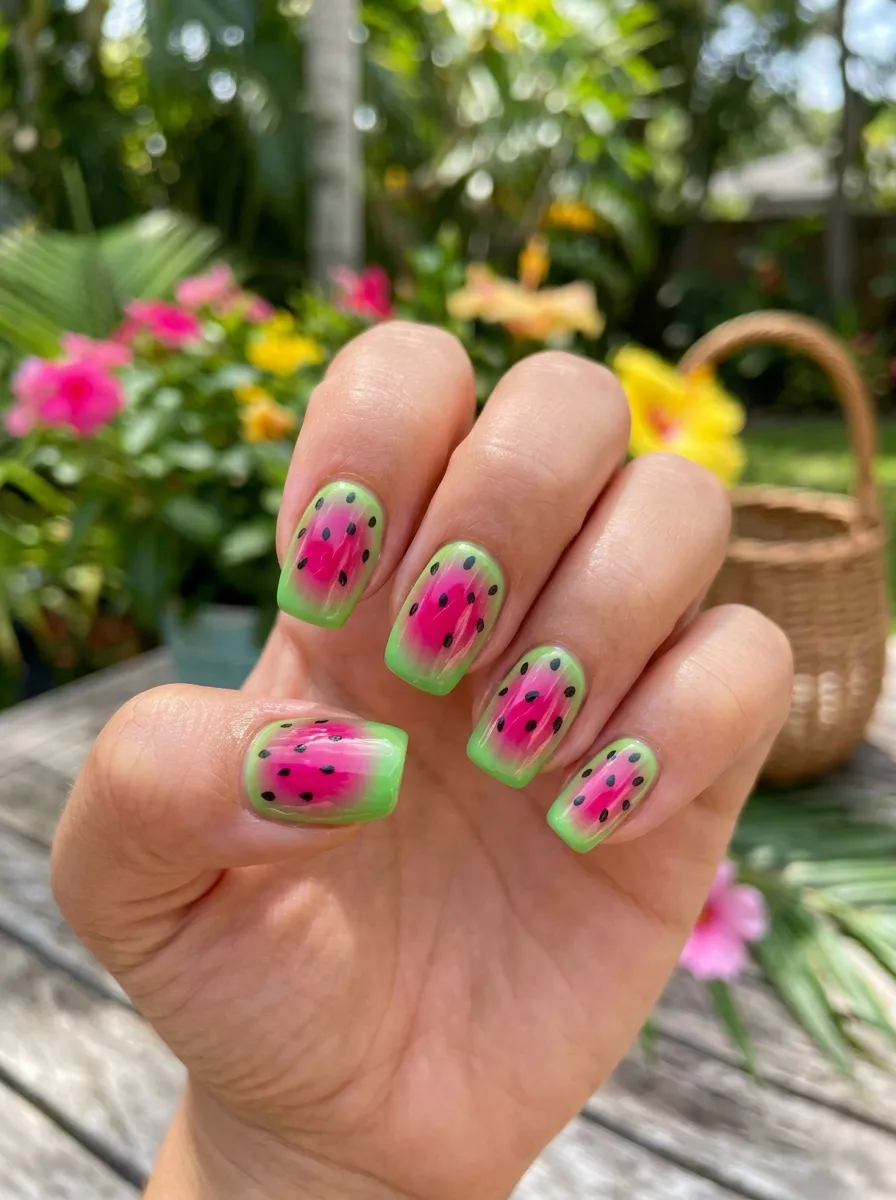
This design borrows the colors of a watermelon slice, using bright pink near the base and green near the tip for a fun, summery look. A few small black dots scattered near the top mimic watermelon seeds, adding a playful detail. Apply pink polish near the cuticle and green near the tip using the sponge method, blending gently where the two colors meet. Once dry, use a thin brush or toothpick to add three or four small black dots near the green section. This design works especially well for summer parties, pool days, or fun themed manicures with kids or friends. All the polishes needed are common shades found in almost any collection, making this an affordable seasonal option. If the seeds look too big or uneven, a cotton swab dipped in remover can clean them up without affecting the rest of the design. A glossy topcoat finishes the look and gives it a bright, juicy shine that matches the playful theme.
23. Pink Aura Chrome Cat Eye
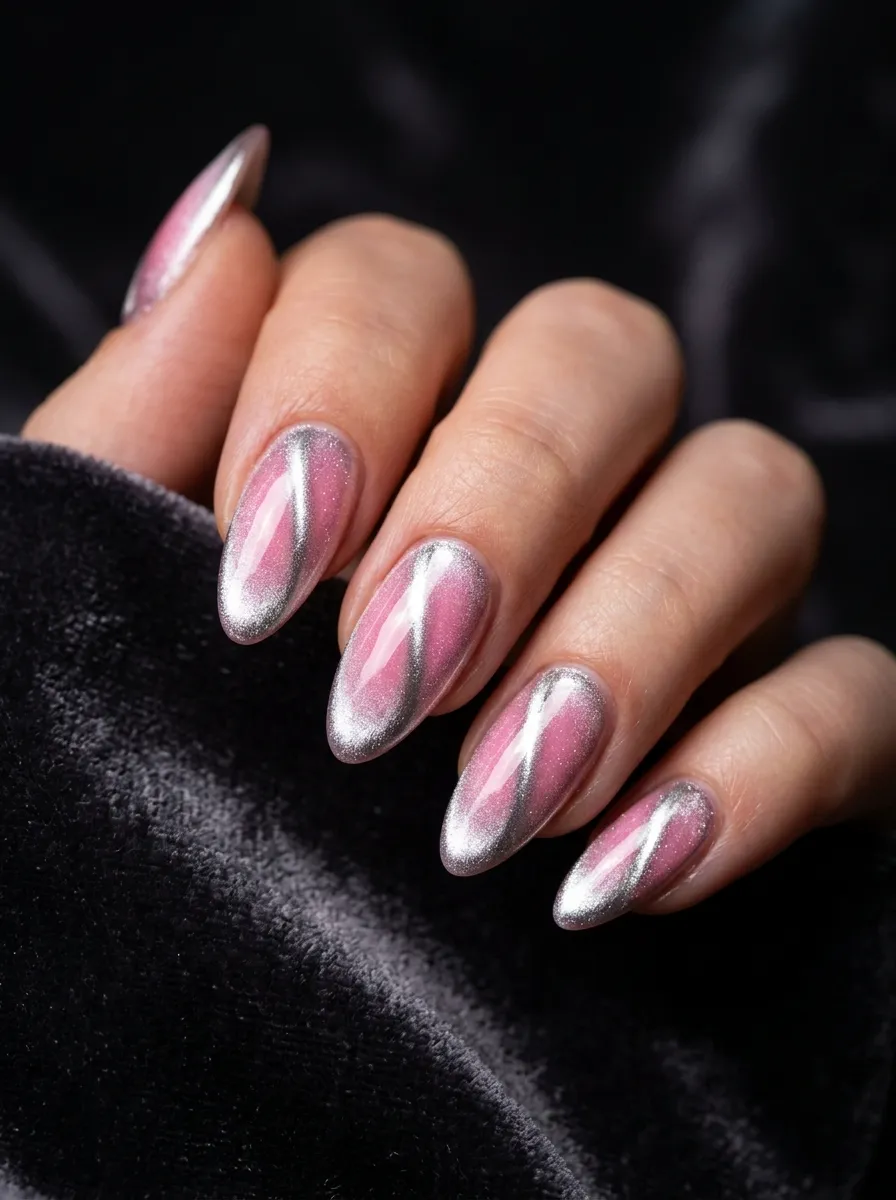
The cat eye effect uses a magnetic polish that creates a light streak across the nail, almost like a beam of light. Paired with a pink aura base, it gives the design extra movement and shine. Apply your pink aura using the sponge method and let it dry fully. Then apply a magnetic cat eye topcoat in a pink or silver tone, holding a small magnet just above the wet polish for several seconds before it dries. The magnet pulls the metallic particles into a curved light streak. This design works well for evening events, holidays, or anyone who wants a manicure with a bit of movement and shine. Magnetic cat eye polishes are sold as a set with the magnet included, and one bottle typically lasts through many manicures. If the streak doesn’t show up clearly, holding the magnet closer without touching the wet polish usually helps. Finish with a glossy topcoat to protect the design and keep the metallic shine looking smooth for days.
24. Cherry Blossom Pink Aura
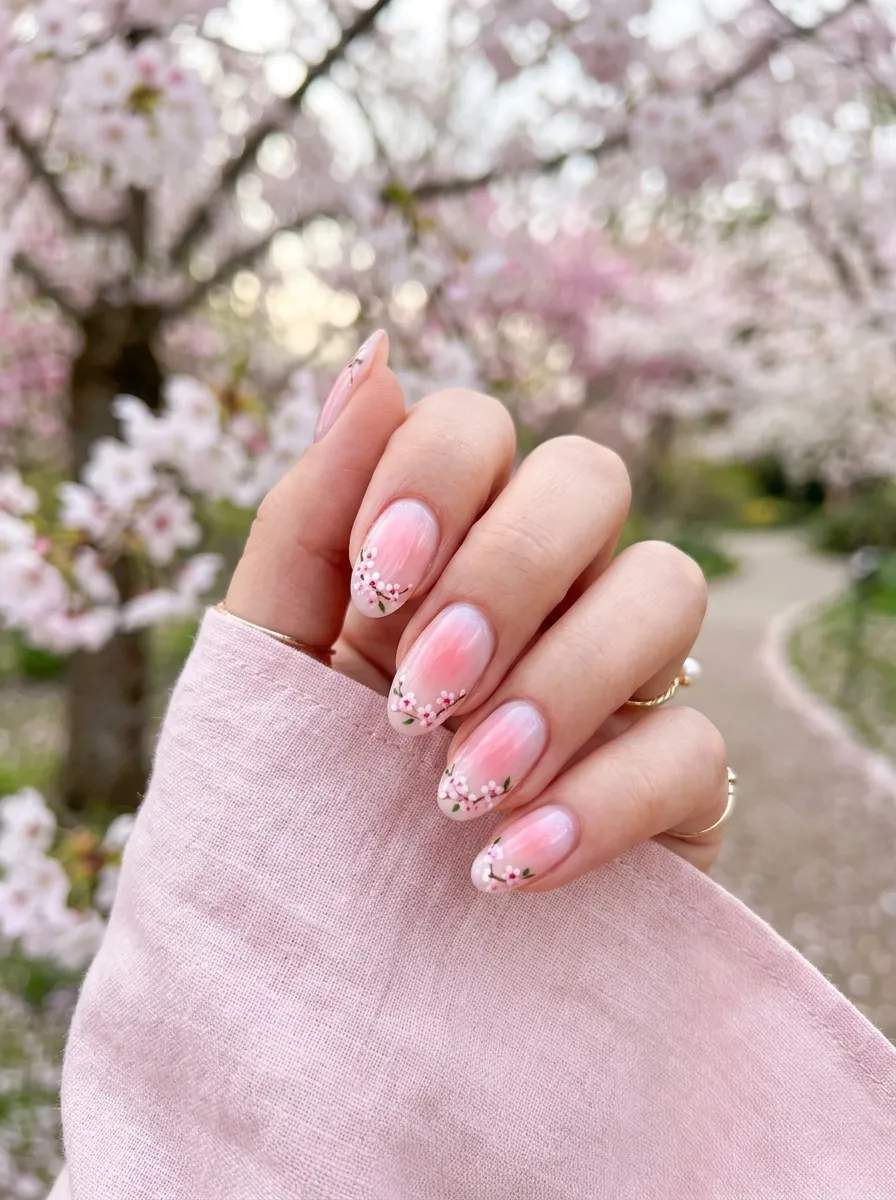
This design takes inspiration from cherry blossom flowers, pairing a soft pink aura with a few tiny hand painted blossoms near the tip of the nail. It feels delicate and seasonal, perfect for spring. Start with a soft pink aura base using the sponge method, then once dry, use a thin brush dipped in white polish to paint small five petal flowers near the tip. A tiny dot of yellow in the center of each flower adds a nice finishing touch. Keep the flowers small and simple rather than overly detailed, since a light touch usually looks more natural on such a small canvas. This design suits spring events, garden parties, or anyone who wants a manicure that feels a little more artistic. A thin nail art brush and small bottles of white and yellow polish are inexpensive and can be reused for many future designs. A glossy topcoat seals the blossoms in place and gives the whole design a soft, spring like shine.
Conclusion
Pink aura nails offer something for every mood and every budget, from a barely there blush glow to a bold neon statement. Most of these designs only require polish you probably already own, a basic sponge, and a little patience while the colors dry between layers. Start with a simple one or two color aura if you’re just getting comfortable with the sponge technique, then work your way up to marble patterns, chrome accents, or hand painted details once you feel ready. None of these looks require a salon visit or expensive tools, which makes the whole trend approachable for anyone willing to spend an afternoon on their nails. Pick one design from this list, gather a few polishes you already have on hand, and give it a try this week.