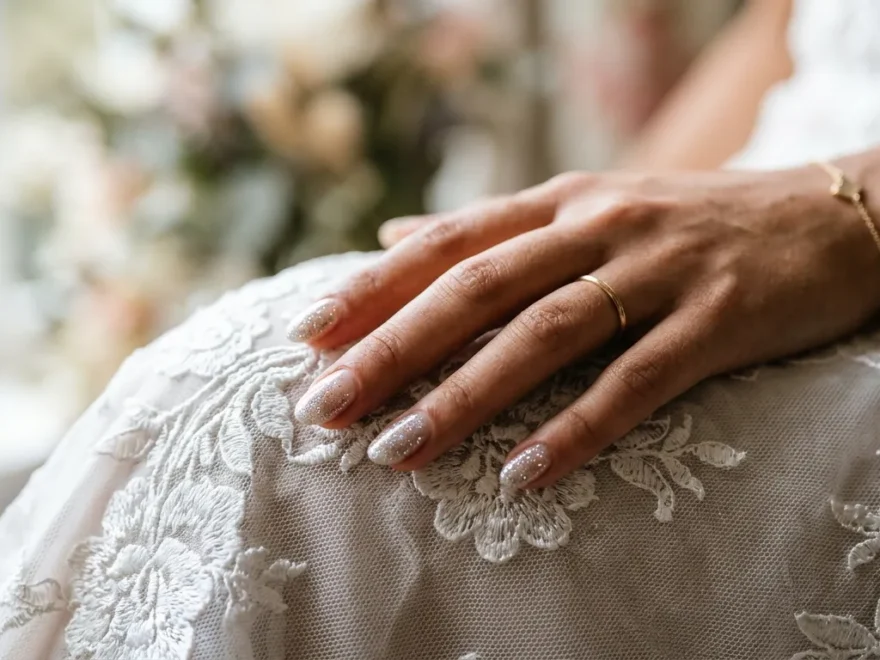
1.Classic French Tip With Glitter Edge
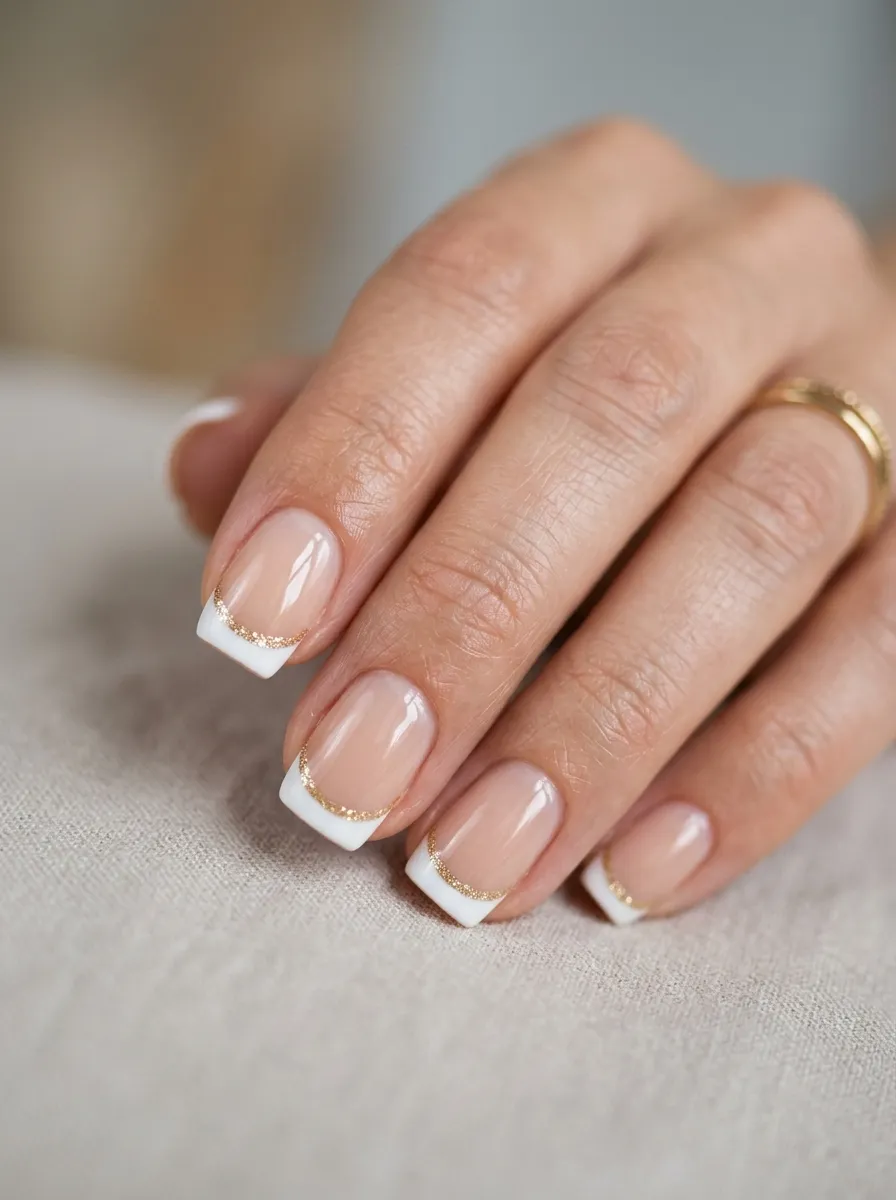
This one takes a familiar style and gives it a small twist. Instead of a plain white tip, you line the edge with fine gold or silver glitter. It looks polished but still simple enough to do yourself. Start with a nude or soft pink base coat. Once dry, use a thin brush to paint the tip in white polish. While it’s still tacky, dab a small angled brush loaded with glitter polish right along that tip line. You don’t need a full glitter tip, just a thin strip does the job.
For a budget-friendly version, buy one bottle of fine glitter polish and reuse it across multiple nail looks throughout wedding season. A five dollar bottle can cover your bridesmaids’ nails too if you’re doing a group manicure night. Seal everything with a clear top coat to keep the glitter from catching on fabric or hair. This style photographs well because the sparkle only shows up when the light hits it directly, giving a subtle shimmer instead of an overwhelming shine.
2.Full Glitter Accent Nail
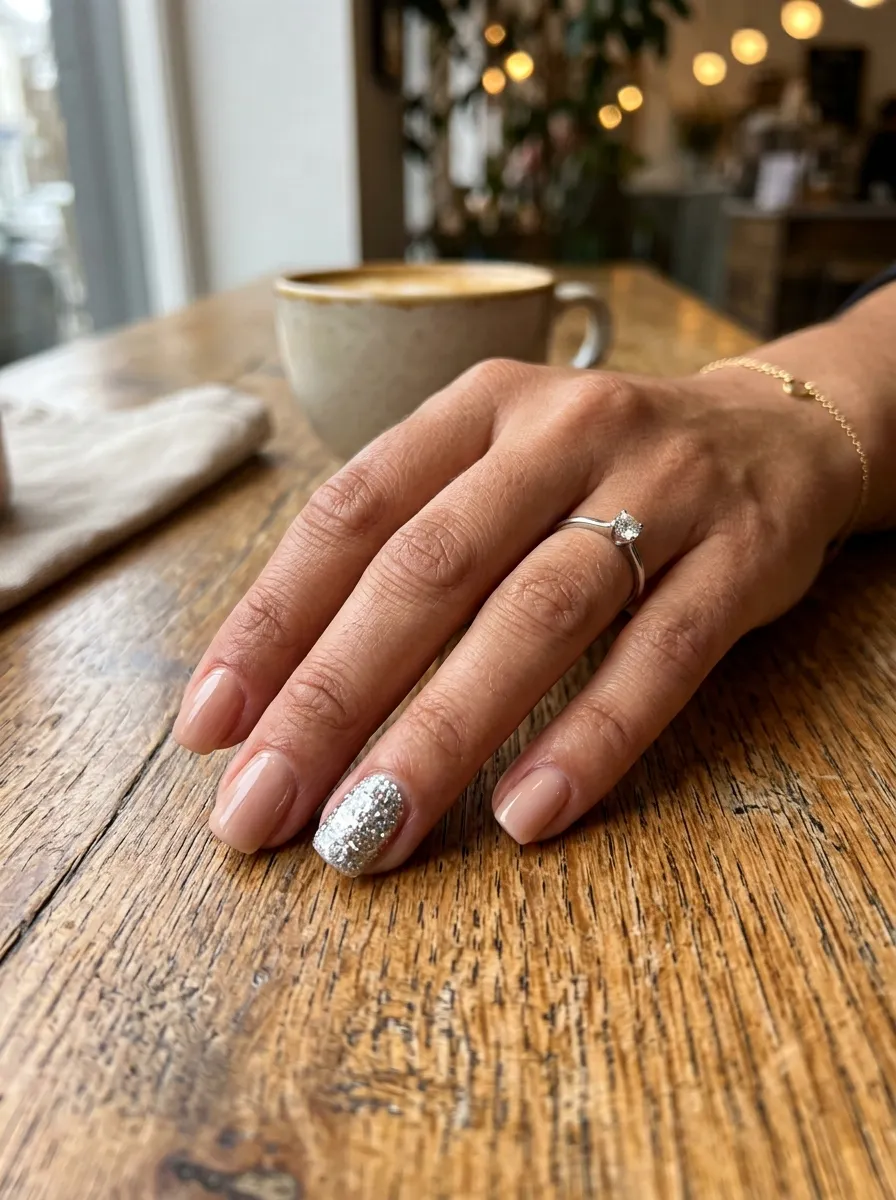
An accent nail is the easiest way to add sparkle without covering every nail. Pick one finger, usually the ring finger, and cover it completely in glitter polish while the rest stay a soft solid color. This keeps the look balanced instead of loud. Use a chunky glitter polish for more texture and light catching, or a fine glitter for a smoother finish.
Application is simple. Paint your base color on all nails first. Let it dry completely. Then apply two coats of glitter polish only on your chosen accent nail. Chunky glitters sometimes need extra top coat layers to smooth out the texture, so don’t skip that step. This look works for the bride, the maid of honor, or the whole bridal party since everyone can choose their own base shade while keeping the glitter accent consistent.
A drugstore glitter polish under ten dollars works just as well as a salon brand here. The accent nail trick also hides small application mistakes since glitter naturally covers uneven edges better than solid color does.
3.Ombre Glitter Fade
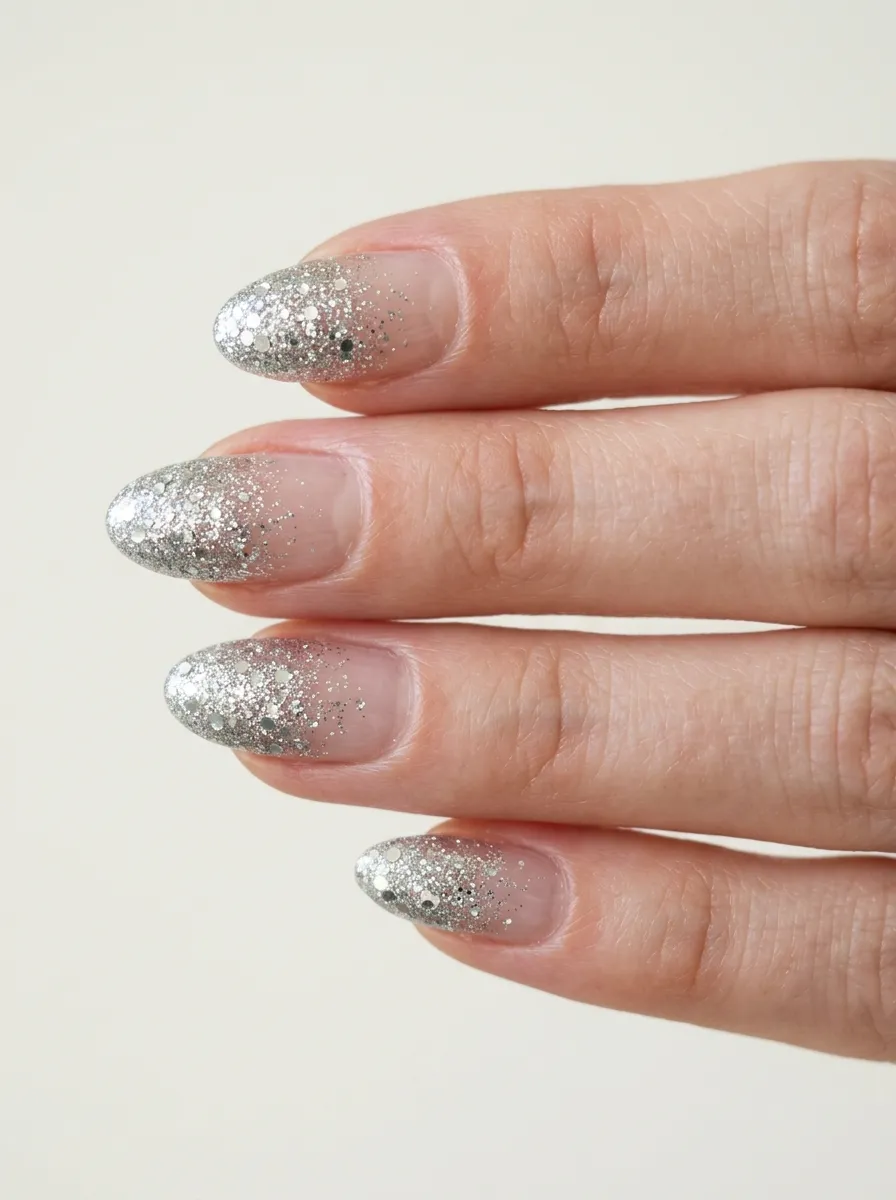
Ombre glitter gives you sparkle that builds gradually instead of covering the whole nail evenly. The base near your cuticle stays clear or nearly bare, and the glitter gets denser toward the tip. It’s a soft way to wear glitter without feeling like too much on your hands.
To create this at home, start with a clear or sheer pink base. Using a makeup sponge, dab glitter polish onto the sponge first, then press it onto just the tip area of your nail. Build up more layers toward the very tip for that fade effect. A cosmetic sponge works better than a brush here because it creates a soft transition instead of a hard line.
This style is easy to adjust based on how much sparkle you want. Keep the glitter light for daytime ceremonies or build it up thicker for evening receptions under warmer lighting. One sponge and one bottle of glitter polish can get you through several practice rounds before your actual wedding date, so it’s a good one to try in the weeks leading up.
4.Glitter Half Moon Manicure
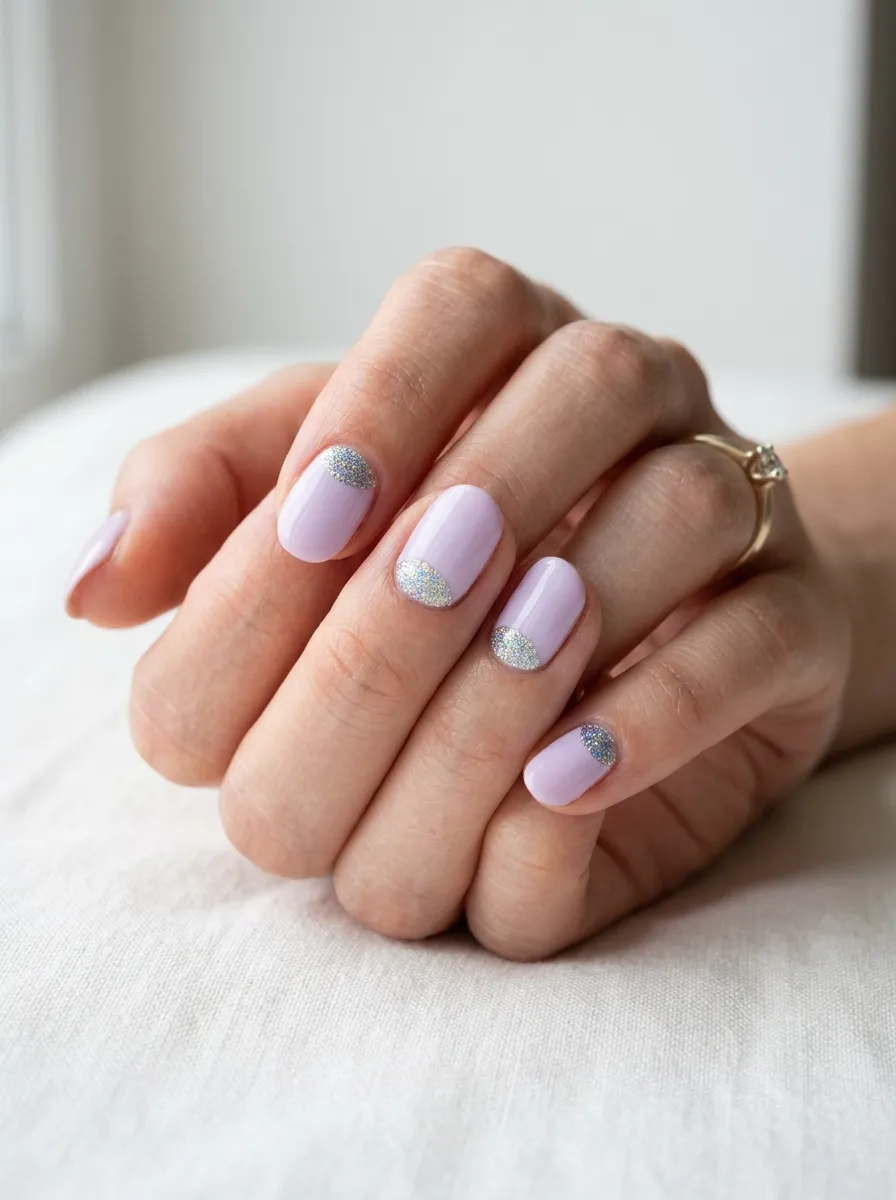
The half moon look flips the usual glitter placement. Instead of covering the tip, the sparkle sits right at the base of the nail near your cuticle in a crescent shape. It gives a structured, intentional look that still feels bridal.
You’ll need a small hole reinforcement sticker, the kind used for notebook paper, to get a clean crescent shape. Stick it near the base of your nail after painting your solid base color. Paint glitter polish over the exposed crescent area, then peel the sticker off before the polish dries completely. This trick keeps your line crisp without needing steady freehand skills.
Pastel shades like blush pink, soft lavender, or pale blue work well as the base color for this look. The glitter crescent can be gold, silver, or even a matching pastel glitter for a more subtle finish. Reinforcement stickers cost almost nothing and come in packs of a few hundred, so you can practice this technique multiple times before committing to your wedding day look.
5.Glitter Ring Finger Wrap
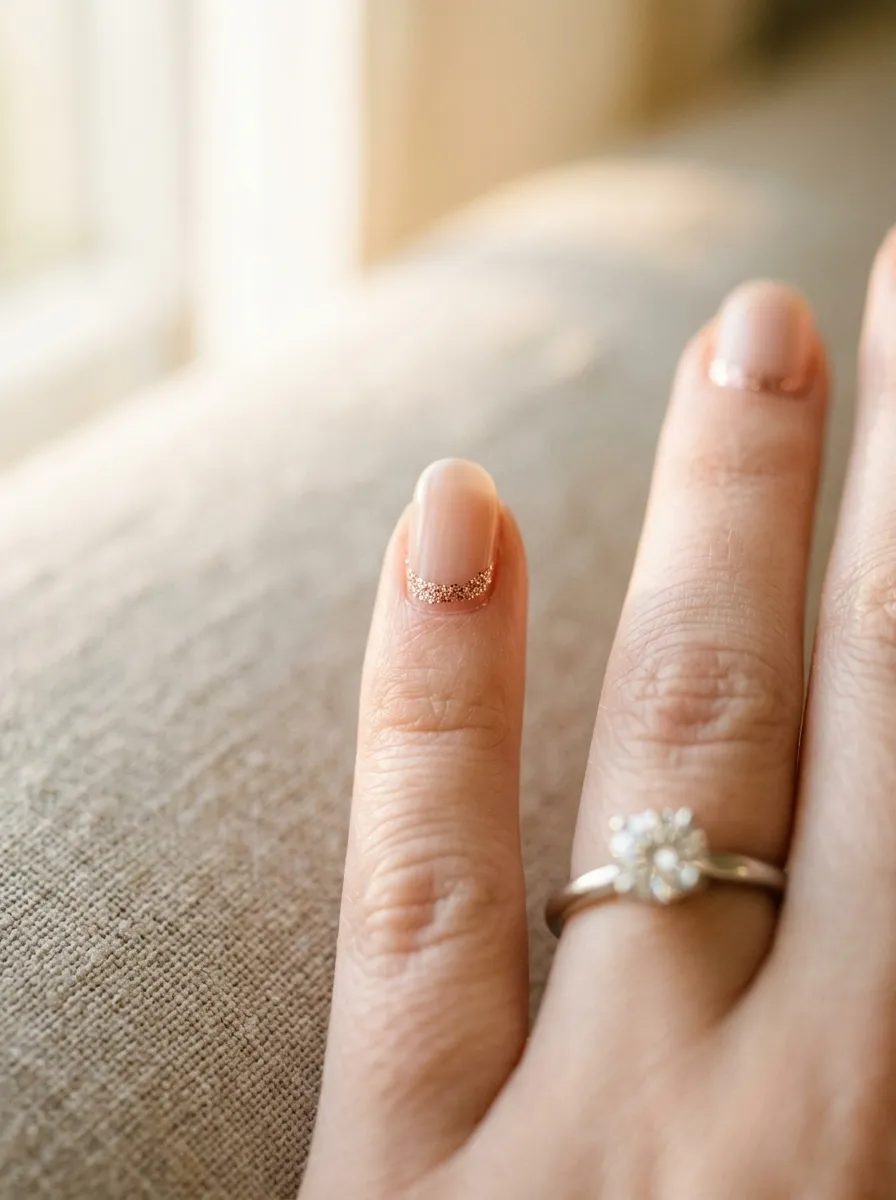
This design mimics the look of a ring by wrapping a thin band of glitter near the base of your ring finger nail, right under where your engagement ring sits. It’s a small detail that ties your hands together in photos.
Paint your base color across all nails as usual. On the ring finger specifically, use a thin nail art brush to paint a narrow band of glitter polish close to the cuticle line, following the curve of your nail. Keep the band thin, about two millimeters wide, so it reads as a delicate detail rather than a bold stripe.
This works especially well when your ring itself has some sparkle, since the glitter band echoes that shine. It’s a low effort, high impact trick that takes maybe five extra minutes compared to a plain manicure. A single nail art brush from a beauty supply store costs just a couple dollars and can be reused for dozens of future manicures beyond your wedding.
6.Chrome And Glitter Combo
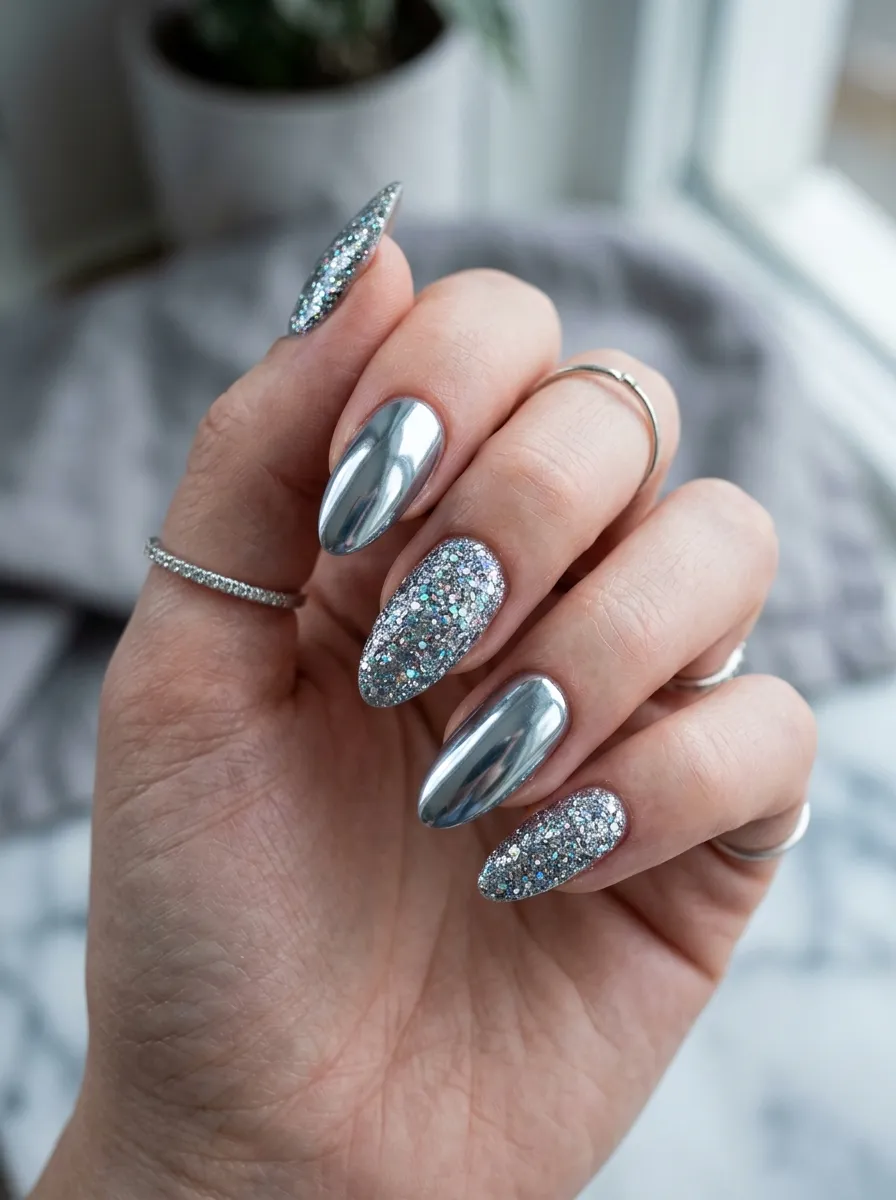
Mixing chrome polish with glitter nails on alternating fingers gives your hands more visual interest without clashing. Chrome nails reflect light like a mirror, while glitter nails scatter it into tiny sparkles. Together they photograph beautifully under both natural and flash lighting.
To try this at home, paint two or three nails with a chrome powder or chrome polish following the product instructions, since application steps vary by brand. Paint the remaining nails with a glitter polish in a matching or complementary tone, like silver chrome paired with white glitter. Alternate the placement so no two chrome nails sit next to each other.
Chrome powders can be tricky for beginners, so practice on a few nails before your wedding week. If chrome feels too complicated, a chrome top coat over a plain silver base gives a similar effect with much less skill required. This combo works well for brides who want their nails to stand out in photos without going fully bold across every single nail.
7.Soft Pink Base With Scattered Glitter
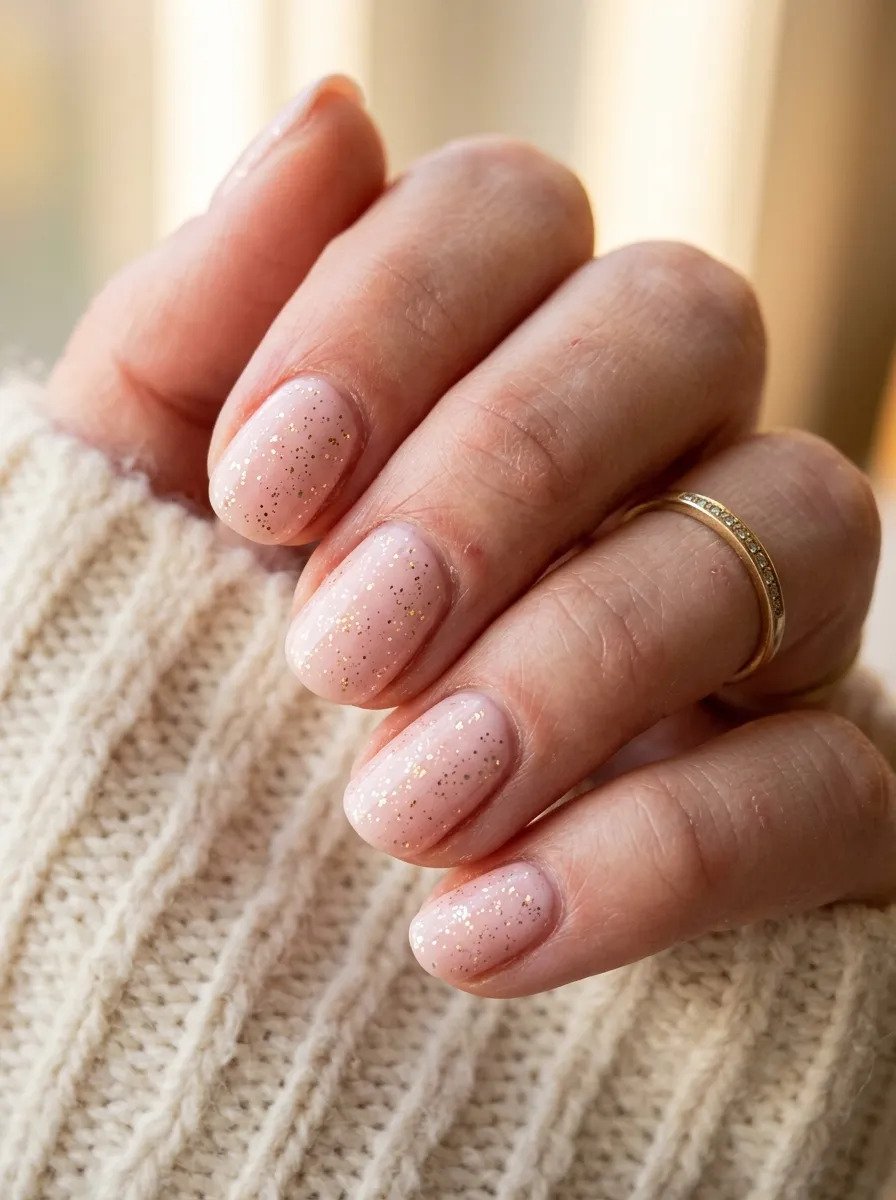
Not every glitter look needs a pattern. Sometimes scattered glitter across a soft pink base gives the most natural, wearable result. It looks like your nails just happen to catch light rather than being deliberately styled, which suits brides who want something understated.
Mix a small amount of loose fine glitter directly into a clear top coat, or buy a pre mixed scattered glitter polish. Apply your pink base color first and let it dry fully. Then apply the glitter top coat in one or two thin layers over the entire nail. Because the glitter is sparse, you won’t get heavy texture buildup like you would with a solid glitter polish.
This style is forgiving for beginners since scattered glitter hides small mistakes and doesn’t require careful placement. It also works on short nails just as well as long ones, making it a flexible choice regardless of your natural nail length heading into the wedding.
8.Glitter French Tip Reverse
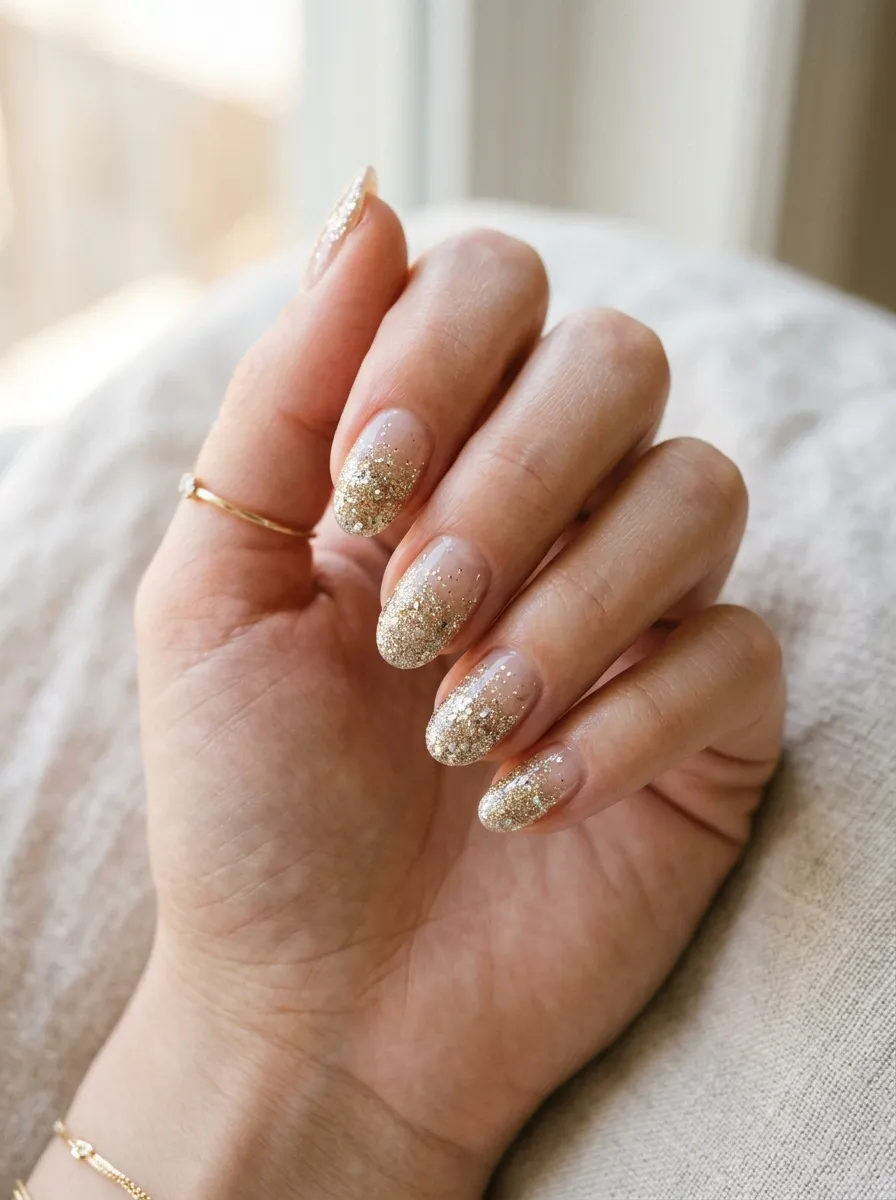
A reverse French tip flips the classic white tip design so the glitter sits at the base instead of the edge. It creates a grounded, elegant look that still has personality without covering the entire nail in sparkle.
Start with a clear or sheer base coat across the whole nail. Using the same hole reinforcement sticker trick mentioned earlier, place the sticker where you want the glitter section to end, usually about a third of the way up from your cuticle. Paint glitter polish below the sticker line, then remove the sticker once the polish sets.
This design pairs nicely with shorter nails since the glitter section takes up more visual space relative to the nail size. It’s also easier to keep clean throughout a long wedding day since there’s less exposed tip area that might chip from handling flowers, rings, or place cards during the reception.
9.All Over Fine Glitter Shimmer
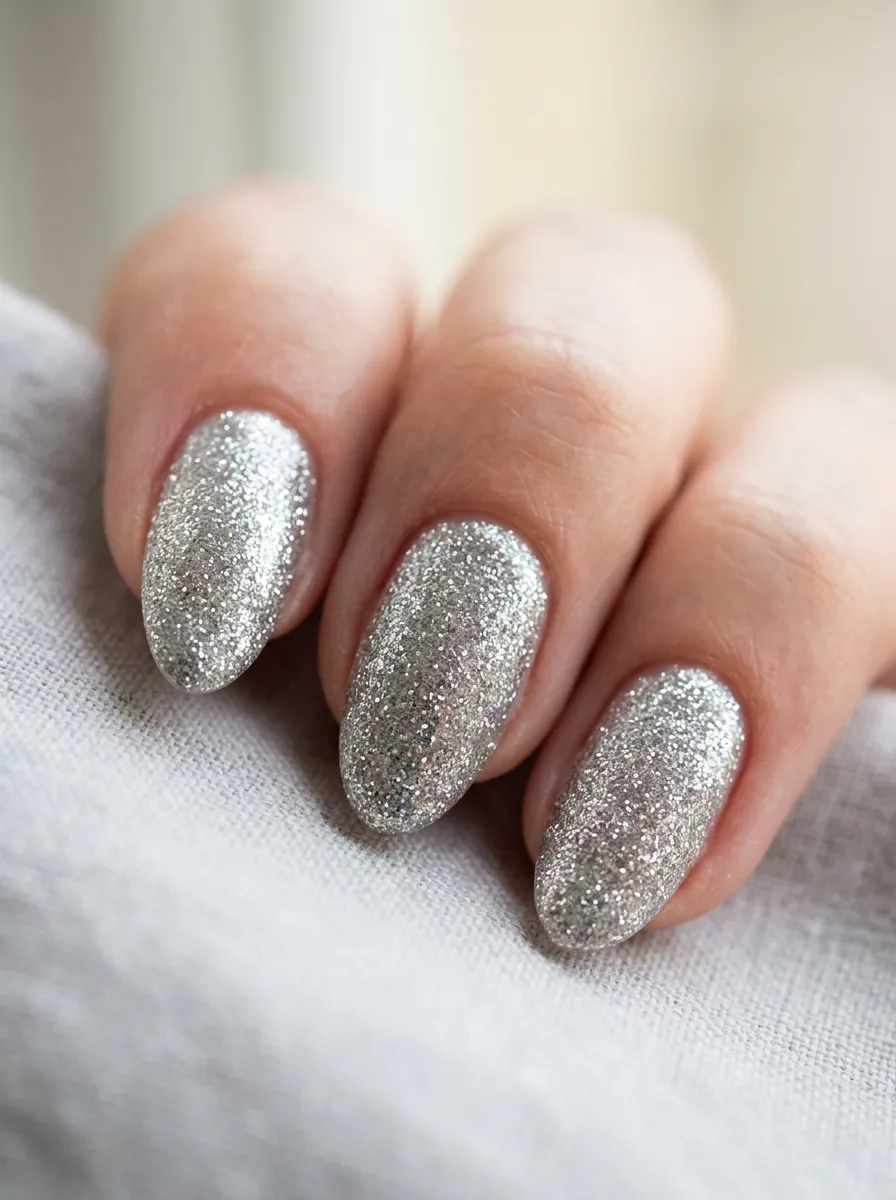
Sometimes the simplest option is covering every nail in a single fine glitter shade. Fine glitter, unlike chunky glitter, dries smoother and doesn’t require heavy top coat layers to even out the texture. It gives a consistent shimmer that works for any wedding style, from rustic to formal.
Apply two thin coats of a fine glitter polish directly, or layer it over a matching solid base for more coverage. Fine glitters usually apply more evenly straight from the bottle compared to chunky varieties, so this is a good option if you’re short on time before the ceremony.
Budget tip: one bottle of fine glitter polish typically covers ten or more manicures, so it’s practical for coordinating a whole bridal party without buying multiple bottles. Silver and champagne gold are the most versatile shades since they match nearly any dress color or wedding theme without competing with your bouquet or jewelry.
10.Glitter Tips With Matte Base
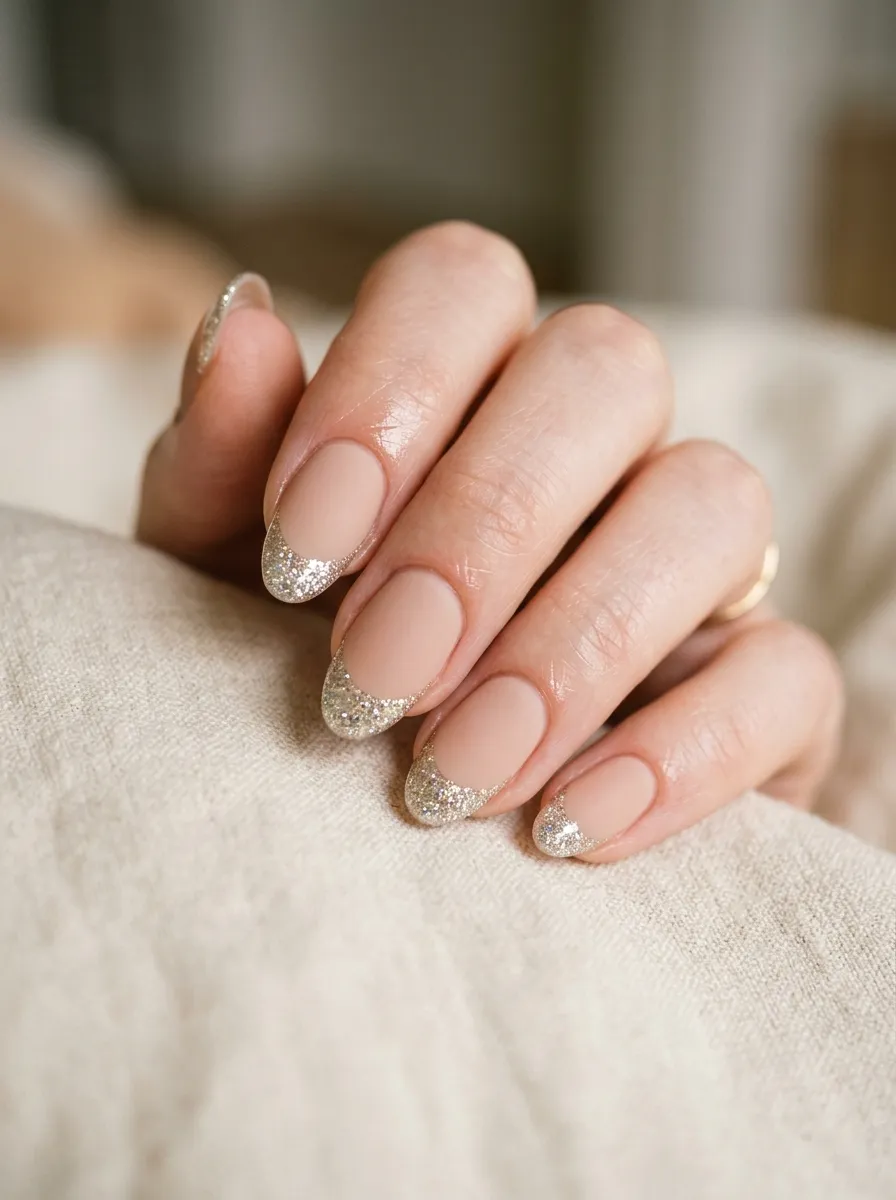
Pairing a matte base with glossy glitter tips creates contrast between two textures on the same nail. The matte section looks soft and velvety, while the glitter tip catches light in a completely different way. It’s a small detail that photographs with more depth than a single finish look.
Paint your base color and let it dry, then apply a matte top coat over the base area only, avoiding the tip. Once that’s dry, paint the glitter section at the tip as usual, followed by a regular glossy top coat just over the glitter part. The two different top coats, matte on one section and glossy on another, create the contrast.
This technique takes a bit more patience since you’re working with two separate top coat types on one nail. Practice on a spare set of fake nails first if you’re new to matte polish, since it behaves differently than regular polish and dries faster. The final look is worth the extra step for brides wanting something a little more unique.
11.Glitter Dipped Almond Nails
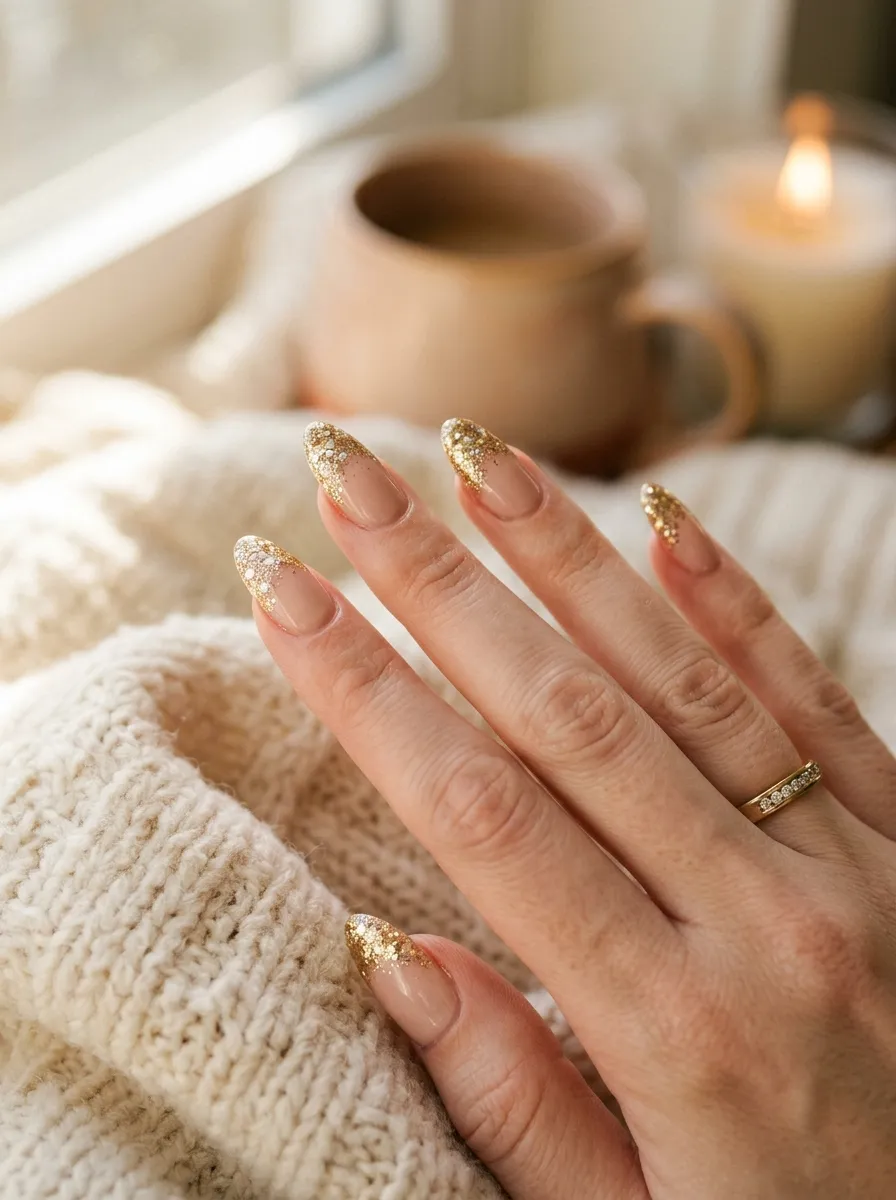
Almond shaped nails already have a soft, tapered look, and dipping just the tips in chunky glitter gives them extra dimension. This style works particularly well on longer nails where there’s more tip surface to show off the glitter texture.
If you’re shaping your own nails, file them into a gentle almond point using a fine grit file, rounding the sides toward a soft tip rather than a sharp one. Paint your base color, then dip the very tip into loose glitter or apply chunky glitter polish just at the end using a flat brush. Seal with two coats of clear top coat since chunky glitter needs extra sealing to stay smooth.
Gold glitter tends to photograph warmer under both daylight and indoor reception lighting, making it a reliable choice for this look. If your nails are shorter, this same technique still works, just with a smaller glitter section relative to the nail.
12.Two Tone Glitter Nails
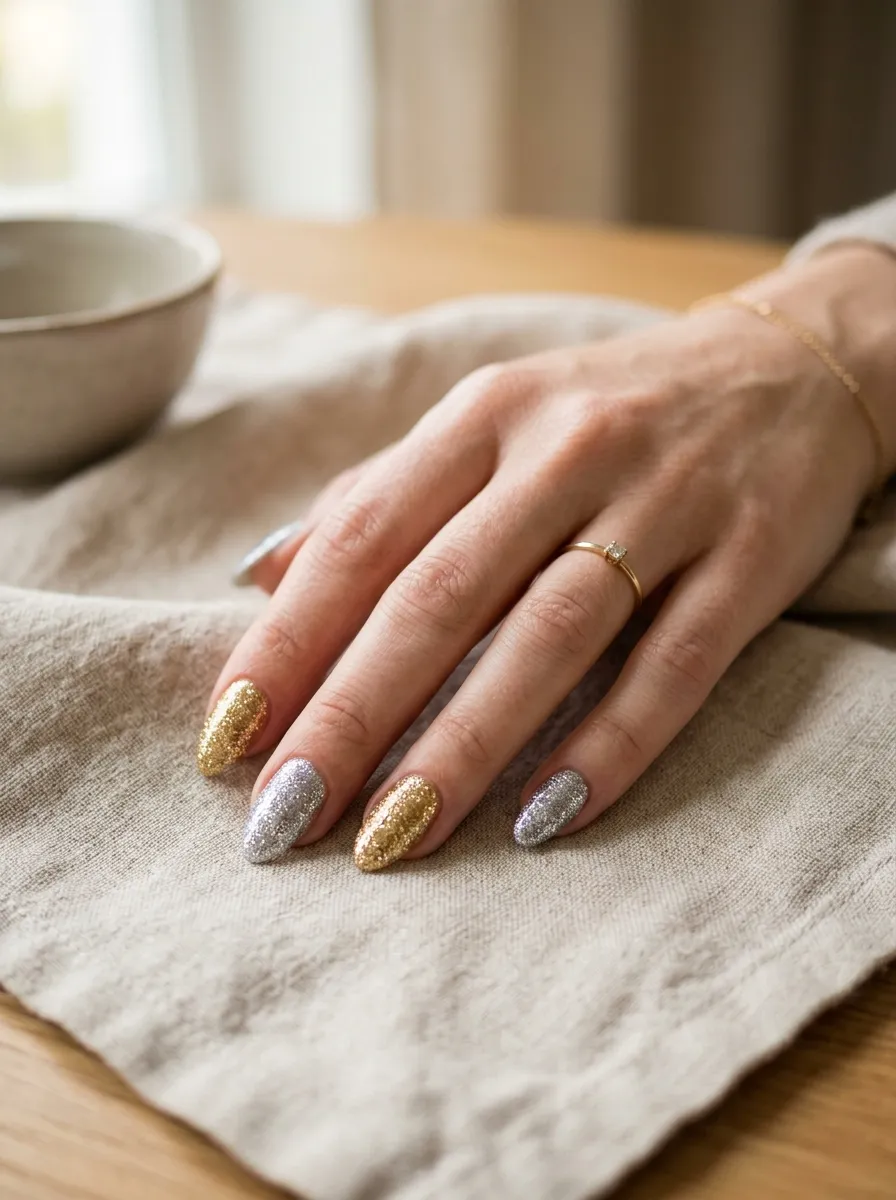
Alternating two different glitter shades across your nails, like gold on some fingers and silver on others, gives a coordinated but not matchy look. It works especially well if your wedding has mixed metal tones in the jewelry, decor, or dress details.
Paint each nail individually with your chosen glitter shade, alternating as you go. There’s no strict pattern required here, though many people alternate every other nail or keep the thumb and ring finger as one shade with the rest in the second shade. Two thin coats of each glitter polish should give full coverage.
This is an easy way to use up half empty polish bottles you already own instead of buying something new. If you’ve got a bit of gold glitter and a bit of silver glitter left from past manicures, this design puts both to use without needing a full bottle of either.
13.Glitter Cuticle Line Accent
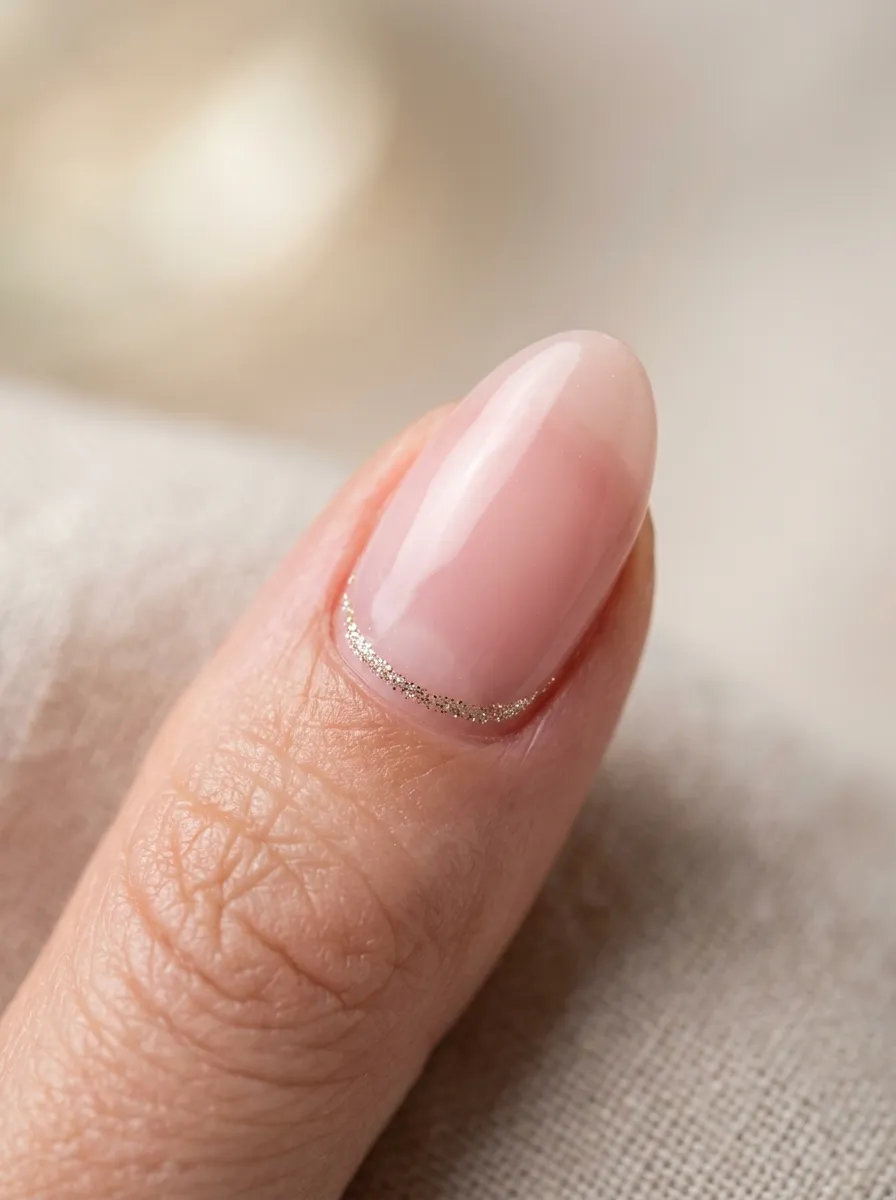
A thin glitter line right above the cuticle is one of the smallest glitter details you can add, and it barely takes any extra time. It works like a tiny accent rather than a full design element, which suits brides who want the smallest hint of sparkle.
Paint your sheer or solid base color first. Using a fine detail brush, trace a thin line of glitter polish just above where your cuticle meets the nail bed. Keep the line under two millimeters thick so it stays delicate. This detail is barely visible from a distance but shows up clearly in close up ring photos.
Because the glitter section is so small, this design is one of the most low maintenance glitter options on this list. It won’t catch on clothing or hair the way a full glitter nail might, making it practical for a long day of hugging guests and adjusting your dress.
14.Sparkle Tips On Nude Nails
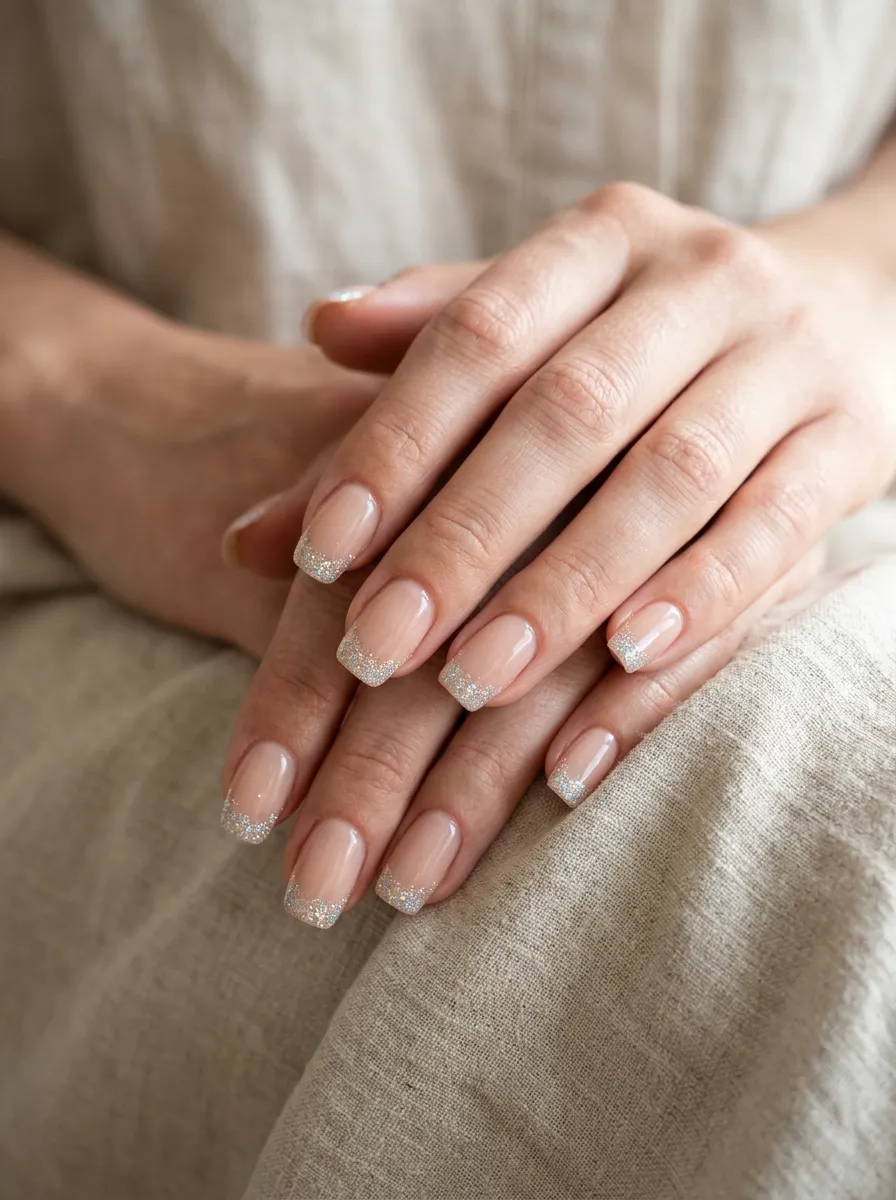
Nude nails are a wedding classic because they go with everything. Adding just a sparkle tip keeps that versatility while giving a small festive touch. Iridescent glitter works especially well here since it shifts color slightly depending on the angle of light.
Paint a nude base across all nails and let it dry fully. Dip a makeup sponge in iridescent glitter polish and press it lightly onto just the very tip of each nail, building up a thin, even layer. This method gives a softer edge than painting with a brush, which suits the overall understated feel of nude nails.
This look transitions well from ceremony to reception since the sparkle is subtle enough for daytime photos but still catches light under evening reception lighting. It’s also a safe choice for brides who aren’t used to wearing much glitter and want to ease into it with a smaller dose.
15.Glitter Ombre Bridesmaid Set
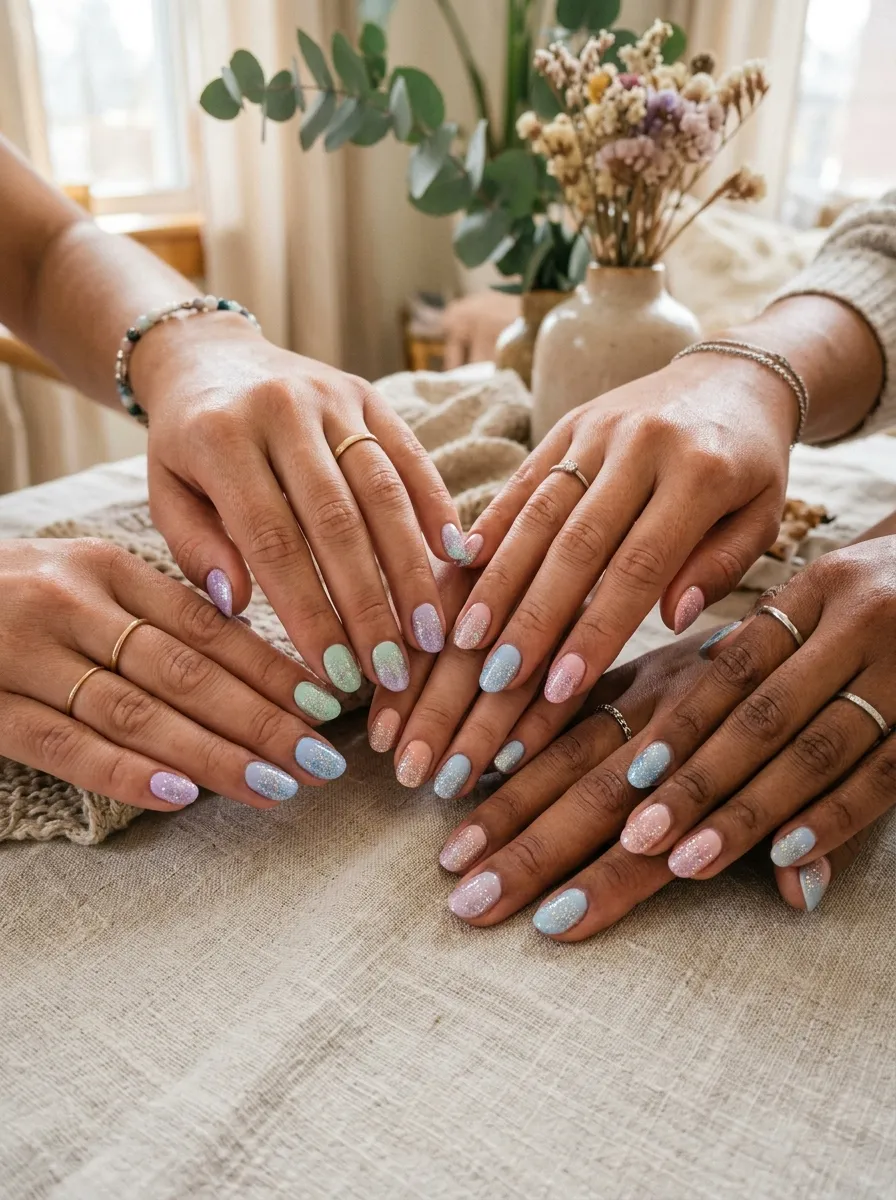
Coordinating your bridesmaids’ nails without making them identical can be tricky. A glitter ombre set solves this by letting each bridesmaid choose her own pastel base color while keeping the glitter fade technique consistent across the group. It reads as coordinated in photos without forcing everyone into the exact same shade.
Each bridesmaid picks a base color that suits her, then applies the same ombre glitter technique described earlier, sponging glitter polish from the tip inward. Because the technique stays the same even though the colors differ, the group photos still look pulled together.
This approach also solves the problem of finding one shade that flatters every skin tone in the group. Letting each person choose her own base while unifying the glitter technique keeps things fair and still photographs as a matching set from a distance.
16.Glitter Underneath Clear Gel
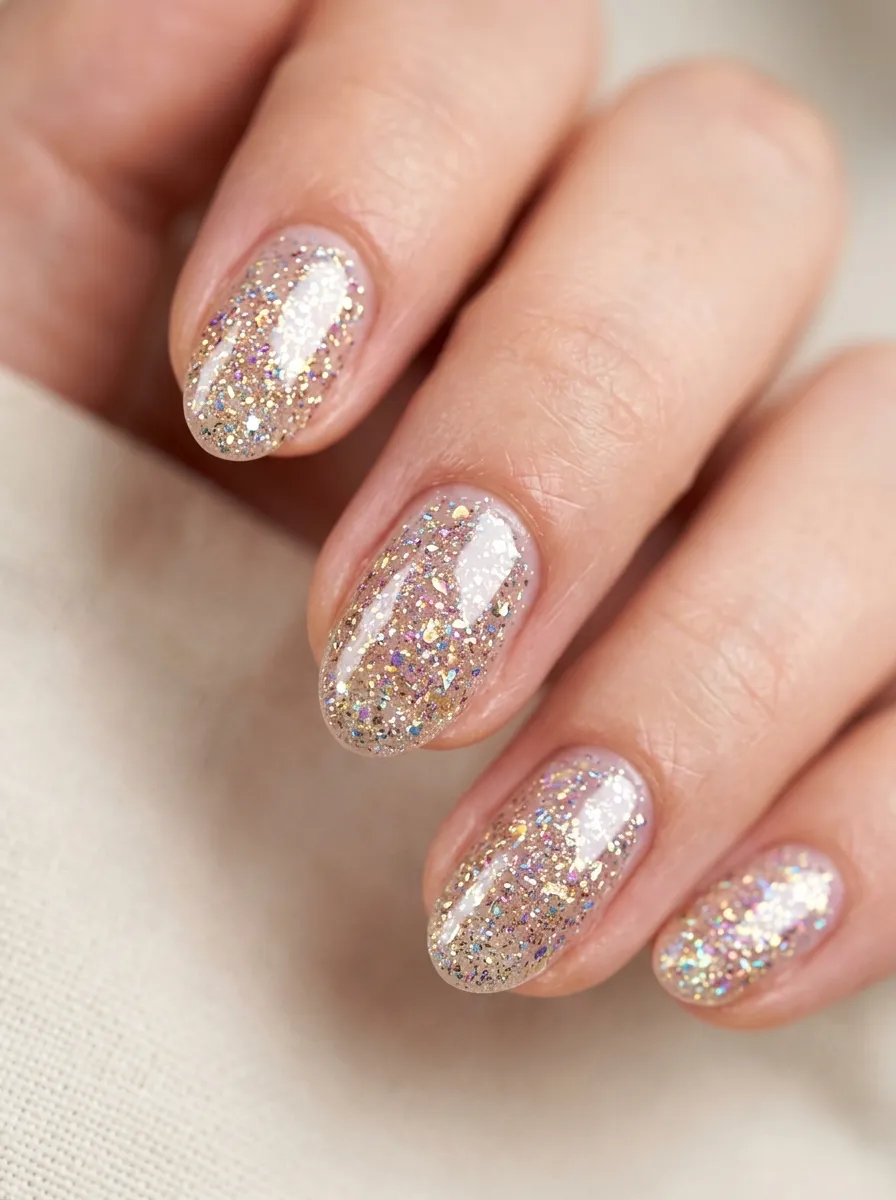
Sandwiching glitter flakes between two layers of clear gel gives a smooth, almost glass like finish. The glitter appears suspended inside the nail rather than sitting on top of it, which creates a more dimensional look than regular glitter polish.
This technique works best with gel polish and a UV or LED lamp, so it’s more suited to brides doing their nails at home with a gel kit or getting this done at a salon. Apply a clear gel base, cure it, then press fine glitter flakes onto the tacky surface before curing again. Seal with a final clear gel top coat and cure once more.
If you don’t have gel equipment, a similar effect can be approximated with regular polish by applying glitter between two clear top coat layers, though it won’t have quite the same glass like depth. Gel kits start around twenty dollars and can be reused for multiple manicures well beyond the wedding.
17.Glitter Star Accent Details
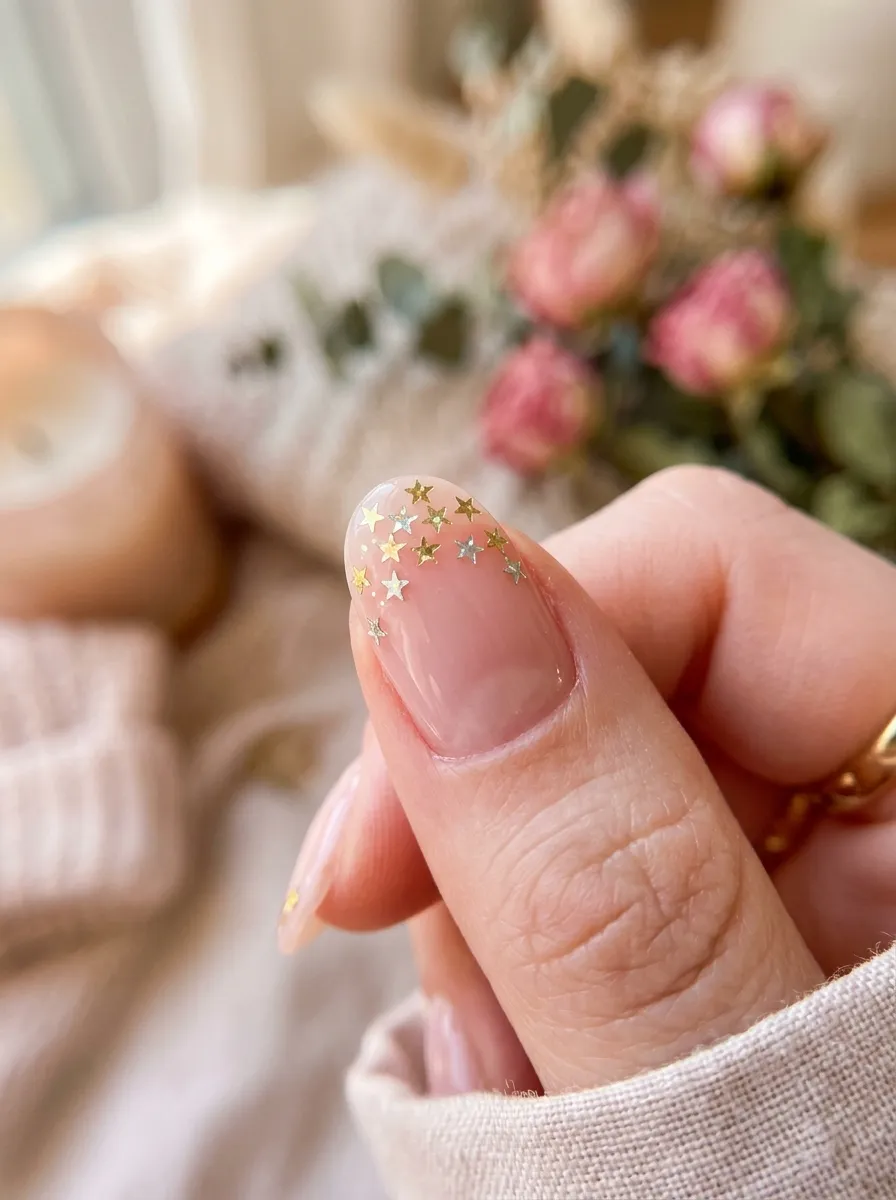
Tiny star shaped glitter pieces add a playful detail without covering the whole nail. This works well for brides who want something a little different from standard round glitter flakes. The stars catch light individually rather than blending into an even shimmer.
Paint a sheer or pale base color first. Using tweezers, place two or three star shaped glitter pieces near the tip of each nail while the top coat is still wet. Seal immediately with a clear top coat to lock the stars in place and smooth over their edges so they don’t catch on fabric.
Star glitter mixes are sold in small jars at most beauty supply stores for just a few dollars and usually include enough pieces for dozens of manicures. This design works especially well for evening weddings or celebrations with a slightly whimsical theme.
18.Glitter Half Covered Nail
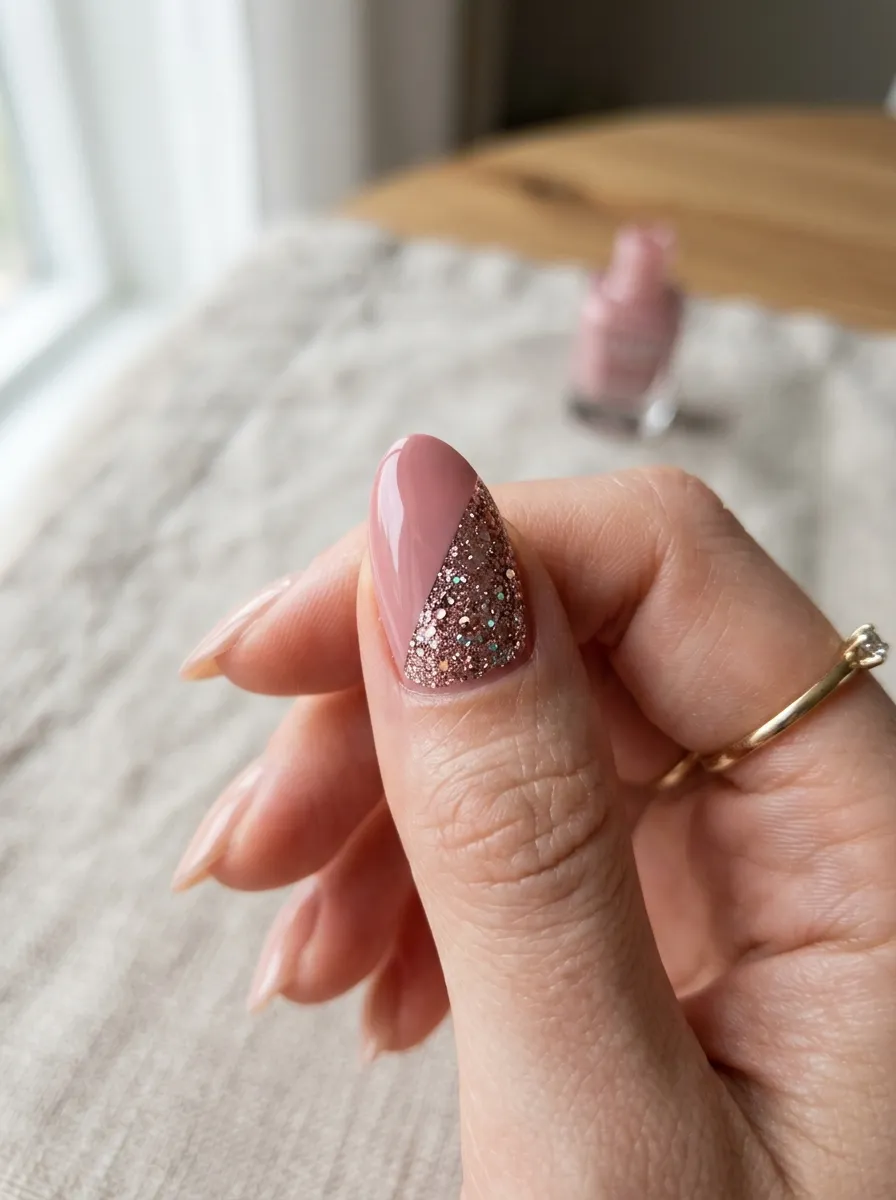
Splitting the nail diagonally, with one half in a solid color and the other in glitter, gives a more modern geometric look. It’s bolder than most designs on this list but still wearable for a wedding, especially for the bride’s own accent nails or a bridesmaid who wants something with more edge.
Use thin strips of tape to mask off the diagonal line you want. Paint the solid color on one side, remove the tape once dry, then re-tape the opposite angle and paint glitter on the remaining half. Removing tape carefully while the polish is still slightly tacky gives the cleanest line.
This design takes more precision than others on this list, so practice the taping technique on a couple of nails before doing your full set. Painter’s tape or nail art tape both work, and either one costs very little compared to the visual impact this design gives.
19.Glitter Base With Pearl Accents
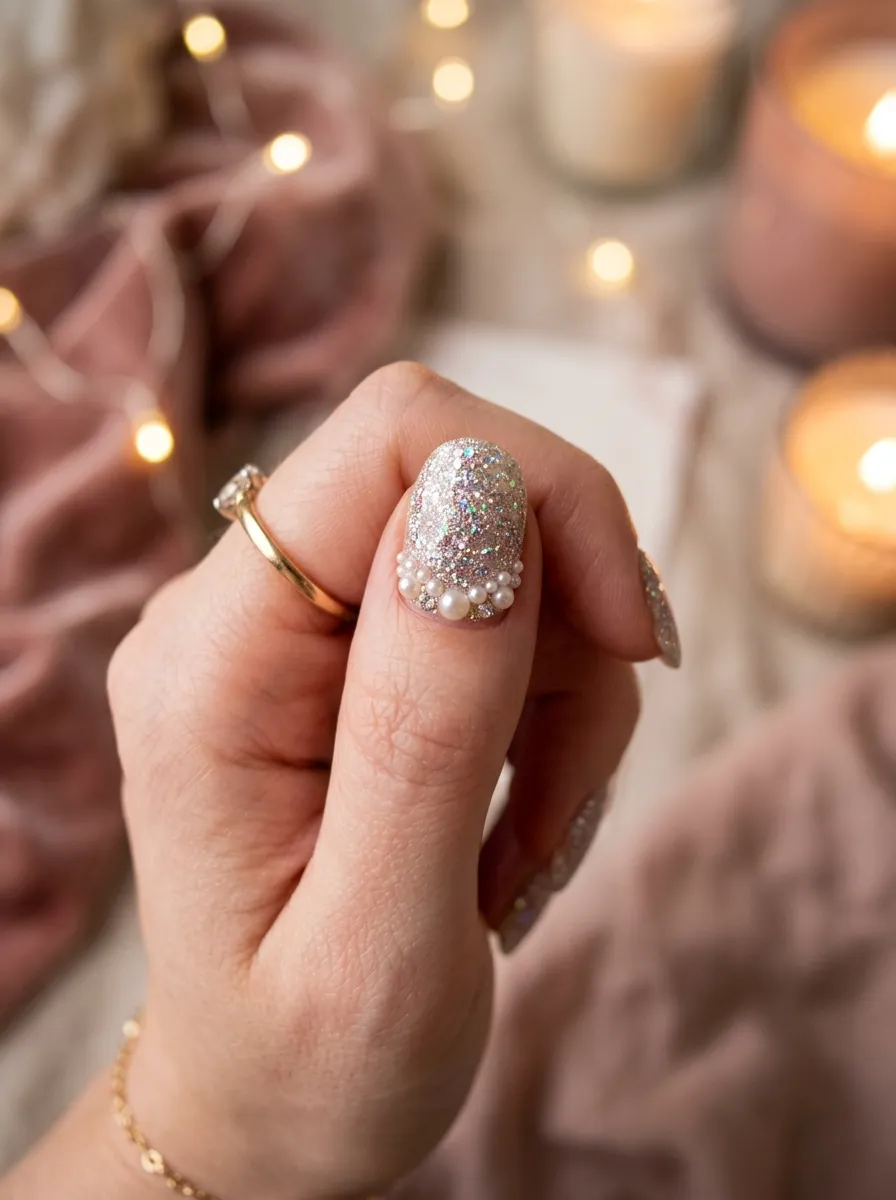
Adding small pearl accents on top of a glitter base combines two classic bridal textures in one design. The pearls sit slightly raised above the nail, giving a bit of dimension that flat glitter alone doesn’t have.
Paint your glitter base color first and let it dry completely. Using nail glue or a dab of clear top coat, attach one or two small flat back pearls near the base of each nail, or cluster a few on just your ring fingers as an accent. Seal around the edges of the pearls with top coat so they don’t catch or lift.
Flat back pearls come in packs of a hundred or more for just a few dollars at craft stores, making this an affordable way to dress up a simple glitter manicure. Keep the pearls small, around two millimeters, so they don’t feel bulky against your rings or bouquet grip.
20.Glitter And Lace Pattern Nails
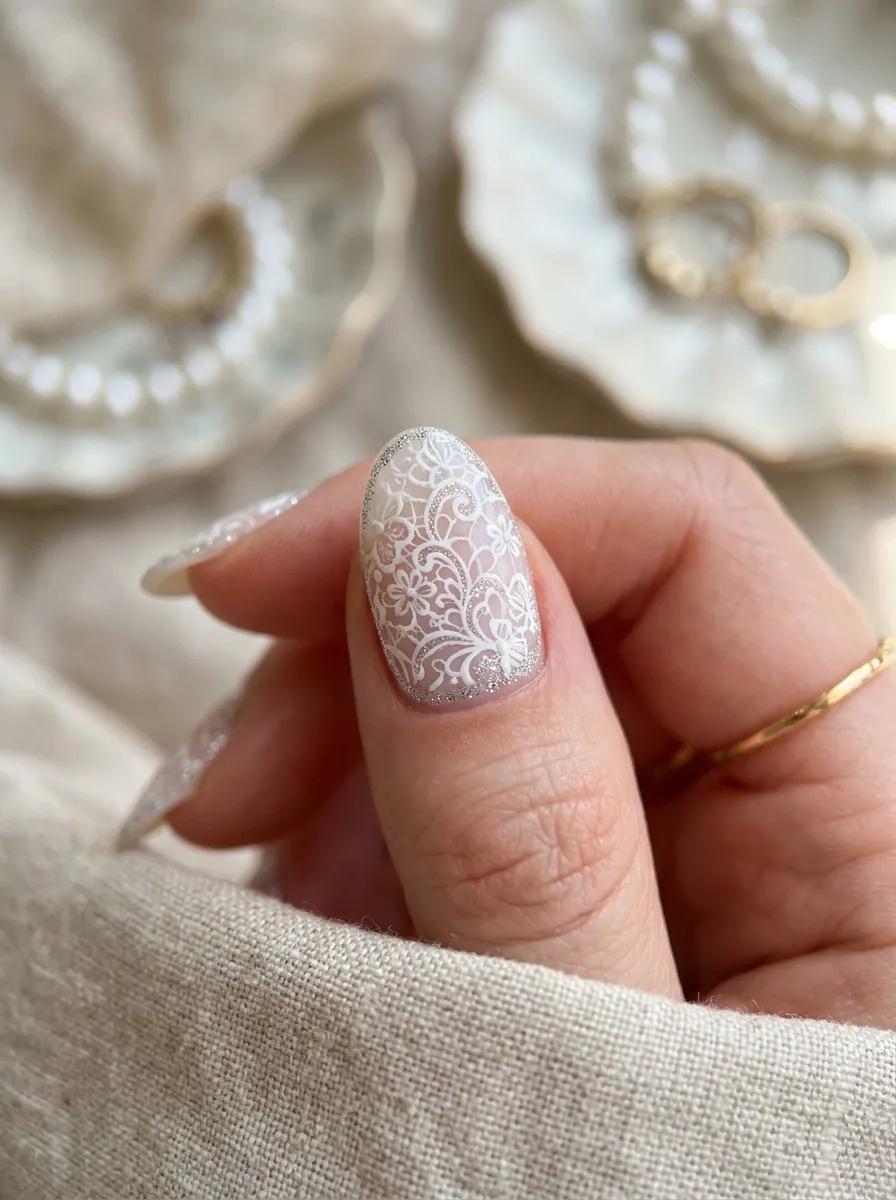
For brides wearing a lace gown, matching nail art with a small lace pattern traced in glitter ties the whole look together. This is one of the more detailed designs here, so it works best on your ring finger or as a single accent nail rather than across all ten.
Paint a sheer white or nude base first. Using a very fine detail brush and glitter polish, trace a simple lace inspired pattern, small loops, dots, or a light floral outline near the base or side of the nail. It doesn’t need to be a perfect lace replica, just a suggestion of the pattern is enough.
If freehand detail work feels intimidating, pre-made lace nail decals are available at most beauty supply stores and can be applied over your glitter base instead. This gives the same visual effect without needing steady hand skills, and a pack of decals usually costs less than a salon nail art session.
21.Glitter Gradient Between Two Colors
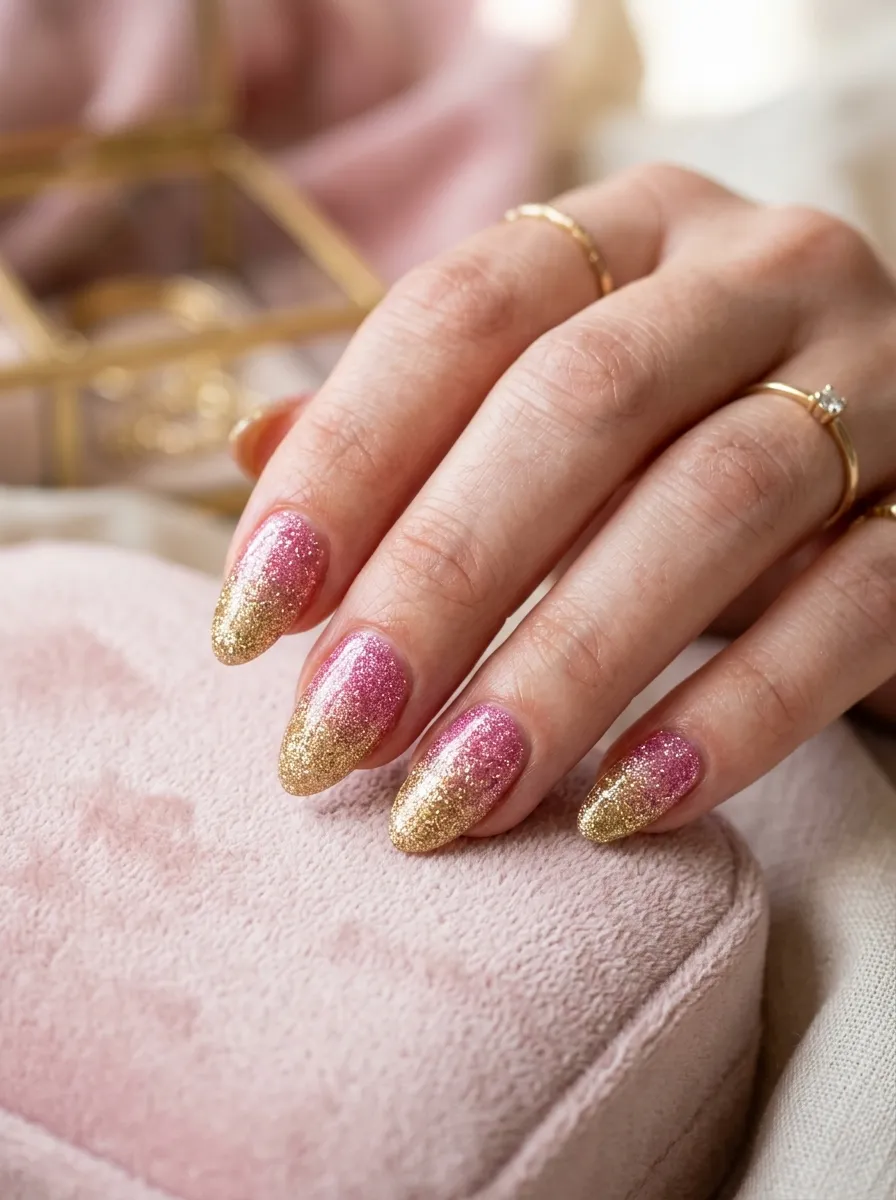
Blending two different glitter shades into each other, rather than just one glitter over a solid base, creates a richer gradient effect. Pink fading into gold, or silver fading into champagne, gives more depth than a single color glitter fade.
Using a makeup sponge, dab one glitter shade onto the base half of the nail and the second shade onto the tip half, slightly overlapping in the middle. Dab gently rather than dragging the sponge to avoid harsh lines between the two colors. Build up thin layers until the transition looks smooth.
This technique takes a little practice to get the blend even, so try it on a few practice nails first. Two half used glitter polishes you already own work perfectly for this, meaning you likely won’t need to buy anything new to try this look before your wedding date.
22.Micro Glitter Long Wear Manicure
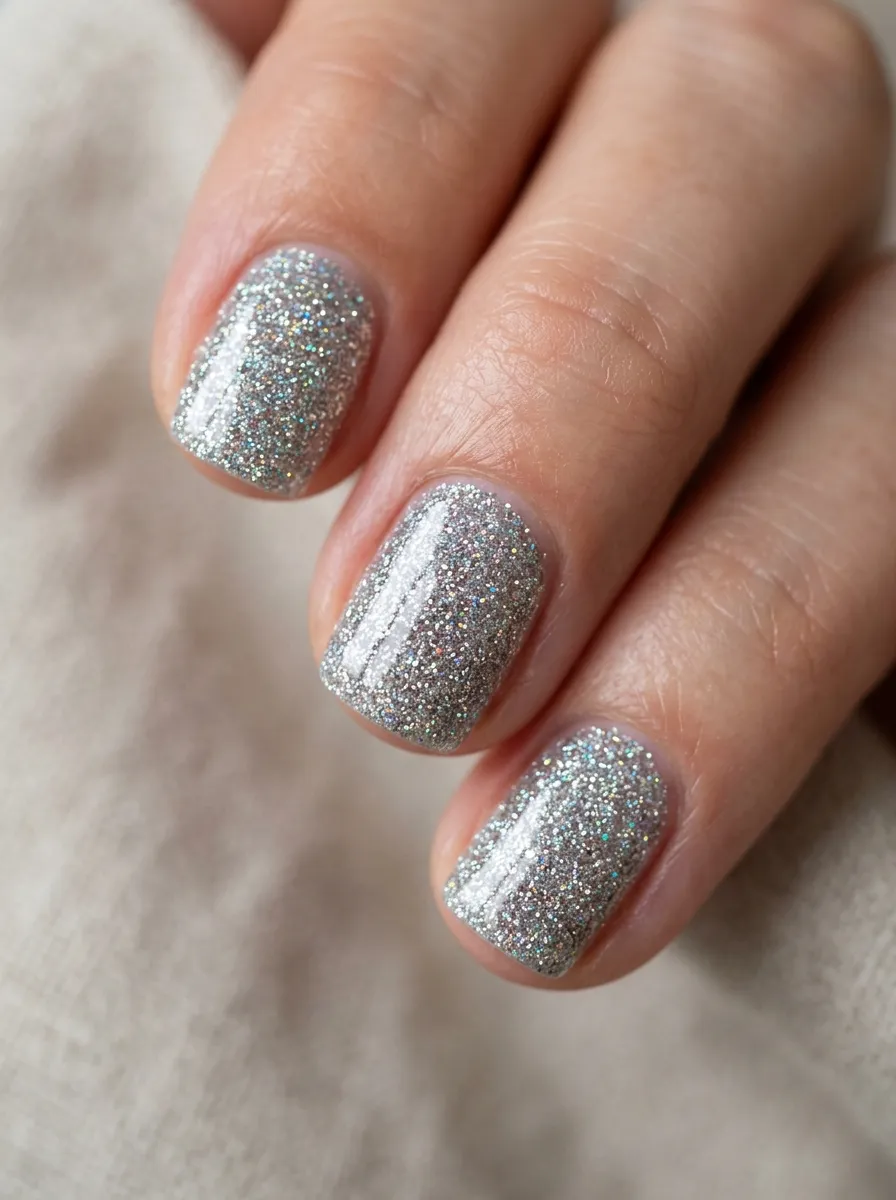
If you’re worried about glitter chipping or catching on your veil, micro glitter offers the smoothest, longest wearing option on this list. Unlike chunky glitter, micro glitter particles are so fine they create an almost solid, smooth finish that resists snagging.
Apply two coats of micro glitter polish directly over a matching base color, or use it alone for a more subtle shimmer. Because the particles are so small, this polish tends to self level better than chunky glitters, meaning fewer top coat layers are needed to get a smooth surface.
This is a practical pick for brides who want glitter but also need their manicure to survive a full day of dress changes, hugging relatives, and holding a bouquet. Micro glitter formulas last longer between touch ups compared to chunkier glitter textures, making it a reliable choice for an all day event.
23.DIY Glitter Ombre Practice Set
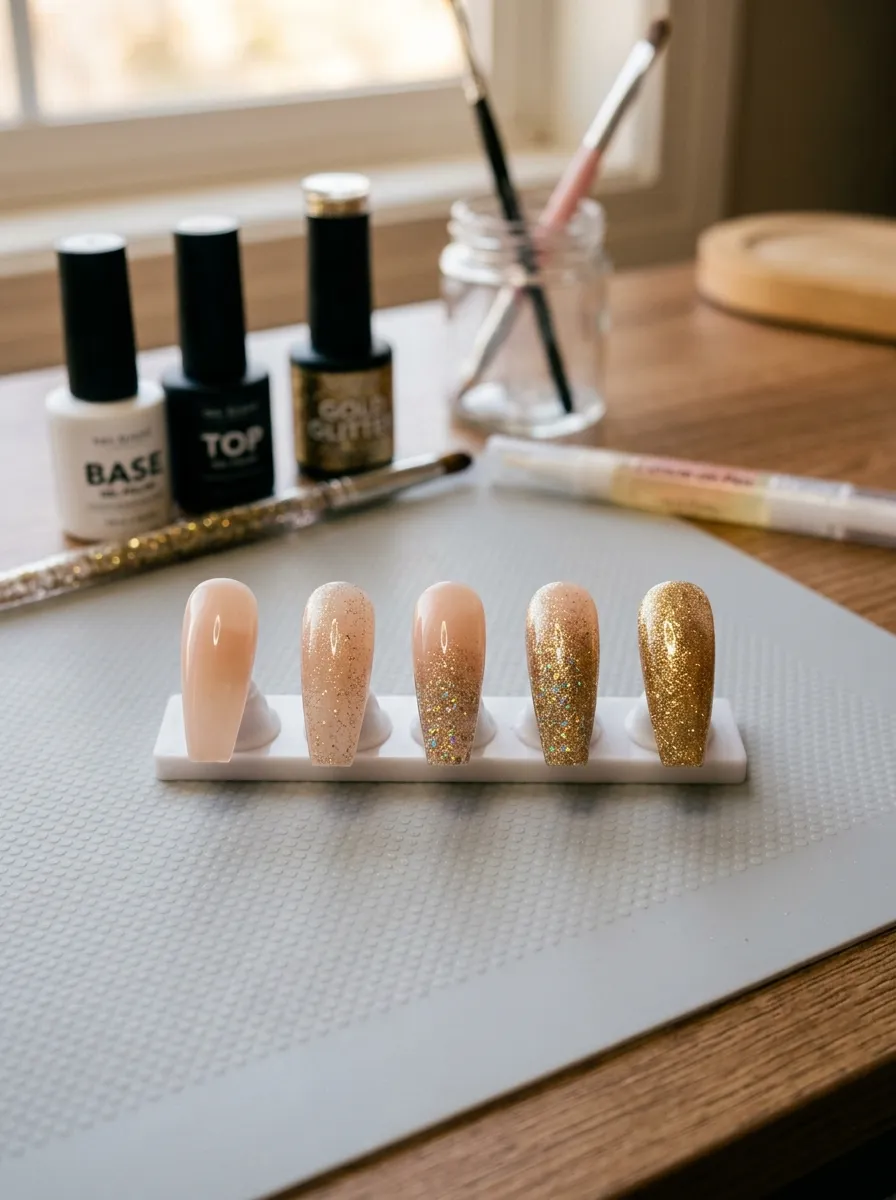
Before committing to your wedding day nails, practicing on a set of fake nail tips lets you perfect your technique without the pressure of a deadline. This is especially useful for glitter designs since sponge application and layering take some trial and error to get right.
Buy a pack of blank practice nail tips, usually just a few dollars for a hundred pieces, and try out two or three glitter techniques from this list on them. Take photos of each attempt so you can compare which design and technique felt easiest and looked best under different lighting.
This step saves time and stress closer to the wedding date since you’ll already know which glitter application method works for your hand and which products give you the results you want. It’s a small investment that pays off when you’re doing your actual nails under a real deadline.
24.Long Lasting Glitter Top Coat Layer
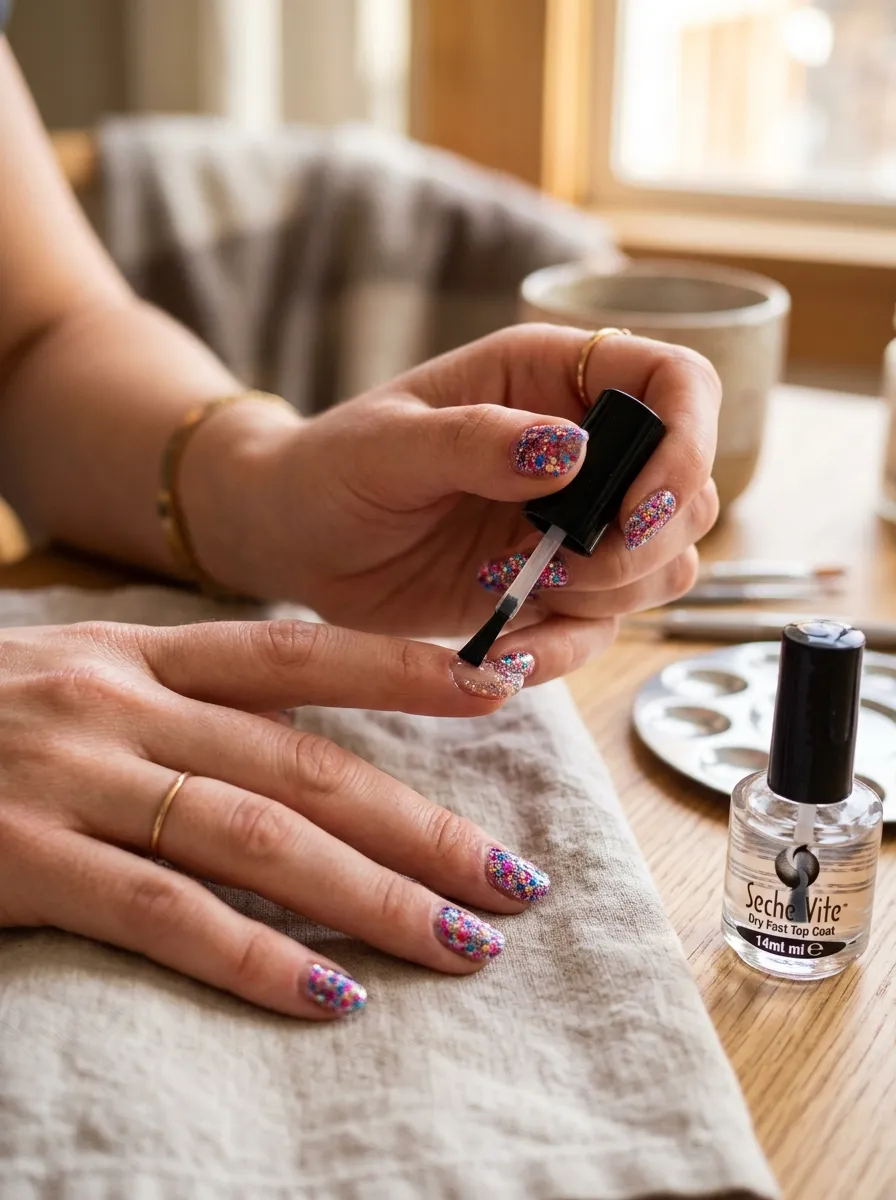
No matter which glitter design you choose, the top coat you use matters just as much as the glitter itself. A thick, quality top coat keeps glitter texture smooth and prevents snagging throughout a long wedding day filled with dress adjustments and handshakes.
Apply at least two coats of a strong, glossy top coat over any glitter design, letting each layer dry fully before adding the next. For chunky glitter especially, a third coat may be needed to fully smooth over the raised texture. Reapply a thin top coat layer the morning of your wedding for extra shine and protection.
A single bottle of good top coat, often under ten dollars, can be reused across every glitter look on this list and beyond. Investing in one quality top coat stretches much further than buying separate products for each individual manicure attempt.
Conclusion
Wedding nail glitter comes down to picking a look that matches your comfort level, your dress, and how much time you want to spend on application. Some of these ideas take five extra minutes with a fine detail brush, while others ask for a bit more practice with sponges, tape, or gel curing. None of them require a big budget, since most glitter polishes, sponges, and small tools cost just a few dollars and stretch across multiple manicures for you and your bridal party. Try a few designs on practice nails in the weeks before your wedding, note which techniques felt easiest, and build your final look from there. Your hands will show up in more photos than you expect on the big day, and a little glitter goes a long way in making them catch the light.