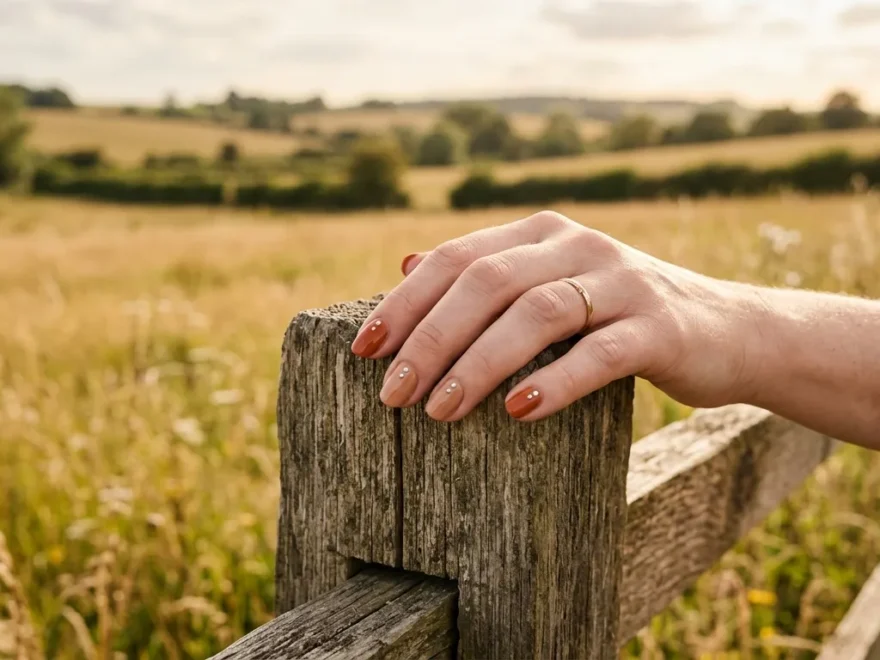
Cowgirl nails bring a bold, earthy energy that feels right at home whether you’re at a rodeo, a country concert, or just want your hands to look a little tougher this season. Think warm browns, rust oranges, turquoise, and silver accents that pull inspiration straight from boots, belt buckles, and open fields. This style leans into texture and personality instead of staying safe and simple. It works for short nails and long nails alike, and most of these looks can be recreated at home with a few basic polishes and dollar store nail art tools. Below are 31 cowgirl nail ideas with western designs that bring a fierce, confident look without needing a big salon budget. If you’re also looking for Wedding Nails Glitter Ideas, delicate shimmer, sparkling accents, and elegant glitter details can add the perfect touch of glamour and romance to your bridal manicure while keeping it timeless and photo-ready.
1. Chocolate Brown Base with Silver Studs
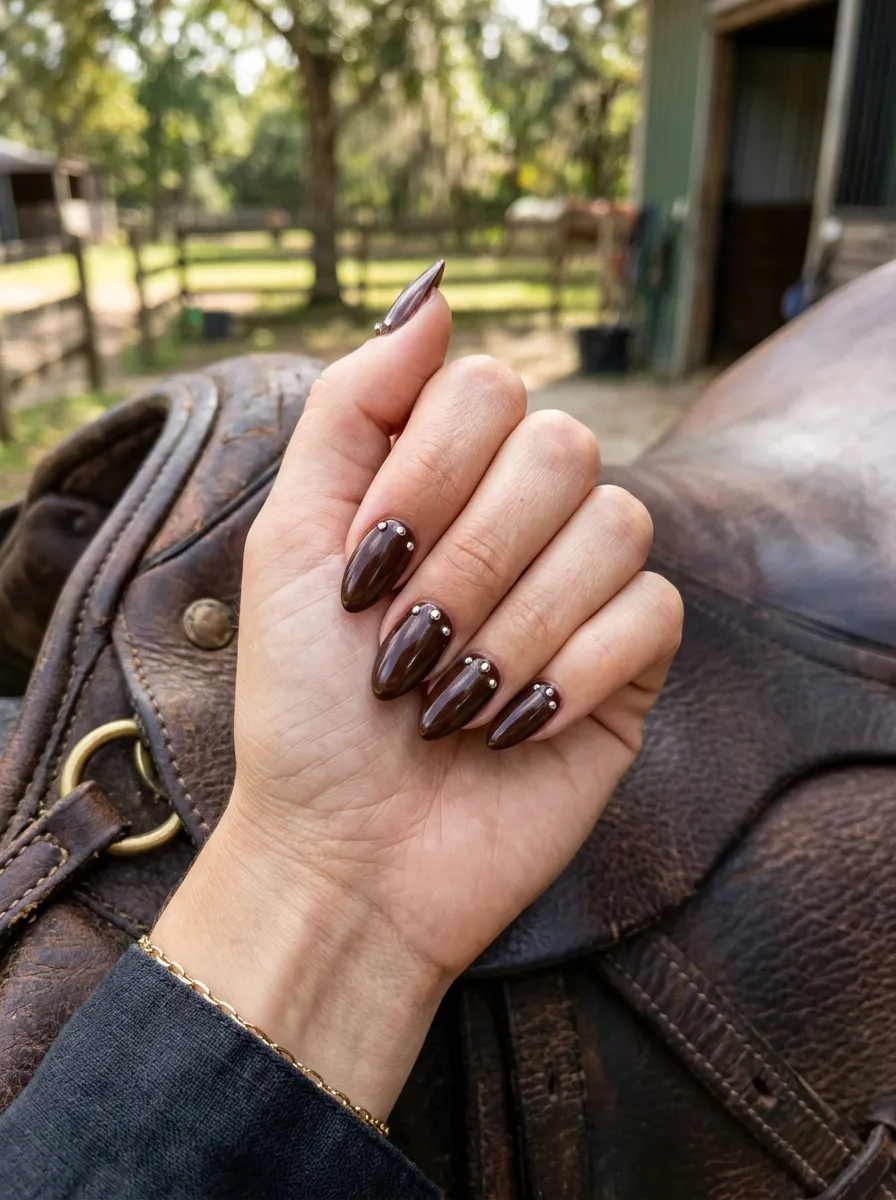
A rich chocolate brown base gives you the perfect starting point for a western look. It reads as warm and grounded, almost like the color of worn leather. Paint two coats of a deep brown polish and let it dry fully before adding detail. Small silver studs, the kind sold cheap at any craft store, press right into wet top coat near the base of each nail. You don’t need glue, just a bit of pressure and patience. This works best on almond or coffin shaped nails since the length gives the studs more room to sit without crowding. If you want to keep cost low, three or four studs per nail is plenty, you don’t need to cover the whole nail. A glossy top coat seals everything in place and gives the brown a rich, polished shine. This design pairs well with turquoise jewelry and feels just as good dressed up as it does dressed down for everyday wear.
2. Fringe Nail Art
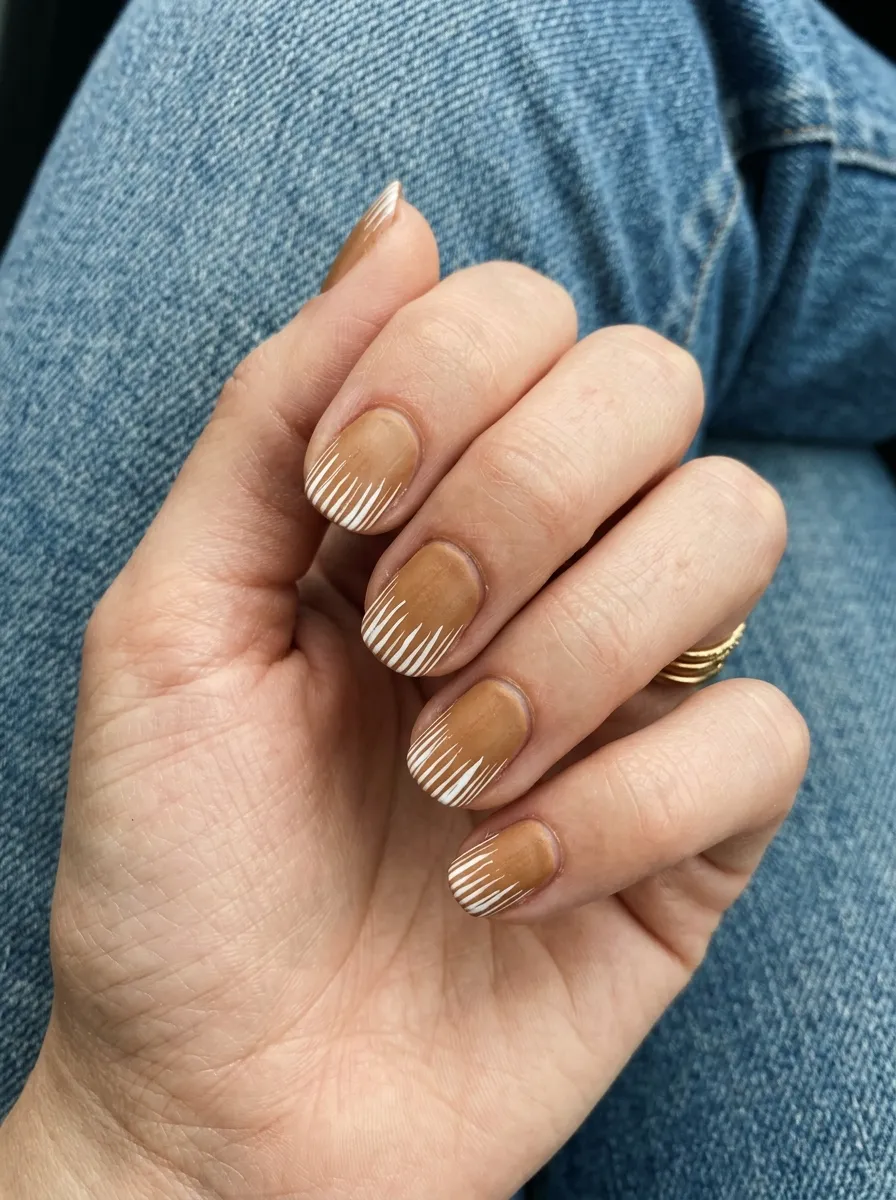
Fringe is a classic western detail, and it translates onto nails better than you might expect. Start with a tan or camel base coat and let it dry completely. Using a thin nail art brush, paint short straight lines in white or cream along the tip of each nail, spaced closely together like real fringe on a jacket. Keep your lines slightly uneven since real fringe never looks perfectly straight anyway. A thin brush from a basic nail art kit works fine, and you can practice the lines on paper first if you’re nervous about your hand staying steady. This design looks best on square or almond nails where the tip gives the fringe a clear space to sit. Finish with a matte top coat to keep the leather like texture believable. It’s a fun design for a themed party or a country concert, and it costs almost nothing if you already own basic polish colors.
3. Cow Print Accent Nail
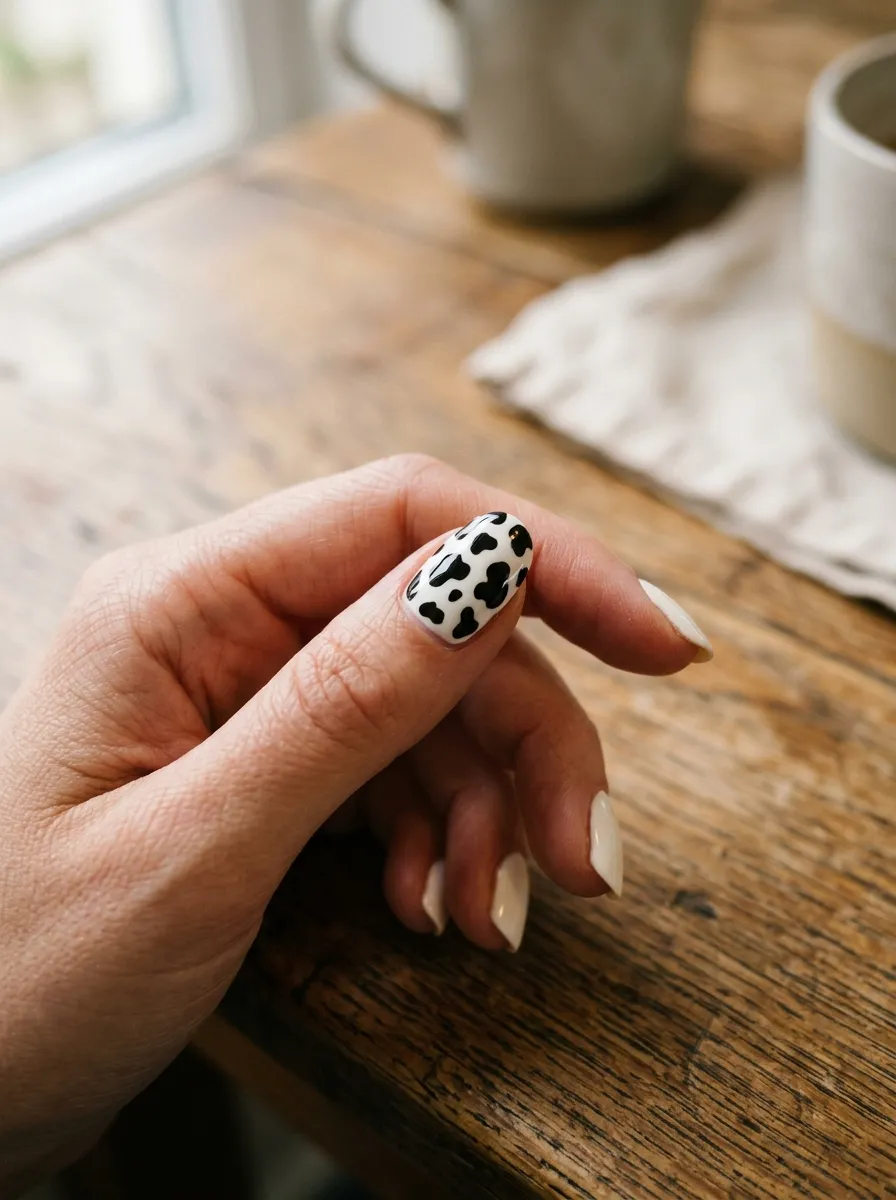
Cow print is probably the most recognizable western pattern, and using it on just one nail keeps the look wearable. Paint all your nails a soft cream color first. On one accent nail, usually the ring finger, add irregular black blobs with a thin brush once the cream is dry. The shapes should look random, not round or even, since real cow spots are never symmetrical. A toothpick works well for the smaller edges if your brush feels too thick. Let the black dry fully before sealing everything with a glossy top coat. This design is budget friendly because you only need two polish colors, black and cream, plus whatever you already use as a base coat. It also saves time since only one nail needs the detailed work. Cow print pairs naturally with rust, turquoise, or brown on the remaining nails if you want to build out a full themed set later.
4. Turquoise and Rust Combo
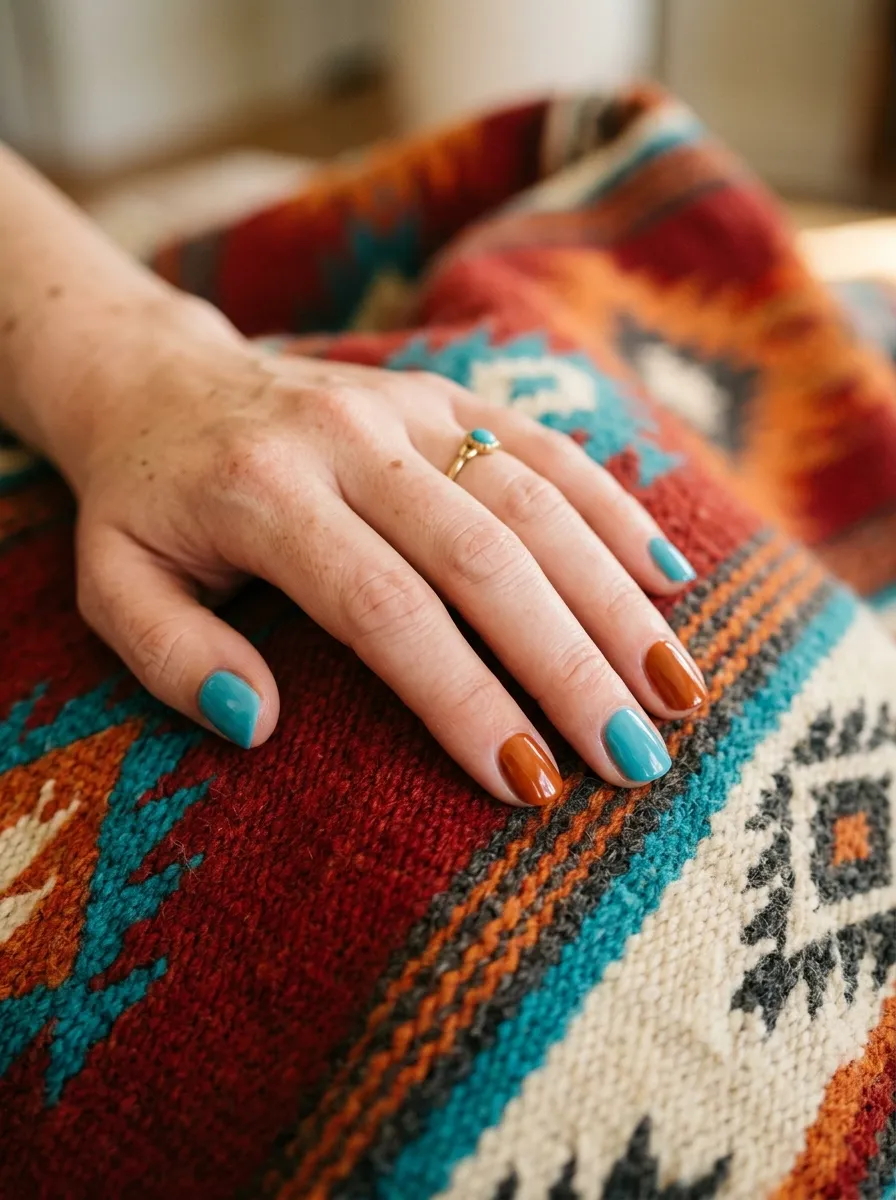
Turquoise and rust sit at the heart of western color palettes, and pairing them together gives your nails instant personality. Alternate the colors nail to nail, turquoise on some, rust on others, rather than mixing them on a single nail. This keeps the application simple since each nail only needs one clean color. Two coats of each polish should give you full, even coverage. These colors work on any nail shape, though rounded or squoval nails tend to show the color blocks the most clearly. A glossy top coat brings out the richness in both shades. If you want to tie the look together, add a small silver dot near the cuticle of each nail using a dotting tool or the end of a bobby pin dipped in polish. This combo works for both short and long nails and holds up well for everyday wear since there’s no fine detail work to chip or smudge.
5. Rhinestone Belt Buckle Nail
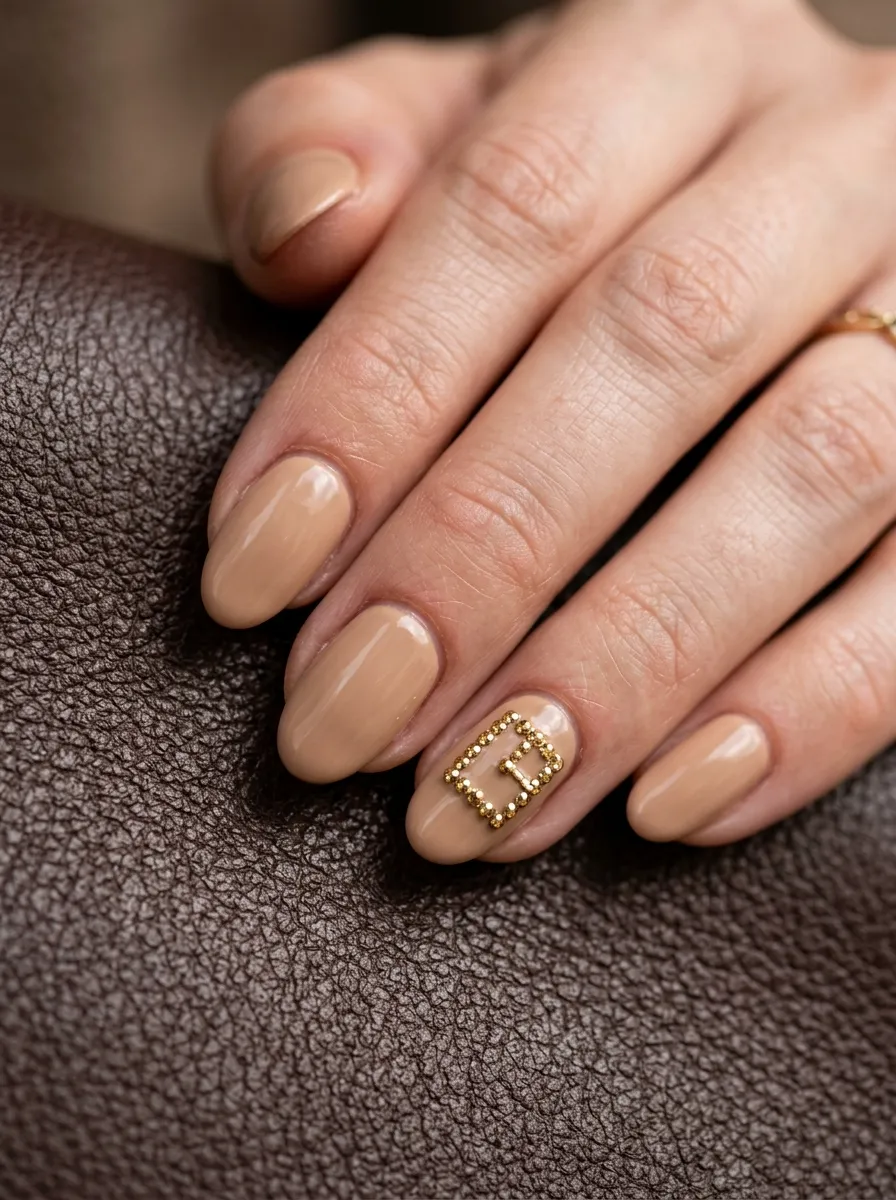
A belt buckle inspired accent nail adds a bit of sparkle without going overboard. Paint your base nails a soft tan or camel shade. On one accent nail, use gold or silver rhinestones and arrange them in a small rectangle near the center of the nail to mimic a buckle shape. Nail glue or a dab of clear top coat holds the stones in place. Craft stores sell rhinestone packs cheap, and you’ll have plenty left over for future manicures. Keep the rest of your nails plain so the buckle nail stands out instead of competing with other details. This design works especially well for a special event like a country wedding or a night out, since the sparkle catches light nicely under any setting. If a stone falls off during the week, just add a new one with a bit of clear polish rather than redoing the whole nail.
6. Suede Matte Tan Nails
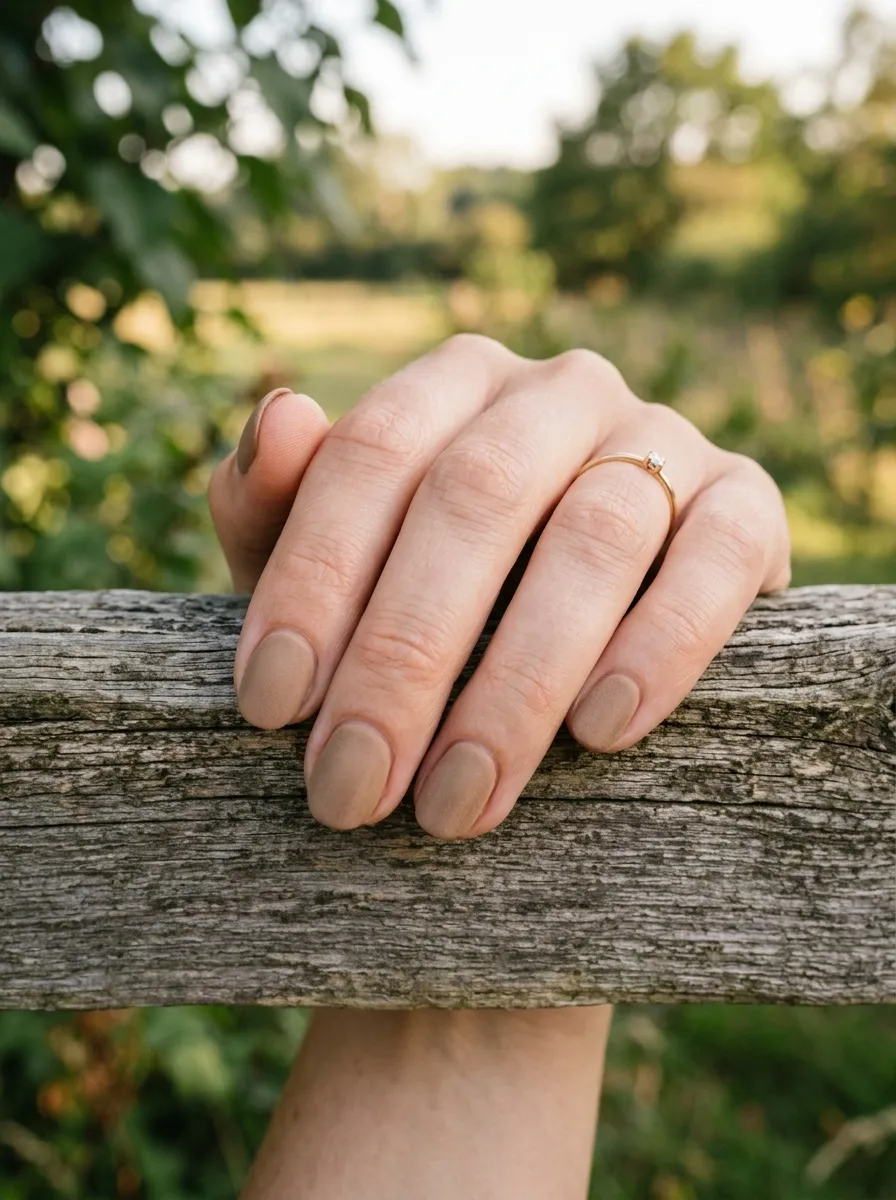
Matte tan nails give you the feel of suede without any extra art or detail work. This is one of the easiest cowgirl looks to recreate since it only needs a tan polish and a matte top coat. Two coats of color should give full coverage, and the matte finish does the rest of the work by softening the shine into something that looks like real suede fabric. This style suits short or round nails especially well, since the flat finish reads clean rather than plain. It’s a great option if your nails are prone to chipping, since matte finishes tend to hide small wear better than glossy ones. Keep a small matte top coat bottle in your bag for quick touch ups between manicures. This look pairs easily with turquoise jewelry, silver rings, or a simple leather bracelet if you want to build out a full western outfit around it.
7. Horseshoe Nail Art
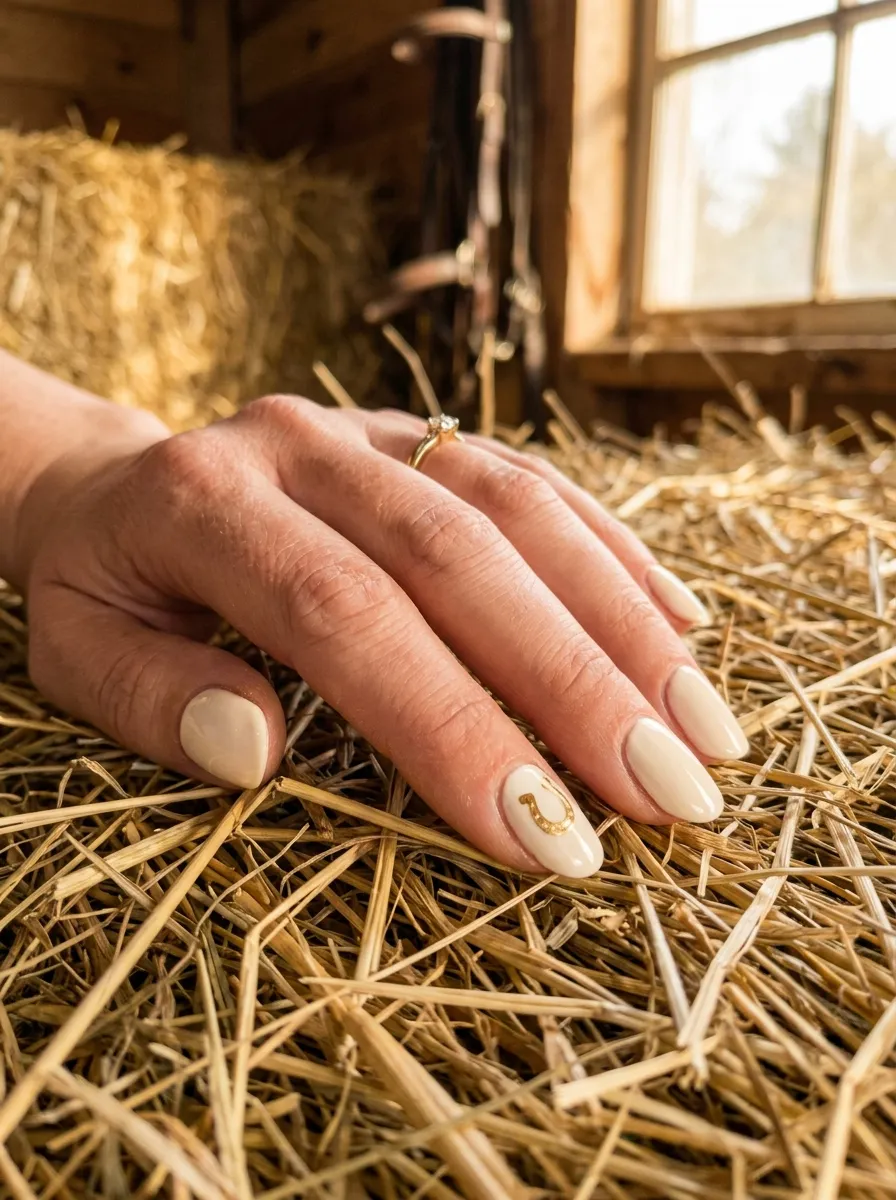
A horseshoe is one of the simplest western symbols to paint by hand, and it works great as a single accent detail. Paint your nails a cream or white base first. On one nail, use a thin brush and gold or silver polish to draw a curved U shape near the center, leaving a small gap at the top like a real horseshoe. Add tiny dots along the curve to mimic the nail holes. This takes practice, so try it on paper a few times before moving to your actual nail. If the shape comes out uneven, a bit of nail polish remover on a small brush cleans up the edges easily. This design is a nice pick for anyone who wants a subtle western touch without covering the whole nail in pattern. It also works well as a lucky charm detail for a wedding or event where you want something meaningful without being flashy.
8. Bandana Print Nails
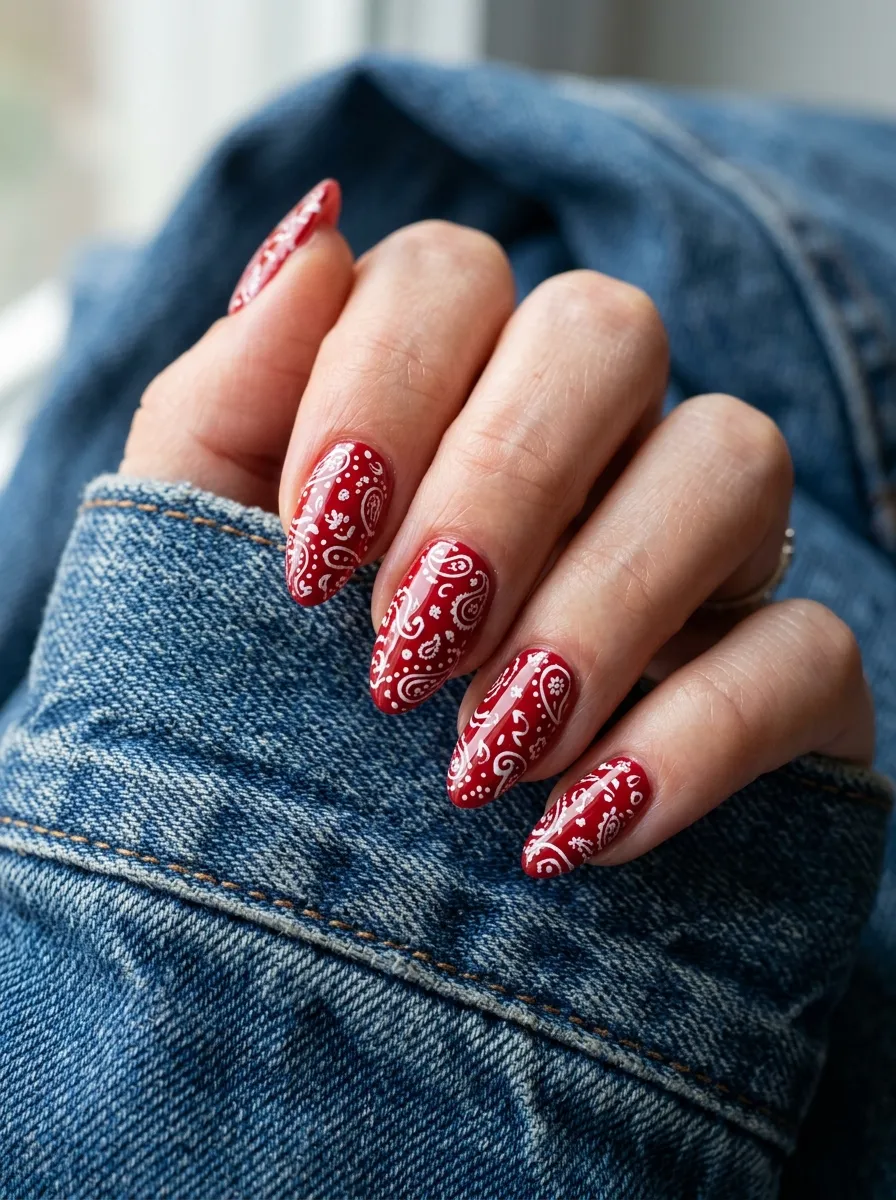
Bandana print brings a classic western pattern onto your nails in a fun, detailed way. Start with a red or white base coat depending on which color you want to stand out most. Using a thin brush, add small teardrop shapes and dots in the opposite color to build a paisley style pattern across the nail. This design takes more patience than others on this list, so it helps to practice the shapes first or look at a real bandana for reference while you paint. If freehand feels too tricky, a small nail stamping plate with a paisley design can save time and give you a more even result. Seal everything with a glossy top coat once dry. This look works best on one or two accent nails rather than a full set, since the pattern is busy enough to stand out on its own. Pair it with a plain red or cream color on your remaining nails to balance things out.
9. Cactus Green Accent
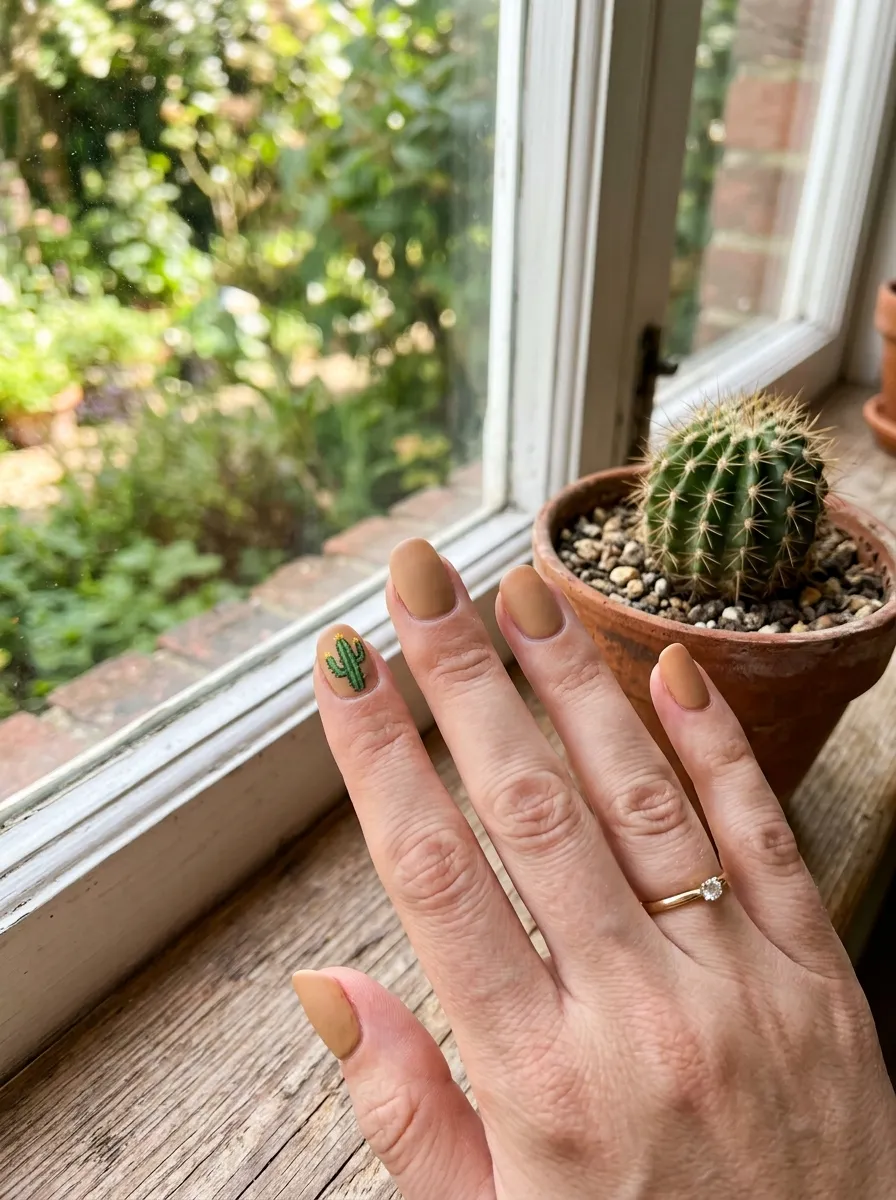
A tiny cactus painted on one nail adds a playful western touch without much effort. Paint your base nails tan or cream, then use a thin brush and green polish to draw a simple cactus shape, just a tall oval body with two rounded arms. You don’t need fine detail for this to look good, a slightly rough shape actually reads as more charming and hand drawn. Add small dots in a darker green for texture if you want extra detail, or leave it simple if you’re short on time. This design costs very little since you likely already own a green polish at home. It works well on short or medium nails and adds a bit of personality to an otherwise plain set. This is also a fun one to try with kids or friends during a DIY nail night, since the shape is forgiving and doesn’t need to look perfect to read clearly as a cactus.
10. Denim Blue French Tips
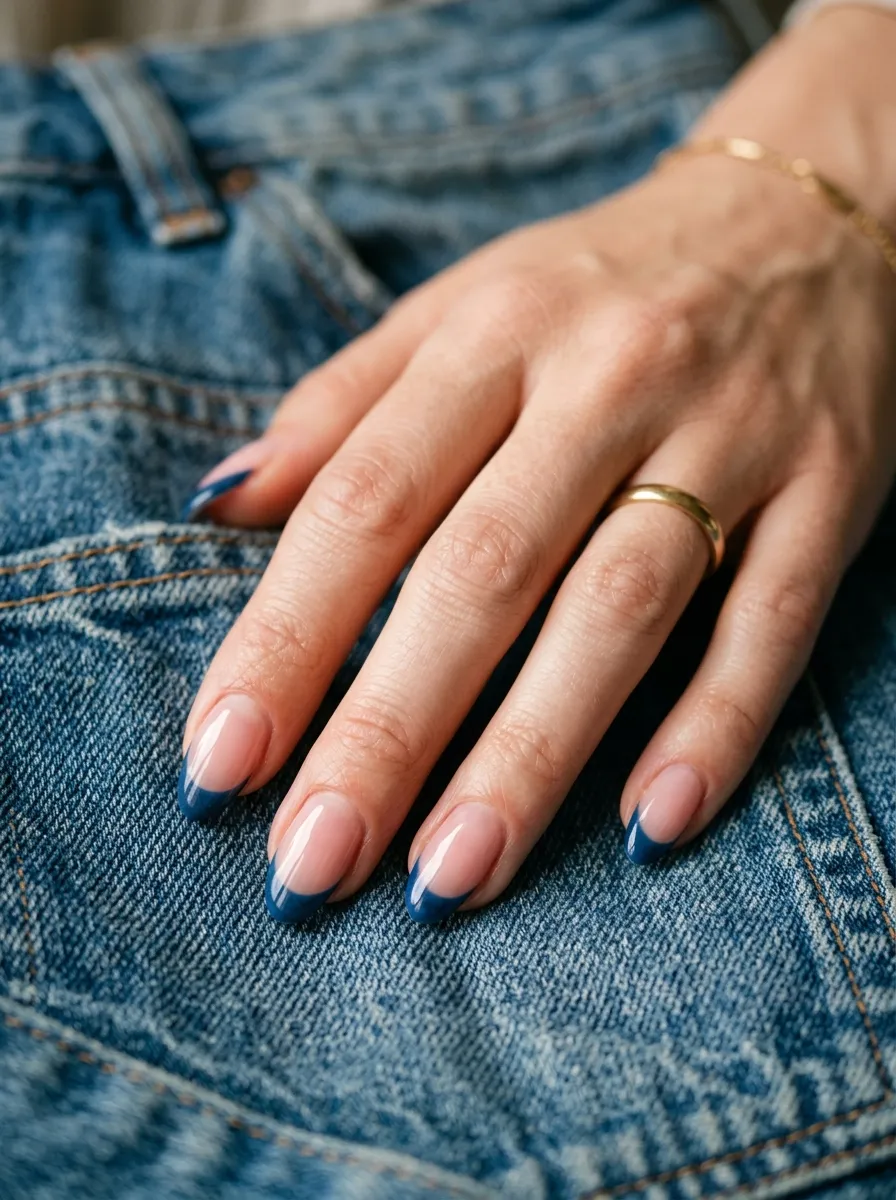
Swapping the classic white french tip for denim blue gives your manicure a western twist while keeping the shape familiar and easy to do. Paint your nails a soft pink or nude base first, then use a thin brush or nail guide sticker to add denim blue polish along just the tip. Nail guide stickers are cheap and make this technique far easier for beginners since they keep your lines straight. Two coats of the blue tip color should give solid coverage. This design suits almond or squoval nails especially well, since the tip shape shows the color line clearly. A glossy top coat finishes the look and gives the blue a nice richness that mimics the color of well worn jeans. This is a great option if you want something western themed but still office appropriate, since the overall look stays clean and classic despite the color swap.
11. Leather Texture Nails
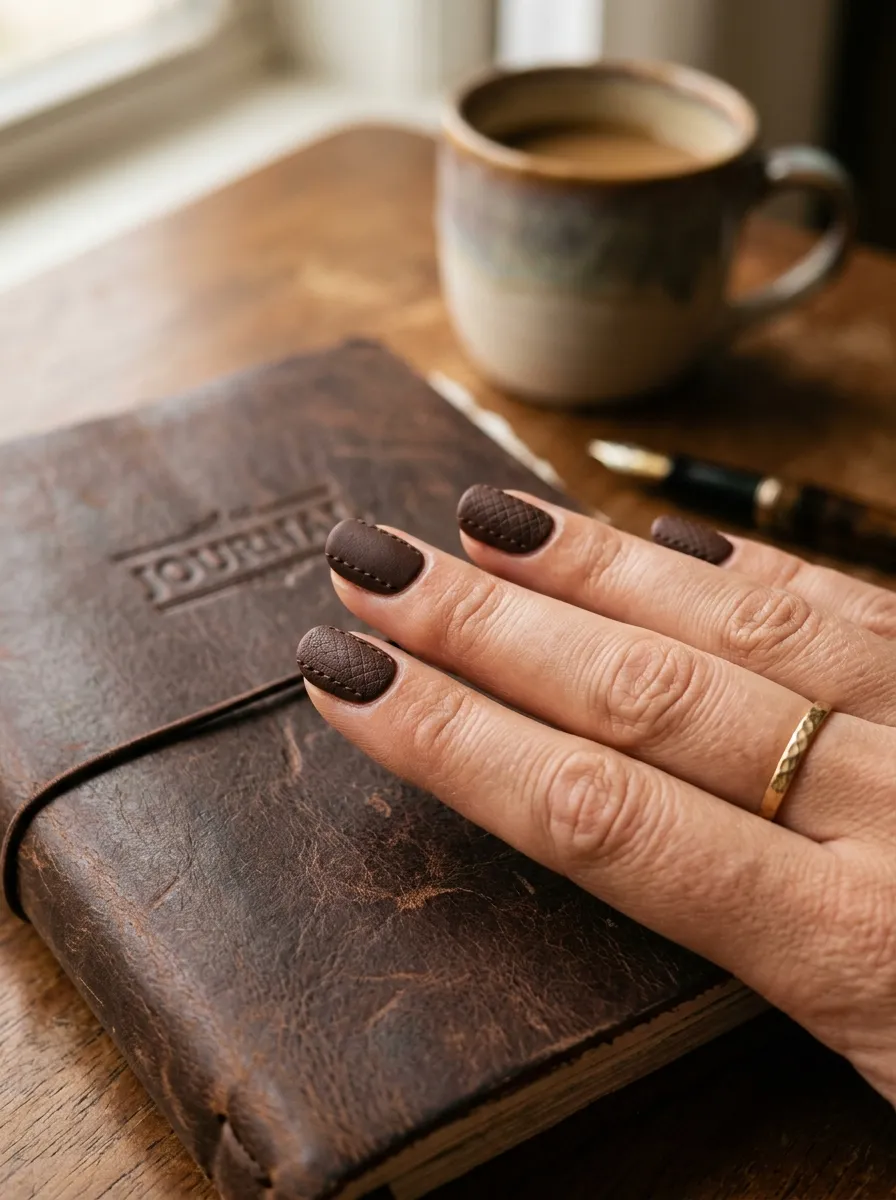
Leather texture nails give you a rugged, tactile looking manicure without needing any 3D products. Paint your nails a deep brown base first and let it dry fully. Using a fine brush and a slightly darker brown, add small crisscross lines across the nail to mimic stitched leather seams. Keep the lines light and thin so the texture reads as detail rather than clutter. A matte top coat helps sell the leather look since shine tends to break the illusion. This design works nicely on longer nail shapes like coffin or almond, where there’s more surface area for the stitching pattern to show. If freehand lines feel tricky, a striping tape strip can help you keep things straight before you peel it away. This look pairs naturally with silver jewelry and turquoise accents, and it holds up well for everyday wear since the matte finish tends to hide small chips better than a glossy one.
12. Star Studded Nails
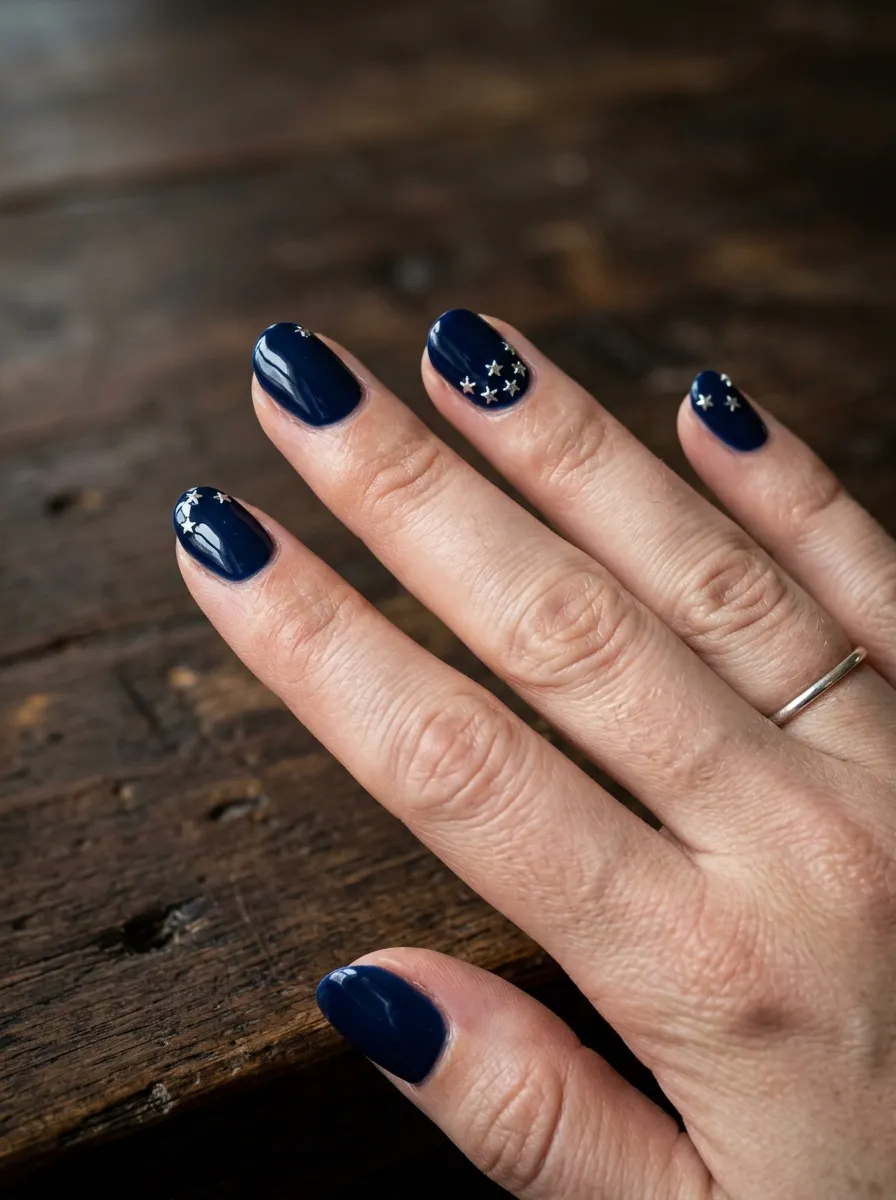
Star studded nails bring a bit of sparkle and a classic western symbol into one simple design. Paint your nails a navy or black base for contrast, then press small silver star shaped studs near the tip of each nail while the top coat is still wet. Craft stores and beauty supply shops sell star studs in bulk for very little money, so this design costs almost nothing to try. You don’t need to cover the whole nail, two or three stars per nail is enough to catch the eye without looking cluttered. A glossy top coat seals the studs in place and adds shine that makes the stars stand out even more. This design works on any nail length and shape, though longer nails give the stars more room to sit without crowding the tip. It’s a fun choice for evening wear or a special western themed event where you want a bit of extra sparkle.
13. Sunset Ombre Nails
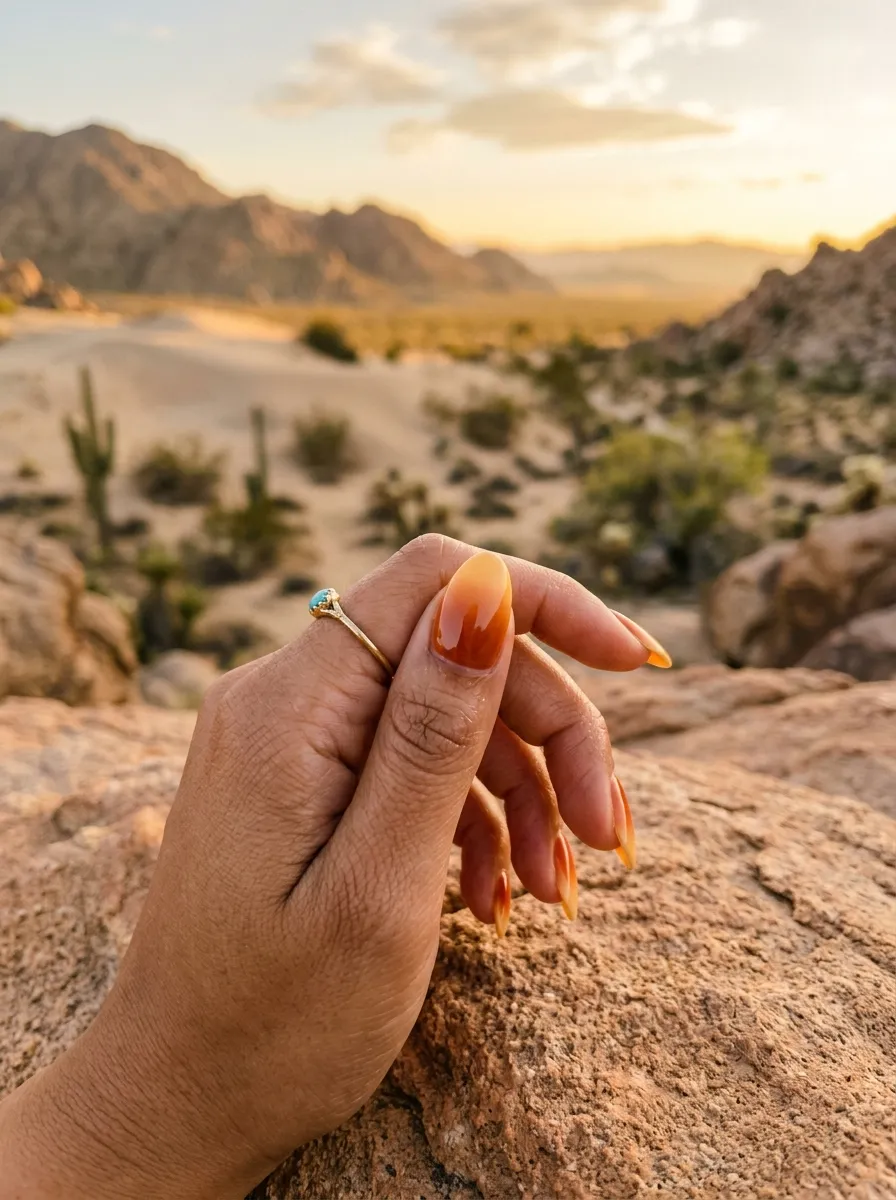
Sunset ombre nails borrow the warm colors of an open sky at dusk, which fits the western theme perfectly. Start with a yellow or cream base coat at the tips and blend into orange, then a touch of pink or red near the cuticle. Use a makeup sponge to dab the colors together while the polish is still damp, working in small sections so the blend stays soft. This technique doesn’t require expensive tools, any beauty sponge from your makeup bag will work fine. If the colors look too harsh where they meet, a bit of nail polish remover on a small brush can soften the line. A glossy top coat brings out the warmth in all three shades once everything is dry. This design looks best on medium to long nails, where the gradient has more room to spread smoothly. It’s a striking option if you want something colorful and eye catching without adding any extra art on top.
14. Braided Rope Nail Art
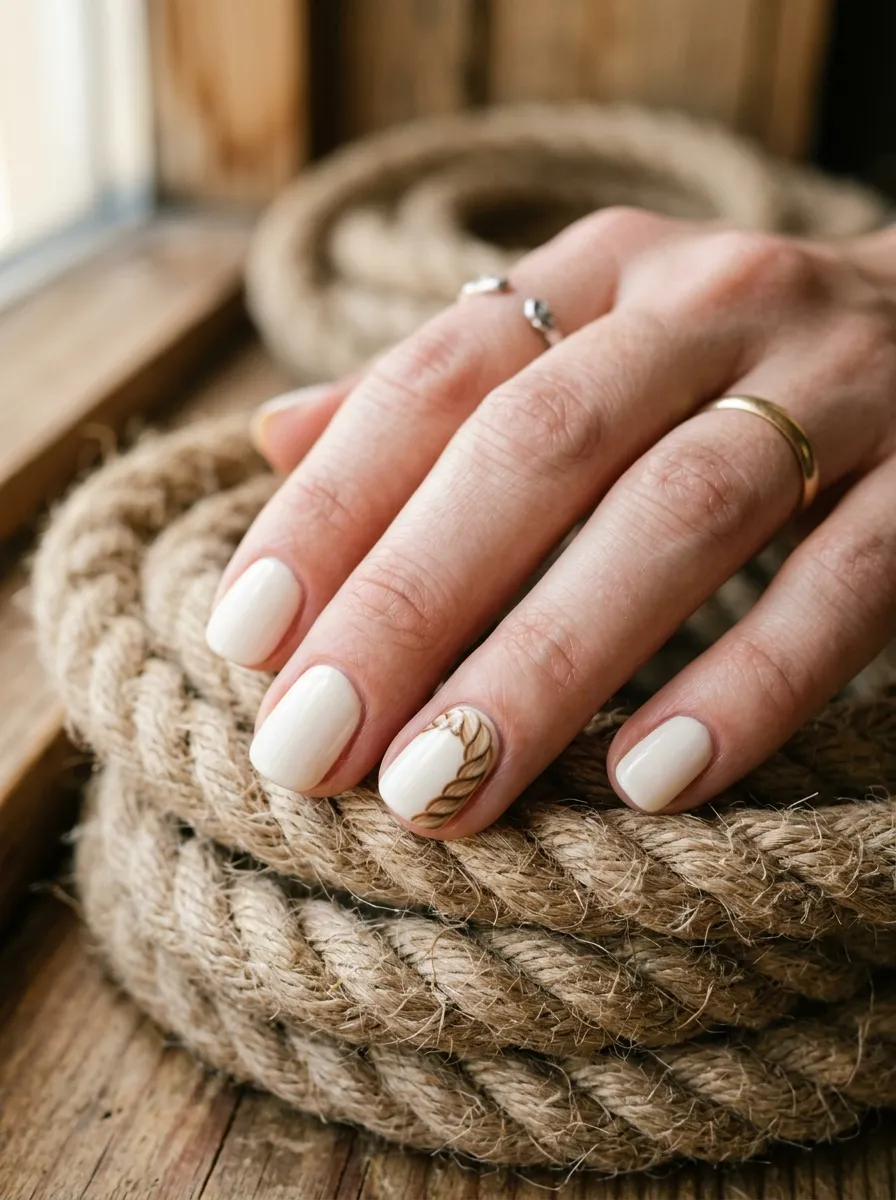
A braided rope design adds texture and detail that feels straight out of a barn or stable. Paint your nails a cream base first, then use a thin brush to add a curved line along one edge in tan, followed by small diagonal strokes in a slightly darker brown to mimic the twist of a rope. This takes a steady hand, so practicing the pattern on paper first can help you get comfortable with the motion before moving to your nail. If freehand feels too difficult, a nail art pen with a fine tip gives you more control than a regular brush. This design works best as a single accent nail rather than a full set, since the detail is busy enough to stand out on its own. Seal with a glossy top coat once dry. It pairs nicely with plain tan or brown nails on the rest of your hand for a balanced western look.
15. Wildflower Accent Nails
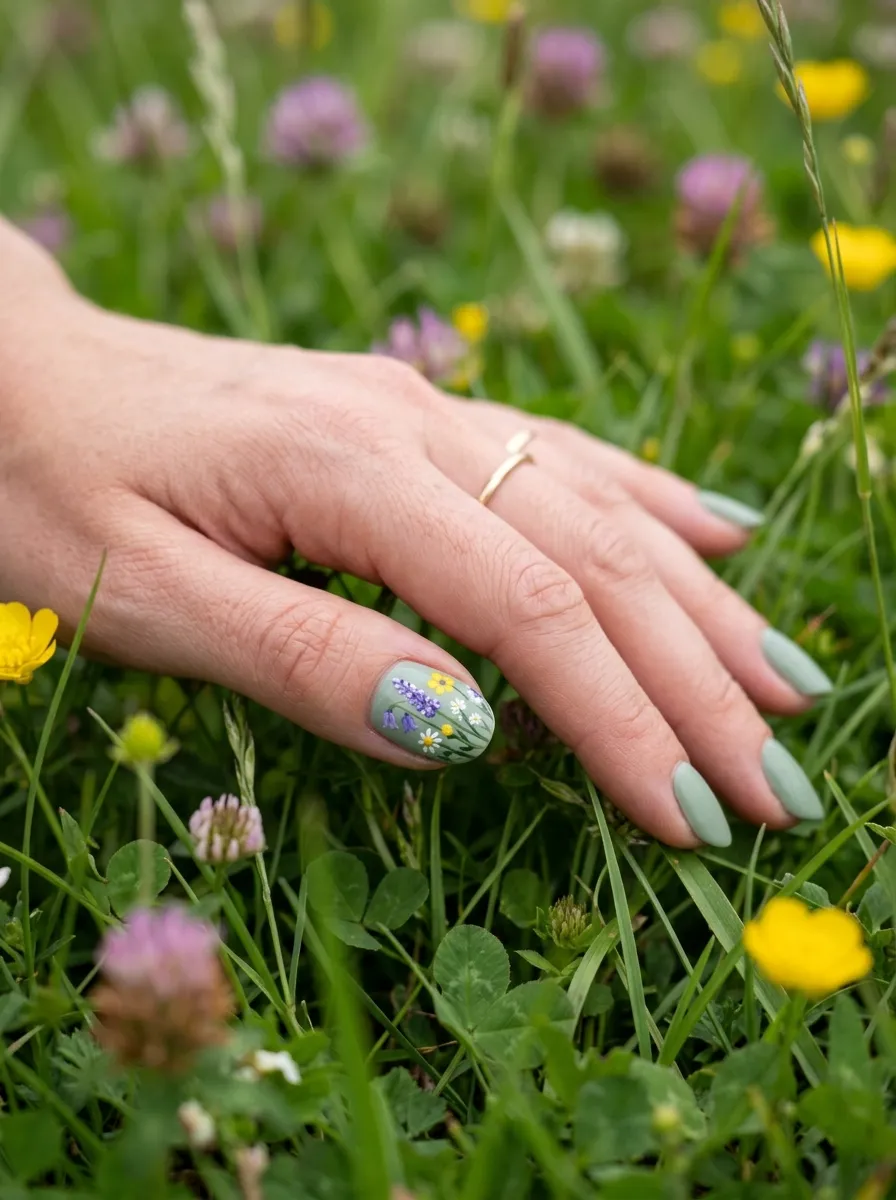
Tiny wildflowers bring a soft, romantic touch to an otherwise rugged western manicure. Paint your base nails a sage green or cream color, then use a dotting tool or the end of a bobby pin to add small flower shapes in purple, yellow, and white on one accent nail. Each flower only needs five small dots arranged in a circle with a tiny yellow dot in the center. This technique is forgiving since flowers don’t need to look perfect to read clearly. A dotting tool set costs very little and works for dozens of future manicures, so it’s a good small investment if you enjoy nail art. Seal everything with a glossy top coat once the flowers are dry. This design pairs beautifully with a plain sage or tan color on the rest of your nails, giving you a look that feels both western and a little bit delicate at the same time.
16. Cowhide Spots
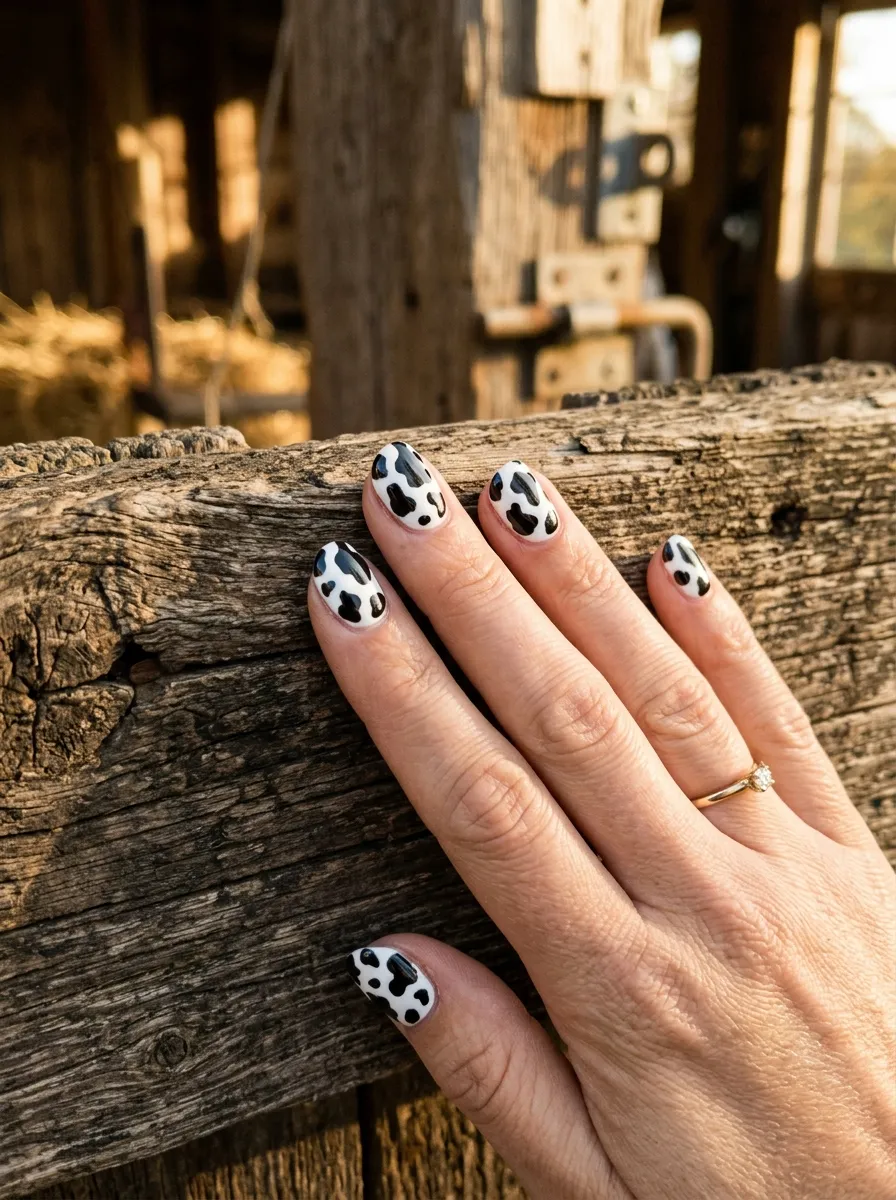
Full cowhide print takes the single accent nail idea from earlier and spreads it across your whole hand for a bolder statement. Paint every nail a cream or white base first, then use a thin brush to add irregular black blobs across each nail, varying the size and shape so nothing looks too uniform. Real cowhide patterns are never symmetrical, so a slightly messy hand actually makes this look more convincing. Let each nail dry before moving to the next to avoid smudging the black shapes. A glossy top coat once everything is dry gives the print a polished finish. This design takes a bit more time than a single accent nail, so set aside a full hour if you’re doing this at home. It’s a bold choice that works well for costume parties, concerts, or anyone who wants their nails to be the first thing people notice.
17. Copper Chrome Nails
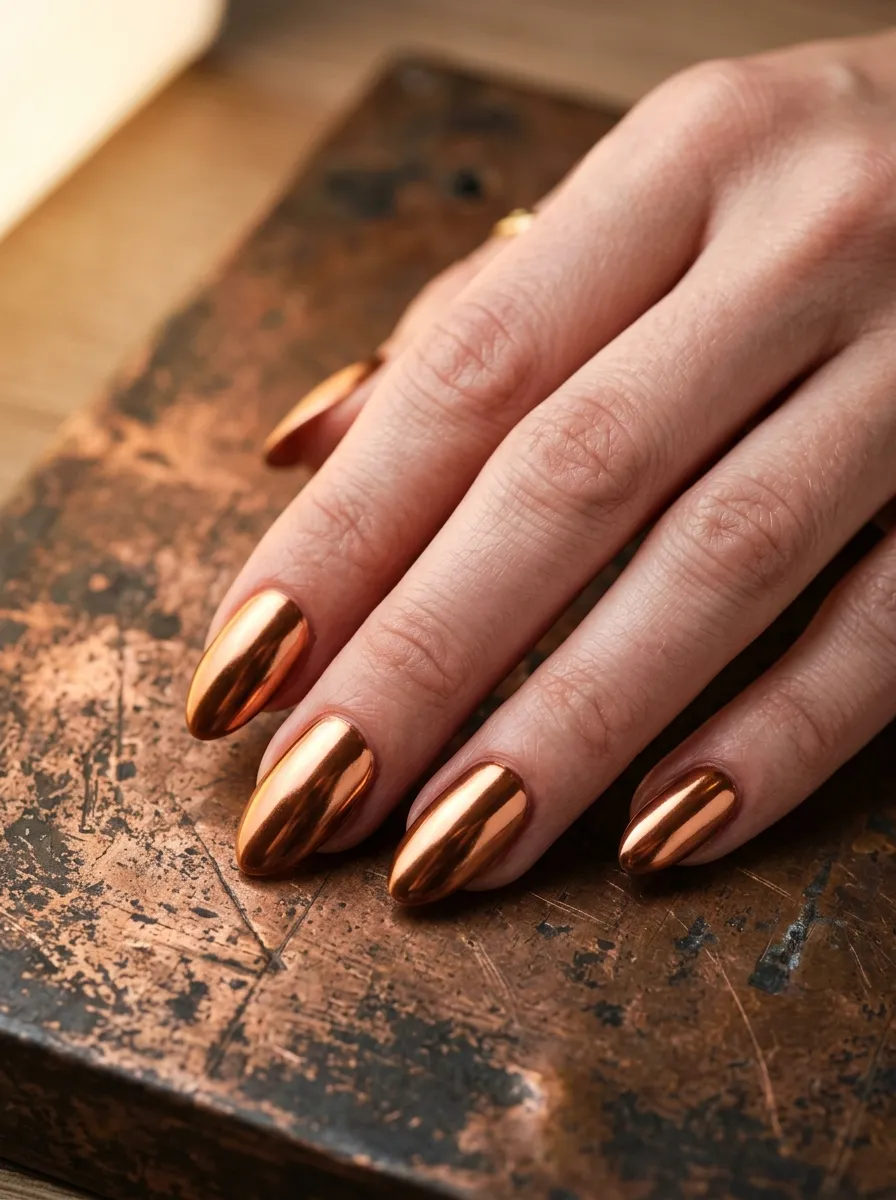
Copper chrome nails bring shine and a metallic western feel without needing any painted detail. Start with a dark base coat, black or deep brown works well, then apply a copper chrome powder or polish over the top following the product instructions. Chrome powders are sold cheap in small jars and go a long way, since only a thin layer is needed for full coverage. Buff the chrome gently with the applicator that usually comes in the kit until the surface turns smooth and reflective. This design works on any nail shape and length, though shorter nails tend to show off the mirror shine most clearly since there’s less surface for the light to scatter across. A top coat isn’t always needed with chrome powders, but adding one can help the finish last longer between manicures. This look pairs beautifully with turquoise jewelry, since the warm copper tone plays nicely against cooler blue accents.
18. Fringe French Tips
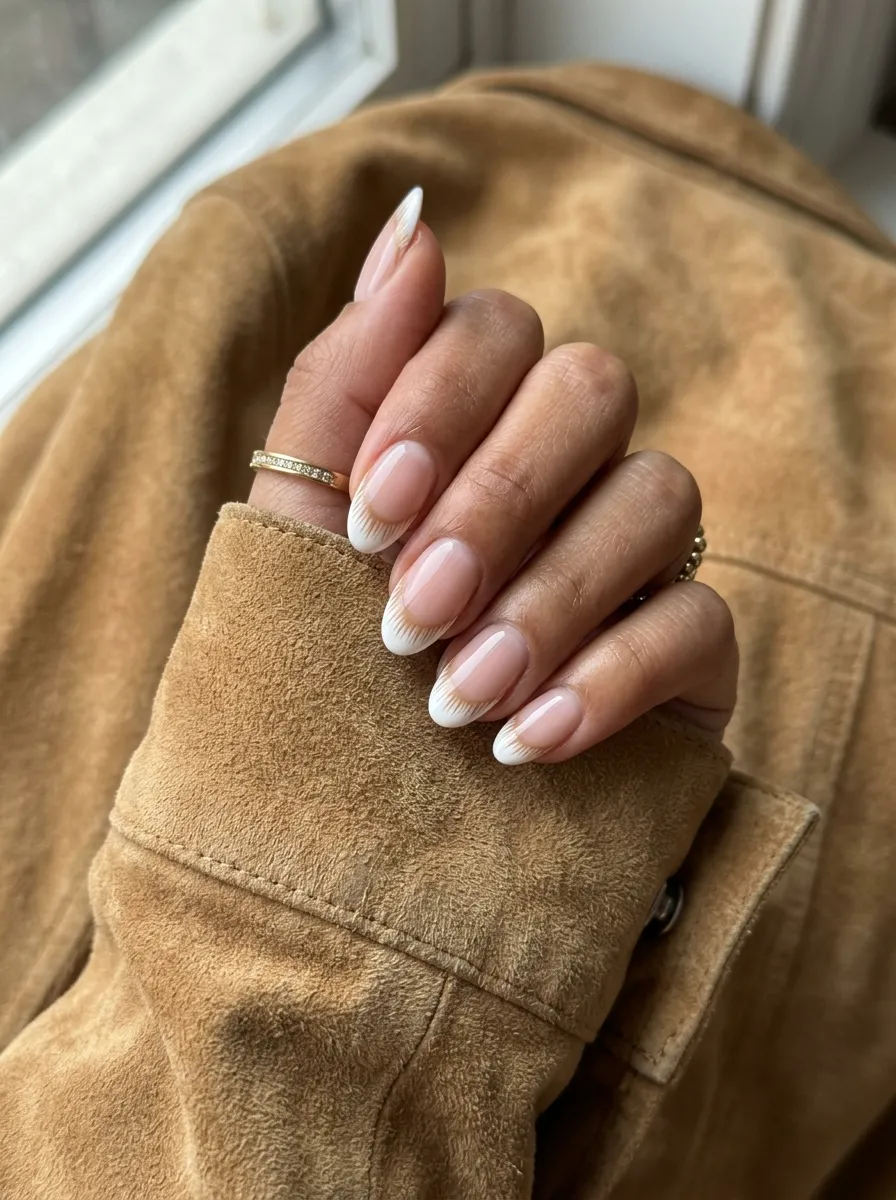
This design combines the classic french tip shape with the fringe detail from earlier for something a little more polished. Paint a nude or pink base first, then add a white or cream tip using a nail guide sticker for clean lines. Once dry, use a thin brush to add small tan fringe lines just below the white tip, running vertically like the fringe on a jacket sleeve. Keep the lines short and slightly uneven for a natural look. This design takes more steps than a plain french manicure, but each step is simple enough for a beginner to manage with some patience. A glossy top coat seals everything and gives the whole look a finished, salon quality shine. This style works well for everyday wear since the base stays classic, while the fringe detail adds just enough personality to feel western without being over the top.
19. Lasso Swirl Nail Art
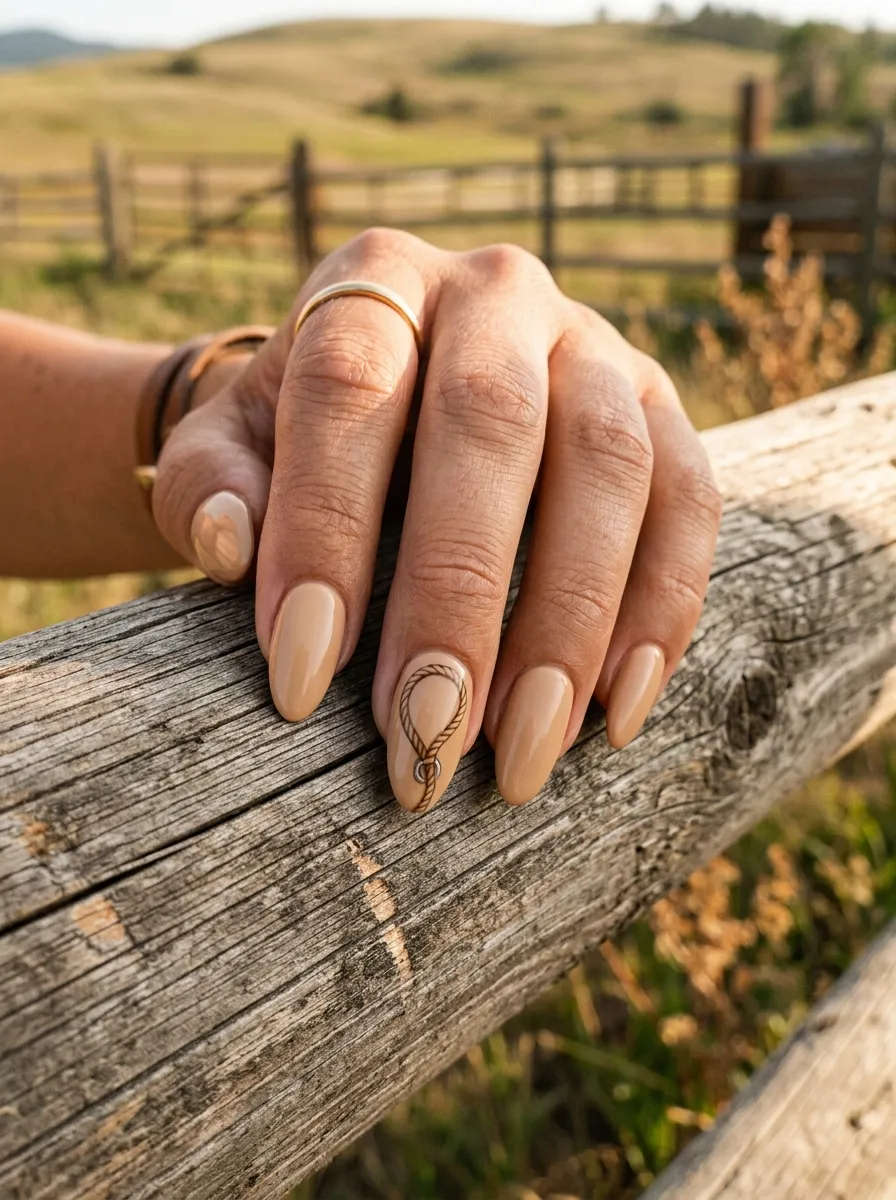
A lasso swirl brings movement and a bit of storytelling into your nail design. Paint your base nails tan or cream, then use a thin brush and brown polish to draw a loose spiral shape on one accent nail, mimicking the loop of a lasso mid swing. The line doesn’t need to be perfectly even, a slightly wobbly loop actually looks more like rope in motion. Add small dashes along the line for texture if you want extra detail. This design takes some practice since it relies on a steady hand for the curve, so try sketching the shape on paper a few times first. Seal with a glossy top coat once the brown polish is fully dry. This works best as a single accent nail paired with plain tan or brown nails on the rest of your hand, giving you one eye catching detail without overwhelming the whole set.
20. Boot Stitch Pattern
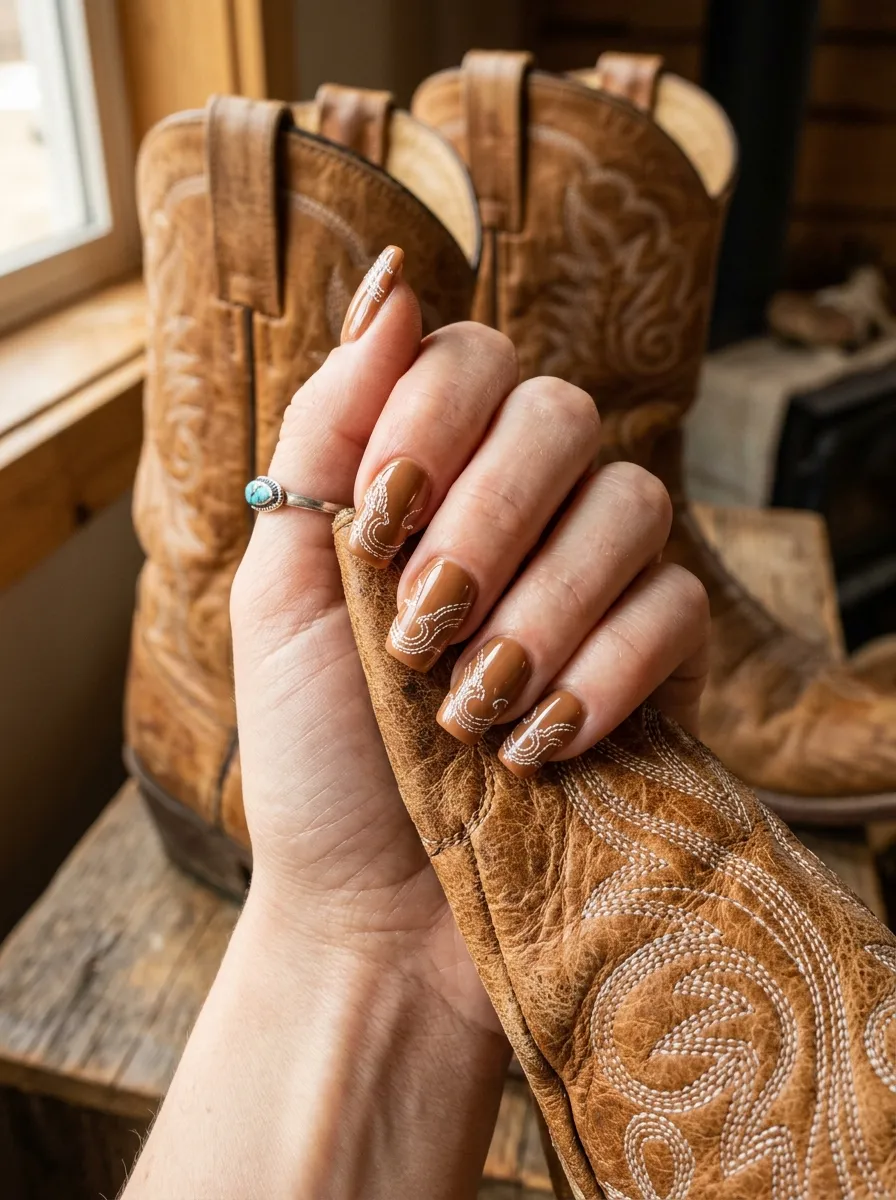
Cowboy boots are known for their detailed stitching, and that same pattern translates nicely onto nails. Paint your base a tan or camel color, then use a thin white or cream brush to add small curved lines near the base of each nail, mimicking the decorative stitching found on boot shafts. Keep the lines simple, two or three curved strokes per nail is enough to suggest the pattern without needing to cover the whole nail. This technique is forgiving since boot stitching in real life is often uneven too. A fine tip nail art pen makes this easier than a brush if you’re new to detailed work. Seal with a glossy top coat once dry. This design pairs naturally with silver studs or a turquoise accent nail if you want to build out a fuller western set. It also works well for someone who loves boots and wants their nails to reflect that same rugged, detailed style.
21. Rustic Red Nails
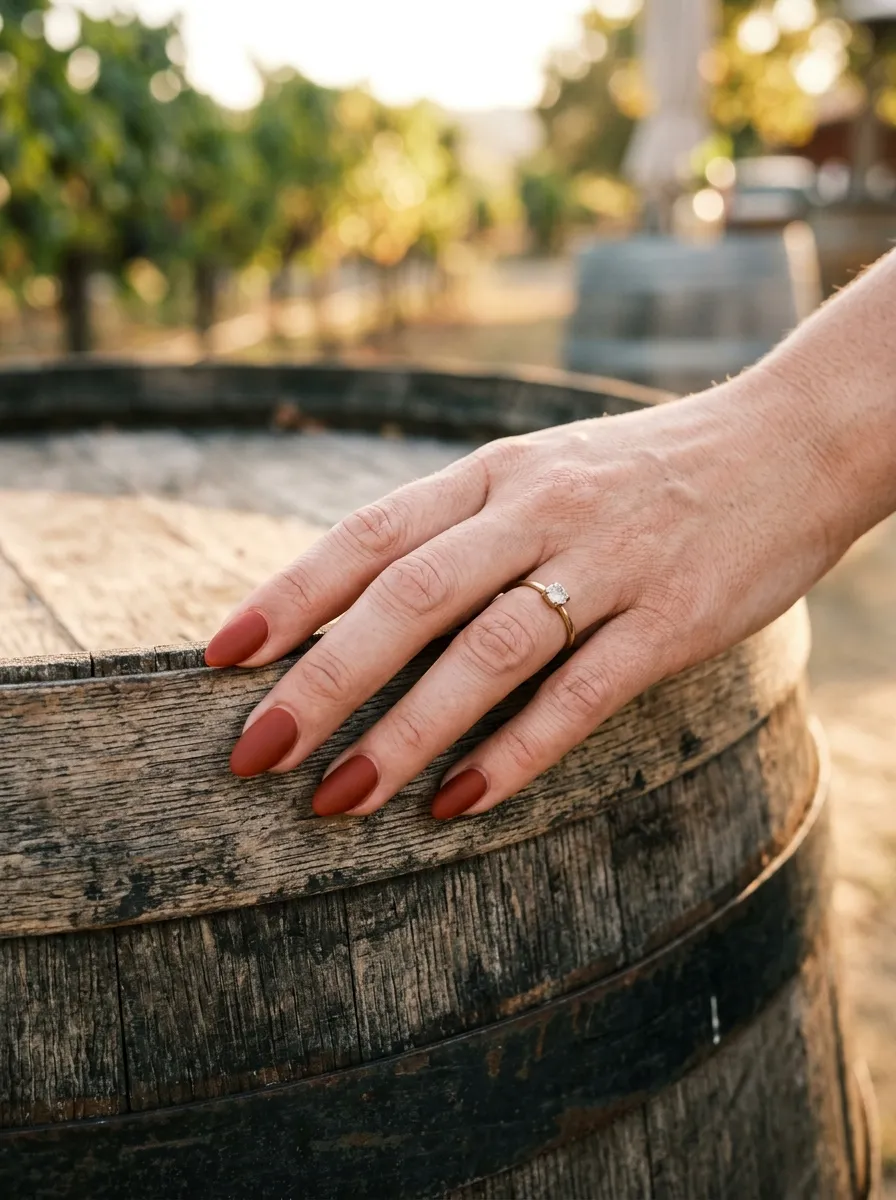
A deep rustic red gives you a bold, confident color without needing any extra art. This shade sits somewhere between brick and barn red, warmer than a classic cherry red and better suited to the western color palette. Two coats of a rustic red polish should give you full, even coverage. A matte top coat softens the shine and gives the color a slightly dusty, weathered look that fits the theme well. This style works on any nail length, though short or medium nails tend to show off the color most clearly without any distraction. It’s one of the easiest looks on this list to recreate since it only needs one polish color and a top coat. Keep a small bottle of your matte top coat in your bag for quick touch ups if the shine starts coming back after a few days of wear. This color pairs beautifully with silver rings and simple leather accessories.
22. Silver Concho Nail Art
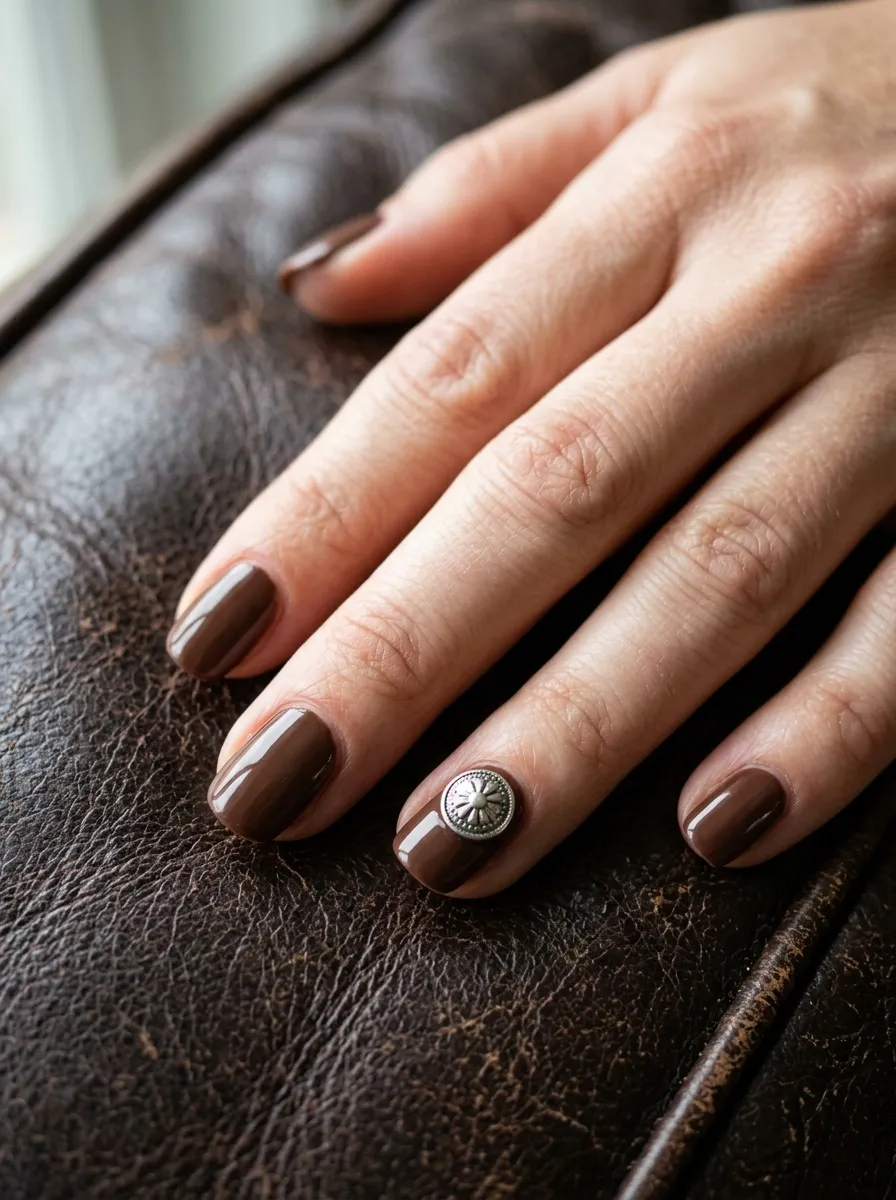
Conchos are the small round metal discs often seen on western belts and saddles, and recreating one on a single nail adds a subtle detail that feels authentic to the theme. Paint your base nails brown, then use a dotting tool dipped in silver polish to create a small circle near the center of one accent nail. Add a tiny dot in the middle for extra dimension, mimicking the screw or rivet often found on real conchos. This design is simple enough for beginners since it only needs a steady hand for one small shape rather than a full pattern. A glossy top coat gives the silver a nice metallic shine once dry. This look works well paired with plain brown or tan nails on the rest of your hand, letting the single silver detail stand out as the focal point of your manicure without much extra effort.
23. Snake Print Accent
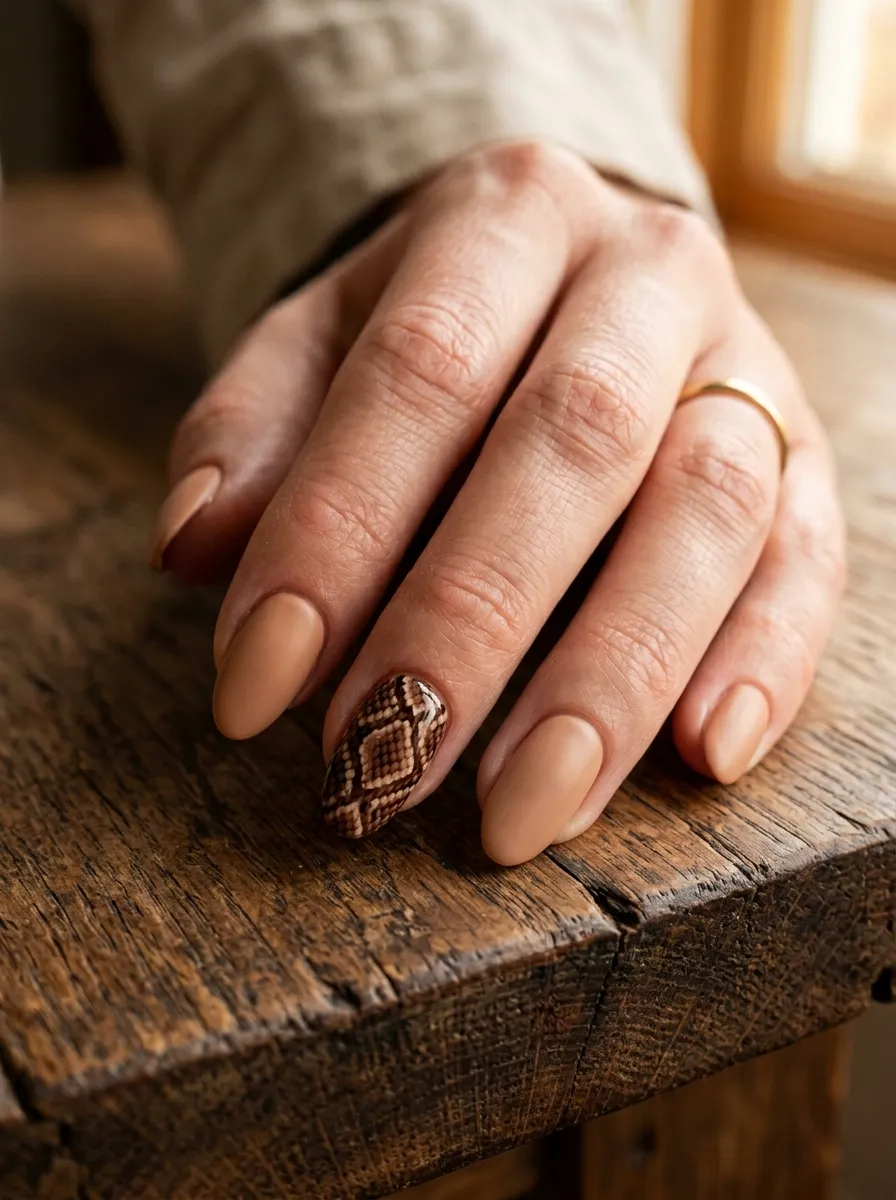
Snake print brings texture and a slightly edgier feel to a western manicure. Paint your base nails tan, then use a thin brush to add small overlapping crescent shapes in brown across one accent nail, building the scale pattern row by row from the base up. This takes patience, so working slowly and letting each row dry a little before starting the next helps keep the shapes clean. A nail stamping plate with a snake print design can save time if freehand feels too tricky, and these plates are sold cheap online or at beauty supply stores. Seal with a glossy top coat once everything is dry. This design works best as one or two accent nails rather than a full set, since the pattern is detailed enough to stand out on its own. Pair it with plain tan or rust colored nails on the rest of your hand for a balanced western look.
24. Saddle Tan Ombre
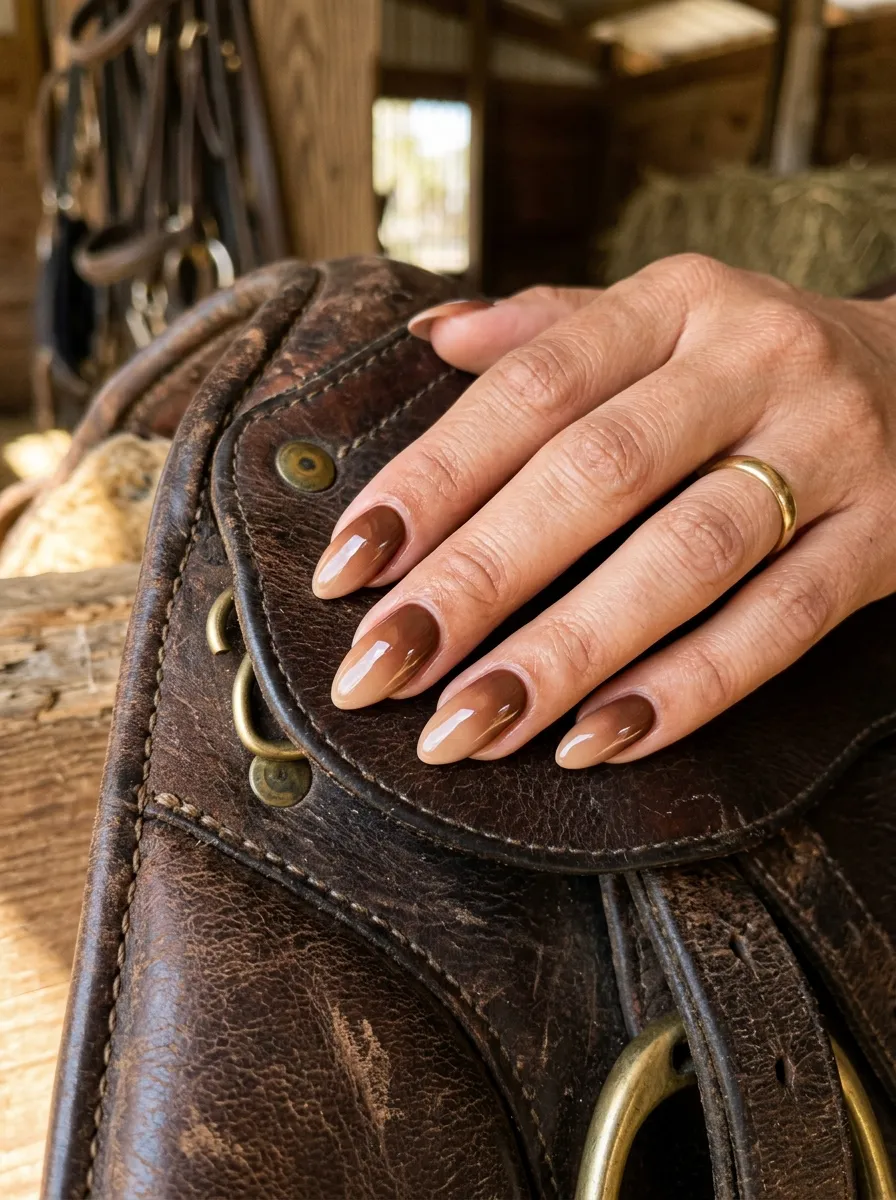
Saddle tan ombre gives you a soft, warm gradient that feels straight out of a stable. Start with a light tan polish at the tips and blend into a deeper saddle brown near the cuticle using a makeup sponge, dabbing gently while the polish is still damp. This technique doesn’t need expensive tools, a basic sponge from your makeup bag works just fine. If the blend looks patchy in spots, adding a thin extra layer of whichever color is lighter in that area helps smooth things out. A glossy top coat once dry brings out the richness in both shades and gives the whole look a polished, salon quality finish. This design works especially well on medium to long nails, where the gradient has more space to spread evenly. It’s a versatile option that pairs with almost any western accessory, from silver jewelry to turquoise stones, since the warm brown tones stay neutral enough to match nearly everything.
25. Wood Grain Nails
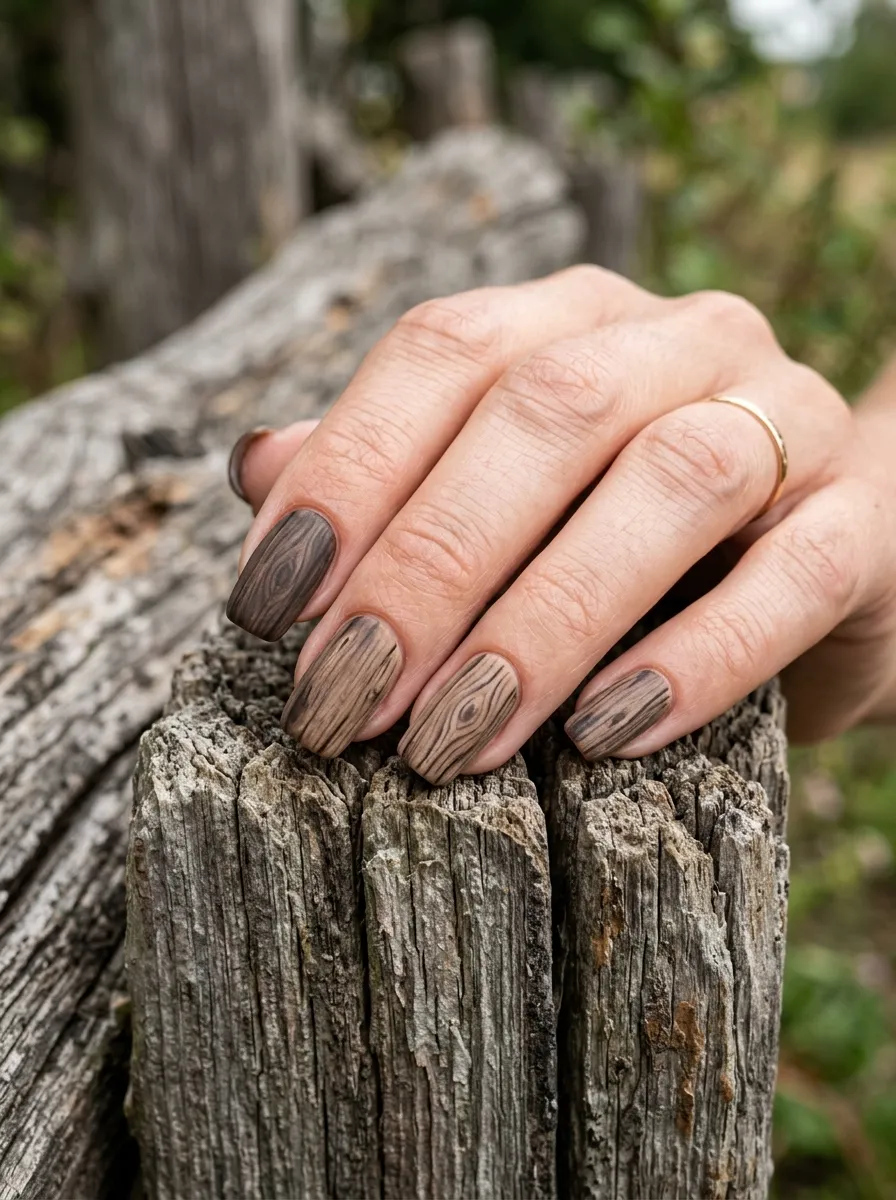
Wood grain nails borrow texture straight from a barn door or fence post for a design that feels rustic and grounded. Paint your base nails a medium brown, then use a thin brush and a slightly darker brown to add wavy horizontal lines across the nail, varying the spacing so it looks natural rather than uniform. Real wood grain is never perfectly even, so a slightly imperfect hand actually helps sell the look. A marbling tool or the tip of a toothpick works well for dragging the lines into soft waves once the polish is still a little wet. Seal with a matte top coat to keep the texture looking believable rather than glossy and artificial. This design suits square or coffin shaped nails especially well, since the flat surface gives the grain lines more room to read clearly. It’s a fun choice if you want a western manicure that feels a bit different from the usual prints and studs.
26. Rodeo Rhinestone Tips
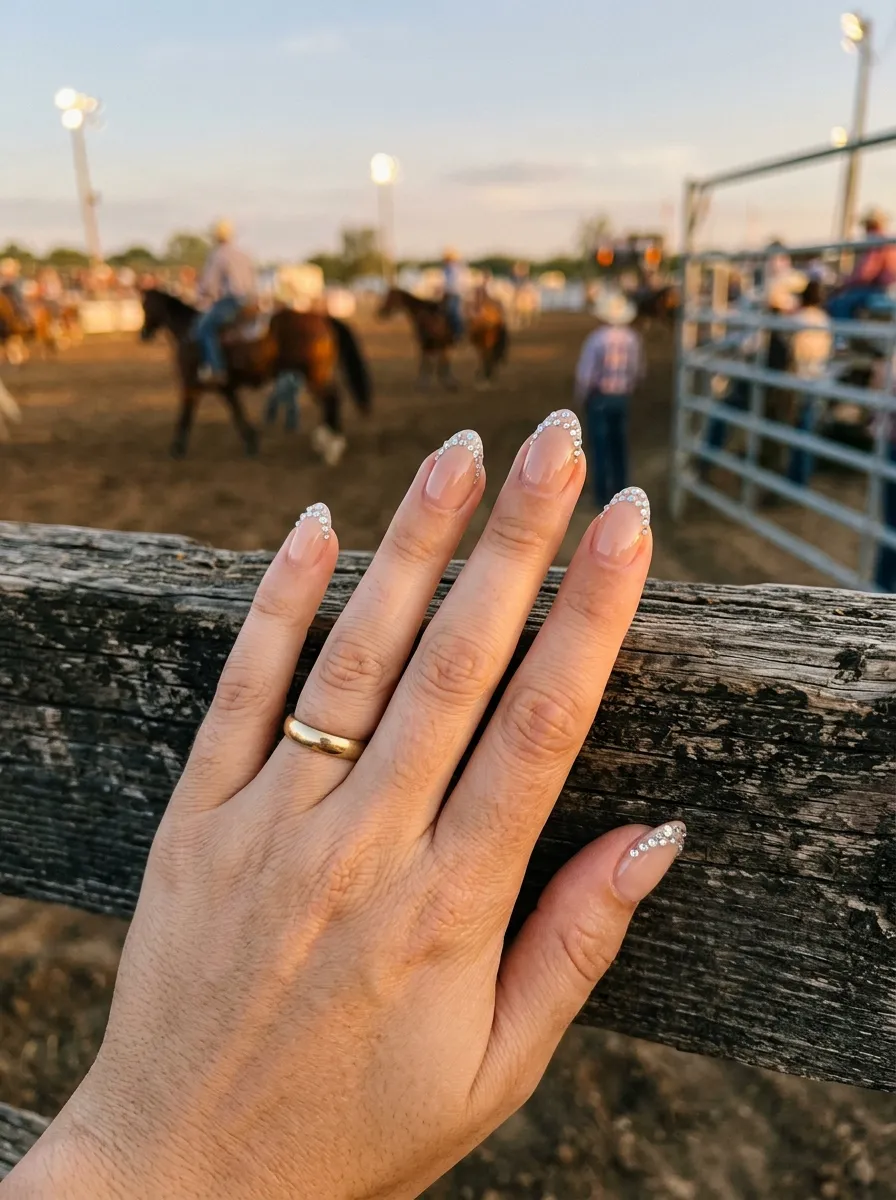
Rhinestone tips add sparkle to your nails while keeping the overall shape simple and classic. Paint a nude or soft pink base first, then use small clear or crystal colored rhinestones along the very tip of each nail, pressing them into wet top coat one at a time. Craft store rhinestone packs are inexpensive and give you more than enough stones for several manicures. You don’t need to cover the entire tip, spacing the stones slightly apart actually looks more elegant than packing them tightly together. This design works well for a night out at a rodeo, concert, or wedding, since the sparkle catches light beautifully under any kind of lighting. A glossy top coat locks the stones in place and adds extra shine. If a stone falls off during the week, simply glue on a replacement rather than redoing the whole nail, which keeps this style easy to maintain.
27. Barn Red French Tips
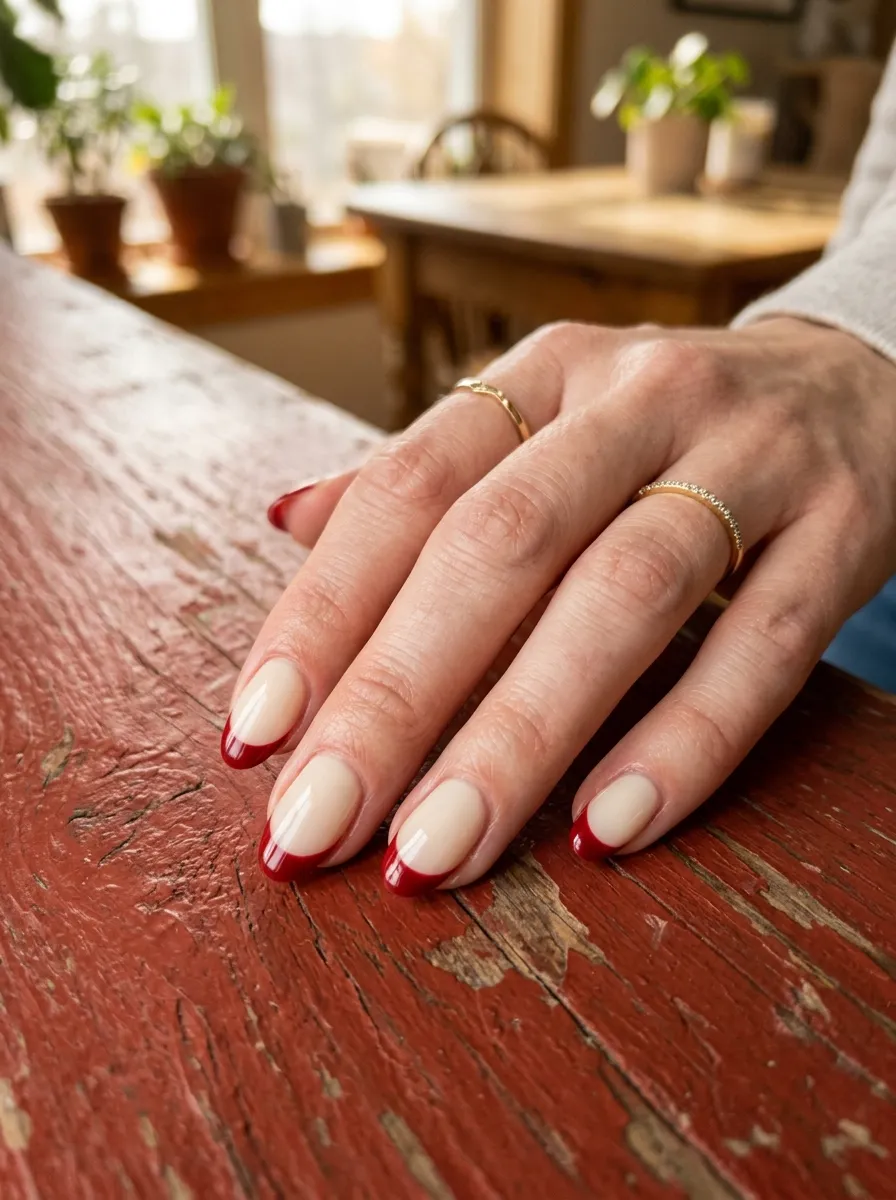
Swapping the usual white french tip for a deep barn red gives this classic style a western feel instantly. Paint a soft cream or nude base first, then use a nail guide sticker to add clean red tips using a rich, slightly muted red polish rather than a bright cherry shade. The sticker helps keep your line straight, especially if you’re newer to nail art and don’t trust a steady freehand. Two coats of the red tip color usually gives full, even coverage. A glossy top coat finishes the design and gives the red a deep, rich shine. This style works for almost any nail shape and length, though square or squoval nails show off the clean tip line especially well. It’s a great option if you want something western themed that still feels office appropriate and easy to wear for everyday activities without looking too busy.
28. Antler Nail Art
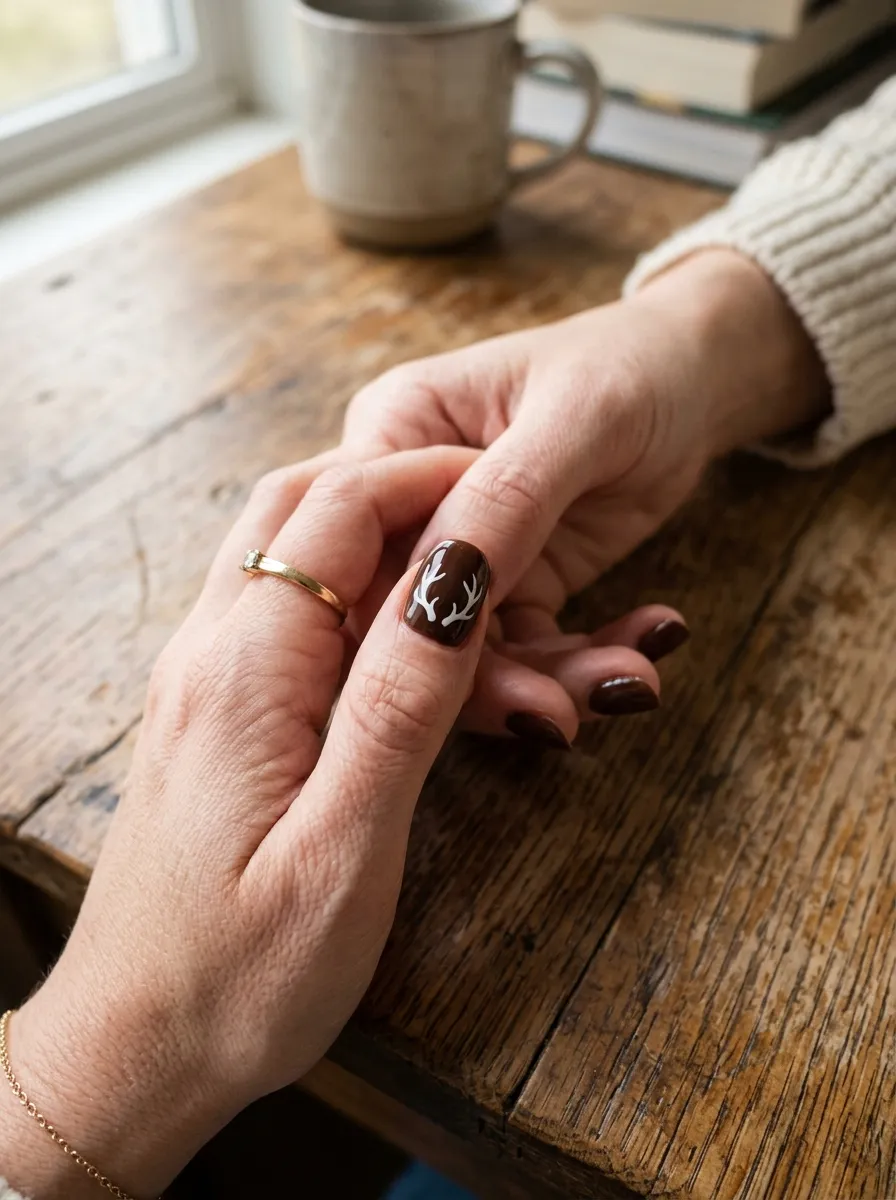
An antler silhouette adds a rustic, outdoorsy detail that pairs naturally with the western theme. Paint your base nails a deep brown, then use a thin brush and white or cream polish to draw a simple branching shape on one accent nail, similar to a small tree with a few short branches coming off a central line. You don’t need anatomical accuracy here, a rough branching shape reads clearly as an antler even if it’s not perfectly symmetrical. This design takes a bit of practice with the thin brush, so sketching the shape on paper first can help build confidence before moving to your actual nail. Seal with a glossy top coat once dry. This works best as a single accent nail paired with plain brown or tan on the rest of your hand, giving you one clear focal point without overcrowding the whole manicure with detail.
29. Dusty Rose Western Nails
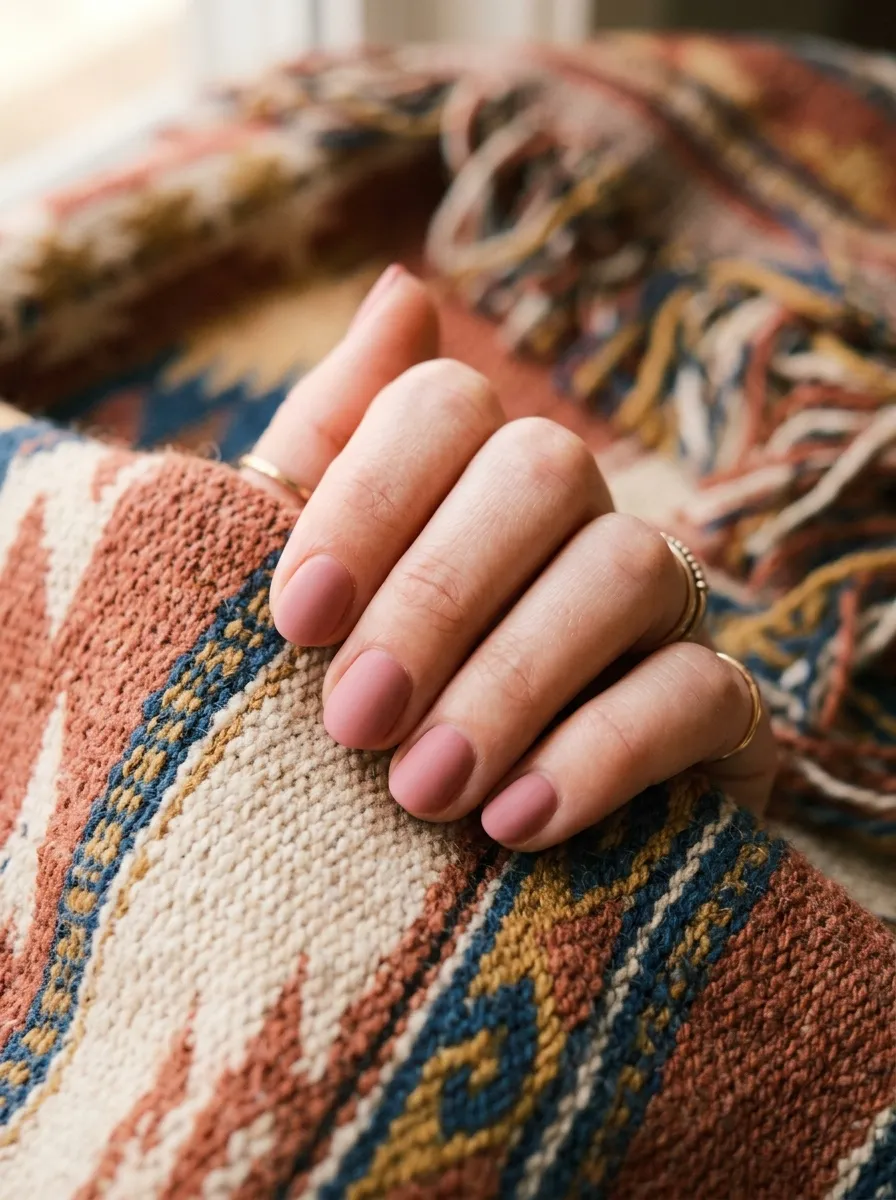
Dusty rose brings a softer color option into the western palette without losing that warm, earthy feel. This shade sits between pink and mauve, muted enough to pair naturally with browns, tans, and rust tones. Two coats of a dusty rose polish give full coverage, and a matte top coat softens the shine into something that feels a little more grounded and less sweet than a typical pink. This style works on any nail length, though short or round nails tend to suit the soft color especially well. It’s an easy pick if you want a western manicure that still feels feminine and gentle rather than bold or busy. Pair it with a single accent nail in cow print or a small silver stud detail if you want to tie it more clearly into the western theme, or keep it simple and let the color speak for itself.
30. Golden Horseshoe Charm
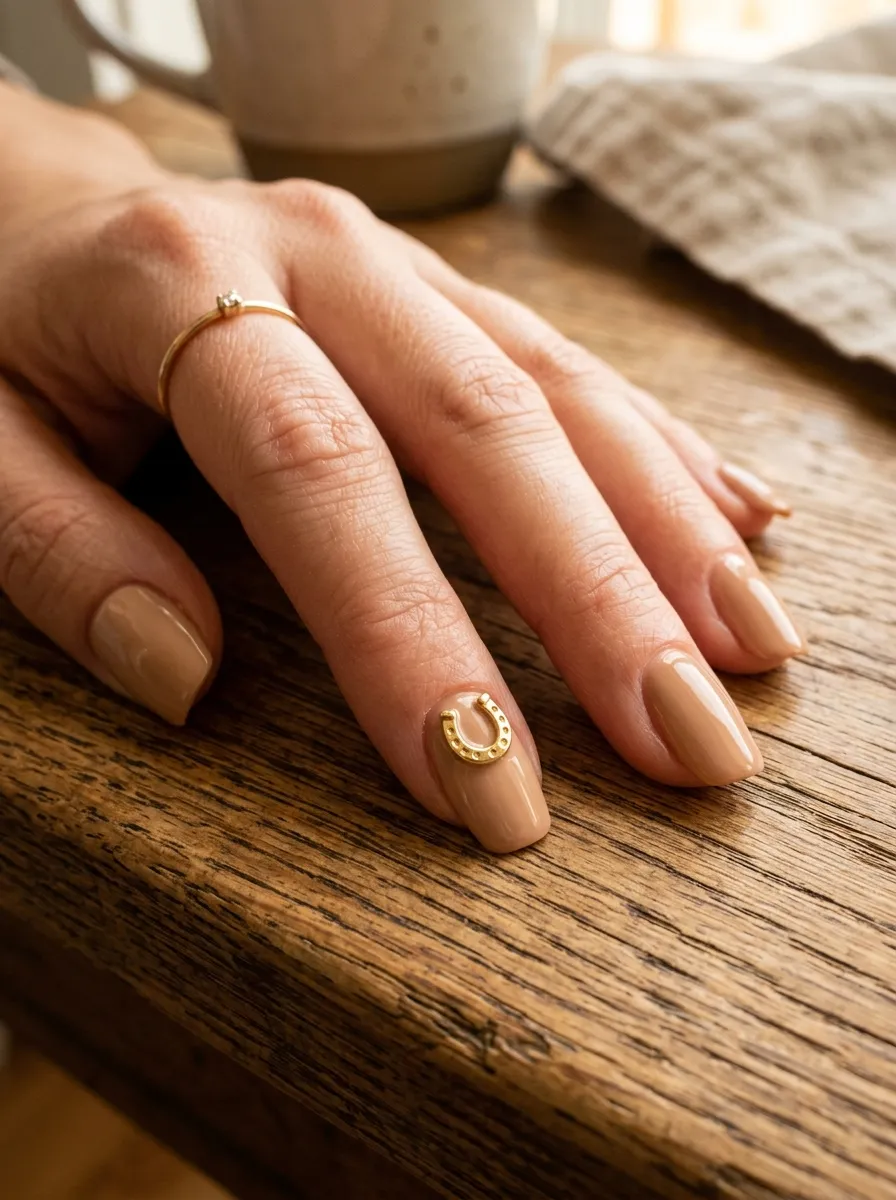
Small nail charms have become an easy way to add detail without any painting skill required. A tiny gold horseshoe charm, sold cheap in most nail art kits, presses right into wet top coat near the base of one accent nail. This gives you a dimensional detail that catches light differently than a flat painted design. Paint your base nails tan or cream first, then add the charm once the base color is fully dry and you’ve applied a fresh layer of top coat to act as glue. Hold the charm in place for a few seconds until it sets before moving on. This design takes almost no time and works well if you love the idea of nail art but don’t feel confident with a brush. It also gives your manicure a bit of texture and depth that flat designs don’t have, making it a nice option for anyone wanting a low effort but still detailed look.
31. Plaid Flannel Nails
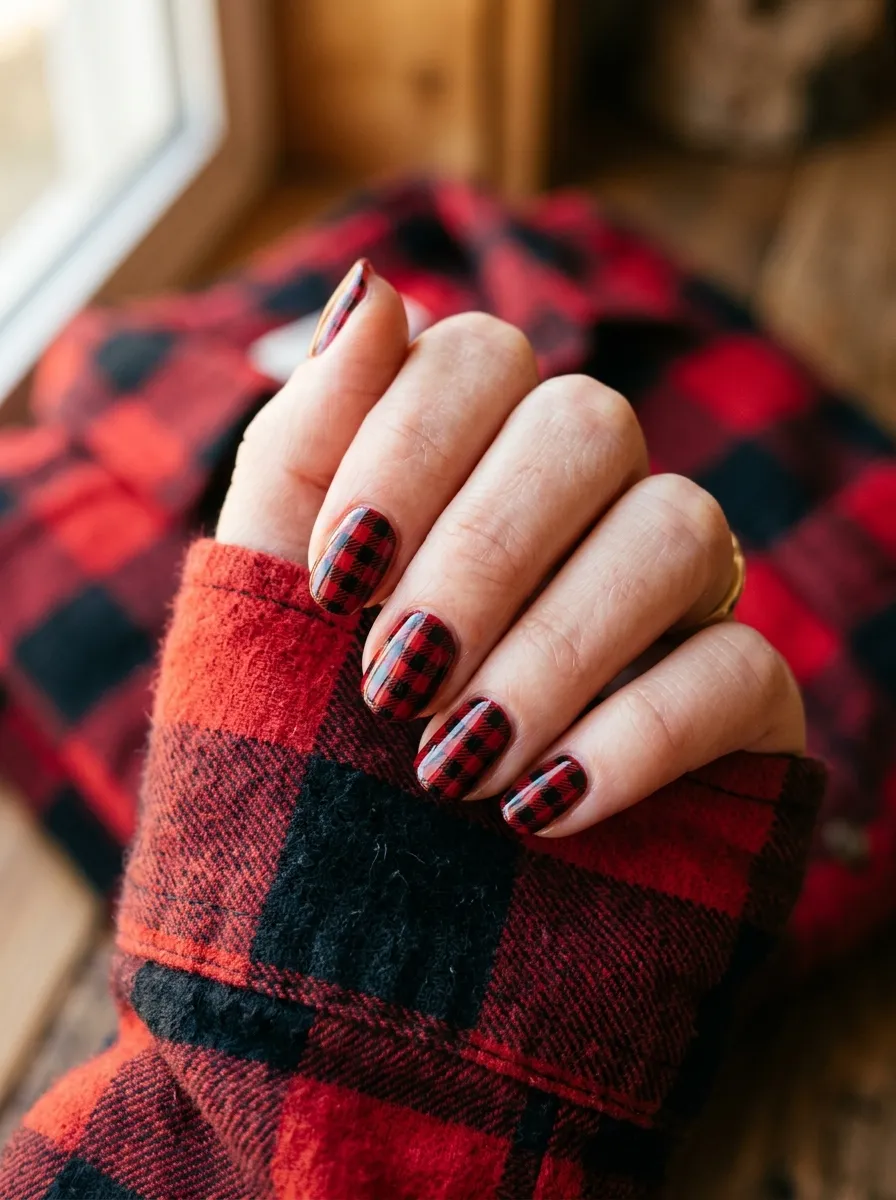
Plaid flannel brings a cozy, rugged western feel onto your nails through a classic crisscross pattern. Paint a base coat in red, then use thin black lines to create a grid pattern across the nail, spacing the lines evenly to mimic a flannel shirt. Add a few thinner lines in a lighter red or white running the opposite direction for extra depth. Striping tape can help keep your lines straight if freehand feels tricky, and it’s sold cheap in most beauty supply stores. This design takes more time than a plain color, so set aside a bit of extra patience if you’re doing it yourself at home. A glossy top coat once dry gives the plaid a clean, finished look. This works well as a single accent nail or across a full set if you love the pattern, and it pairs beautifully with plain brown or tan nails for balance.
Conclusion
Cowgirl nails give you a wide range of options, from simple single color looks to detailed patterns that take a bit more time and patience. The good part is that most of these designs use polish colors and tools you probably already have at home, so trying a new look doesn’t have to cost much. Start with something simple like a matte tan base or a rustic red color if you’re short on time, then work your way up to detailed designs like fringe, cowhide print, or a hand painted lasso once you feel more confident with a brush. Whether you’re heading to a rodeo, a country concert, or just want your hands to feel a little bolder this season, these 31 cowgirl nail ideas give you plenty of western inspired options to try at home or bring to your next salon appointment.