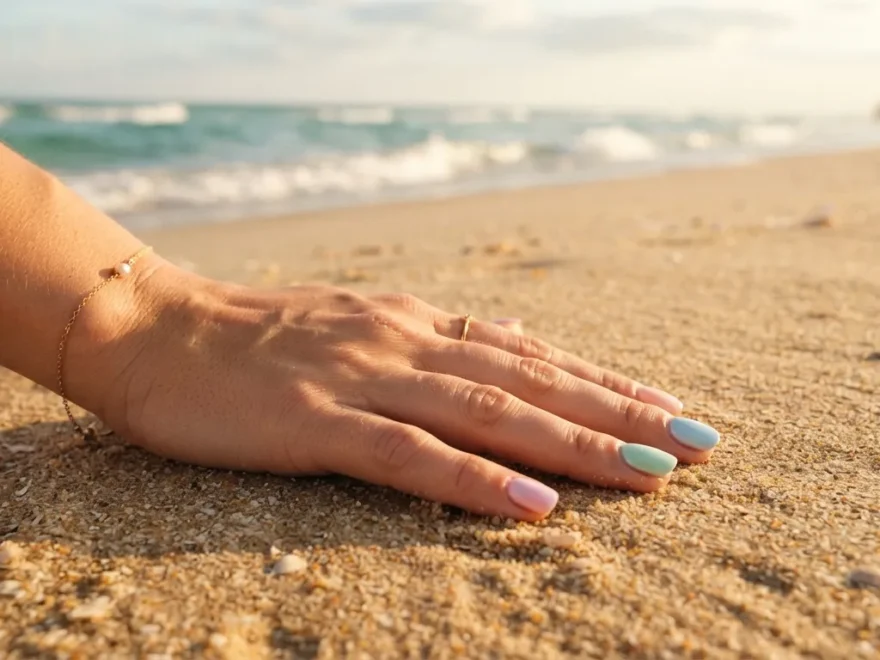
Summer is the season when your hands deserve their own vacation. Beach nail ideas mix soft sand tones, ocean blues, and playful tropical prints into looks that feel light and easy to wear. Whether you paint your own nails at home or bring inspiration to your local salon, these designs work for short trips, long weekends, or an entire summer of sunshine. Each idea below is simple to copy, budget-friendly, and made for anyone who wants their nails to match the mood of warm sand and salty air. If you’re also exploring Matcha Green Nail Ideas, soft earthy green shades, minimalist accents, subtle florals, and glossy finishes create a fresh, calming manicure that feels modern, versatile, and beautiful in every season.
1. Sandy Nude Ombre
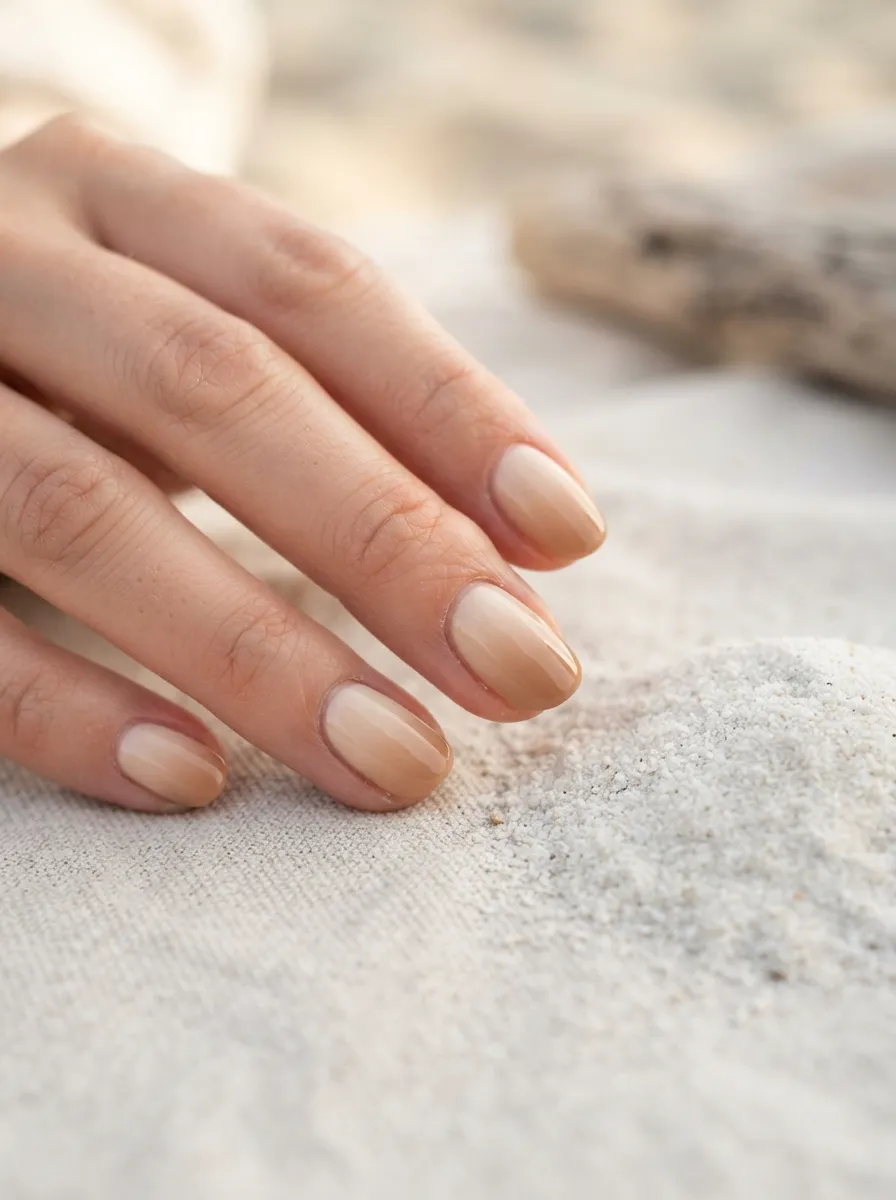
Start simple with a sandy nude ombre. This look blends two shades of beige into one smooth fade. Grab a light tan and a warm cream polish from your local drugstore. Use a makeup sponge to dab both colors onto the nail for a soft blend. No fancy brushes needed. This style pairs with any outfit and hides small chips well, which makes it great for long beach days. Try practicing on paper first if you’re new to sponge blending. It takes a few tries to get the fade smooth, but once you do, it looks like a salon job. Add a glossy top coat to seal everything and give your nails a wet sand shine. This design costs less than ten dollars in supplies and lasts about a week with proper care. It’s a solid pick for anyone who wants a beach look without loud color. Pack a small bottle of top coat in your beach bag for quick touch ups after swimming.
2. Turquoise Wave Tips
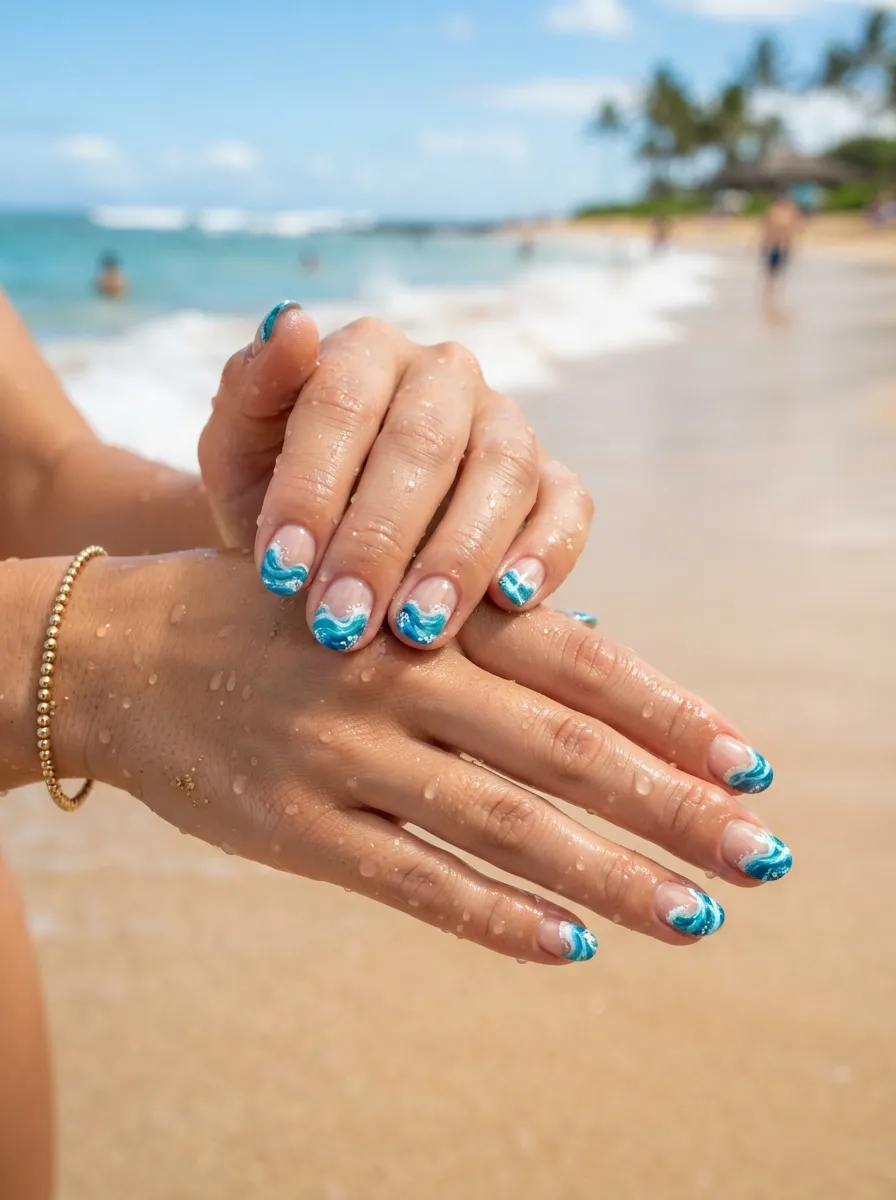
Turquoise wave tips bring the ocean straight to your fingertips. Paint your nails a clear or soft white base first. Then use a thin nail art brush to sweep small wave shapes in turquoise along the tip of each nail. You can find dollar store nail art brushes that work just fine for this. Keep the waves loose and uneven since real ocean water never looks perfectly straight. This design looks great with a matte top coat for a beachy finish or a glossy one for extra shine. If painting waves feels tricky, try a few practice swipes on a paper towel before touching your nails. This look works for both short and long nails and pairs nicely with swimsuits in any color. It’s a fun weekend project you can do while watching a show at home. Total cost stays under fifteen dollars if you already own a base polish.
3. Seashell Accent Nails
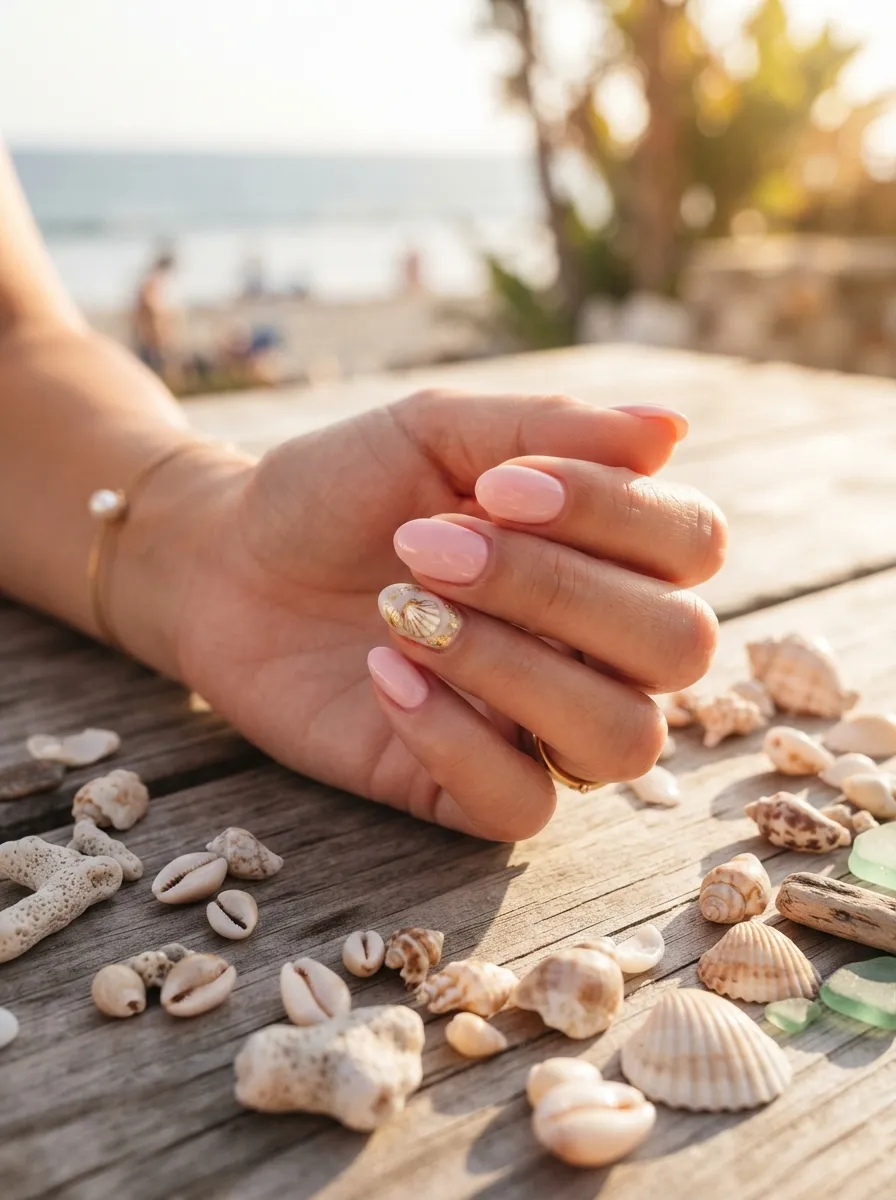
Seashell accent nails give you a subtle beach theme without covering every nail in detail. Paint four nails a soft pink or cream shade. On the fifth nail, paint a small shell shape using white and light gray polish. Add tiny curved lines with a dotting tool to mimic shell ridges. You don’t need to be an artist here. Even a simple half circle with a few lines reads as a shell from a distance. This design is a good choice if you’re short on time but still want a beach touch. Try using nail stickers if freehand painting feels hard. Many craft stores sell shell stickers for a few dollars that stick right onto wet polish. Seal everything with a top coat so the sticker stays in place. This look pairs well with neutral outfits and works for both casual days and dressier beach dinners.
4. Coral Reef French Tips
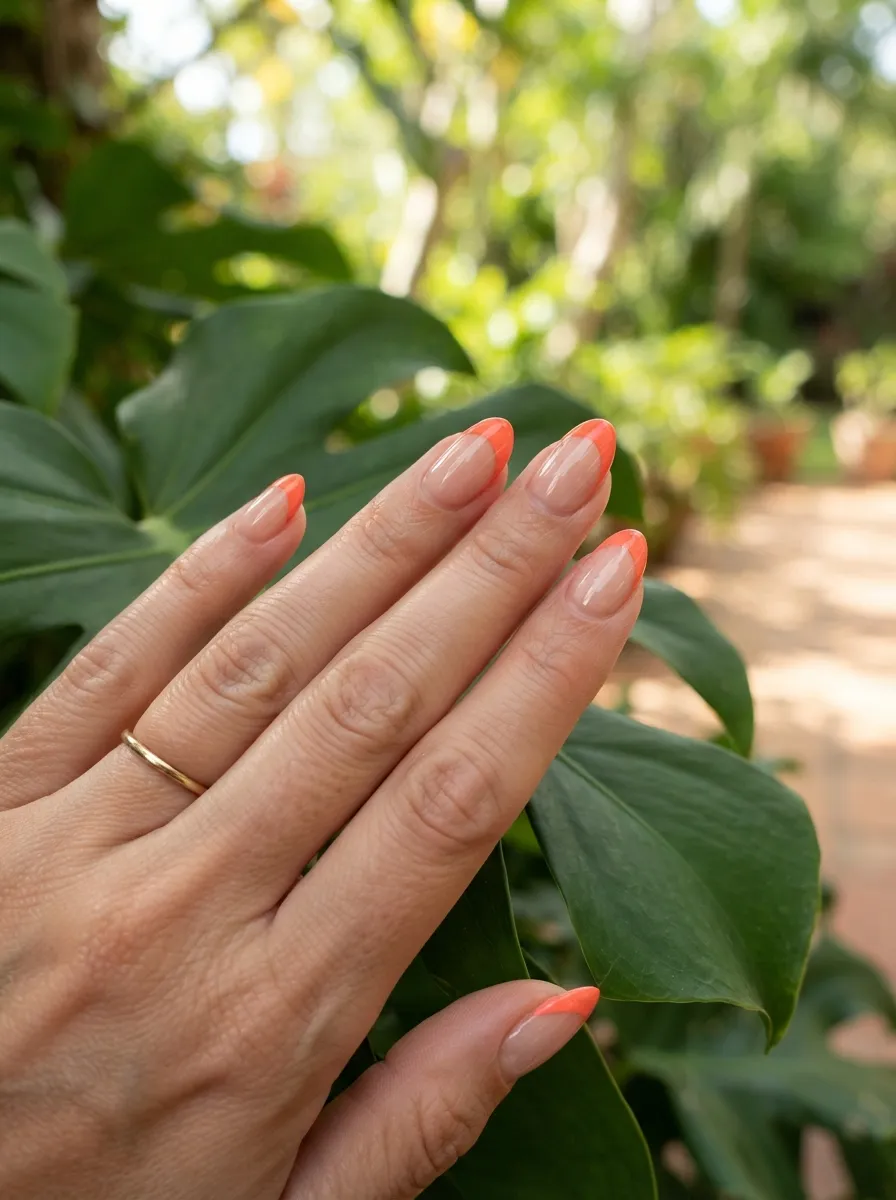
Swap the classic white french tip for a coral orange shade instead. This small change turns a basic manicure into something that feels tropical. Use a nude or sheer pink base coat, then paint just the tip of each nail with a bright coral polish. A french tip guide sticker, sold cheaply at most beauty stores, makes clean lines easy even for beginners. Let each layer dry fully before adding the next to avoid smudging. This design works on short nails just as well as long ones, which makes it flexible for everyone. Coral pairs beautifully with tanned skin and bright swimsuits. If you want extra shine, finish with a glossy top coat. This is one of the easiest beach looks to recreate at home since it only needs two polish colors and a steady hand. Total supply cost usually stays under twelve dollars.
5. Palm Tree Silhouette Nails
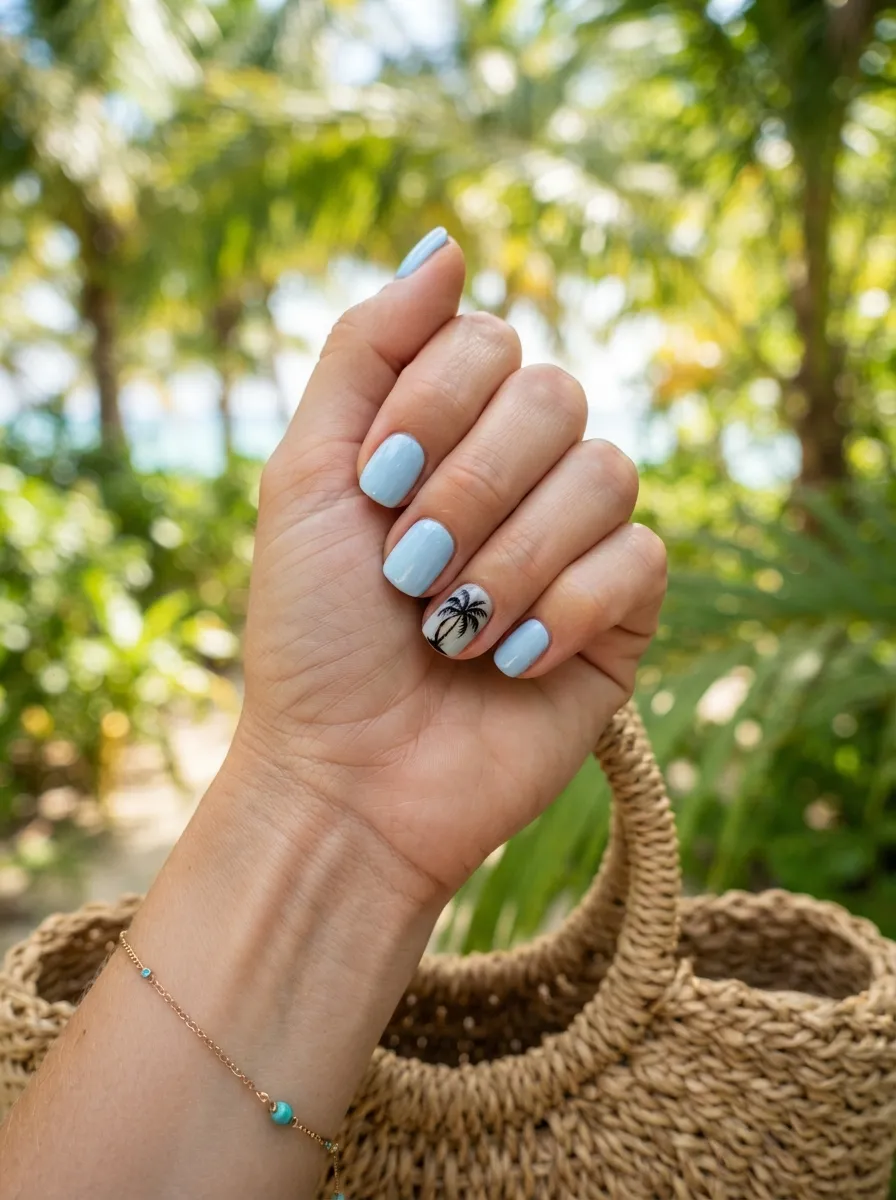
Palm tree silhouette nails are simple but full of personality. Paint your nails a light sky blue or soft yellow base. On one or two accent nails, use a thin black nail art pen to draw a small palm tree trunk with a few curved leaves on top. It doesn’t need to be perfect since a rough sketch still reads as a palm tree. Nail art pens cost just a few dollars and are easy to find at drugstores. Practice the shape on paper a couple times before painting your nails. This design brings a fun island feel to any manicure and works well for vacation photos. Pair it with simple solid colors on the other nails so the palm tree stands out. Seal with a top coat for extra shine and durability. This look holds up well for about a week with normal daily activities.
6. Sunset Gradient Nails
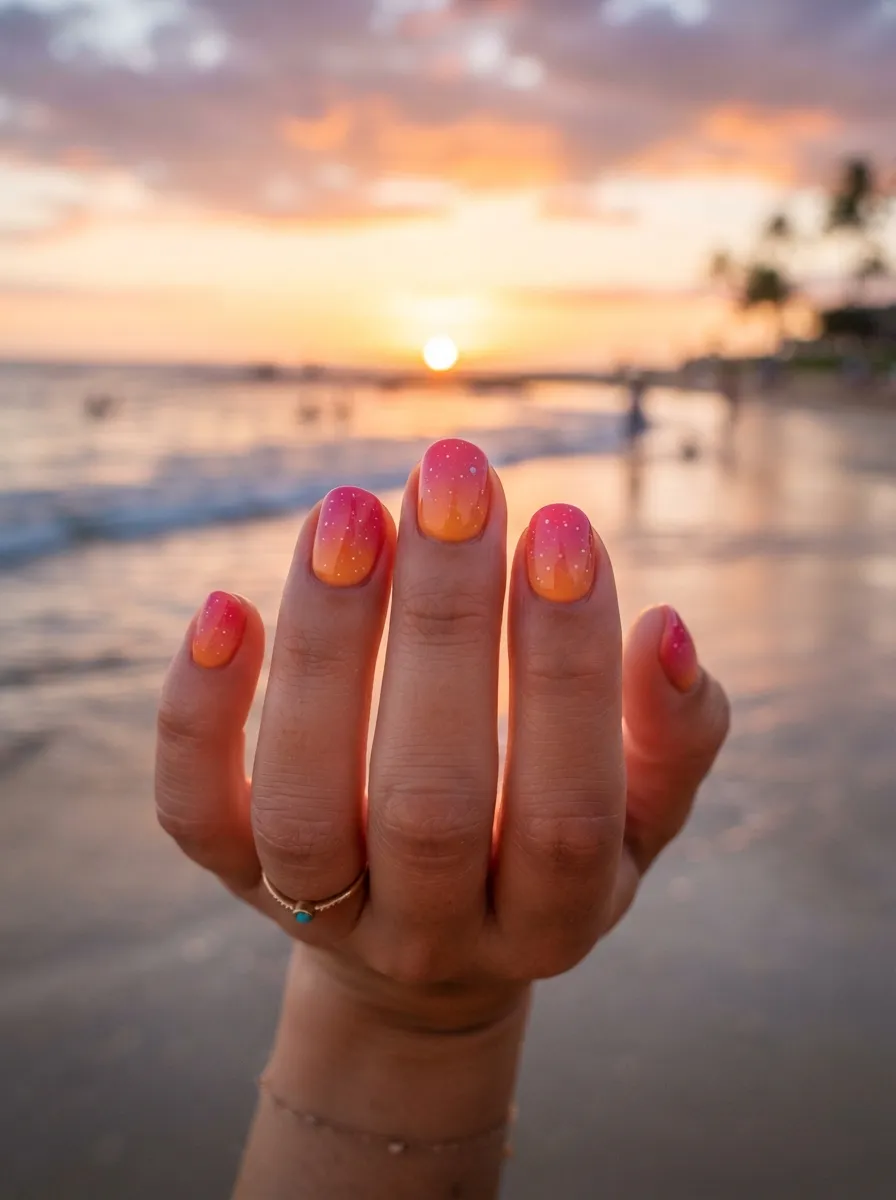
Sunset gradient nails capture that warm evening beach glow. Use three shades: a soft yellow, a warm orange, and a light pink or purple. Apply each color in a horizontal band across the nail, then blend the edges together using a makeup sponge before the polish dries. This creates a soft transition similar to a real sunset. It takes a bit of practice to blend evenly, so try one nail first before doing the rest. A glossy top coat adds shine that mimics warm evening light. This design pairs beautifully with gold jewelry and simple outfits. It’s a great choice for beach weddings, sunset dinners, or evening walks along the shore. All three polish shades can usually be found in one drugstore rack for a low combined cost. Keep a cotton swab dipped in nail polish remover nearby to clean up any smudges around the cuticle for a neat finish.
7. Mermaid Scale Nails
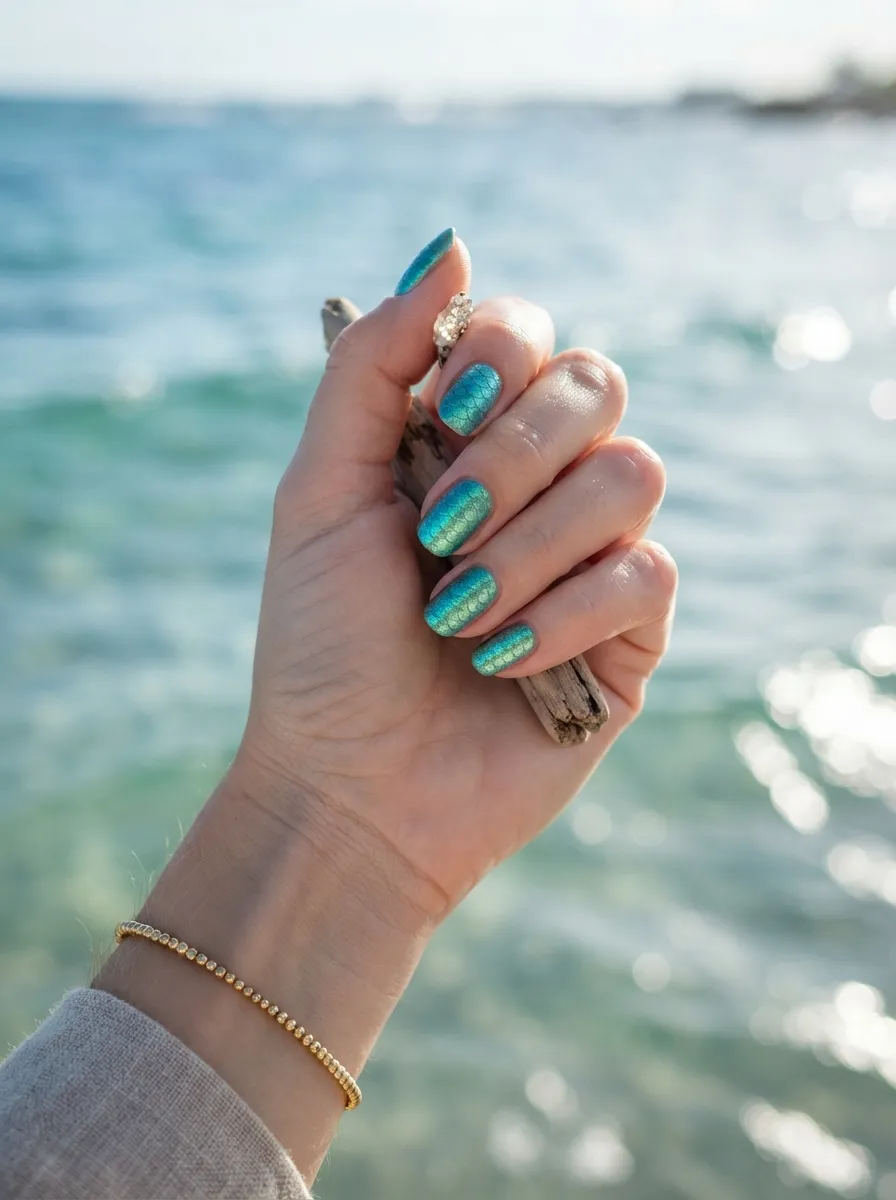
Mermaid scale nails bring shimmer and texture to your summer look. Start with a teal or emerald green base polish. Using a small round brush or even a bobby pin dipped in silver polish, dab small overlapping half circles across the nail to mimic scales. Layer a shimmery top coat over the design for extra sparkle. This look takes patience but doesn’t require expensive tools. A bobby pin works just as well as a fancy nail art tool for the dabbing technique. Try practicing the scale pattern on a spare nail wheel or paper before starting on your real nails. This design pairs nicely with swimsuits and beach cover ups in blue or green tones. It photographs beautifully in sunlight thanks to the shimmer finish. This is a fun project for a rainy beach day when you’re stuck indoors and want something creative to do with your hands.
8. Pearl White Chrome Nails
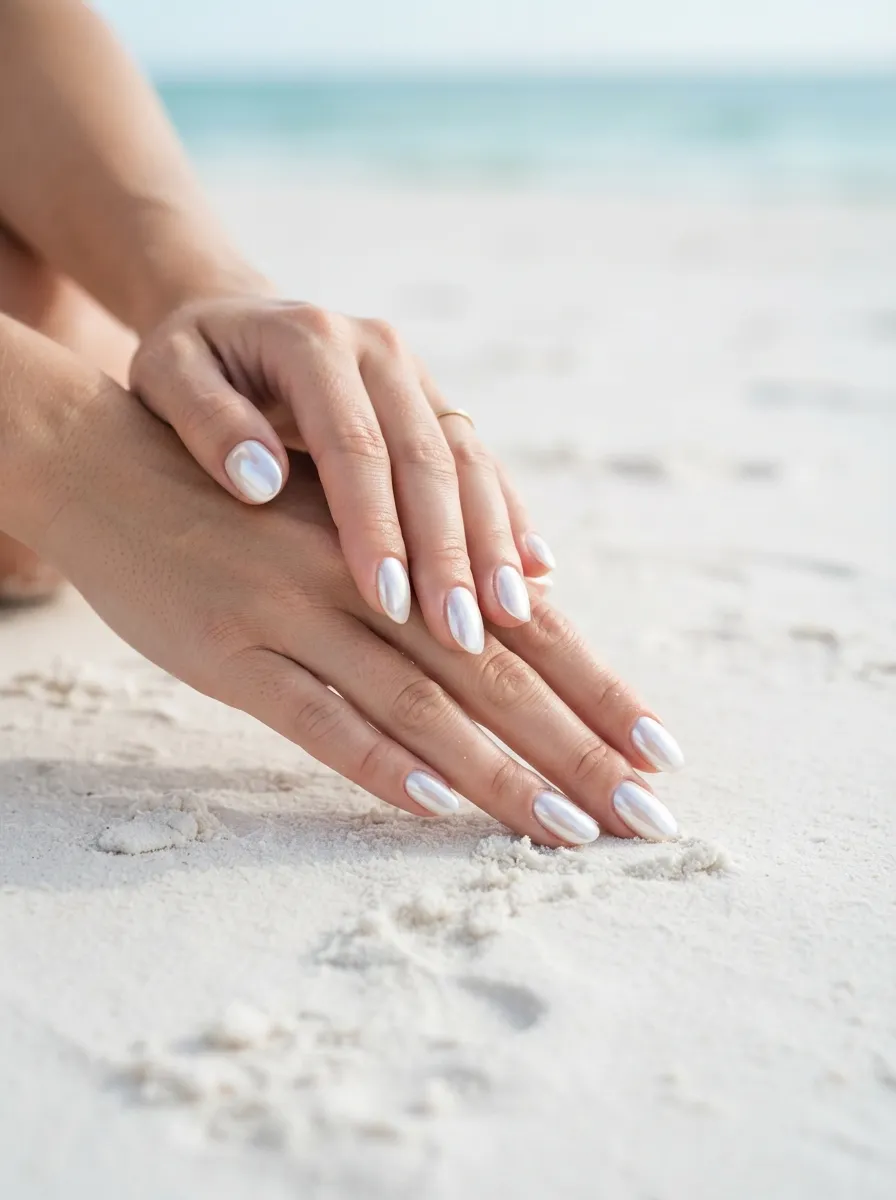
Pearl white chrome nails give off a soft, glowing shine that looks like polished seashells. You can create this effect at home using a white base polish and a chrome powder kit, which usually costs around ten to fifteen dollars and lasts for several manicures. Paint your nails white, let them dry fully, then rub the chrome powder on using the small sponge applicator included in most kits. The result is a smooth, pearly finish that catches light beautifully. This look works for both casual beach days and dressier evening events. It pairs well with simple gold or silver rings for a clean, elegant style. If chrome powder feels too advanced, a pearl finish top coat over white polish gives a similar softer glow. This design holds up well against water exposure once fully cured, making it a smart choice for swimming and sunbathing.
9. Starfish Nail Art
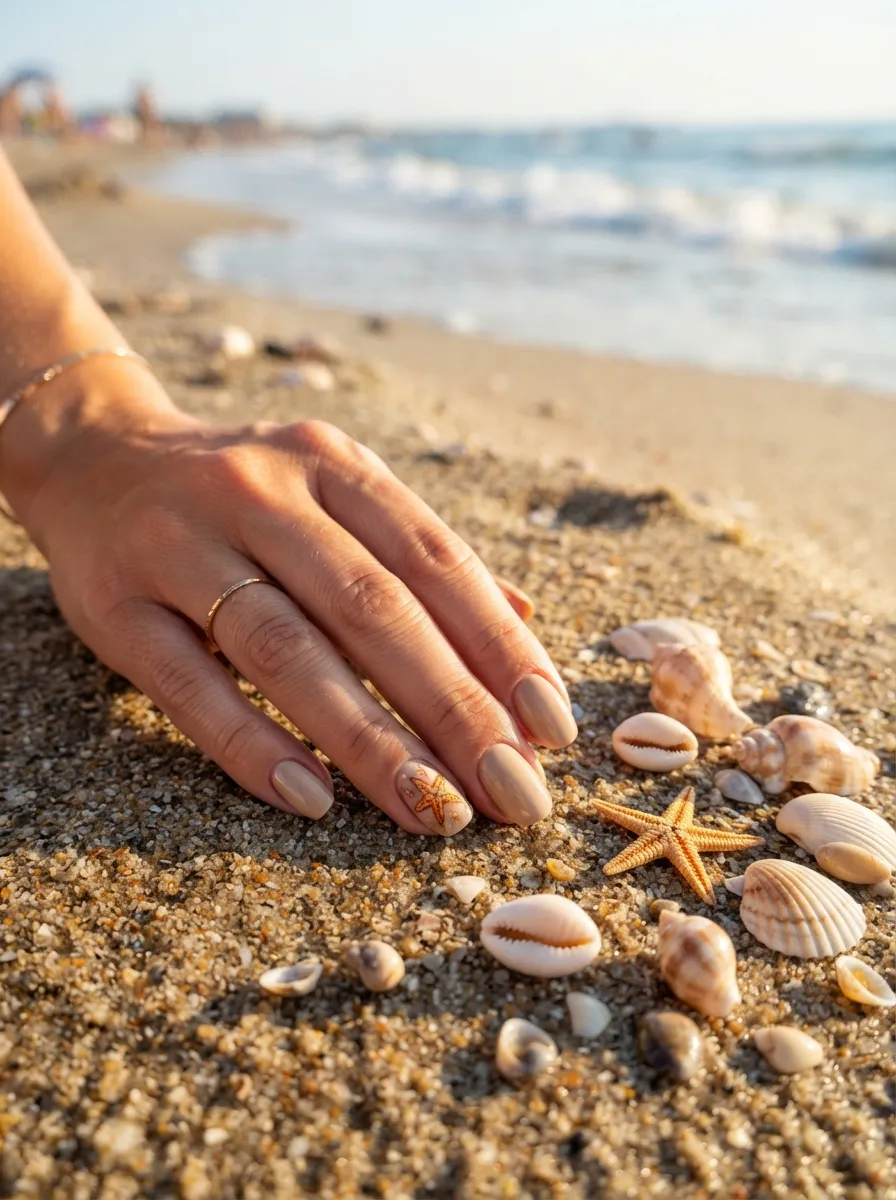
Starfish nail art adds a playful beach detail without much effort. Paint your nails a sandy beige or soft white base. On one accent nail, use orange or coral polish to paint a simple five point star shape, then add small dots with a toothpick for texture. This design doesn’t require a steady hand since starfish are naturally uneven and rounded. A toothpick or bobby pin works just as well as a fine detail brush for the dots. This look is a fun beach themed detail that pairs well with plain colors on the remaining nails. Kids and beginners can copy this design easily since it only needs one simple shape. Seal with a top coat to keep the paint from chipping during sandy beach activities. This is a low cost option since it only requires polish you likely already own plus one accent color.
10. Tropical Hibiscus Nails
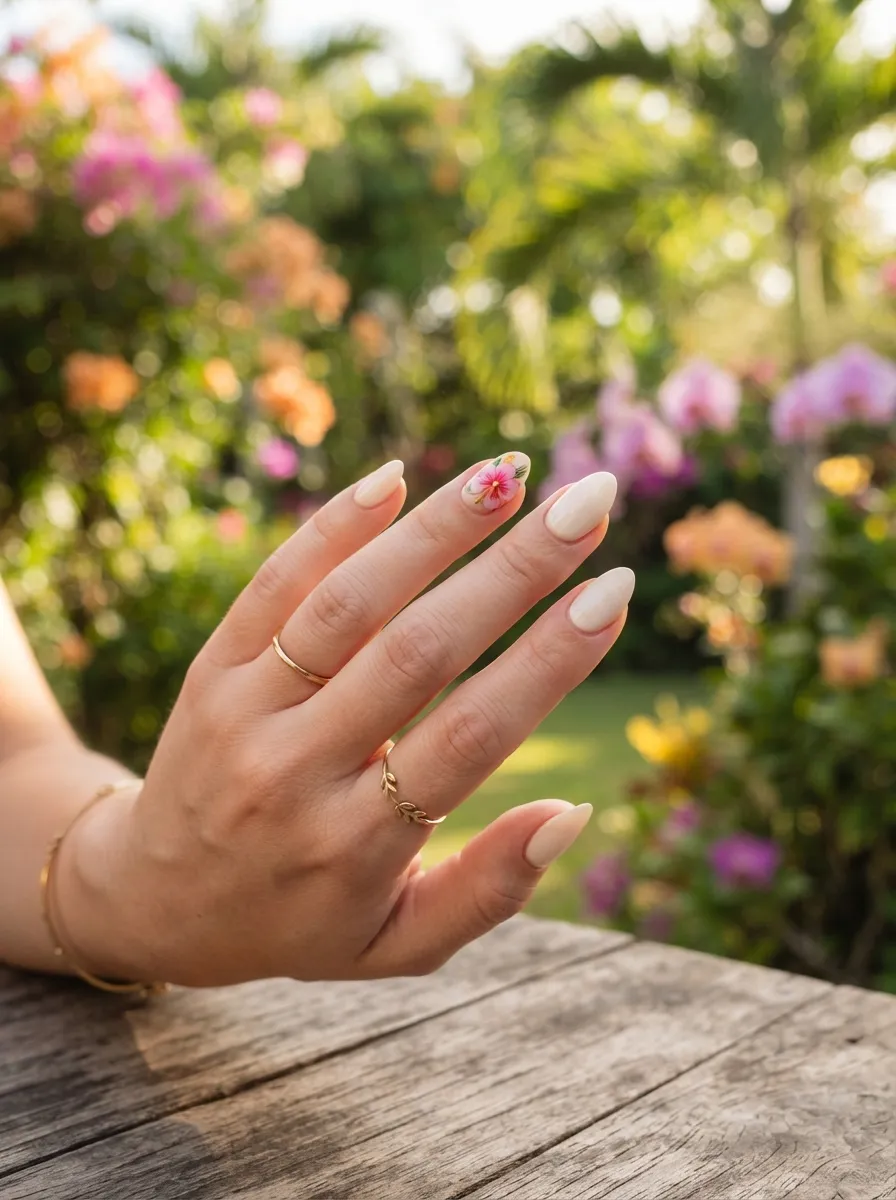
Tropical hibiscus nails bring a floral pop to your beach look. Paint your nails a cream or soft pink base. On one or two nails, paint five small oval petals in a circle using pink or red polish, then add a yellow dot in the center. This flower shape is simple enough for beginners to recreate with a basic detail brush. Practice the petal shape on paper first if you’re nervous about symmetry. This design pairs beautifully with tropical print swimsuits and sarongs. It also works well for beach vacations, luaus, or summer parties. A dotting tool helps create clean, round petals without much effort. Seal the design with a glossy top coat for a fresh, dewy finish. This look costs very little since it only needs a few polish colors you can find in most home collections or a low cost drugstore trip.
11. Aqua Marble Nails
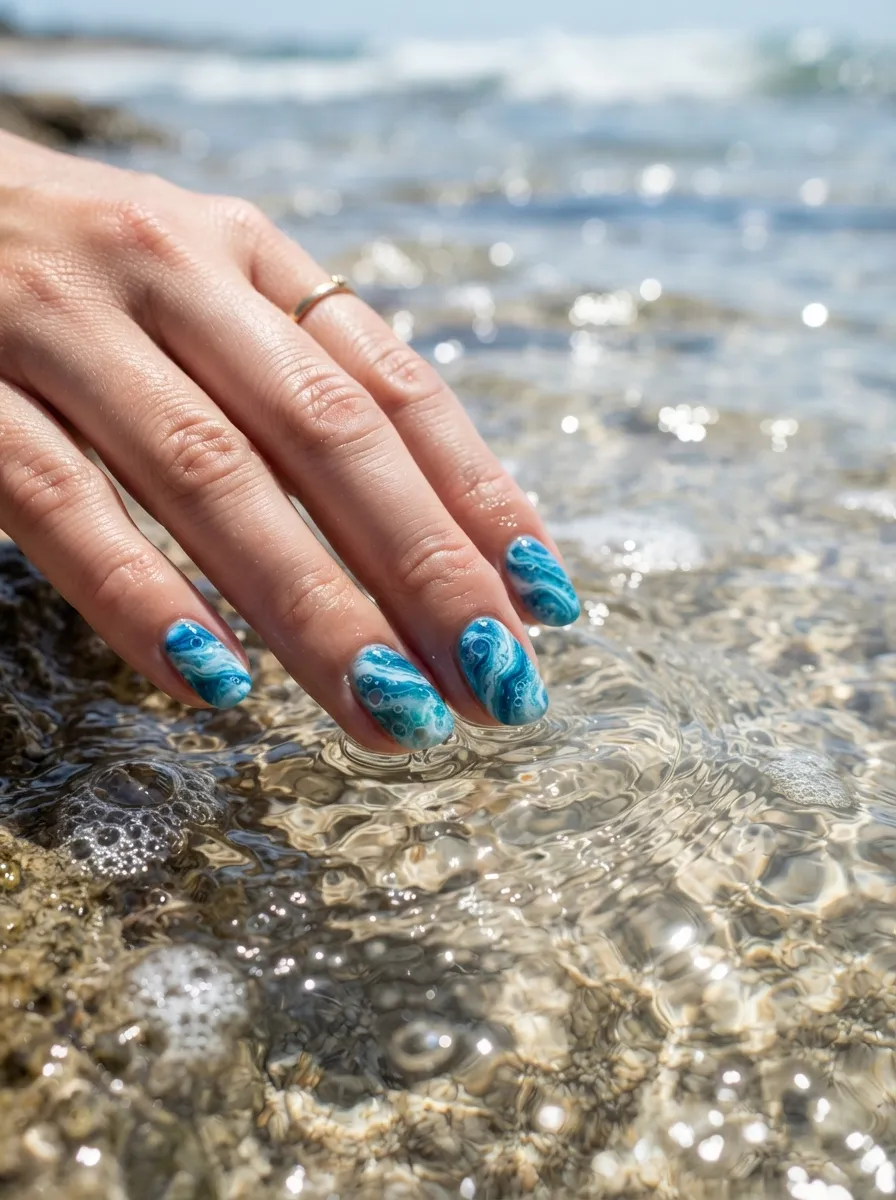
Aqua marble nails mimic the swirling look of ocean water. To create this at home, drop small dots of blue and white polish into a cup of room temperature water, then swirl them together using a toothpick. Dip your nail into the swirled pattern and pull it out slowly. This water marbling technique takes practice but produces stunning results once mastered. Try practicing on a few spare nails or a paper plate before committing to your full set. Tape around your fingers first to protect your skin from extra polish, then clean up any mess with a cotton swab dipped in remover. This design looks like moving water and pairs beautifully with silver jewelry. It’s a fun weekend project for anyone who enjoys a bit of a creative challenge. Supplies for this look are minimal since you likely already own the polish colors needed.
12. Golden Sand Glitter Tips
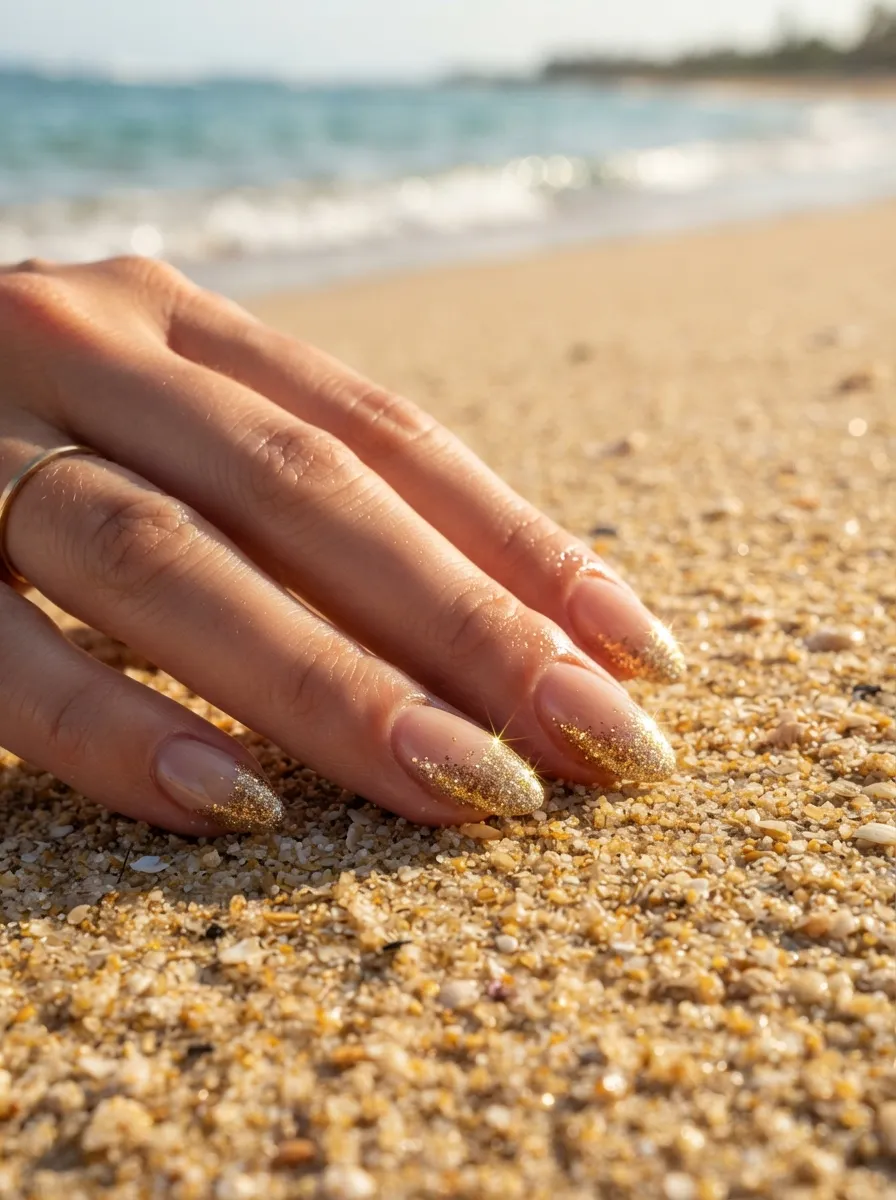
Golden sand glitter tips bring texture and shine to a simple manicure. Paint your nails a nude or soft pink base, then apply gold glitter polish just to the tips using a small brush or sponge. The glitter mimics sand catching sunlight and adds a festive touch without covering the whole nail. This look is beginner friendly since glitter naturally hides small mistakes. A cheap glitter top coat from any drugstore works well here. Let each layer dry fully to avoid clumping. This design pairs beautifully with tan skin and gold accessories. It’s a great choice for beach parties, birthdays, or summer weddings. If you want extra durability, apply a thick top coat over the glitter to smooth the texture and prevent snagging. This manicure usually lasts about a week and costs very little since one glitter polish bottle covers many manicures.
13. Pineapple Pattern Nails
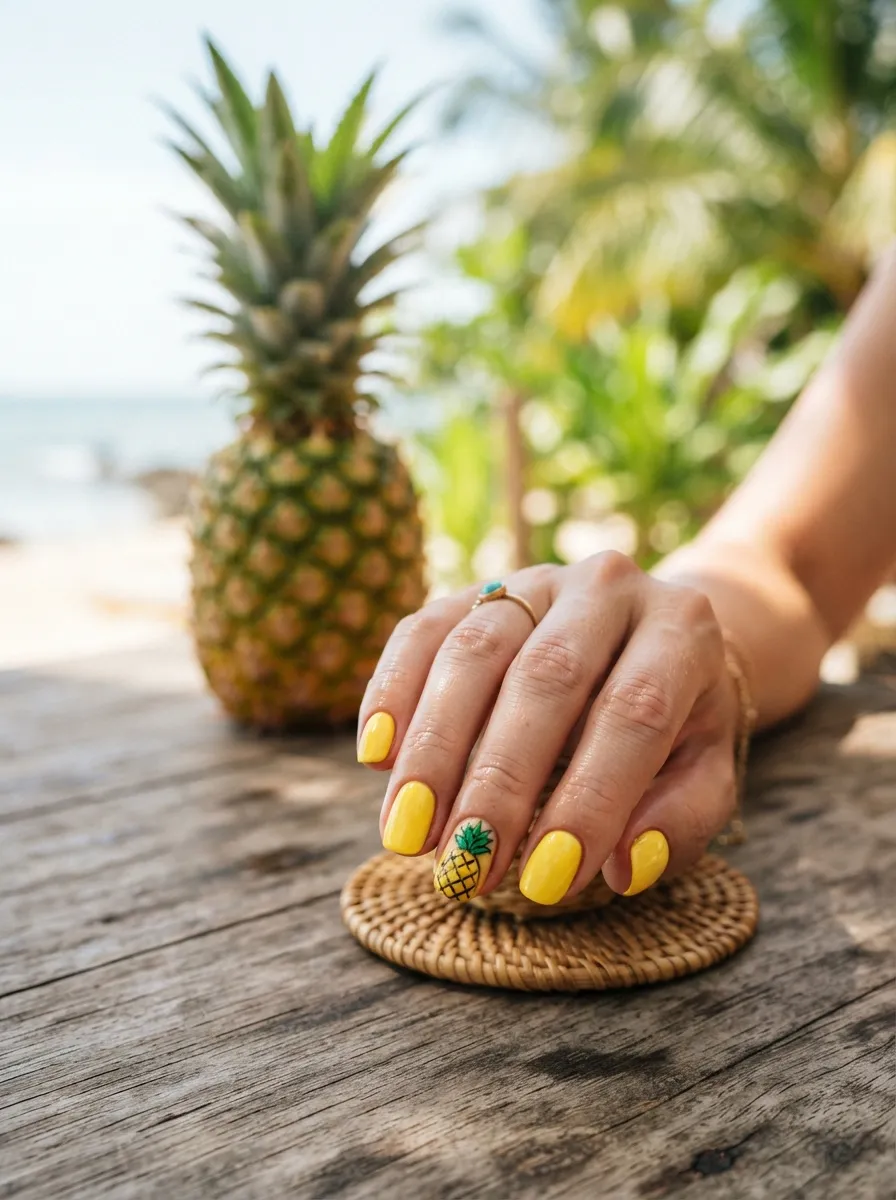
Pineapple pattern nails add a fun, fruity twist to your summer look. Paint your nails a bright yellow base. On one accent nail, use a detail brush to draw a small crosshatch pattern in gold or brown, then add short green leaf shapes at the top using a different brush. This design looks complex but only needs a few simple lines and dots. Practice the crosshatch pattern on paper first to get comfortable with the spacing. This look pairs well with tropical prints and works for beach parties, summer barbecues, or vacation days. Kids often enjoy this design too since pineapples are playful and easy to recognize. Seal with a top coat for shine and lasting power. This manicure is budget friendly since it only requires yellow, green, and brown polish, which most people already have in their collection.
14. Watermelon Beach Nails
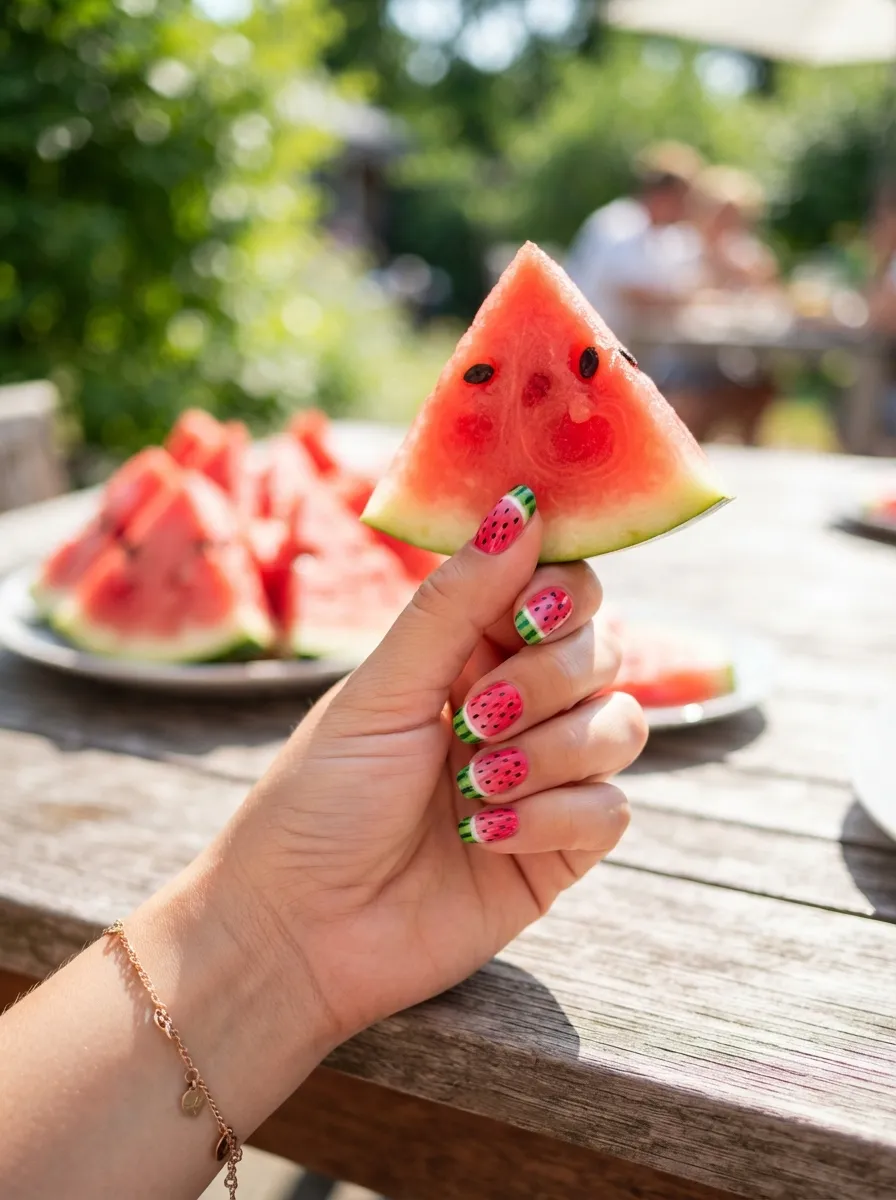
Watermelon beach nails are playful and easy to make. Paint most of your nail pink, then add a thin green stripe near the base and a white line between the pink and green sections. Use a small brush or toothpick to add tiny black dots for seeds. This design works great for short nails since the sections are simple to paint even in tight spaces. Try using striping tape to keep your lines clean if freehand painting feels tricky. This look pairs well with bright summer outfits and adds a cheerful pop to any beach day. It’s also a fun design to try with kids since the steps are simple and forgiving. Seal everything with a glossy top coat for a juicy, fresh finish. Supplies for this design are minimal and likely already sitting in your nail polish collection at home.
15. Cloud Blue Sky Nails
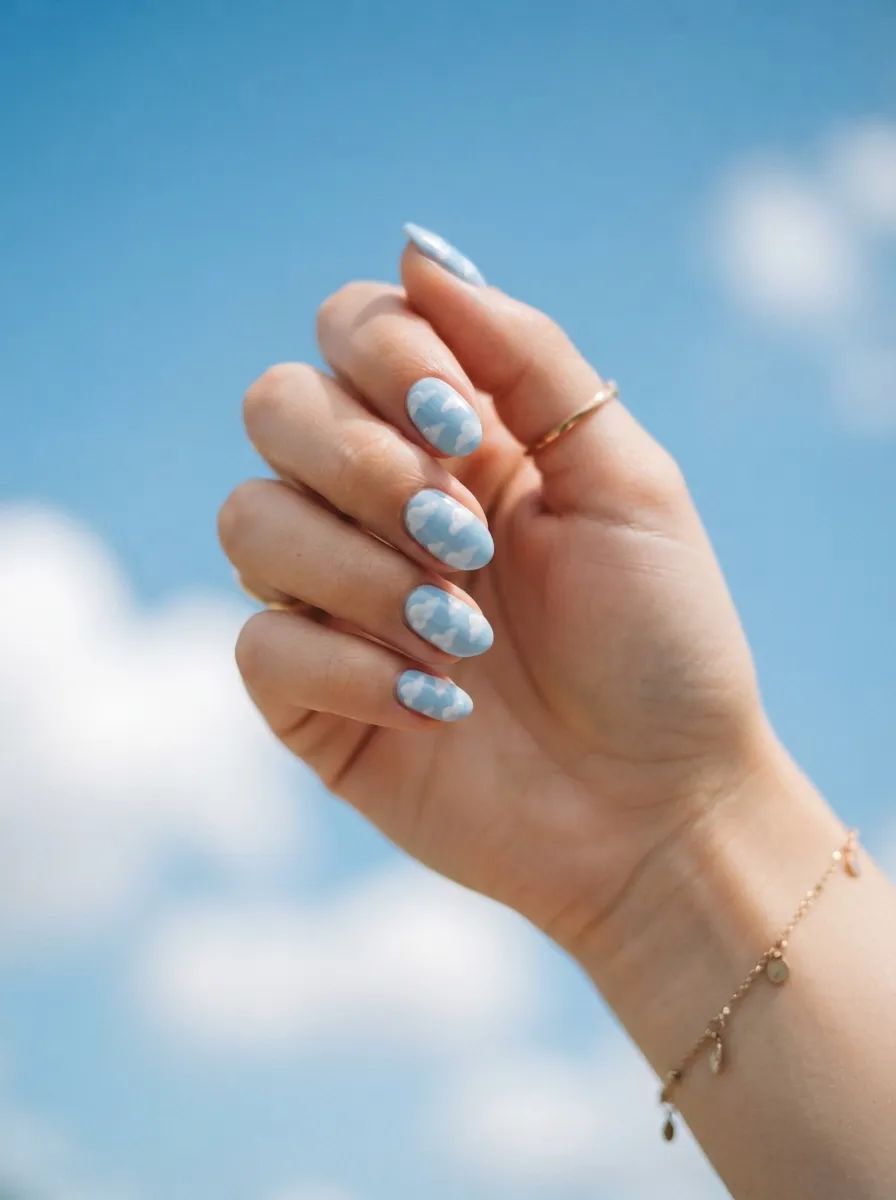
Cloud blue sky nails bring a calm, dreamy feel to your beach look. Paint your nails a soft sky blue base. Using white polish and a small round sponge or brush, dab a few soft cloud shapes across each nail. Keep the edges soft and uneven since real clouds are never perfectly shaped. This design is beginner friendly since clouds don’t need to be symmetrical to look good. A cotton swab dabbed lightly in white polish also works well for a soft cloud texture. This look pairs beautifully with white or blue swimsuits and feels light and airy for hot summer days. Seal with a glossy top coat for a fresh, clear sky finish. This manicure is simple enough to finish in under thirty minutes and only requires two polish colors, making it one of the most affordable options on this list.
16. Salt Water Taffy Pastels
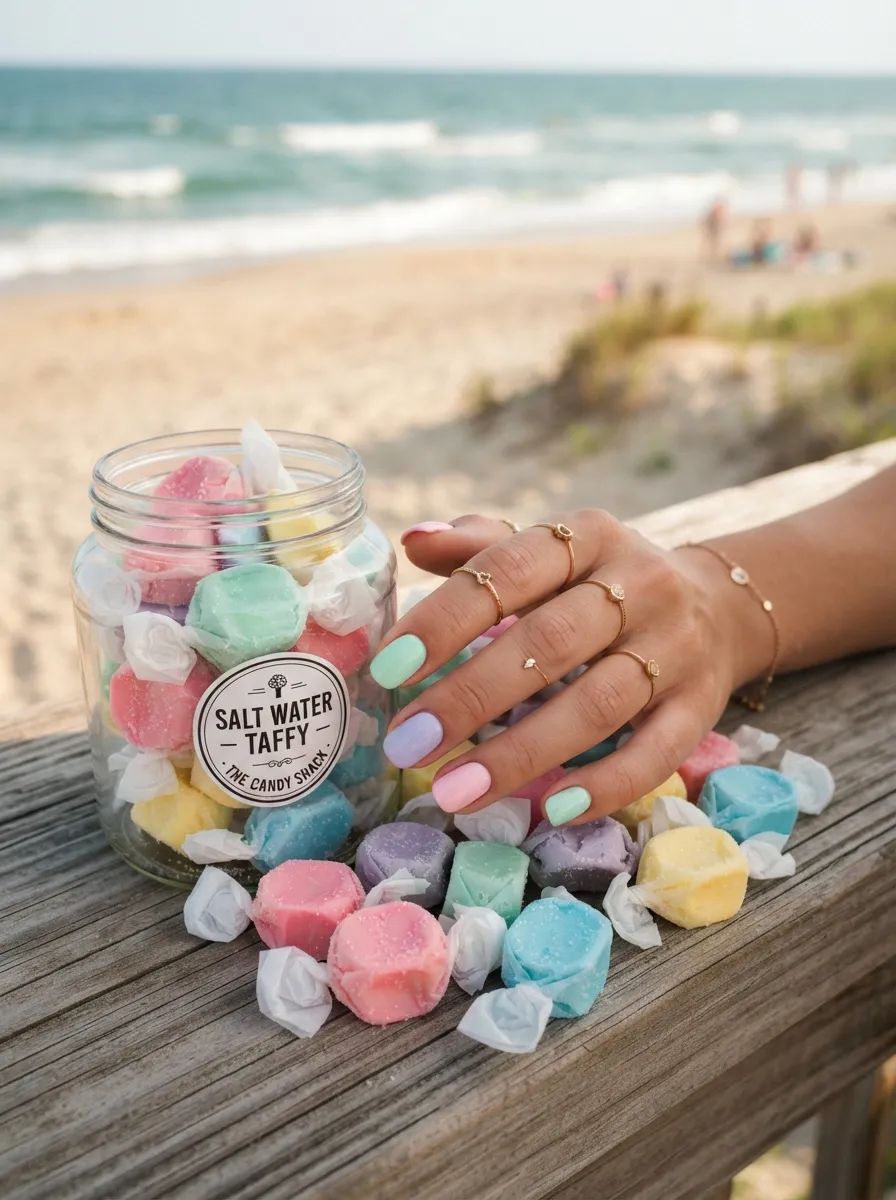
Salt water taffy pastels bring a candy colored twist to your beach manicure. Paint each nail a different soft pastel shade like pink, mint, lavender, or light yellow. This mix and match style is easy to do at home since you don’t need to worry about matching colors perfectly. Pull out a few pastel polishes you already own and pick four or five shades to rotate across your nails. This design works for any nail length and pairs beautifully with white or denim outfits. It’s also a great choice for beach vacations since the soft colors won’t clash with bright swimsuits. Seal each nail with a glossy top coat for a smooth, candy like shine. This manicure costs little to nothing if you already own a few pastel polishes, making it one of the easiest and most affordable looks on this list.
17. Beachy Boho Nail Art
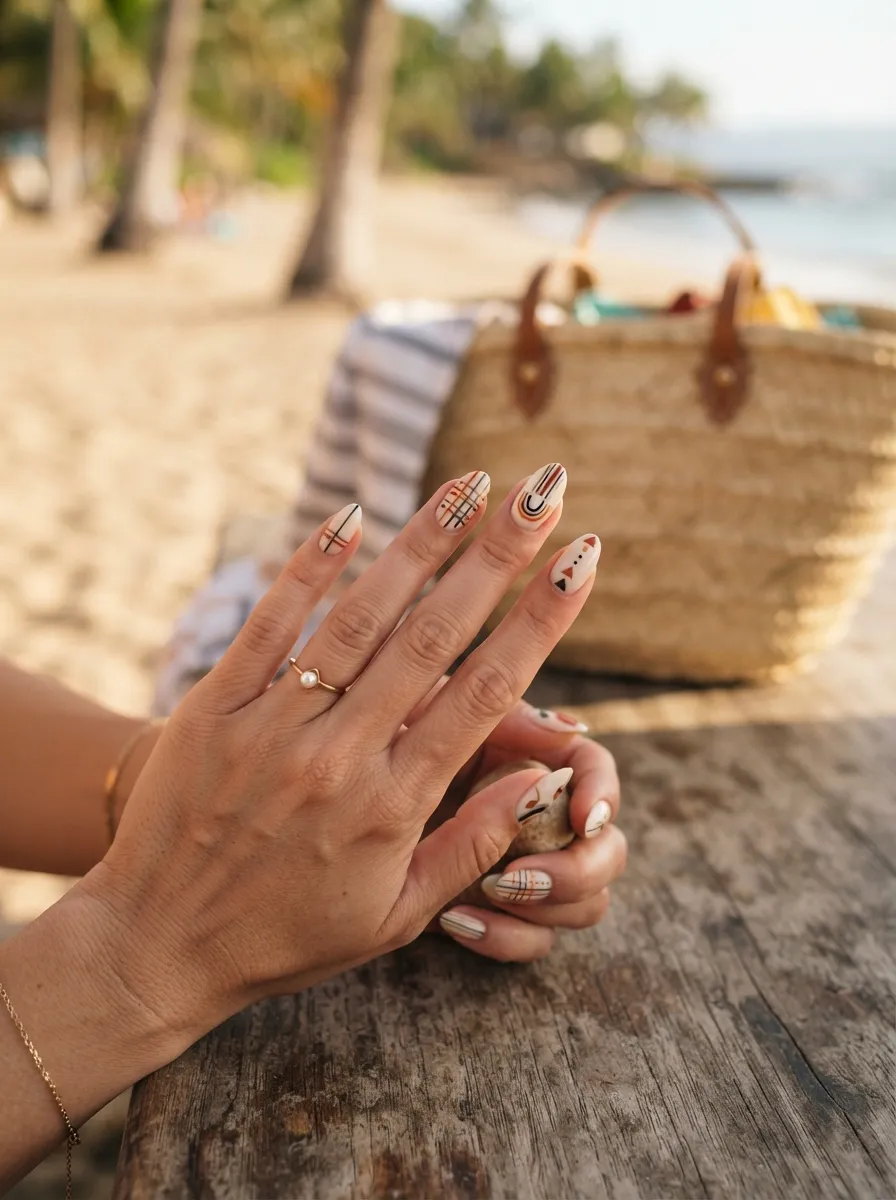
Beachy boho nail art mixes earthy tones with simple geometric shapes. Paint your nails a cream or tan base. Using a fine detail brush, add small triangles, dots, or thin lines in terracotta, rust, or soft brown polish. This design draws inspiration from woven beach bags and boho jewelry. You don’t need to follow an exact pattern since boho style embraces a relaxed, imperfect look. Try sketching a few patterns on paper first to find a design you like before painting your nails. This look pairs beautifully with flowy beach dresses and layered jewelry. It works well for beach weddings, summer festivals, or casual vacation days. Seal with a matte top coat for an earthy, natural finish, or use a glossy one for extra shine. This manicure only needs a couple of earthy polish shades, keeping the cost low.
18. Nautical Stripe Nails
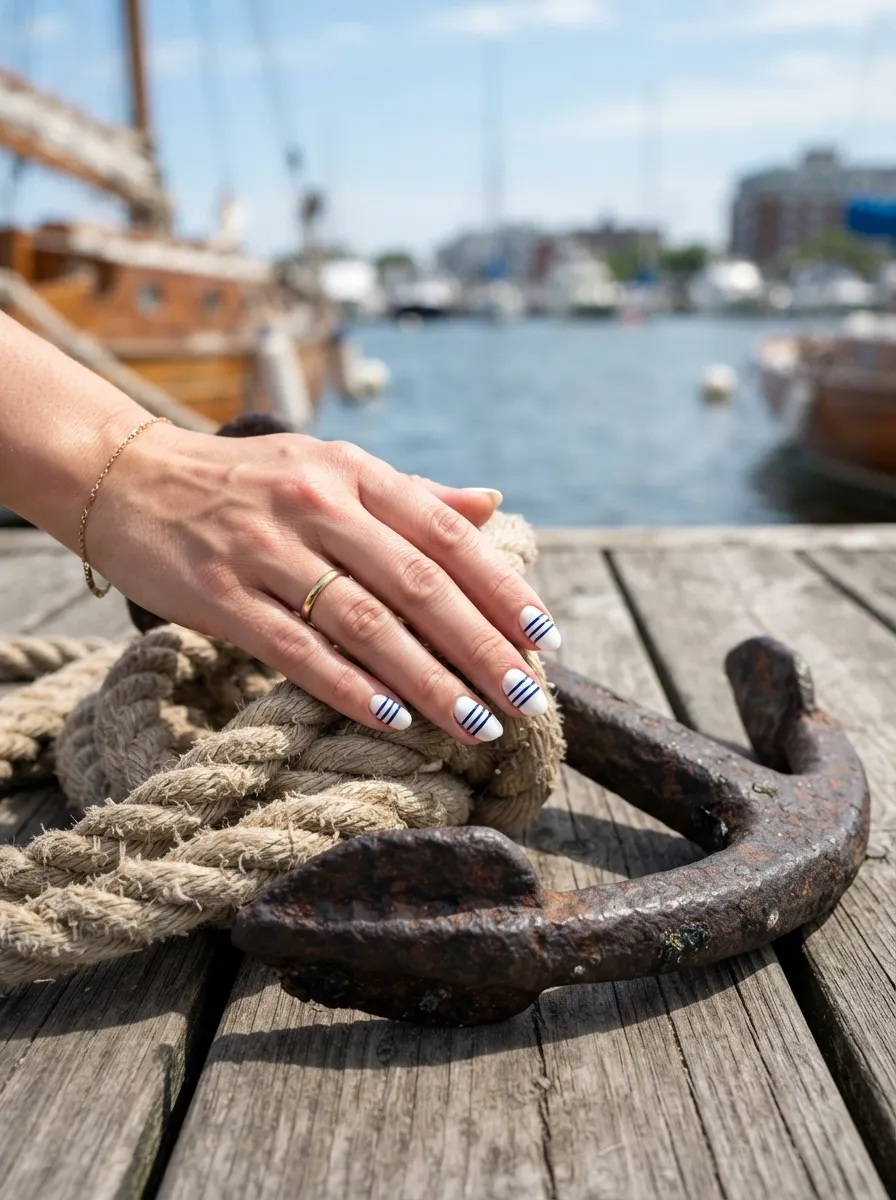
Nautical stripe nails bring a classic sailor inspired look to your summer manicure. Paint your nails white as a base. Using striping tape or a thin detail brush, add horizontal navy blue lines across each nail. Striping tape, sold cheaply at most beauty stores, makes this design simple even for beginners since it keeps your lines straight and clean. Peel the tape off carefully once the polish sets to reveal crisp stripes. This look pairs beautifully with red accents like a bold lip or red sandals for a full nautical theme. It works well for beach vacations, boat trips, or summer parties near the water. Seal with a glossy top coat for a clean, polished finish. This manicure is affordable since it only needs two polish colors and a roll of striping tape that can be reused for many future manicures.
19. Sea Glass Nails
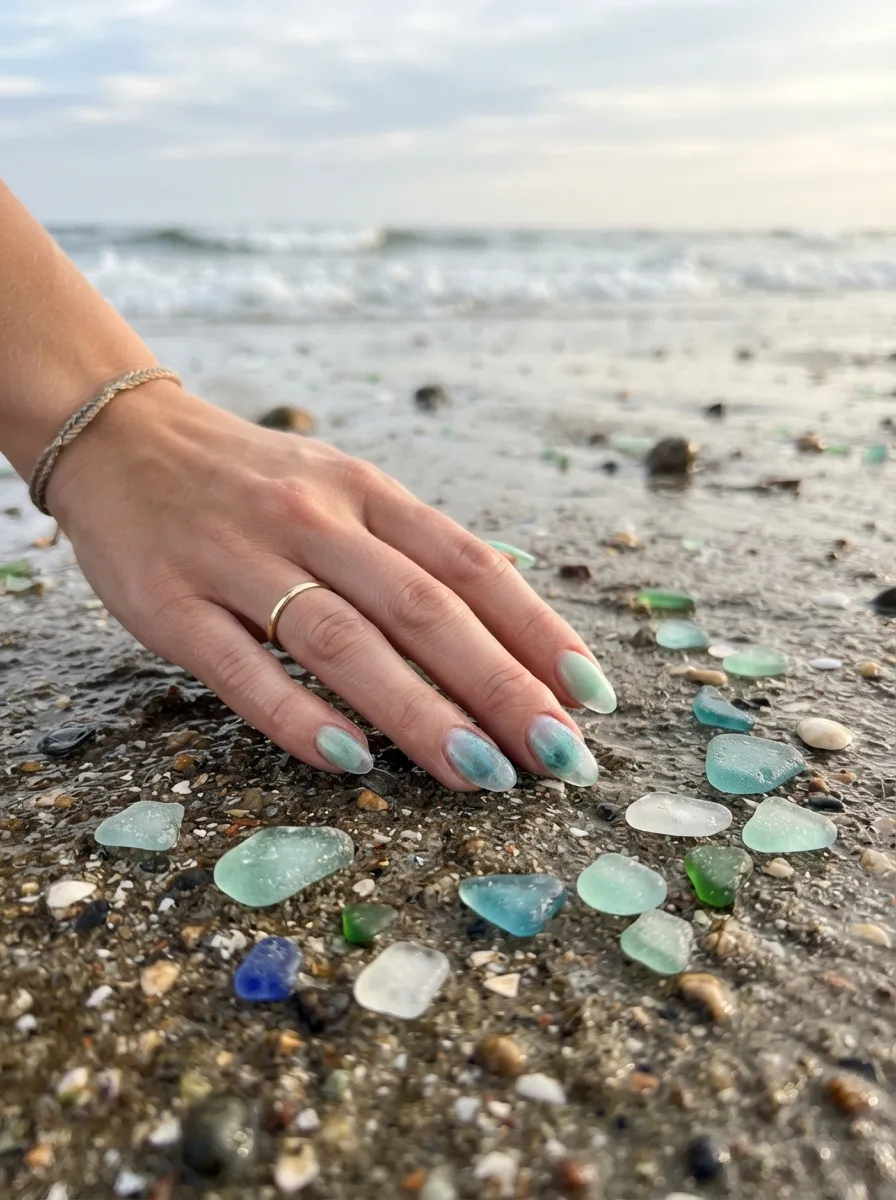
Sea glass nails capture the soft, frosted look of glass smoothed by ocean waves. Use sheer or jelly polish in soft green, blue, or lavender shades layered over a white or clear base. The translucent quality of jelly polish creates a soft glow similar to real sea glass. Apply thin layers and let each one dry fully for the best effect. This design pairs beautifully with silver jewelry and simple beach outfits. It’s a calming, soft look that works for both casual days and dressier evening plans. If jelly polish isn’t available, a sheer regular polish layered thin over a light base gives a similar effect. Seal with a glossy top coat for extra shine. This manicure is a good pick for anyone who wants something soft and subtle rather than bold or bright, and it costs very little since sheer polishes are widely available at low prices.
20. Flip Flop Tan Line Nails
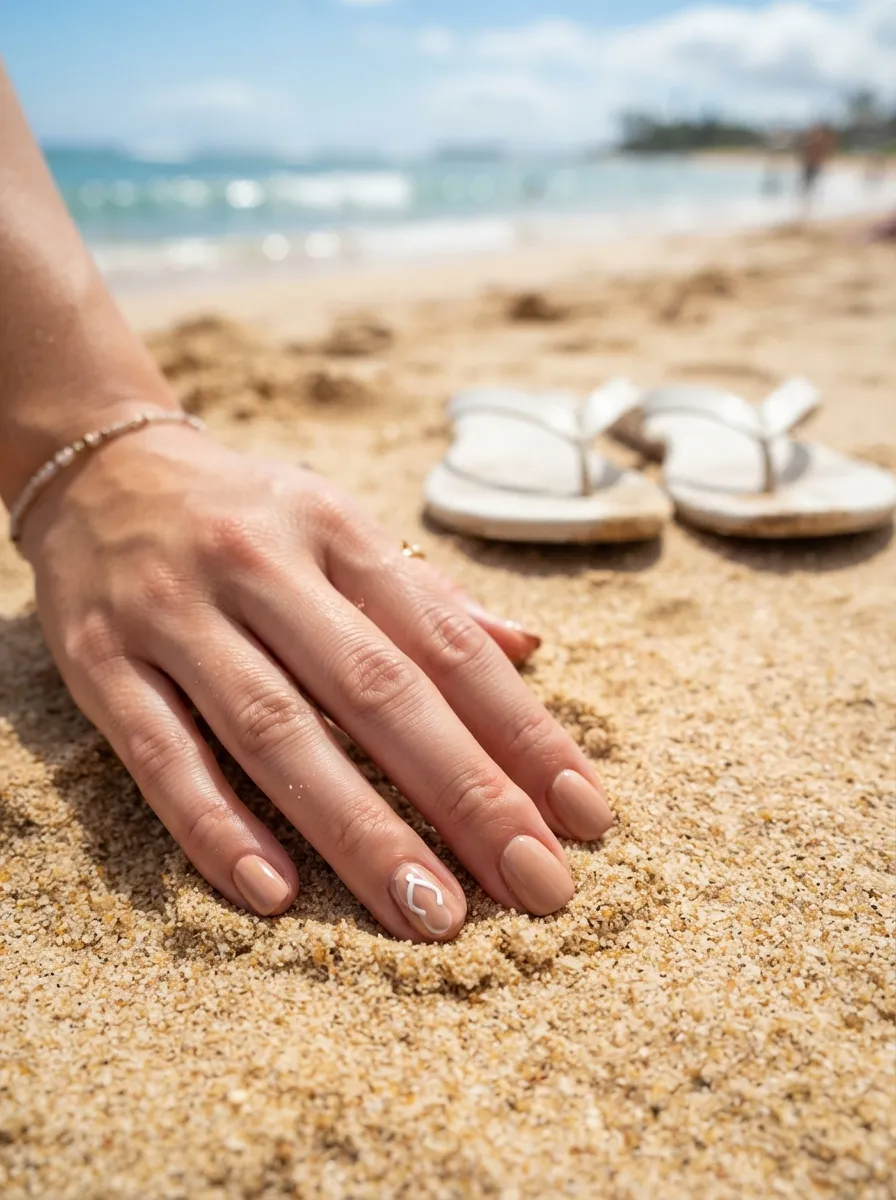
Flip flop tan line nails are a playful nod to summer footwear. Paint your nails a soft tan or sandy beige base. On one accent nail, use white polish and a thin brush to paint a small V shaped strap design, mimicking the classic flip flop tan line on your feet. This design is a fun conversation starter and easy to recreate with basic tools. A thin detail brush or even a toothpick works well for the strap lines. This look pairs nicely with simple summer outfits and beach sandals. It’s a lighthearted option for anyone who wants a beach themed manicure with a bit of humor. Seal with a top coat for shine and durability. This manicure is low cost since it only requires a tan base polish and one accent color, both of which are likely already in your collection.
21. Coconut Cream Nails
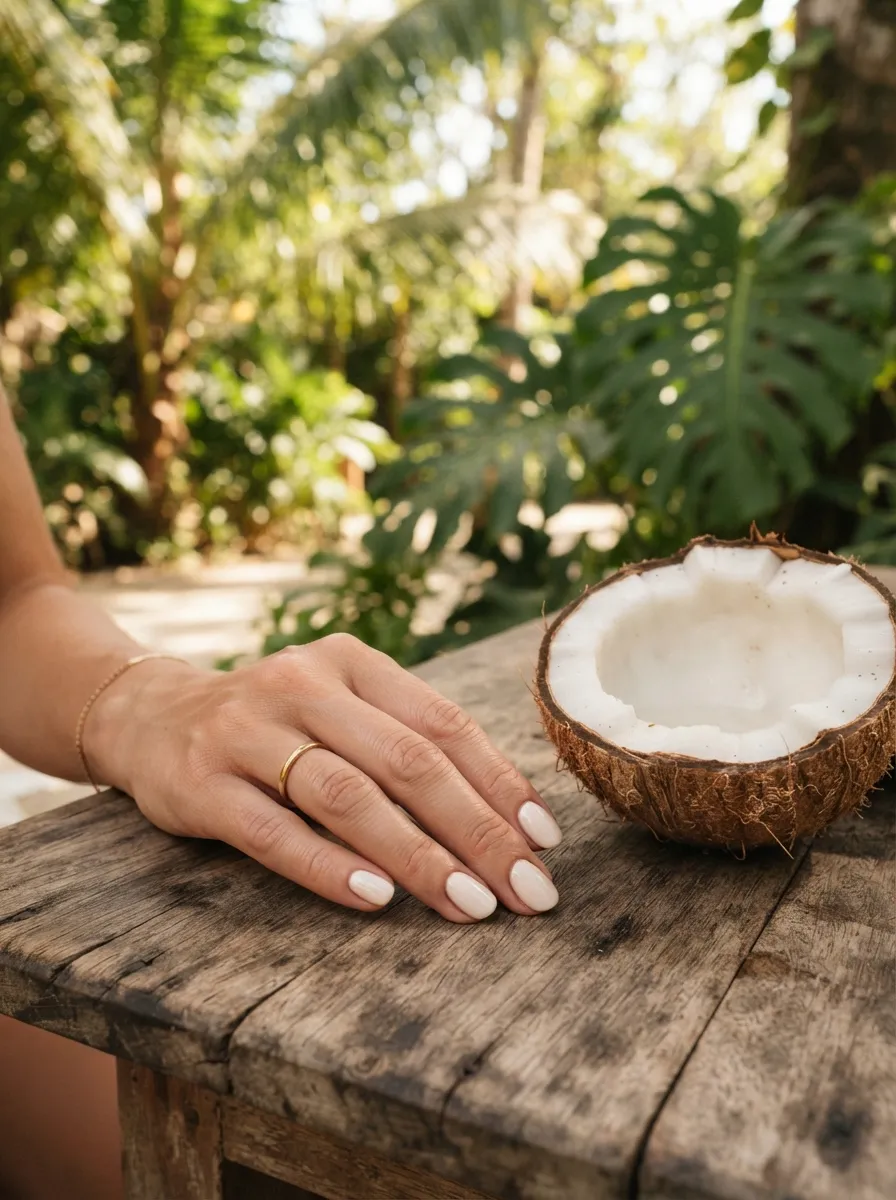
Coconut cream nails offer a soft, milky white finish that feels clean and simple. Use a creamy white or off white polish for a smooth, opaque coat. This shade works beautifully against tanned skin and pairs with almost any summer outfit. Apply two thin coats for full coverage without a streaky finish. This look is a great choice for anyone who wants a beach manicure without bold colors or detailed art. It’s also one of the easiest designs on this list since it only requires one polish color. A glossy top coat adds a soft shine similar to coconut flesh, while a matte top coat gives a more subtle, powdery finish. This design works for both short and long nails and holds up well throughout busy beach days. Since it only needs one bottle of polish, this is one of the most affordable options here.
22. Sunburst Yellow Nails
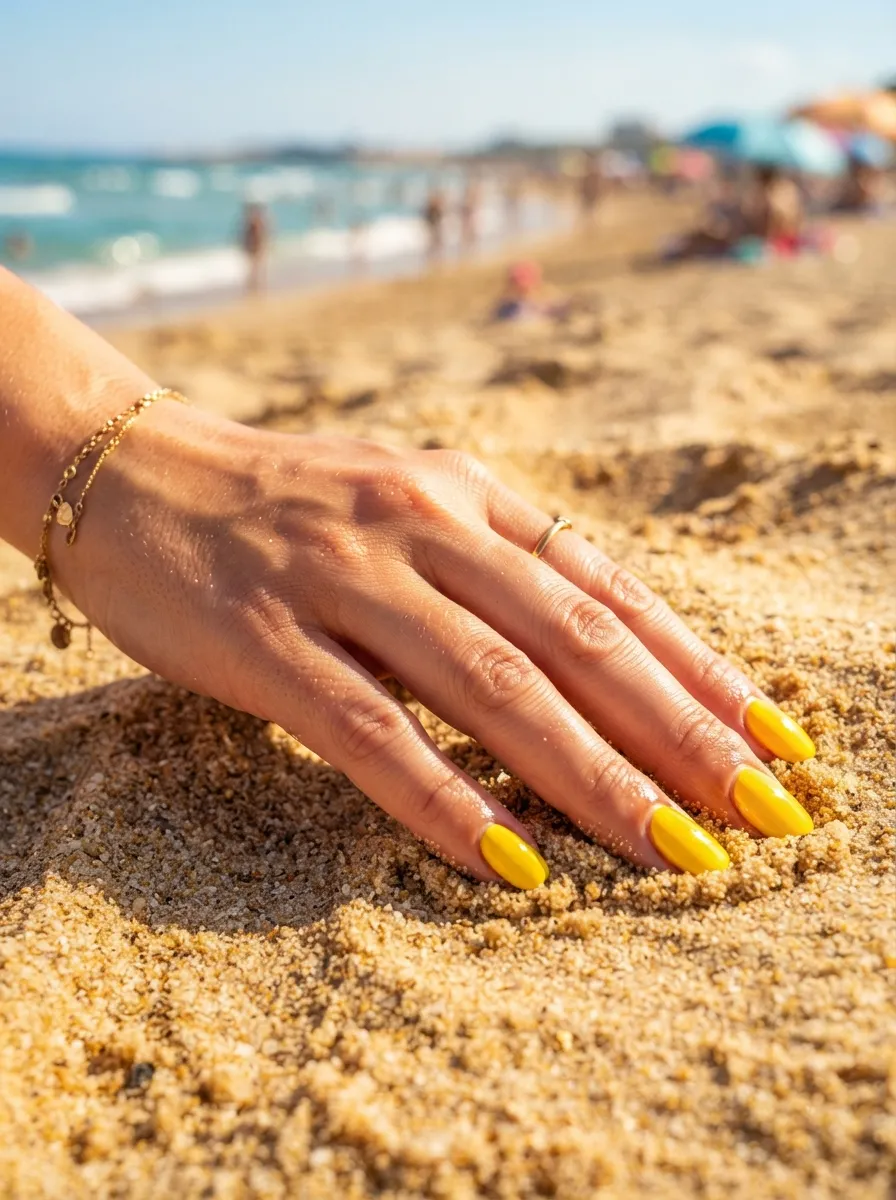
Sunburst yellow nails bring bold, cheerful energy to your summer look. Paint your nails a bright, warm yellow shade for a manicure that feels like sunshine. This color pairs beautifully with tanned skin and bright summer outfits. Apply two thin coats for even coverage, since yellow polish can sometimes appear streaky with just one layer. This look works well on its own or paired with a small gold accent on one nail for extra shine. A glossy top coat adds a warm glow similar to afternoon sunlight. This manicure is a good pick for anyone who wants a bold color without complicated nail art. It photographs beautifully against blue ocean water and white sand. Since this design only needs one polish color, it stays budget friendly and quick to apply, usually taking less than twenty minutes from start to finish.
23. Aloha Flower Nails
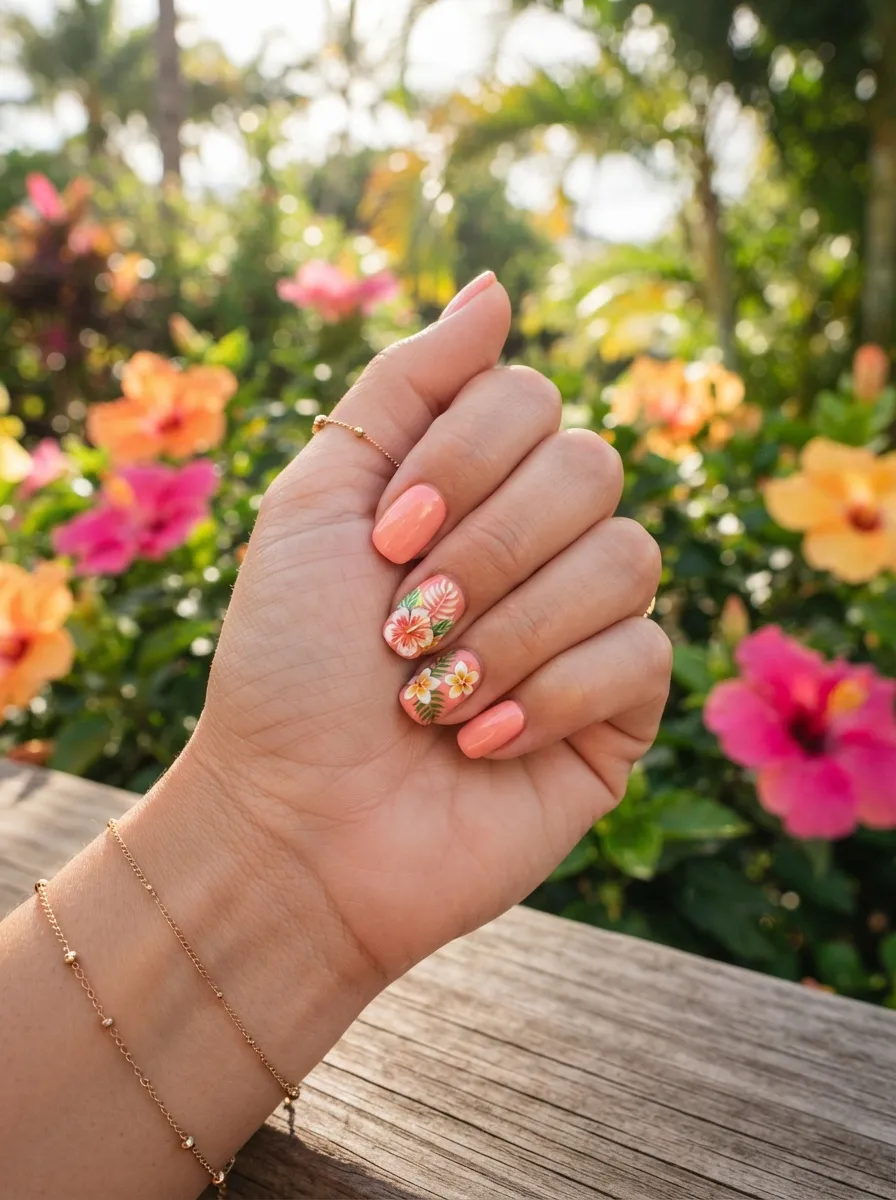
Aloha flower nails bring a full tropical statement to your summer manicure. Paint your nails a soft coral or white base. On two accent nails, paint small tropical flowers in pink, orange, and yellow using a fine detail brush. Add small green leaves between the flowers for extra depth. This design takes a bit more time than others on this list, but the payoff is a manicure that feels like a real Hawaiian print. Try practicing the flower shapes on paper before starting on your nails. This look pairs beautifully with tropical dresses and beach vacations. It’s a fun choice for anyone who wants their nails to double as a conversation piece. Seal with a glossy top coat for lasting shine. This manicure uses a few extra polish colors, but all of them are common shades that are easy to find at a low cost.
24. Rippling Water Nails
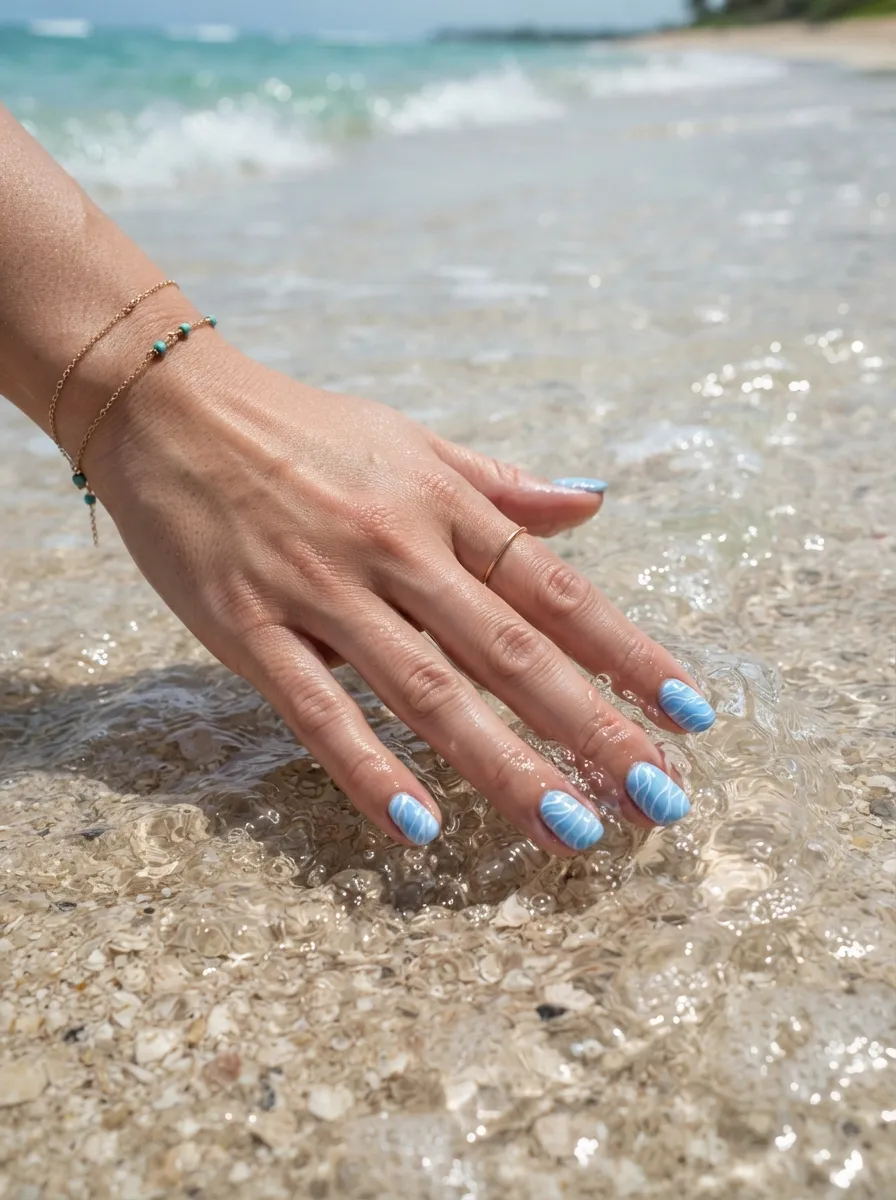
Rippling water nails mimic the gentle movement of shallow ocean water. Paint your nails a soft blue base. Using a thin detail brush, add fine wavy lines across the nail in a slightly darker blue or white shade. Keep the lines loose and uneven since real water ripples are never perfectly straight. This design is calming and simple, making it a good choice for anyone new to nail art. Practice a few wavy lines on paper first to get a feel for the motion before painting your nails. This look pairs beautifully with silver jewelry and simple summer outfits. It works well for beach vacations, pool days, or casual outings. Seal with a glossy top coat to add extra shine and mimic the look of light reflecting off water. This manicure only needs two polish shades, keeping the total cost low.
25. Peachy Sunburn Nails
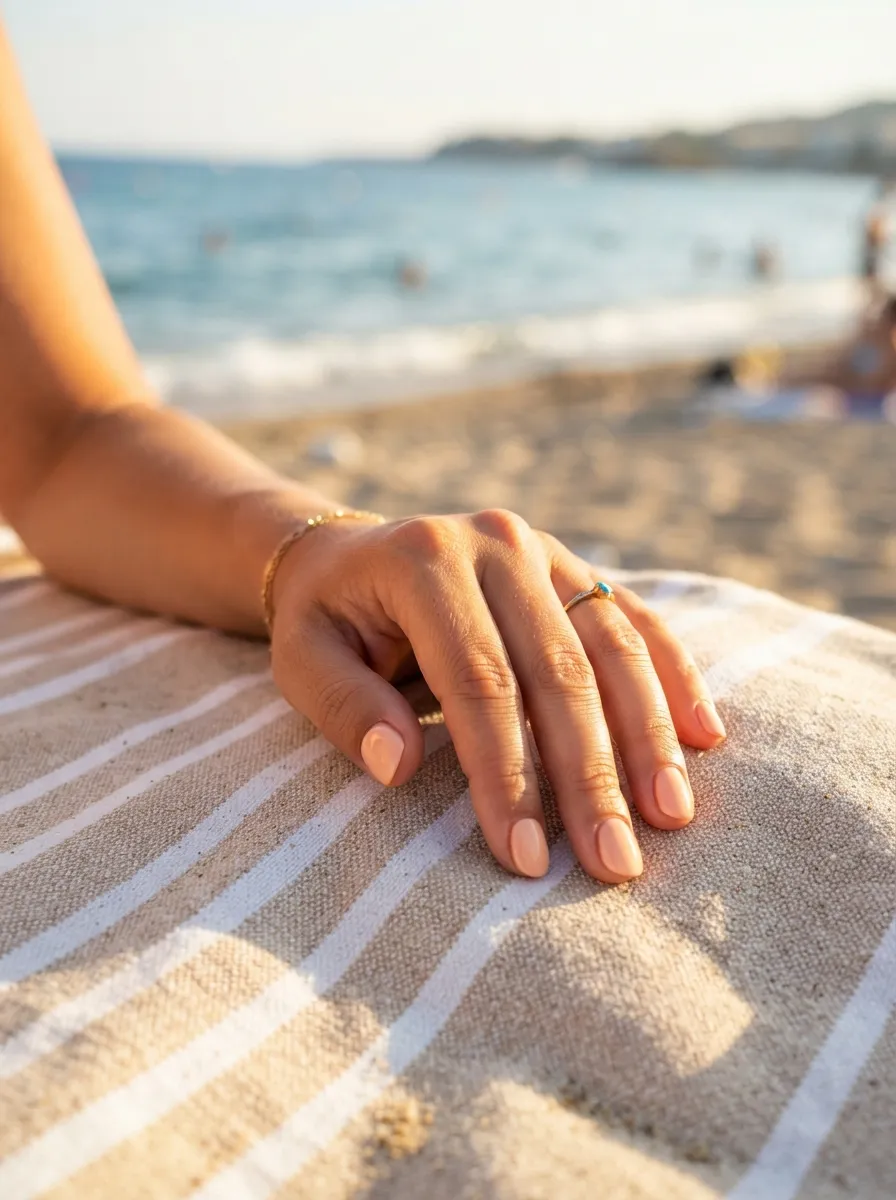
Peachy sunburn nails offer a warm, glowing shade that mimics a light summer tan. Use a soft peach or salmon polish for a manicure that feels warm and sun kissed. This shade flatters most skin tones and pairs beautifully with white or denim outfits. Apply two thin coats for smooth, even coverage. This look is simple enough to finish quickly, making it a good option for busy mornings before a beach trip. A glossy top coat adds a dewy shine that mimics sun warmed skin, while a matte finish gives a softer, more natural look. This manicure works well on its own or as a base for adding small accents like a single glitter nail. Since it only requires one main polish color, this design is budget friendly and easy to maintain throughout a busy summer season.
26. Coral Pink French Tips
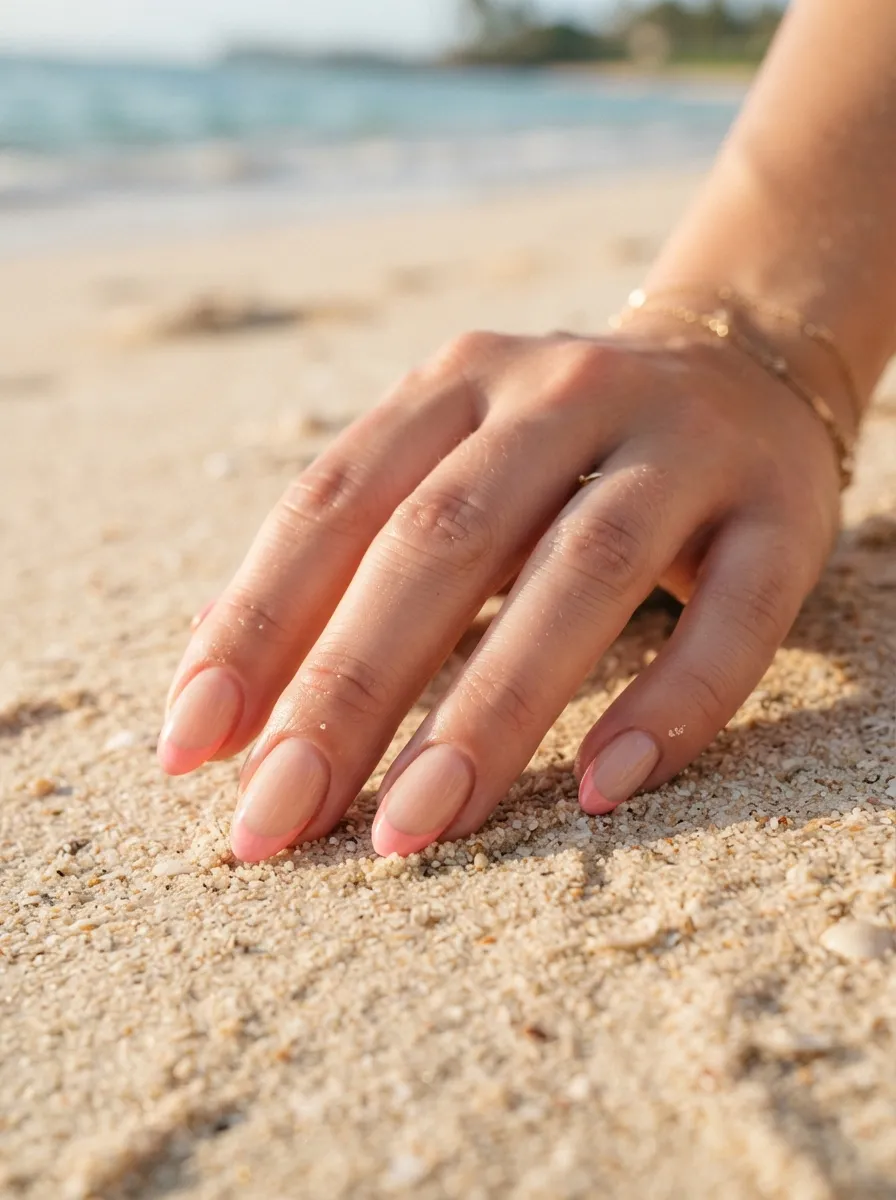
Coral pink french tips add a soft, romantic touch to the classic french manicure. Use a sheer pink or nude base coat, then paint the tip of each nail with a soft coral pink shade instead of the traditional white. A french tip guide sticker helps keep your lines clean and even, especially if you’re new to this technique. This design feels a bit softer than the bold coral reef version, making it a good pick for anyone who wants a subtle beach touch. It pairs beautifully with light summer dresses and simple jewelry. Seal with a glossy top coat for a polished, elegant finish. This manicure works for both short and long nails and holds up well for everyday wear. Since it only needs two polish shades, this design remains one of the more affordable options on this list.
27. Ocean Foam White Tips
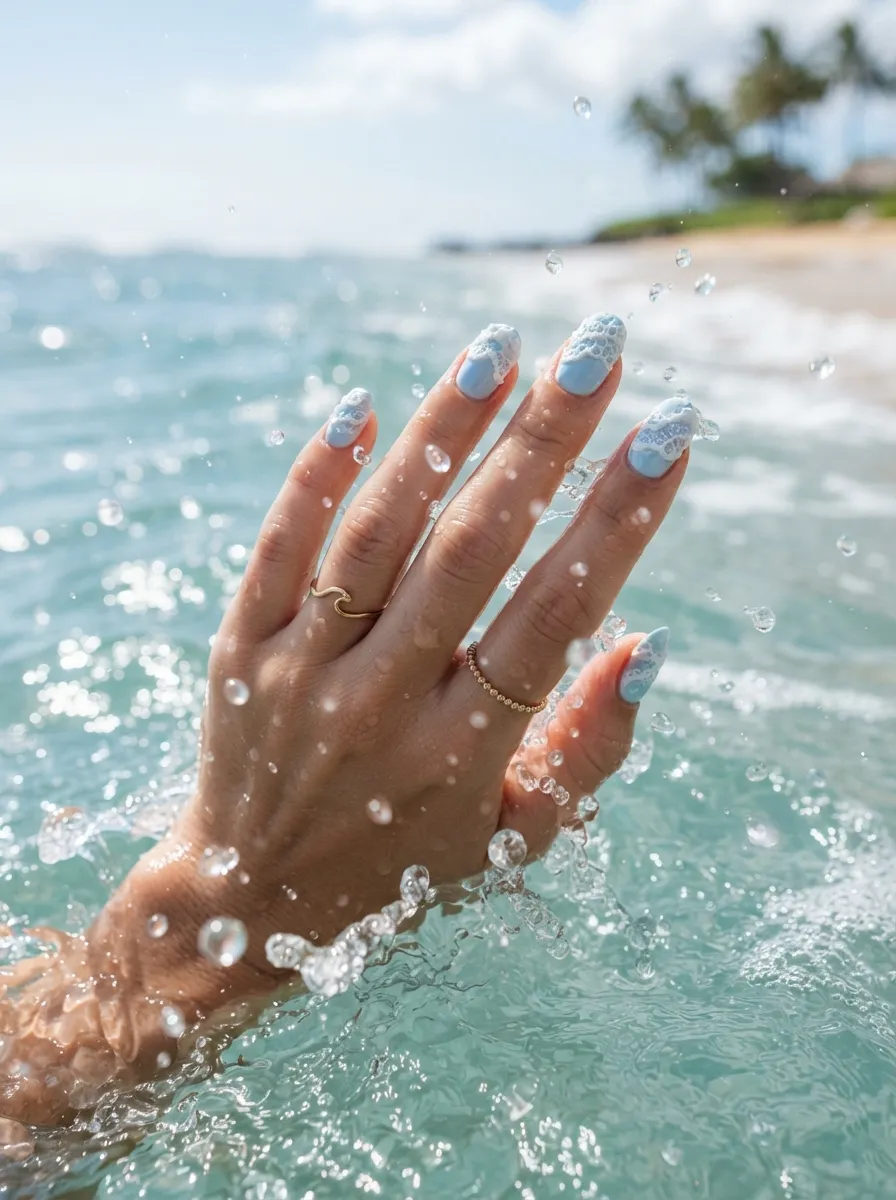
Ocean foam white tips bring texture and movement to a simple blue manicure. Paint your nails a pale blue base. Using white polish, dab small irregular dots and short lines near the tip of each nail using a sponge or dotting tool to mimic sea foam. Keep the texture uneven and scattered for a realistic look, since foam never forms in neat patterns. This design is a fun twist on the classic french tip and works well for beginners since a bit of imperfection actually helps the design look better. This look pairs beautifully with simple swimsuits and beach cover ups. Seal with a glossy top coat for a fresh, watery shine. This manicure only requires two polish colors, making it an affordable and quick option for anyone heading to the beach on short notice.
28. Island Sunset Swirl Nails
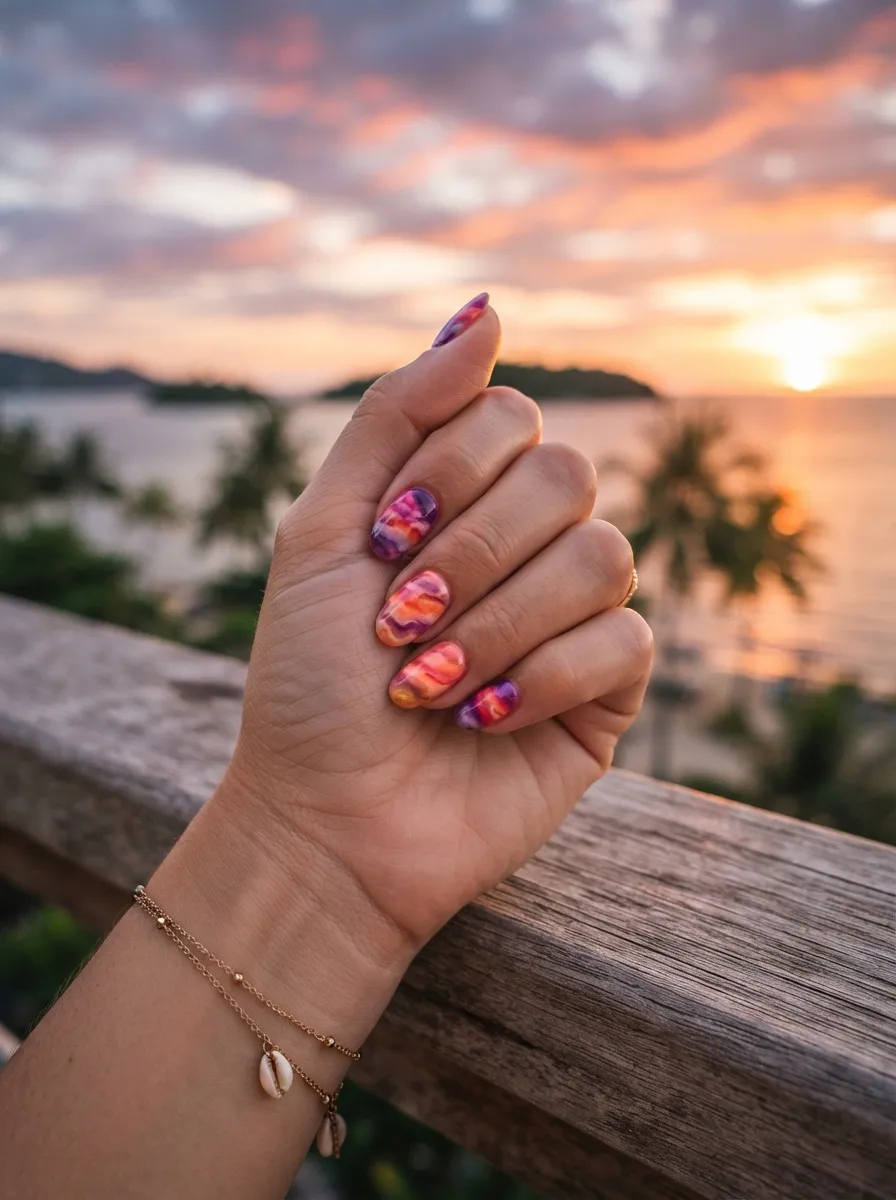
Island sunset swirl nails combine multiple warm shades into one flowing design. Use orange, pink, and purple polish, applying small amounts of each color onto the nail and blending them together using a toothpick or thin brush before the polish sets. This creates a soft, swirled pattern similar to clouds during a colorful sunset. This design takes a little practice, so try it on one nail first before moving to the rest. This look pairs beautifully with gold jewelry and simple sandals. It works well for beach vacations, sunset dinners, or evening beach walks. Seal with a glossy top coat to lock in the swirled pattern and add extra shine. This manicure uses three polish colors, but since small amounts are needed for each nail, one bottle of each color can last through many manicures, keeping the overall cost low.
Conclusion
Beach nails are a small detail that can make a big difference in how put together you feel during summer. From soft sandy nudes to bold sunset swirls, each design on this list can be recreated at home with basic tools and a few affordable polish colors. Start with one look that catches your eye, practice a few times on paper if needed, and build your confidence from there. Your hands deserve a bit of sunshine too, so grab your favorite polish colors and bring a little beach magic to your next manicure.