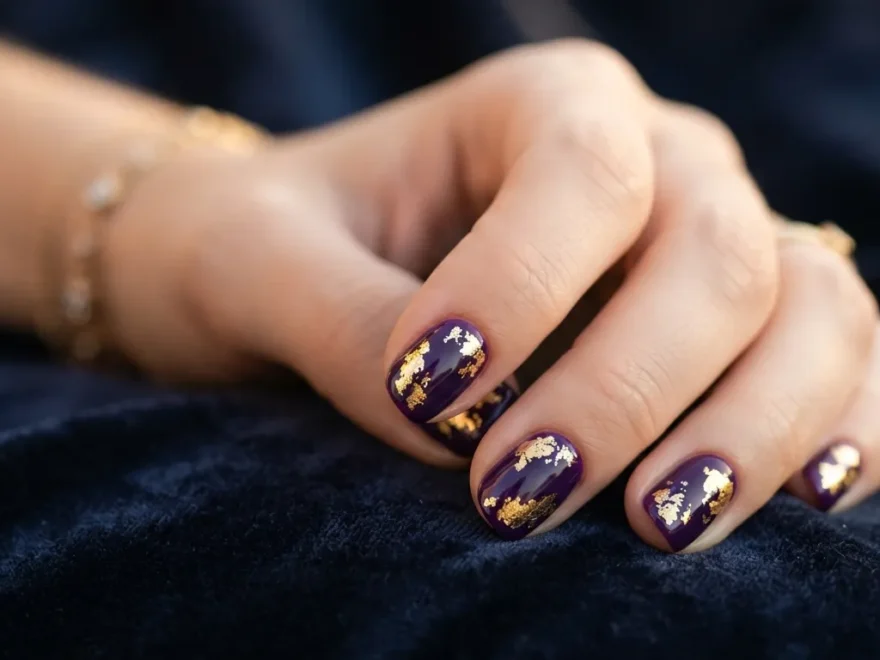
Purple and gold nail ideas carry a kind of glamour that never goes out of style. The two colors sit together like a crown and a cape, one deep and moody, the other bright and metallic. Whether you’re getting ready for a wedding, a holiday party, or just want your hands to feel dressed up on an ordinary Tuesday, this color pairing works for almost any occasion. Below you’ll find 27 ways to wear purple and gold on your nails, from simple one-color looks you can do at home to detailed designs worth booking a salon appointment for. Each idea comes with practical tips so you can recreate the look on a budget, using tools you probably already have in your polish drawer. If you’re also exploring Purple and Green Nail Ideas, rich emerald tones, soft lavender shades, ombré blends, floral accents, and abstract patterns offer a fresh, eye-catching color combination that feels bold, creative, and perfect for every season.
1. Deep Amethyst Base With Gold Foil Accents
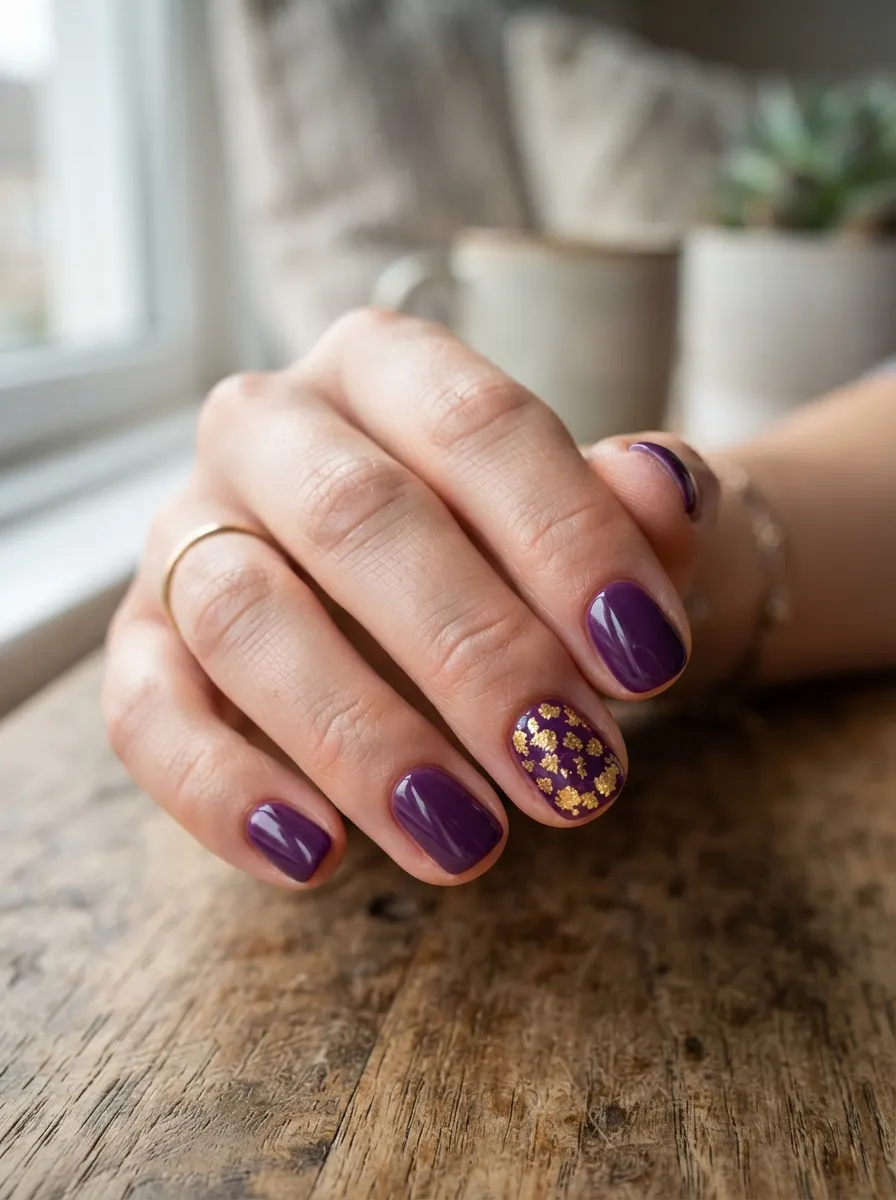
Start simple. Paint every nail a deep amethyst purple, two coats for full coverage. Let it dry completely. Then pick one nail, usually the ring finger, and press small pieces of gold foil onto wet top coat. The foil sticks in random patterns, giving you a cracked-glass effect. You don’t need special foil glue. A clear top coat works fine as the adhesive. Press the foil down with a cotton swab, then peel back the plastic backing slowly. Some spots will grab, others won’t, and that’s the look you want. It should feel a little imperfect, almost like real stone. This is one of the easiest ways to add shine without a steady hand. Foil sheets cost just a few dollars and one sheet lasts for many manicures. Keep the rest of your nails matte purple to let the foiled accent nail stand out. Finish with a glossy top coat over the plain nails only, skipping it on the foil so the texture stays visible. This look takes under thirty minutes start to finish and works for both short and long nails.
2. Gold Chrome French Tips on Purple Base
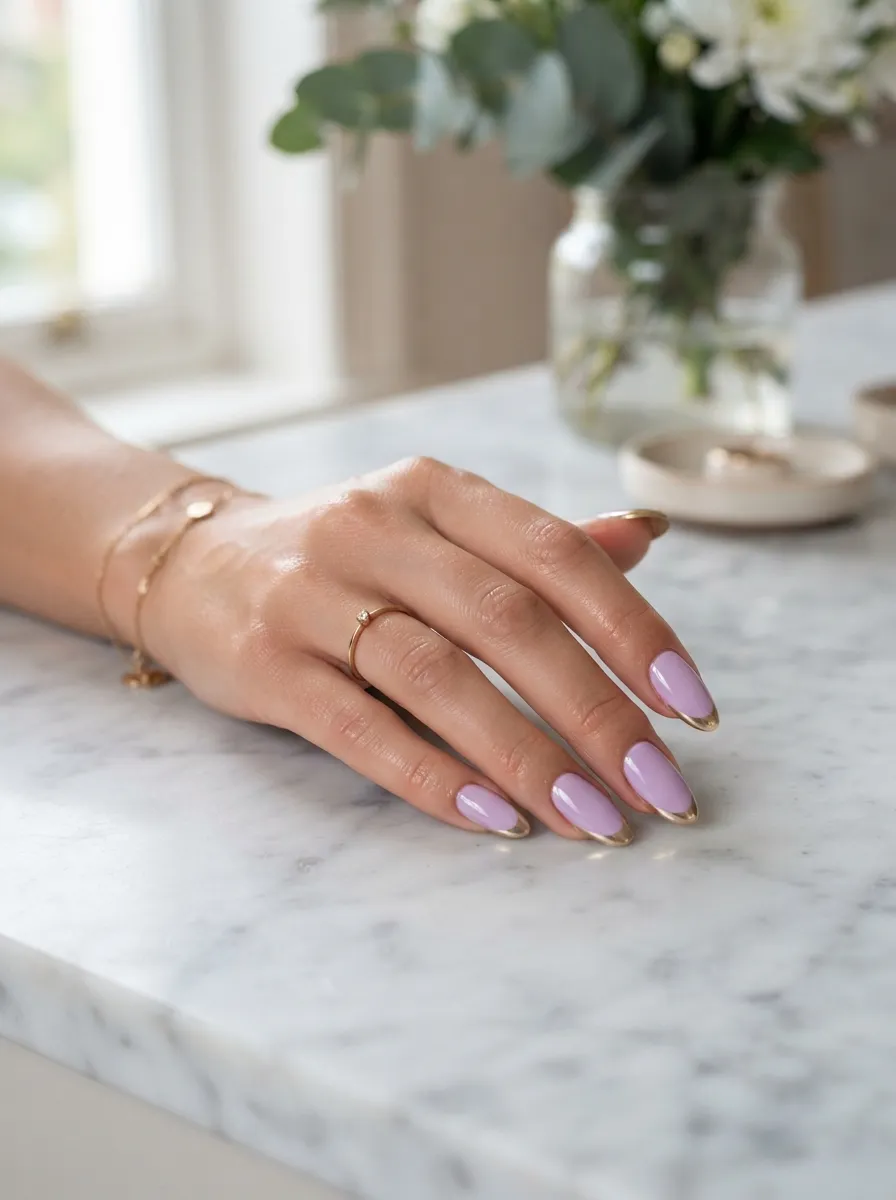
Swap the classic white tip for gold chrome. Paint your nails a light to medium purple as the base color. Once dry, use a small angled brush or a striping brush to paint a curved gold line across the tip of each nail. Chrome powder takes this from pretty to eye-catching. After the gold polish dries, rub a small amount of chrome powder onto the tip using a silicone applicator or your fingertip. The powder sticks to tacky polish and creates a mirror-like shine. Seal everything with a non-wipe top coat so the chrome doesn’t dull. Chrome powder kits are affordable and one jar covers dozens of manicures. If you don’t have chrome powder, a metallic gold polish alone still looks sharp. This design suits almost any nail shape, from square to almond to coffin. It also grows out gracefully since the tip color naturally fades with your nail growth instead of showing an obvious line near the cuticle.
3. Lavender Ombre With Gold Glitter Fade
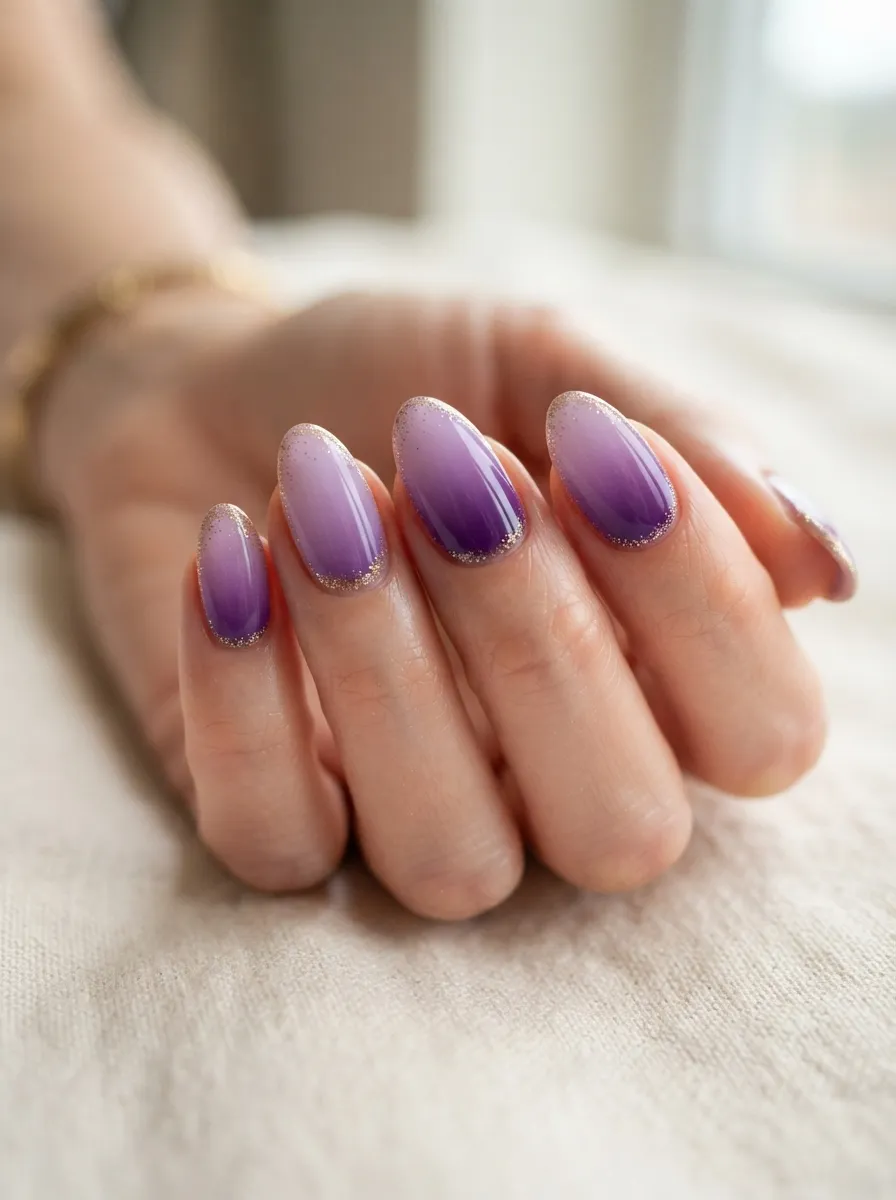
Ombre nails look complicated but the technique is simple once you try it. Use a makeup sponge to blend two purple shades, light lavender near the cuticle and a deeper violet toward the tip. Dab the sponge lightly against the nail in an up and down motion until the colors merge. While the polish is still slightly tacky, sweep fine gold glitter along the tip using a small fan brush. The glitter catches the light and softens the line between the two purples. Seal with a thick top coat to smooth out any glitter texture. A makeup sponge costs almost nothing and can be reused several times before it needs replacing. This design works well for brides or anyone wanting a romantic, soft look that still has some sparkle. If your polish dries too fast to blend, spritz the sponge lightly with rubbing alcohol before dabbing, which keeps the colors workable a little longer.
4. Royal Purple Marble With Gold Veins
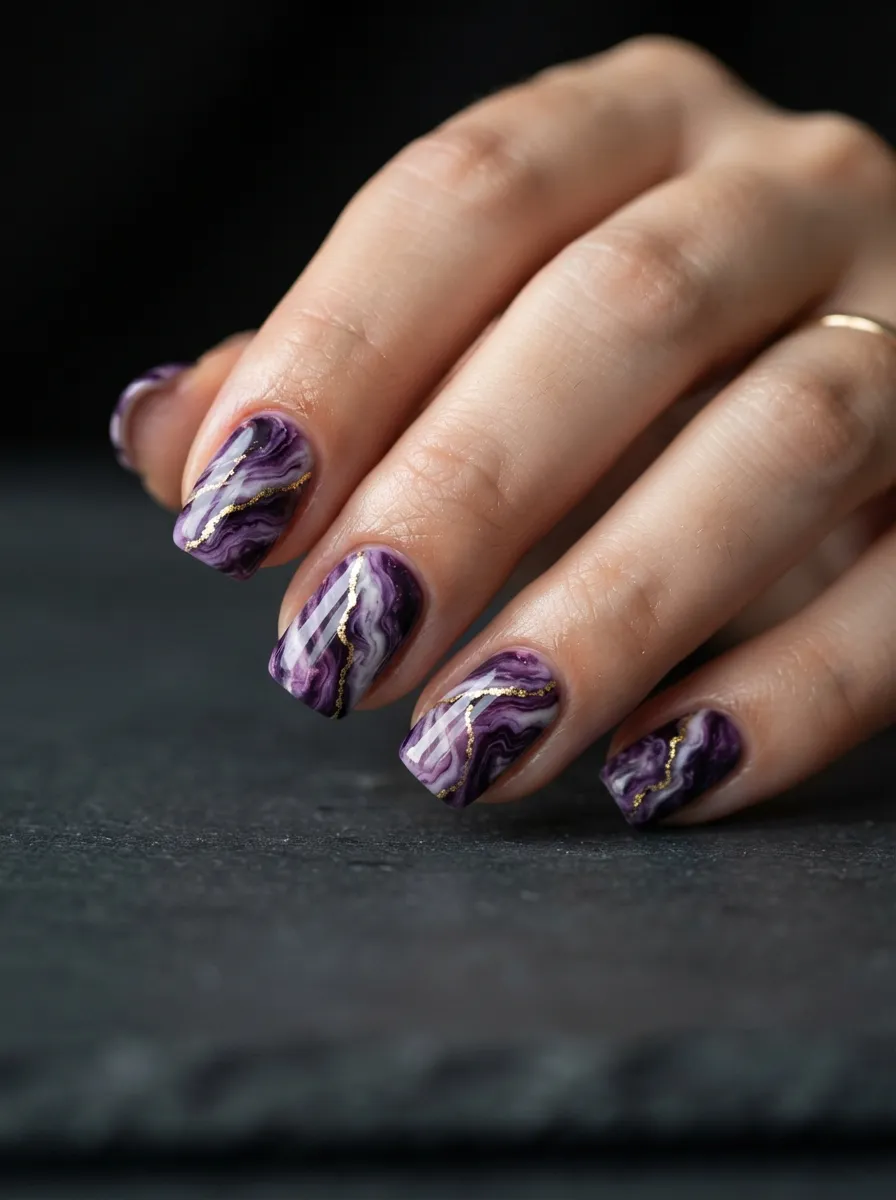
Marble nails mimic the look of polished stone, and purple with gold veining feels like something out of a palace. Drop small amounts of purple, white, and a touch of black polish into a cup of room temperature water. Use a toothpick to swirl the colors into a marbled pattern on the water’s surface. Dip your nail in at an angle, then pull it out slowly. Clean up the excess polish around your cuticle with a brush dipped in acetone. Once dry, add gold lines with a fine detail brush, following the natural curves of the marble pattern to mimic mineral veins. This technique takes practice, so try it on a spare nail wheel first if you’re new to water marbling. The upside is you only need polishes you likely already own, plus a cup of water and some toothpicks. The result looks custom and detailed, closer to a salon design than something done at the kitchen table.
5. Matte Purple With Glossy Gold Tips
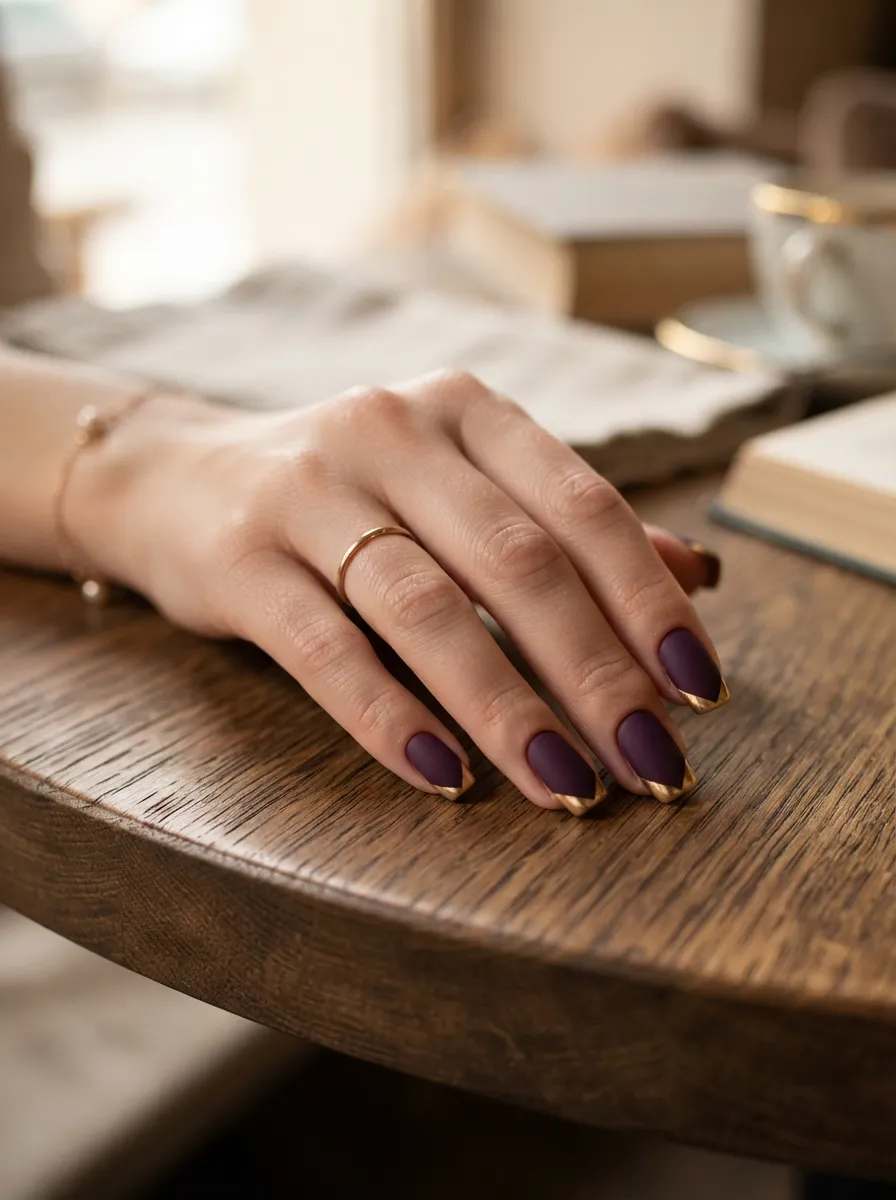
Texture contrast makes simple designs interesting. Paint your nails a deep purple, then apply a matte top coat over the whole nail. Once fully dry, paint just the tips in a glossy gold polish, leaving the matte purple visible underneath. The shine of the gold against the flat purple creates depth without any detailed brushwork. Use tape or a nail guide sticker to keep the tip line clean and even. This is a great option if you’re short on time but still want something that looks intentional. Matte top coats are inexpensive and last through several manicures if stored properly. This look also hides small imperfections better than high gloss finishes, since matte surfaces don’t reflect light the same way. It works well for both short, practical nails and longer statement lengths. Pair it with gold rings or bracelets for a coordinated look without overdoing the metallic theme across your whole outfit.
6. Gold Leaf Accent Nail on Plum Polish
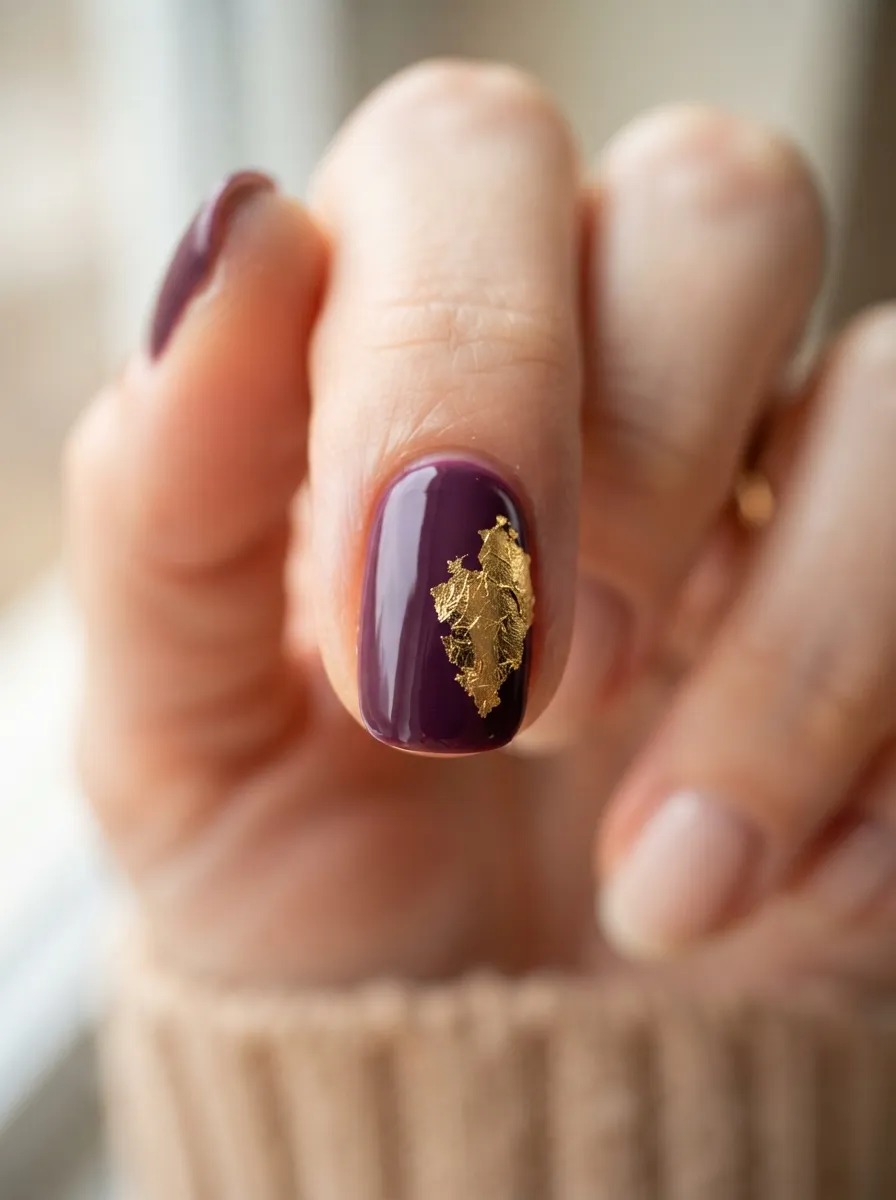
Gold leaf, the kind used in art projects, adds a raw and organic texture to nail art. Paint your nails a deep plum purple and let them cure fully. Choose one accent nail and brush on a thin layer of clear top coat as adhesive. Press a small torn piece of gold leaf onto the wet polish using tweezers, then gently pat it down with a soft brush. The leaf will crinkle and tear slightly, which is part of the charm. Seal with another layer of top coat to keep the leaf from lifting. Craft stores sell gold leaf sheets for just a couple of dollars, and a single sheet provides enough material for many manicures. This look feels artistic and a little unpredictable, since no two applications turn out the same. Keep the remaining nails simple in solid plum to let the textured gold leaf nail be the star of the set.
7. Purple and Gold Geometric Line Art
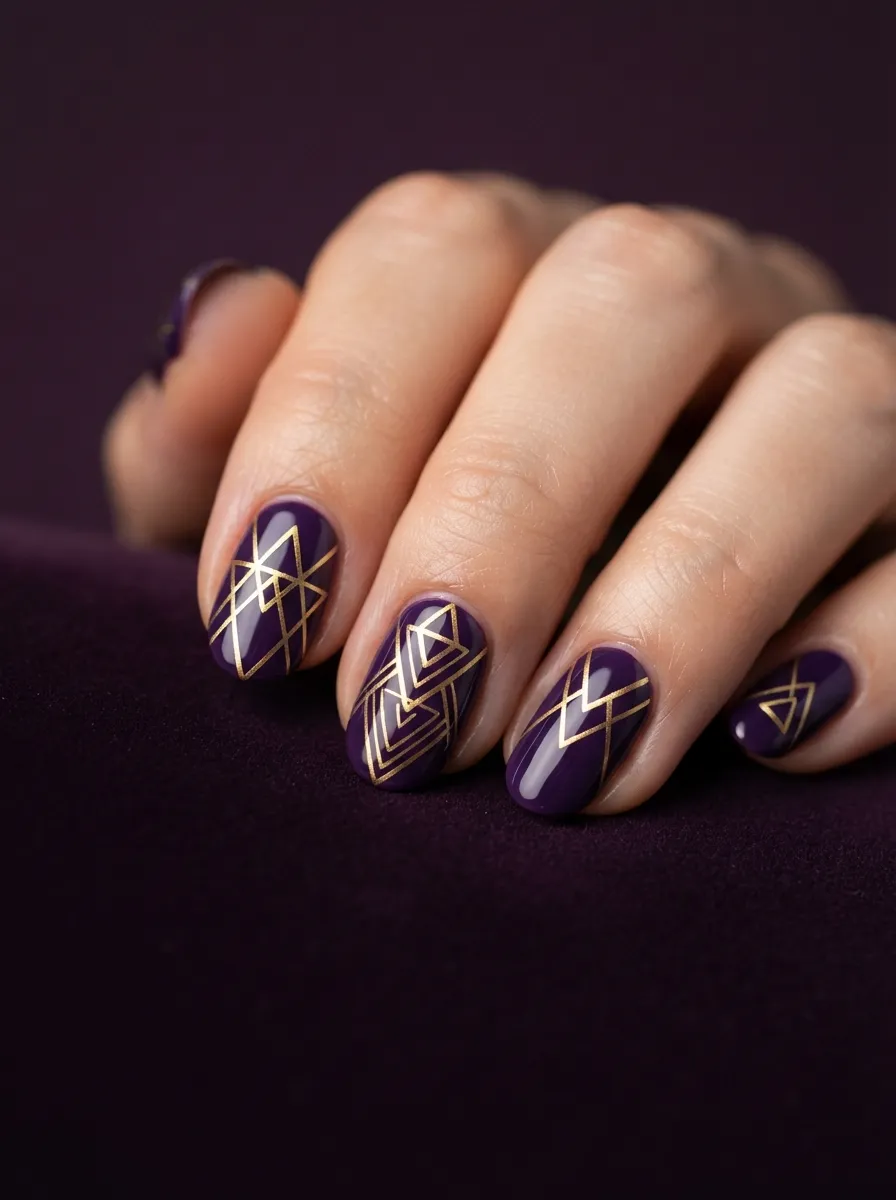
Geometric designs give you a modern, graphic look using just a fine liner brush. Paint your nails a solid purple base and let it dry completely. Using a striping polish or gold nail art pen, draw thin straight lines across the nail to form triangles, chevrons, or crossing angles. Steady your hand by resting your pinky against the table while you draw. If a line goes crooked, wipe it away with a small brush dipped in polish remover before it dries and try again. Nail art pens are budget friendly and give more control than a traditional brush, especially for beginners. This design looks sharp on square or coffin-shaped nails where straight edges complement the geometry. Keep your lines simple at first, just two or three per nail, rather than trying to fill the whole surface. Simple geometric patterns often look more polished than busy ones, and they photograph well too.
8. Metallic Gold Half Moon Manicure
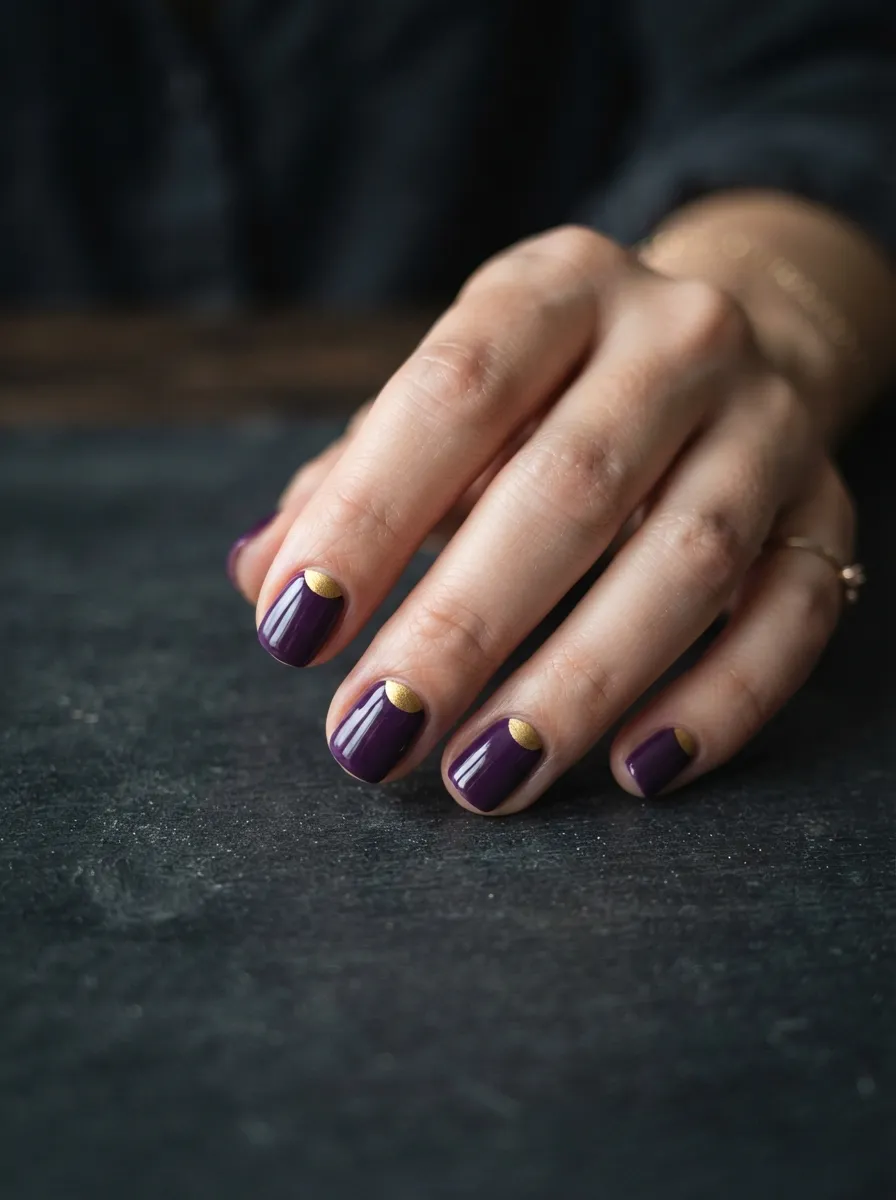
The half moon manicure flips the classic French tip upside down. Instead of color at the tip, you paint a crescent shape in gold near your cuticle, leaving the rest of the nail purple. Use a small round sticker or hole reinforcement label as a guide. Place it near your cuticle, paint gold over and around it, then peel it away once the polish sets to reveal a clean curved line. Fill in the rest of the nail with purple polish, slightly overlapping the gold edge for a seamless blend. Hole reinforcement stickers come in packs of hundreds and cost very little, making this an affordable design to repeat often. This style suits nails of any length and draws attention to your cuticle area, which can make nails look longer than they actually are. It’s a good choice if you want something that feels retro but still fits current trends.
9. Deep Violet With Gold Dust Sparkle
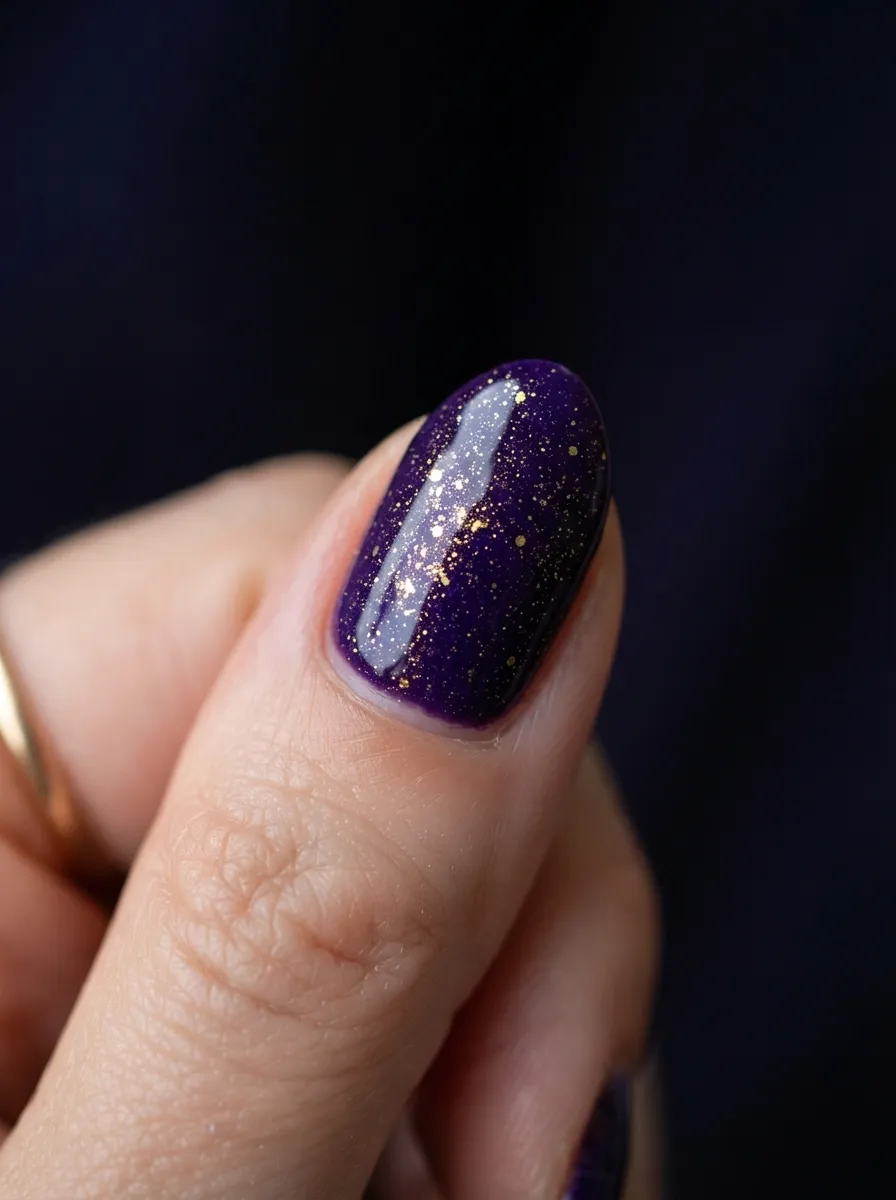
Gold dust gives nails a soft, scattered sparkle rather than the heavy shine of chrome or glitter polish. Paint your nails a deep violet shade and apply top coat while it’s still slightly wet. Using a small dry brush, pick up a tiny amount of loose gold pigment or eyeshadow and tap it lightly across the nail surface. The sparkle will land unevenly, which gives it a natural, star-scattered appearance instead of a uniform glitter look. Seal everything with a final top coat to lock the pigment in place. Loose pigments and cheap eyeshadow pans work just as well as dedicated nail pigments, so check your makeup bag before buying anything new. This technique is forgiving since mistakes can be brushed away before the top coat seals them in. It suits evening wear especially well, since the subtle sparkle catches candlelight or string lights beautifully without looking overdone in daylight.
10. Purple Velvet Nail Art With Gold Studs
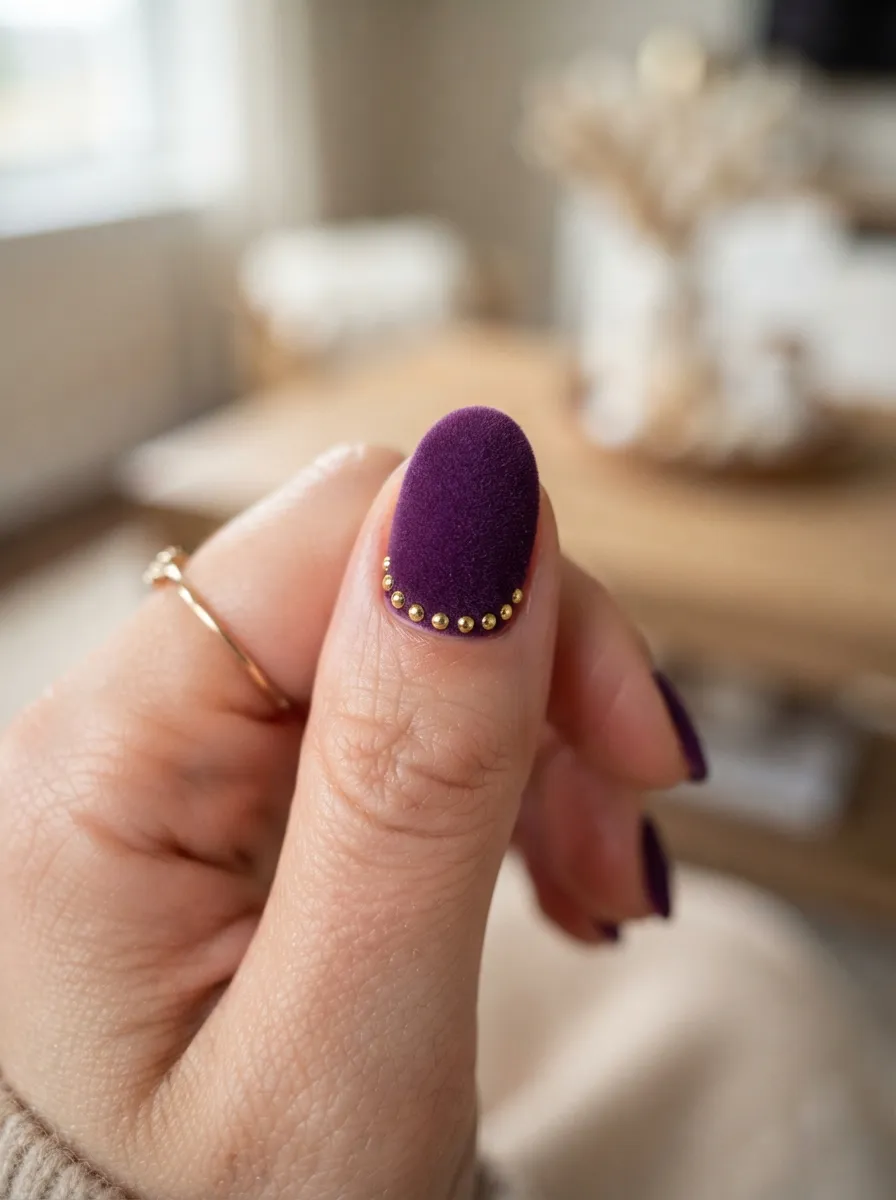
Velvet flocking powder turns ordinary polish into a soft, textured surface that looks almost like fabric. Paint your nail purple, then while it’s still wet, dip it into flocking powder or sprinkle powder over the top and press gently. Tap off the excess once dry. The result feels fuzzy to the touch and has a rich, matte depth that photographs beautifully. Add small gold studs near the cuticle line using tweezers and a dot of clear polish as glue. Studs come in bulk packs for just a few dollars and can be reused across many different manicure looks. This design works best as an accent nail rather than across all ten fingers, since the velvet texture isn’t the most practical for everyday hand use. Save it for special occasions like holiday parties or date nights. Keep the studs sparse, three to five per nail, so they don’t compete with the texture underneath.
11. Gold Foil Marble Swirl Design
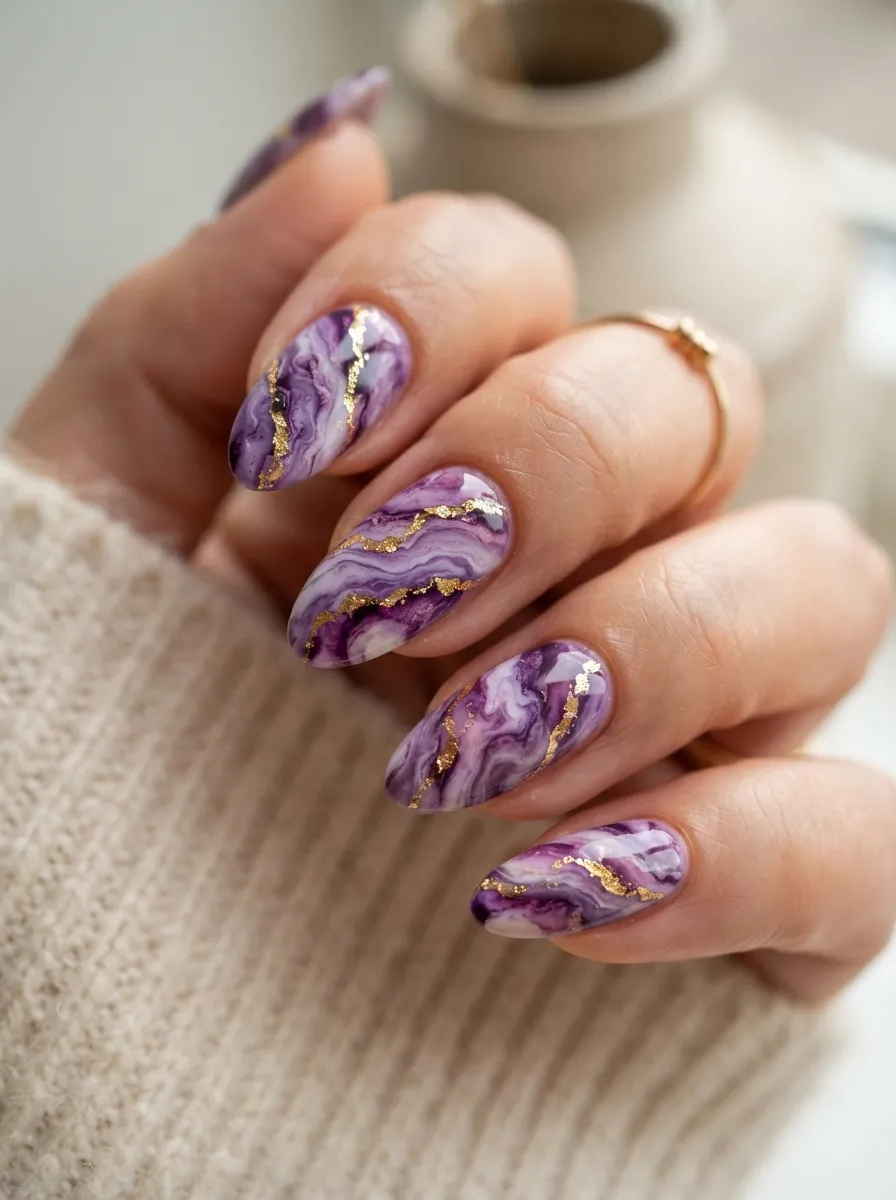
This design combines two techniques from earlier on this list, marbling and foil, into one detailed look. Create your marble base using the water marbling method with purple, white, and a hint of black polish. Once dry, add small strips of gold foil over the swirled areas using clear top coat as glue. The foil should follow the natural curves of the marble pattern rather than sitting in straight lines, which keeps the design looking organic. Seal with a glossy top coat to blend the foil texture with the smooth marble surface. This look takes more time than most on this list, closer to forty-five minutes per hand, so set aside a quiet afternoon. The materials themselves are inexpensive, just polish, water, and foil sheets. This design suits special events where you want something detailed and eye-catching, like a formal dinner or an anniversary celebration.
12. Eggplant Purple With Gold Chain Detail
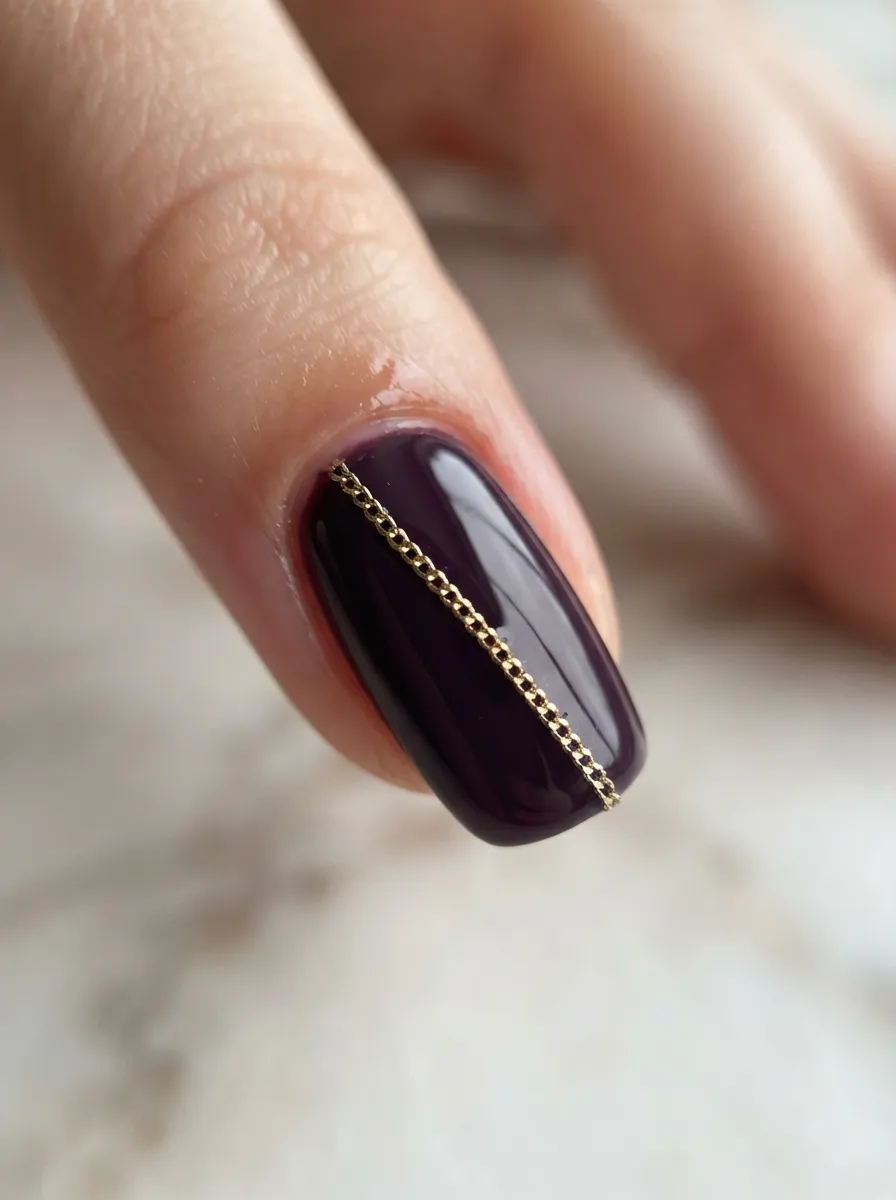
Nail chains add a jewelry-like detail without needing an actual charm or stud. Paint your nails a dark eggplant purple, a shade close to black but with a visible purple undertone in the light. Once dry, lay a small gold chain, the kind sold specifically for nail art, diagonally across one or two accent nails. Secure it with a thick layer of clear top coat, pressing gently so the chain sits flat against the surface. Let it cure fully before touching anything, since chains take longer to seal than flat polish. Nail chains are sold in craft and beauty supply stores for just a couple of dollars per roll, and one roll covers many manicures. This design feels a little edgy and works well with darker, moodier purple shades rather than pastels. It pairs nicely with gold hoop earrings or layered necklaces for a coordinated, jewelry-inspired look.
13. Purple Gradient With Gold Glitter Tips
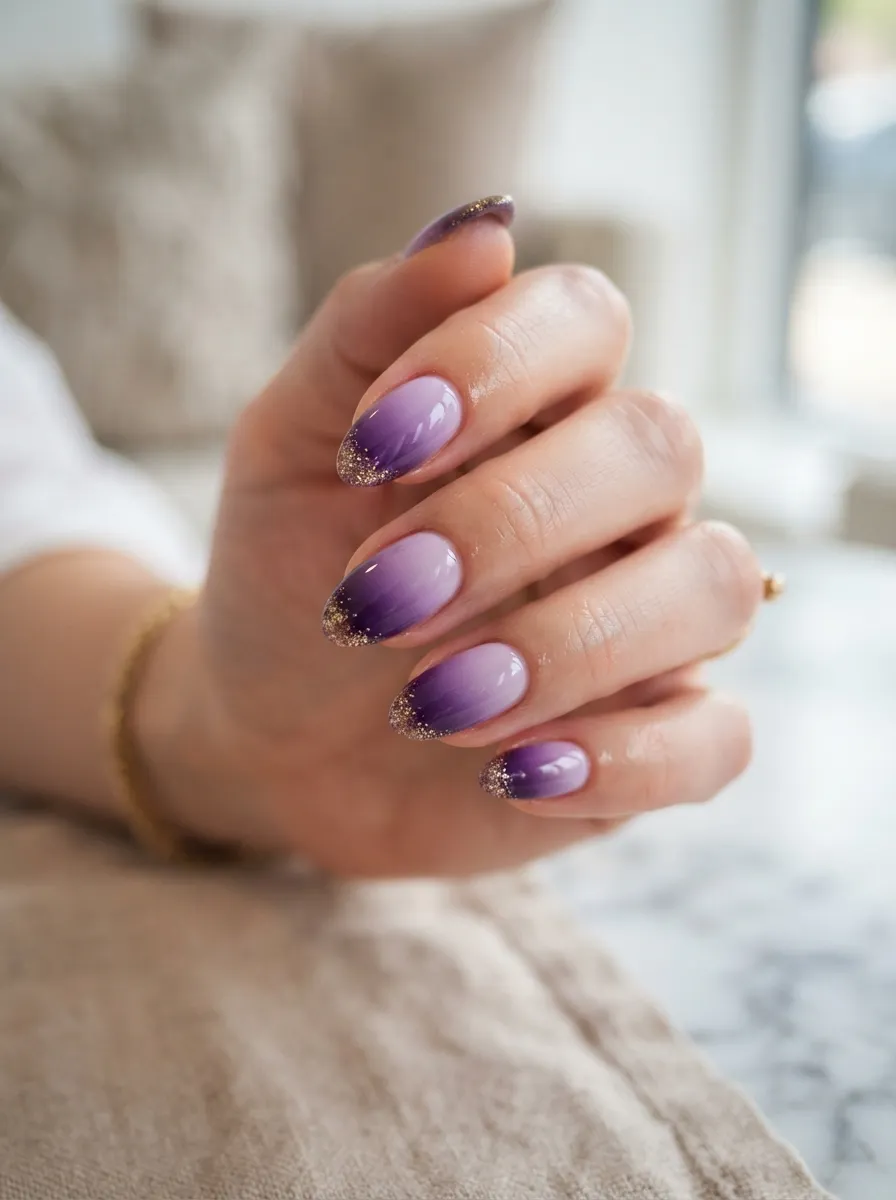
This variation on ombre keeps the gold contained to just the tips instead of blending it throughout. Sponge on a gradient of purple shades from light near the cuticle to dark at the tip, following the same method described earlier in this list. Once the gradient is dry, dip just the tip of each nail into loose gold glitter or brush on a chunky gold glitter polish. The line between purple and gold should be visible rather than blended, giving a two-tone effect. Seal with a thick top coat since gold glitter tends to feel rough without one. Chunky glitter polishes are widely available at drugstores for a low price, and a small bottle lasts through many applications. This design has more contrast than the fully blended ombre version, making it a good choice if you want your gold to stand out clearly rather than fade softly into the purple.
14. Gold Striping Tape on Purple Polish
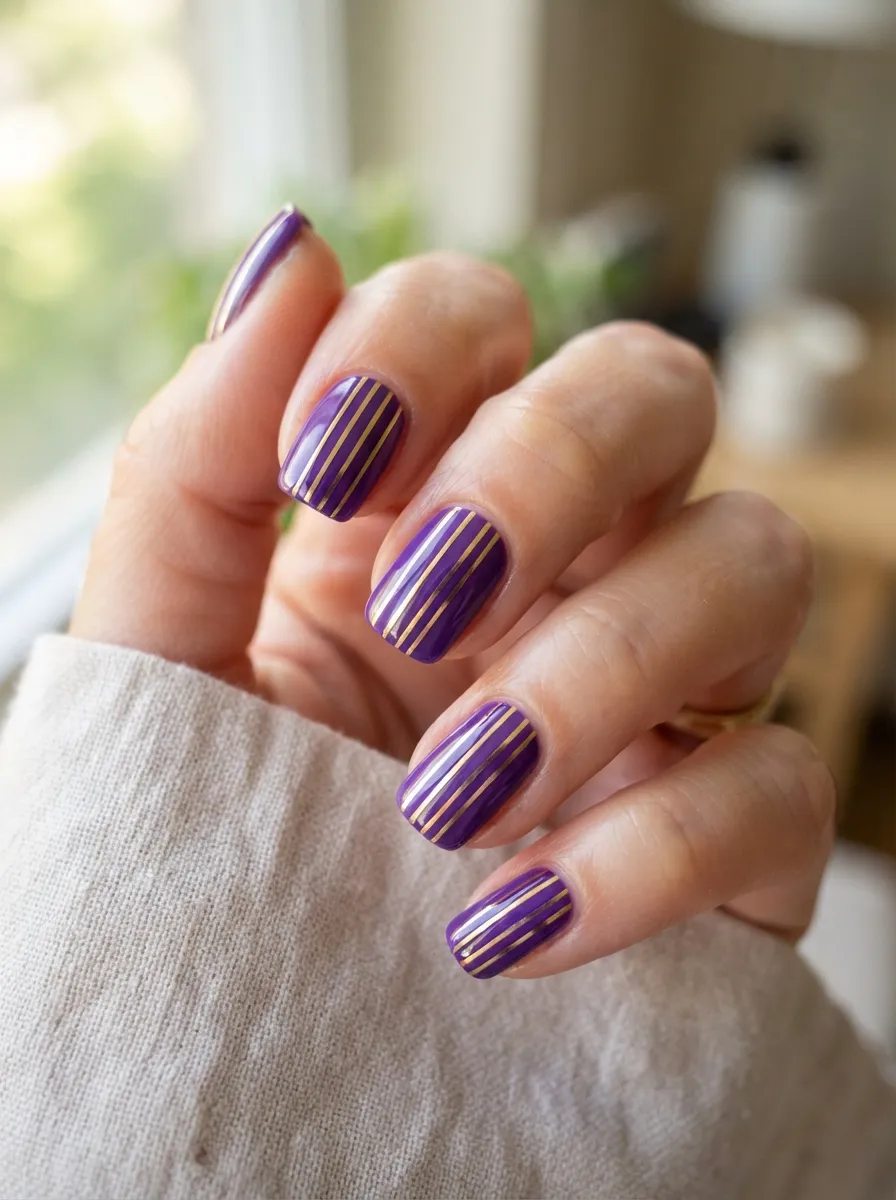
Striping tape is one of the easiest tools for adding clean gold lines without any brush skills. Paint your nails a solid purple and let them dry completely, since tape won’t stick well to tacky polish. Cut small strips of gold striping tape and press them onto the nail in parallel diagonal lines, trimming the excess with small scissors or a cuticle tool. Seal everything with a top coat, which also helps the tape stay flat and prevents it from catching on things. Striping tape rolls are cheap and come in long lengths, so one roll can last through dozens of manicures. This technique works well for anyone who struggles with a steady painting hand, since the tape does the precision work for you. Try different line placements, crossing diagonals, a single stripe near the cuticle, or a border around the edge of the nail, to find a pattern you like before committing to all ten nails.
15. Purple and Gold Animal Print Accent
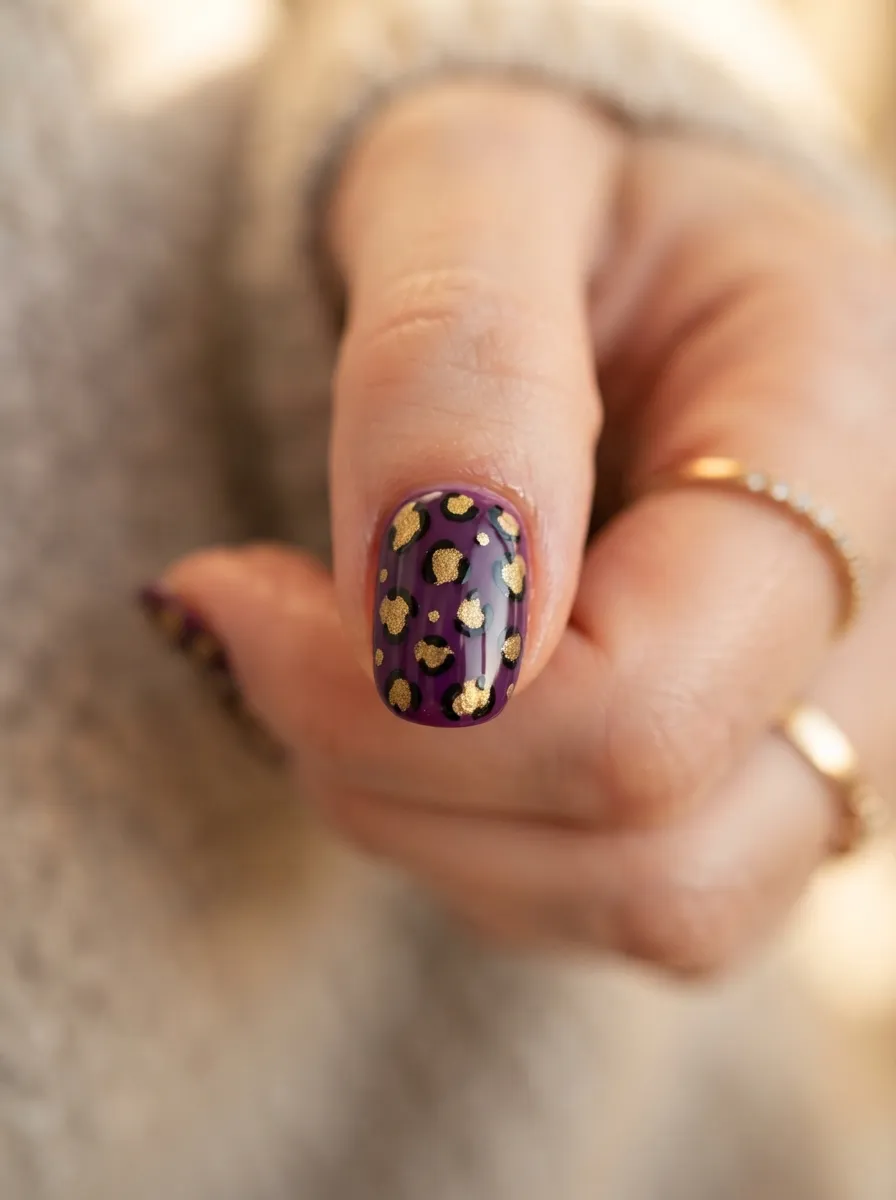
Animal print adds personality without needing a lot of precision. Paint your nail a deep purple base and let it dry. Using a small dotting tool or the end of a bobby pin, dab irregular gold spots across the nail in small clusters. Once the gold dries, outline each spot loosely with black polish using a thin brush, leaving gaps rather than full circles for an authentic leopard print look. This works best as a single accent nail paired with solid purple on the rest, since a full set can feel busy. Dotting tools cost very little and often come in multi-packs with different tip sizes for other nail art too. If you don’t have one, a bobby pin or toothpick works just as well. This design suits people who want a bold, fun look for a night out without committing to a fully detailed design across every nail.
16. Amethyst Crystal Embellished Nails
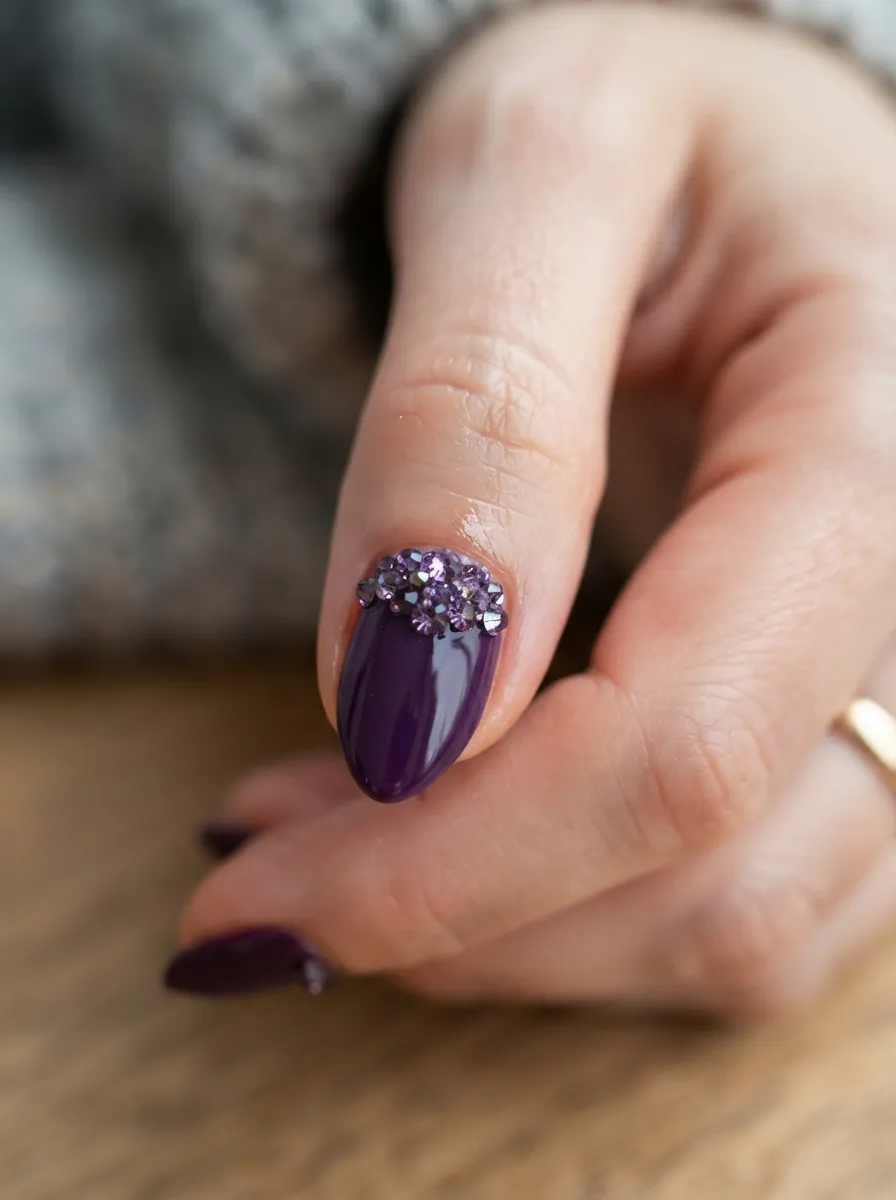
Small crystals bring texture and sparkle that flat polish can’t match. Paint your nails a rich purple shade and let them dry fully. Apply a small dot of nail glue or clear top coat where you want each crystal, then place them one at a time using tweezers or a wax pencil tip, which picks up crystals easily thanks to its slight stickiness. Cluster three to five crystals near the cuticle of one or two accent nails rather than scattering them across the whole set. Seal carefully around the edges with top coat, avoiding the crystal surface itself so it stays clear and reflective. Rhinestone packs are inexpensive and come with hundreds of pieces, more than enough for many manicures. This look suits weddings, proms, and other formal events where a little extra shine feels appropriate. Keep everyday activities in mind though, since crystals can occasionally snag on fabric or hair.
17. Purple Base With Gold Star Confetti
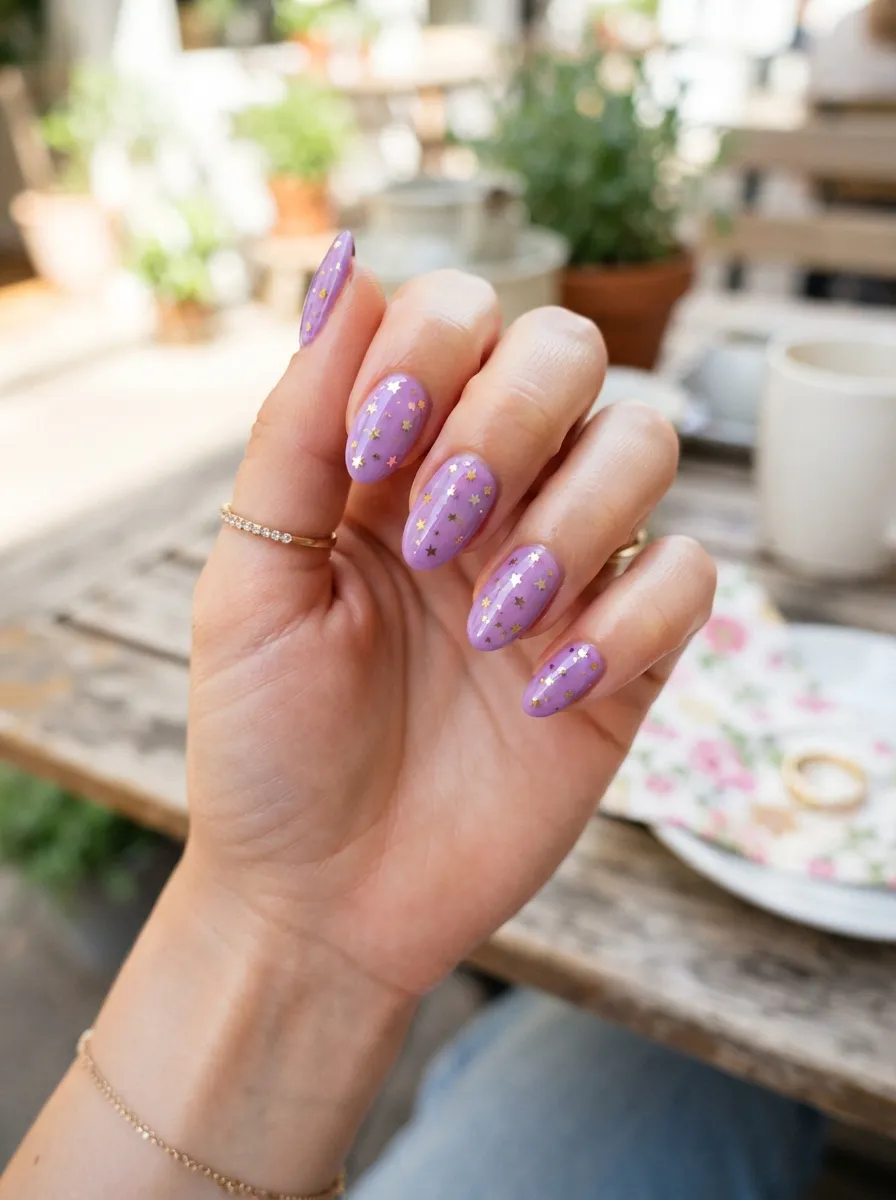
Confetti nail art brings a playful energy that works well for celebrations. Paint your nails a light to medium purple and let them dry. While applying your top coat, sprinkle tiny gold star confetti pieces across the wet surface using tweezers or your fingertips. Press each piece down gently so it sits flush against the nail rather than sticking up. Seal with an extra layer of top coat once everything is placed. Confetti pieces are sold cheaply in craft stores, often in the scrapbooking or card-making section, and one small container covers many manicures. This look suits birthdays, New Year celebrations, or any occasion that calls for a little extra fun. Vary the placement, some nails with just one or two stars, others with a small cluster, to avoid a repetitive pattern across all ten fingers. The uneven scatter makes the design feel more natural and less like a template.
18. Gold Cuticle Line on Purple Nails
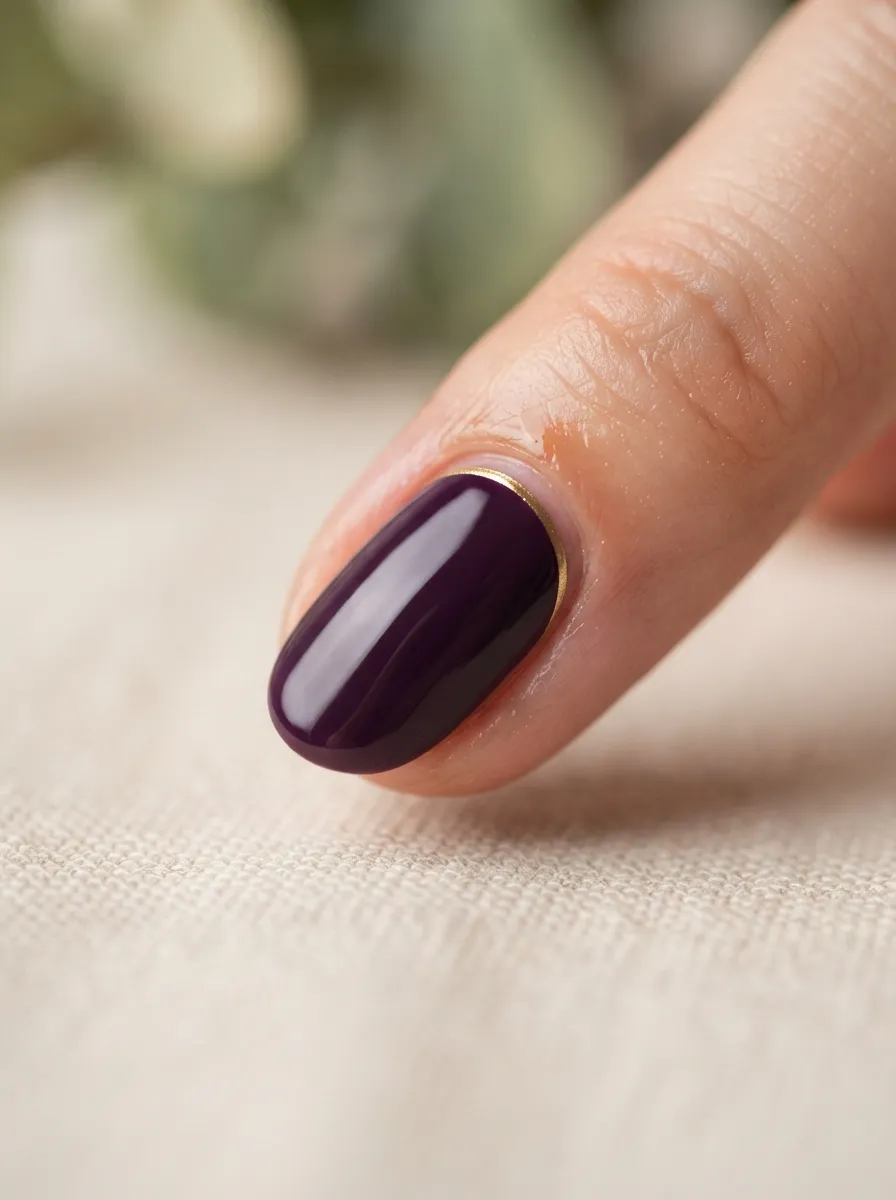
Sometimes the simplest line makes the biggest difference. Paint your nails a solid purple and let them dry completely. Using a thin detail brush or a gold nail art pen, trace a single fine line just above your cuticle, following its natural curve. Keep your hand steady by resting your elbow on a table and moving the brush slowly rather than quickly. If your line wobbles, a cotton swab dipped in polish remover cleans it up without disturbing the rest of the nail. This minimal design costs almost nothing since it only needs polish you likely already have. It suits workplaces or everyday settings where bold nail art might not fit, offering just enough gold to feel special without being loud. This is also a good beginner technique for practicing line control before moving on to more detailed geometric or marble designs elsewhere on this list.
19. Purple French Tips With Gold Edge
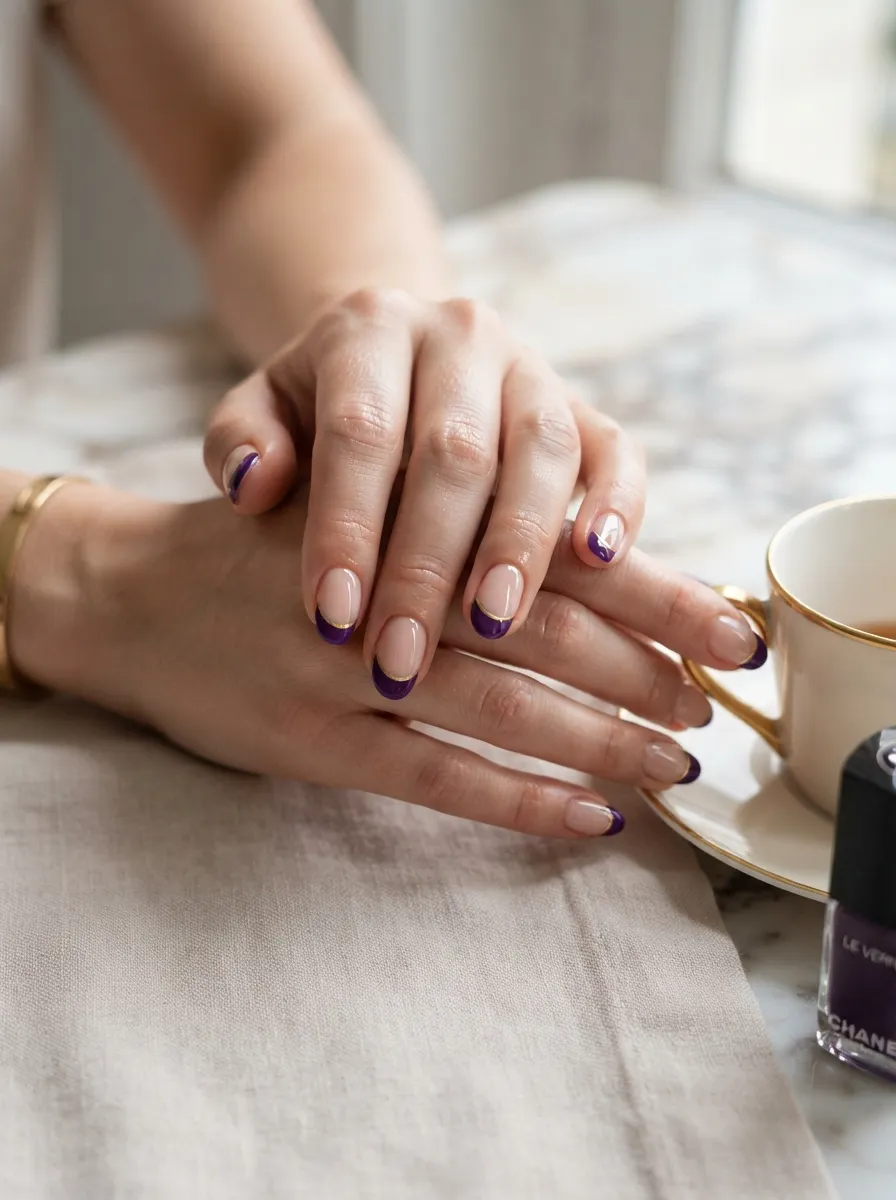
This design updates the traditional French manicure by swapping white tips for purple, then adding a gold outline for definition. Paint your nails a sheer nude or pale pink as the base. Using a French tip guide sticker, paint the tip of each nail in a medium purple shade. Once dry, trace a thin gold line along the curve where the purple meets the nude base, using a fine detail brush or nail art pen. This gold line adds definition and makes the tip color pop more than it would alone. French tip guide stickers are sold cheaply in multi-packs and can be reused several times if cleaned gently after each use. This design suits professional settings and formal events alike, since it keeps the classic French shape while adding just enough color and metallic detail to feel current rather than dated.
20. Gold Speckled Purple Nail Art
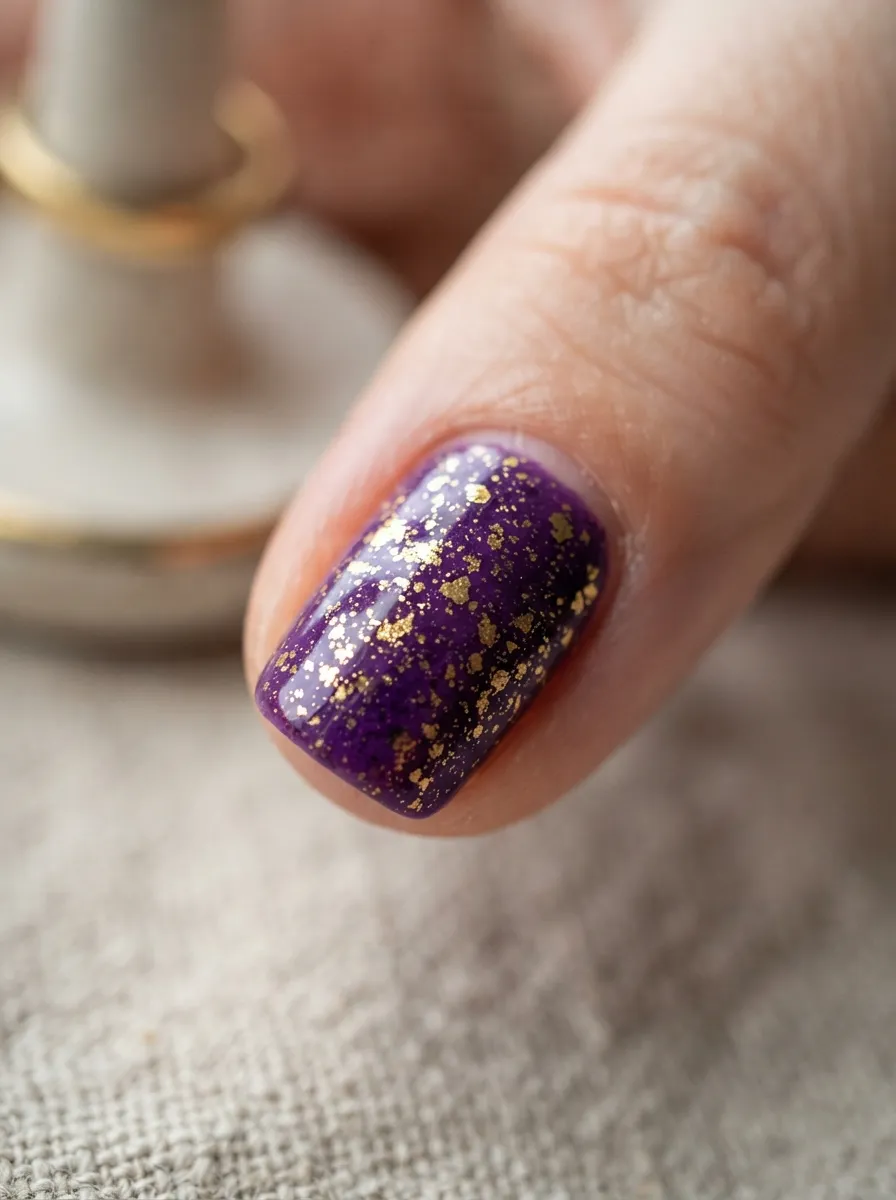
Speckled nails mimic the look of paint splatter, giving a loose and artistic finish. Paint your nails a solid purple base and let them dry fully. Dip an old toothbrush lightly into gold polish thinned slightly with polish thinner, then hold it a few inches from your nail and run your thumb across the bristles to flick small speckles onto the surface. Cover your fingers and surrounding area with a paper towel first, since this technique gets messy. Let the speckles dry, then seal with a top coat. An old toothbrush costs nothing if you already have one lying around, and polish thinner is a cheap bottle that lasts a long time. This design has a hand-painted, artistic quality that looks more complex than the actual effort required. Try varying the distance between your nail and the toothbrush to control speckle size, closer for larger dots, farther for a finer spray.
21. Purple Ombre Fade Into Gold Tip
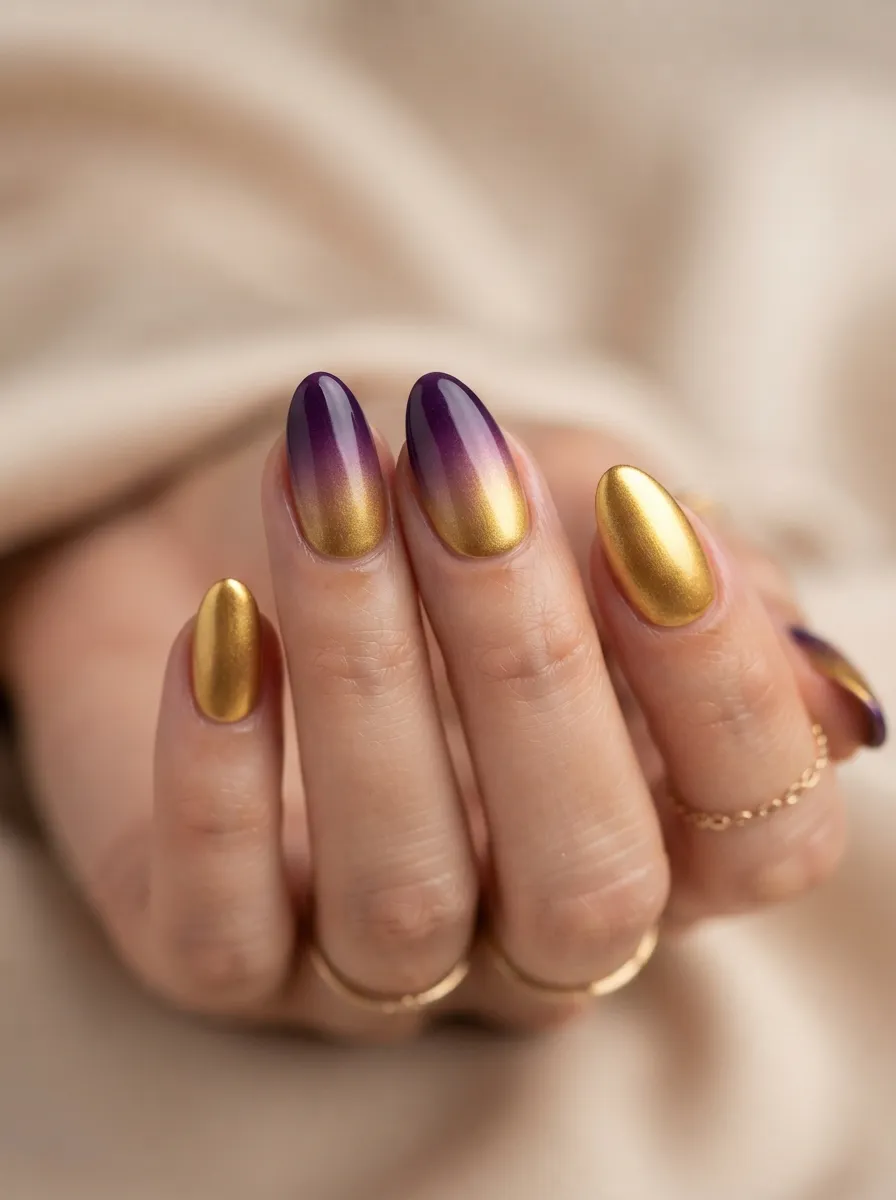
Unlike the earlier gradient design that blends two purple shades, this version fades purple directly into solid gold. Use a makeup sponge to blend purple polish near the cuticle into metallic gold polish at the tip, dabbing the sponge in the middle zone where the two colors meet until they merge smoothly. This takes a few practice attempts to get the blend right, so consider trying it on a nail wheel first if you’re new to sponge gradients. Seal with a top coat to smooth the texture and add shine. This look has more visual impact than a single-color manicure while still feeling wearable for daily life. It works on both short and long nails, though longer nails give you more room to blend gradually. A makeup sponge is the only extra tool needed, and one sponge typically lasts through several attempts before it needs replacing.
22. Gold Foil Accent Stripe on Plum Nails
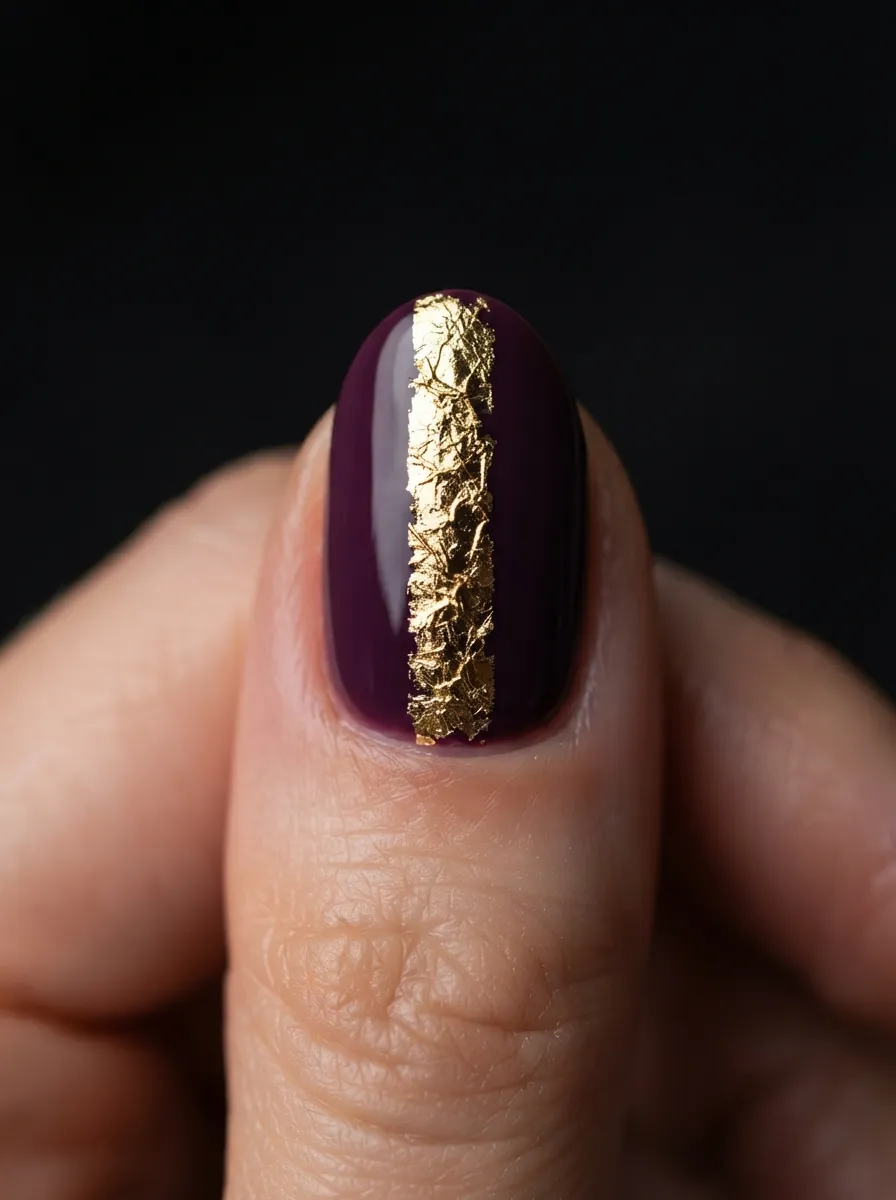
A single vertical stripe of gold foil creates a bold, graphic accent without covering the whole nail. Paint your nails a deep plum purple and let them dry completely. Apply a thin line of clear top coat down the center of one nail, then press a narrow strip of gold foil onto it using tweezers. Smooth it down gently with a soft brush, letting some natural texture and creasing remain for visual interest. Seal with a final top coat over the entire nail, foil included. This design draws the eye down the length of the nail, which can make short nails appear a little longer. Foil sheets are affordable and one sheet provides enough material for many stripes across multiple manicures. Keep the rest of your nails a solid plum to let the single striped accent nail stand out clearly against the simpler background nails.
23. Purple Nails With Gold Butterfly Charms
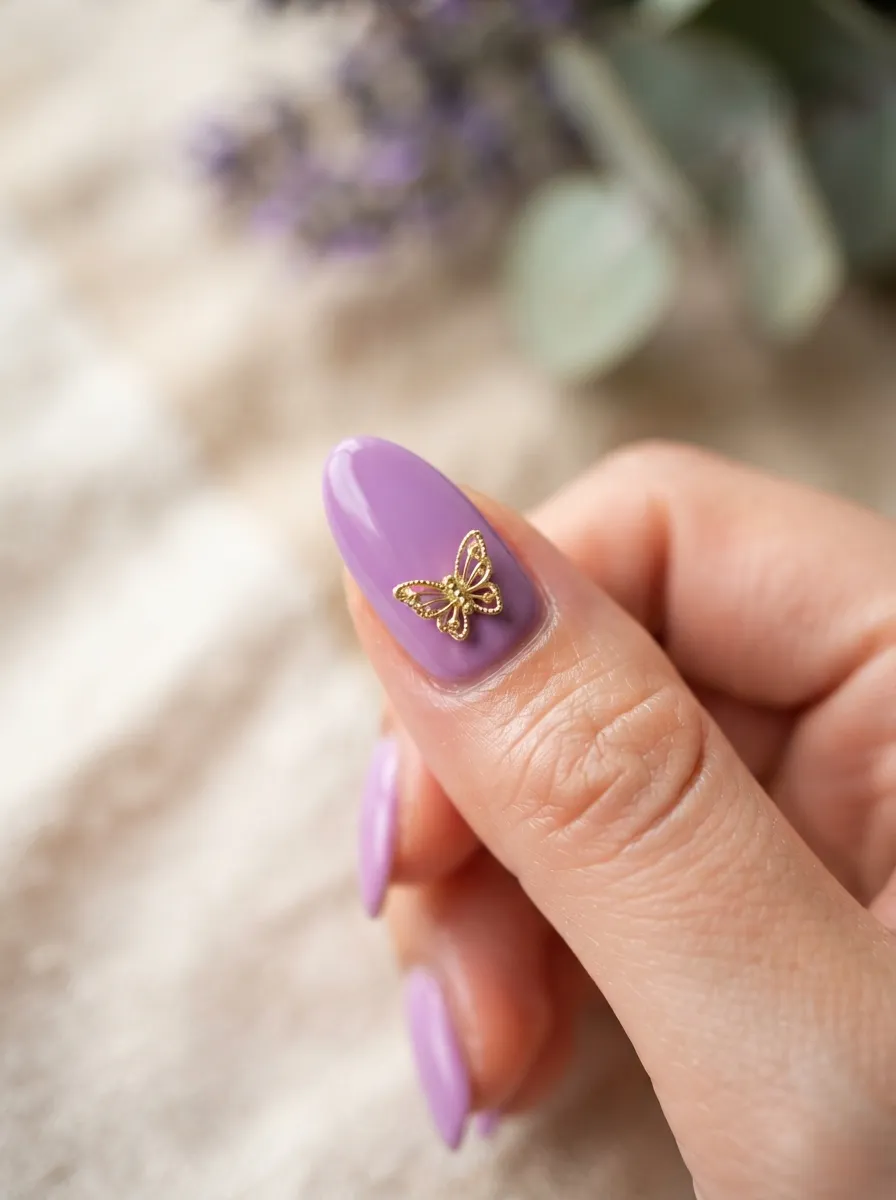
Small metal charms add a three-dimensional detail that flat nail art can’t achieve. Paint your nails a soft lilac purple and let them dry. Using a dot of strong nail glue, attach a small gold butterfly charm near the cuticle of one or two accent nails. Press down gently and hold for a few seconds until secure. Seal around the edges of the charm with top coat, being careful not to cover the charm itself, which would dull its shine. Charm packs are sold cheaply online and in beauty supply stores, often including butterflies, stars, hearts, and other shapes in one set. This design feels feminine and detailed without requiring any painting skill beyond the base color. Charms do add slight texture to the nail surface, so keep this in mind if you work with your hands often, since they may occasionally catch on fabric or hair.
24. Deep Purple With Gold Snakeskin Print
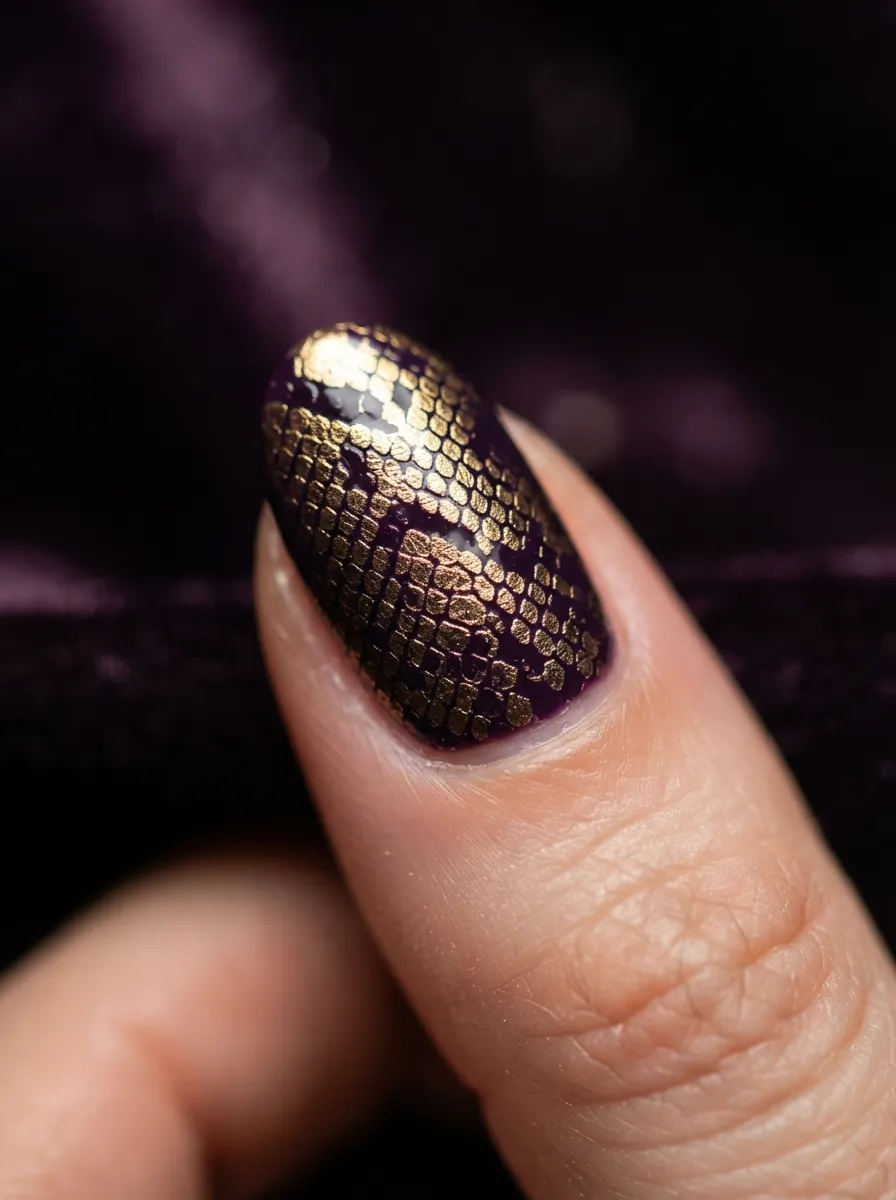
Snakeskin print gives nails an edgier, textured look using a simple stamping technique. Paint your nails a deep purple base and let them dry fully. Using a nail stamping plate with a snakeskin pattern, apply gold polish to the plate, scrape off the excess with a scraper card, and press a stamper onto the design before transferring it onto your nail with a firm, even roll. Seal with top coat once the stamped pattern has dried. Stamping plates and stampers are sold together in affordable starter kits, and one plate offers dozens of pattern options beyond just snakeskin. This technique takes a little practice to master the timing between scraping and stamping, since gold polish dries faster than some other colors. Try practicing on a spare nail or plastic sheet first. The finished look feels bold and a little daring, well suited for anyone who wants their nails to make a statement.
25. Purple and Gold Two-Tone Nails
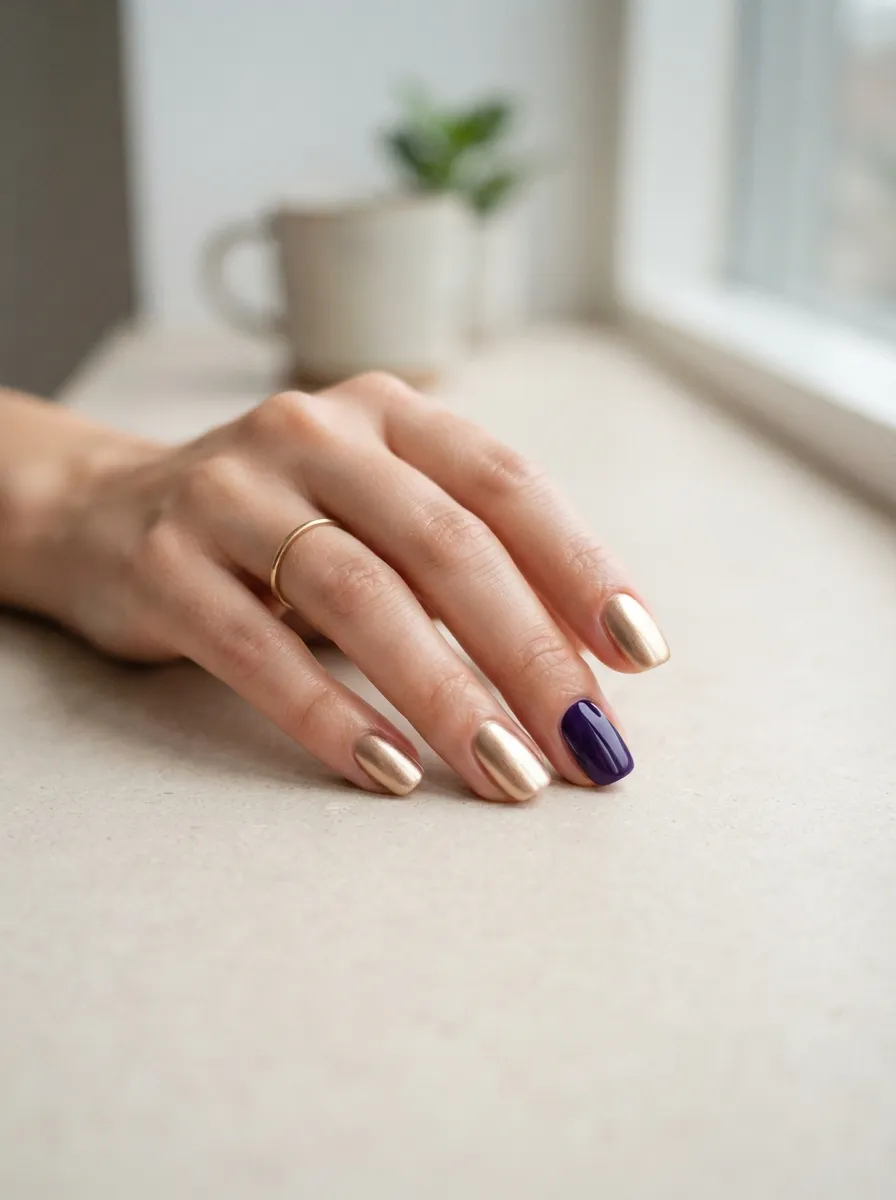
Sometimes the boldest choice is the simplest one. Instead of combining purple and gold on every nail, paint each nail a single solid color, alternating between the two across your hand. This creates a graphic, color-blocked effect without any detailed brushwork at all. Use two coats of each polish for full, even coverage, and finish with a glossy top coat across all ten nails for a cohesive shine. This design takes less time than almost anything else on this list, often under twenty minutes total, making it a great option for a last-minute manicure before an event. It only requires two polish colors, so it’s also one of the most budget-friendly choices here. Try different alternating patterns, one nail on, one nail off, or grouping three purple nails followed by two gold ones, to find an arrangement that feels balanced on your specific hand shape.
26. Gold Glitter Ombre With Purple Base
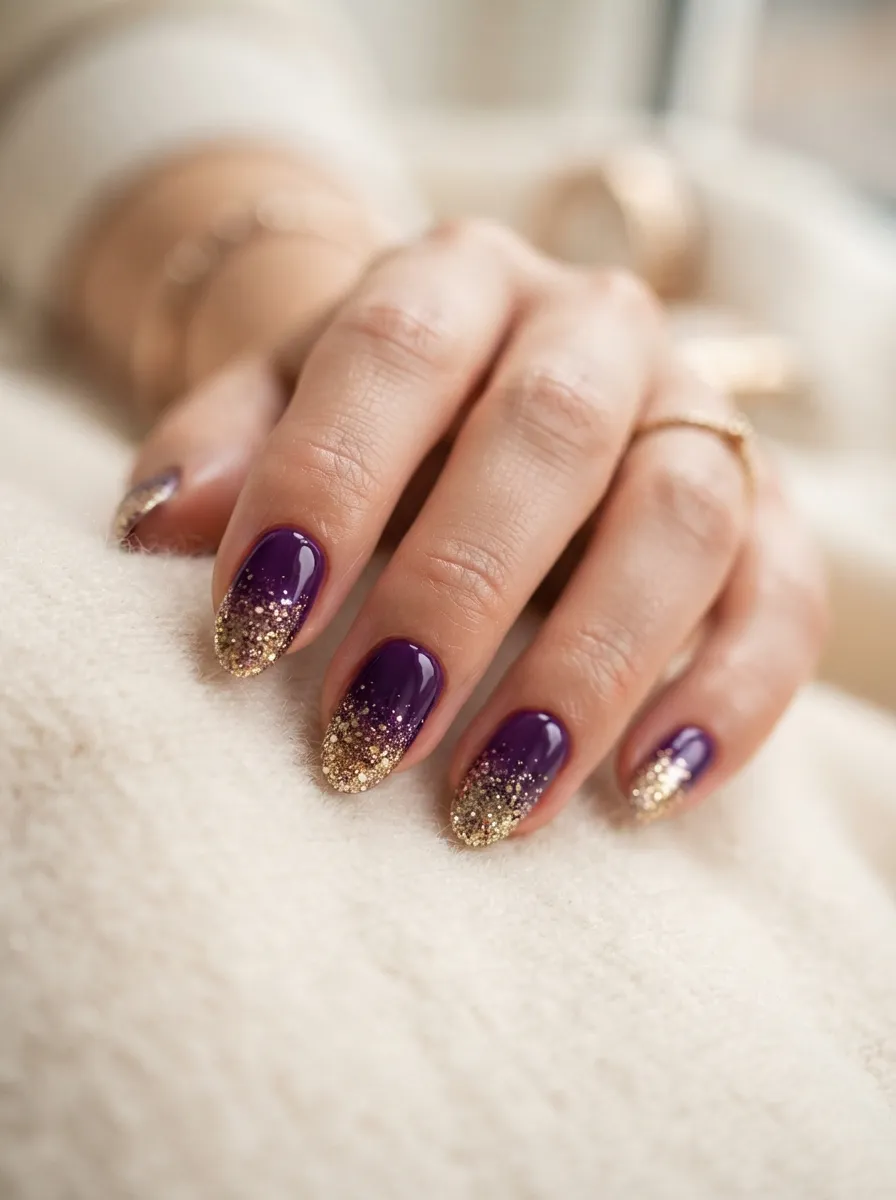
This design layers a glitter gradient directly over a solid purple base rather than blending two polish colors. Paint your nails a solid purple and let them dry completely. Using a makeup sponge, dab gold glitter polish starting lightly near the middle of the nail and building up density toward the tip, reapplying glitter to the sponge as needed for a fuller effect at the very edge. Let each layer dry slightly between dabs to control how much glitter builds up. Seal with a thick top coat, since glitter texture needs extra coats to feel smooth under your fingertips. This look has more sparkle concentration than the earlier tip-glitter design, since the fade happens gradually rather than starting abruptly at the tip line. Glitter polishes are inexpensive and widely available, and a single bottle covers many manicures. This design suits holiday gatherings, birthdays, or any evening event where extra shine feels fitting.
27. Purple Nails With Gold Rhinestone Cuff
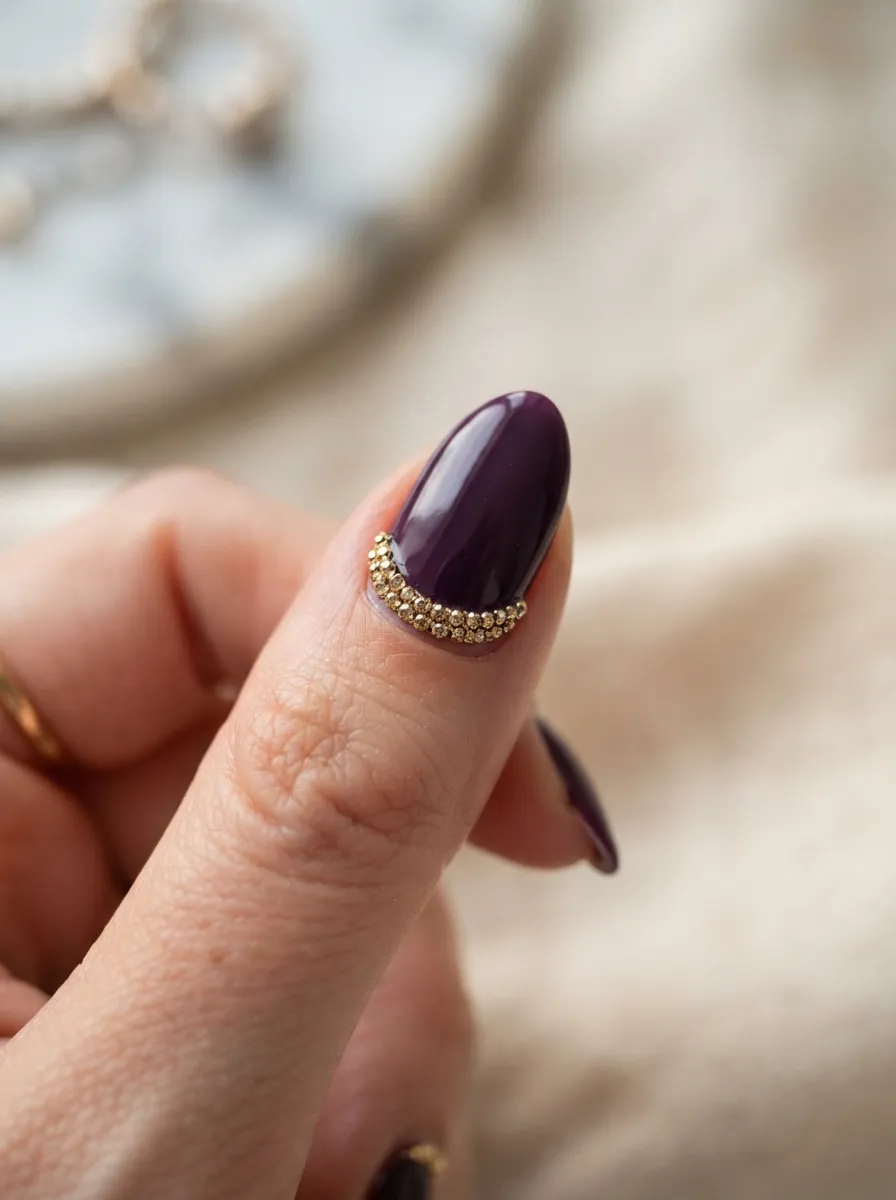
A rhinestone cuff design places a row of small gems across the base of the nail, mimicking the look of a delicate bracelet or cuff. Paint your nails a deep purple and let them dry fully. Apply a thin line of clear top coat or nail glue across the base of one or two accent nails, then place small gold rhinestones side by side along the line using tweezers or a wax pencil tip. Keep the row neat and evenly spaced for the cleanest look. Seal carefully around the stones, avoiding their surface so they stay clear and sparkly. Rhinestone packs are cheap and come in bulk, so you’ll have plenty left over for future manicures or other projects. This design pairs beautifully with actual gold jewelry, like bracelets or rings, tying your whole look together. Save it for occasions where you want your hands to feel a little extra dressed up, like weddings or holiday dinners.
Conclusion
Purple and gold nails offer more ways to experiment than most other color pairings, from quiet single-line accents to full glitter gradients and textured stamped patterns. You don’t need a professional salon budget to try any of the 27 ideas above. A few polishes, some household tools like toothpicks and old toothbrushes, and a little patience are often all it takes. Start with one or two techniques that match your current skill level, then build up to the more detailed designs like marbling or stamping as you get comfortable. Keep a small kit of foil sheets, striping tape, and rhinestones on hand so you’re ready to switch up your look whenever the mood strikes. Whether you’re dressing up for a special event or just want your hands to feel a little more polished on a regular day, this color combination delivers a rich, royal feel every time.