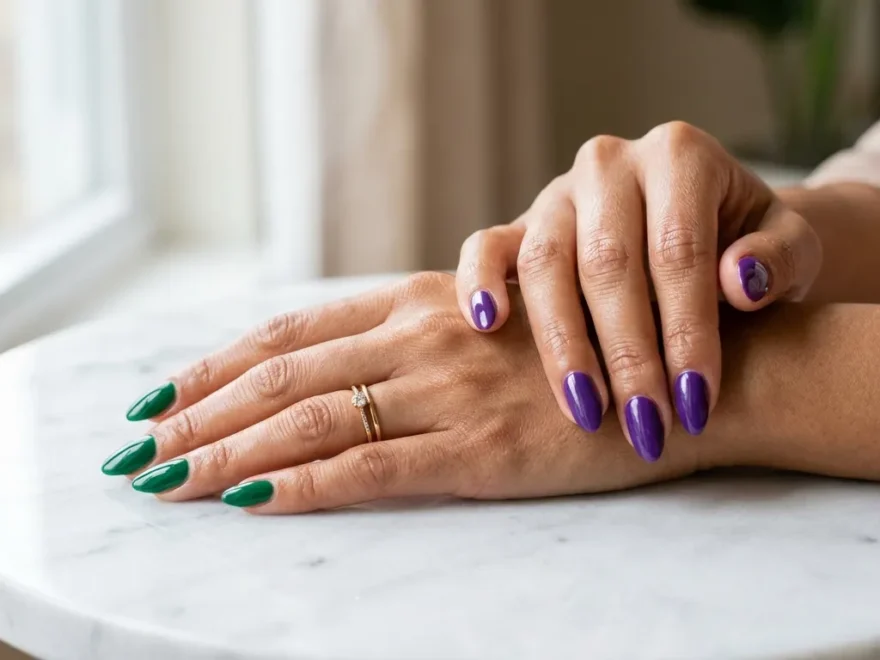
Purple and green nail ideas are one of those combinations that people underestimate until they see them in person. These two colors sit opposite each other on the color wheel, which means they naturally create contrast that draws the eye. Whether you lean toward soft lavender with sage or bold plum with forest green, there is a version of this pairing that works for your style and budget. You can achieve stunning results with drugstore polishes, nail stickers, or simple hand-painted designs. This list covers 30 fresh ways to wear purple and green on your nails, from minimalist accents to full-on art. Each idea is approachable, budget-conscious, and easy to recreate at home. If you’re also exploring Proposal Nail Ideas, elegant neutrals, romantic pinks, subtle sparkle, and timeless designs can help create a beautiful manicure that complements your ring and makes every proposal photo feel even more special.
1. Lavender and Sage Color Block Nails
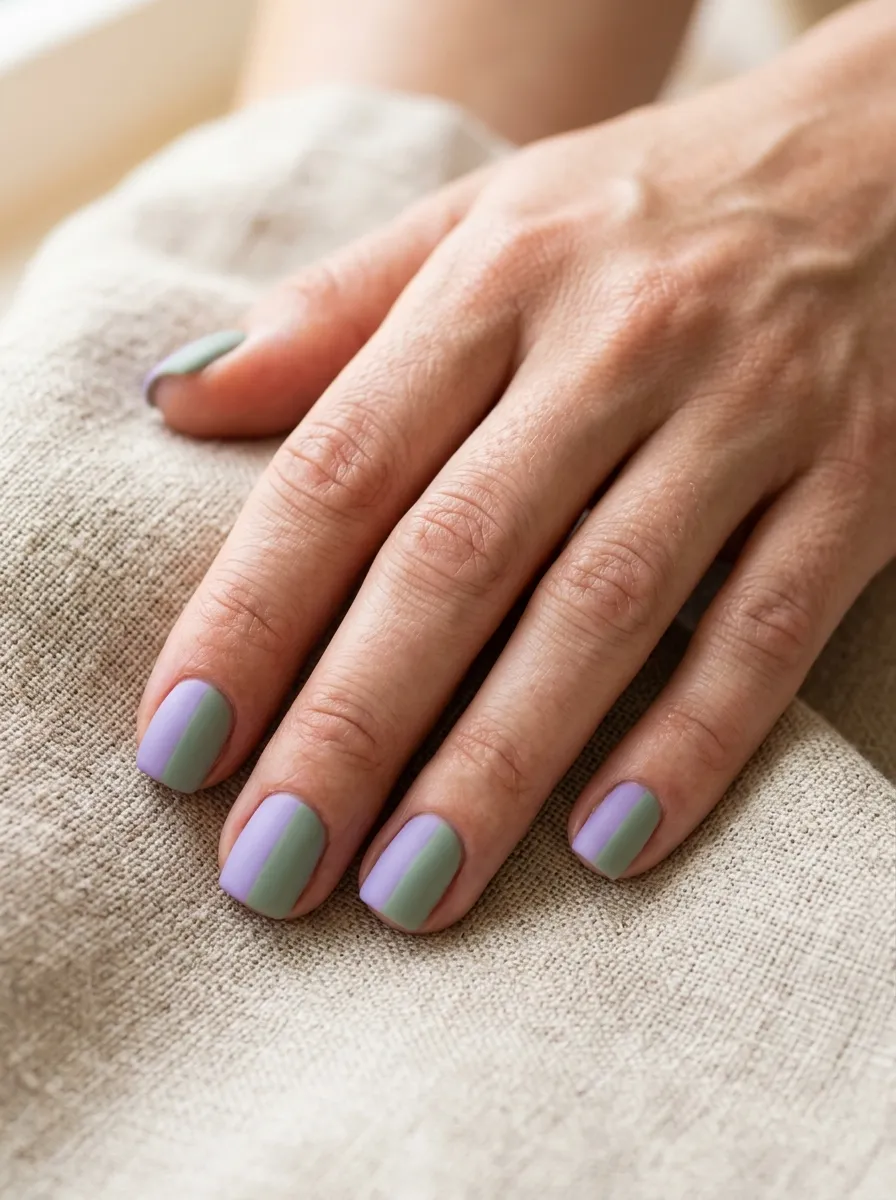
Color blocking is one of the easiest nail looks you can pull off at home. You only need two polishes and steady hands.
Paint half of each nail lavender and the other half sage green. Use tape to get a clean line if your hands are not steady.
Lavender and sage feel soft and modern together. This is not a loud look. It is calm and put-together.
This works well on short nails because the two colors fill the space without feeling crowded. On longer nails, the line has more room to make an impact.
You can find both shades at any drugstore for under five dollars each. Brands like Sinful Colors and Sally Hansen carry great options in this range.
If you want the line to feel more polished, use a thin brush dipped in acetone to clean up the edges after the polish dries.
This look pairs well with neutral outfits. It adds just enough color without competing with bold clothing.
Try it on a Friday before a weekend outing. It takes about 20 minutes and lasts well with a good topcoat applied every two days.
2. Deep Plum and Forest Green Gel Nails
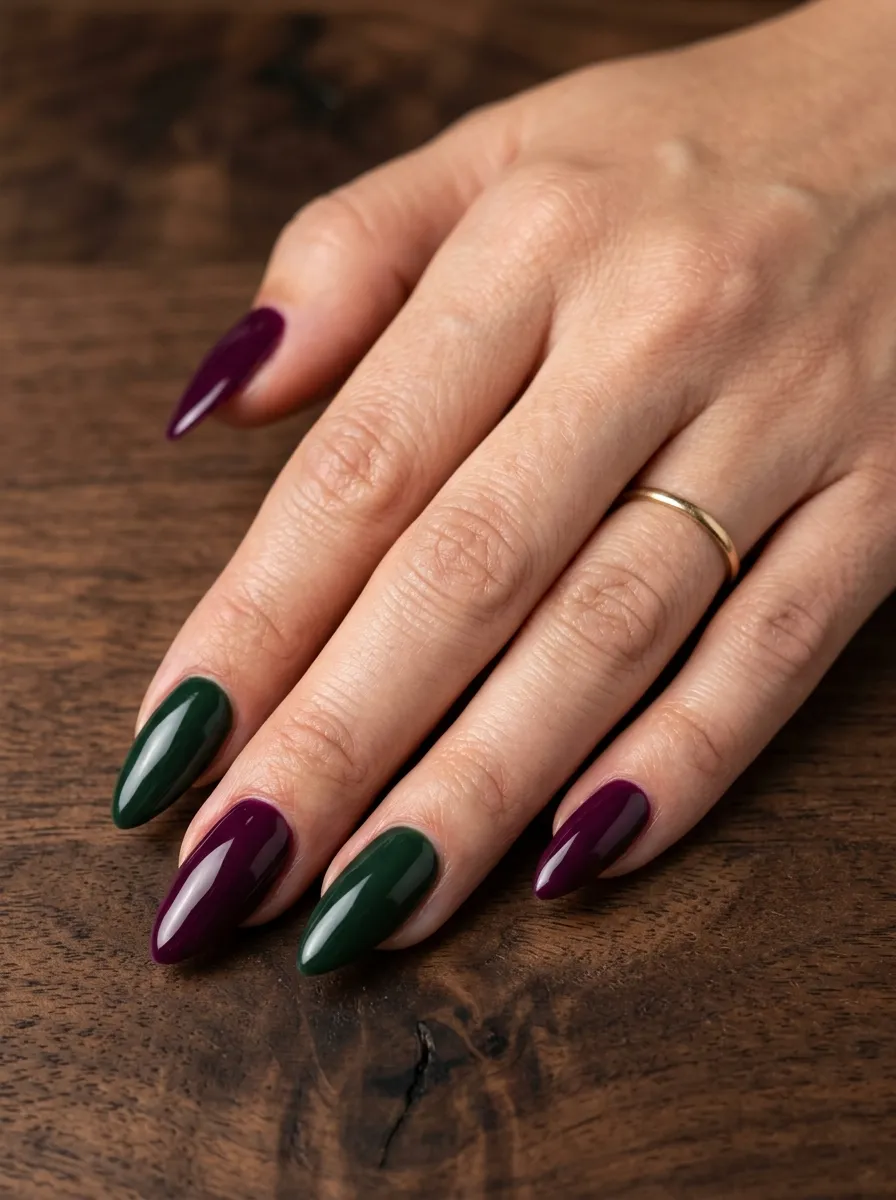
Dark and moody nail looks have a strong moment every fall and winter. Deep plum and forest green are two of the best shades for this aesthetic.
Alternate the colors across your fingers. Plum on the thumb, forest green on the index finger, and so on.
Jewel-toned nails like these photograph beautifully. They show up well against dark backgrounds and in low light.
If you go to a nail salon, this is one of the more affordable gel designs. No art is needed, just two strong colors in a clean application.
At home, you can recreate this with regular polish and a high-gloss topcoat. The topcoat does a lot of the heavy lifting and mimics the gel finish.
This combination works especially well on medium to long nails. The dark tones make shorter nails look a little more dramatic too.
Wear this look with a neutral outfit and let the nails be the statement. Black, white, and cream clothing all work perfectly here.
These shades suit every skin tone. The depth of the colors reads differently on light versus dark skin, and both versions look incredible.
3. Purple Glitter Tips with Green Base
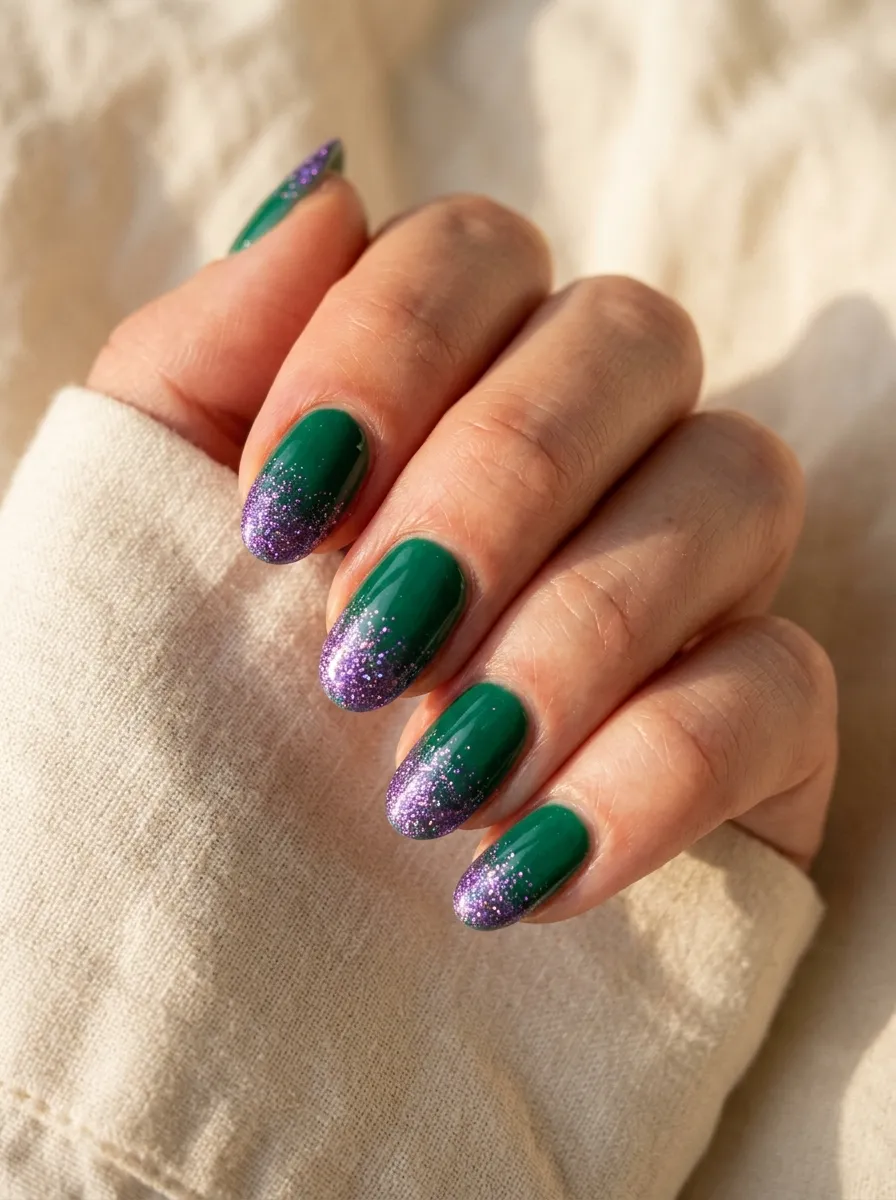
This is a fun twist on the classic French tip. Instead of white tips, you use purple glitter.
Start with two coats of emerald green as your base. Let it fully dry before moving to the tips.
Apply purple glitter polish to the tips using light dabbing motions. You can use a makeup sponge for a diffused, gradient effect.
This look is festive without being over the top. It works for holidays, parties, or whenever you want a little sparkle in your day.
You do not need a nail artist to pull this off. The dabbing technique is forgiving and actually looks better when it is slightly uneven.
Glitter nail polishes are inexpensive and widely available. Look for ones with fine holographic glitter for the best light-catching effect.
Seal everything with a thick topcoat to keep the glitter from snagging. Apply two layers for the smoothest finish.
This look lasts well for about a week before tip wear becomes noticeable. A quick touch-up on the tips can extend the life by a few more days.
This is also a great look for people who are just starting to experiment with nail art. It requires minimal skill and delivers a high-impact result.
4. Mint Green and Lilac Swirl Nails
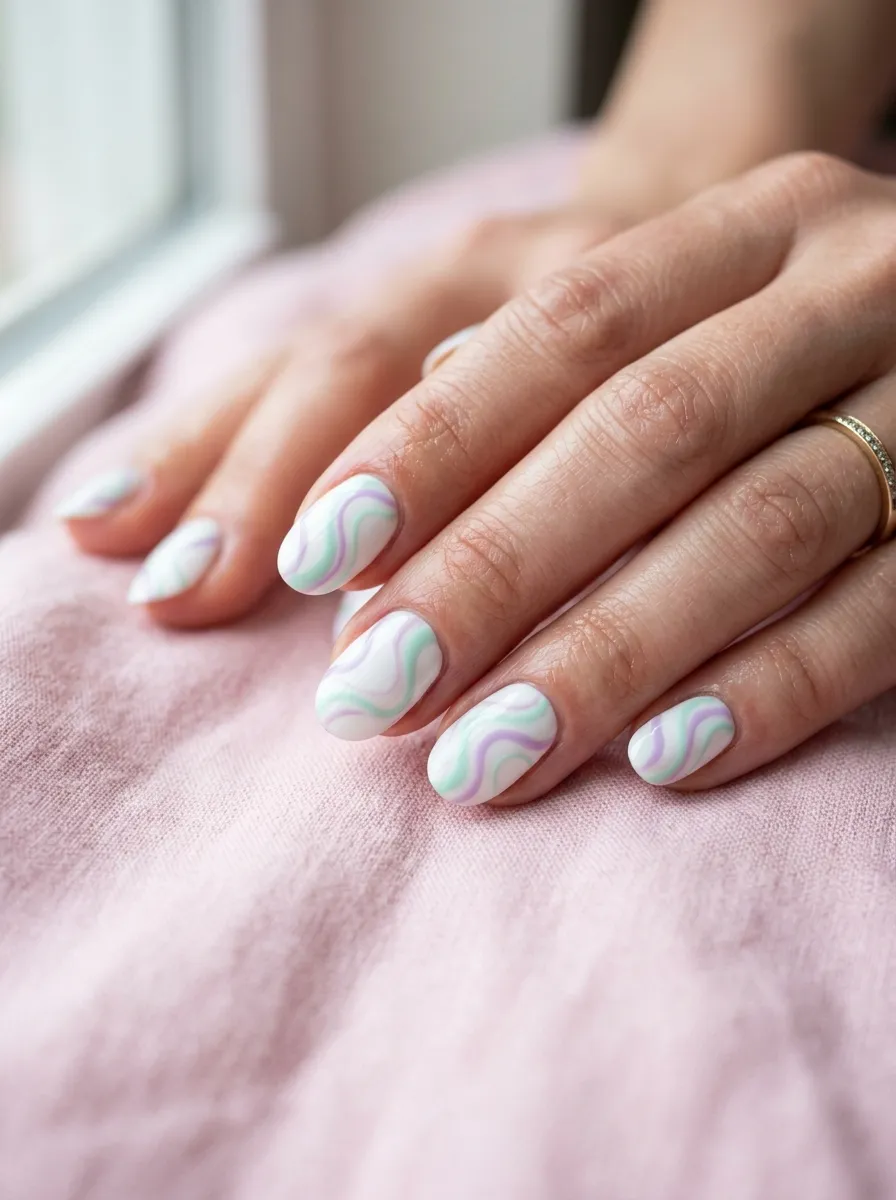
Swirl nails are everywhere right now. The good news is they are easier to do than they look.
Use a white base coat first. This makes both the mint and lilac pop much more than they would on a bare nail.
Dip a thin nail art brush into mint green polish and draw loose, flowing curves across the nail. Then do the same with lilac. Let the lines overlap and cross.
Do not try to make it perfect. The beauty of swirls is that they look intentional even when they are free-form.
A dotting tool or a toothpick works if you do not have a nail art brush. Both give you enough control for loose swirl shapes.
Pastel swirls work especially well in spring and summer. They feel light and airy against sun-kissed skin.
This is a great design for people who love nail art but do not have a lot of time. Each nail takes about two minutes to complete.
Finish with a matte topcoat for a modern editorial feel. Or use a glossy topcoat for a more classic look.
Both options are beautiful. The matte version photographs especially well in natural light.
5. Ombre Purple to Green Nails
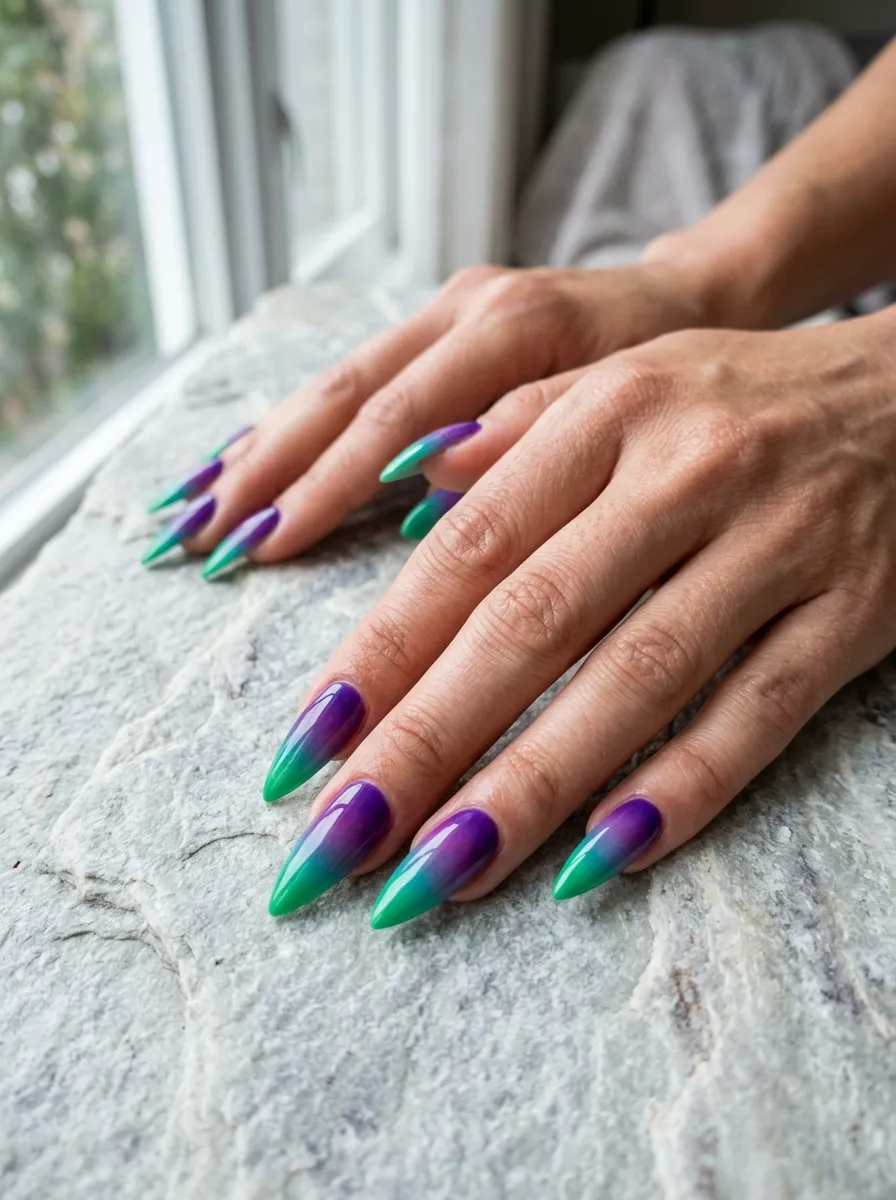
Ombre nails look expensive. They feel like something only a professional can do. But the sponge technique makes them very doable at home.
Paint both purple and green onto a makeup sponge in overlapping strips. Then dab the sponge onto your nail in a pressing motion.
Repeat two or three times, building up the color. Clean up the edges with acetone on a small brush.
The key to a smooth ombre is working quickly before the polish dries on the sponge. Have everything ready before you start.
This look works on any nail length. On shorter nails, the gradient is more compressed. On longer nails, you get the full color journey.
Purple to green ombre reads differently depending on which shades you pick. Pastel versions feel soft and dreamy. Dark versions feel bold and dramatic.
Try a violet-to-sage combo for a muted, sophisticated take. Or go bright purple to neon green for maximum impact.
Seal with a thick topcoat to smooth out any texture from the sponging technique. Two topcoat layers will give you the cleanest finish.
This is one of those looks that gets compliments every single time. People rarely believe you did it yourself.
6. Green French Tips with Purple Accent Nail
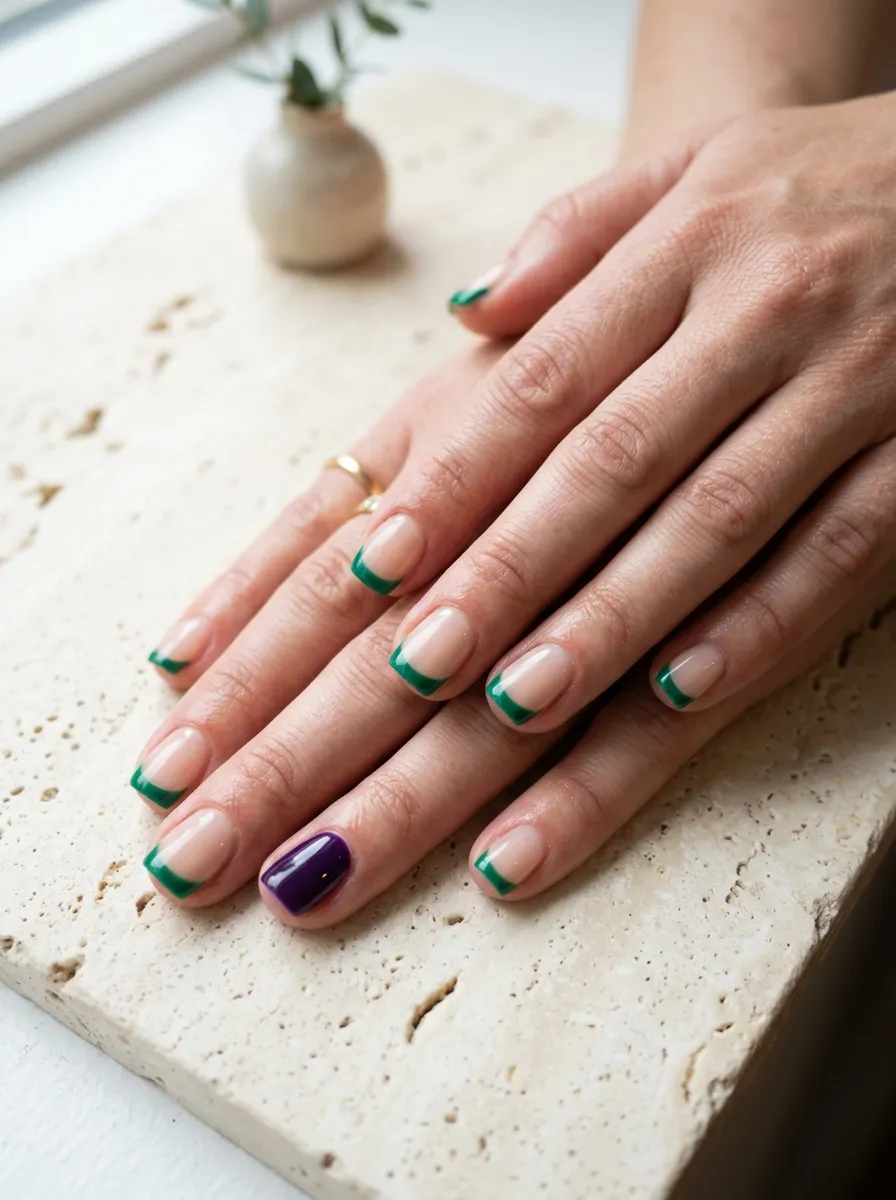
The accent nail approach is one of the smartest ways to wear two bold colors without committing to both on every finger.
Keep most of your nails simple with a nude base and green French tips. Then paint one nail, usually the ring finger, fully in purple.
This creates a focal point without overwhelming the hand. The eye moves naturally to the accent nail.
Green French tips are a modern update on a classic look. They feel unexpected and current without being loud.
You can do this look at home with a thin brush or even nail tape to get a clean tip line. The tape method is especially beginner-friendly.
This is also a great option for workplaces with conservative dress codes. The nude base keeps it subtle while the pops of color keep it interesting.
Try a dark hunter green for tips with a plum accent nail in colder months. Switch to lime green tips with a lavender accent for summer.
Either version of this look stays polished for up to ten days with a topcoat refresh every few days.
It is one of those reliable, low-effort designs that always looks like you put in more time than you actually did.
7. Purple Marble with Green Veining
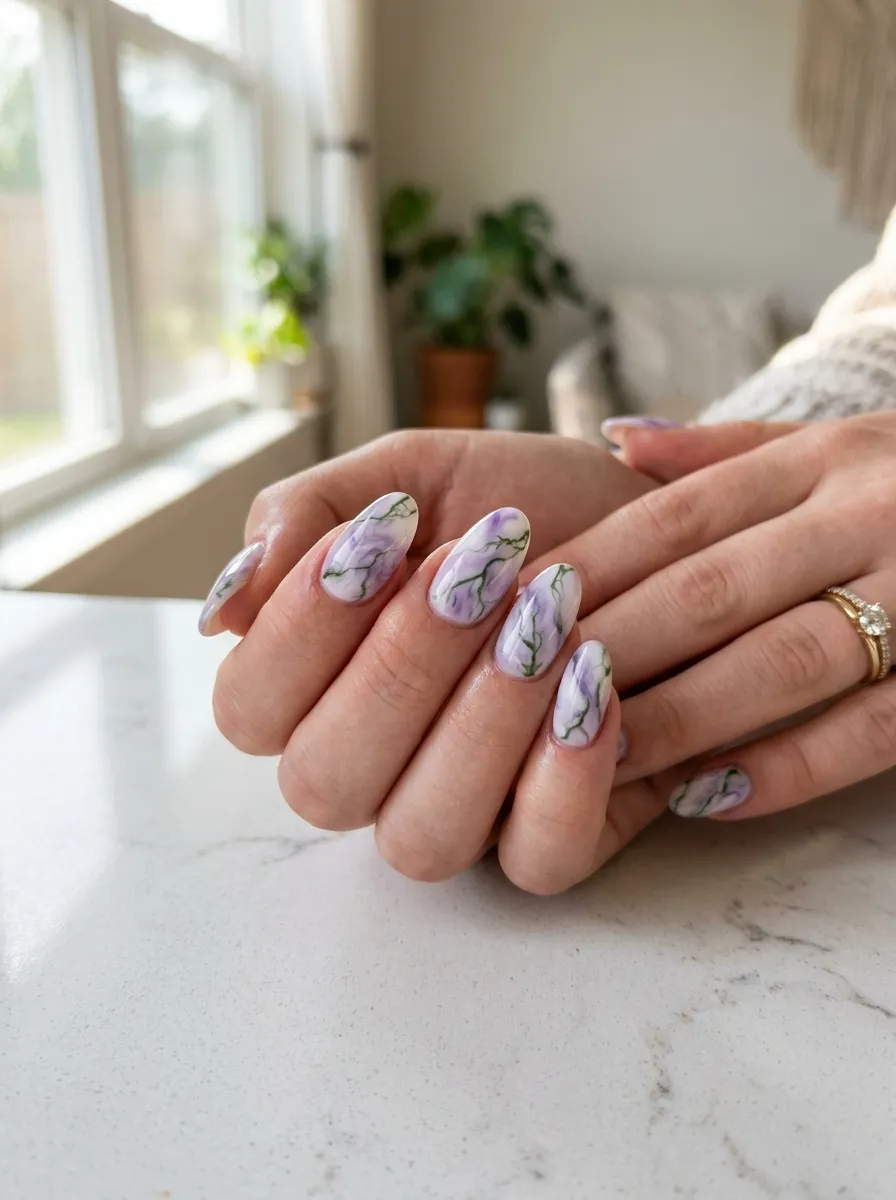
Marble nails have a luxurious look that costs almost nothing to recreate at home. The trick is in the veining technique.
Start with a white or light purple base. Let it dry completely.
Dip a thin nail art brush or even a piece of torn foil into green polish and drag it across the nail in thin, branching lines. The irregular edge of the foil creates a more organic vein pattern than a brush alone.
Add a few lines, then add thinner branches off of those lines. Do not overdo it. Less is always more with marble.
Seal with a glossy topcoat to give the look that polished stone feel. The topcoat also blurs the lines slightly, which makes the marble look more realistic.
This design works beautifully on medium to long nails where the veining has room to travel.
If the green feels too bold, try a sage or olive tone for a more subtle effect. Dark emerald creates a dramatic, high-fashion marble look.
This is a great design to try on a slow Sunday. Pour a coffee, set up your nail supplies, and take your time with each nail.
You will end up with nails that look like they came from a high-end salon.
8. Neon Green and Purple Graphic Lines
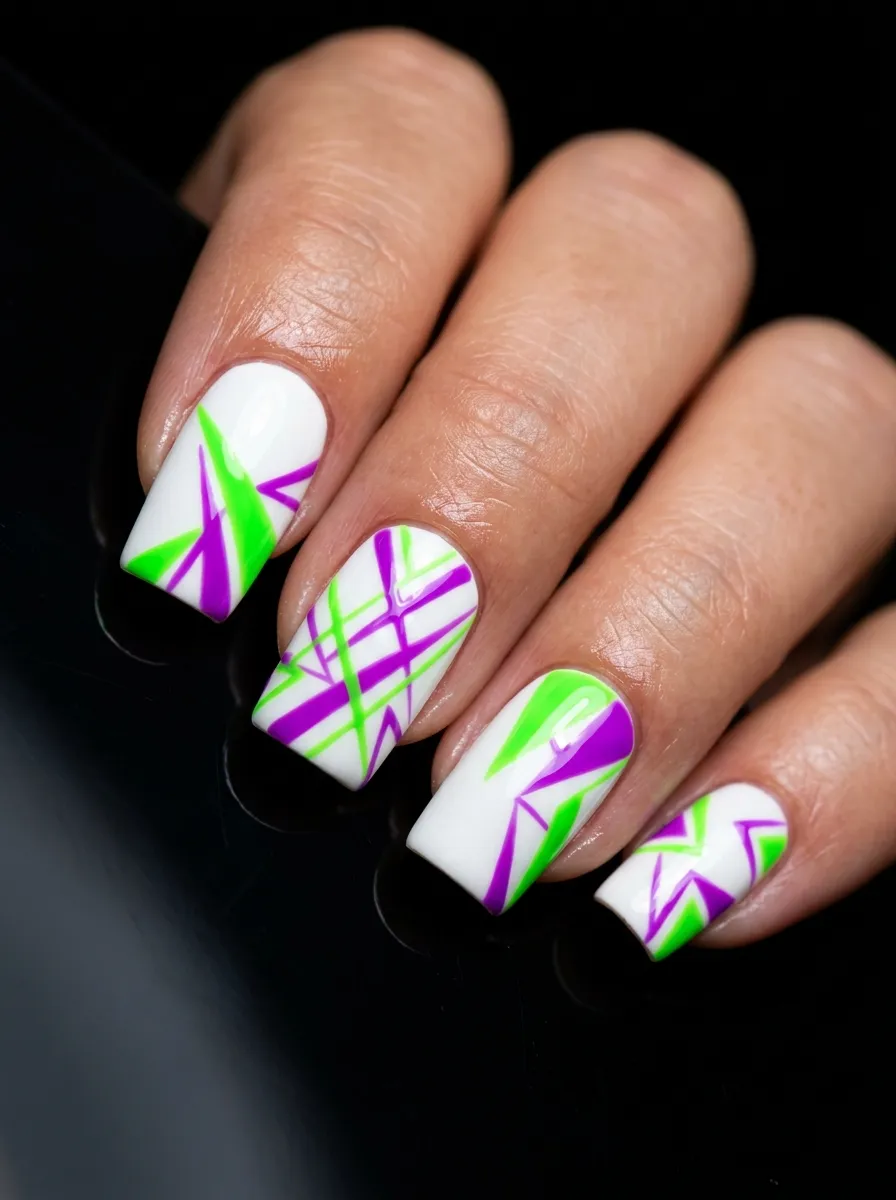
Graphic nail art is one of the most impactful styles you can wear. Bold lines and angles create a look that feels like wearable art.
Start with a white base coat. Use nail tape to create clean, straight lines across each nail.
Paint neon green along some tape sections and bright purple along others. Remove the tape while the polish is still slightly wet for the sharpest edges.
Crossing lines, triangles, and angular shapes all work well here. You do not need to plan it out perfectly. The abstract nature of the design is part of the appeal.
Neon shades require a good base coat to appear fully opaque. Apply two coats of each color for the best saturation.
This look is bold and intentional. It works well at music festivals, art events, or any time you want your nails to start conversations.
Nail tape is available online and at beauty supply stores for very little money. It makes clean graphic nail art accessible even for beginners.
Seal with a matte topcoat to make the colors appear even more vibrant. The contrast between matte finish and bright pigment is visually striking.
This is a quick design once you have the tape technique down. Each nail takes about five minutes.
9. Dusty Purple and Olive Green Tortoiseshell
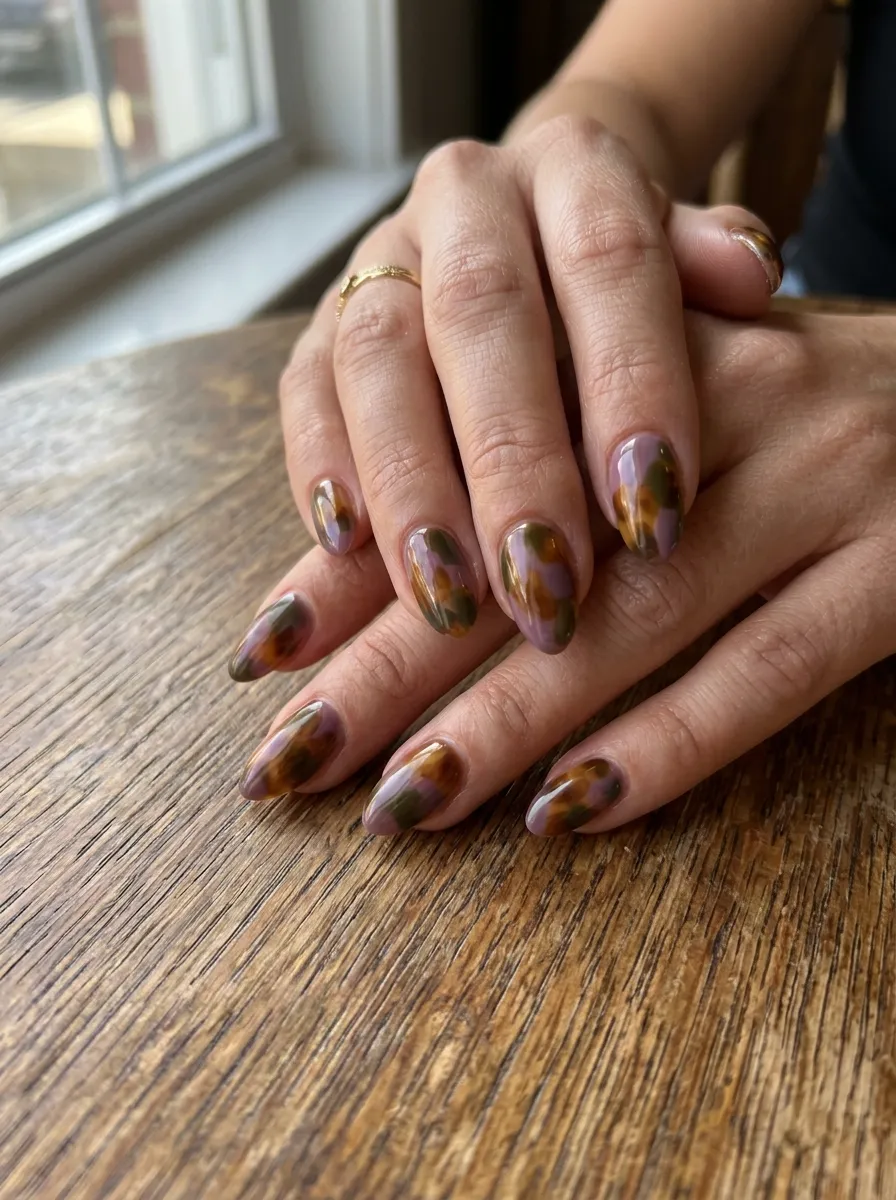
Tortoiseshell nail art is unexpected when done in non-traditional colors. Swapping the usual amber tones for purple and olive creates something genuinely original.
Start with a warm nude or amber base. Drop spots of dusty purple and olive green onto the nail using a dotting tool or the tip of a brush.
While the spots are still wet, gently drag a thin brush through them to create the blurred, organic tortoiseshell pattern. Work quickly.
The shapes should look irregular and overlapping. Real tortoiseshell is never uniform, so do not try to control it too much.
Add a few thin lines of dark brown or black to separate some of the patches. This adds depth and makes the pattern look more dimensional.
Finish with a glossy topcoat to give the effect that polished resin look. Two coats will give the best depth.
This is one of those designs that looks incredibly complex but takes under 15 minutes per nail once you practice the technique a few times.
It suits warmer skin tones beautifully. The olive and dusty purple feel very Mediterranean and earthy.
Try this look in autumn when you want something more textured and warm than the typical fall nail options.
10. Pastel Purple and Green Checkerboard
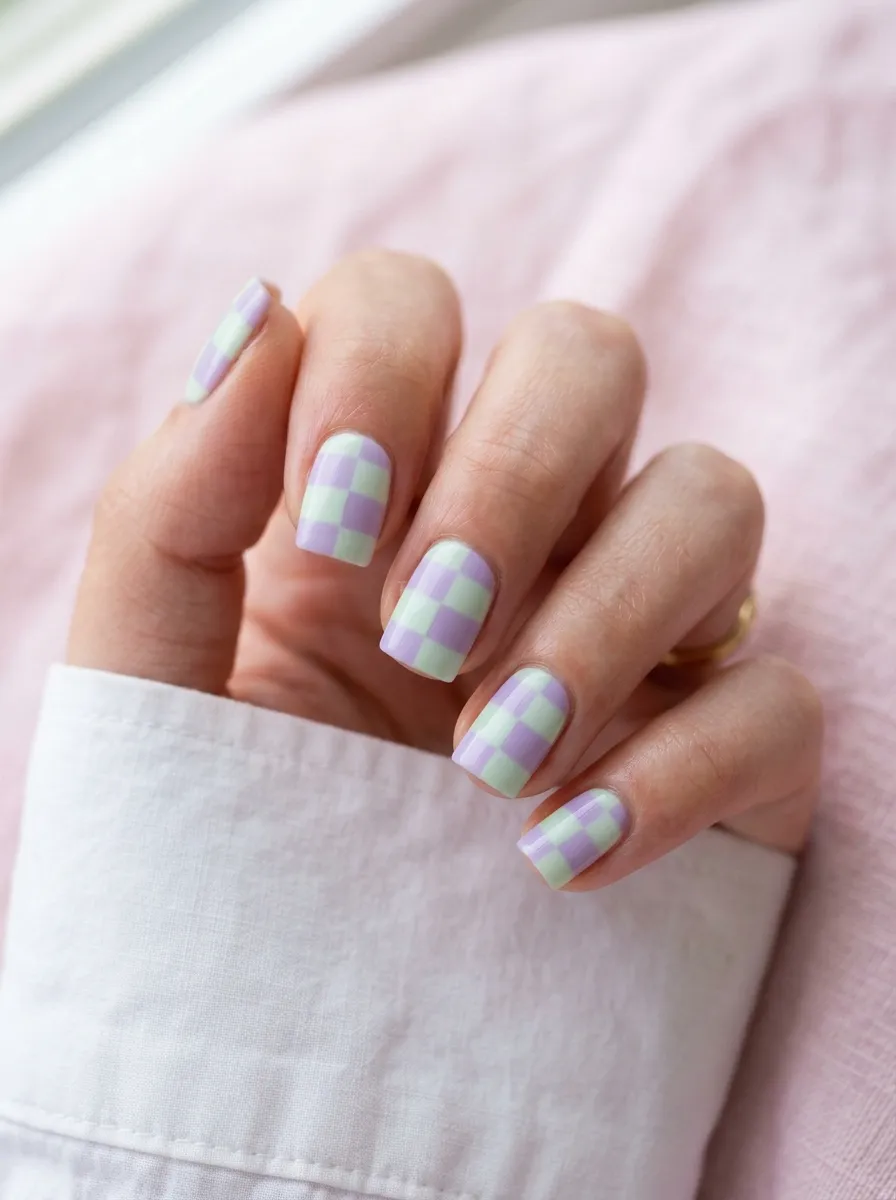
Checkerboard nails have been popular for a few years and they are not slowing down. The pastel version is softer and more wearable than the classic black-and-white.
Use nail tape or a thin brush to create a grid pattern on each nail. Alternate pastel lavender and pale mint in each square.
Getting the grid even takes a little patience. Pre-drawing it lightly with a white pencil before painting can help.
Short square nails are the best shape for this pattern. The flat surface gives the grid maximum space to show.
Pastel checkerboard looks great in spring and summer. It has a retro feel that pairs well with casual, colorful outfits.
If hand-painting the grid feels like too much, look for checkerboard nail stickers online. They come in many color combinations and make the process much faster.
Apply the stickers over a base coat and seal with topcoat for a finished look that lasts up to a week.
This is one of those nail designs that photographs exceptionally well. It looks great on social media and in person.
Keep the rest of your look simple when you wear this. The nails do all the talking.
11. Purple Chrome and Green Foil Mix
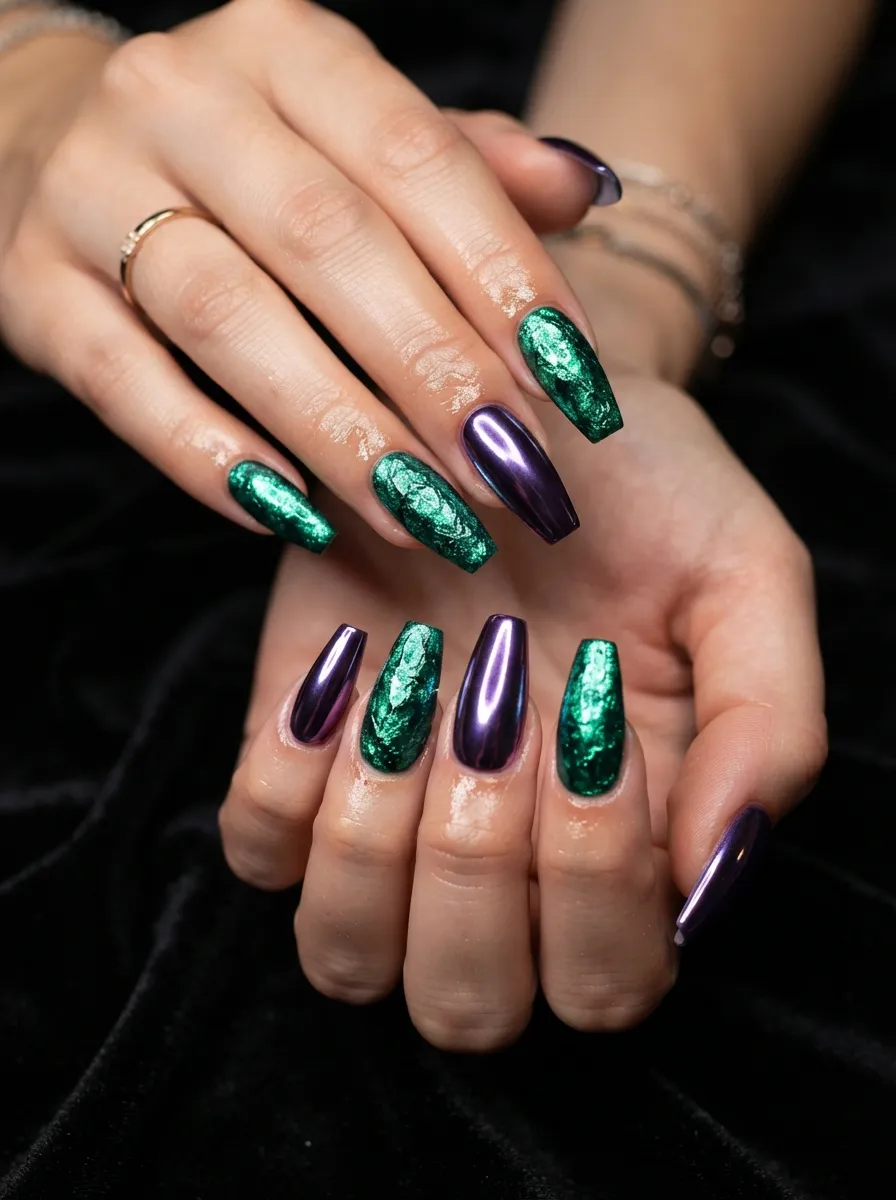
Chrome and foil finishes are two of the most striking textures you can put on your nails. Mixing them on alternating fingers creates something dramatic and editorial.
Apply a purple chrome powder over a gel or dark polish base to get that mirror-like finish. Use a silicone finger tip applicator to buff the powder in circular motions.
On alternating nails, press green nail foil sheets onto tacky topcoat to get the crinkled, metallic texture.
The combination of the smooth chrome and the irregular foil texture creates visual interest across the hand.
Both chrome powders and nail foils are available online for very affordable prices. You can get starter kits that include multiple colors for under fifteen dollars.
This look is best on medium to long nails where the textures have more surface area to show.
It is ideal for evenings out, performances, or any event where you want your hands to catch the light.
The two different textures will photograph differently depending on the angle. That variability is part of the appeal.
A strong topcoat is needed over both finishes to protect them and extend wear time.
12. Botanical Purple Floral on Green Background
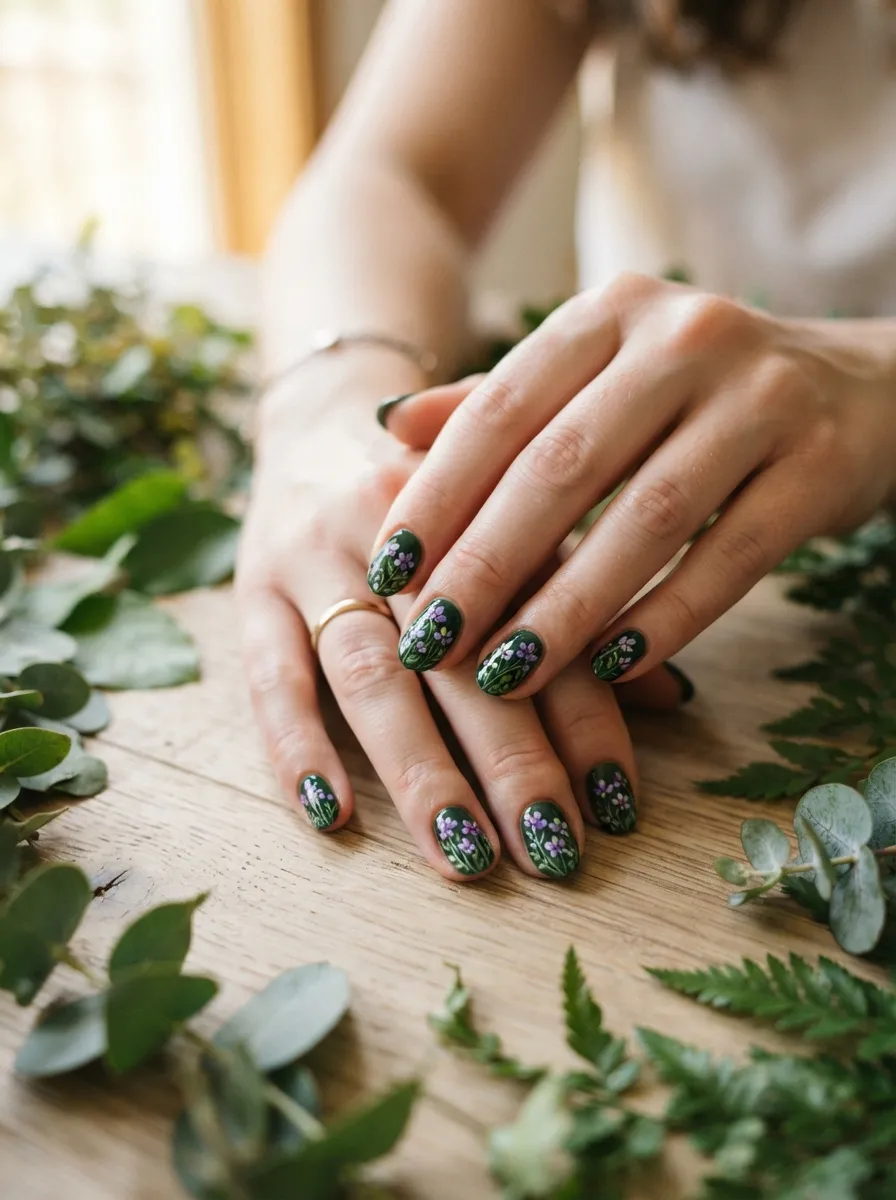
Floral nail art sounds complicated but small, simple flowers are very achievable at home with a dotting tool.
Paint all your nails in deep forest green. This becomes the garden background for your flowers.
Use a dotting tool dipped in purple polish to create five-petal flowers. Press the dotting tool at five angles around a central point. That is the flower.
Add white or yellow dots in the center of each flower. Add thin stem lines with a thin brush or toothpick.
You do not need to cover the entire nail in flowers. Two or three flowers per nail with a bit of green showing looks more natural and less crowded.
This look feels romantic and botanical. It works beautifully for garden parties, outdoor events, and spring occasions.
Practice on paper or on your non-dominant hand first. The dotting technique becomes very intuitive after a few tries.
A good starter dotting tool set costs about three to five dollars online and opens up a huge range of nail art possibilities.
Finish with a glossy topcoat to make the flowers look like they are sealed behind glass.
This is one of the most rewarding DIY nail designs because the final result looks far more skillful than the actual effort required.
13. Two-Toned Purple and Green Negative Space Nails
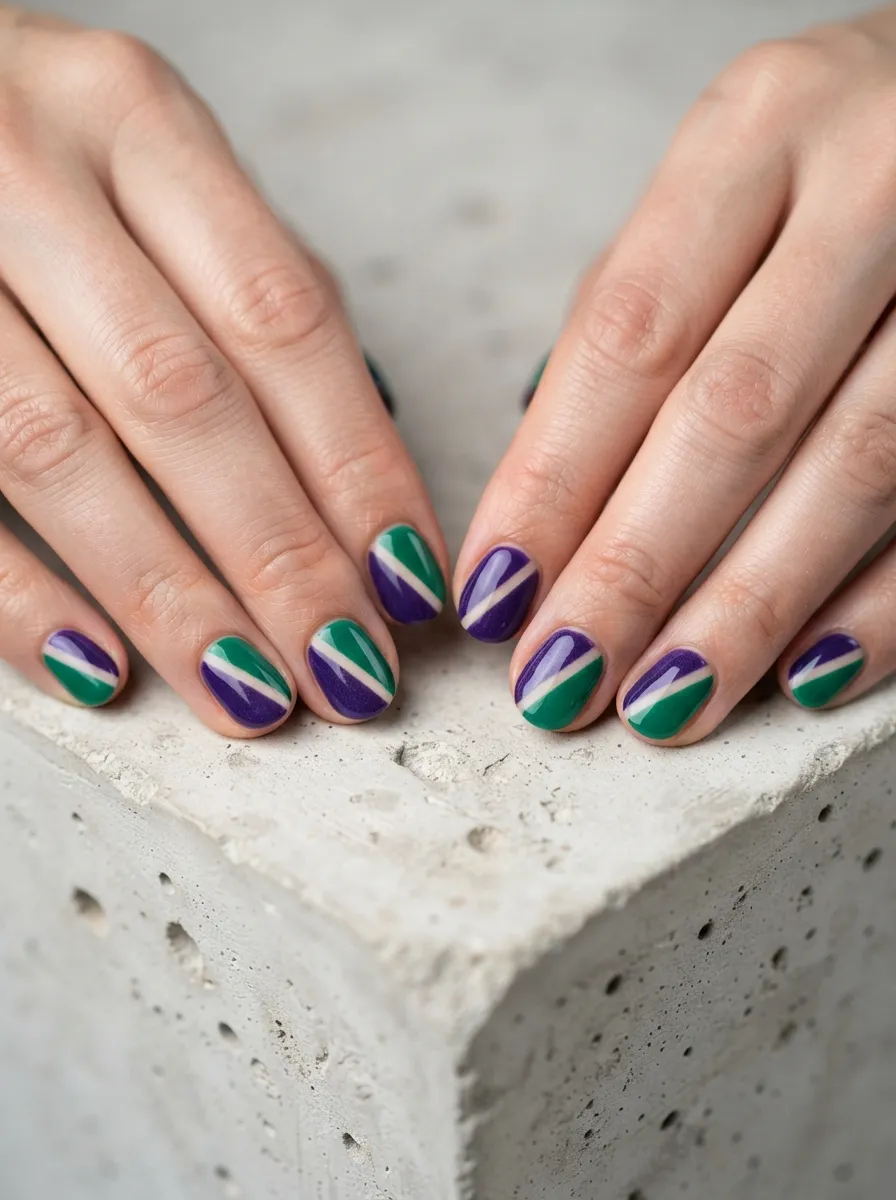
Negative space nail art uses your bare nail as part of the design. It is modern, minimal, and surprisingly easy.
Divide each nail diagonally with a strip of tape. Paint one side deep violet and the other side emerald green. Leave the taped strip bare to create the negative space.
When you remove the tape, a clean strip of natural nail runs through the center of the color block.
The bare nail strip adds a graphic, architectural quality to the design. It makes the colors feel more intentional and less like an accident.
This look works on any nail length. On shorter nails, it reads as bold and graphic. On longer nails, it feels more sculptural.
Try varying the angle of the tape on different fingers for an asymmetric effect across the hand.
No topcoat is needed over the negative space strip, which actually protects that section from chipping and keeps the bare nail looking clean.
Apply topcoat over the colored sections as normal for extended wear.
This design is faster than it looks. Once you have your tape placed, the painting itself takes only a few minutes per nail.
14. Grape Purple and Lime Green Color Pop Nails
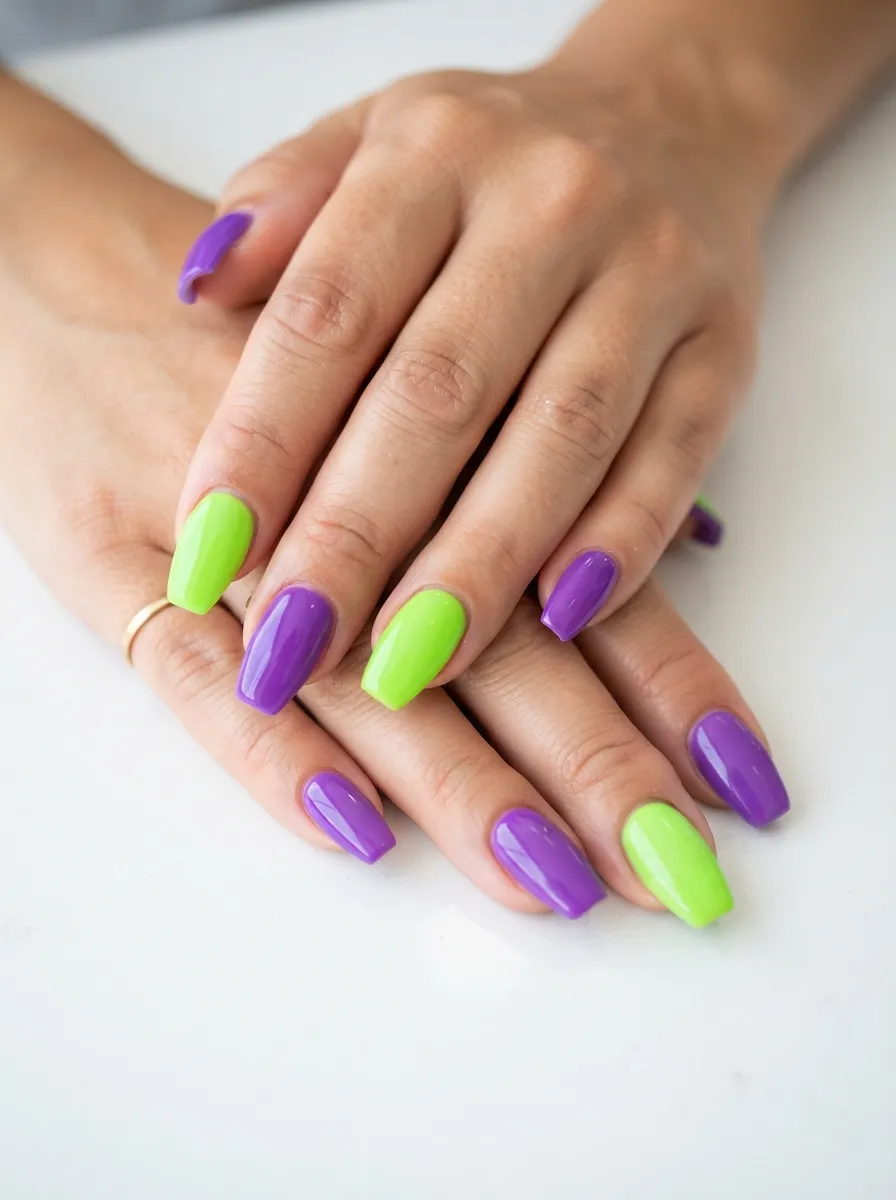
Sometimes the boldest nail look is also the simplest. Solid, saturated color on alternating nails creates maximum impact with minimum effort.
Paint your thumb and middle finger in vivid grape purple. Paint your index, ring, and pinky fingers in electric lime green.
Or flip the pattern. There is no wrong way to alternate two colors.
This look is pure color theory at work. Purple and lime green are near-complementary colors, which means they intensify each other when placed side by side.
Both shades are available in every price range. Neon lime greens and bright purples are especially well-stocked during summer at most drugstores.
This is a great option for beginners because there is no nail art involved. Clean application of two solid colors is the entire design.
The key to making this look polished is thin, even coats. Two thin coats of each color will look much cleaner than one thick coat.
Finish with a glossy topcoat to add shine and protect the color.
This is also a great summer pedicure option. Lime and purple toes peek out of sandals and always look intentional and fun.
15. Violet and Green Galaxy Nails
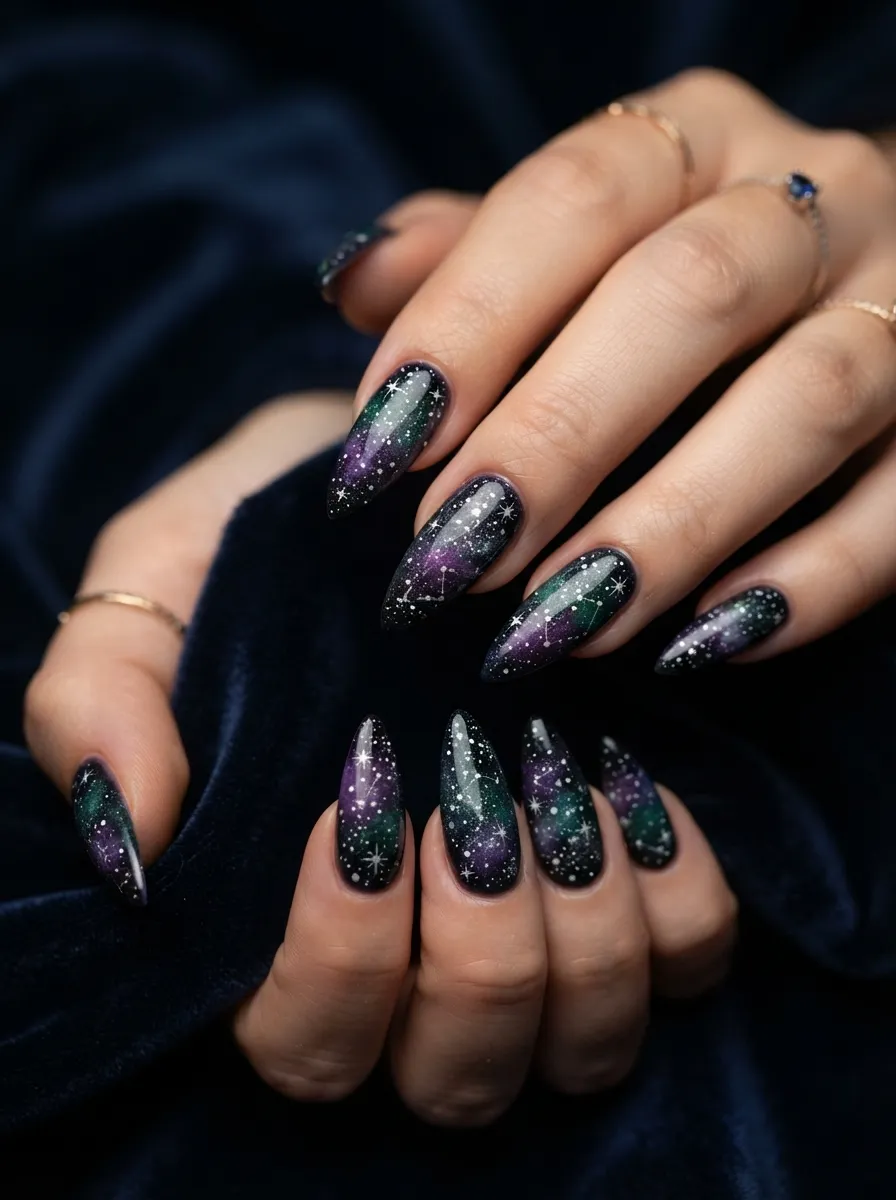
Galaxy nails combine sponging, dotting, and a black base into a look that feels like outer space on your fingertips.
Start with a black base coat. Let it dry fully.
Using a makeup sponge, dab on patches of violet and dark green in irregular, cloud-like shapes. The patches should overlap and blend slightly.
Add more depth by sponging on some dark blue or navy in the gaps. Then use a thin brush or toothpick to add tiny white dots as stars.
The more dots you add, the more cosmic the effect. Vary the dot sizes for a more realistic starfield.
This is one of those designs where imperfection makes it better. No real galaxy has clean edges or even colors.
Finish with a glossy topcoat to give the space scene that dark, glassy look.
This design works best on medium to long nails where the scene has more canvas to develop. Shorter nails work too but the galaxy feels more compressed.
It is a great weekend project when you want to spend some time on something creative. Put on music or a show and take your time with each nail.
16. Striped Purple and Green Abstract Nails
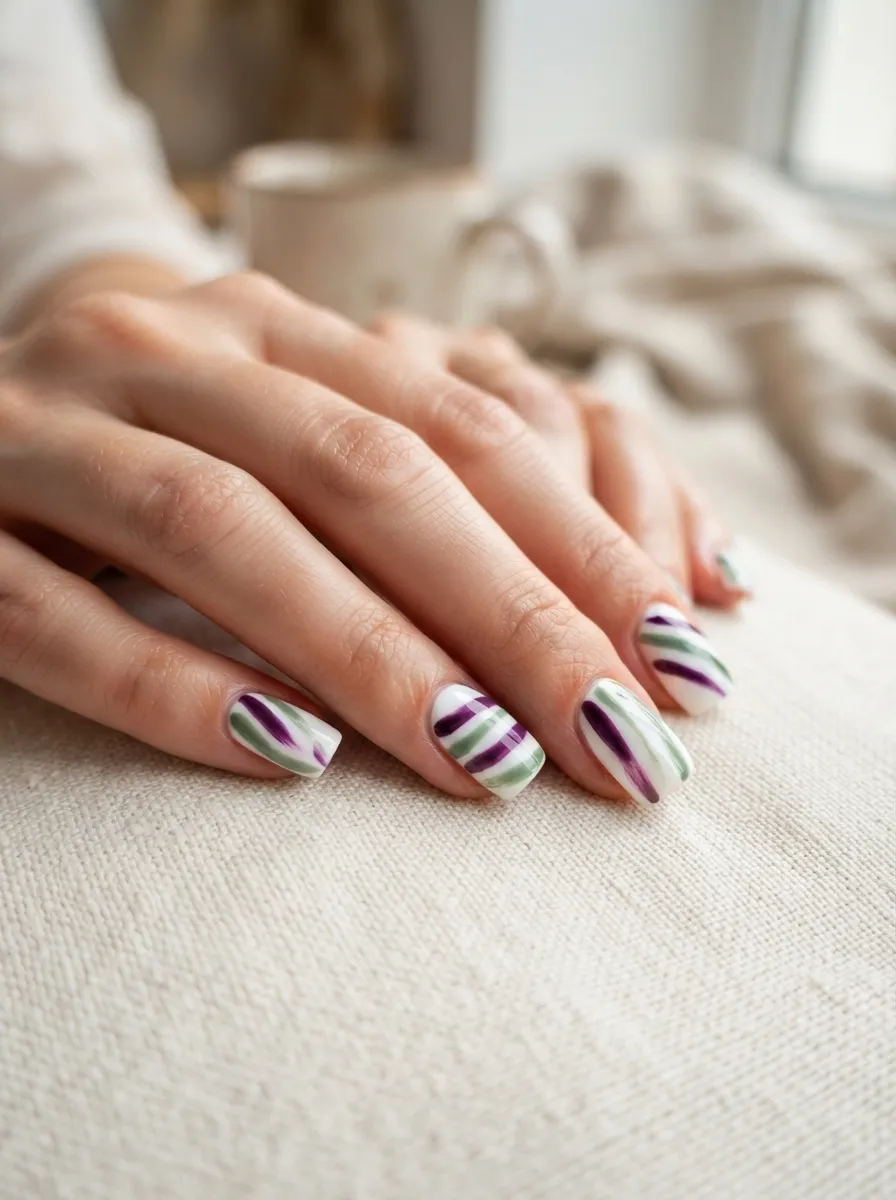
Abstract stripes are one of the fastest ways to create nail art that looks complex and planned. All you need is nail tape and two polishes.
Place strips of nail tape across each nail at different angles. Paint sections between the tape in violet or sage green. Remove the tape before the polish dries.
The result is a series of stripes in different widths and directions across each nail. Every nail looks slightly different, which makes the overall hand look cohesive but dynamic.
Vary the stripe widths by using different widths of tape. Wide stripes feel graphic and bold. Thin stripes feel more refined and delicate.
This look can go minimalist or maximalist depending on how many stripes you add per nail.
A matte topcoat makes this design feel modern and current. A glossy topcoat makes it feel more classic and polished.
Both finishes work. Choose based on the rest of your outfit and how bold you want to go.
Nail tape is sold at most beauty supply stores and online in large packs for just a few dollars. One pack will last for many manicures.
17. Purple Glazed Donut Nails with Green Sparkle
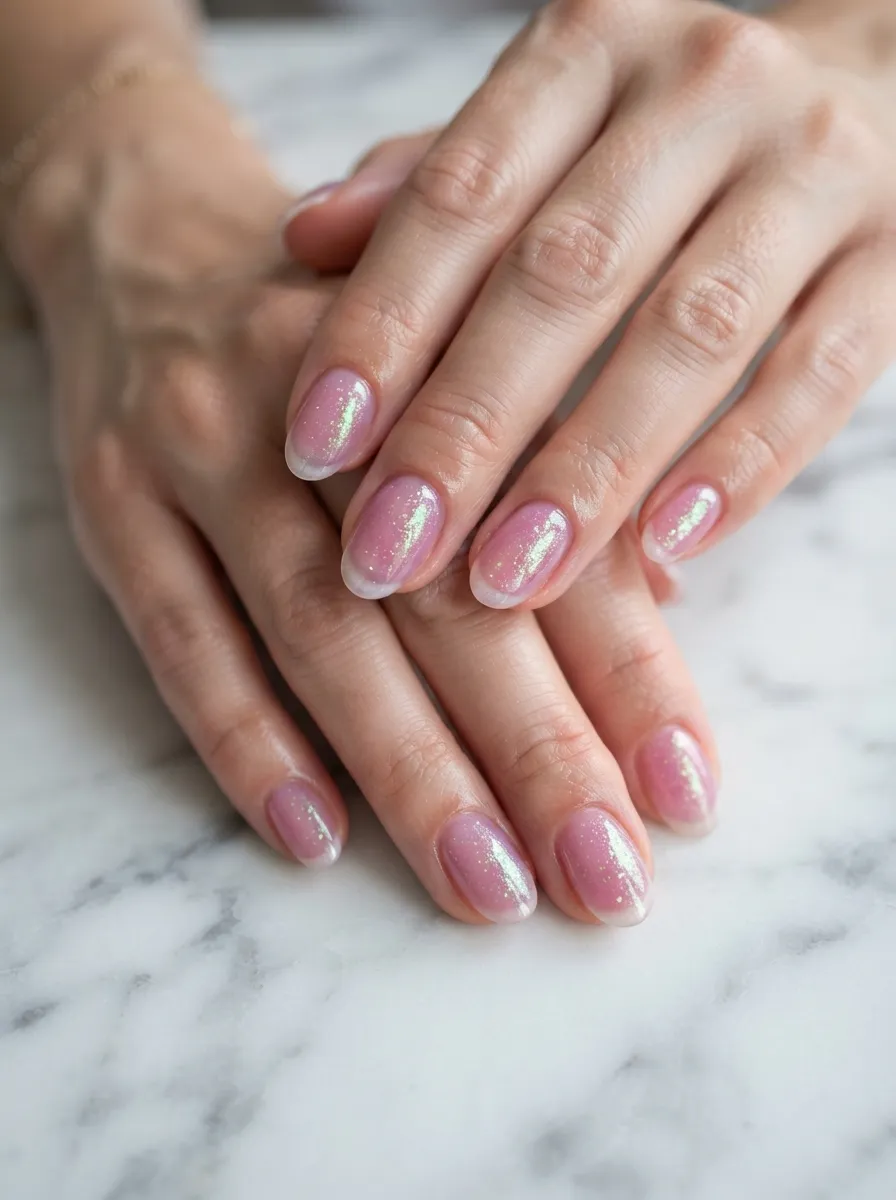
The glazed donut nail trend shows no signs of stopping. Adding a subtle green iridescent shimmer into a purple glaze creates a unique version of this aesthetic.
Start with a sheer purple tinted topcoat or mix a tiny amount of purple pigment into a glossy topcoat yourself.
Apply two coats for a translucent, glass-like effect. Then add a coat of green shimmer topcoat over the top.
The green shimmer shows through the purple glaze, creating an aurora-like depth. The overall effect is soft, luminous, and almost glass-like.
This look is very achievable at home. Many brands now sell glazed nail topcoats in both sheer purple and iridescent green finishes.
The layering of the two is what creates the dimensional effect. Either color alone would look flat. Together, they create movement and light.
This is a great look for every day. It is subtle enough for professional settings but interesting enough to get compliments.
It also works as a way to refresh old nail polish. Apply these topcoats over any existing color to shift the finish toward this dreamy aesthetic.
Wear this look with gold jewelry for maximum impact.
18. Stiletto Nails in Deep Plum with Emerald Tips
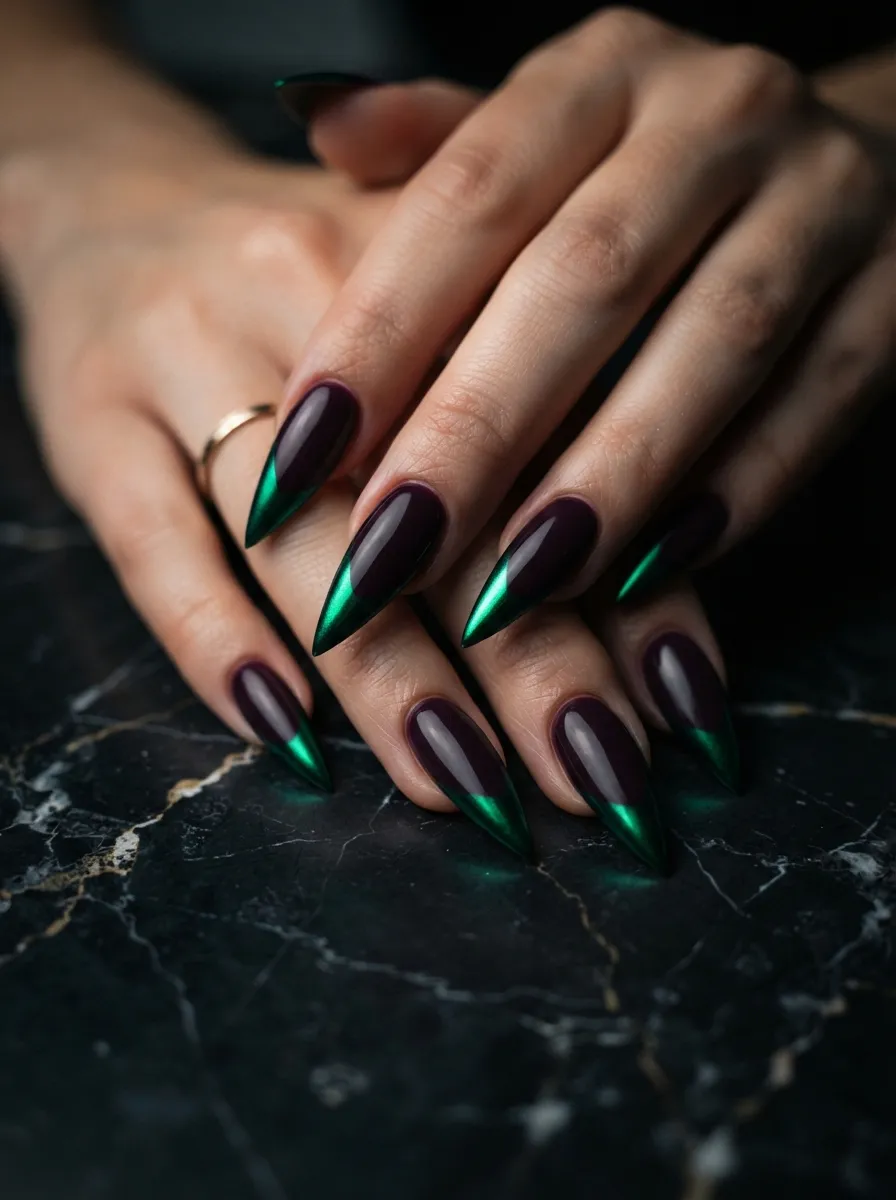
Long stiletto nails with two-toned coloring are one of the most dramatic nail looks available. The pointed tip adds intensity to whatever color you put on it.
Paint the full nail in deep plum. Once dry, apply metallic emerald only to the pointed tip area, about a quarter of the nail length.
The metallic green tip on a dark plum base creates a look that is bold and high fashion.
If you do not have natural long nails, press-on stiletto nails are a very affordable option. You can paint them at home before applying, which makes the process much easier.
Press-on nails have improved dramatically in quality over recent years. Some brands offer kits with adhesive tabs that last a week or more.
This look is best for evenings, events, or photo shoots. It is bold and intentional.
Pair it with dark clothing and minimal other jewelry. Let the nails be the statement piece.
A metallic green nail polish is the key product here. OPI, Essie, and Sally Hansen all carry versions of this shade at various price points.
19. Soft Purple and Green Watercolor Nails
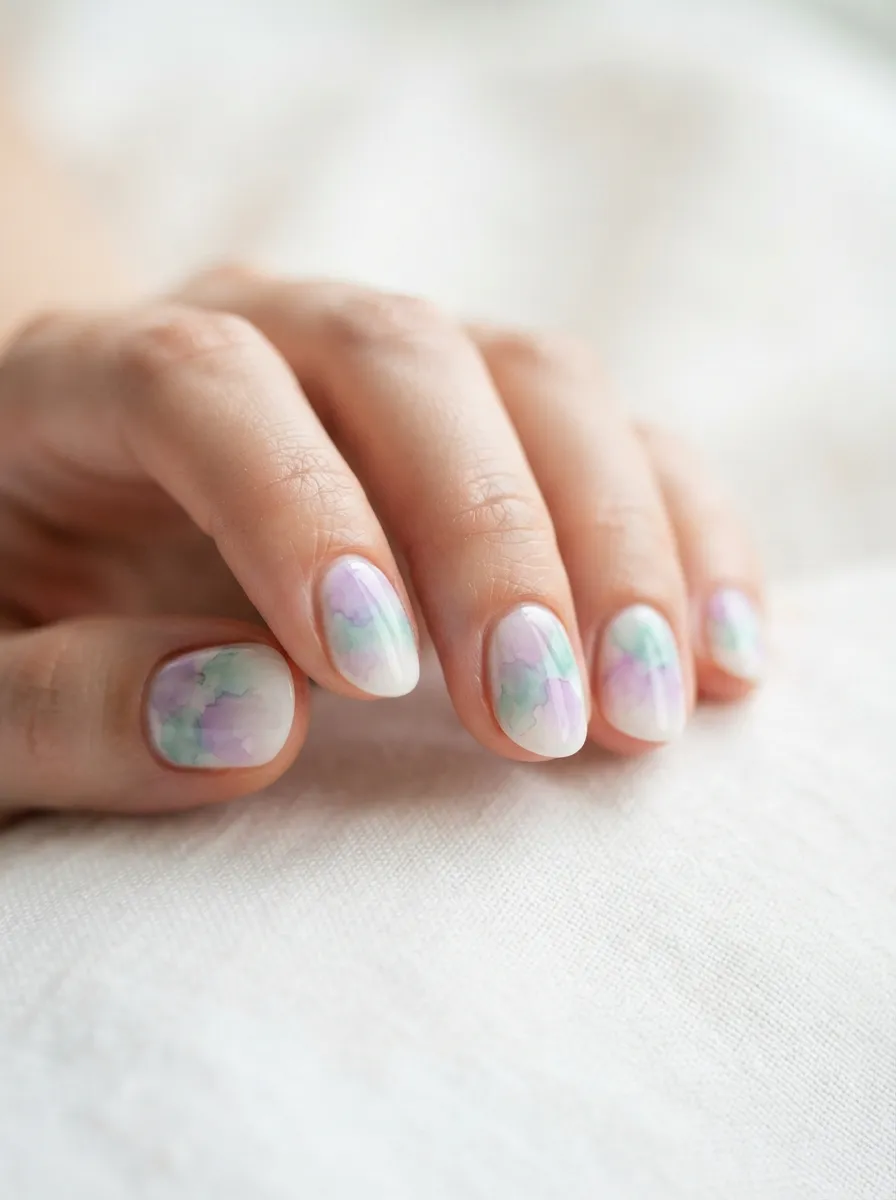
Watercolor nails have a soft, artistic quality that feels different from most nail styles. The key is thin, translucent color application.
Use a white base coat as your canvas. Mix a tiny drop of purple nail polish with topcoat to create a diluted, sheer version.
Apply this thinly across the nail. Repeat with diluted green. Let the two colors run into each other in the center.
The blending happens naturally when both colors are still slightly wet. Do not overwork it. Let the colors flow.
Different application pressures create different effects. A light touch creates whispy, feathery edges. More pressure gives you more saturated blotches.
Finish with a matte topcoat for the most convincing watercolor effect. Gloss reflects too much light and can make the look feel more like regular nail polish.
This style suits a creative, artistic personality. It looks great with minimal jewelry and natural makeup.
It is also one of the most calming nail designs to apply. The loose, free approach means there is no stress about perfection.
Try it on a quiet morning with good lighting and you will end up with something that looks genuinely painterly.
20. Purple Drip Nails with Green Base
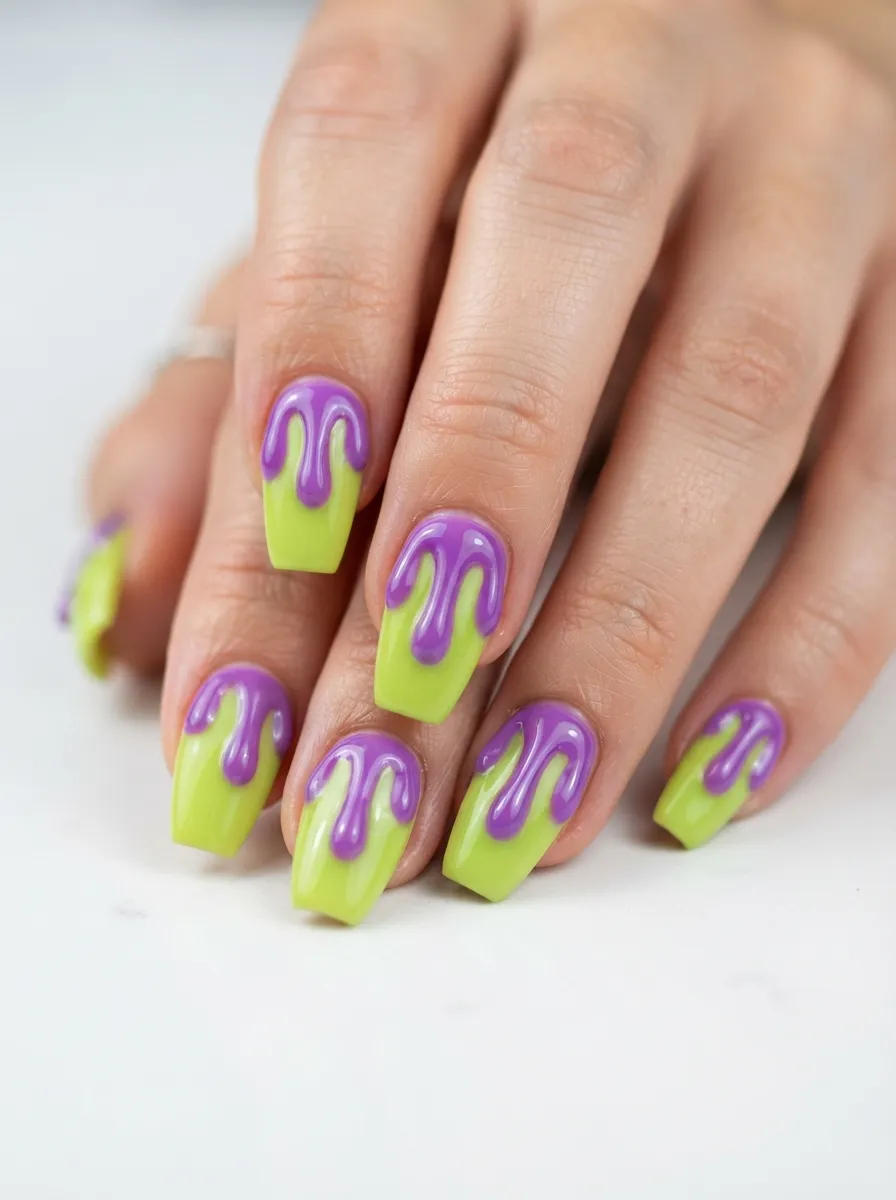
Drip nails are a playful, graphic design that looks like melting candy. They are more approachable than they appear.
Paint a full coat of lime green on all nails. Let it dry completely.
Using a thin nail art brush, paint thick, curved drip shapes starting at the tip and running downward toward the cuticle. The drip shapes should look like paint or melting liquid.
Vary the length and width of the drips on different nails for a more organic effect.
The drip design looks best when the purple polish is thick and glossy. Use a brush-loading technique where you pick up a good amount of polish before starting each drip stroke.
If the drip shapes come out too thin, apply a second pass once the first is dry. Building up layers creates more dimension.
Finish with a thick glossy topcoat over the entire nail, including the drips, to seal everything and give the design that wet, candy-like finish.
This look is fun and irreverent. It works great for summer, festivals, or any time you want something playful on your hands.
It also photographs extremely well, especially against plain backgrounds.
21. Purple and Green Butterfly Wing Nails
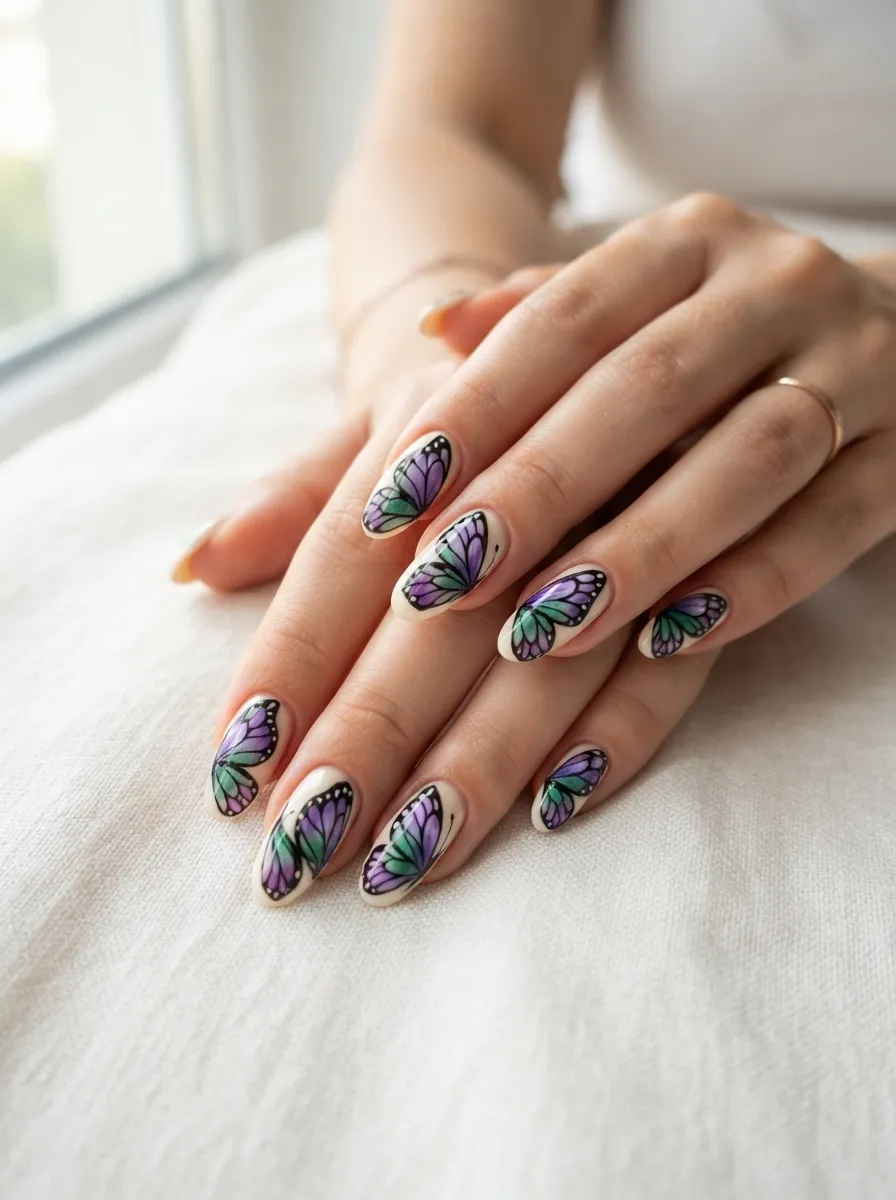
Butterfly nails lean into a feminine, nature-inspired aesthetic. The wing designs can be as simple or detailed as your skill level allows.
Start with a cream or white base. Use a thin nail art brush to outline a butterfly wing shape in black.
Fill the wing sections with violet and emerald green. Use a toothpick to add thin vein details inside the wings while the polish is still wet.
A simple version of this design uses just the outline and two fill colors. A more advanced version includes gradient shading inside the wings.
Start with the simpler approach and add complexity as your brush control improves.
Butterfly nail stickers and decals are also widely available if the hand-painting feels intimidating. They look great and require almost no skill to apply.
Press the sticker onto dry polish, then seal with a topcoat to protect it and make it look painted on.
This design works well on longer nails where the wing has room to spread. On shorter nails, use a smaller, more abstract wing shape.
Pair this with floral outfits, summer dresses, or any time you want your nails to feel like garden art.
22. Matte Mauve and Muted Green Minimalist Nails
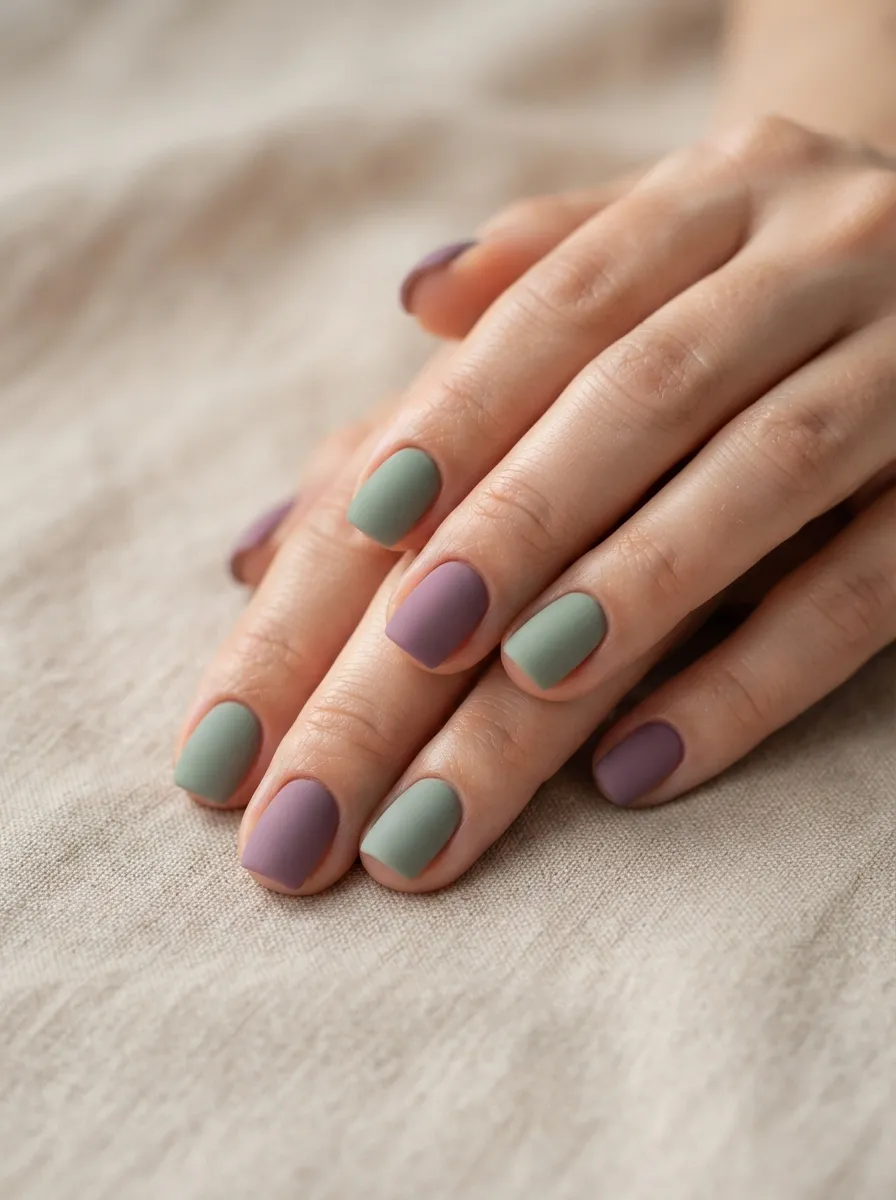
Not every nail look needs to be loud. Matte mauve and muted sage are two of the most sophisticated shades you can wear.
Alternate matte mauve and muted sage green across your fingers. No art, no embellishments. Just clean solid color.
The matte finish does all the work here. It gives both shades a velvety, editorial quality that glossy polish cannot replicate.
Matte topcoats are inexpensive and can be applied over any regular polish to achieve this finish. You do not need to buy specific matte polishes.
This combination is particularly suited to autumn and winter. The dusty, faded quality of both shades reflects those cooler seasons.
It is also a workplace-appropriate nail look. The muted tones are interesting without being distracting.
This pairs well with earth tones, camel, rust, and cream in your clothing. The overall effect is cohesive and put-together without much effort.
Short square or short oval nail shapes suit this look best. The understated design benefits from a clean, simple nail silhouette.
Refresh your matte topcoat every two days to keep the finish looking fresh and even.
23. Purple and Green Art Deco Nails
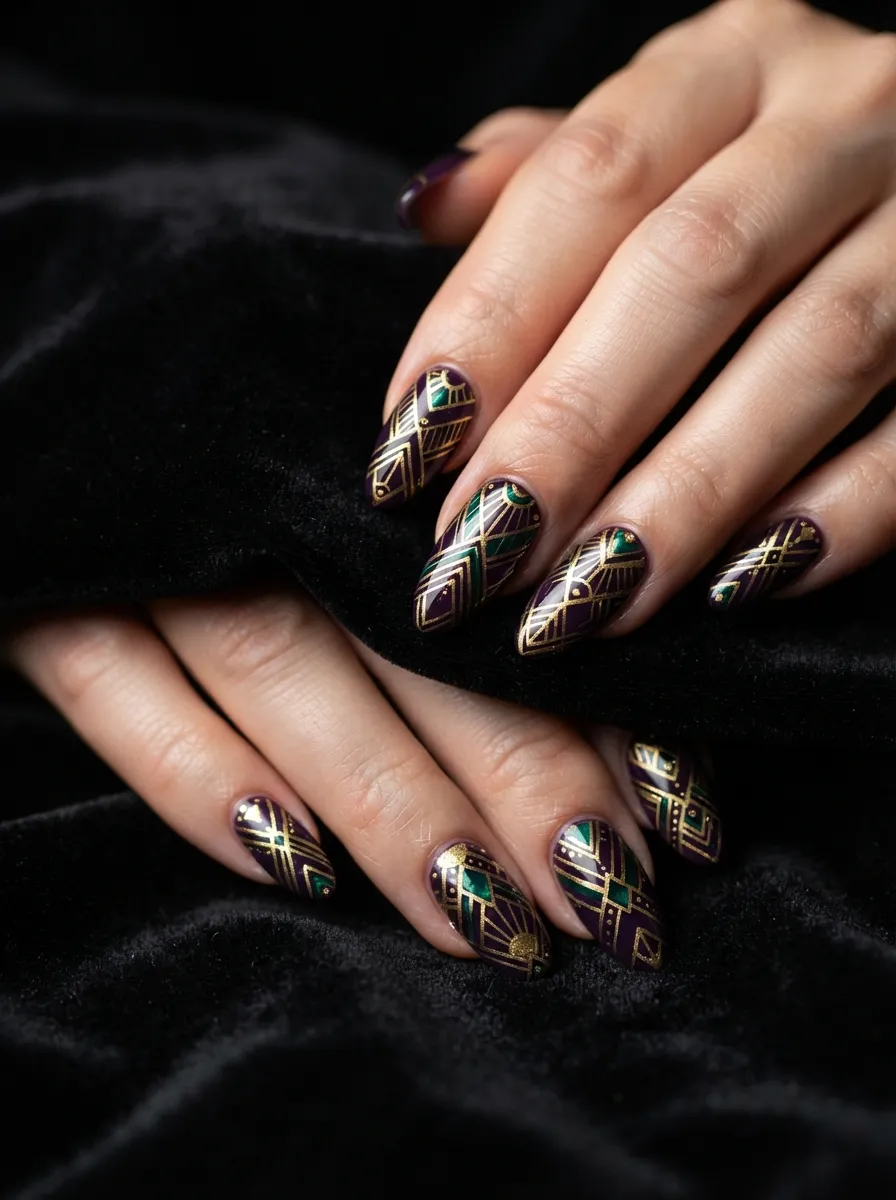
Art Deco patterns on nails feel opulent and architectural. The geometric shapes are actually very achievable with nail tape and a steady hand.
Start with a deep purple base. Let it dry completely.
Use thin strips of nail tape to mask off geometric shapes. Paint emerald green within the taped sections and add thin gold lines with a nail art brush.
Classic Art Deco elements include fan shapes, chevrons, stepped rectangles, and sunburst patterns. Choose one element per nail and repeat it consistently.
Gold nail art pens make the thin line work much easier. They are available online for under five dollars and are one of the most useful nail art tools you can own.
This look works especially well on almond or long oval nails. The elongated surface suits the vertical geometric patterns.
It is perfect for formal occasions, holiday parties, or any time you want something genuinely impressive on your hands.
Practice the geometric shapes on paper first. Once you have the muscle memory for the shapes, applying them to the nail becomes much easier.
This is a nail look that feels like jewelry.
24. Green Holographic Base with Purple Shimmer
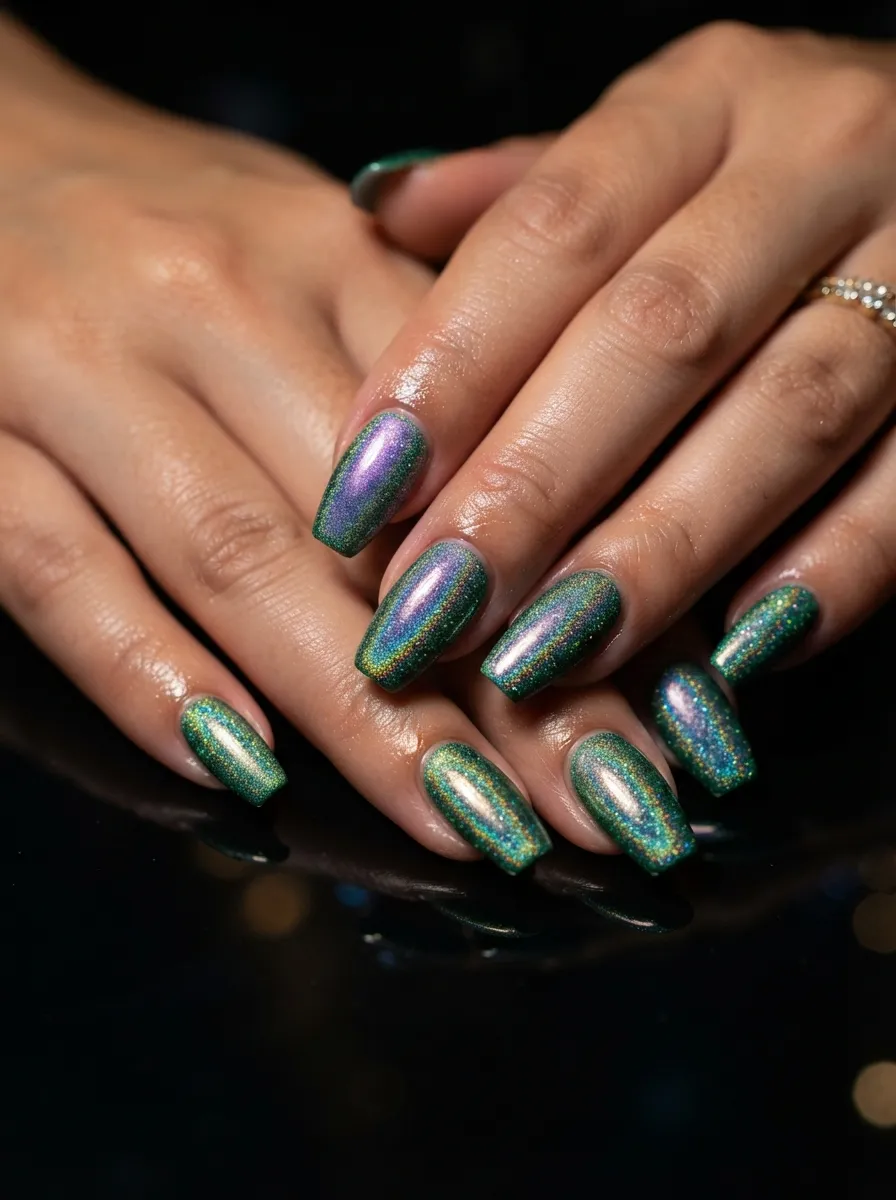
Holographic nail polish is one of those products that makes every other design look more exciting. When you add a purple shimmer over a green holographic base, the result shifts and changes with every movement.
Apply two coats of holographic emerald green polish. The holographic effect is strongest in bright or direct light.
Once dry, apply a single coat of purple shimmer topcoat over the top. The purple shimmer sits on top of the green holographic layer and creates a color-shifting effect.
In different lights, the nail will look predominantly green, then predominantly purple, then shift through iridescent tones.
Holographic polishes are widely available in budget-friendly ranges. ILNP, Sinful Colors, and KBShimmer all offer strong holographic formulas.
This is an every-occasion look. The holographic effect can read subtle in soft lighting and dramatic in direct sunlight or under artificial light.
It is also one of the lowest-effort designs on this list. Two products, clean application, and a good topcoat is all you need.
Wear this look to any event where you will be photographed. The camera flash creates stunning holographic captures.
25. Purple Stained Glass Nails with Green Outlines
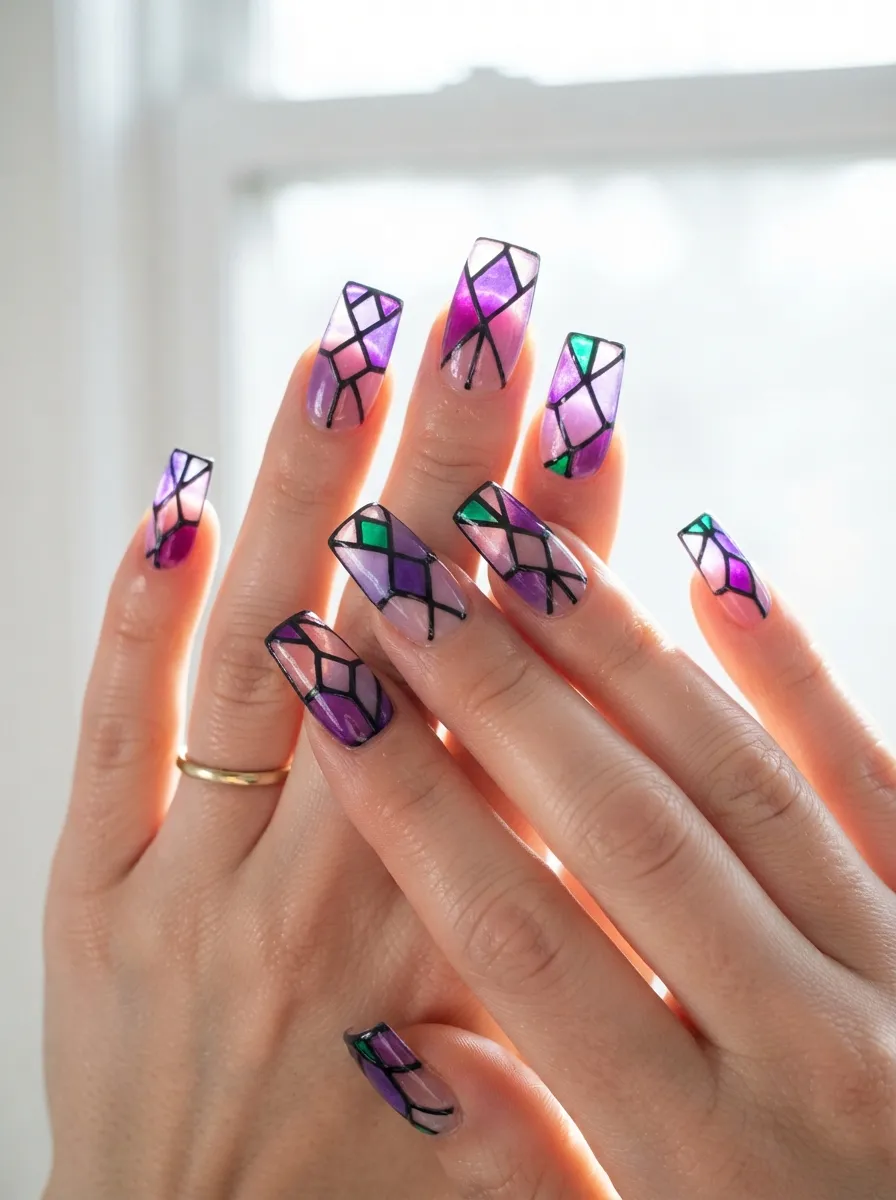
Stained glass nails are a stunning effect that uses sheer polish to mimic the look of colored glass panes separated by lead lines.
Apply a clear base coat. Use a thin nail art brush dipped in black polish to draw irregular geometric lines across each nail, creating pane shapes.
Fill each pane section with sheer or translucent purple polish in different tones, lavender in one, violet in another, lilac in the next. Add emerald green to a few panes for contrast.
The key is keeping the fill colors sheer. Mix a small amount of color into clear topcoat if your polish is too opaque.
When held up to light, the translucent panels appear to glow like actual stained glass. It is one of the most photogenic nail designs you can wear.
This is a more time-intensive design. Budget about 30 to 40 minutes for the full set.
The result is absolutely worth the time. These nails look like nothing else and attract constant attention and questions.
Finish with a thick clear topcoat to protect the fine black line work.
26. Purple and Green Daisy Nail Art
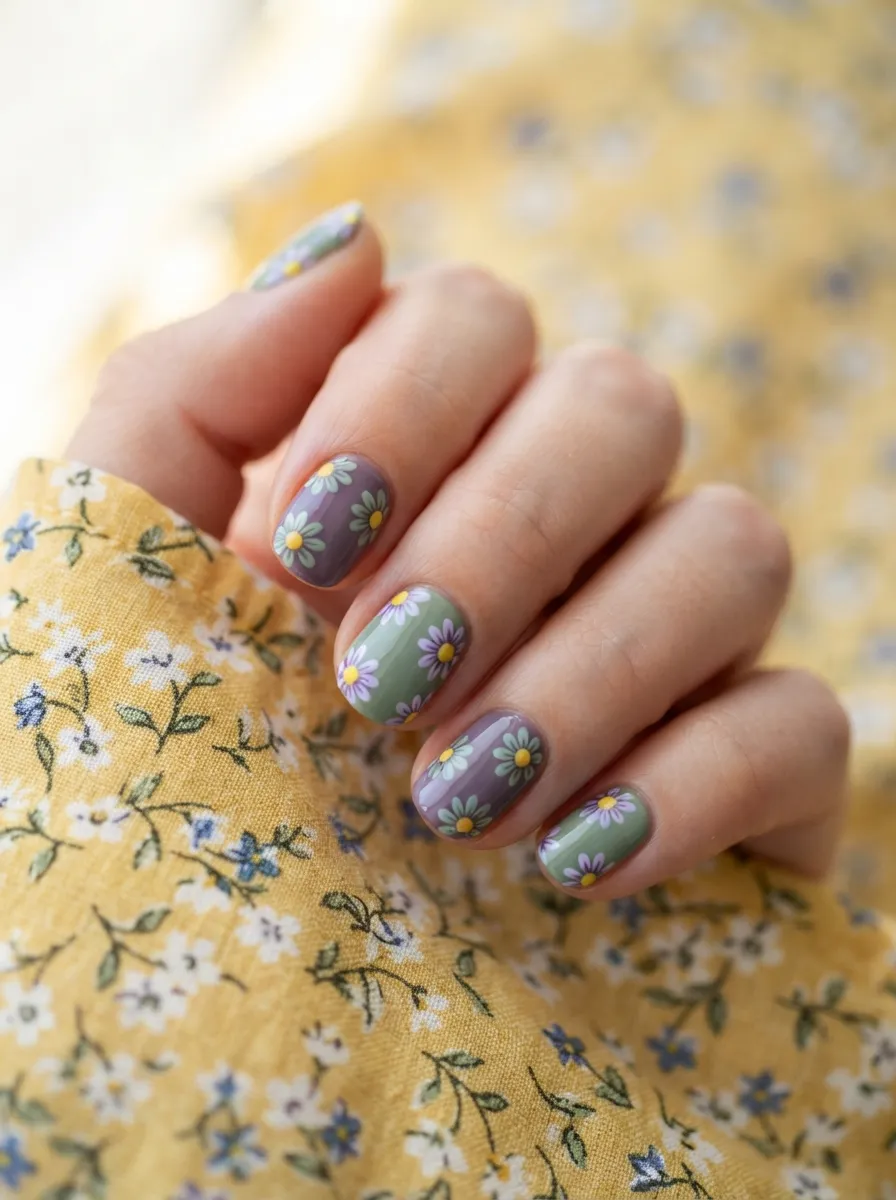
Daisies are one of the most universally loved nail art motifs. The two-tone approach of alternating background and flower colors creates a cohesive but layered design.
On sage green nails, paint daisies with purple petals and yellow centers. On purple nails, paint daisies with sage green petals and white centers.
The color swap between background and flower creates a playful call-and-response effect across the hand.
Daisy petals are just elongated ovals radiating from a center dot. Use a dotting tool for the center and a thin brush for the petals.
Short, rounded nails suit this design best. The small daisy proportions fit naturally on a smaller nail surface.
This is one of the friendliest and most approachable nail art designs in terms of technique. Imperfect petals still look charming and intentional.
This look is made for spring and summer. It pairs beautifully with floral dresses, denim, and any casual warm-weather outfit.
It is also a great design for nail art beginners because the daisy shape teaches the fundamental skills of dotting and petal placement that apply to many other designs.
27. Dark Academia Purple and Green Nails
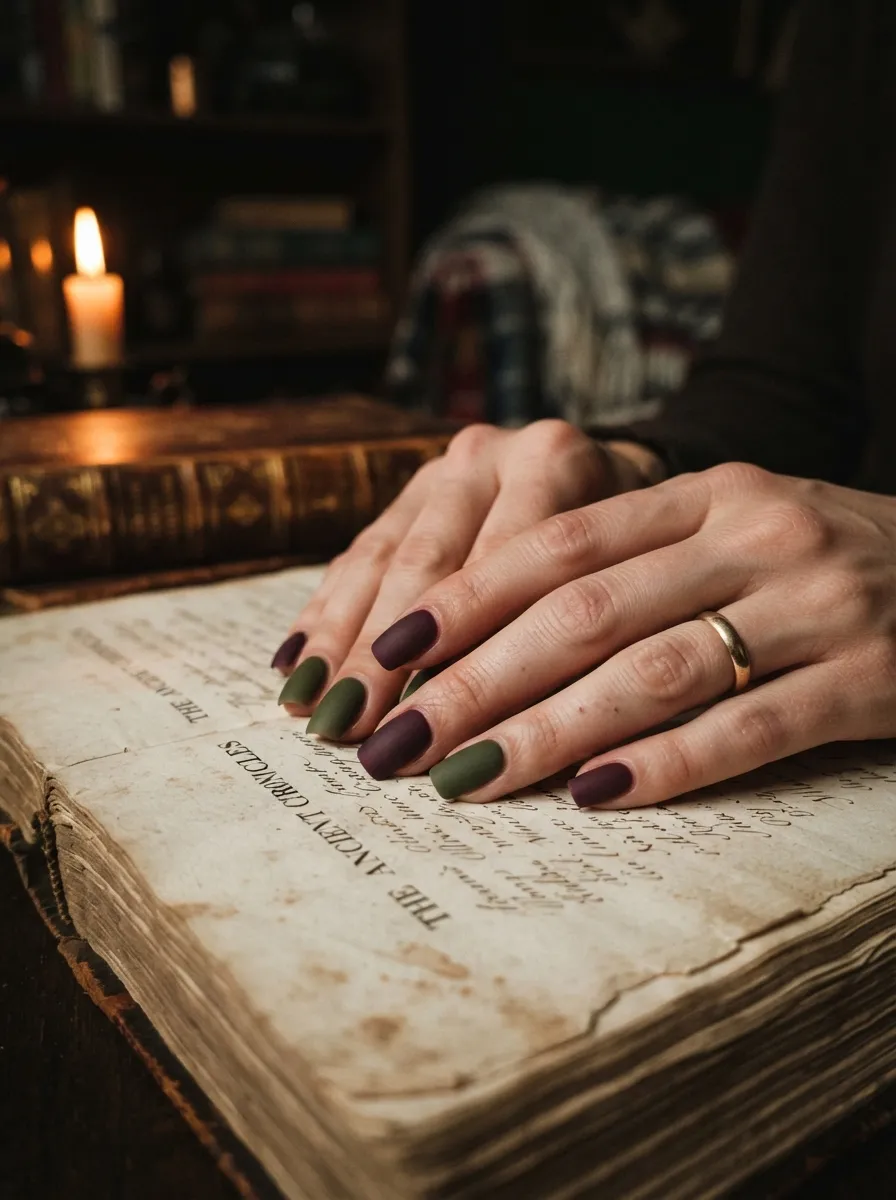
Dark academia is an aesthetic built on rich, vintage tones, layered textures, and literary atmosphere. These nails fit perfectly into that world.
Choose a wine purple or dark mulberry shade and a deep olive green or hunter green. Both should feel slightly dusty and aged, not bright or neon.
Alternate these across your nails in a clean, simple pattern. No art needed. The mood comes entirely from the color choice.
Matte topcoat enhances the dark academia feel significantly. It makes the shades look more like they belong in an old painting than a modern salon.
This is a great set for autumn and winter. The colors align naturally with falling leaves, wool sweaters, and rainy afternoons.
It works beautifully at bookstores, libraries, gallery openings, and academic settings. The nails feel like part of the costume of intellectual life.
Budget-friendly brands carry great versions of these shades. Look for OPI’s darker plum ranges or Essie’s earthy greens for quality at reasonable prices.
A single accent nail in a subtle gold or antique bronze adds one more layer of the aesthetic without breaking the cohesion.
This is a nail mood as much as it is a nail design.
28. Iridescent Purple and Green Mermaid Nails
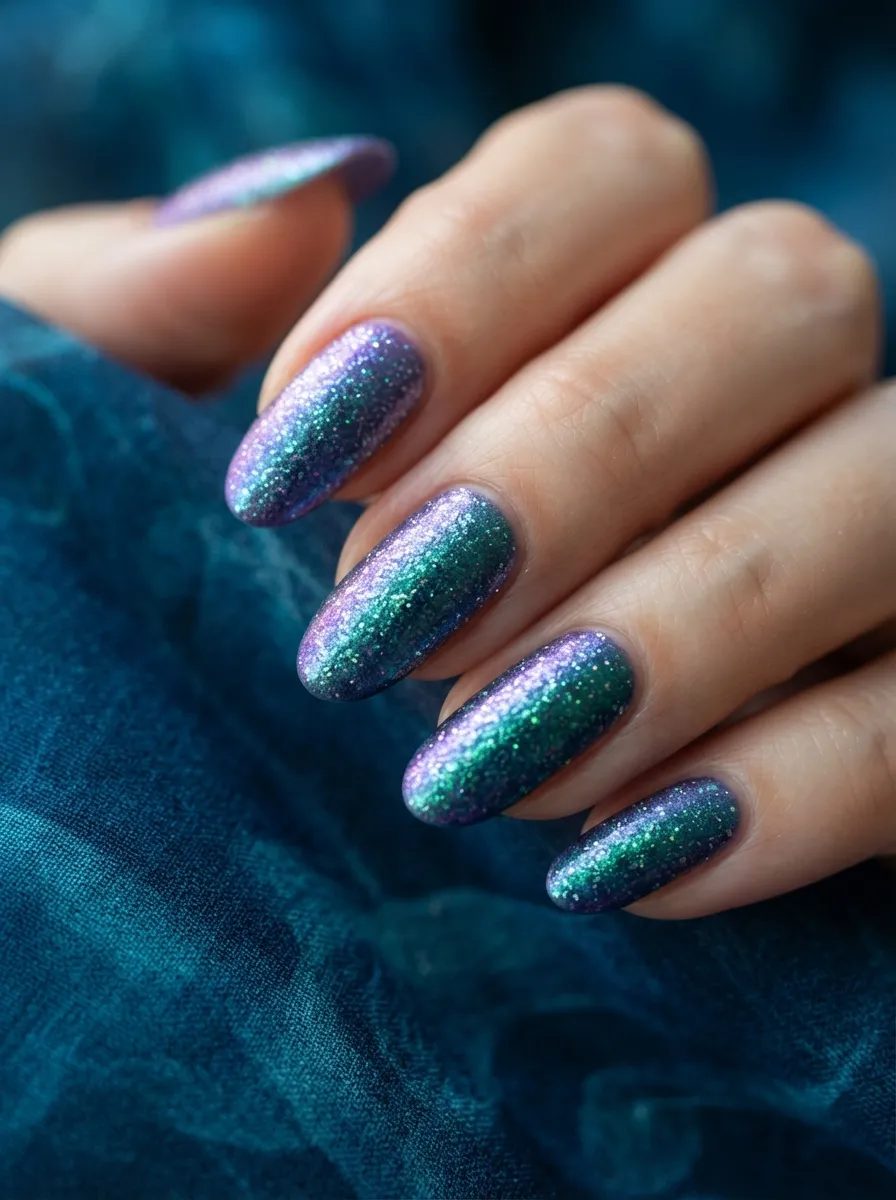
Mermaid nails capture the color-shifting quality of scales under water. Purple and green are the natural palette for this look.
Use a duochrome or color-shifting nail polish that moves between purple and green tones depending on the angle of light. These polishes are widely available online in budget price ranges.
Apply two coats over a dark base coat. A black or deep navy base intensifies the color shift dramatically.
The color shift is most visible in direct light or when you move your hand. The nails look almost alive.
For extra scale texture, press a silicone fish scale pattern into the nail while the polish is still tacky. You can find these textured sponges in nail art kits online.
The textured scale pattern combined with the shifting color creates an extremely convincing mermaid effect.
This is a great vacation nail look. Ocean backdrops, water, and natural light all show off the iridescent finish at its best.
It also works for costume events, fantasy photoshoots, or any time you want nails that feel otherworldly.
Seal with two layers of a high-shine topcoat to preserve the color shift and add depth to the finish.
29. Purple Moon with Green Star Nail Art
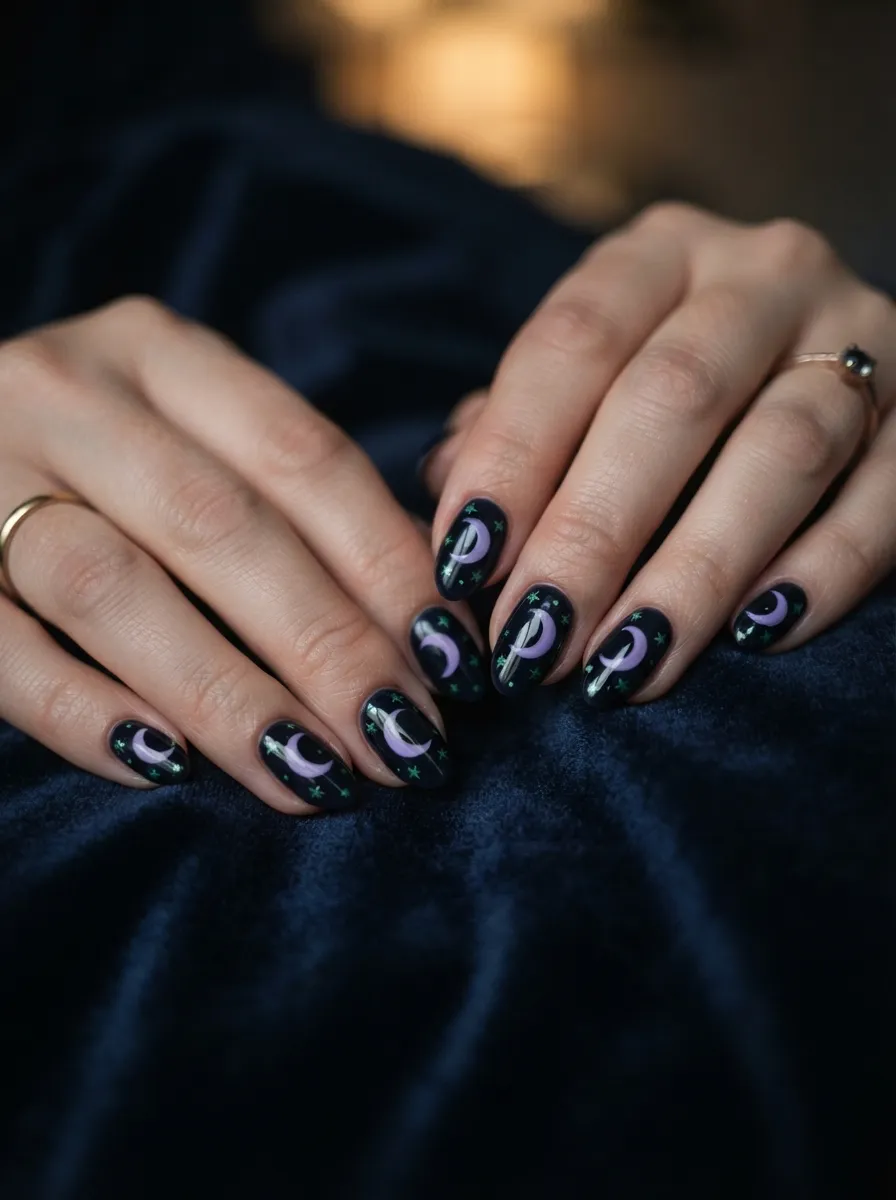
Celestial nail art has a timeless, mystical quality. The combination of a purple moon and green stars on a dark background creates something that feels like looking up at a different kind of night sky.
Use a black or deep navy base on all nails. Let it dry fully.
Paint a crescent moon shape in violet or purple using a thin brush. Then add small five-pointed emerald green stars scattered across the nail.
The stars do not need to be perfect. Rough, handmade stars actually look more charming than rigid geometric ones.
A gold or white star here and there alongside the green adds more depth to the night sky composition.
This is a design that rewards a slow, careful approach. Sit in good light with a fine brush and take your time with each nail.
Celestial nails suit darker moods and darker seasons. They feel at home in autumn and winter months.
Pair with silver jewelry and dark clothing for a cohesive look that feels intentional and styled from head to hands.
Finish with a topcoat that has a starry glitter shimmer for an extra cosmic effect over the sealed design.
30. Purple and Green Tie-Dye Nails
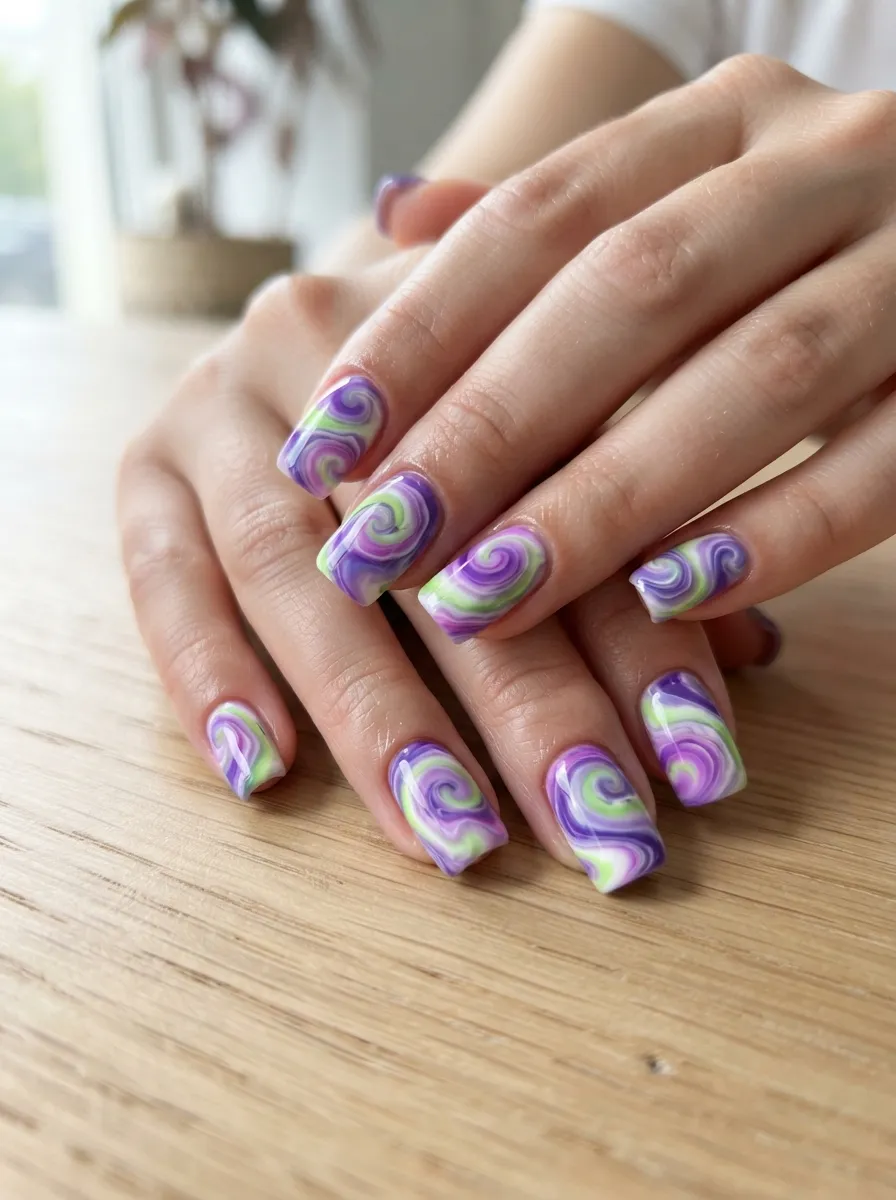
Tie-dye nails have the free-spirited energy of summer and the bold color of festival fashion. Purple and green are one of the best color combinations for this effect.
Start with a white base coat. Drop small amounts of violet, lilac, and lime green polish onto the nail while the base is still slightly tacky.
Use a toothpick or thin brush to swirl the colors together in circular, spiral patterns. Work from the outside edge toward the center.
The more you swirl, the more the colors blend. Stop before they turn muddy. A few decisive swirl strokes are better than over-blending.
No two tie-dye nails will look the same. That is the entire point. Embrace the variation across your fingers.
Water marbling is another technique for tie-dye nails. Drop polish onto the surface of water in a small bowl, swirl it with a toothpick, then dip your nail in. The pattern transfers directly onto the nail.
The water marbling technique creates even more organic, flowing patterns than the direct application method.
Either approach results in a unique, wearable art piece on each nail.
Finish with a matte topcoat for a retro, fabric-like feel, or a glossy coat for a more modern interpretation of the tie-dye effect.
Purple and green nails offer more range than almost any other two-color combination. From soft pastels to dark jewel tones, from minimal color blocking to detailed nail art, this pairing adapts to every mood, season, and skill level. You do not need professional tools or a salon budget to wear these looks well. A few inexpensive polishes, some nail tape, a toothpick, and a steady hand are enough to recreate most of the designs on this list. Start with the simpler looks and work toward the more detailed ones as your confidence grows. The most important part is enjoying the process and wearing colors that genuinely make you happy when you look at your hands. These 30 ideas are your starting point. Where you go from here is entirely up to you.