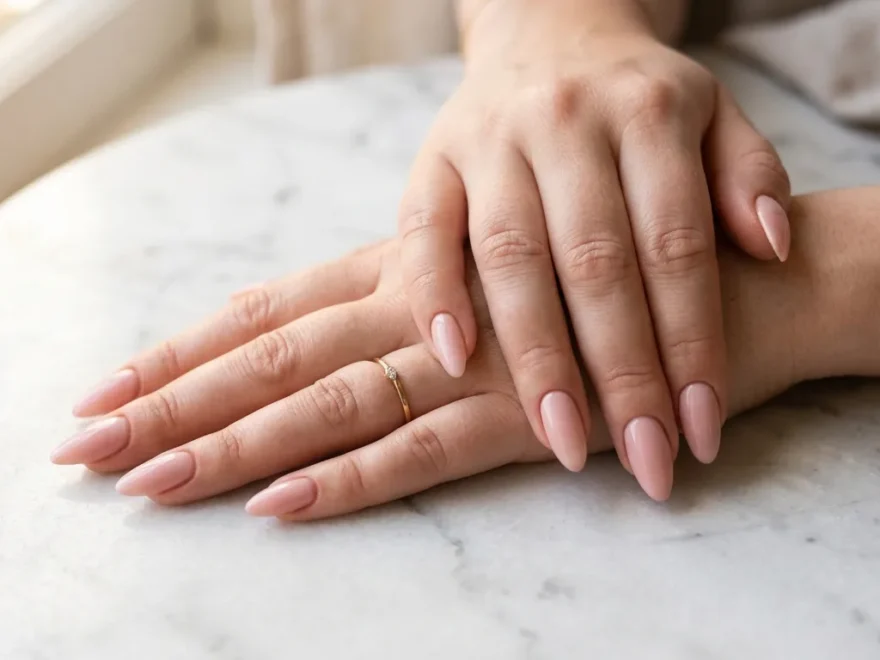
1. Almond Nails
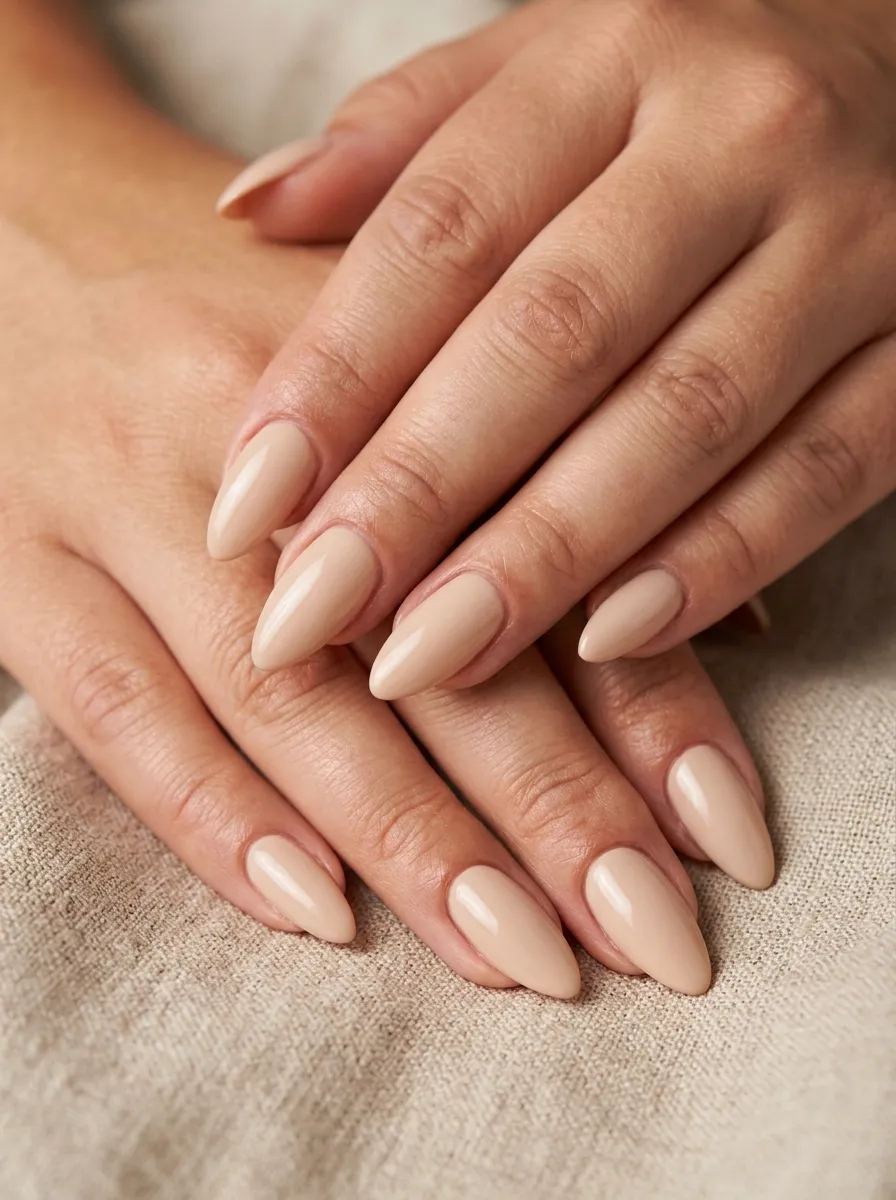
Almond nails are one of the most popular shapes for chubby hands. The shape tapers toward the tip and ends in a soft, rounded point. This creates a visual illusion. Your fingers look longer and more slender than they actually are.
The key is keeping the sides straight and slim before the taper begins. If the sides flare out, the effect is lost.
Filing tip: File from the outer edges inward toward the center tip. Use a glass nail file for smooth, even results.
You can do this shape at home with a bit of patience. Start with longer nails for the best results. If your natural nails are short, try press-on almond nails from the drugstore. Brands like Kiss or imPRESS sell packs for under $8. They look great and last up to two weeks.
Go for nude, soft pink, or beige polish on almond nails. These colors keep the focus on the shape and add to the slimming effect.
Avoid chunky nail art or super-wide glitter on this shape. Keep it clean and simple for the most flattering look.
2. Oval Nails
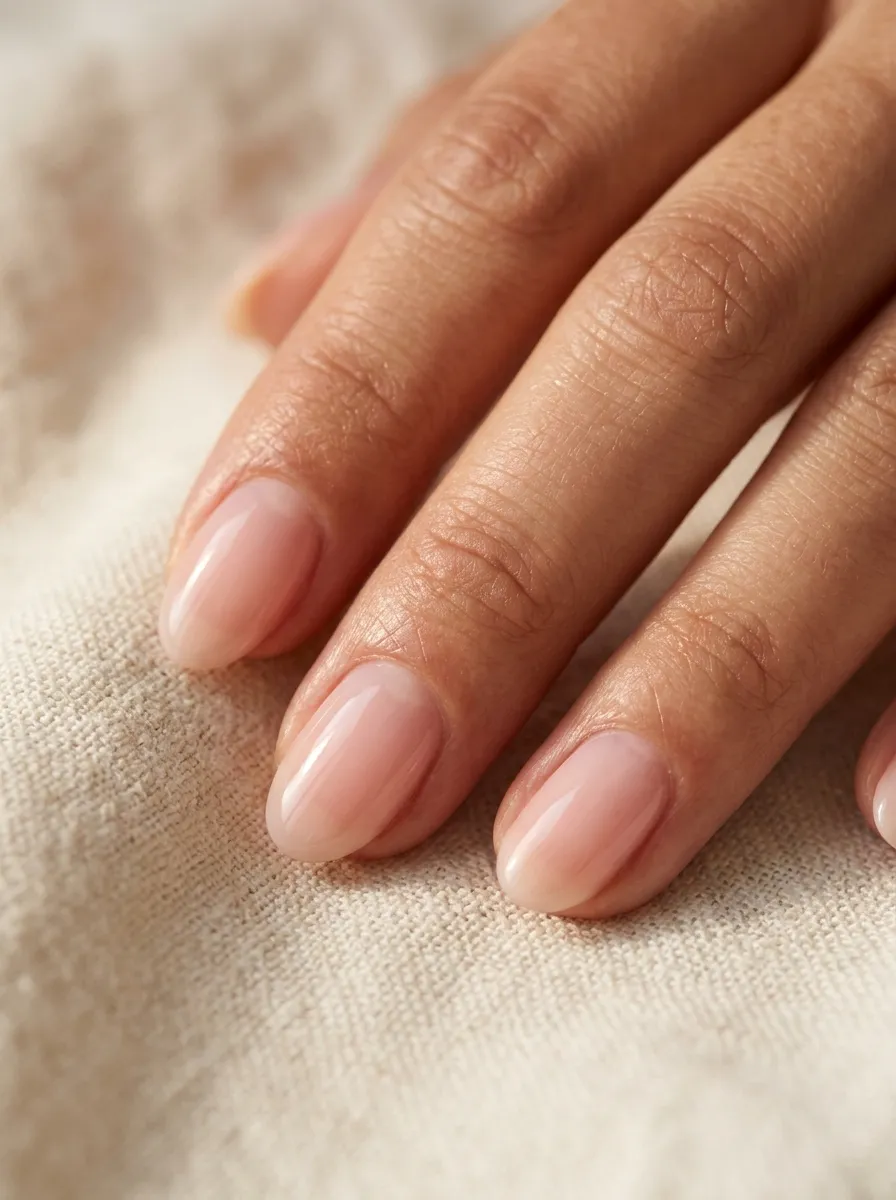
Oval nails are the gentle cousin of almond nails. The tip is rounded and curved rather than pointed. This makes the shape easier to maintain and less likely to snag.
For chubby hands, oval nails create a soft elongating effect. The rounded tip draws the eye upward, making fingers look a little longer.
DIY tip: After growing your nails to a medium length, file the sides slightly inward. Then round off the tip. Use a 180-grit file for shaping and a 220-grit buffer for smoothing.
This shape works well at almost any nail length. Even a short oval nail looks neater and more proportional than a blunt square tip on wide fingers.
Soft colors work best. Think baby pink, lavender, peach, or a classic French tip. These shades enhance the elegant curve of the oval shape.
Oval nails are also low-maintenance. They are less prone to breakage compared to almond or stiletto shapes. If you are new to nail shaping, start here. It is forgiving and flattering at the same time.
3. Soft Square Nails
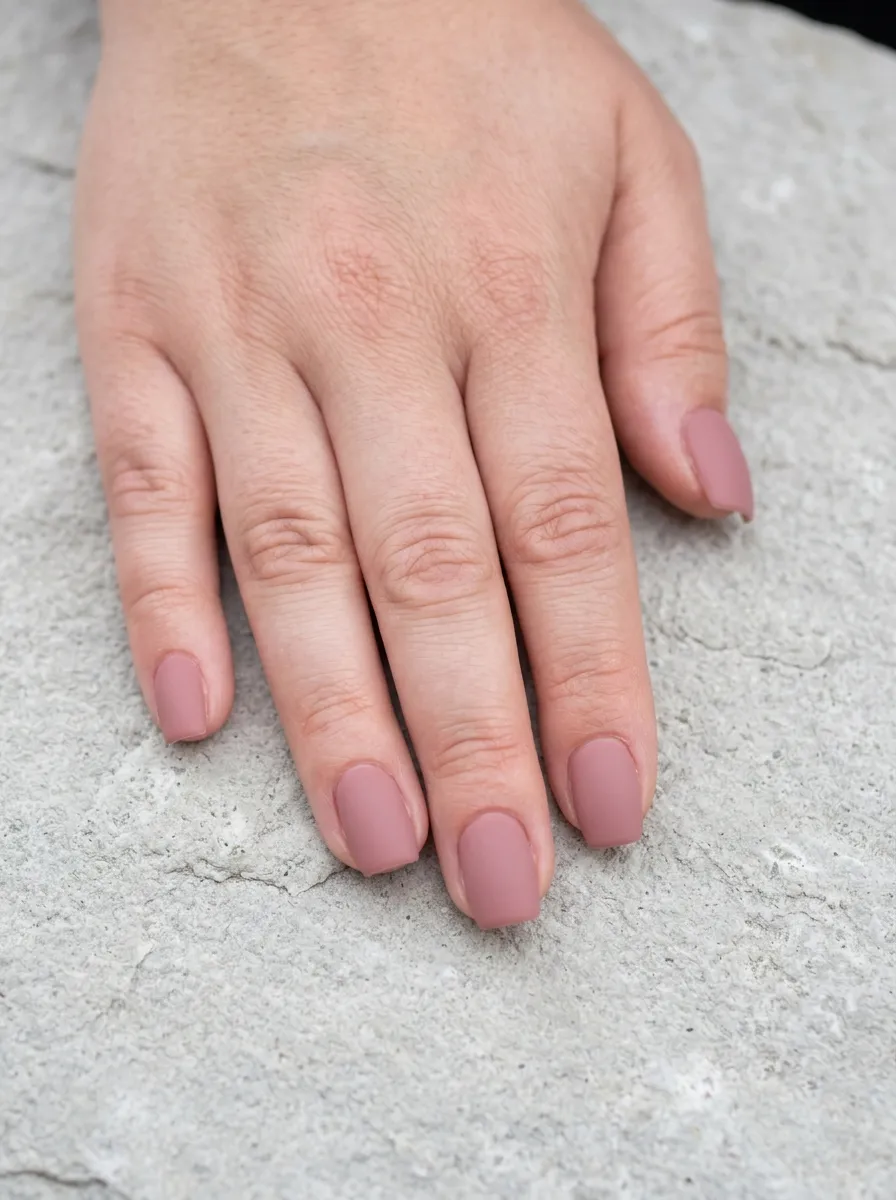
Regular square nails can make wide fingers look even wider. But soft square nails are different. The corners are slightly rounded, softening the overall shape.
This small change makes a big difference. The nails still look clean and structured, but without the harsh corners that can emphasize width.
Keep the nail length at medium or slightly longer for the best effect. Too short, and the wide nail plate dominates. Too long, and the shape can look unbalanced.
Budget tip: You can achieve soft square nails at home with a basic nail file set from any dollar store. File the top of the nail straight across first. Then gently file each corner at a slight angle to round it off.
Soft square nails look great with solid colors. Deep berry, warm terracotta, and classic red are all excellent picks. They give the nails a polished look without overwhelming the shape.
This is also a great shape for people who use their hands a lot. It is sturdy and practical, while still being flattering.
4. Stiletto Nails
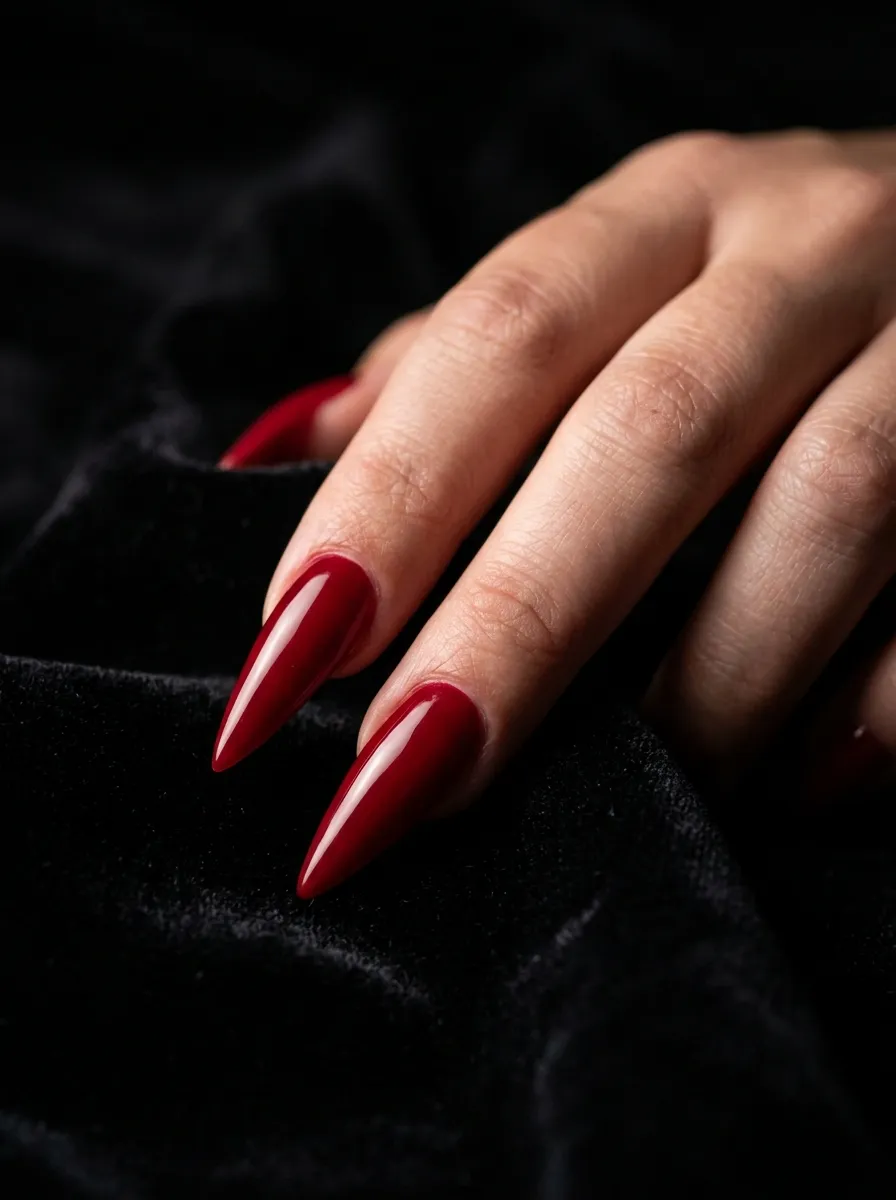
Stiletto nails are long and sharply pointed. They are dramatic. They are bold. And for chubby hands, they create one of the strongest elongating effects possible.
The long, sharp tip pulls the eye toward the end of the finger. This makes fingers look significantly longer and slimmer.
The trade-off? They are harder to maintain and more fragile. They are also not ideal for people who type a lot or do physical work.
Affordable option: Try acrylic stiletto nail sets from beauty supply stores. Full sets run between $10 and $20. Nail technicians can apply them in under an hour.
If you want to try stilettos at home, use a nail tip set and nail glue. Shape the tips after application using a coarse file.
Dark, saturated colors work beautifully on stiletto nails. Black, plum, deep navy, and crimson all look stunning. For a softer take, try a glossy nude or pale pink.
Keep the nail art minimal. One accent nail with glitter or a simple design goes a long way on this dramatic shape.
5. Coffin Nails (Ballerina Shape)
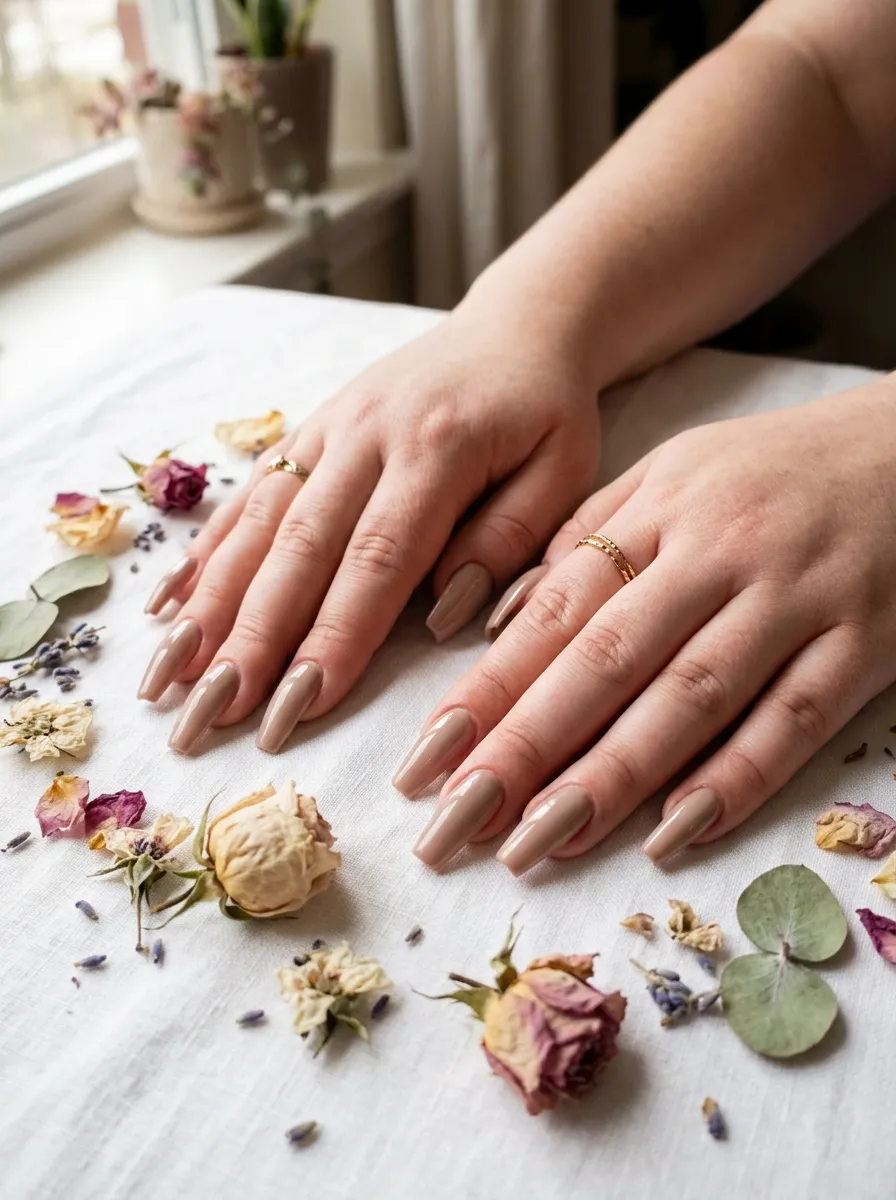
Coffin nails are named for their shape: wide at the base, tapered on the sides, and flat at the tip. They are also called ballerina nails because they resemble pointe shoes.
This shape is excellent for chubby hands. The tapered sides slim down the visual width of each finger. The flat tip keeps the shape grounded and modern.
You need medium-to-long nail length for coffin nails to work well. If your natural nails are short, opt for gel extensions or press-on coffin nails.
DIY option: Press-on coffin nails are widely available at Walmart or Target for around $7. Brands like Static Nails or Glamnetic make reusable options that look salon-quality.
Coffin nails look gorgeous in neutral shades like taupe, caramel, or dusty mauve. They also work well with ombre designs. A soft pink-to-white ombre on coffin nails is effortlessly flattering.
Avoid overly wide coffin shapes. Keep the taper noticeable. A long, narrow coffin nail will always look more elegant on wider fingers than a short, stubby version.
6. Squoval Nails
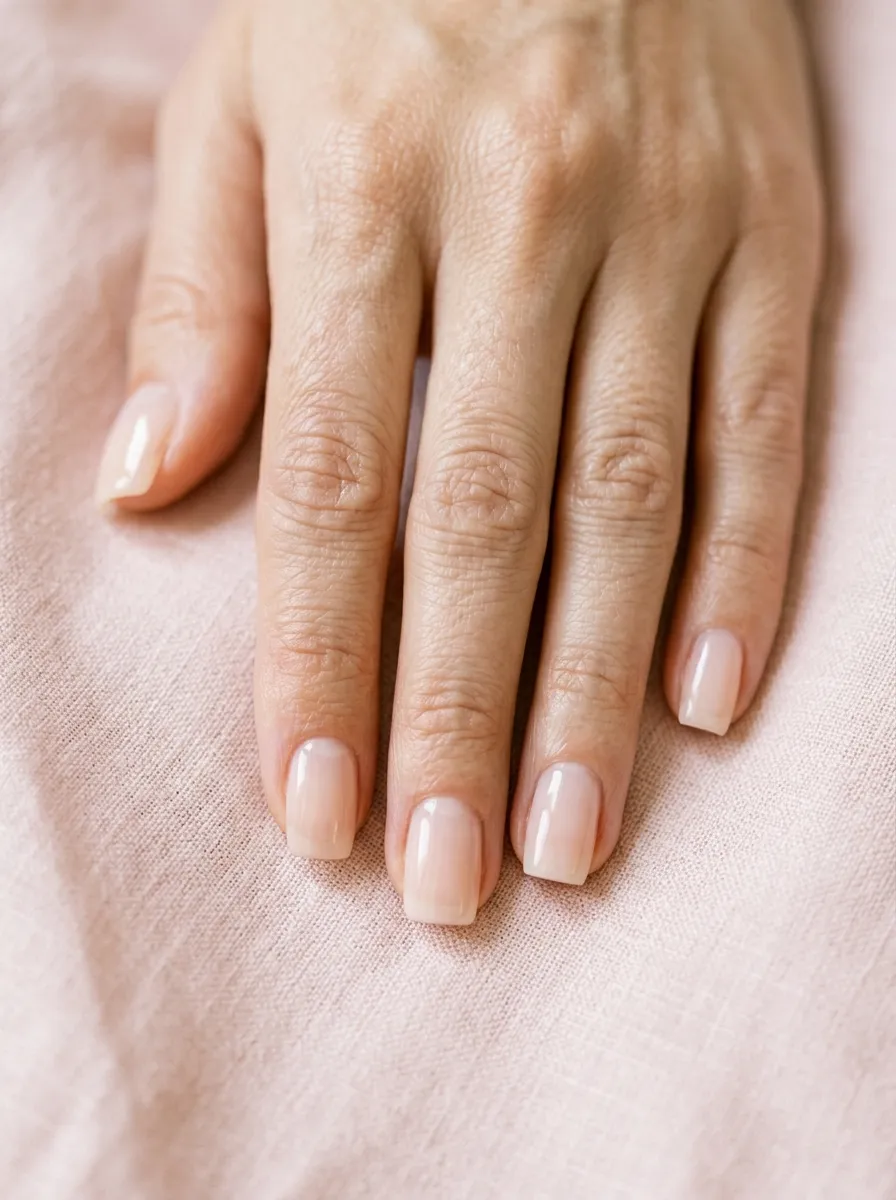
Squoval nails are the sweet spot between square and oval. The top is fairly straight, but the corners are noticeably rounded. This gives the best of both worlds.
For chubby hands, squoval nails are a safe and flattering everyday choice. They are neat and clean without the harsh width of full square nails.
The shape is also very easy to maintain at home. You do not need special skills. File the top straight, then gently curve the corners.
Tip: Use a fine-grit nail file (around 220 grit) for the final shaping pass. This prevents jagged edges and makes the rounded corners look smooth and intentional.
Squoval nails work with any color or finish. Nude and blush tones are especially flattering. If you want something fun, try a simple negative space design, where part of the nail is left bare. This draws attention to the shape itself.
This is also one of the most practical nail shapes. It does not snag as easily as oval or almond. It is a great choice if you work with your hands or prefer lower-maintenance nails.
7. Tapered Square Nails
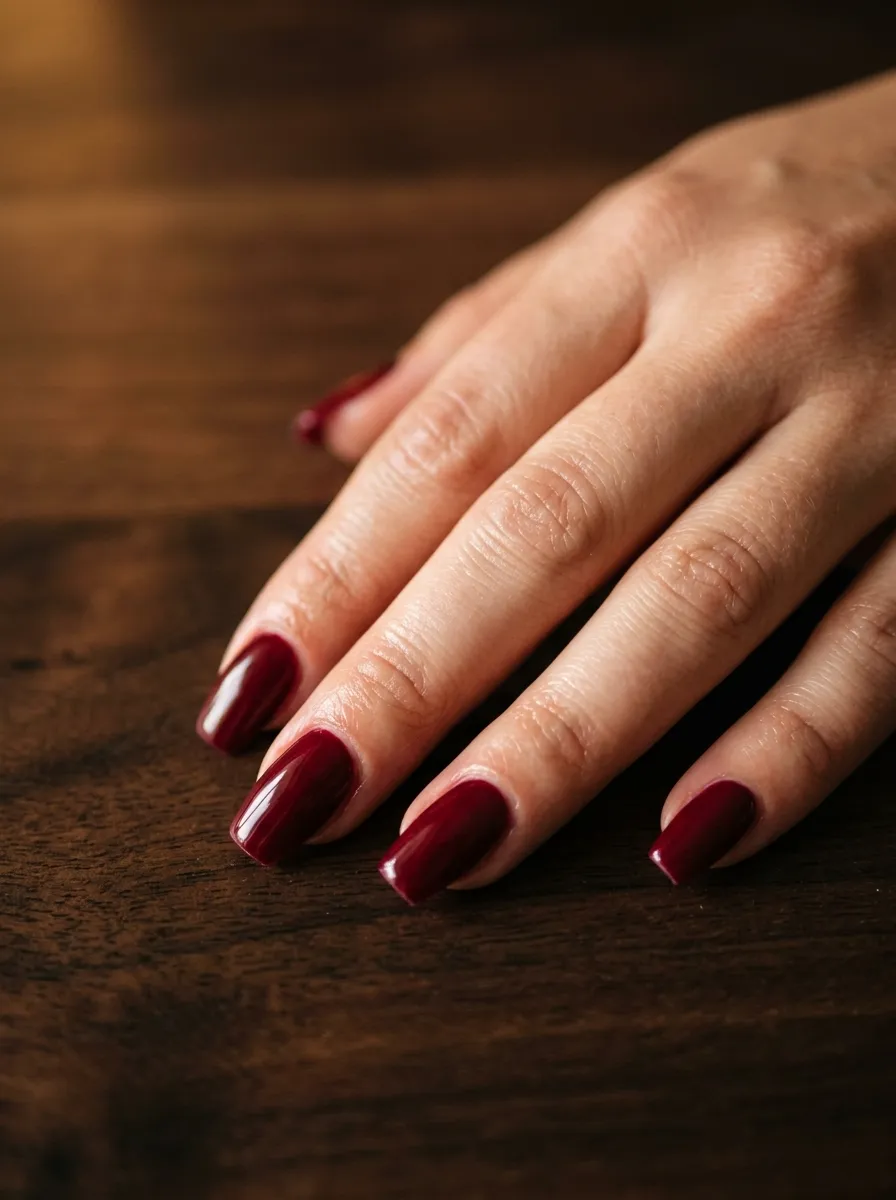
Tapered square nails combine the clean flat tip of square nails with the narrowing sides of almond nails. The result is a shape that slims the sides while maintaining a modern, structured top.
This is a fantastic choice for anyone who loves the look of square nails but finds they make their fingers look wider.
The shape requires a medium to long nail length. At short lengths, the taper effect becomes harder to see.
How to file it: Start by filing the sides inward at a slight angle. Do not go too steep. You want a subtle taper, not a full pointed shape. Then file the tip straight across to create the flat top.
Use a base coat before applying any color. This prevents staining and helps polish last longer. A good drugstore base coat like Sally Hansen’s Hard as Nails is around $4.
Colors that work well with tapered square nails include deep jewel tones like emerald, cobalt blue, or plum. These rich shades give the nails a sophisticated look that suits the structured shape.
8. Extended Almond Nails
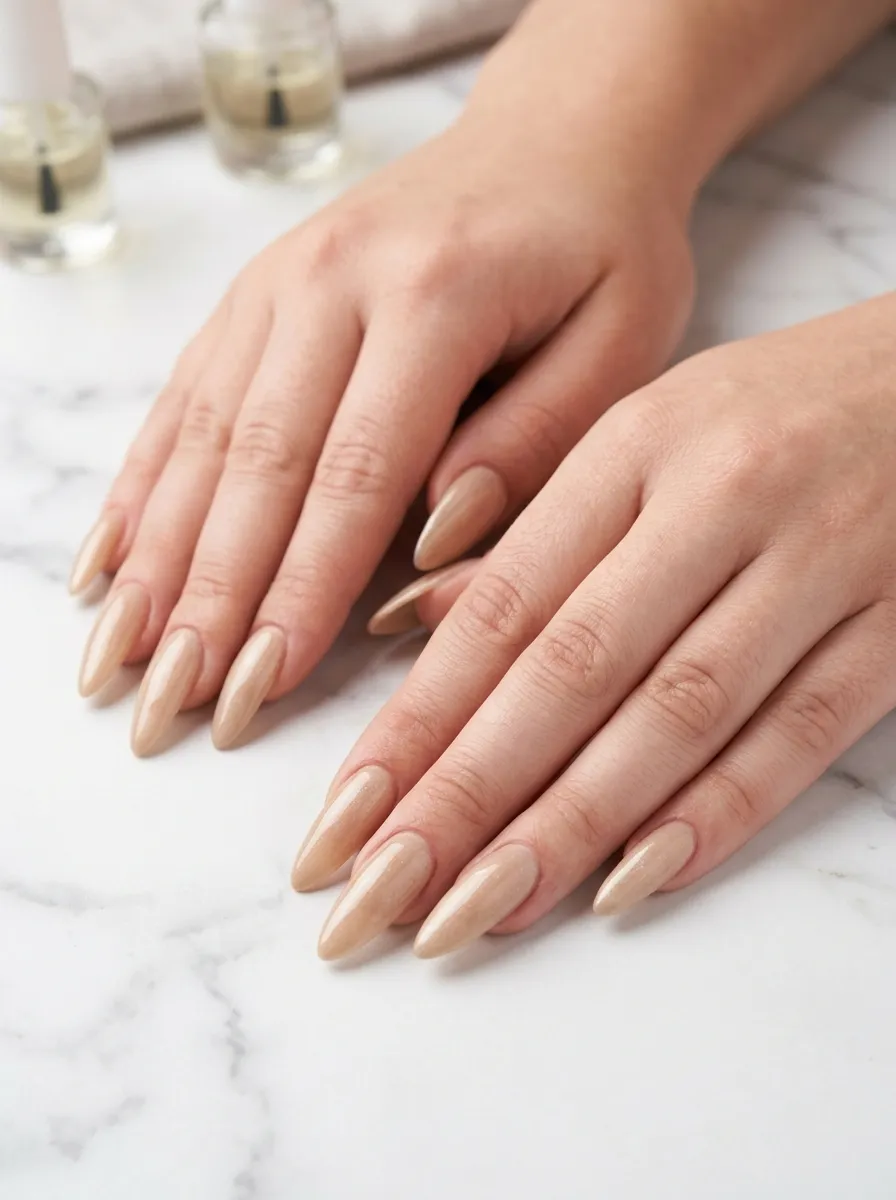
Extended almond nails are simply longer versions of the classic almond shape. The extra length amplifies the slimming effect on chubby hands.
When the nail is longer, the taper is more gradual and pronounced. This creates an even stronger illusion of length and slimness.
This shape is ideal for a special occasion or event. It looks elegant and intentional.
Tip: If your natural nails are short or brittle, get gel extensions or acrylics at a nail salon. A basic acrylic set starts at around $25 at most mid-range salons. For an extended almond specifically, ask your nail tech to file the tips before applying the final gel coat.
Nude, champagne, and soft gold polishes look best on extended almond nails. They keep the focus on the long, tapered shape.
If you want nail art, add a thin metallic stripe or a single rhinestone at the base of one or two nails. This draws the eye and adds detail without overwhelming the elegant shape.
Extended almond nails require regular upkeep. Fill appointments every two to three weeks will keep them looking fresh.
9. Round Nails
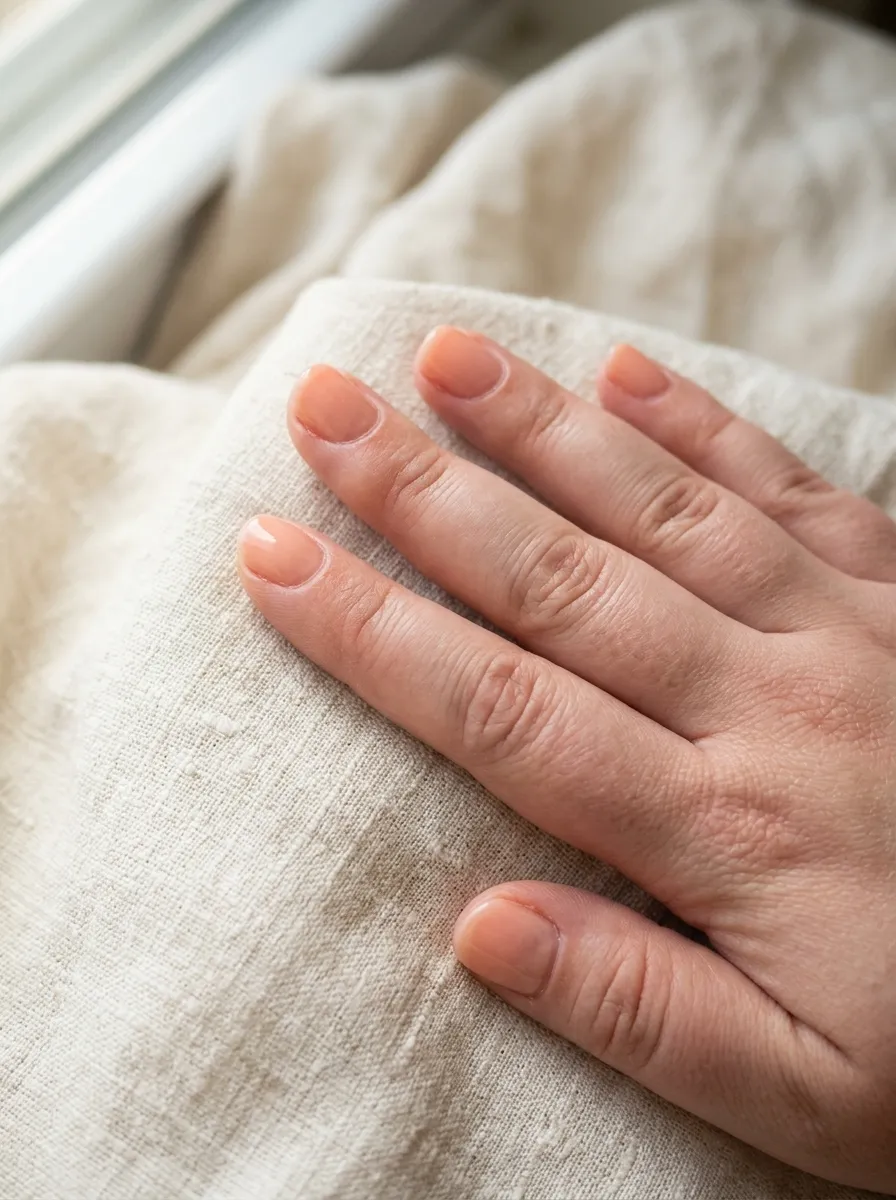
Round nails follow the natural curve of your fingertip. They are one of the simplest shapes to maintain. And they look surprisingly neat and flattering on chubby hands when done right.
The key is to keep the nails at the right length. Too short, and the wide nail plate looks stubby. A little extra length, just past the fingertip, makes a noticeable difference.
Round nails are beginner-friendly. You do not need advanced filing skills. Just follow the natural curve of the finger and smooth out any rough edges.
Budget tip: A glass nail file ($3 to $6 at most beauty stores) makes shaping round nails easier and leaves a smoother edge than emery boards.
Soft, natural colors are ideal for round nails. Sheer pinks, nudes, and whites keep things simple and elegant. A classic French manicure on round nails looks especially clean and polished.
This shape is great for people who want low-maintenance, everyday nails. It is also very comfortable since there are no sharp corners or points. If you are transitioning from bitten nails or very short nails, round is often the best starting shape.
10. Flared Nails (Duck Nails)
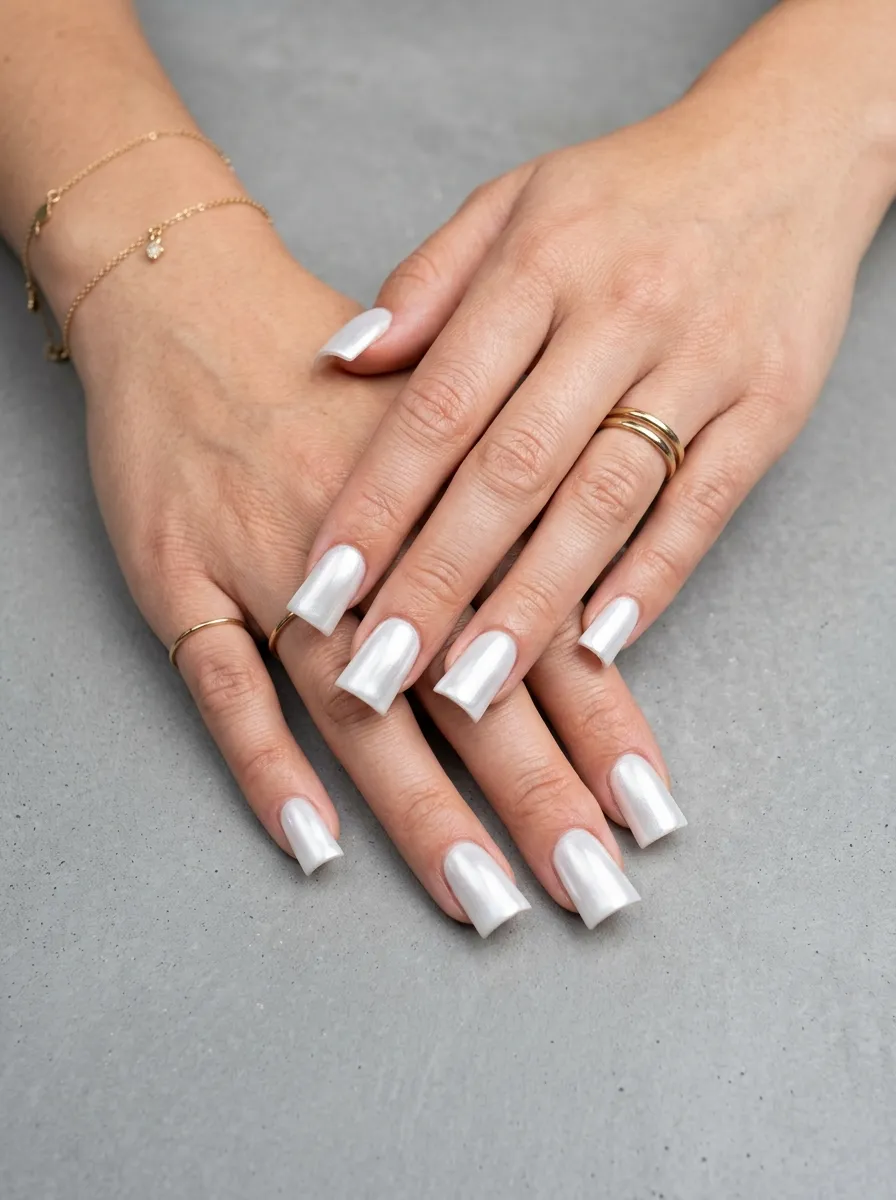
Flared nails, sometimes called duck nails, widen dramatically at the tip. This is an unconventional choice. But it can actually work for chubby hands when styled correctly.
The wider tip draws attention away from the finger itself. The nail becomes the focal point. When paired with the right color and length, this shape creates an interesting visual balance.
This is not an everyday work nail. It is bold, artistic, and statement-making.
How to get this look affordably: Buy a set of wide-tip press-on nails and trim them into a flare shape with nail scissors. Some nail supply stores like BornPrettyStore sell flare tips specifically.
Keep the color strong and uniform. White, chrome silver, or holographic finishes look striking on flared nails. Avoid busy nail art that fights with the dramatic shape.
If you are feeling creative, try a color gradient from dark at the base to light at the wide tip. This creates a visual trick that narrows the appearance of the finger while the flare adds drama.
This shape is for the adventurous. But it is definitely a conversation starter.
11. Lipstick Nails
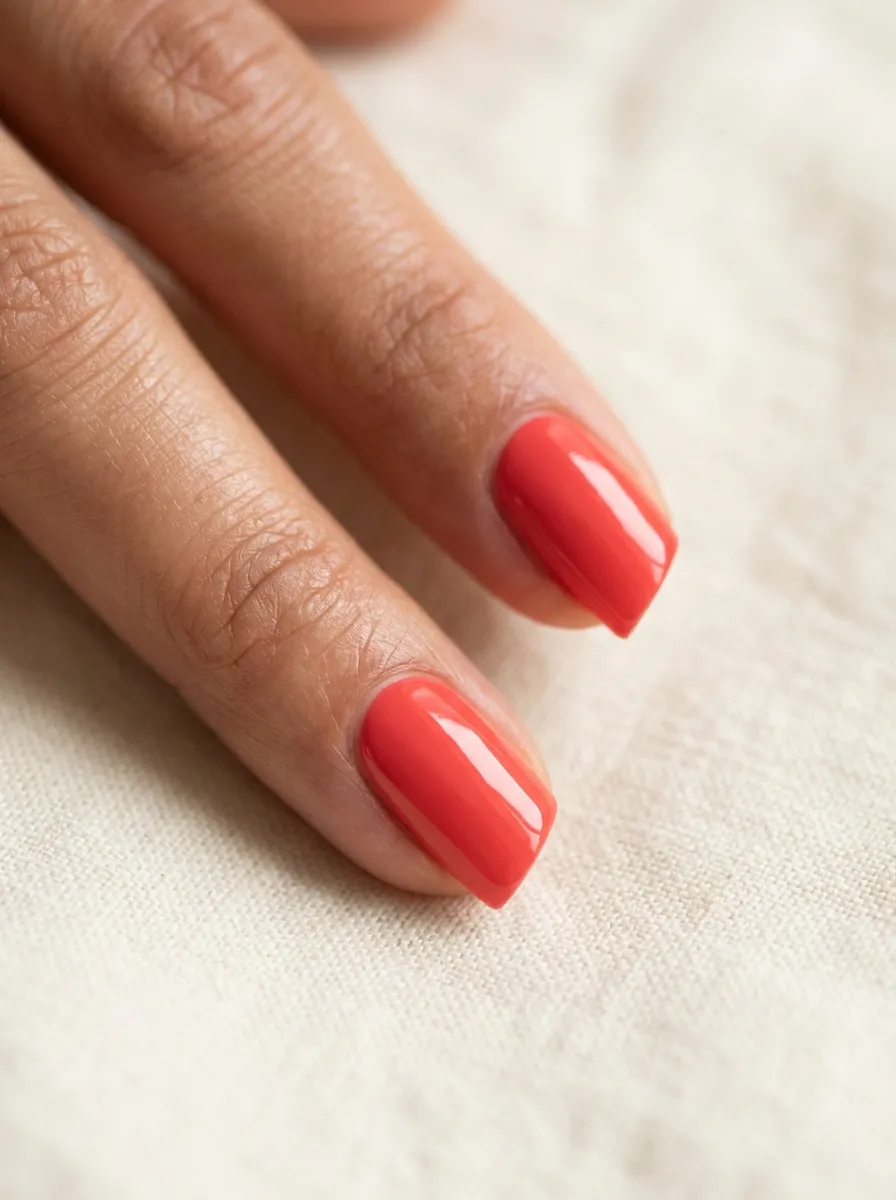
Lipstick nails are shaped to resemble the angled tip of a lipstick bullet. One side is cut diagonally higher than the other.
This asymmetrical shape is unexpected and stylish. On chubby hands, the diagonal cut creates the impression of length on one side of the nail, adding a slimming effect.
This shape is not for everyone. But if you love expressive, artistic nails, it is worth trying.
DIY tip: File one side of the nail tip diagonally. The highest point should be on the outer edge of the nail. Practice on one hand first to make sure you like the look before doing all ten fingers.
Bright, bold colors work best. Coral, hot pink, electric blue, and fire engine red all look stunning on lipstick nails. The unusual shape pairs well with equally confident color.
A neutral or sheer polish can also work if you want the shape to speak for itself without a bold color adding extra drama.
Keep this shape clean and well-maintained. Because the angle is very noticeable, any chips or uneven filing will stand out. Touch up regularly with a top coat to extend wear.
12. Short Almond Nails
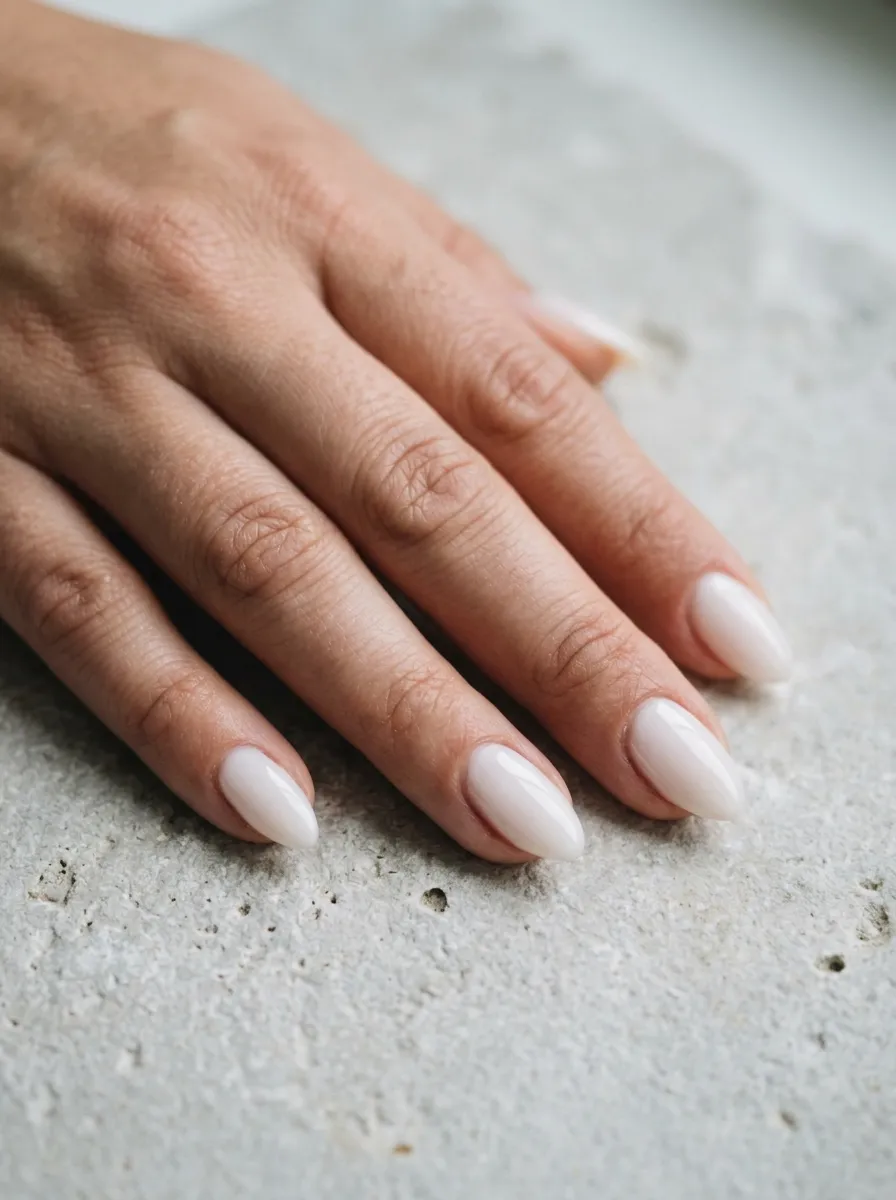
Not everyone wants or can have long nails. Short almond nails are the answer. The almond taper is applied even at a modest nail length. The effect is still flattering, just more subtle.
Short almond nails are practical for people who work with their hands or prefer low-maintenance nails. They still create the visual illusion of elongated fingers without the fragility of longer styles.
Filing tip: Even at a short length, file the sides inward slightly before rounding the tip. This minimal taper makes a real difference.
Go for light, skin-tone polish on short almond nails. Nudes, sheers, and soft pinks are ideal. They make the nails look longer than they actually are.
A sheer top coat with a slight shimmer is another great option. The shimmer reflects light and draws attention to the shape, creating the illusion of length.
Short almond nails require some upkeep because the shape can lose definition as nails grow. Plan to reshape every one to two weeks. A quick five-minute filing session is all it takes.
13. Medium Coffin Nails
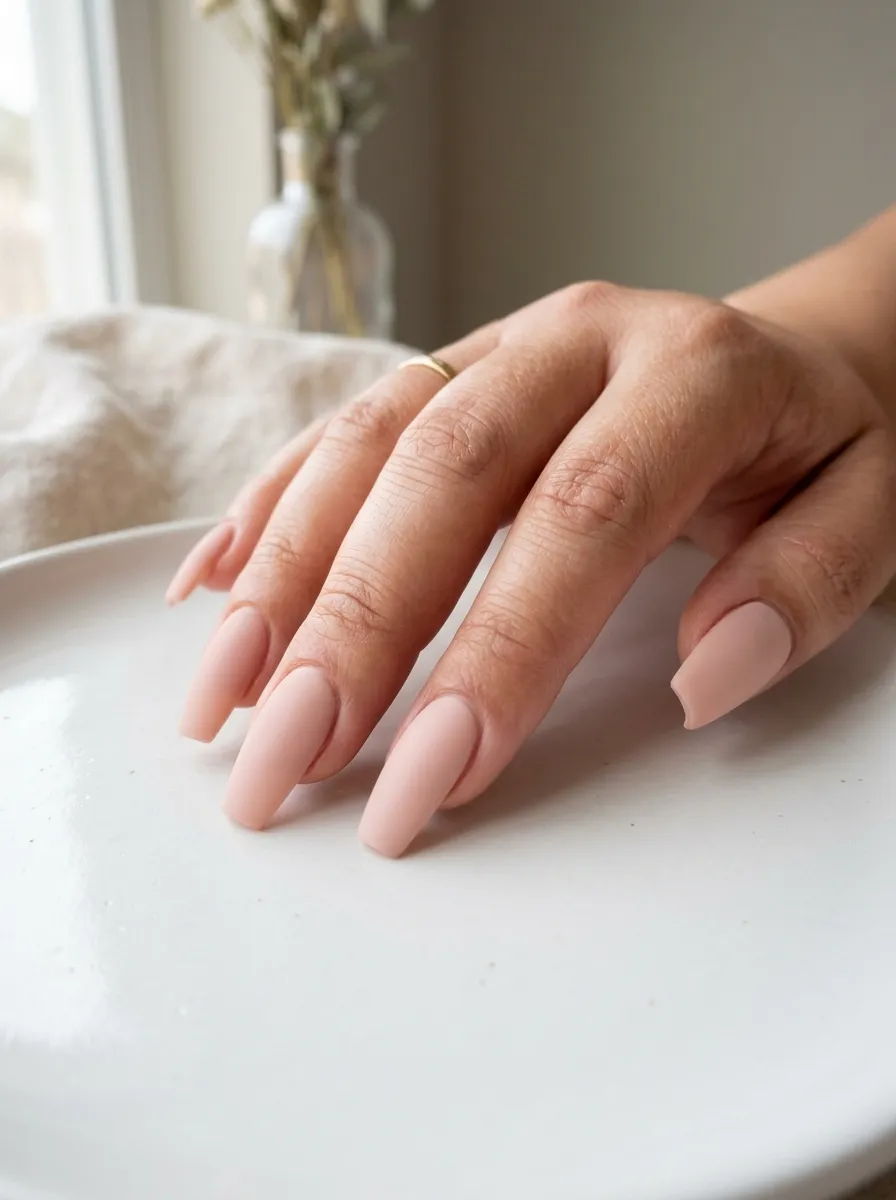
Medium coffin nails are shorter than dramatic coffin nails but still carry the same flattering tapered silhouette. They are a great compromise between bold and practical.
At medium length, the taper is visible and slimming without making the nails feel unwieldy. You can still type, text, and cook without stress.
Affordable option: Gel nail kits for home use are now widely available. Brands like Beetles or Makartt sell complete gel nail sets for under $30. Watch a tutorial on YouTube and practice the coffin shape at home.
Matte top coats look especially good on medium coffin nails. Matte finishes reduce glare and make the shape look more intentional and editorial. Apply a matte top coat over any regular polish for an instant upgrade.
Medium coffin nails in beige, caramel, or warm taupe look incredibly flattering on all skin tones. These warm neutrals complement the structured shape and look polished without being overdone.
Fill appointments for gel medium coffin nails are needed every two to three weeks. At home, reshaping with a nail file as they grow is simple and quick.
14. Natural Nude Elongated Nails
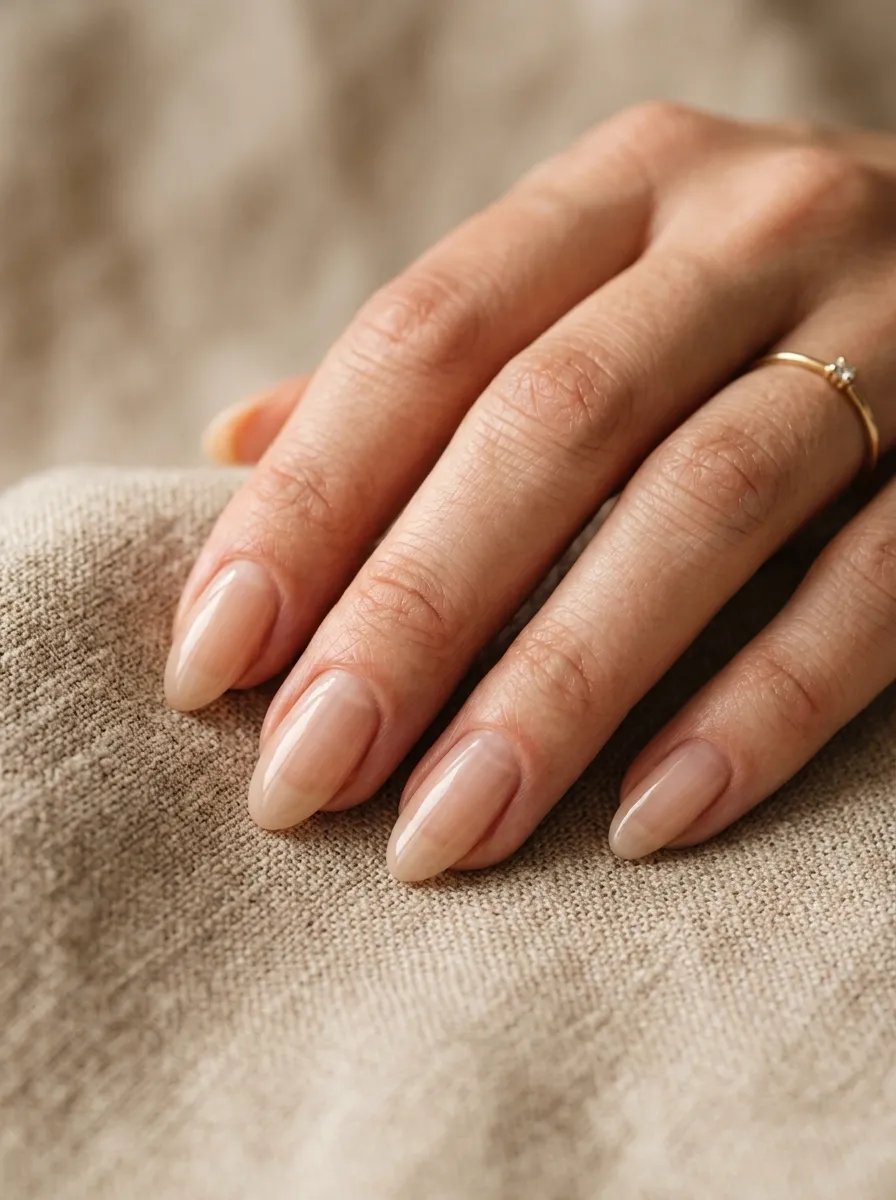
Sometimes the simplest approach is the most effective. Natural nails filed into a slightly elongated shape and painted in a nude or skin-tone polish can look incredibly flattering on chubby hands.
The nude color blends the nails into the skin. This creates a continuous, unbroken line from fingertip to tip, making the entire finger look longer.
Key insight: Choose a nude that matches your skin tone. If you have lighter skin, go a shade lighter than your skin. If you have darker skin, choose a warm caramel or bronze nude. A mismatched nude can have the opposite effect.
Brands like OPI, Essie, and Sally Hansen all have extensive nude ranges. Drugstore options are just as good as high-end brands for this purpose.
File your natural nails into a slight oval or almond shape. Even without gel or acrylic, a shaped natural nail in the right nude looks elegant.
Add one coat of a high-shine top coat. This gives the nails a healthy, groomed appearance. Seche Vite is a popular fast-drying top coat available at most drugstores for around $8.
15. Pointed Oval Nails
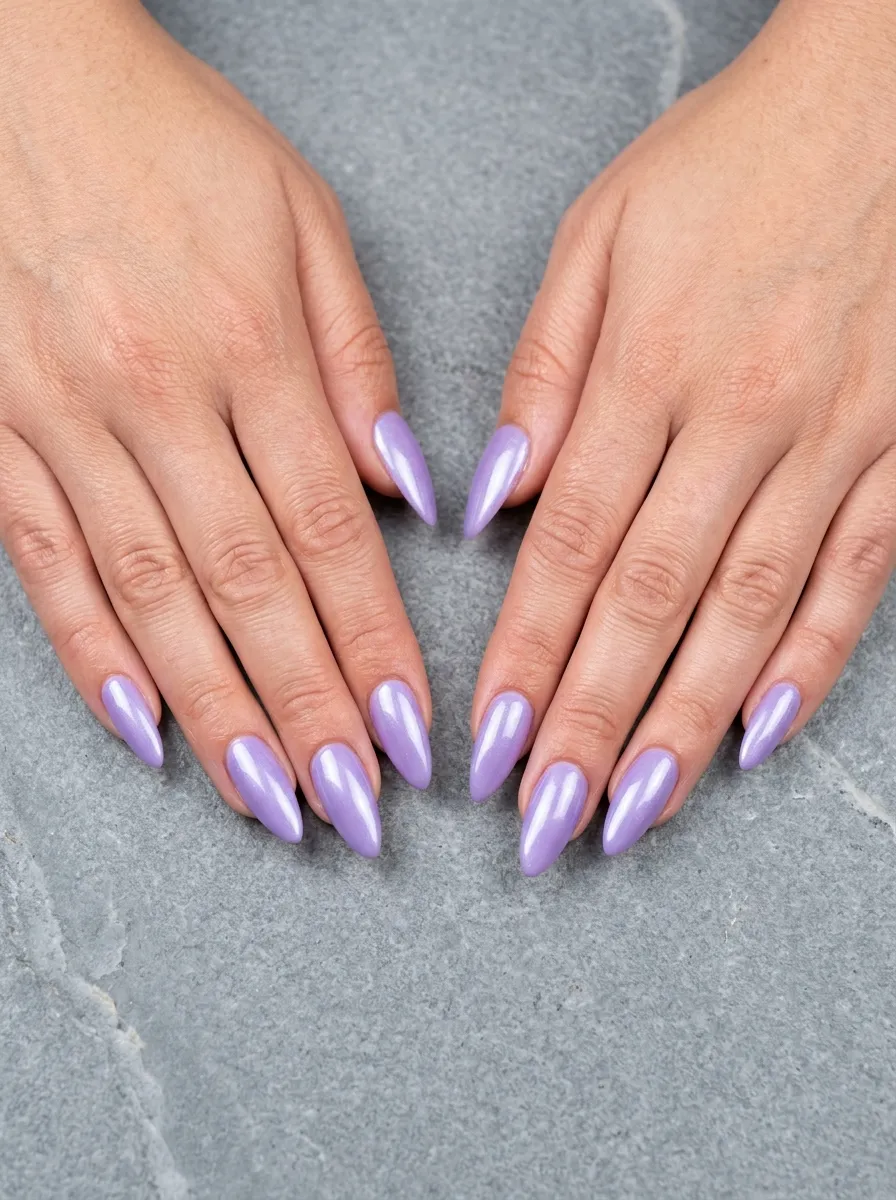
Pointed oval nails fall between an oval and an almond. They are softer than a true almond but sharper than a rounded oval. The slight point adds elegance without the fragility of a stiletto.
This shape is extremely flattering on chubby hands. It provides significant elongation while being easier to maintain than a full stiletto or almond.
Filing technique: File the sides inward gradually. Stop just before you reach a sharp point. The tip should feel slightly pointed when you run your finger across it, but not sharp enough to scratch.
Light, icy, or pastel colors are stunning on pointed oval nails. Lavender, pale blue, and mint give the nails a modern, fresh look. These cooler shades also photograph beautifully.
If you want something more dramatic, a deep plum or midnight blue on this shape looks sophisticated and bold.
Pointed oval nails look best at medium or medium-long lengths. Too short, and the point disappears. Too long, and they become fragile.
A strengthening base coat is especially useful for this shape. Try OPI Nail Envy or Orly Nailtrition, both available at Sally Beauty or online for under $15.
16. French Manicure on Almond Nails
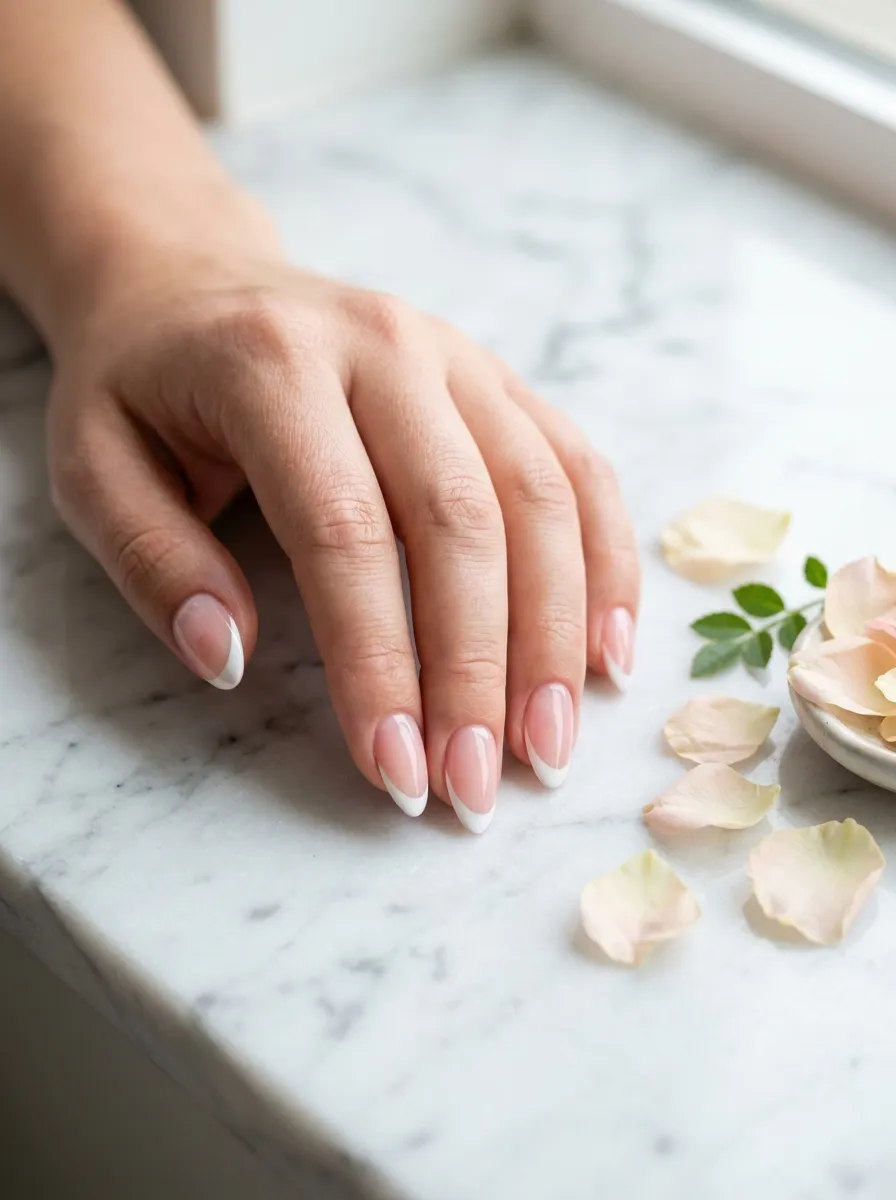
A French manicure on almond nails is one of the most timeless looks for chubby hands. The combination works beautifully. The almond shape lengthens the finger, and the French tip adds clean structure to the look.
The white tip creates a visible endpoint that draws the eye to the end of the nail. This enhances the elongating effect of the almond shape.
DIY French tip tip: Use French tip guides, which are adhesive strips, to get a perfectly straight white line. Apply the guide, paint the white, let it dry, then remove the guide and apply the sheer pink base. Guides cost about $2 at any beauty supply store.
Keep the white tip thin and precise. A thick white tip can look heavy on wider fingers. A thin, clean line looks delicate and polished.
The sheer pink base should match your skin tone closely. A slightly warmer or lighter pink than your natural skin looks most natural and flattering.
Finish with a high-gloss top coat. This gives the French manicure that clean, professional salon finish. Reapply the top coat every two days to prevent chipping.
17. Ombre Coffin Nails
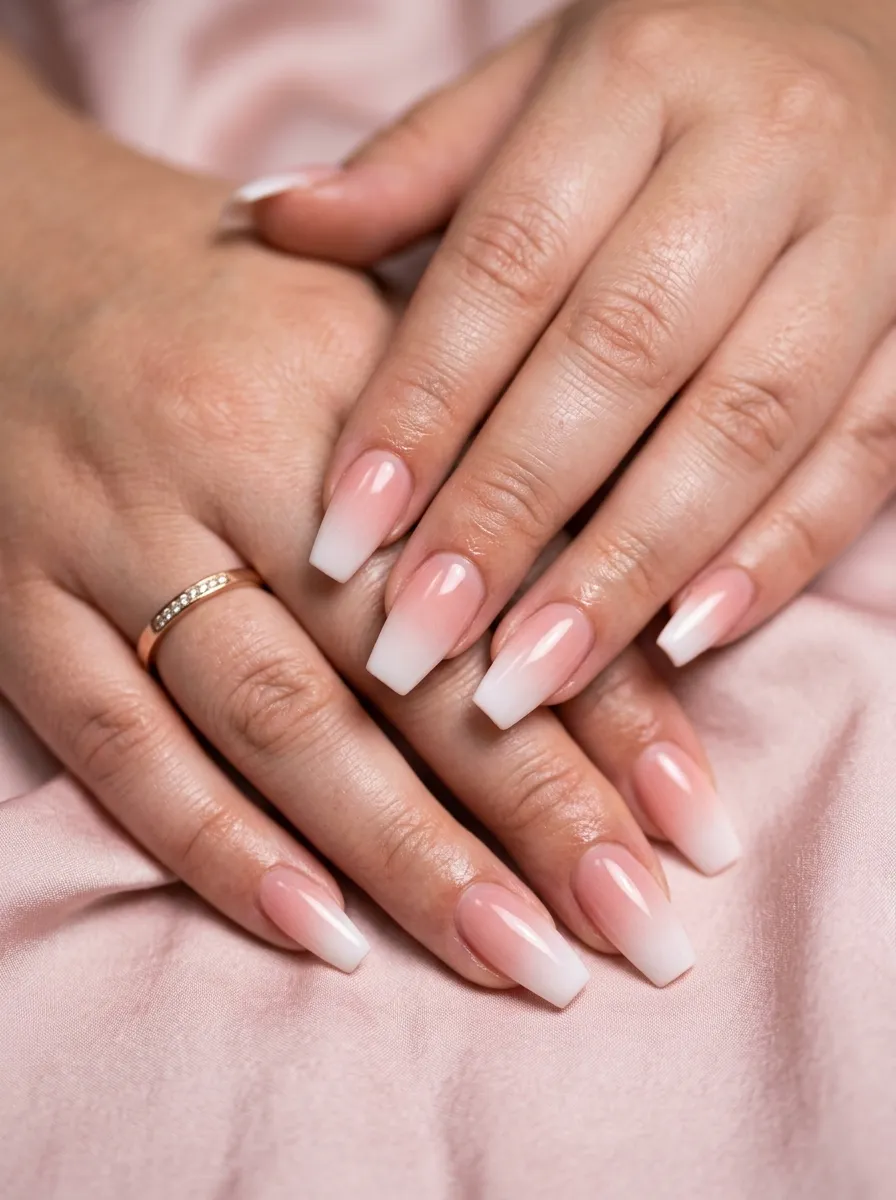
Ombre coffin nails combine two flattering elements. The tapered coffin shape slims the sides of each finger. The gradient color draws the eye upward along the nail, toward the tip.
Together, these effects create a powerful elongating illusion on chubby hands.
Pink-to-white ombre is the most popular and flattering version for this purpose. The light color at the tip brightens the nail and makes the finger look longer.
DIY ombre technique: Apply the lighter color to the top third of the nail with a sponge. Sponge the darker color at the base. Dab gently where the colors overlap to blend. Apply a top coat to seal and smooth the gradient.
A makeup sponge from a dollar store works perfectly. Cut a small piece, dab it in polish, and stamp it onto the nail. Practice makes this easier.
You can also try a dark-to-darker ombre for a moodier effect. Navy-to-black or burgundy-to-plum both look stunning on coffin nails.
Ombre nails photograph beautifully, which makes them an excellent choice for events, weddings, or special occasions.
18. Thin Nail Extensions
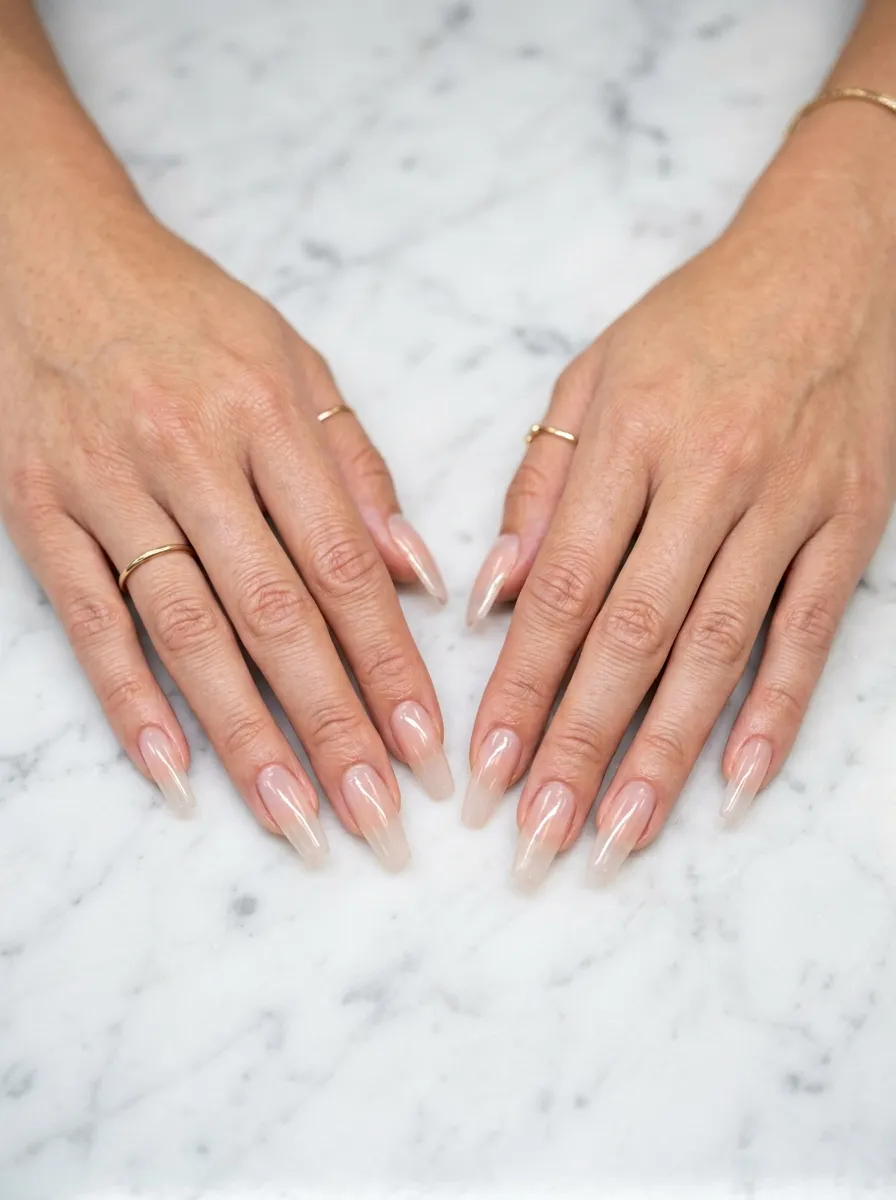
One of the most effective techniques for making chubby hands look slimmer is to use thin or narrow nail extensions. Instead of using a tip that covers the full width of the nail, your nail tech applies a narrower tip.
This narrows the visible width of the nail plate. It creates a slimmer, more tapered appearance from the base of the nail to the tip.
Discuss this specifically with your nail technician before your appointment. Not every nail tech does this automatically. Ask for a narrowed tip application or a “slim extension.”
Cost consideration: Standard acrylic or gel extensions at a mid-range salon typically cost $30 to $50 for a full set. Ask about slim tip options when booking.
Combine thin extensions with an almond or coffin shape for maximum effect. The combination of a slim extension and a tapered shape is one of the most powerful elongating combinations available.
Polish color matters here too. Keep it simple: nudes, soft pinks, or sheer finishes. Busy nail art on narrow extensions can look cluttered. Simple and clean always wins.
19. Gel Nails with a Dark Polish
Dark polish is a surprisingly powerful tool for chubby hands. Deep, saturated colors like burgundy, navy, forest green, or black create a strong visual boundary at the nail edge. This boundary makes the nail look more defined and the finger look slimmer.
Gel nails with a dark color are especially effective because the gel finish gives the polish an even, glass-smooth appearance. No streaks, no brush marks. Just deep, saturated color.
At-home gel option: LED gel nail kits are now affordable and easy to use. Beetles Gel Nail Polish Starter Kit is around $25 on Amazon and includes a lamp, base coat, and top coat. Dark gel polish pots cost around $5 to $8 each.
Apply thin, even layers. Two thin coats of color cure better than one thick coat. Cure each layer under the LED lamp for 30 to 60 seconds.
Try this on an almond or oval shape for the full slimming effect. The dark color plus the tapered shape is one of the best combinations for chubby fingers.
Add a glossy top coat as the final step. This seals the color and gives it that unmistakable gel shine.
20. Minimalist Nail Art on Oval Nails
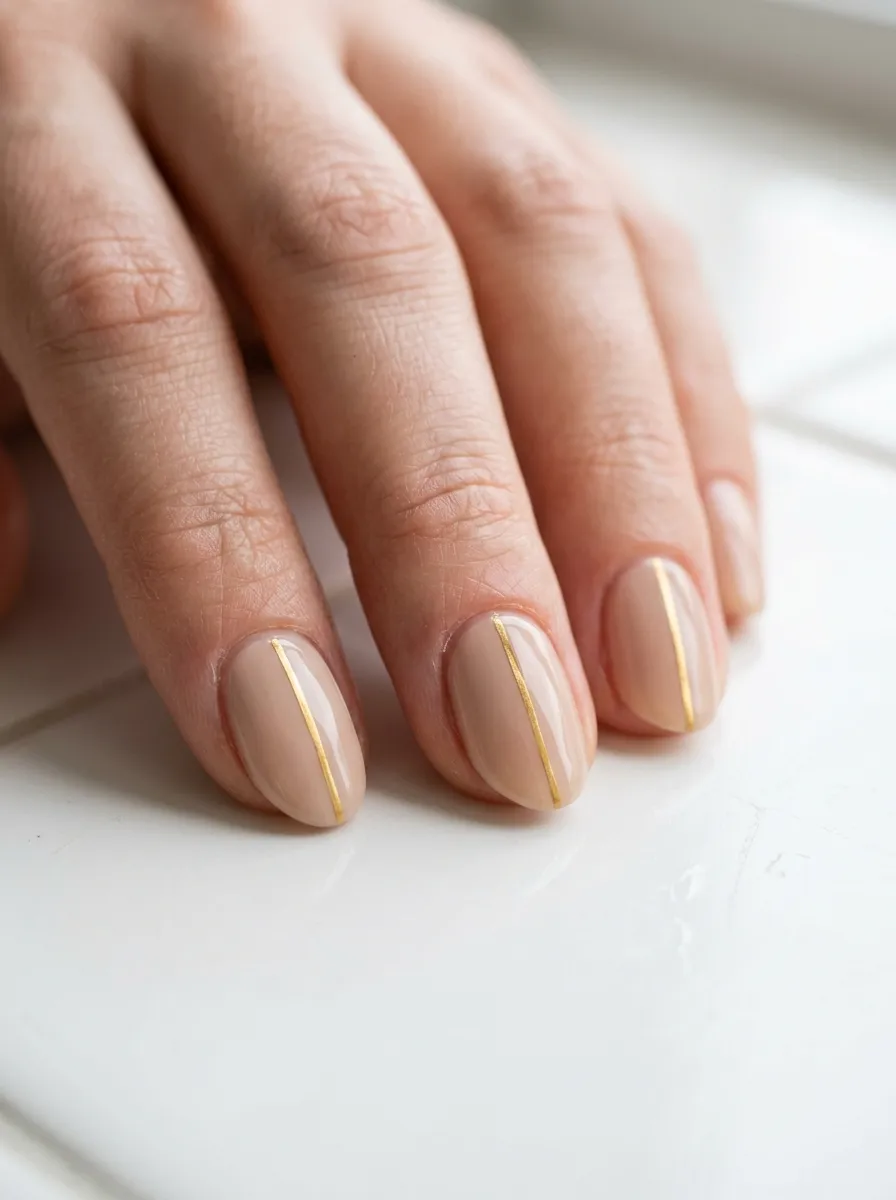
Minimalist nail art on oval nails is one of the most flattering combinations for chubby hands. The oval shape is already slimming. A vertical or upward-pointing design element enhances that effect even further.
Think thin gold lines, a single small dot, or a delicate floral painted near the cuticle. These designs are subtle but intentional. They draw the eye without overwhelming the nail.
DIY nail art tools: A nail art striping brush costs about $2 to $5 at beauty supply stores. Practice on a piece of paper first. A slow, steady hand makes clean lines. You can also use nail art stickers for instant minimalist designs.
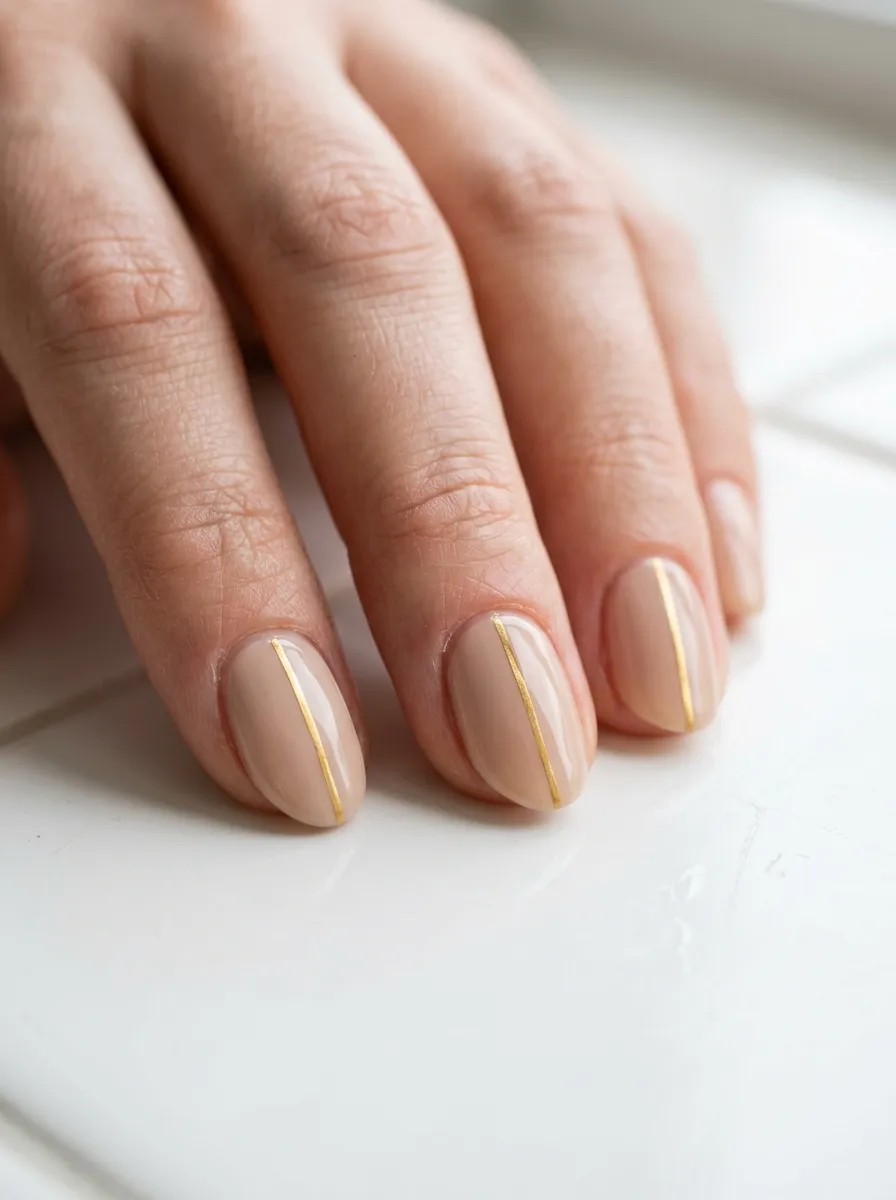
Vertical lines are particularly flattering. They mimic the elongating direction of the almond or oval shape. A single thin gold or white vertical stripe on each nail can look very polished.
Try combining a nude or soft beige base with a single metallic accent. This keeps the overall look clean while adding a hint of personality.
Nail stickers and decals from brands like KISS or Static Nails make minimalist designs accessible even for beginners. A sheet of nail stickers often costs less than $5.
21. Glitter Ombre on Almond Nails
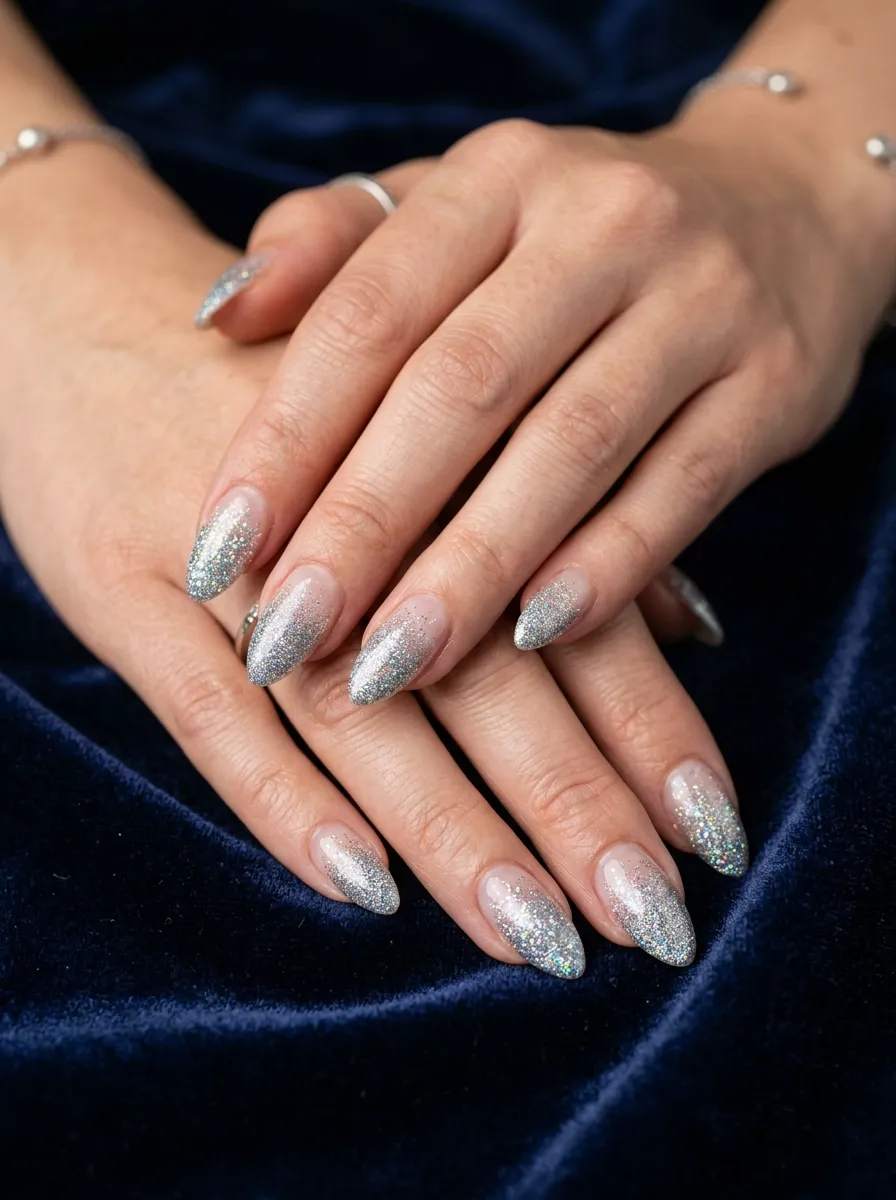
Glitter ombre on almond nails is a glamorous choice for special occasions. The glitter fades from dense sparkle at the tip to nothing near the cuticle. This gradient draws the eye to the tip of the nail.
By concentrating the sparkle at the top, the design directs attention away from the width of the finger and toward the long, tapered nail tip.
Use a chunky glitter or a fine micro-glitter in silver, gold, or rose gold for the most flattering effect. Fine glitter tends to look more sophisticated. Chunky glitter is more dramatic and fun.
DIY glitter ombre: Apply a sheer or nude base coat first. Dip a small sponge piece in glitter polish and dab it at the tip of the nail. Build up the layers for more density. Let each layer dry before adding the next. Seal with a thick, glossy top coat.
Multiple thin top coat layers help smooth out the texture of glitter. Apply two to three coats, letting each dry fully before the next.
This look is ideal for weddings, parties, and holiday events. It is bold, eye-catching, and flattering.
22. Negative Space Nail Designs
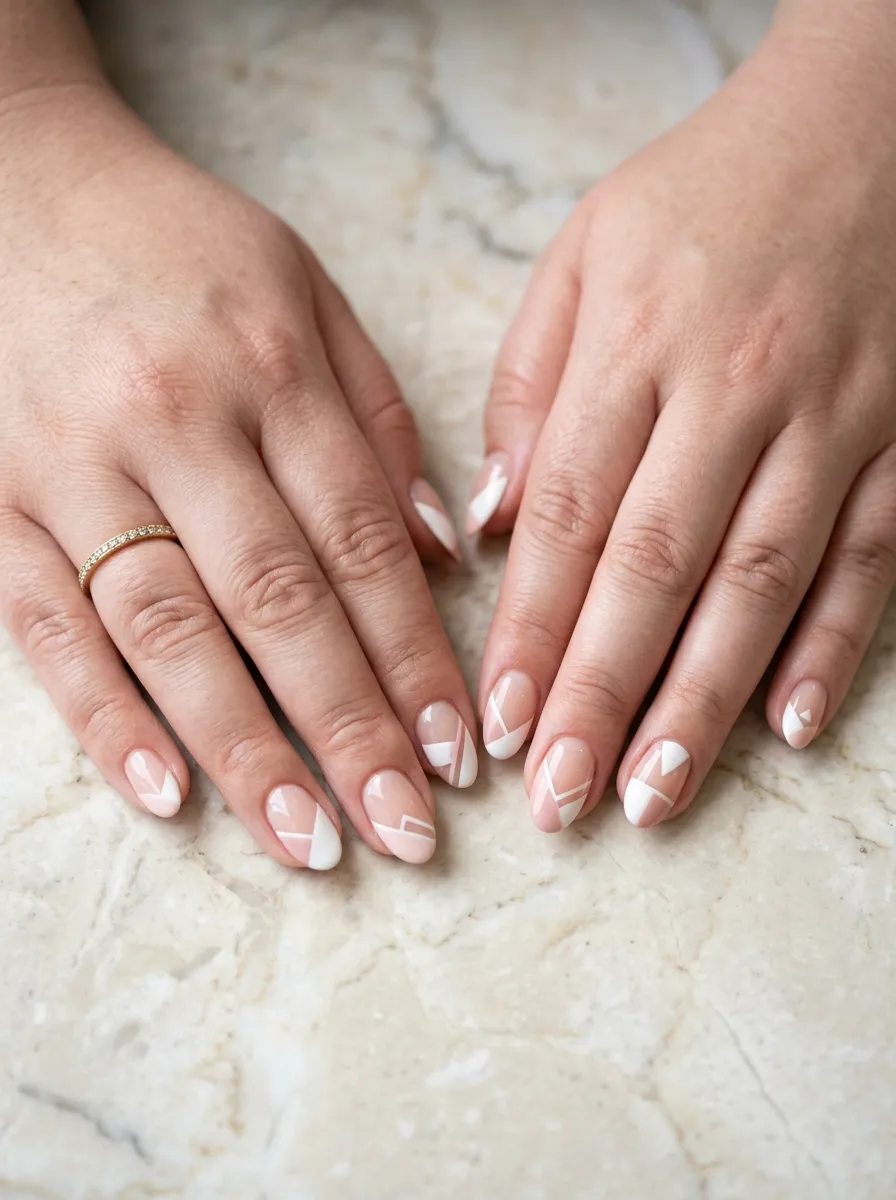
Negative space nail designs leave part of the nail bare intentionally. This breaks up the visual mass of the nail and creates an interesting, modern look.
For chubby hands, negative space works well because it draws attention to the design itself rather than the width of the finger. The eye is focused on the pattern, not the nail bed.
Design ideas: A simple half-moon at the cuticle. A thin diagonal stripe leaving one corner bare. A geometric window shape cut out of color.
These designs look complex but are achievable at home with tape. Apply regular tape or nail art tape in the desired shape, paint the color, remove the tape while still wet, and clean up the edges with a small brush dipped in acetone.
Negative space designs look especially clean on oval or squoval nails. The smooth, rounded shape complements the geometric precision of the bare areas.
Go for high contrast in your color choice. Black on nude, or dark red on clear, makes the negative space pop. You can also try a chrome or metallic color against bare nail for a futuristic look.
23. Sheer Glass Nails
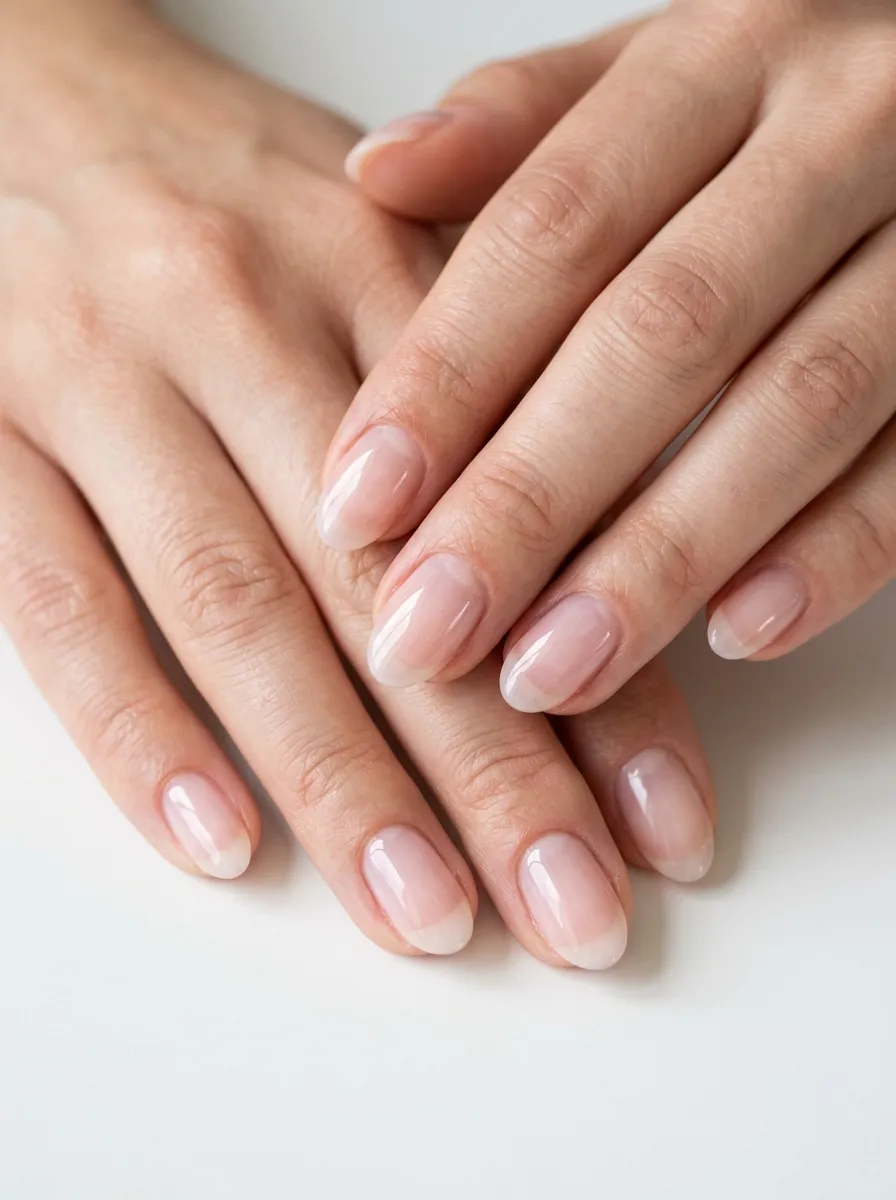
Sheer glass nails are a Korean nail trend that has taken off globally. The nails are almost see-through, with a glassy, reflective finish. They can be clear, or very lightly tinted in pink, peach, or beige.
For chubby hands, the sheer finish is excellent. It minimizes the look of the nail plate. A smaller-looking nail plate makes the finger look slimmer.
The glass effect also catches light in a unique way, making the nails look healthy and almost three-dimensional.
How to achieve this at home: Apply a clear base coat. Then layer one thin coat of a very sheer jelly polish. Let dry. Apply a high-gloss top coat. For extra effect, try a holographic top coat from brands like ILNP or Holo Taco (available online for around $10 to $12).
The key to this look is thin layers. Too much product makes the nail look cloudy. You want light, barely-there color.
This trend works on any nail shape, but oval and almond nails make the glass effect look most refined.
24. Chrome Powder Nails
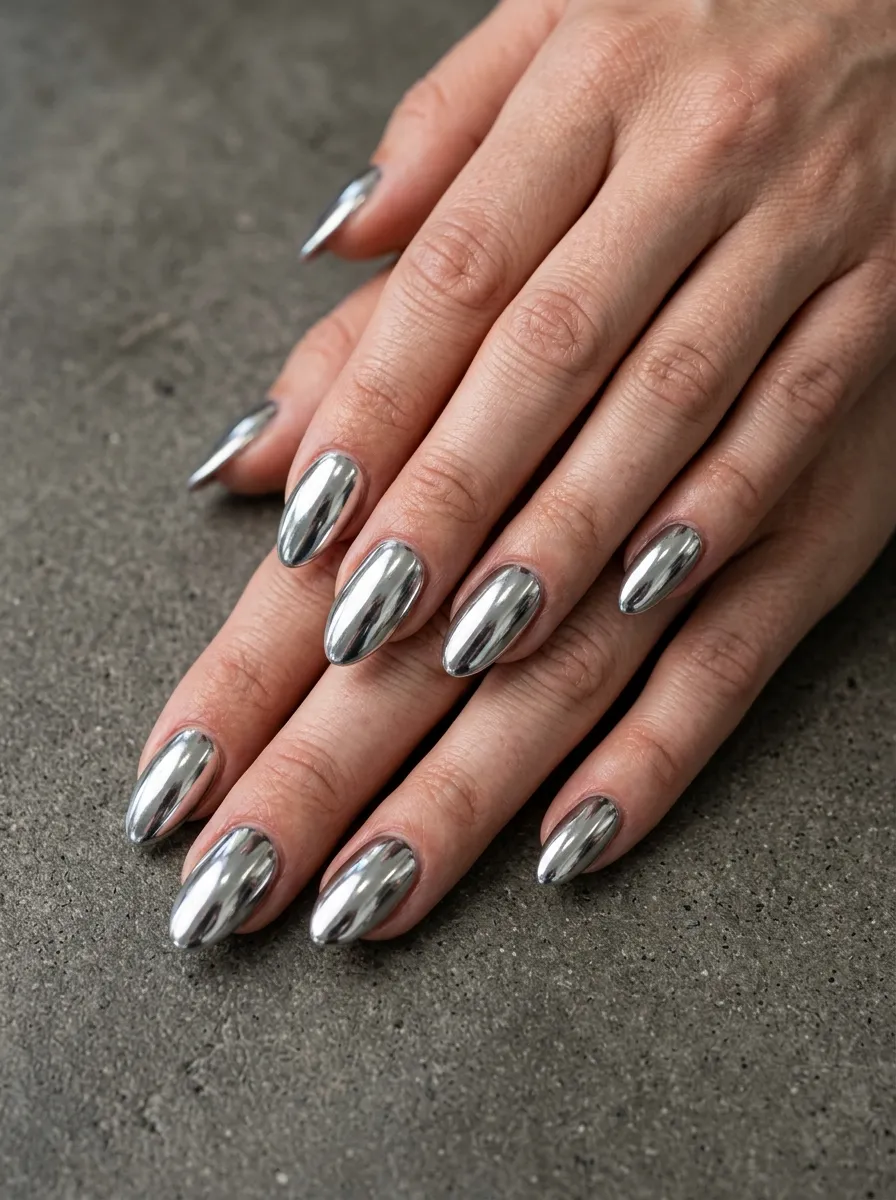
Chrome powder nails have a reflective, mirror-like finish. They look futuristic and high-fashion. And for chubby hands, the reflective surface draws attention to the nail shape rather than the finger.
When the nails have a strong reflective surface, they become the visual centerpiece of the hand. Everything else recedes.
Chrome powder is applied over a gel base coat. The powder is rubbed onto the nail with a small sponge applicator. The result is an incredibly shiny, metallic surface.
DIY chrome kit: Chrome powder kits are available on Amazon for around $10 to $15. They include the powder and an applicator. You will need a gel base coat and LED lamp. Brands like Born Pretty and Modelones offer affordable options.
Silver chrome is the most dramatic. Gold chrome is warm and luxurious. Rose gold chrome is soft and feminine. All three look striking on any nail shape.
Pair chrome nails with an almond or coffin shape for the most flattering look. The tapered shape plus the reflective finish is a powerful combination for elongating the appearance of wide fingers.
25. Cat Eye Magnetic Nails
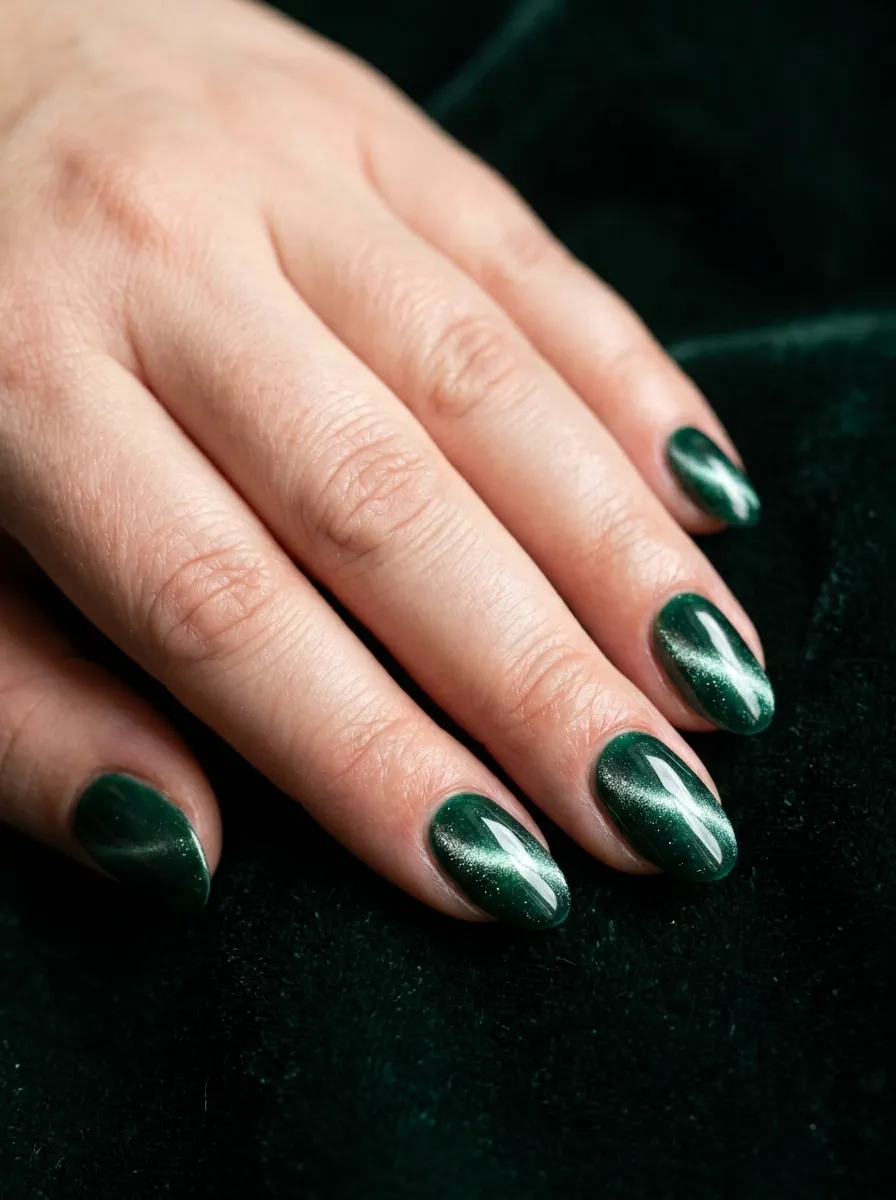
Cat eye nails use magnetic gel polish to create a striking streak of light through the center of each nail. The effect resembles the glowing eye of a cat.
The linear streak of light runs vertically up the nail. This vertical line reinforces the illusion of length. On chubby hands, this vertical emphasis helps each finger look longer and slimmer.
Cat eye gel polishes are applied like regular gel polish. Before curing, you hold a magnet above the nail to draw the metalite particles into the signature streak pattern. Cure under the LED lamp, and the effect is locked in.
DIY option: Cat eye gel polish kits are available from brands like OwlCat, Beetles, and Makartt for around $8 to $12 per bottle. Most come with a built-in magnet cap.
Deep jewel tones work best: forest green, navy, burgundy, and deep purple all showcase the cat eye effect beautifully. The richer the base color, the more dramatic the streak.
Apply two thin coats for full opacity. Hold the magnet close to the nail for five to ten seconds during each coat to form the streak before curing.
26. Pale Pink Gel Nails
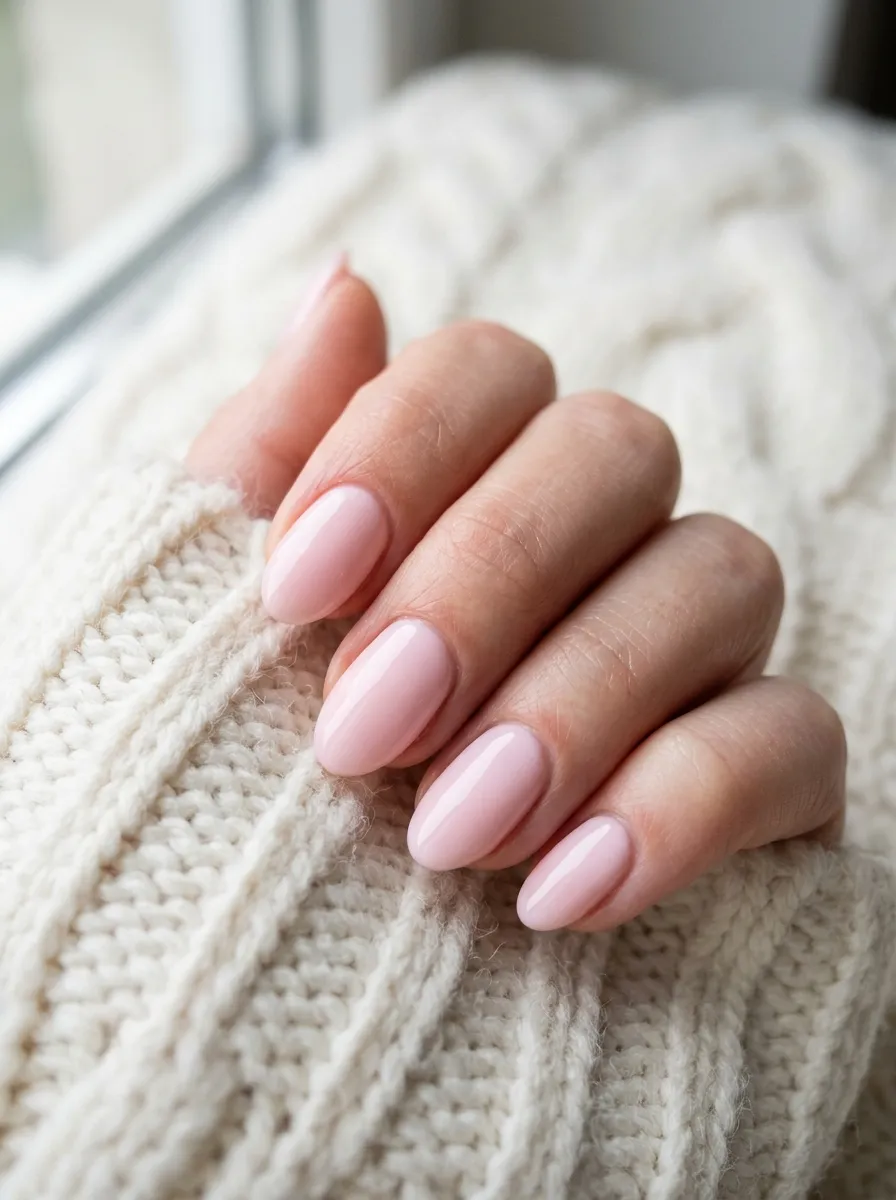
Pale pink gel nails are a classic for a reason. Soft pink is close to the natural nail color, which means it creates a seamless extension of the finger.
This seamless look is one of the simplest ways to make fingers look longer. There is no sharp color break between the finger and the nail tip.
Gel polish lasts longer than regular polish. It resists chipping and stays glossy for two to three weeks without touch-ups.
At-home gel pink recommendation: Sally Hansen Miracle Gel requires no lamp and gives a gel-like finish. It is widely available at drugstores for around $10. For a true gel look, try a starter kit from Beetles or GAOY with a lamp and pale pink gels.
Pick a pale pink that is slightly lighter than your skin tone. This subtle difference adds to the elongating effect.
Oval, almond, or squoval nail shapes look especially polished with pale pink gel. These classic shapes plus the understated color create a clean, put-together appearance that suits any occasion.
27. Matte Nude Nails
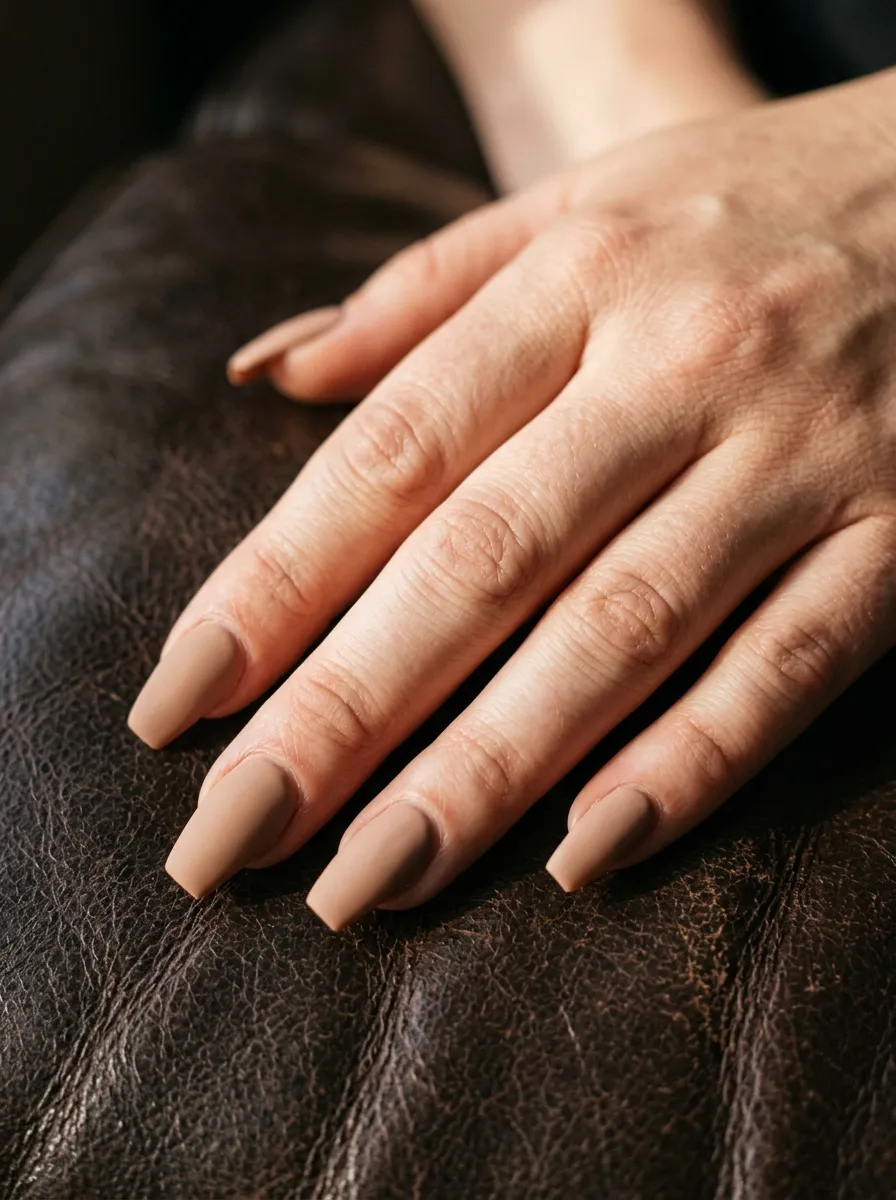
Matte nails have no shine at all. The surface is velvety and flat. This finish changes how the nail reads visually.
Because matte nails absorb light instead of reflecting it, they look less prominent. The nail plate appears smaller and more refined. On chubby hands, this is a subtle but effective trick.
Matte nude nails, in particular, are incredibly flattering. The skin-tone color blends the nail with the finger. The matte finish reduces the visual mass of the nail plate.
How to get matte nails cheaply: Buy a matte top coat from brands like Sally Hansen or Essie for around $8. Apply it over any regular nude or neutral polish. It dries in minutes and transforms the finish completely.
Re-apply the matte top coat every two to three days. It is more likely to scuff than a glossy top coat, but it is easy to refresh.
Coffin and oval shapes look especially editorial in matte nude. The combination feels fashion-forward and effortlessly chic.
Avoid matte finishes on very short nails. The lack of shine on a very short nail can make it look dull. At medium or longer lengths, the matte nude finish is stunning.
28. Two-Tone Nails
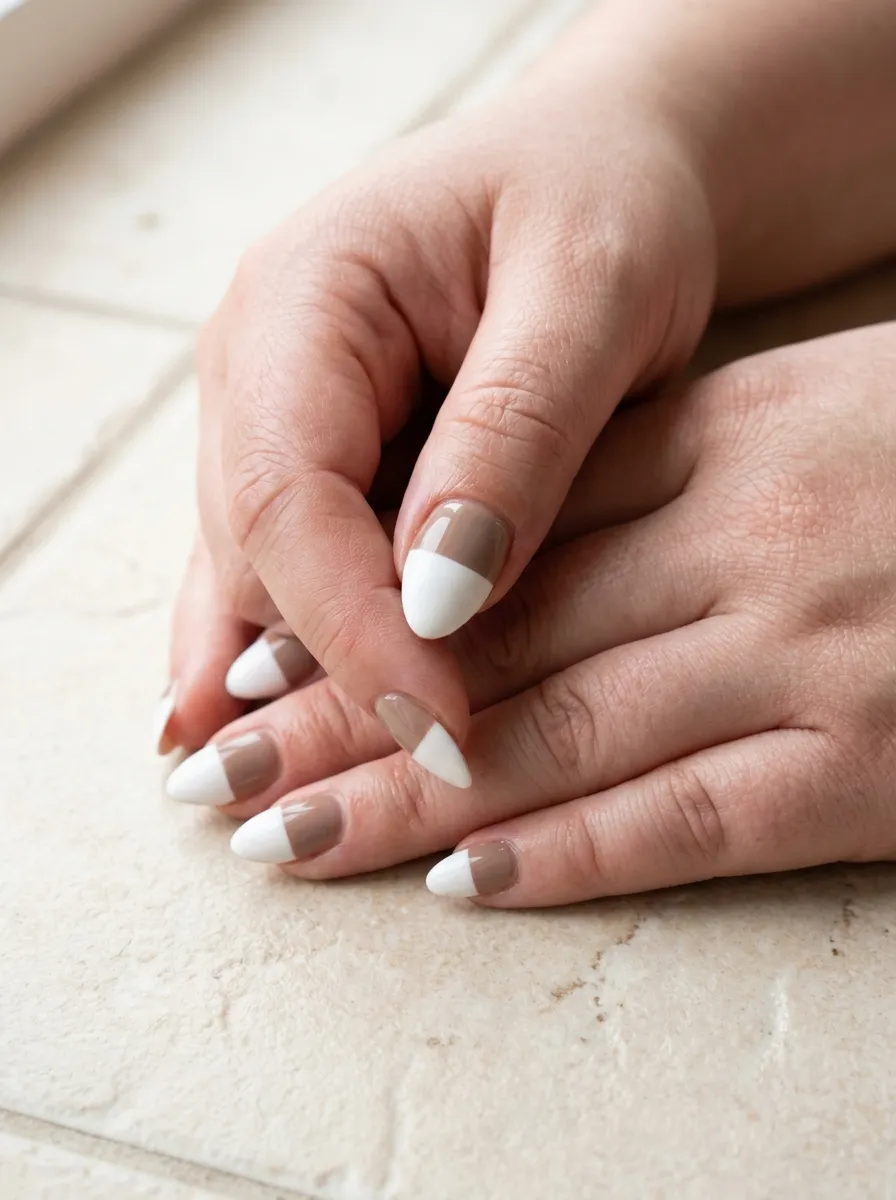
Two-tone nails divide each nail into two colors. Usually the lower half and upper half are painted in different but complementary shades.
For chubby hands, a smart two-tone design uses a lighter or brighter color on the upper half of the nail. This draws the eye upward. The focus moves to the tip of the nail rather than the base, which creates the impression of a longer finger.
Design ideas: Nude on the bottom, white on the top. Taupe on the bottom, pale gold on the top. Blush on the bottom, bright coral on the top.
Nail tape or striping tape helps create a clean, sharp division between the two colors. Apply the base color first, let it dry fully, then place the tape across the nail where you want the division. Paint the second color above the tape, and remove the tape while still wet.
Two-tone nails work best on almond, coffin, or oval shapes. These tapered shapes complement the graphic quality of the design.
Keep both colors in the same warm or cool family. Mixing warm and cool tones can make the design look off. Warm neutrals together, or cool pastels together, always look harmonious.
29. Accent Nail in a Bold Color
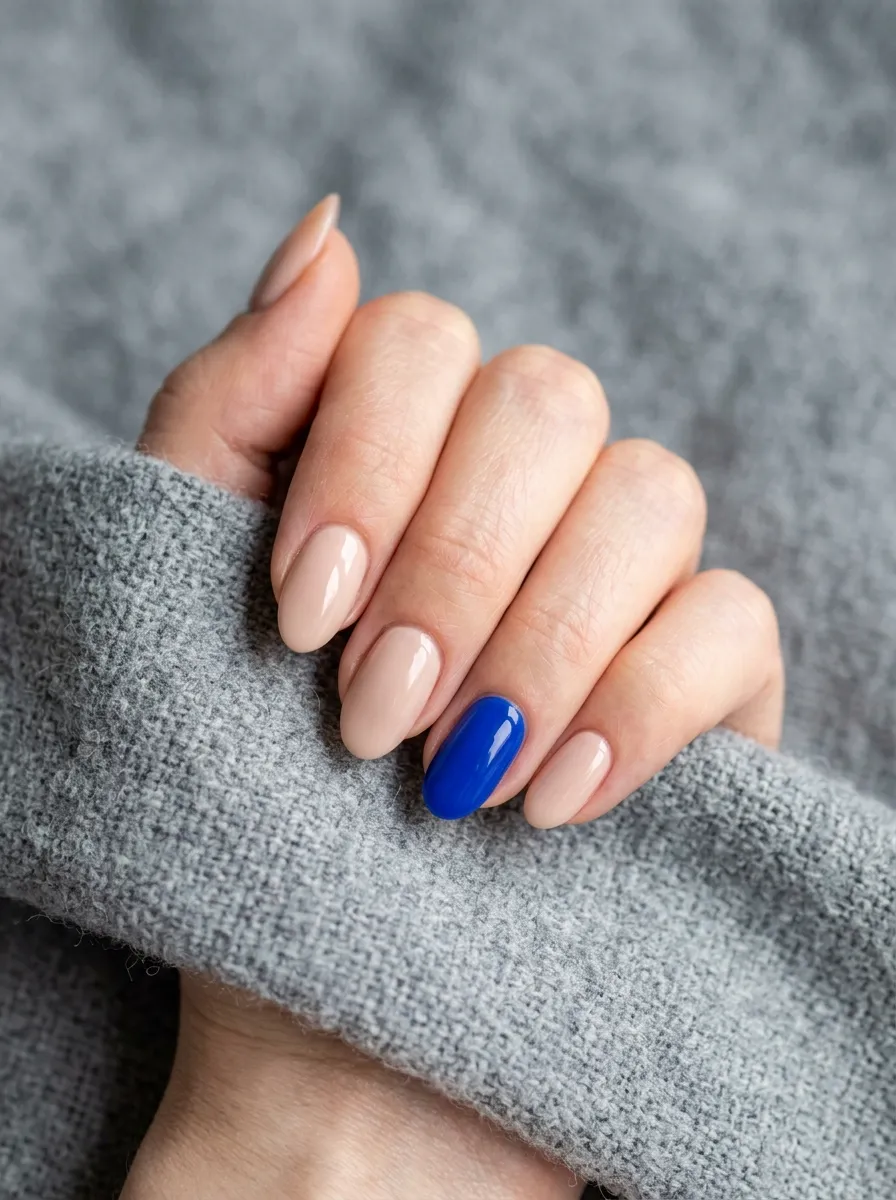
An accent nail uses one boldly colored nail as a statement piece against four neutral nails. This is one of the easiest and most affordable ways to add personality to your manicure.
For chubby hands, the accent nail trick works by directing attention to a specific point rather than spreading it across all fingers. The eye goes to the bold color, and the overall hand looks more stylized and deliberate.
The ring finger is the traditional accent nail placement. It is visible in most hand positions and is a natural focal point.
Budget approach: Use regular nail polish. The four neutral nails and the one accent nail only require two bottles total. Essie, Sally Hansen, and Wet n Wild all have great nail polish for under $5 a bottle.
Go bold with the accent. Electric blue, vibrant orange, neon yellow, or deep cherry red all pop against neutral backgrounds. The contrast is the whole point.
Apply a good top coat over the accent nail specifically. Because it is the focal point of the manicure, it needs to stay chip-free and glossy.
This technique requires no special skills or tools. Anyone can do it in under 30 minutes at home.
30. Jelly Nails
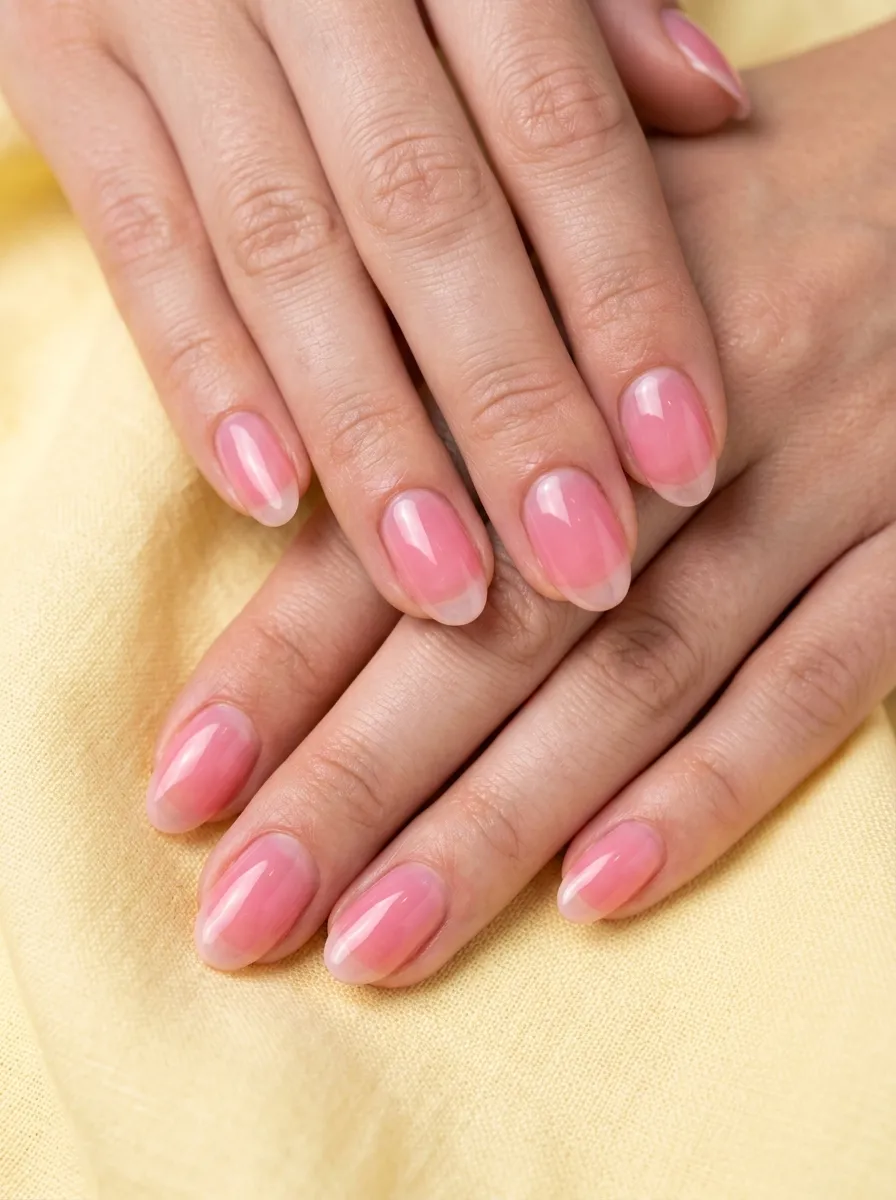
Jelly nails are sheer, translucent, and glossy. They look like a piece of hard candy sitting on the nail. The polish is thick and clear enough to see the nail through it.
For chubby hands, jelly nails minimize the appearance of the nail plate. The transparency reduces the visual prominence of the nail, making the finger look slimmer overall.
Jelly nails also look incredibly healthy. The translucent, glass-like shine suggests well-moisturized, cared-for nails.
How to get jelly nails: Look for sheer jelly polishes from brands like ILNP, Dazzle Dry, or even budget options on Amazon. Many craft stores and beauty supply stores carry them too. A single bottle usually costs $6 to $12.
Apply three to four thin coats for the classic jelly look. Let each coat dry between applications. Seal with a high-gloss top coat for extra depth.
Candy pink, peachy coral, clear, and lilac are the most popular jelly nail shades. They all look beautiful on oval or almond nail shapes.
Jelly nails pair perfectly with the sheer glass nail trend. Combine a jelly base with a holographic top coat for an elevated version of this look.
31. Long Square Nails with Rounded Corners
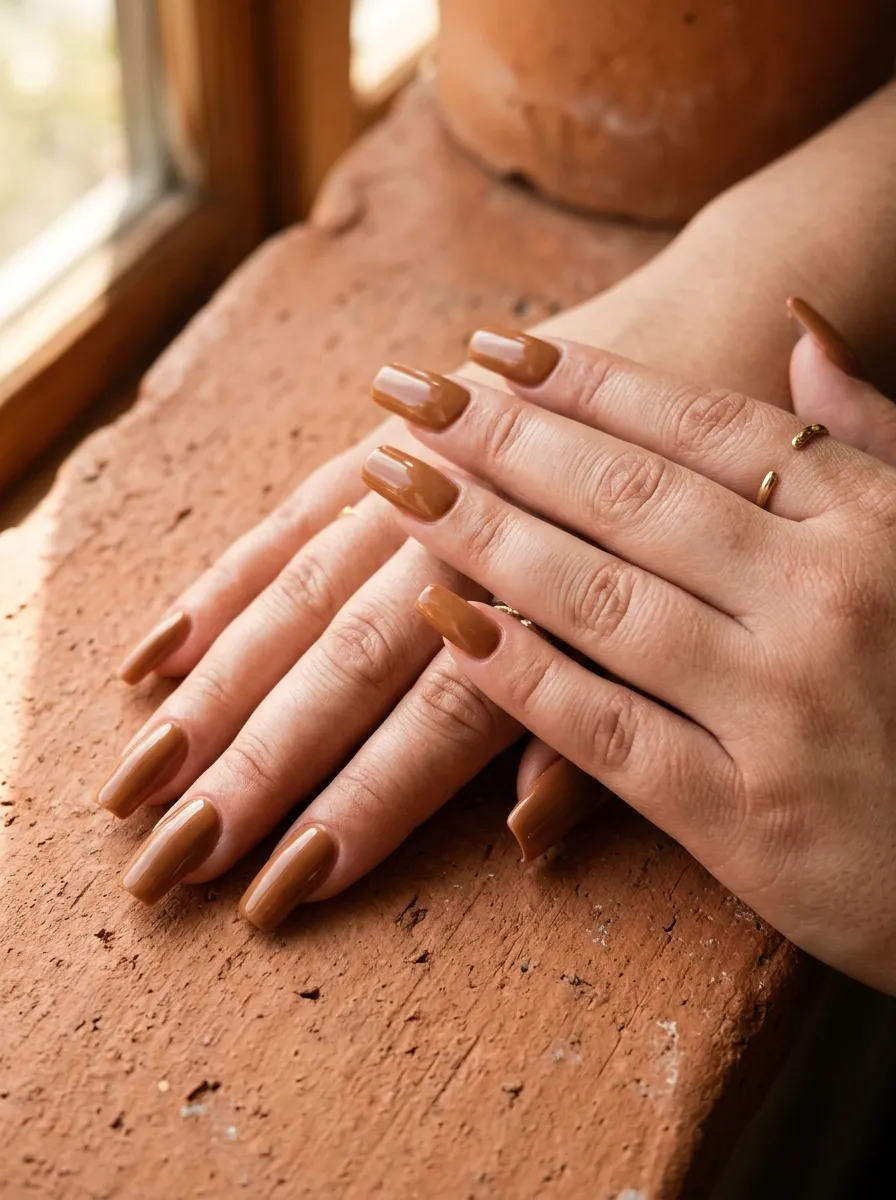
Long square nails with rounded corners are the full version of the soft square shape. At a longer length, this shape becomes noticeably more flattering. The extra length adds elegance and the soft corners prevent the harsh widening effect of fully sharp square edges.
This is a great choice for people who love a classic square nail but want a more flattering version.
The length must be kept consistent across all ten nails for this to look polished. Uneven lengths make the square shape look messy.
Maintenance tip: Use a nail file on the tips every few days to keep the length consistent as nails grow at slightly different rates. A quick, light pass across each tip keeps everything even.
Warm, earthy polish colors look stunning with this shape. Think caramel, warm brown, terracotta, or deep olive green. These rich, grounded shades complement the structured shape beautifully.
Apply a strengthening base coat before any polish. This prevents breakage on longer nails, especially near the corners where stress concentrates. OPI Nail Envy Nail Strengthener is a popular choice at around $20 and lasts for months.
This shape photographs beautifully and looks equally impressive in person. It is the kind of nail shape that gets compliments.
Conclusion
Having chubby hands or wide fingers does not mean you are stuck with unflattering nails. The right nail shape and color can genuinely change how your hands look. A tapered almond, a slimming coffin shape, or even a classic oval with the right polish can create the illusion of longer, slimmer fingers.
You do not need to spend a fortune. Most of these looks are achievable at home with affordable tools and a little practice. Start with one shape that appeals to you. Try it with a flattering nude or soft color. Notice the difference it makes.
The biggest takeaway is this: long, tapered shapes elongate. Lighter or skin-tone colors extend the finger visually. Matte and sheer finishes minimize the nail plate. Use any combination of these principles and you will always have a flattering manicure.
Pick one idea from this list and try it this week. Your hands deserve to look and feel their best.