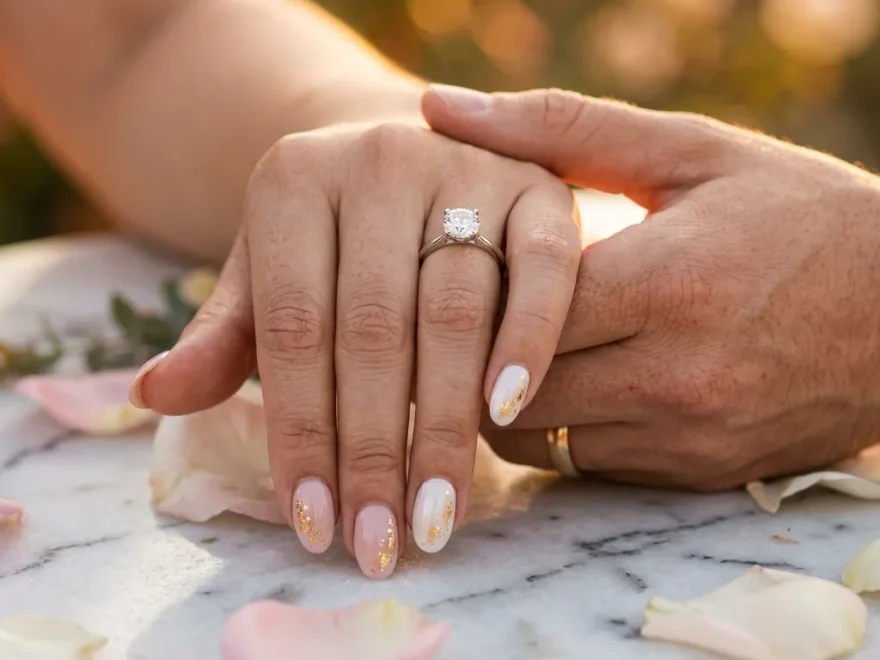
Your nails are in every single photo from the moment you say yes. They catch the light when the ring goes on. They hold the champagne glass. They go straight onto Instagram before the night is even over. That is why what is on your fingertips actually matters. Whether you are planning a romantic dinner proposal, a beach moment, or a cozy backyard setting, the right nail look ties the whole memory together. You do not need to spend a fortune or book weeks in advance at a luxury salon. There are gorgeous, affordable, and downright dreamy options for every style, skin tone, and budget. This guide walks you through 23 proposal nail ideas that are completely worth it for your proposal moment. If you’re also looking for Engagement Photo Nail Ideas, soft neutrals, elegant French tips, subtle shimmer, and delicate nail art can help create a timeless manicure that enhances your ring and looks stunning in every photograph.
1. Classic Soft Pink Sheer Glaze
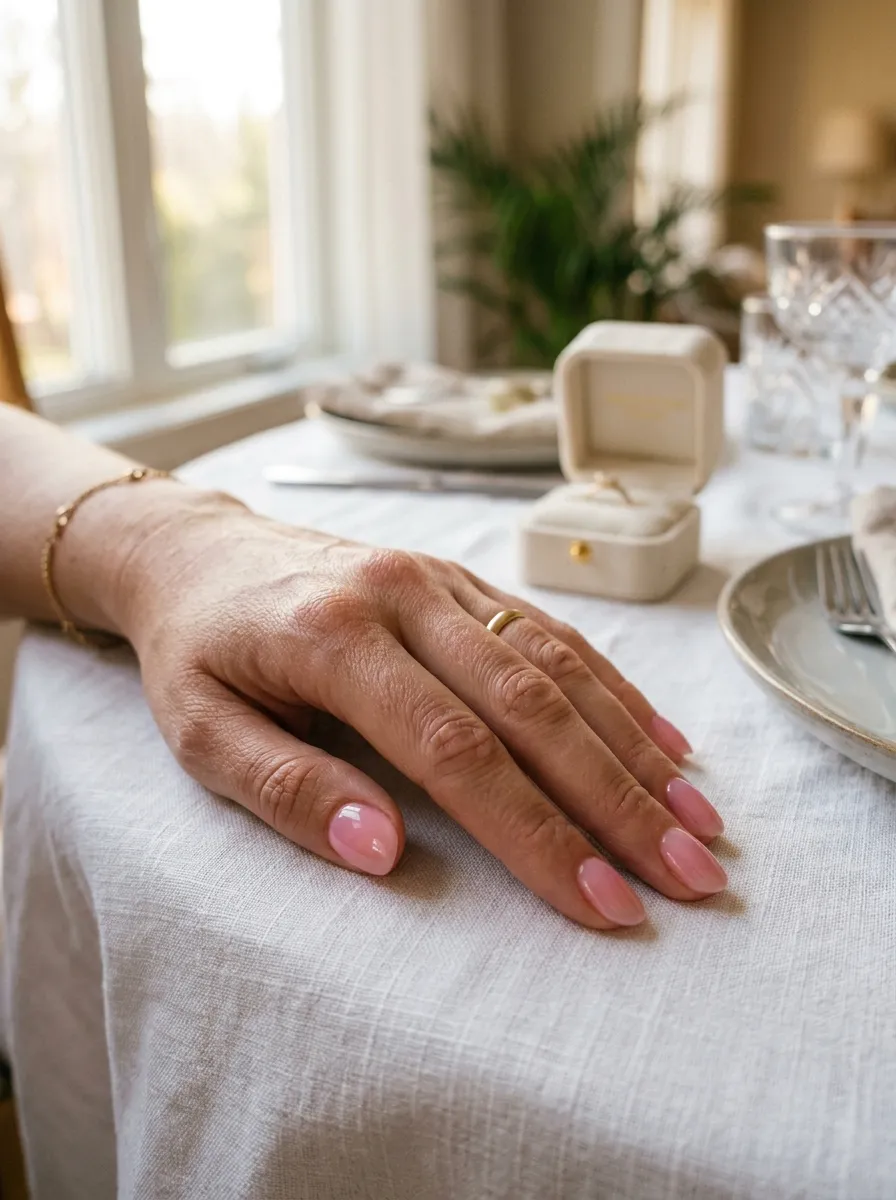
Soft pink sheer nails never go out of style for a reason.
This look is clean, feminine, and incredibly flattering on every skin tone. It does not compete with your ring. Instead, it frames it beautifully.
Sheer pink gives you just enough color without being bold or distracting. Think of it like a tinted lip gloss for your nails.
You can get this look at home using any drugstore sheer pink polish. Brands like Sally Hansen or Essie have perfect options under five dollars. Apply two thin coats and a glossy top coat for a salon-worthy finish.
This is one of the safest choices you can make for a proposal setting. It photographs beautifully in all lighting, from golden hour outdoors to candlelit restaurants.
If your nails are short, this shade actually makes them look longer and more polished. If your nails are long, it adds elegance without drama.
Budget tip: OPI Bubble Bath is the cult favorite sheer pink and costs around eight dollars. It has been a bridal staple for decades and works on every hand.
2. French Tips with a Twist
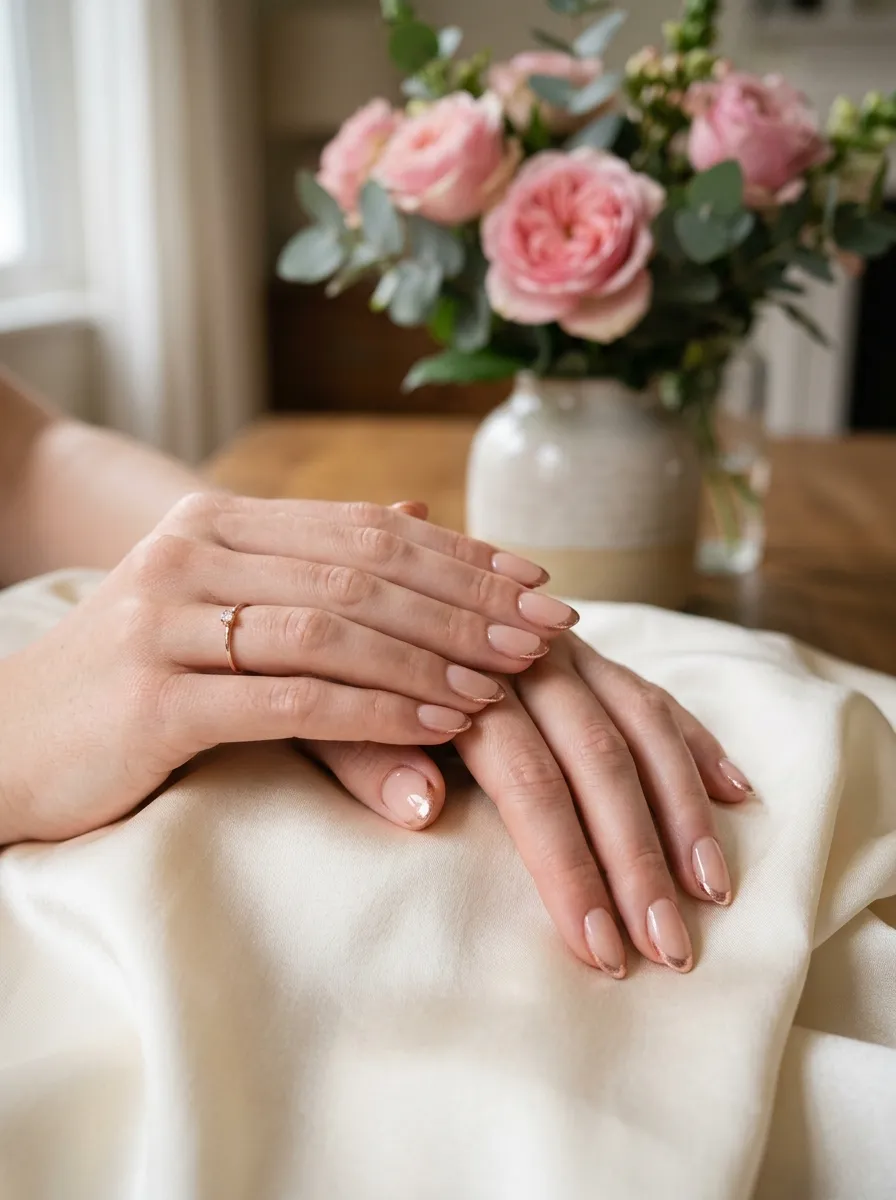
The classic French manicure gets a romantic upgrade here.
Instead of a bright white tip, try rose gold, blush, or even a dusty lavender tip. This small change makes the look feel modern and intentional without being over the top.
A twist on the French tip still reads as clean and polished in photos. It just has a little more personality than the traditional version.
You can do this at home using nail guide stickers, which cost around three dollars at any beauty supply store. Paint the base in sheer nude, let it dry completely, apply the sticker guide, then paint the tip in your chosen color.
Rose gold tips especially photograph beautifully when a diamond ring is involved. The warm metallic tones complement the sparkle of most stones.
If you are going to a salon, this typically adds only a few dollars to the cost of a regular manicure. It is a small ask with a big payoff.
Pro tip: Use a thin nail art brush to get a precise tip line if you are doing it at home. It takes practice but is absolutely doable in one afternoon.
3. Nude with Gold Foil Accents
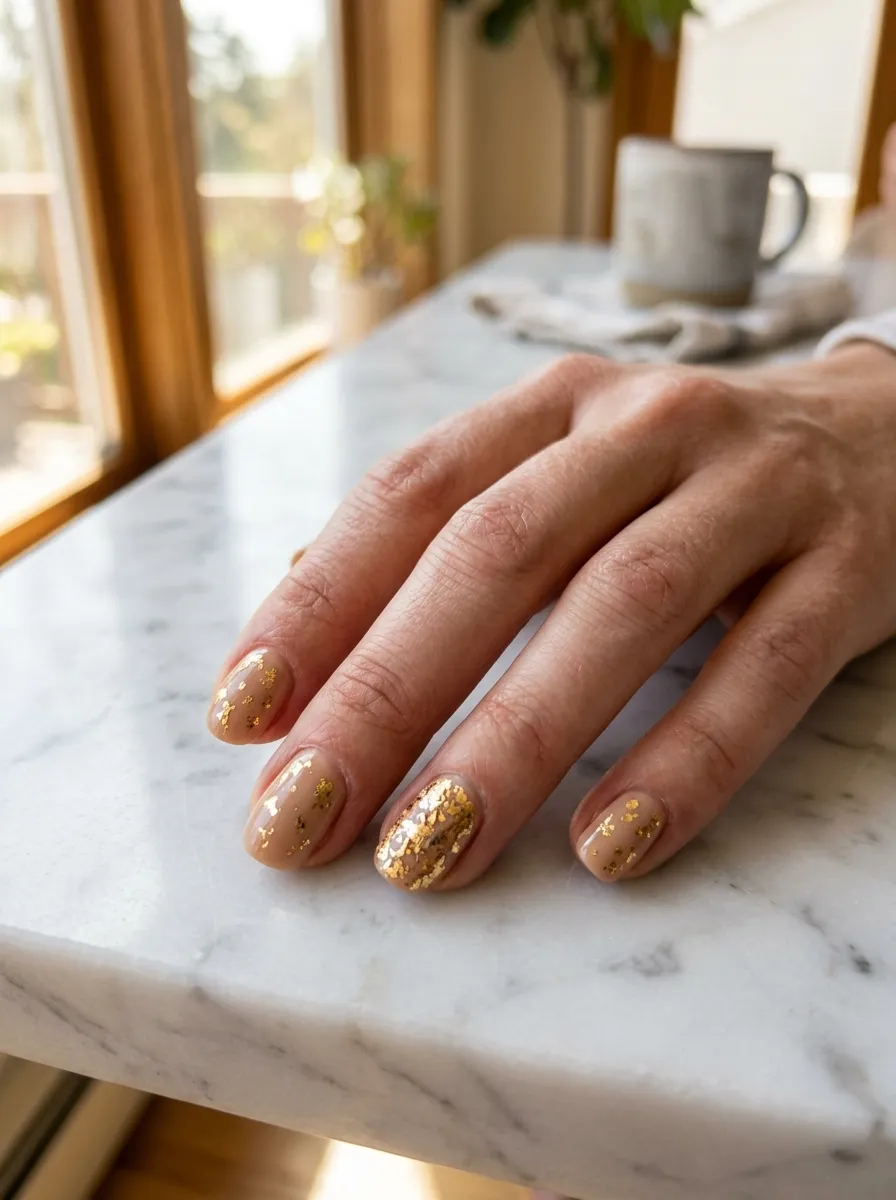
This look feels expensive without actually costing much.
A nude base is universally flattering. It makes fingers look slender and nails look clean. Adding scattered gold foil takes it from simple to stunning in minutes.
Gold foil nail kits are widely available online for under eight dollars. You apply the nude base, wait for it to get slightly tacky, then press small torn pieces of foil onto the nail surface using a silicone tool or even your finger.
The result is imperfect in the best possible way. No two nails look exactly the same, which gives the look an artistic and organic feel.
This pairs beautifully with yellow gold and rose gold rings. If your partner has a white gold or platinum ring picked out, try silver foil instead.
The accent nail concept, where you go heavier on foil on just the ring finger, works especially well here. It draws attention right to where the ring will go.
Budget tip: Amazon sells gold foil nail sets for under six dollars. Watch one five-minute tutorial on YouTube before you start and the process becomes very simple.
4. Dusty Rose Matte Finish
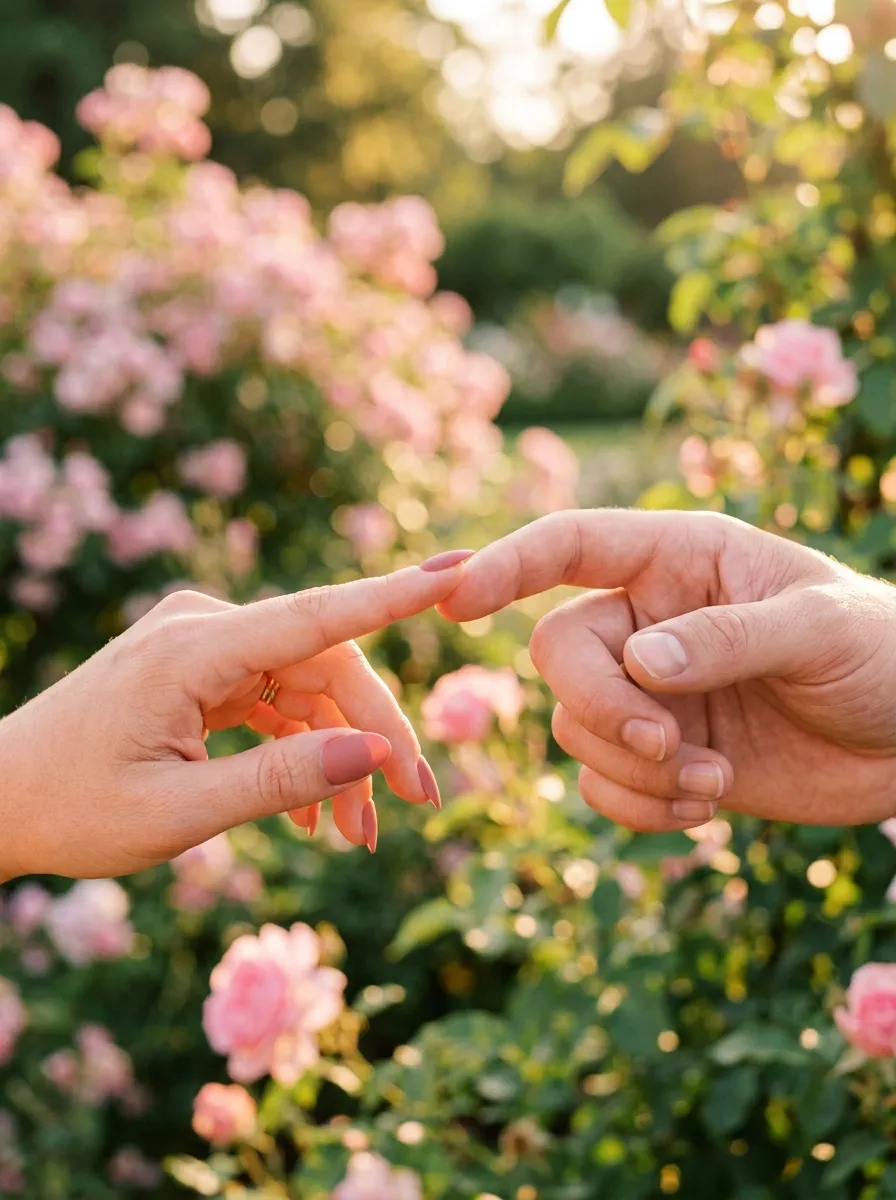
Matte nails have a quiet elegance that feels deeply romantic.
Dusty rose matte specifically photographs with incredible softness. There is no harsh glare. The color just looks like it belongs there.
This shade sits between pink and nude, making it a genuinely universally flattering choice. It works on short nails, long nails, square shapes, and almond shapes.
Getting a matte finish is easy. Apply your regular polish in any dusty rose shade, then finish with a matte top coat. These are available at any drugstore for around four dollars.
The matte finish does chip faster than glossy, so apply your look one to two days before the proposal rather than a week before.
If you want the look to last longer, apply a thin layer of matte top coat every other day as a refresh coat. This keeps the finish looking fresh without full removal.
Budget tip: Essie Matte About You is a widely available matte top coat that works over any polish. Pair it with any drugstore dusty rose shade for a high-end finish at a low cost.
5. Milky White with Pearl Shimmer
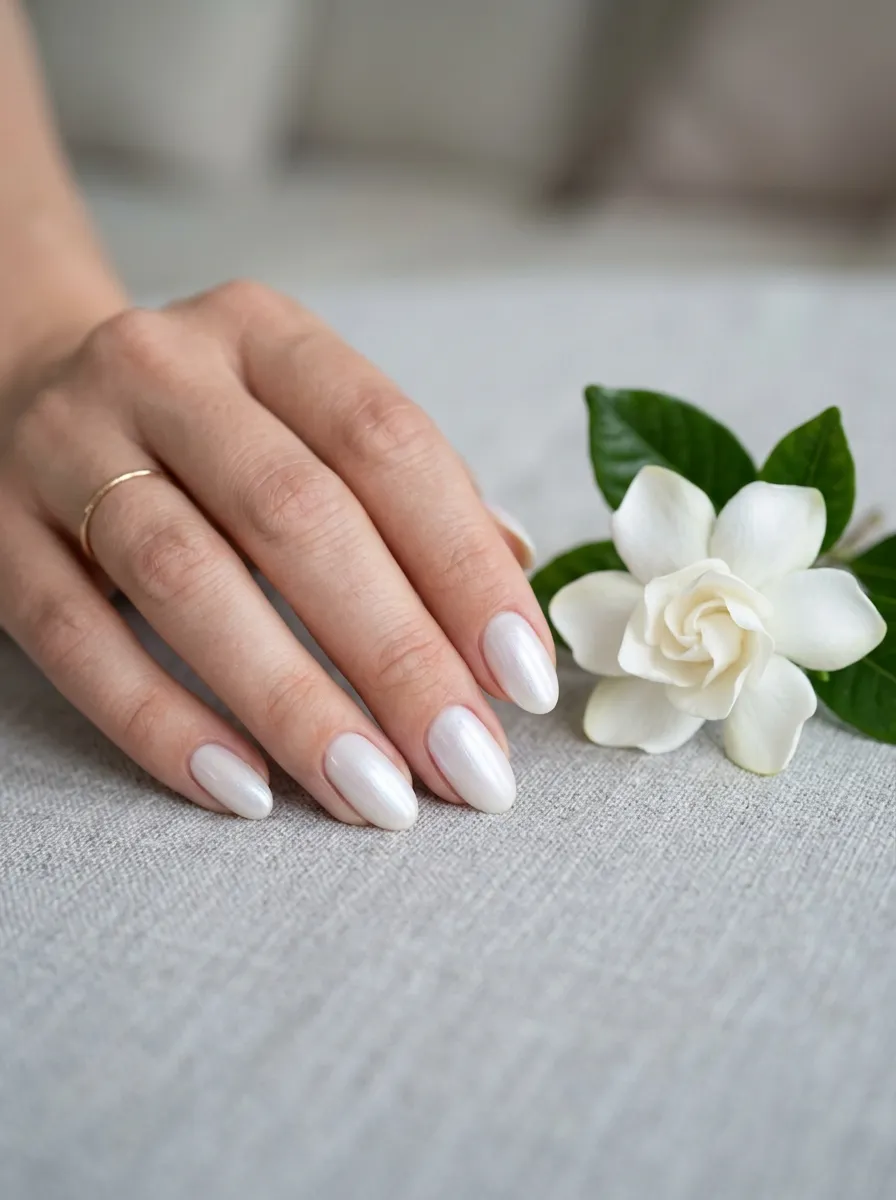
Milky white nails look like moonlight on your fingertips.
This is one of the most romantic looks you can wear. The pearl shimmer adds dimension without being flashy. It catches light in the most delicate way.
This look works especially well for outdoor proposals. Sunlight hits the shimmer and creates a luminous effect in every photo.
Milky white polishes are everywhere right now. They are having a serious moment in the nail world. Look for shades described as “glazed,” “pearlescent,” or “milky” at any beauty retailer.
The Hailey Bieber glazed donut nail look popularized this finish and there are now dozens of affordable dupes available. Wet n Wild and Sally Hansen both carry great options under six dollars.
To get the shimmer effect, apply a pearl or chrome nail powder over the tacky top coat layer. This requires a gel lamp if you are doing the gel version at home, but a powder can also be pressed into regular wet polish.
Budget tip: Try the CND Vinylux in Romantique or any OPI sheer shimmer shade. These last up to a week without chipping and cost around ten dollars.
6. Blush Ombre Fade
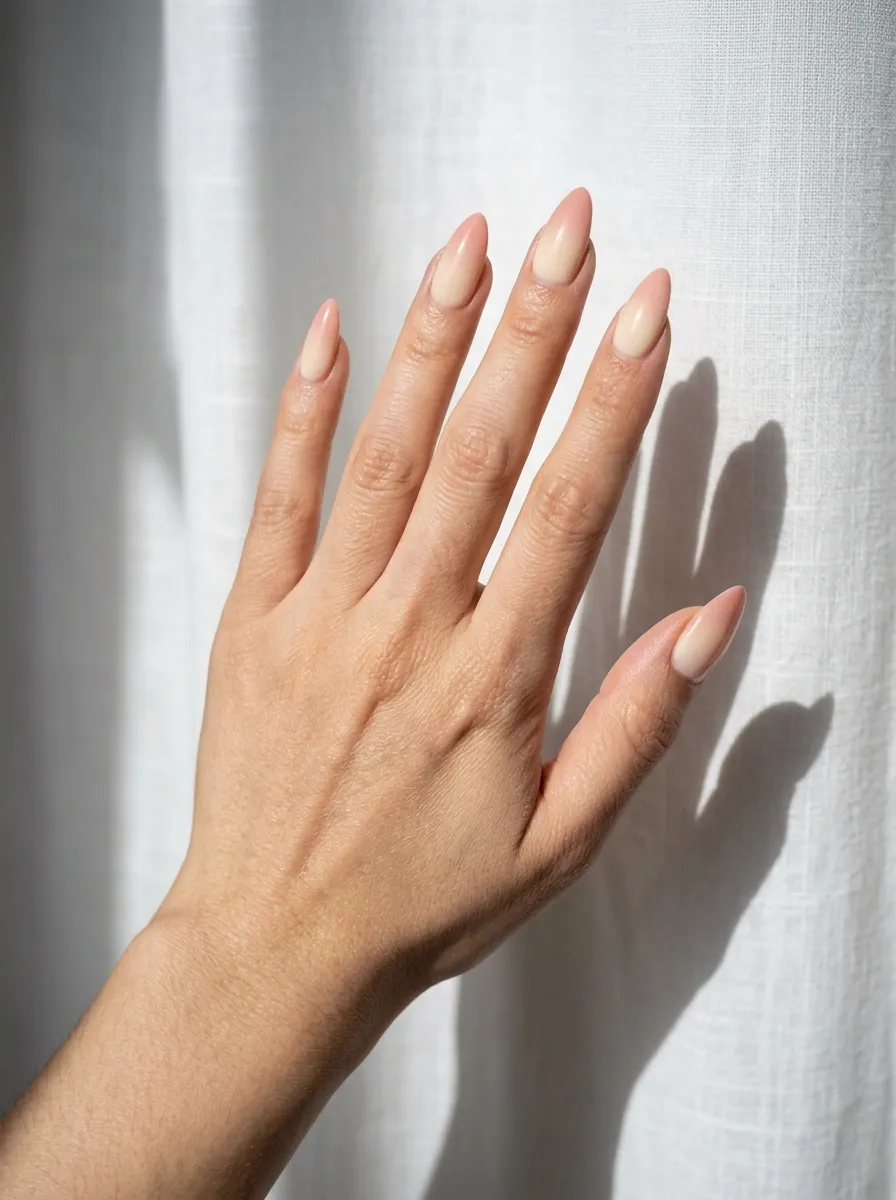
Ombre nails look like a professional did them, even when you do them yourself.
A blush to white ombre is the most romantic version of this trend. It feels soft, dreamy, and very bridal without being too formal.
The technique is simpler than it looks. You paint two shades onto a small makeup sponge, then press and dab it onto the nail. The sponge blends the colors naturally.
You need just two polishes: one sheer white and one blush pink. Clean up the edges with a small brush dipped in nail polish remover. Then seal with a glossy top coat.
This looks incredible on longer nail lengths but also works beautifully on medium and shorter nails.
Give yourself about an hour the first time you try this. It takes patience and two or three coats of sponging for the gradient to look smooth and seamless.
Budget tip: This entire look costs under ten dollars if you buy the two polish shades from a drugstore brand. Essie, Sinful Colors, and Sally Hansen all have the perfect shades for under four dollars each.
7. Nude Almond Nails with a Single Gem
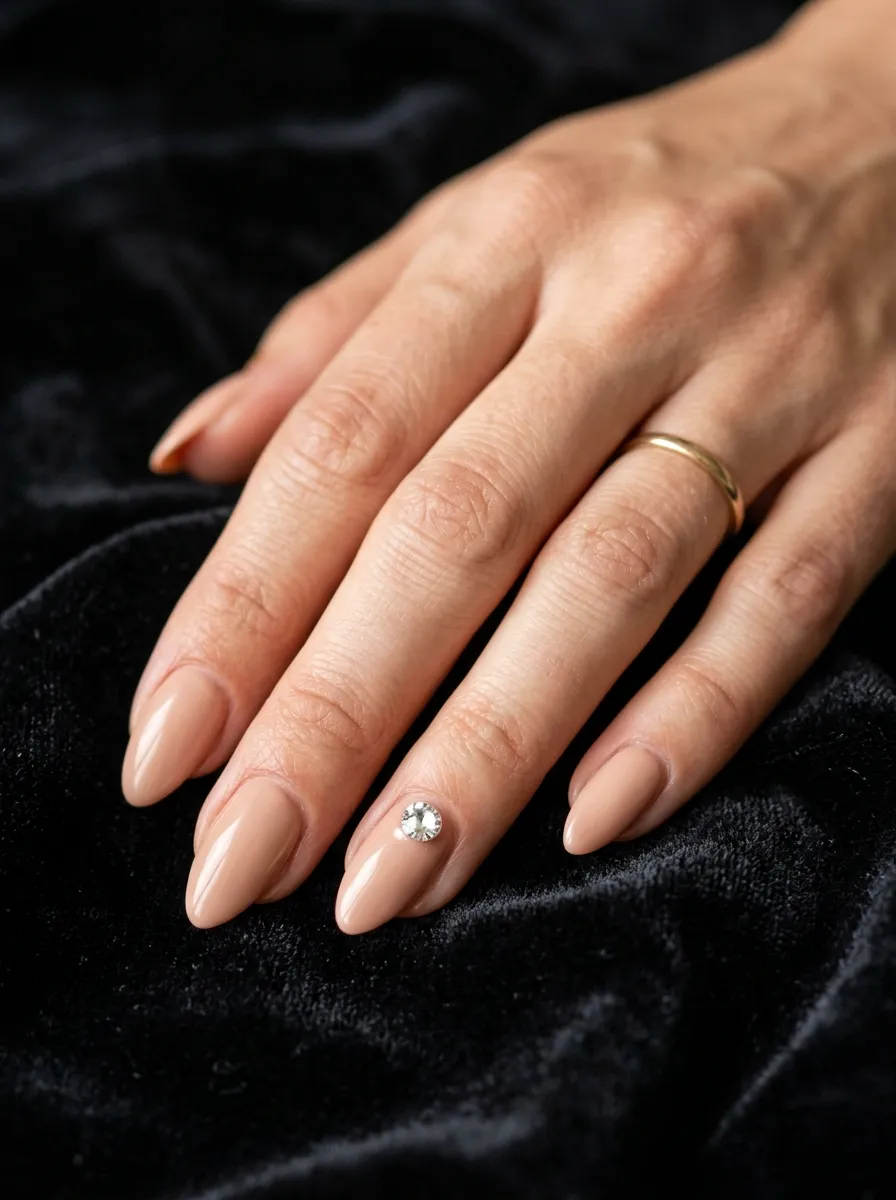
Sometimes one small detail says everything.
A single nail gem on the ring finger is subtle, intentional, and deeply romantic. It draws the eye exactly where you want it without competing with the ring itself.
Nail gems or rhinestones are available in packs of hundreds for under five dollars online. You simply pick one small clear crystal, apply a small dot of nail glue or a thick clear polish drop to your nail, and press the gem on with tweezers or an orange stick.
Let it dry completely before touching anything. Once set, apply a layer of top coat over the entire nail, leaving a tiny gap around the gem to help it stay in place.
This look is especially romantic when the rest of the nails are a clean nude. The restraint of keeping everything else minimal makes that one gem feel significant.
It also photographs beautifully. Engagement photos often feature the ring hand prominently, and that little gem catches light in the most delicate way.
Budget tip: Amazon sells 3D nail rhinestone kits with a variety of crystal sizes for around five dollars. Choose the smallest size for the most elegant result.
8. Burgundy with Gold Leaf Detail
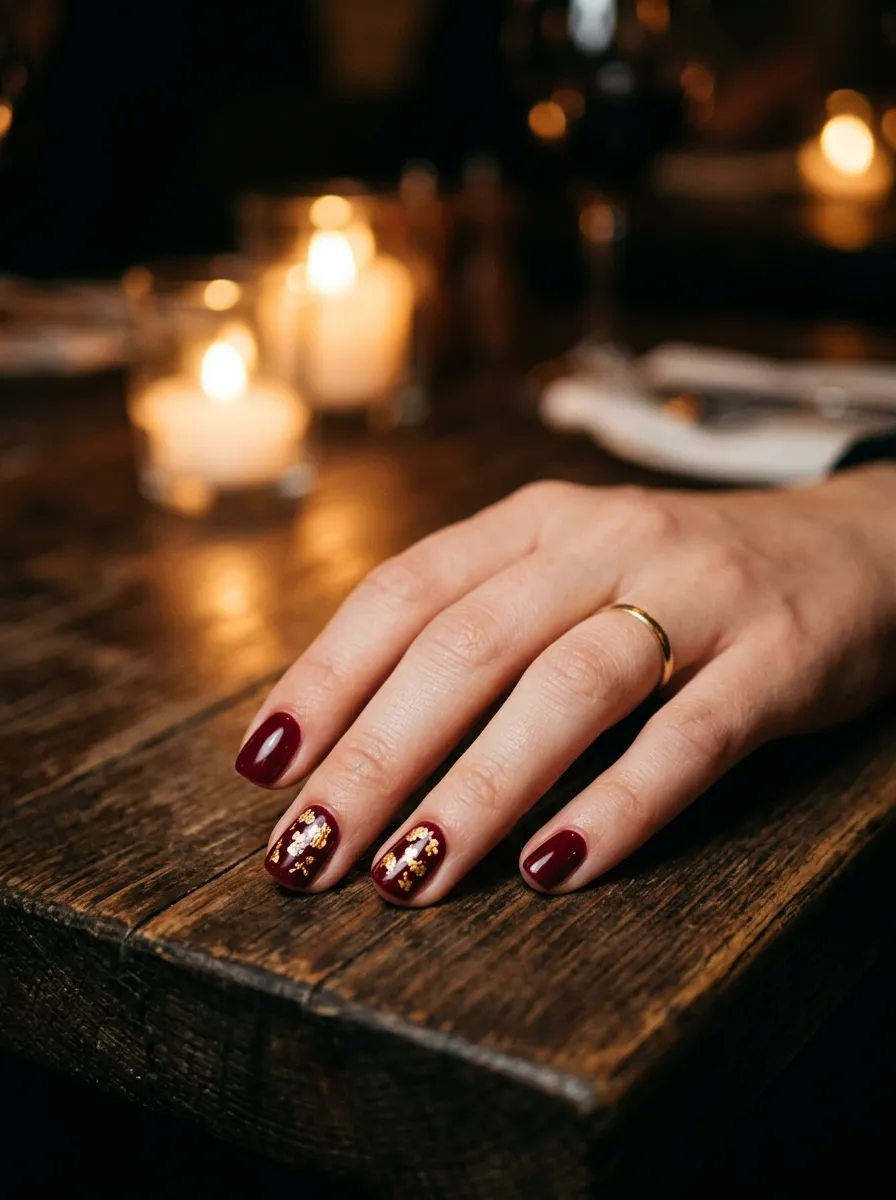
Not every romantic proposal nail needs to be soft and pastel.
Deep burgundy is dramatic, luxurious, and incredibly romantic in its own way. It is perfect for evening proposals, candlelit dinners, and fall or winter settings.
Adding gold leaf to one or two nails pulls this look out of everyday territory and into something truly special. The contrast between the deep wine color and warm gold is striking.
This combination photographs beautifully in low light, which is perfect if your proposal happens in a restaurant or intimate indoor setting.
Gold leaf nail foil behaves the same as regular nail foil. Apply it over a slightly tacky top coat layer and press gently with your fingertip. The irregular edges make it look artistic rather than overly polished.
Keep the rest of the nails in clean solid burgundy to let the foil nails stand out without overwhelming the whole look.
Budget tip: A bottle of Essie Berry Naughty or OPI Malaga Wine costs around ten dollars and provides the perfect deep burgundy base. Gold foil kits on Amazon run under six dollars.
9. Lavender with White Floral Nail Art
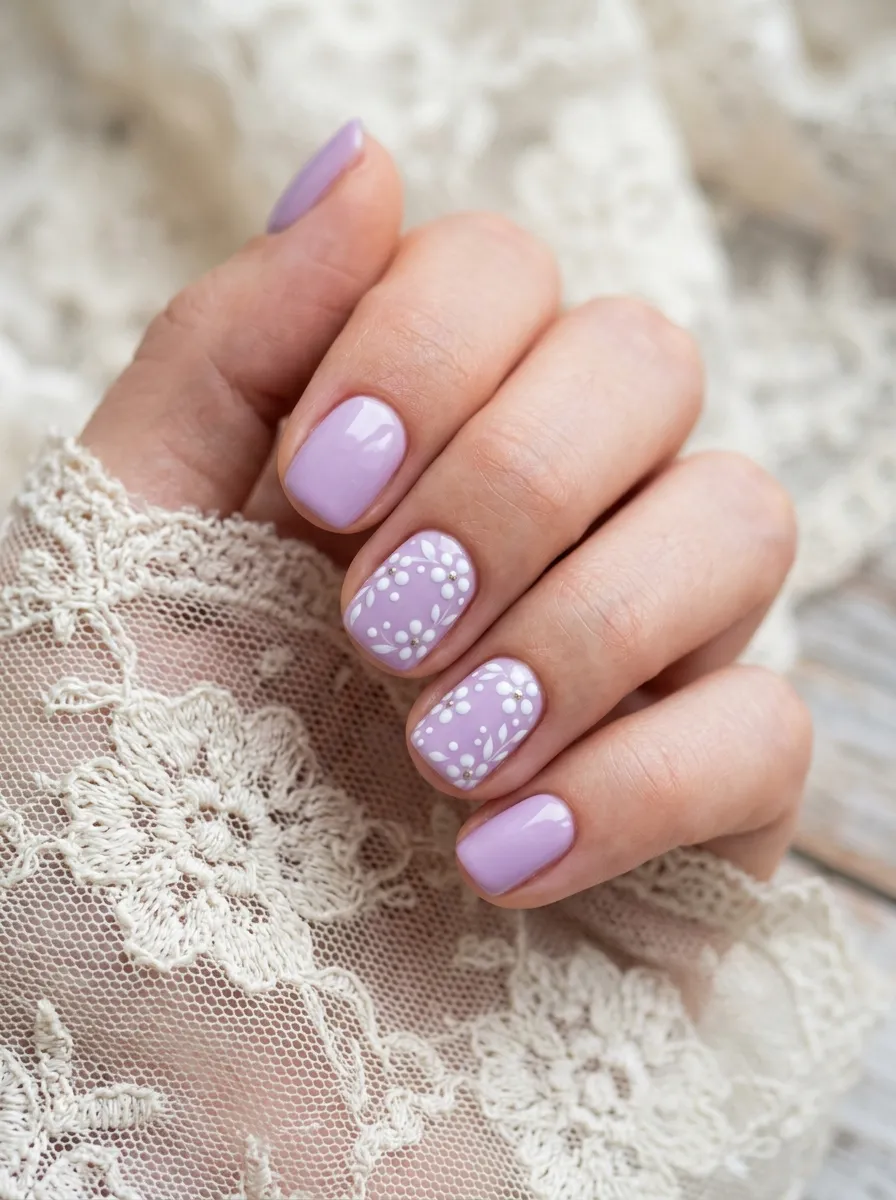
Floral nail art sounds complicated. It really is not.
Tiny white flowers painted over a lavender base are one of the easiest nail art designs to learn. You make small dots with a dotting tool or even the end of a bobby pin to form petals. Add a yellow dot in the center and the flower is done.
Lavender is a romantic shade that photographs with an almost dreamy quality. Pair it with soft floral nail art and you have a look that feels like a garden in spring.
This works beautifully for outdoor daytime proposals. The delicate nature of the design matches the romance of the moment perfectly.
You do not need nail art skill to do this. Seriously. Five petals arranged in a circle using dots is something anyone can manage. Practice on a piece of paper first and you will have it down in ten minutes.
Budget tip: A pack of nail dotting tools costs around four dollars and will serve you for dozens of nail art projects after the proposal. The only polish you need is lavender, white, and yellow.
10. Pale Peach with Thin Gold Line Accent
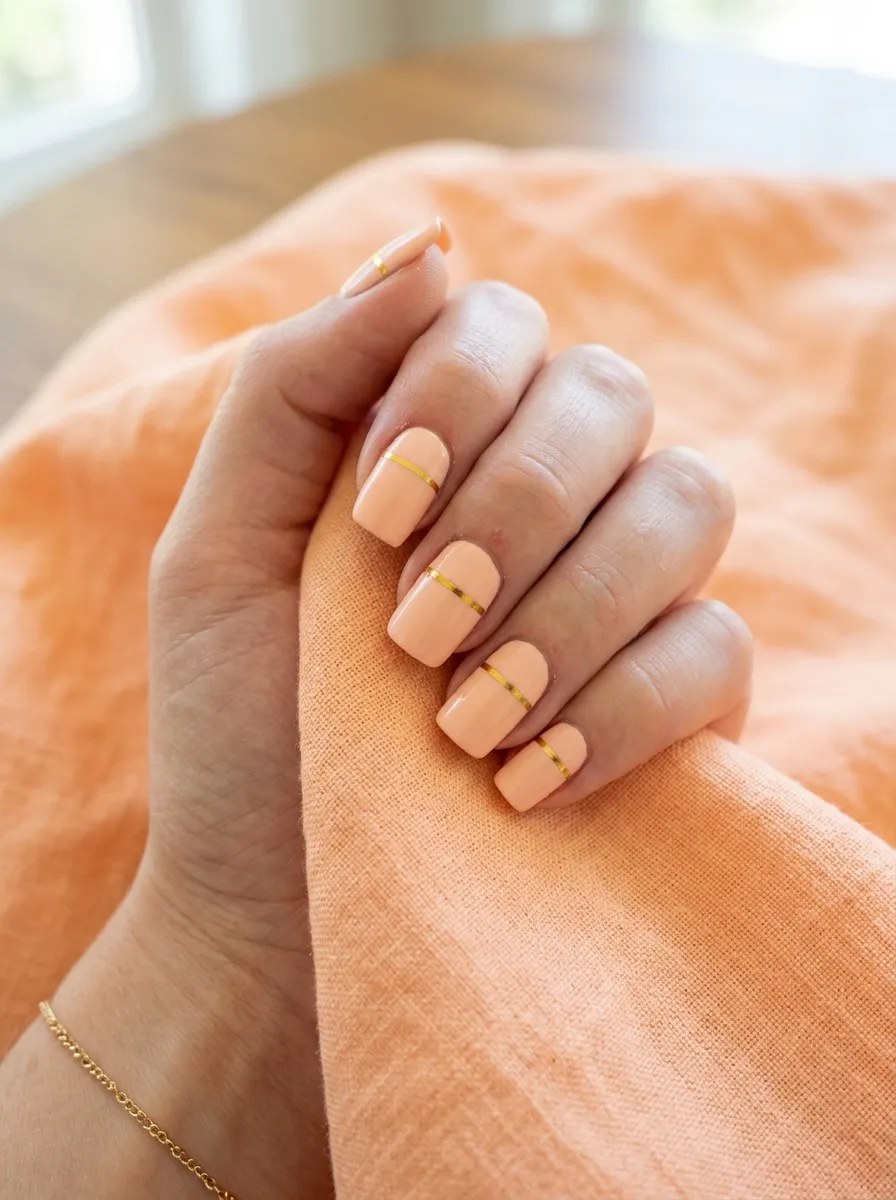
A thin gold line turns a simple nail into something architectural and romantic.
Pale peach is warm, soft, and extremely flattering. It reads as almost skin-tone but with a rosy warmth that looks fresh and intentional.
The gold line across the center of the nail or near the base adds a graphic element that makes the look feel considered and fashion-forward.
You can create this line using striping tape, which is a thin nail tape that you apply to the dry base coat, paint over with gold polish, then remove immediately for a perfect clean edge. This tape costs around two dollars for a roll.
Alternatively, a nail art striping brush dipped in gold nail polish allows you to freehand the line with a little practice.
This look photographs especially well in editorial-style engagement photos where hands are featured prominently against clean neutral backgrounds.
Budget tip: A gold nail art polish pen from Amazon costs around six dollars and gives you far more control than a regular brush for creating fine lines on your nails.
11. Glossy Chocolate Brown Nails
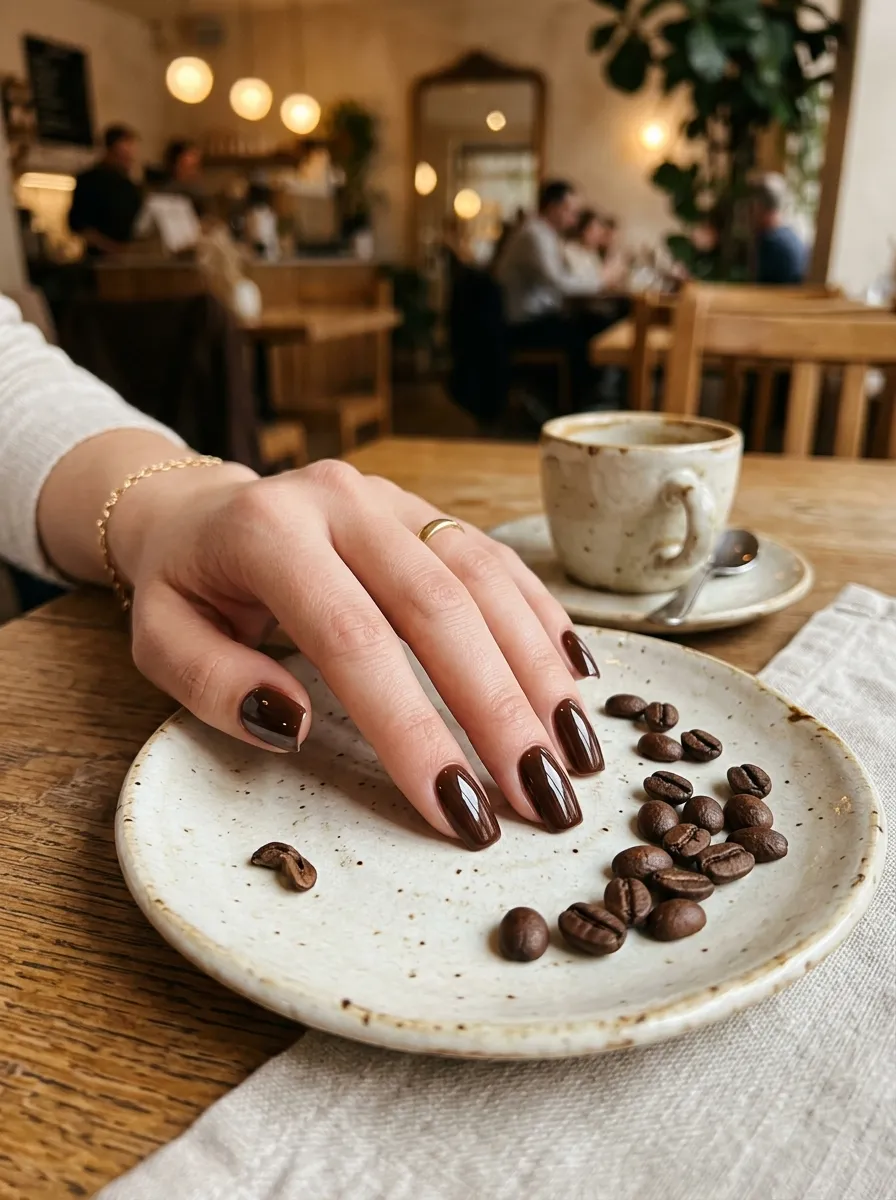
Brown nails are having a moment and they are genuinely romantic.
Glossy chocolate brown feels rich, warm, and sophisticated. It is a departure from the typical soft pink but still feels elegant and timeless for a proposal setting.
This shade works beautifully for autumn and winter proposals. It complements warm-toned skin especially well but also looks striking on cooler skin tones as a contrast shade.
The high-gloss finish is what makes this look feel luxurious. Use a gel-effect top coat for maximum shine. These are available at drugstores for around five dollars and give a salon-quality gloss without a UV lamp.
Brown nails also have the practical advantage of hiding minor chips and wear far better than lighter shades. If you are nervous about maintaining your nails in the lead-up to a proposal, this is a forgiving choice.
Budget tip: Essie Mink Muffs, Zoya Chestnut, and Sally Hansen Triple Shine in Nutmeg are all drugstore accessible brown shades under eight dollars that look incredible with a high-gloss top coat.
12. White Glazed Nails
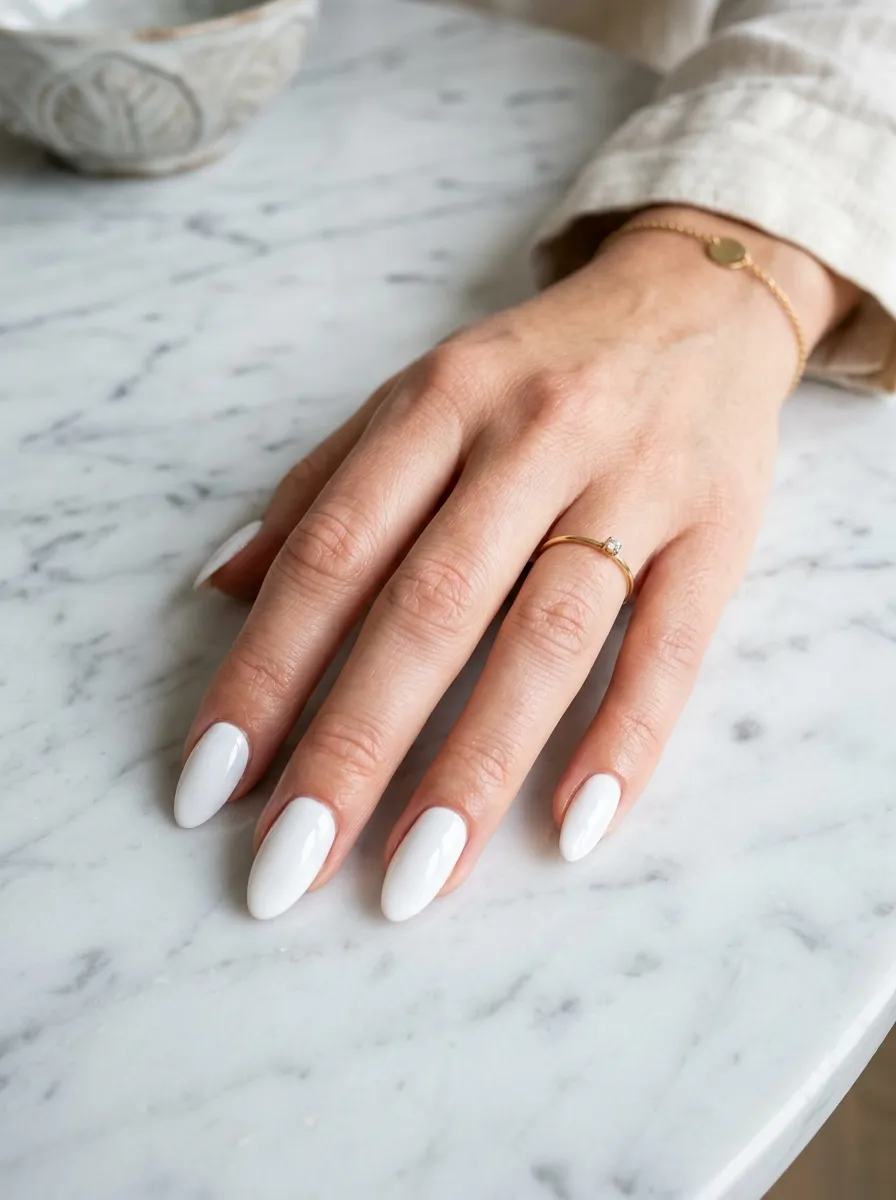
White nails are bold, clean, and surprisingly romantic.
Glazed white specifically has a porcelain quality that looks almost like fine china on your fingertips. It is sophisticated without trying too hard.
This look pairs strikingly well with colorful gemstone rings. If your partner has chosen a sapphire, emerald, or ruby stone, white nails make the color of the stone pop dramatically.
For diamond rings, white nails create a clean, bright backdrop that makes the sparkle of the stone the clear focal point.
Getting a truly glazed finish requires multiple thin coats rather than one thick coat. Three thin coats of white followed by two layers of glossy top coat will give you the ceramic effect.
White polish can look patchy if applied too thickly. Thin coats with full drying time in between are the key to getting this right.
Budget tip: OPI Alpine Snow is the classic white nail polish used by professionals worldwide and costs around ten dollars. It is worth every cent for a perfectly opaque and smooth white.
13. Pink Chrome Mirror Nails
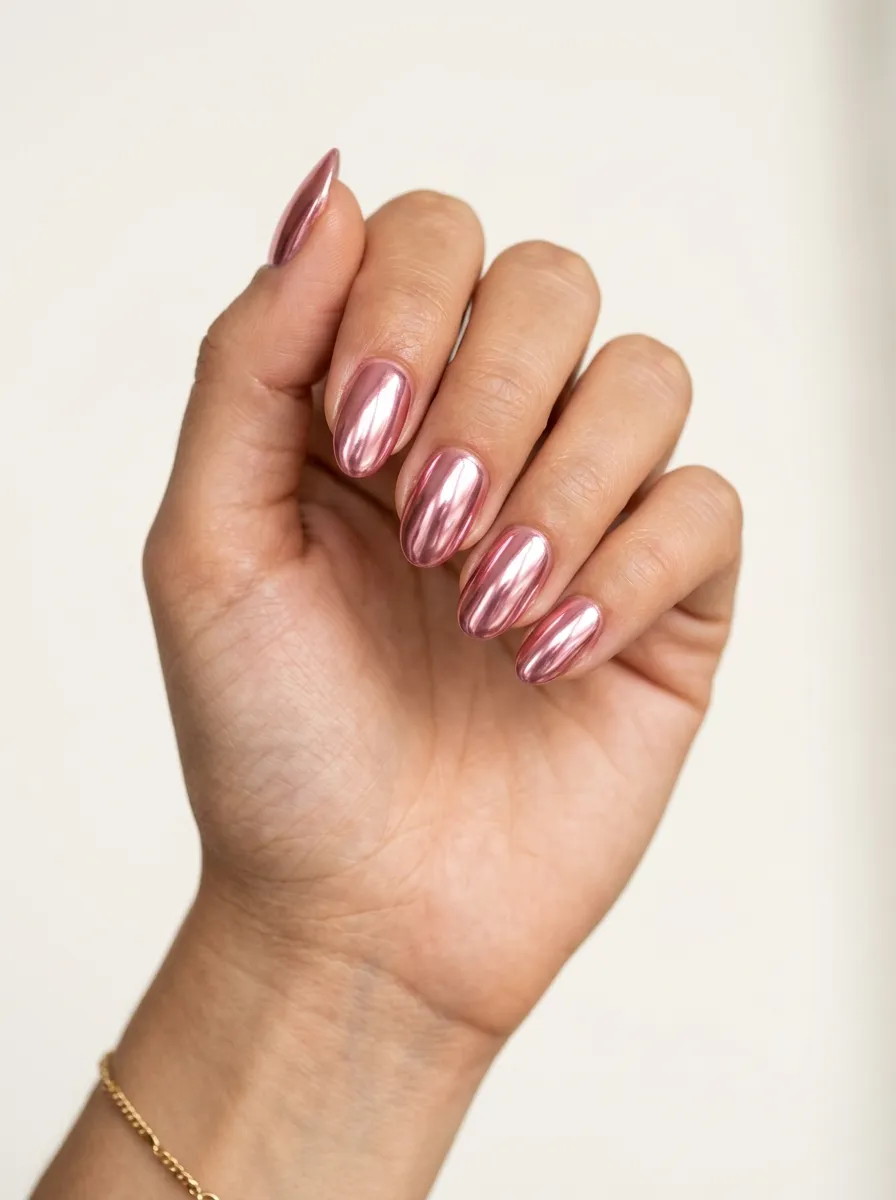
Chrome nails look like jewelry and that is exactly the point.
Pink chrome has a mirror-like finish that catches every photon of light in a room. When your ring goes on, the combination of metal and mirror nails creates a moment that photographs like a dream.
Chrome powder is applied over a gel base coat that has been cured but not wiped. You rub the powder onto the sticky surface using a silicone applicator or a felt tool. The result is an instant mirror finish.
If you do not have a gel lamp at home, chrome powders that work over regular polish are also available. These require you to apply the powder over a slightly undercured top coat layer. Results are slightly less intense but still very beautiful.
A small jar of chrome powder costs around five to eight dollars and provides enough product for dozens of applications.
Budget tip: Beetle nail chrome powder sets on Amazon come with multiple shades including rose gold and pink for under ten dollars. Watch one tutorial video before applying and the process takes under twenty minutes.
14. Baby Blue with Dainty Silver Stars
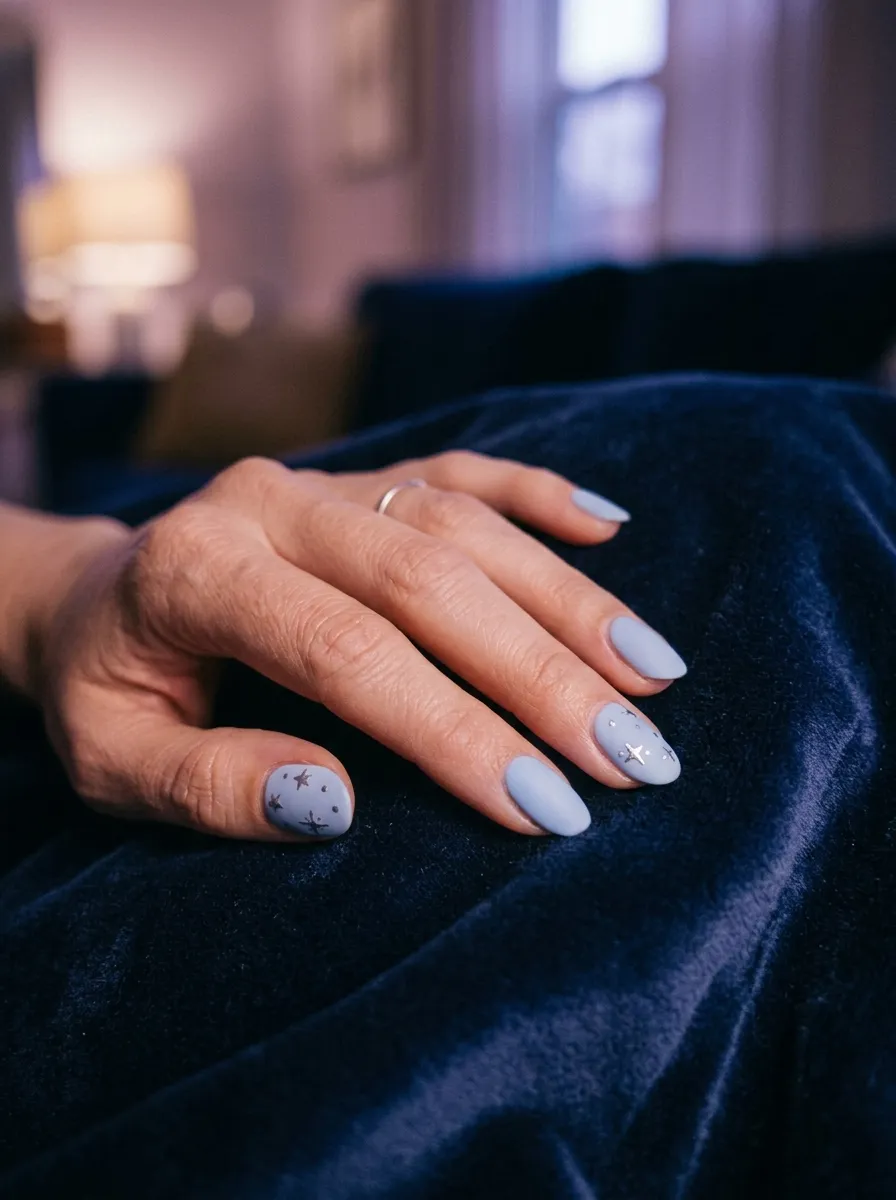
Baby blue nails feel like something out of a fairy tale.
This shade is unexpected for a proposal look, which is exactly why it works so well. It is fresh, dreamy, and deeply personal if blue holds significance for you as a couple.
Adding tiny silver stars takes the look into romantic territory. Stars feel symbolic. They suggest something lasting and expansive, which is a beautiful sentiment for the day you get engaged.
The stars can be painted with a small nail art brush or achieved using silver star-shaped nail stickers, which are available for under three dollars online. Sticker stars require zero art skill and still look gorgeous.
Baby blue pairs beautifully with white gold and platinum rings. The cool blue and bright metal tones complement each other very naturally.
Budget tip: Zoya Logan and Essie Bikini So Teeny are both gorgeous baby blue shades under ten dollars. Silver star stickers from Amazon or Etsy shops cost around two to three dollars for hundreds of stickers.
15. Terracotta with Thin White Stripe
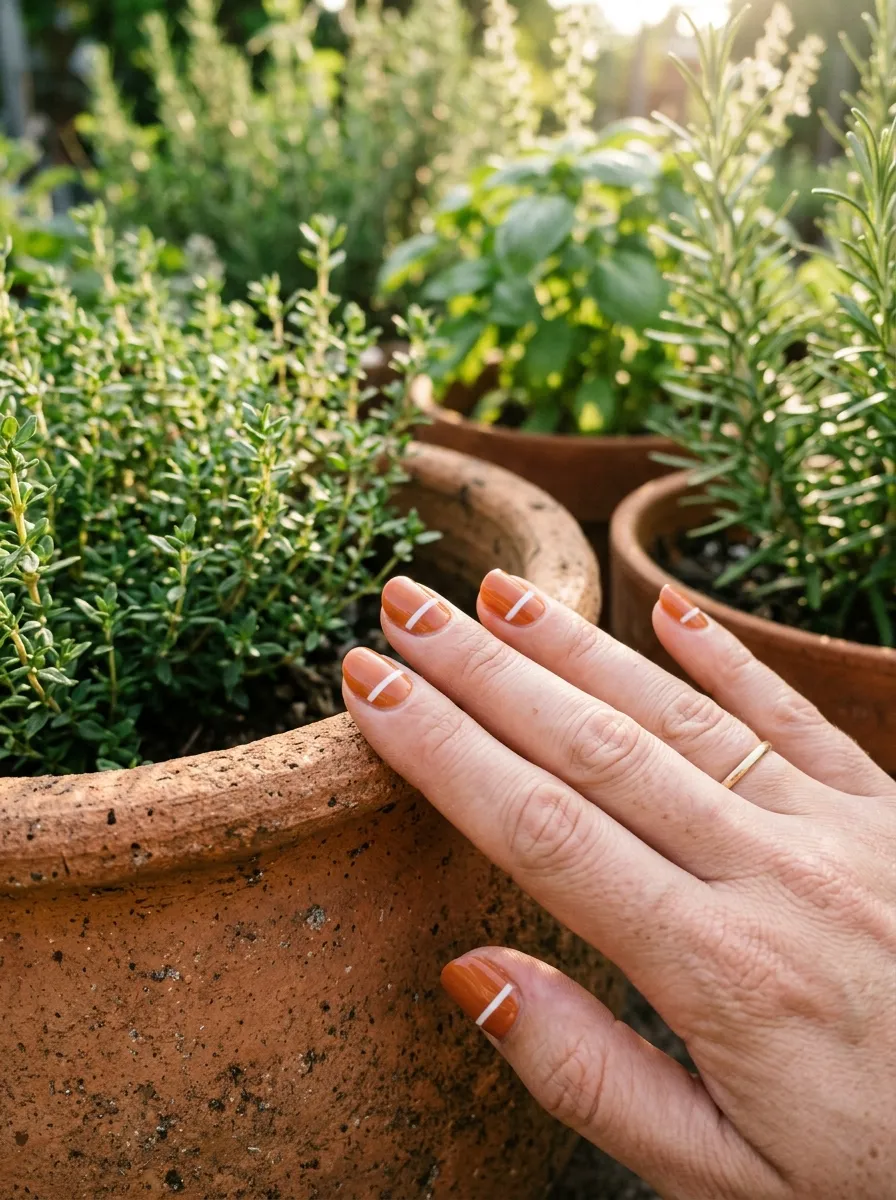
Terracotta nails feel grounded and unexpectedly romantic.
This warm, earthy orange-red shade has a natural quality that looks stunning outdoors. If your proposal involves a hike, a garden, a vineyard, or any nature setting, terracotta nails will photograph beautifully against those backgrounds.
A thin white stripe near the nail base adds a graphic contrast detail that prevents the look from feeling too rustic. It signals intention and style.
This combination is especially flattering on medium to deeper skin tones where the warm earthy tone creates a harmonious contrast.
The white stripe is achieved the same way as the gold stripe in an earlier look. Use striping tape for a clean edge or a fine striping brush for a freehand version.
Terracotta polish is widely available now. The shade sits between orange and red, closer to clay than either pure color.
Budget tip: Essie Terracotta, OPI Suzi Needs a Loch-smith, and Sally Hansen Spice Girl are all accessible drugstore shades in this color family, each costing under ten dollars.
16. Deep Navy with Glitter Tips
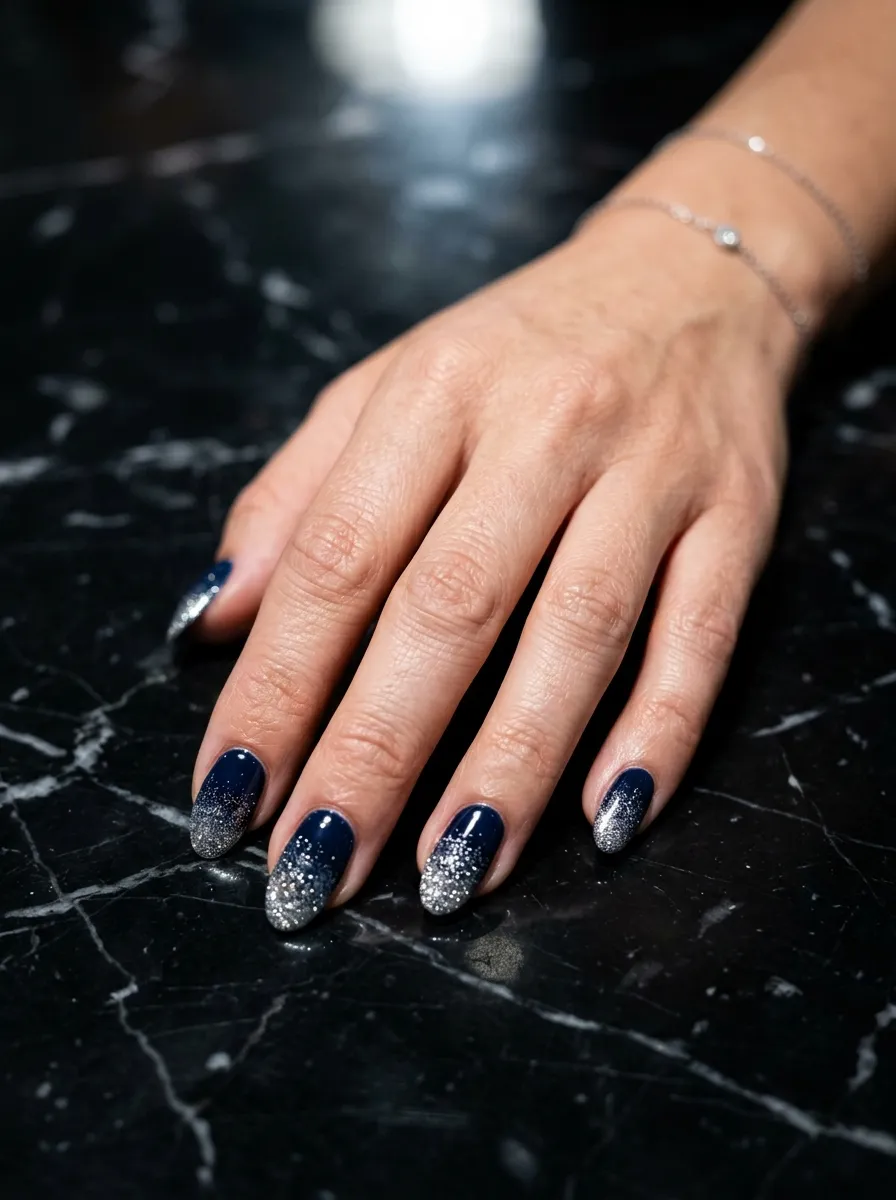
Navy and glitter is a combination that belongs at a proposal dinner.
Deep navy is romantic in the most sophisticated way. Pair it with a glitter tip and the effect is like looking at the night sky on your fingernails.
This look is perfect for an evening proposal. Low light, candles, and restaurant lighting will make the glitter catch and sparkle in every direction.
To get the glitter tip effect, apply your navy base and let it dry. Then dab a fine glitter polish or loose glitter onto just the tip of the nail using a small brush or makeup sponge. Seal everything with a glossy top coat.
Chunky glitter works here too if you prefer more drama. Holographic glitter creates an especially magical effect that shifts color under different lights.
This is one of the bolder looks on this list but it is absolutely proposal-worthy for someone who loves drama and depth in their personal style.
Budget tip: Sally Hansen Glitter Rush in Silver Bullet and any deep navy drugstore polish create this look for under twelve dollars total. The combination is striking and genuinely gorgeous.
17. Soft Lilac Jelly Nails
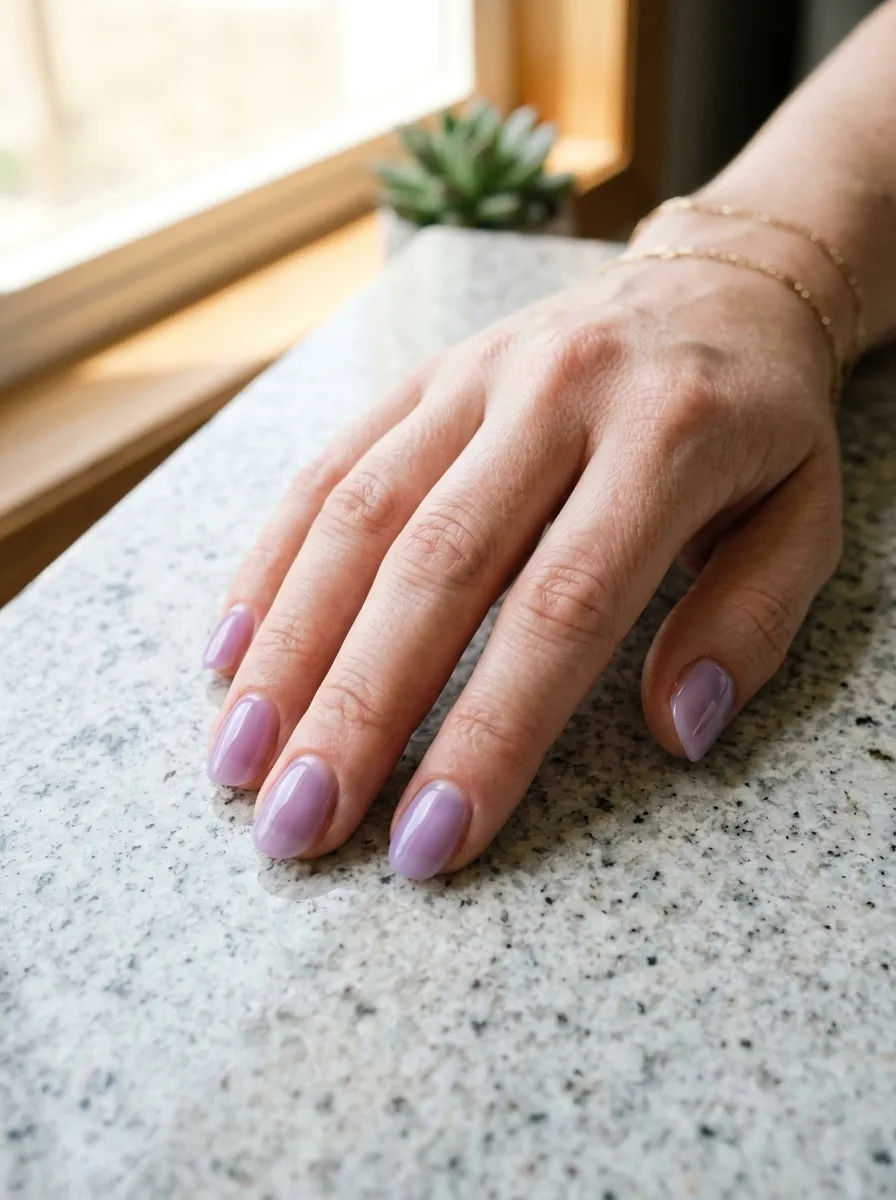
Jelly nails have a candy-like quality that is playful and deeply romantic at the same time.
Soft lilac jelly specifically is translucent, which means it shows the natural nail underneath while adding a dreamy wash of purple color. The effect looks three-dimensional and almost lit from within.
This look is particularly beautiful for daytime proposals. Natural light hits jelly nails in the most gorgeous way, making them look almost luminous.
Jelly nails are achieved by applying a sheer lilac polish in multiple layers. Three to four coats build the depth and translucency. Each coat must dry fully before the next.
This works best on nails that are in good condition. Since the polish is sheer, the natural nail is slightly visible, so a little nail care beforehand makes a difference.
Budget tip: Olive and June and Zoya both make beautiful jelly-finish polishes in lilac and mauve tones under twelve dollars. If you want a real jelly look on a budget, try mixing a small drop of sheer lilac with your clear top coat and building the sheer color gradually.
18. Mauve Satin Finish
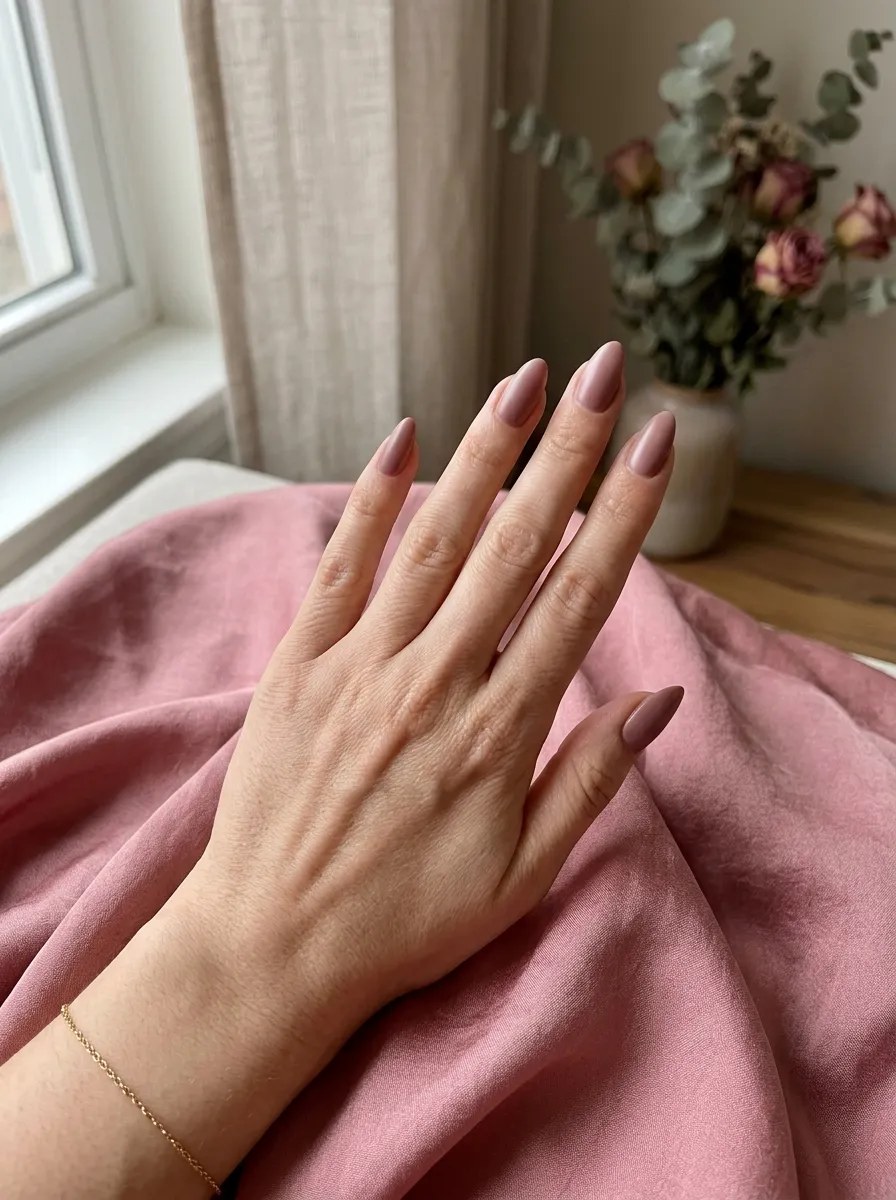
Mauve sits perfectly between pink and nude and it is one of the most romantic shades ever created for nails.
Satin finish mauve adds a refined quality that glossy and matte both miss separately. Satin finish is somewhere in between and it catches light in the most elegant, understated way.
This looks especially beautiful in photos taken at golden hour. The warm tone of the shade combined with warm late-day light creates an incredibly romantic visual.
Mauve is an approachable color. It is not too bold. It does not demand attention. It simply makes your hands look beautiful in a quiet and confident way.
A satin finish can be achieved by mixing one part matte top coat with one part glossy top coat and applying that combination over your dried polish. This is a simple DIY approach that works remarkably well.
Mauve polish shades are extremely widely available. You will find the perfect shade at almost any drugstore or beauty retailer.
Budget tip: Essie Ladylike, OPI Tickle My France-y, and Zoya Chantal are all accessible mauve shades that work perfectly with this technique and cost under twelve dollars.
19. Ivory with Dried Flower Encapsulation
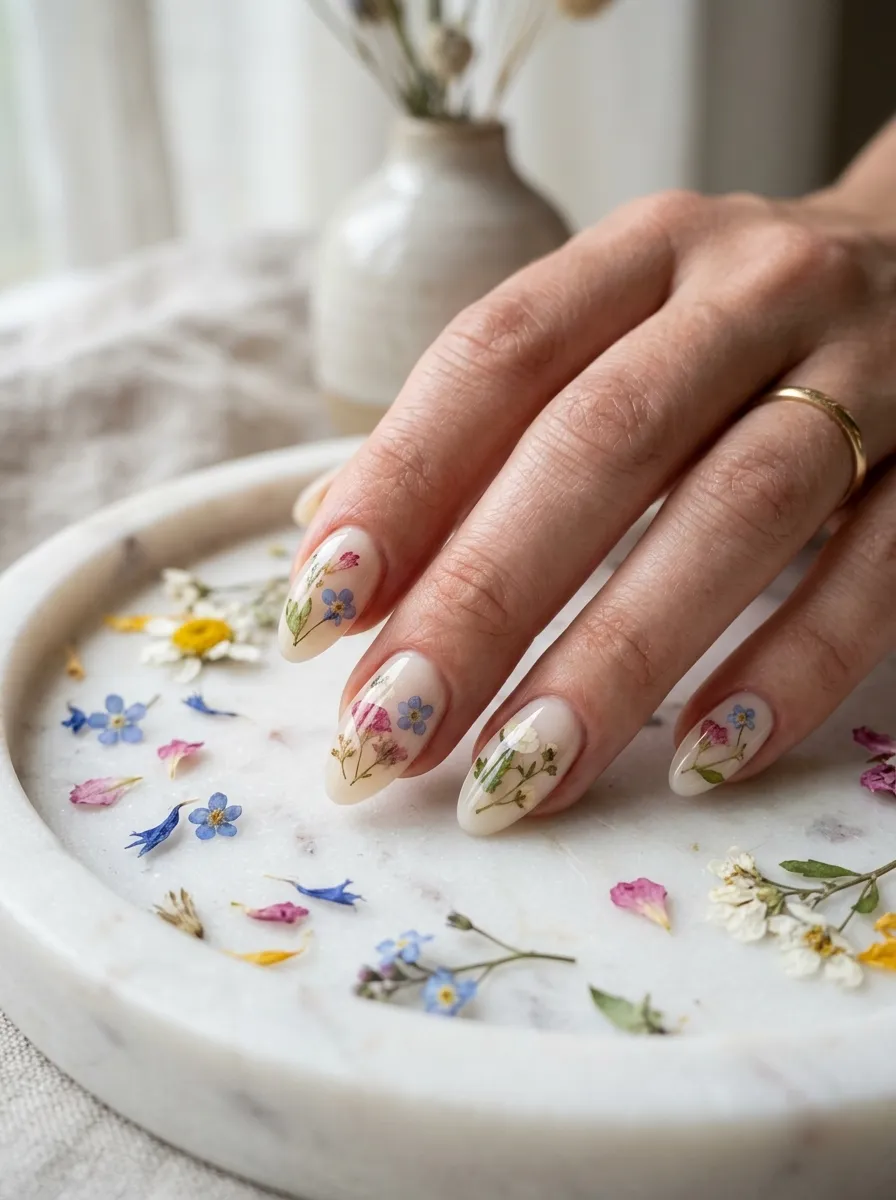
Flowers inside your nails sounds complicated but this is genuinely doable at home.
Dried flower nail encapsulation involves pressing tiny dried flower petals or whole mini flowers onto the nail surface before sealing them under a clear gel or regular top coat. The flowers appear to be suspended inside the nail.
This look is so romantic it almost feels like wearing a tiny garden on your fingertips. For a proposal that involves flowers, botanical themes, or outdoor settings, this look is absolutely perfect.
Dried flower nail sets for this specific purpose are sold online for around six to eight dollars. They come with tiny pre-dried and flattened flowers in multiple varieties and colors.
Apply your ivory or sheer base, then place the dried flowers where you want them using tweezers. Seal with two to three layers of thick top coat or gel, allowing full drying between each layer.
The result is dimensional and completely unique. No two nails look exactly the same.
Budget tip: Amazon and Etsy both sell dried nail flower sets for under eight dollars. Pair with Essie Marshmallow or OPI Bubble Bath for the ivory base and your total cost stays under fifteen dollars.
20. Red with White Heart Accent
[Image Prompt: A photograph of a woman’s hand resting on a red velvet surface, nails painted in a classic rich red with a small white hand-drawn heart painted on the ring finger nail near the base. The small heart detail is precise and clean. Warm moody lighting from the left side creates a romantic atmosphere. Shot with a professional camera capturing the contrast between the bold red nail and the delicate white heart detail.]
Red nails are classic, bold, and undeniably romantic.
Classic red on the nails has always been associated with love, passion, and celebration. For a proposal, there is a very logical emotional logic to wearing red nails.
Adding a tiny white heart on the ring finger nail turns this from a strong classic choice into something deeply personal and proposal-specific. The heart detail is small. It does not take over. But it says everything about the occasion.
Paint the heart using a thin nail art brush or a nail art pen. Draw two curved bumps for the top of the heart and bring them to a point at the bottom. It takes practice but is manageable with a little patience.
If freehand feels too challenging, white heart nail stickers are available for around two dollars and look just as sweet.
Classic red nail polish options are endless. Every brand has their own version of the perfect red.
Budget tip: Essie Really Red, OPI Big Apple Red, and Sally Hansen Red My Lips are all drugstore-accessible perfect red shades under ten dollars. Add a white nail art pen for around four dollars and this look costs you under fifteen dollars total.
21. Holographic Silver
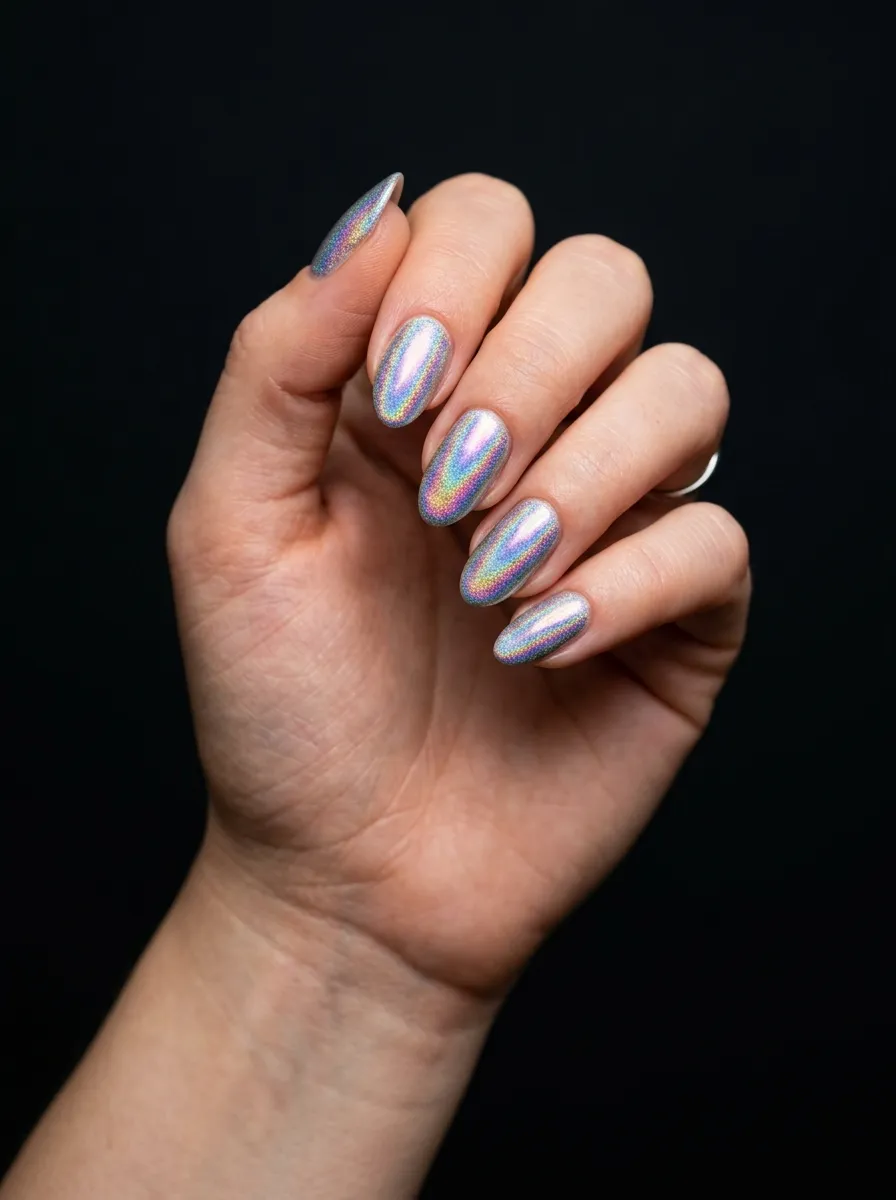
Holographic silver nails are like wearing a prism on every finger.
This is the most show-stopping look on this entire list. Holographic polish shifts through an entire rainbow of colors as your hand moves. Pink, purple, blue, green, and back to silver in seconds.
For a proposal, this is a conversation-starting choice. When the ring goes on and catches the light alongside the holographic nails, the visual is absolutely stunning.
Holographic polish is applied exactly like regular polish. The holographic particles are already suspended in the formula. Two coats over a base coat give you the full effect.
This look is surprisingly approachable from a skill perspective. No nail art technique is required. It is just polish that happens to be extraordinary.
The effect photographs differently depending on lighting conditions. Natural light gives you the full rainbow spectrum. Indoor light creates a more subtle silver shimmer. Both are beautiful.
Budget tip: Spectraflair holographic topcoat is around six dollars and can be applied over any polish to add holographic effect. Or try ILNP or Finger Paints holographic polishes for under twelve dollars.
22. Warm Beige with Thin Nude Gradient
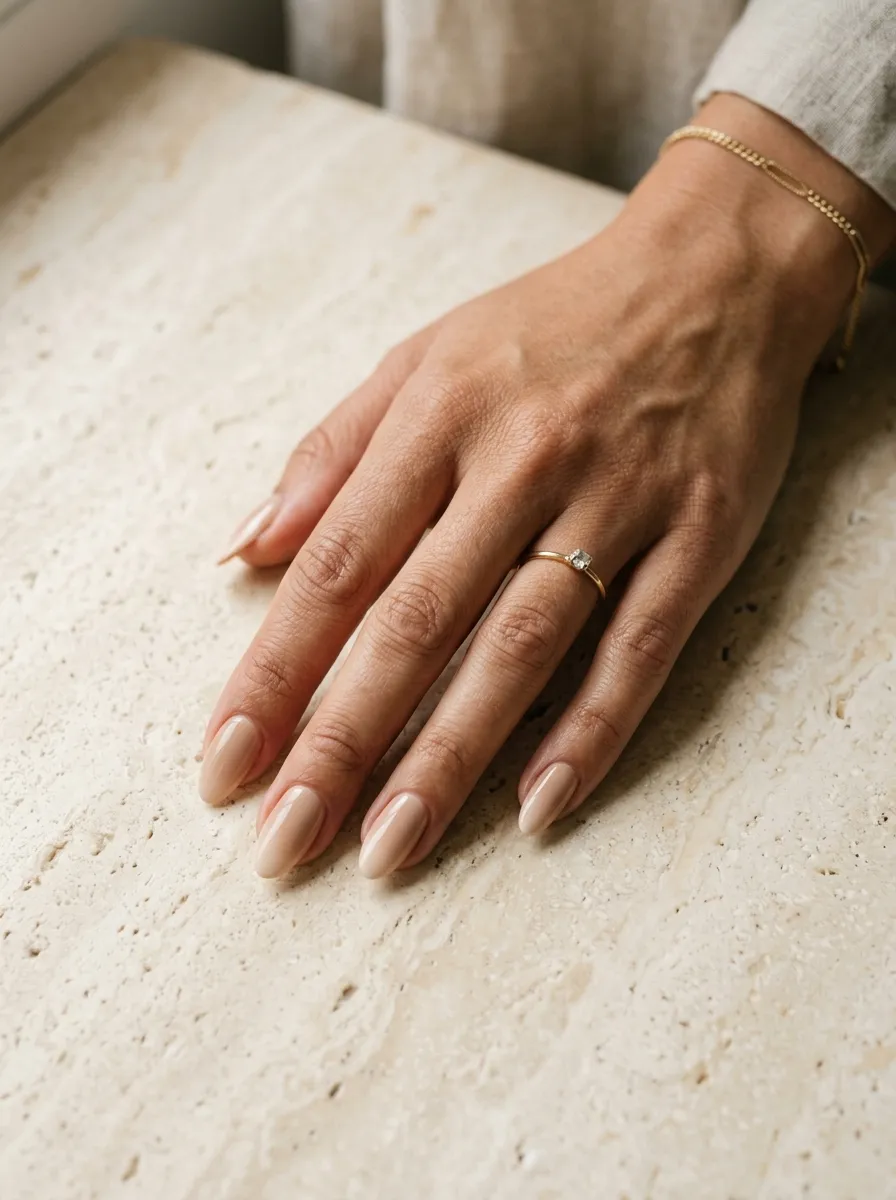
Sometimes the most romantic thing you can do is keep it completely effortless.
Warm beige with a nude gradient is the most wearable look on this list. It goes with absolutely everything. It will not clash with any ring metal or stone color. It photographs beautifully in any lighting.
This look is also the most long-lasting in terms of wear. Because the two tones used are so close together, minor chips and tip wear are almost invisible.
The gradient here is extremely subtle. You are blending a warm sandy beige at the base into a lighter barely-there nude at the tip. The transition is so gentle it almost reads as just one color from a distance.
Use the sponge technique with two similar-toned polishes to achieve the gradient. Because the tones are so close, the blend is forgiving and comes out naturally smooth.
This is the ideal choice if you are nervous about nail art or do not have much time to practice.
Budget tip: Sally Hansen Bare Necessity and Essie Sand Tropez create a perfect warm beige to nude gradient pair and cost under eight dollars each.
23. Personalized Initial or Date Nail Art
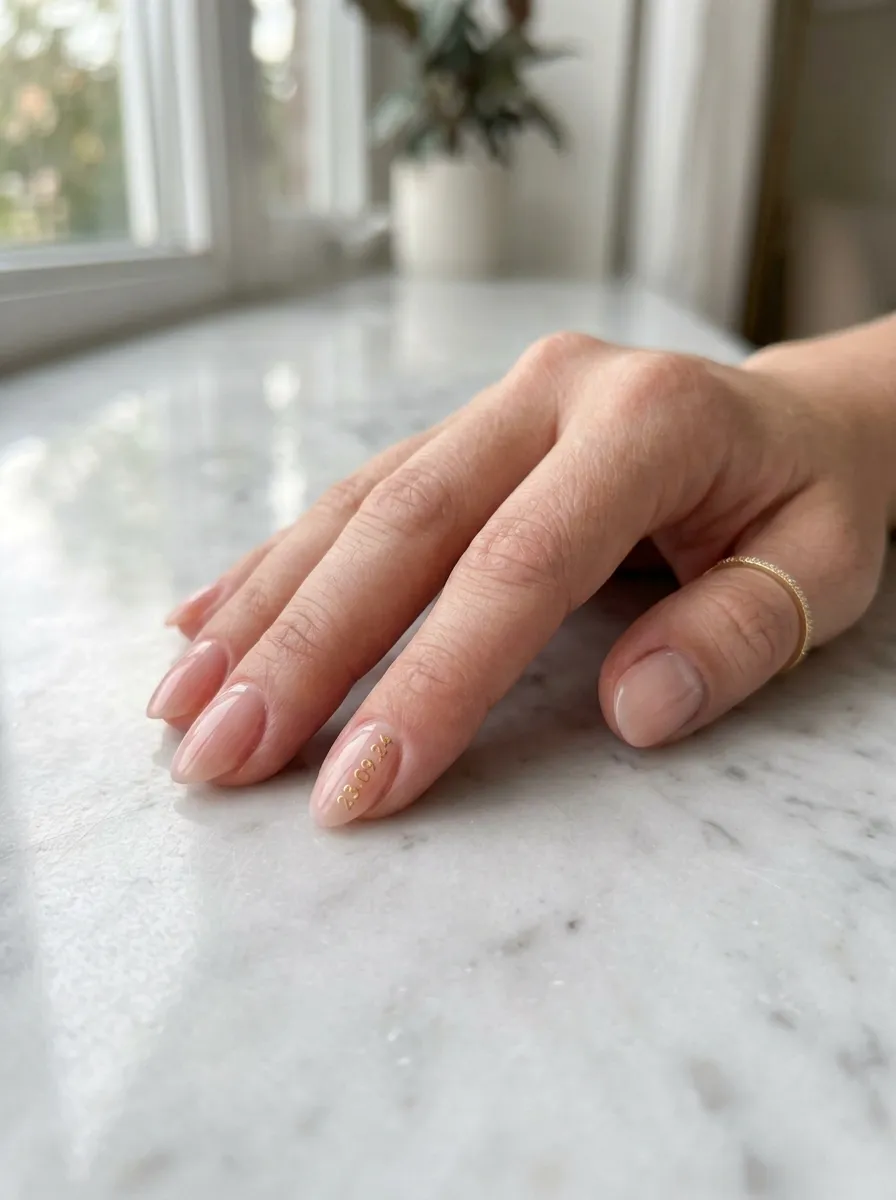
This one is about as personal as nail art gets.
A tiny initial or date painted on your ring finger nail is a proposal detail that no one else will have. It is yours entirely. Whether it is your partner’s first initial, the date of the proposal, or a small meaningful symbol, it transforms your nails into a piece of wearable memory.
This is admittedly the most skill-dependent look on this list. Fine lettering requires a very thin nail art brush and a steady hand.
However, nail art pens with ultra-fine tips make this much more accessible. These pens work like a regular pen or marker but contain nail polish. You can write directly on your nail surface.
Practice the letters or numbers on paper until you feel confident. Then do it on a nail that has been painted with your base color and allowed to dry completely. Seal immediately with top coat.
Even imperfect lettering on a nail has its own charm. The handmade quality of it makes it more personal, not less.
Budget tip: Nail art pens are available on Amazon for around five dollars each in gold, silver, and white. These pens give you control that no regular brush can match for small detailed work.
Your Nails, Your Moment
Every single look in this guide is achievable, affordable, and genuinely beautiful for a proposal setting. You do not need to spend a hundred dollars at a luxury nail salon to have nails that look stunning in every photo and feel right for the moment.
Start by thinking about the setting. Outdoor afternoon proposals call for soft nudes, blushy tones, and botanical details. Evening restaurant proposals suit deep colors, shimmer, and glitter. Beach or garden proposals come alive with pastels, florals, and jelly finishes.
Then think about your personal style. If you wear bold colors every day, go for the holographic silver or deep navy. If you keep things simple, the sheer pink or warm beige will feel exactly like you on the most important day.
Most of these looks can be done at home in under an hour with supplies that cost less than fifteen dollars. That means you can do a trial run a week before and refine anything that does not feel right.
The ring deserves beautiful hands. The photos deserve nails that look intentional. And you deserve to feel completely like yourself when the moment happens. Pick the look that makes you feel most like you and wear it with the full confidence that it is perfect.