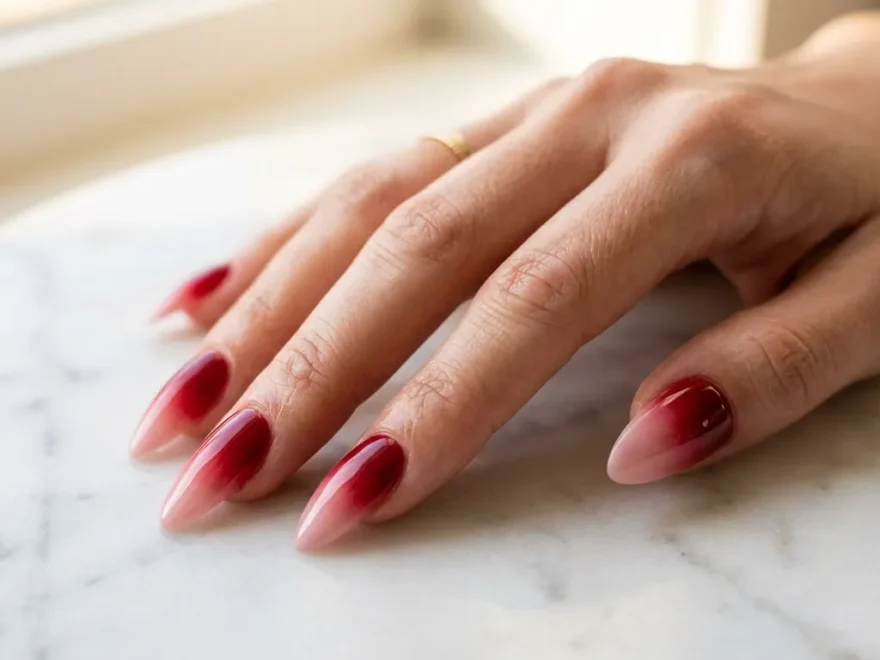
Red ombre nails are having a major moment right now, and for good reason. Whether you want something bold for date night or something polished for an everyday look, red ombre on acrylics gives you that wow factor without trying too hard. The gradient effect adds depth and drama that a solid color simply cannot match. You can go dark to light, red to nude, or even red to glitter, and each version looks completely different. This list covers 33 real, doable ideas that work for different nail shapes, budgets, and skill levels. Some you can try at home. Others are worth a salon trip. Either way, you will find something here that fits your style perfectly. If you’re also looking for Light Pink Chrome Nails Ideas, the soft pink base and reflective chrome finish create an elegant, luminous manicure that feels modern, feminine, and suitable for everything from everyday wear to special occasions.
1. Classic Red to Nude Fade
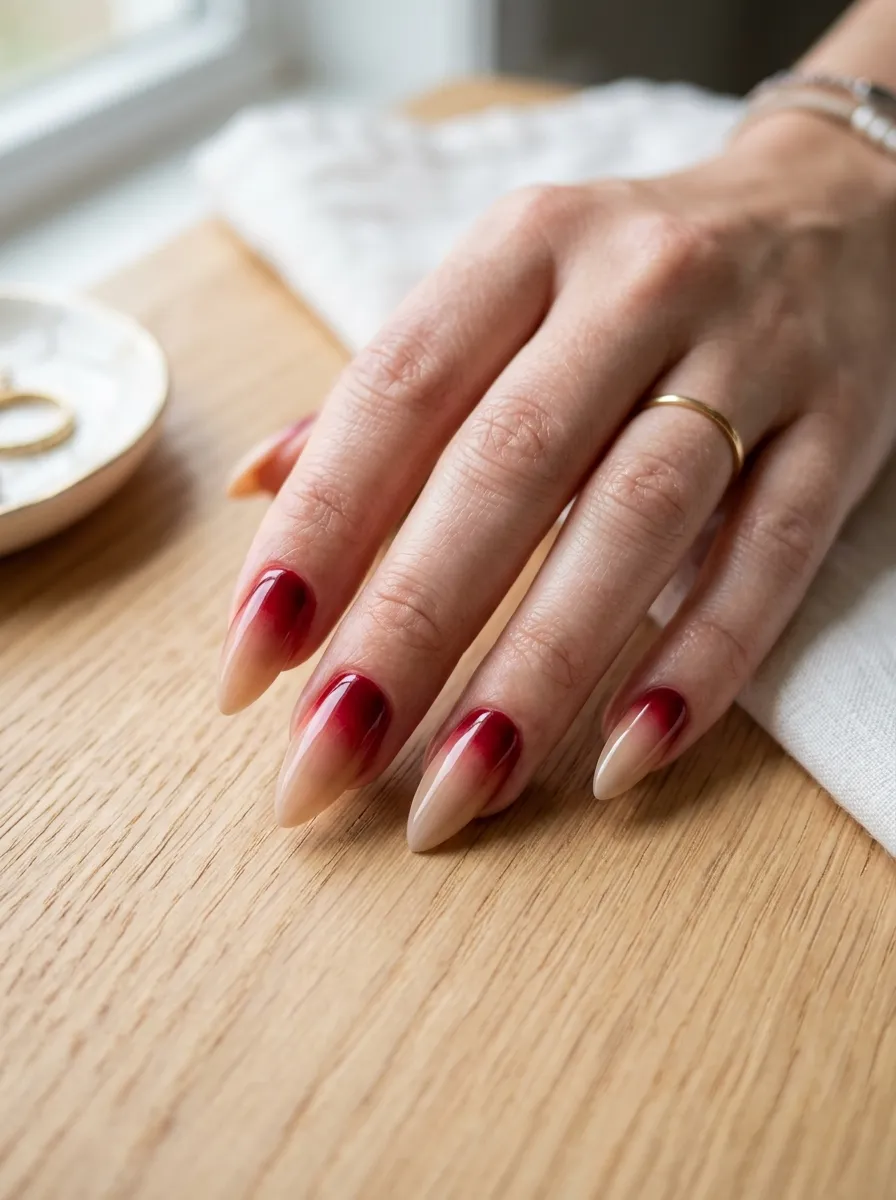
This is the one that started it all. A deep red at the base fading into a soft nude at the tip looks clean, elegant, and works for almost any occasion.
It is the kind of nail look that gets compliments at work and at weddings. Not too loud. Not too plain.
How to get it: At the salon, ask for a red-to-nude sponge ombre with a gel topcoat. At home, use a small makeup sponge to dab the two colors together on each nail before sealing with a clear top coat.
Pick a red that suits your skin tone. Cooler skin tones look great with blue-based reds. Warmer skin tones shine with orange-based reds.
Budget tip: Drugstore polishes like Sally Hansen and NYX work well for sponge ombre at home. You do not need expensive brands to pull this off. Practice on a few nails first and you will get the hang of the blending fast.
2. Deep Burgundy to Cherry Red Fade
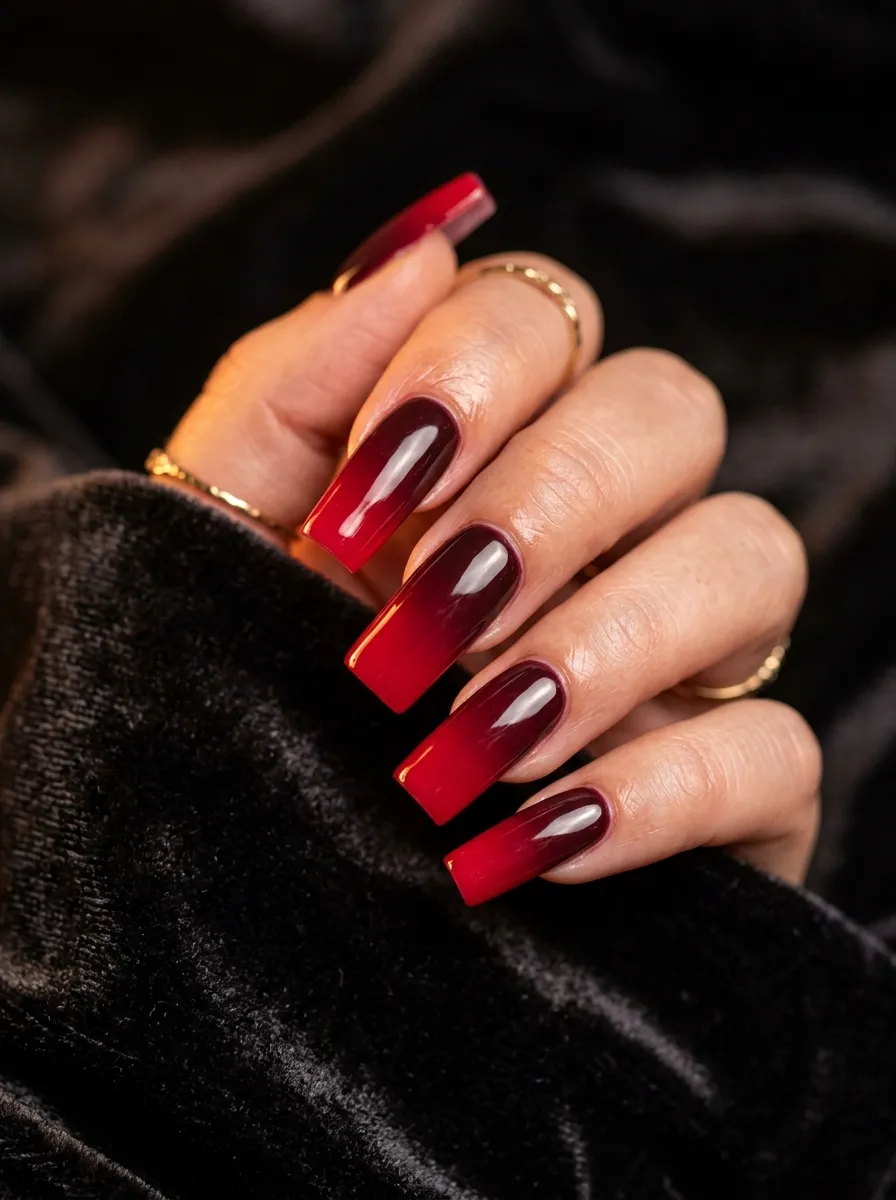
This one keeps everything in the red family but plays with depth. Going from a moody burgundy to a brighter cherry red creates a gradient that looks intentional and really rich.
It works beautifully on longer nails because there is more surface area for the color shift to show.
This is a great option for fall and winter. It feels warm and luxurious without needing any glitter or embellishment.
DIY tip: Use a makeup sponge with burgundy on one end and cherry red on the other. Press and dab gently. Overlap the colors in the middle of the nail. Wipe excess off your skin before the top coat goes on.
It takes about two or three practice nails before it starts looking smooth. Do not rush the drying time between layers.
Finish with a glossy top coat to make the gradient really pop. A matte top coat over this combo also looks stunning if you want a more editorial, moody vibe for your red ombre acrylic nails.
3. Red to White Tip Ombre
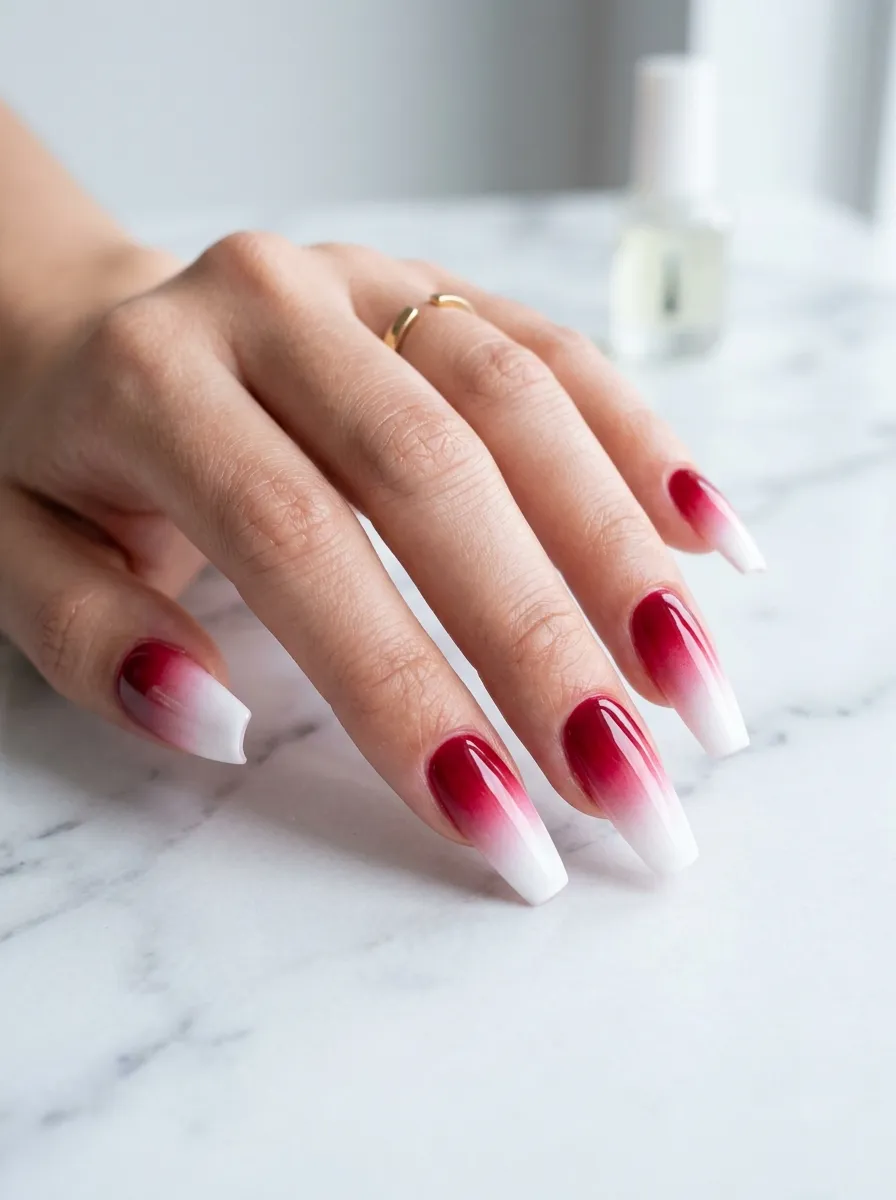
Red and white together have a bold graphic energy that feels modern and striking. This ombre version softens that contrast by blending the two rather than placing them side by side.
The result is something that feels festive without being costume-like. It works for holidays, parties, and even casual everyday wear depending on the nail shape.
Coffin and stiletto shapes work best here because the dramatic tip really shows off the white.
Salon tip: Ask specifically for a sponge fade, not a French tip look. The gradient should be gradual, not a sharp line.
Home tip: Apply your red base first. Let it dry completely. Then take white polish on a sponge and press it gently near the tip, building up coverage slowly. Thin layers blend better than thick ones.
Add a clear glitter coat over the white section to make the tips sparkle. That small upgrade turns a simple red-to-white ombre into something that looks way more expensive than it cost.
4. Red Glitter Ombre Nails
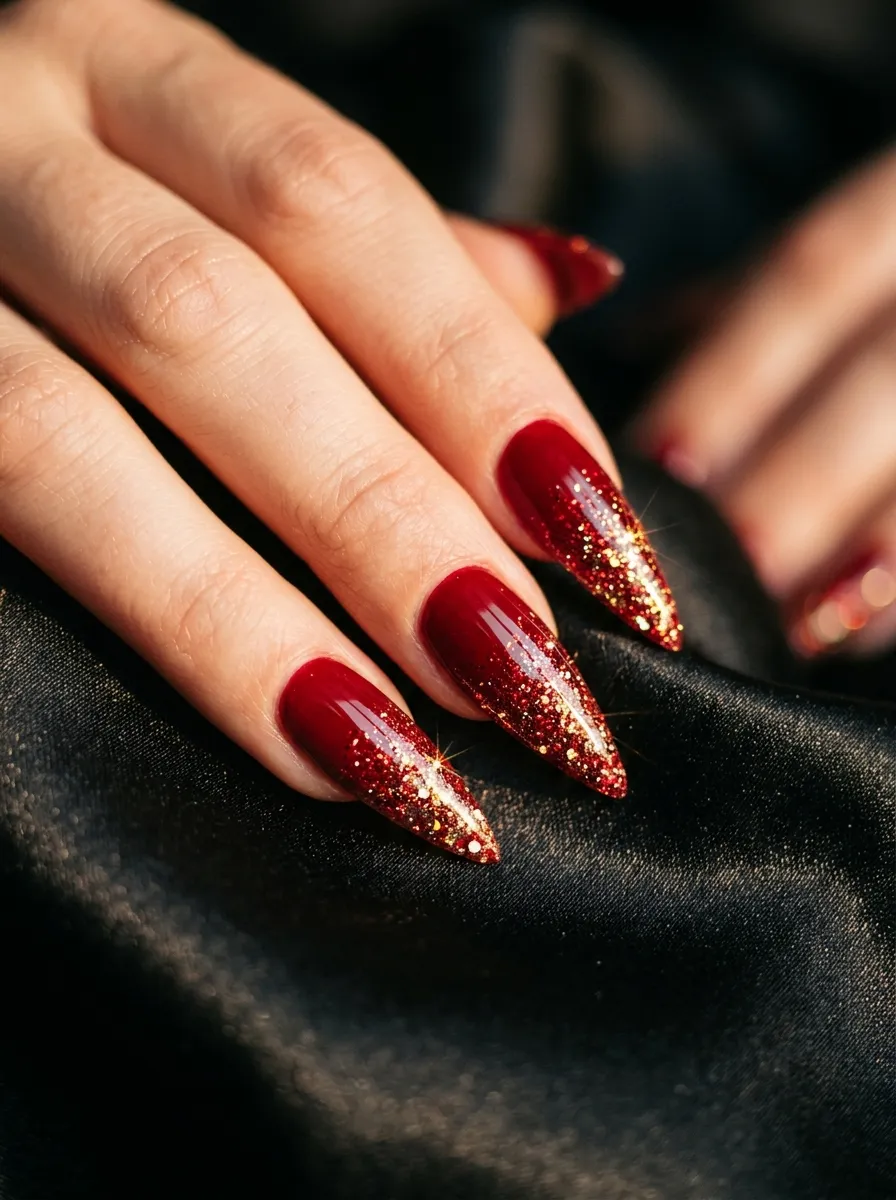
Glitter ombre is one of the easiest ways to make red nails feel special. The glitter naturally creates a gradient effect without needing perfect blending technique.
You press loose glitter or a glitter polish near the tip and let it fade back into the solid red. It is forgiving and fast.
This style is perfect for events, New Year’s Eve, or any time you want your hands to look like a celebration.
Budget tip: Buy loose red or gold glitter from a craft store and mix it with a clear nail polish. Apply it near your tip while the base coat is still slightly tacky. Press gently with a brush for even distribution.
Alternatively, OPI, Sally Hansen, and Essie all have affordable glitter polishes that work beautifully as ombre tips over a red base.
Seal everything with two coats of a hard top coat because glitter can snag and lift if not properly sealed. Reapply your top coat every two days to keep the look fresh and chip-resistant for longer.
5. Reverse Red Ombre (Light to Dark)
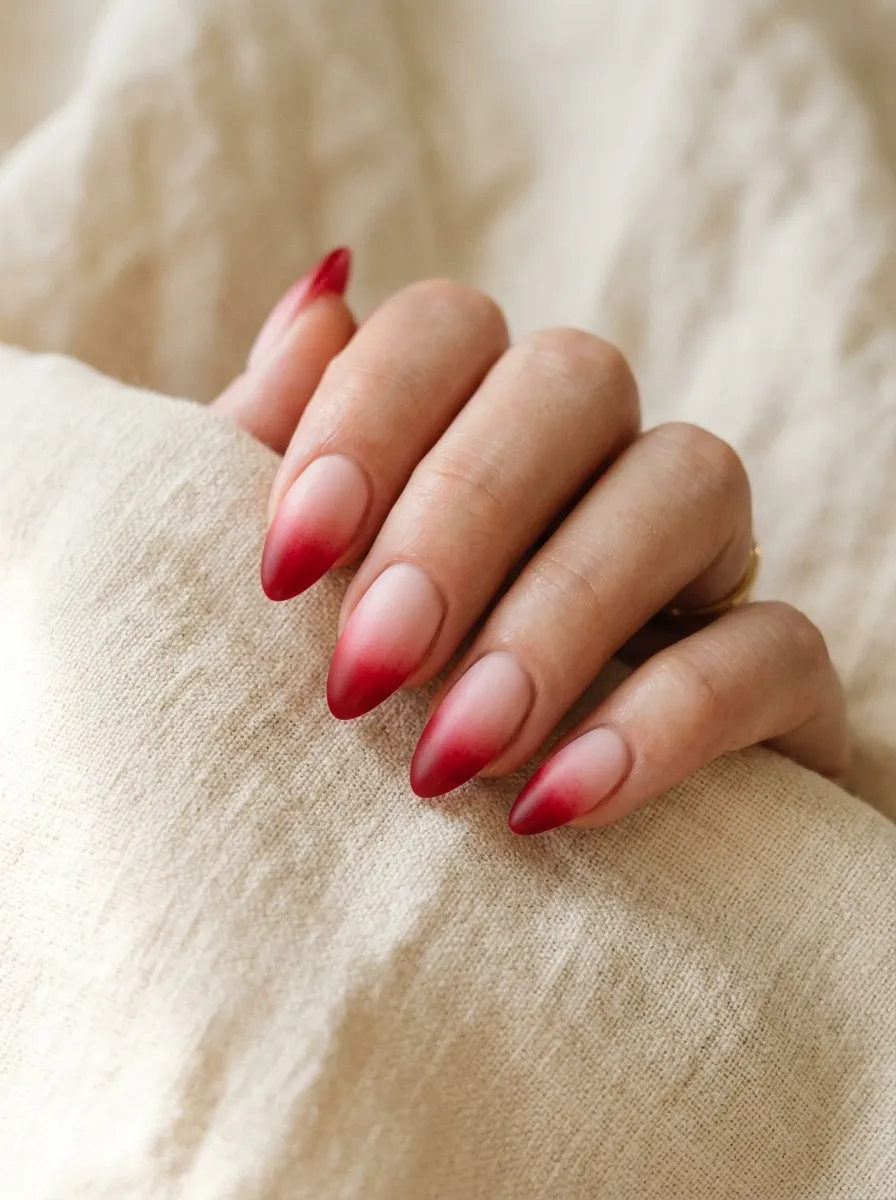
Most ombre nails go dark at the tip and light at the base. Flip it. Starting light at the cuticle and deepening to red at the tip is unexpected and really eye-catching.
It draws attention to your nail tips, which makes longer nails look even more dramatic.
This works especially well on almond and stiletto shapes where the tip is the focal point.
How to do it: Apply a light nude or blush as your base. While it is wet, press red onto the tip area using a sponge. Build the red up in layers until it is saturated at the tip but fades as it moves toward the cuticle.
Clean up skin edges with a brush dipped in acetone before it dries for a neat finish.
This reverse red ombre acrylic nail look feels editorial and fashion-forward. It is the kind of thing you see in high-end nail art accounts but it is actually one of the simpler gradients to execute at home. Try it once and you will see how satisfying the result is.
6. Red Chrome Ombre Nails
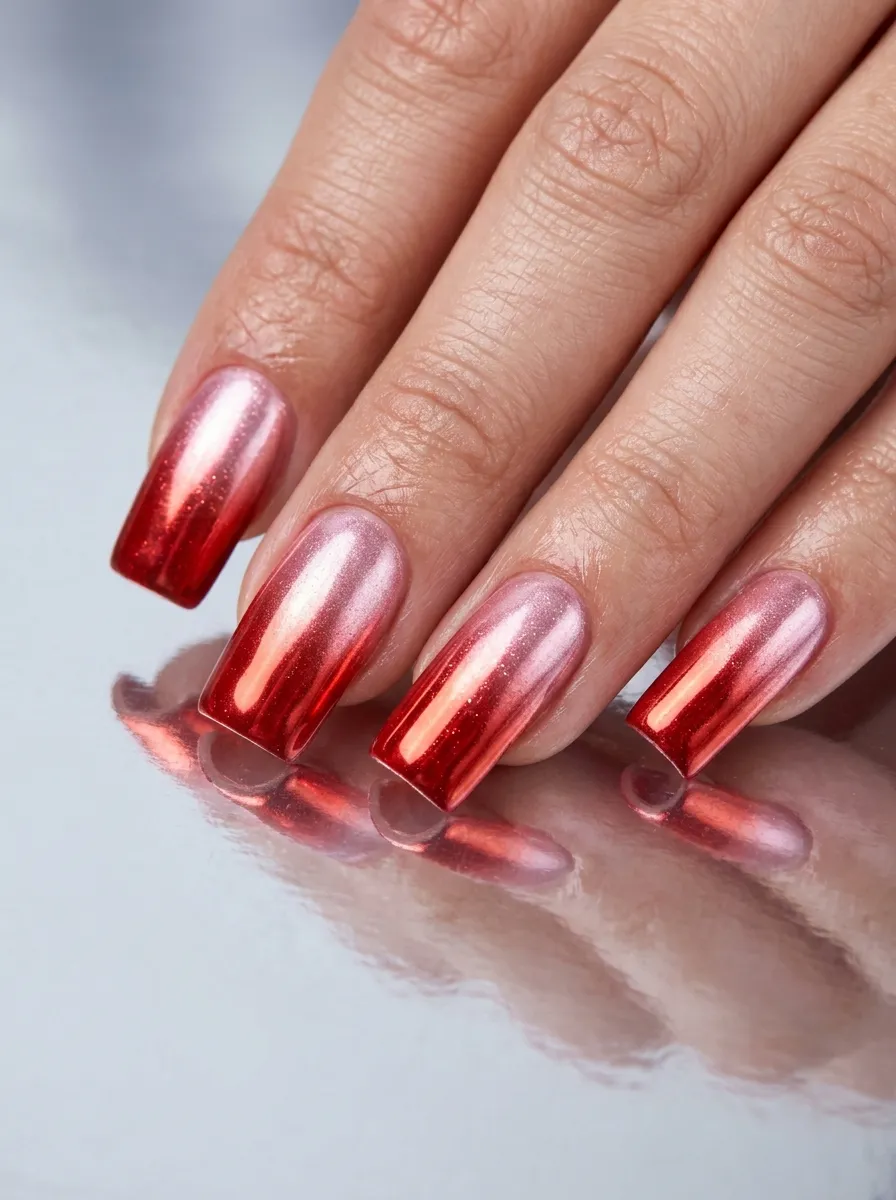
Chrome powder takes red ombre nails to a completely different level. The mirror-like finish makes your nails look metallic and futuristic.
You apply a red gel base, then rub chrome powder over the tip section for the ombre effect. The powder only sticks to cured gel, so it naturally concentrates where you apply it most.
This technique does require a UV/LED lamp and gel products. It is harder to replicate with regular polish.
Salon route: This is worth spending on. A chrome ombre set at a nail salon typically runs between $45 and $75 depending on your area. The results are dramatic and last two to three weeks with minimal chipping.
Home kit option: Chrome powder kits are available on Amazon for under $15. They come with a small applicator sponge. Practice the application pressure because uneven rubbing creates patchy coverage.
Pair red chrome tips with a deeper red base for a rich, layered effect. Or go red chrome over a black base for an intense, dramatic look that is perfect for evening events and night-out occasions.
7. Matte Red to Glossy Tip Ombre
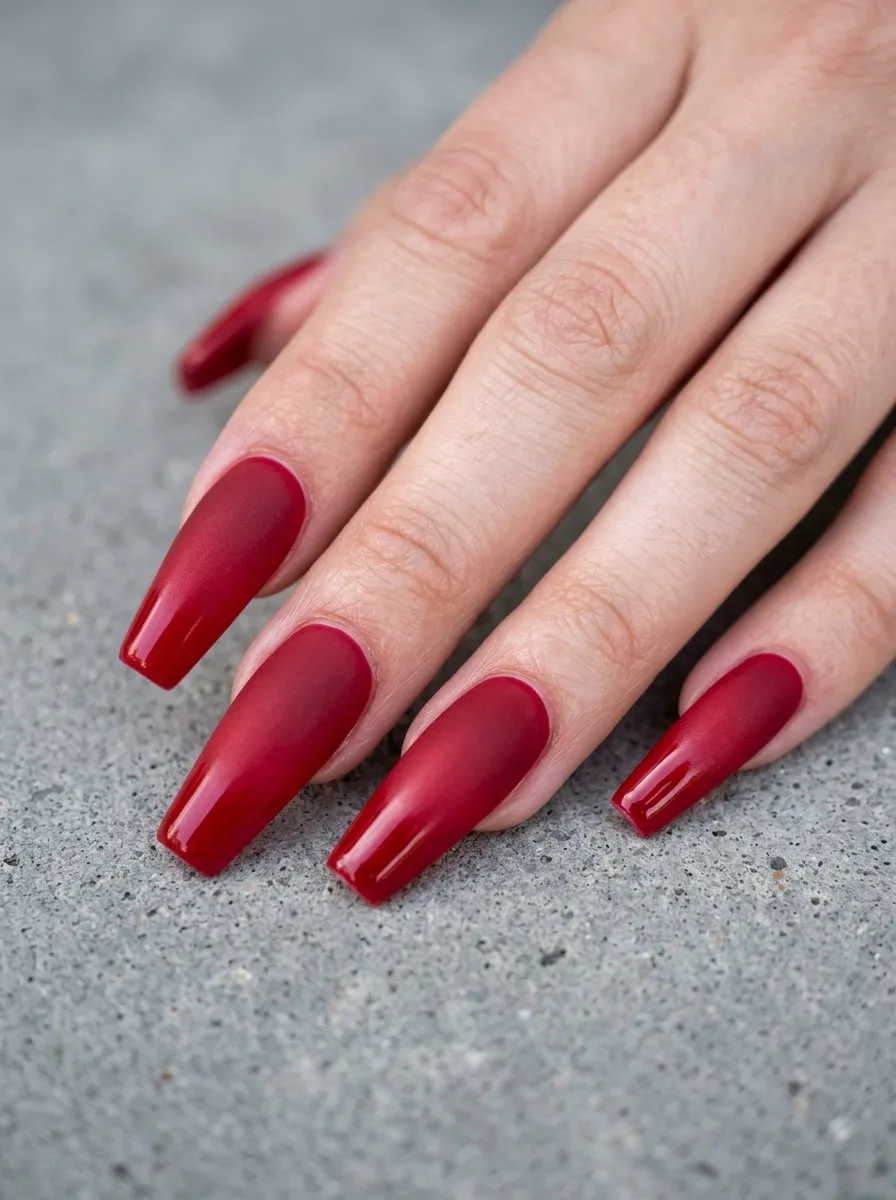
This idea is less about color and more about texture. Both sections are red but one is matte and one is glossy.
That contrast in finish creates a subtle, sophisticated gradient that looks incredibly intentional and polished.
It is a minimal design with maximum impact.
How to do it: Apply your red base and let it cure or dry. Cover the bottom two thirds of each nail with a matte top coat. Then apply a glossy top coat only to the tip area.
The line where they meet does not need to be perfect. A soft feathered edge between matte and glossy actually looks better than a sharp line.
This works for any nail length and shape. It is understated enough for professional settings but interesting enough to get noticed.
Budget tip: A matte top coat is the only extra product you need. Essie Matte About You costs around $8 and works over any polish. Combine it with any glossy top coat you already own and you have this look for almost no extra money.
8. Red and Black Ombre Nails
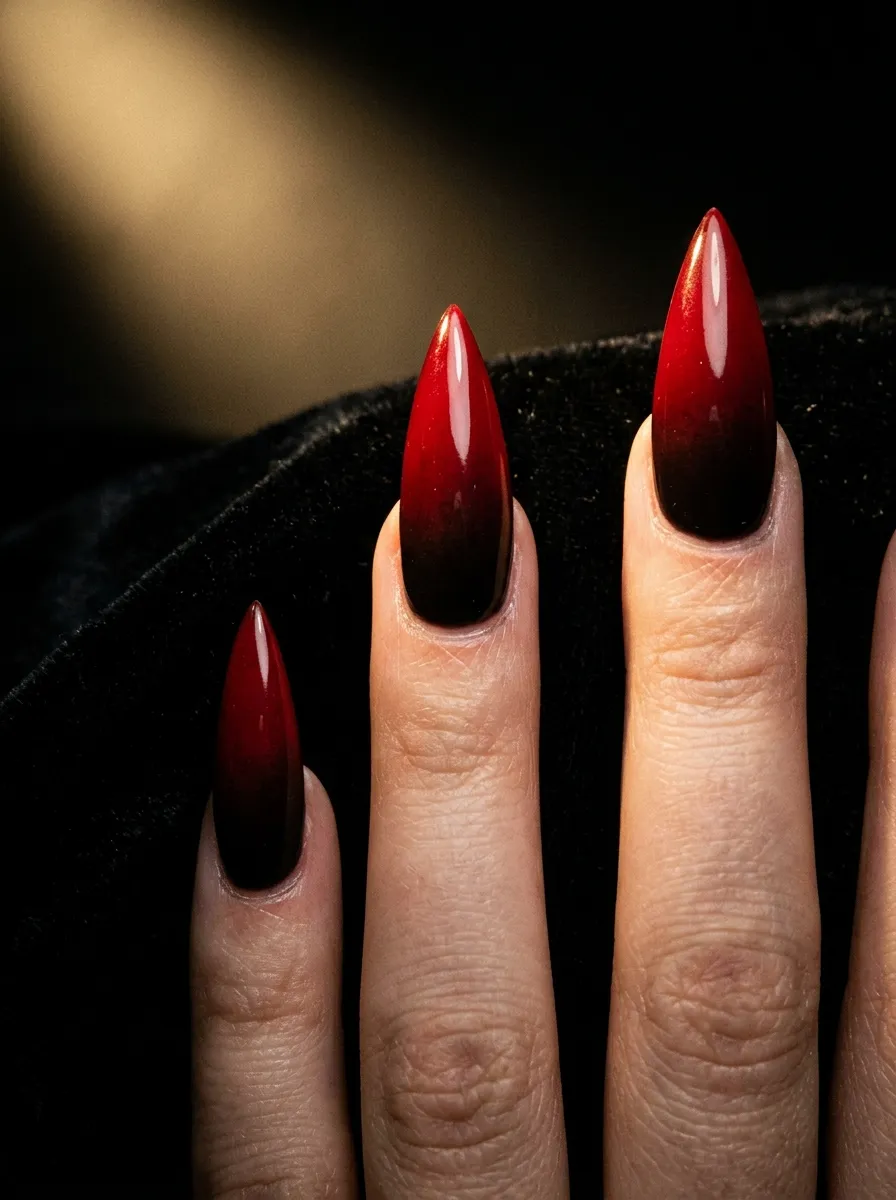
Black and red together have a boldness that is hard to match. As an ombre, the two colors meld together in a way that feels dark, dramatic, and seriously cool.
This is a popular choice for gothic, edgy, and Halloween nail looks, but done right, it works year-round.
Longer nails in stiletto or coffin shapes show off this gradient best.
DIY tip: Use a black base and sponge red onto the tip while the base is dry. Alternatively, start with a red base and sponge black from the cuticle downward. Both methods work, and your preferred starting color depends on which end you want darkest.
The blending zone in the middle is where the magic happens. Work slowly and build color in thin layers.
Add a small amount of red glitter in the mid-section to make the blend look smoother and more professional.
A glossy or glass finish top coat over red and black ombre nails makes the colors look like they are lit from within. This is one of the most dramatic red ombre acrylic nail ideas on this list.
9. Red to Pink Ombre Nails
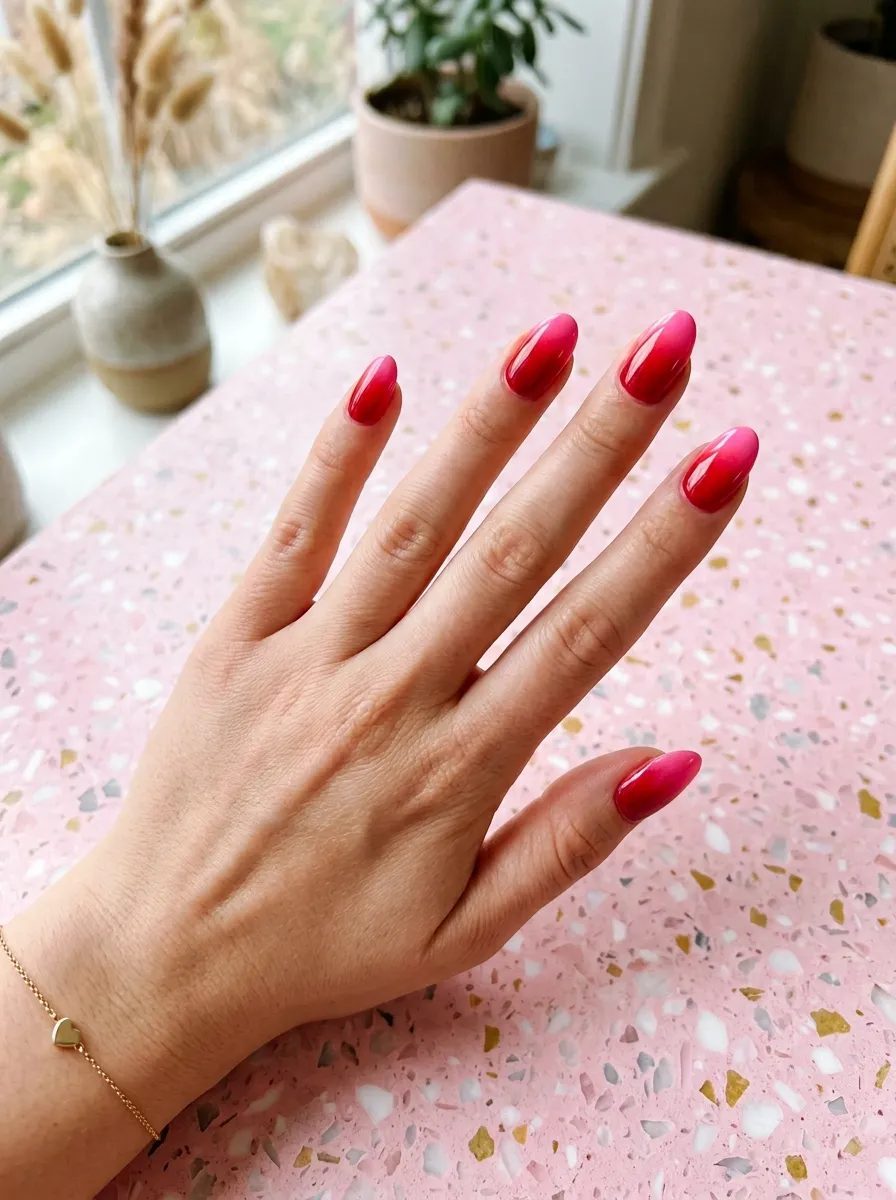
Red to pink is one of the most wearable ombre combinations because both colors feel warm, energetic, and fun.
It suits spring and summer especially well but honestly looks good all year. The pink softens the red and keeps the overall look playful rather than intense.
Shade pairing tip: Try a deep red with a hot pink for high contrast. Or use a softer coral-red with a baby pink for something more delicate and romantic.
Both pairings work great on short and medium nails, not just long ones.
Home tip: Use the same sponge method with your two chosen colors. Apply red over the full nail first as a base. Once dry, sponge the pink from the tip inward, stopping about halfway down the nail.
Repeat two to three times for color depth.
Seal with a shiny top coat to make the colors look vibrant. This is the kind of red ombre nail look that photographs beautifully and gets compliments at brunch, birthday parties, and everything in between. It feels youthful and bright without being overdone.
10. Stiletto Red Ombre With Gold Foil Tips
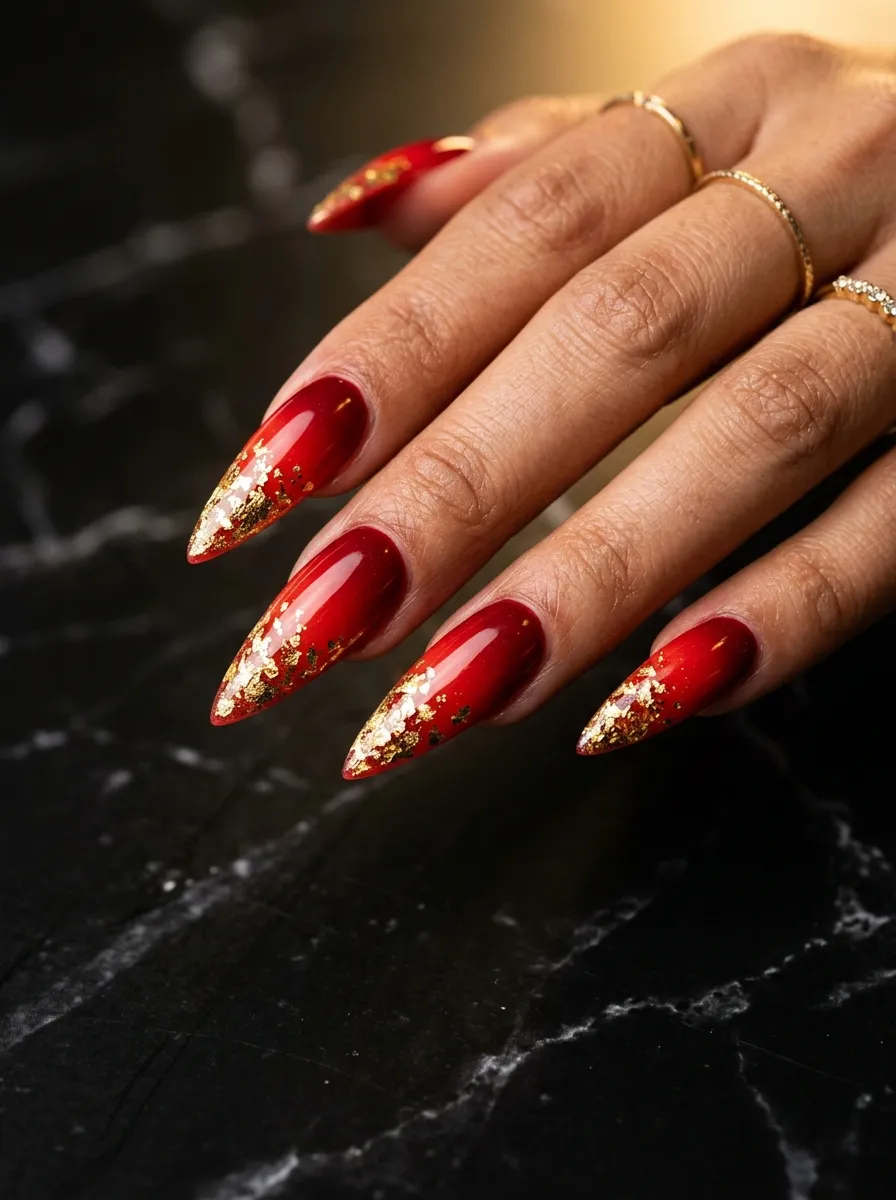
Gold foil on red nails looks incredibly expensive. The foil catches light in a way that is completely different from glitter. It has an editorial, high-fashion energy.
You press tiny pieces of gold foil onto the tip area after applying a sticky gel layer. The foil tears into irregular pieces naturally, which gives it that luxurious organic look.
Cost breakdown: Gold nail foil sheets cost between $5 and $10 for a large sheet. A little goes a very long way. You can do multiple sets of nails from one pack.
You need a gel base and UV lamp for the best adhesion, but some foils also work over regular tacky polish.
Application tip: Tear small irregular pieces from your foil sheet. Press them gently onto the nail tip while the polish is still slightly tacky. Then smooth down with a soft brush or orange stick. Seal with two coats of top coat.
The imperfection in how foil breaks apart is what makes it look so beautiful. Do not try to make it too neat. Let it be organic and irregular for the most authentic, high-end result on your red ombre acrylic nails.
11. Short Coffin Red Ombre Nails
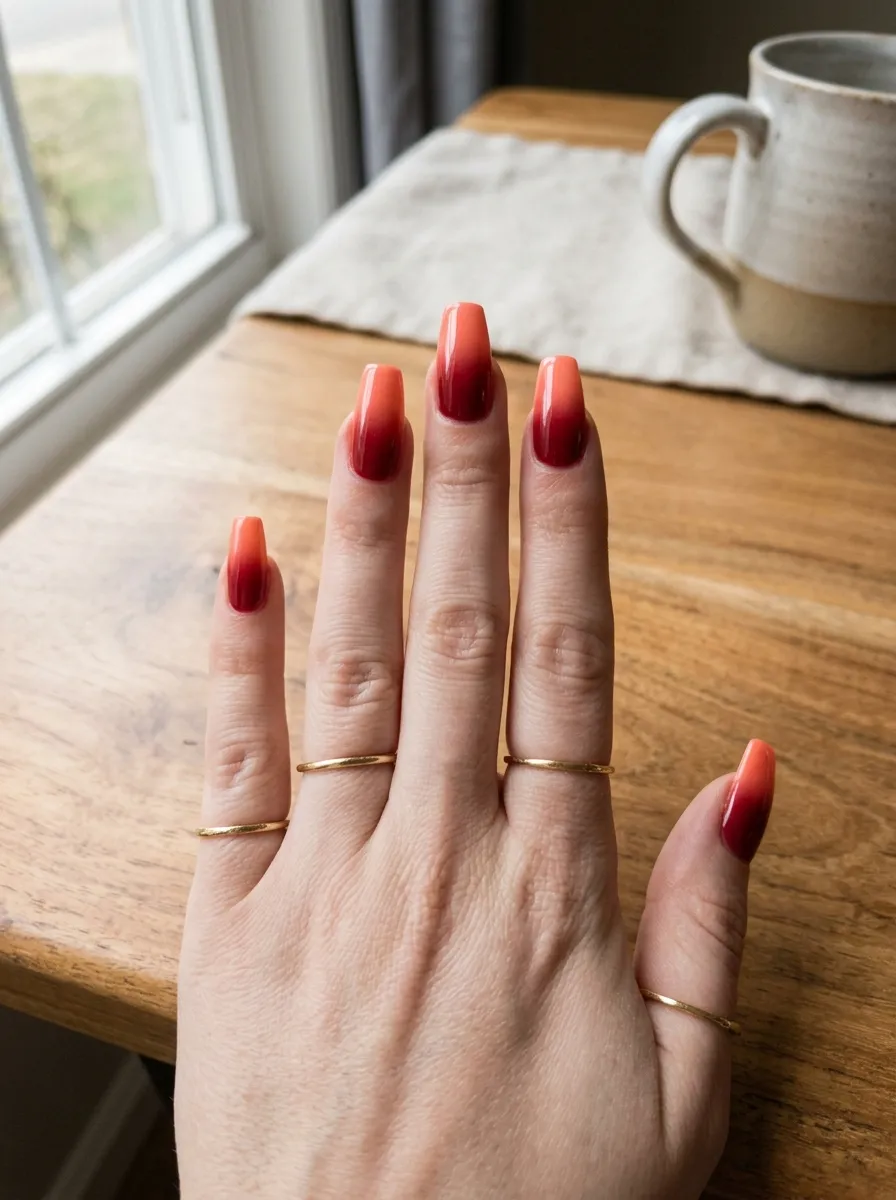
You do not need long nails to make red ombre work. Short coffin nails with a red gradient look modern, chic, and are way more practical for everyday life.
The coffin shape on shorter nails gives a subtle squared-off tip that frames the ombre beautifully.
This is a great option if you work with your hands or prefer nails that do not get in the way.
Why it works: The gradient does not need a large surface area to read well. Even a small color shift on a short nail looks intentional and polished.
DIY approach: Apply your base red. Use a fine sponge tip to press a lighter tone onto just the last few millimeters of the nail. Build it softly so it does not look like a separate color.
The key on short nails is keeping the ombre subtle. Too much contrast on a small nail can look busy.
Finish with a gel-effect top coat for extra shine and longevity. Short coffin red ombre nails are underrated and deserve way more attention than they get in the nail world.
12. Red to Clear Ombre (Jelly Nails)
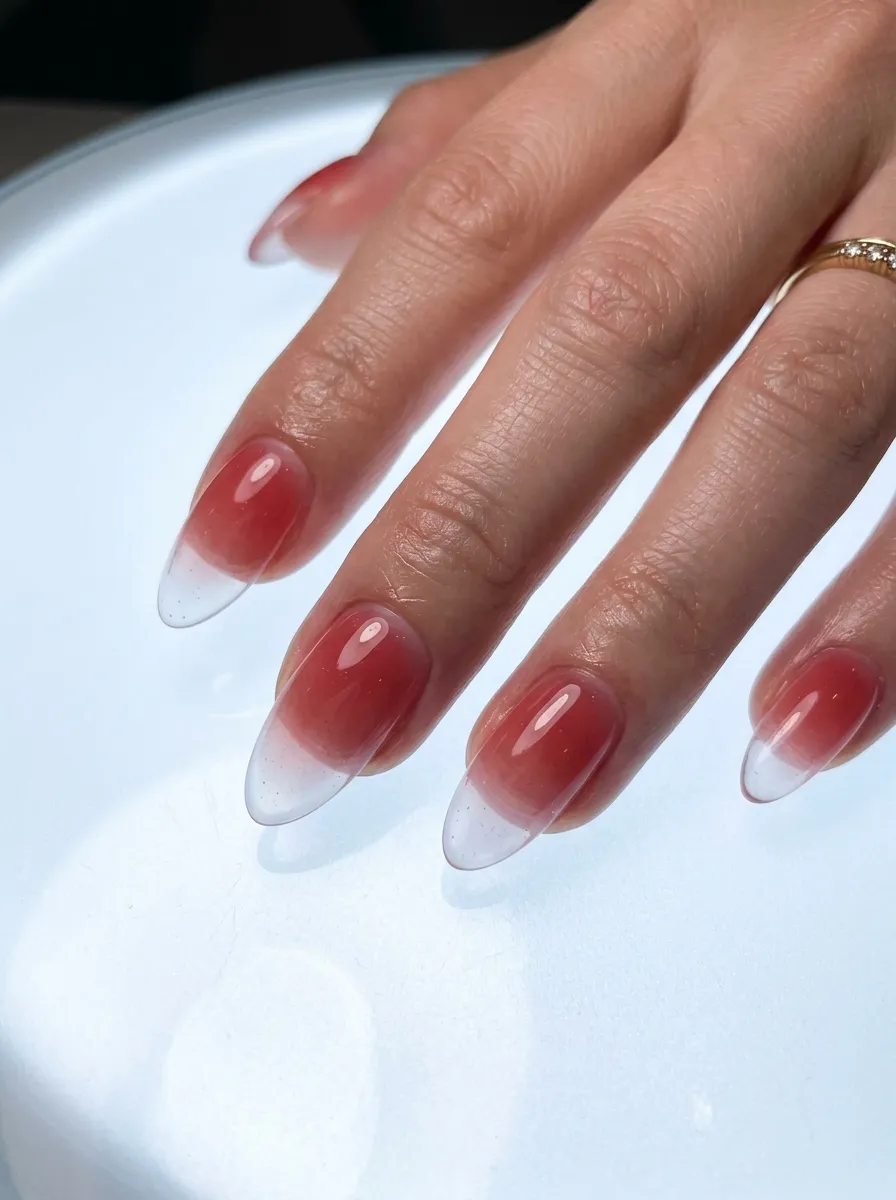
Jelly nails have been huge in nail trends, and combining that translucent look with a red ombre is something genuinely unique.
The red fades into a sheer, glassy finish at the tip. It looks like a jewel sitting on your fingertip.
This is not a typical look, which makes it stand out.
How to create it: Use a sheer red gel polish as your base. Build opacity at the cuticle and blend toward the tip by layering lighter, sheerer coats as you move up the nail.
Alternatively, mix a small amount of red pigment into a clear gel polish to create your own custom jelly color.
Who it works for: This subtle approach suits people who want red nails without them being too bold. The translucency softens everything.
It works across all nail shapes but looks especially beautiful on almond and oval shapes where the curve adds to the jewel-like quality.
A single coat of clear top coat keeps it looking like polished glass. This is one of the most creative and underused red ombre acrylic nail ideas, and it will absolutely make people ask where you got your nails done.
13. Ombre Red Nails With Nail Art Accents
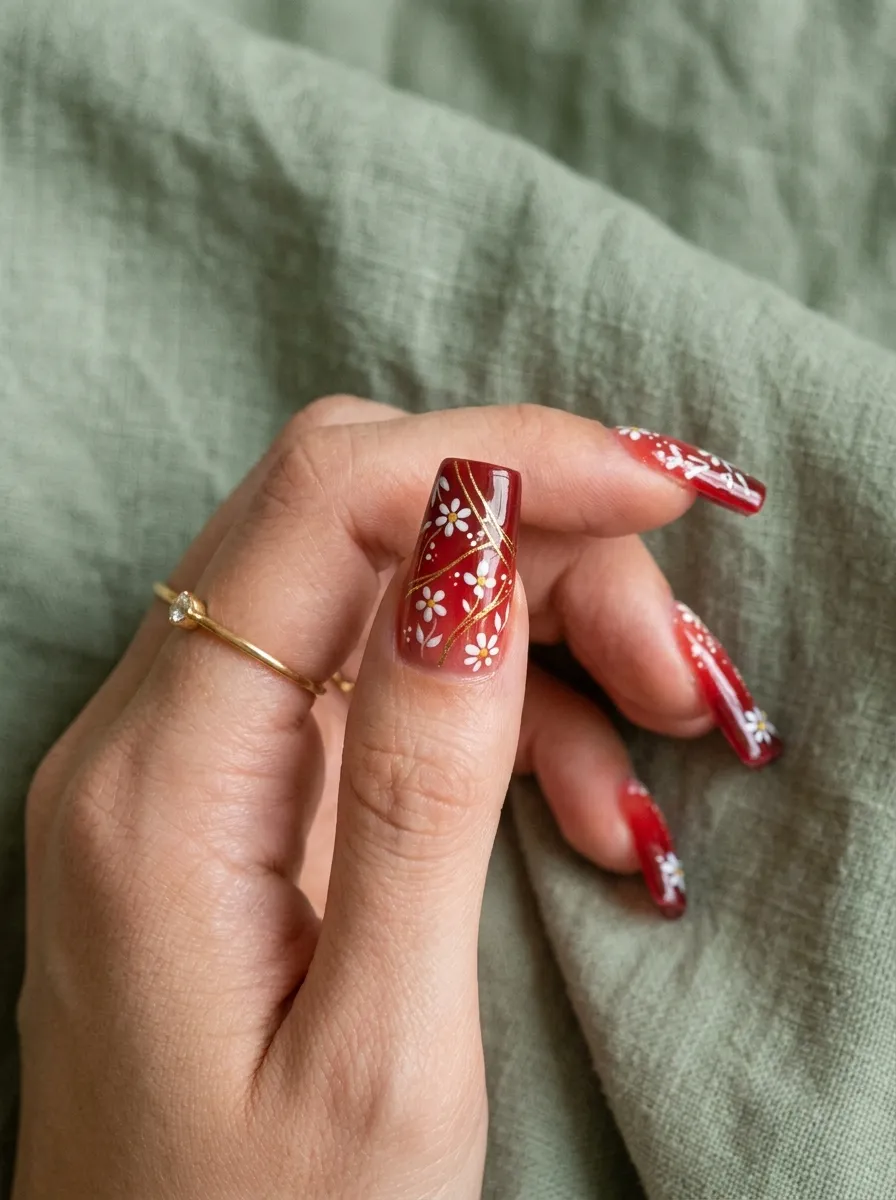
Red ombre by itself is already beautiful. Add a single nail art accent and it moves into full statement territory.
You do not need to decorate every nail. One accent nail on your ring finger or middle finger is enough to make the whole set feel curated and intentional.
Popular accent options include thin gold line art, tiny florals, abstract squiggles, or small gemstones.
Budget tip: Nail art pens cost around $5 to $8 at any craft or beauty store. They work directly over dried polish with no additional tools needed. Practice simple designs on paper first.
Thin gold striping tape is another option. You just press it onto the nail in whatever pattern you like and seal it under top coat. A roll of striping tape costs under $3.
Design ideas: Try a simple abstract swirl in white or gold over the ring finger only. Or stick three small rhinestones at the base of one nail for a clustered gem effect.
Keep the accent nail’s ombre the same as the rest of the set. The nail art is the focal point, not a different color. This keeps the overall look cohesive while still being creative and personalized.
14. Red Velvet Ombre Nails
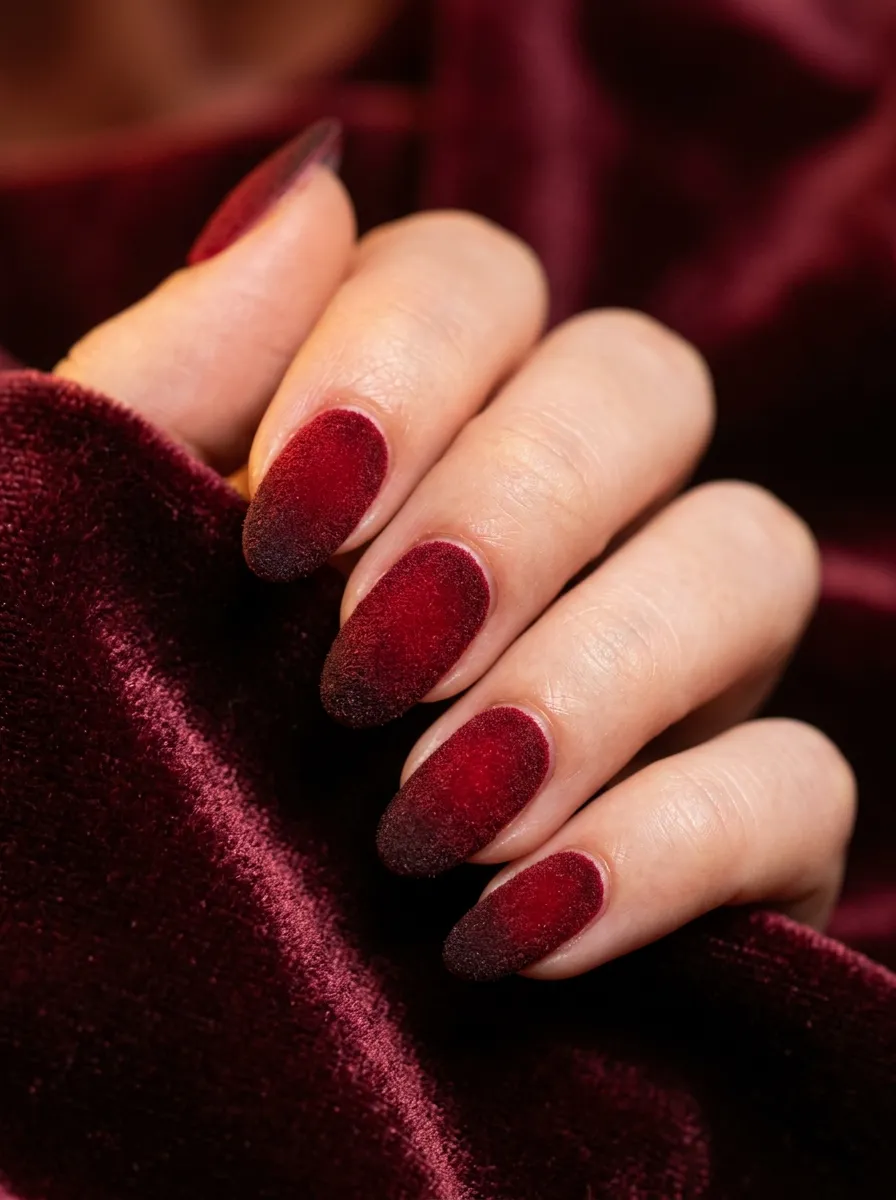
Velvet nails use a special flocked powder that creates an actual soft, suede-like texture on the nail surface. When applied as an ombre over a red base, the effect is strikingly luxurious.
The velvet powder sits on a tacky gel layer and reflects light differently from every angle. It looks three-dimensional and genuinely different from anything else.
Where to get the powder: Velvet nail powder is available on Etsy and Amazon for around $8 to $12 per pot. A little goes a long way.
You do need gel products and a UV lamp for proper adhesion because the velvet requires a tacky surface to stick to.
Application: Cure your red gel base. While the inhibition layer is still tacky, press a makeup brush loaded with velvet powder onto the center of each nail. Tap off excess. The edges will remain smooth and glossy while the center has the velvet texture.
Do not add a top coat over velvet powder because it flattens the texture and removes the effect entirely.
This red ombre acrylic nail look is dramatic, tactile, and completely original. It photographs with incredible depth and gets a reaction every single time someone notices the texture up close.
15. French Tip Red Ombre Nails
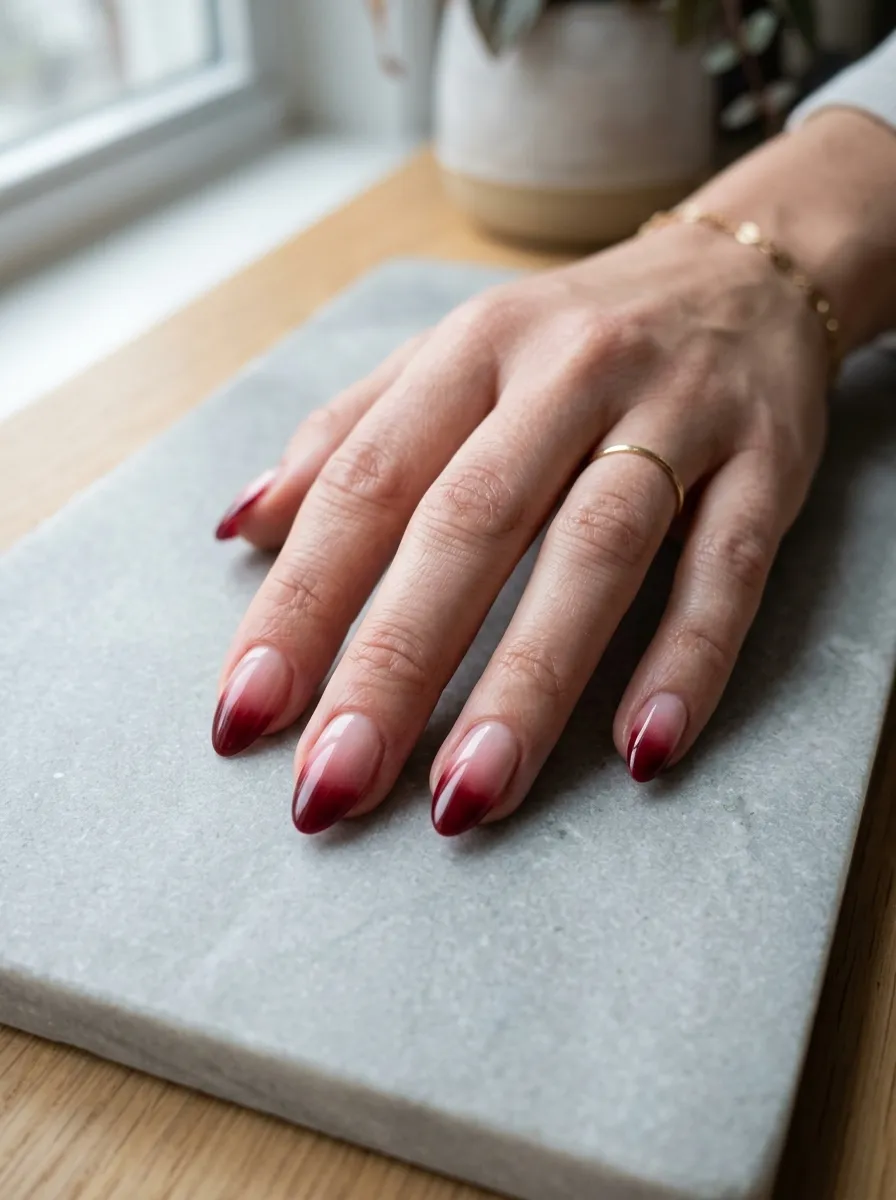
The classic French manicure gets a red update with this idea. Instead of a white tip, you use a red gradient at the tip over a sheer base.
It keeps the elegance of a French mani but makes it feel current and more interesting.
This is a great option for people who like clean, polished nails but want a small unexpected detail.
How it works: Apply a sheer or soft pink base over the whole nail. Once dry, apply red only to the tip area using a sponge or angled brush. Blend the edge so it is not a harsh line.
The result is soft and pretty rather than bold, which suits a lot of different nail lengths and settings.
Tip: Keep the red tip section narrow for the most refined look. A wide swath of red is more dramatic, while a thin crescent at the very tip is more subtle and delicate.
This style looks great on natural-length acrylics and is one of the most wearable red ombre nail ideas on this list. It crosses the line between everyday and special occasion beautifully.
16. Red Ombre With Rose Gold Shimmer
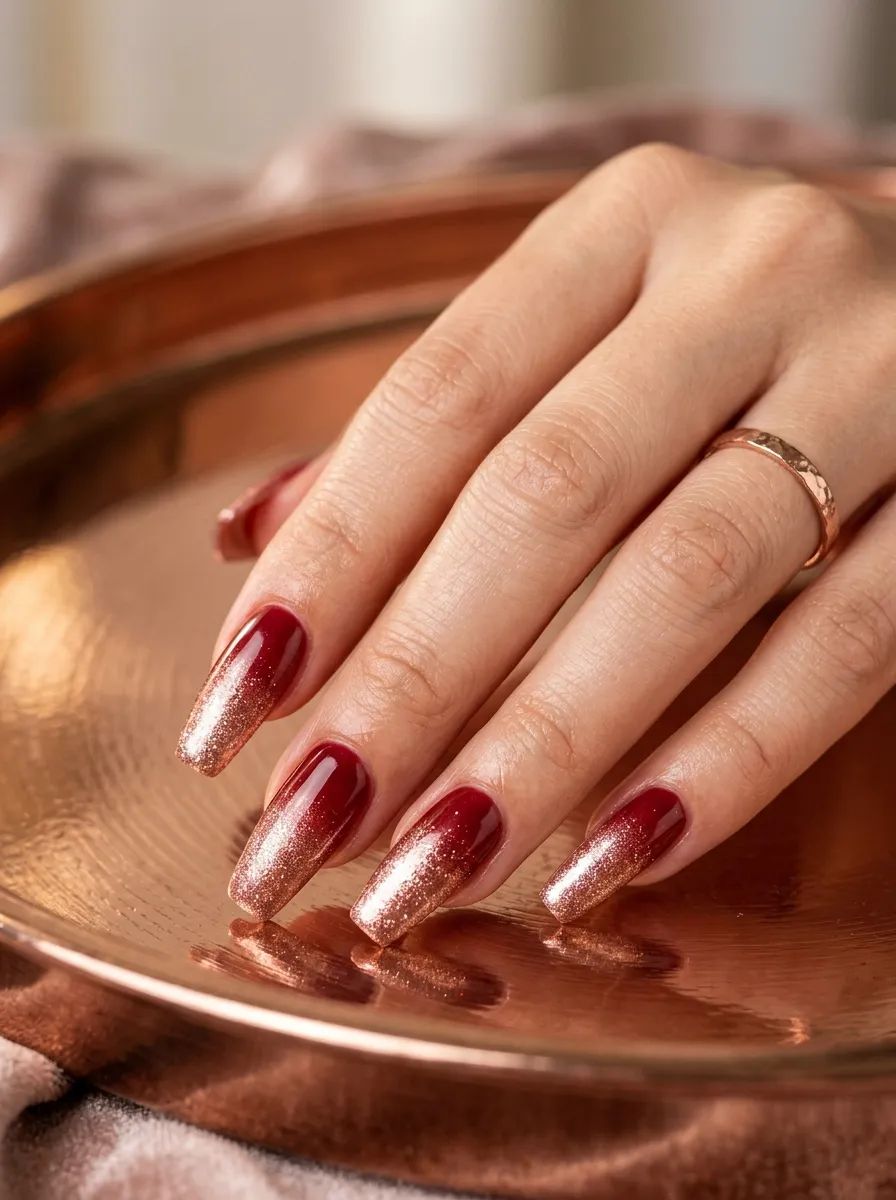
Rose gold and red share warm undertones that make them work together harmoniously. A shimmer or metallic rose gold tip over a red base feels romantic and elegant without being over the top.
This is a great date night nail idea that also works for weddings, anniversaries, and any occasion where you want to feel beautiful.
Budget tip: Rose gold shimmer eyeshadow can double as a nail powder. Press it onto a tacky gel layer near the tip for a budget-friendly shimmer ombre. You can also find rose gold shimmer nail polish at the drugstore for under $8.
Pairing tip: Use a warmer, orangey red as your base to best complement the rose gold. Cooler blue-based reds can clash slightly with rose gold tones.
Apply a glossy top coat and the shimmer will look even more luminous.
This combination is especially flattering on medium skin tones, but honestly works beautifully across all complexions. The warmth of the color palette is universally flattering and always photographs with a gorgeous, sun-kissed glow that makes your hands look radiant.
17. Ombre Red Nails With Negative Space
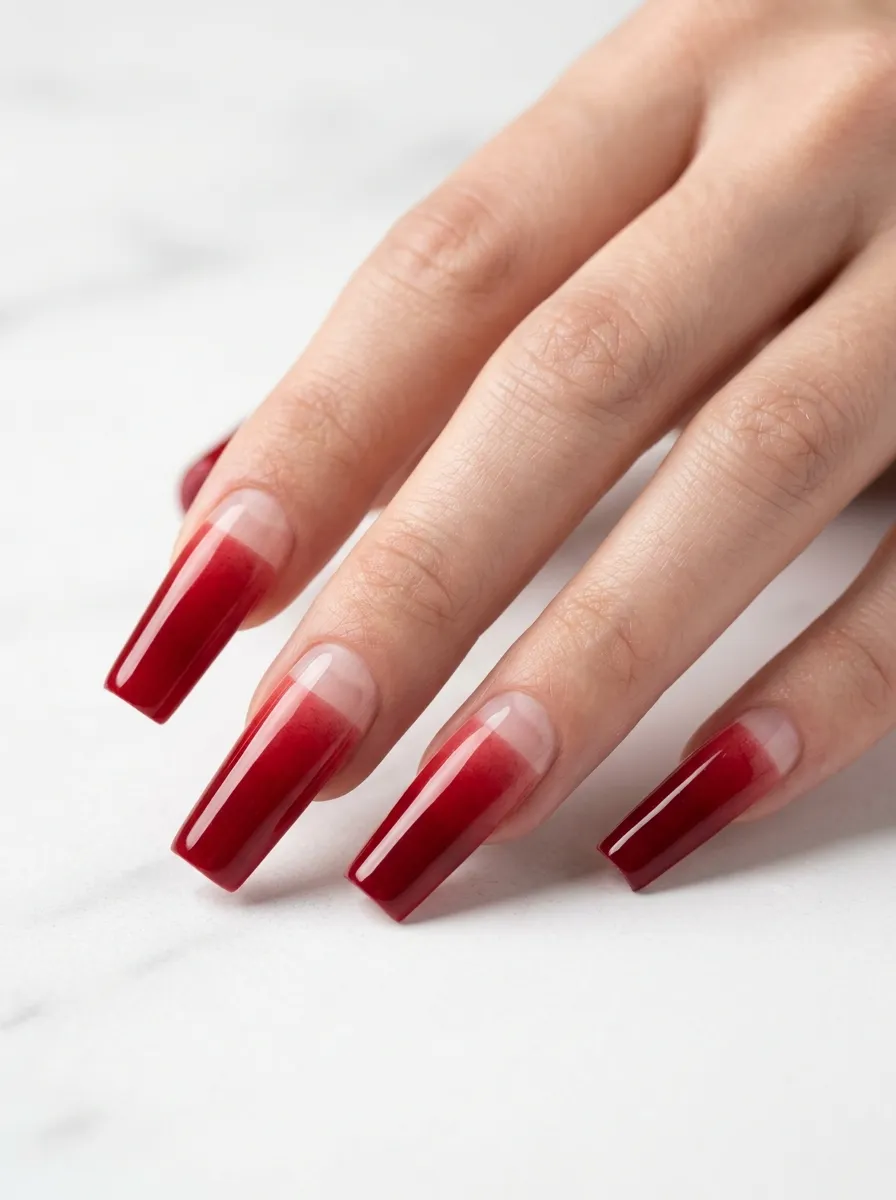
Negative space nail art uses exposed sections of the natural nail as a design element. Combined with a red ombre, it creates something graphic, modern, and genuinely original.
You leave a crescent or geometric strip near the cuticle unpainted and let the red ombre take over the rest of the nail.
The bare section looks intentional, not unfinished.
DIY method: Use nail tape or reinforcement stickers to create a clean edge near your cuticle. Apply the red ombre over the rest of the nail. Peel the tape while the polish is still wet for a sharp line.
Practice on one nail to get the tape placement right before doing the full set.
Shape options: A crescent along the cuticle works on all nail shapes. A diagonal stripe of negative space across the middle of the nail looks geometric and bold. A small triangular cutout at the base is more subtle.
This is one of those red ombre acrylic nail ideas that takes almost no extra products or skill but looks like it required a lot of thought and planning. The restraint in design is exactly what makes it so visually strong and impactful.
18. Cherry Red to Peach Ombre Nails
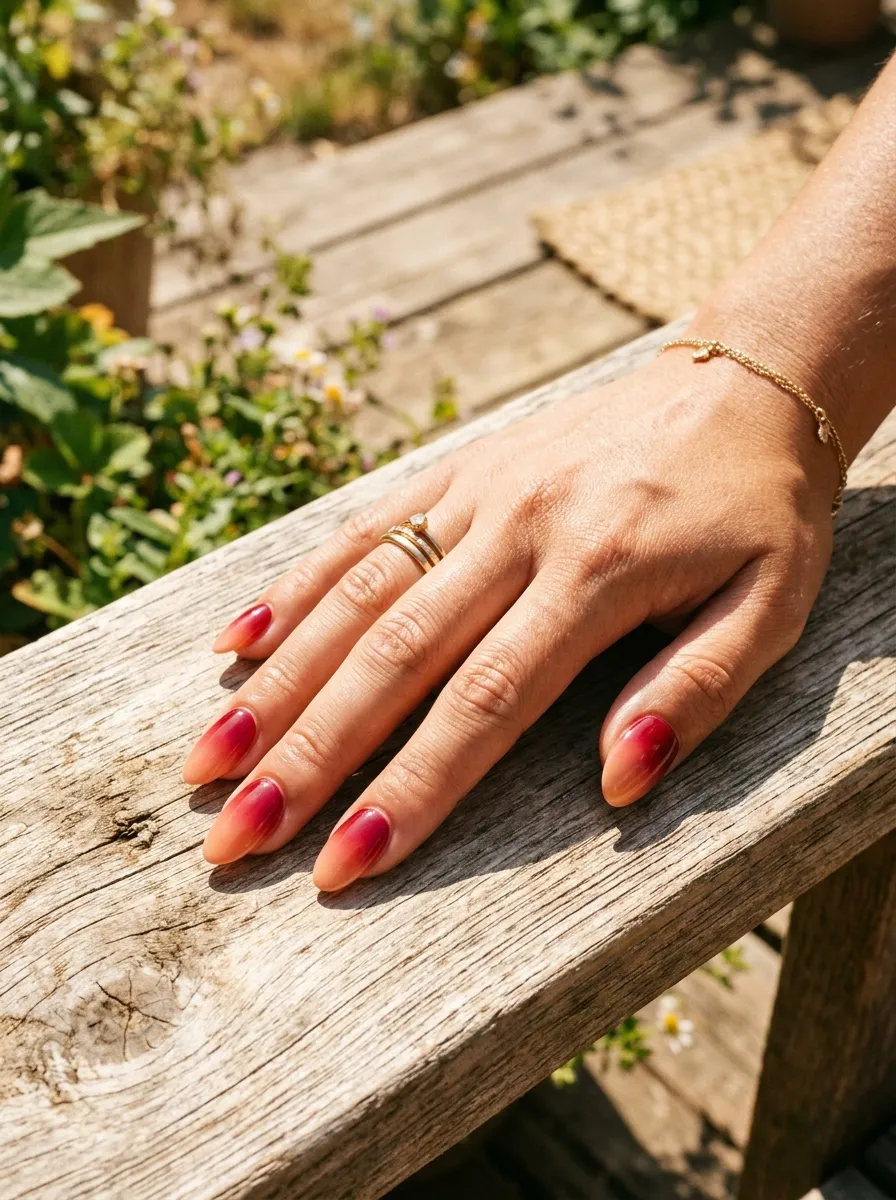
Cherry red to peach is an underrated combination that sits right in the warm spectrum. It feels like summer in nail form.
The red stays grounded and bold near the base while the peach lightens everything up at the tip. The result is something that feels bright and happy.
This suits shorter and medium nails really well because the warm tones keep everything looking fresh on a smaller surface area.
Color suggestion: Look for a true cherry red rather than a wine or burgundy for this combo. The brightness of cherry red is what makes the transition to peach feel natural.
DIY tip: Apply cherry red as your base coat. Sponge on a coral or peach tone starting at the mid-nail and concentrating at the tip. Blend the overlap in the middle.
The transition point does not need to be perfectly centered. Slightly higher or lower looks organic.
Add a glossy top coat for warmth and shine. This pairing works beautifully for summer vacations, beach trips, and any warm-weather event where you want your nails to match the energy of the season. Simple, affordable, and genuinely charming.
19. Multicolor Red Ombre (Red, Orange, Yellow)
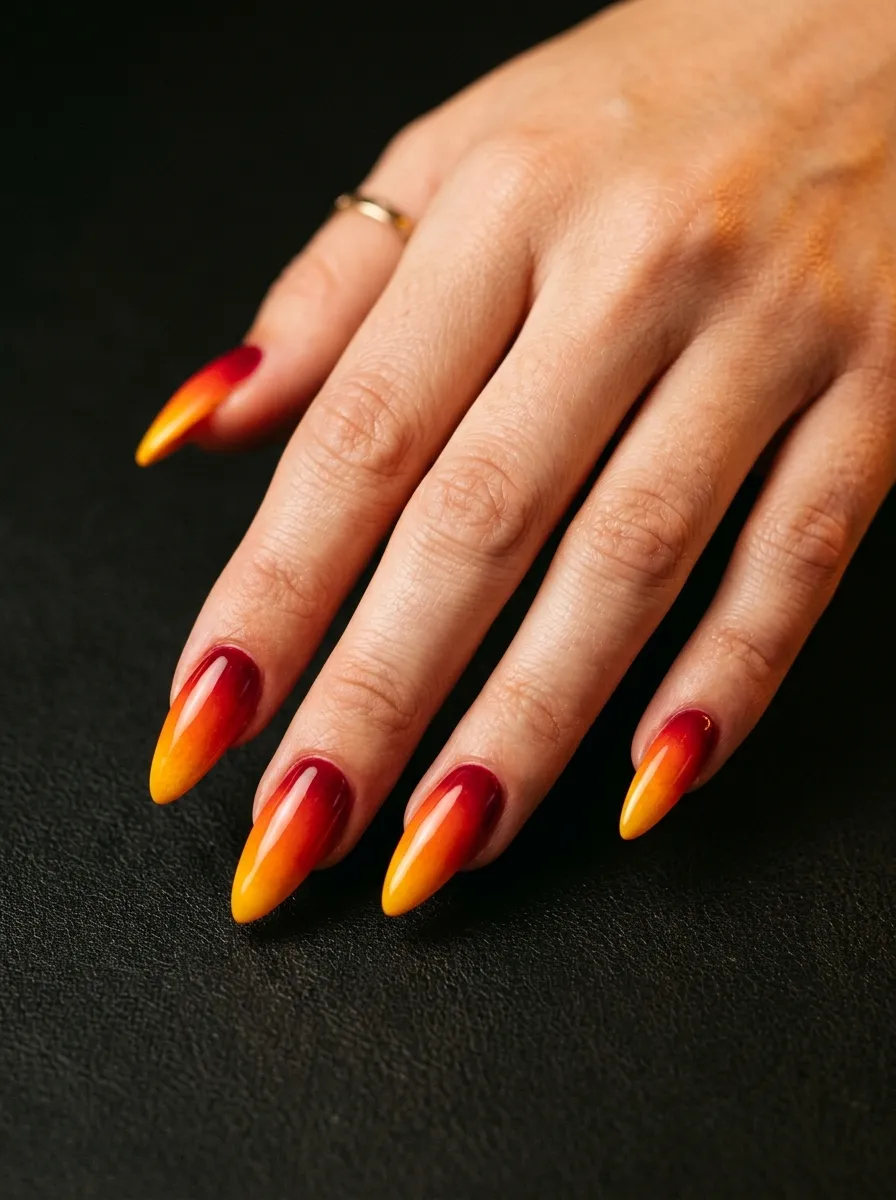
This is fire nails done as a gradient. Deep red at the base, orange through the middle, yellow at the tip. It looks like an actual flame on your fingertips.
It is bold, artistic, and completely eye-catching. This is not a subtle nail look, and that is exactly the point.
Who it suits: People who love color, love standing out, and are not afraid to commit to a statement manicure.
Three-color ombre tip: Work with one color at a time. Apply red as your base. Sponge orange into the mid-section while the red is still tacky. Add yellow at the tip. Blend each overlap with a clean sponge section.
Work fast because you want the layers to blend while they are still wet enough to merge.
This takes practice. Your first attempt may not be perfect, but even an imperfect fire ombre looks cool because the warmth of the colors always reads as intentional.
Seal with a glossy top coat. This multicolor red ombre acrylic nail idea is one of the most dramatic looks on this list and gets the biggest reactions of any nail style at parties and events.
20. Subtle Tonal Red Ombre Nails
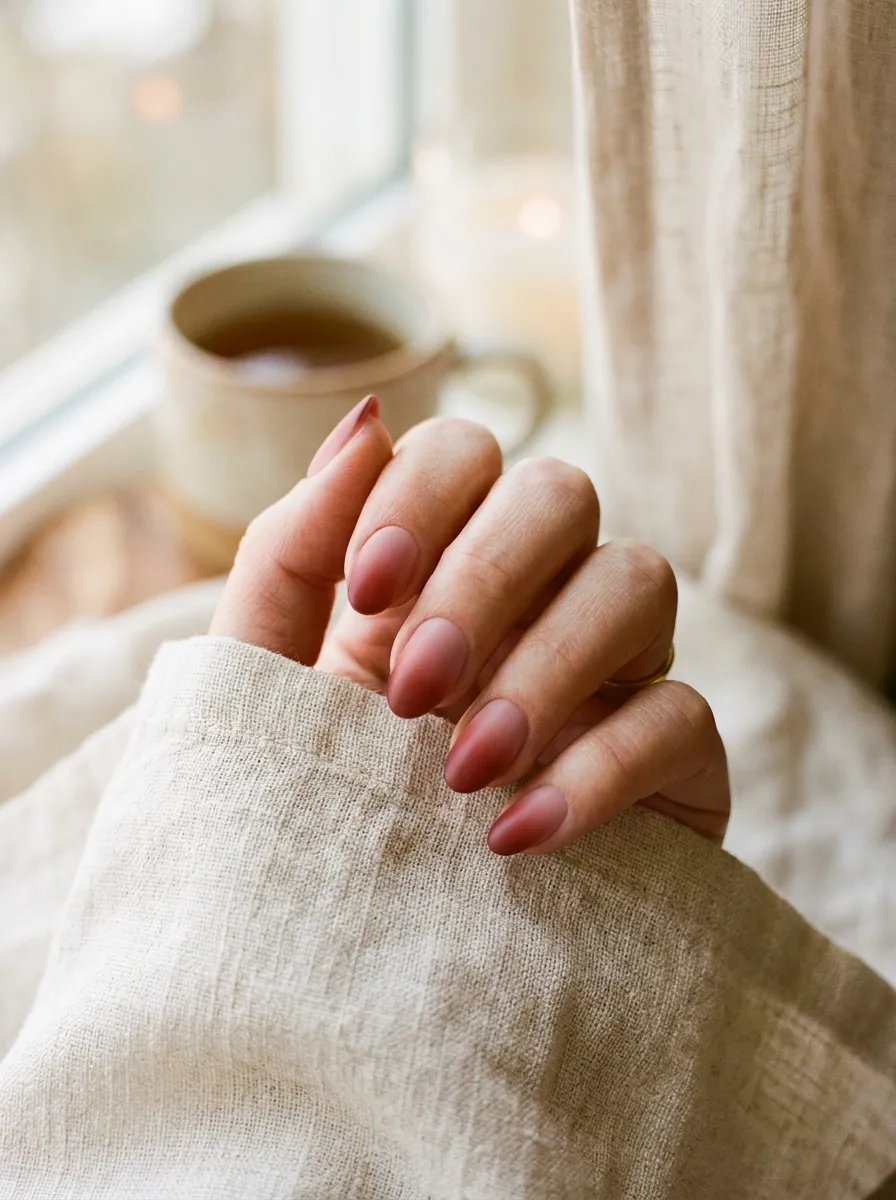
Not every red ombre needs to be bold. A tonal red ombre uses two shades of red that are close to each other on the color spectrum. The result is soft, blended, and barely noticeable until someone looks closely.
This is the most wearable version of a red ombre nail. It suits offices, formal events, and everyday wear without drawing strong attention.
Shade pairing: Combine dusty rose with muted brick red. Or try a soft coral-red with a slightly deeper cherry. The key is keeping both shades in the same color family without too much contrast.
Why it works: The subtlety is the point. It looks like your nails have incredible depth of color without screaming for attention.
At home: This is one of the easier ombre techniques because the two shades blend naturally due to their similarity. There is much less risk of harsh lines or obvious patchiness.
Apply the lighter shade as your base. Sponge the deeper shade near the tip only. One or two passes is enough.
A satin top coat instead of glossy adds to the softness of this look. Tonal ombre red acrylic nails are perfect for anyone who loves color but prefers an elegant, quieter approach to nail art.
21. Red Ombre Nails With 3D Flowers
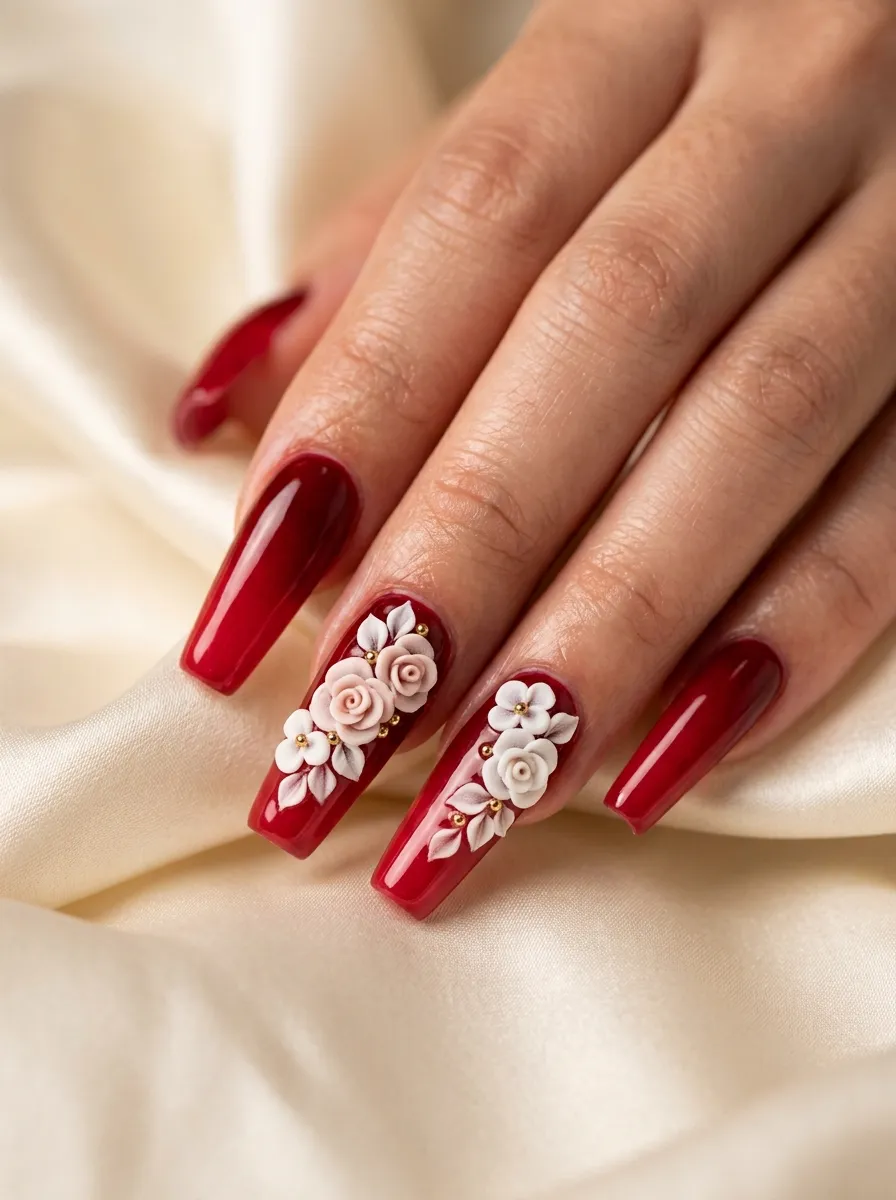
3D nail art takes any nail look from pretty to showstopping. Adding tiny raised flowers over a red ombre base creates a romantic, feminine look that feels very special.
This is a salon technique that requires acrylic powder or gel to sculpt the flowers, so it is harder to DIY without practice.
Salon tip: Book with a nail tech who specializes in nail art. Bring a reference photo of exactly what you want. 3D flowers can range from simple round dots to elaborate full petals.
DIY alternative: Pre-made 3D nail charms are available on Amazon and Etsy for very low prices, around $5 to $10 for a mixed pack. They have flat backs and press onto a tacky gel layer before sealing.
Stick to two accent nails with flowers. Doing 3D art on every nail becomes visually overwhelming.
White, blush, or gold flowers over a red ombre base look the most refined. Green leaf accents next to the flowers add a botanical detail that is very on-trend.
This is one of the most photographed styles of red ombre acrylic nails and works beautifully for weddings, proms, bridal showers, and any event where you want your hands to look like art.
22. Red Holo Ombre Nails
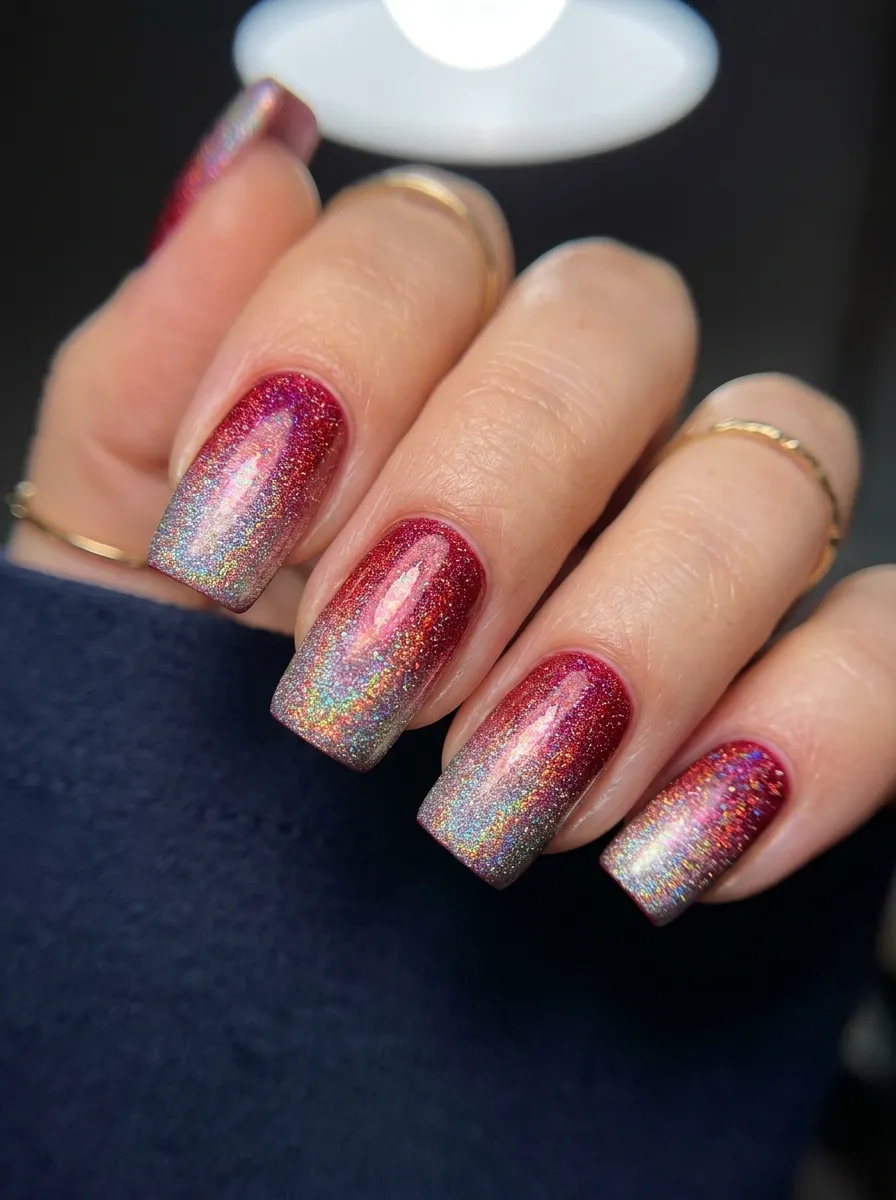
Holographic nail powder takes red nails into a completely different dimension. Under light, holo nails scatter the spectrum across the nail, creating flashes of purple, blue, pink, and gold over the red base.
It looks like something from a science fiction film and is completely mesmerizing in sunlight.
How to apply: Use a red gel base and cure fully. Take a silicone applicator and rub holo powder over the cured gel’s inhibition layer. The powder bonds to the tacky surface. Wipe the excess and seal with a no-wipe top coat.
Holo powder is around $8 to $12 per pot online. A small amount of powder covers a full set of nails with product to spare.
Tip: The more you buff the powder, the stronger the holo effect. Use circular motions with consistent pressure.
For an ombre, apply the holo powder only on the tip half of the nail. The shift from solid red at the base to holographic red at the tip creates an incredible dimensional effect.
This is one of the most photographed red ombre nail ideas on social media right now because the camera catches the light scatter in ways that look almost unreal.
23. Red Ombre Press-On Nails
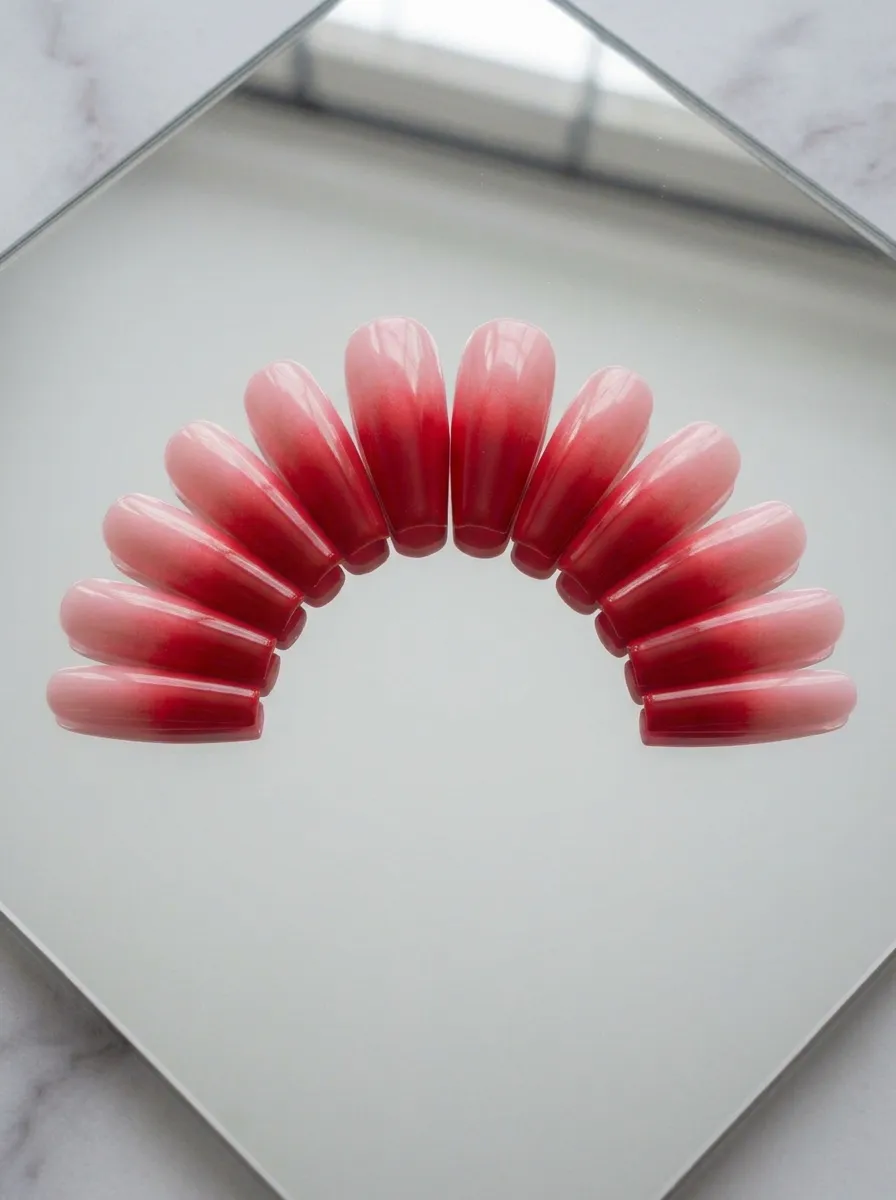
You do not need a salon or even nail polish to get red ombre nails. Press-on nails have come a very long way and many brands now offer stunning pre-designed ombre sets.
They apply in minutes and last up to two weeks with proper prep.
Best brands: Impress by Kiss, Static Nails, and OhMyNails on Etsy all offer red ombre options. Prices range from $8 to $30 depending on brand and design quality.
How to make press-ons last: Clean your natural nails with alcohol before applying. Push back and remove cuticles. File the surface lightly for adhesion. Apply the press-on firmly and hold each nail for 30 seconds.
Avoid soaking your hands in water for the first 24 hours after application.
Custom option: Buy plain red press-ons and create your own ombre at home using sponge and a lighter shade on the tips. Seal with top coat and let dry fully before wearing.
Press-on red ombre nails are the best budget solution for a special event. They take under 15 minutes, look salon-quality when applied correctly, and cost a fraction of professional acrylics.
24. Red Ombre Nails With Rhinestone Accents
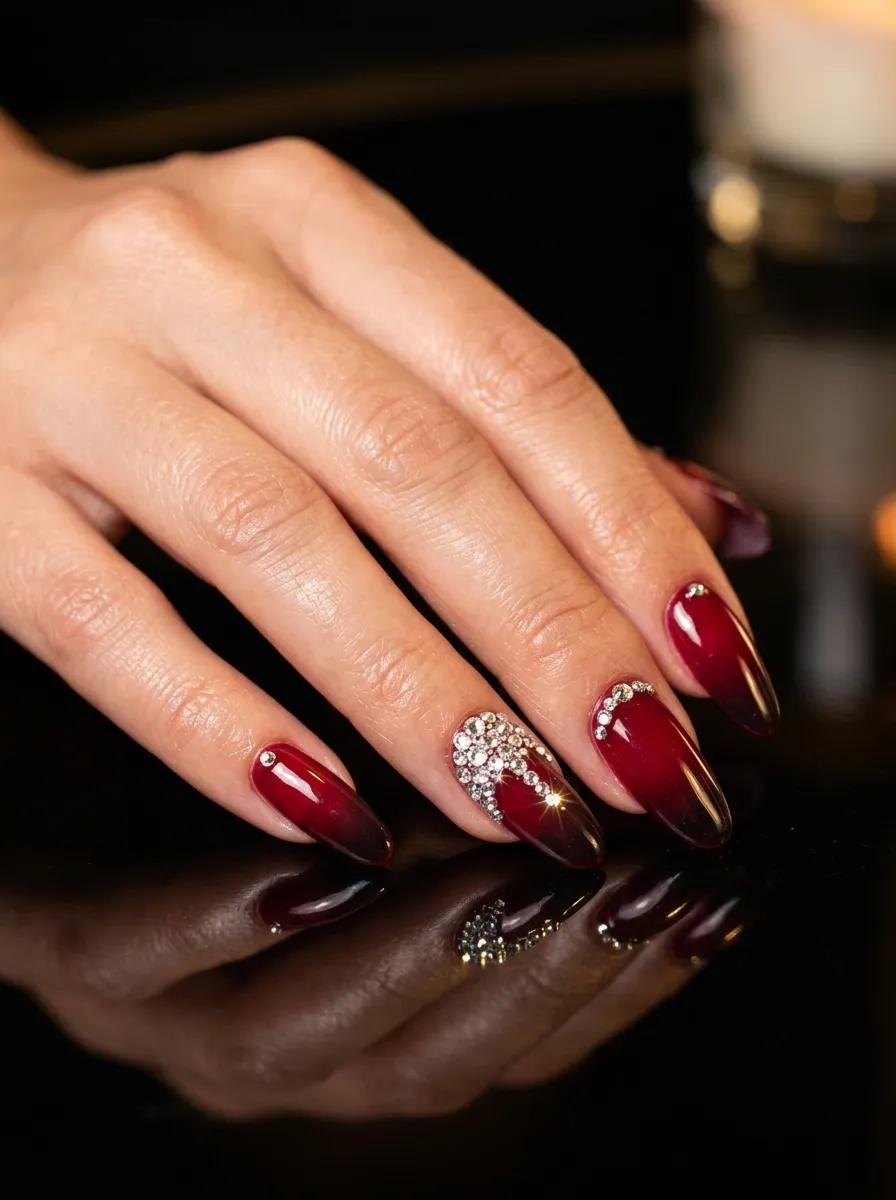
Rhinestones are one of the fastest ways to make any nail look feel more glamorous. On top of a red ombre base, they look intentional, sparkly, and expensive.
You do not need to cover every nail in stones. A cluster of small clear or red rhinestones on one or two accent nails is enough.
Placement ideas: A crescent arc of rhinestones along the cuticle. A cluster at the base of the nail. A single large stone centered at the tip.
Each placement creates a different visual effect, from delicate to bold.
How to apply: Use a dotting tool or toothpick with a small amount of nail glue or tacky gel to pick up each stone and place it precisely. Seal with a thick top coat, making sure the top coat covers and encases each stone.
Without sealing, rhinestones fall off within days.
Budget tip: Rhinestone packs with hundreds of mixed sizes are available for $5 to $8 on Amazon. You get enough stones for dozens of nail sets from a single pack.
Red ombre with rhinestones is the top choice for special events like weddings, proms, and holiday parties where you want your nails to look polished and eye-catching all evening.
25. Red Ombre Almond Nails
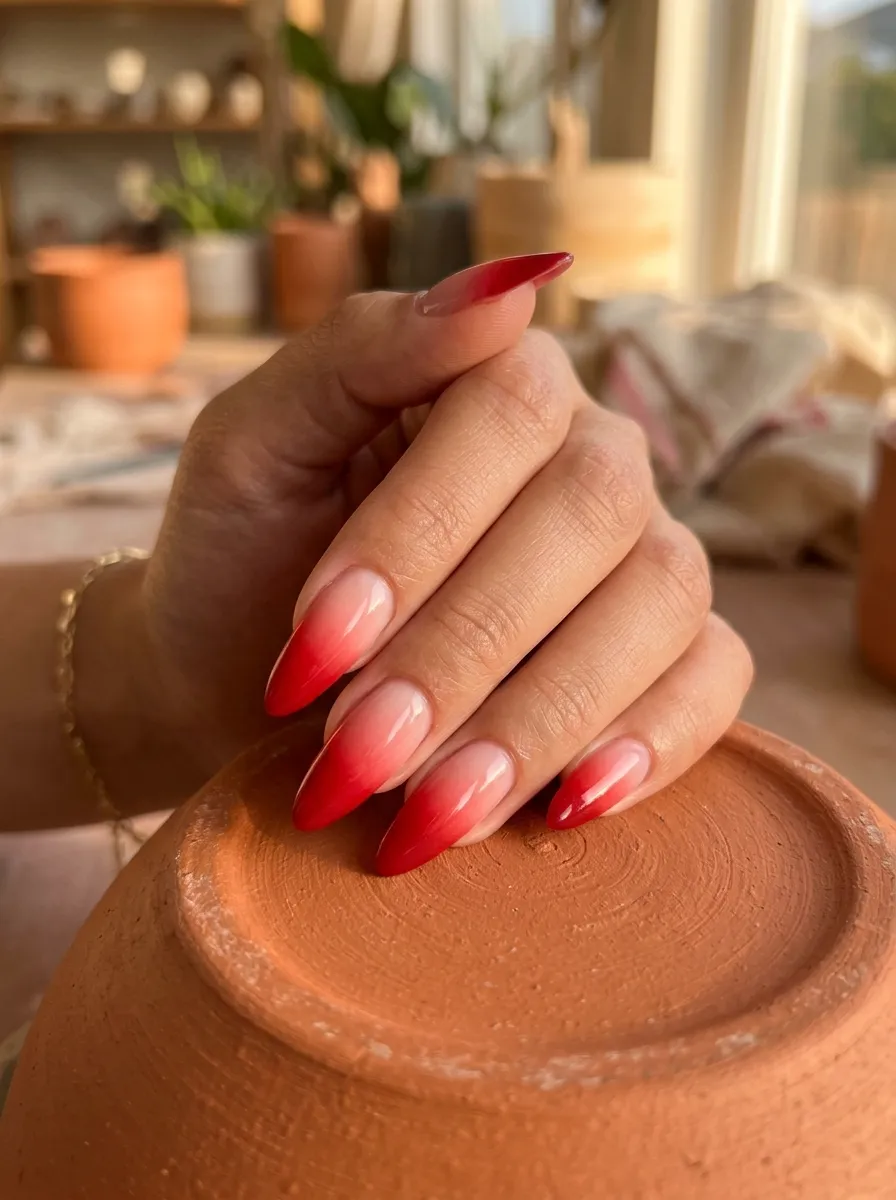
Almond nails are the most flattering nail shape for ombre because the tapered tip creates a natural point where the darker color can concentrate dramatically.
Every ombre variation looks better on almond nails. The shape does a lot of the visual work.
If you are unsure which nail shape to choose for your red ombre set, almond is almost always the right answer.
Length guide: Almond nails work best at medium to long lengths. Too short and you lose the tapered point that gives the shape its character.
At the salon: Ask for an extended almond tip when getting your acrylics applied. Make sure the taper is even on both sides for a symmetric look. An asymmetric almond tip throws off the whole set.
Ombre pairing: Any red ombre combination on this list works beautifully on almond nails. Red to nude, red to pink, reverse ombre, or red to glitter all look their absolute best on this shape.
A glossy gel finish on almond red ombre nails looks like something straight from an editorial shoot and is one of the most consistently beautiful nail combinations available.
Red ombre nails have so much range. From subtle tonal fades to glitter explosions, from short practical nails to long dramatic stilettos, there is a version of this look for every person, every budget, and every occasion. You do not need expensive products or a professional salon to pull off most of these ideas. A sponge, two nail polishes, and a bit of patience are enough to create something genuinely beautiful at home. Start with one or two ideas that feel most like your style and build from there. Once you try sponge ombre for the first time, you will realize how approachable it is. Pick your favorite look from this list, gather your supplies, and give your nails the red moment they deserve.