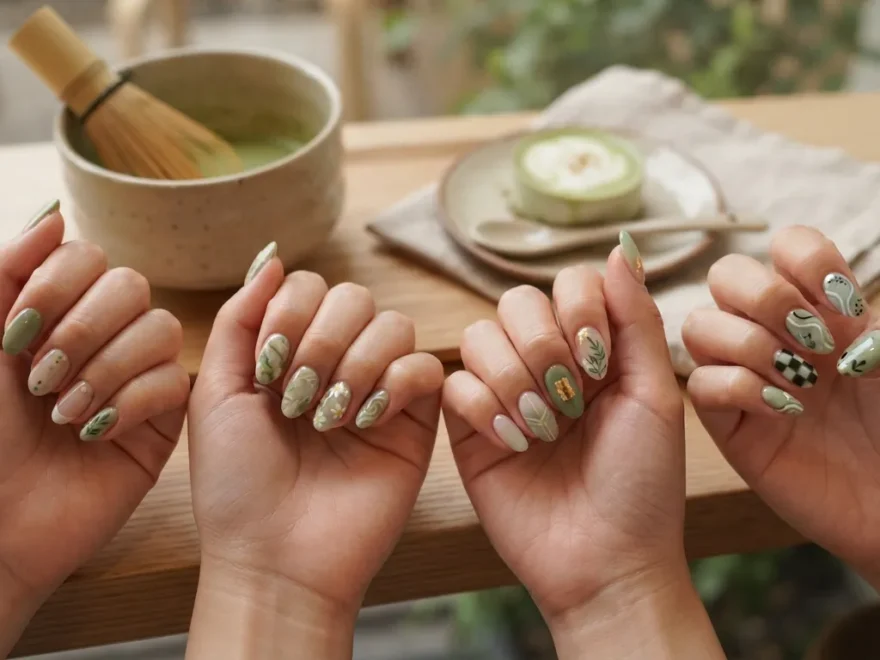
Matcha green has moved from your morning latte to your nail polish bottle, and it makes sense. This soft, earthy shade feels calm the moment you look at it. It pairs with almost any skin tone, works for every season, and never feels loud or overdone. Whether you paint your own nails at home or bring reference photos to your local salon, matcha green gives you a manicure that looks put together without trying too hard. Below are 28 matcha green nail ideas you can copy this week, plus small tips to keep the whole thing budget friendly. If you’re also exploring Watermelon Nail Art Ideas, juicy pink and green color combinations, playful seed details, fruity accent nails, and vibrant summer-inspired designs can help you create a fun, refreshing manicure that’s perfect for warm-weather occasions.
1.Simple Matcha Green Base Coat
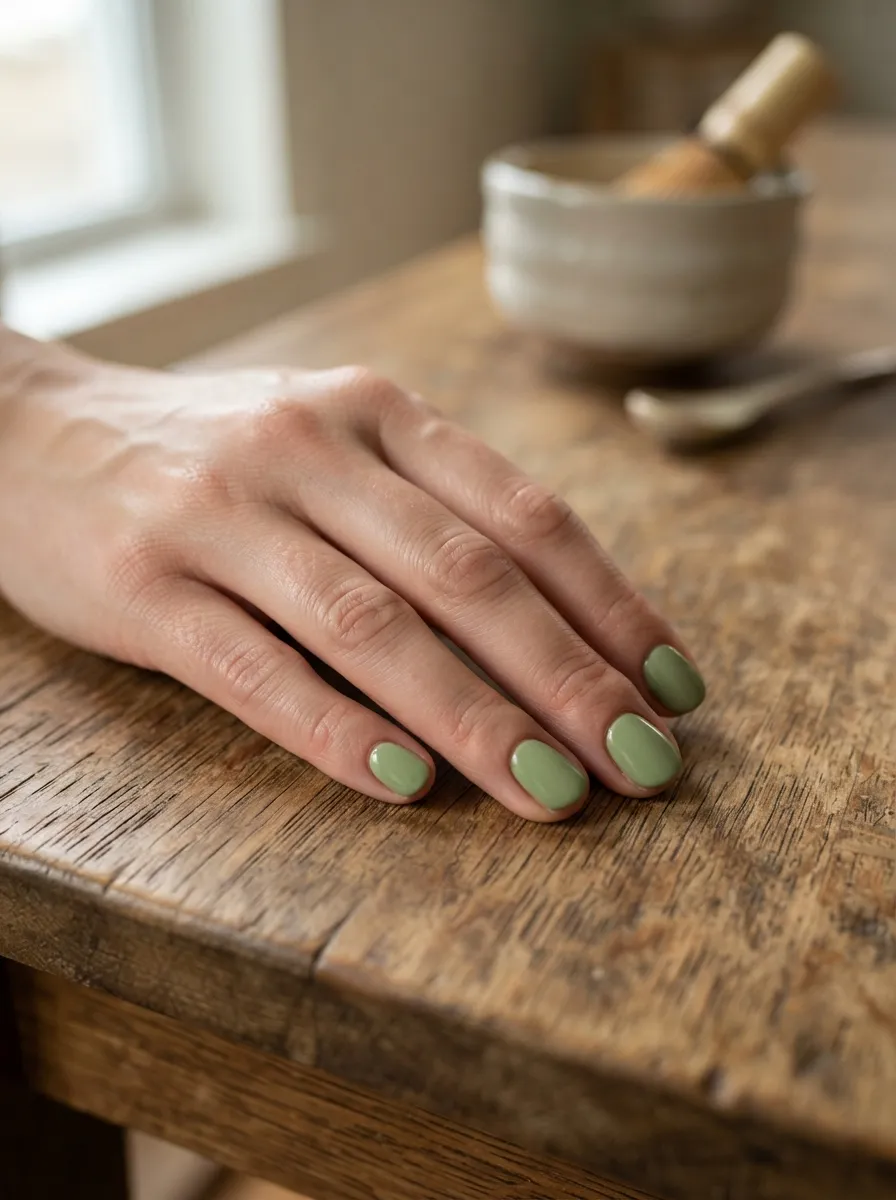
Sometimes one clean color is all you need. A single coat of matcha green on short, round nails gives you a look that works for the office, brunch, or a quiet Tuesday. Pick a creamy formula so the color goes on smooth without streaks. Two thin coats usually beat one thick coat. Thin layers dry faster and last longer without chipping. If you are painting at home, use a small fan or cold air setting on a hair dryer to speed up drying time. A budget tip: drugstore matcha shades from brands like Essie or Sally Hansen often look just as rich as salon polish. Finish with a glossy top coat for shine, or go matte if you want a softer, dustier look. This style is forgiving for beginners because small mistakes barely show on a solid color. It also grows out gracefully, so you get more days between touch ups. Keep a cotton swab dipped in remover nearby to clean up any polish that lands on your skin while you paint.
2.Matcha Green French Tips
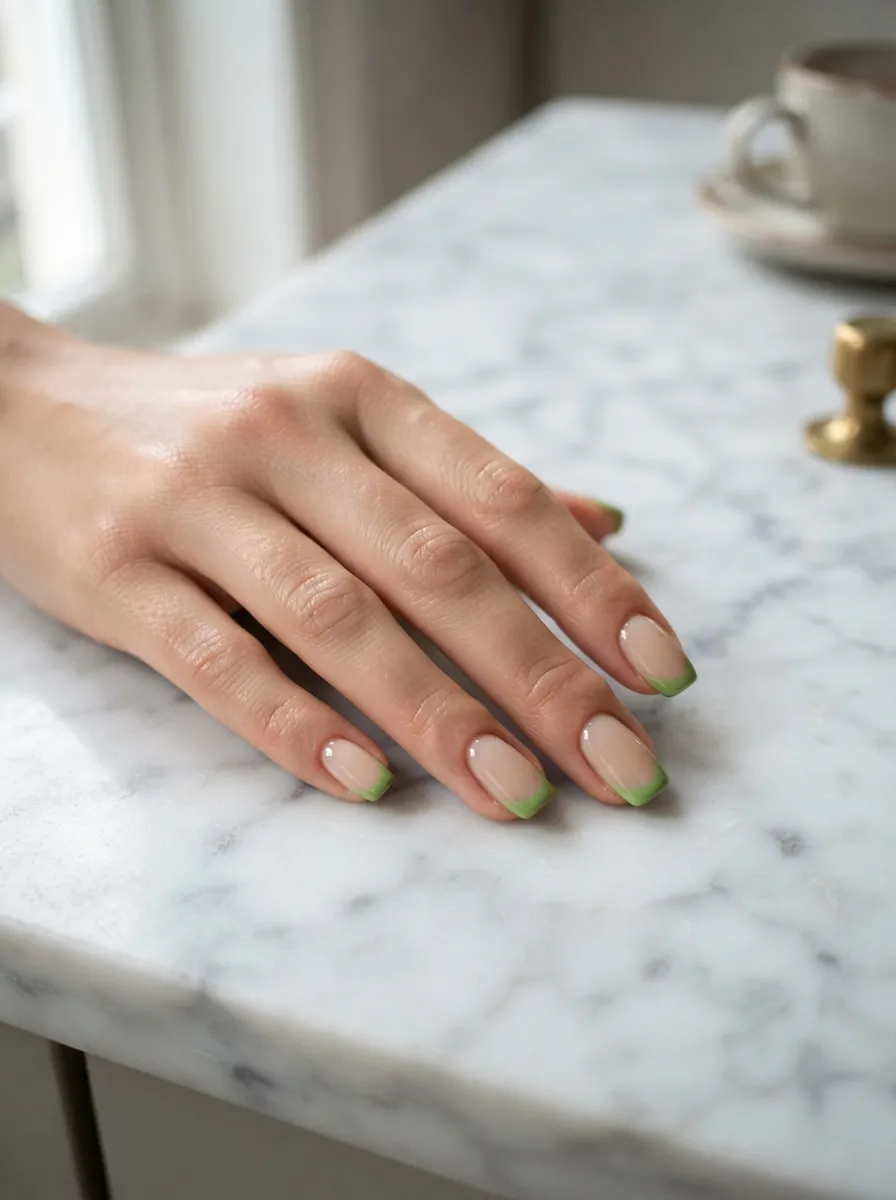
The French manicure gets a calm update when you swap the white tip for matcha green. Start with a sheer pink or nude base color. Then use a thin nail art brush to paint just the tip in matcha green. If freehand feels tricky, French tip guide stickers cost only a few dollars and make straight lines easy. Practice on paper first if you are new to this. Short square or almond shaped nails show off this style well. The contrast between the soft base and the green tip keeps things interesting without being busy. This look works for weddings, job interviews, and everyday wear alike. A budget hack is to use one bottle of matcha polish for both this style and a solid color look, so you get two manicures from one purchase. Seal everything with a strong top coat since tips tend to wear down first from typing and daily tasks. Reapply the top coat every few days to keep the edge crisp and clean looking.
3.Ombre Matcha Fade
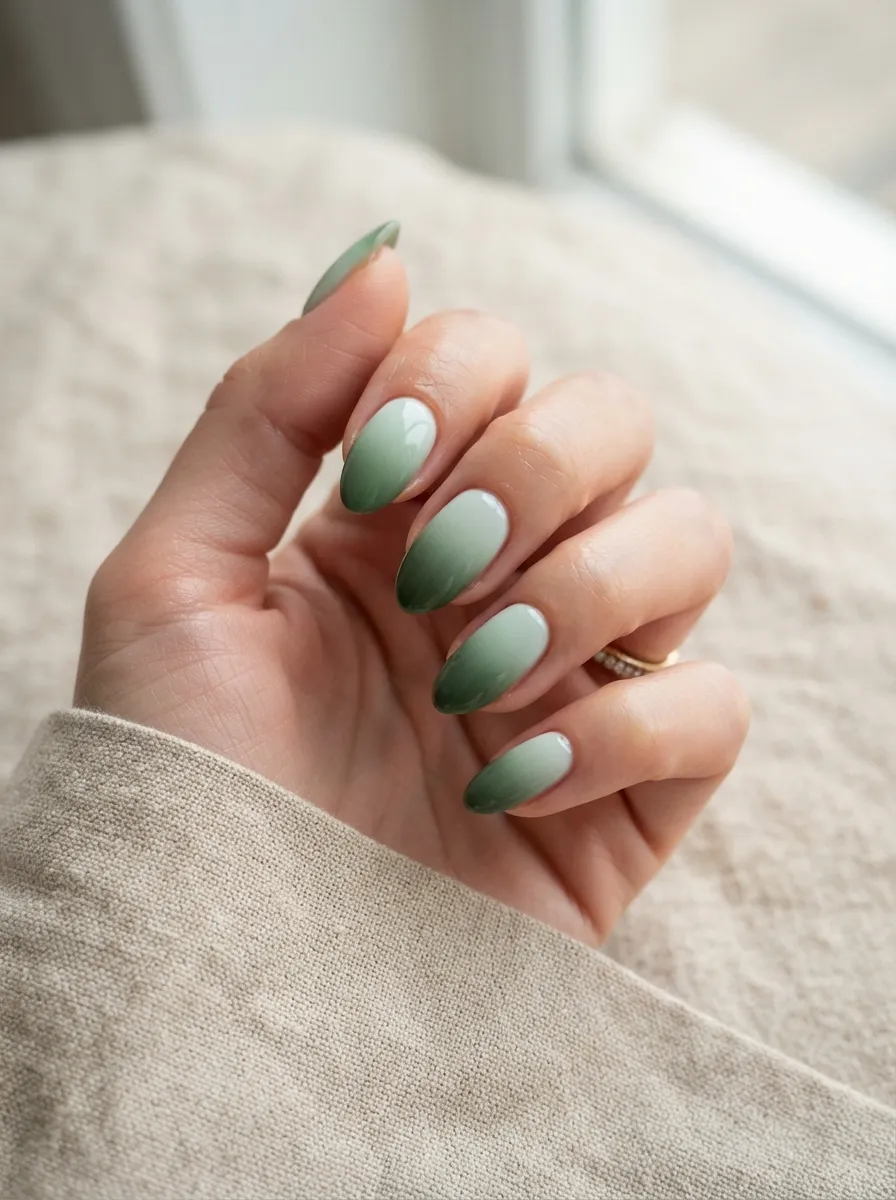
An ombre fade adds movement to a manicure without adding extra colors. Pick two or three shades of green, from a light mint to a deep matcha, and blend them across each nail. A makeup sponge makes this easier than a brush. Dab the polish onto the sponge, then press it onto the nail in sections. Wipe the sponge clean between colors so they stay separate. Let each layer dry a little before adding the next dab, then blend the middle line where the two shades meet. This technique takes practice, so try it first on a paper nail wheel from the beauty supply store. Those cost very little and let you test the fade without wasting real polish. Once you get the blend right on paper, moving to your actual nails feels much easier. This style photographs beautifully and works well for special occasions like graduations or spring weddings. Finish with a glossy top coat to make the gradient pop under light.
4.Matcha Green with Gold Accents
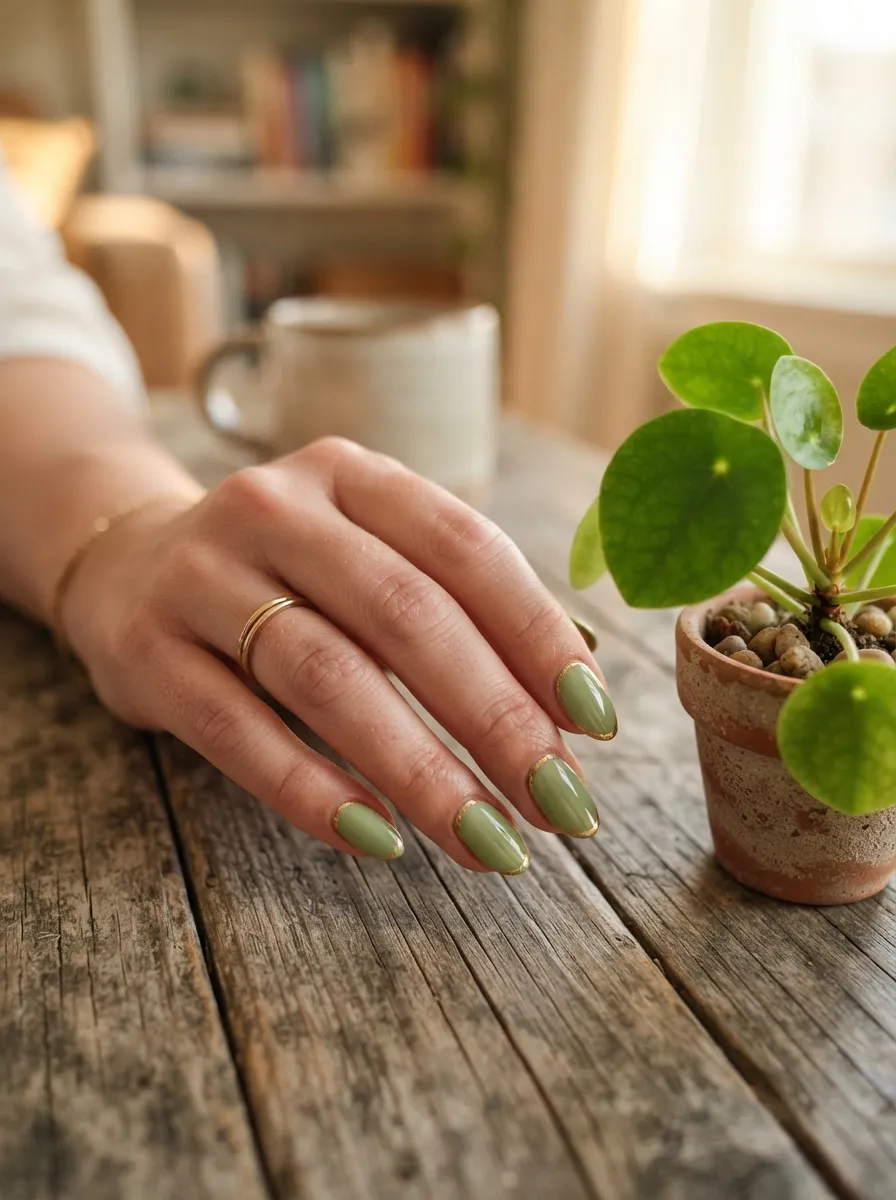
Gold and green have been paired in design for centuries, and this manicure proves why. Paint your nails a full matcha green as the base. Once dry, add a thin gold line near the cuticle using a striping brush or a gold nail art pen. These pens are widely available online for a small price and are reusable for months. You can also press small gold foil flakes onto wet top coat for a scattered, sparkly effect instead of a clean line. This style feels dressed up without needing rhinestones or heavy embellishment. It works well for holiday parties or date nights. Keep the gold detail limited to one or two nails if you want a more toned down version, or add it to every nail for a fuller look. A budget tip is to buy a small gold striping tape roll instead of paint, since tape gives you clean edges instantly and can be reused across several manicures. Seal the gold detail with top coat so it does not lift or peel early.
5.Matte Matcha Green Nails
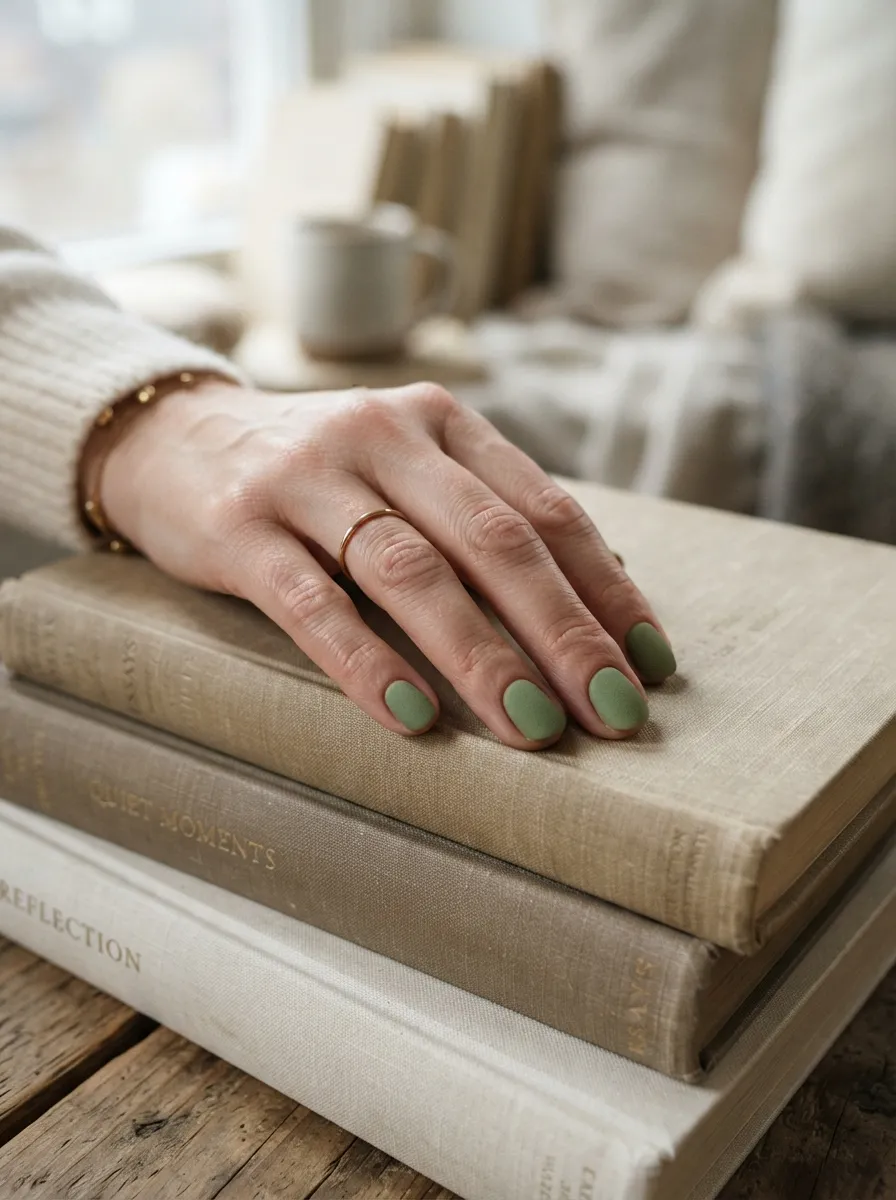
Matte polish changes how a color reads on the nail. Matcha green loses its shine and takes on a dusty, velvet like look that feels calm and grounded. Most brands sell a matte top coat separately, and one small bottle can turn any glossy polish matte in seconds. This means you do not need to buy a whole new set of matte polishes. Just apply your matcha green as usual, let it dry fully, then brush on the matte top coat. Give it a few minutes before touching anything, since matte formulas can be tacky at first. This style hides small imperfections better than glossy polish, which makes it a good pick for beginners. It also pairs nicely with simple gold rings or a plain watch, since the matte finish does not compete with jewelry. Keep in mind matte nails chip a bit faster, so touch up the tips every few days with a small dab of top coat. This look works well for fall and winter when softer textures feel more fitting.
6.Matcha Green Almond Shape
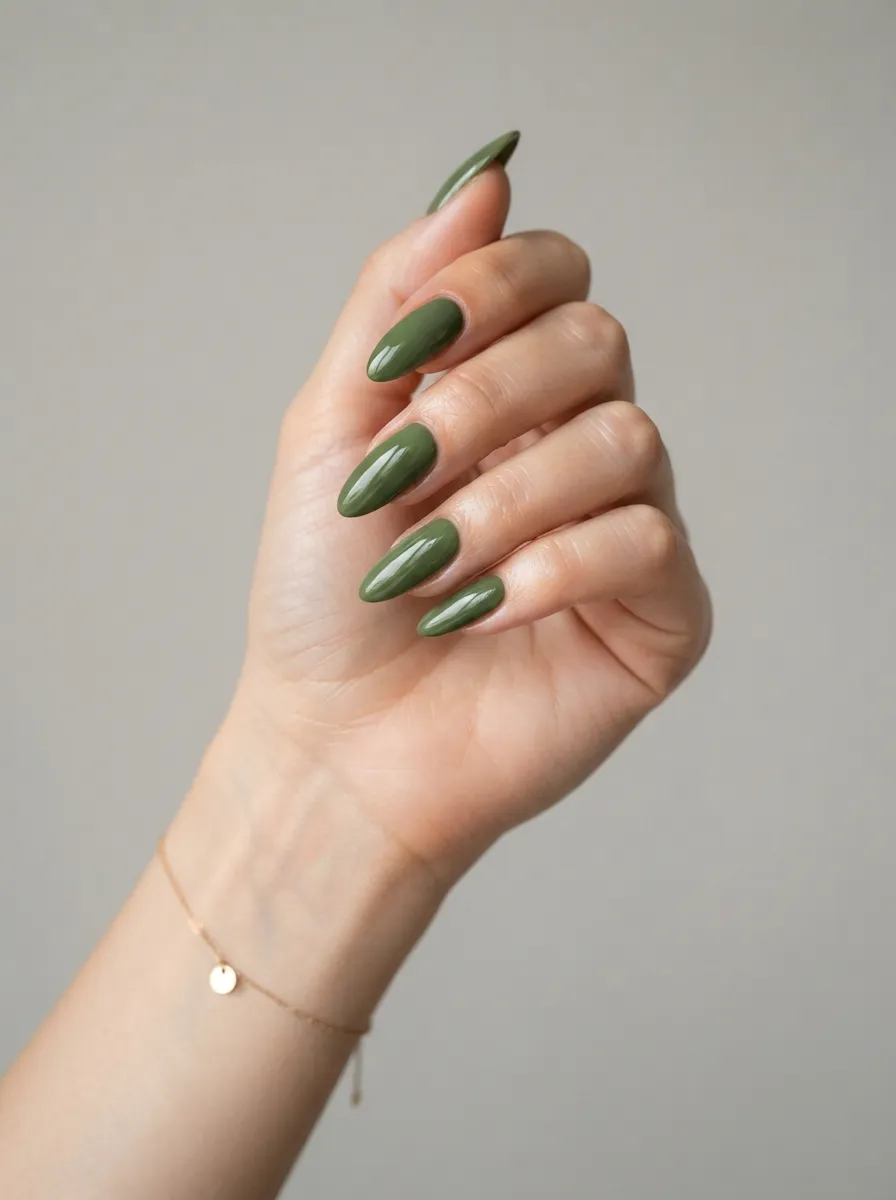
Shape changes everything about how a color looks. Almond shaped nails taper at the tip, giving fingers a longer, softer appearance. Matcha green on this shape feels elegant without being flashy. If you file your own nails, work slowly and file in one direction to avoid weak spots. Start from the side and curve the file toward the center to build the almond point gradually. This shape works best on medium to long nails, so give yourself a few weeks of growth before attempting it if your nails are currently short. Press on nails are a budget friendly shortcut if you want the almond shape without waiting. Many sets come pre shaped and cost less than a single salon visit. Paint them matcha green before applying, or buy a pre painted set if you are short on time. This look pairs well with simple hairstyles and minimal makeup, letting the nails be the standout detail. Keep cuticles moisturized so the almond shape looks clean at the base.
7.Short Square Matcha Nails
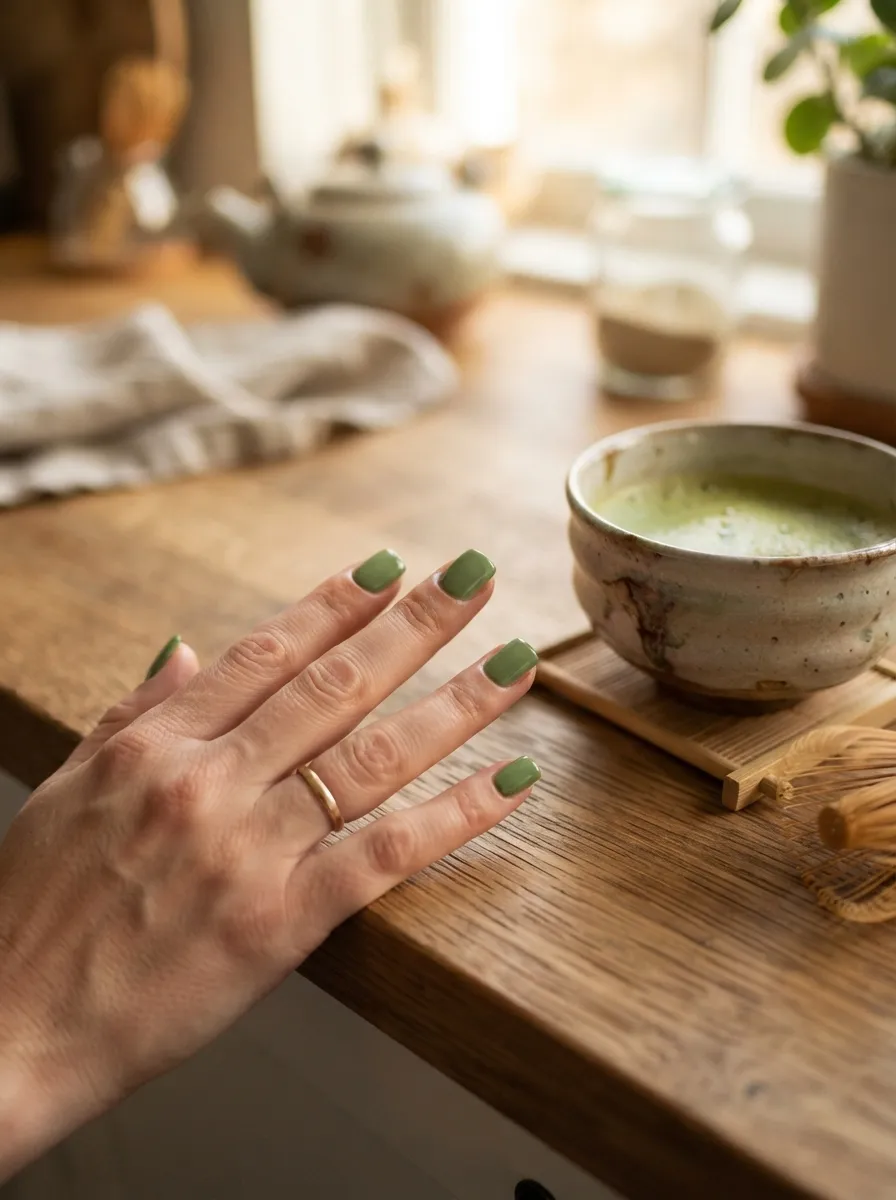
Short square nails are practical and still look polished in matcha green. This shape works well if you type a lot, cook often, or just prefer low maintenance nails. File the sides straight and keep the corners slightly rounded so they do not catch on fabric. A solid matcha green coat on this shape reads clean and modern. Two coats give the best color payoff without looking thick. This style is a good pick if you are new to painting your own nails, since the short length makes it easier to control the brush. It also means less polish is needed per manicure, which helps stretch a bottle further. Add a coat of clear top coat every two to three days to keep the shine going and prevent chipping. This shape and color combination suits everyday errands, work meetings, and casual outings equally well. If you want a small twist, paint just the ring finger a slightly darker green for subtle contrast without extra effort.
8.Matcha Green Marble Swirls
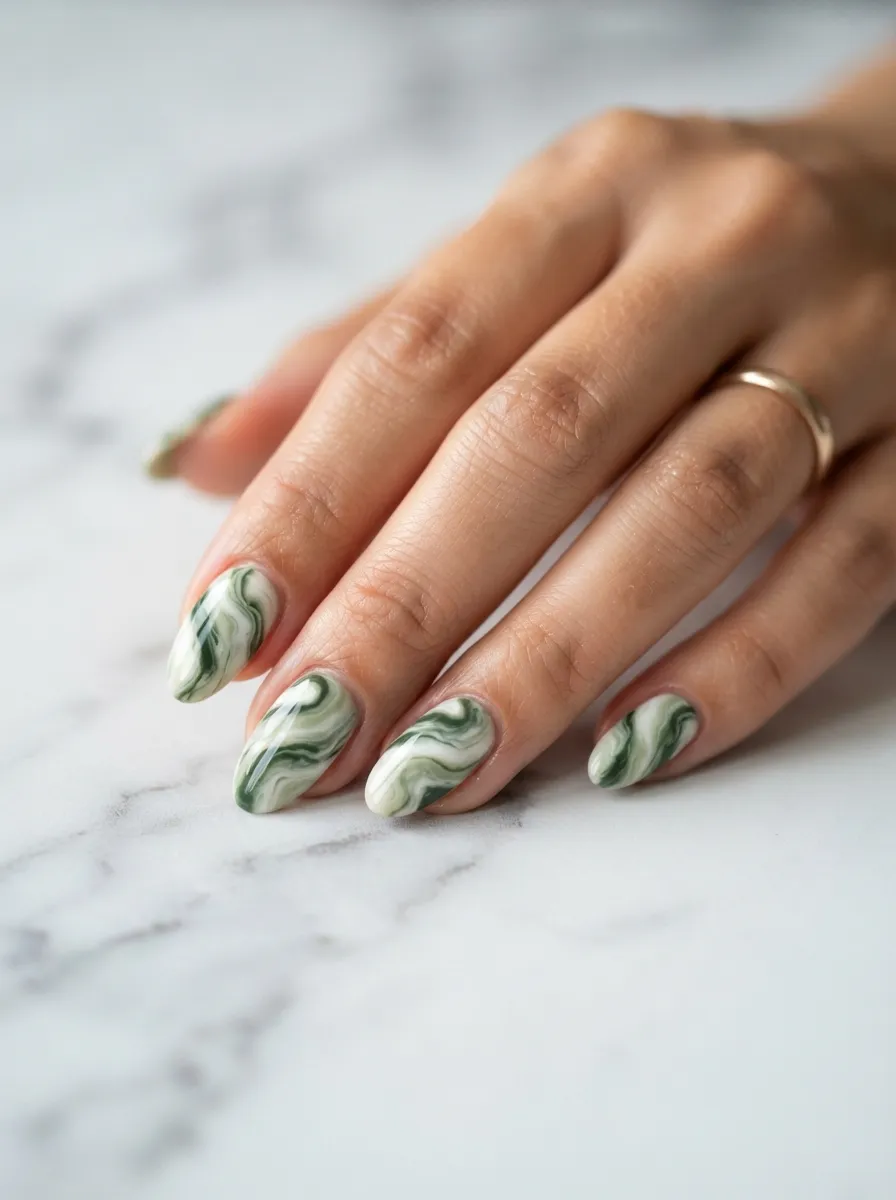
Marble nails look complex but the technique is simpler than it seems. Drop small dots of matcha green and white polish onto a plate or piece of parchment paper. Use a thin brush or toothpick to swirl the colors together, creating a marble pattern. Dip your nail into the swirl to transfer the design, or paint the pattern directly onto a base coat if you prefer more control. This method does use more polish than a solid manicure, so keep a paper towel nearby for cleanup and work over a tray to catch drips. Practice the swirl technique on paper first if you are nervous about wasting polish. Each nail will look slightly different, which is part of the charm of this style. A budget tip is to use polish you already own instead of buying new colors, since even small amounts go a long way in marbling. Seal with a thick top coat to smooth out any texture from the swirl process. This look works well for anyone who wants a manicure that feels artistic without needing salon level skill.
9.Matcha Green and White Stripes
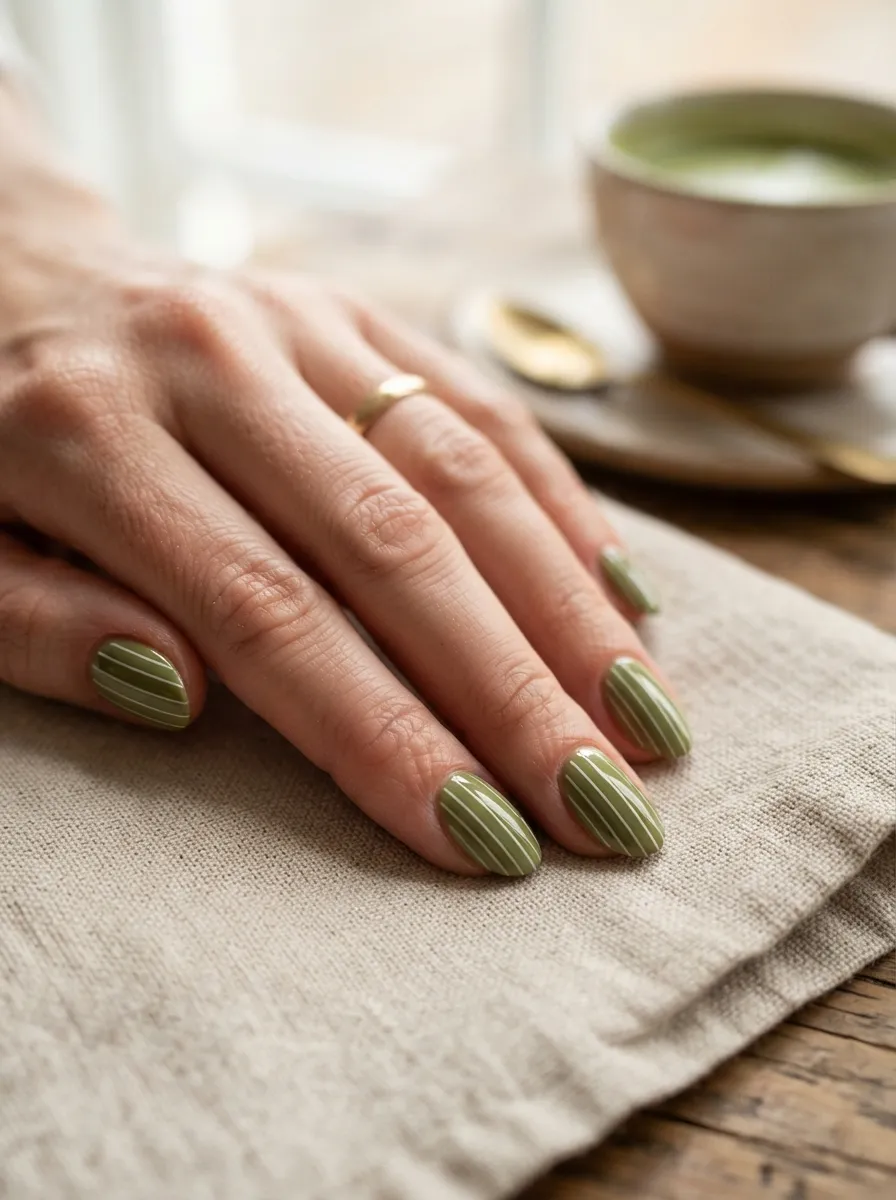
Stripes add structure to a simple color without much extra work. Paint your base coat of matcha green first and let it dry completely. Then use nail art tape or a striping brush to add thin white lines across each nail. Vertical lines make nails look longer, while horizontal lines create a playful, graphic effect. Nail striping tape is inexpensive and comes in rolls that last through many manicures. Simply press the tape down, paint over the exposed sections, then peel the tape away before the polish fully dries for the cleanest edge. This style suits nails of any length and shape, though shorter nails may only fit one or two stripes comfortably. It works well for spring and summer when graphic, playful patterns feel more fitting. If stripes feel like too much on all ten nails, try it as an accent on just your pinky and ring finger while keeping the rest solid matcha green. This keeps the look balanced and easy to maintain.
10.Glossy Matcha Green Coffin Nails
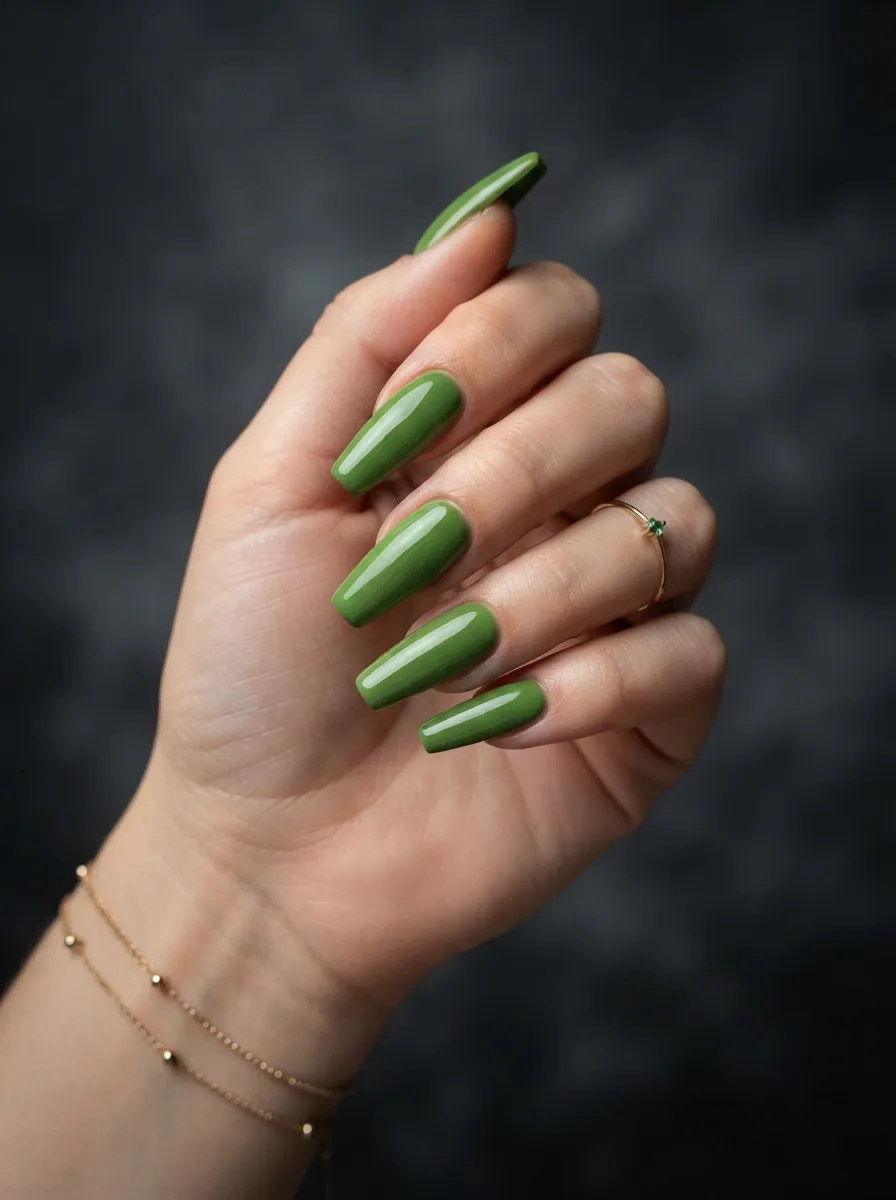
Coffin shaped nails, also called ballerina nails, have straight sides and a squared off tip. This shape gives matcha green a bold, elongated look. A high shine top coat makes the green almost glassy, which photographs beautifully. This style usually needs some length, so acrylic or gel extensions may be worth considering if your natural nails are short. That said, press on coffin nails are a much cheaper alternative and can look just as sharp for a fraction of the price. Many sets come already shaped, so all you need to do is size them to your nail bed and apply with adhesive tabs or glue. This look pairs well with statement rings since the long shape draws the eye. Keep in mind coffin nails need a bit more care during daily tasks, since the corners can catch on things. If you are prone to breakage, keep the length a little shorter while still keeping the squared tip shape. This gives you the coffin look with less risk of snapping a nail.
11.Matcha Green with Tiny Daisies
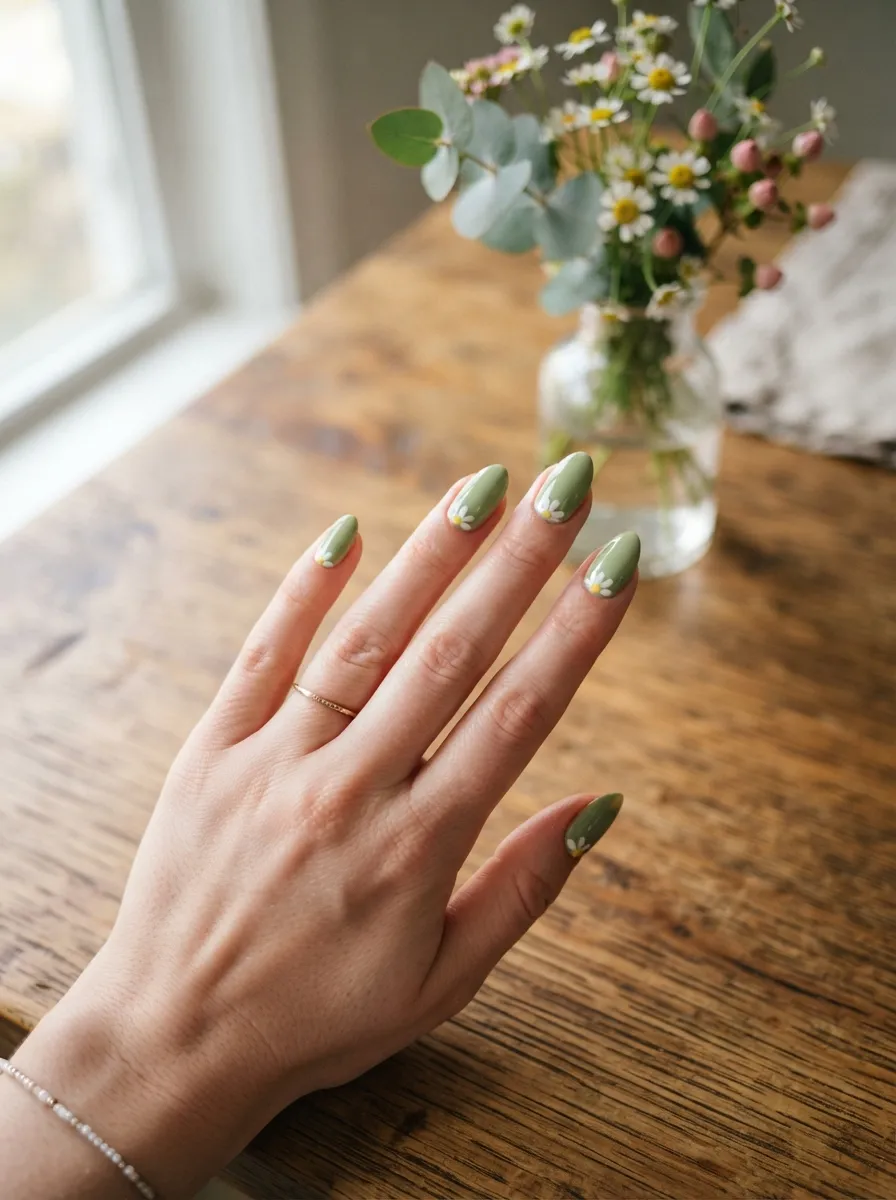
Small floral details bring a soft, cheerful touch to matcha green nails. Paint your base coat first and let it dry fully. Then use a thin brush or a dotting tool to create tiny daisies near the cuticle. Five small white petals around a yellow center is all it takes. Dotting tools cost very little and make this technique far easier than trying to freehand each petal. If you do not own one, the round end of a bobby pin works as a substitute in a pinch. Keep the daisies small and simple rather than trying to make them perfect, since a slightly imperfect flower still reads as charming and handmade. This style works well for spring and early summer. It also makes a nice look for garden parties or outdoor brunches. If painting flowers on all ten nails feels like too much, add them to just two or three nails and keep the rest a solid matcha green. This keeps the manicure balanced and quicker to finish.
12.Matcha Green Negative Space
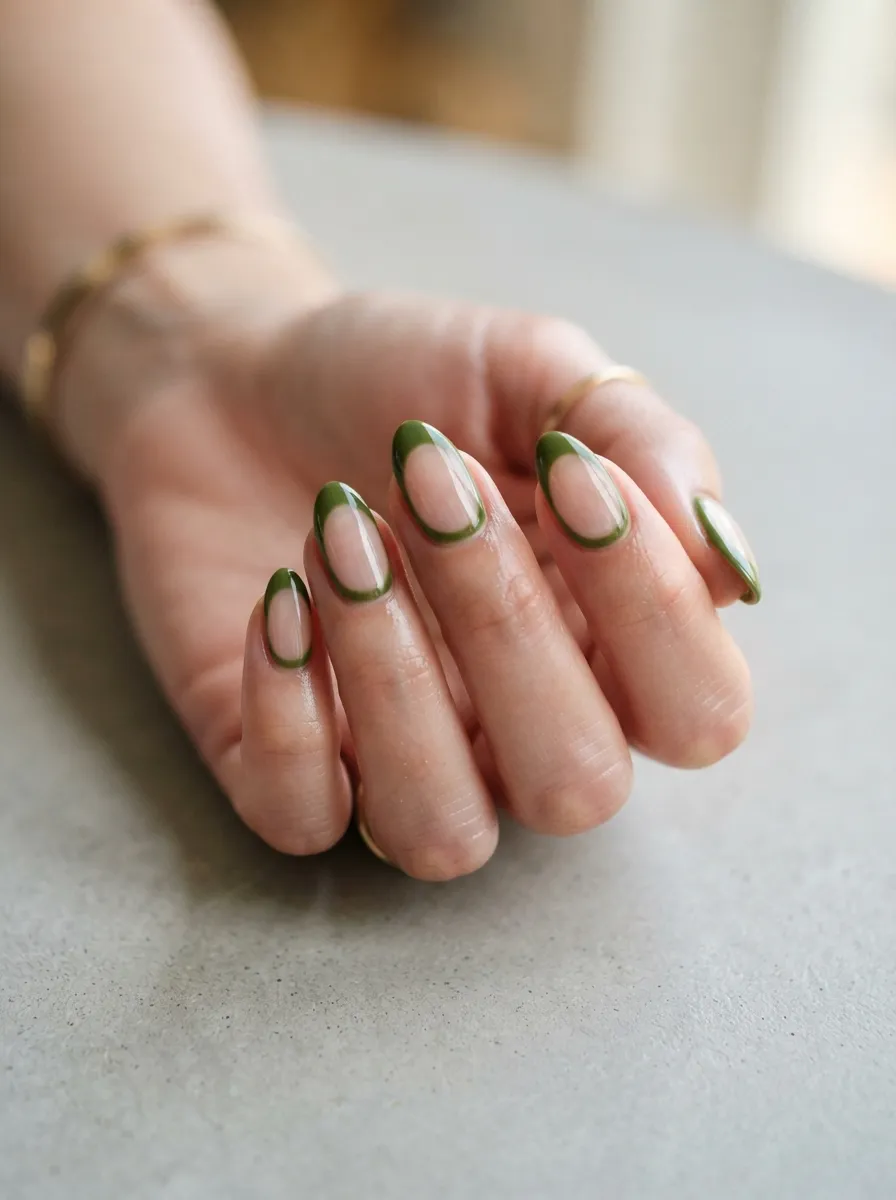
Negative space nails use bare, natural nail as part of the design instead of covering the whole surface. Paint a border of matcha green around the edges of your nail, leaving a bare patch in the middle or along one side. This style works especially well as a French tip variation, where the base is left natural and only a thin green line runs along the smile line. It requires a steady hand, so use a thin detail brush and take your time. If lines come out uneven, a small brush dipped in polish remover can clean up the edges. This look feels modern and a little edgier than a full color manicure while still keeping that calm matcha green tone. It also uses less polish overall, which stretches your bottle further. This style suits short to medium nails best, since the bare space stays visible without looking sloppy. Keep nails buffed smooth before starting, since the bare sections will be on full display and any texture will show more than usual.
13.Matcha Green with Chrome Finish
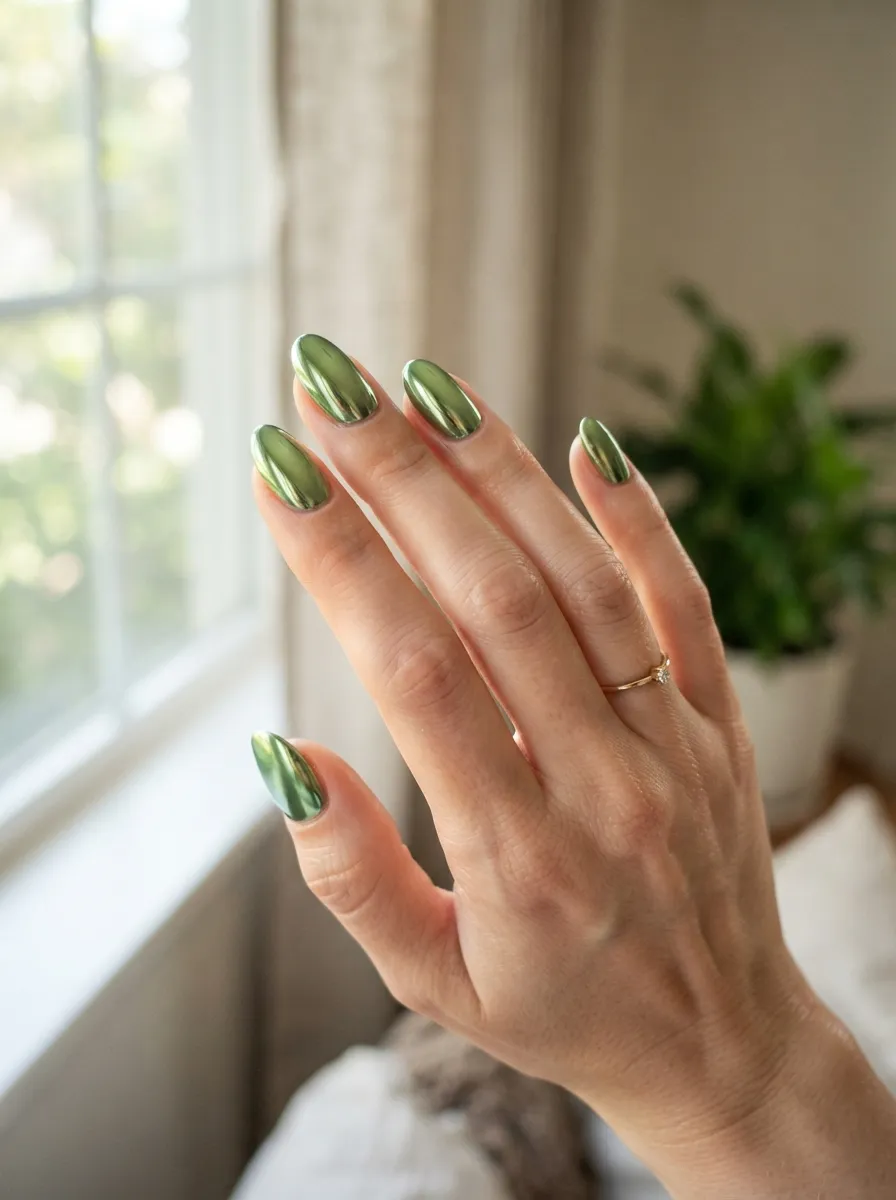
Chrome powder turns a simple matcha green manicure into something that catches every bit of light in the room. Start with a dark green gel or a sticky, tacky top coat as your base. While it is still slightly tacky, rub chrome powder over the surface with a soft applicator or makeup sponge. The powder sticks to the tacky layer and creates a mirror like shine. Chrome powder pots are affordable and one small container lasts through many manicures since only a tiny amount is needed per nail. This technique works best with gel polish since it needs that tacky layer to grip onto, though some cream polishes also work if applied thick enough. Seal with a glossy top coat to lock the shine in place and prevent the powder from rubbing off. This look feels bold and modern, perfect for a night out or a special event. If chrome nails feel like too much for daily wear, save this style for weekends or occasions where you want your hands to stand out.
14.Matcha Green Half Moon Nails
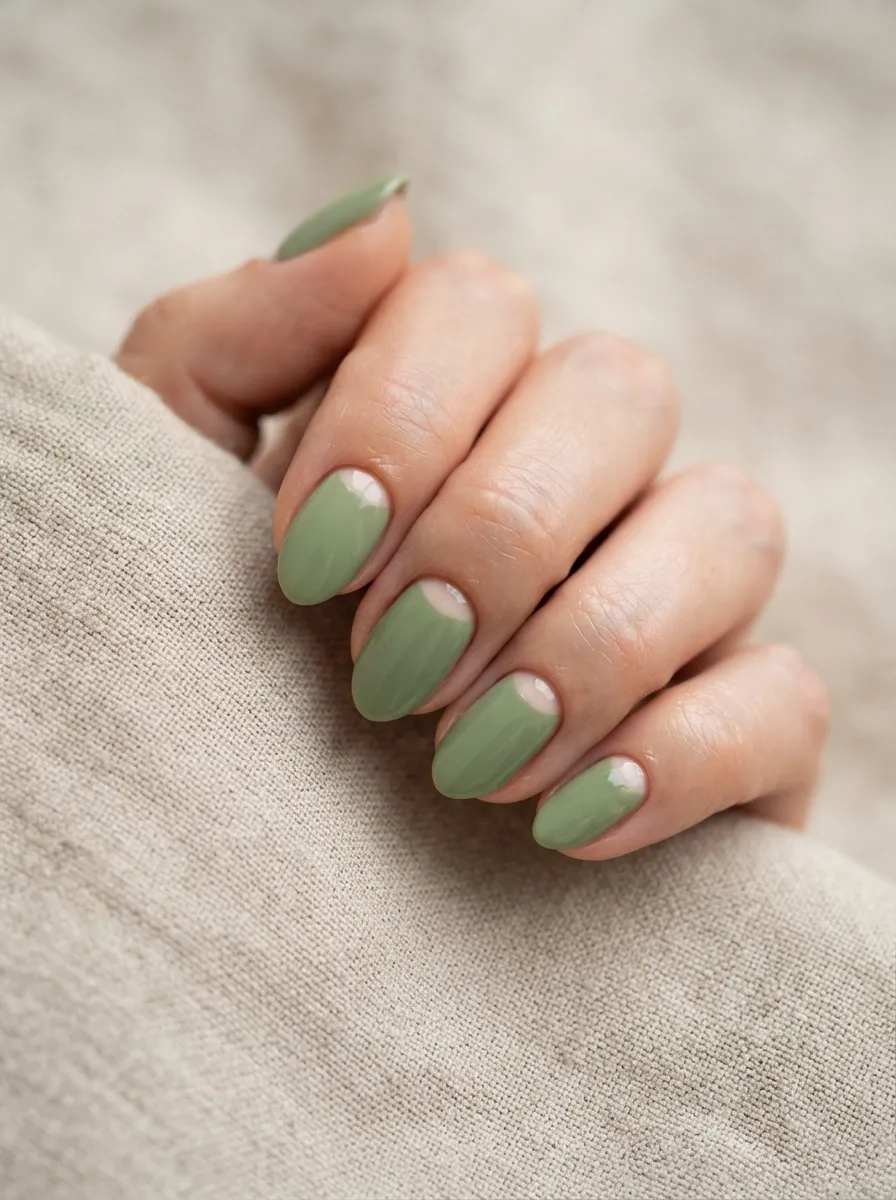
The half moon manicure leaves a crescent of bare nail near the cuticle while the rest is painted solid. This creates a clean, geometric contrast that still feels soft in matcha green. Round stickers work well as a guide for this style. Press a sticker over the cuticle area, paint the rest of the nail, then peel the sticker away before the polish sets. These stickers are cheap and reusable across several manicures if handled carefully. This look gives the illusion of longer nails since the bare crescent draws the eye upward. It also grows out more gracefully than a full color manicure, since the natural regrowth blends with the bare crescent shape. This style suits both short and long nails and works for any season. If you want a twist, try a double half moon by adding a second thin crescent line in a lighter green just above the bare space. Keep edges clean with a small brush dipped in remover for the most polished finish.
15.Matcha Green with Gold Foil Flakes
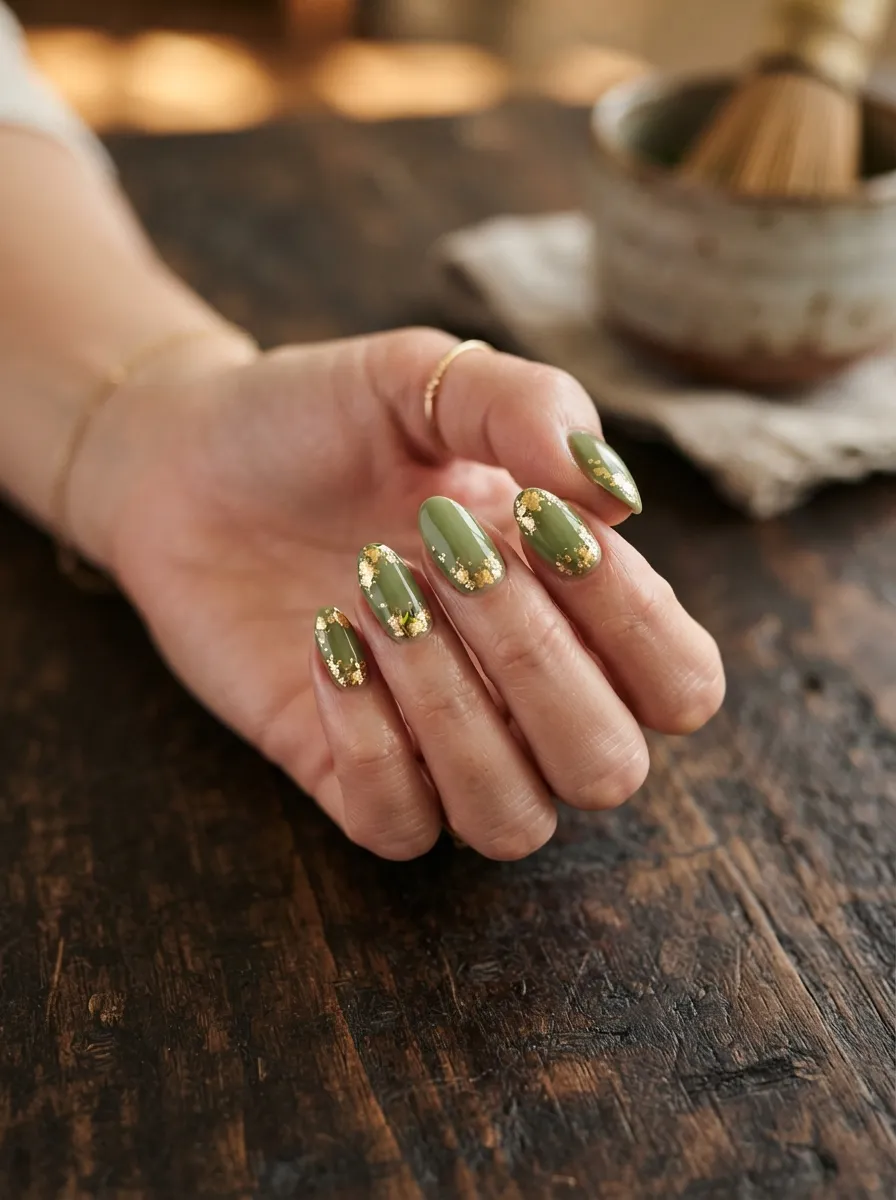
Gold foil flakes add texture and sparkle without needing a full glitter manicure. Paint your matcha green base and let it dry. While the top coat is still wet, use tweezers to place small pieces of gold foil onto the tips or scattered across the nail. Foil flakes come in small jars and are inexpensive, with enough product to last through many manicures. Press the foil down gently so it sticks to the wet top coat, then seal everything with another layer of top coat once the foil is placed. This keeps the flakes from lifting or catching on fabric later. This style works well for holidays, birthdays, or any time you want a manicure with a bit of shine. Keep the foil concentrated near the tips or cuticle for a more controlled look, or scatter it across the whole nail for something bolder. If foil feels tricky to place, gold glitter polish is an easier substitute that gives a similar sparkly effect with much less effort.
16.Matcha Green Checkerboard Pattern
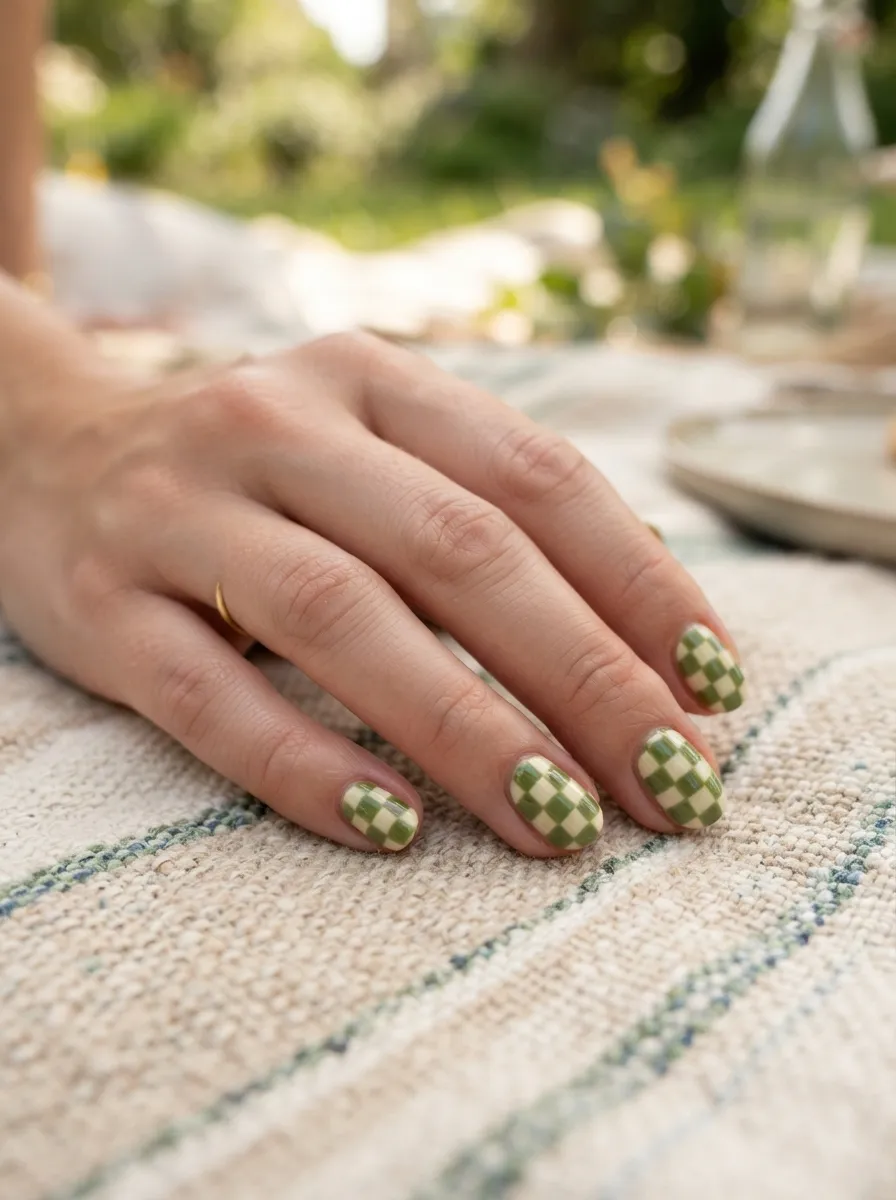
Checkerboard nails have a playful, retro feel that pairs nicely with the calm tone of matcha green. Start with a cream or off white base coat. Once dry, use a thin striping tape to create a grid pattern across the nail. Fill in alternating squares with matcha green polish using a small detail brush. This takes patience, so start with just a few squares per nail rather than a full grid if you are short on time or new to nail art. Toothpicks or a fine tip nail art pen also work well for filling in small squares if a brush feels too wide. This style suits square or short almond shaped nails best, since flat surfaces make the grid easier to paint evenly. It works well for casual, everyday looks and adds personality without feeling overdone. A budget tip is to practice the pattern on a paper nail wheel first, which costs very little and lets you perfect your spacing before committing to your real nails.
17.Matcha Green Cat Eye Nails
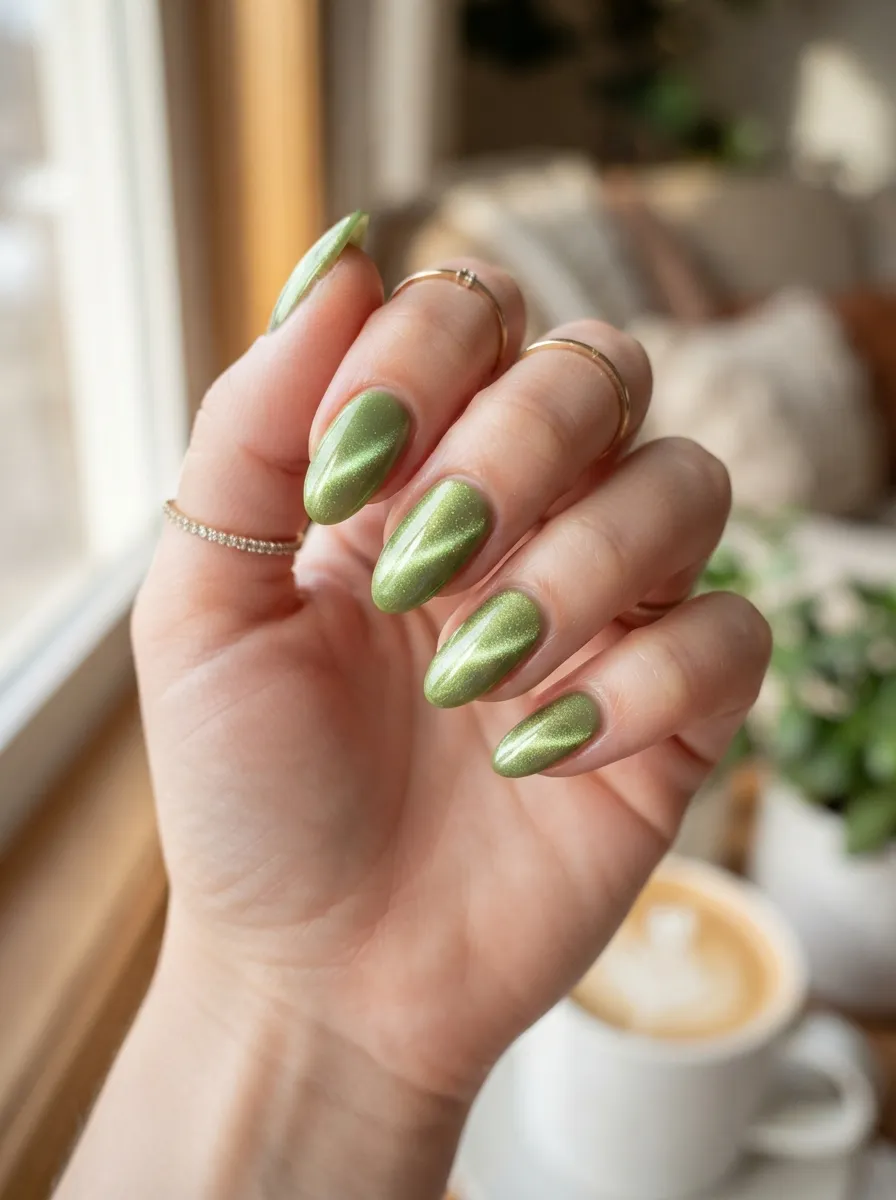
Cat eye polish contains tiny metallic particles that respond to a magnet, creating a glowing line across the nail. In matcha green, this effect looks like light catching on morning dew. After painting your base coat, hold the small magnet that comes with the polish just above the wet nail for a few seconds before curing or drying. The particles shift toward the magnet, creating the signature glowing streak. Cat eye polish bottles usually include the magnet, so there is no extra tool to buy. This style works with both gel and regular polish formulas, though gel tends to give a stronger, more defined line. It photographs beautifully in natural light, which makes it a nice pick for spring or summer days. This look suits any nail shape or length. If you want variation, angle the magnet differently on each nail so the light line falls in a slightly different spot, giving a more natural, varied shimmer across your hands.
18.Matcha Green with Brown Swirls
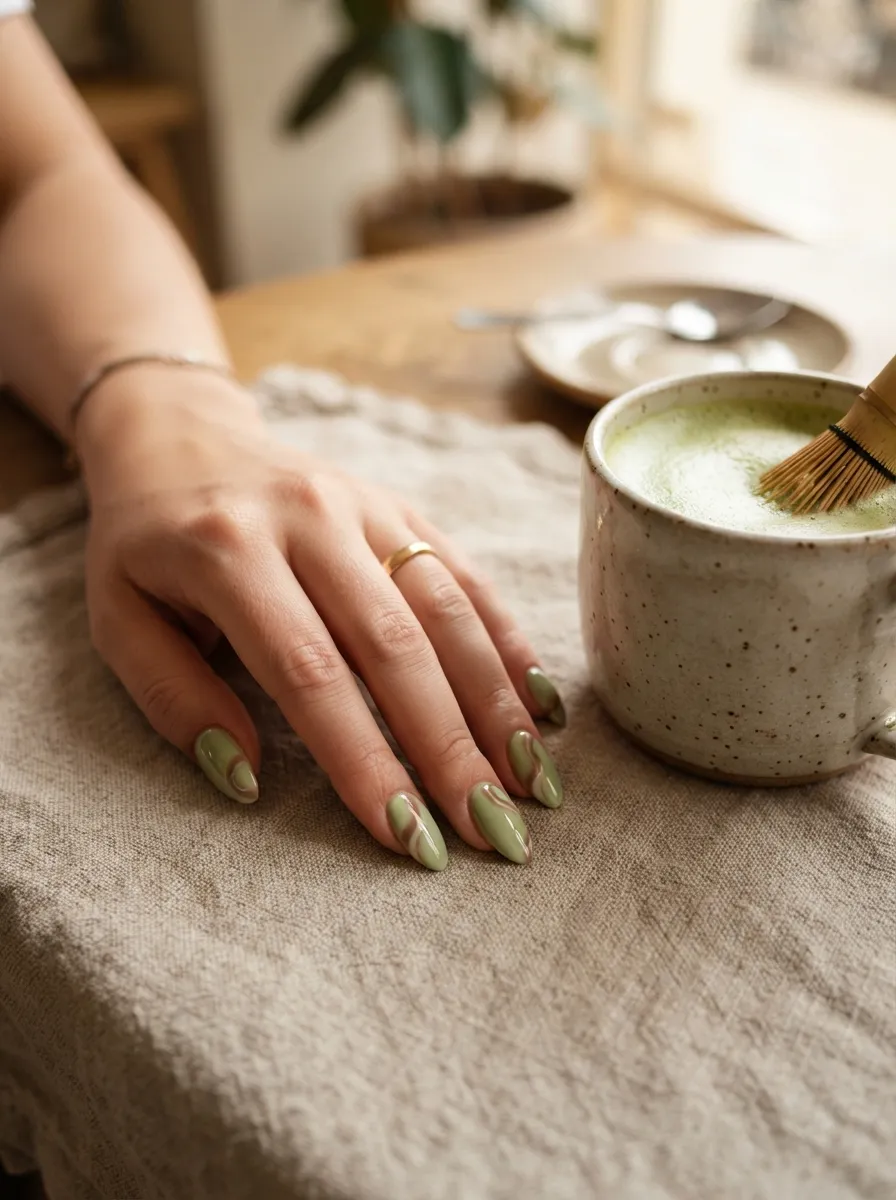
Brown and green together feel earthy and grounded, almost like tea leaves settling in a cup. Paint your base coat in matcha green and let it dry fully. Then use a thin brush to add small swirls or dots of light brown near the tip or cuticle of each nail. Keep the swirls loose and organic rather than trying to make them symmetrical, since imperfect lines actually suit this earthy theme better. A caramel or coffee toned brown polish works best for contrast without looking too dark against the green. This style suits fall especially well, though it works year round if you like warm, natural tones. It pairs nicely with gold jewelry and neutral outfits. If freehand swirls feel intimidating, try dabbing small brown dots instead of full swirls for a simpler version of the same idea. Seal with a glossy top coat to help the two colors blend smoothly at the edges. This look feels calm, warm, and a little different from typical green and gold pairings.
19.Matcha Green Minimalist Line Art
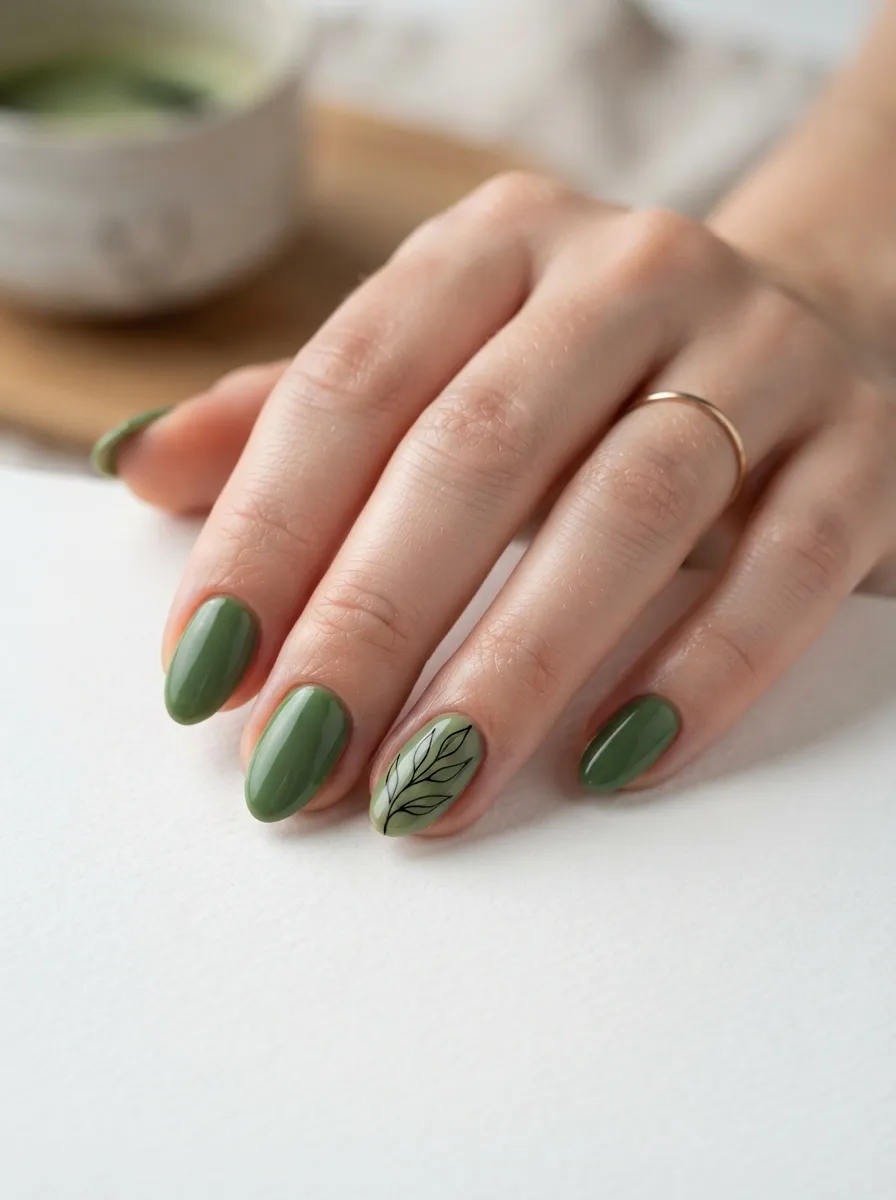
Minimalist line art keeps most nails solid while adding a single artistic detail on one or two fingers. Paint your matcha green base across all nails first. Then choose one nail, usually the ring finger, to add a thin black or white line drawing. A simple wave, a small leaf outline, or a single curved line all work well. Use a fine tip nail art pen for this, since it gives more control than a brush and costs only a few dollars. This style feels modern and intentional without requiring much extra time. It works for nearly any occasion, from work to weekends, since the rest of the nails stay simple. If you make a mistake on the line art, a cotton swab dipped in remover can clean it up without disturbing the base color underneath. This look is a good entry point into nail art for beginners, since you only need to focus on getting one small design right rather than repeating a pattern across all ten nails.
20.Matcha Green Cloud Nails
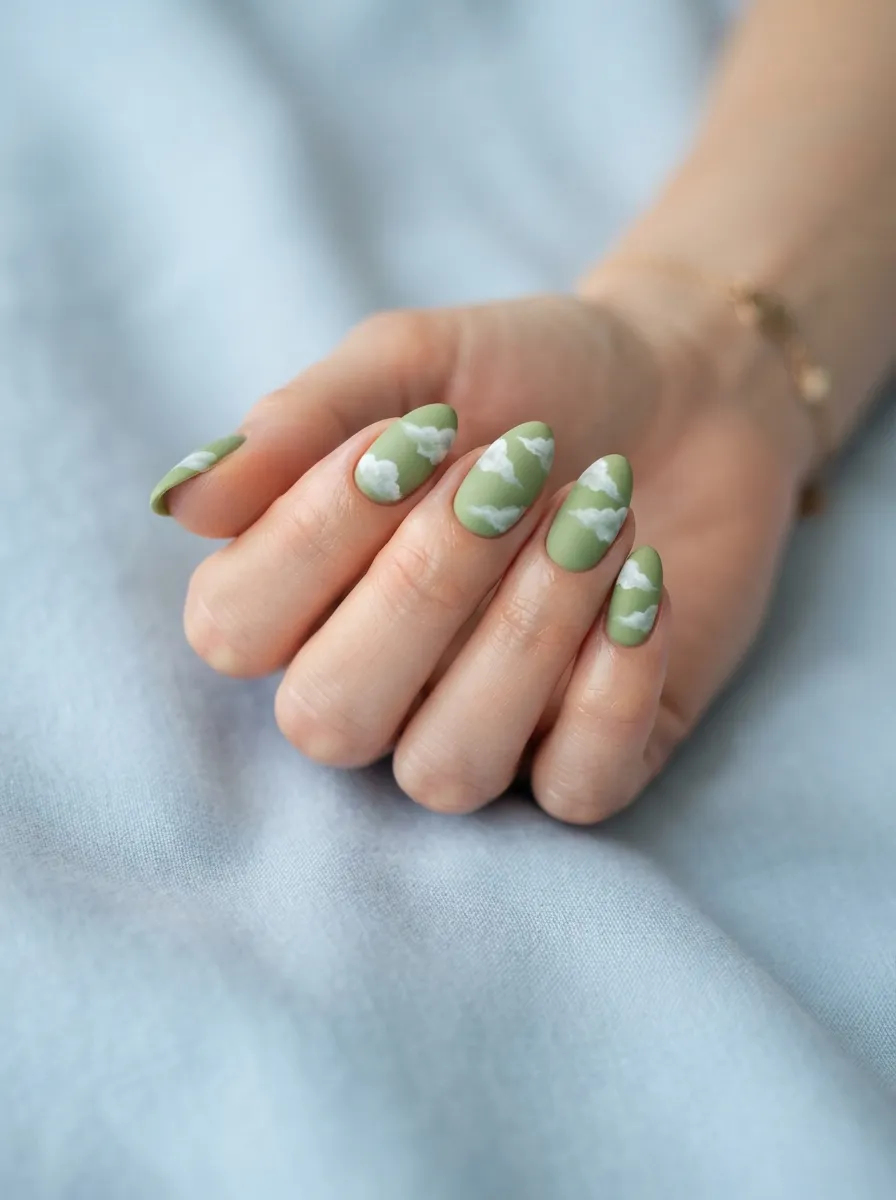
Cloud nails bring a dreamy, soft texture to a matcha green manicure. Paint your base coat and let it dry. Then use a small makeup sponge dabbed lightly in white polish to create fluffy cloud shapes near the tips or scattered across the nail. The sponge technique gives clouds a soft, textured edge that looks more natural than painting them with a brush. Go over each cloud a few times with light dabs to build up opacity without making the edges too sharp. This style feels calm and whimsical, fitting well with the overall relaxed tone of matcha green nails. It suits spring and summer especially well. A budget tip is to use a makeup sponge you already own instead of buying a special nail art sponge, since both work the same way. Keep the clouds small and simple rather than overly detailed, since a light touch reads as more effortless. Finish with a glossy top coat to smooth over the sponge texture and add shine.
21.Matcha Green with Pearl Dots
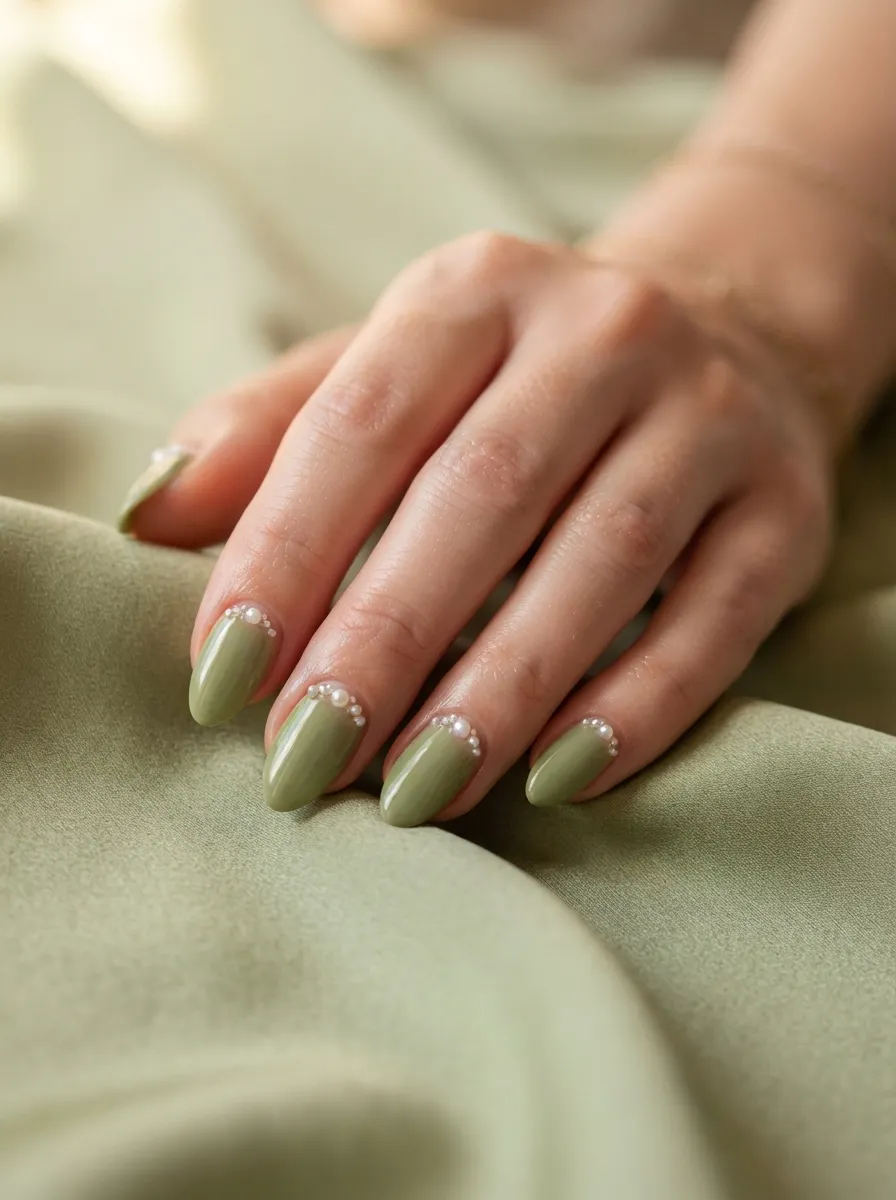
Small pearl accents add a delicate, polished touch to matcha green nails. Paint your base coat and let it dry fully. While the top coat is still wet, use tweezers to place tiny pearl beads near the cuticle or in a small cluster on one nail. Pearl beads for nail art come in small packs and are inexpensive, lasting through many manicures. Press each pearl gently into the wet top coat so it stays in place, then seal with another light coat once everything is positioned. This style feels elegant and works well for weddings, showers, or any dressed up occasion. Keep the pearls limited to one or two nails if you want a subtle accent, or add a few to each nail for a fuller look. If pearls feel like too much upkeep, a single dot of white polish in the same spot creates a similar visual effect with none of the risk of the bead falling off. This look pairs nicely with soft, romantic makeup and simple hairstyles.
22.Matcha Green Reverse French
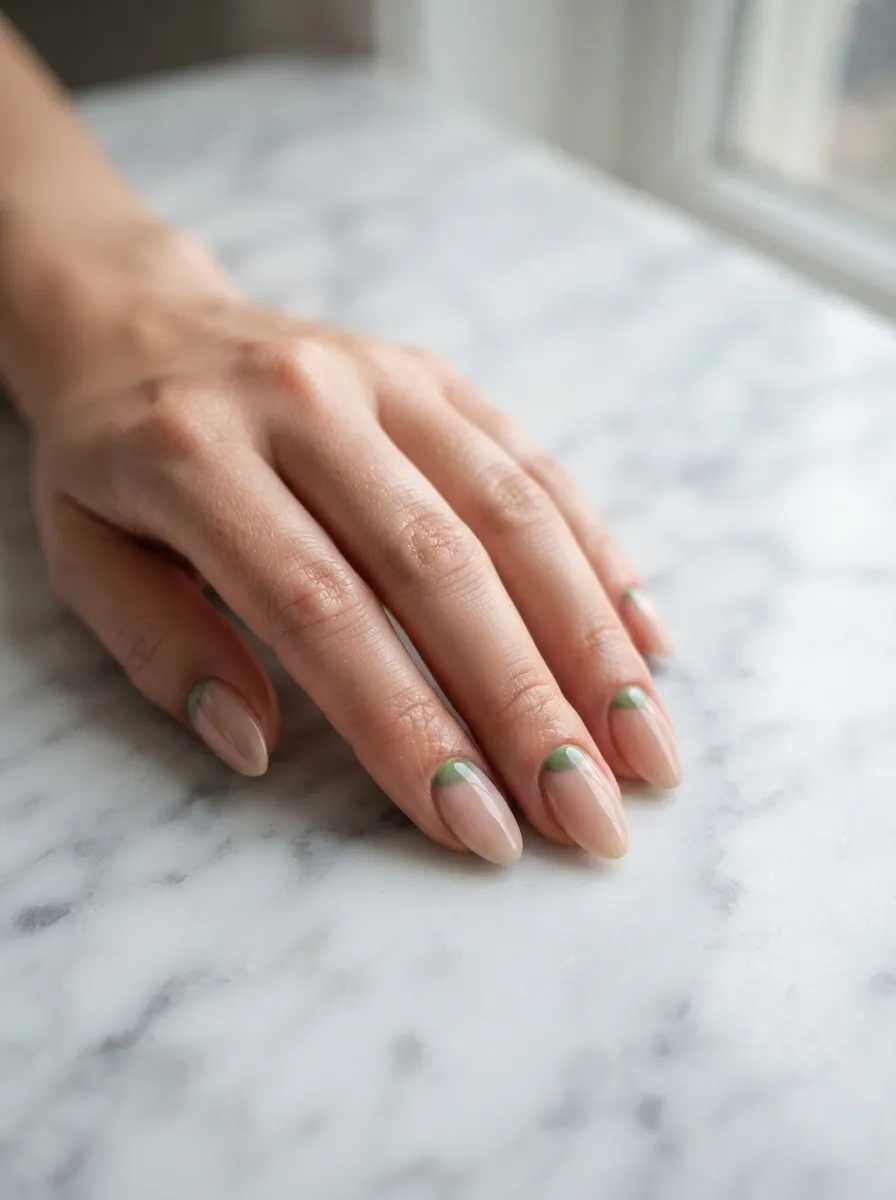
A reverse French manicure flips the classic style by placing color at the base of the nail instead of the tip. Paint a sheer or nude base coat first, then use a thin brush or curved sticker guide to paint a smile shaped line of matcha green near the cuticle. This style draws attention to the base of the nail rather than the tip, which some people find more flattering, especially on shorter nails. Curved guide stickers make this technique much easier and cost very little at beauty supply stores. Press the sticker down close to the cuticle, paint over it, then peel away before the polish sets for a clean line. This look feels fresh and a little different from the typical French manicure everyone recognizes. It works for both casual and dressed up occasions. If your hand is not steady enough for a smooth curve, a straight line near the cuticle still looks intentional and stylish, just in a slightly different shape.
23.Matcha Green Textured Nails
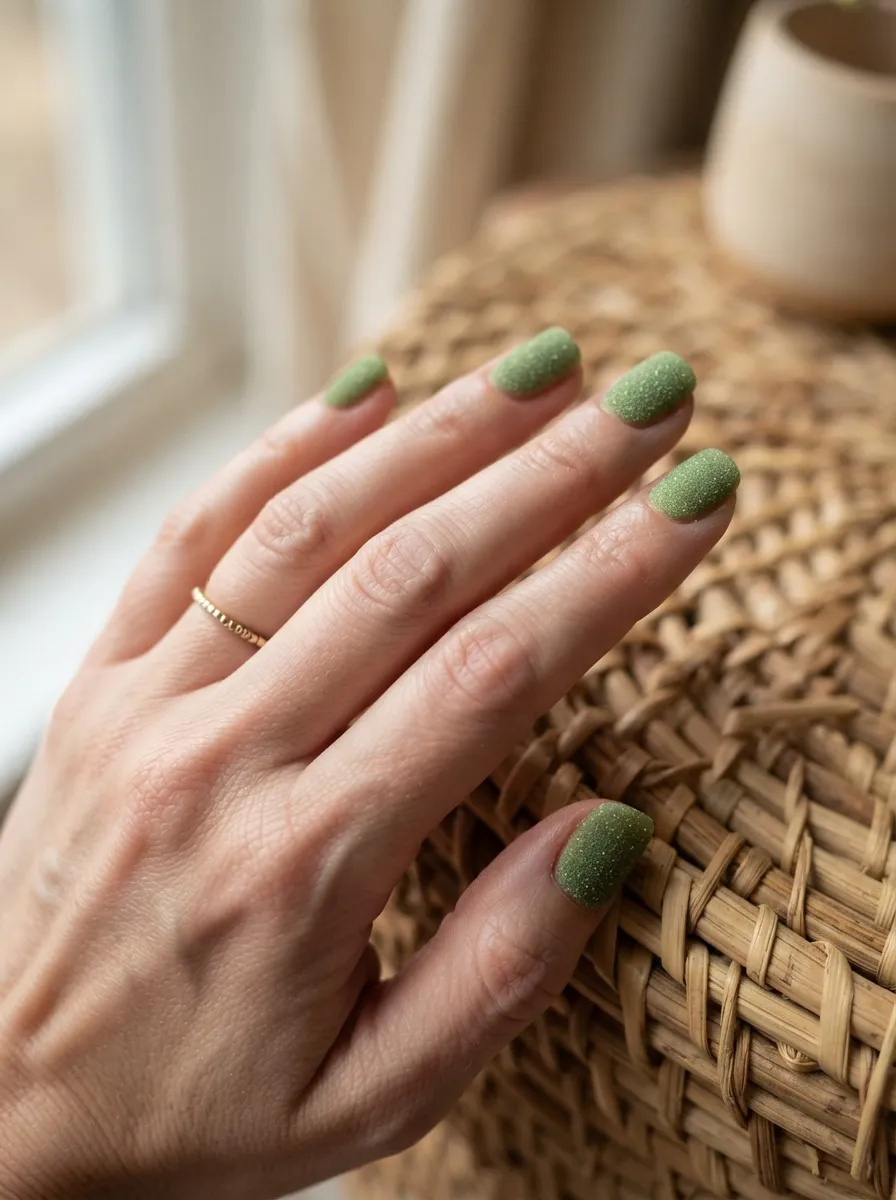
Textured polish, sometimes called sugar or sand polish, gives matcha green a grainy, tactile finish instead of a smooth surface. This texture happens because of tiny particles mixed into the formula. Apply two coats for the best texture payoff, letting each layer dry fully before adding the next. No top coat is needed for this style, since a glossy layer would flatten the texture you are trying to show off. Textured polish tends to last a bit longer than glossy formulas since the grainy surface hides small scratches and wear better than a shiny finish would. This look feels cozy and suits colder months especially well, though it works year round for anyone who likes a tactile finish. It pairs nicely with knit sweaters and warm toned outfits. A budget tip is to check for textured polish during end of season sales, since these formulas often get marked down after fall and winter collections wrap up. This style is low maintenance and easy to keep looking fresh with minimal upkeep.
24.Matcha Green with Tortoiseshell Print
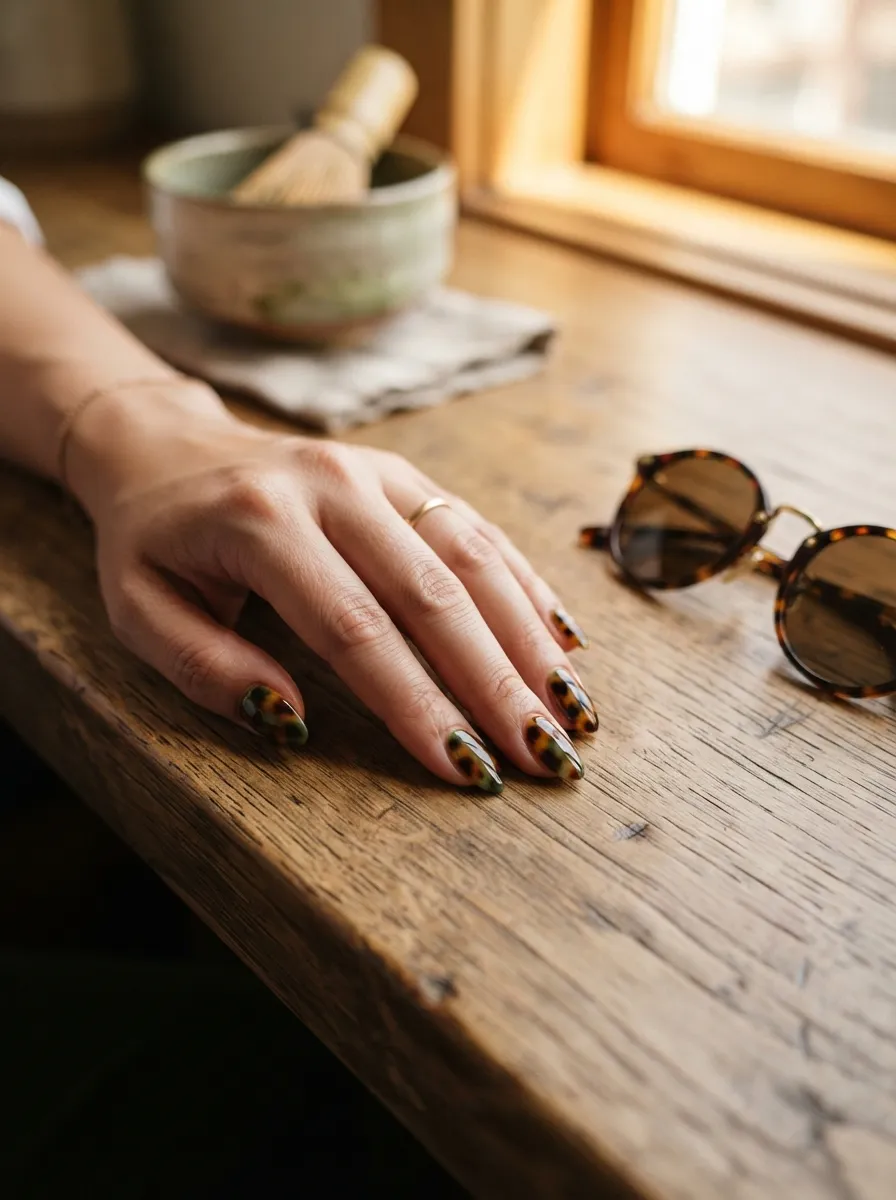
Tortoiseshell print swaps the usual orange and brown tones for a green based palette, giving it a fresh twist while keeping the pattern recognizable. Start with a light amber or honey colored base. Then use a thin brush to add irregular blotches of matcha green and dark brown across the nail, blending the edges slightly while the polish is still wet. This pattern looks best when it stays uneven and organic rather than symmetrical, so do not worry about making each nail match perfectly. This style works well for fall and works nicely with tortoiseshell sunglasses or hair accessories for a coordinated look. It suits any nail length or shape. A budget tip is to practice this pattern on paper first, since blending three colors takes a bit of trial and error before it looks natural. Seal with a glossy top coat once you are happy with the blend, which also helps smooth out any texture from layering multiple colors on top of each other.
25.Matcha Green Two Tone Nails
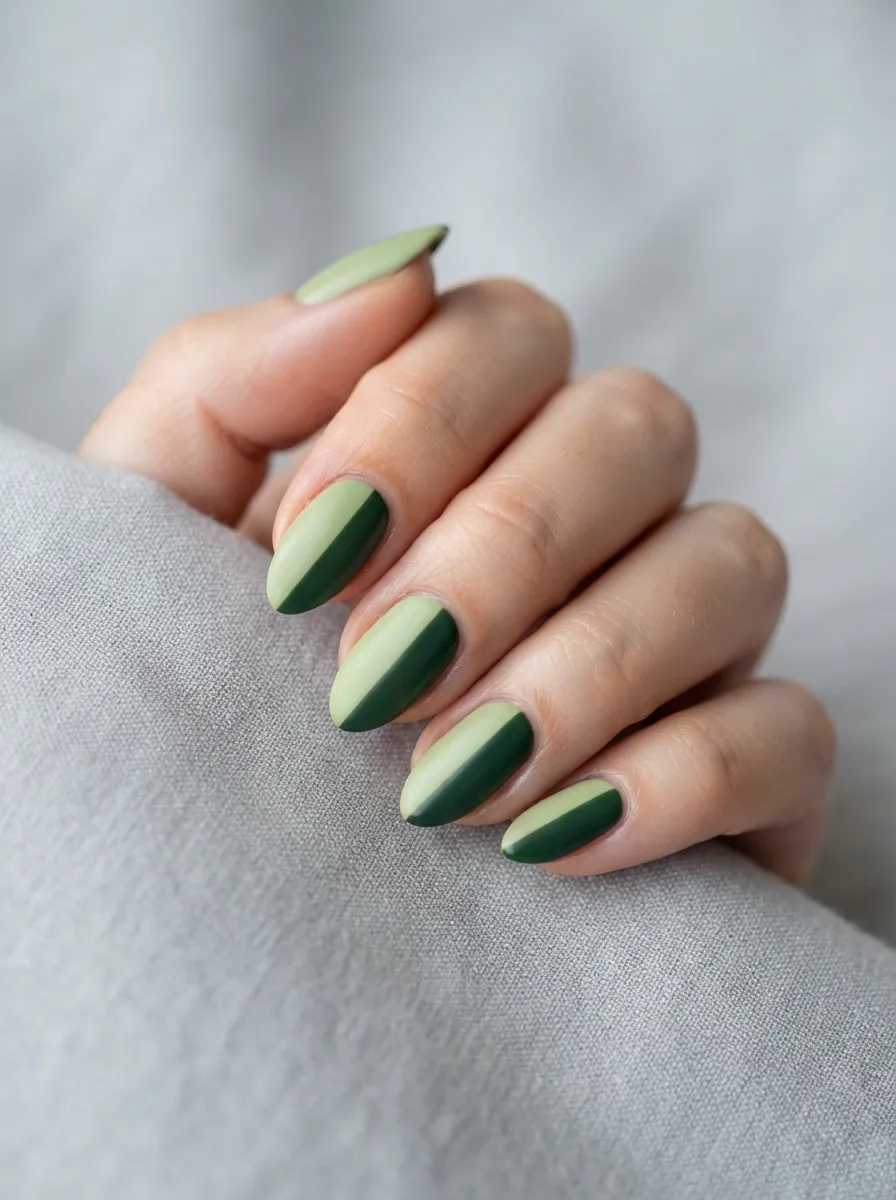
Two tone nails split the nail into sections using two different shades of the same color family. Paint one half of the nail in matcha green and the other half in a deeper forest or olive green. A diagonal split looks more dynamic than a straight down the middle line, though both work well. Use striping tape to mask off the section you are not painting, which keeps the line clean and crisp. This technique uses two bottles of polish you likely already own if you have any green shades in your collection, making it a budget friendly way to get more use out of existing polish. This style suits square or almond shaped nails especially well, since the flat surface makes the split easier to paint evenly. It works for both casual and dressed up occasions. If a diagonal split feels tricky, try splitting the nail horizontally near the cuticle instead, which is a simpler variation with a similar effect.
26.Matcha Green with Tiny Hearts
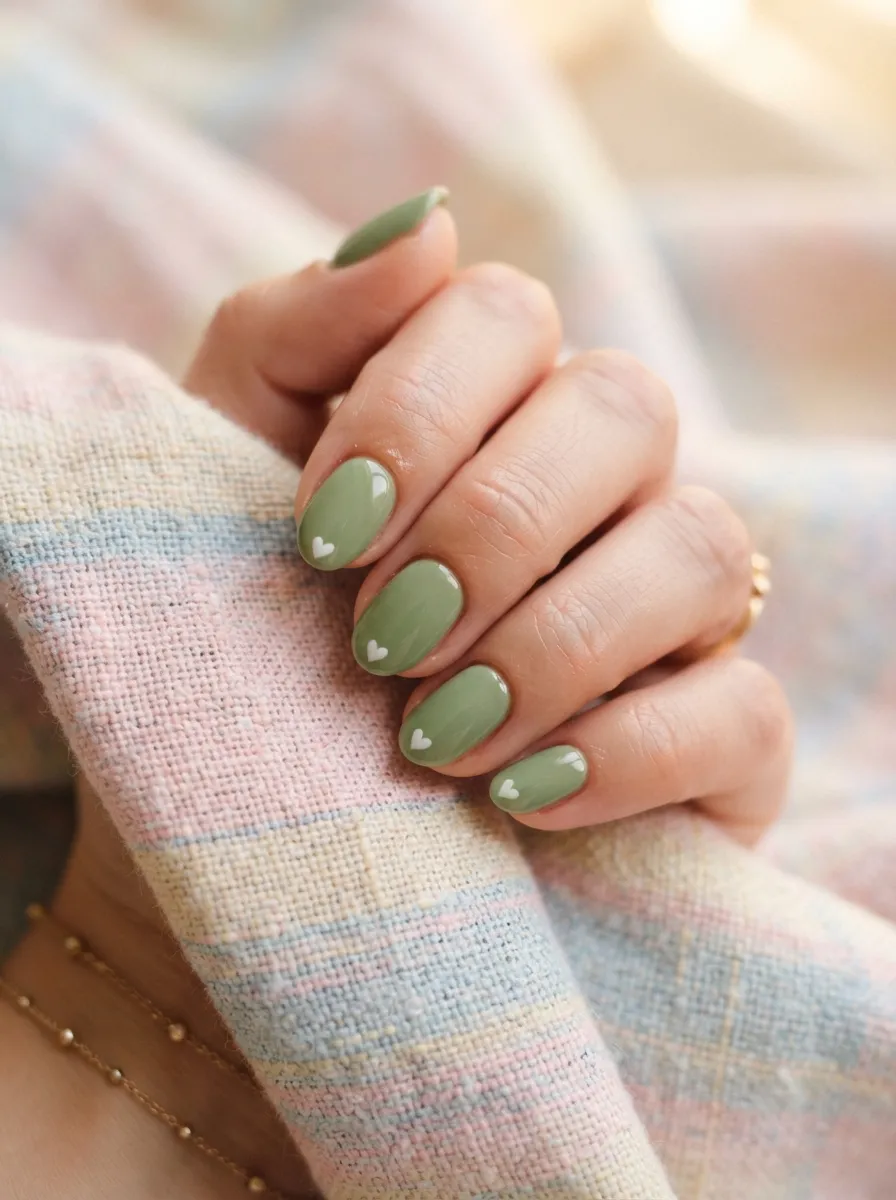
Small heart details add a soft, playful touch without overwhelming the calm base color. Paint your matcha green base and let it dry completely. Use a dotting tool or the tip of a toothpick to create two small dots close together, then drag a thin line down from the center to form a simple heart shape. This takes a little practice, so try a few on paper before moving to your actual nails. Keep the hearts small and slightly imperfect, since a hand drawn look actually suits this style better than trying to make them too precise. White or soft pink hearts both work well against matcha green. This look suits Valentine’s Day, anniversaries, or any time you want a touch of sweetness without going overboard. If hearts feel too tricky to freehand, small heart shaped nail stickers are inexpensive and give the same effect with none of the guesswork. Seal with a glossy top coat to keep the design smooth and protected.
27.Matcha Green Squoval Shape
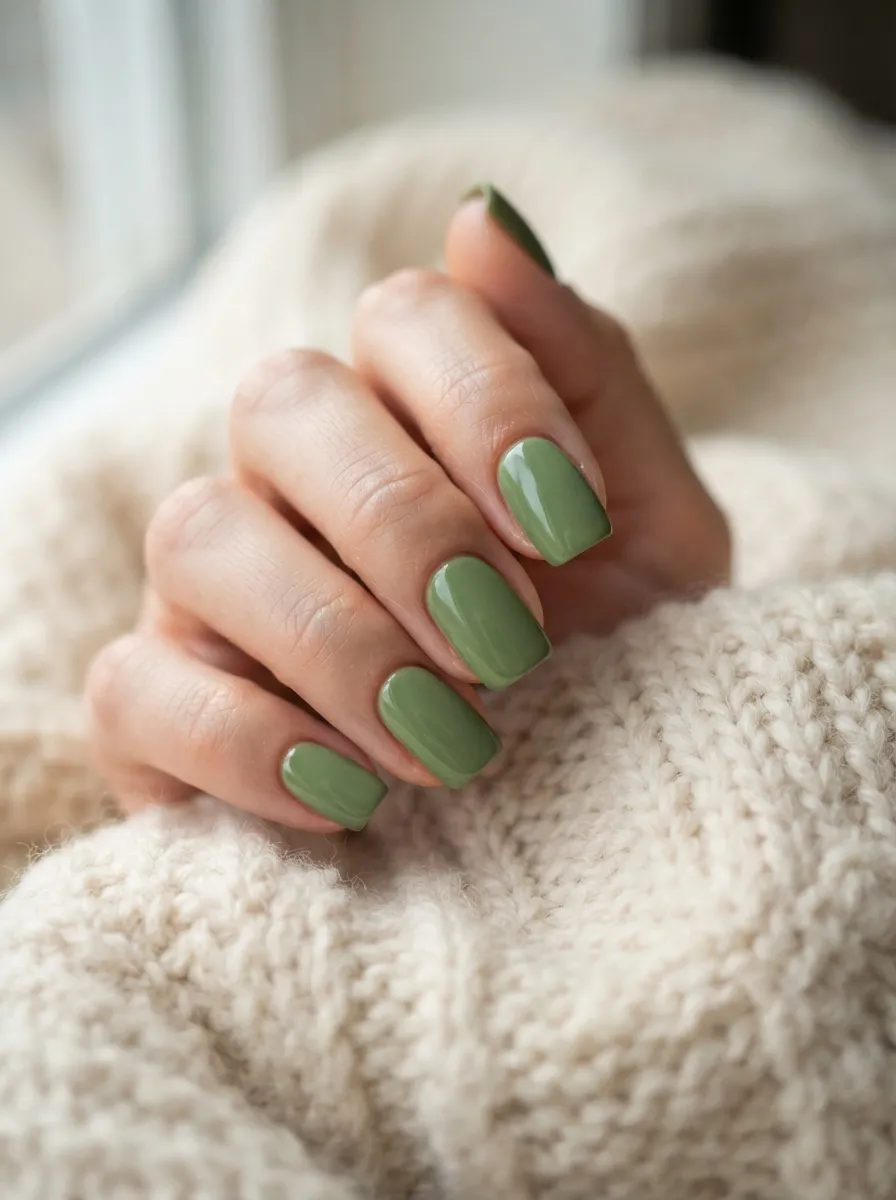
Squoval nails combine the strength of a square shape with the softness of rounded corners. This shape works well for people who want a manicure that looks polished but is less likely to snag or break compared to sharper square corners. File the sides straight, then gently round just the corners rather than the whole tip. Matcha green looks clean and balanced on this shape, since the slightly rounded edges soften the overall look. This style suits nails of almost any length, from short and practical to medium length for a bit more presence. It is a good pick for anyone who works with their hands often, since the shape holds up well to daily wear. A budget tip is to use a glass nail file instead of a disposable emery board, since glass files last much longer and give a smoother edge, saving money over time. Two coats of matcha green with a glossy top coat completes this look nicely, giving you a manicure that feels both practical and put together.
28.Matcha Green with Milky White Tips
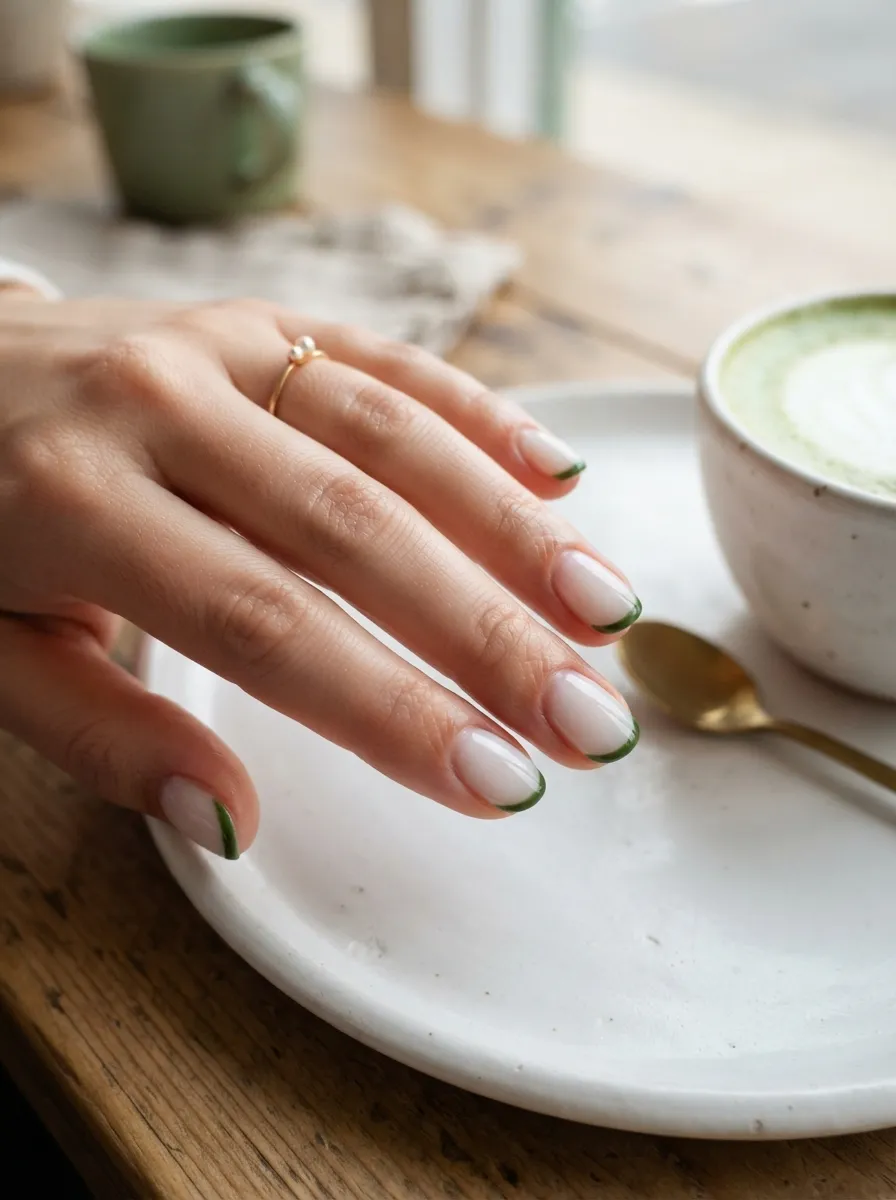
This style takes the French tip idea and softens it further with a milky, translucent white base instead of a sheer pink or nude. Paint one or two thin coats of a milky white polish across the whole nail, allowing a bit of the natural nail to show through for that soft, cloudy effect. Once dry, add a thin band of matcha green right at the very tip using a striping brush or guide stickers. The contrast between the cloudy white and the crisp green tip feels modern and a little different from a typical French manicure. This look suits almond or coffin shaped nails especially well, since the elongated shape gives the tip color more room to stand out. It works for both everyday wear and dressed up occasions. A budget tip is to look for milky white polish during seasonal sales, since this shade tends to be a popular seasonal color and often gets discounted after its peak months pass.
Conclusion
Matcha green nails give you a simple way to bring a calm, natural feeling to your hands without much cost or effort. From a single solid coat to detailed marble swirls, there is a version of this trend for every skill level and budget. Start small if you are new to nail art, maybe with a solid matcha green manicure or a basic French tip, then build up to swirls, chrome finishes, or hand painted details as you get more comfortable. Keep a small stash of budget friendly tools on hand, things like dotting tools, striping tape, and a good top coat, since these items get used across nearly every style on this list. Try one idea this week, snap a photo of the result, and let it guide your next manicure. Matcha green is patient, forgiving, and easy to make your own, one coat at a time.