1. Classic French Manicure with a Twist
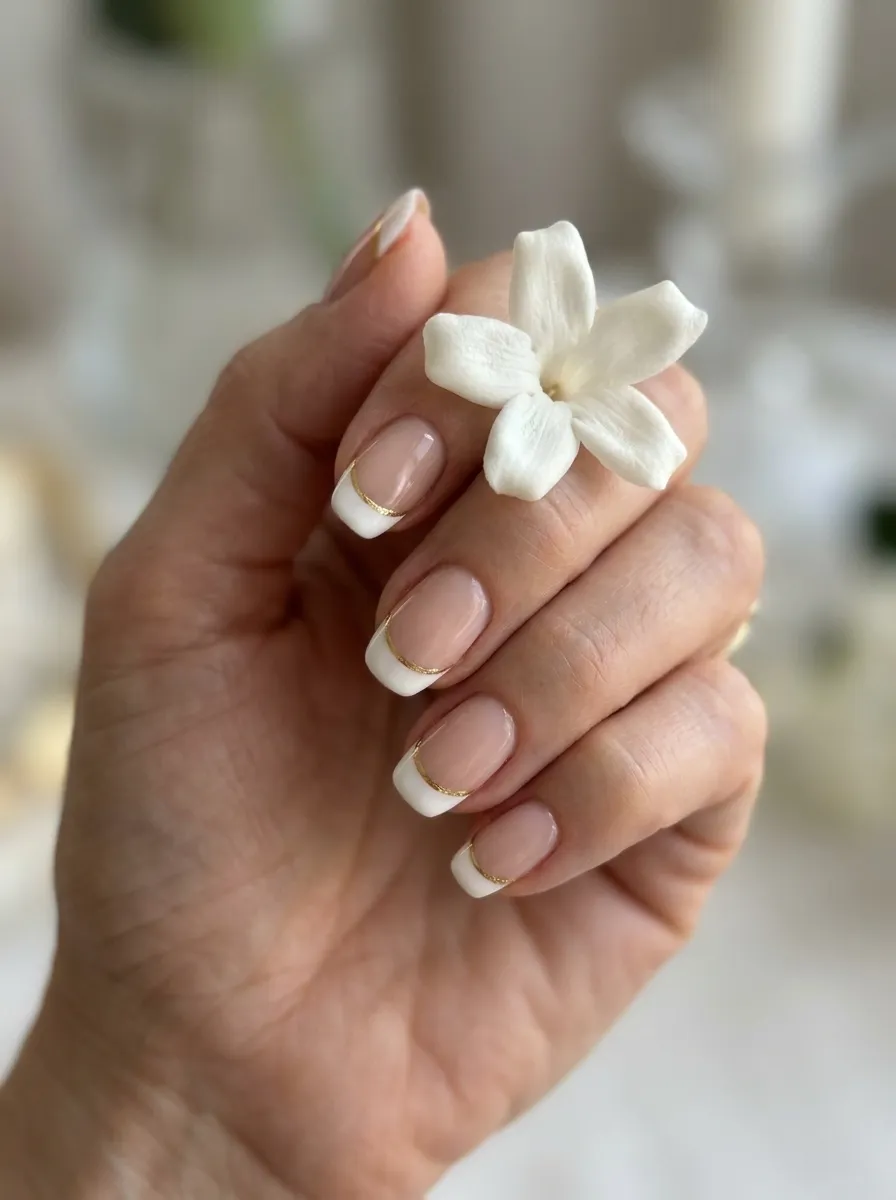
The French manicure never goes out of style. Brides love it because it looks clean and pairs with any dress. For a modern twist, swap the plain white tip for a thin gold or silver line. It adds a small sparkle without going over the top. You can do this at home with striping tape and a fine brush. Buy a basic nude polish and a white polish from any drugstore. Use the tape to mark the tip line, then paint carefully. Let each layer dry before adding the next. A top coat locks everything in place and adds shine. This look works for short or long nails, so it fits any hand shape. It also grows out nicely if your wedding date shifts. Brides on a budget can skip the salon and still get a polished result. Practice a few times before the big day so your hand feels steady. Keep a small bottle of top coat in your bag for touch-ups between photos. This simple update keeps the classic look fresh and personal.
2. Soft Blush Pink Nails
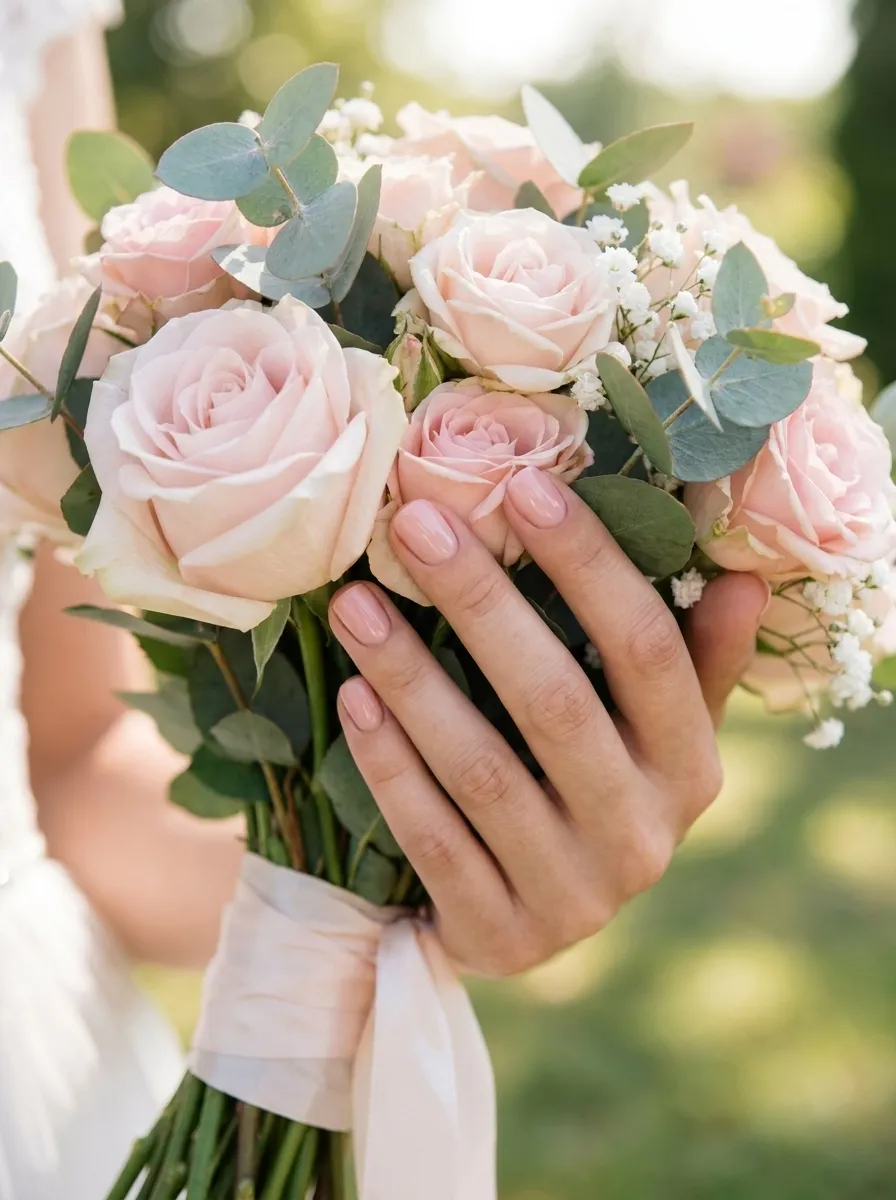
Blush pink is a favorite for brides who want a soft, romantic look. It matches almost every skin tone and complements pastel or white wedding themes. This shade feels bridal without trying too hard. You can find affordable blush polishes at any drugstore, so there’s no need to splurge. Two thin coats give the best color without streaks. Apply a base coat first to protect your natural nails and help the polish last longer. Let each coat dry fully before adding the next layer. A glossy top coat gives it a fresh, dewy finish. If you want a matte look instead, use a matte top coat for a soft, velvety texture. Blush pink also works well if you’re adding jewelry, since it doesn’t compete with rings or bracelets. This color is easy to touch up yourself between the ceremony and reception. Keep the bottle in your travel bag just in case. Soft pink nails photograph beautifully in natural light, making them a smart pick for outdoor ceremonies.
3. Ivory and Cream Tones
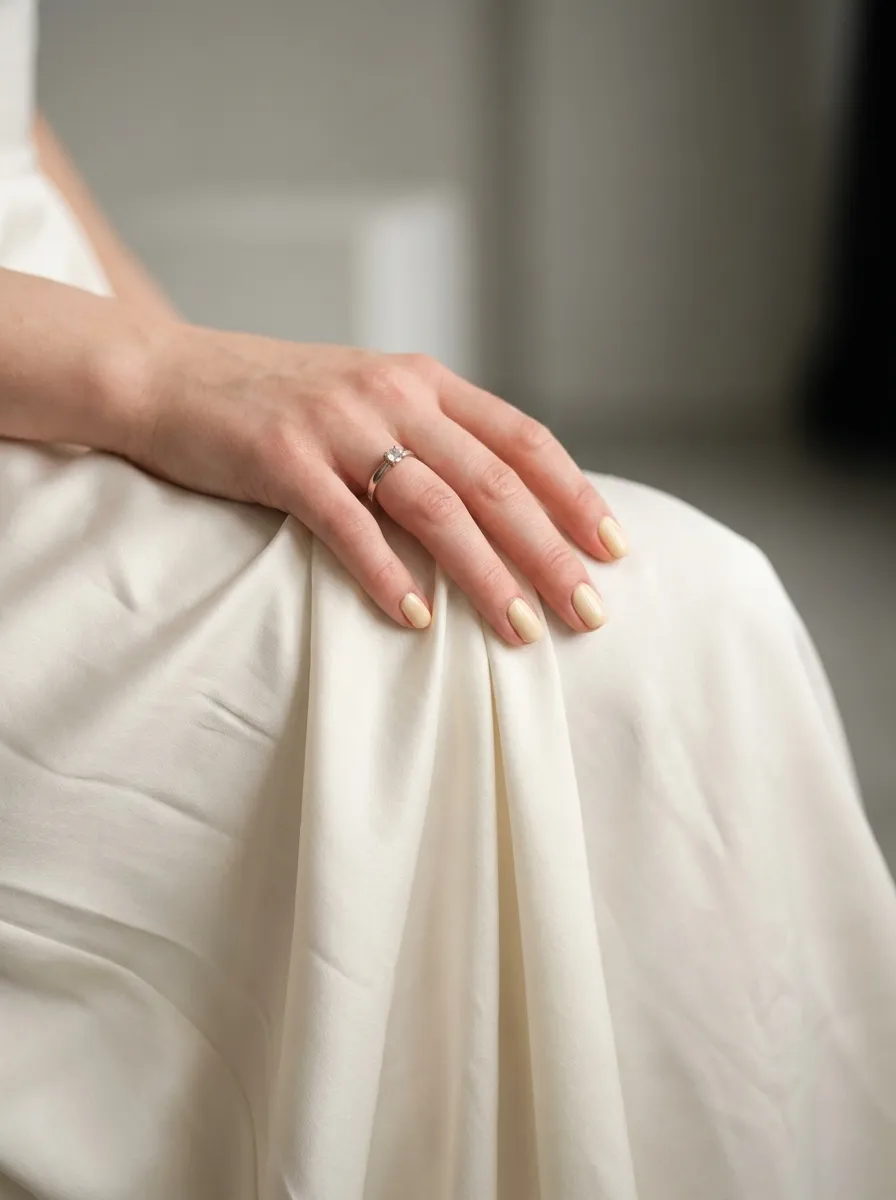
Ivory and cream nails give a soft, warm alternative to bright white. These tones match ivory wedding dresses without clashing or looking too stark. They also flatter warmer skin tones better than cool white shades. This is an easy DIY option since cream polishes apply smoothly and don’t require a steady hand for lines or patterns. Start with a clear base coat to prevent staining. Apply two coats of your cream polish, letting each dry before moving to the next. Finish with a glossy top coat for a soft sheen. If your dress has lace or beading, cream nails pull the whole look together without pulling focus. This shade also works for bridesmaids who want a coordinated but not identical look. Cream polish is often less than the price of a coffee, making it one of the most budget-friendly options on this list. Keep your nails short to medium length for the cleanest finish. This look pairs well with gold jewelry and warm-toned makeup too.
4. Delicate Lace-Inspired Nail Art
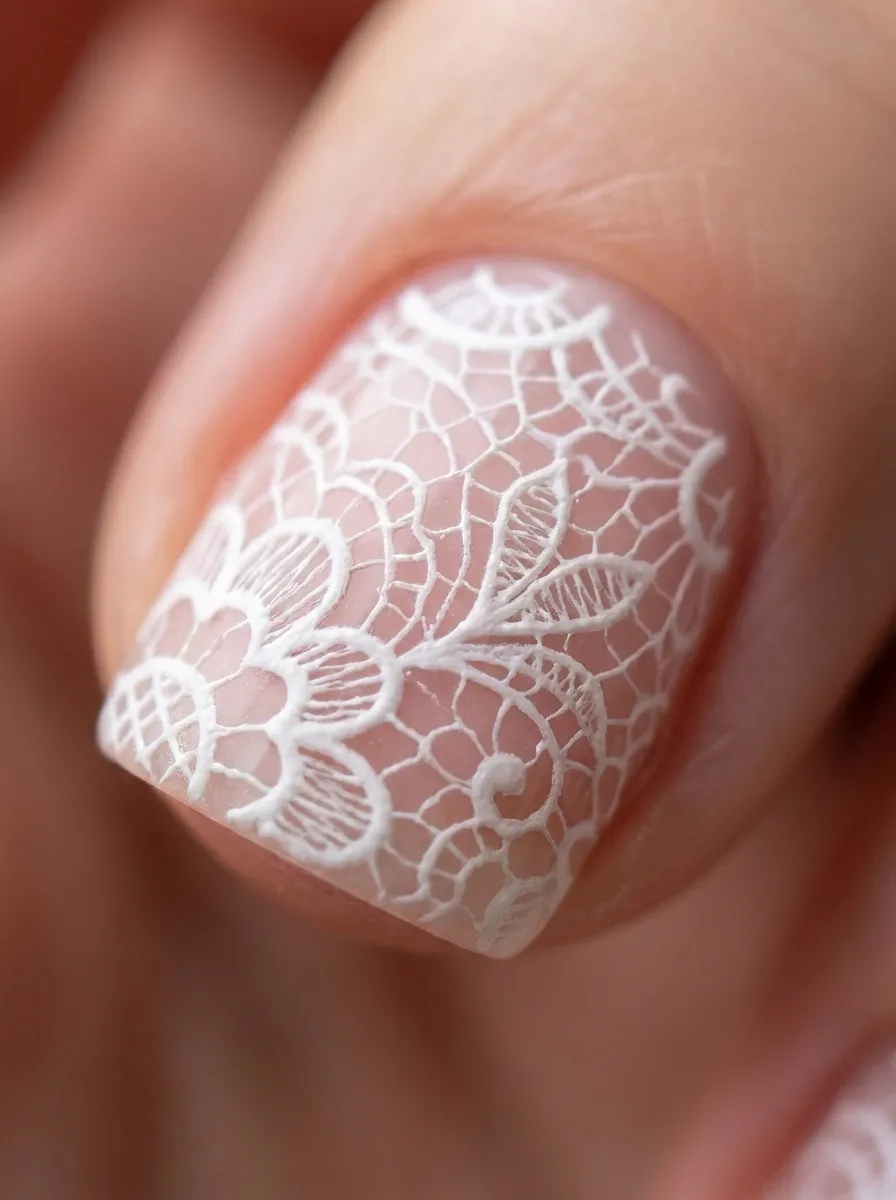
Lace nail art brings texture and detail to your bridal look. It mirrors the lace often found on wedding dresses or veils. This design takes a bit more patience, but it’s doable at home with a thin nail art brush. Start with a sheer pink or white base coat. Once dry, use white polish and a fine brush to paint small dots and connecting lines that mimic lace patterns. You don’t need to be an artist. Simple dots and curved lines create the illusion of lace from a distance. Practice on paper first if you’re nervous about the design. A matte top coat gives the lace a soft, fabric-like finish, while a glossy coat adds shine. This design works best on one or two accent nails rather than all ten, which keeps the look balanced and saves time. Many beauty supply stores sell nail art pens for under five dollars, making this an affordable way to add detail. Lace nails feel personal and match the romance of a wedding day.
5. Pearl Accent Nails
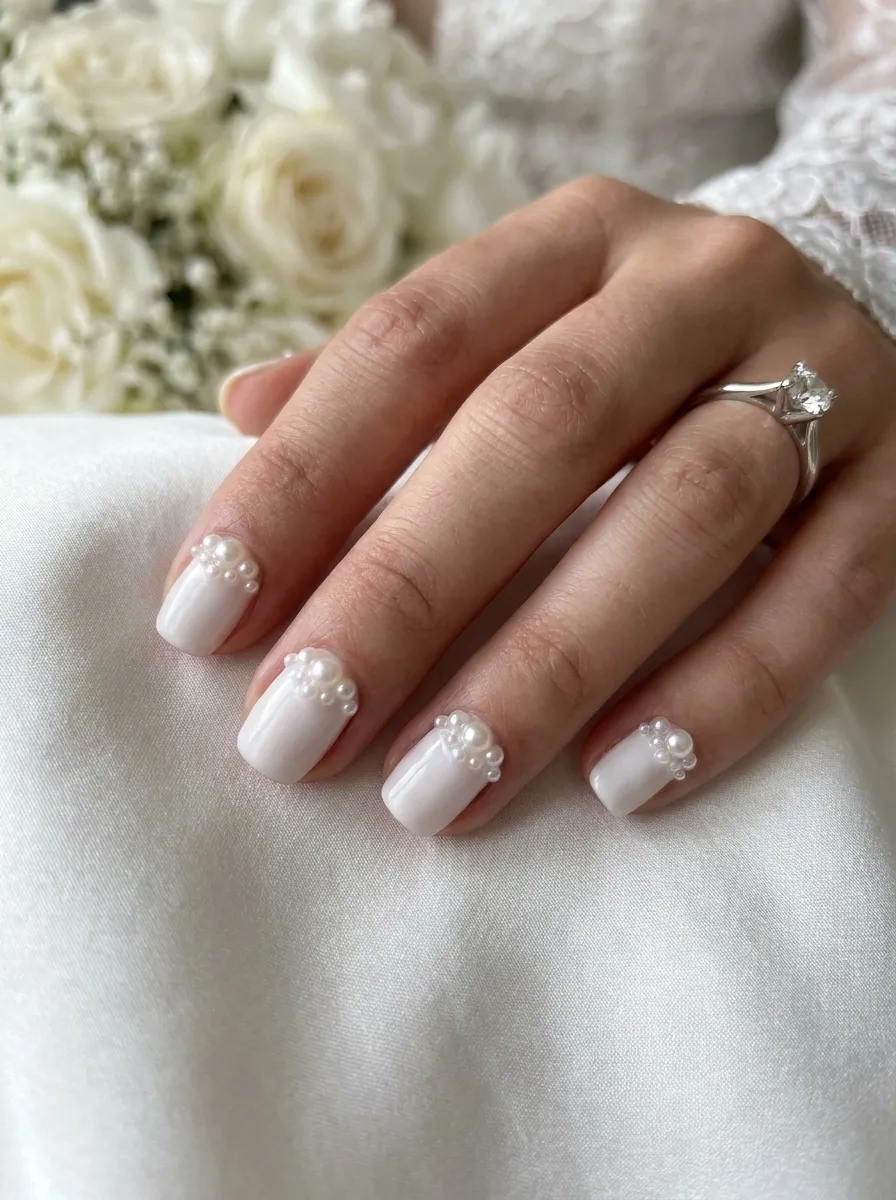
Pearls are a wedding staple, and they work just as well on your nails as they do on jewelry. This look uses tiny pearl beads placed at the base of each nail for a subtle, elegant accent. Start with a plain white or nude polish base. Once dry, use a dot of clear nail glue to attach small pearl beads near the cuticle line. Craft stores sell packs of tiny pearls for just a few dollars, which is enough for multiple manicures. You don’t need every nail decorated. Try just your ring finger or thumb for a simple, elegant touch. This keeps the look from feeling too busy while still adding a bridal detail. A top coat over the surrounding polish helps everything stay in place through the day. Pearl accents photograph beautifully up close, especially during ring exchange photos. This design also works if you’re incorporating pearls elsewhere in your outfit, like earrings or a hairpiece, tying your whole look together.
6. Minimalist Single Line Nail Art
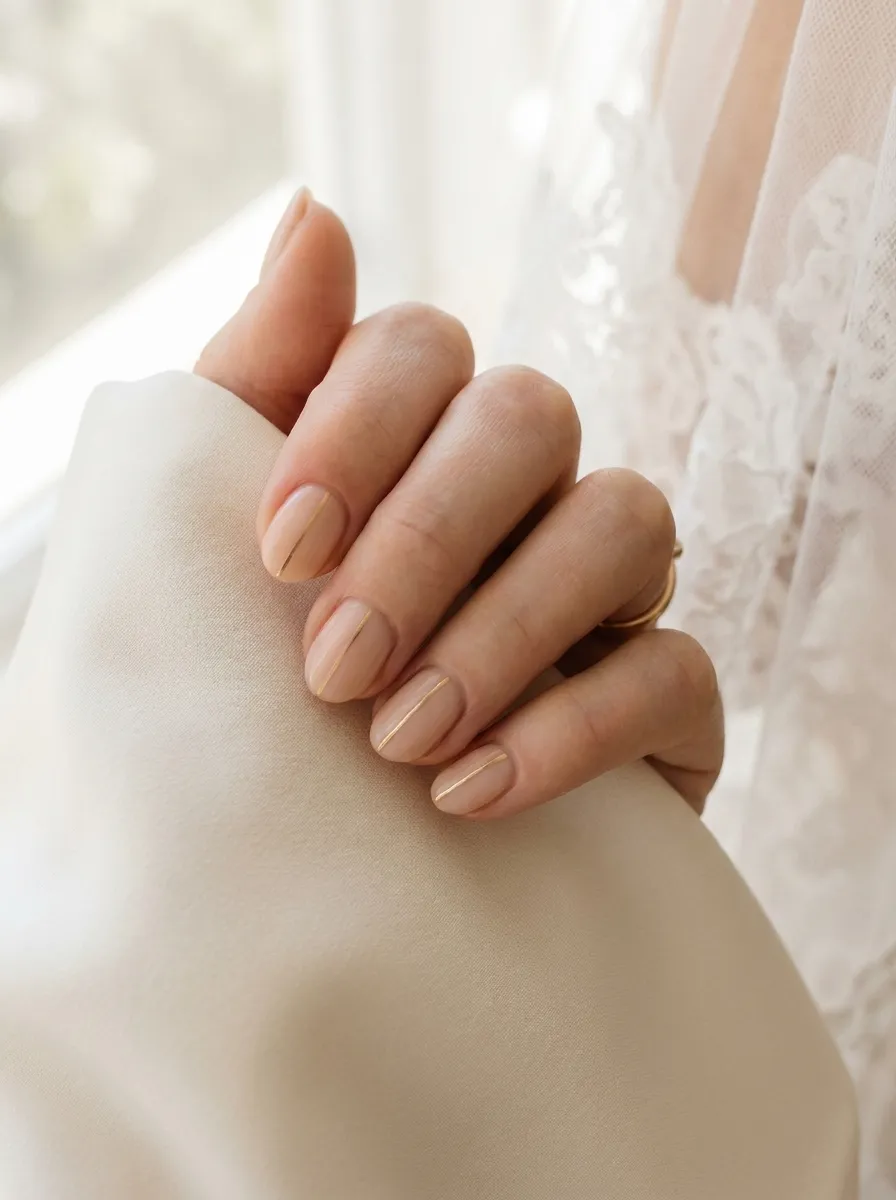
Minimalist nail art has grown in popularity for brides who want something modern and simple. A single thin line across a nude or white base adds interest without overwhelming the hand. This is one of the easiest designs to do yourself. Paint a base coat of nude or soft white polish and let it dry completely. Use a fine liner brush or a striping tape to create one straight or diagonal line in gold, silver, or a soft color. You only need a small bottle of metallic polish, which usually costs very little. This design suits brides who wear a lot of jewelry, since it won’t compete for attention. It also works on any nail length or shape, from short square nails to long almond nails. If your hand shakes, striping tape helps keep the line straight and clean. This look feels fresh and current, giving your bridal style a modern touch without losing the soft, romantic feel most weddings call for.
7. Chrome and Metallic Finish
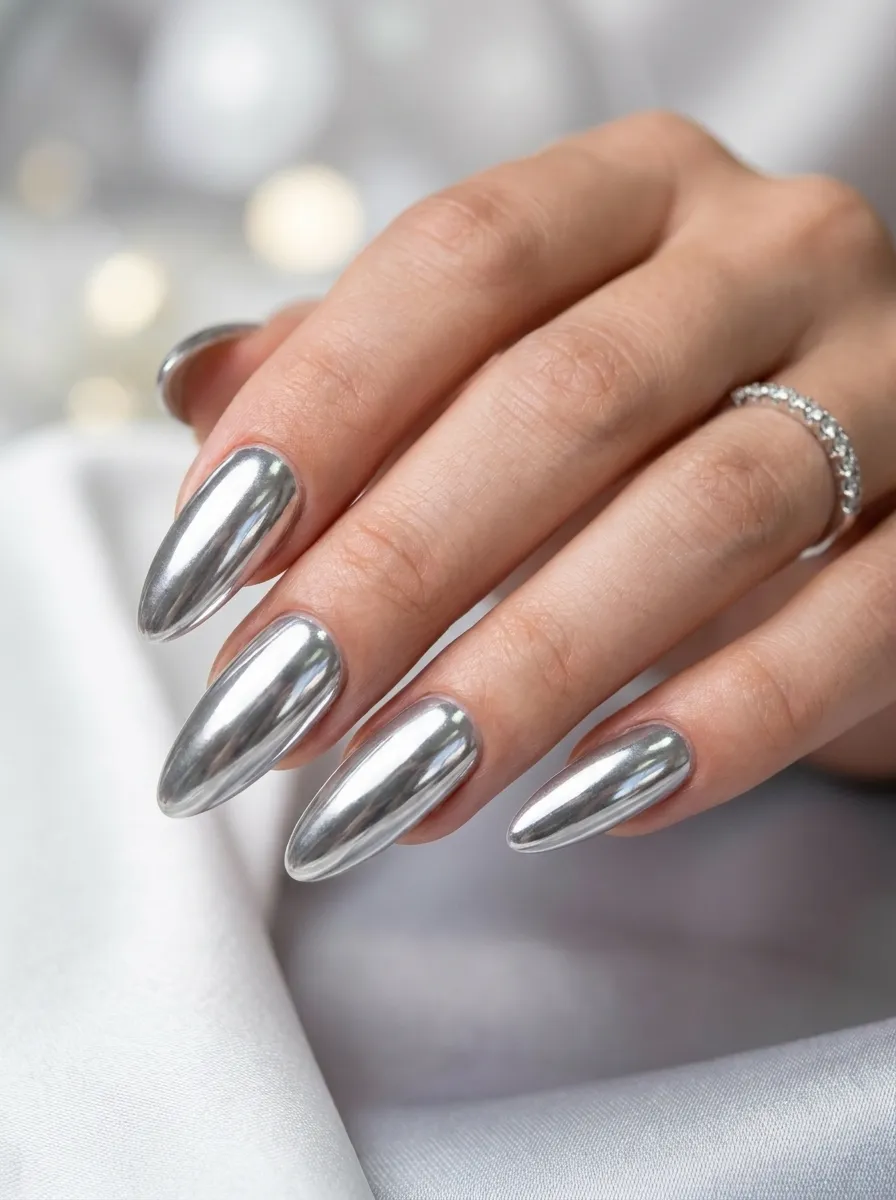
Chrome nails give a mirror-like shine that catches the light beautifully in photos. This look works for brides who want a bit of glamour without adding color. Chrome powder kits are sold at most beauty supply stores and cost less than a single salon visit. Start with a dark base coat, since chrome shows up best over black, navy, or deep gray polish. Once dry, rub the chrome powder onto the nail using a small sponge applicator included in most kits. The shine appears almost instantly. Seal it with a top coat to protect the finish and help it last through dancing and hugging guests. Silver chrome pairs well with almost every wedding color scheme, while gold chrome suits warmer palettes. This look takes a little practice, so try it on your fingers a week or two before the wedding. Chrome nails photograph well under both natural light and flash, making them a strong choice for evening receptions with lower lighting.
8. Floral Hand-Painted Nails
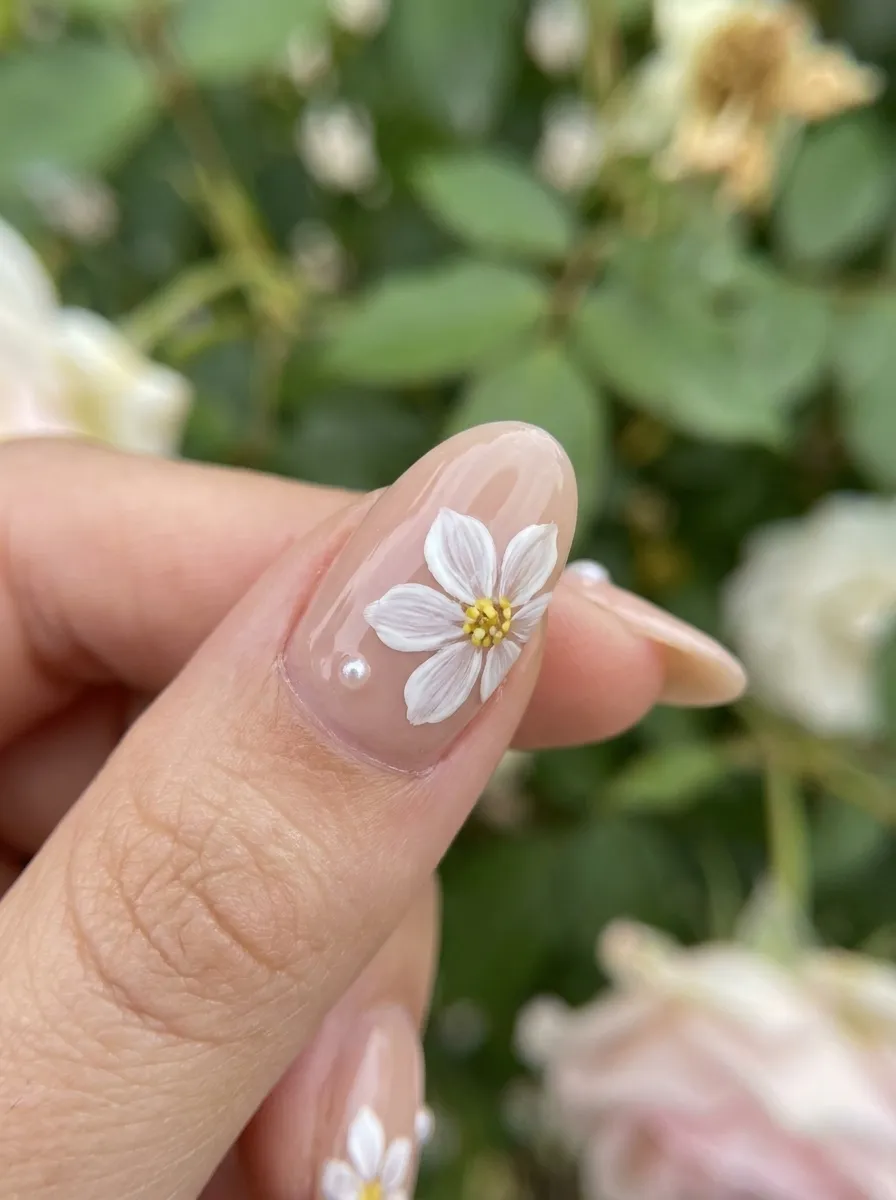
Floral nail art brings a garden feel to your bridal look, especially for outdoor or spring weddings. You don’t need professional skill to try this at home. Start with a nude or soft pink base coat. Using a thin brush, paint small dots in a circle to form a flower shape, then add a tiny dot of yellow or gold in the center. Keep the flowers small and simple rather than detailed, since tiny brushstrokes are easier to control. Practice on a spare nail tip or paper before working on your actual nails. A matte top coat gives the flowers a soft, painterly look, while glossy finishes add shine. This design works well as an accent on just one or two nails, keeping the rest of your hand simple and clean. Craft stores sell nail art brush sets for a few dollars, making this an affordable option. Floral nails match bouquets, table settings, and dress details beautifully in photos.
9. Matte White Nails
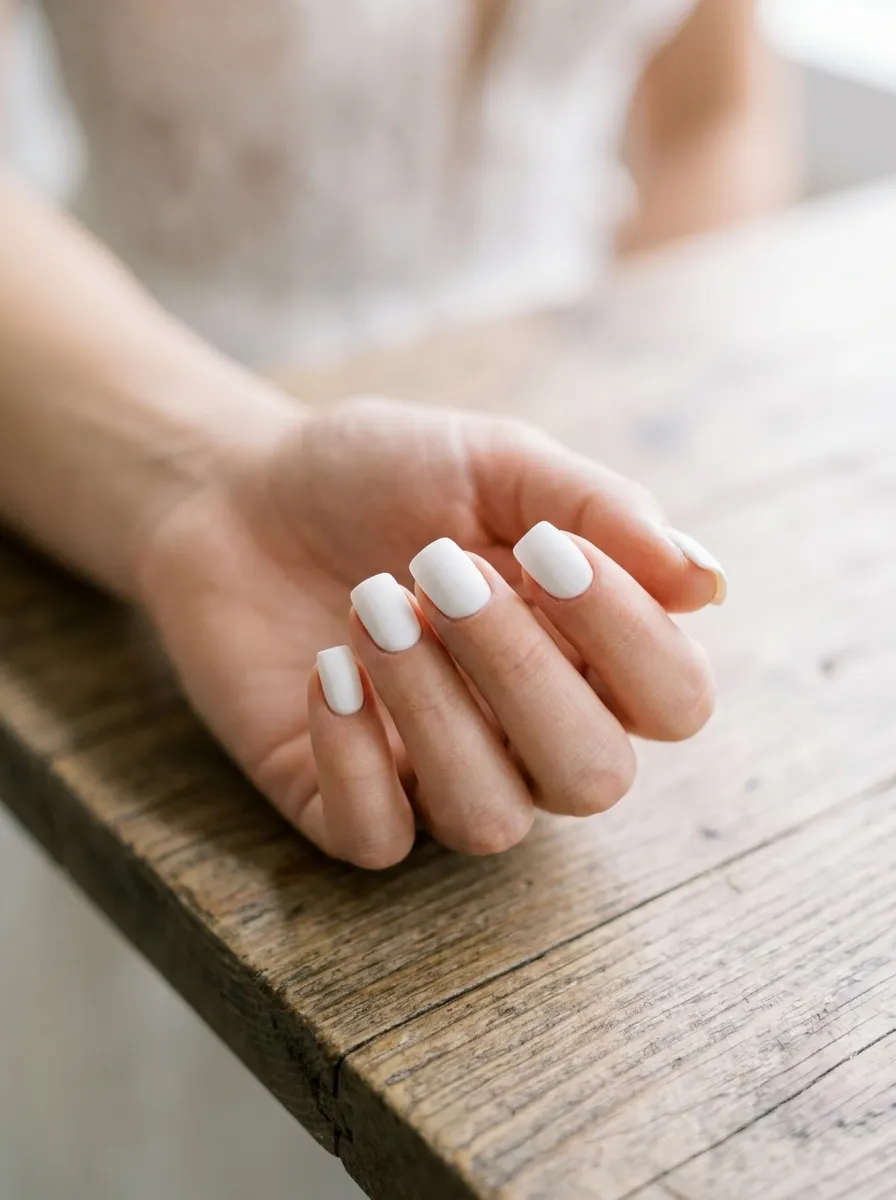
Matte white nails give a clean, modern look that works for almost any wedding style. The lack of shine makes the color feel soft rather than stark, which flatters most skin tones. This is one of the simplest looks to recreate at home. Apply two thin coats of white polish, letting each layer dry fully to avoid streaking. Finish with a matte top coat instead of a glossy one. This changes the entire mood of the color, making it feel understated rather than bold. Matte white pairs well with gold or silver jewelry and works for both minimalist and detailed wedding themes. If you’re worried about chipping, apply a fresh matte top coat the morning of your wedding for extra protection. This look also suits brides who want short, practical nails, since matte finishes tend to hide small imperfections better than glossy ones. It’s an affordable option since most drugstore brands carry both white polish and matte top coats for a low price.
10. Glitter Ombre Nails
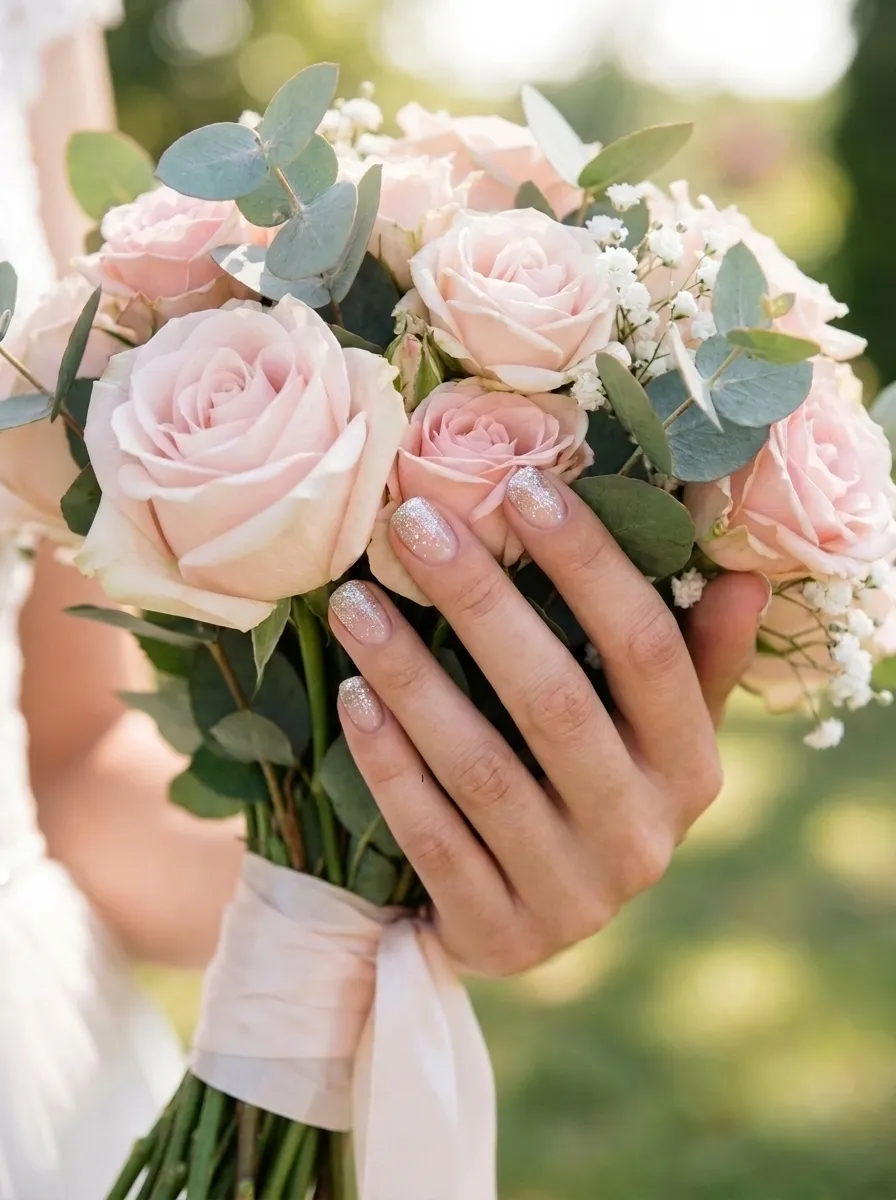
Glitter ombre nails add sparkle without covering the entire nail in glitter. The gradient effect, fading from clear or nude at the base to glitter at the tip, feels festive but still elegant. To recreate this at home, use a makeup sponge to dab fine glitter polish onto the tips of your nails after your base coat dries. Blend the edge gently by dabbing lighter near the cuticle. Let it dry, then seal with a thick top coat to smooth out any glitter texture. Fine glitter works better than chunky glitter for this technique, since it blends more evenly. Silver and gold glitter both photograph well under wedding lighting, especially during evening receptions with dim lighting or string lights. This look is budget-friendly since one small bottle of glitter polish covers several manicures. It also hides small chips better than solid polish, which is helpful for a long wedding day filled with hugs, hand-holding, and photos.
11. Rhinestone Accent Nails
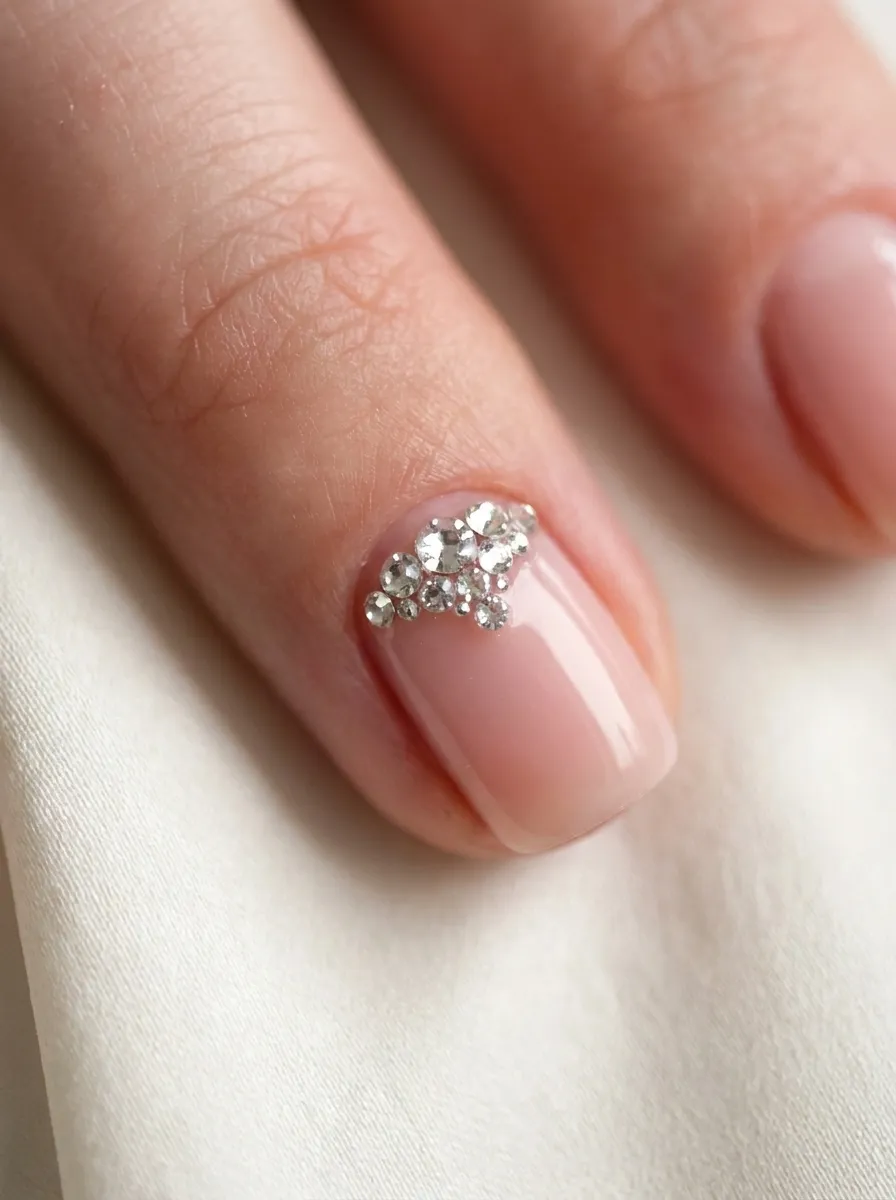
Rhinestones add a bit of sparkle to bridal nails without overwhelming the design. A few small stones near the cuticle or in a simple pattern feel elegant rather than flashy. Craft stores and beauty supply shops sell small rhinestone packs for just a few dollars, and one pack covers several manicures. Start with a sheer pink, white, or nude base. Once the polish dries, dab a small amount of clear nail glue where you want each stone. Use tweezers or a wax pencil to place the stones precisely. Add a top coat around the stones, being careful not to cover them completely, since this can dull their sparkle. Try placing rhinestones on just your ring finger for a simple accent, or line a few along the base of every nail for a fuller look. This design pairs beautifully with pearl or lace details if you want to mix textures. Rhinestone nails catch camera flash well, making them a strong choice for evening wedding photos.
12. Soft Nude Nails
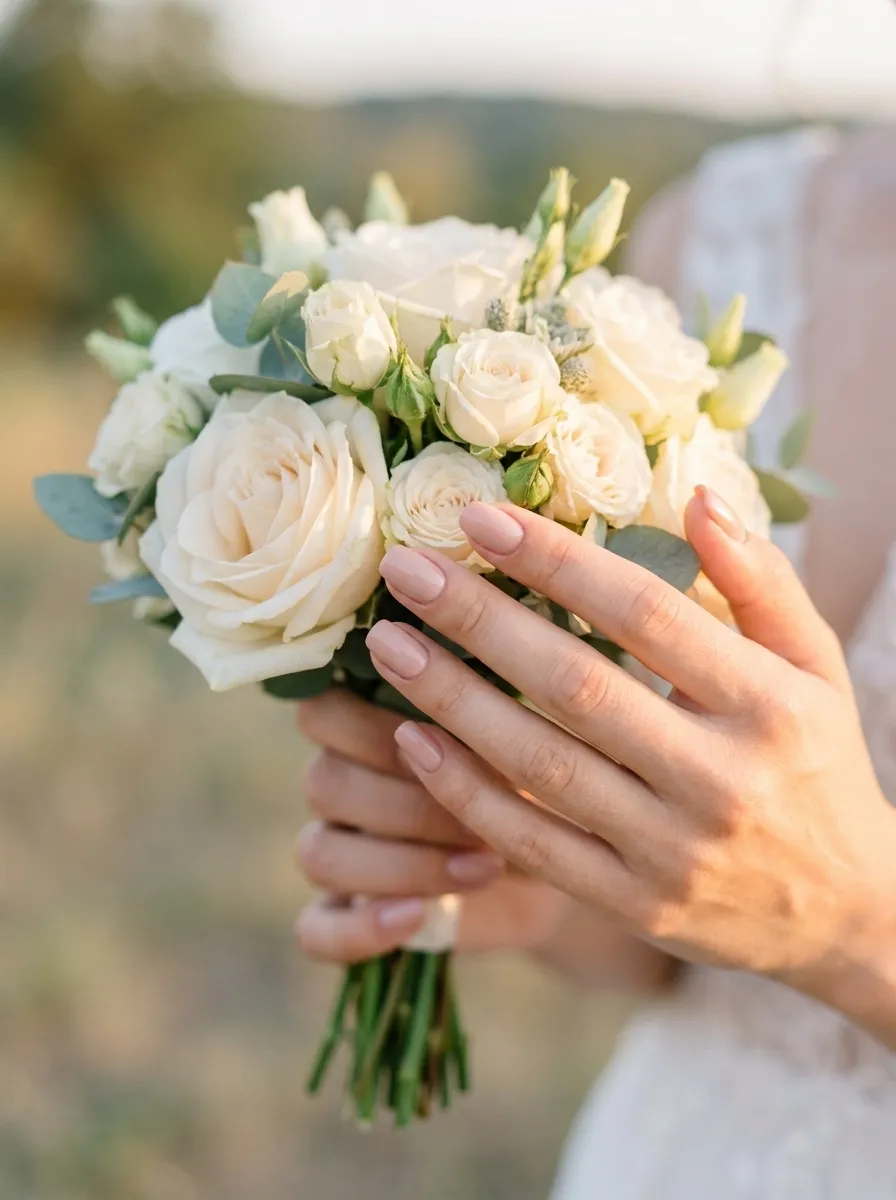
Soft nude nails are one of the easiest and most flattering choices for brides. They match nearly every skin tone and never clash with dress color or venue style. This look also requires very little skill to apply evenly, making it a great DIY option. Choose a shade close to your natural skin tone, then apply two thin coats for even coverage. A glossy top coat gives a healthy, polished shine, while a matte top coat offers a softer, more natural finish. Nude nails work well if you’re wearing statement jewelry, since they don’t pull focus away from rings or bracelets. This shade also suits brides who prefer short or practical nail lengths, since nude tones tend to make nails look longer and cleaner. Drugstore nude polishes are widely available and affordable, often costing just a few dollars. This look is easy to touch up yourself throughout the day, so keep a small bottle in your bag for the reception.
13. Iridescent Shimmer Nails
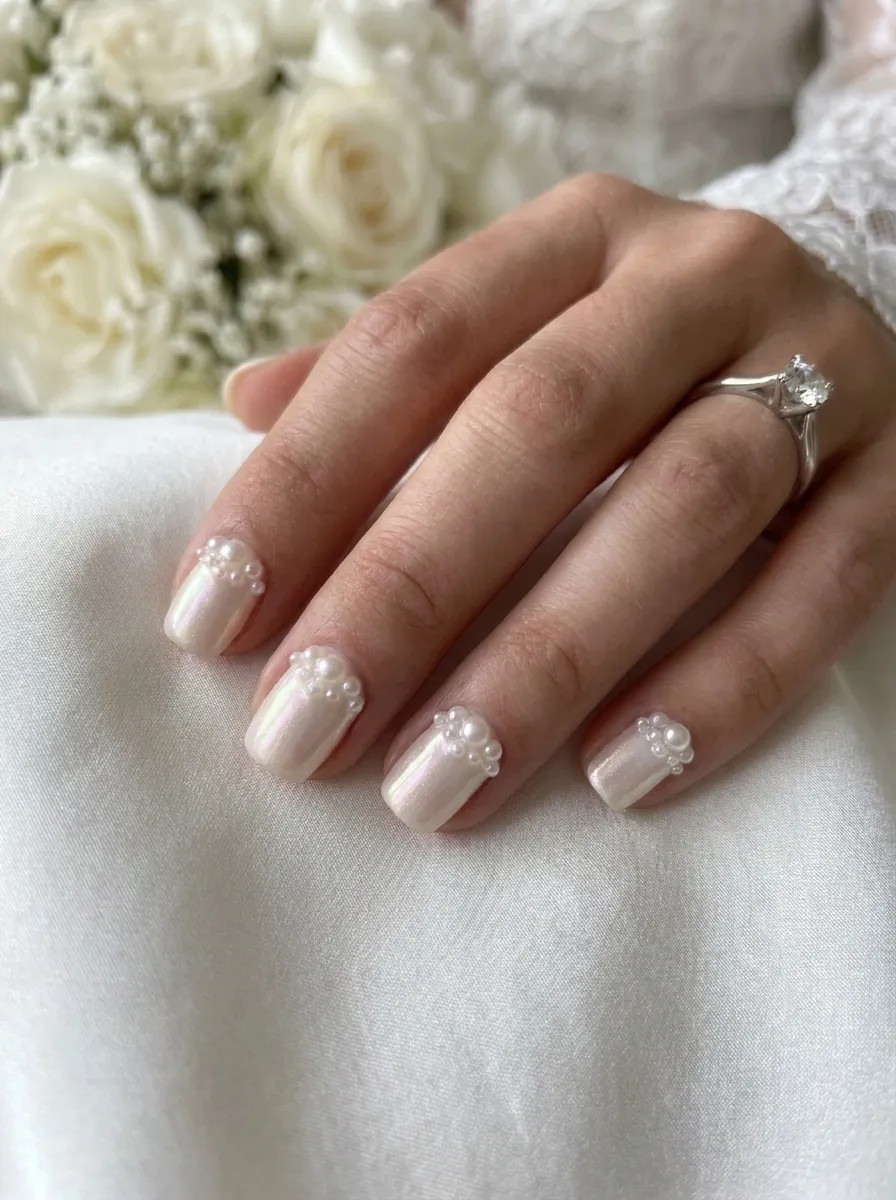
Iridescent nails shift color slightly depending on the angle of light, giving a soft glow rather than a bold sparkle. This effect works well for brides who want shine without heavy glitter. Many drugstore brands now carry shimmer or iridescent top coats that you can layer over a white or clear base. Apply your base color first and let it dry completely. Then add one or two thin coats of the iridescent top coat. The shimmer builds with each layer, so you can control how subtle or bold the effect looks. This finish photographs beautifully in natural light, especially during outdoor ceremonies where sunlight brings out the color shift. It also pairs well with soft pastel wedding themes. Since the shimmer sits in the top coat rather than the base polish, you can reuse the same shimmer bottle with different base colors for other events. This makes it a practical purchase that goes beyond just your wedding day.
14. Milky White Jelly Nails
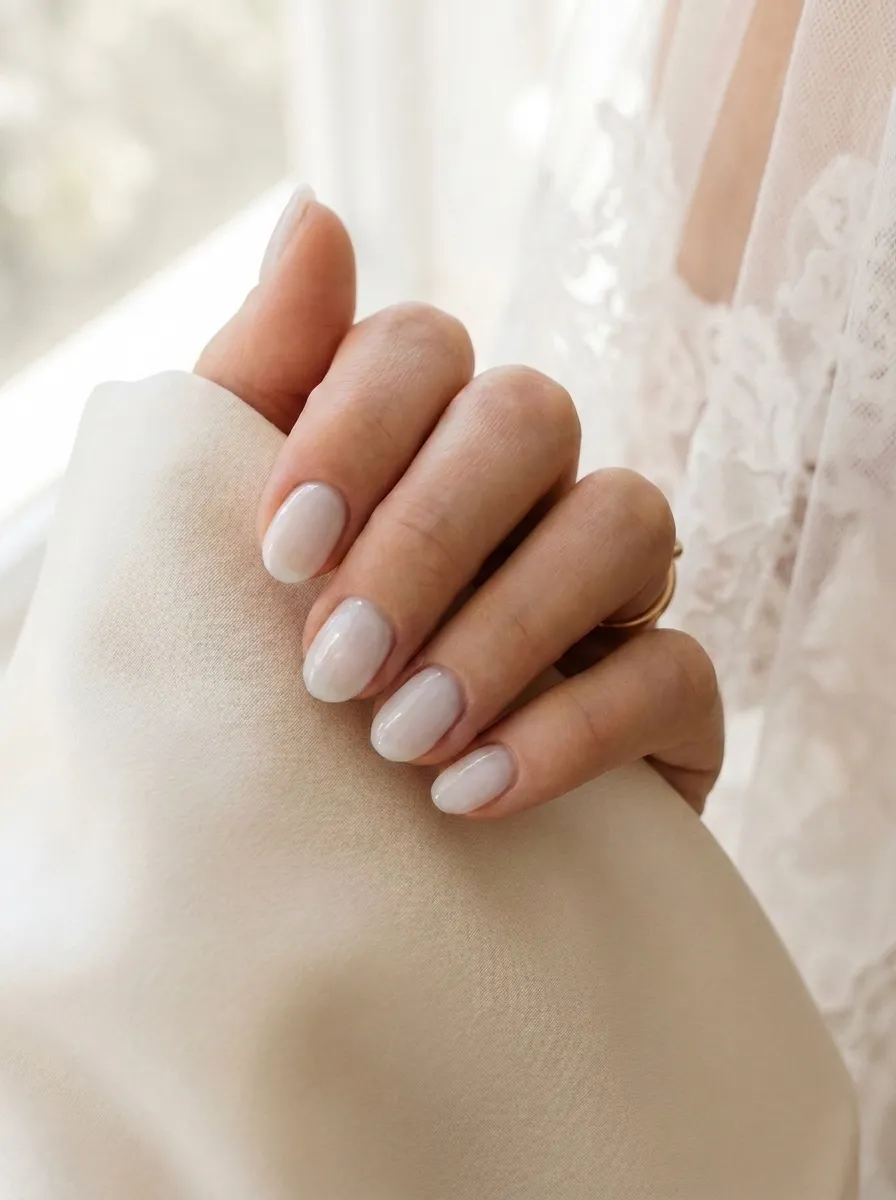
Milky white jelly nails have a soft, translucent look that feels modern and clean. Unlike solid white polish, this finish lets a hint of your natural nail show through, giving a soft glow rather than a flat color. To recreate this look, choose a sheer white or milky polish, often labeled as a jelly finish. Apply two to three thin coats, letting each layer dry before adding the next, since sheer polishes need more layers for even coverage. A high-shine top coat finishes the look and gives it a glassy appearance. This style works for brides who want something between bare nails and full color. It also suits minimalist wedding themes and modern dress styles. Milky jelly polishes are available at most drugstores for an affordable price, and the sheer formula tends to last longer without showing wear as obviously as solid polish. This look pairs well with gold jewelry and soft, natural makeup for a cohesive bridal appearance.
15. Butterfly Nail Art
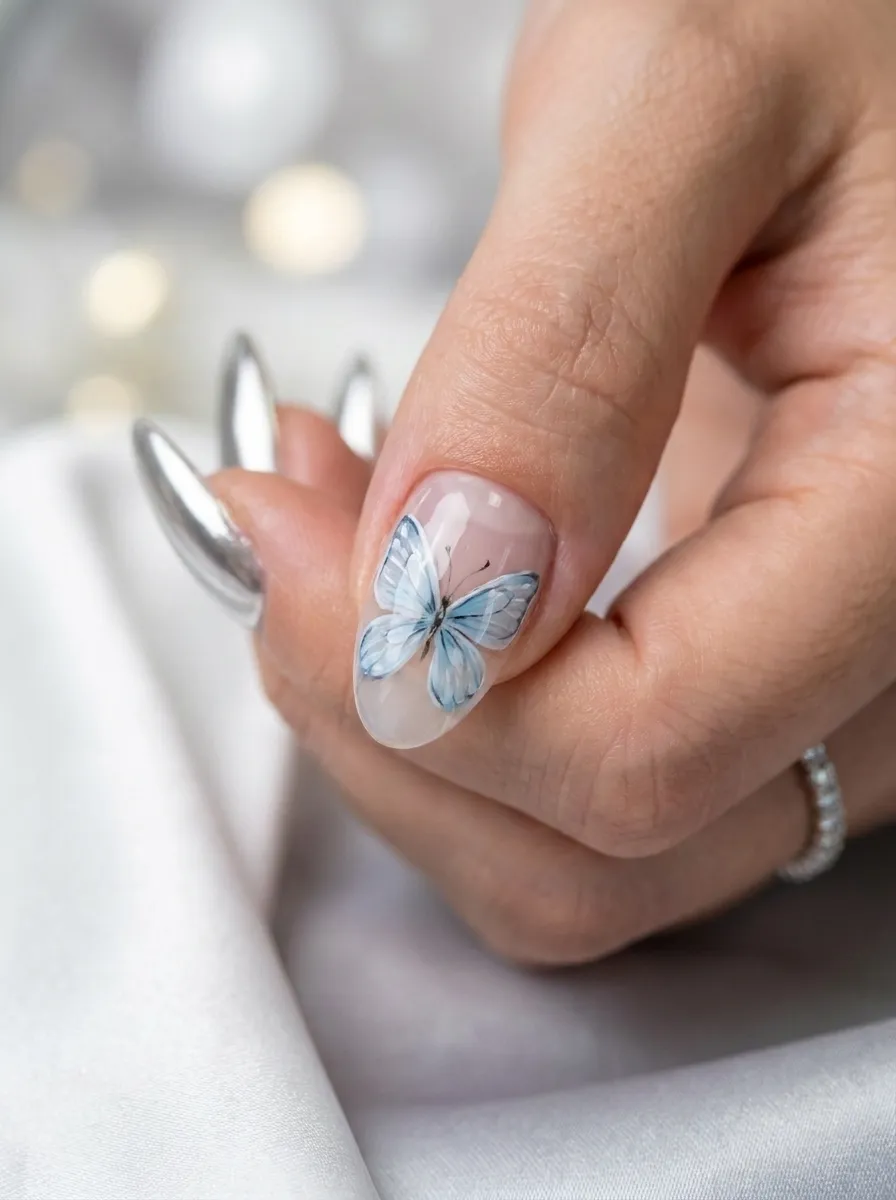
Butterfly nail art adds a whimsical touch, especially for spring or garden-themed weddings. This design can be as simple or detailed as you like. For an easy version, use a small dotting tool to create two ovals for wings on each side of a thin center line. Add tiny dots along the wing edges for detail once the base shape dries. Soft blue, white, or pastel pink work well for a delicate look. Keep the butterfly small and place it on just one or two accent nails to avoid an overly busy design. Practice the shape on paper first if you’re new to nail art. A glossy top coat makes the colors pop, while a matte finish gives a softer, more artistic look. Nail art brush sets are inexpensive and available at most beauty or craft stores. This design pairs nicely with soft nude or white nails on your other fingers, keeping the overall look balanced and romantic.
16. Pastel Color Palette Nails
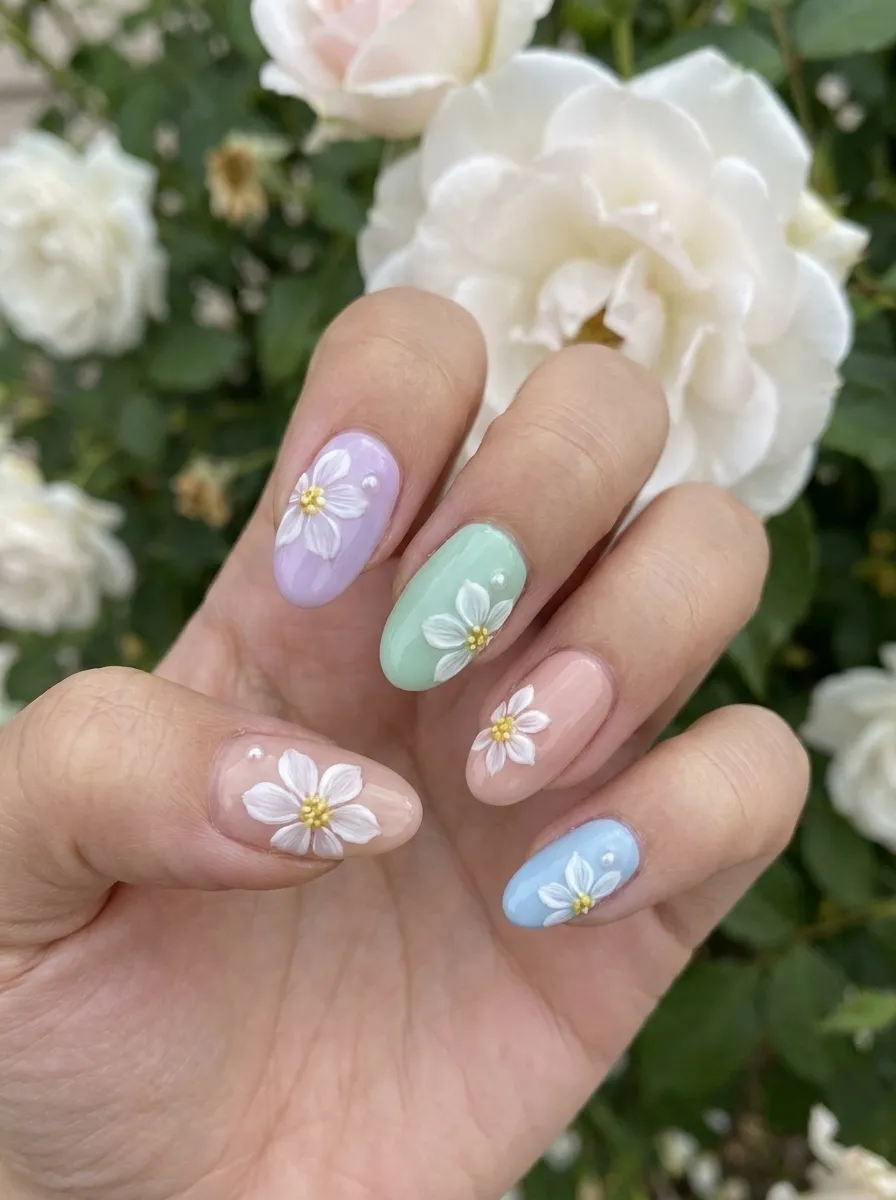
Pastel nails bring a soft, cheerful feel that suits spring and summer weddings especially well. Instead of one solid color, try painting each nail a different pastel shade, like lavender, mint, blush, and soft yellow. This adds interest without looking mismatched, since the colors share the same soft, muted tone. Apply two coats of each color for even coverage, letting nails dry fully between coats to avoid smudging. A glossy top coat ties the different shades together and gives a cohesive finish. This look is budget-friendly since many drugstore brands sell pastel polish sets specifically designed to coordinate with each other. It also works well if your wedding has a garden or outdoor theme with lots of natural color. Pastel nails photograph beautifully in daylight and pair nicely with fresh flower bouquets. If you prefer a more subtle version, choose just two or three pastel shades instead of a different color for every nail.
17. Geometric Line Nail Art
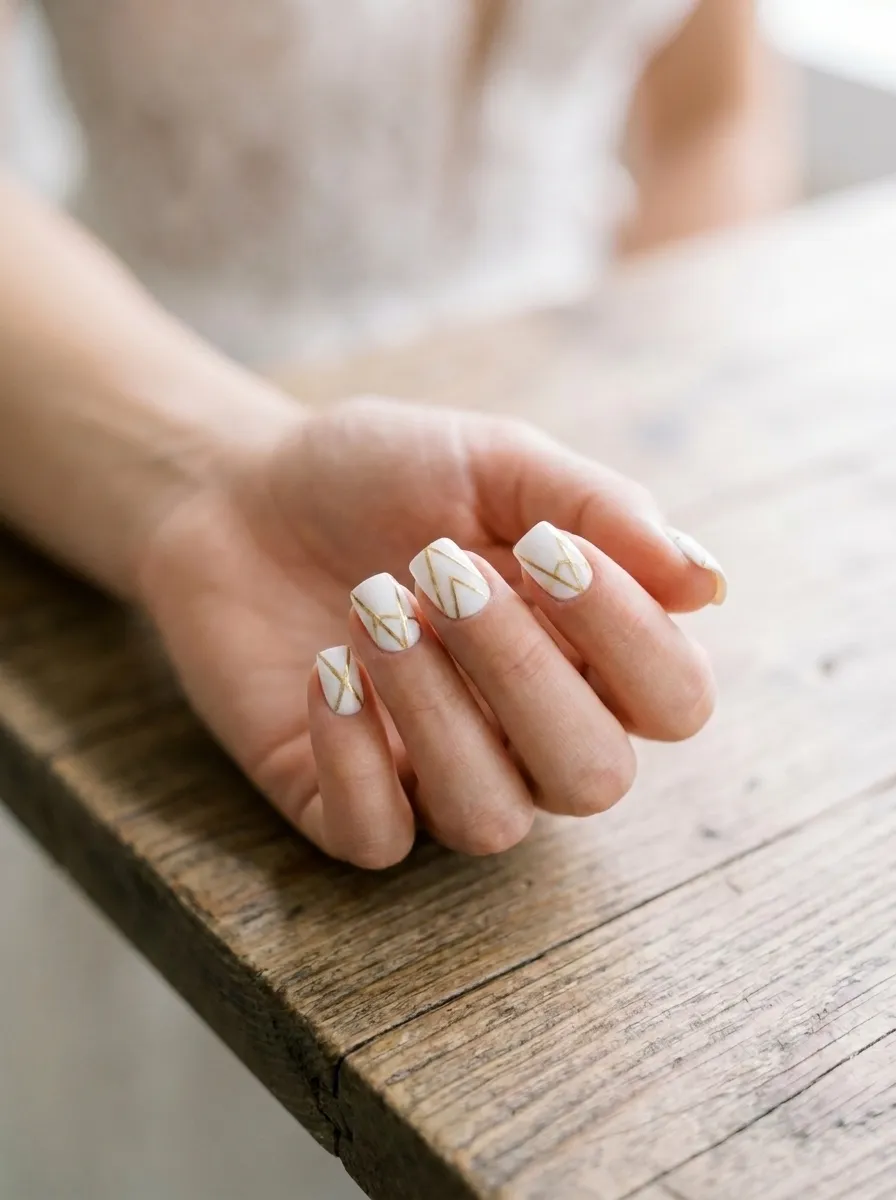
Geometric nail art gives a modern, structured look that suits contemporary wedding themes. Thin gold or black lines forming triangles, angles, or simple shapes add interest without needing detailed artwork. Start with a white or nude base coat and let it dry fully. Use a fine liner brush or striping tape to create straight lines in a metallic or contrasting color. Striping tape makes this design much easier for beginners, since it keeps lines crisp and even. Peel the tape away carefully once the polish underneath is dry to avoid smudging. This look works well on square or coffin-shaped nails, where straight lines follow the natural shape of the nail. Geometric nails pair beautifully with modern, minimalist wedding decor and clean-lined dresses. Metallic striping tape and fine liner brushes are both inexpensive, often under five dollars each. This design also looks intentional even if your lines aren’t perfectly straight, since the geometric style embraces clean, graphic simplicity over realism.
18. Marble Effect Nails
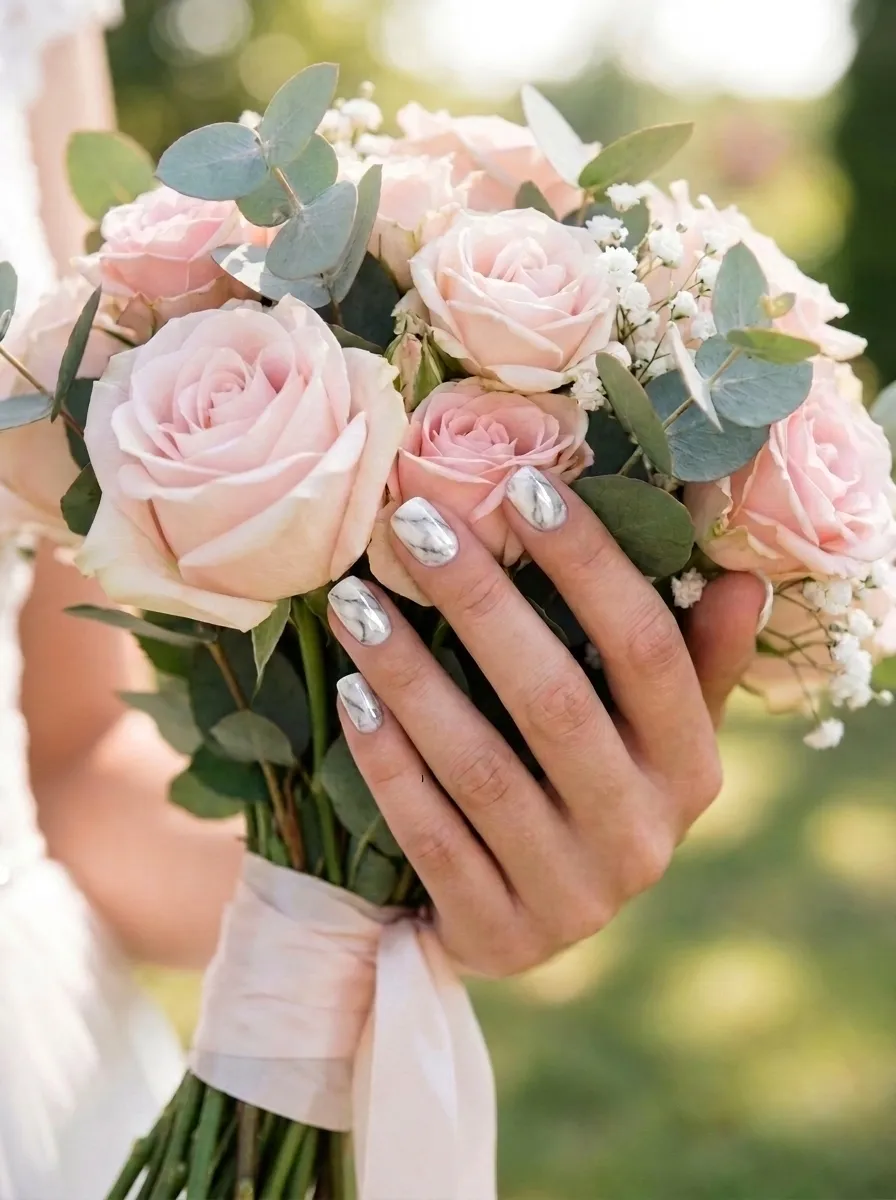
Marble nails mimic the look of polished stone, giving an elegant, luxurious feel without needing rhinestones or glitter. This design takes a bit of practice but is achievable at home using a water marbling technique or a marble effect nail polish that’s designed to create the pattern automatically. For the easier route, look for a marble-effect top coat at beauty supply stores, which creates swirling patterns with minimal effort. Apply your white or gray base coat first and let it dry. Then apply the marble top coat according to the bottle’s instructions, usually by dabbing rather than brushing. Seal everything with a high-shine top coat to enhance the stone-like effect. This look suits brides with a classic or formal wedding style, especially those incorporating marble or stone details in their venue decor. Marble nails photograph well under most lighting conditions since the pattern adds natural depth and dimension without relying on sparkle or shine to stand out.
19. Gold Foil Accent Nails
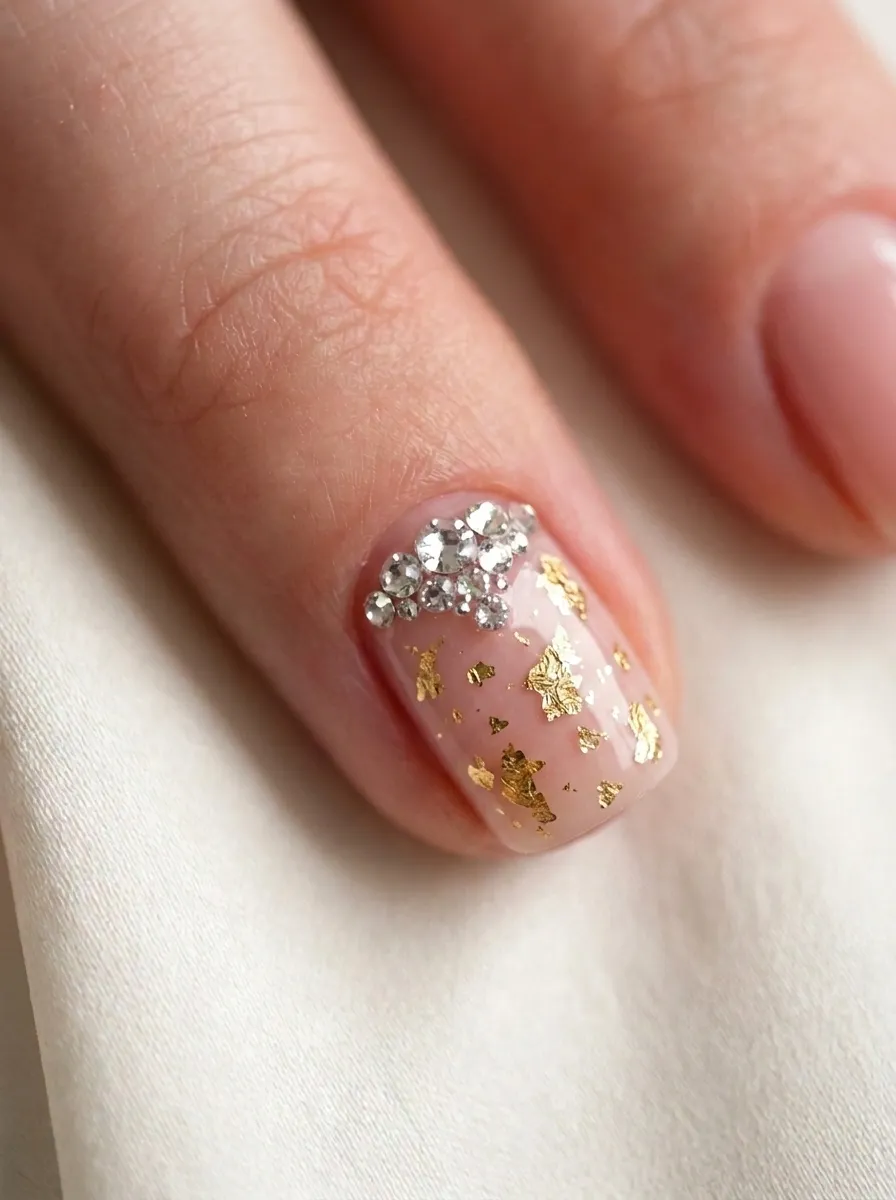
Gold foil adds a touch of luxury without covering the entire nail in metallic polish. Small flecks or a partial foil placement give a broken, natural pattern that catches light beautifully. Foil sheets are sold in craft and beauty stores for a low price and can be reused for multiple manicures. Start with a tacky top coat or specialty foil glue, applying it only where you want the foil to stick. Once it becomes tacky, press small pieces of gold foil onto the nail and peel away gently, leaving fragments behind. Seal everything with a clear top coat to smooth the texture and lock the foil in place. This look works beautifully as an accent on just the ring finger, paired with a simple nude or white polish on the remaining nails. Gold foil pairs well with warm-toned wedding colors like champagne, blush, or ivory. It’s an easy way to add shine without full glitter or chrome coverage.
20. Cat Eye Chrome Nails
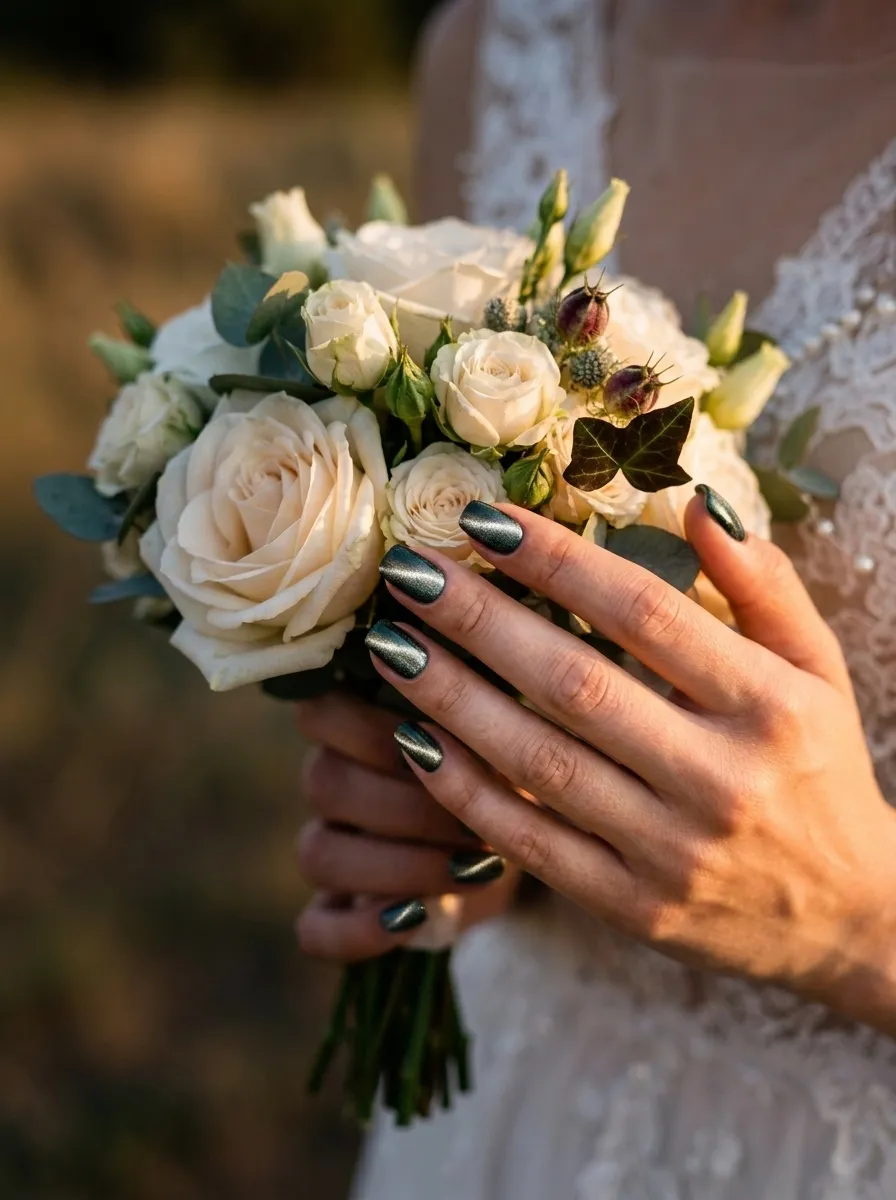
Cat eye nails use a magnetic polish that creates a glowing line across the nail when a magnet is held above it while wet. The effect looks similar to the shine seen in cat’s eye gemstones, giving a soft, moving shimmer. Beauty supply stores sell cat eye polish kits that include the magnet, usually at an affordable price point. Apply your base color, often a deep gray, navy, or soft brown, and while it’s still wet, hold the magnet close to the nail without touching it. Wait a few seconds for the pattern to form, then let the polish dry fully before sealing with a glossy top coat. This look suits evening weddings especially well, since the shimmer catches light beautifully under both natural and artificial lighting. It also gives a more subtle sparkle compared to full glitter or chrome, making it a good middle-ground option for brides who want shine without too much shine.
21. Almond Shape Nude Nails
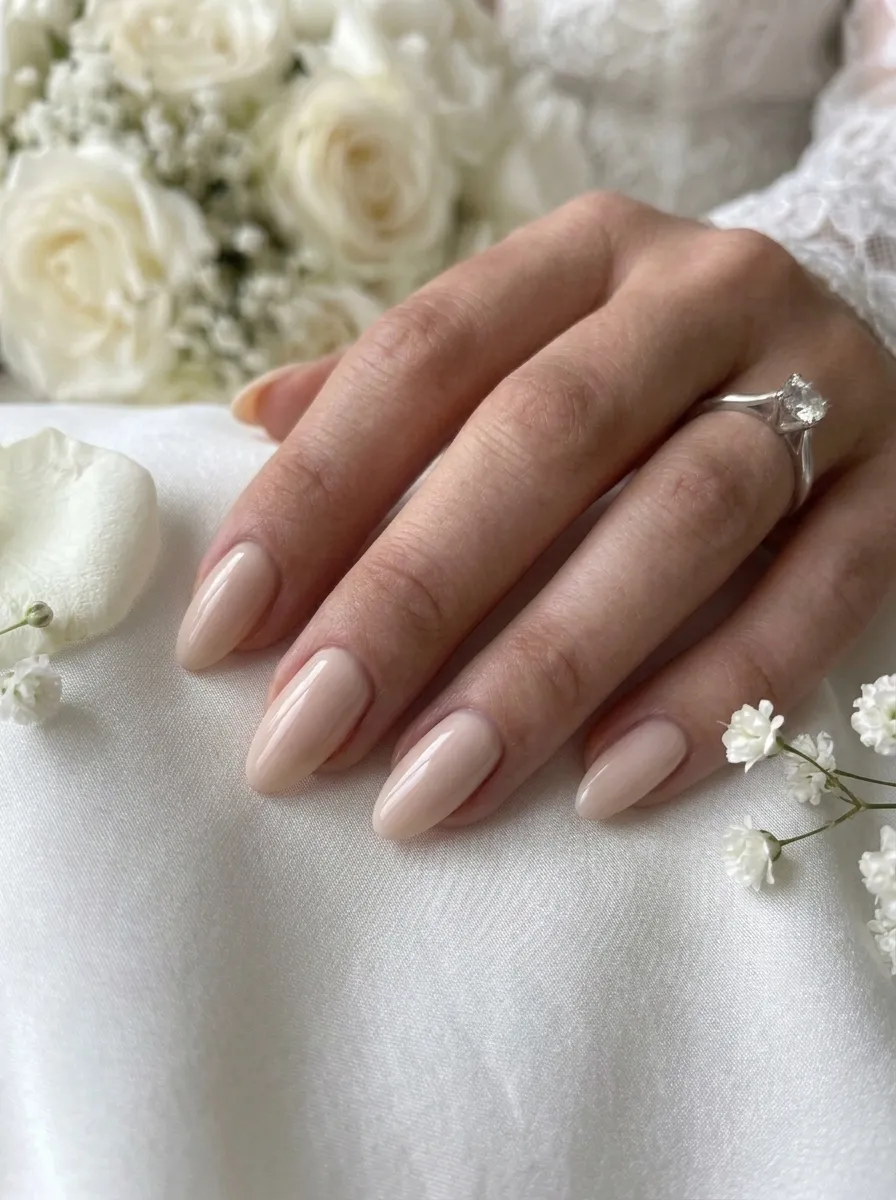
Almond-shaped nails give a soft, elongated look that flatters most hand shapes. Paired with a nude polish, this style feels elegant and timeless. Filing your nails into an almond shape is easy to do at home with a regular nail file. Start by shaping the sides inward slightly, then round the tip into a soft point rather than a sharp one. File slowly and check both hands often to keep the shape even. Once shaped, apply a nude polish in two thin coats for smooth coverage. A glossy top coat enhances the elongating effect of the almond shape. This style suits brides who want their nails to look longer without extensions, since the shape itself creates that illusion. Almond nails also pair well with most nail art styles listed here, including gold lines, pearls, or rhinestones. Keep nails at a medium length for the most comfortable, low-maintenance option, especially if you’ll be handling a bouquet or dancing throughout the reception.
22. Coffin Shape Bridal Nails
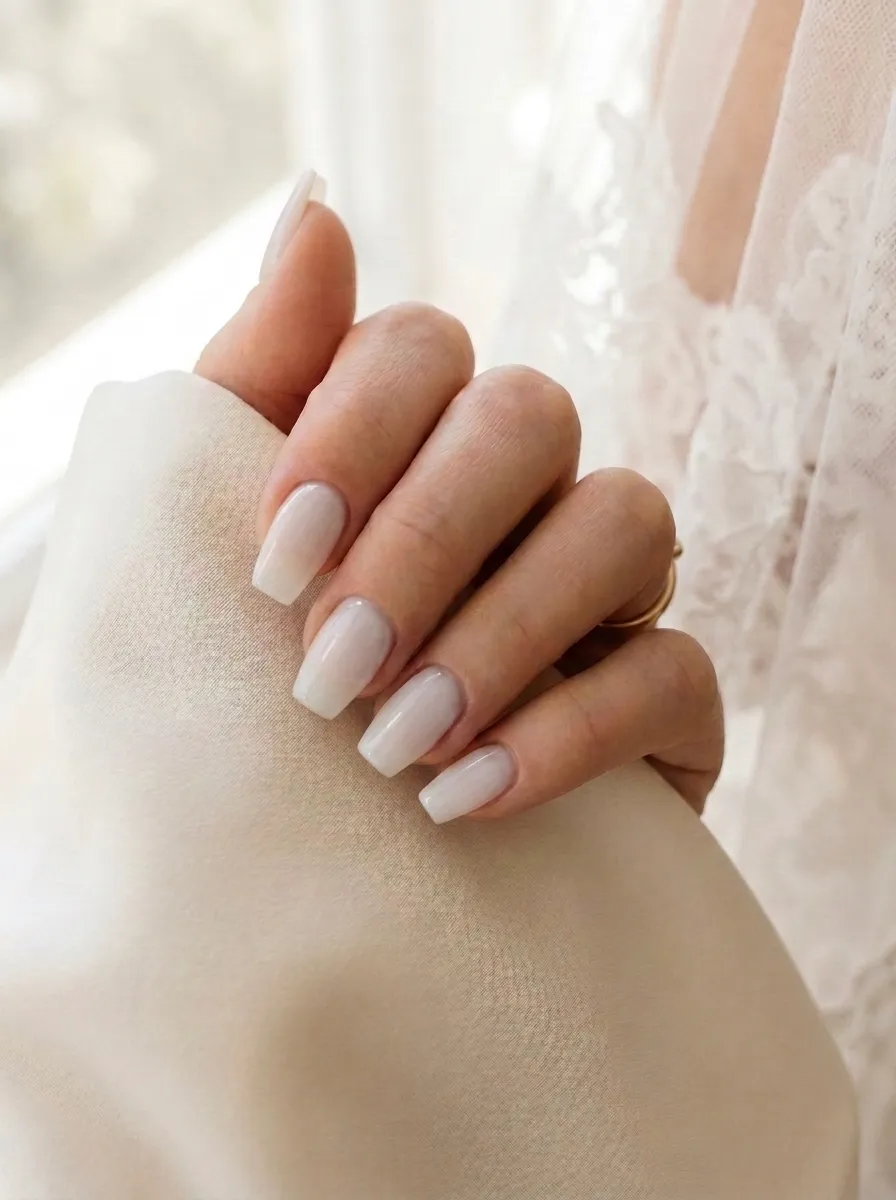
Coffin-shaped nails, also called ballerina nails, have a tapered shape with a flat, squared-off tip. This style gives a bold, modern look that pairs well with detailed nail art like geometric lines or marble patterns. Filing this shape at home takes a bit more practice than a simple oval or square. Start by tapering the sides of the nail inward, then file the tip flat rather than rounding it. A nail file with a finer grit helps create smooth, clean edges. This shape works best on medium to longer nails, since shorter nails may not have enough length to show the tapered effect clearly. Coffin nails pair beautifully with matte finishes, chrome, or bold color choices. If filing feels tricky, press-on coffin-shaped nails are widely available and affordable, offering a quick alternative without commitment. This shape suits brides who want a more fashion-forward bridal look while still keeping the overall color palette soft and wedding-appropriate.
23. Short Square Nails for Brides
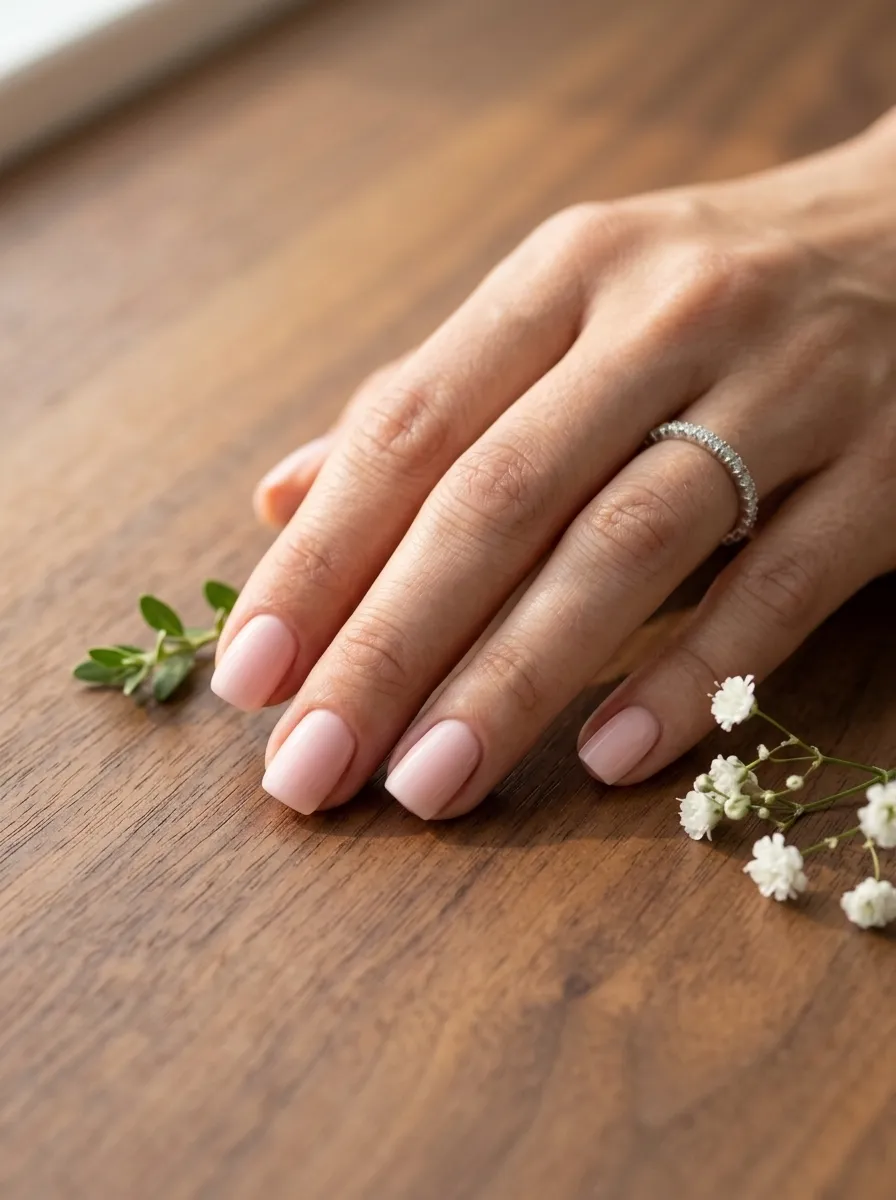
Short square nails are a practical choice for brides who want a polished look without added length. This shape suits active brides who’ll be handling flowers, adjusting a veil, or dancing throughout the night. Square nails are also one of the easiest shapes to file at home, since it simply involves trimming the nail straight across and softening the corners slightly. Choose a soft pink, nude, or white polish for a clean bridal look. Two thin coats provide even coverage, and a glossy top coat adds shine without extra effort. This shape holds up well over a long day, since shorter nails are less likely to catch on fabric or accidentally chip. It’s also a comfortable option for brides who aren’t used to longer nails and don’t want to adjust their daily routine before the wedding. Short square nails pair well with simple designs like a single gold line or small rhinestone accents, keeping the overall look clean and low-maintenance.
24. Sheer Glazed Donut Nails
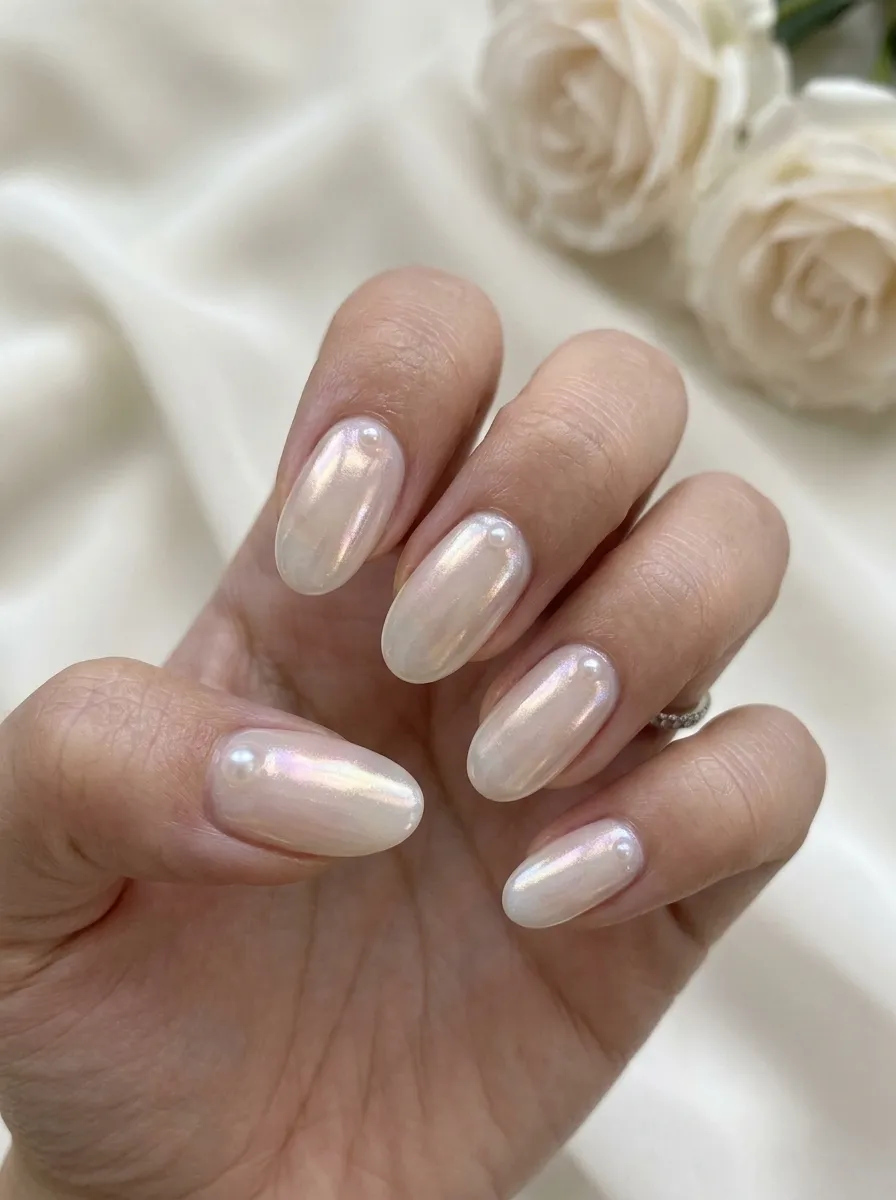
The glazed donut nail trend uses a sheer, pearlescent polish that gives nails a glossy, glowing finish. It looks similar to milky jelly nails but has a slightly more shimmering, wet-look shine. This trend became popular for its clean, modern appearance that works with nearly any outfit or wedding style. To recreate it, apply a sheer white or pearl base polish in two to three coats. Once dry, add a specialty glazed or shimmer top coat, which many drugstore brands now carry due to the trend’s popularity. This top coat gives the glassy, glowing finish that defines the look. It’s an easy design for beginners since there’s no detailed art involved, just careful layering. This style suits brides who want a subtle, glowing manicure that photographs well without competing with other bridal details like jewelry or hair accessories. It also pairs nicely with both short and long nail lengths, making it a flexible option for most brides.
25. Two-Tone French Tips
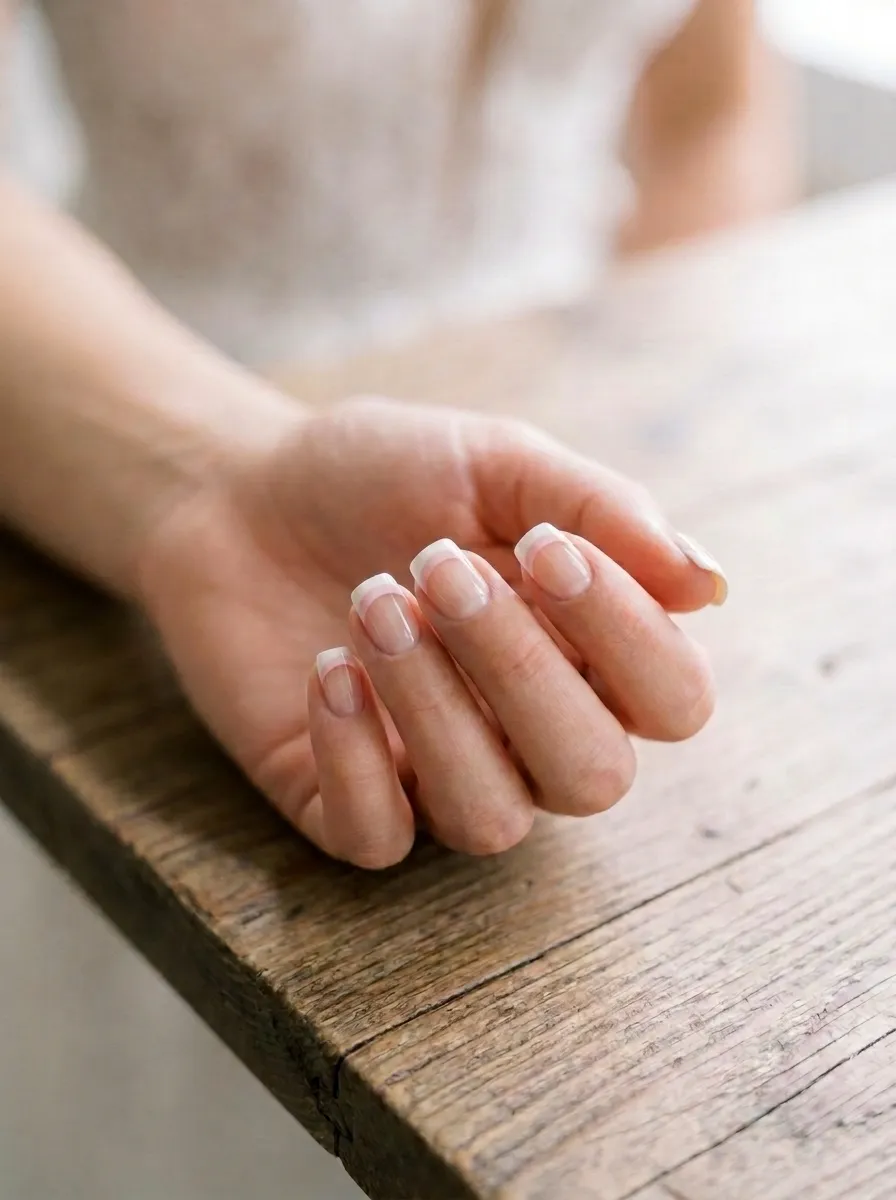
Two-tone French tips update the classic French manicure by using two colors instead of one for the tip line. This adds subtle depth and interest while keeping the overall look elegant and bridal. Start with a nude or soft pink base coat. Once dry, use striping tape to mark a small line near the tip and paint it white. Let that dry, then move the tape up slightly and paint a second, thinner line in a soft pink or gold above the white section. This creates a layered, two-toned tip effect. A top coat seals everything and adds shine. This design takes a little more patience than a standard French tip but doesn’t require advanced nail art skills, just careful taping and steady layers. It works well for brides who want something slightly different from a traditional French manicure without moving into bold colors or patterns. This look photographs nicely in close-up ring shots.
26. Beaded 3D Nail Art
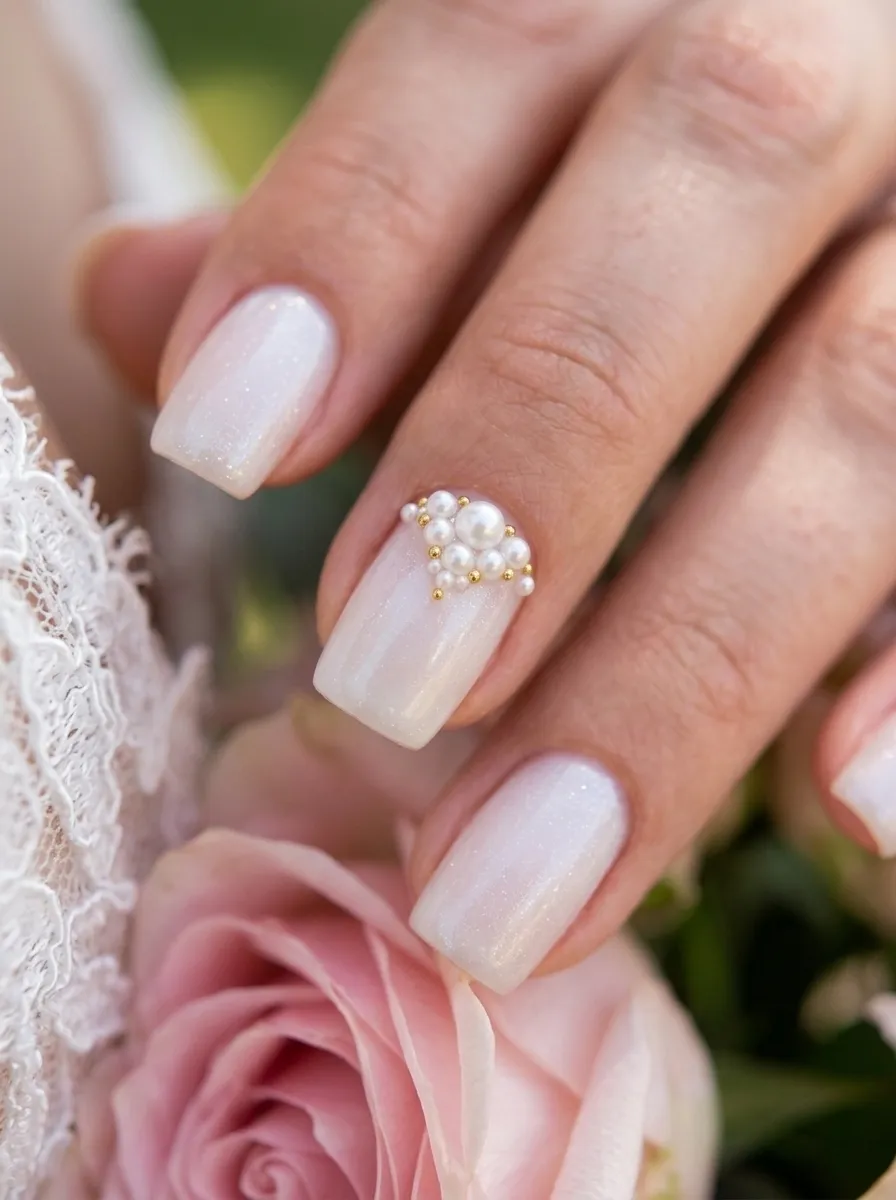
Beaded 3D nail art adds texture and dimension, giving nails a tactile, decorative feel. Small beads, often sold in bridal or craft nail art kits, are arranged in clusters or lines to create a raised design. Start with a base polish in white, nude, or pale pink. Once dry, use a small amount of clear nail glue to attach the beads in your desired pattern, whether that’s a small cluster near the cuticle or a line along one edge of the nail. Tweezers help with precise placement. Let the glue set fully before applying activities like putting on gloves or handling fabric. This design works best as an accent on one or two nails rather than all ten, since the raised texture can feel bulky if overdone. Beaded nail art pairs beautifully with simple, solid-colored nails on the remaining fingers. Bead kits are inexpensive and often include enough pieces for several manicures, making this a cost-effective way to add bridal detail.
27. Champagne Glitter Nails
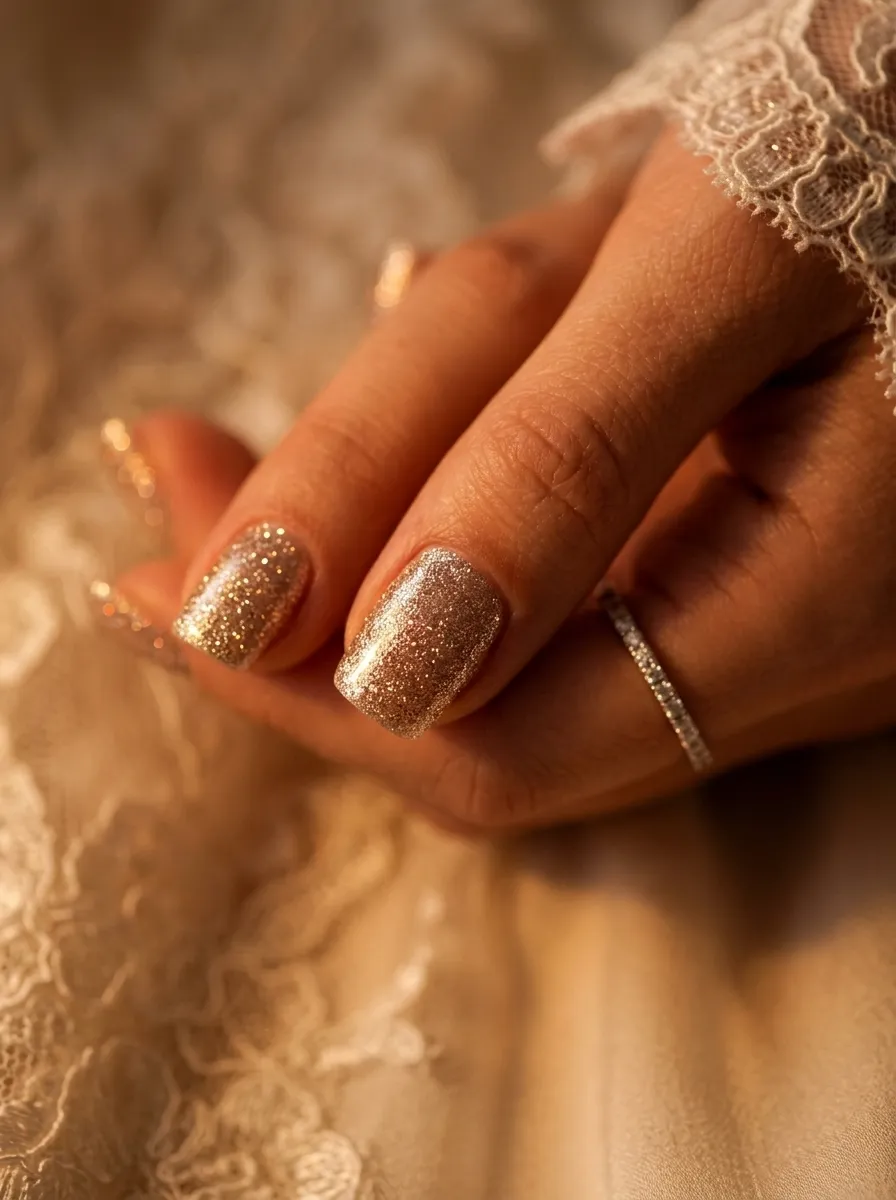
Champagne glitter nails bring warmth and sparkle, especially suited for fall or evening weddings. This soft gold-toned glitter feels more sophisticated than silver or clear glitter, matching warm wedding color palettes like champagne, blush, or burgundy. Apply a nude or soft gold base coat first, letting it dry completely. Then apply one or two coats of champagne glitter polish, using a top coat between layers to smooth the texture if the glitter feels rough. A thick top coat at the end helps seal in the glitter and gives a smoother overall finish. This look works well for brides who want sparkle without a cool-toned or overly bright shine. Champagne glitter also photographs beautifully under warm string lights or candlelight, common at evening receptions. It’s an affordable option since one bottle of glitter polish covers several manicures, and it pairs nicely with gold jewelry, warm makeup tones, and neutral wedding decor.
28. Baby Boomer Ombre Nails
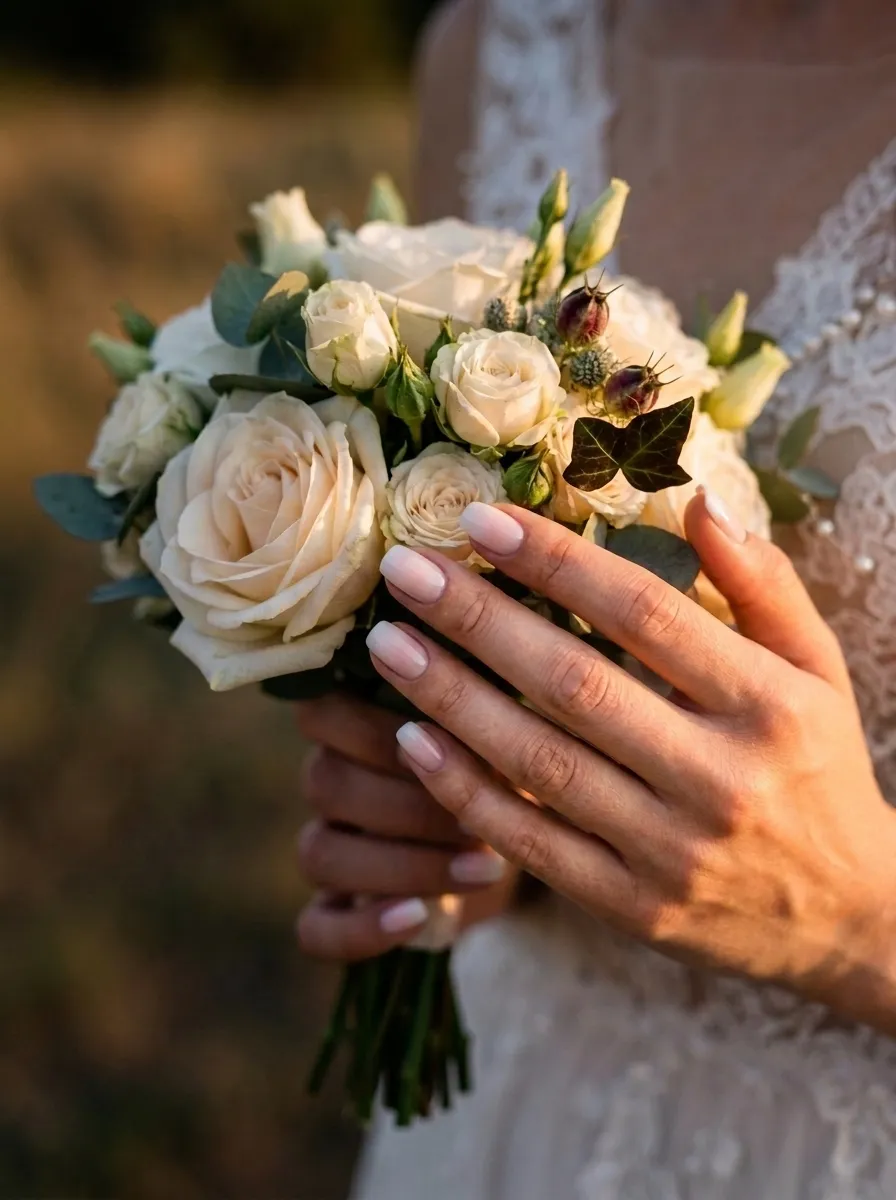
Baby boomer nails use a soft gradient technique, blending a pale pink base into a white tip for a subtle, elegant ombre effect. Unlike a traditional French tip with a sharp line, this design has a smooth, blended transition between the two colors. To recreate this at home, apply a pale pink base coat and let it dry. Using a makeup sponge, dab white polish onto the tip of the nail, blending upward gently before the polish dries completely. Repeat if needed for a more solid tip, blending each time for a soft transition. A top coat smooths any texture from the sponge application. This look gives the elegance of a French manicure with a softer, more modern edge. It suits brides who want a subtle design without bold color or added embellishments. Baby boomer nails work on any nail shape and length, making them a flexible, classic choice for nearly any wedding style or dress.
29. Crystal Encrusted Statement Nail
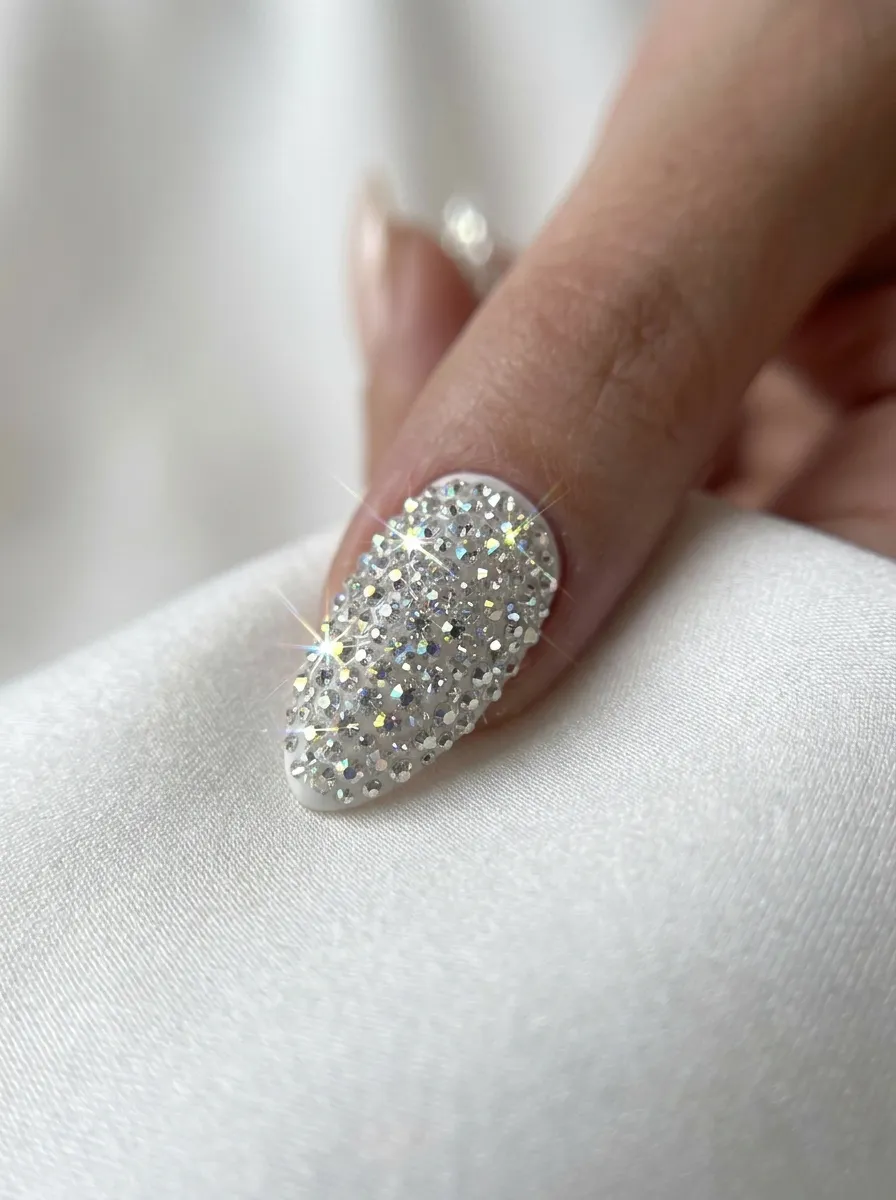
A crystal encrusted statement nail focuses all the sparkle on just one nail, usually the ring finger, while keeping the rest simple. This creates a glamorous accent without covering every nail in stones, which keeps the overall look balanced and practical for a full day of activities. Start with a white or nude base on the accent nail and let it dry. Apply a thick layer of clear nail glue, then press small crystals onto the surface using tweezers, working quickly before the glue sets. Cover the nail as fully or lightly as you like, depending on how bold you want the accent to look. Let it dry completely before touching anything. Paint your remaining nails in a simple nude, white, or soft pink polish to let the statement nail stand out. Crystal packs are inexpensive and available at most craft or beauty stores. This design photographs beautifully during ring exchange and bouquet shots.
30. Soft Grey and Silver Nails
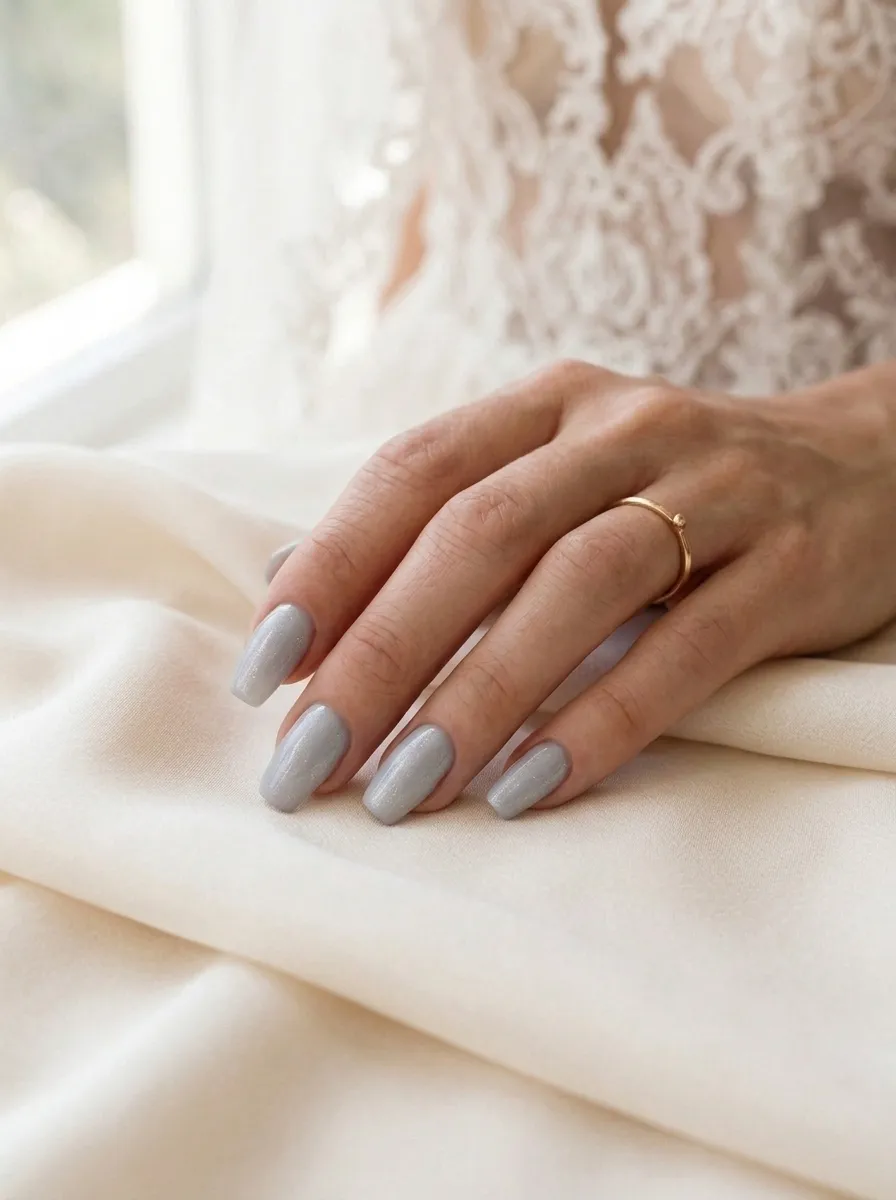
Soft grey nails offer a cool, sophisticated alternative to traditional white or nude bridal colors. This shade suits winter weddings or brides who want a modern, understated look. Pairing grey with a touch of silver shimmer keeps it from feeling too plain. Apply a base coat of soft dove grey polish in two thin, even layers. Once dry, add a light layer of silver shimmer top coat for subtle sparkle. This combination gives depth without looking heavy or dark. Grey nails pair beautifully with silver jewelry and cooler wedding color palettes like slate blue, lavender, or icy white. This look also works well for bridesmaids who want a coordinated but understated manicure. Grey polish is widely available at drugstores for an affordable price, and the shimmer top coat can be reused for other events beyond the wedding. This shade photographs well in both natural daylight and indoor reception lighting, giving a calm, polished finish to any bridal look.
Conclusion
Your wedding nails are a small detail that shows up in almost every photo, from getting-ready shots to the final send-off. The good news is you don’t need a big budget or professional experience to get a look you love. Many of these designs use drugstore polish, basic tools, and a bit of practice at home. Pick the style that matches your dress, your color palette, and how much time you want to spend on your hands. Try a few options before the big day so you feel confident and comfortable with the result. Whether you choose a simple nude shade or a detailed design with beads and crystals, your nails can add one more personal touch to a day that’s already full of them.