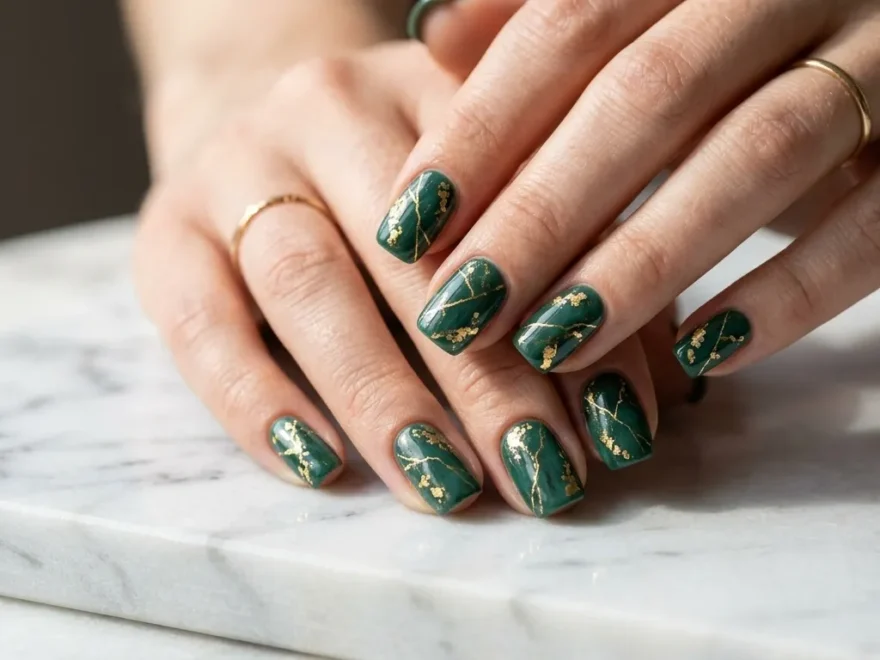
There is something about jade and gold together that feels expensive without trying too hard. The deep, cool green of jade carries a calm, gemstone energy, and gold adds just enough warmth to make the whole look pop. Whether you want something minimal for everyday wear or full-on glam for a special occasion, this color pairing works across nail shapes, lengths, and skill levels. You do not need a salon budget to pull this off. A few affordable polishes, some gold foil sheets, and a steady hand can get you surprisingly close to what you see on Pinterest. This list covers 21 real, wearable jade and gold nail ideas that range from simple single-color looks to detailed nail art styles you can try at home or bring to your nail tech as inspiration. If you’re also looking for Beetlejuice Nail Ideas, bold black and white stripes, neon green accents, spooky character art, and gothic details can create eye-catching nail designs that capture the fun, eerie charm of the iconic Beetlejuice aesthetic.
1. Solid Jade With a Gold Tip
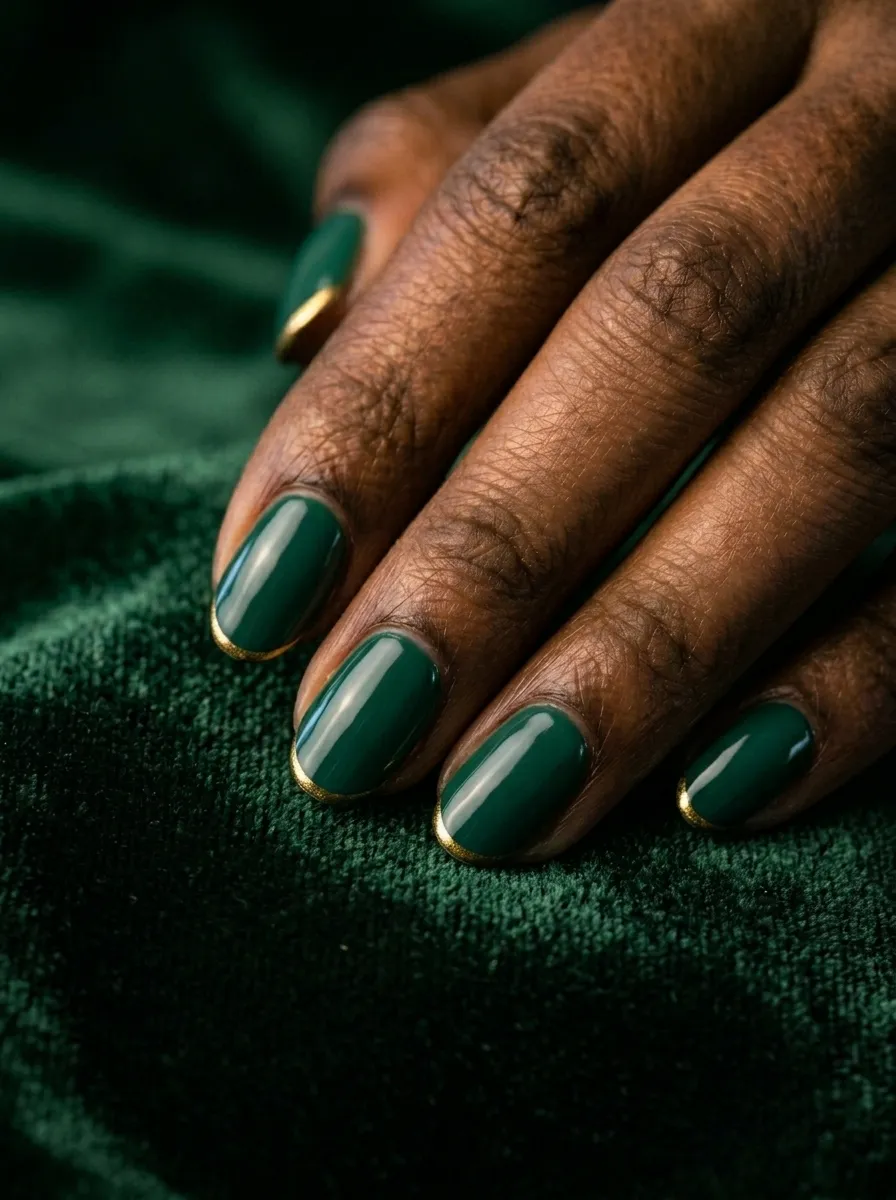
This is probably the easiest place to start if you are new to this color combo. Paint all your nails in a solid jade green and then add a thin gold line right along the tip using a nail art brush or a gold striping tape.
The result looks clean and put together without being overdone. It reads more polished than a classic French tip because the colors feel richer and more intentional.
For a budget version, pick up a dark jade creme polish and a roll of gold striping tape from any beauty supply store. Lay the tape along the smile line of each nail and press down firmly, then seal with a clear top coat. The tape does all the work for you.
This style works well on short nails too. You do not need length for the gold tip to show up. Even a few millimeters of free edge is enough for the line to read clearly.
It is a great option for work settings where you want something polished but not too loud. The combo is rich without being distracting.
2. Gold Foil Accents on Jade Base
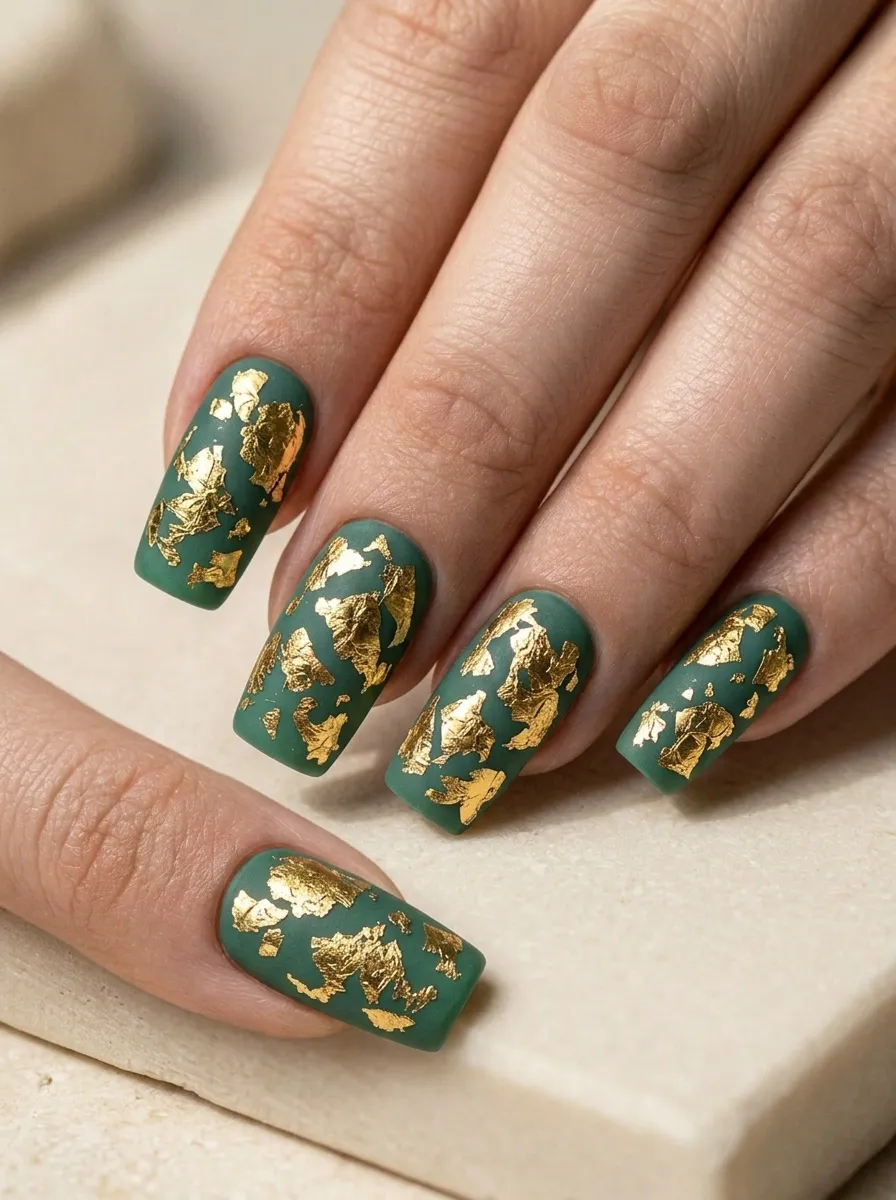
Gold foil on a jade base is one of those looks that photographs beautifully and is shockingly easy to do at home. You paint your nails in jade, let them dry to a tacky finish, and then press small torn pieces of gold foil onto the surface with a dotting tool or even your fingernail.
The foil sticks wherever the polish is still slightly sticky, which gives you that organic, uneven texture that looks like real gold leaf.
You can go heavy with the foil for a full metallic effect or keep it sparse and editorial. Either way, the combination of the cool green and warm gold is striking.
Gold foil sheets are widely available online for just a few dollars. A single pack will last you many manicures. They work best over gel or any polish that has not fully cured to a hard finish.
Finish with a glossy top coat to lock everything in place and smooth out any lifted edges. The result looks like something you would see at a high-end nail salon, but you can do it in your living room on a Tuesday night.
3. Jade and Gold Marble Nails
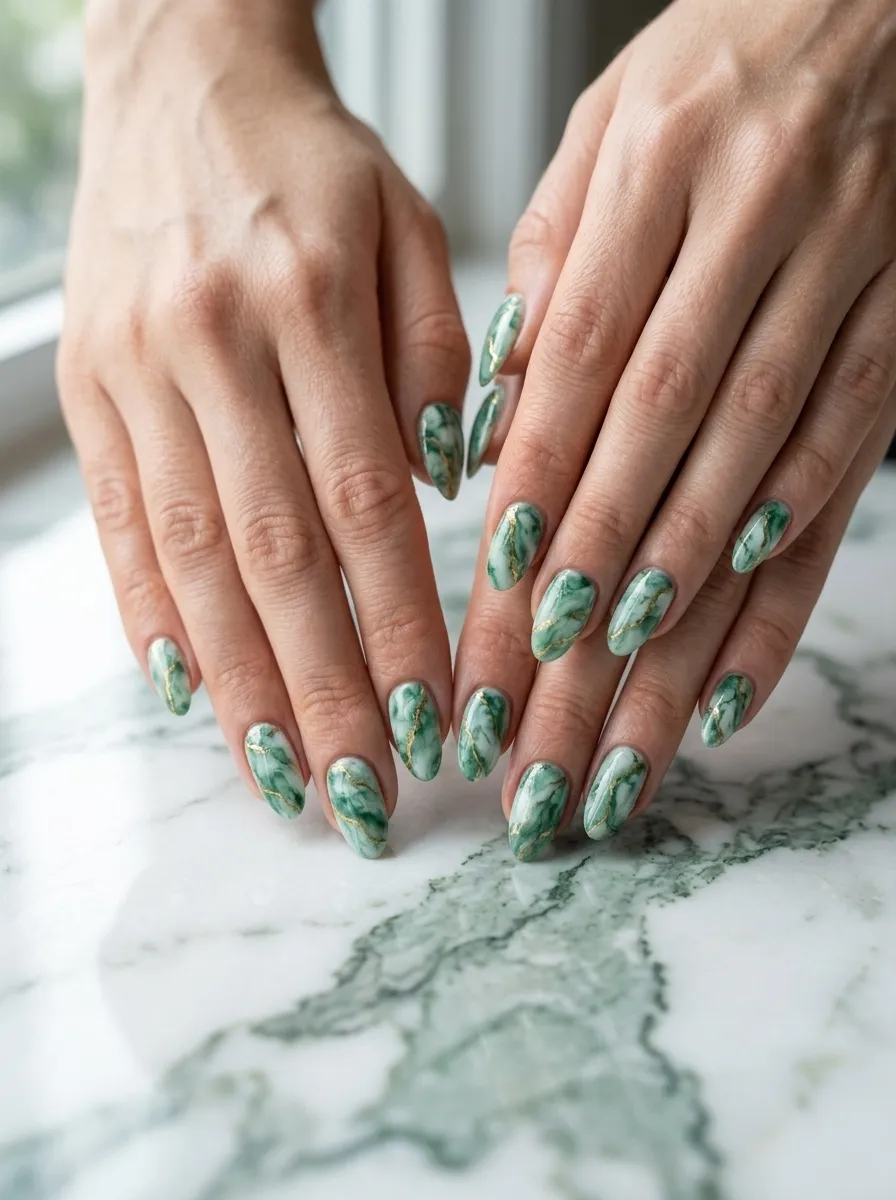
Marble nails with a jade and gold color scheme look like wearable fine art. The base is typically a pale or mid-tone jade green, and then thin, irregular veins of gold are painted across each nail using a very fine brush or even a toothpick.
The trick to good marble nails is making the veins look random, not geometric. Let your hand wobble a little. Real marble has imperfections, and that is what makes it look real.
You can add white veins alongside the gold ones to give more depth to the look. Some people also use a slightly darker jade for shadow veins to create dimension.
A thin, flexible nail art brush works best here. If you do not have one, a bobby pin or a toothpick dipped in gold polish will also work for thin lines.
This look suits longer nails better because there is more surface to show off the pattern. But it can be scaled down for shorter nails too by keeping the veins minimal. Seal everything with a glossy top coat to mimic the polished surface of real marble.
4. Half-and-Half Jade and Gold Split Nails
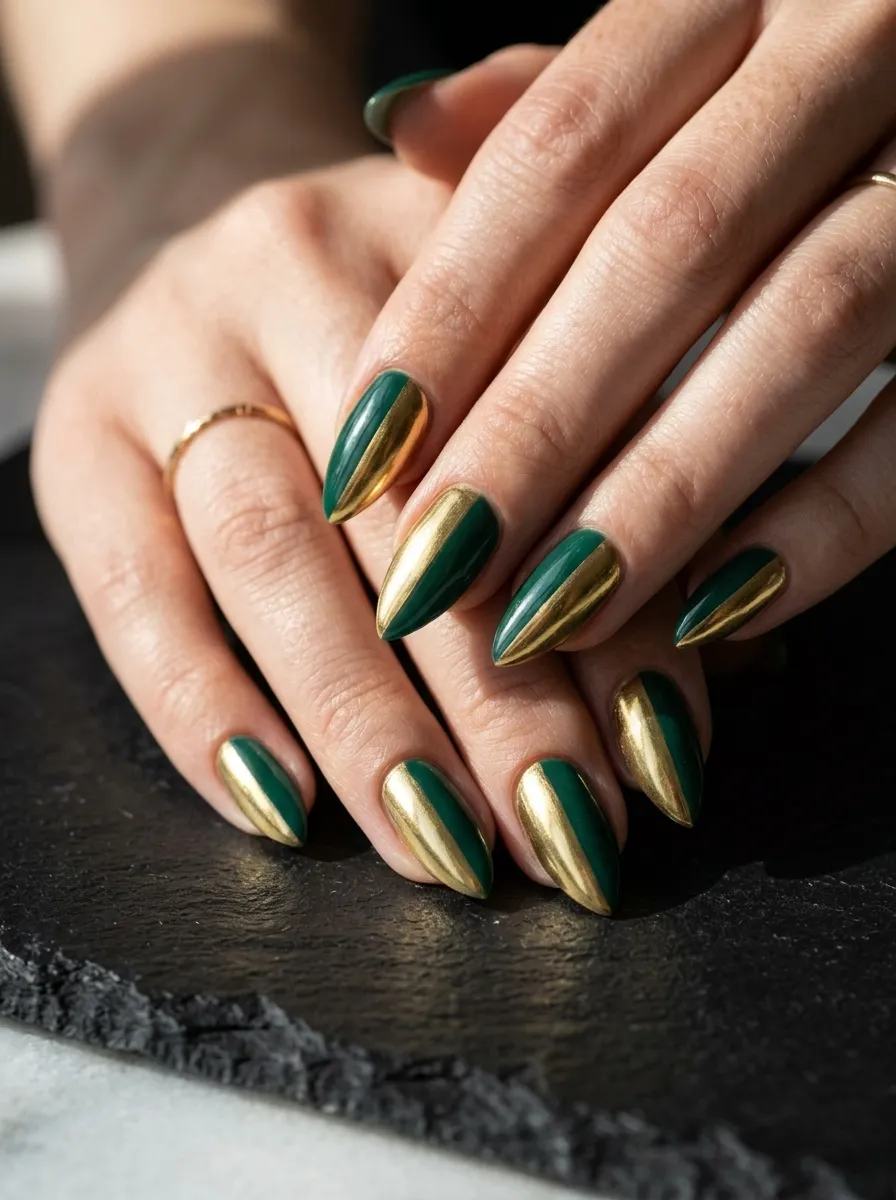
The split nail look is bold, geometric, and very on-trend. Each nail is divided down the middle or at a diagonal angle, with one half in jade green and the other in metallic gold.
To get clean lines at home, use striping tape to mask off one side of the nail before painting the second color. Press the tape down firmly to prevent bleeding, paint quickly, and peel while the polish is still wet.
The diagonal split feels more dynamic than a straight vertical split. You can also alternate the direction of the split on different fingers to create variation across the hand.
This look is especially striking on longer nail shapes like stiletto, almond, or coffin. The extended length gives the split more visual space to read clearly.
For a more subtle version, keep the jade side matte and the gold side glossy. That contrast in finish adds another layer of interest without adding more color.
This is the kind of style that gets compliments. It looks like you spent a long time on it, but with tape it is actually one of the faster nail art techniques you can try at home.
5. Jade Nails With Gold Geometric Lines
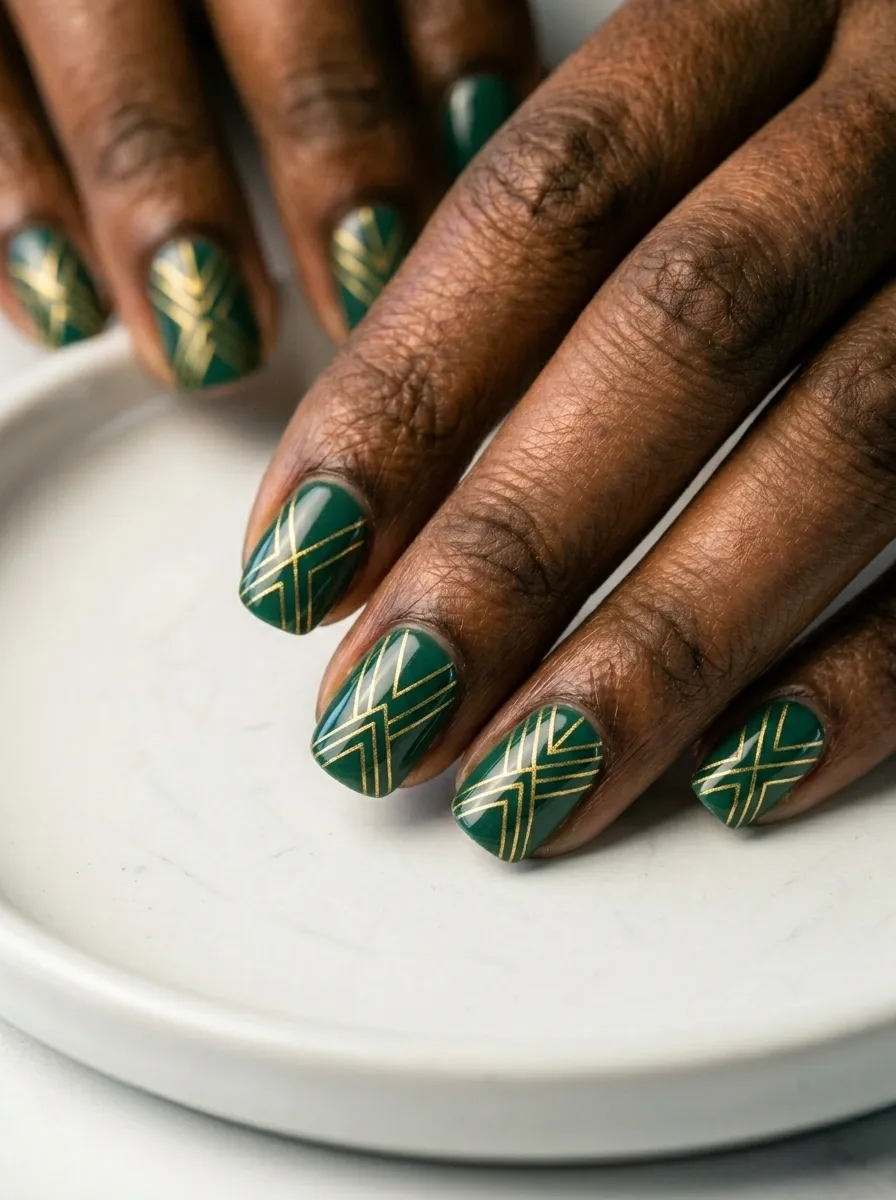
Fine gold lines on a jade base create a modern, architectural look. Think thin triangles, angled stripes, or abstract intersecting lines painted over a solid jade base.
This style works best if you have a thin striping brush or even a gold nail art pen. Nail art pens are available at drugstores and beauty supply shops for just a few dollars, and they make straight lines much easier for beginners.
You do not need the lines to be perfect. In fact, slightly imperfect lines look more hand-drawn and artistic than ruler-straight ones. Embrace the small wobbles.
Try painting a single diagonal line on one nail, a triangle on another, and crossing lines on a third. Mixing the patterns across fingers gives the manicure a curated, collected look rather than something that feels too uniform.
This style is easy to keep subtle by using just one or two lines per nail, or more dramatic by adding multiple shapes. Either way, the gold catches the light in a way that keeps the look feeling rich.
Seal with a matte or glossy top coat depending on the vibe you want. Matte feels more modern and editorial, while glossy reads more classic and polished.
6. Dark Jade With Gold Glitter Accent Nail
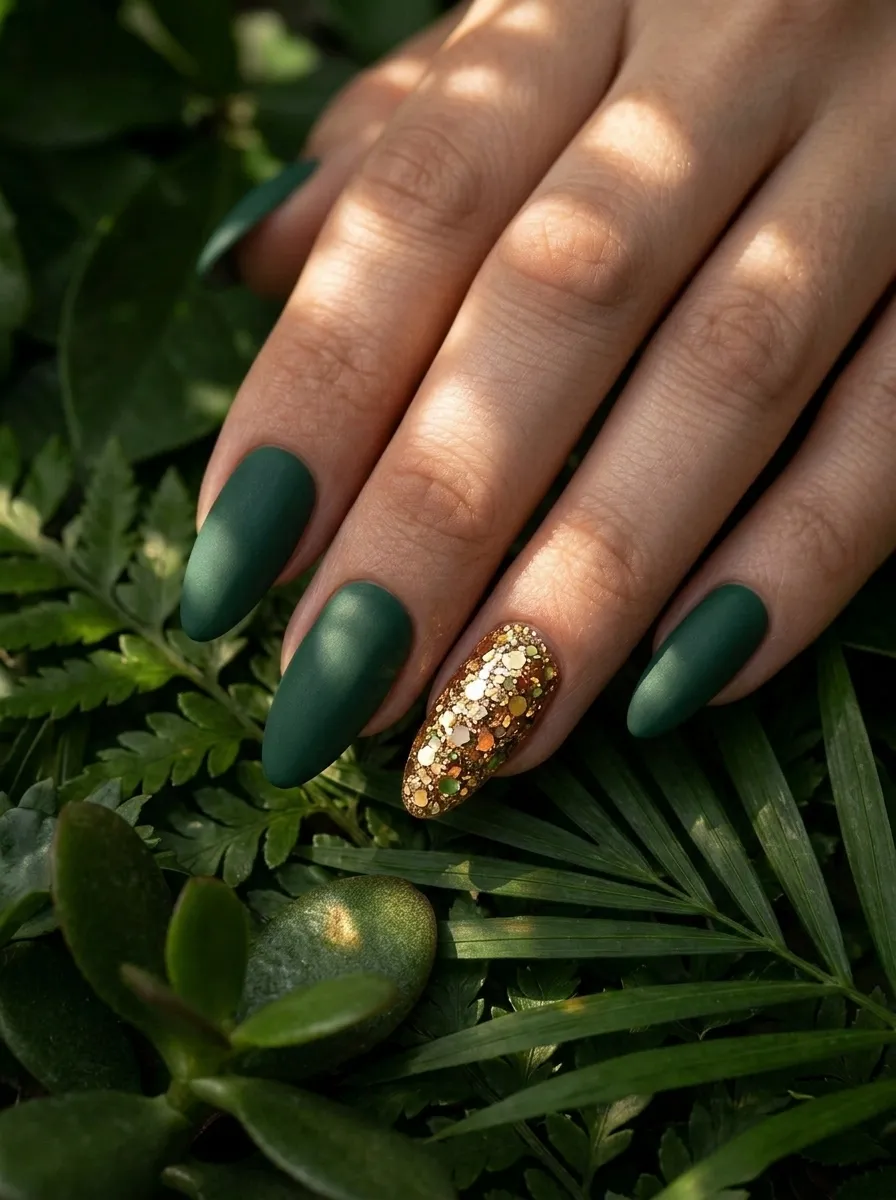
The accent nail method is one of the easiest ways to bring gold into a jade manicure without committing to a full design. Paint all nails in your jade shade, then cover the ring finger on each hand with a thick gold glitter polish.
This is a classic look that has never really gone out of style because it works. The glitter nail draws attention without overwhelming the rest of the manicure. It adds a bit of sparkle that makes the whole look feel more festive.
For the glitter, choose a chunky gold glitter polish or a fine micro-glitter in gold for a more subtle shimmer. Both work, but chunky reads bolder and fine reads more elegant.
You can also skip the ring finger tradition and do the accent nail on the middle finger or thumb for something less expected.
Budget tip: drugstore gold glitter polishes are just as effective as salon brands for this look. The glitter itself is what does the heavy lifting here, not the formula.
This works beautifully for events, holidays, or any time you want your nails to feel a little more special. It is also one of the faster nail art options since you are only decorating one nail per hand.
7. Jade Ombre Into Gold
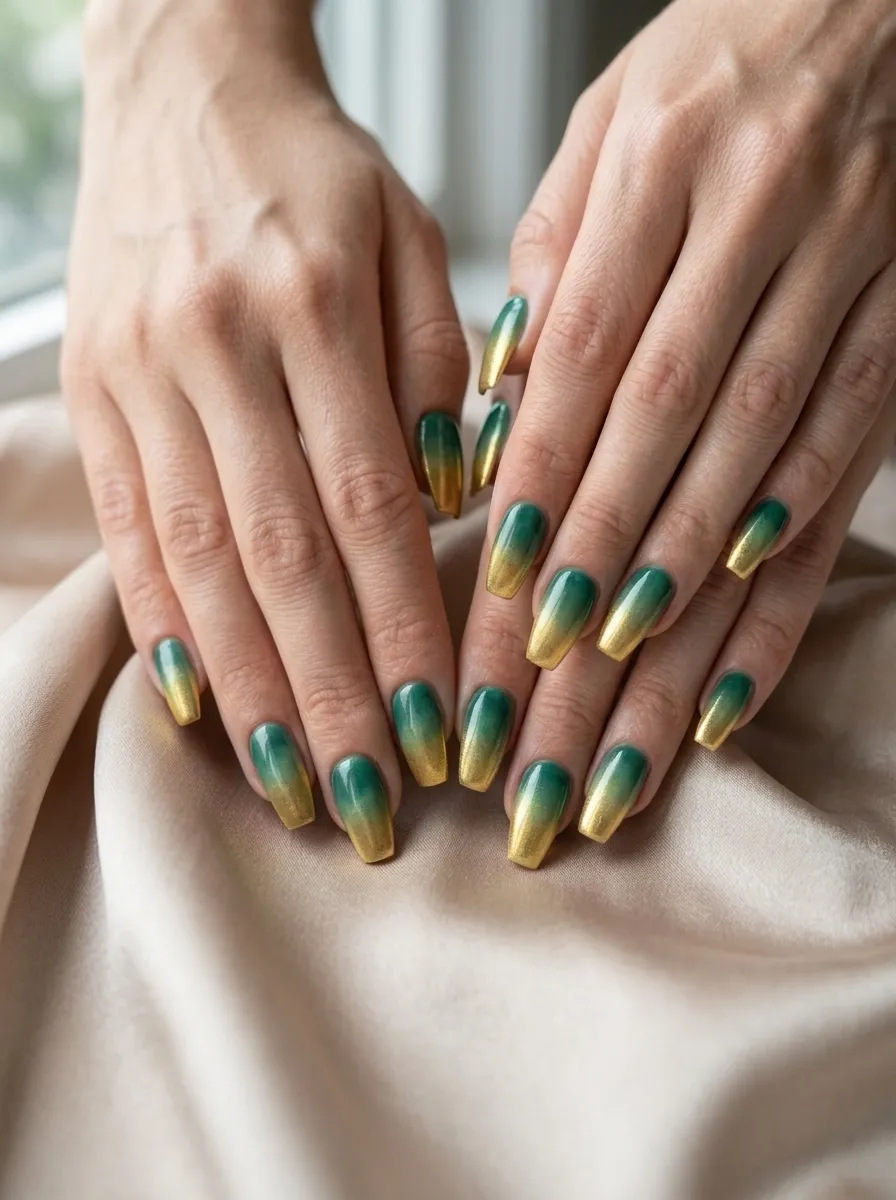
Ombre nails look complicated but they are one of the more achievable nail art styles once you know the sponge technique. For jade to gold ombre, you paint jade at the base, gold at the tip, and sponge the two together where they meet in the middle.
Use a small piece of makeup sponge to dab the colors together. Apply both shades side by side on the sponge first, then dab it onto the nail in quick, light taps. Repeat this several times to build up the gradient.
Clean up the skin around your nails with a small brush dipped in acetone once the polish is dry. This step makes the whole thing look much more professional.
Longer nail shapes show off the gradient more dramatically, but even medium-length nails can carry this look well.
The jade-to-gold color transition feels especially warm and jewel-toned. It looks expensive without requiring expensive products. A jade creme polish and a metallic gold polish from any drugstore are all you need along with a small sponge.
Seal with multiple thin layers of top coat, letting each dry between coats, to smooth the texture that the sponge leaves behind.
8. Minimalist Jade With a Single Gold Dot
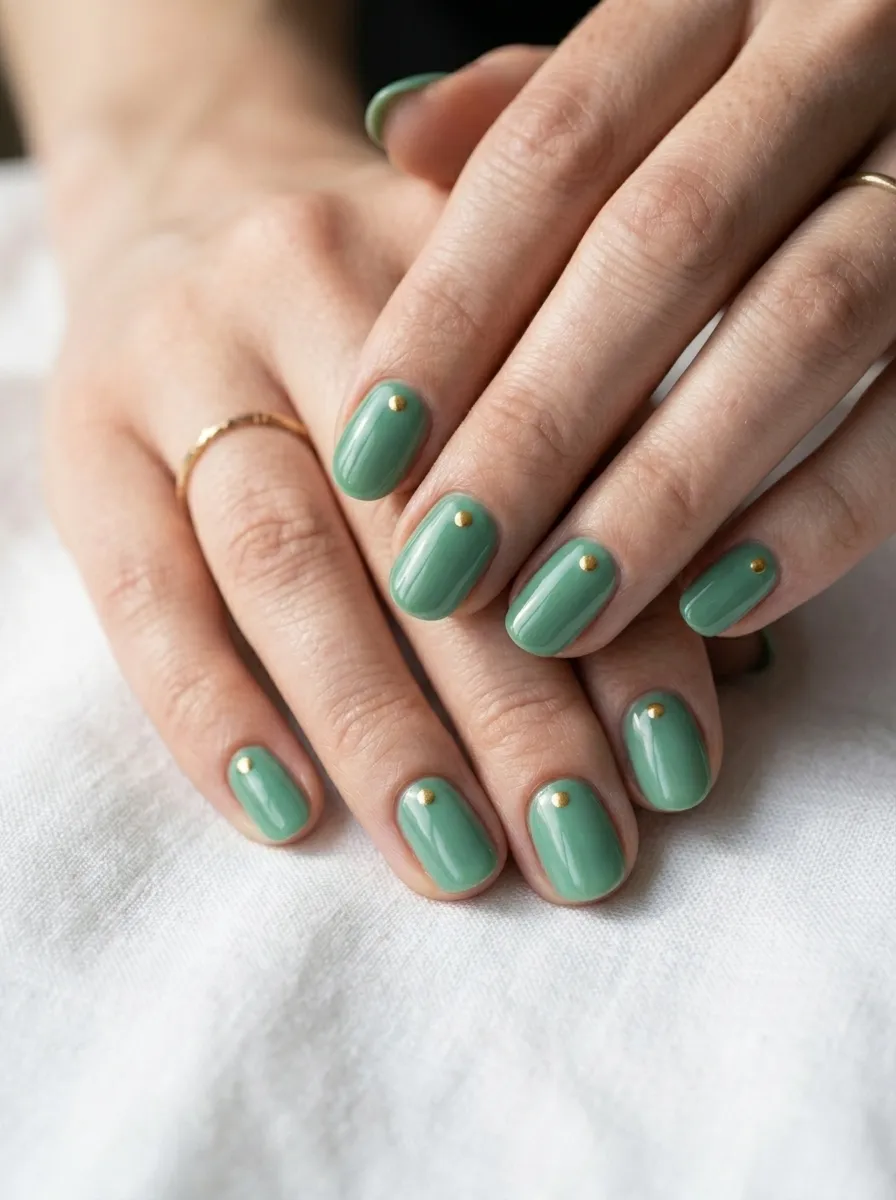
Sometimes the simplest approach lands the hardest. A single gold dot near the cuticle on each jade nail is minimal, chic, and takes almost no skill to execute.
Use a dotting tool, the back of a bobby pin, or the tip of a toothpick dipped in gold polish. Tap once gently near the base of the nail to create a round, clean dot. That is the whole design.
This kind of understated nail art works well for professional settings or anyone who prefers a lighter touch with nail design. It gives the jade polish a finished, intentional look without going too far.
You can vary the dot size across different fingers, or place two dots on some nails for a subtle asymmetry. Playing with placement keeps it from looking too rigid.
This is also a great style for beginners who are not confident in their freehand nail art yet. The dot is forgiving. Even if it is not perfectly round, it reads as intentional from normal viewing distance.
Pair this with short, well-shaped nails and tidy cuticles and the whole look feels very put together. Clean nail maintenance makes minimalist designs land much harder.
9. Gold Negative Space on Jade Nails
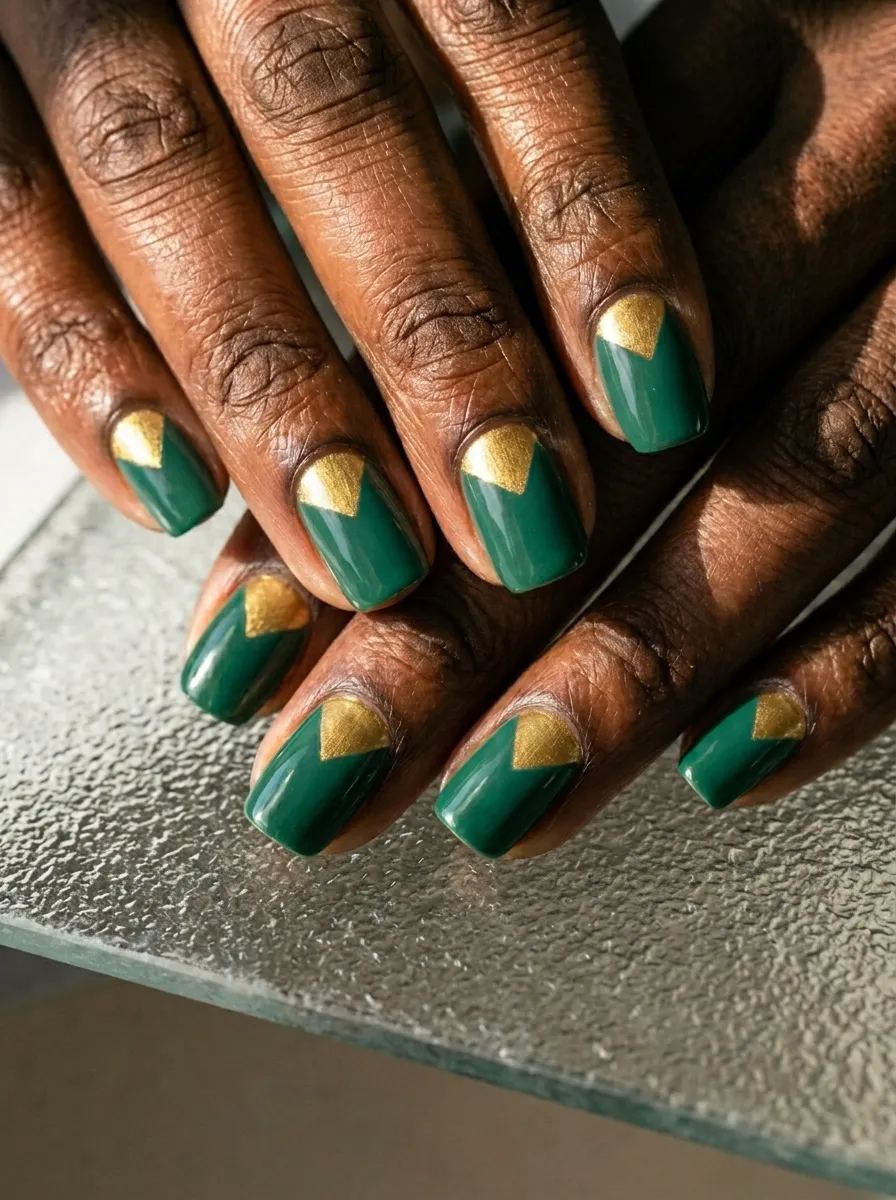
Negative space nail art uses the bare or lightly polished nail as part of the design. In this version, you paint jade over most of the nail and leave a small crescent near the cuticle bare, then fill that space with gold polish.
You can also reverse it by painting gold in the center or using tape to create geometric negative space shapes. The bare or differently colored section creates contrast that makes the look feel very modern and graphic.
Nail tape is your best friend for clean negative space edges. Lay the tape where you want the line to be, paint over it, and peel carefully while the polish is still slightly wet.
This style works especially well on medium to longer nails where the shape of the negative space section reads clearly. On very short nails, the crescent or shape can look cramped.
The gold and jade combination in a negative space design has a very editorial, runway feel to it. It looks like something from a high-fashion photo shoot but is completely achievable at home with a steady hand and some tape.
Finish with a top coat that stops just short of the bare nail area to keep the clean edge visible.
10. Jade Nails With Gold Foil Moon
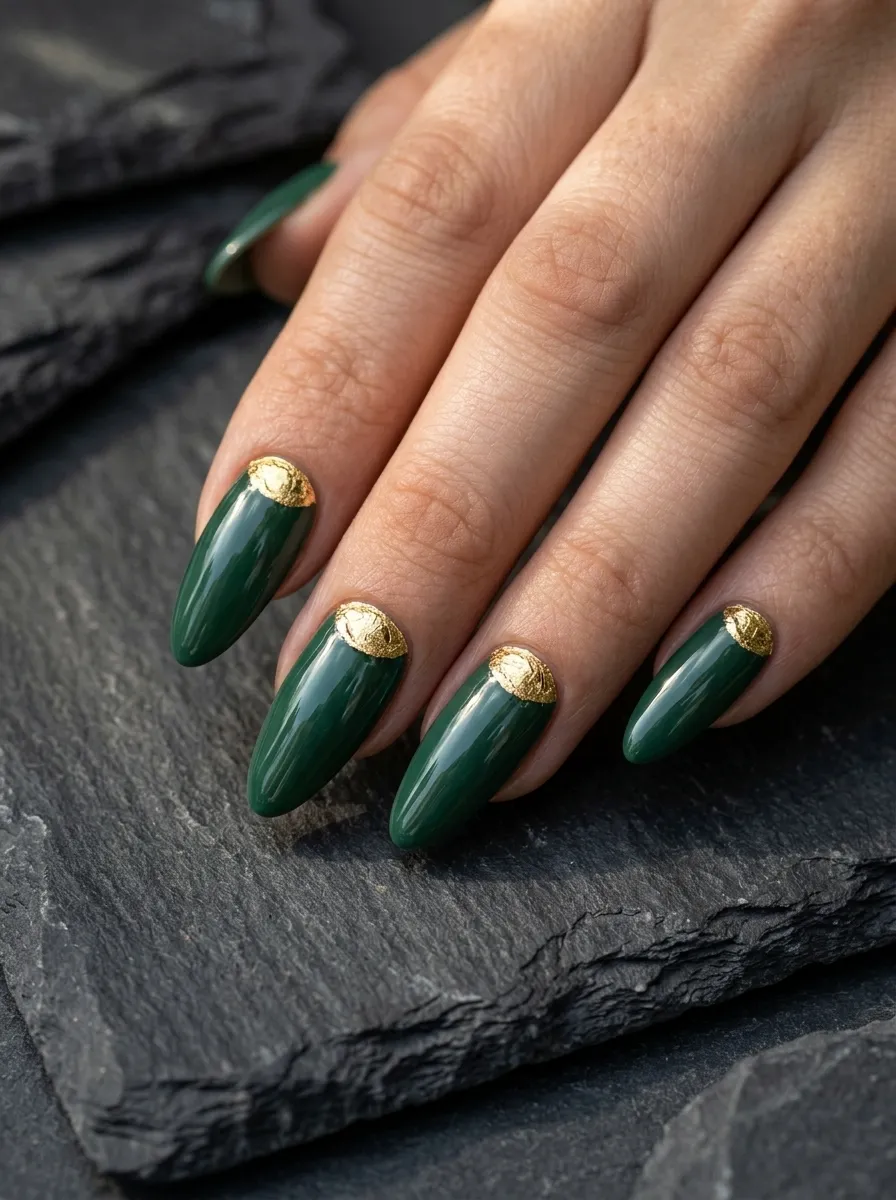
The half-moon or luna nail is a classic style that pairs beautifully with jade and gold. Instead of leaving the moon bare or painting it a different shade, here you create the crescent using gold foil for a metallic, textured effect.
Apply your jade base and let it dry fully. Then cut small crescent shapes from gold foil sheets and press them into place at the base of each nail using a dotting tool or tweezers. Seal with top coat carefully to keep the foil from lifting.
If cutting tiny foil crescents feels too fiddly, you can also use gold metallic polish and a curved brush or a round makeup sponge with tape to mask off the crescent shape.
This look works beautifully on both short and long nails. The crescent shape naturally follows the cuticle line, which keeps the design looking intentional regardless of nail length.
The moon motif also has a lot of symbolic weight right now. It pairs well with the natural, earthy quality that jade green carries. The combination feels grounded and a little mystical at the same time.
Pair this with clean, filed nails and a good base coat for the cleanest result.
11. Jade French Tips With Gold Outline
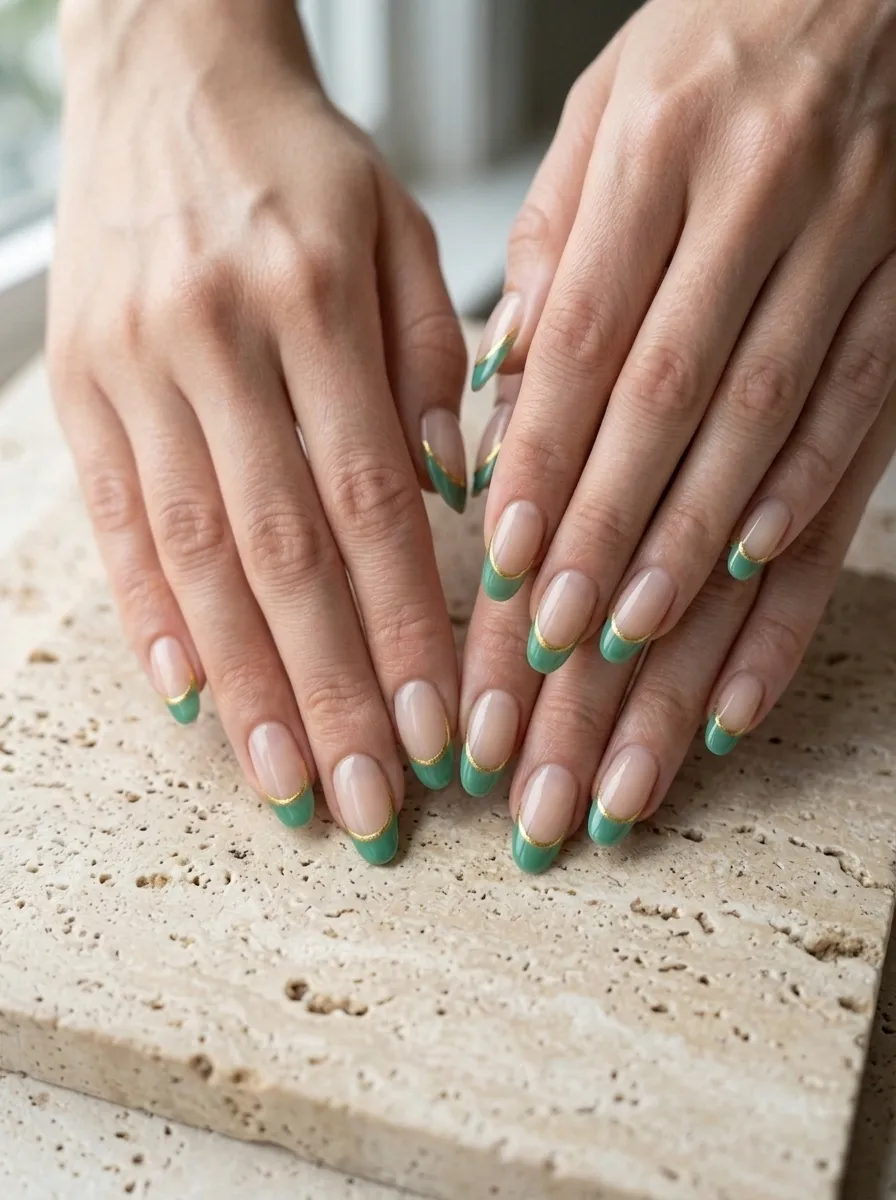
This is a modern update on the French manicure that feels fresh and fashion-forward. Instead of a white tip, you use jade green, and then you outline that tip with a fine gold line to define the edge and add richness.
Start with a sheer or nude base coat to keep the look light and wearable. Apply the jade tip using nail tape for a straight line or freehand it along the natural smile line. Once dry, use a thin gold striping brush or a nail art pen to trace a line right along the edge of the jade tip.
The gold outline serves two purposes. It sharpens the edge of the tip so any unevenness disappears, and it adds a jewelry-like detail that makes the whole manicure look more expensive.
This works on any nail shape but looks particularly good on oval, almond, and square shapes. Coffin nails also carry this well because the long edge gives the tip and outline plenty of room to read.
Budget-friendly tip: nail art pens with a fine tip are excellent for this. They give you more control than a brush for outlining work and are widely available for a few dollars.
12. Chunky Gold Glitter on Dark Jade
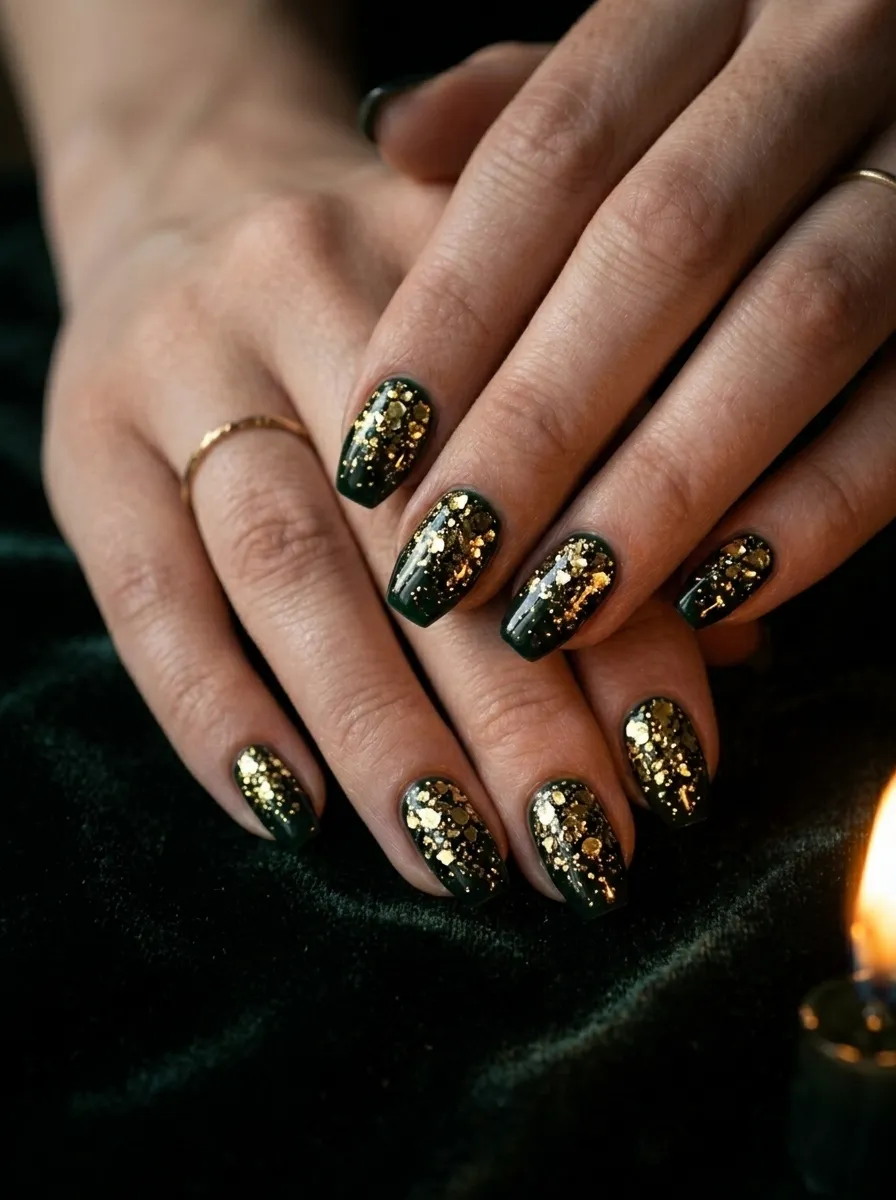
This look leans into maximum drama. A very dark jade base, almost approaching forest green or black-green, topped with a heavy coat of chunky gold glitter creates a deeply luxurious effect.
The dark base makes the gold glitter pop harder than it would over a lighter shade. It creates contrast that makes each piece of glitter look like a tiny piece of gold ore caught in deep green stone.
Apply two solid coats of your dark jade shade first, then apply the glitter polish in thick layers, building up the coverage with each coat. Chunky hex glitter polishes tend to need three to four coats for full opacity.
Seal with a thick, glossy top coat and then a second coat once dry to level out the glitter texture and create a smooth surface.
This style is excellent for winter evenings, holiday gatherings, or any event where you want your nails to do the talking. It is genuinely hard to look away from when the light hits it at the right angle.
For a DIY approach, you can also buy loose gold hex glitter and mix it into a clear polish base to customize the density.
13. Jade and Gold Botanical Press Nails
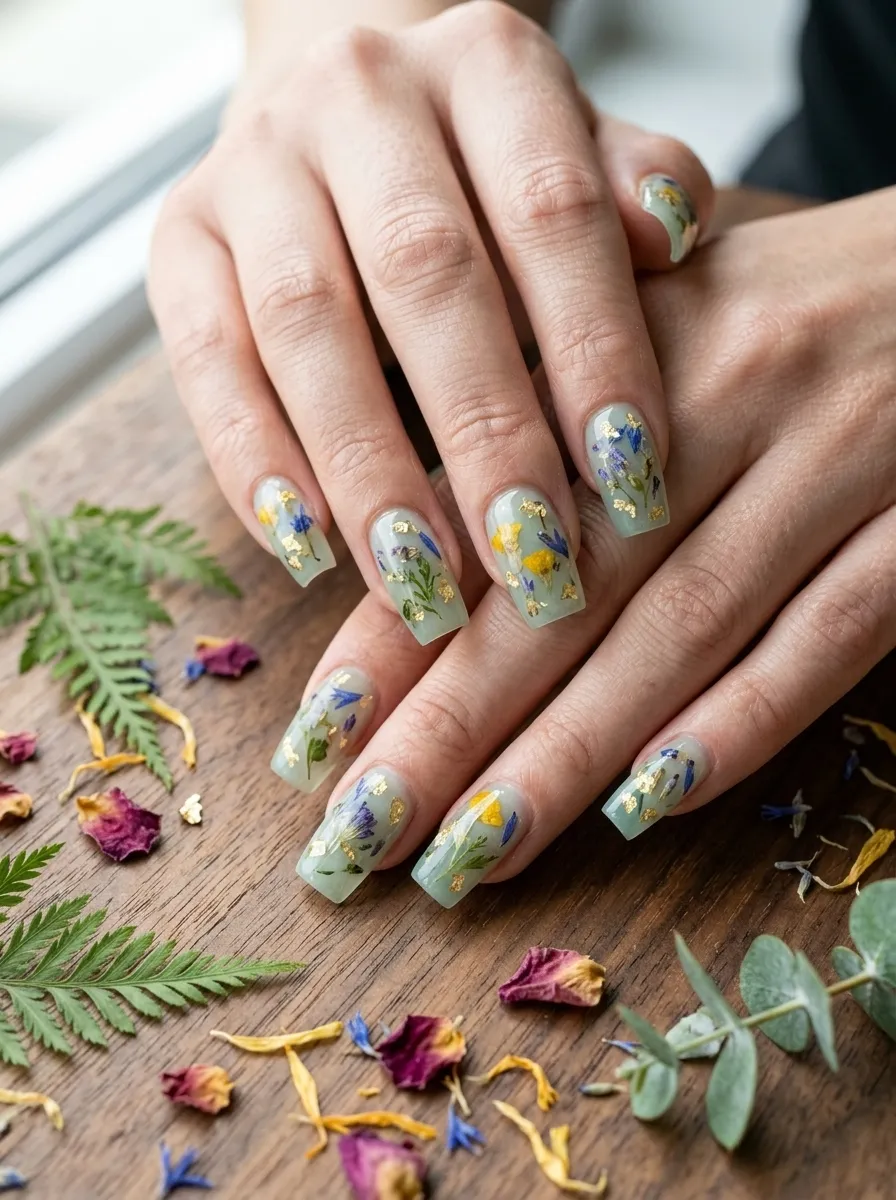
Botanical or pressed flower nails look incredibly delicate and artistic. For this jade and gold version, you work with a light jade or clear tinted base and embed dried flowers alongside small pieces of gold foil directly into the polish.
You can find small dried flowers at craft stores or order them online. The kind sold for resin art work well for nails. Tiny petals, baby’s breath, or small fern fronds all look beautiful.
Apply your base coat and one coat of clear or tinted jade polish. While it is still slightly wet, place the dried flower using tweezers and press gently. Then add a tiny piece of gold foil alongside it. Seal with multiple thick layers of top coat to encapsulate everything.
The layering process takes time because you need to let each top coat layer dry fully before adding the next. But the result is genuinely stunning. Each nail looks like a tiny terrarium.
This style works best on flat or slightly curved nails rather than very short or very curved shapes, where the flat botanical pieces may not sit smoothly.
It is a look that gets a lot of attention and people often cannot tell at first glance what the flowers are made of.
14. Swirled Jade and Gold Art Nails
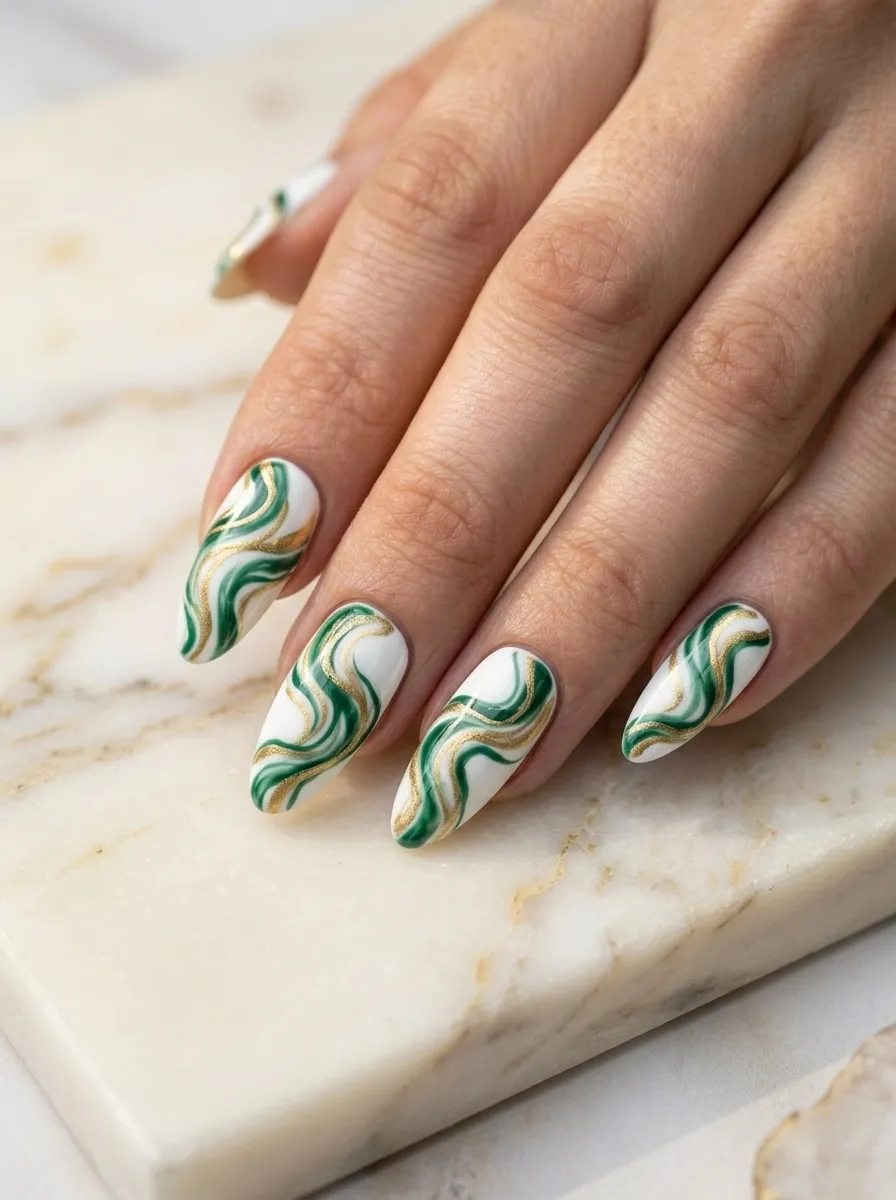
Abstract swirl nails are one of the most popular nail art trends of the past few years, and jade with gold is a combination that looks especially striking in this style.
You paint a white or cream base coat first, then use a thin nail art brush to paint flowing jade and gold swirls across each nail. The swirls can be tight and small or wide and loose depending on the look you are going for.
Working wet-on-wet gives you the most fluid looking lines. Paint the jade swirls first, then add the gold swirls on top before either color has fully dried. Where they overlap, the colors will mix slightly and create soft edges.
No two nails need to match. In fact, the look is better when each nail has its own unique swirl composition. Think of it like abstract painting where each nail is its own small canvas.
This is a great style to practice on paper before doing it on your actual nails. Get comfortable with the motion of the swirl stroke before committing to polish.
Finish with a glossy top coat that brings the colors together and makes the whole design look cohesive.
15. Jade Chrome Nails With Gold Accents
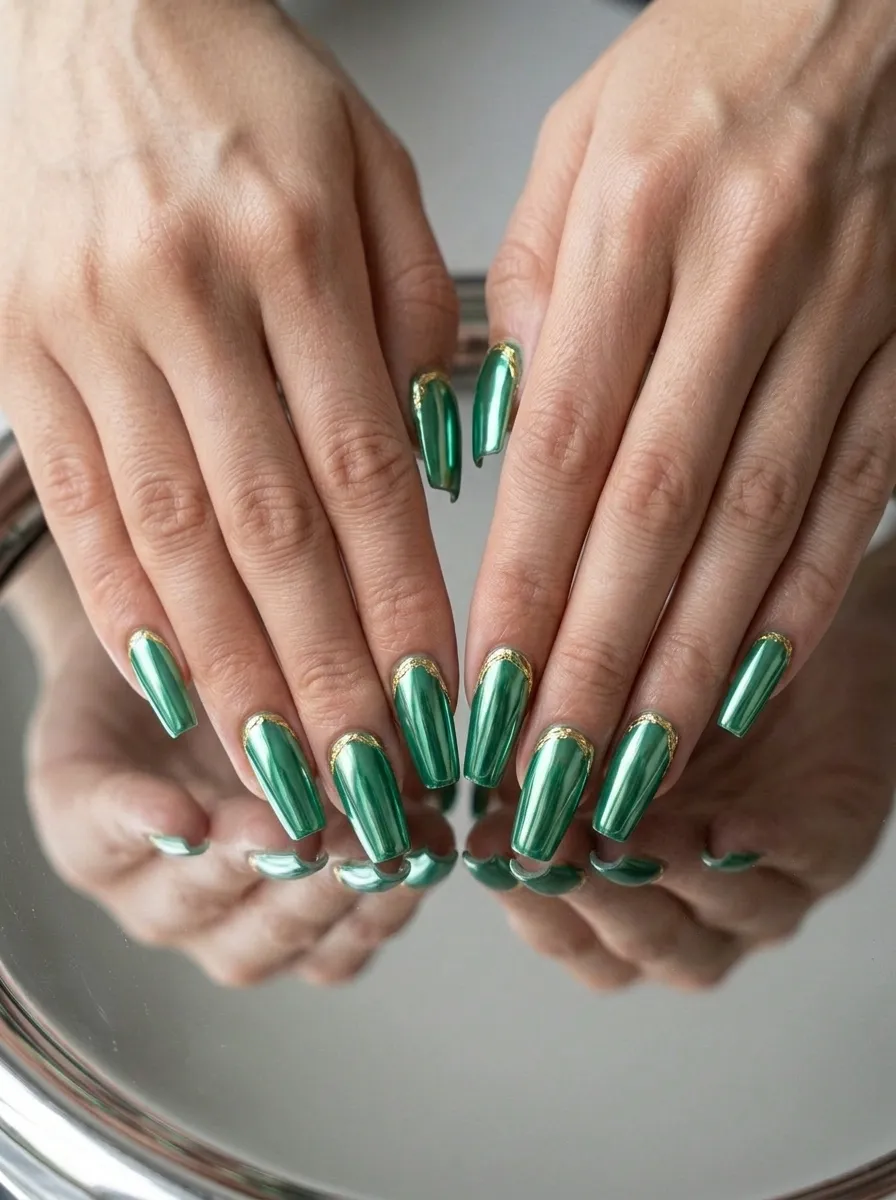
Chrome jade nails take the color in a more futuristic, high-shine direction. Instead of a regular polish finish, you use a chrome powder rubbed over a cured gel base to get that mirror-like reflection in a deep jade green.
Chrome powders are applied over a gel no-wipe top coat that has been cured under a UV or LED lamp. You rub the powder onto the tacky surface using a sponge applicator and then seal it with another layer of top coat.
The result is a nail that literally reflects light like a piece of polished metal, but in a cool, jewel-toned jade green.
Adding small gold foil accents near the cuticle or a thin gold stripe along one edge gives the look a warm contrast against the cool chrome green.
Chrome jade nails look particularly impressive on coffin or stiletto shapes where the long, flat surface shows off the reflection to its full effect.
This style does require a gel lamp setup if you want the truest chrome effect, but there are also chrome powders marketed for use over regular polish that give a similar (though slightly less intense) result.
16. Stamped Floral Pattern in Gold on Jade
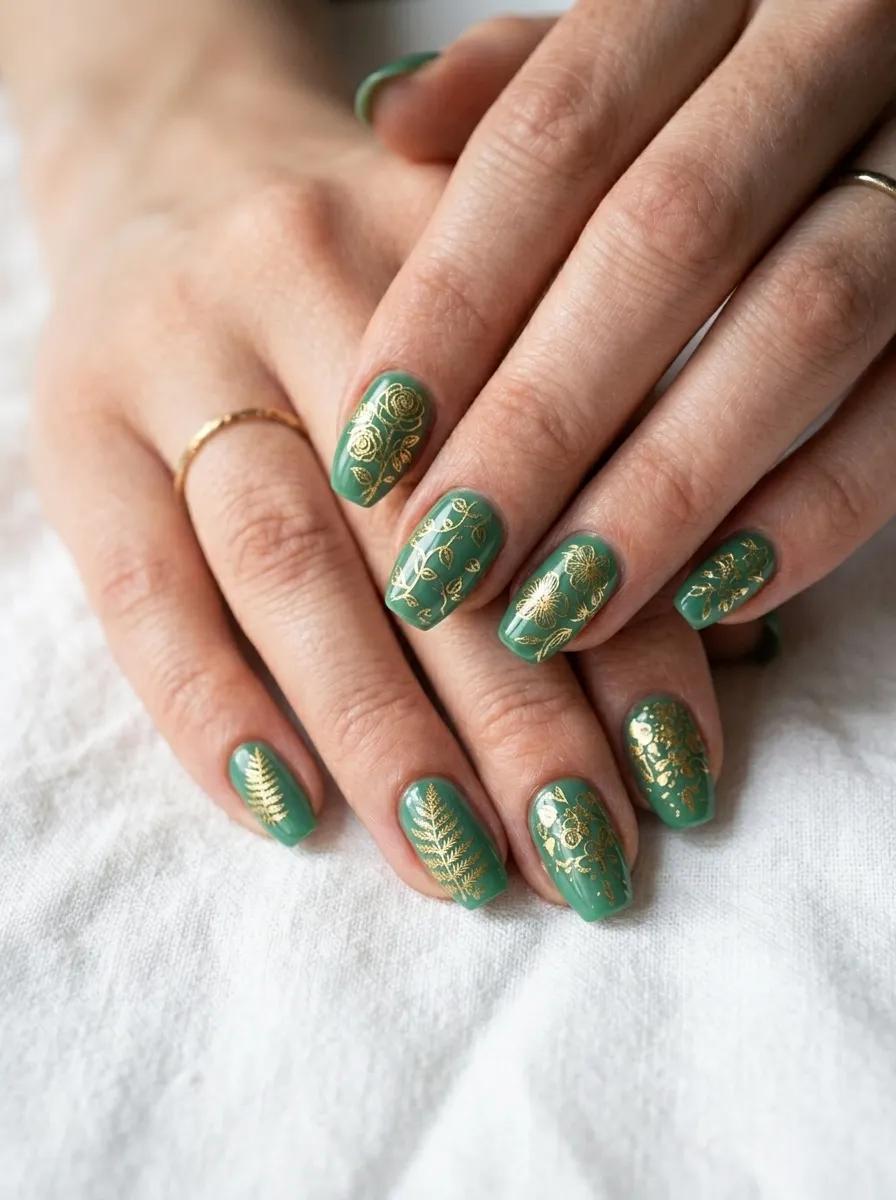
Nail stamping is a technique where you use a special stamping plate, a scraper, and a stamper to transfer detailed designs onto your nails quickly and consistently. For this look, you stamp gold metallic patterns over a jade base.
Stamping plates with floral, botanical, or delicate repeating patterns work beautifully with the jade and gold combination. The gold stamping polish catches the light over the green base in a way that feels almost like antique jewelry.
You need a stamping kit that includes a plate, a stamper, and a scraper. These are available online for around ten to fifteen dollars for a basic set. Gold stamping polishes are sold separately and are specifically formulated to transfer cleanly.
The technique takes a few practice runs to get right. The main things to remember are to work fast, use enough polish on the plate, scrape cleanly in one stroke, and transfer quickly before the polish dries.
Once you get the hang of it, stamping is actually one of the faster ways to add complex patterns to your nails at home. A single stamp takes only a few seconds per nail.
This style has a vintage, art nouveau feeling that pairs well with the earthy, natural energy of jade green.
17. Jade and Gold Stained Glass Nails
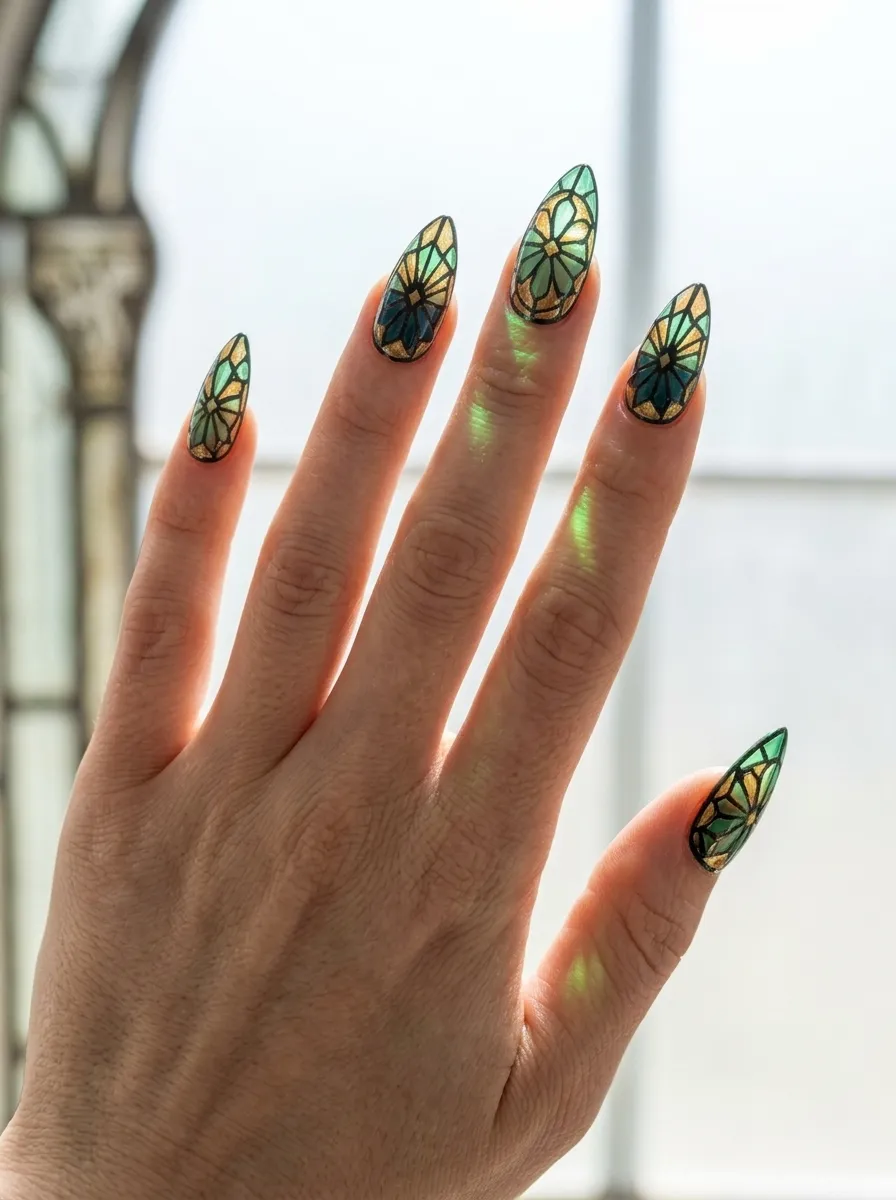
Stained glass nails are a bold, artistic look where the nail is divided into colored sections separated by thin black lines, mimicking the look of a stained glass window. In this version, the sections are filled with jade, teal, and translucent gold.
You start by painting the black grid or lines onto the nail using a thin brush. These are the “lead” of the stained glass. Once dry, you fill in the sections with jade green, a slightly darker teal, and a translucent gold polish that lets light through.
The translucent gold sections are especially effective on longer nails when held up to a light source. They glow slightly and give the whole design an almost magical quality.
This is a more advanced nail art style that requires patience and a steady brush hand. But the black lines act as a guide that defines the design, so even if your color fills are slightly uneven, the lines correct it visually.
Jelly polishes or thin, semi-sheer polishes work best for the color-filled sections because they maintain that translucent, glowing quality.
This look is truly one of the most show-stopping in this list. It is a manicure that belongs at an art gallery opening.
18. Jade Nails With Raised Gold Nail Art
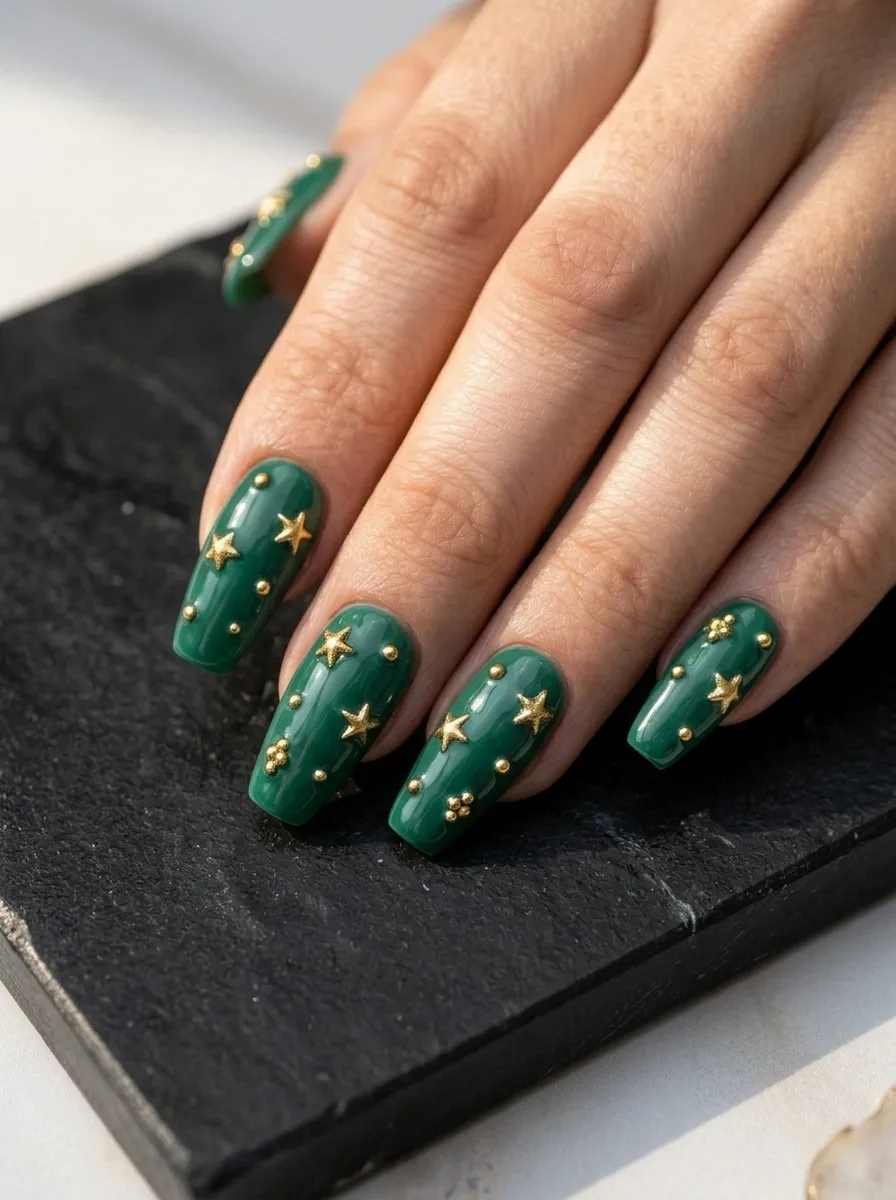
Raised or 3D nail art adds a tactile dimension to the jade and gold combination. Small gold metal studs, rhinestones in gold, micro beads, or tiny star-shaped nail charms pressed onto the jade base create a look that is dimensional as well as visually rich.
Apply your jade base and let it fully dry. Then apply a small bead of clear gel or nail glue where you want to place each charm. Use tweezers or an orange stick to place each piece precisely, then seal with top coat carefully around the edges of each piece.
Keep the design simple. Two or three small gold elements per nail look more intentional than a nail covered in every charm you own. Placement near the cuticle or along one side of the nail is a good starting point.
Gold star-shaped charms are particularly good for this because they pick up the light from multiple angles as your hands move.
This style does require a bit more maintenance because raised pieces can catch on fabric or snag if the top coat seal lifts at the edges. Reapplying top coat every few days helps extend the life of the design.
The textural contrast of smooth jade polish against the raised gold metal has a jewelry-like quality that makes it feel very premium.
19. Matte Jade With Gold Shimmer Wash
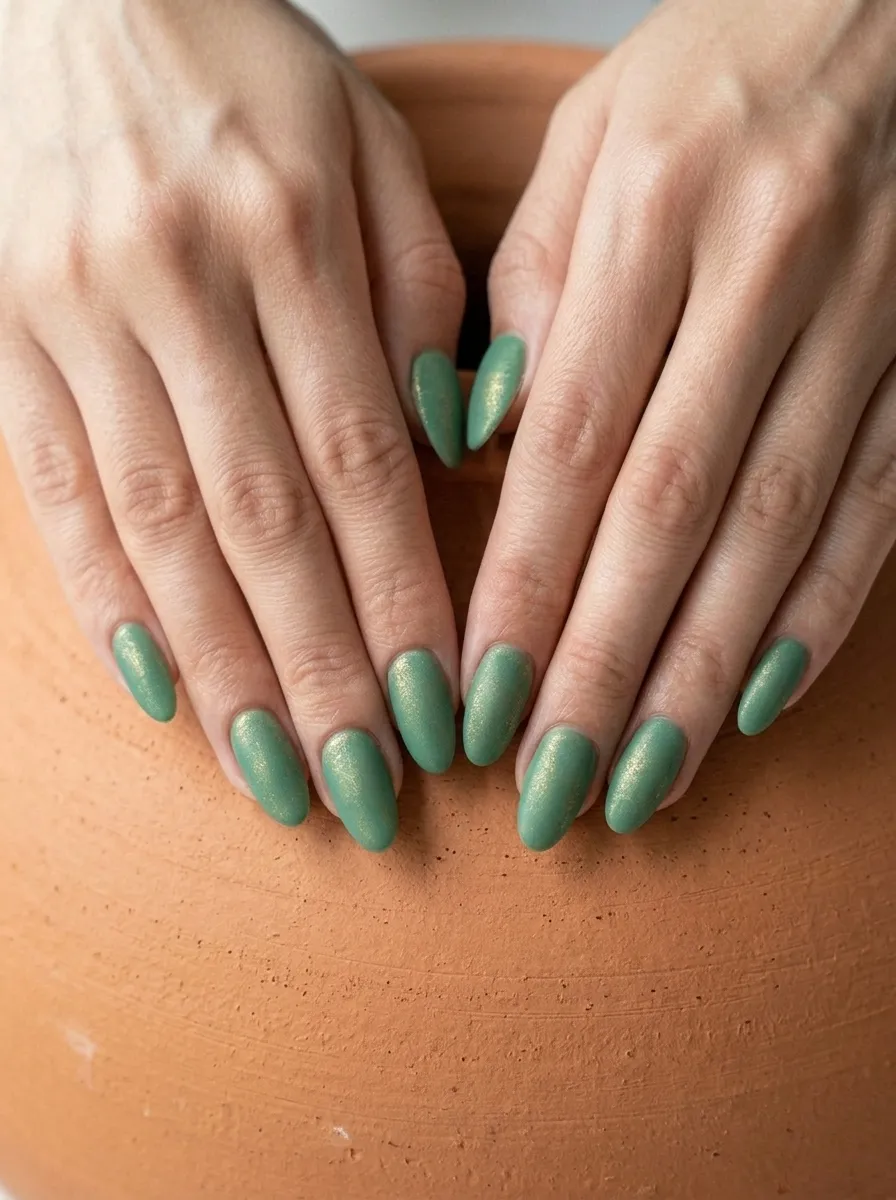
A matte jade base with a light wash of gold shimmer over the top creates a dusty, antique-looking effect that feels very sophisticated. It is not full glam, but it is not understated either. It sits in an interesting middle space.
Apply your jade shade and let it dry. Then, using a fan brush or a flat eyeshadow brush, dust on a dry brush of gold eyeshadow or a very watered-down gold shimmer polish over the surface. The goal is a light veil of gold, not full coverage.
You can also use a cosmetic-grade gold eyeshadow for this. Loose gold eyeshadow brushed over matte nail polish with a dry brush and then sealed with matte top coat creates the same soft-shimmer effect without requiring specialized nail products.
The matte top coat is what ties the look together. It keeps the base texture flat and matte while letting the gold shimmer sit slightly on top, like a layer of fine dust.
This is a nail look that photographs beautifully in natural light. It has a quality that is hard to describe in words but very easy to see. It looks like something that belongs in a museum collection.
20. Jade Color Block With Gold Square
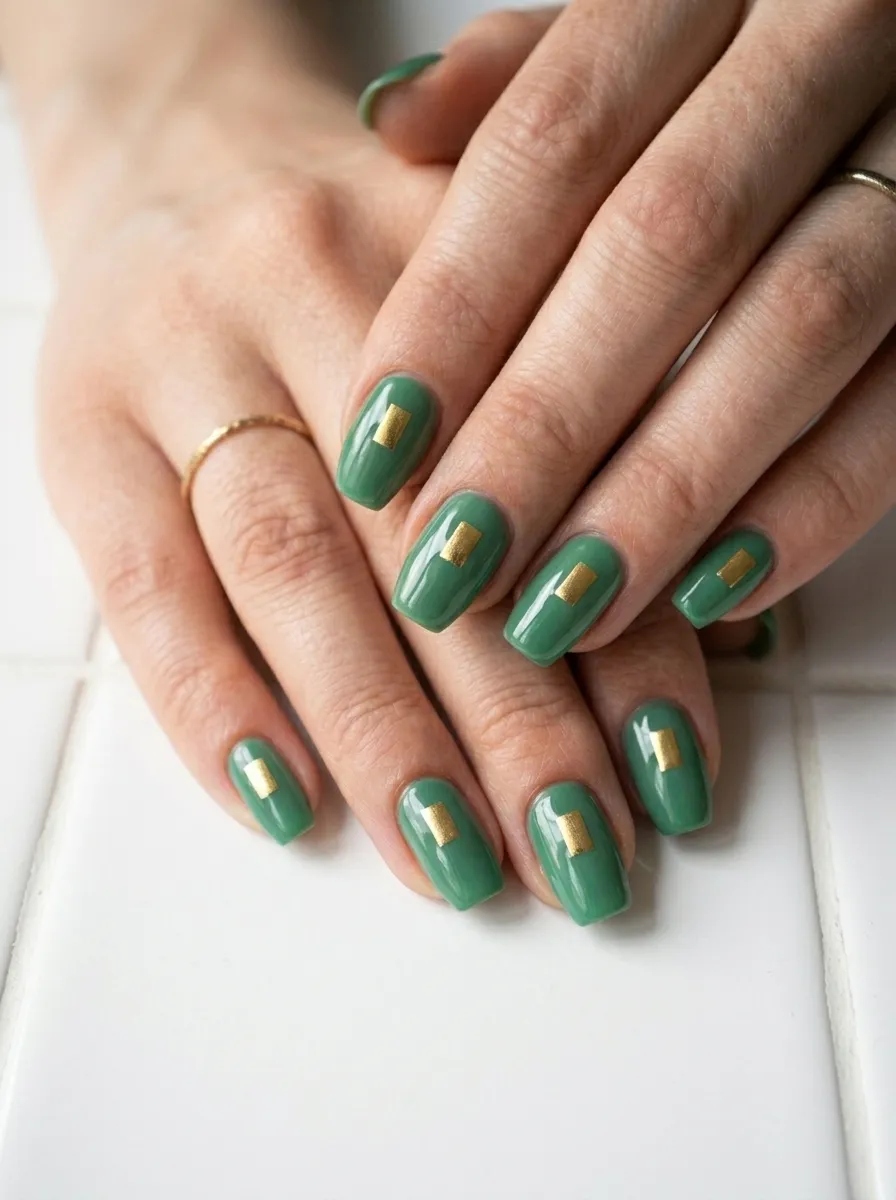
Color blocking is a graphic design principle applied directly to the nail. Here, a jade green base hosts a bold, clean gold rectangle painted right in the center of each nail. The contrast between the two flat colors creates a strong, modern visual.
Use tape to get perfectly straight edges on the gold square. Apply your jade base, let it dry completely, then tape off a rectangle or square shape in the middle of each nail. Paint the gold inside the taped area and peel the tape while the gold is still wet.
The cleaner the tape lines, the sharper the color block reads. Press the tape down firmly on both edges and paint from the inside of the shape outward to avoid paint sneaking under the edge.
You do not need the gold square to be the same size on every nail. Varying the proportions slightly across fingers looks considered and deliberate rather than mechanical.
This style has a very graphic, editorial quality to it. It looks like a nail that was designed by someone with a background in visual design. It is bold without relying on complicated techniques.
Finish with a glossy top coat over the full nail to unify the two color fields and smooth out any raised tape edges.
21. Jade and Gold Galaxy Nails
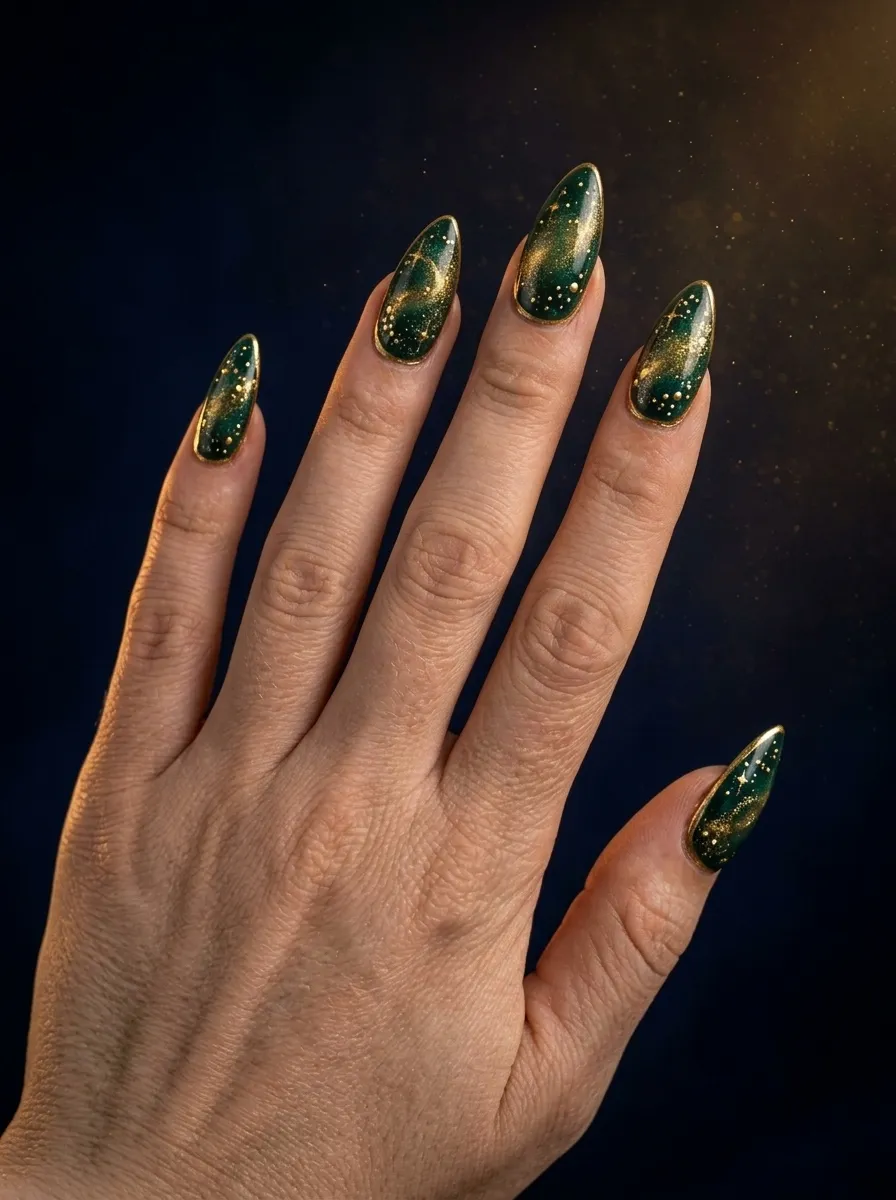
Galaxy nails in jade and gold feel cosmic and otherworldly. The base is a very dark jade, almost the color of deep space in green, and then layers of gold shimmer, micro glitter dots, and scattered fine gold particles are built up to look like stars and nebulae.
Start with a dark jade base and let it dry fully. Then use a small sponge to dab patches of gold shimmer or dust in certain areas of the nail to create cloudy, uneven light distribution. Then use a very fine brush or a toothpick to dot individual gold dots in varying sizes across the surface.
Finish with a scatter of micro gold glitter tapped on with a fan brush for the finest particle layer, like distant stars.
Each layer of the design adds depth. The sponged shimmer clouds sit furthest back visually, the brushed dots sit in the middle distance, and the scattered micro glitter reads as the closest stars.
This is a design that rewards looking closely. The more time someone spends looking at these nails, the more they see.
Budget-friendly tip: loose cosmetic glitter and metallic eyeshadow work just as well as specialized nail products for the shimmer and dust layers. The top coat seals everything regardless of the product origin.
Jade and gold is one of those color combinations that will not age out of style because it borrows from something older and more permanent than trends. It borrows from gemstones, from nature, from centuries of decorative art. Whether you go minimal with a single gold dot or all-in with galaxy nails or swirled abstract art, there is a version of this pairing that suits you and your budget. Most of these looks are achievable at home with polish that costs less than a coffee, a few sheets of gold foil, and some tape. Start with the simplest option, build your confidence, and work your way toward the more detailed styles. Your nails are one of the most personal style choices you make every day. Make them count.