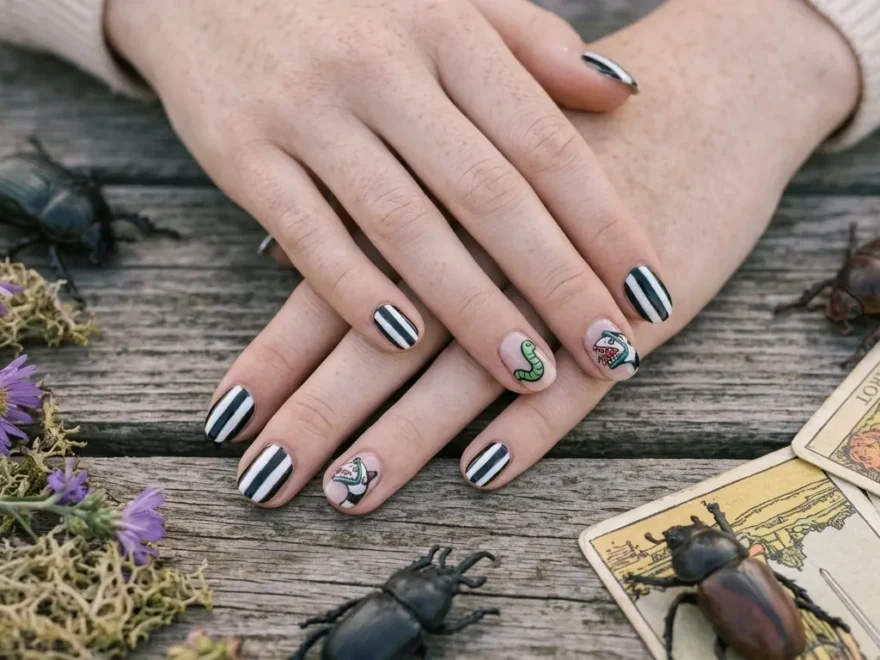
If you love the dark, quirky, and wildly theatrical world of Beetlejuice nail ideas, your nails are the perfect canvas to bring that energy to life. These designs pull from the iconic black and white stripes, decaying Victorian charm, neon green accents, and ghost world aesthetics that make the Beetlejuice universe so unforgettable. Whether you are heading to a themed party, Halloween night, or just want nails that turn heads every single day, there is something here for every skill level and budget. You do not need a salon visit to pull these off either. Many of these looks are totally doable at home with a few affordable polishes and a steady hand. Get ready to find your next obsession. If you’re also exploring Ghost Nail Ideas, playful ghost characters, spooky silhouettes, glowing details, and minimalist Halloween-inspired designs can create a fun and creative manicure that works beautifully throughout the spooky season and beyond.
1. Classic Black and White Stripes
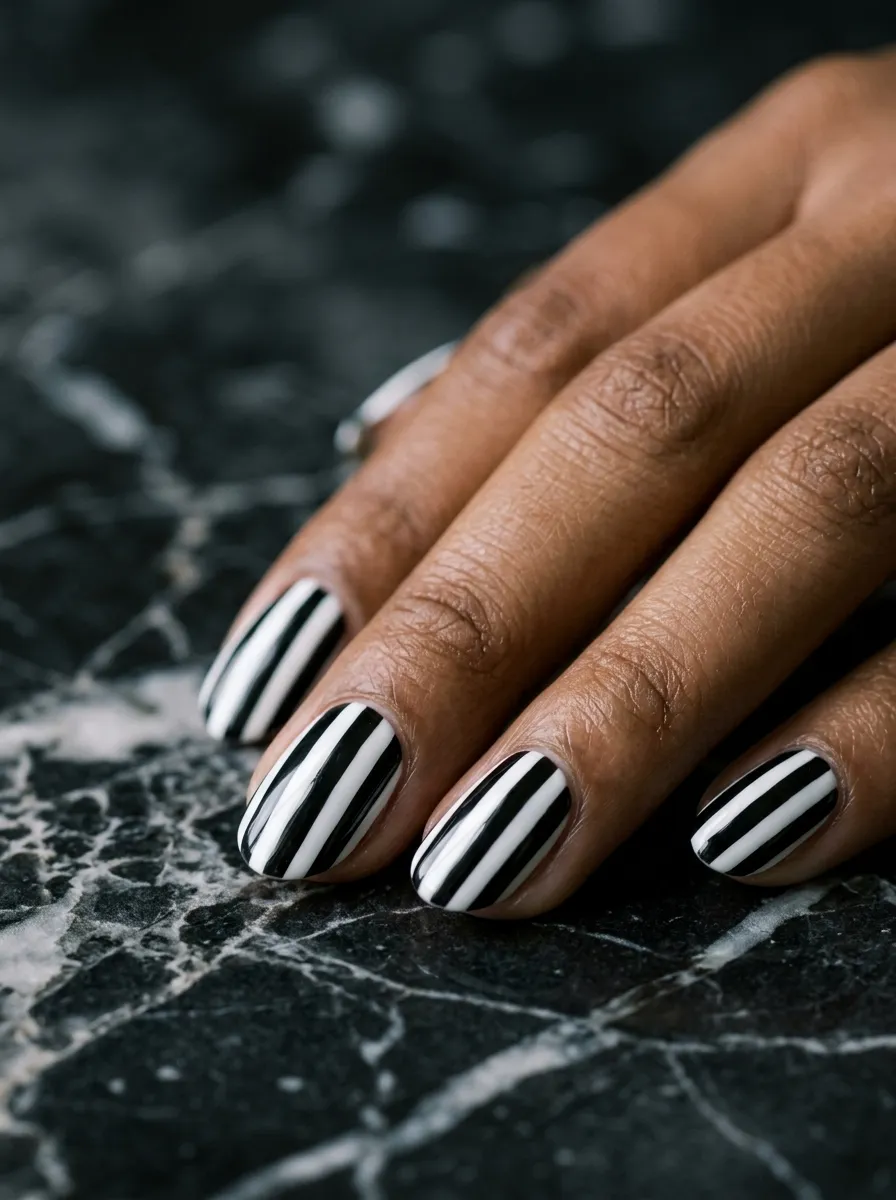
This is the most recognized look from the entire Beetlejuice world. The black and white stripe pattern is bold, graphic, and instantly recognizable. It works on any nail shape and length.
To do this at home, start with a white base coat. Let it dry completely before adding thin black stripes using a nail art brush or striping tape. Striping tape is a game changer if your hands are not super steady. You can find it at any beauty supply store for under two dollars.
Use a matte topcoat for a more editorial look or a glossy one for something sleek and polished. Both work beautifully.
You can do all ten nails in stripes or mix it up with a solid black or white accent nail. The accent nail idea saves time and still gives you the full effect. If you want to go bolder, alternate the stripe direction on each nail. Some vertical, some horizontal. It creates a chaotic, fun energy that feels very on brand for Beetlejuice. This is the perfect starter look if you are new to nail art.
2. Neon Green French Tips
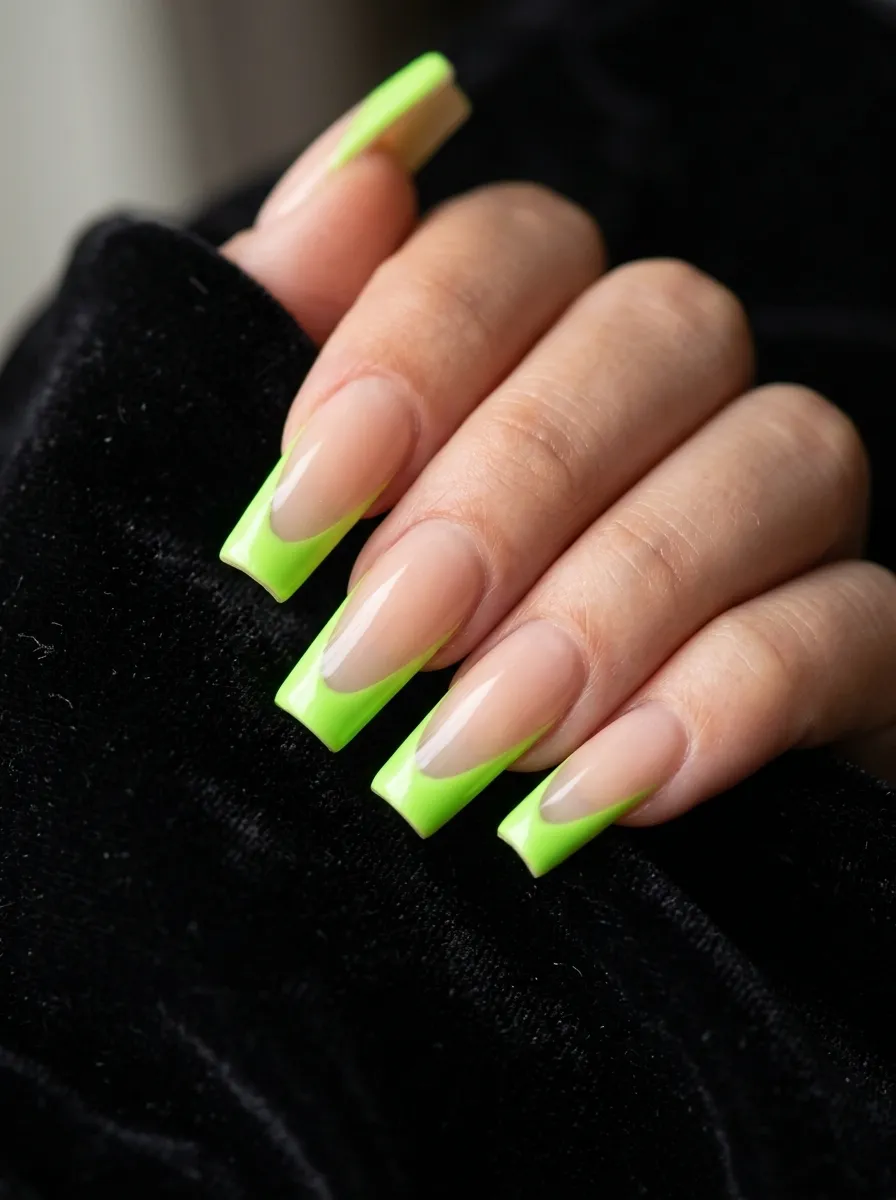
French tips get a whole new personality when you swap the classic white for neon green. This is the color of Beetlejuice’s world, the supernatural glow, the otherworldly energy. It is eye catching without being too complicated to pull off.
You can use any neon green polish you already own. Brands like Sally Hansen and NYX have affordable options that show up in just one coat. Use nail guides or tape to get a clean smile line if you want precision. Or go freehand for a more imperfect, handmade feel.
The neon green pops especially well over a sheer or nude base. It creates contrast without competing colors. If you want to take it further, add a thin black stripe right below the green tip to separate it from the base color.
This look photographs incredibly well under natural light. The green almost glows in photos. It is also a subtle way to do a Beetlejuice themed manicure that still works for everyday wear. Pair it with simple gold or black jewelry and you have a complete look that feels intentional and cool.
3. Ghostly White Marble Nails
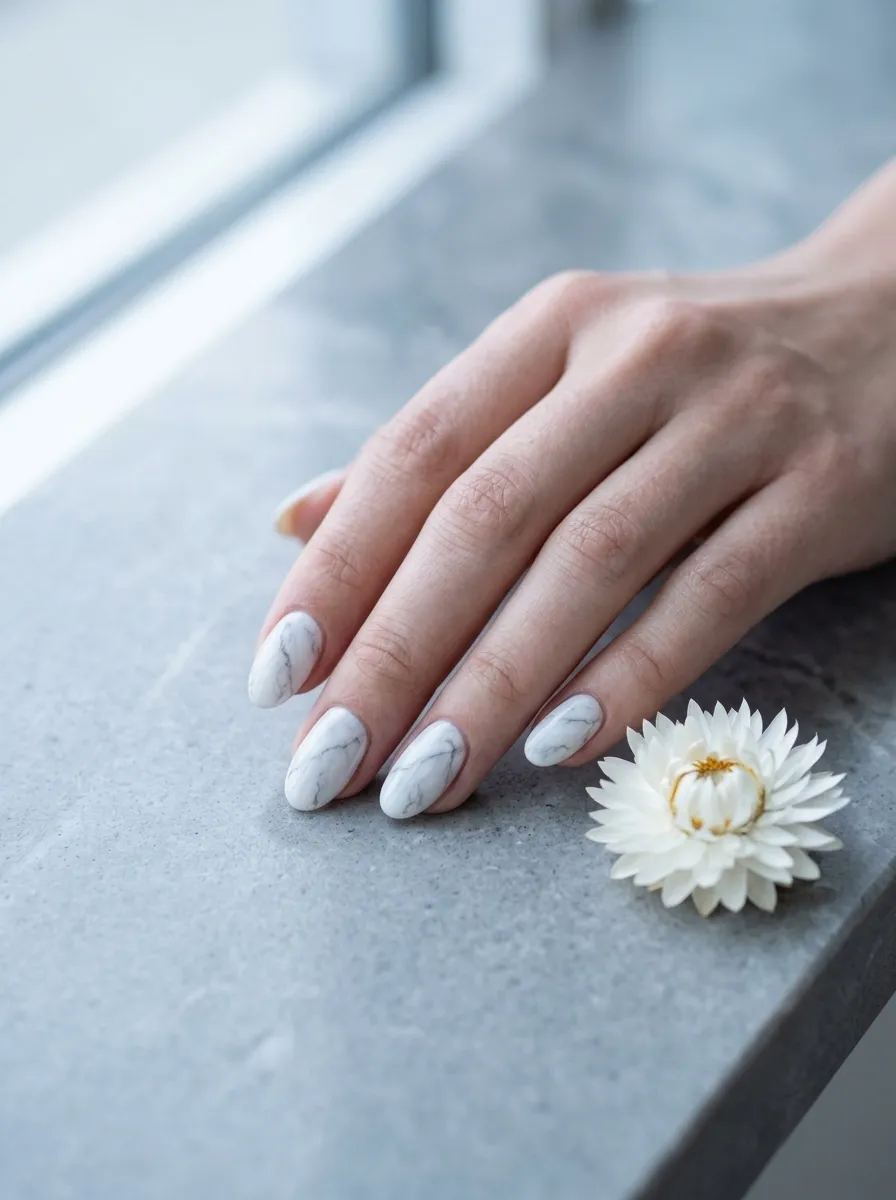
Think of the ghost world in Beetlejuice. The washed out, pale, almost translucent aesthetic is eerie and beautiful at the same time. White marble nails capture that energy perfectly.
You do not need a special tool to do marble nails at home. All you need is a white base, a thin brush, and a pale gray or silver polish. Paint the white base first and let it dry. Then use your thin brush to draw thin, organic veining lines in gray. The trick is to keep your hand loose and let the lines wiggle naturally. Marble is never perfectly straight.
Add a glossy topcoat to make the whole thing look like real stone. You can also use a water marbling technique if you want a more dramatic result, though that takes a bit more practice.
This look feels editorial and high fashion. It also leans into the ghostly, beyond the grave aesthetic without being too costumey. It is the kind of nail art that works on a Monday at work just as well as it does at a Halloween party. Pair it with silver or white jewelry for a cohesive finish.
4. Coffin Nails in Matte Black
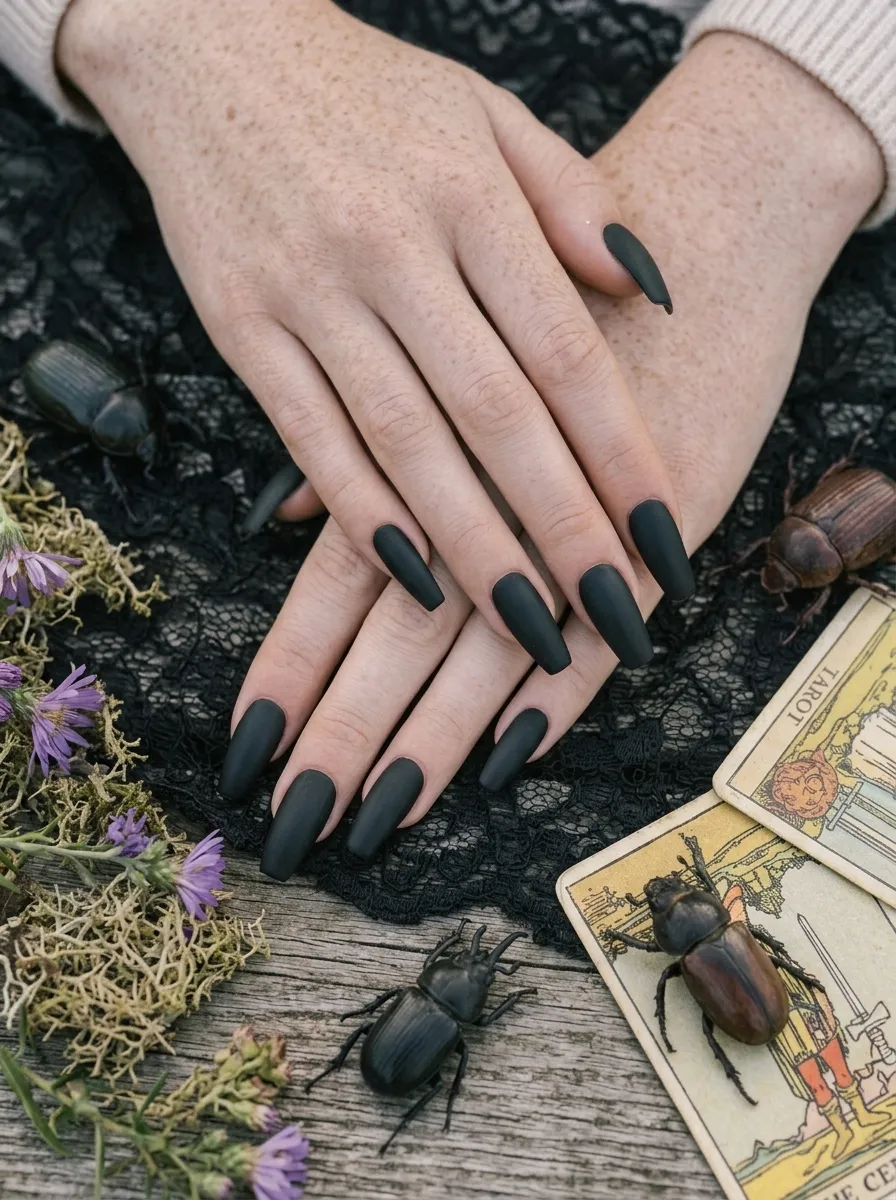
Coffin nails and matte black are a natural pair. The shape alone gives a dramatic, theatrical energy and matte black takes it to another level. This is a core Beetlejuice aesthetic.
Matte black polishes are widely available and very affordable. OPI, Essie, and Sally Hansen all have solid options under ten dollars. If you already have a black polish you love, you can simply use a matte topcoat over it to kill the shine. A matte topcoat transforms any glossy color instantly.
Coffin nails can be achieved with press-ons if you do not want to grow your natural nails. Kiss and Impress both make affordable coffin shaped press-ons that you can paint over. This is a great budget hack.
This look needs zero nail art skills. It is all about the shape and the finish. Clean cuticles and a precise application make it look professional. You can leave it simple or add a single white stripe on one or two accent nails to tie in the full Beetlejuice energy. The simplicity of this look is what makes it so powerful.
5. Graveyard Scene Nail Art
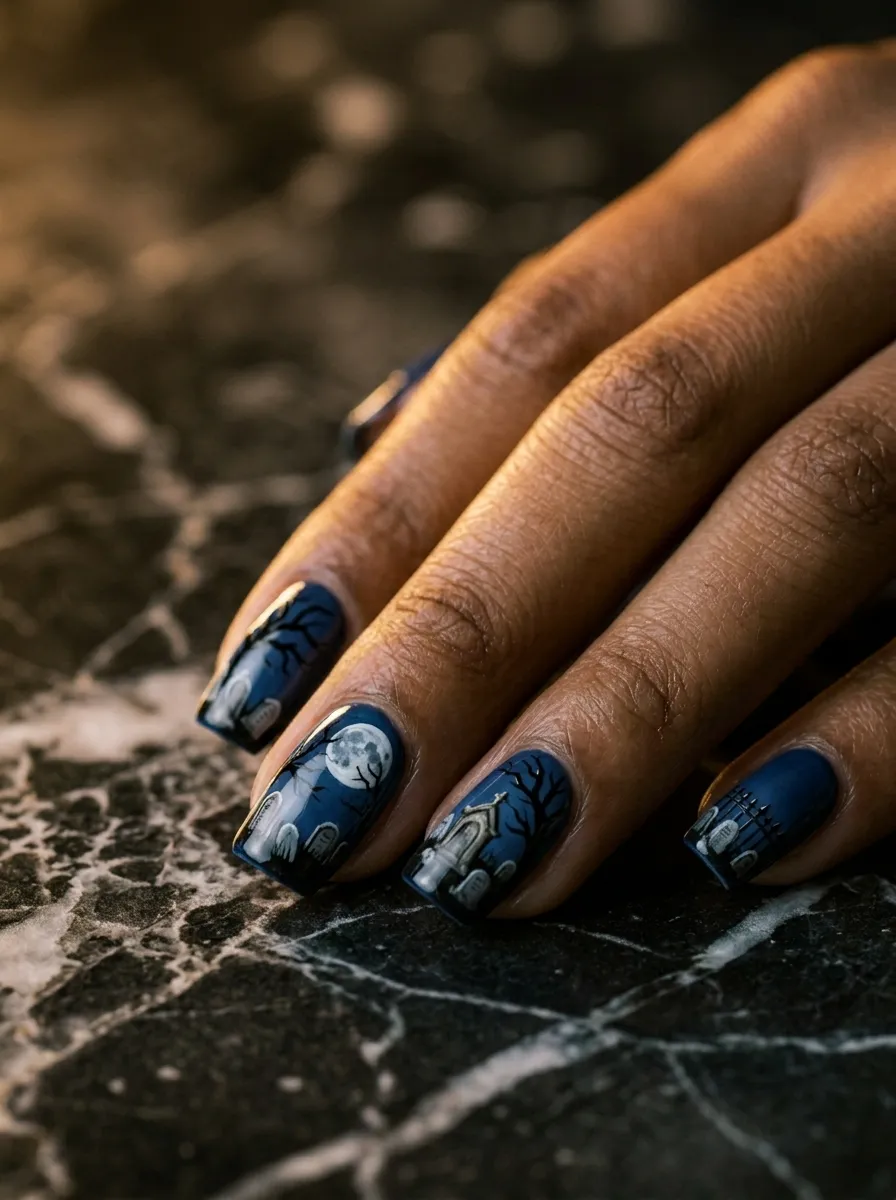
This is a more advanced look but the payoff is incredible. A graveyard scene spread across all ten nails tells a story. Each nail becomes a tiny piece of the scene.
You can keep it simple by using stamp plates, which have pre-made graveyard designs you press onto the nail. No freehand skills needed. Nail stamp kits are available online for around ten to fifteen dollars and they include multiple designs in one kit.
For a DIY approach, use a dark navy or black base and add elements one nail at a time. One nail gets a gravestone. Another gets a bare tree. Another gets a full moon. You do not need all ten to be detailed. Let a few nails be solid black or dark to give the scene room to breathe.
Use a white or pale gray nail art pen for the details. These are easier to control than a brush for fine work. The result looks incredibly detailed even if each element is simple. This is the kind of manicure that starts conversations everywhere you go.
6. Black and White Checkerboard
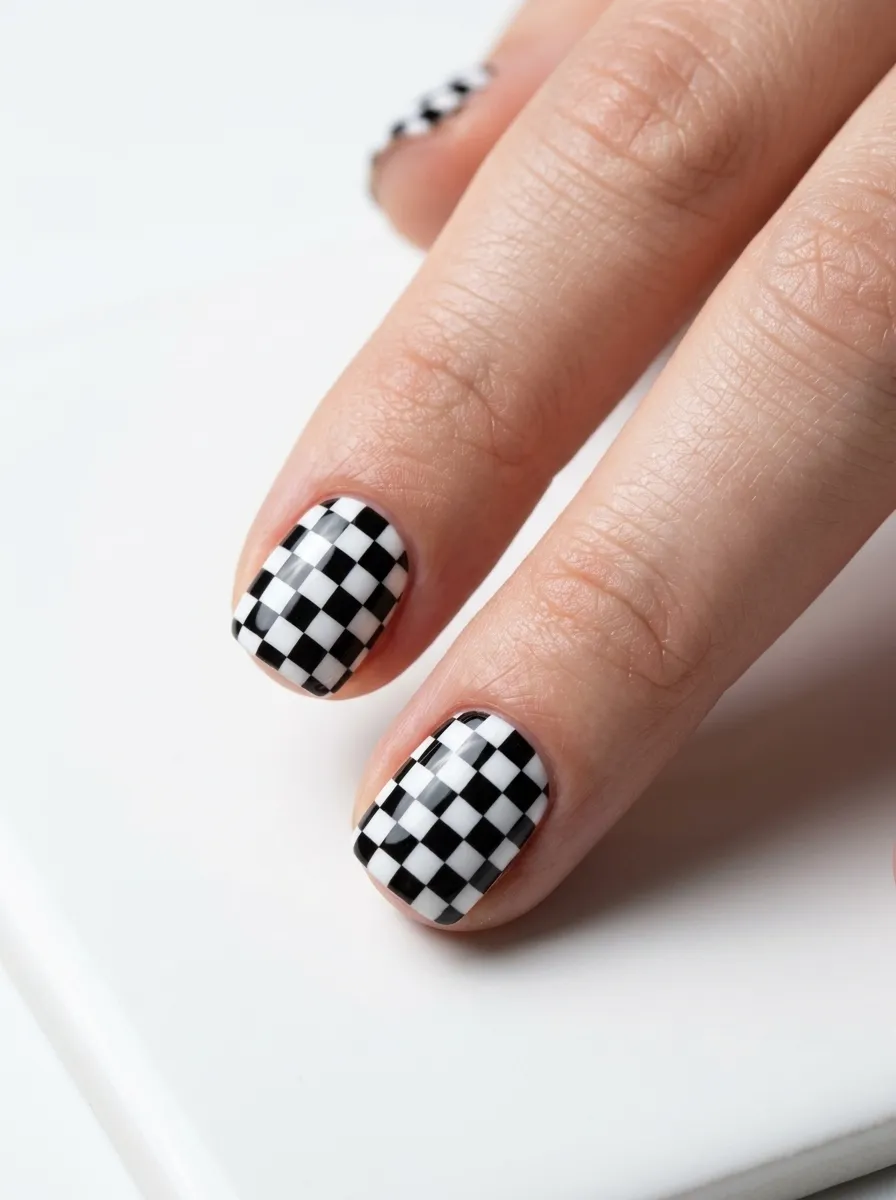
Checkerboard nails live in the same graphic, high contrast world as the Beetlejuice stripe. They feel retro and modern at the same time.
Striping tape is your best friend for this one. Lay strips of tape in a grid pattern over your base color, paint over with the second color, then peel the tape away while the polish is still slightly wet. You get clean, sharp lines without needing a steady hand.
Short square or squoval nails work best for checkerboard because the flat surface gives the pattern more space. On longer nails, the pattern can stretch and look distorted.
You can do the full checkerboard on every nail or use it as an accent. Try checkerboard on the ring finger and thumbs with solid black or white on the rest. This creates balance without overwhelming the look. The pattern also works beautifully with a neon green detail added somewhere, like a single green square hidden in the grid. That small detail ties the whole look back to the Beetlejuice world in a fun, subtle way.
7. Ghostly Face Nail Art
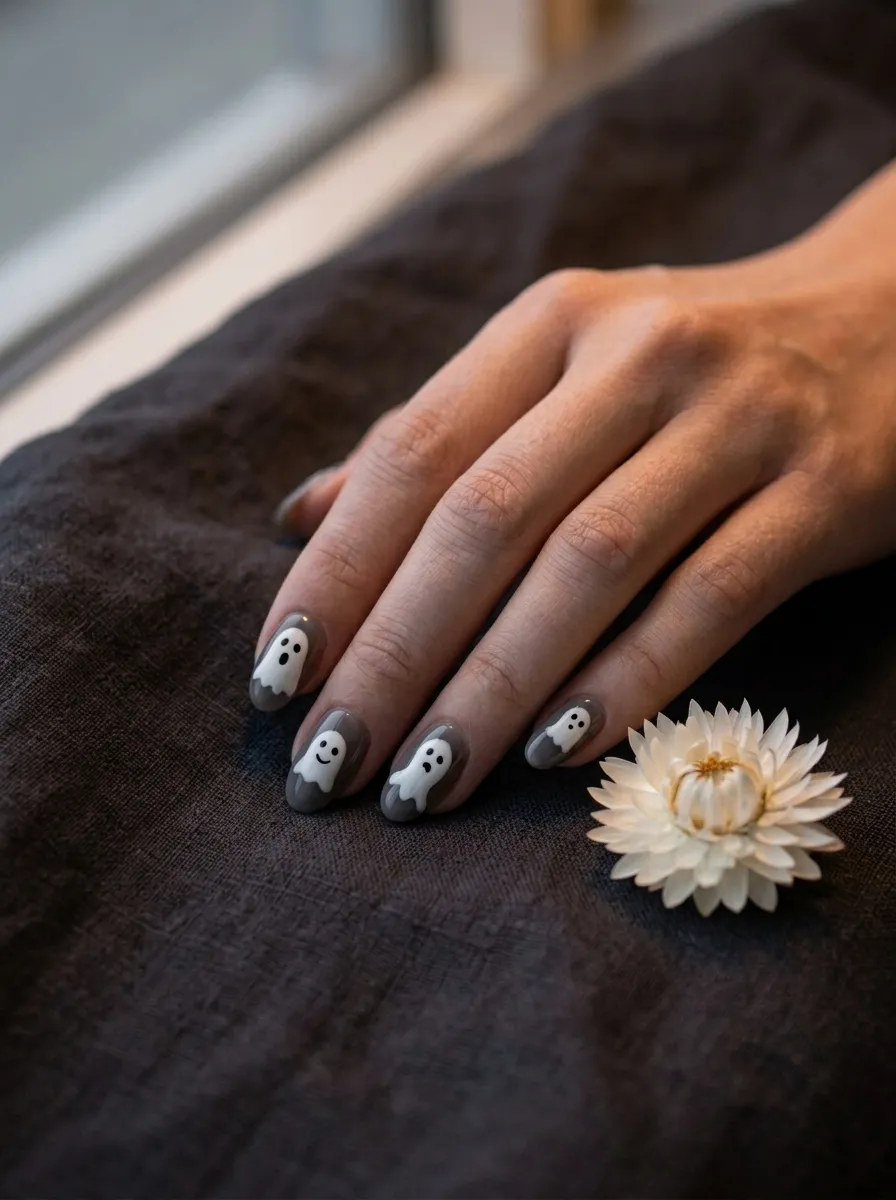
Ghost faces are a playful and recognizable Beetlejuice motif. You do not need to be an artist to pull this off because simple ghost designs actually look better than overly detailed ones.
Use a black or gray base and let it dry. Then use a white nail art pen or a dotting tool to create the ghost body. A simple rounded shape with two small black dots for eyes is all you need. The wonkier it looks, the more charming it becomes.
Nail art pens from Born Pretty or Modelones are affordable and easy to control for beginners. You can find them online for about five to eight dollars for a set.
You can paint one ghost on each nail or cluster a few small ghosts on a single nail for a busier look. Add tiny dots around the ghost to suggest floating or movement. A matte topcoat over this design gives it a soft, eerie quality that feels very true to the ghost world aesthetic. This is one of those designs that looks impressive but takes very little skill to execute. Kids love it too if you are painting nails with little ones for a themed event.
8. Sandworm Inspired Abstract Nails
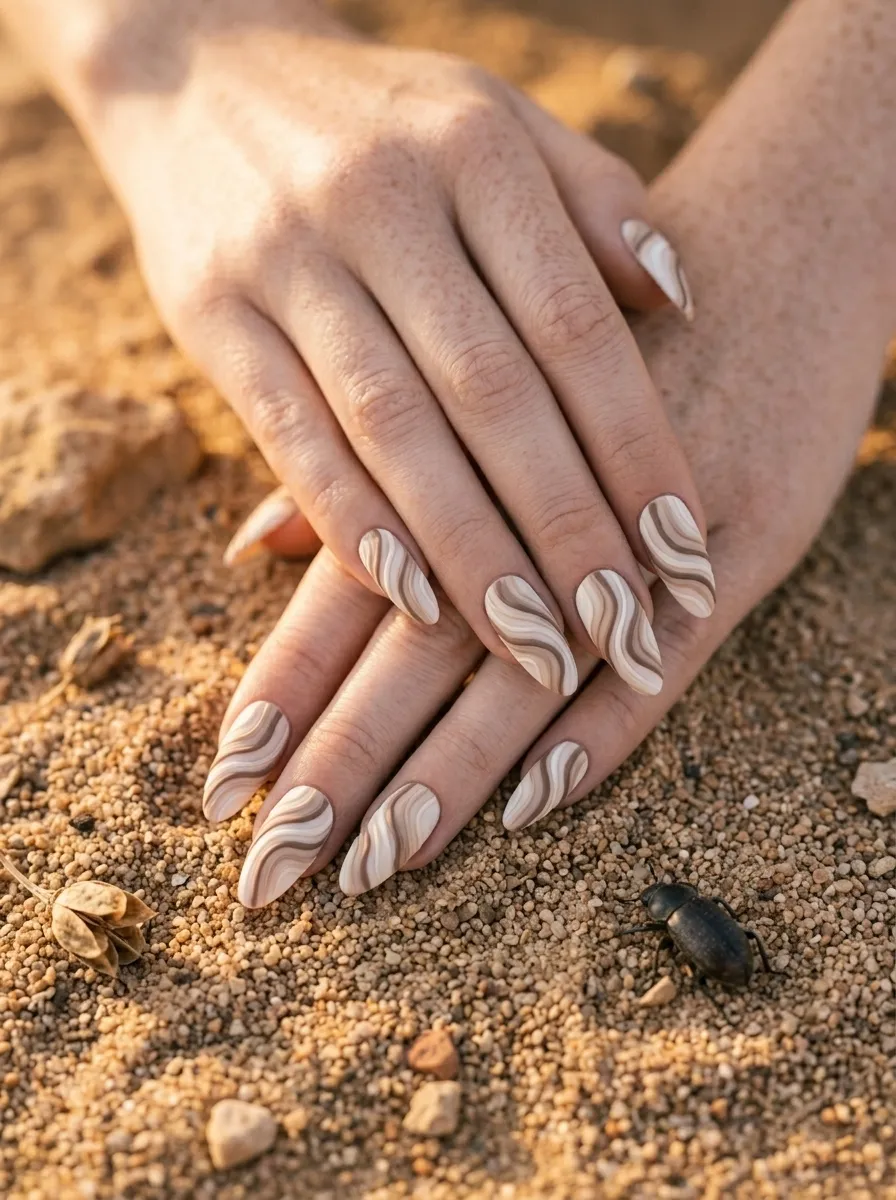
The sandworm from Beetlejuice is one of the most bizarre and lovable creatures in the film. Its ringed, segmented body inspired this abstract nail look.
You do not need to paint an actual sandworm. Instead, use wavy horizontal lines in beige, tan, and cream on a white or sand colored base to suggest the texture and movement of the creature. The result looks like modern abstract nail art to someone who does not know the reference, but to fellow fans it is immediately recognizable.
Use a thin nail art brush or striping brush to create the wavy lines. Go slow and let each line dry before adding the next. This prevents smearing.
Add a small dot or circle at the tip of one accent nail to represent the sandworm’s open mouth. That single detail is the Easter egg that Beetlejuice fans will absolutely love. This look is understated compared to striped or neon designs but it has a quiet cool factor that is hard to replicate. It pairs beautifully with a neutral or earthy outfit where the nails become the single interesting element.
9. Neon Green and Black Ombre
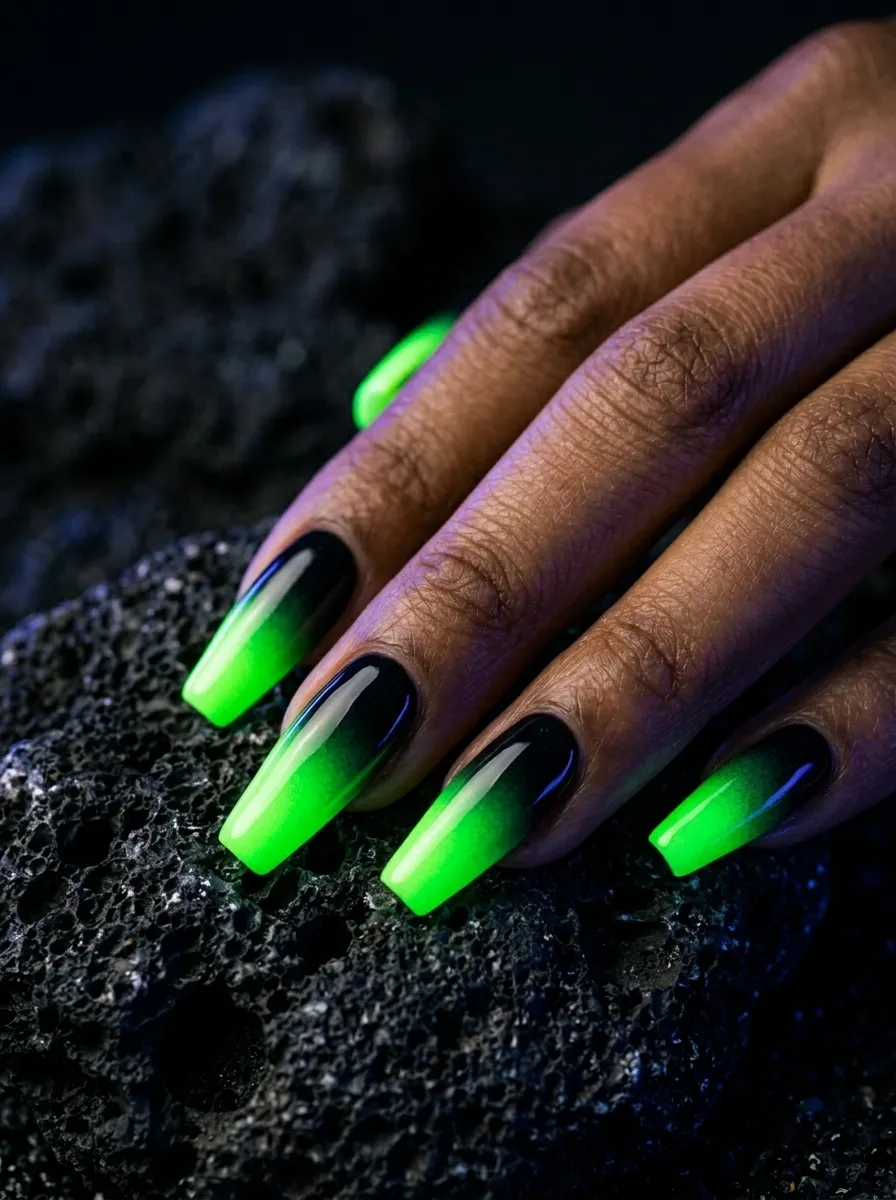
Ombre nails in neon green and black feel like something straight out of the ghost world. The glow of the green fading into deep black is dramatic and stunning.
You can create an ombre at home using a makeup sponge. Paint both colors side by side on the sponge, then press it onto the nail and dab lightly. Repeat a few times to build up the gradient. Clean up the edges with a small brush dipped in acetone.
Neon polishes sometimes need a white base underneath to show their true brightness. Apply a coat of white first, let it dry, then do your ombre on top. This is especially true with cheaper neon polishes.
Finish with a glossy topcoat to seal everything and make the colors pop. This look works beautifully on longer nails because the gradient has more space to develop. If you have shorter nails, you can still do a mini version by focusing the neon at the tip and fading it quickly into black. The result is bold and unapologetic, exactly the energy that Beetlejuice represents.
10. Victorian Damask Nail Stamps
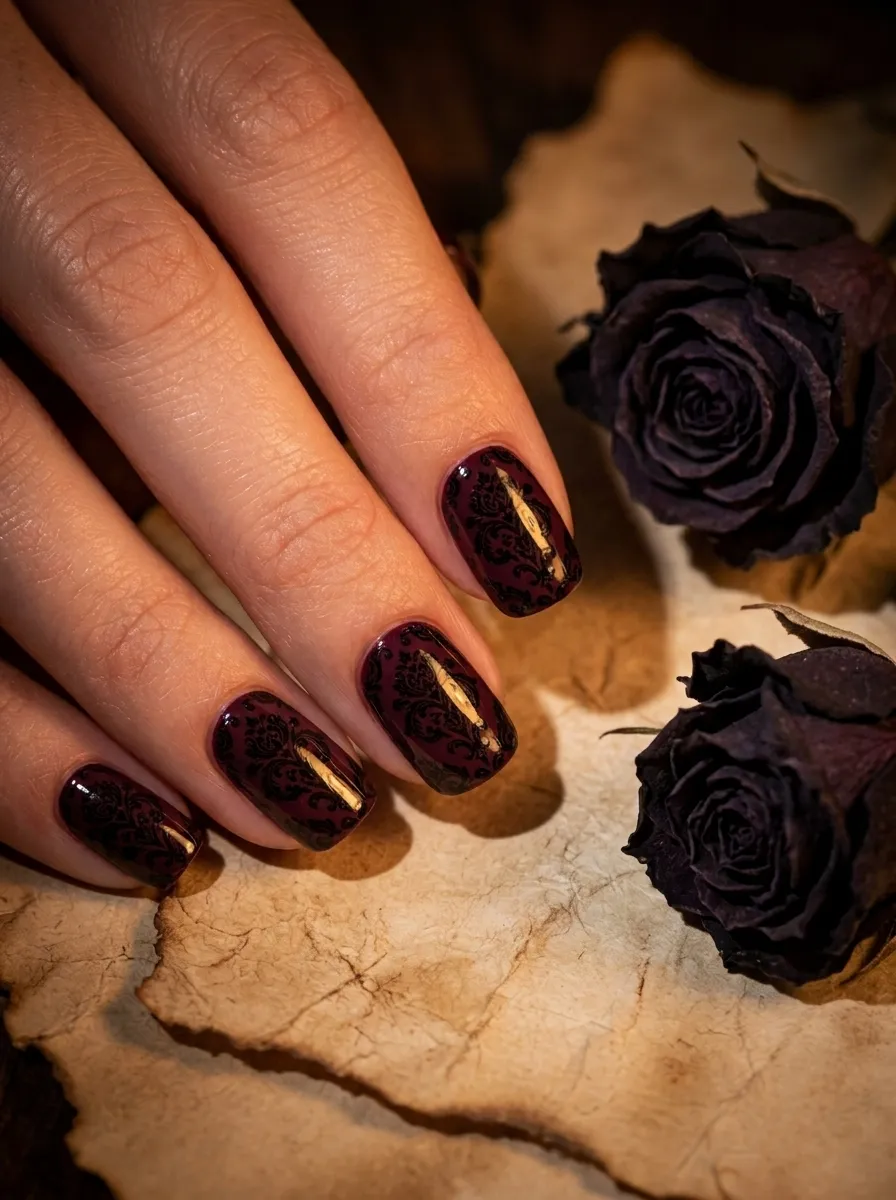
The Victorian gothic world of Beetlejuice is full of intricate wallpaper patterns, ornate furniture, and dramatic decor. Damask stamped nails bring that energy directly to your fingertips.
Stamping is one of the easiest ways to get intricate looking nail art without any freehand skills. A basic nail stamp kit from Moyou London or Born Pretty costs about ten to fifteen dollars and includes multiple plates with detailed designs including damask, floral, and baroque patterns.
Use a deep burgundy, forest green, or black base and stamp the pattern in a contrasting metallic or matte black. The combination of rich base color and detailed stamp looks luxurious.
Clean stamper heads with acetone between uses to keep the prints crisp. If your stamp is not picking up polish cleanly, try stamping right after opening a new bottle of stamping polish. Regular nail polish can be too thin for good stamp transfer. This look feels high end and editorial. It reads as sophisticated on its own but when you pair it with the other Beetlejuice elements in your outfit or makeup, the whole look comes together beautifully.
11. Skull Accent Nails
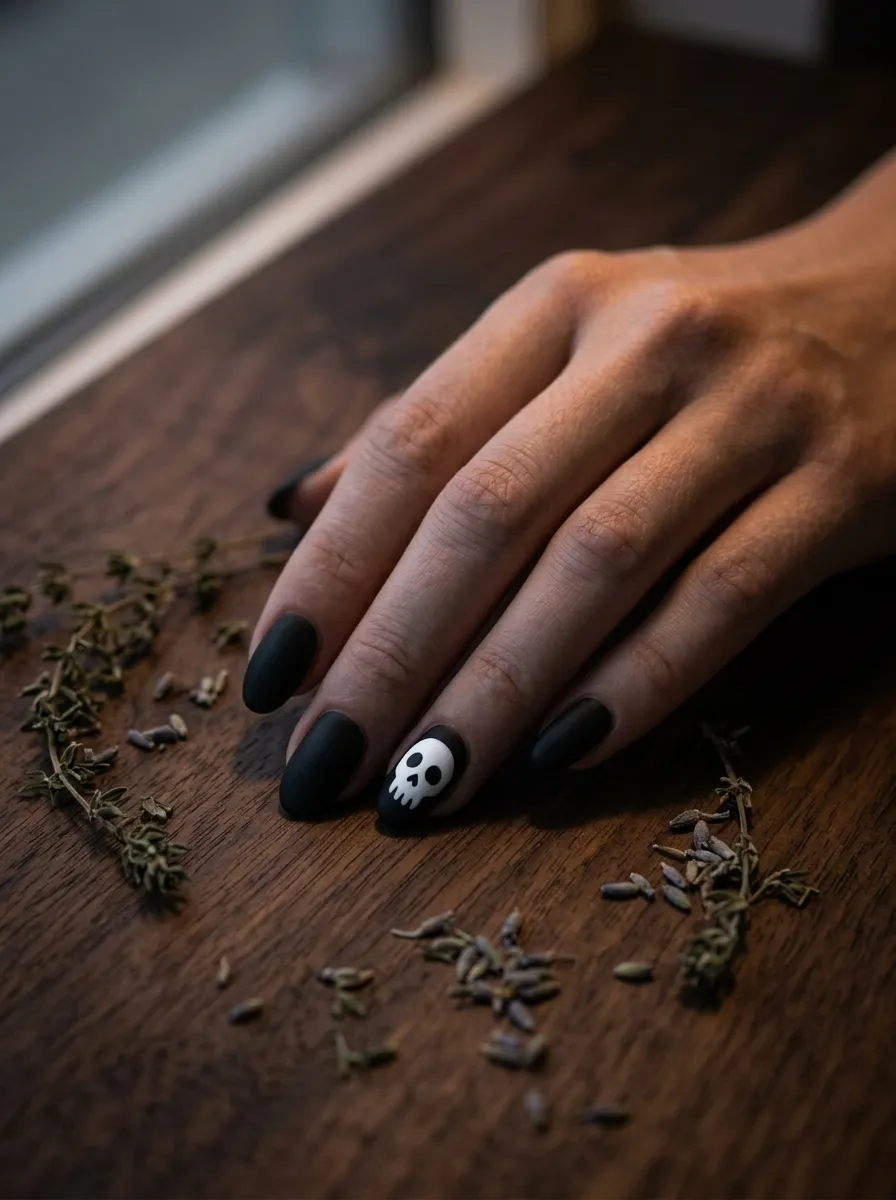
Skulls are a classic symbol in the Beetlejuice universe. Painting a skull on a single accent nail is one of the easiest ways to add a statement detail without committing to a full nail art look on every finger.
Use your ring finger as the canvas. Start with a white or neon green base and draw the skull outline using a black nail art pen. Keep the shape simple, a rounded top, wide eye sockets, a small nose triangle, and a toothy grin. You do not need realism. The more graphic and cartoonish it looks, the better it translates on a tiny nail.
Nail art pens with a fine tip give you the most control here. Shake the pen before use and test the flow on a piece of paper first.
Pair the skull accent nail with solid matte black on the remaining nails. This creates a clean, wearable look that still has that Beetlejuice edge. You can also add tiny dots or stars around the skull to fill the negative space. This nail style works for any occasion from casual days out to Halloween parties to a concert.
12. Purple and Black Swirl Nails
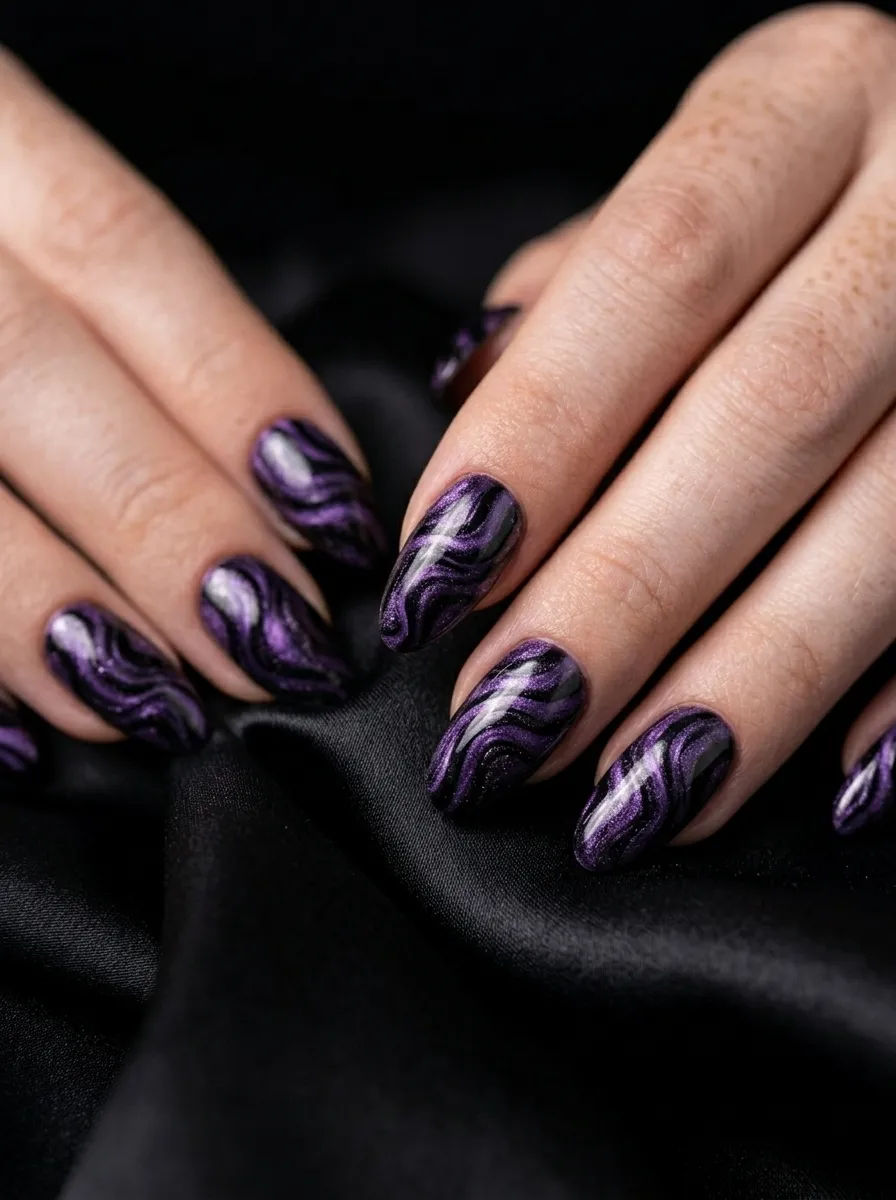
Deep purple swirled into black creates a hypnotic, otherworldly nail look. It feels like the inside of the waiting room in Beetlejuice, strange, mysterious, and magnetic.
To create this at home, apply a black base and let it dry. While a fresh drop of purple polish is still wet on the nail, use a thin brush or toothpick to drag and swirl the colors together. Work fast because wet polish blends beautifully but dries quickly.
Gel polishes give you more working time if you want to perfect the swirl before curing. Regular polish works too but you need to move faster.
You can also use nail wraps or water decals with swirl patterns if freehand feels too unpredictable. These are available on Etsy for a few dollars per sheet and apply in seconds. Add a glossy topcoat and the swirls look like they have depth and movement even though they are flat. This is one of those designs that looks wildly complicated but takes maybe fifteen minutes once you get the hang of the swirling technique.
13. Cobweb Corner Nails
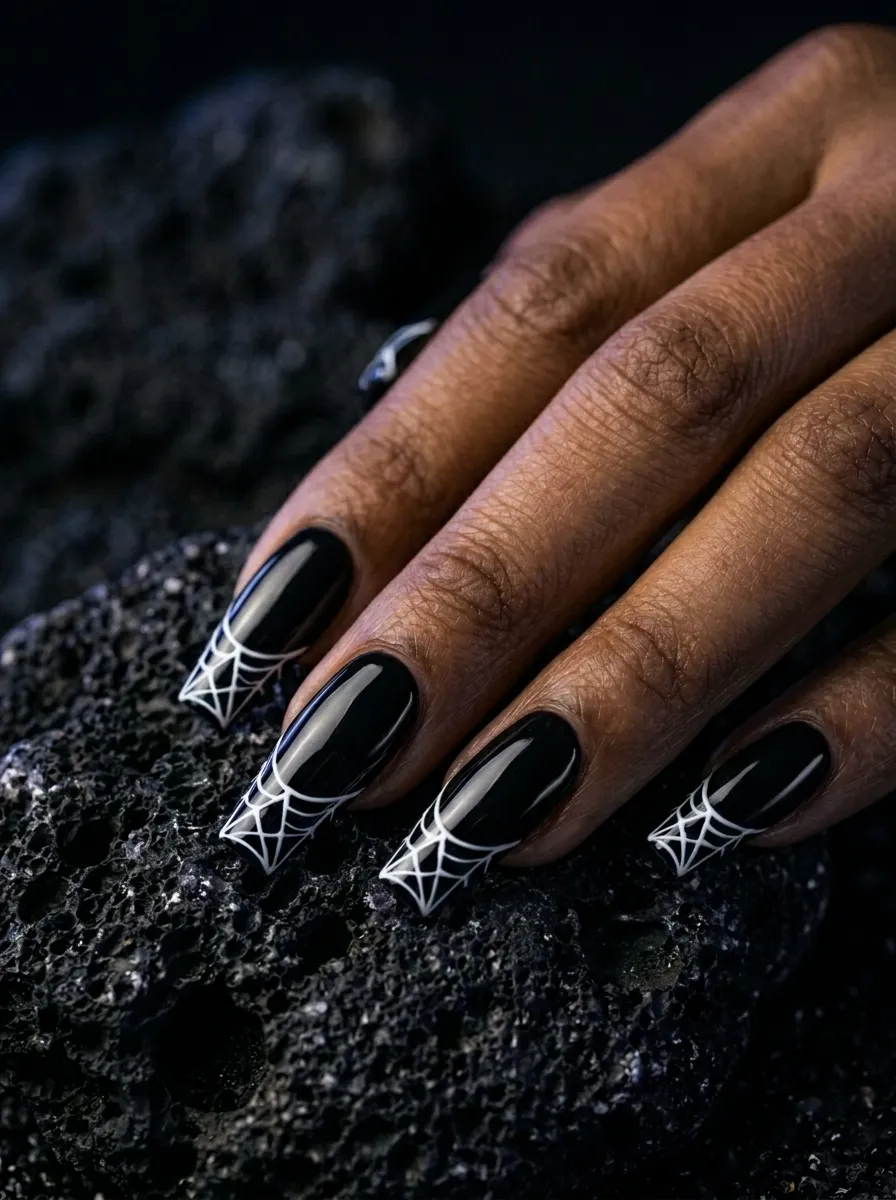
A cobweb detail in the corner of the nail looks effortlessly gothic and polished. It is one of those designs that photographs beautifully and always looks intentional.
You can draw a cobweb using a dotting tool and a thin nail art brush. Start with a small dot in the corner. Draw straight lines radiating out from the dot. Then connect the lines with curved arcs moving outward from the center dot. The arc lines are what create the web shape.
White or silver polish on a black base is the most striking combination. For a subtler version, try a nude base with a black cobweb. Both look great.
Practice the web on a piece of paper before doing it on your nail. Once you get the pattern down, it takes about two minutes per nail. You can add the web to just the tips of the nails, making it look like the cobweb is growing from the edge. This is the kind of detail that is small but completely elevates how finished and artistic the whole look appears. Perfect for Halloween season but honestly wearable year round for anyone who loves a gothic aesthetic.
14. Beetlejuice Green Glitter Nails
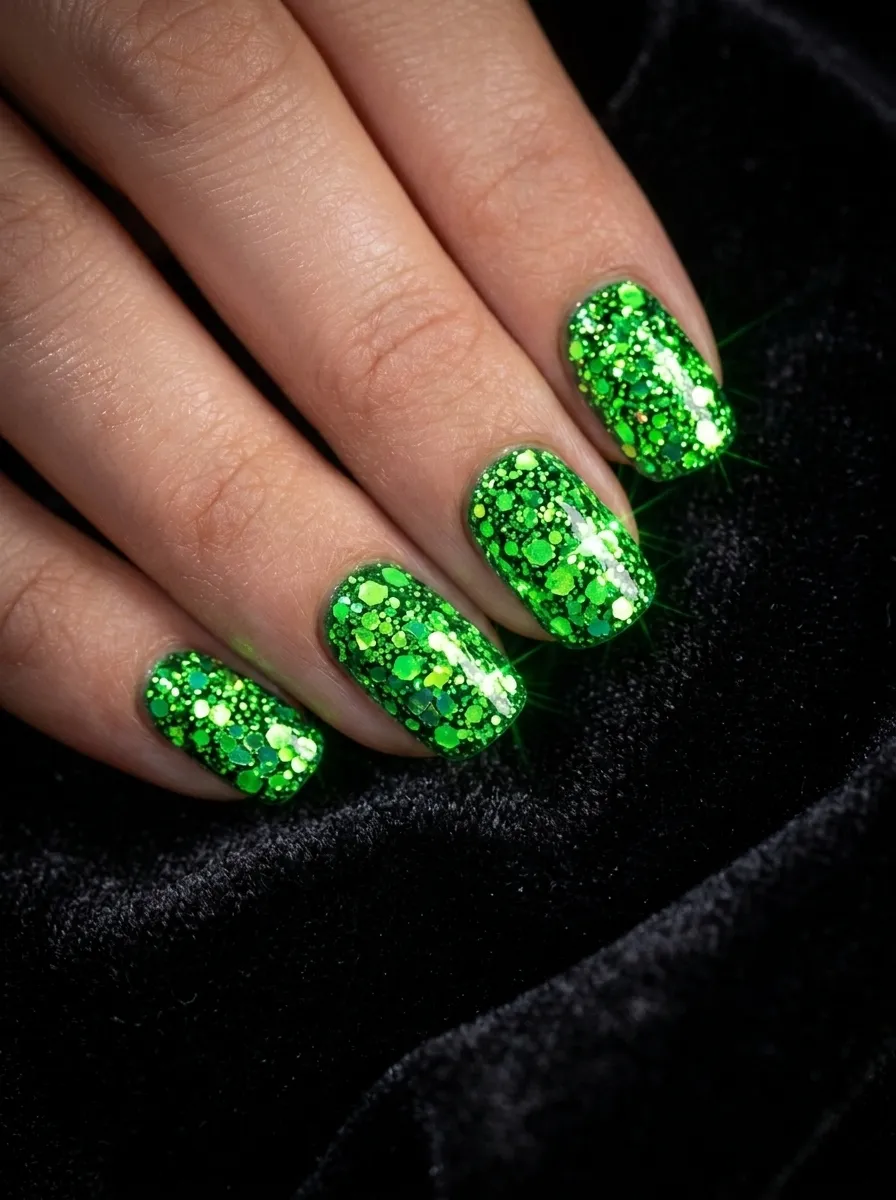
Glitter nails in neon green are bold, fun, and fully Beetlejuice coded. The sparkle adds dimension that flat neon polish does not have.
Neon green glitter polishes are widely available at drugstores and beauty supply shops. China Glaze, Sinful Colors, and Orly all have options under eight dollars. Apply two to three coats for full coverage and let each coat dry before adding the next.
For extra intensity, do a neon green base coat first, then layer the glitter on top. This fills in any gaps and makes the color look denser.
Finish with a generous layer of glossy topcoat to smooth out the texture and protect the glitter from chipping. Glitter nails can be tricky to remove, so use a foil removal method. Soak cotton rounds in acetone, press them on the nail, wrap each finger in foil, wait ten minutes, then wipe off. The glitter comes right off without scrubbing.
This look is festive and dramatic. It works for parties, concerts, and any occasion where you want your hands to do the talking before you even say a word.
15. Striped Half Moon Nails
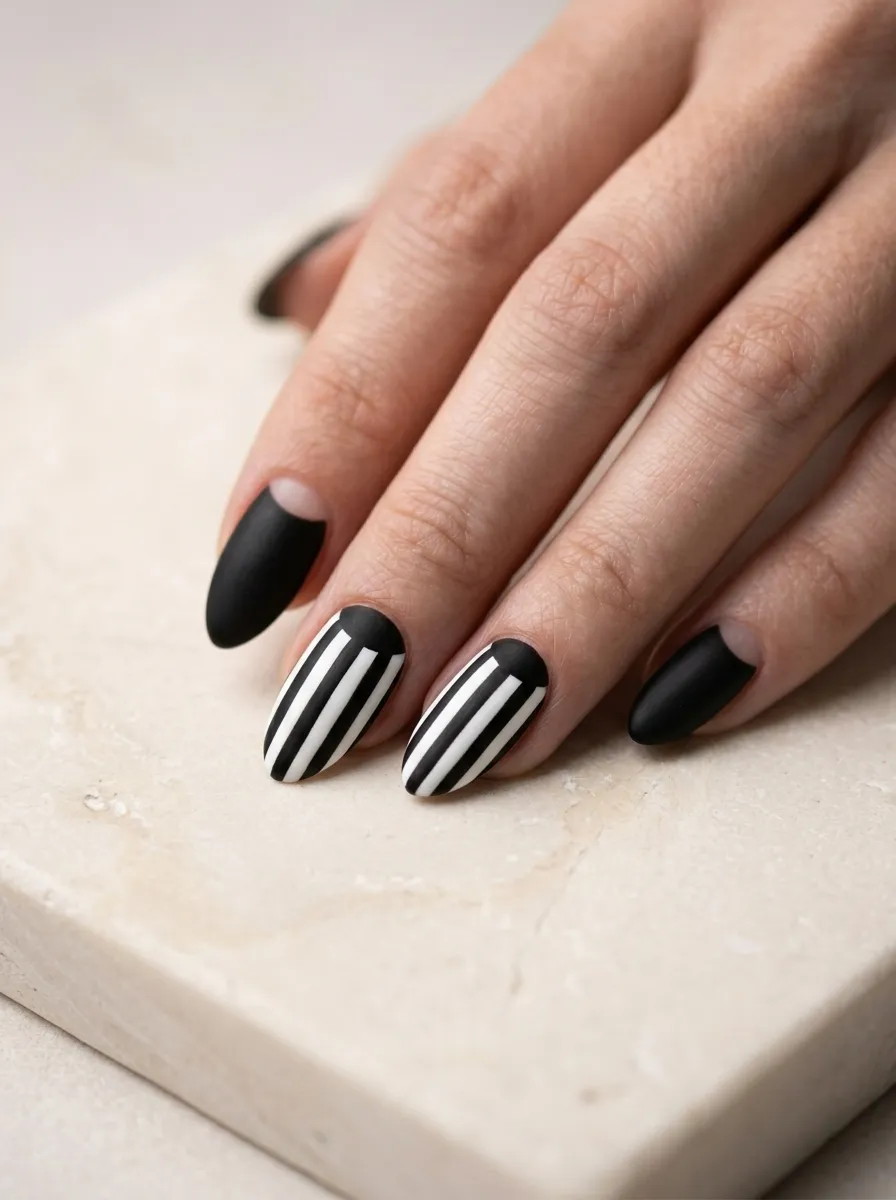
The half moon nail technique adds a retro, graphic element to any manicure. Combined with the classic Beetlejuice stripe, it becomes something really special.
To create the half moon, use a small round reinforcement sticker or a hole punch guard placed at the base of the nail near the cuticle. Apply your base color over the sticker and the rest of the nail. Once dry, peel the sticker away to reveal a clean half circle of the base color. Then add your stripes over the rest of the nail.
Reinforcement stickers cost almost nothing and are available at any office supply store. They are the easiest way to get a perfect half moon shape without freehand drawing.
This design has that throwback glamour of vintage nail art but with a modern, Beetlejuice edge. You can also reverse it, stripes at the base and a solid neon green half moon at the tip. Both versions look intentional and polished. The layering of techniques in this design makes it look more complex than it actually is, which is exactly the kind of nail art win everyone loves.
16. Spooky Eye Nail Art
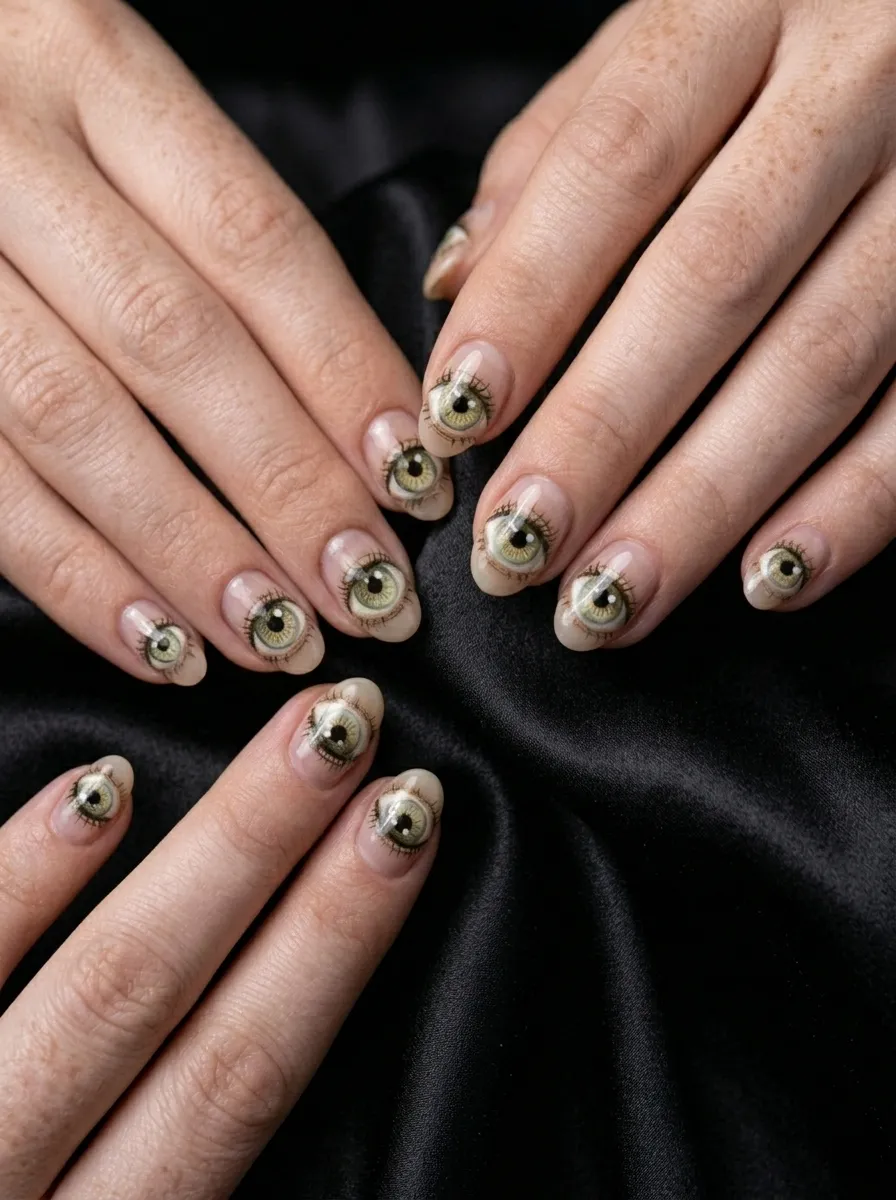
Eyes are one of the most atmospheric motifs in gothic and surreal art, and they fit perfectly into the Beetlejuice world. Painting a wide, staring eye on each nail creates a look that feels supernatural and unsettling in the best way.
Use a black base. Paint a white almond shape in the center of the nail. Add a pale green or golden iris inside the white, then a black pupil in the center of that. Add tiny white dots for the light reflection in the eye. Finally, use a thin black brush to draw lashes radiating from the white of the eye.
Nail art pens are essential for the fine details like lashes and pupil outlines. They give you much more control than a regular polish brush.
You can simplify the design to just the outline of an eye with no iris detail and it still reads clearly. Or you can add red veining in the white of the eye for a more intense effect. This nail art has a high visual impact and gets a lot of attention. It is the kind of manicure that makes people stop mid-conversation to ask about it.
17. Black Lace Overlay Nails
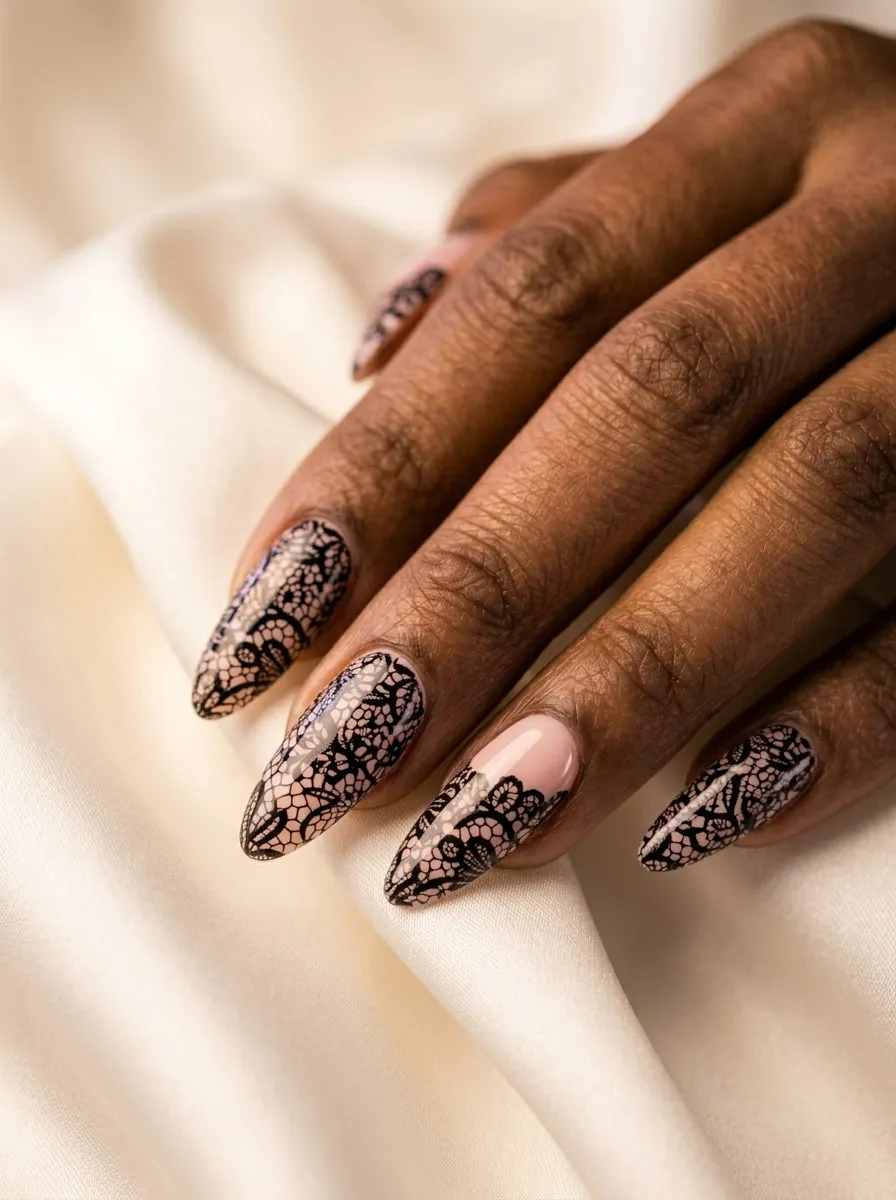
Lace nails bring a dark romantic quality to the Beetlejuice aesthetic. Think gothic Victorian funeral attire, the black wedding dress, the layers of mourning fabric.
You can achieve lace nails using nail stamps with lace or floral designs. Stamp the pattern in black over a nude, blush, or white base for maximum contrast. The combination of delicate and dark is the whole point of this look.
Moyou London and Bundle Monster both have stamp plates with lace patterns that cost about ten dollars each and contain multiple designs. A good stamping kit is one of the best investments for nail art beginners.
If you want to go further, you can use actual fabric lace pressed against the nail while the topcoat is wet. Trim a tiny piece of lace, press it onto the sticky topcoat, seal with another layer, and you get a real three dimensional texture. This technique takes a bit of patience but the result is extraordinary. The lace nail look is one of those rare designs that is gothic without being heavy. It is wearable at formal events and everyday outings while still carrying that quiet, dark edge.
18. Bleeding Heart Nails
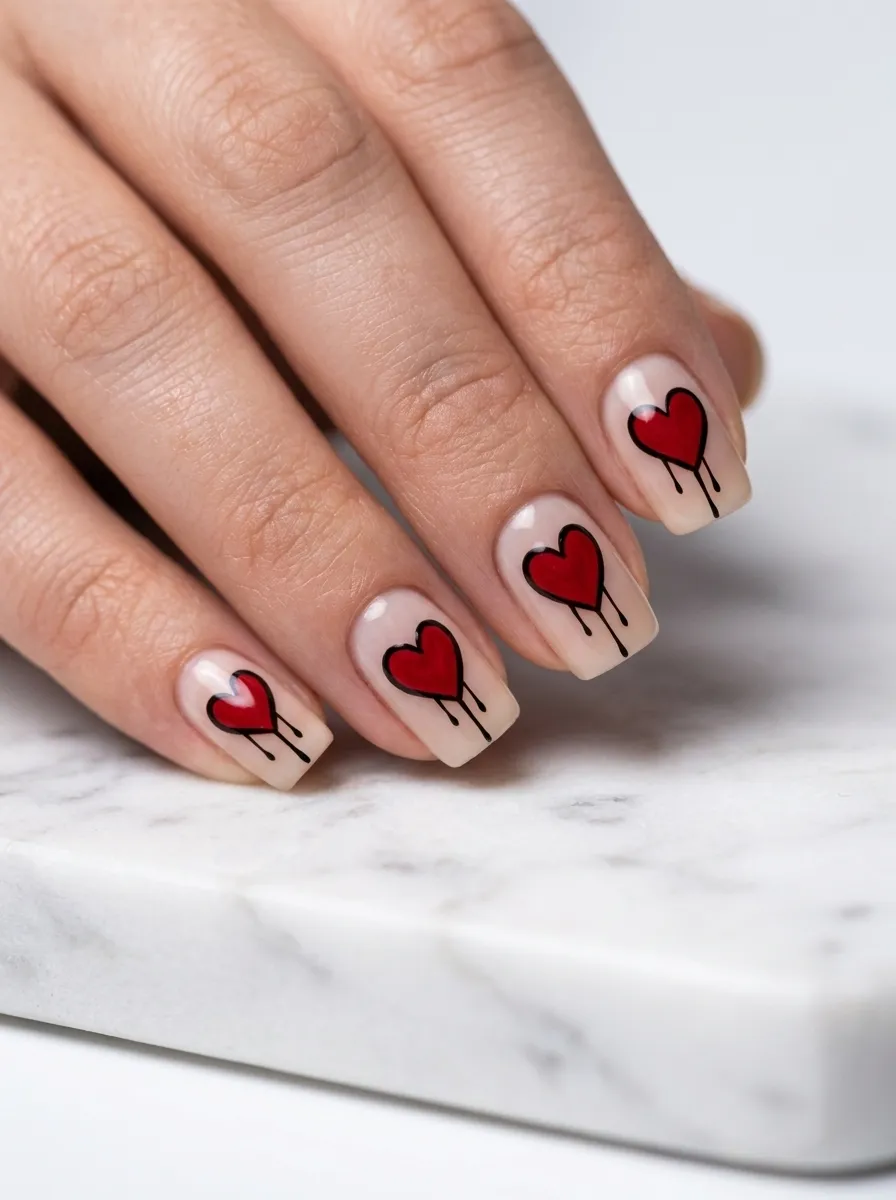
The bleeding heart is a classic gothic motif and it works beautifully as small nail art. It is bold enough to be a statement but small enough to fit comfortably on any nail size.
Paint a white or black base first. Draw a small heart shape using a red nail art pen. Once dry, use a thin black brush to add small drip lines falling from the bottom of the heart. These drip lines are what give it the bleeding effect.
Bold, graphic hearts look better on nails than realistic ones. Keep the heart shape simple and the drips clean.
You can do a heart on every nail or place one on the ring finger only as an accent. Black base with red heart and black drips is the most dramatic version. White base with the same detail creates a more playful, pop art quality. Add a small halo above the heart for an extra detail that nods to the ghost world theme. This is a quick design that takes maybe ten minutes once you have practiced the drip motion a few times on paper. Great for Valentine’s Day meets Halloween crossover events.
19. Monochrome Gothic Floral Nails
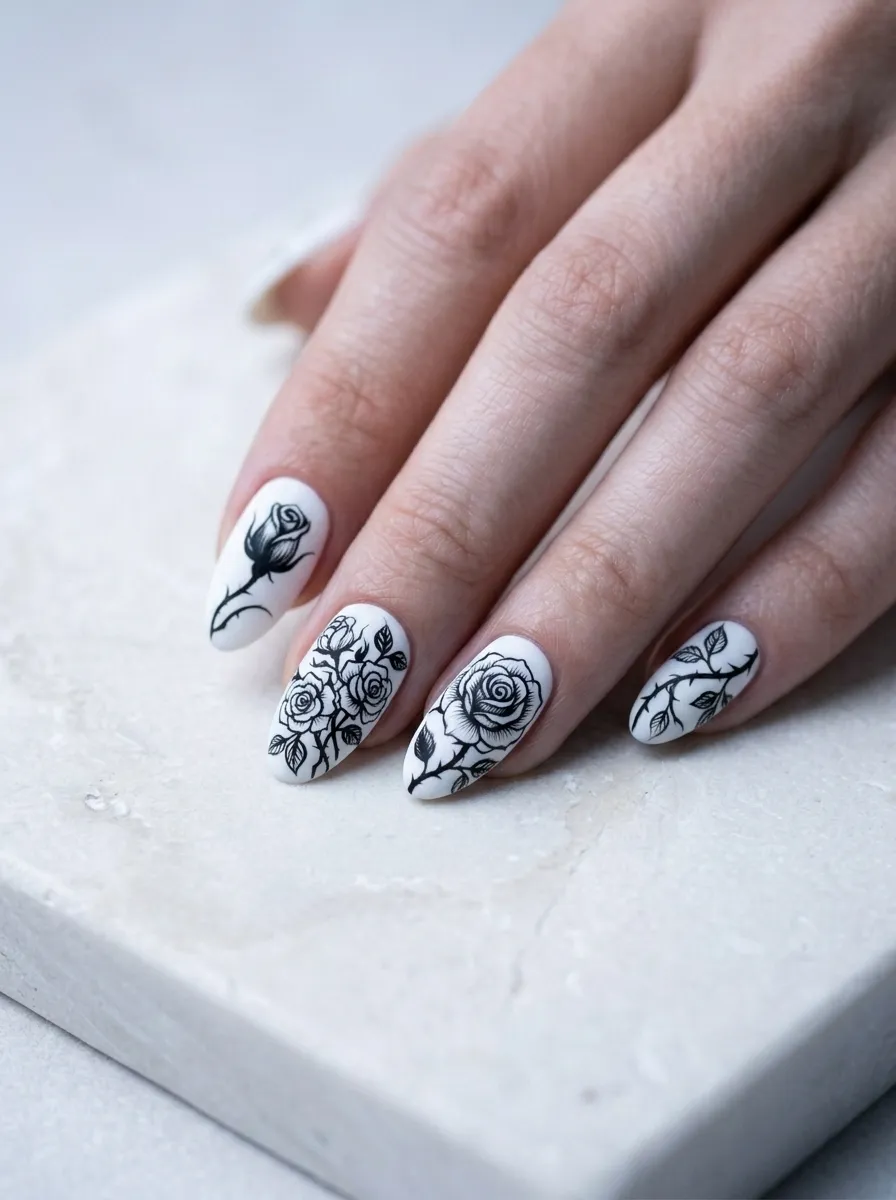
Gothic florals in black and white bring the Victorian graveyard aesthetic to life on your nails. Think decaying roses, thorned stems, and dark blooms painted in stark monochrome.
Use a white matte base and a fine black nail art pen. Draw simple rose shapes, starting with a small spiral center and adding petal curves around it. Add a few leaves and a curved stem. You do not need the rose to look realistic. A stylized, slightly wonky rose has more charm than a perfect one.
Give each nail a different botanical element. One nail gets a full rose. One gets just the stem and thorns. One gets scattered petals. This tells a small story across the hand.
Finish with a matte topcoat to keep the monochrome feel clean and graphic. Glossy topcoat also works but matte keeps it more editorial. This look works for any season. In autumn and winter it feels seasonal and perfectly gothic. In spring and summer it reads as high fashion botanical art. The Beetlejuice connection is in the drama of the black on white and the slightly morbid floral subject matter.
20. Striped Press-On Nails with Gems
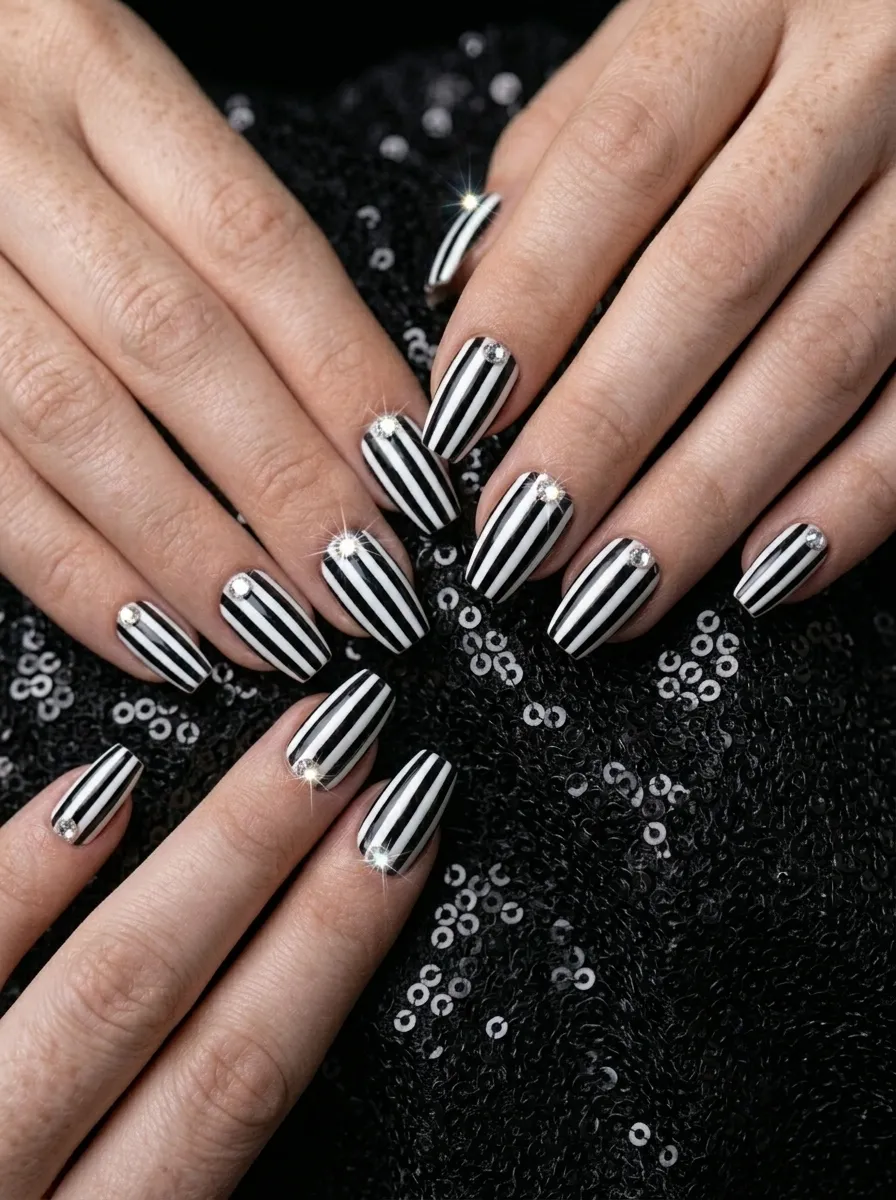
Not everyone wants to paint their nails freehand, and press-ons have become seriously impressive in quality and variety. You can buy plain coffin or almond shaped press-ons and customize them yourself for a fraction of salon prices.
Buy a pack of plain white or clear press-ons and paint stripes on them before applying. This is actually easier than painting directly on your natural nail because you can hold the press-on flat and work at a better angle.
Add flat back rhinestones along the cuticle edge after applying the press-on. Use nail glue or a small dot of topcoat to secure each gem. Gems in black, white, or neon green keep the Beetlejuice color palette consistent.
Finished press-ons with gems look like they came from a nail salon. The total cost for a set of customized press-ons including gems and polishes is usually under fifteen dollars. Press-ons also last a week or more when applied correctly over clean, oil free nails. Use a base coat on your natural nail before applying for better adhesion and longer wear.
21. Dark Rainbow Nails
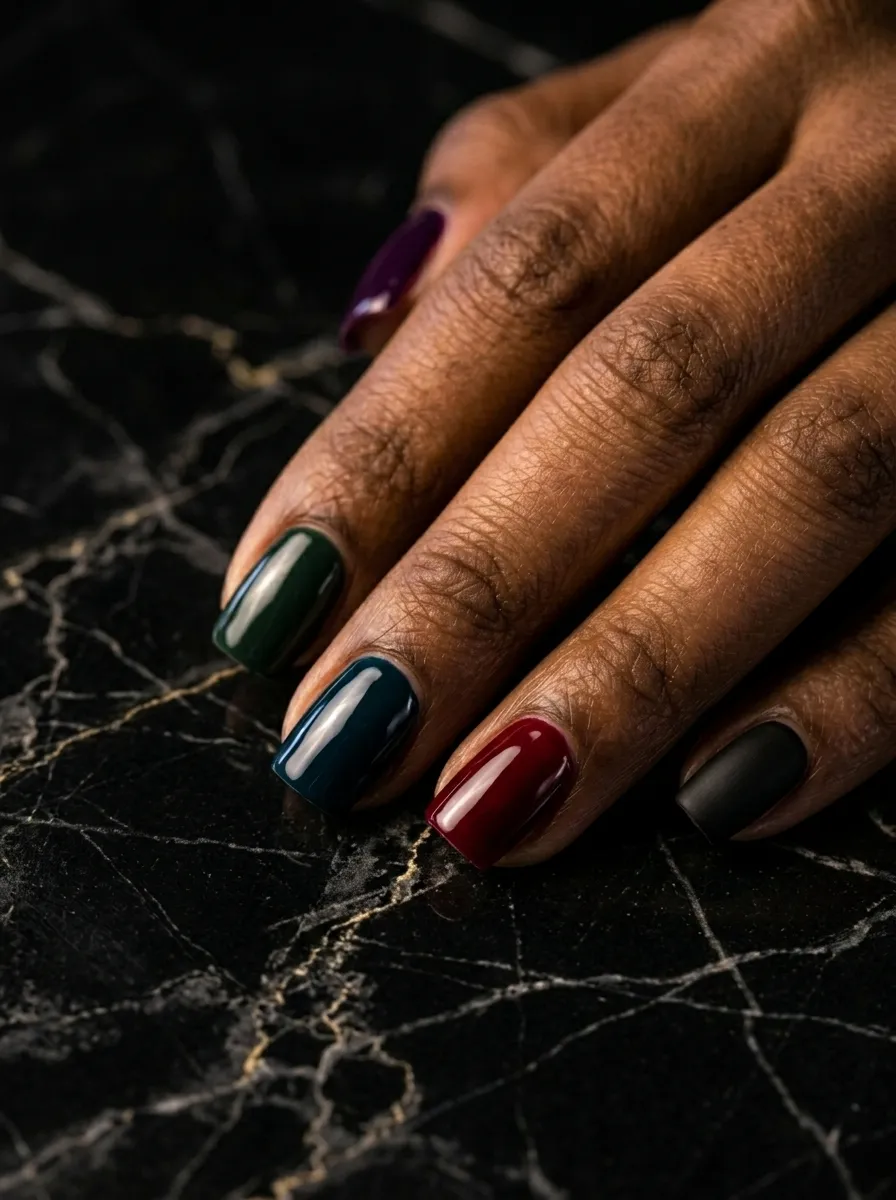
Dark rainbow nails assign a different jewel-toned shade to each finger. Deep plum, forest green, midnight blue, blood red, and onyx black. Every nail is different but they belong to the same moody, gothic family.
This is one of the most budget-friendly nail looks because you are using simple solid polishes in different colors. No nail art brushes, no tools, no stamps needed. Just five coordinating dark shades applied one per nail.
The key to making this look cohesive is staying within the dark jewel tone family. Avoid light or pastel colors. Every shade should have depth and richness to it.
Finish all nails with the same topcoat finish, either all matte or all glossy, to tie them together visually. This look is inspired by the afterlife waiting room in Beetlejuice where strange, mismatched souls coexist. Each nail represents a different character or energy but they all belong in the same universe. It is an easy, effortless manicure that still carries a strong aesthetic point of view.
22. Snake Skin Texture Nails
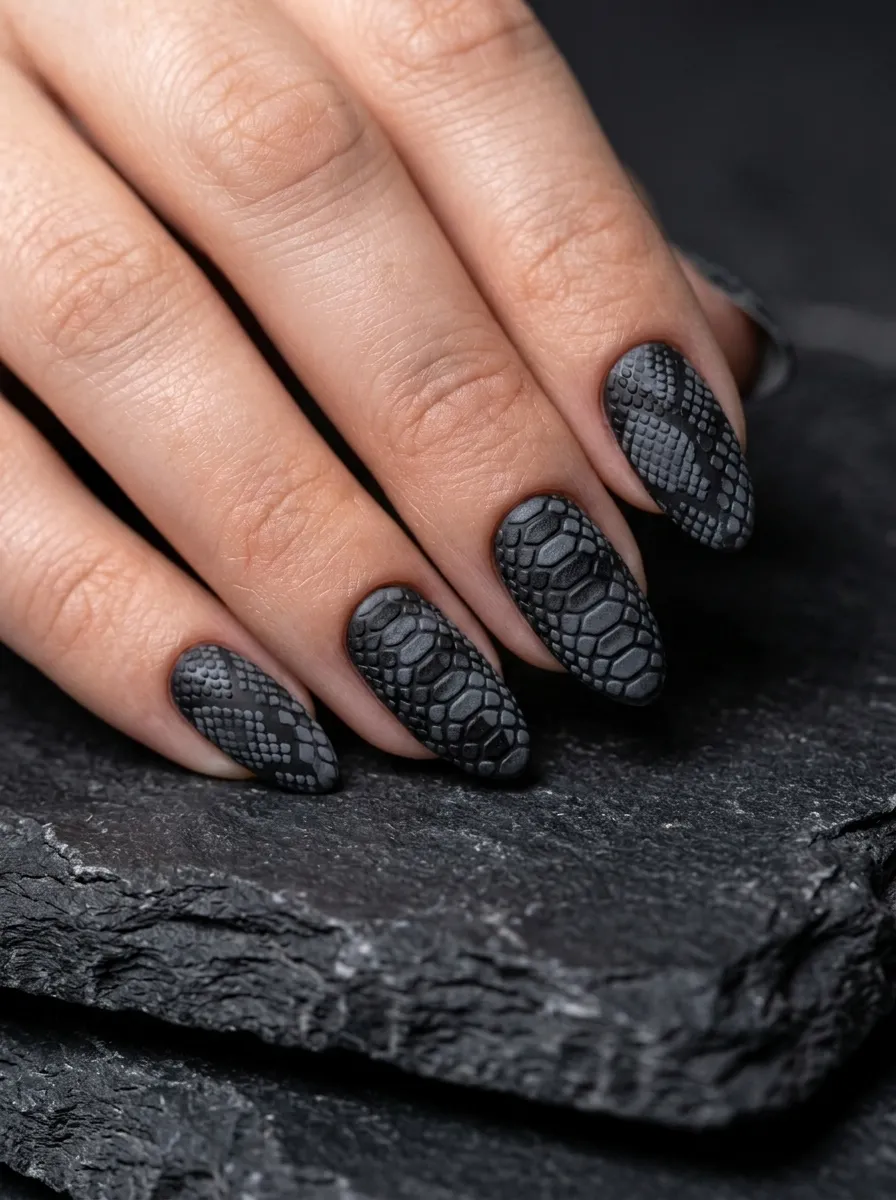
Snakes and serpents are everywhere in gothic art, and snakeskin texture nails bring a wild, untamed element to the Beetlejuice aesthetic.
You can create a snakeskin look using a mesh or fishnet stocking pulled taut over the nail while the topcoat is wet. Press the mesh gently into the wet polish, let it dry briefly, then peel it away. The mesh leaves an imprint of its grid pattern behind, which mimics snakeskin.
Alternatively, use a nail stamp with a snakeskin or scale pattern. These are common designs in stamp plate sets and take only seconds to apply.
Matte black or dark olive green are the best base colors for this look. You can also layer two colors, a dark base with a slightly lighter shade stamped or pressed over it, to create a two-tone scale effect that looks very realistic. This nail look is textural and interesting up close, which makes it great for situations where people see your hands often, like photo shoots, events, or content creation. It pairs beautifully with leather or velvet outfits.
23. Rotten Banana Yellow Nails
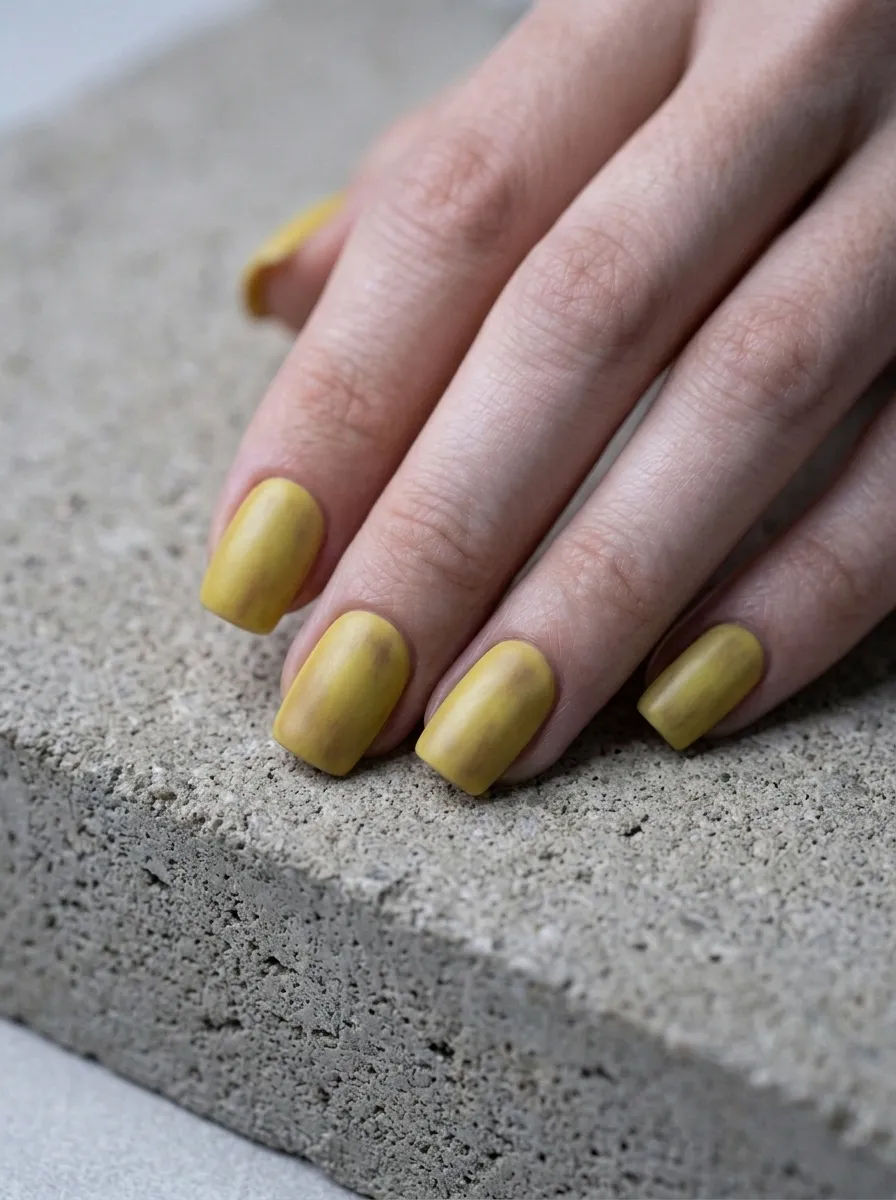
Beetlejuice’s suit is that specific shade of dirty, rotten banana yellow that is somehow both revolting and iconic. Nails in this shade are unexpected, conversation starting, and deeply rooted in the character’s color story.
Look for yellow nail polishes described as chartreuse, sulfur, mustard, or aged yellow. You are looking for a yellow that feels slightly off, not bright sunflower yellow but something murkier and more complex.
OPI, Zoya, and Cirque Colors all have interesting yellow shades in this range. Searching for “chartreuse nail polish” or “dirty yellow nail polish” online will bring up options quickly.
Pair this yellow with a matte topcoat to remove any brightness and make it feel more authentic to the character’s gritty suit color. You can add thin black pinstripes over the yellow using a striping brush for an even more literal Beetlejuice suit reference. This is a bold color choice that fashion forward people will appreciate immediately. It is the kind of nail color that signals a strong personal aesthetic and confidence. Not for everyone but absolutely perfect for Beetlejuice fans.
24. Cracked Stone Effect Nails
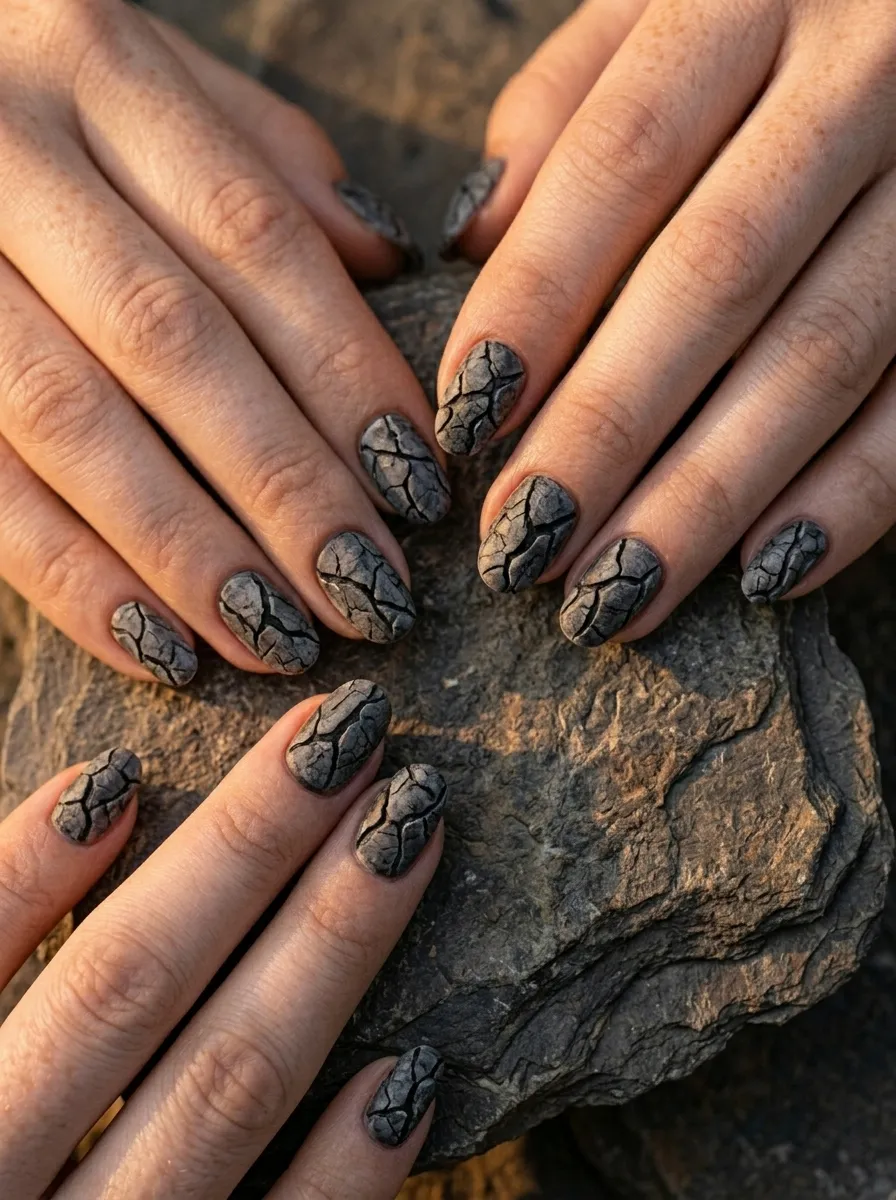
Cracked stone nails look like ancient tombstone material. They have a raw, structural quality that fits the decaying Victorian graveyard world of Beetlejuice perfectly.
You can create a cracked effect using crackle nail polish, which is a specialized formula designed to split and crack as it dries. Apply a solid base color, let it dry, then apply a thin coat of crackle polish over it. As it dries, it splits apart to reveal the base color underneath.
Sally Hansen Crackle Overcoat is one of the most widely available crackle polishes and costs about eight dollars. It comes in black, white, and metallic shades.
Apply the crackle polish in one smooth stroke per nail. The thicker you apply it, the larger the cracks. A thin coat creates fine, intricate cracks. A thicker coat creates bold, dramatic splits. Practice on a swatch first to find the effect you like best. Once sealed with a topcoat, crackle nails are surprisingly durable. This look is quick and requires very minimal skill while delivering a result that looks complex and artistic.
25. Haunted Mansion Window Nails
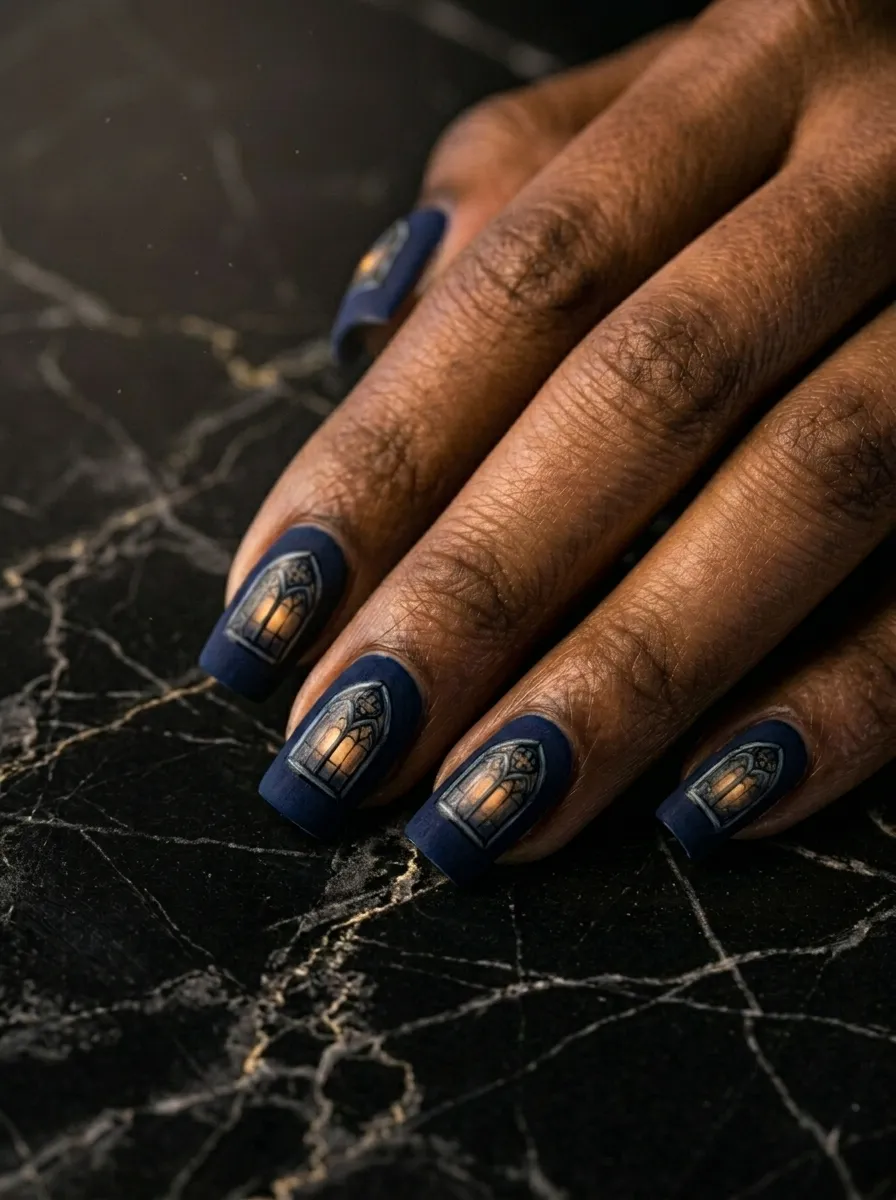
Painting tiny gothic windows on nails creates a miniature haunted mansion scene. It is an architectural, detailed look that tells a story.
Use a deep navy, forest green, or black base. Paint a simple arch shape using a thin brush in a slightly lighter color. Add two vertical lines inside the arch to divide it into window panes. A tiny dot of pale yellow or white at the center of each pane suggests light glowing from within.
The simpler you keep each window, the more effective it looks at the small scale of a nail. Detail gets lost at that size, so bold shapes work better than intricate ones.
You can do one window per nail across all ten fingers as a repeating motif. Or make each window slightly different, some with more light, some darker, to suggest different rooms with different stories. A matte dark base with the windows painted in a slightly glossy lighter shade creates an interesting texture contrast. This is a nail design that rewards close inspection. People will want to look at your hands to see all the tiny details, and that is a genuinely satisfying experience.
26. Coffin Shape Nails with White Stripes
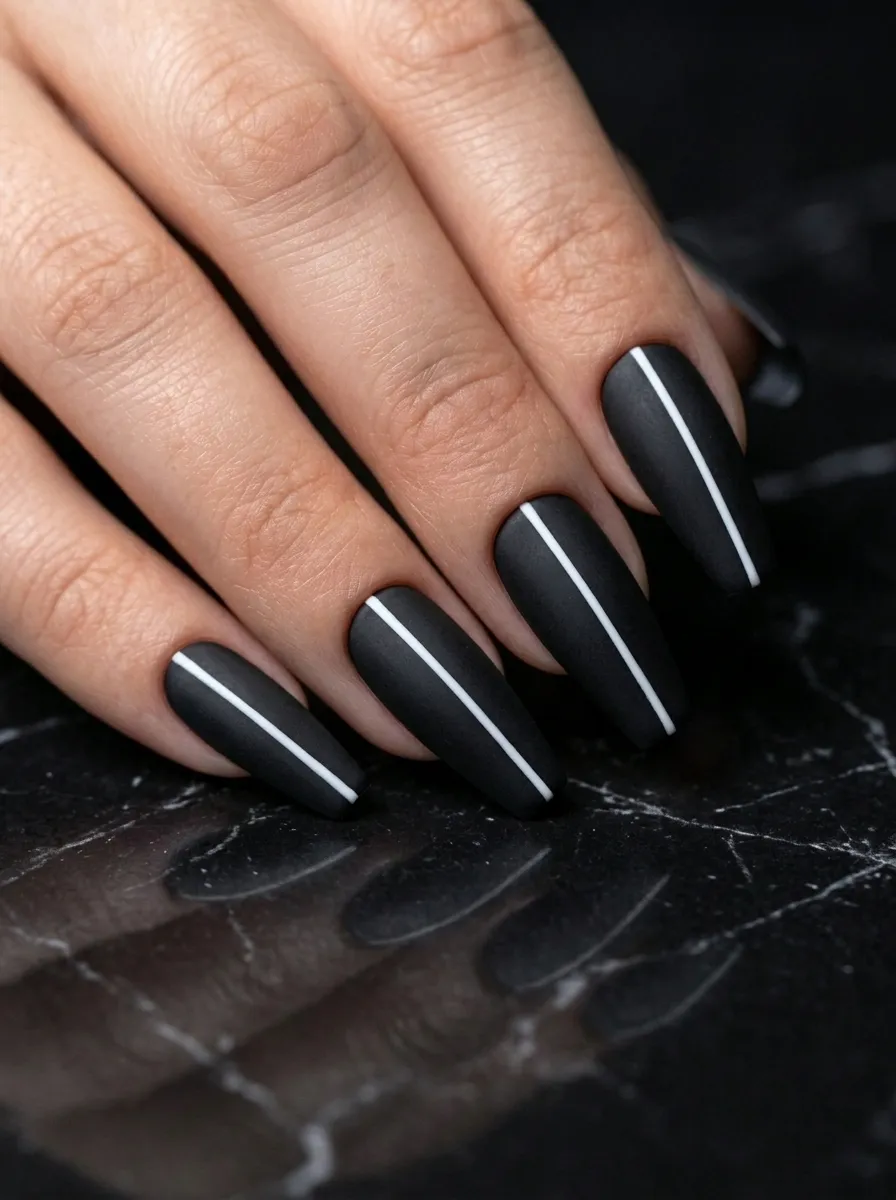
This is a refined, minimal version of the Beetlejuice stripe. One thin white line down the center of each matte black coffin nail. Simple, precise, and extremely striking.
You can create the center stripe using a very thin striping brush or a nail art pen. Alternatively, use a narrow piece of striping tape. Apply the tape down the center of the nail after the base coat dries, then carefully peel it away to reveal a clean line.
Getting the stripe perfectly centered takes a little practice. A helpful trick is to mark the very tip of the nail first, then draw or tape from that center point down toward the cuticle.
The coffin shape makes this design look expensive and deliberate. The long tapered silhouette gives the single stripe more drama than it would have on a shorter nail. This design is one of the most wearable Beetlejuice inspired looks on this list. It is polished enough for professional settings but carries enough edge to feel personal and fashion forward. It is also extremely quick to do, making it a solid choice for when you want something special without spending an hour on nail art.
27. Glow in the Dark Nails
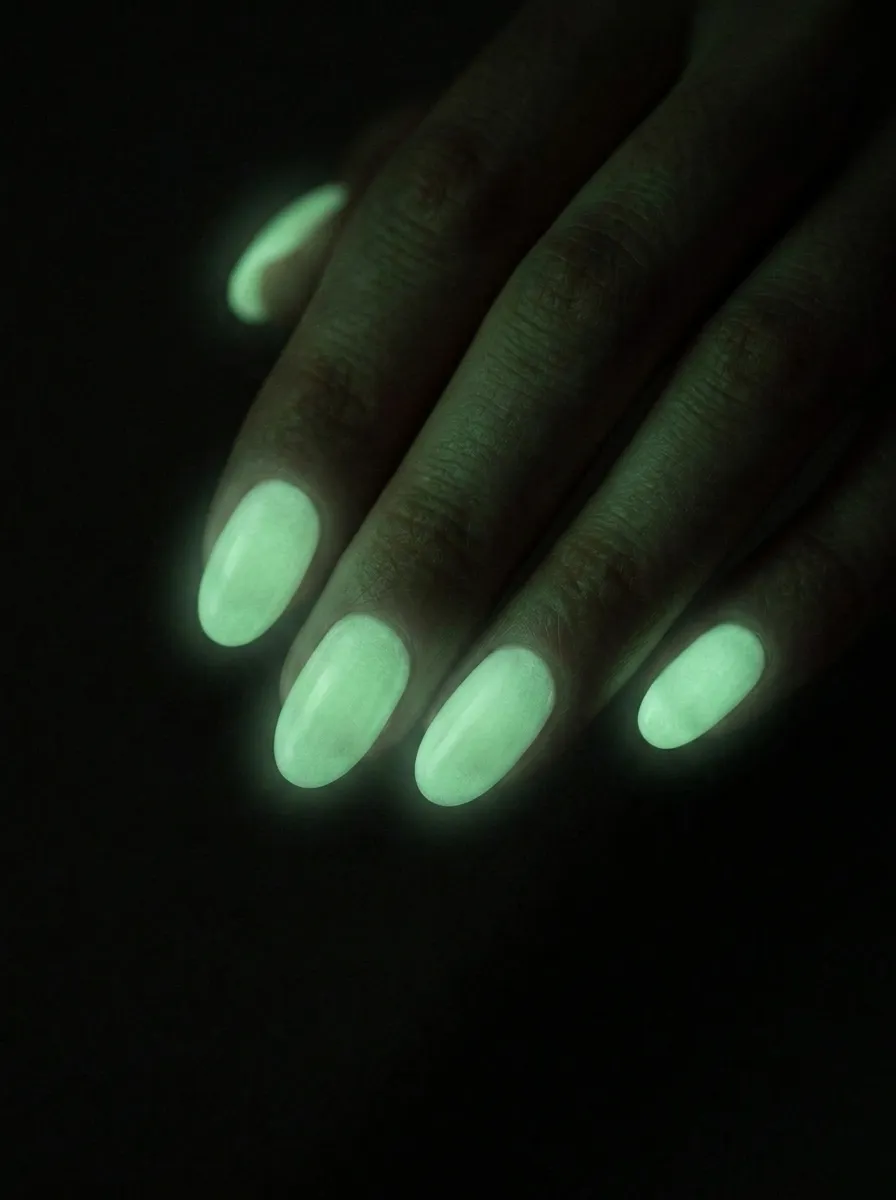
Glow in the dark nails feel genuinely supernatural at night. They absorb light during the day and release it in the dark as a ghostly green or white glow.
Glow in the dark polishes are available from brands like Orly, Color Club, and various indie brands on Etsy. Some are sheer during the day and only show their true color in the dark, while others are pigmented during the day as well.
Charge the glow by holding your nails under a bright light for thirty seconds before going somewhere dark. The more light they absorb, the more intensely they glow.
Layer the glow polish over a white base to maximize the glow effect. The white base reflects and amplifies the glow rather than absorbing it. You can also add glowing spots over a dark base for a starfield effect. This is a nail look that genuinely surprises people. Wearing these to a Beetlejuice themed event, a rave, or a night event where the lights drop will absolutely make your nails the most talked about accessory in the room. The combination of supernatural glow and Beetlejuice energy is perfect.
28. Mini Beetlejuice Character Portrait
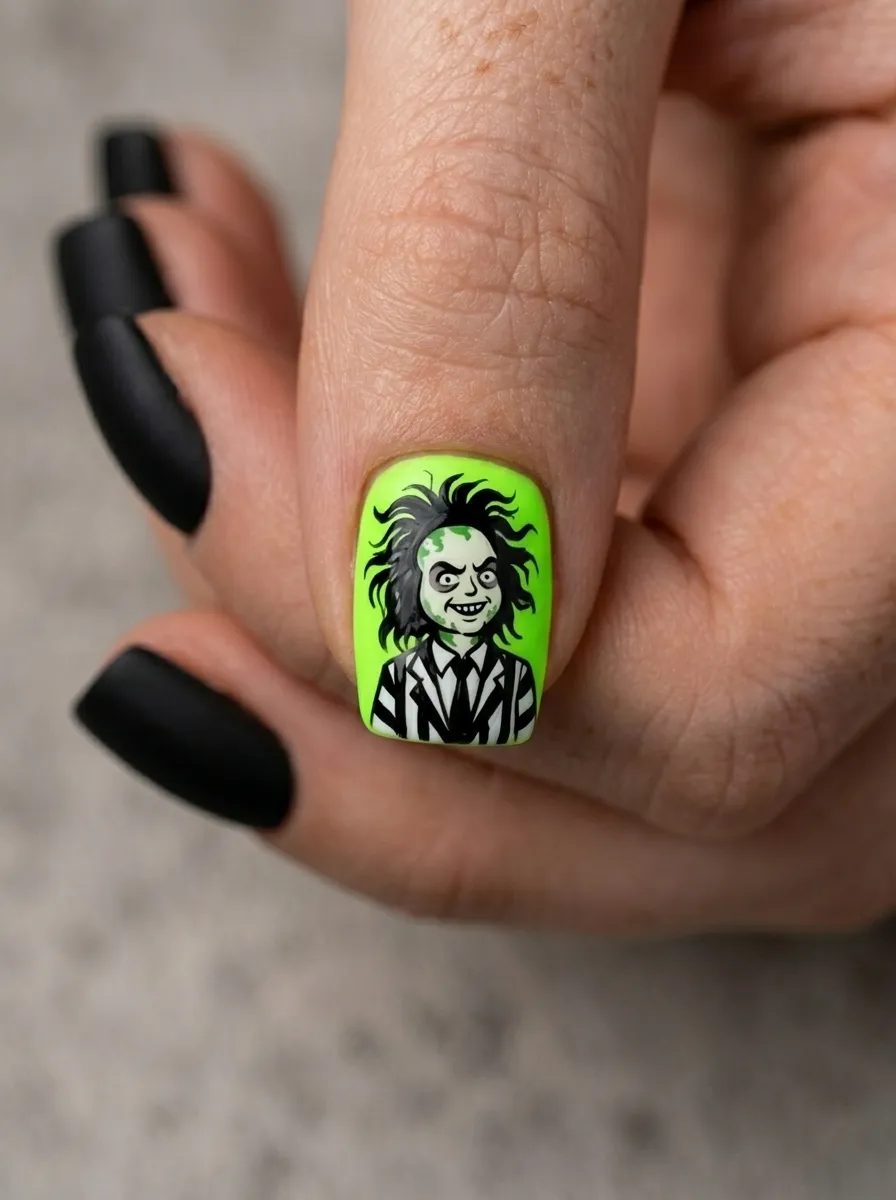
Painting a tiny character portrait on a single accent nail is an advanced technique but incredibly rewarding. You do not need photo realism. A bold, cartoon-like version of the striped suit, wild hair, and pale face reads immediately.
Use neon green as the base on the accent nail. Start with the rough outline of the head and hair using a black nail art pen. Add a white face shape, small dark eyes, and a striped suit body. The more graphic and simplified, the better it translates at nail scale.
A fine-tip nail art pen gives you the most control for character art. Practice the character on paper first until you are happy with how it looks, then transfer that simplified version to the nail.
Keep all other nails solid matte black or add simple stripes. This keeps the character portrait nail as the undeniable star of the look. This design is conversation-starting at every single event. Beetlejuice fans will immediately know what they are looking at and that shared recognition creates an instant connection. It is a fun, expressive way to wear your fandom proudly on your hand.
29. Barcode Stripe Variation
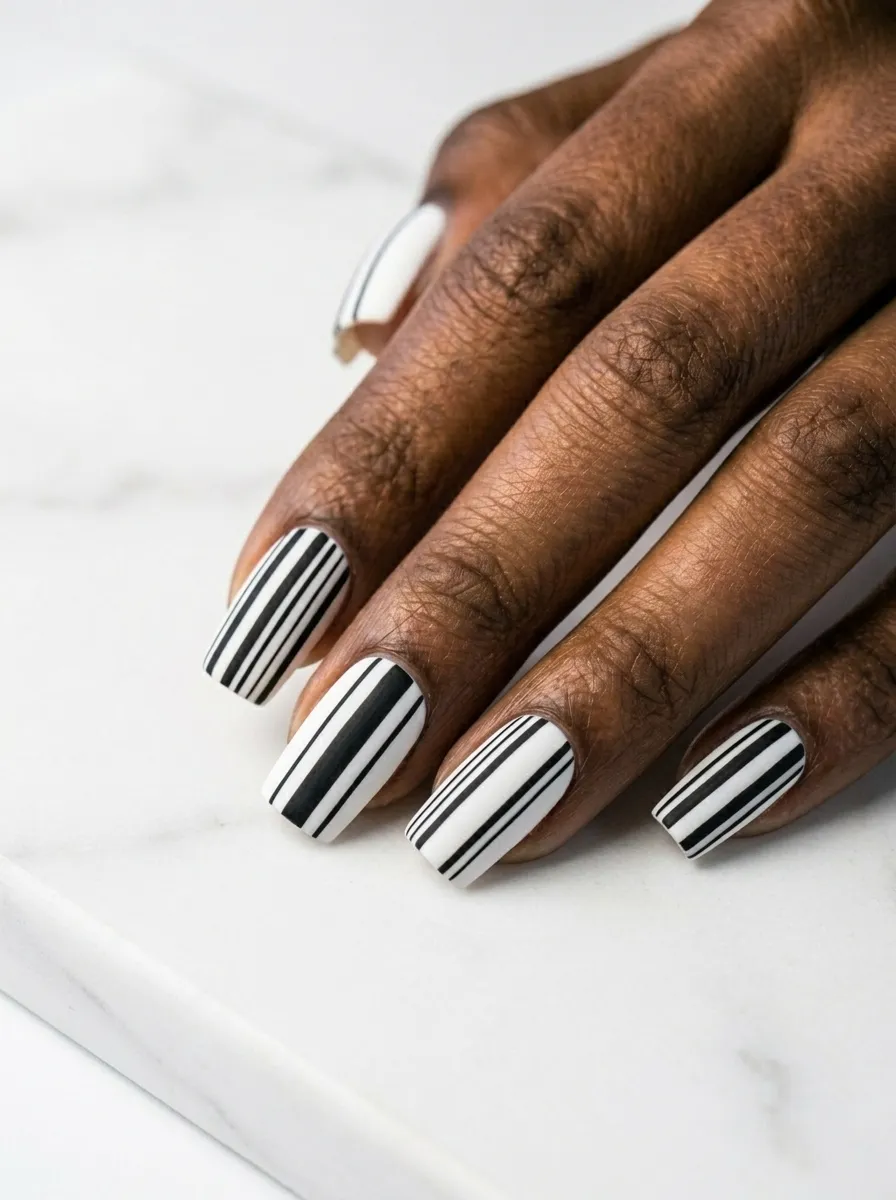
A barcode variation of the classic Beetlejuice stripe creates an unexpected, graphic result. Instead of evenly spaced stripes, the lines vary in width and spacing, creating rhythm and visual interest.
Use a white base and let it dry completely. Then use a thin nail art brush to paint black vertical lines of different widths. Some lines thick, some hairline thin. Some close together, some with wider gaps. There is no wrong way to do this because the variation is the whole point.
The asymmetry makes each nail unique even though they all belong to the same visual language. This is much more forgiving than perfect uniform stripes.
You can leave some nails with just one or two bold stripes and others more densely packed. This creates variety across the hand. A matte topcoat over this look gives it a very editorial, graphic design quality. Glossy topcoat makes it sharper and more high-contrast. Either finish works beautifully. This is one of those designs that takes the familiar Beetlejuice stripe and evolves it into something that feels personal and artistic rather than just costume-inspired.
30. Black Drip Tips
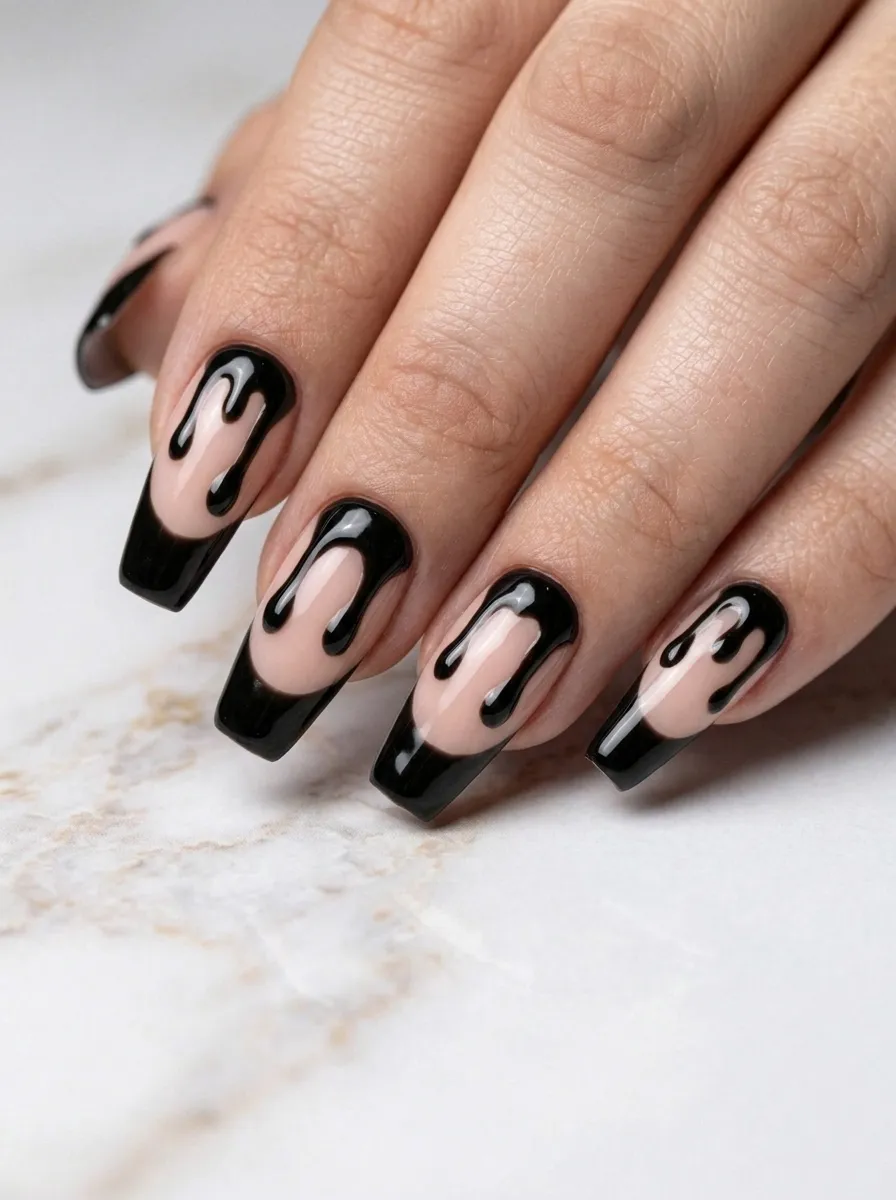
Black drip nails look like something dark is dripping down from your fingertips. It is a dramatic, gothic design with a strong visual impact and it is easier to create than it looks.
Paint a nude, white, or pale base first. Once dry, dip a thin brush into black polish and create the drip shape at the tip of the nail. A drip is basically an uneven, organic line that widens slightly at the top and narrows into a teardrop point as it comes down the nail.
Vary the length and shape of each drip so they look organic rather than patterned. Some drips short, some long, some curved slightly to one side.
Seal with a glossy topcoat to give the drips a wet, liquid appearance. The glossy finish makes the black drips look genuinely fluid against the lighter base. This design works on any nail shape and length but looks most dramatic on coffin or stiletto nails where the drip has more length to travel. You can add a small neon green dot at the end of each drip if you want to tie in the Beetlejuice color palette even more directly.
31. White Tipped Nails with Black Outlines
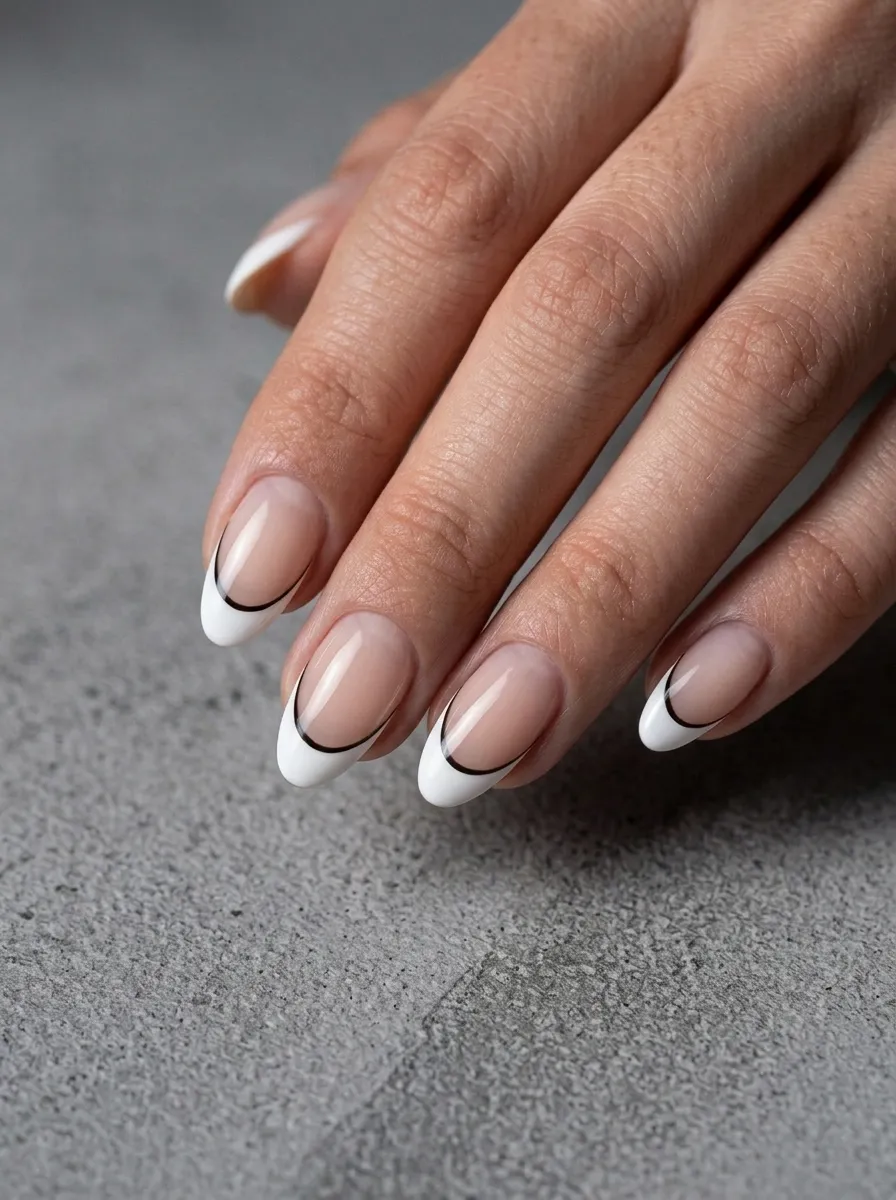
This takes the classic French tip and gives it a bold, comic book outline. The thick black outline around the white tip looks graphic and intentional, like a panel in an illustrated novel.
Apply a sheer or nude base. Using nail guides or tape, create a clean white tip. Once dry, use a black nail art pen to draw a clean line right along the edge of the white tip, following its curve. This outline is what transforms the French tip into something distinctly gothic and artistic.
Keep the outline consistent in thickness across all nails for a polished result. Too much variation looks accidental rather than intentional.
You can make the outline thicker or thinner depending on the vibe you want. A thin outline is subtle and elegant. A thick, bold outline looks more graphic and street-art inspired. Both connect to the Beetlejuice aesthetic in different ways. This is one of the most wearable designs on the list. It reads as elevated nail art to people unfamiliar with Beetlejuice while being an obvious nod to the stripe-heavy world for fans.
32. Deep Teal and Black Geometric Nails
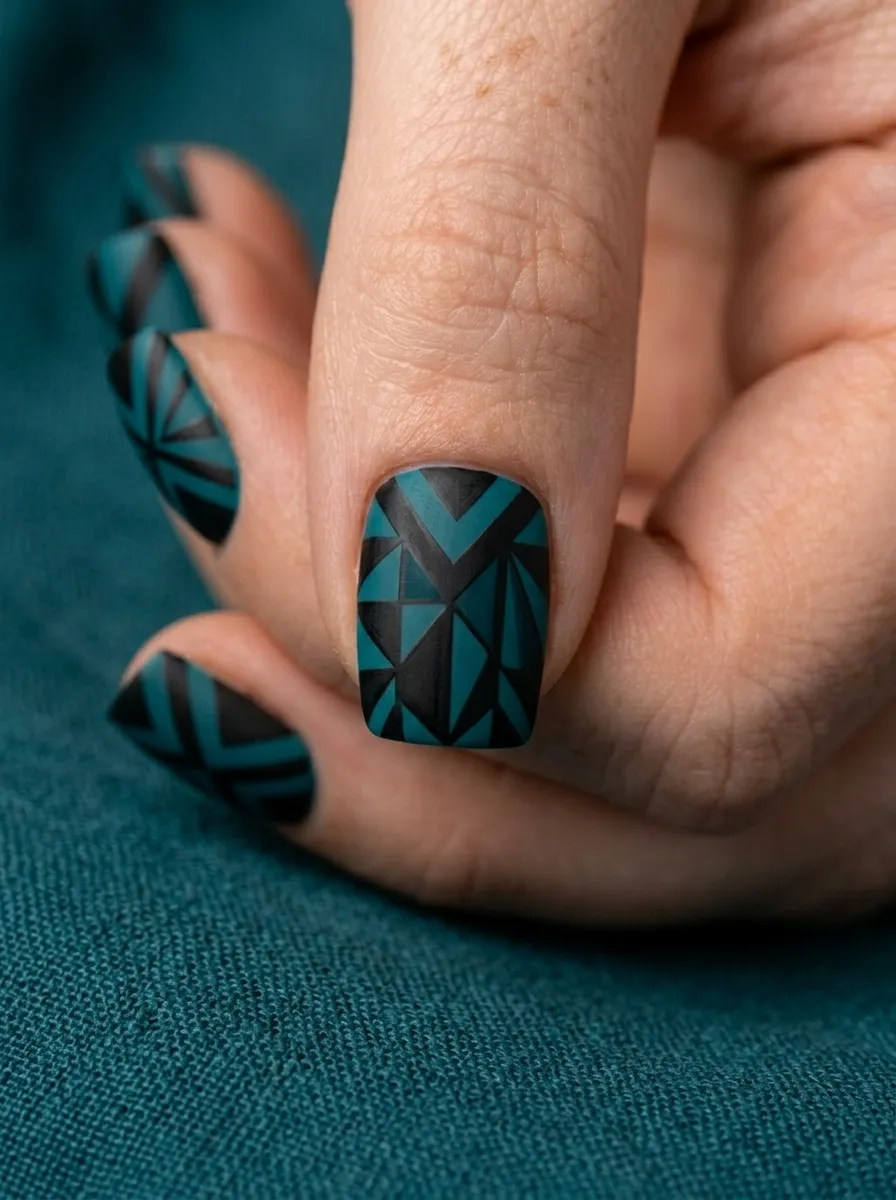
Deep teal mixed with matte black creates a moody, structured geometric look. The color sits right in the haunted house world, dark water, gothic stained glass, rotting wood that once had color.
Geometric nail art looks best when you use tape to create clean lines. Apply one color, let it dry fully, tape off a section, apply the second color, and peel the tape while the second color is still wet. The result is a clean, precise edge.
Start with simple shapes. A diagonal split across each nail is the simplest geometric design. Half teal, half black. From there you can add triangles, chevrons, or arrow shapes.
You can do a different geometric design on each nail to create variety while keeping the color palette unified. All teal and black, different shapes on each finger. This creates a cohesive set that still has visual variety and personality. The teal adds just enough unexpected color to lift the look beyond a simple black and white design while still staying very much within the gothic, atmospheric Beetlejuice world.
33. Tiny Bat Nails
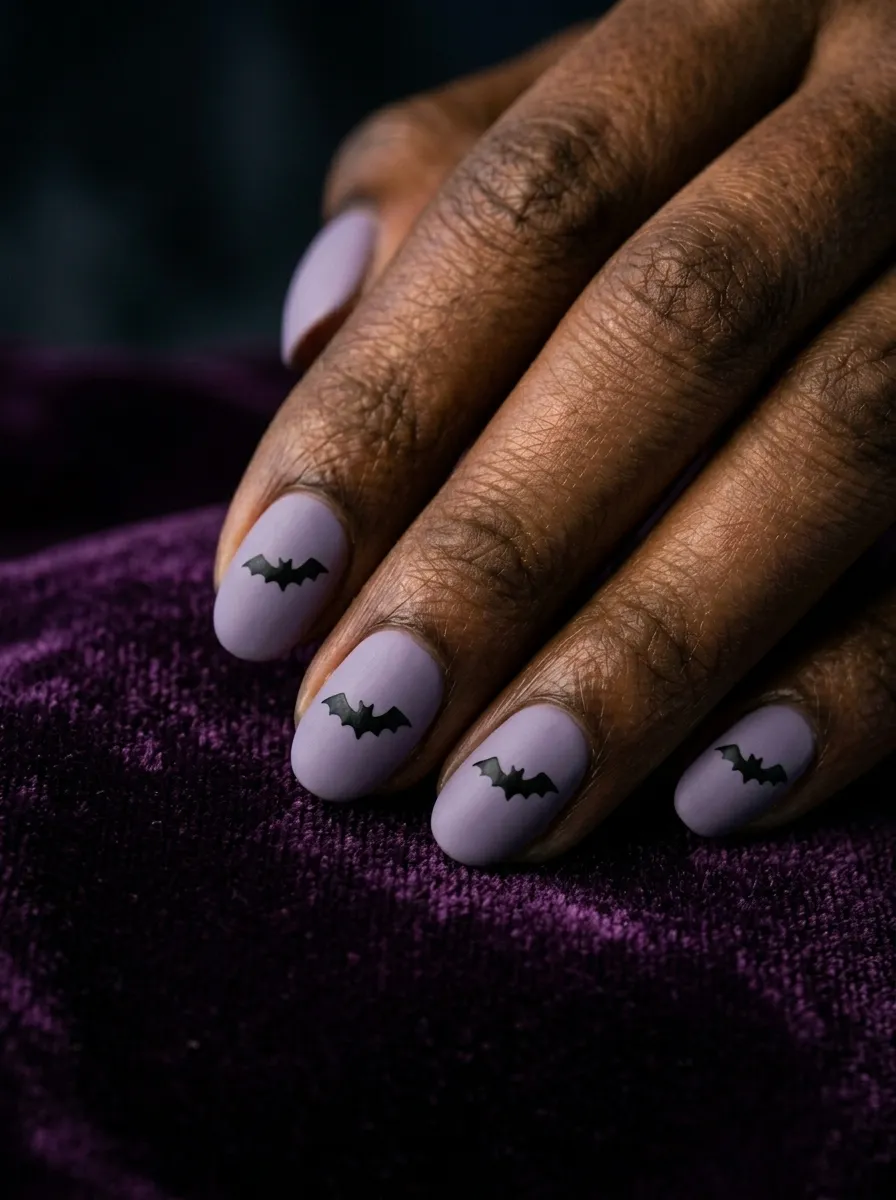
Tiny bat silhouettes on each nail are simple, adorable, and completely on theme for the Beetlejuice world. Bats are quick to paint because you are working with a silhouette, no interior detail needed.
Use any base color you like and let it dry. Then use a black nail art pen to draw the bat outline. A bat is essentially a small curved body in the center with two wings spread to each side. The wings have a wavy, organic lower edge. The whole shape takes about fifteen seconds to draw once you have done it a few times.
Practice the bat shape on paper a few times before doing it on the nail. Aim for a loose, imperfect bat rather than a technically perfect one. The charm is in the handmade quality.
Add tiny dots around the bat to suggest movement or use a pale yellow dot to create a full moon behind the bat for added drama. You can do one bat per nail or scatter two to three smaller bats across a single nail in a mini swarm effect. This is a crowd-pleasing design that works for Halloween but is also charming enough for year-round wear for anyone who loves a gothic aesthetic.
34. Foil Accent Nails in Gunmetal and Black
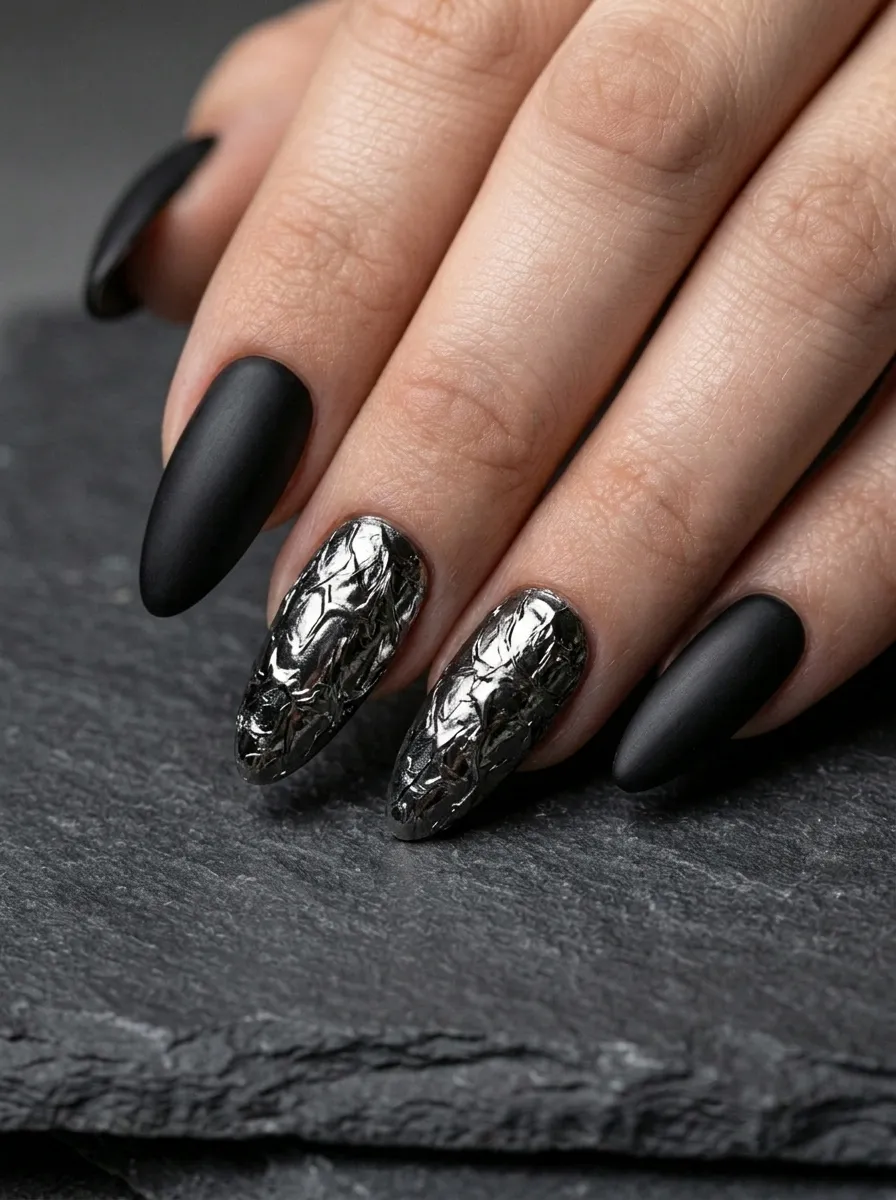
Nail foil creates a crinkled, metallic texture that looks like crushed metal or distressed chrome. In gunmetal or dark silver, it fits perfectly into the industrial, otherworldly Beetlejuice aesthetic.
Nail foil kits include a foil adhesive, sheets of foil, and a topcoat. Apply the adhesive over your base color. Wait until it becomes slightly tacky, usually two to three minutes, then press the foil sheet metallic side down onto the nail. Rub gently and peel away. The foil sticks to the adhesive areas and leaves behind its metallic texture.
Alternating matte black and gunmetal foil nails creates a sophisticated, editorial contrast. The flat matte and the reflective foil play off each other beautifully.
Nail foil kits are inexpensive, usually around eight to twelve dollars for a full kit with multiple foil colors. The result looks extremely high end and is genuinely difficult to achieve with regular polish alone. This look photographs particularly well because the foil catches light differently in every shot, giving you a dynamic, ever-changing surface.
35. Full Gothic Art Gallery Set
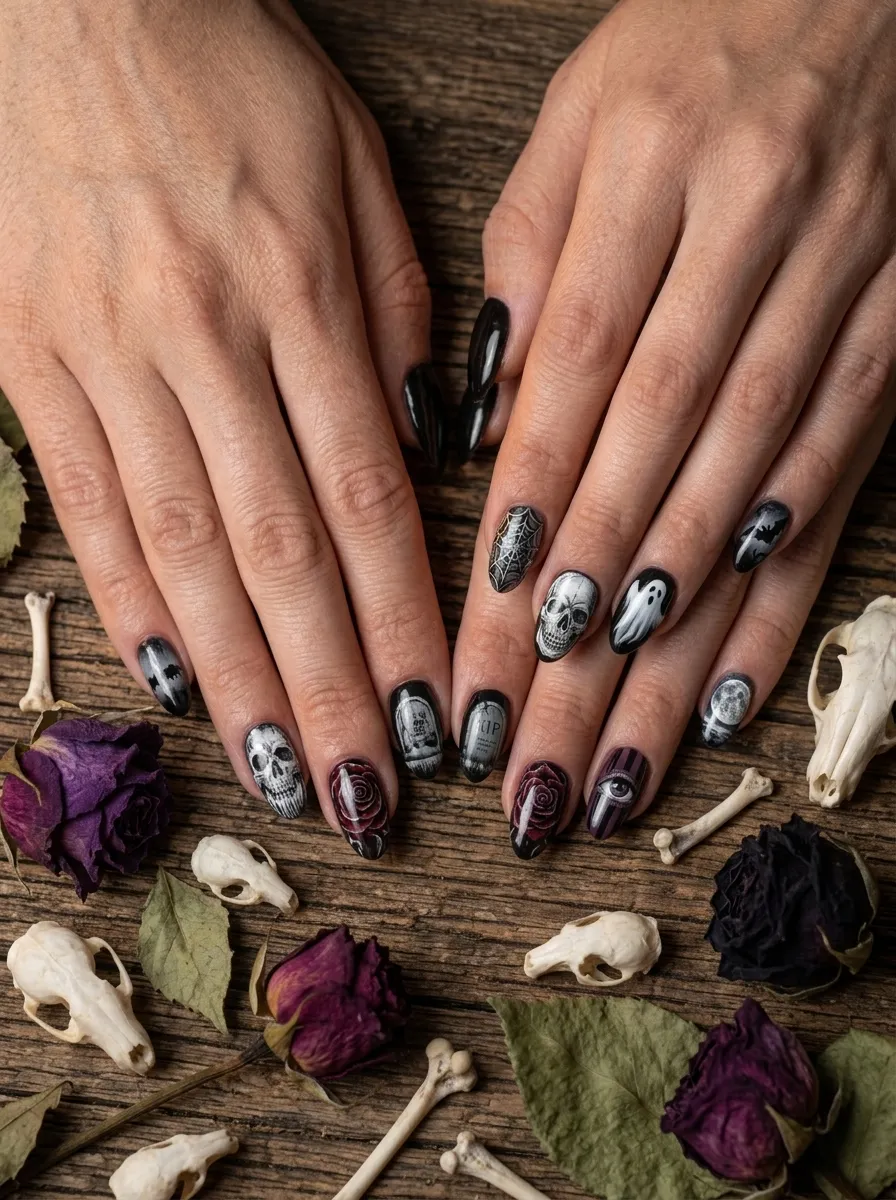
Why choose one design when you can wear a whole gallery? A mixed gothic art set uses a different Beetlejuice inspired design on each nail, creating a complete themed collection across all ten fingers.
Plan the set before you start painting. Assign one motif to each nail. Skull, cobweb, ghost, bat, moon, graveyard stone, rose, eye, stripe, and one solid black nail as a rest for the eye.
Keep the color palette consistent across all ten designs even though the motifs vary. Black, white, neon green, and maybe one deep jewel tone creates cohesion across a wildly varied set.
Use nail art pens for most of the designs and stamps for any motif you are not confident painting freehand. This is a project to do over an evening when you have an hour or two to enjoy the process. Put on the Beetlejuice soundtrack and paint.
This kind of manicure is the ultimate expression of your love for the film. It is personal, creative, and deeply intentional. Every finger tells a different part of the story and together the whole hand becomes a tiny tribute to one of the most unforgettable films ever made.
Beetlejuice nail art gives you so much creative territory to work with. Whether you want to keep it simple with black and white stripes or go full gothic art gallery across all ten fingers, there is a design here that matches your skill level, your budget, and your personal style. The best part is that most of these looks cost very little to recreate at home. A few good nail art pens, some striping tape, and polishes you probably already own are all you need to start. Pick one design that excites you most and start there. Once you nail it, you will want to try them all.