![[Image Prompt: Overhead shot of both hands placed flat on a pale cream linen surface, nails painted in a delicate ombre from blush pink at the base fading into cool mint green at the tips, soft diffused natural light from a nearby window, no nail art accessories, clean cuticles, skin appears natural and unfiltered, captured with a mirrorless camera at a slight angle, pastel tones appear muted and soft.]](https://polishwithus.com/wp-content/uploads/2026/07/Hands_with_pink_green_ombre_202607051310_31_11zon_31_11zon-1-880x660.webp)
1. Soft Pink to Mint Green Pastel Ombre
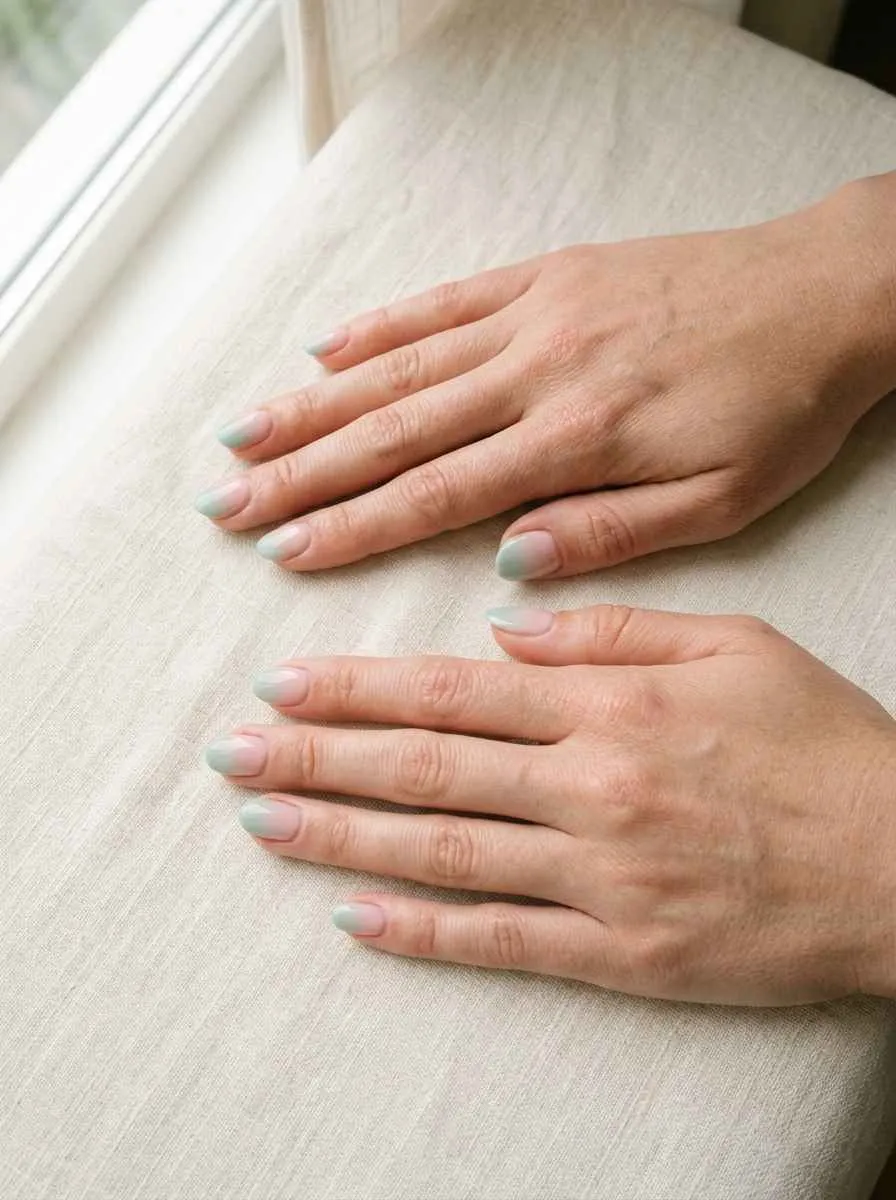
This is the gentlest version of the pink and green ombre, and it is perfect if you want something pretty but not overwhelming.
The color story starts with a barely-there blush pink at the cuticle. It slowly fades into a cool, soft mint green toward the tip.
Why this works: The pastel tones are close in value, so the ombre blends almost effortlessly.
For a DIY version, pick up a drugstore blush pink and a pale mint green. Use a makeup sponge to dab the colors where they meet. Blend in small, dabbing motions until the line disappears.
This look photographs beautifully against light backgrounds. It suits short, almond, or square nails equally well.
Budget tip: Sally Hansen and Essie both carry pastel shades under $5 each. You do not need gel or a UV lamp for this style.
If your blending looks patchy, add a thin layer of clear top coat and blend again while it is still tacky. That trick smooths out most imperfections quickly.
This style works for weddings, baby showers, office settings, or any day when you want polished nails without being loud about it.
2. Hot Pink to Neon Green Bold Ombre
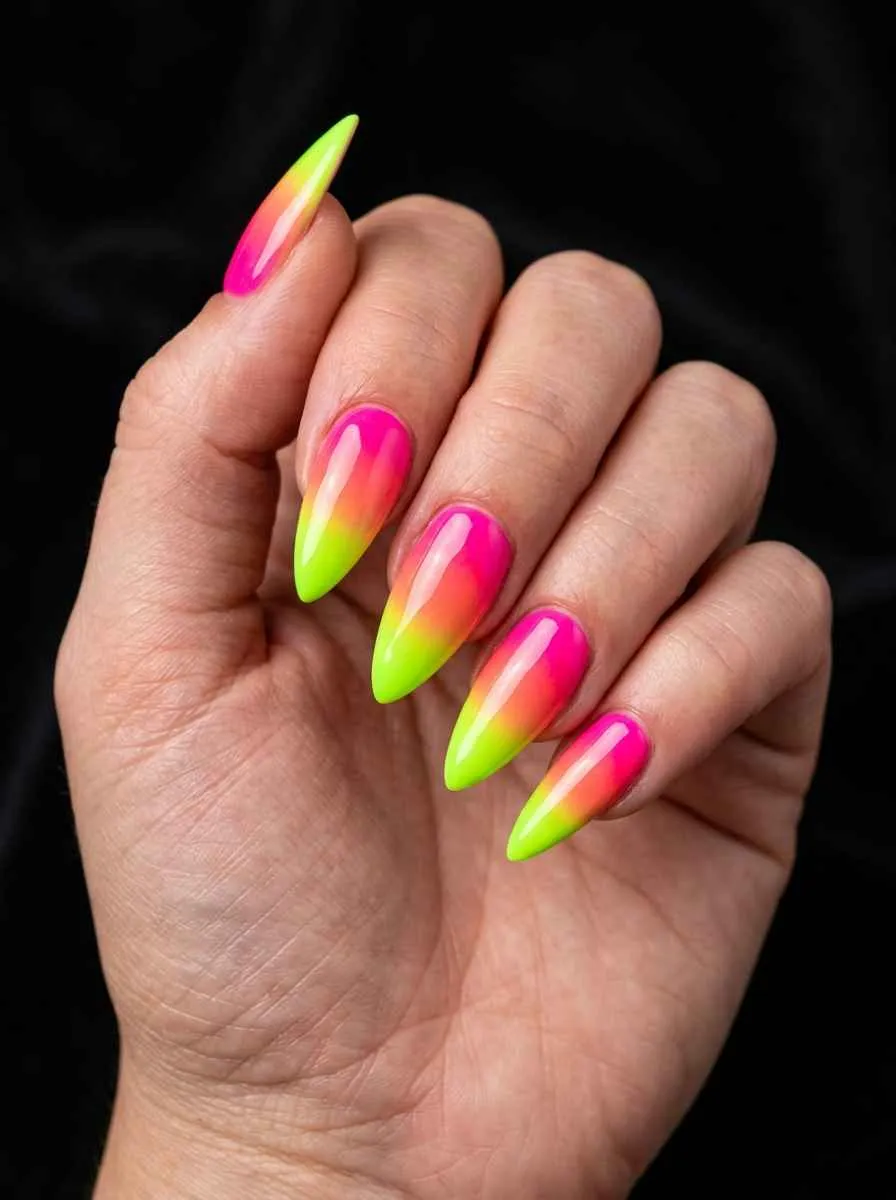
If pastels are not your thing, go the opposite direction entirely.
This version uses hot pink and neon green, and it makes zero apologies. The color contrast is extreme. The vibes are electric. This is a festival nail, a concert nail, a birthday nail.
Start with a white base coat. Neon colors always perform better over white because the pigment pops without looking washed out.
Use a flat nail art brush or a makeup sponge to layer the hot pink from the base. Bring the neon green down from the tip. Let them meet in the middle and blend aggressively.
Seal with a glossy top coat to push the brightness even further.
Where to find neon shades: Brands like Orly, Color Club, and China Glaze carry neon collections seasonally. You can also find affordable options at beauty supply stores or even dollar stores around summer.
This look hits hardest on longer nails, especially coffin or stiletto shapes. On short nails, it still works but feels more playful than dramatic.
Pair with minimal jewelry and let the nails be the statement. This color combination does not need help competing for attention.
3. Dusty Rose to Sage Green Earthy Ombre
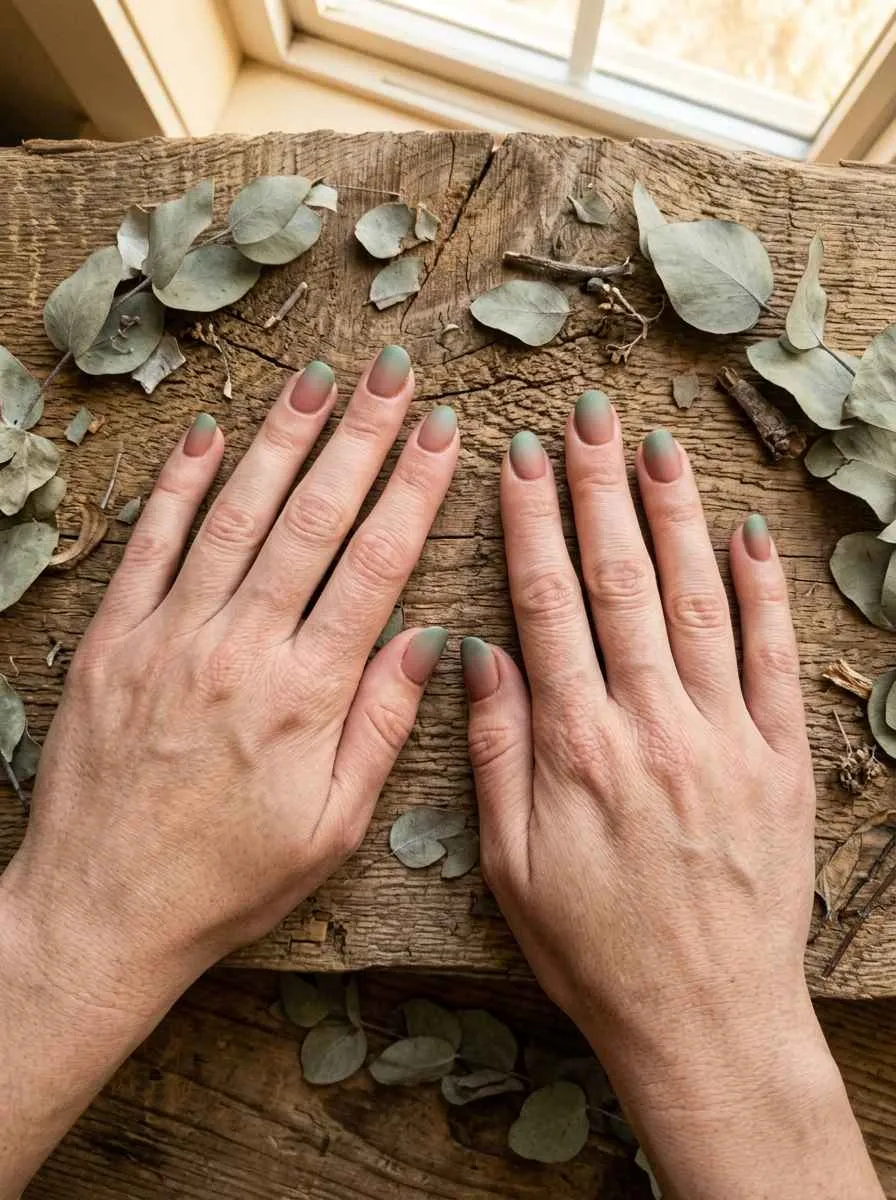
This one leans earthy and organic rather than bright and punchy.
Dusty rose is a warm, muted pink with a slightly brown or grey undertone. Sage green is soft, muted, and herbal. Together, they feel like a walk through a botanical garden.
This palette works beautifully in matte. Skip the glossy top coat and use a matte one instead. The muted colors look even more sophisticated without shine.
It is one of the most wearable combinations on this list because it suits almost every skin tone. The warmth in the dusty rose and the earthiness in the sage create balance without either color fighting for dominance.
DIY tip: OPI’s “Tickle My France-y” and Zoya’s “Sage” are drugstore and mid-range options that pair perfectly for this look.
Use a sponge to layer and blend. Because both colors are already slightly greyed out, the blend point looks naturally smoky rather than muddy.
This style suits oval, round, or squoval nails. It also looks stunning on short nails where you want something grown-up and wearable for work or everyday life.
Add a tiny dried flower accent nail if you want to take it one step further without spending much.
4. Pink to Dark Forest Green Dramatic Ombre
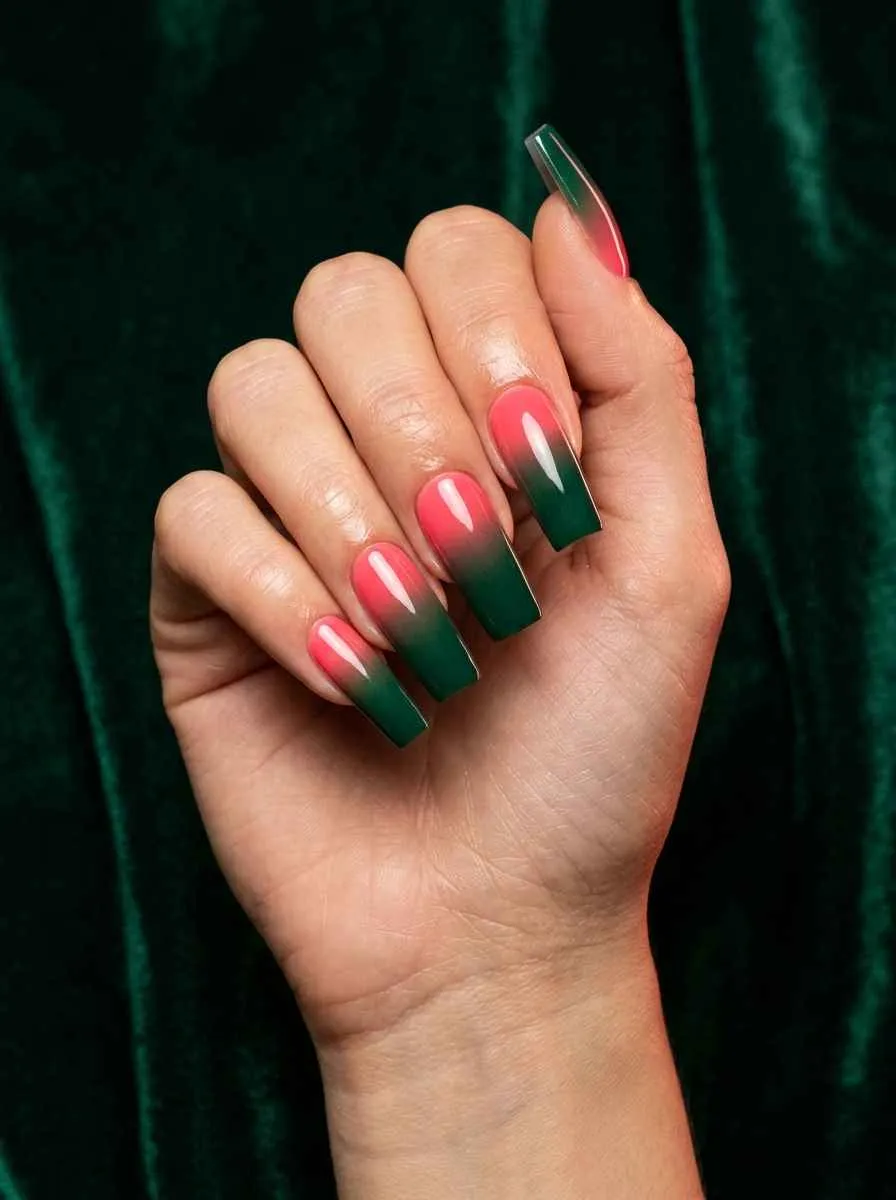
Dark forest green paired with a bright pink creates one of the most dramatic contrasts on this list.
This combination feels bold and editorial. It is not subtle. It is meant to stop people mid-sentence.
The key is using a true, deep green rather than a mid-tone. Think pine, hunter, or forest tones. The deeper the green, the more striking the contrast with pink.
Start with a pink base at the cuticle area. Build the forest green from the tip inward. Because dark green has heavy pigment, use it sparingly at the blend point or you risk overpowering the pink entirely.
Pro tip: Do your green first, let it dry slightly, then dab in the pink at the base. This order gives you more control over how far the green extends.
Gel polish holds this combination particularly well because the dark green stays true without fading or going patchy over time.
This is a fall and winter nail. It also works for holiday parties, date nights, and any event where you want your hands to look like they have a personality.
Coffin and square shapes carry the drama best. The flat tip lets both colors get their full moment before they meet and blend.
5. Baby Pink to Lime Green Summer Ombre
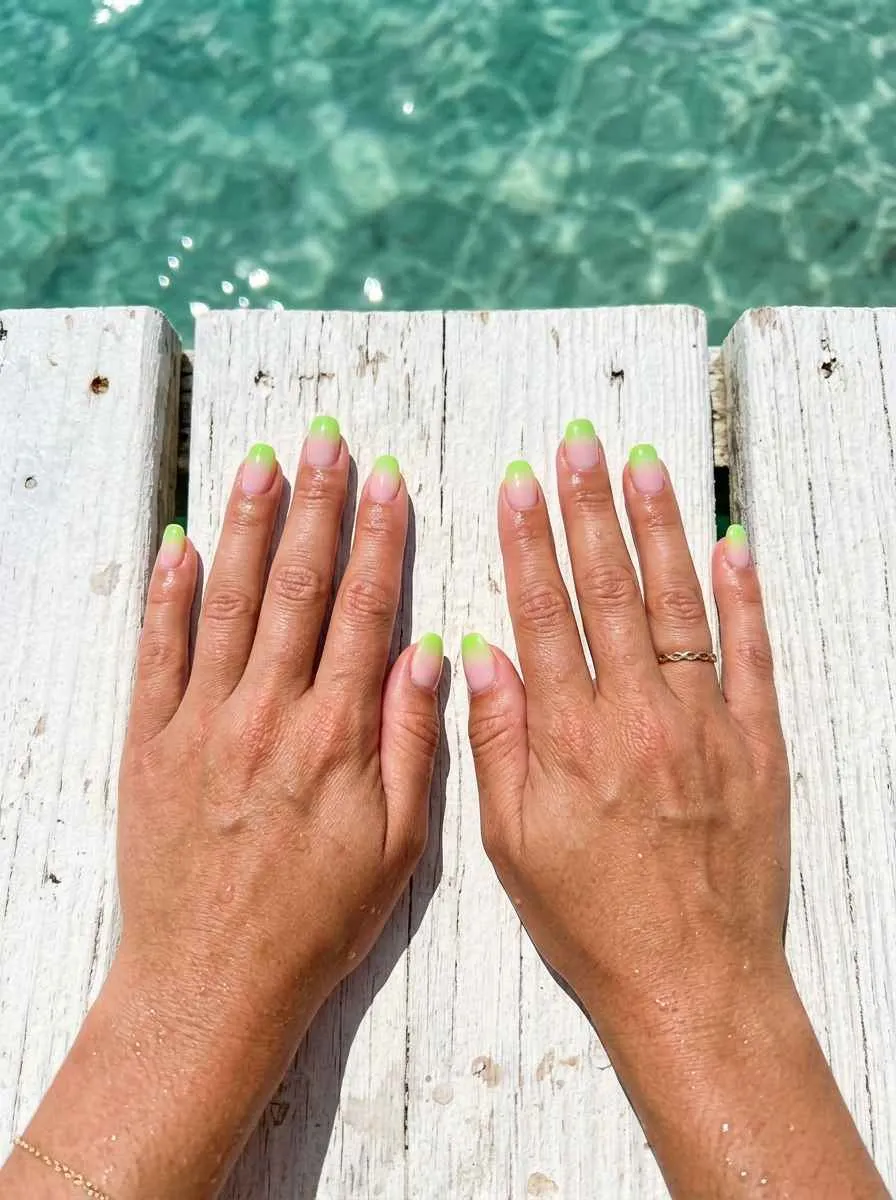
Summer nails need energy. This combination delivers it without going full neon.
Baby pink is soft and sweet. Lime green is sharp and zesty. Together they feel like a slice of watermelon or a tropical cocktail.
This works best on short to medium length nails where the colors feel playful rather than overwhelming. Long nails with this combo can tip into costume territory unless you keep the ombre very blended.
Use a fine-tipped makeup sponge or a cut-up kitchen sponge for the blend. The rougher texture of a kitchen sponge actually creates a softer gradient than smooth beauty sponges in some cases.
Affordable brands to try: Sinful Colors carries both baby pink and lime green shades at around $2 each. That means you can do this entire look for under $10 including top coat if you shop smart.
Apply two coats of each color first to build opacity. Then sponge the blend zone last.
Clean up edges with a small brush dipped in acetone. This step takes five minutes but makes the whole manicure look professional.
This look pairs well with white outfits, denim shorts, or anything with tropical or floral prints. It is a joyful color story that works for vacations, festivals, or just a regular Tuesday when you need something fun on your hands.
6. Ombre French Tip in Pink and Green
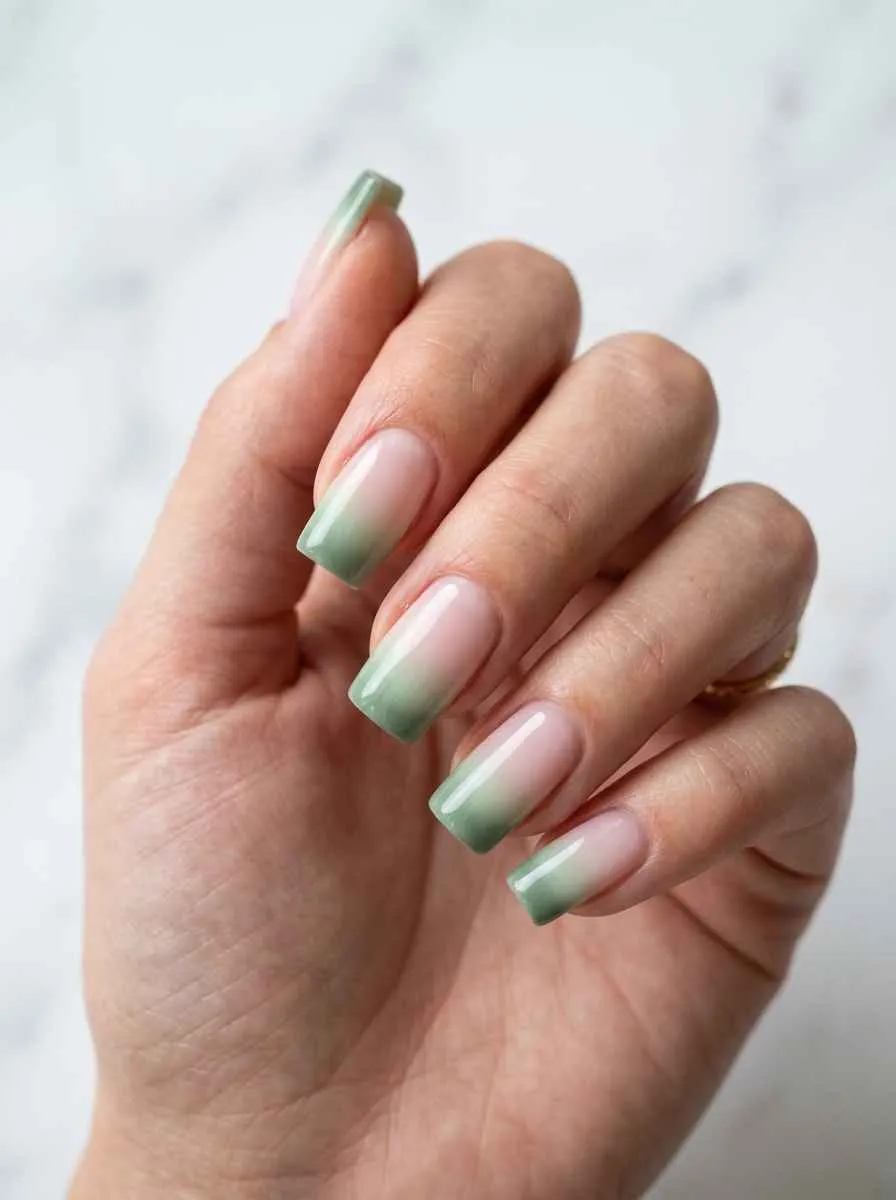
The French manicure gets a color update with this pink and green spin.
Instead of the classic white tip, this version uses a green ombre tip over a sheer pink base. It is a clean, modern take that still looks polished and put-together.
The base stays sheer pink. Apply one or two coats of a sheer or nude pink that lets your natural nail show through slightly. This keeps the look fresh rather than heavy.
Then apply the green tip. You can use nail tip guides or tape to create a clean smile line. Sponge a soft gradient from pale green to a deeper shade to add dimension.
This style reads as office-appropriate even though it uses color. The structure of the French tip keeps it neat and intentional-looking.
This is a great gateway style if you have never done ombre before. You are only blending one zone rather than the full nail length, so the technique is much more forgiving.
Budget option: Use nail tip stickers as guides instead of steady-hand painting. You can find them at most beauty supply stores for under $3.
Remove the guides while the polish is still slightly tacky so the edge does not peel away with it. Seal with top coat immediately after.
7. Pink and Green Floral Ombre
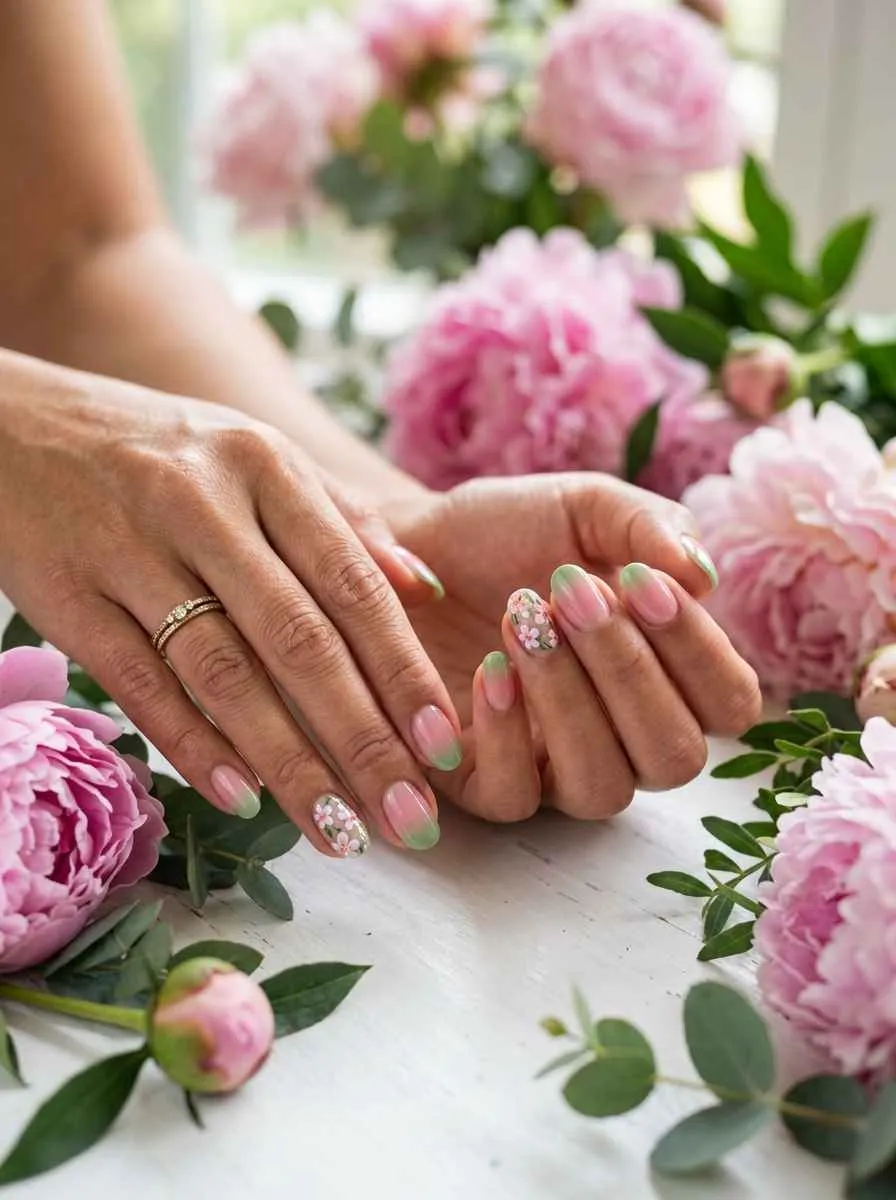
Ombre and florals are two nail trends that were made for each other.
This style uses a standard pink to green ombre as the base. Then tiny flowers are added on one or two accent nails to pull the look together into something that feels garden-party perfect.
You do not need to be a nail artist to pull this off. Nail art stickers and water decals with floral designs are widely available online and at beauty stores. Apply them over your finished ombre before the top coat goes on.
For those who want to freehand, a thin liner brush and white nail polish is all you need to paint basic daisies or cherry blossoms. A dot of white, a few short strokes outward, a yellow dot center. That is the whole technique.
The ombre base does most of the visual work here. The flowers just add a finishing touch that feels intentional and detailed.
This look is particularly popular for spring and summer events like garden parties, bridal showers, Easter gatherings, and outdoor brunches.
Keep the rest of your look simple. This nail style works best when the hands are the focal point. Light, airy outfits in white, cream, or soft yellow complement this combination beautifully.
8. Holographic Pink to Green Chrome Ombre
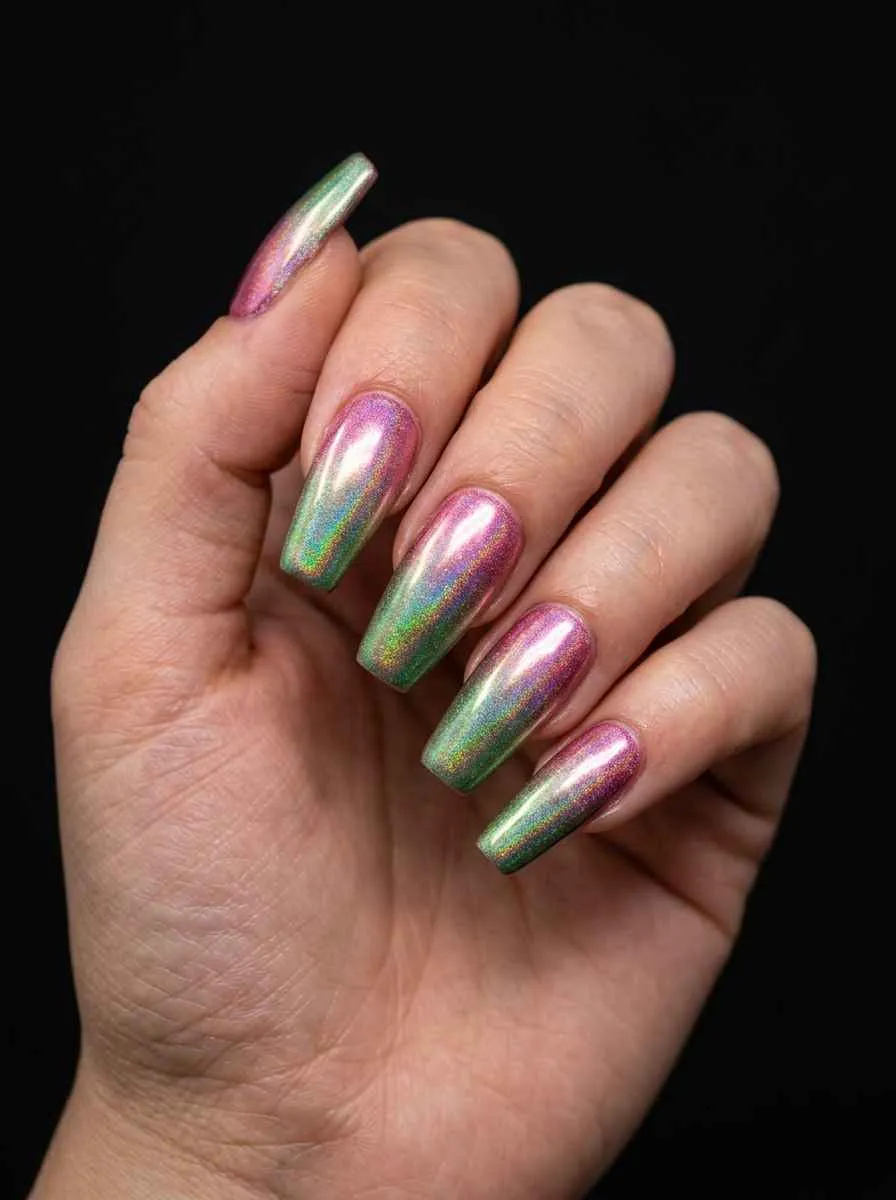
Chrome powder takes the ombre concept and makes it futuristic.
This style uses chrome or holographic pigment powders that shift between pink and green depending on the angle of light. The effect is multidimensional in a way that regular polish cannot replicate.
Chrome powders are more affordable than they used to be. Brands like Born Pretty and Beetles Gel sell complete chrome powder kits for under $15. You do need a gel base to apply the powder, so a UV or LED lamp is required for this one.
The technique: cure your gel base, apply the powder with a silicone tool or eye shadow applicator while the gel is still tacky, then cure again and seal.
The result looks expensive. People will assume you paid for a professional set when you did this yourself on a Saturday afternoon.
This style works on any nail length or shape but hits differently on coffin and almond nails where there is more surface area to catch the light.
Pair this with monochrome outfits in black, white, or metallics. The nails will do all the talking and you do not want competing patterns pulling the eye away from the light show on your fingertips.
9. Watercolor Wash Pink and Green Ombre
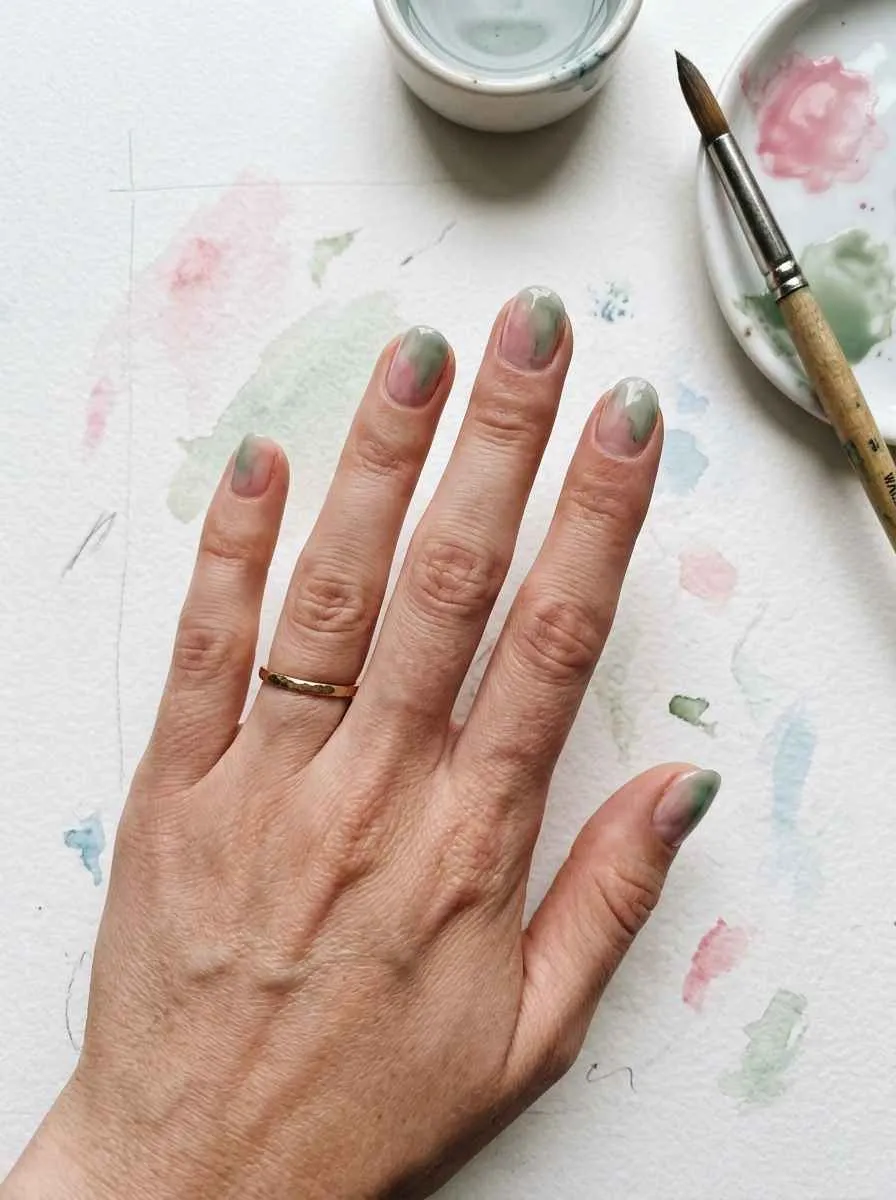
Watercolor nails are all about embracing imperfection, and that makes them one of the easiest styles on this list to DIY.
The look is intentionally soft and slightly transparent. Colors seem to bleed into each other like wet paint on paper.
How to get this effect: Use sheer or watered-down polish. Some people actually thin their polish with a little nail polish thinner to get the right consistency. Apply in loose, uneven strokes rather than trying to stay perfectly within the nail edges.
The pink and green in this style are low-saturation and slightly muted. Think watermelon rind, blush, and soft sage rather than vivid primaries.
This style suits natural, short nails particularly well. The sheer tones look like a healthy natural nail with just a hint of artistic color.
Top coat choice matters here. Use a glossy top coat to mimic the wet-paint look or a satin finish for something that feels more like actual watercolor paper.
This is a great style for people who love nail art but find the precision intimidating. The whole point is that it looks fluid and organic, not perfectly executed.
It also photographs well in lifestyle settings like on hands holding a book, a coffee cup, or a bouquet of flowers.
10. Dark Pink to Emerald Green Gothic Ombre
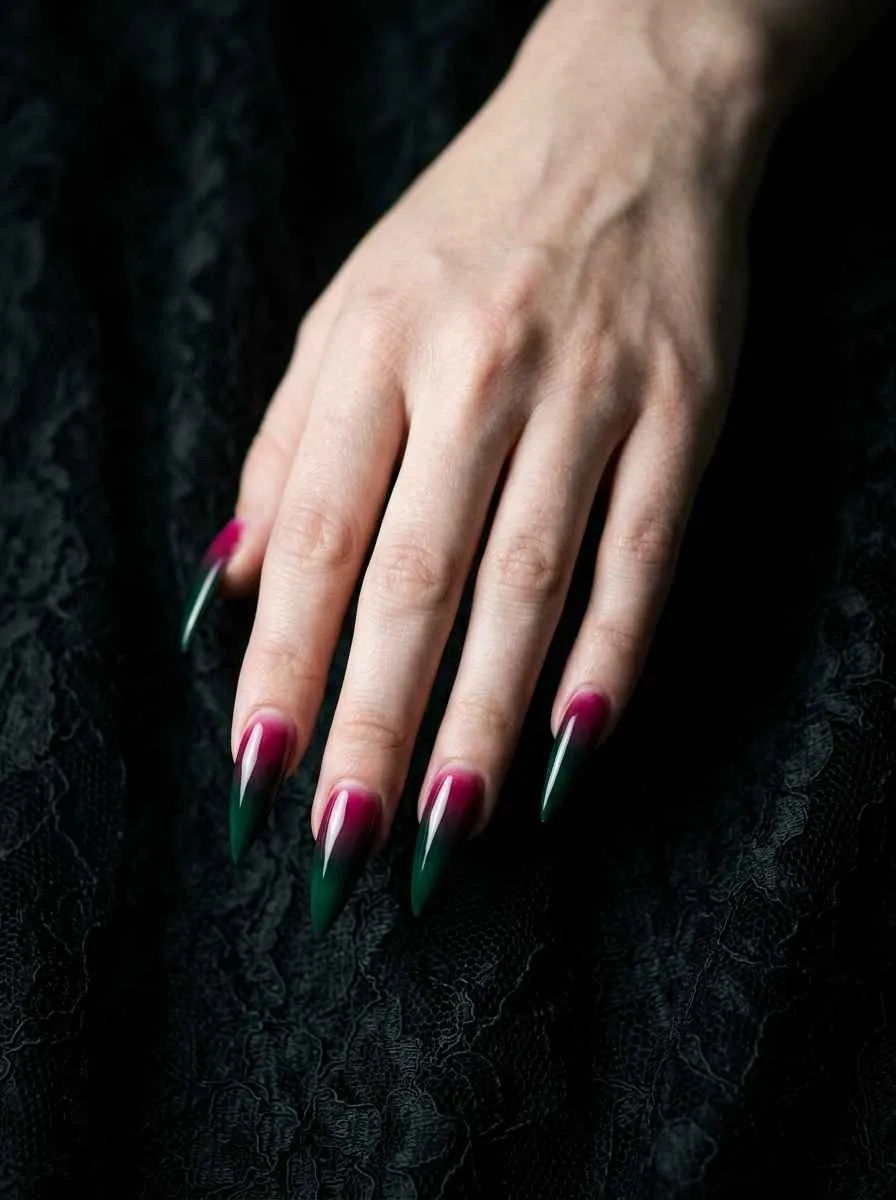
Not every nail look has to be sweet. This one leans dark, dramatic, and confident.
Deep magenta or wine pink at the base pairs with dark emerald green at the tip. The result feels almost gothic, like something from a dark fantasy or moody editorial shoot.
This combination works best on longer nail shapes. Stiletto nails carry the drama. Coffin nails give it a modern edge. Short nails can still work but the impact is less theatrical.
For the polish choices, look for colors with depth. Avoid sheer or pastel versions of these shades. You want a deep, pigment-rich magenta and a true dark emerald with no yellow undertones.
Gel is your friend for this look. The deep colors stay rich and chip-free for weeks when done in gel. If you are using regular polish, apply three thin coats for maximum opacity.
This style is perfect for fall, winter, Halloween, holiday parties, and any event where you want your nails to feel like a mood.
Pair with dark, minimal fashion. Black outfits, deep burgundy or forest green clothing, or anything leather or velvet.
Add a single crystal or gem at the cuticle of one nail if you want to add a touch of glamour without overdoing the detail.
11. Pastel Rainbow Ombre Across All Ten Nails
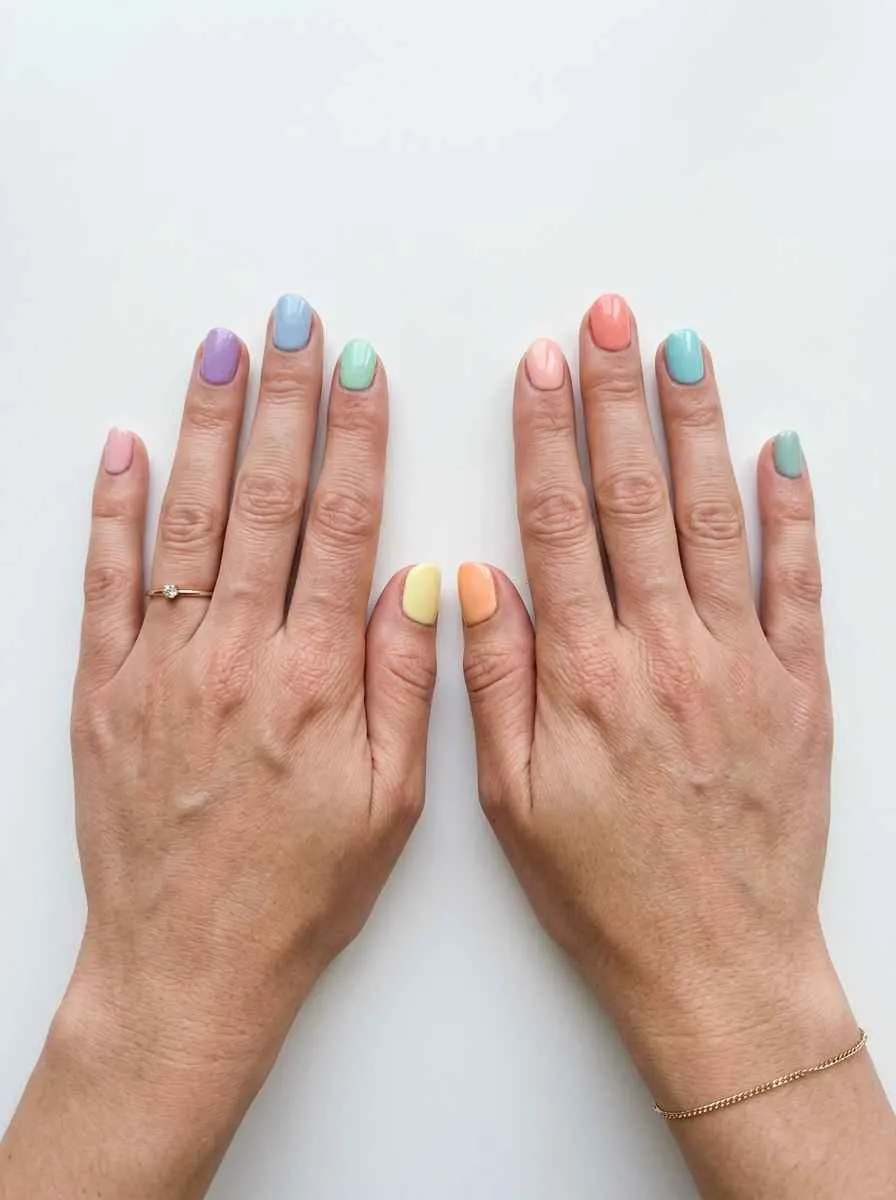
Instead of putting the ombre on each individual nail, this version spreads the gradient across all ten fingers at once.
The pinky starts in blush pink. Each finger shifts a shade closer to green. By the time you reach the other pinky, you are at soft mint or sage.
This requires some planning. Lay out your polishes in gradient order before you start. Having them in sequence makes the painting process smoother and less confusing mid-manicure.
You will need four to six shades total to make the transition feel gradual rather than abrupt. Many brands sell ombre or gradient nail polish sets that already do this work for you.
Budget pick: Color Street and Olive and June both sell multi-shade sets that work well for this style.
This look photographs extraordinarily well. When both hands are placed together flat on a surface, the full rainbow effect is visible and it reads as highly intentional and artistic.
It is a commitment because each nail is a different color, which means touching up individual nails is trickier. Keep all your shades handy for quick fixes.
This style suits people who love maximalist, cheerful aesthetics. It is a joyful and expressive nail look that works for celebrations, graduations, and any event where you want your nails to feel like confetti.
12. Pink to Green Marble Effect Ombre
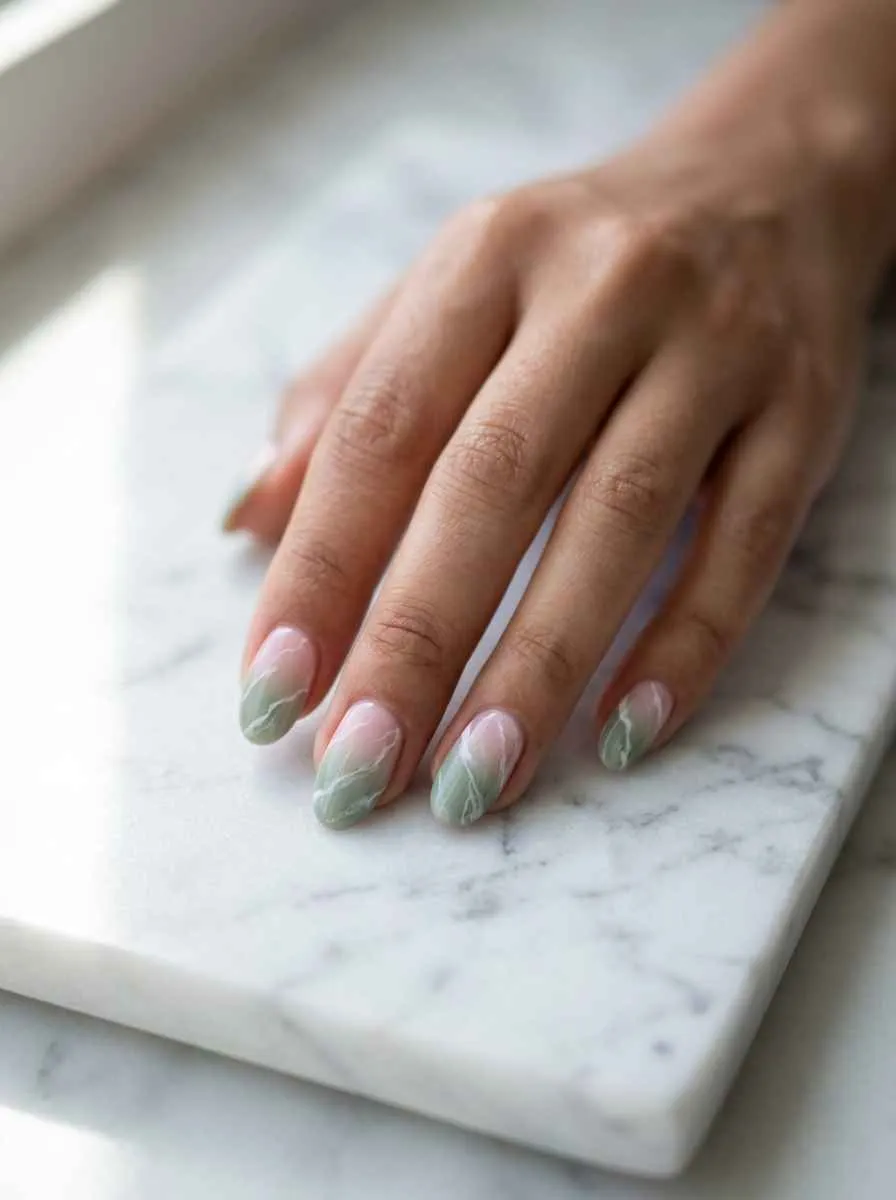
Marble nails and ombre are two techniques that combine into something truly striking.
The base is a soft pink to green ombre. Over the top, thin white veining is painted to mimic the look of natural marble stone. The result is complex-looking but easier to execute than most people expect.
For the veining, use a thin striper brush or even a toothpick. Dip in white nail polish and drag loosely across the ombre base in irregular diagonal lines. Vary the pressure to create thick and thin sections of each vein.
Real marble veins are never perfectly straight. Wiggle the brush slightly as you drag. That organic imperfection is what makes it look convincing.
The ombre underneath should be relatively light so the white veining shows up clearly. A blush pink to soft green works better for this style than dark, saturated colors.
Seal with a glossy top coat to push the marble illusion further. The shine mimics the polished surface of actual stone.
This is a salon-quality look that you can genuinely achieve at home with practice. Watch two or three short tutorials before you start, even if you consider yourself experienced with nail art.
The marble effect suits oval, round, and almond shapes best. It looks refined and adult in a way that pairs well with professional and formal settings.
13. Glitter Pink to Green Ombre
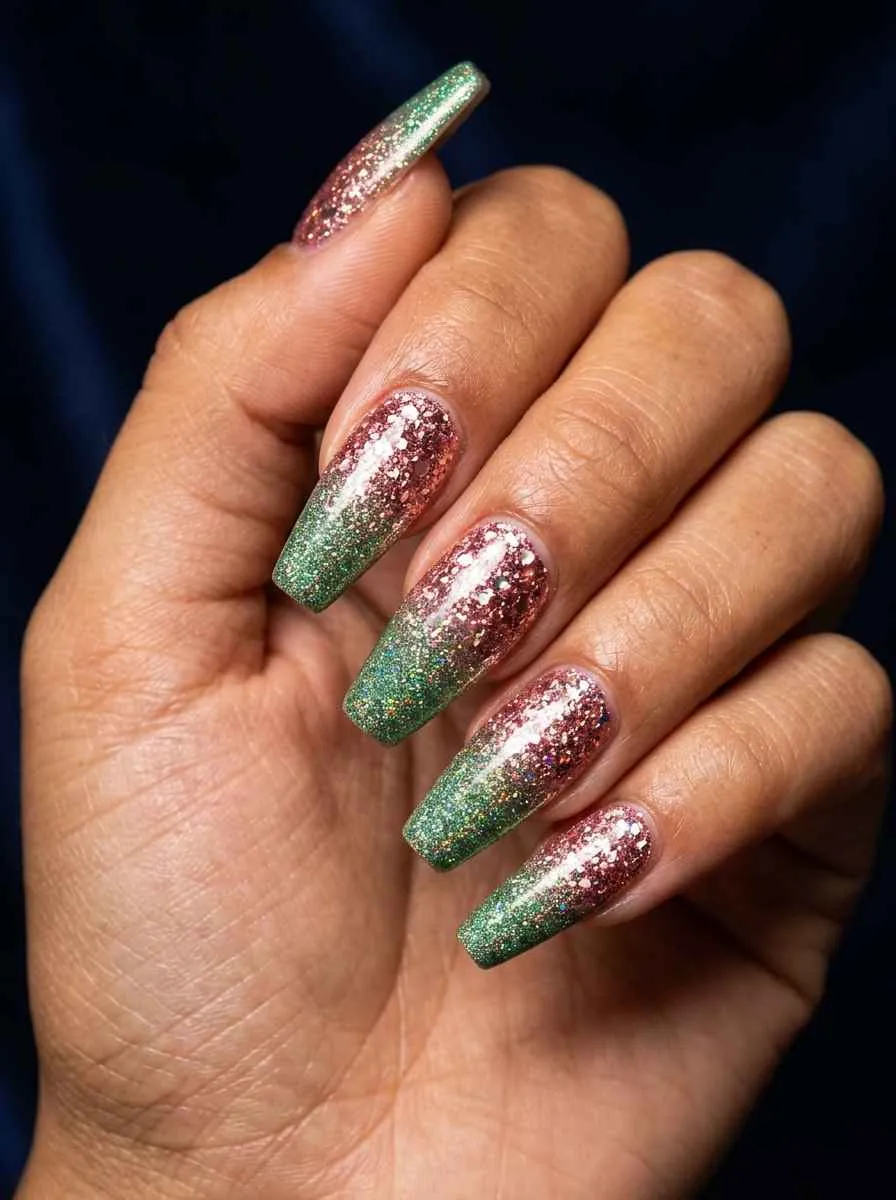
Glitter makes everything more celebratory, and this ombre is no exception.
This style layers glitter polishes rather than shimmer or cream finishes. The pink end uses chunky or fine glitter in a rose or coral tone. The green end uses fine holographic or iridescent green glitter. Where they meet, the sparkle is almost overwhelming in the best possible way.
Glitter polishes are available everywhere. OPI, Sally Hansen, and many drugstore brands sell affordable glitter options in seasonal collections. You can also find craft glitter and mix it into clear nail polish to make your own custom shades.
Apply multiple thin layers to build glitter density. Two to three coats is usually enough.
Removal tip: Glitter polish is notoriously stubborn. Soak small pieces of foil with acetone, press them over each nail, and wait ten minutes before peeling off. This saves a lot of scrubbing.
This style is made for celebrations. New Year’s Eve nails, birthday nails, anniversary nails, holiday parties. Any time you want your hands to look like they belong in a photo shoot.
Wear with slinky or formal fabrics. Silk, velvet, satin, and sequins all pair beautifully with glitter nails because the textures share the same love of light.
14. Short Pink to Green Ombre Nails
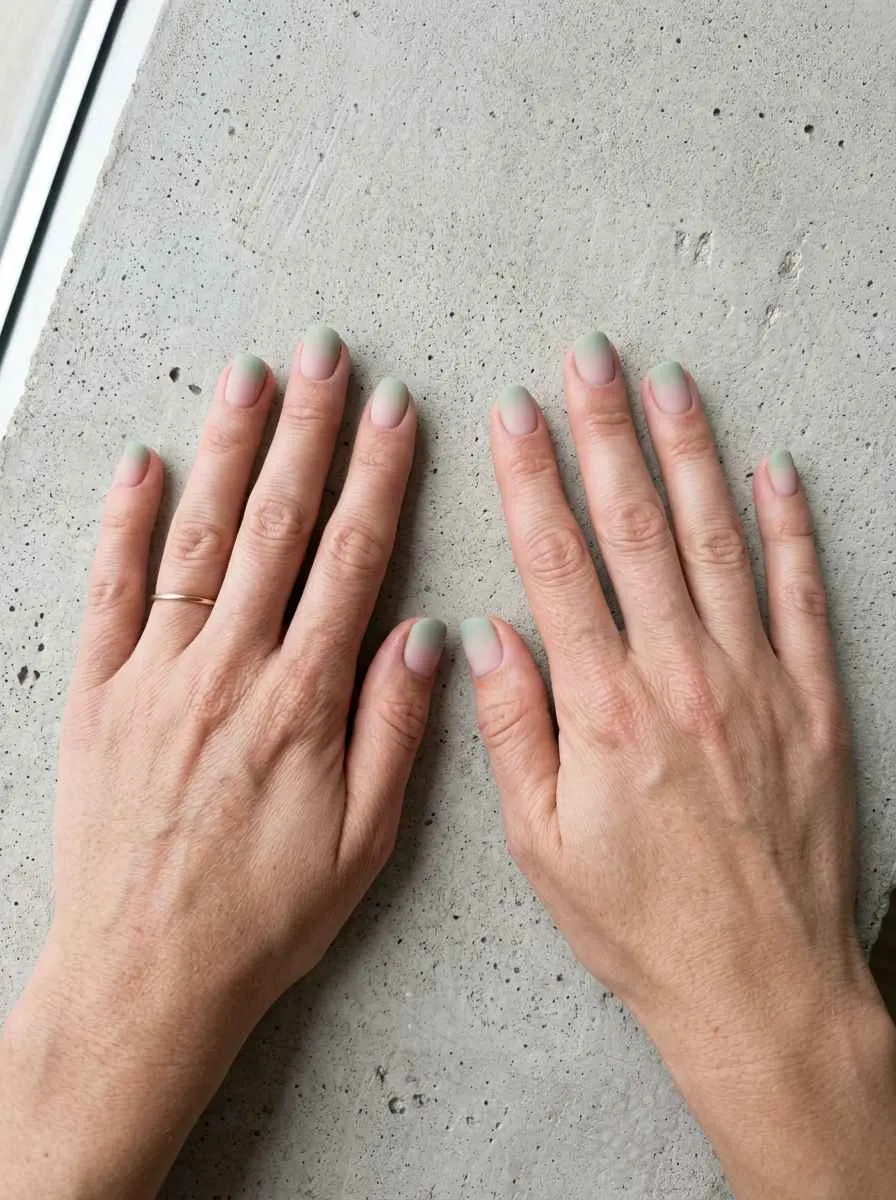
Ombre nails are not just for long nails. Short nails can carry this look just as well, and sometimes better.
Short nails with a pink to green ombre look clean, practical, and modern. The key is keeping the colors relatively soft and the blend smooth, since shorter nails have less room to show the full gradient.
Use two colors that are clearly different so the ombre reads even on small nails. Pastel on pastel can get lost. A slightly more saturated pink against a clear soft green works better on shorter lengths.
Squoval and round shapes suit short ombre nails beautifully. They give the color maximum surface area without the nail looking awkward.
This is also the most practical version of this trend for people who work with their hands, type all day, or generally cannot maintain long nails. Short ombre nails look intentional and considered rather than like you gave up on nail length.
Matte top coat works brilliantly on short nails. It makes the look feel more contemporary and grown-up than glossy.
Maintenance is easier too. Short nails chip less frequently. When they do grow out, the ombre line simply moves up and still looks good until your next repaint.
This is the version of pink and green ombre that absolutely anyone can wear anywhere, regardless of job, lifestyle, or nail history.
15. Pink and Green Ombre with Negative Space
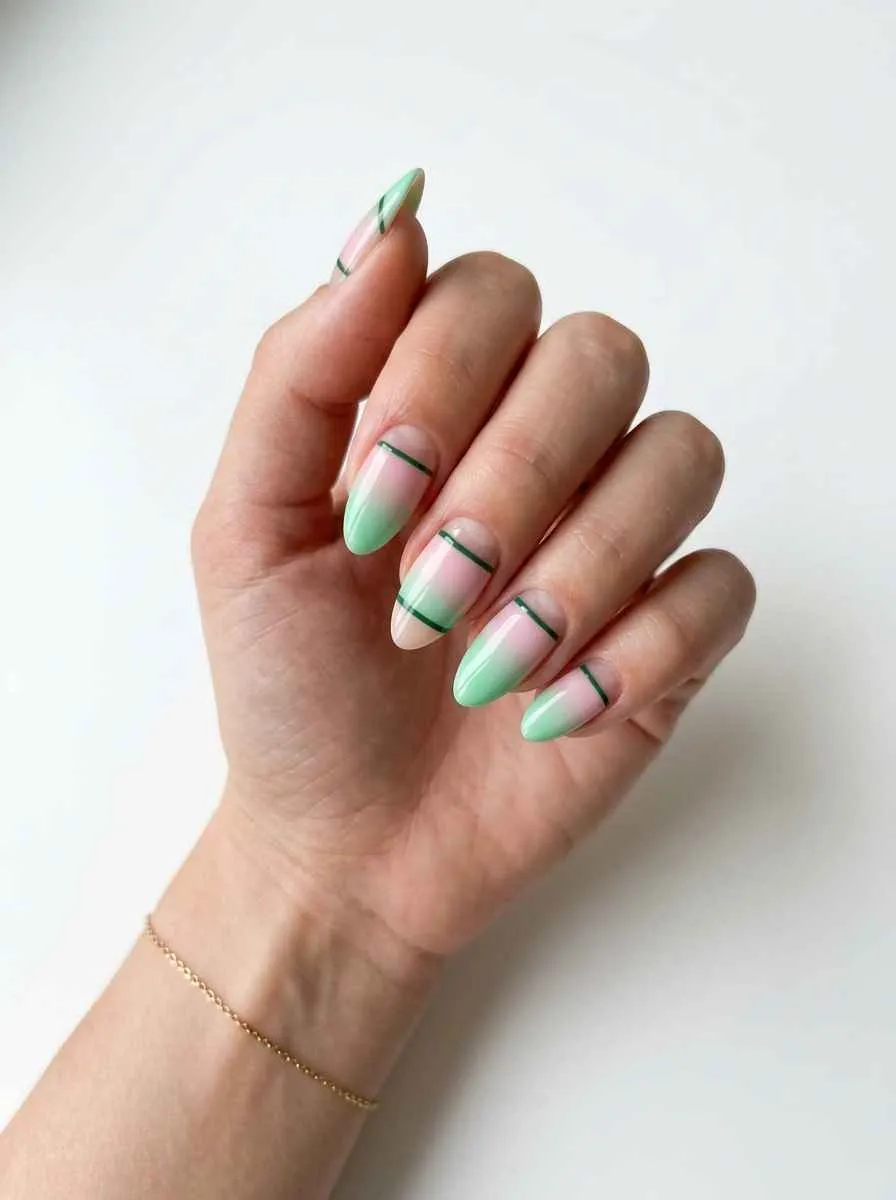
Negative space nail art incorporates the bare or natural nail as part of the design itself.
In this version, sections of the nail are left unpainted while the ombre pink to green fills specific zones. The combination of painted and bare areas creates a graphic, architectural look.
Tape is your best tool here. Use thin strips of tape or nail art striping tape to mask off the areas you want to keep bare. Paint your ombre over the rest. Peel the tape while the polish is still slightly wet to get clean edges.
The bare nail can be your natural nail or a sheer nude if your natural nail color is uneven.
This style feels editorial and minimal rather than maximalist. It suits people who love design, architecture, or clean aesthetics.
It works on medium to longer nail lengths where there is enough surface area to show both the bare and painted zones clearly.
Almond and oval shapes carry this look with the most elegance. The curved tip softens the geometric lines of the negative space design.
This is also a great style for people who find fully painted nails feel heavy or overdressed for their usual aesthetic. Negative space keeps the look feeling open and light.
Try pairing this with simple gold rings on one or two fingers to add metallic warmth without disrupting the clean visual story of the nails.
16. Pink and Green Ombre Acrylic Set
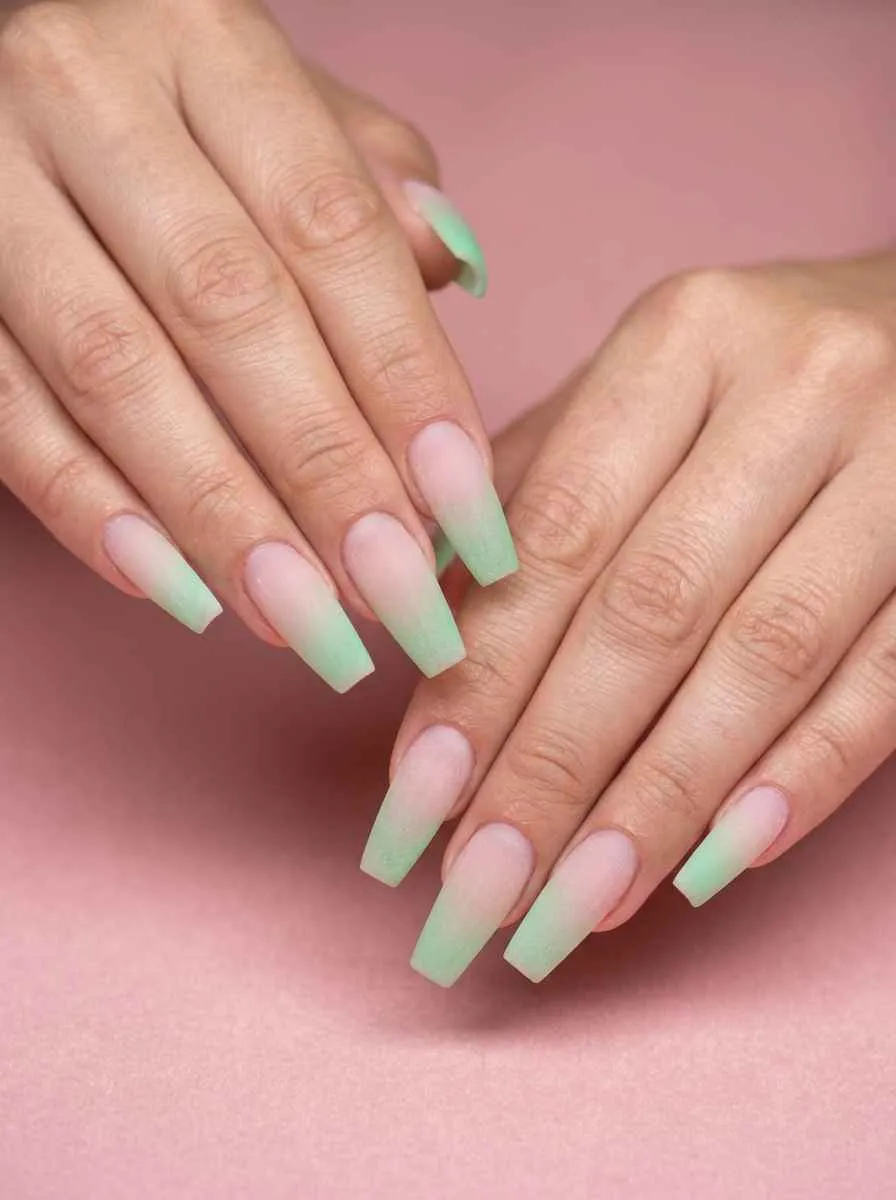
Getting your ombre built into the acrylic structure rather than painted on top is a next-level approach.
With acrylic ombre, the nail technician blends pink and green acrylic powders during the sculpting process. The color lives inside the nail itself, not on the surface. This means it does not chip or fade the way painted ombre does.
This is not a DIY-friendly technique for most beginners. It requires practice with acrylic application. If you are learning, watch detailed tutorials and practice on nail tips before moving to your actual nails.
For salon visits: Show your nail tech this reference style so they know you want the ombre blended into the acrylic body. Not all technicians do this automatically.
The cost varies but typically runs $50 to $90 at most salons depending on your location. That price includes shaping, length, and the ombre application.
This style lasts three to four weeks before needing a fill. The grown-out look with a clear base is also attractive, so you have flexibility on timing.
Coffin, stiletto, and almond shapes show the internal ombre best because the length gives the gradient room to breathe.
If you are investing in acrylics, this technique is worth the extra effort because the result is polished, durable, and genuinely different from anything you can achieve with regular polish at home.
17. Pink to Mint Green Ombre with White Stamping
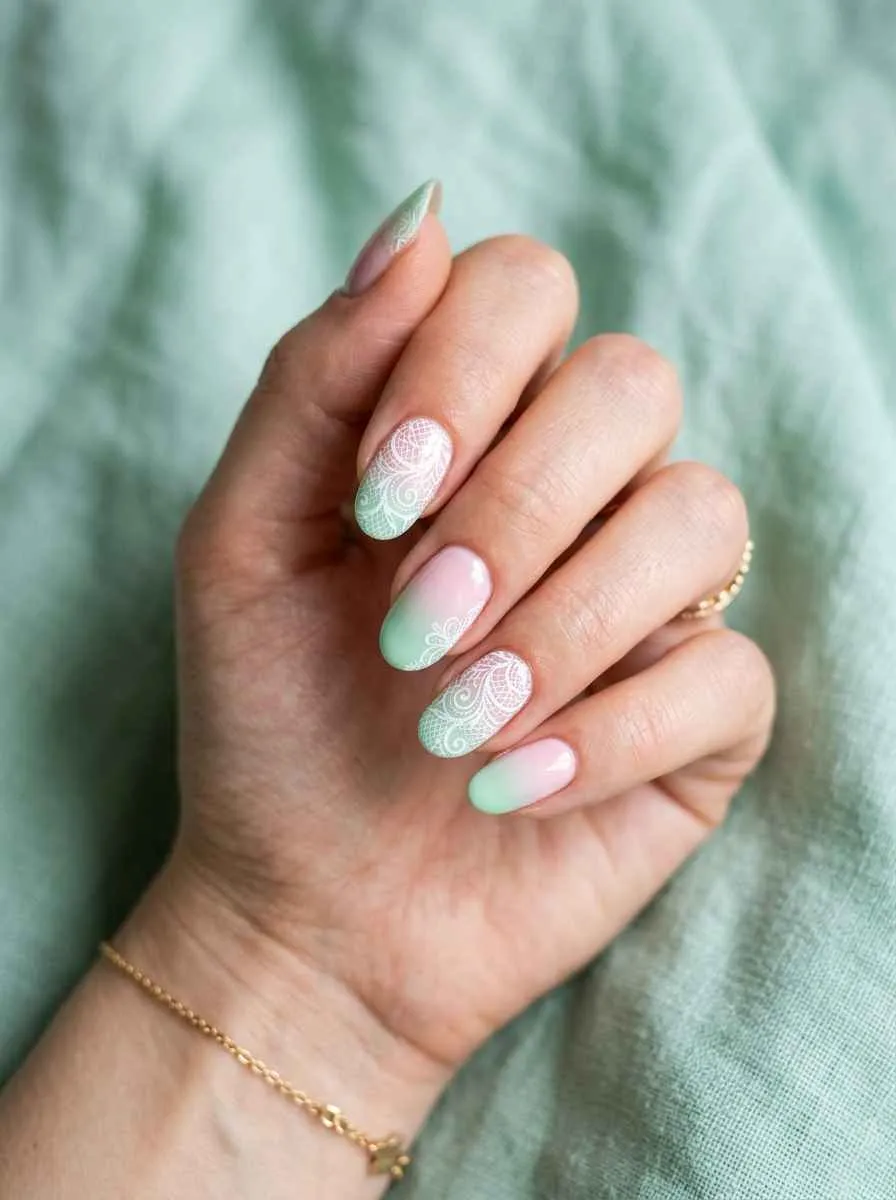
Nail stamping is a tool-based technique that lets you apply intricate patterns without needing any freehand skill.
The ombre base does the color work. The stamping plate does the detail work. Together they create nails that look like they took hours but actually take about thirty minutes once you know the technique.
You need a stamping kit: A stamping plate with patterns, a stamper tool, and a stamping polish. These kits start at around $10 on Amazon or at beauty supply stores.
Apply your pink to mint ombre first. Let it dry. Scrape stamping polish over the design on the plate. Press the stamper onto the plate, then roll it onto the nail.
White stamping polish over a colored ombre base creates a beautiful lace or floral overlay. It looks handcrafted and intricate.
Practice the rolling motion of the stamper a few times on a piece of paper before touching your nails. The pressure and angle matter more than most beginners expect.
This style suits spring and summer especially well. It also works for weddings, formal events, and any occasion calling for feminine and detailed nails.
Seal with a top coat quickly after stamping. Stamping polishes dry fast and a top coat helps bond everything together so the pattern does not peel at the edges.
18. Geometric Pink and Green Ombre
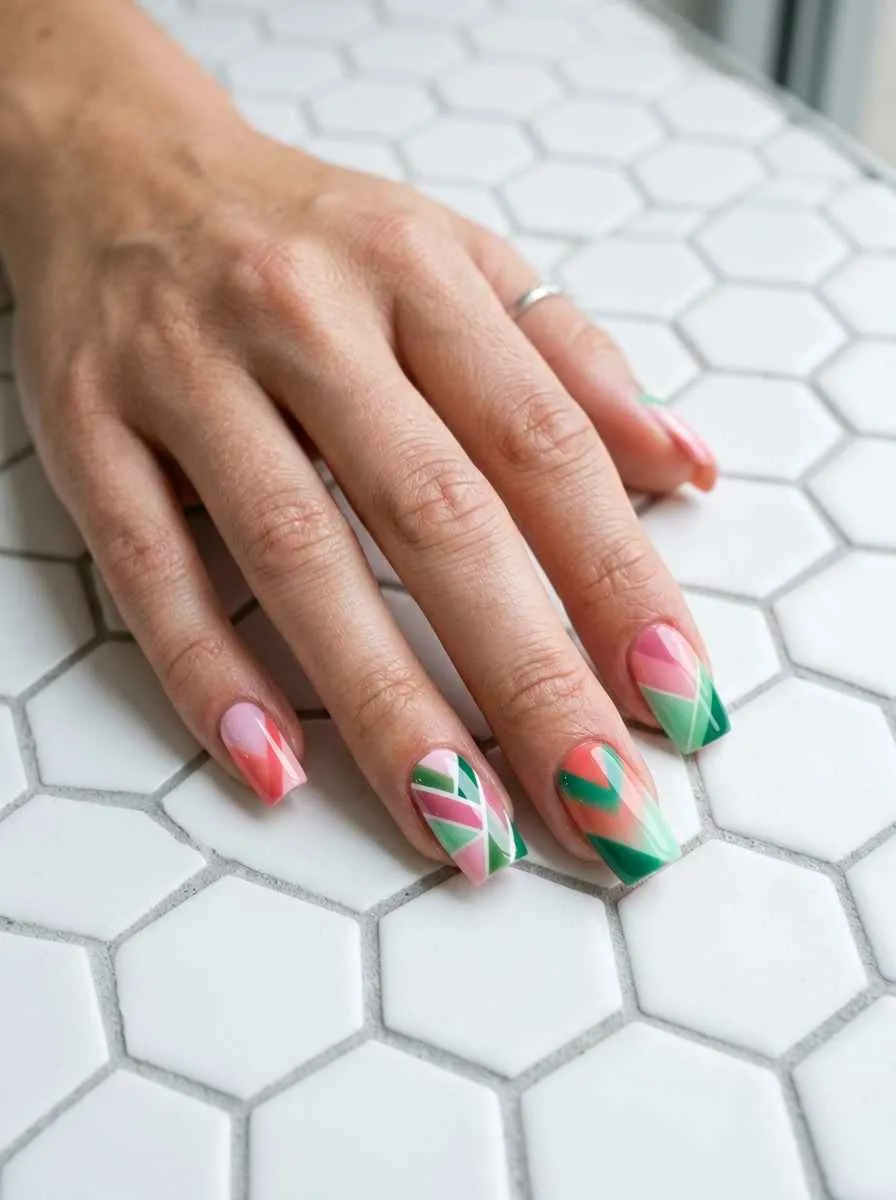
Instead of a blended gradient, this version creates the ombre effect through geometric color blocking.
Angular sections of pink and green are placed side by side on each nail. The eye reads them as an ombre even though there is no actual blending involved. It is a graphic design approach to a traditional nail technique.
Tape makes this achievable for anyone. Lay strips of tape diagonally across the nail to create sharp geometric lines. Paint one color on each side. Peel the tape while the polish is still wet.
The result is clean, modern, and architectural rather than soft and romantic.
This style suits square and coffin nail shapes where the flat surfaces make the geometry feel intentional rather than accidental.
Use colors with strong contrast for maximum impact. A bright coral pink and a deep olive or forest green create the most striking geometric story.
This look works in both gloss and matte finishes. Matte makes the geometry feel more graphic and design-focused. Gloss keeps it fashion-forward and editorial.
Budget options are easy here because you only need two polishes and a roll of tape. This is genuinely one of the most affordable nail art styles on this entire list.
Pair this nail style with structured, minimal fashion. Clean lines in your clothing echo the clean lines in your nails and the whole look feels considered and intentional.
19. Pink and Green Ombre Press-On Nails
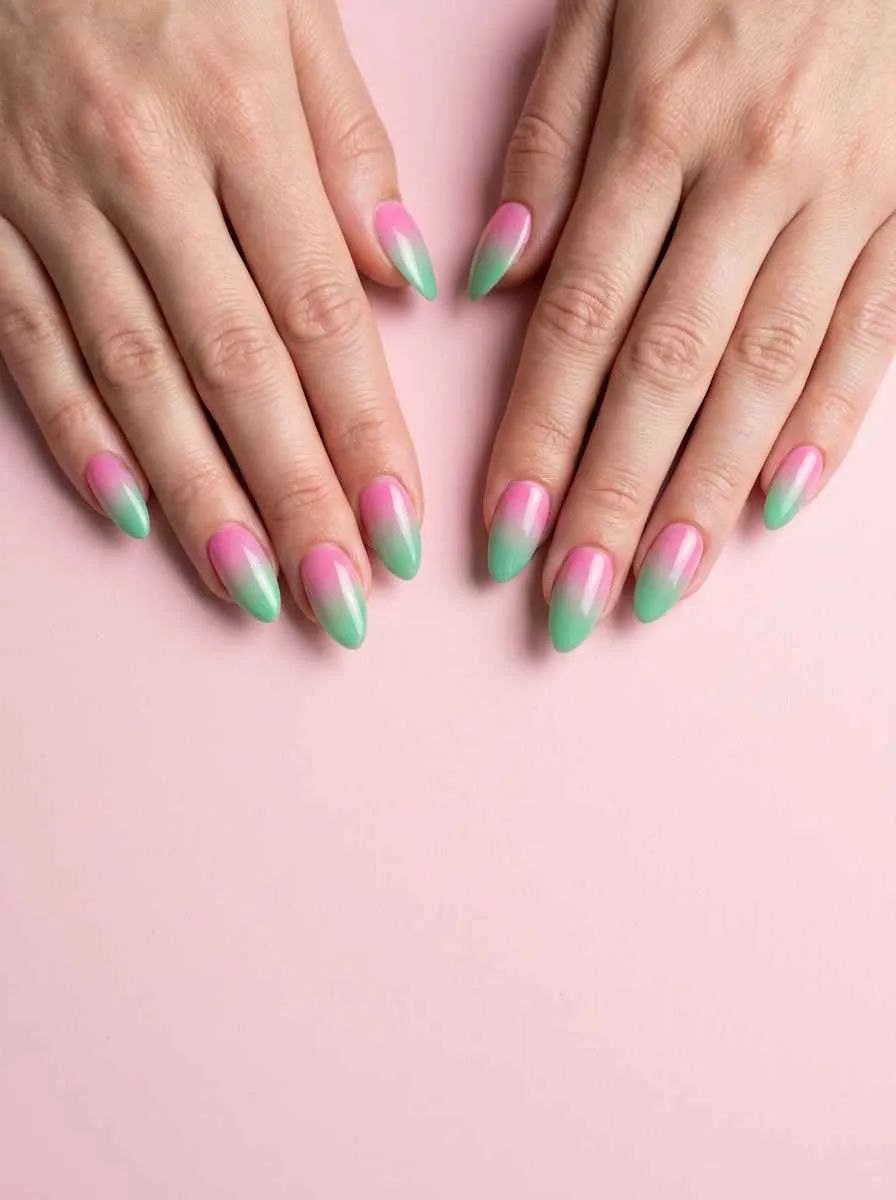
Press-on nails have come a long way from the cheap plastic sets of the past.
Modern press-ons are made from high-quality materials, come in custom shapes and lengths, and include ombre designs that look salon-quality right out of the box. Pink and green ombre press-ons are widely available on Etsy, Amazon, and in beauty stores.
This is the fastest way to achieve this look. Application takes about ten to fifteen minutes. No drying time, no blending, no skill required.
Cost comparison: A full set of quality press-ons runs $8 to $25 depending on the brand and source. That is often cheaper than a bottle of each nail polish you would need for DIY.
Press-ons last one to two weeks with proper application. The key is prepping your natural nails well. File them lightly, push back cuticles, wipe with alcohol to remove any oil, and use the included adhesive or nail glue for the best hold.
Removal is gentle when done correctly. Soak in warm soapy water for ten minutes, then gently rock the press-on from side to side until it releases.
This is the go-to option for special events, last-minute nail transformations, or anyone who has not yet mastered nail art techniques at home.
Many small Etsy shops create custom press-on sets in any color combination you want at very reasonable prices.
20. Pink to Green Ombre Gel Nails at Home
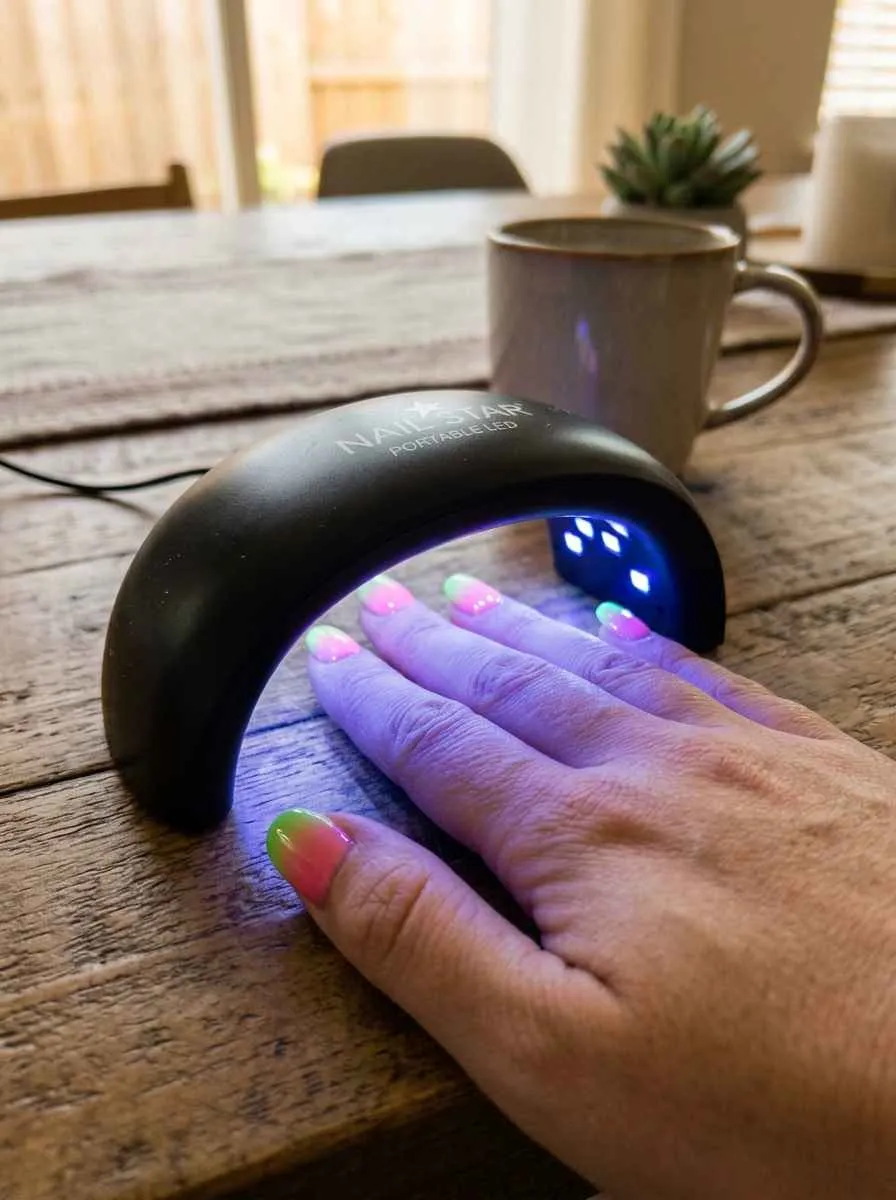
Gel at home used to feel complicated. Now it is one of the most accessible nail techniques available.
A basic home gel kit includes a UV or LED lamp and two or three gel polishes. The whole setup costs $30 to $60 and the lamp lasts for years. Each bottle of gel costs less than $10.
The ombre technique in gel works the same as regular polish but with a faster-drying window. You need to work quickly with the sponge before the gel starts to cure under ambient light.
Cure each layer for 60 seconds under the lamp. Apply the ombre in one or two thin sponge layers. Cure again. Then seal with a gel top coat and cure for a final time.
The result is chip-free nails for two to three weeks. For the pink to green ombre specifically, the gel formula keeps the colors rich and vibrant without fading.
Brands like Beetles, Modelones, and Gellen sell affordable gel kits with multiple shades included. Many of them specifically sell ombre or gradient sets with colors chosen to work together.
Removal requires acetone and foil wraps but is easy to do at home. Do not peel gel off your nails. That damages the nail plate and is avoidable with a little patience.
This is the best long-term investment for anyone who wants their nails done consistently without salon prices.
21. Pink and Green Color Shift Ombre
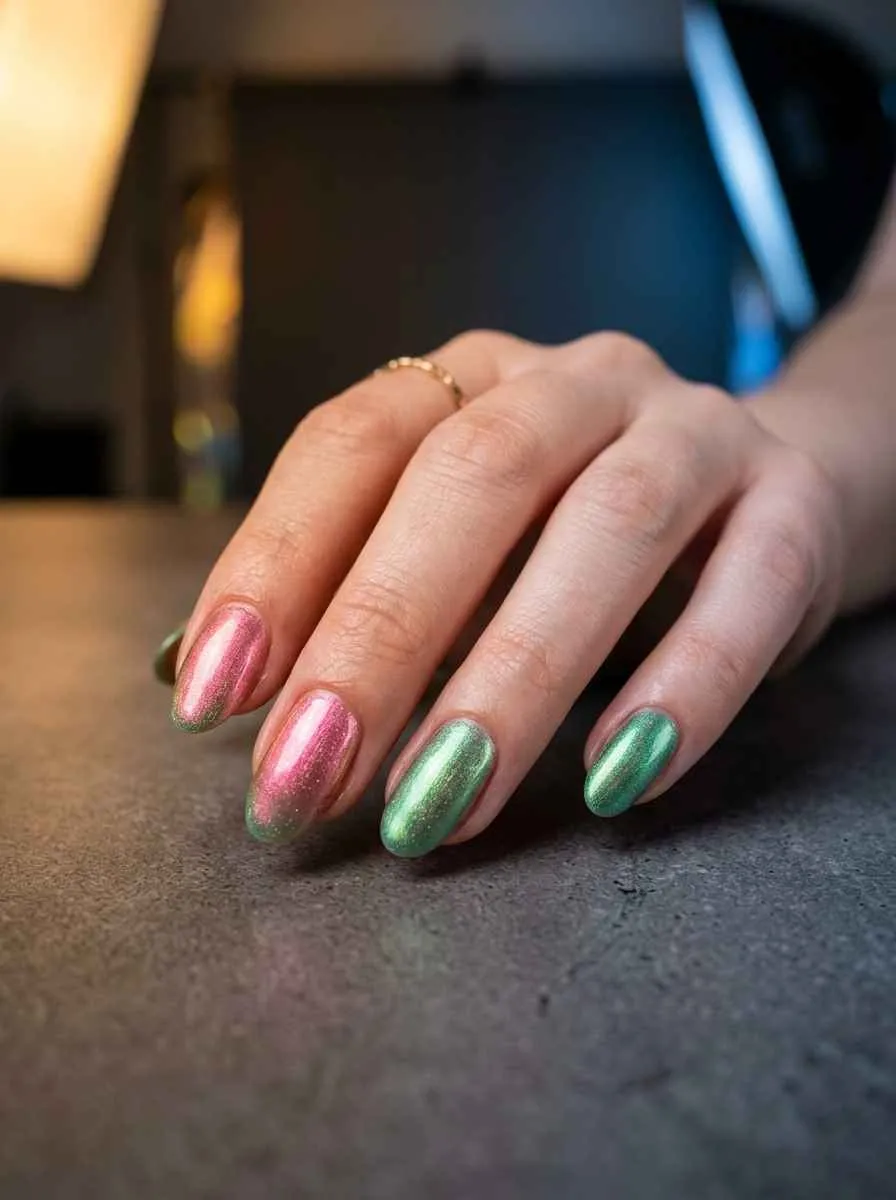
Duochrome and color-shift polishes are specifically designed to appear as two colors at once depending on the light source and angle.
A pink-to-green duochrome polish creates an automatic ombre effect because different parts of the nail catch light differently. The convex center might read green while the edges appear pink.
This is the most effortless ombre on this list. You paint a single color and the polish does the rest.
Brands like Cirque Colors, KBShimmer, and China Glaze all make duochrome polishes that shift between pink and green tones. Prices range from $8 to $14 per bottle.
The effect reads most strongly over a black base. Apply one thin coat of black first, then layer the duochrome polish over it. The dark background makes the color shift vivid and obvious.
Over a clear or light base, the effect is more subtle and ethereal.
This style suits every nail shape and length. The color shift works regardless of the surface area.
This is also a great gift idea for nail enthusiasts because duochrome polishes feel like something special and unusual even to people with large polish collections.
Wear this under different lighting throughout the day and enjoy watching your nails change color as you move between warm interior lighting and cool outdoor or fluorescent light.
22. Pink and Green Ombre with Gold Foil Accents
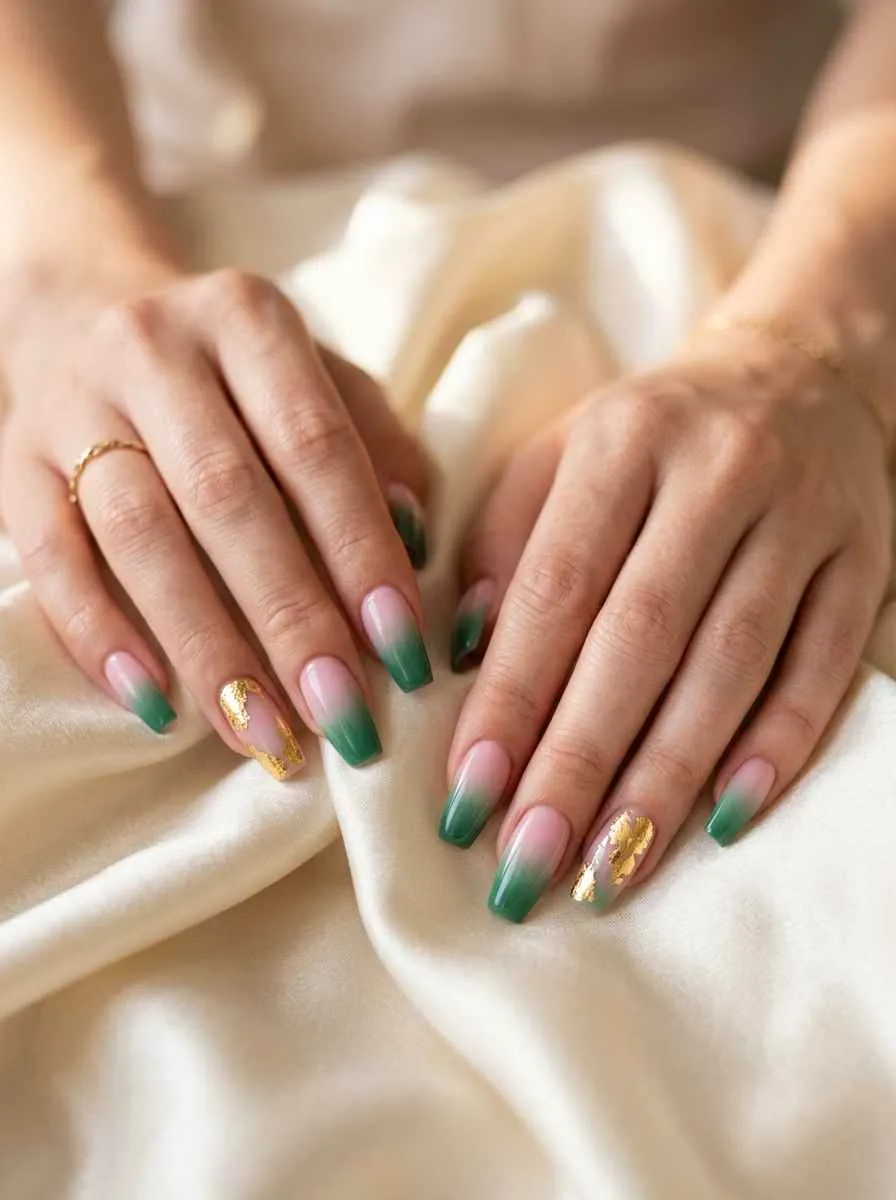
Gold foil adds a luxury dimension to any nail look without requiring advanced skill.
The ombre provides the color story. Small irregular pieces of gold foil pressed into the still-tacky top coat add metallic texture and light.
Gold foil is inexpensive and easy to find. Nail foil sheets and foil transfer kits are available from most beauty supply stores and online for $3 to $8. You only use tiny pieces at a time so one sheet lasts a very long time.
Technique: Apply your pink to green ombre. Seal with a gel top coat but do not cure it yet if using gel, or apply regular top coat and let it get slightly tacky. Press small torn pieces of foil onto the nail and rub gently. The foil sticks to the tacky surface.
You can apply foil over the whole nail or just at the cuticle edge for a subtle rim of gold.
This is particularly stunning on darker ombre combinations like deep pink to forest green where the gold reads as especially rich and warm.
Pair with gold jewelry for a cohesive metallic moment throughout the look.
This nail style suits formal events, holiday gatherings, anniversary dinners, and any moment that calls for a little extra.
23. Pink to Green Ombre Swirls Nail Art
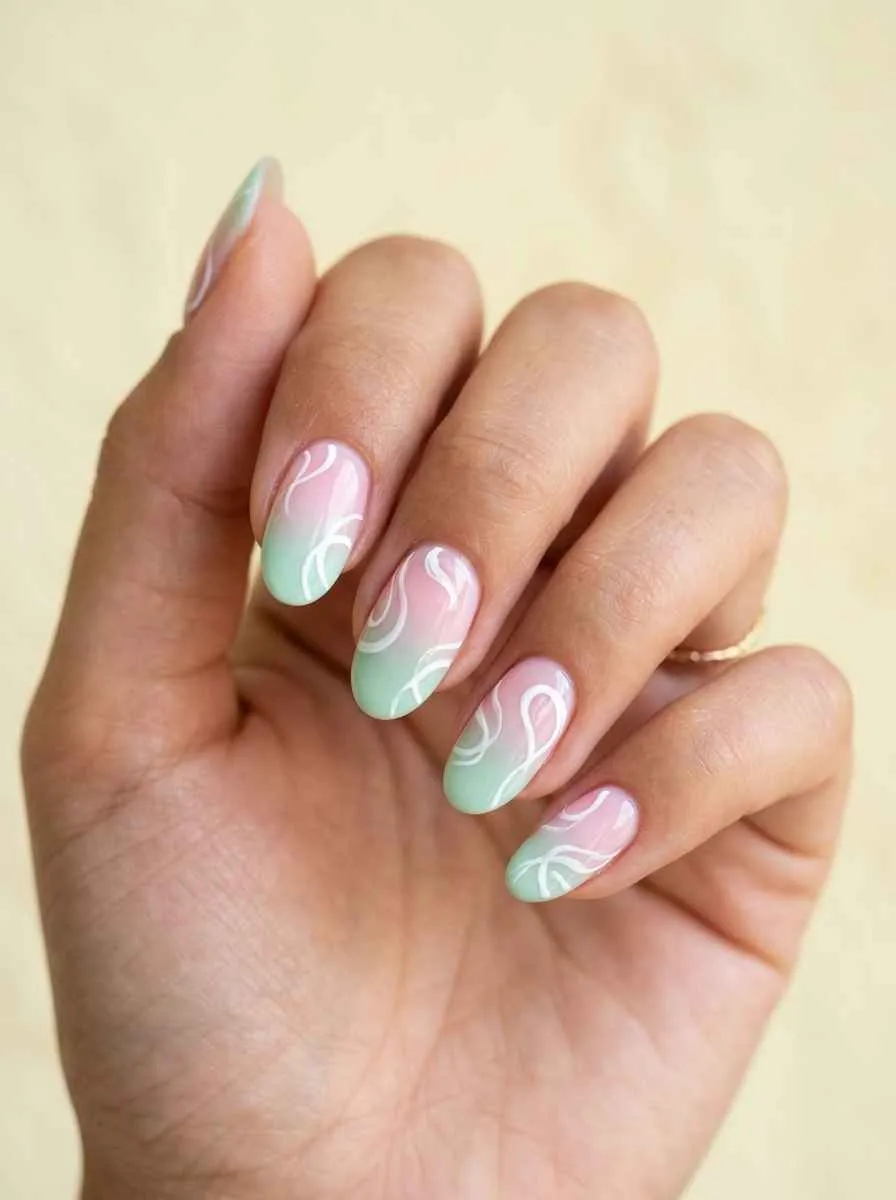
Swirls add movement and personality to an ombre base without requiring precise nail art skills.
The ombre provides structure. The swirls add a loose, expressive layer on top that feels modern and artistic.
How to swirl: Use a thin striper brush or a dotting tool. Pick up white or a contrasting color. Draw loose, flowing S-curves across the nail surface. Do not overthink it. Speed and looseness are what make swirls look good.
Watch one or two reference videos before you start so you understand the natural motion of the brush. The stroke should flow from your whole arm, not just your wrist.
This aesthetic is sometimes called “abstract nail art” and it has been popular in fashion and editorial nail spaces for several years. It feels contemporary and of-the-moment.
Swirls work on all nail lengths but look most impactful on medium to longer nails where there is room for the lines to breathe.
Color options for the swirls: White is the most classic choice. Black adds drama. Gold adds warmth. A contrasting pink or green (opposite end of the ombre) creates a playful self-referential look.
This style requires very little in the way of tools or materials. Your two ombre polishes, one thin brush, and one contrasting color are genuinely all you need.
24. Pink and Green Ombre with Rhinestone Accents
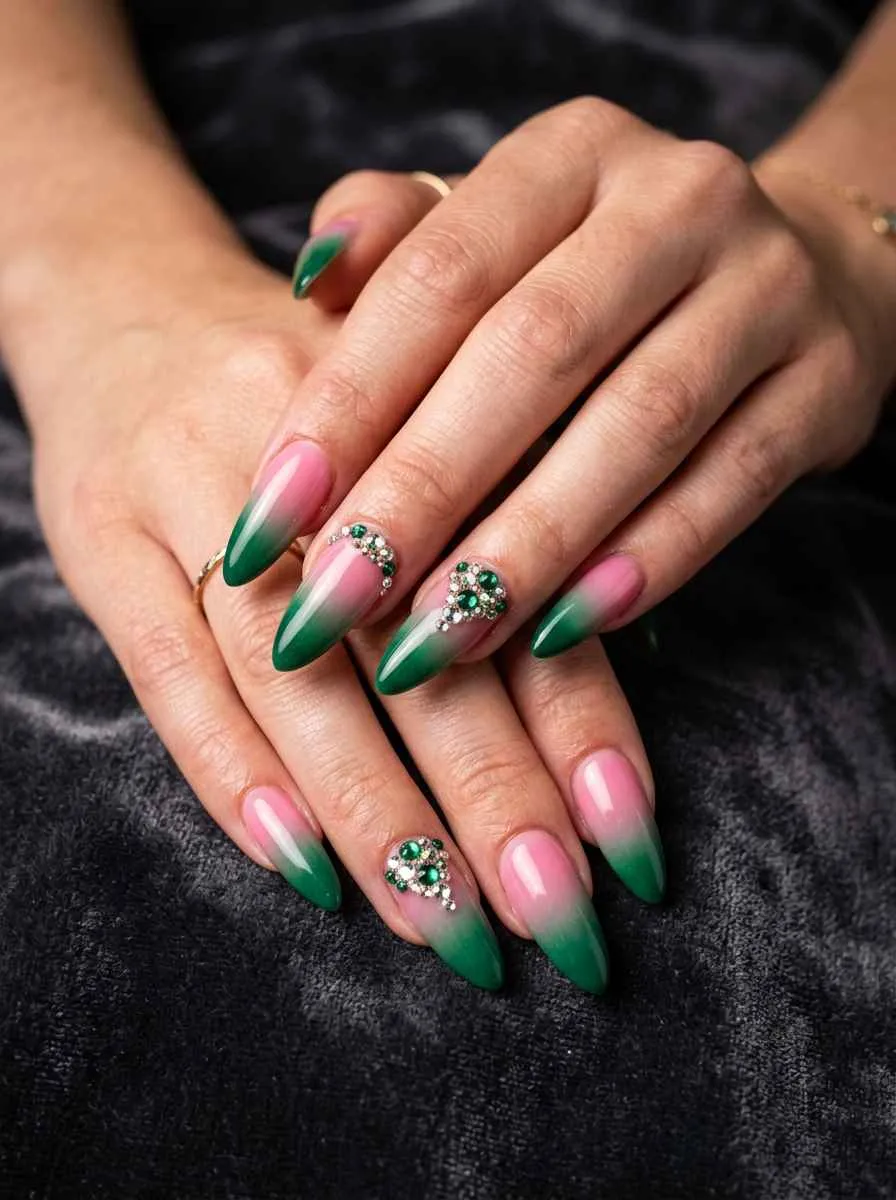
Rhinestones take any nail look from nice to extraordinary in about ten minutes.
Add them to a pink to green ombre base for a glamorous result that looks far more expensive than it actually is.
Rhinestones are widely available and affordable. A bag of mixed sizes in clear, pink, and green rhinestones from Amazon or AliExpress costs $3 to $6 and contains hundreds of stones. You will not run out anytime soon.
Application technique: Apply your ombre and seal with top coat. While the top coat is still wet, use a dotting tool or an orange stick to pick up each rhinestone and press it gently onto the nail surface. The tacky top coat holds them in place.
Apply a second layer of top coat over the rhinestones to seal them. This step is critical or they will pop off within days.
Placement matters. A cluster at the cuticle of two or three accent nails looks intentional. Stones scattered randomly across every nail can look crowded.
This style suits formal and special-occasion wear but can absolutely be worn everyday if you enjoy maximalist nail aesthetics.
Pair with simple, clean fashion so the rhinestones remain the focal point. Delicate gold chain jewelry pairs beautifully with this combination.
25. Tortoiseshell Pink and Green Ombre
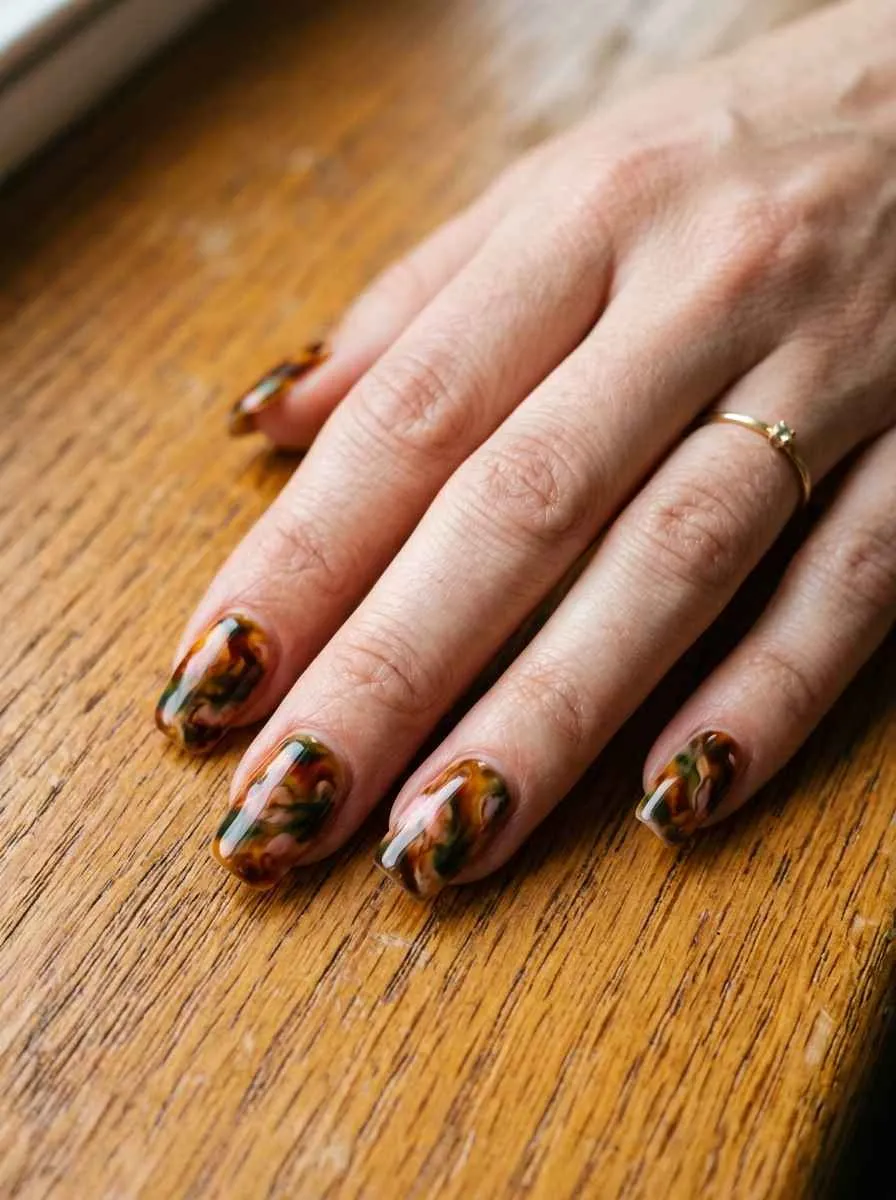
Tortoiseshell is a nail art technique that creates layered, translucent color effects similar to actual tortoiseshell material.
When done in pink and green tones with warm amber undertones, it reads as an earthy ombre with an organic, textural quality.
The technique: Start with an amber or warm nude base. Drop dots of pink, dark green, and deep brown randomly across the wet nail. Use a thin brush or toothpick to drag and swirl the dots into each other. Do not overblend.
The key is stopping before it gets muddy. Two or three swirls per nail is usually enough.
Seal with a glossy top coat to deepen the colors and give them that rich, lacquered quality that tortoiseshell is known for.
This is a nuanced look that rewards patience. Your first attempt may not be perfect and that is completely fine. The organic nature of the technique means slight variations in each try still look intentional.
This style is particularly beautiful in fall. The warm undertones connect the pink and green to the amber and brown seasonal tones naturally.
It suits rounded nail shapes best. Oval and almond nails carry the organic lines of tortoiseshell with the most elegance.
Pair with warm, earthy fashion tones in rust, camel, forest green, and burgundy.
26. Pink and Green Ombre Nails for Weddings
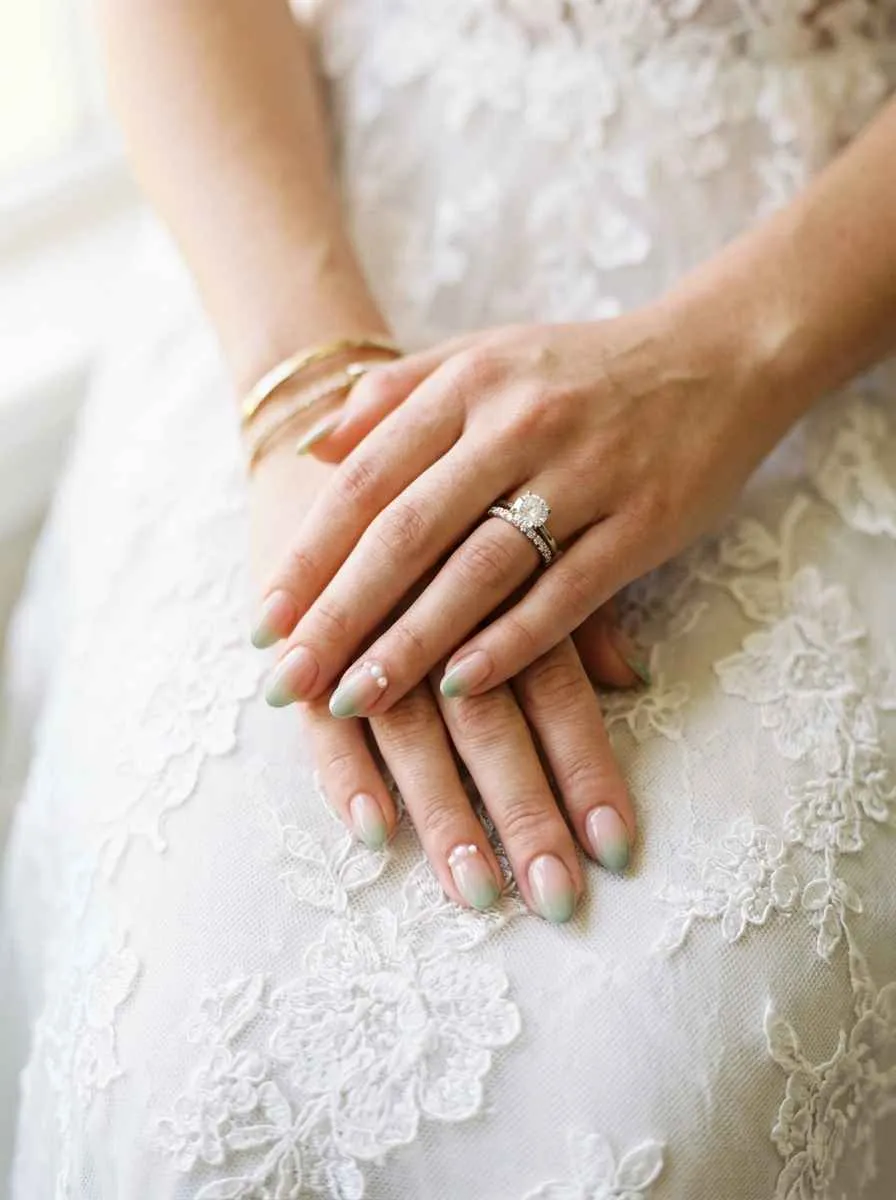
Pink and green ombre is a genuinely beautiful choice for wedding nails, and it is more popular than you might expect.
The key for weddings is keeping the tones soft and refined. Blush pink to sage green reads as romantic and botanical. It pairs beautifully with white, ivory, and champagne wedding dresses.
Sheer polishes work best for this application. You want the nails to look healthy, dewy, and elegant rather than heavy or bold.
A gel manicure or professional acrylics are worth the investment for wedding day nails because they hold up through the entire event without chipping or lifting.
If budget is a concern, a professional gel manicure at a local nail salon typically runs $35 to $60. That cost is reasonable for something you will have in every photograph from one of the most documented days of your life.
Add a small pearl detail at the cuticle of your ring finger for a bridal-specific touch. Single pearls are elegant and understated.
Coordinate with your bridesmaids. Having the bridal party wear slightly different shades of the same pink to green ombre palette creates beautiful group photo moments.
This look also works for engagement shoots, anniversary portraits, and any formal romantic event where you want nails that feel feminine, refined, and intentionally chosen.
27. Pink to Green Ombre with Butterfly Nail Art
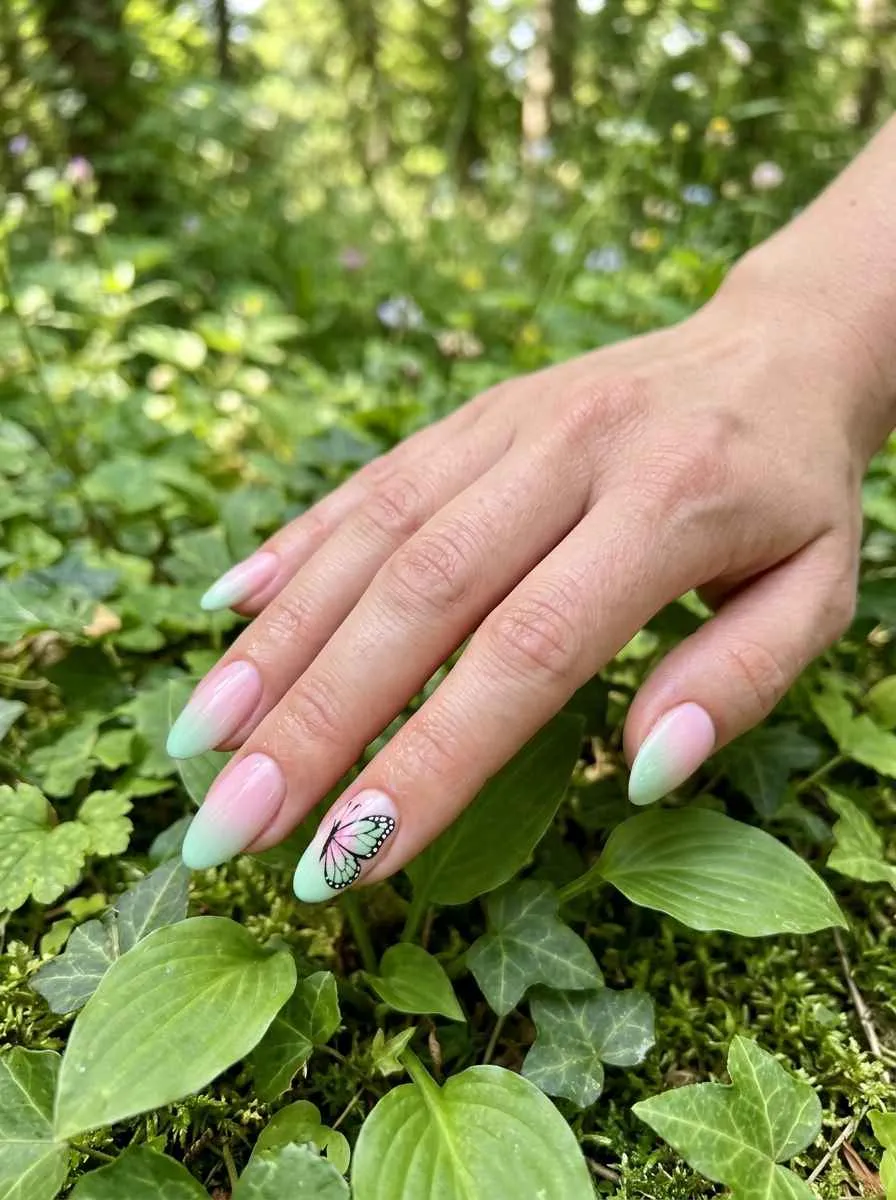
Butterflies and ombre nails share the same energy of something transforming from one beautiful thing into another.
Painting a butterfly on one or two accent nails over a pink to green ombre base creates a nature-inspired set that feels cohesive and thought-through.
Nail stickers are the easiest route. Search for butterfly nail stickers on Amazon or Etsy and you will find hundreds of options in pink and green colorways for under $5 a sheet.
For freehand painting: Use a small oval brush to create the wing shapes. The upper wings are larger and rounder. The lower wings are smaller and more triangular. Paint in the ombre colors of your base for a unified look.
This style suits people who love nature aesthetics, cottagecore fashion, floral clothing, and outdoor settings.
The photography for this nail style looks exceptional in natural light, especially outdoors with greenery in the background. The nails literally echo the environment.
Medium to long almond nails carry butterfly art beautifully because the elongated shape leaves room for the full wing detail to be visible.
This is a meaningful and wearable nail art choice for spring and summer. It also photographs well for social media and nail art sharing communities.
28. Pink and Green Ombre Nails Inspired by Watermelon
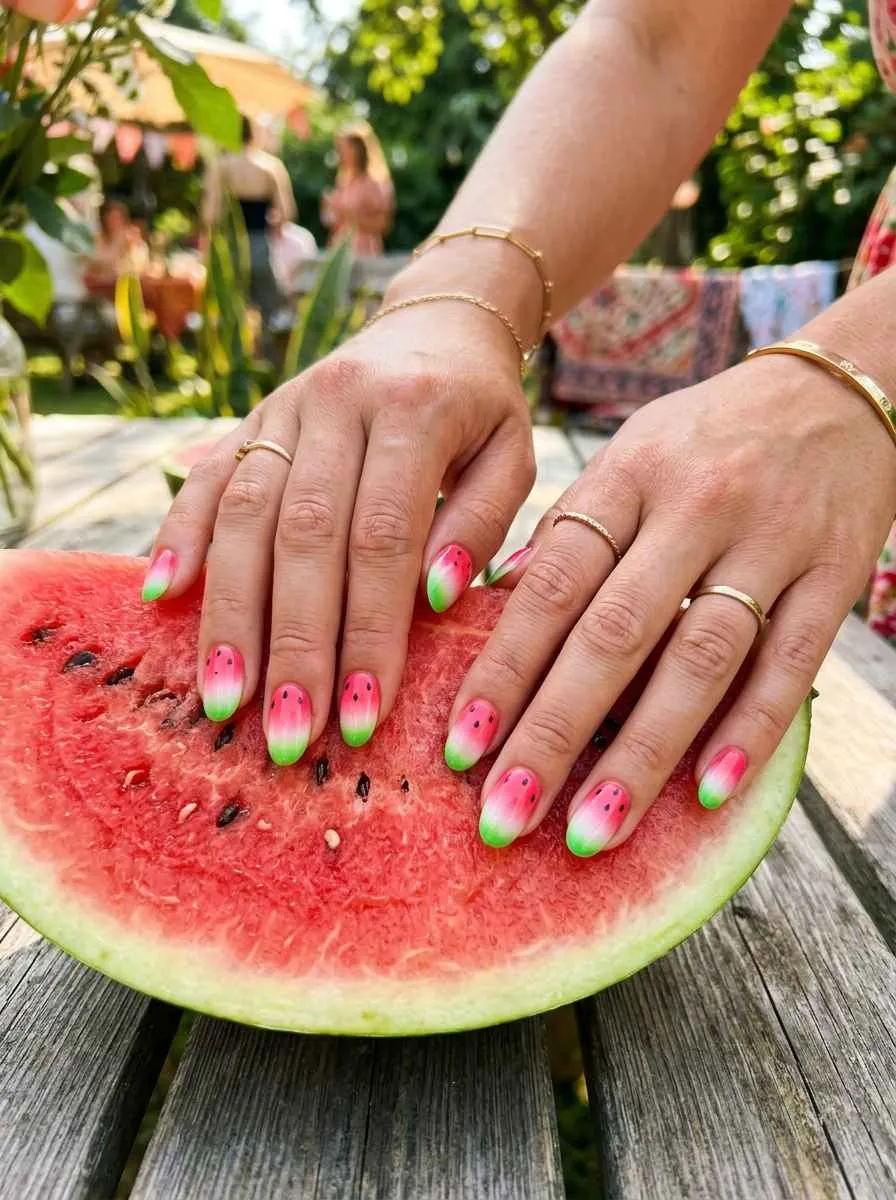
Watermelon nails are one of the most recognizable takes on the pink and green ombre concept, and they are endlessly charming.
The color story is: vivid pink at the base, white in the middle, bright green at the tip. Optional black seed dots on one or two nails complete the fruit illusion.
This is a fun, playful nail style that works best for summer, vacations, pool days, and any setting where you want your nails to make people smile.
Short and medium oval nails carry this look particularly well. The rounded tip mimics the curve of an actual watermelon slice.
For the white mid-section: Apply a thin white stripe across the nail between the pink and green zones. Blend it gently into both colors so it reads as part of the ombre rather than a hard line.
Seed dots: Use a dotting tool or the tip of a bobby pin dipped in black polish. Two or three seeds per nail is enough. More than that starts to look cluttered.
This style is universally beloved because it is recognizable, cheerful, and immediately communicates summer energy.
Pair with colorful, casual fashion. Swimwear, sundresses, shorts and tank tops. This nail look does not belong at a formal event. It belongs at a cookout, a picnic, or a day at the beach.
29. Pink to Green Ombre Nails with Abstract Lines
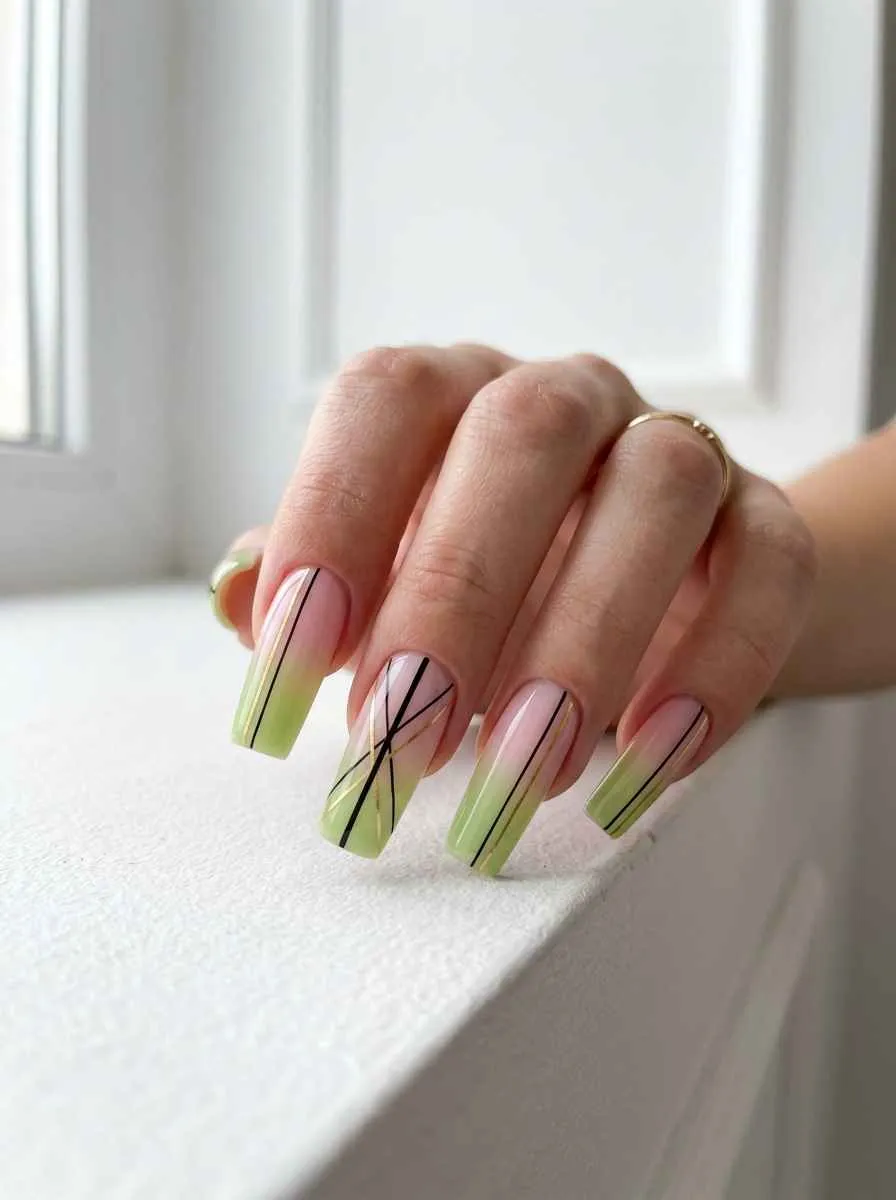
Abstract line work is one of the most modern and design-forward styles in nail art right now.
Over a pink to green ombre base, thin lines in contrasting colors create a graphic, editorial effect that feels more fine art than nail polish.
Striping tape is your easiest tool. Apply the tape to the dry ombre base in a pattern you like. Apply a contrasting color over the tape. Remove the tape immediately. The result is clean, precise lines every time.
For freehand lines, use a thin striper brush. Keep your hand steady by resting your pinky finger on your work surface as an anchor.
Black lines create maximum contrast. Gold lines feel luxurious. White lines feel clean and fresh. Whichever you choose, keep the line weight consistent across all nails.
This style suits minimalist fashion sensibilities. People who wear clean silhouettes, neutral palettes, and structured clothing will feel most at home with this nail aesthetic.
Long square nails show this style at its best. The flat, wide surface gives the abstract lines room to be seen fully.
This is a nail art style that grows with you. As your skill improves, the lines can get more complex and intentional. But even the simplest version of one or two diagonal lines per nail looks striking over a well-executed ombre base.
30. Three-Tone Pink, White, and Green Ombre
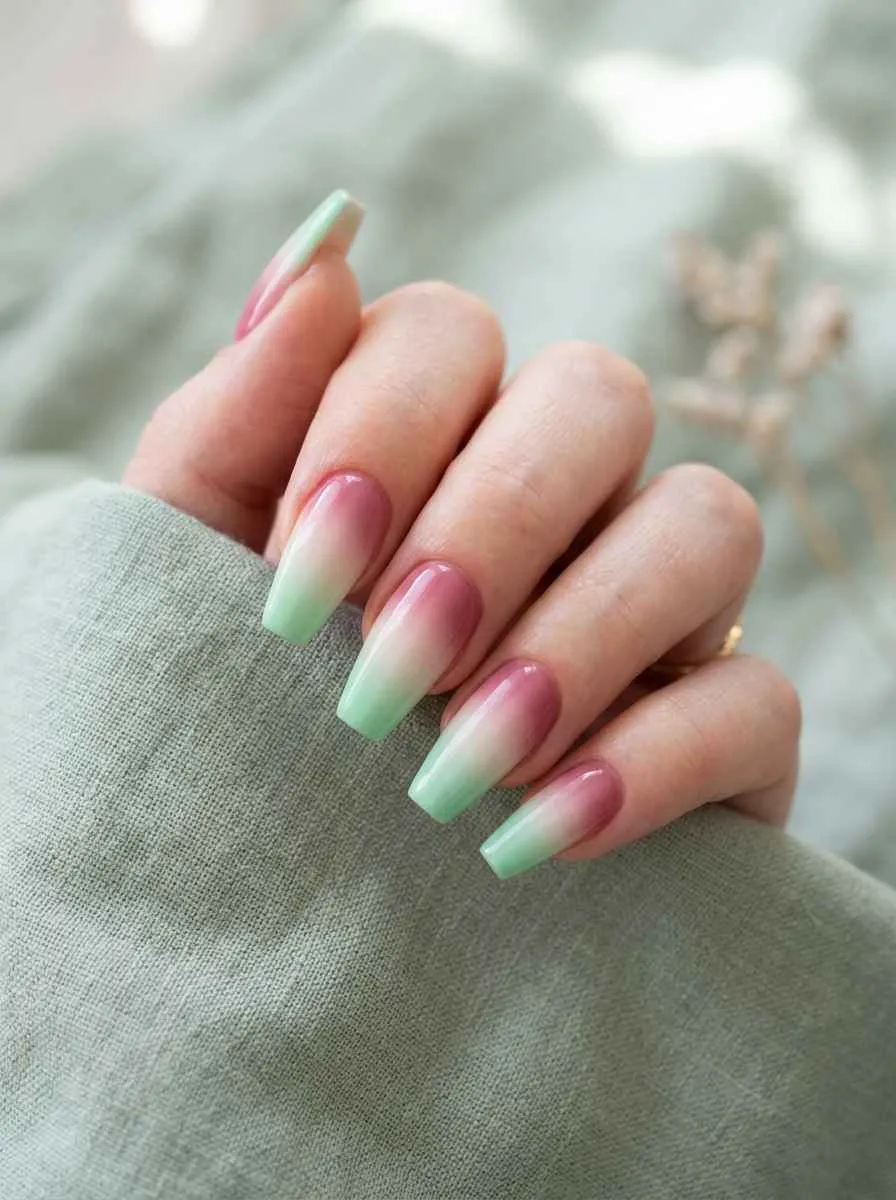
Adding white to the middle of a pink and green ombre creates a lighter, airier feel than a two-tone approach.
The three zones are: pink at the cuticle, white in the center, green at the tip. The white acts as a natural bridge between the two colors, making the transition feel smoother and more sophisticated.
This is also a more forgiving technique for ombre beginners because you have an extra zone to work with. If the pink-to-white blend is not perfect, the eye tends to forgive it because white naturally softens transitions.
Use a slightly off-white or cream rather than stark white for the most natural-looking center zone. Pure white can look clinical.
Color ratios matter. Give the pink and green roughly equal space and let the white zone be the narrowest band. This keeps both colors present without either dominating.
This style reads as light and fresh. It suits spring particularly well but works in any season.
Medium coffin nails show the three zones most clearly because the tapered shape lets each color zone get a clear horizontal moment before narrowing toward the tip.
This is also a beautiful bridal or formal nail option for people who want something more interesting than a single color but not as loud as a bold two-tone ombre.
31. Pink and Green Ombre Nail Art Inspired by Aurora Borealis
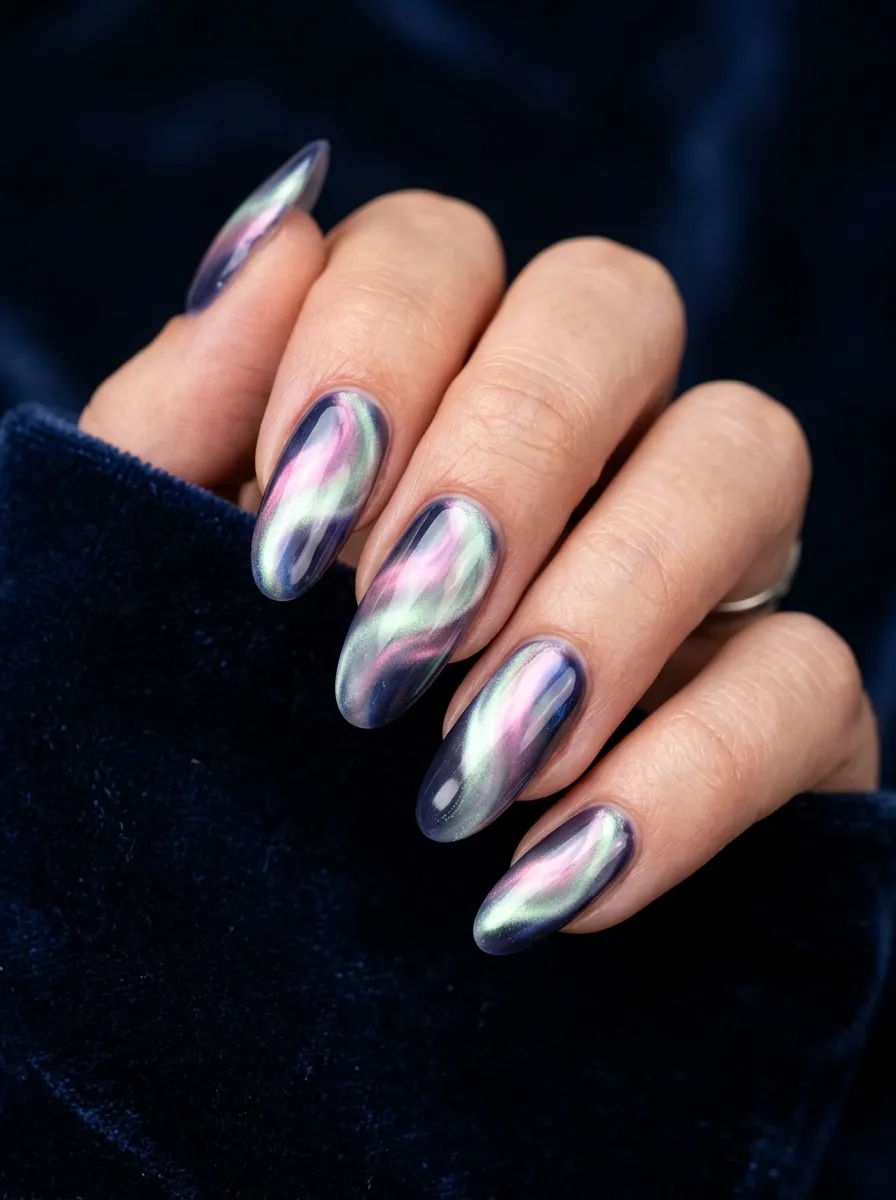
The Northern Lights are one of the most breathtaking natural light displays on earth, and they translate remarkably well into nail art.
This version uses a dark navy or black base with translucent, luminous layers of pink and green ombre applied over the top. The result looks like light itself is dancing across your nails.
The key ingredient is sheer, shimmer-rich polish. Look for polishes described as “jelly,” “translucent,” or “aurora.” These are polishes with heavy shimmer suspended in a clear or tinted base.
Apply the dark base first. Let it dry completely. Then sponge the pink and green shimmers over the top in loose, diagonal bands that mimic the flowing movement of actual Northern Lights.
Do not cover the dark base entirely. Leave some dark showing through. The interplay between the dark base and the glowing ombre creates the aurora depth effect.
This is a stunning winter nail style. It suits December through February particularly well when the actual auroras are most active in the real world.
Pair with deep, jewel-tone fashion. Navy, deep purple, forest green, and black clothing all complement this nail story without competing with it.
Conclusion
Pink and green ombre nails offer a color story that works for every mood, every season, and every budget. From soft pastels that barely whisper to bold neons that practically shout, this combination has a version for everyone. Whether you are reaching for press-ons in a hurry, experimenting with a makeup sponge on a Sunday afternoon, or sitting in your favorite salon chair asking for something different, the options here give you a clear starting point. The most important thing is picking the version that actually excites you and going for it. Nails grow out. Polish chips. Nothing about this is permanent, which means every few weeks you get a completely fresh start. Choose a look from this list, gather your supplies, and paint something you are genuinely proud to wear.