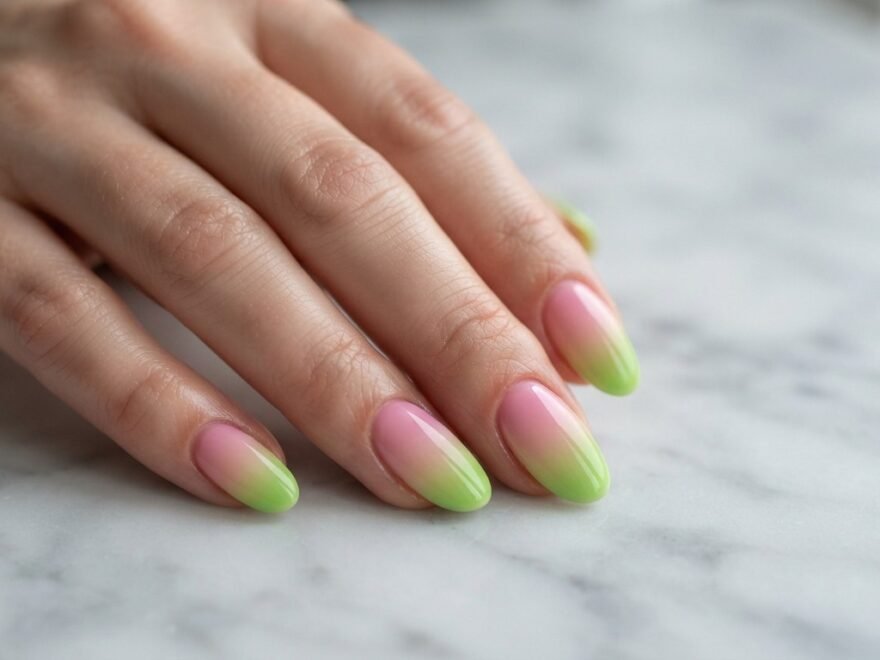
1. Soft Rose to Sage Ombre
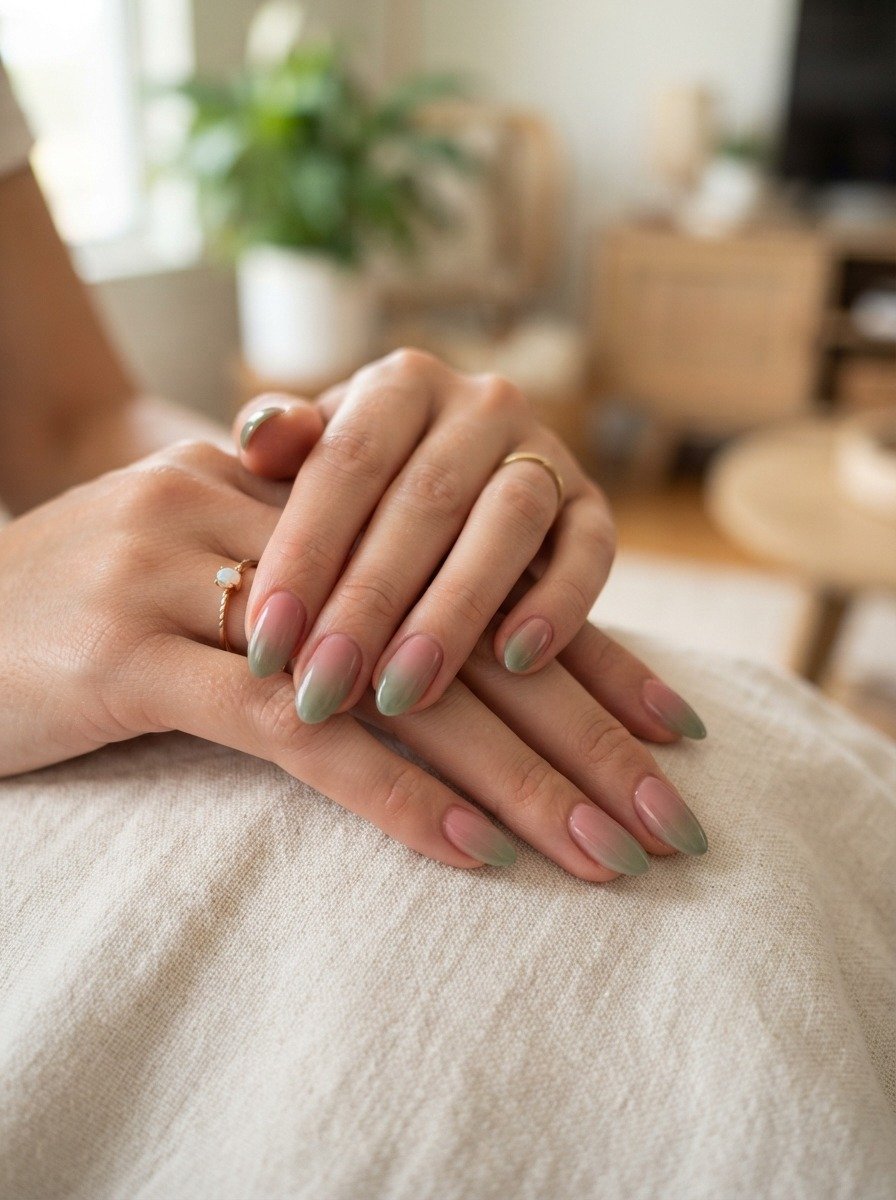
This combination is the definition of understated beauty. Dusty rose and sage green are both muted, earthy tones that sit right next to each other on the color wheel in terms of mood.
The result is a nail look that feels calming and grown-up without being boring. It works with neutral outfits, linen tones, and earthy accessories.
To DIY this at home, pick up a dusty rose and a sage green nail polish from any drugstore. Apply the pink as your base, then use a makeup sponge to dab the sage green onto the tip area. Blend where the two colors meet by tapping lightly with the sponge.
Seal it all with a top coat to smooth out any texture from the sponge. The sponge method is the secret weapon here. It creates a soft, diffused fade that a brush cannot replicate.
This look suits short and medium nail lengths equally well. Oval and almond shapes show off the gradient the best. If your first attempt is not perfect, that is fine. A little unevenness actually gives it more of a hand-painted, artistic feel that looks intentional.
2. Hot Pink to Neon Lime Ombre
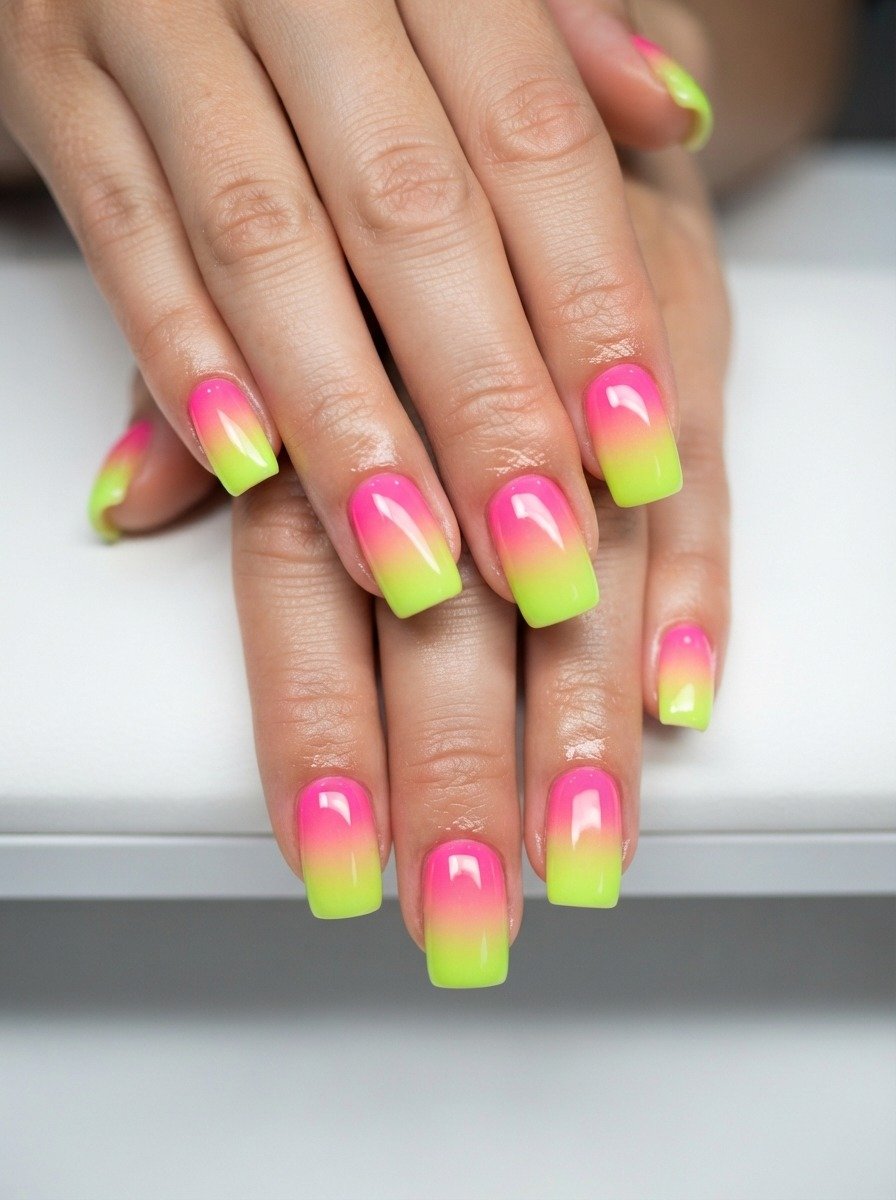
If you want something that stops people in their tracks, this is the combination for you. Hot pink and neon lime together are loud, fearless, and absolutely fun.
This pairing works incredibly well for summer festivals, beach trips, or any event where you want your nails to do the talking. The two colors are both high energy, so the ombre between them feels electric.
Use neon polishes specifically for this look because regular bright pink and lime will not have the same impact. Neon formulas are designed to glow, especially in daylight and under UV lighting.
Apply the neon pink as your full base coat. Once it dries, use a sponge to layer the neon lime starting from the tip, blending down about one third of the nail. The transition zone will naturally mix into a yellow-green, which adds a cool middle color effect.
Finish with a gel-like high-gloss top coat. This type of top coat intensifies neon colors and makes them look almost lit from within. Clean up any skin around the nail with a small brush dipped in acetone. This look is bold and is meant to be worn with confidence.
3. Pastel Pink to Mint Ombre
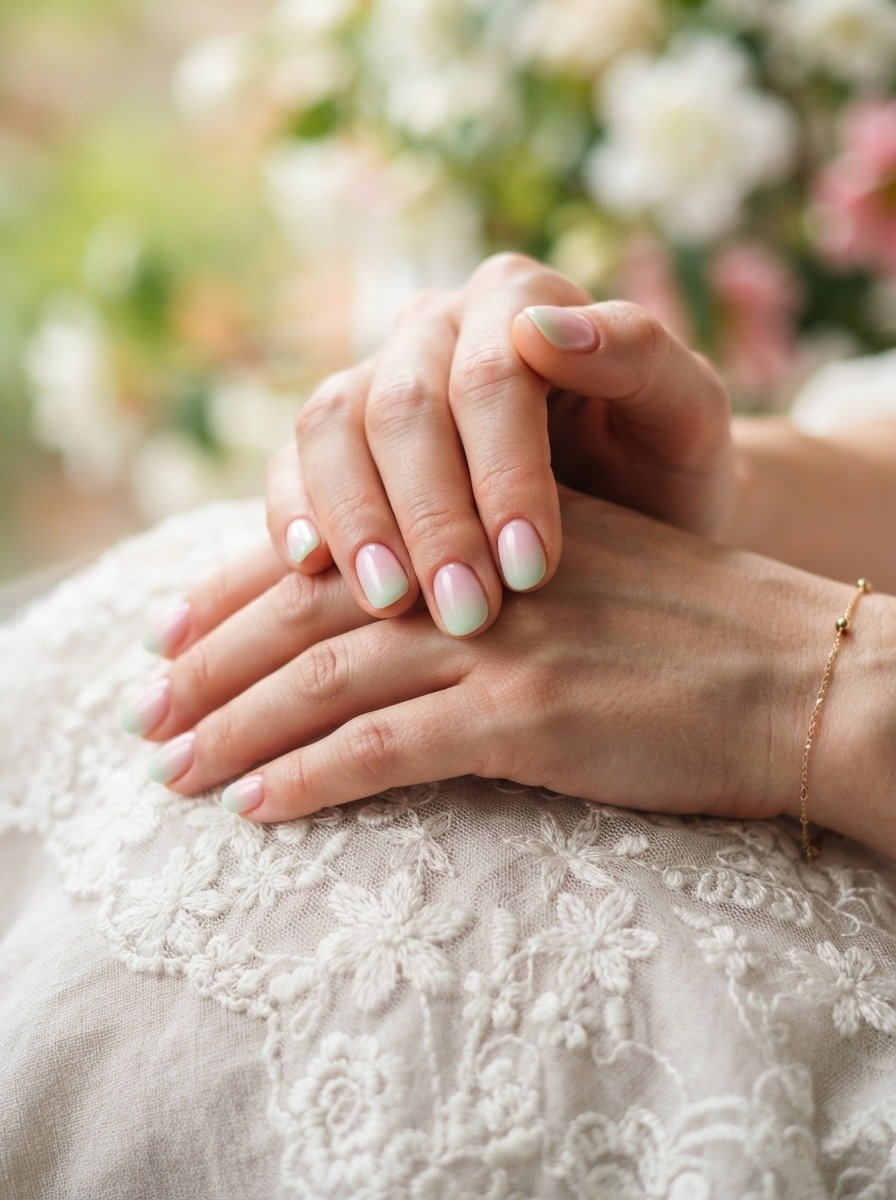
Pastel pink and mint is the nail combination that Easter dreams are made of. It is soft, sweet, and completely approachable for people who prefer gentle colors over bold ones.
This look suits every nail length and shape. It is especially charming on shorter nails because the pale tones make small nails look clean and polished.
The key to this ombre is keeping both shades very light. If either color is too saturated, the blending will not look as smooth. Look for a sheer or milky baby pink and a pale, cool-toned mint.
Apply the pink base first and let it dry fully. Then use a sponge to dab mint onto the tips, keeping the application very light. Build the color slowly with multiple thin layers rather than one heavy one. The lighter you go, the more seamless the fade.
A matte top coat gives this look a soft, frosted feel that leans romantic. A glossy top coat keeps it classic and fresh. Either way, it photographs beautifully and lasts well with a proper base coat underneath.
This is a great starter ombre for beginners because the pale shades are forgiving and easy to work with.
4. Bubblegum Pink to Forest Green Tips
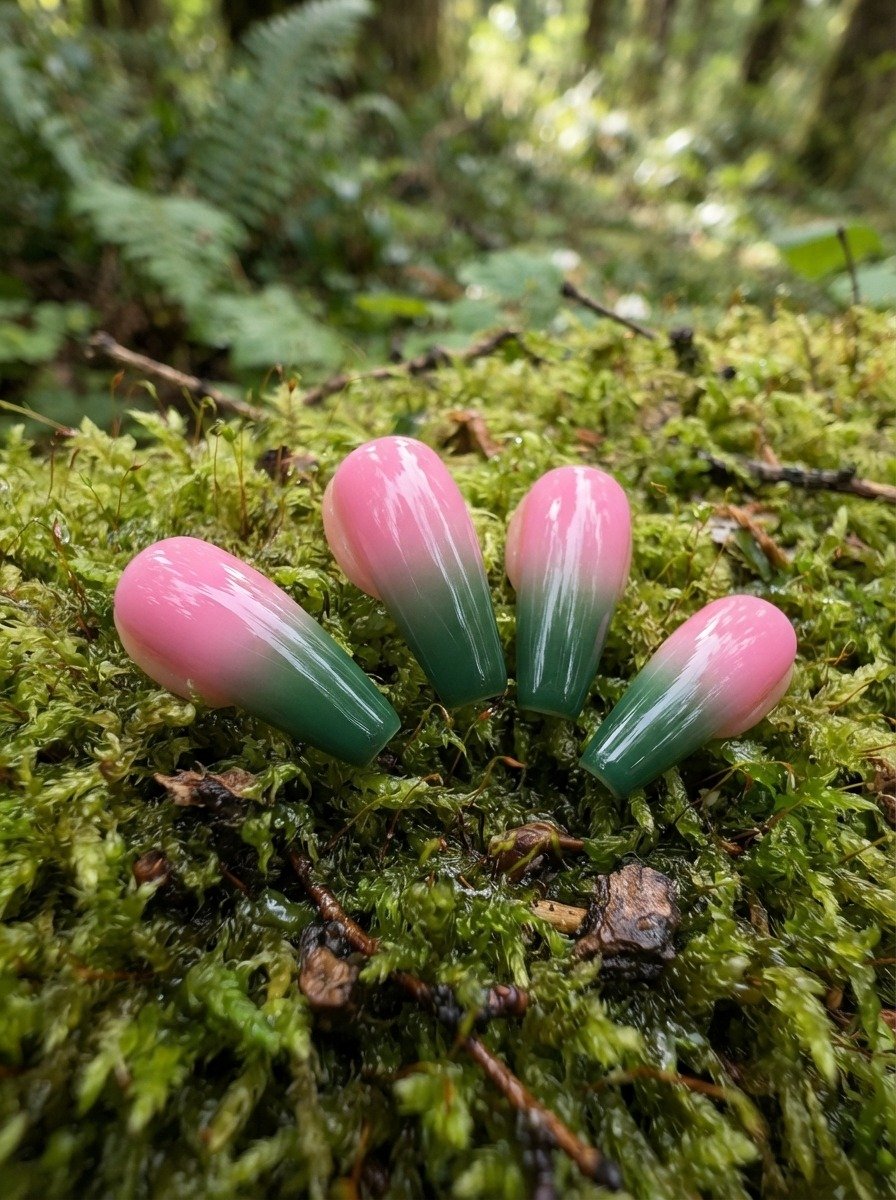
Bubblegum pink paired with deep forest green is a high-contrast ombre that plays with color in a really interesting way. The brightness of the pink against the depth of the forest green creates a look that is both playful and rich.
This combination has a botanical, garden-inspired feel. It is perfect for spring or fall when you want something that references nature without going fully neutral.
Coffin and stiletto nail shapes work especially well here because the elongated tips give the forest green room to develop its depth before the nail ends.
For the DIY version, start with two to three coats of bubblegum pink all over. Then mix a tiny bit of black into your forest green to deepen it even further. Sponge this deepened green onto the upper half of the nail and focus intensity at the very tip.
The middle zone will show an interesting olive or deep teal, which adds a natural complexity to the gradient. Seal with a glossy top coat to bring out the richness of the forest green.
This look pairs beautifully with gold jewelry. Even simple gold rings or bracelets warm up the cool forest green and complement the cheerful pink.
5. Dusty Pink to Olive Green Ombre
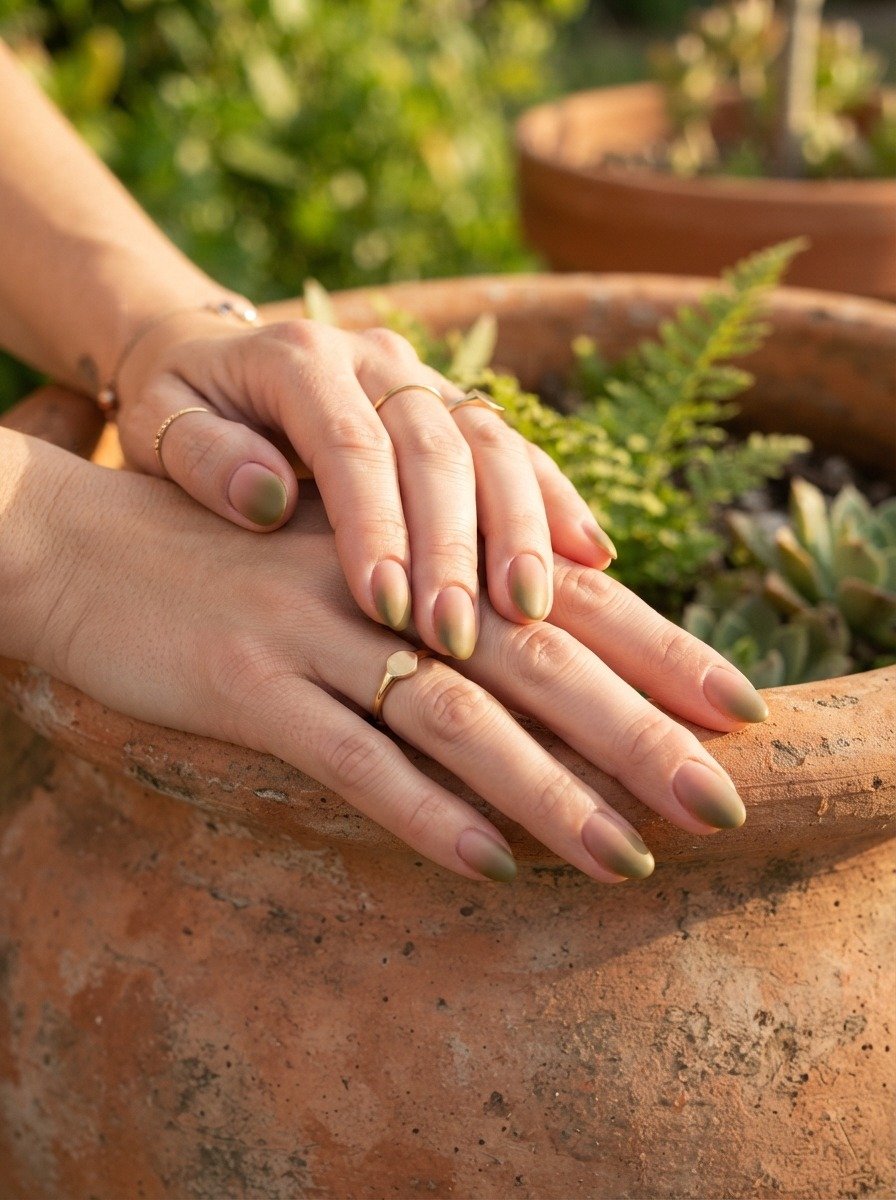
Dusty pink and olive green are two of the most wearable nail colors individually, and together they make a surprisingly rich ombre. This combination has a very earthy, organic quality that feels grounded and modern.
This works well for people who love neutral-adjacent tones but want a little more personality in their nails. The dusty quality of both shades keeps the look cohesive.
Olive green is a warm-toned green, so it naturally harmonizes with the warm, slightly brown undertones in dusty pink. The ombre between them can produce a beautiful warm peach-green in the middle zone.
Apply dusty pink as the base and let it dry fully. Using a sponge, start applying olive green from the midpoint of the nail upward. Focus the deepest color at the tip. Build gradually and wipe off excess polish from the sponge before each dab.
This look is stunning with a matte finish. Matte top coats make both dusty pink and olive green look incredibly chic and modern. The colors almost look like suede under a matte finish.
Wear this with your everyday outfits. It is polished enough for work and interesting enough for a night out. A very wearable, low-maintenance look that still gets compliments.
6. Magenta to Emerald Ombre
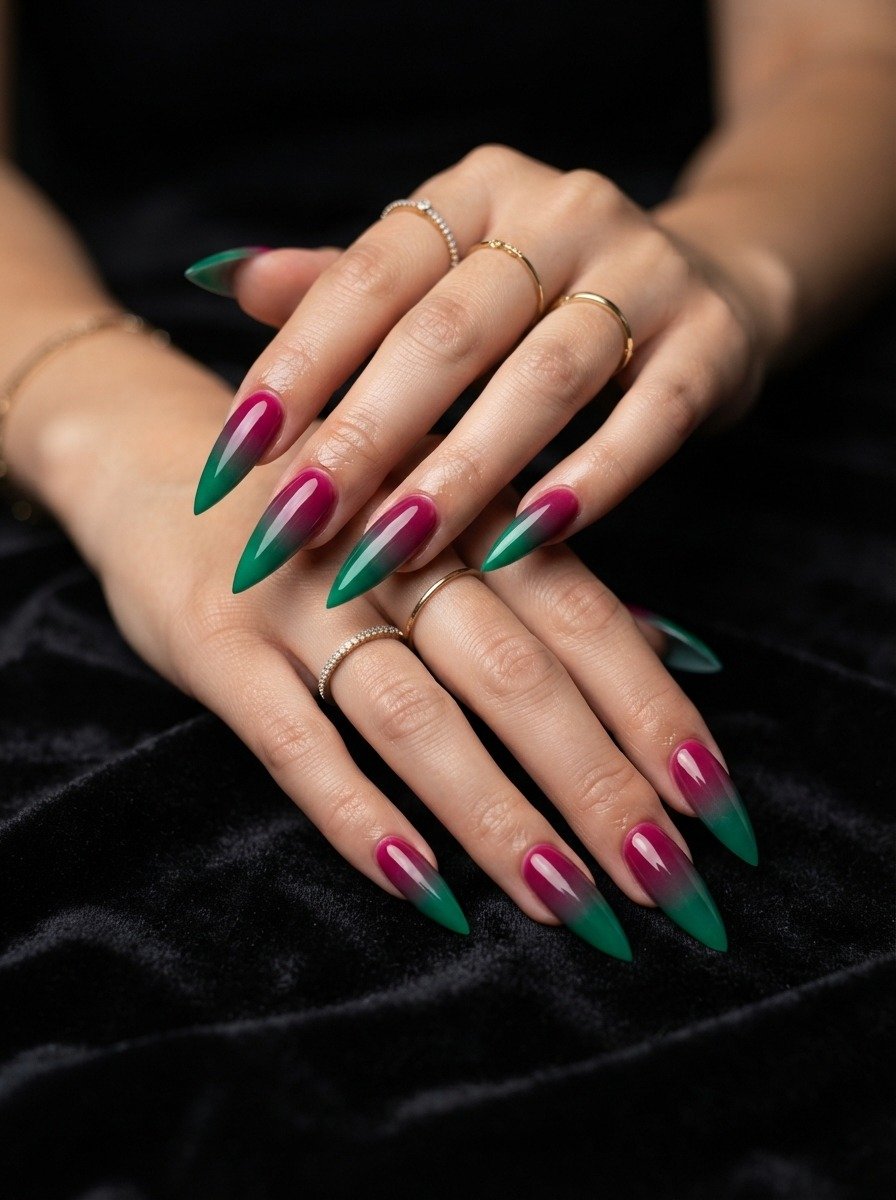
Magenta and emerald together are absolutely jewel-toned perfection. These two colors are rich, saturated, and deeply glamorous when placed next to each other.
This ombre works best on longer nails because both colors need space to breathe and develop. Stiletto and coffin shapes look especially dramatic with this combination.
This is a statement nail look meant for events, celebrations, or any time you want your manicure to feel luxurious. It reads as high-fashion without requiring a salon visit.
For the DIY version, apply two to three coats of magenta as the base and allow complete drying time between layers. The emerald green needs to be very saturated to hold its own against the deep magenta, so look for a jewel-toned formula.
Sponge the emerald starting at the tip and work it down about one third of the nail. The middle area will produce a deep berry-green or dark teal, which is one of the coolest byproducts of this combination.
A high-gloss or gel-effect top coat is the right finish here. It makes the jewel tones look like they are lit from within and gives the nails a professional, salon-quality appearance. Pair with gold jewelry for maximum impact.
7. Light Pink to Seafoam Green Ombre
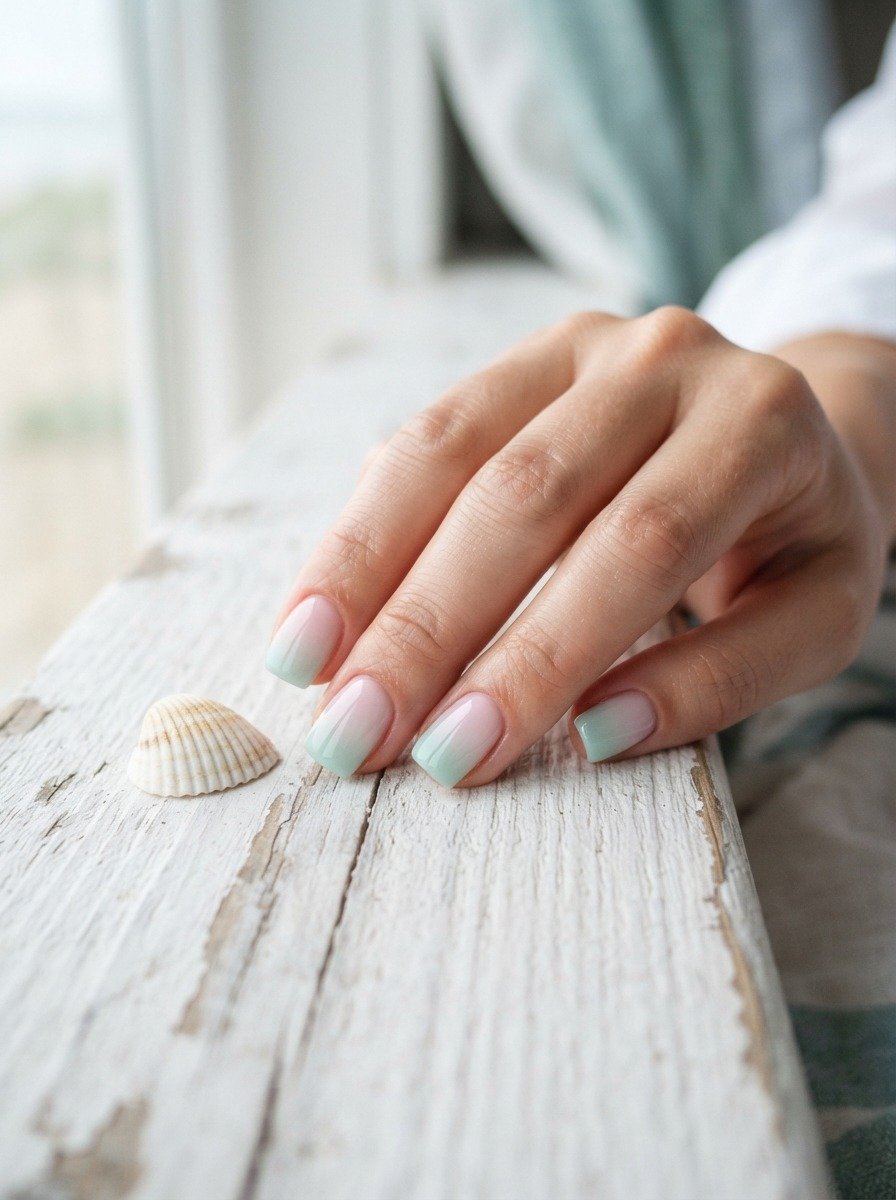
This combination instantly makes you think of beach days and sea glass. Light pink and seafoam green together have a cool, breezy quality that feels relaxed and carefree.
It is one of the most popular picks for summer vacations and beach weddings because the colors echo the sand, the foam, and the sky all at once.
Short and square nails are a perfect canvas for this ombre. The clean edge of a square shape frames the soft gradient in a really satisfying way.
Apply light pink as your base. You want a sheer, slightly cooled pink rather than a warm or peachy one. The seafoam green should be similarly light and airy, with a hint of blue or grey in it.
Use the sponge method for the gradient and aim for a very soft, barely-there fade. This is not a high-contrast ombre. The beauty of this look is how gently one color melts into the other.
A sheer, glossy top coat finishes the look perfectly and gives it a clean, glass-like surface. This is a great look for people who like their nails to be beautiful without being loud.
8. Coral Pink to Bright Green Ombre
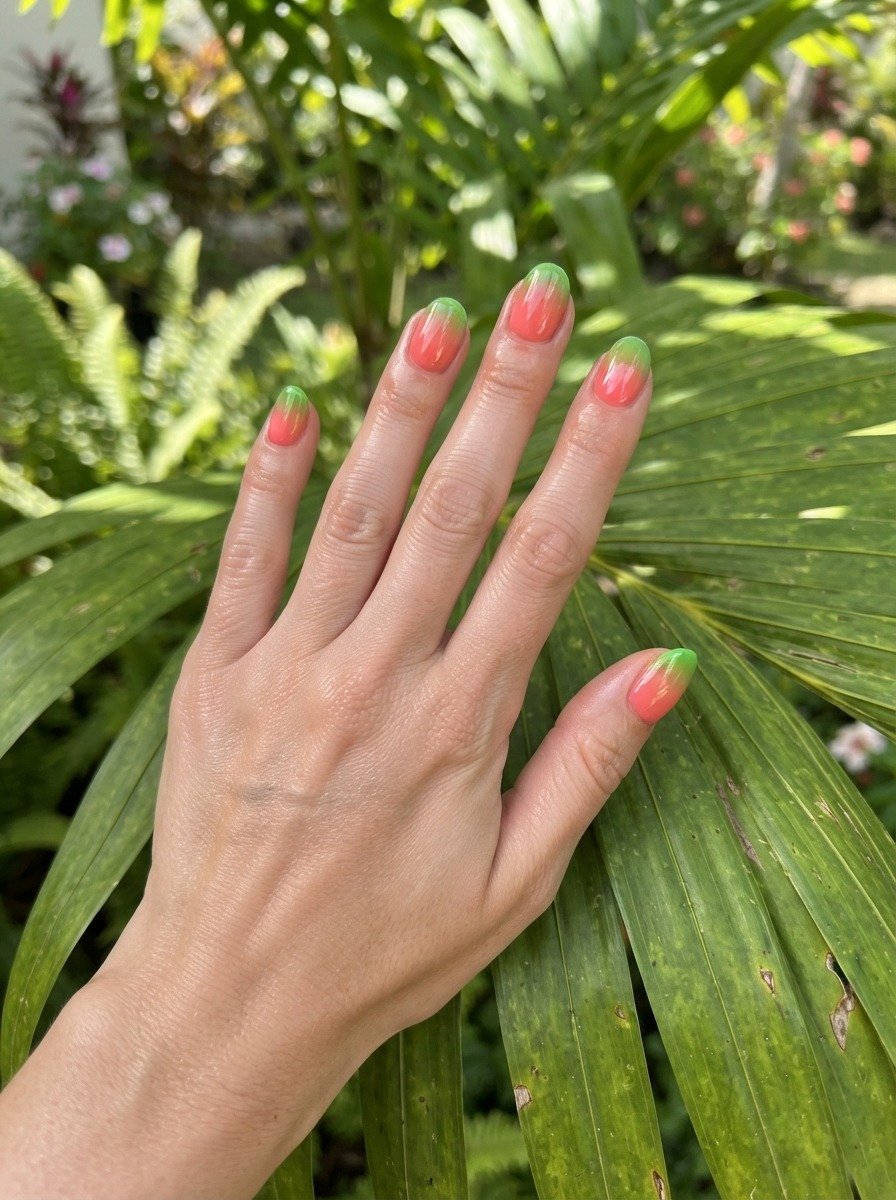
Coral pink and bright green is the nail look that says summer loud and clear. Coral has warm, orange undertones that pair beautifully with a vivid, warm-toned green.
The combination feels tropical and joyful. It looks like something you would find at a colorful resort shop or on a travel influencer’s feed.
The warmth in coral is the secret ingredient here. Unlike a cool-toned pink, coral brings out the warmth in green and creates an ombre that feels unified rather than contrasting.
Start with two coats of coral polish as the base. A good coral should have equal parts pink, orange, and warmth. Apply bright green to the tips using a sponge, and the warm zone between them will produce a beautiful golden-green or warm yellow-green.
This middle-transition color is one of the highlights of this combination. It adds depth and complexity without you having to do any extra work. It just happens naturally when the two warm colors meet.
Finish with a glossy top coat and clean up the edges. Wear this with bright summer outfits, white linen, or tropical prints. It is a cheerful, holiday-ready look that requires minimal effort but delivers maximum color payoff.
9. Blush Pink to Pistachio Ombre
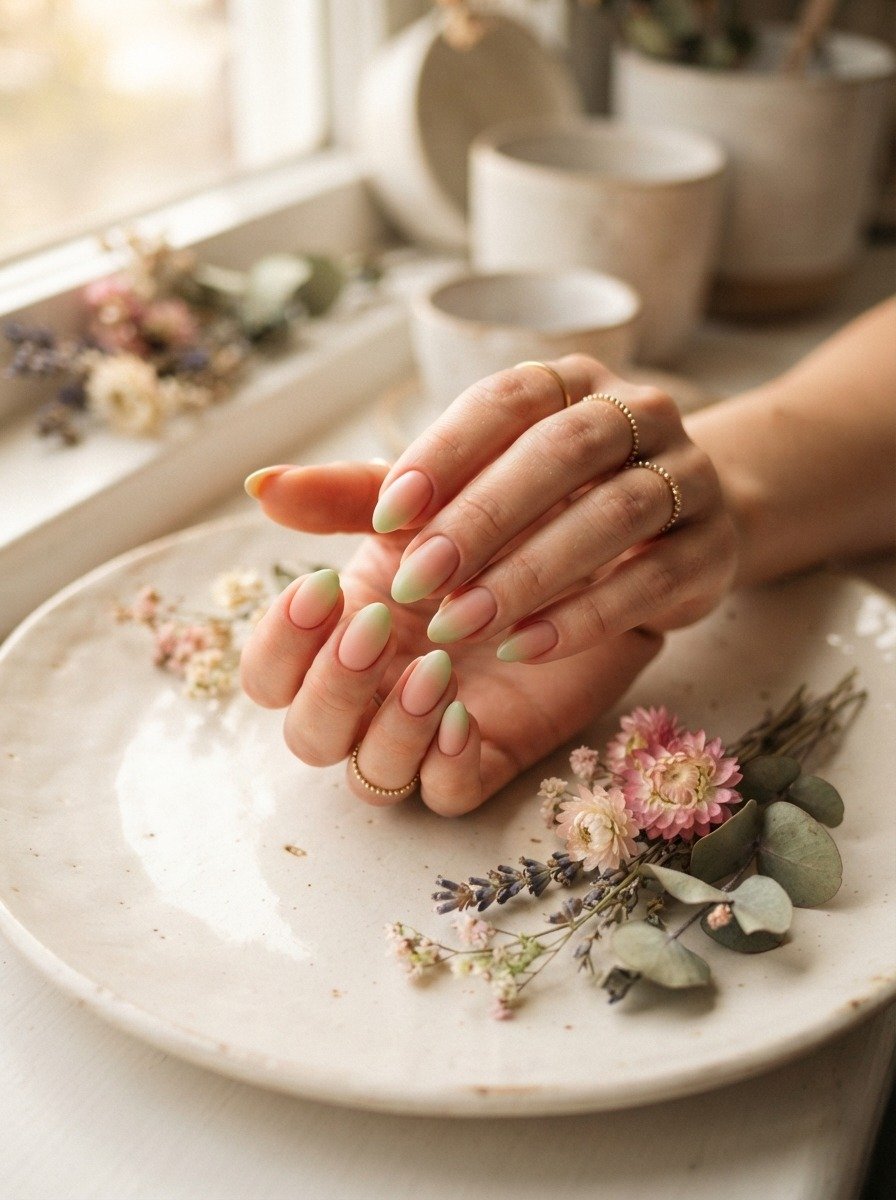
Blush and pistachio is arguably one of the most beautiful color pairings on this entire list. Both shades are soft, warm, and just slightly muted, making the ombre between them incredibly smooth.
This look suits virtually every skin tone beautifully. The warmth in blush complements deeper skin tones just as well as it does lighter ones, and pistachio adds a brightness that keeps everything looking fresh.
Almond-shaped nails really show off this ombre best because the curved tip helps the soft colors read as romantic and feminine.
For the DIY version, apply a warm blush as your base. Blush should be slightly peachy or nude-leaning rather than a bright pink. Apply pistachio with a sponge from the tip down, building slowly. Pistachio is naturally light, so you may need three or four sponge applications to get a good color payoff.
Finish with a milky, semi-matte top coat for a dreamy, editorial-style finish. This is one of those nail looks that photographs beautifully and gets a lot of compliments without being in-your-face about it.
Great for bridal events, brunches, and spring occasions where you want to look effortlessly put-together.
10. Fuchsia to Lime Green Ombre
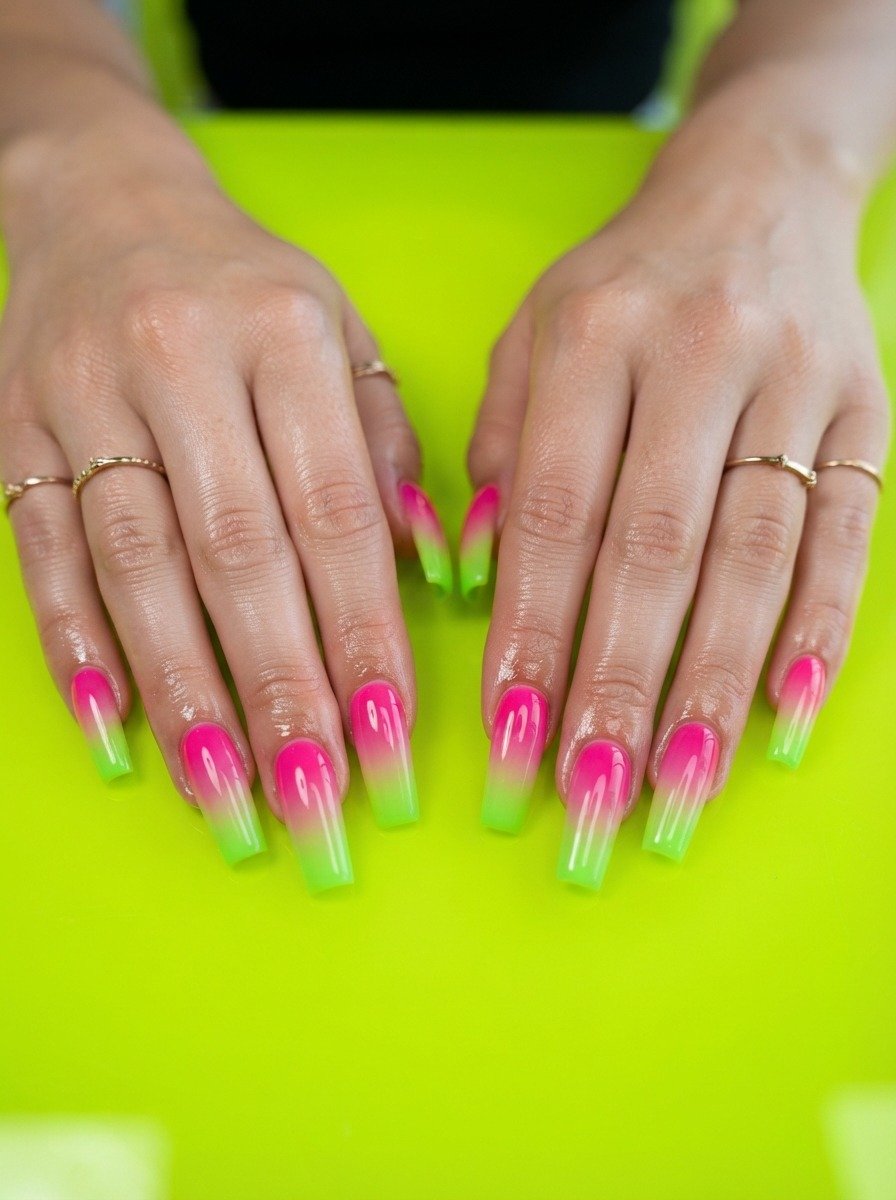
Fuchsia and lime green is pure Y2K energy and it is absolutely back in fashion. This combination is not shy. It is loud, fun, and completely unapologetic about being colorful.
If you love bold nails and want something that reads trendy and current, this is it. The combination has been showing up on runways, nail feeds, and festival looks consistently.
Fuchsia is a blue-toned pink, which gives it an interesting contrast when placed against warm lime green. The middle zone of this ombre can sometimes produce a soft lavender-green, which is an unexpected but gorgeous detail.
Apply two coats of fuchsia as the base and let it dry completely. Use a sponge to apply lime green from the tip, pressing firmly and building up in thin layers. The more layers you add, the more opaque the lime green becomes.
For the most vivid result, apply a white base coat under the lime green area before applying the green. White underneath any light or neon color makes it pop significantly more.
A chrome or gel-finish top coat will take this look into full statement territory. Pair with minimal jewelry to let the nails be the main attraction.
11. Mauve Pink to Sage Ombre With Gold Foil
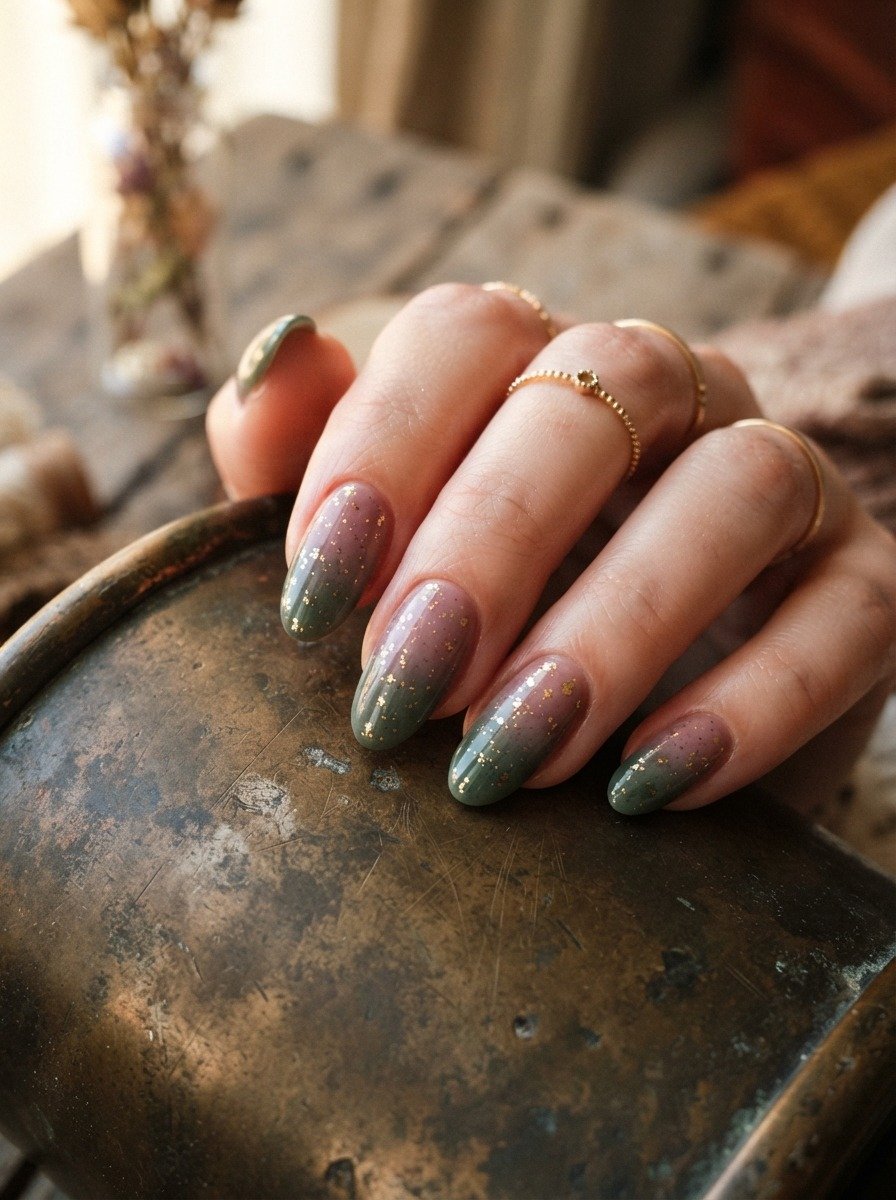
Adding gold foil to a mauve-to-sage ombre takes the look from simple to truly special. The foil catches light and adds a luxurious texture that elevates the entire manicure without changing the color palette.
Mauve and sage are both moody, sophisticated tones that work particularly well in fall and winter. The gold foil adds warmth and makes the combination feel festive without being over the top.
Gold foil is available at any beauty supply store for just a few dollars, and applying it is simpler than it looks. You press small pieces of foil onto the nail while the top coat is still tacky, then seal with another layer once the foil is in place.
Do the ombre gradient first as your base. Apply mauve all over and sponge sage green from the tip. Let it dry, then apply a thin layer of top coat. While it is still slightly tacky, tear off tiny, irregular pieces of gold foil and press them onto the nail with a dotting tool or toothpick.
Seal with a final top coat and smooth everything down. The result is a nail look that looks like it came from an expensive salon. The combination of muted tones and glinting gold is endlessly photogenic.
12. Pink to Green Ombre With White Marble Accent
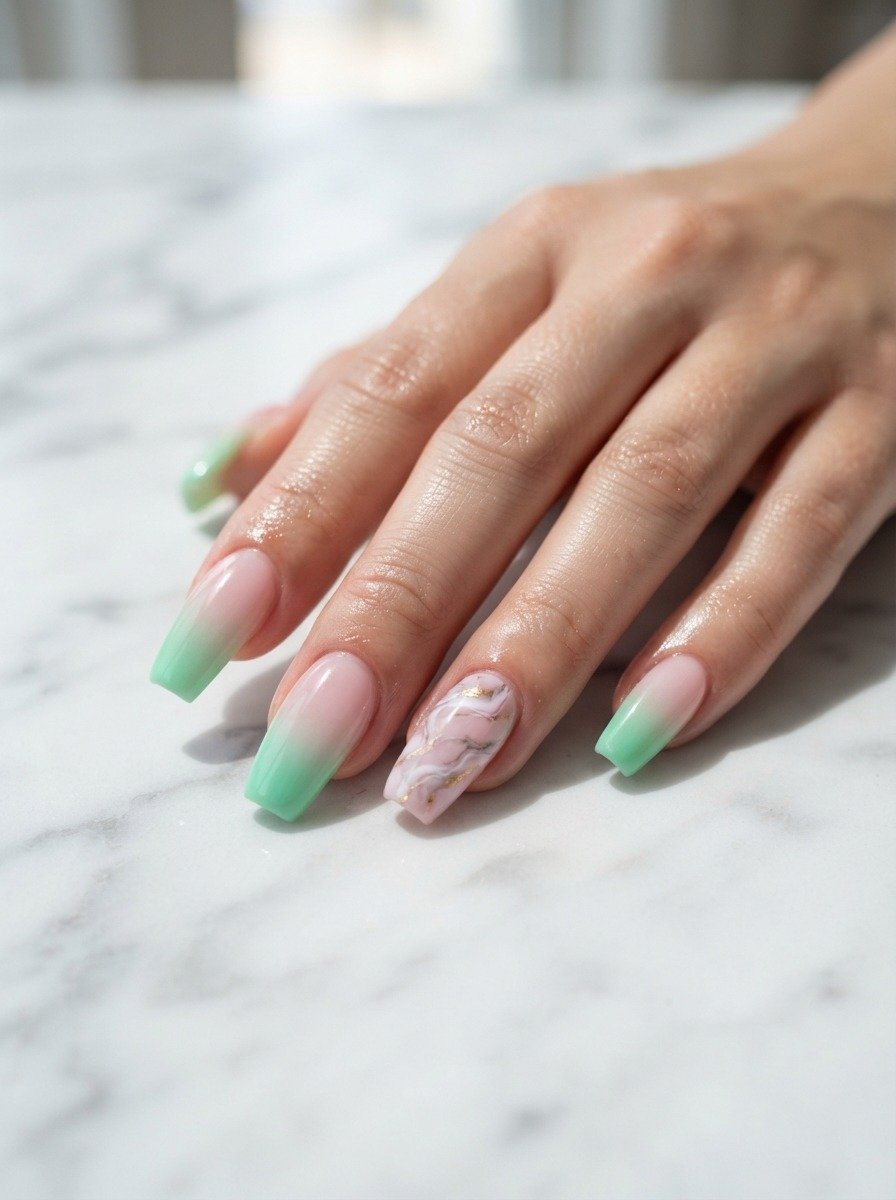
Mixing an ombre nail with a marble accent nail is a smart way to add visual interest to a set without doing too much on every single finger. The marble nail becomes the focal point while the ombre nails frame it beautifully.
This approach is also great if full ombre on all ten nails feels like too much. One marble accent nail on each hand balances the look.
For the marble nail, use a thin nail art brush or a toothpick dipped in white polish. On a pink or light green base, drag thin, irregular lines across the nail in different directions. Add a few grey lines on top of the white for more realism.
The lines should not be perfectly straight. Real marble has organic, meandering patterns that curve and branch. Work quickly before the base dries so the lines drag slightly and feather at the edges.
Seal with a glossy top coat, which gives marble patterns their characteristic smooth, stone-like finish. The contrast between the hand-painted marble and the gradient ombre nails makes the whole set look thoughtfully designed.
This combination works beautifully for special occasions, weddings, and any time you want a set that goes slightly beyond the ordinary.
13. Baby Pink to Mint With Glitter Tips
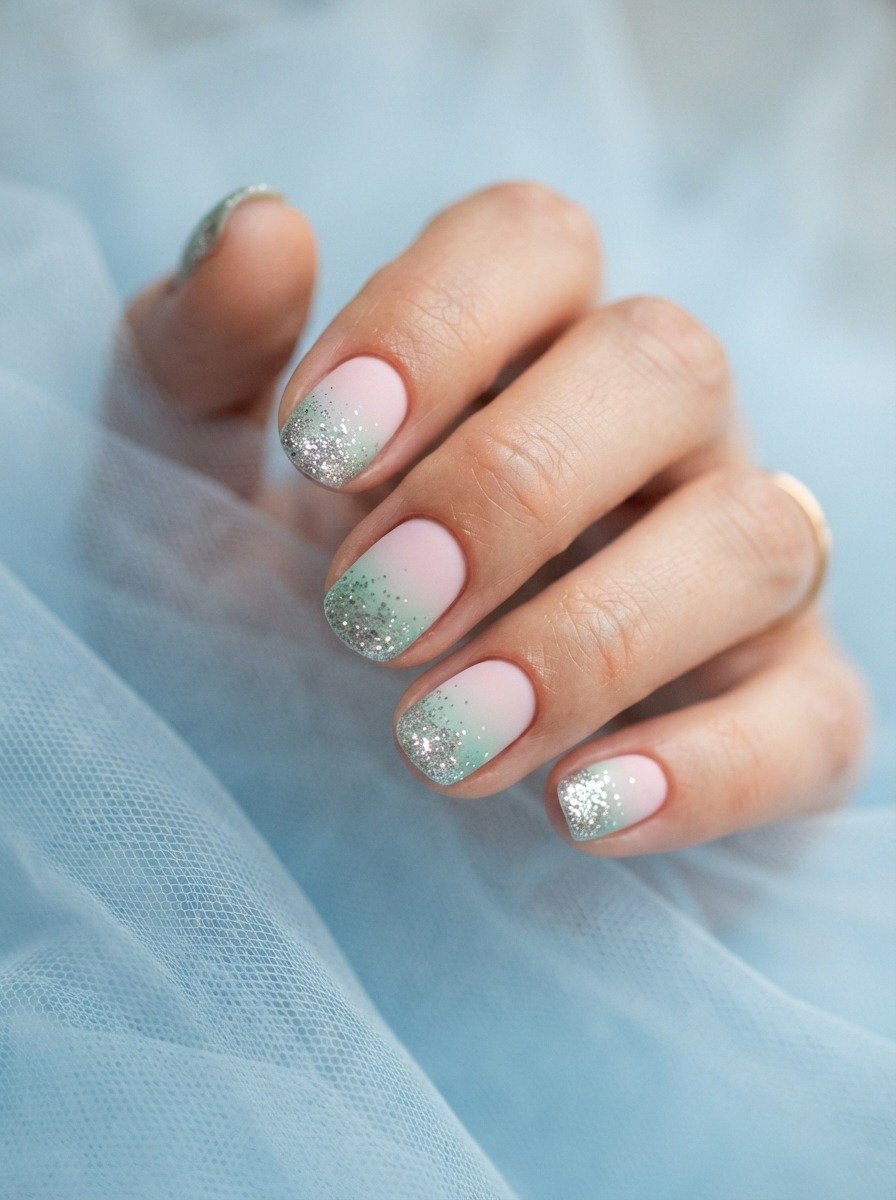
Glitter tips on a pastel ombre is one of those ideas that sounds simple but looks completely magical in person. The sparkle at the tip draws the eye and makes the whole gradient pop.
This look is perfect for the holiday season, New Year’s, or any event where a little glimmer is appropriate. It is also sweet and soft enough for everyday wear if you love a bit of shine.
Ultra-fine glitter polishes work better than chunky glitter here because they layer more smoothly and create a more refined, glittery edge rather than a clumpy one.
Do your baby pink to mint ombre first and let it dry fully. Then apply a fine glitter polish just to the very tip of each nail, about two to three millimeters from the edge. Keep the glitter placement precise and clean for the neatest result.
Build the glitter in two or three thin layers. Each layer adds more density and sparkle. Seal everything with a thick layer of glossy top coat to smooth the texture of the glitter and prevent peeling.
This is a three-step DIY that takes about 30 to 40 minutes at home. The results look far more complex and expensive than the effort required.
14. Hot Pink to Dark Green Ombre With Negative Space
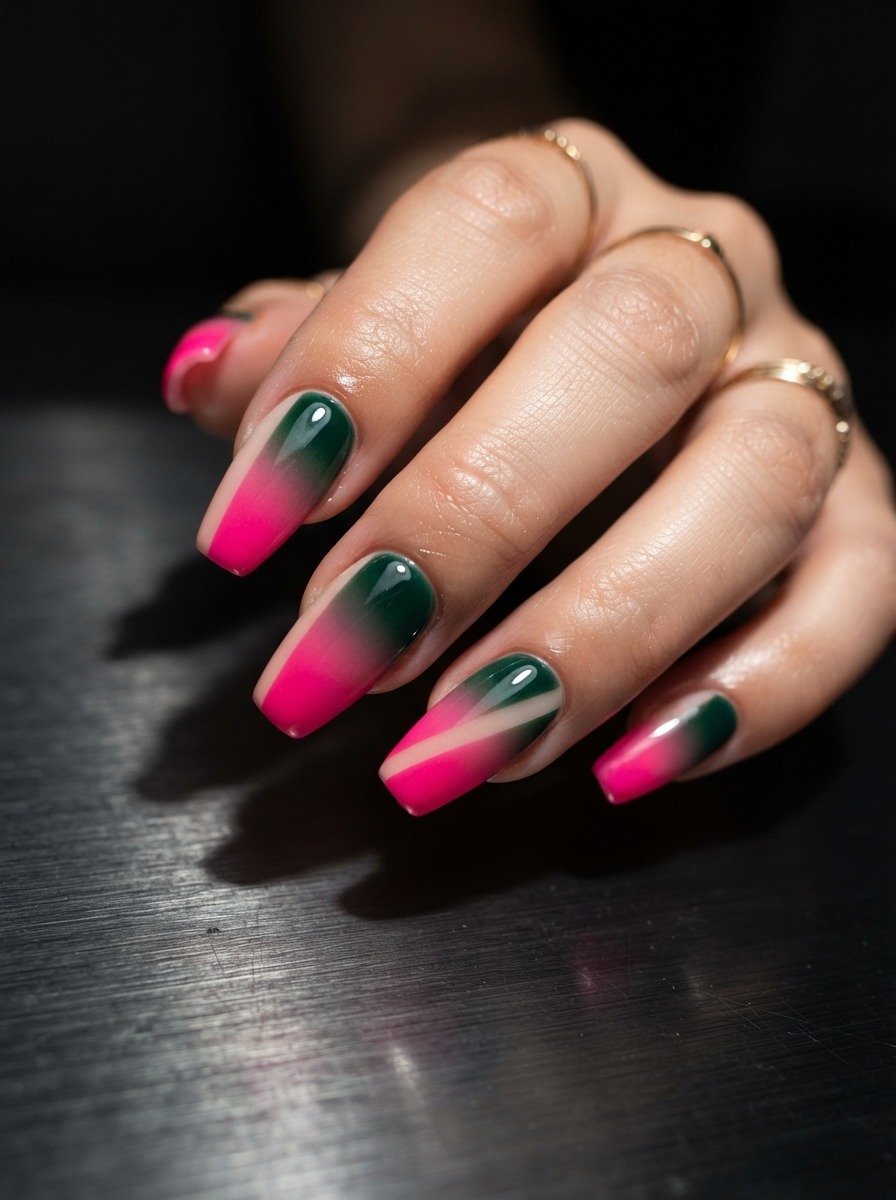
Negative space nails are one of the more adventurous nail art techniques, but the results look incredibly modern and artistic. Combining negative space with a pink to green ombre gives you something truly original.
The unpainted strip lets your natural nail show through, creating a graphic contrast against the bold gradient colors. It looks like a design choice from a fashion-forward nail studio.
The easiest way to create clean negative space is to use striping tape before you begin the ombre. Lay a strip of tape along the side or across the base of your nail, press it down firmly, and do your ombre over the rest of the nail.
Once the polish dries, peel the tape away slowly and carefully to reveal the clean unpainted line underneath. The edge will be perfectly sharp because the tape acted as a barrier.
Seal with top coat but try to avoid flooding the negative space with the top coat brush. Just seal the polished areas and leave the bare nail strip as clean as possible.
This look works best on medium or longer nails where there is enough canvas to appreciate the design. It is one of those nail art techniques that seems hard but is actually very accessible with a little tape.
15. Pastel Rainbow Ombre With Pink and Green Anchors
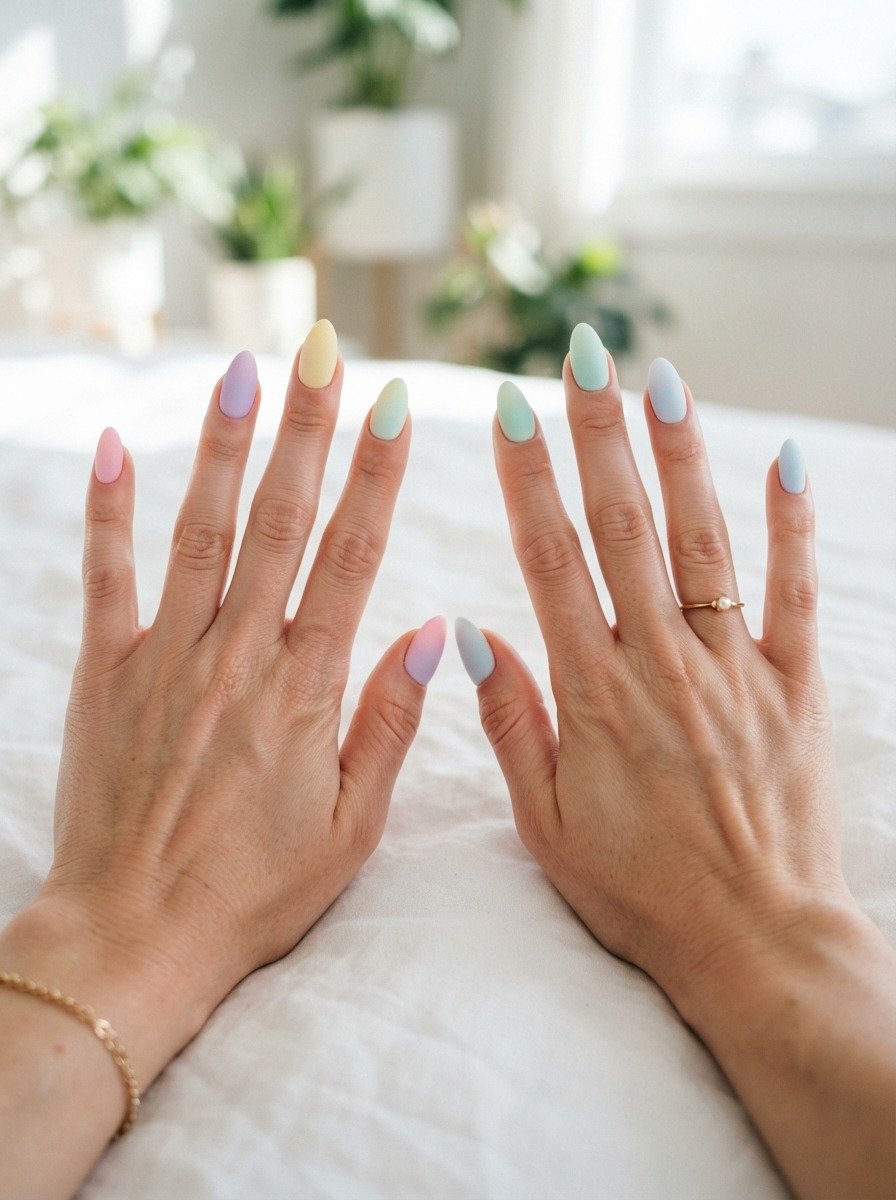
Instead of doing the full pink to green ombre on one nail, you can spread the gradient across all five fingers. Pink on the thumb, transitioning through lighter shades toward green on the pinky.
This is called a rainbow ombre or a color shift manicure, and it looks stunning because your whole hand becomes the canvas.
The trick here is choosing shades that sit harmoniously between pink and green. Think blush, lavender, soft yellow, pale mint, then green. Each nail gets a solid color and together they read as a flowing gradient.
Apply each nail with its designated solid color first. Let them all dry. Then you can add a subtle ombre effect within each individual nail using shades slightly lighter at the base to slightly deeper at the tip.
This level of detail is optional. Even solid colors on each nail following the pink to green sequence will look spectacular.
Finish with a matte or glossy top coat applied consistently across all nails for a unified look. This is a great weekend DIY project. It takes time but the result is genuinely show-stopping in a quiet, artistic way.
16. Chrome Pink to Holographic Green Ombre
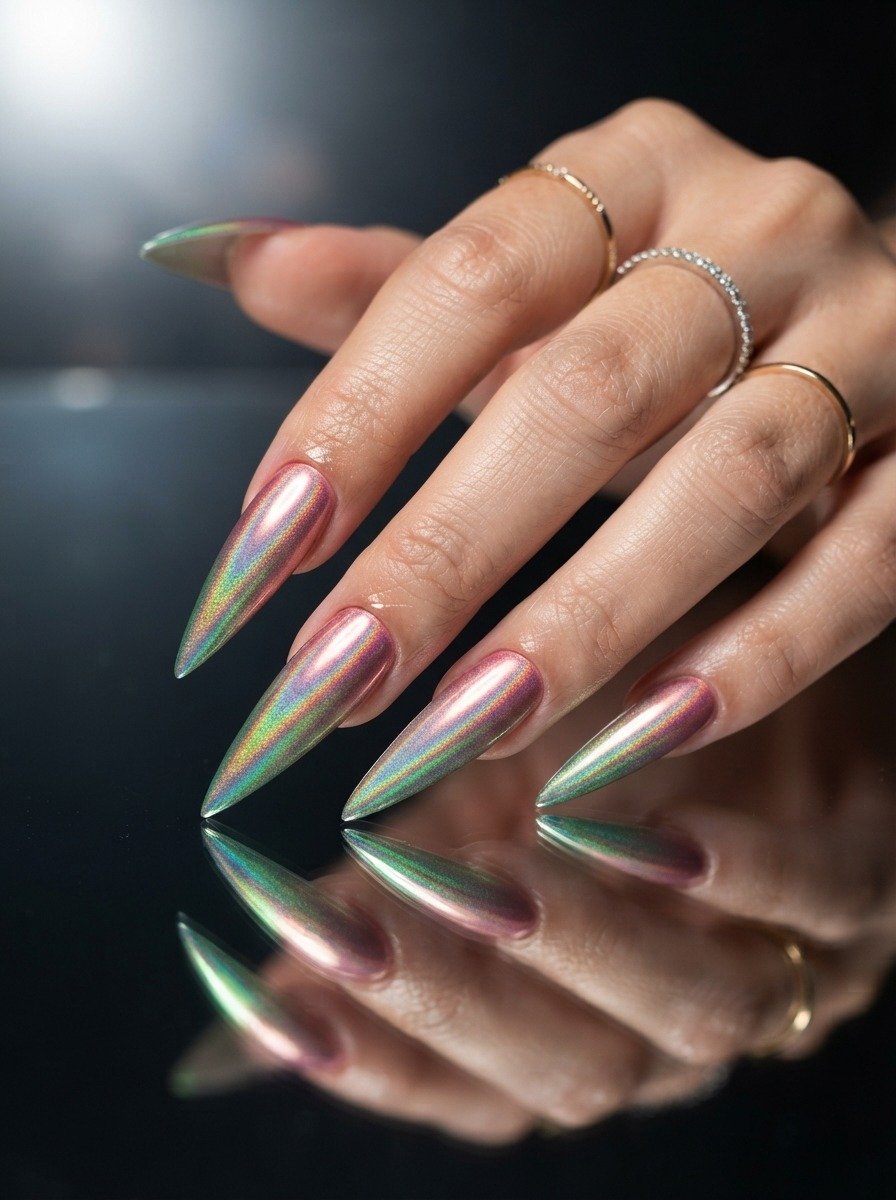
Chrome and holographic finishes take the pink to green ombre into full-on futuristic territory. This is a nail look made for people who want something that looks genuinely unlike anything else on the market.
Chrome powder is applied over a gel base, and holographic powders give that shifting, rainbow-in-the-light effect that everyone notices. The combination of the two in an ombre format is a next-level DIY project.
You will need a UV or LED lamp for this look since chrome powders require a gel base to adhere properly. If you already have a gel nail kit at home, this is a very accessible upgrade.
Apply rose gold gel polish as your base and cure it. Apply holographic gel polish from the tip and cure. Then apply a no-wipe gel top coat and cure. While still slightly tacky, use an eyeshadow brush to apply chrome powder from the base and holographic powder from the tip.
Buff gently in circular motions until the powders adhere. Seal with a final layer of top coat and cure again. The resulting finish looks like it belongs in a science fiction film and is absolutely spectacular in natural light.
17. Muted Rose to Earthy Green Ombre
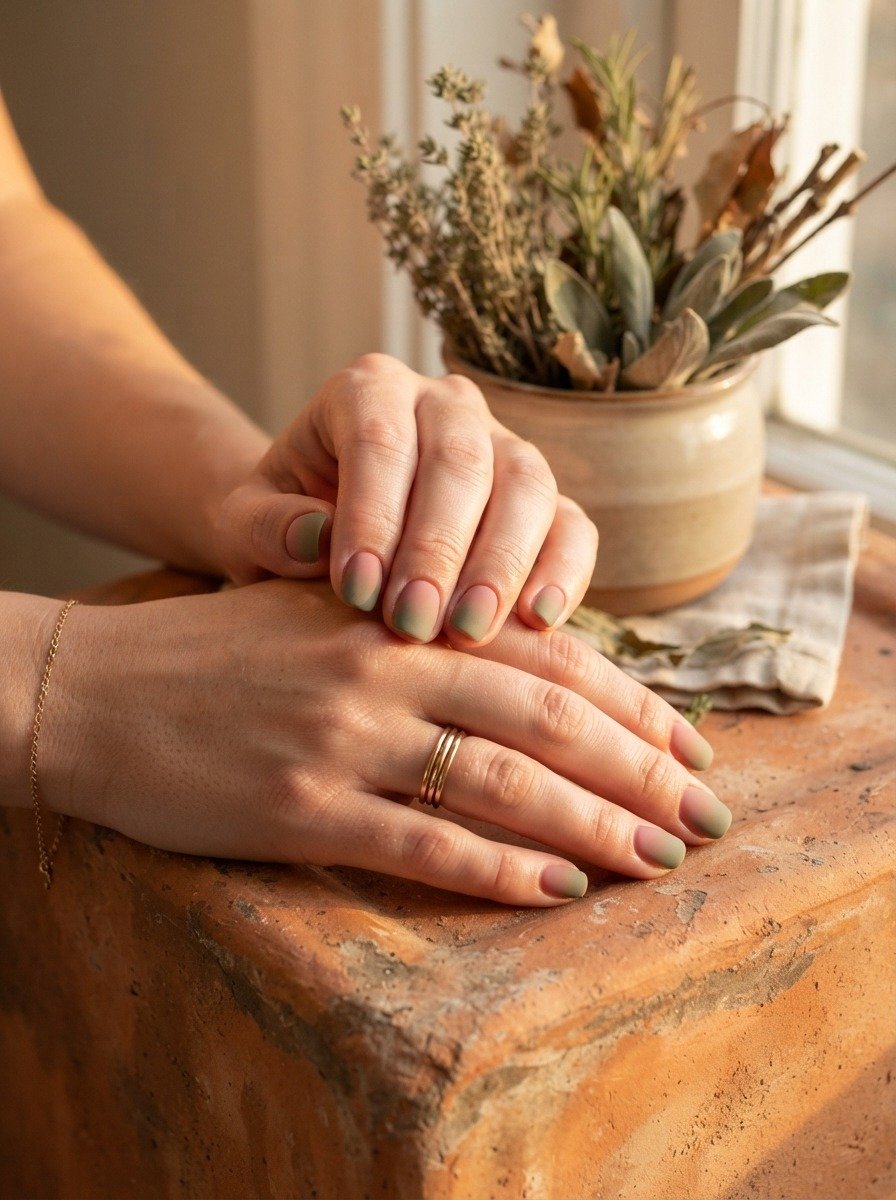
Sometimes the most beautiful nail looks are the quietest ones. Muted rose and earthy green together create an ombre that looks like it belongs in a ceramics studio or a farmhouse kitchen.
These tones are deeply wearable and work across all seasons. They do not scream for attention but they draw it in effortlessly because the color relationship is so interesting.
Muted shades require a matte or chalky finish to really show their best side. A glossy top coat can make muted tones look slightly cheap or washed out, so go matte here without hesitation.
Look for a rose polish that leans dusty or grey-pink rather than true pink. For the green, look for an olive or khaki-green that has some brown warmth to it. These are the kinds of shades that are increasingly common in indie nail polish brands.
Apply the muted rose base, then sponge the earthy green from the tip. The middle zone will produce a beautiful greyed-out terracotta or warm taupe, which is surprisingly gorgeous.
Matte top coat and clean up. This is the nail look for people who say they do not wear nail polish because it is too much. This is just the right amount.
18. Bright Pink to Tropical Green With Palm Leaf Accent
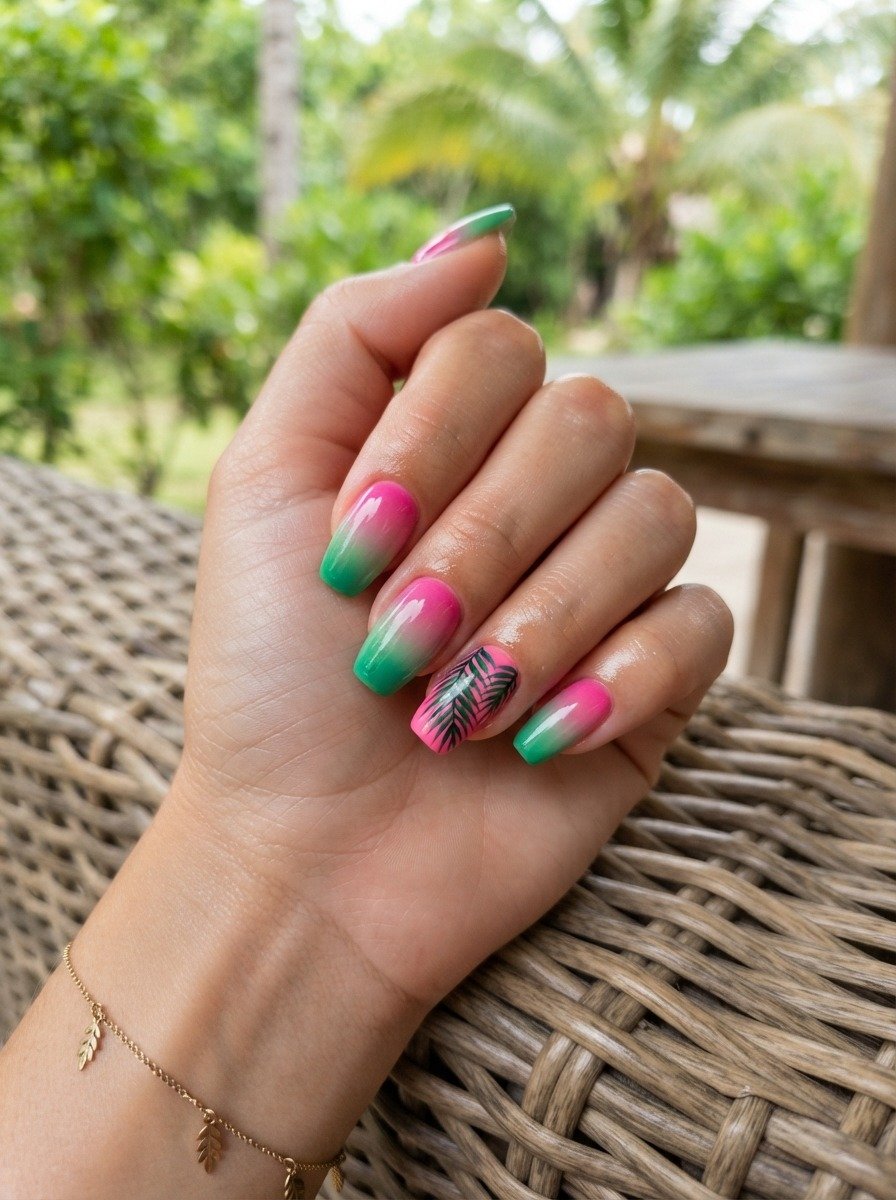
Mixing a tropical-toned ombre with a painted accent nail is a fun, vacation-ready nail concept that brings the resort directly to your fingertips. The palm leaf accent nail ties the whole set together and gives it a cohesive theme.
You do not need to be a professional nail artist to paint a palm leaf. It is one of the more forgiving nail art designs because the organic shape of leaves means imperfection is part of the look.
Use a thin striping brush or a regular nail art brush with a pointed tip. On a bright pink base, paint a thin stem first. Then add several elongated leaf shapes branching off the stem at alternating angles.
The leaves do not need to be identical. Real palm fronds are all slightly different. Use a slightly curved stroke for each leaf to give them movement and life. Add a second coat of green on top for depth once the first layer dries.
Keep the other nails as clean, vibrant ombre and let the accent nail be the design centerpiece. Finish everything with a glossy top coat and the whole set will look cohesive and tropical.
This look is ideal for summer vacations, bachelorette trips, and pool parties.
19. Neon Pink to Slime Green Ombre
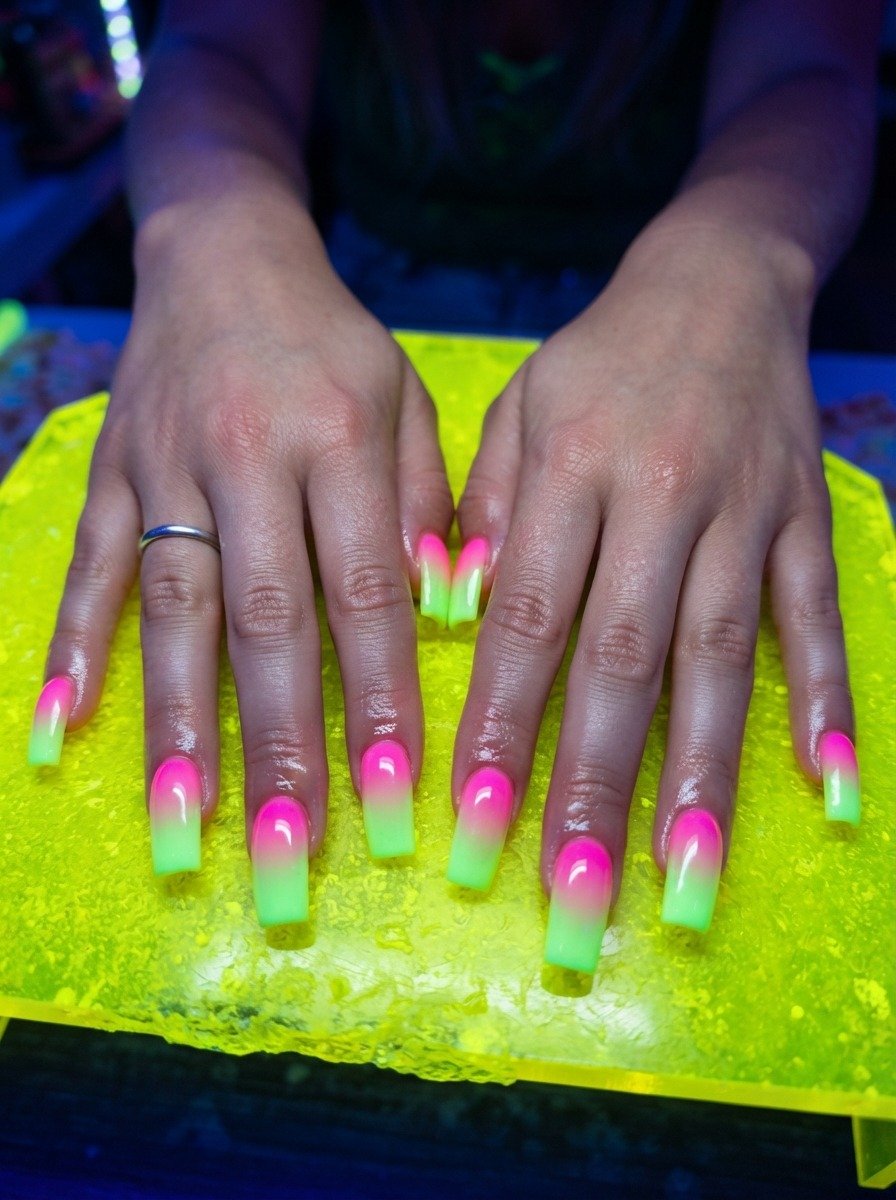
The slime green and neon pink combination is one of the most searched nail looks right now. It is heavily Y2K influenced and has a playful, internet-era energy that feels very current.
Slime green is that specific shade of bright, slightly yellow-tinted green that became iconic in the late 90s and early 2000s. Paired with neon pink, it is a color combination that practically buzzes with visual energy.
Both neon polish formulas in this look work best when applied over a white base coat. The white underneath acts as a reflector and makes neon colors about 40 percent more vivid than they would appear over a standard nude or natural base.
Apply white base, then two coats of neon pink all over. Sponge slime green from the tip in heavy, deliberate layers. Because neon polishes are often sheer, you will need four to five sponge layers to build the slime green to full opacity.
Seal with a high-gloss top coat that has a gel-like finish. Under bright sunlight or artificial light, these nails will look like they are almost glowing.
This is a bold look made for people who fully commit to fun.
20. Pink Ombre Nails With Green Foliage Art
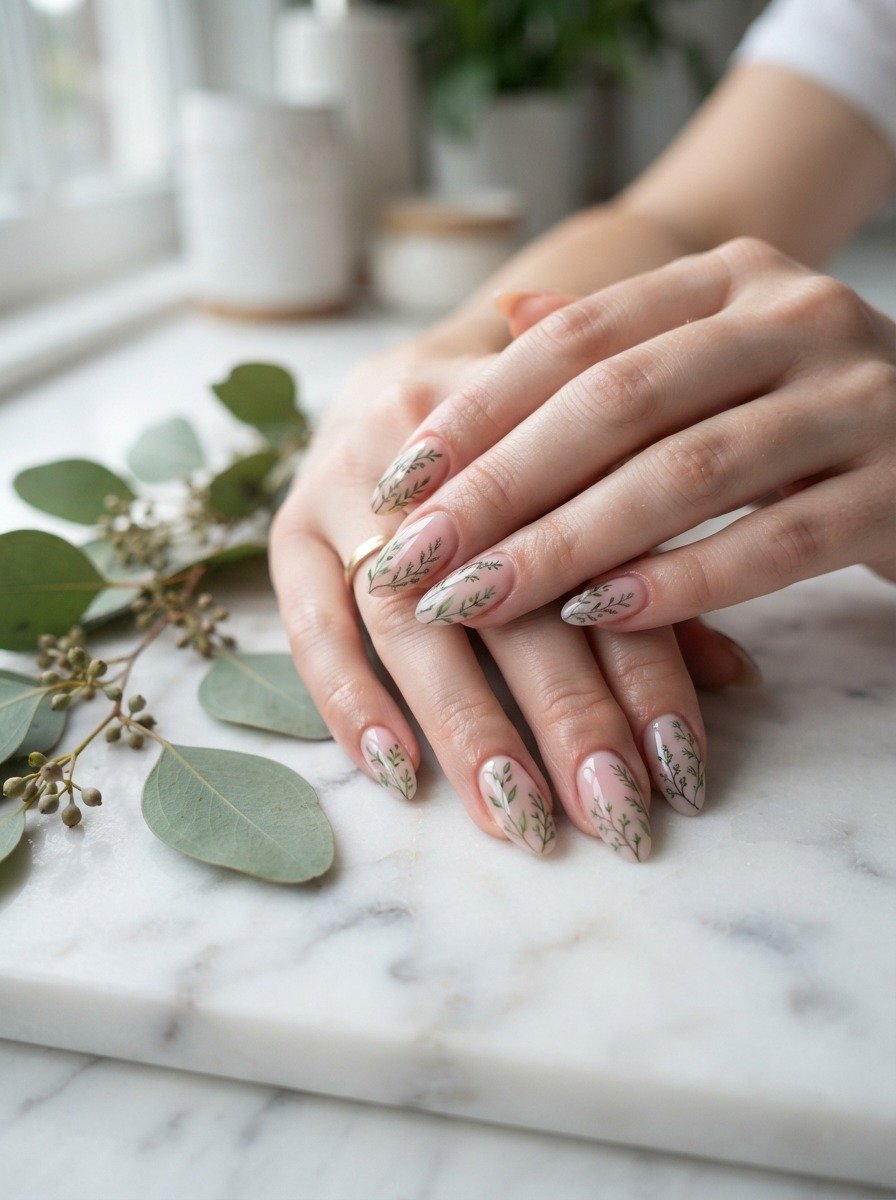
Botanical nail art is one of the most enduring nail trends because it borrows from nature in a way that never goes out of style. Painting delicate green foliage over a pink ombre base creates a look that is artistic, feminine, and completely original.
The pink ombre acts as the background, and the foliage is layered on top like a painting. Because the background is already colorful, the foliage does not need to be complex. Simple, thin stems and small leaves are enough.
A fine liner brush is the most important tool for this look. Look for a striping brush with a very long, flexible tip. These brushes give you precise control for drawing thin lines.
Start by doing a pink ombre base using any two shades you love. Let it fully dry. Then, using a dark green polish loaded onto the striping brush, draw thin arching stems. Add tiny leaf pairs branching off each stem with small, oval strokes.
Keep the design scattered naturally across the nail rather than concentrated in one corner. This gives it an organic, botanical print quality. Seal with glossy top coat.
The result looks genuinely artistic and takes far less skill than it appears. A steady hand and a fine brush are all you need.
21. Candy Pink to Grass Green Ombre
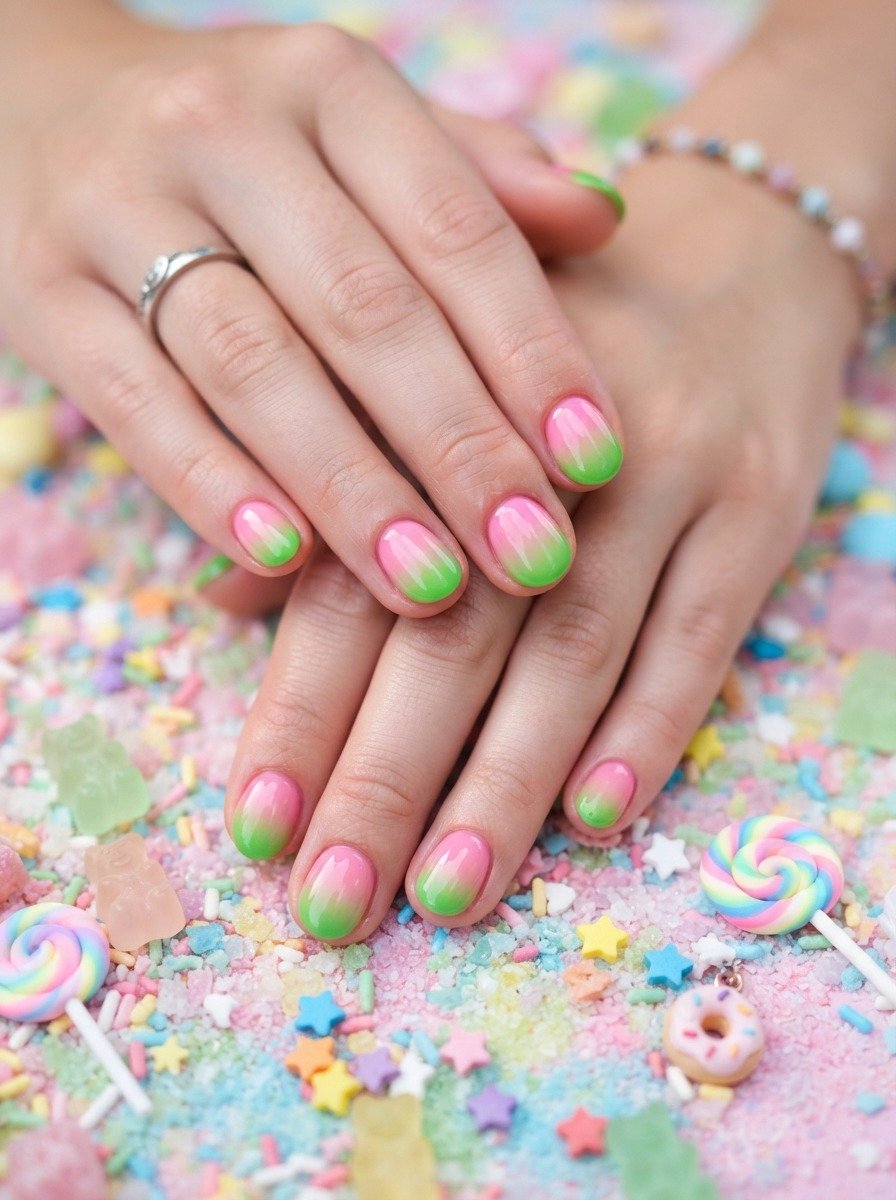
Candy pink and grass green together have an almost edible quality. These are bright, saturated colors with a cheerful, candy-shop feeling that makes them irresistible for summer and spring looks.
The combination feels genuinely playful without tipping into being childish. The key is the finish. A high-gloss top coat makes both colors look candy-like and polished rather than crayon-like.
Candy pink differs from hot pink in that it is slightly lighter and less aggressive. Think strawberry candy or bubblegum ice cream rather than a highlighter. Grass green should be bright and warm without veering into neon territory.
Apply candy pink as the full base. Let it dry. Use a sponge to apply grass green from the tip, using light and consistent pressure for an even gradient.
You can add tiny white dots over the finished ombre for a confetti effect if you want to push the playful factor further. Use the rounded end of a dotting tool or a toothpick dipped in white polish.
Seal with a thick glossy top coat to really bring out that candy-shine finish. This look is happiness in nail form.
22. Rose Gold Pink to Dark Hunter Green Ombre
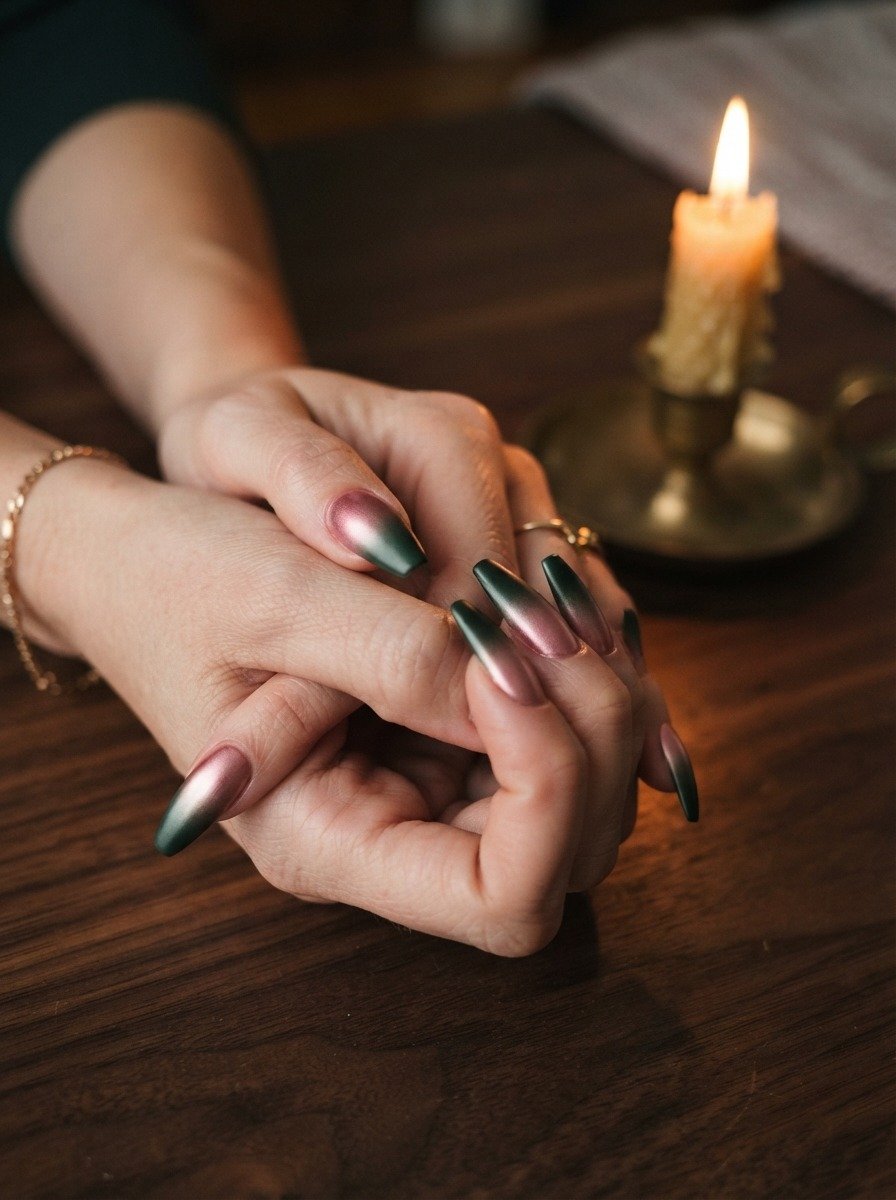
Rose gold and hunter green is the color combination that belongs at a fall wedding or a holiday party. These two shades together have a deep, luxurious quality that feels festive without being flashy.
Rose gold is a metallic warm pink, and hunter green is one of the richest, darkest greens available. The contrast between them is dramatic and the gradient between them produces a beautiful, murky green-gold in the middle zone.
Metallic rose gold polishes are widely available at any beauty store and are fairly affordable. Look for one with fine golden shimmer rather than flat metallic paint for the most beautiful result.
Apply rose gold as the base and let it dry. The shimmer in rose gold can sometimes make sponging tricky because the particles catch the sponge unevenly. Dab very gently with the sponge to avoid dragging.
Apply hunter green from the tip and build gradually. The depth of hunter green means you only need two to three sponge layers for full opacity.
A gel-finish glossy top coat seals and intensifies both colors. This is a stunning manicure for the cooler months and looks gorgeous with burgundy, camel, and plaid outfits.
23. Flamingo Pink to Mint Ombre With Polka Dots
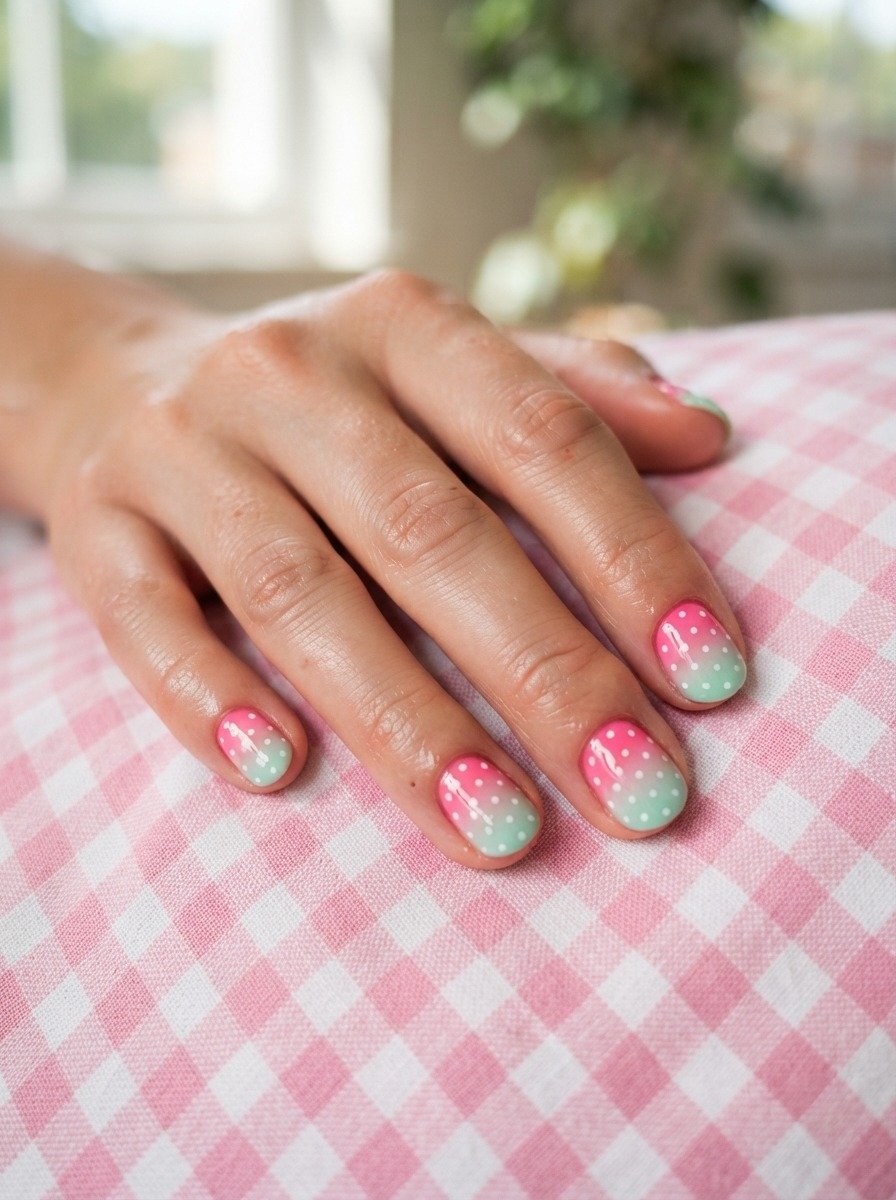
Adding polka dots to a flamingo pink and mint ombre is a sweet, retro touch that makes the manicure feel unique and personal. The dots sit on top of the gradient like cheerful little decorations.
This is a great nail art technique for beginners because polka dots are forgiving. They do not need to be perfectly uniform or perfectly spaced to look good.
A dotting tool is ideal for this but a toothpick works just as well. Dip the rounded end into white polish or a contrasting color and press firmly onto the dry ombre nail. Lift cleanly upward to create a clean, round dot.
Space the dots freely across the nail without worrying about exact placement. Random spacing looks more charming than overly precise rows. Vary the dot size slightly by pressing with different amounts of pressure.
You can use white, gold, or even pale yellow dots depending on the mood you want. White keeps it clean and graphic. Gold makes it feel more luxurious.
Let the dots dry completely before sealing with top coat. Applying top coat too quickly over dots can smear them. Patience here pays off. The finished look is delightfully cheerful and completely unique.
24. Dusty Mauve to Sage With French Tip Detail
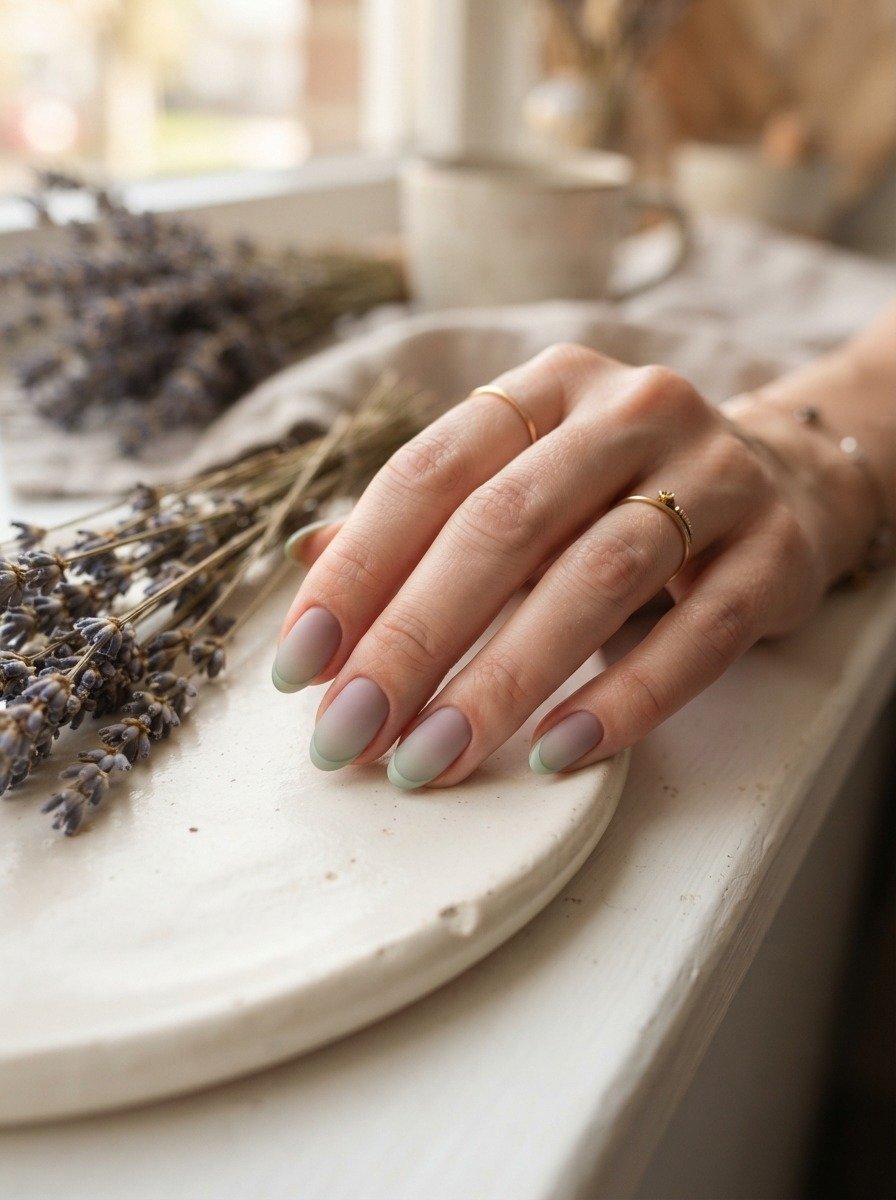
A French tip detail on top of an ombre base is a sophisticated hybrid of two classic nail techniques. Instead of the traditional white tip, a sage green tip on a mauve ombre base gives a modern, fashion-forward result.
This look is subtle and refined, perfect for professional settings, events, and everyday wear. It looks more complex than a standard French manicure but takes only slightly more effort.
Nail guides or French tip stickers are the easiest way to get a clean, precise tip line without freehand painting. Apply the guide just below where you want the tip line, paint the green over the tip area, and peel the guide away while the polish is still slightly wet.
Do the ombre base first and let it dry completely before applying the tip guides. The tip line should be thin, about one to two millimeters wide, for the most elegant result.
A sage green tip on a mauve ombre reads as a complete, designed look rather than two separate nail ideas stuck together. The shared cool undertones in both colors create natural harmony.
Finish with a semi-matte or soft gloss top coat. This is a manicure for someone who appreciates the details.
25. Bright Pink to Kelly Green Ombre
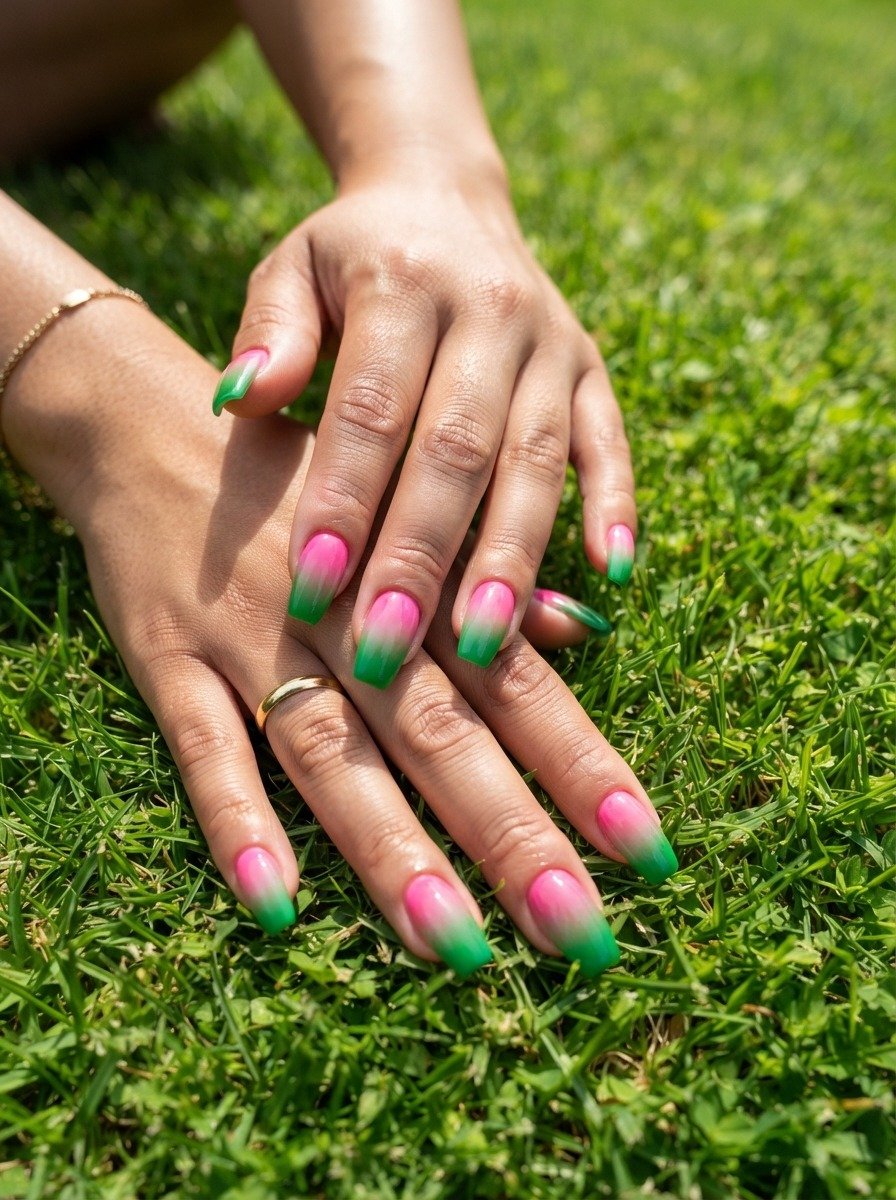
Kelly green is a true, balanced green without any yellow or blue bias, and paired with bright pink it creates one of the cleanest, boldest color contrasts on this entire list. This is a classic color story told in nail form.
The brightness of Kelly green against a vivid pink creates an ombre that reads as confident and sporty. It has a preppy, collegiate quality that works really well for summer.
Kelly green is more widely available in nail polish than you might think. Many brands offer it under names like true green, classic green, or simply green. Look for a shade that is neither too yellow nor too blue.
Apply bright pink as the full base. Sponge Kelly green from the tip downward. Because Kelly green is a medium-value color, it sponges onto the nail evenly without requiring too many layers.
The middle zone produces a warm, medium green that blends naturally between the two colors. It is a clean, uncomplicated ombre that looks very professional.
A simple glossy top coat finishes the look. This is a great go-to ombre when you want something colorful and fun without spending too much time or creative energy on the decision.
26. Peachy Pink to Mint Ombre
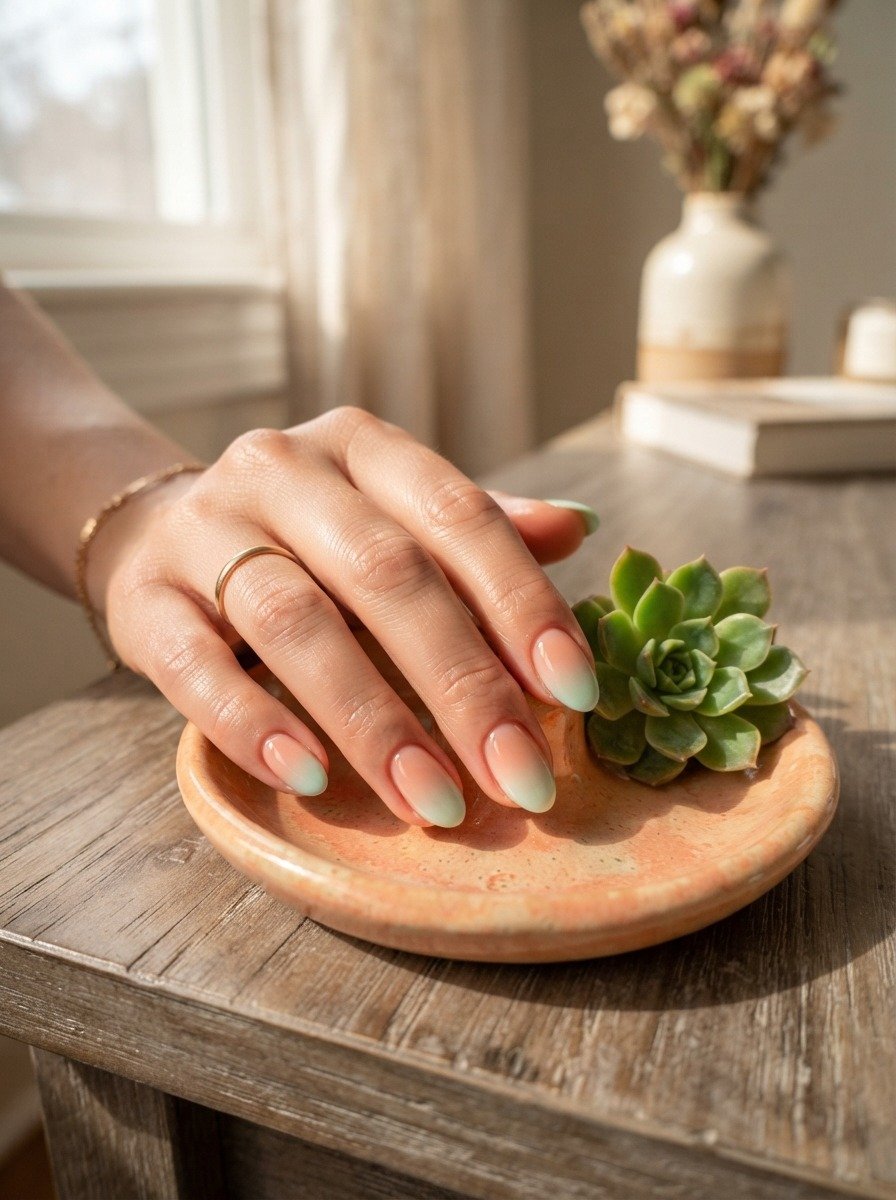
Peachy pink and mint is a color combination that feels like a warm spring morning. The warmth of peach against the coolness of mint creates an interesting thermal contrast that makes the ombre unexpectedly vibrant.
This look suits all skin tones beautifully. The warmth in peach complements golden, olive, and deeper skin tones especially well, while the mint adds brightness and freshness.
Peach is not the same as coral. Peach is softer and more cream-adjacent, while coral is bolder and more orange-forward. For this ombre, you want a gentle, creamy peach rather than a saturated coral.
Apply the peach base in two thin coats. For the mint, choose a shade that is cool but not too grey or too blue. A classic, soft mint works best here.
Sponge the mint from the tip gently, using light pressure and building slowly. The transition zone will produce a beautiful warm green or warm seafoam depending on your specific shade choices.
Top coat with a glossy finish to keep the colors looking fresh and clean. This is one of the most wearable pink and green ombres on this list. It is soft enough for daily life and interesting enough to get noticed.
27. Dark Pink to Teal Green Ombre
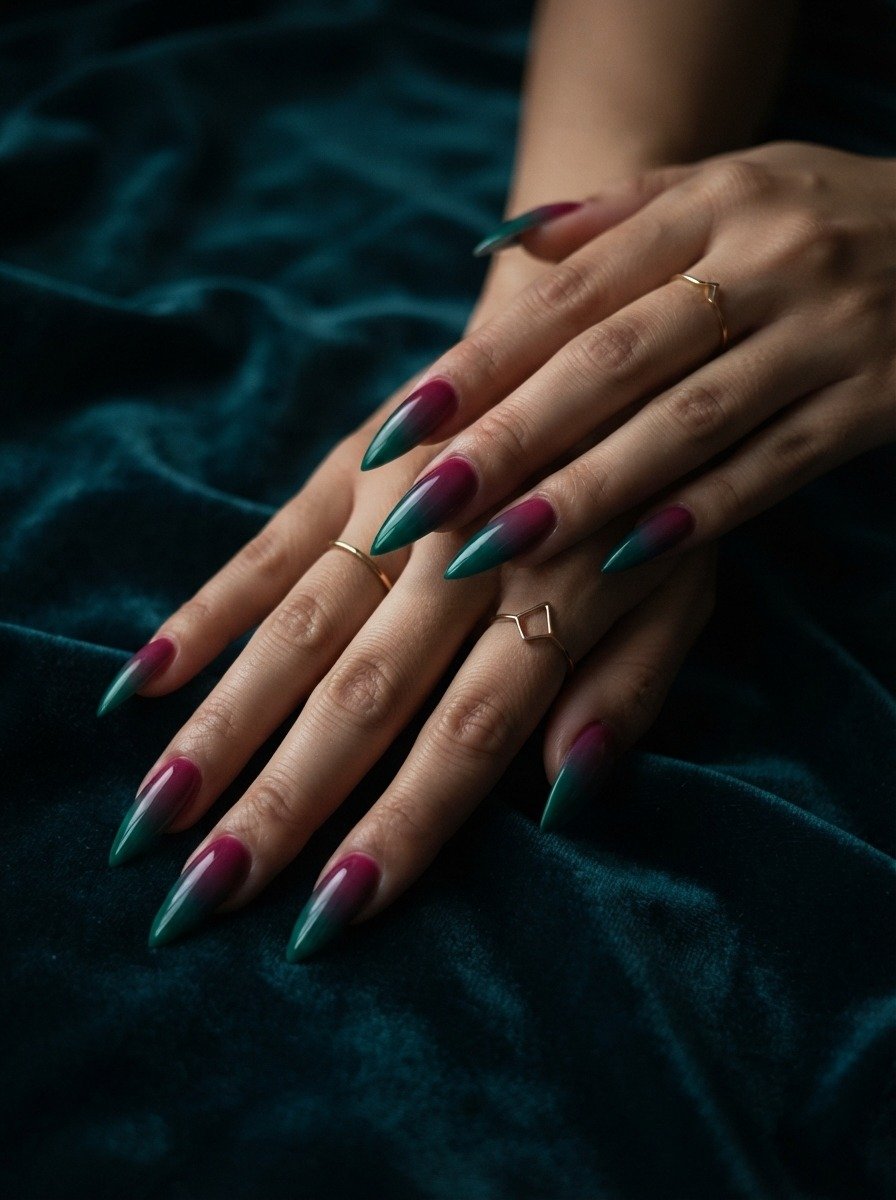
Teal is a green that contains a significant amount of blue, and when combined with a deep berry pink, the result is a cool, moody, and deeply sophisticated ombre.
This is a fall or winter nail look. The depth of the colors gives it a warmth that suits cooler months and darker wardrobes. It pairs beautifully with black, deep purple, camel, and grey.
Berry pink or deep rose works better than hot pink here because the cooler undertones in berry harmonize with teal’s blue-green character. Together they create an ombre that feels intentional and refined.
Apply the deep berry-pink base in two opaque coats. For the teal, look for a jewel-toned teal that is rich and saturated. Teal can sometimes look dark and muddy in low-quality polishes, so invest in a decent formula here.
Sponge the teal from the tip, building slowly. The transition zone between dark pink and teal can produce a deep, intriguing purple-green. This is one of the more unusual and beautiful effects in the entire pink and green ombre category.
A gel-finish glossy top coat brings out the depth and dimension of both colors. This is a manicure for moody aesthetics and people who love their dark side.
28. Light Pink to Sage With Dried Flower Resin Effect
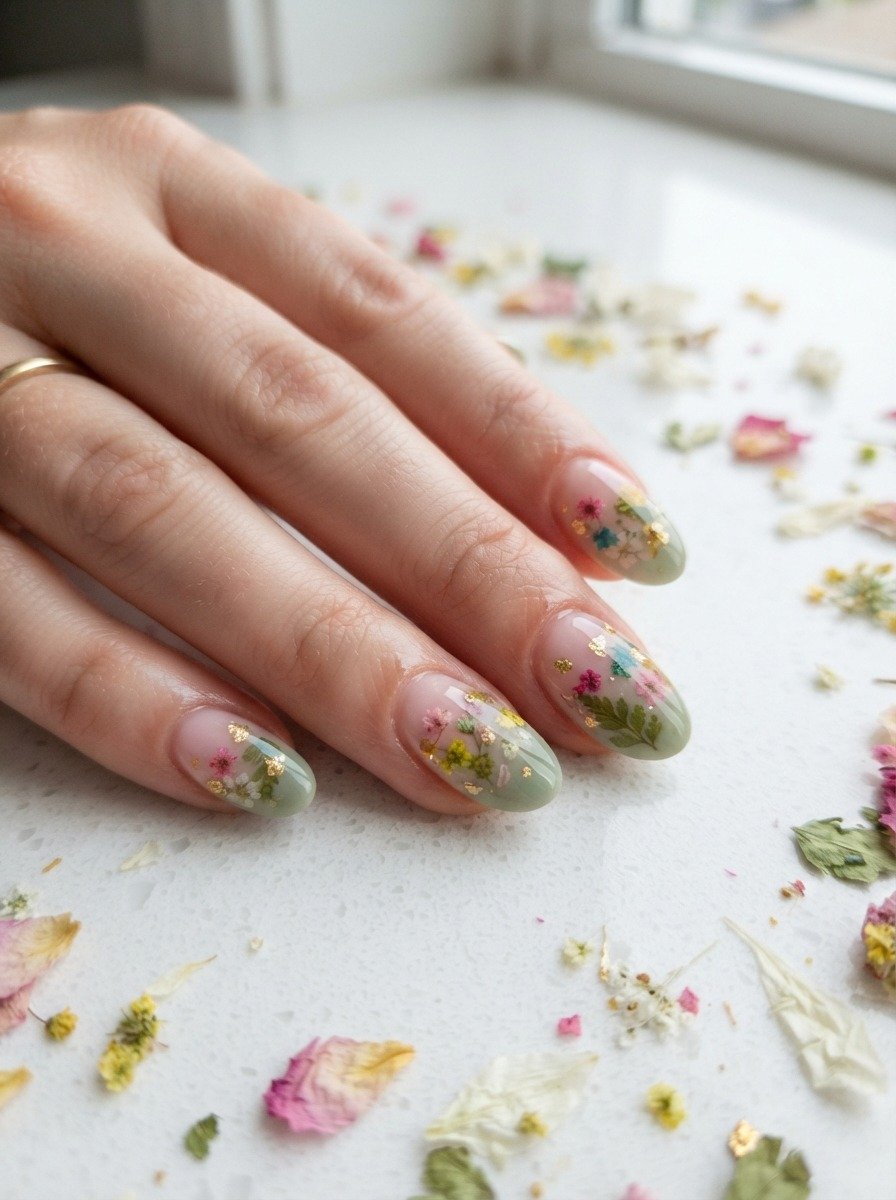
Dried flower nails are one of the most jaw-dropping nail art trends and combining them with a soft pink to sage ombre is a match made in botanical heaven.
Real or faux dried flowers are pressed onto the nail and sealed under multiple layers of top coat until they appear to float inside a clear dome. The effect is absolutely stunning.
You can buy dried flower nail art sets online for just a few dollars. These sets include tiny, paper-thin dried florals in various colors and shapes, all scaled to fit on a nail.
Do your pink to sage ombre base first. Let it dry fully. Apply one layer of top coat and, while still tacky, lay tiny dried flowers onto the nail using tweezers or a toothpick. Press them down gently.
Apply three to four more layers of top coat over the flowers, letting each layer dry between applications. Each layer adds depth and creates the resin-like encapsulation effect.
The finished nails look like botanical specimens preserved in glass. The green flowers against the sage ombre and the pink flowers against the pink ombre create a fully cohesive, nature-inspired set that people absolutely cannot stop looking at.
29. Ombre Pink to Green With Swirl Nail Art
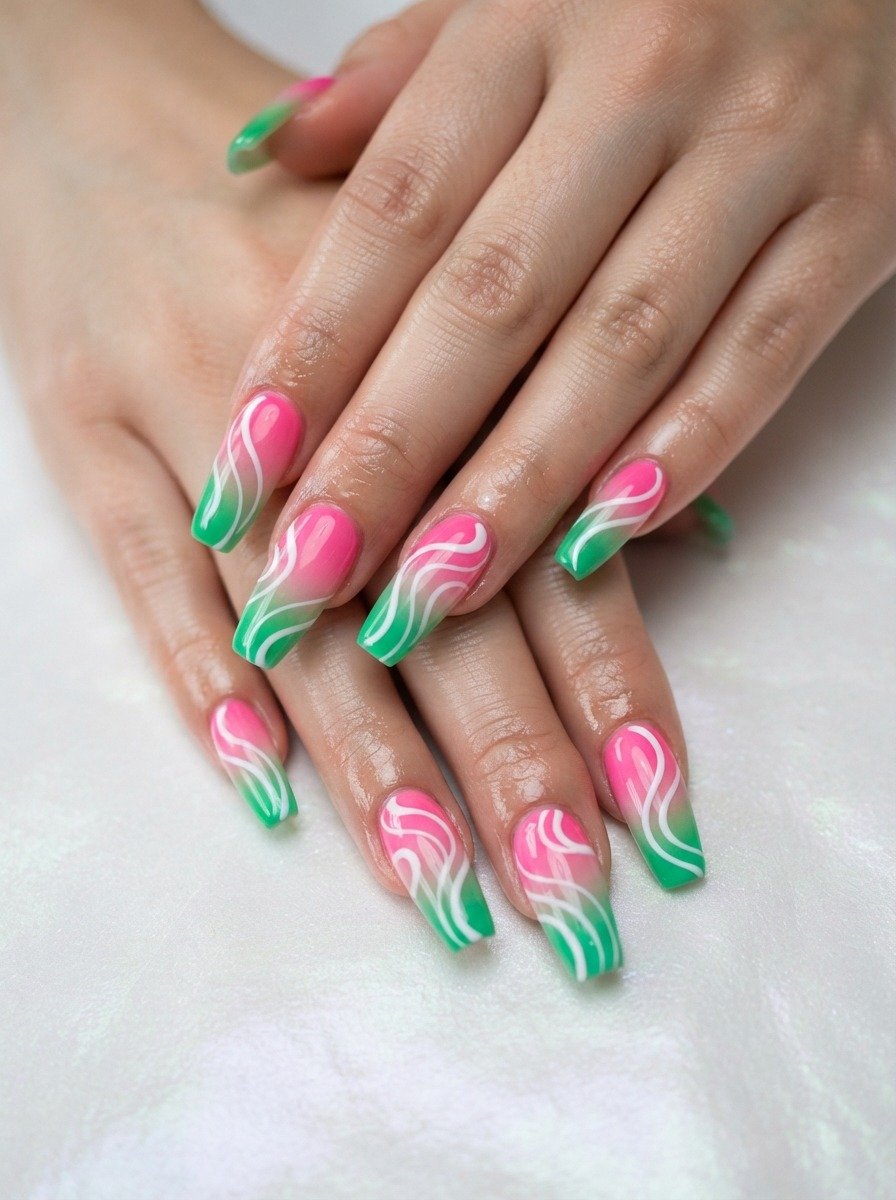
Swirl nail art is one of the most popular nail design elements right now, and laying it over a pink to green ombre creates something truly gallery-worthy. The fluid, organic swirl lines contrast beautifully with the structured gradient underneath.
Swirls look complex but are actually very achievable at home with a thin nail art brush. The organic, freeform quality of swirls means that no two nails need to match and imperfections are part of the design.
Load a striping or liner brush with white polish. Starting from one side of the nail, draw a smooth, curving line that loops and spirals across the nail surface. Do not overthink the direction. Just let the brush move naturally.
Add a few branching loops or spirals that extend off the main swirl. Keep the lines thin and the movements fluid. Avoid pressing too hard with the brush, which causes the line to wobble.
Apply swirls to each nail differently. Some can have large, sweeping spirals. Others can have smaller, tighter loops. The variation makes the full set look dynamic and intentional rather than copied.
Seal with top coat and the swirls become part of the ombre composition. This is a genuinely artistic nail look and one of the most fun DIY projects on this list.
30. Soft Pink to Green With Daisy Nail Art
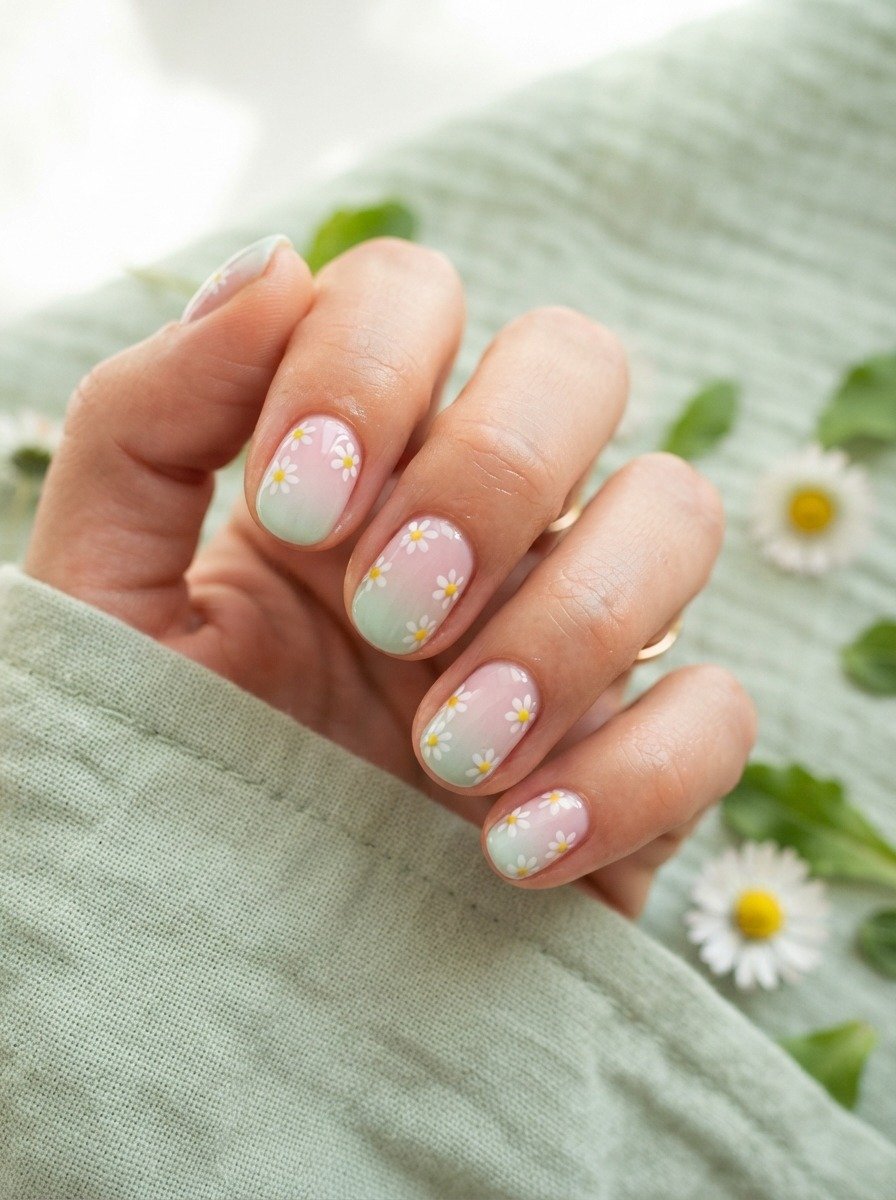
Daisy nail art is eternally sweet and painting tiny daisies over a pink to green ombre creates a look that is pure spring in manicure form.
Daisies are one of the more beginner-friendly nail art designs because they require only two colors and a basic technique. Even slightly imperfect daisies have charm because real flowers are imperfect too.
Use a dotting tool for the petals. Dip into white polish and press five small dots in a ring arrangement on the nail. Leave a space in the center. Once the petals dry, fill the center with a single yellow dot.
That is all a daisy requires. For more dimension, add a second smaller ring of petals over the first in a slightly offset pattern. You can also add thin green stems if you want to complete the botanical picture.
Scatter the daisies at different angles and sizes across each nail. Some nails can have one large daisy, others can have two or three small ones. The variety keeps the design from feeling repetitive.
Seal with a glossy top coat and the daisies will look like miniature paintings sealed under glass. This is a thoroughly joyful nail look and requires very little skill to pull off.
31. Two-Tone French Tip: Pink Base Green Tip
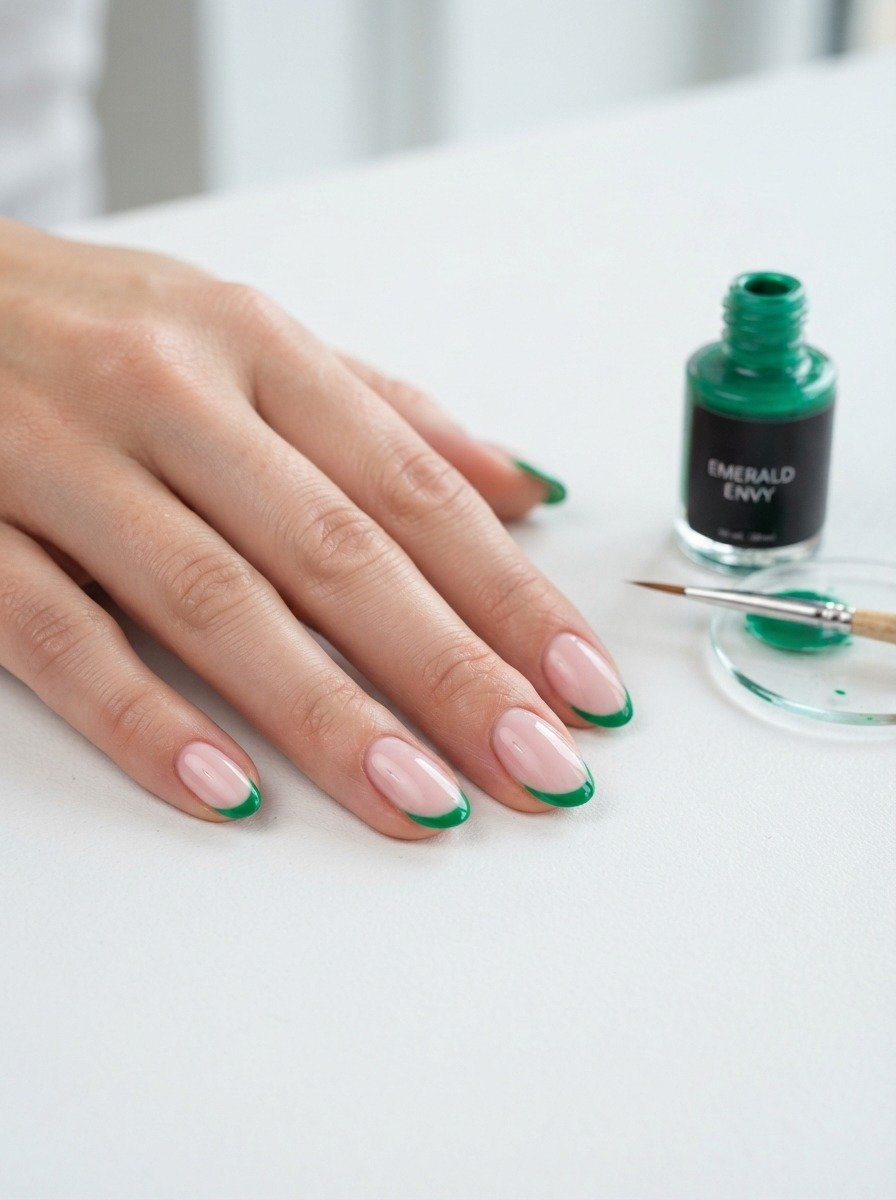
A color-blocked French tip using pink and green is a minimalist take on the ombre concept. Instead of a gradual fade, the two colors meet in one clean line at the tip.
This look is sharp, graphic, and very modern. It suits people who like their nail art precise and geometric rather than soft and blended.
French tip stickers or nail guides are the key to getting a clean tip line. Press the guide at the desired tip line location and apply two coats of green over the free edge. Remove the guide while still wet for the cleanest edge.
The base can be any shade of pink you love. Blush, baby pink, hot pink, or mauve all create different moods when paired with a green tip. A darker green tip on a light pink base reads as dramatic. A mint tip on hot pink reads as playful.
This look does not require any blending, sponges, or complex tools. It is one of the most achievable on this list and takes no more than 20 minutes from start to finish.
Seal with a glossy top coat and you have a salon-quality manicure done entirely at home. Clean, affordable, and genuinely stylish.
32. Mixed Finish Pink and Green Ombre: Matte Meets Shimmer
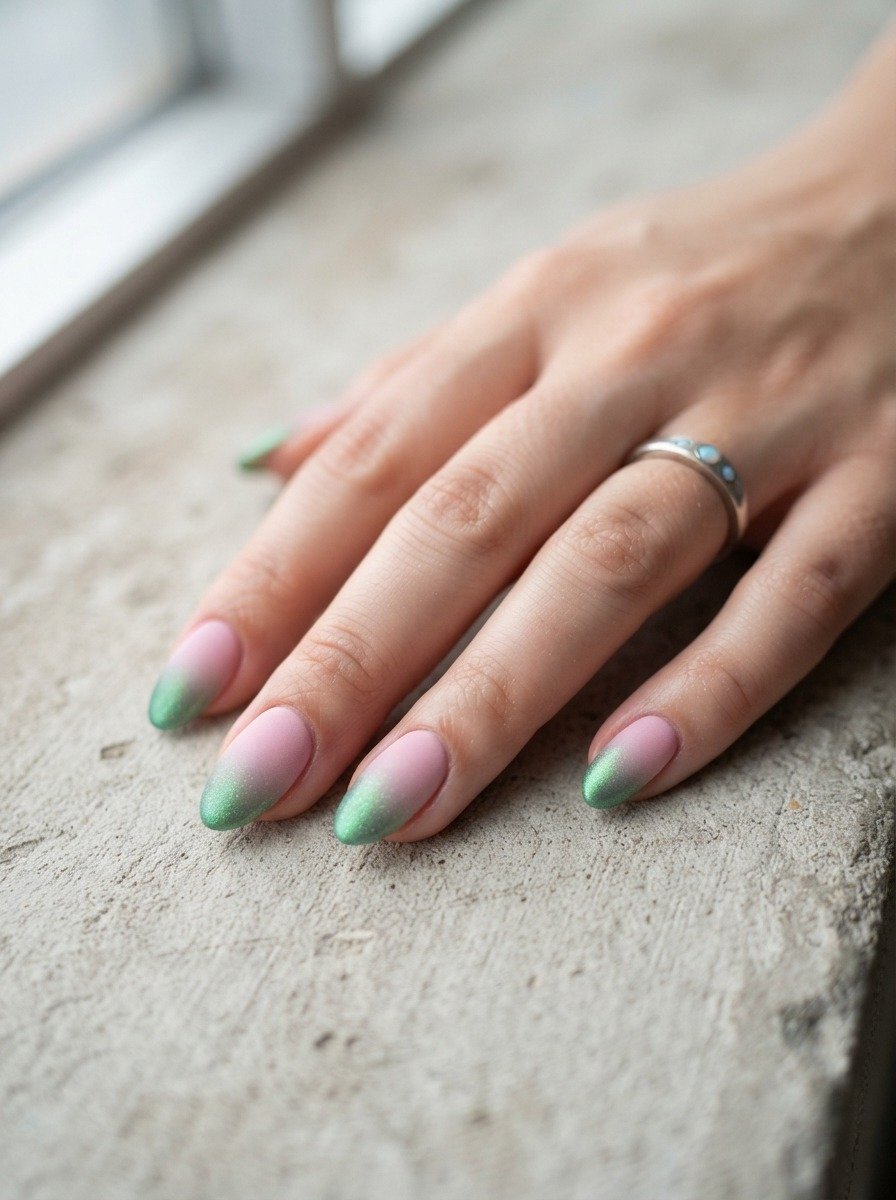
Mixing finishes within a single ombre is one of the most creative things you can do with your nails. Instead of the entire gradient being the same texture, the pink half is matte while the green half shimmers, creating a textural contrast that is as interesting as the color contrast.
This effect draws the eye because your brain registers something unusual about the nail surface even before it identifies what exactly is different.
Apply the ombre as usual with both colors in their standard glossy formula. Once dry, apply matte top coat only to the pink base area using a fine flat brush, carefully avoiding the green portion.
Apply shimmer or pearl top coat to the green tip area, also with a fine brush to keep the application precise. Where the two top coats meet near the gradient zone, you can allow a small area of natural overlap which creates an interesting blurred boundary between the two textures.
The shimmer green tip catches and reflects light while the matte pink base absorbs it. The result is a nail that changes character depending on the lighting and viewing angle.
This is an affordable technique that requires no special products beyond a matte and a shimmer top coat. Both are available at any beauty store for just a few dollars each. The result looks genuinely custom and high-end.
Pink and green ombre nails offer more range than almost any other color combination in the nail world. From the quietest pastel blush and mint to the loudest neon pink and slime green, from simple solid gradients to layered botanical art, this pairing consistently produces something worth looking at. The best part is that most of these looks are fully achievable at home with a sponge, a couple of polishes, and patience. You do not need a salon appointment or an expensive kit to wear beautiful nails. Pick one idea from this list, gather your supplies, and give it a try this weekend. Your next favorite nail look is already waiting for you.