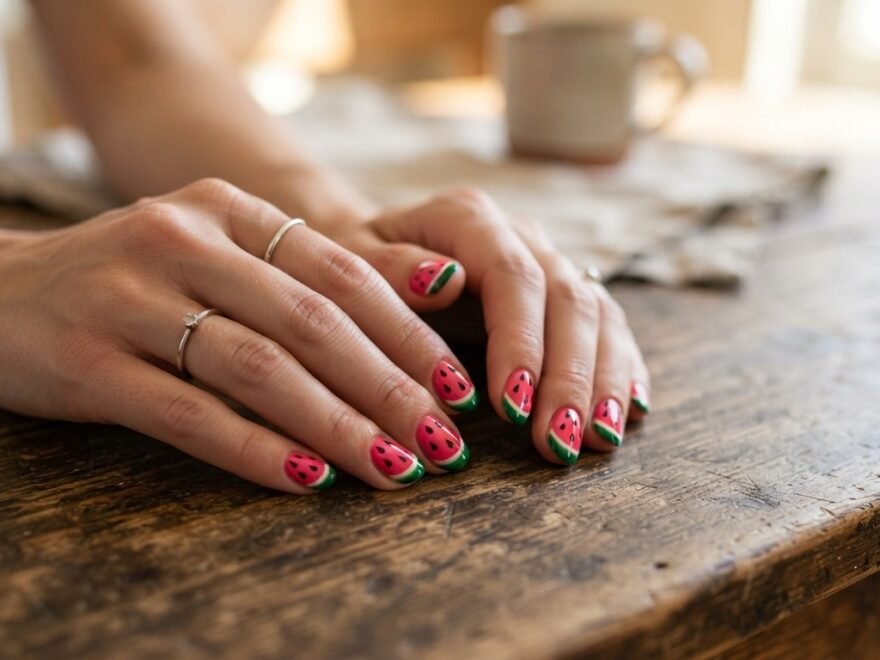
Summer manicures come and go, but watermelon nail art ideas keeps showing up on salon boards and DIY feeds for good reason. The juicy pink base, the seed dots, the green rind edge, all of it reads as playful without trying too hard. Whether you’re heading to a pool party, a backyard barbecue, or just want your hands to match the season, this list breaks down 23 ways to wear the trend. Some designs use a full watermelon slice. Others just borrow the color palette or a single seed accent. You’ll find options for short nails, long nails, gel polish, and regular polish. Every idea here works with drugstore products, so you don’t need a professional kit or a salon appointment to try it. Grab a base coat, a couple of polish shades, and a thin nail art brush or even a bobby pin, and you’re set. Let’s get into the list. If you’re also exploring Pink Floral Nail Ideas, delicate blossoms, soft pastel pinks, hand-painted petals, and elegant floral accents create a fresh, feminine manicure that works beautifully for spring, summer, weddings, and everyday wear.
1.Classic Watermelon Slice Tips
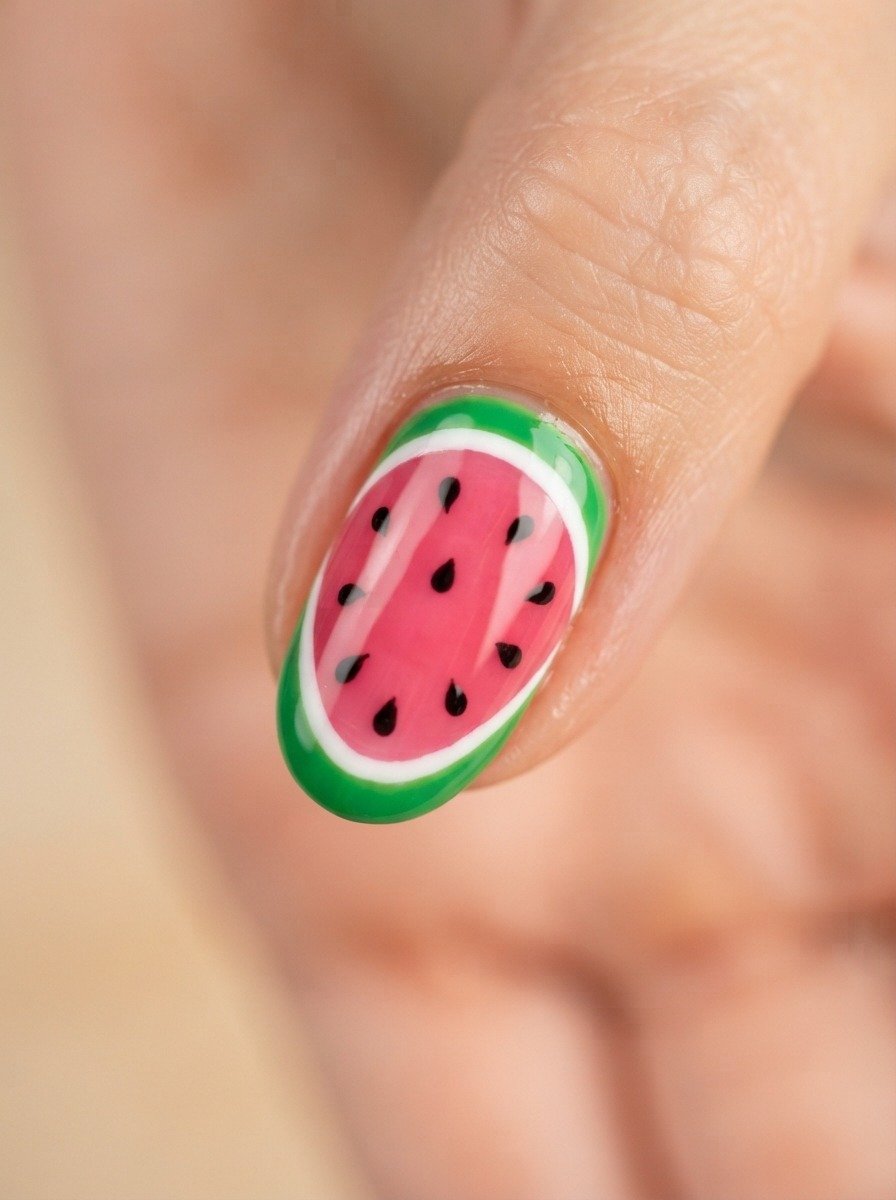
This is the design most people picture when they hear “watermelon nails.” Paint the tip of your nail pink, add a thin white line under it, then finish with a green edge. Small black dots scattered across the pink section act as seeds. It’s simple, but it reads as a tiny watermelon slice sitting right on your nail. You don’t need steady hands for this one. A dotting tool or the end of a bobby pin works fine for the seeds. Budget tip: skip the specialty nail art kits. A one-dollar dotting tool from a beauty supply store does the same job. Try this on your ring finger only, and keep the rest of your nails a plain pink or nude. That way, the watermelon tip stands out instead of competing with itself on ten fingers. If you’re new to nail art, practice the shape on paper first. Draw the curve, add the line, then the dots. Once it looks right on paper, it’ll go faster on your nail. This design works well for short nails too, since the tip shape naturally fits a smaller canvas.
2.French Tip Watermelon Twist
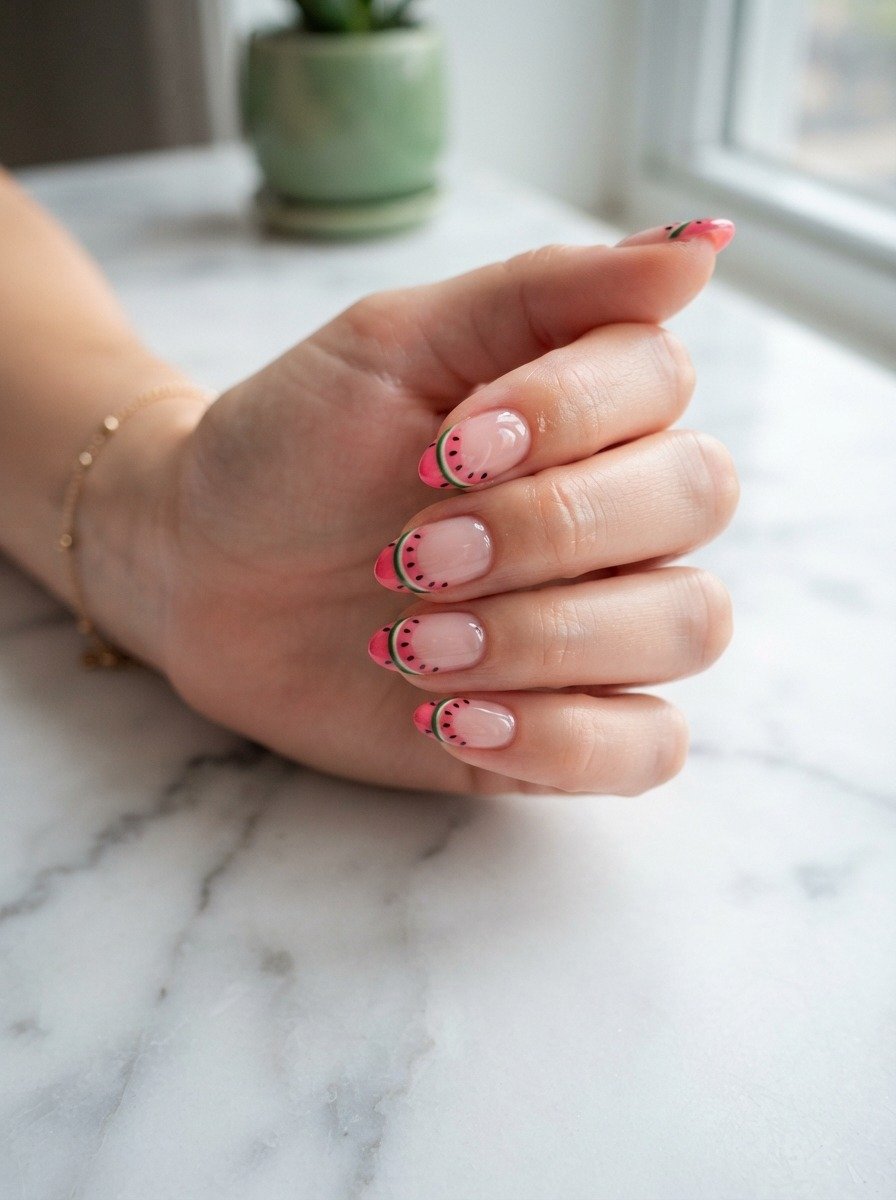
Take the traditional French manicure and swap the white tip for watermelon colors. Instead of a straight white line, paint a pink crescent at the tip, then trace a thin green line just above it. A few black dots near the pink section finish the look. This version feels dressier than a full slice design, which makes it a good pick for a wedding guest or a dinner reservation. Budget tip: use French tip guide stickers, which cost just a few dollars at any drugstore, to get a clean curved line without freehand shaking. Peel them off once the polish sets. If you don’t have stickers, a small piece of tape cut into a curve works just as well. This design also photographs nicely for social media because the color contrast is sharp against most skin tones. Stick to two coats of each polish color for full coverage, and let each layer dry fully before adding the next. Rushing the layers is the most common reason French tip designs smudge.
3.Minimalist Single Seed Accent
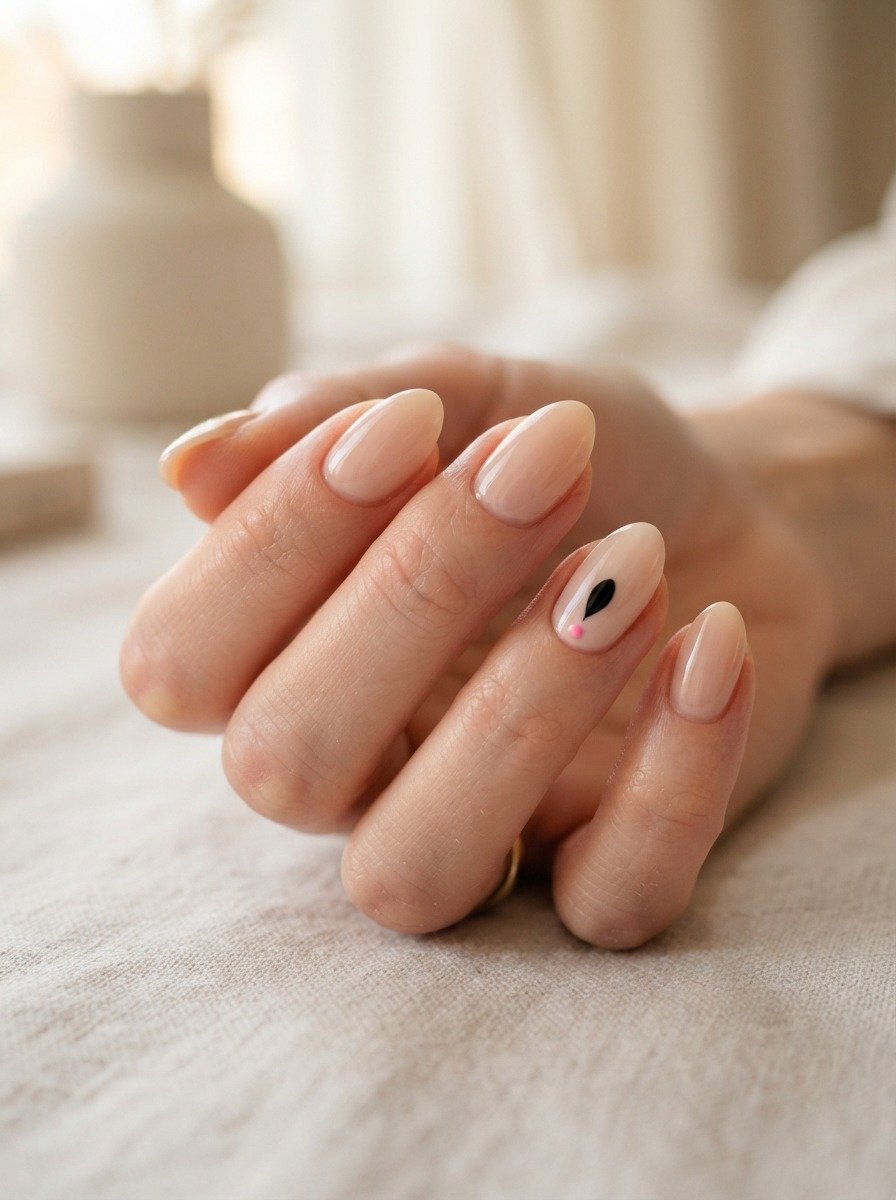
Not everyone wants a full fruit design on every nail, and that’s fine. This idea keeps things quiet. Paint all your nails a soft nude or pale pink, then add just one tiny black seed shape and a small green line to a single accent nail. It’s subtle enough for an office setting but still nods to the watermelon theme. Budget tip: you likely already own black and green polish from other manicures, so this costs nothing extra beyond what’s in your drawer. A cheap nail art pen with a fine tip makes the seed shape easy to draw freehand. This look also works if you’re short on time. The base coat takes the longest, and the seed accent adds maybe two extra minutes per hand. Try pairing it with a matte top coat instead of glossy for a different texture. Matte finishes tend to hide small mistakes better than glossy ones, which helps if your freehand lines aren’t perfectly even. This is a solid starting design for beginners easing into nail art.
4.Ombre Watermelon Gradient
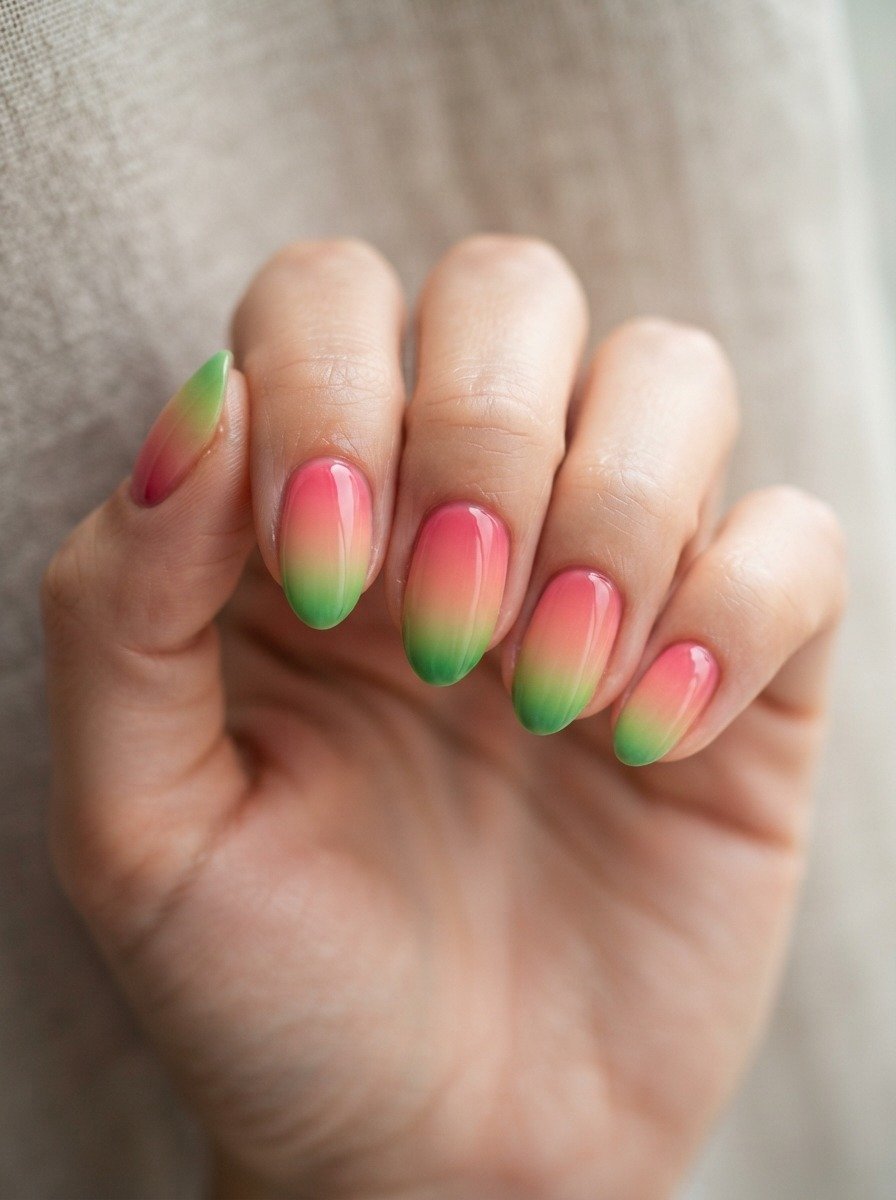
Ombre nails blend two or three colors into a smooth gradient instead of sharp lines. For a watermelon version, start with pink at the base of the nail and fade into green at the tip, or reverse it depending on your preference. A makeup sponge is the easiest tool for this. Dab the sponge with both polish colors, then press it onto your nail in light layers until the colors blend. Budget tip: a cosmetic sponge wedge, the same kind used for foundation, costs under two dollars and can be reused for several manicures if you clean it between colors. Let the first color dry completely before sponging on the second, or the shades will smear into mud instead of blending cleanly. Add a few black seed dots near the green section once the gradient dries, and seal everything with a glossy top coat. This design takes a little more patience than a flat color, but it doesn’t require any drawing skill, which makes it approachable for people who feel shaky with a brush.
5.Watermelon Rind Border
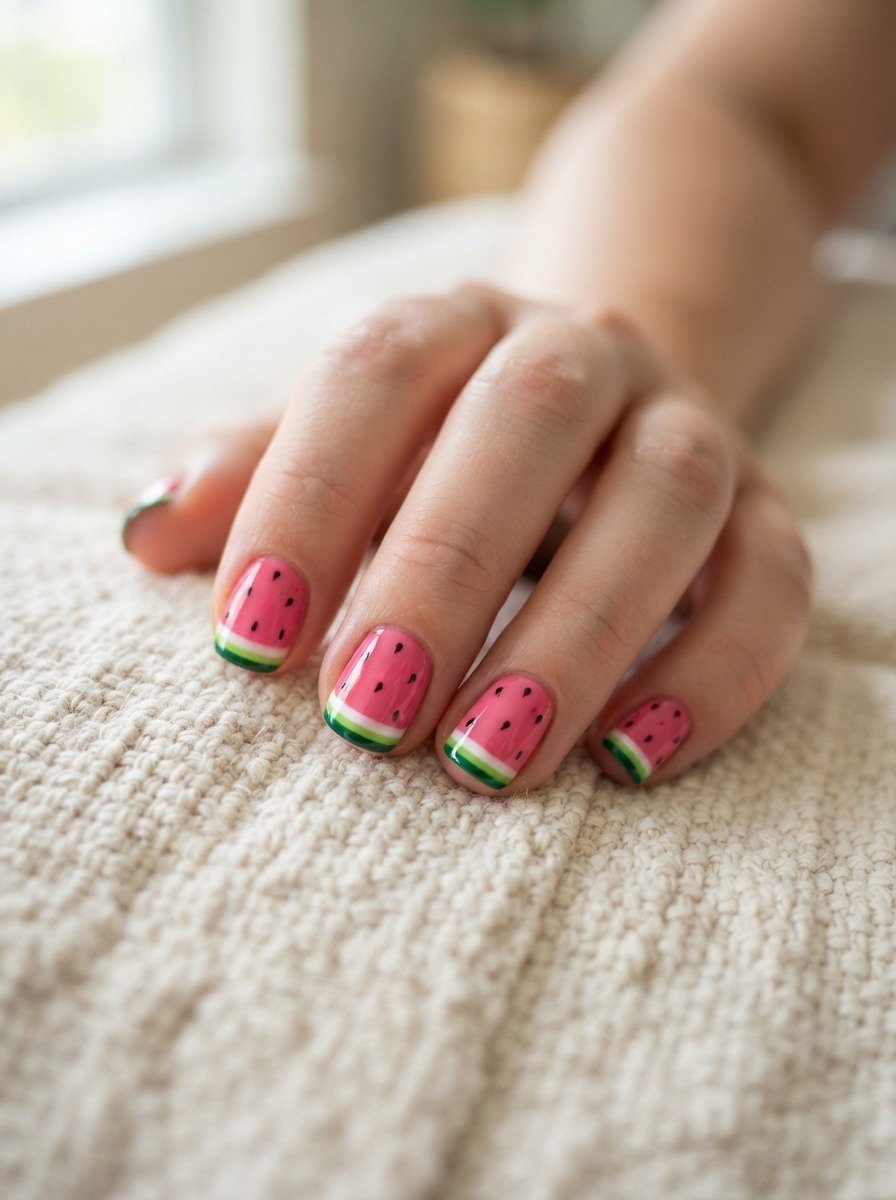
Flip the usual watermelon design so the rind sits at the base of the nail instead of the tip. Paint the bottom third in two shades of green, a darker olive tone near the cuticle and a lighter green just above it, with a thin white line separating them from the pink polish covering the rest of the nail. This layout works nicely for people who like keeping most of their nail one solid color with just a hint of the fruit pattern near the base. Budget tip: use striping tape, sold cheap at most beauty stores, to keep the green and white lines crisp. Press the tape down firmly before painting so polish doesn’t bleed underneath. Peel it off carefully once the polish is tacky but not fully dry. This design pairs well with almond or square nail shapes since the straight base line looks tidy against those forms. Round nails work too, just curve your rind lines slightly to match the nail’s natural shape.
6.Watermelon Sugar Glitter Top
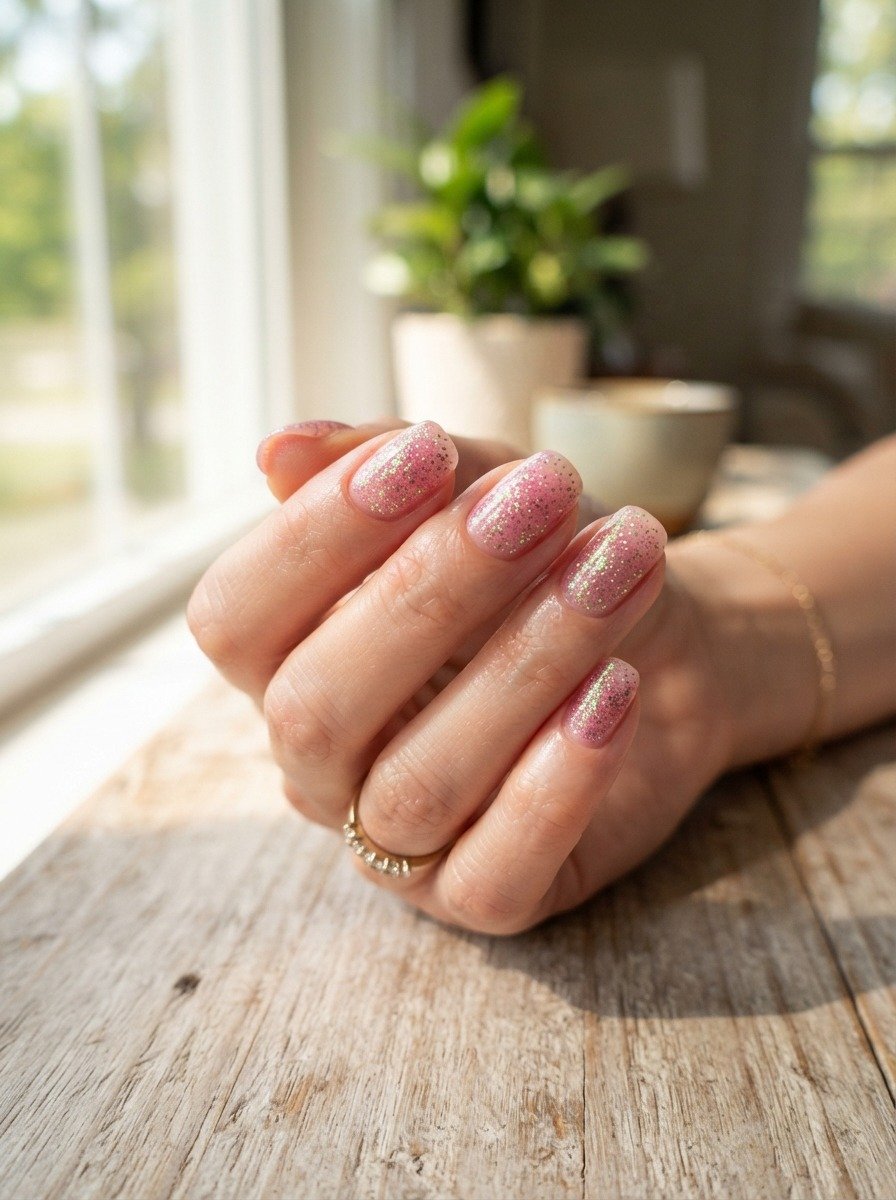
Glitter adds shine without needing any drawing skills at all. Start with a sheer or light pink base coat, then dab on a pink and green glitter mix while the polish is still slightly tacky. The glitter sticks better when the base isn’t fully dry. Once it sets, seal it with a thick top coat to lock in the sparkle and smooth out any rough texture. Budget tip: loose glitter sold for crafts works just as well as glitter marketed specifically for nails, and it’s usually cheaper per gram. Just make sure it’s fine, not chunky, so it lays flat under the top coat. This design suits summer evenings, beach trips, or any occasion where you want your hands to catch light. It also hides small application mistakes well, since the glitter distracts from any unevenness underneath. If you want a hint of the fruit shape, add one or two black seed dots on a single nail before the glitter goes on, so it still reads as watermelon-themed rather than just sparkly pink.
7.Matte Watermelon Finish
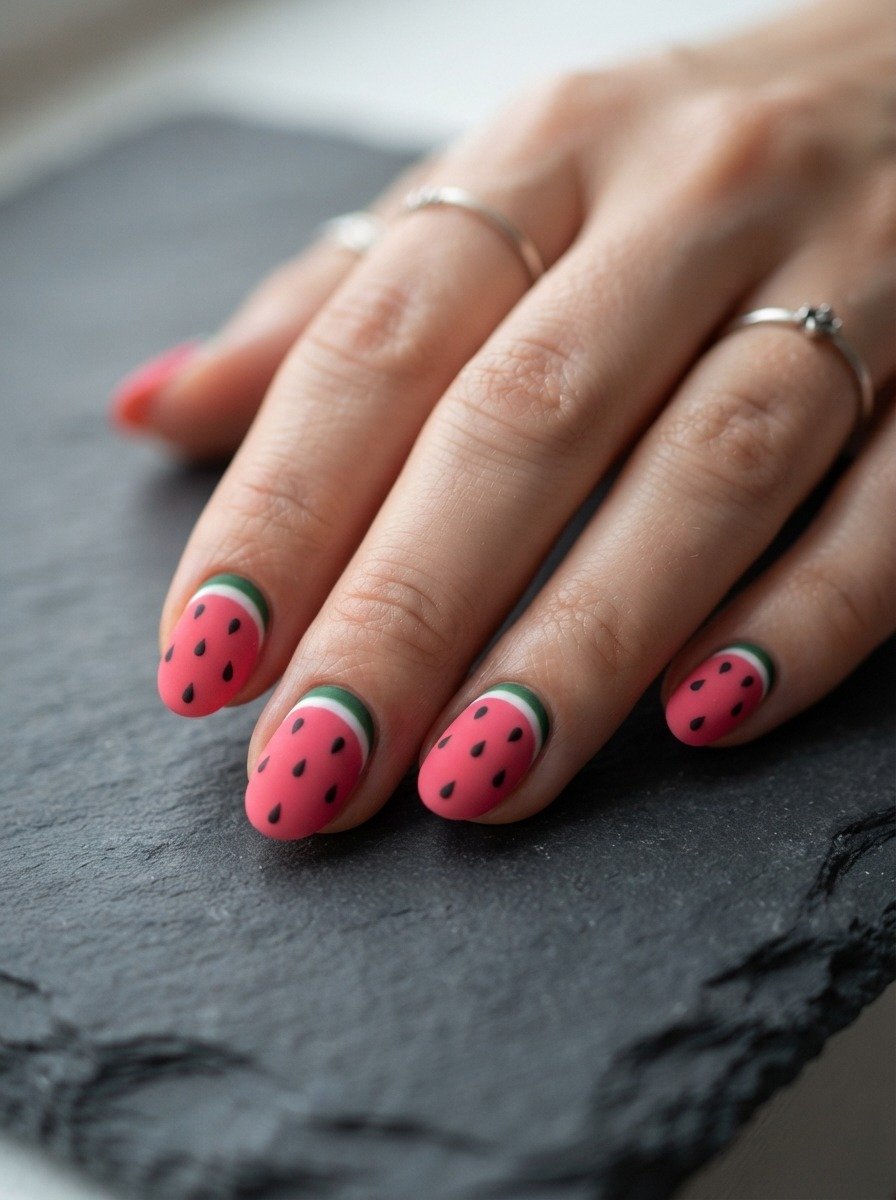
Matte top coats change how a design feels without changing the pattern itself. Paint your usual watermelon slice design, pink tip, white line, green edge, black seeds, then finish with a matte top coat instead of glossy. The flat finish gives the manicure a softer, almost velvet look that reads differently in photos and in person. Budget tip: matte top coats run about the same price as glossy ones, so this swap costs nothing extra if you’re already buying a top coat. Some brands also sell matte-effect powder you dust onto wet polish, which stretches a single bottle further. This finish works well for fall or transitional weather when bright glossy watermelon nails might feel too summery, but you still want the color palette. Matte also tends to show less smudging from daily wear since it doesn’t reflect light the same way glossy does. Keep in mind matte top coats chip a bit faster than glossy ones, so plan on a touch-up sooner if you choose this route.
8.Watermelon Seeds Scattered Design
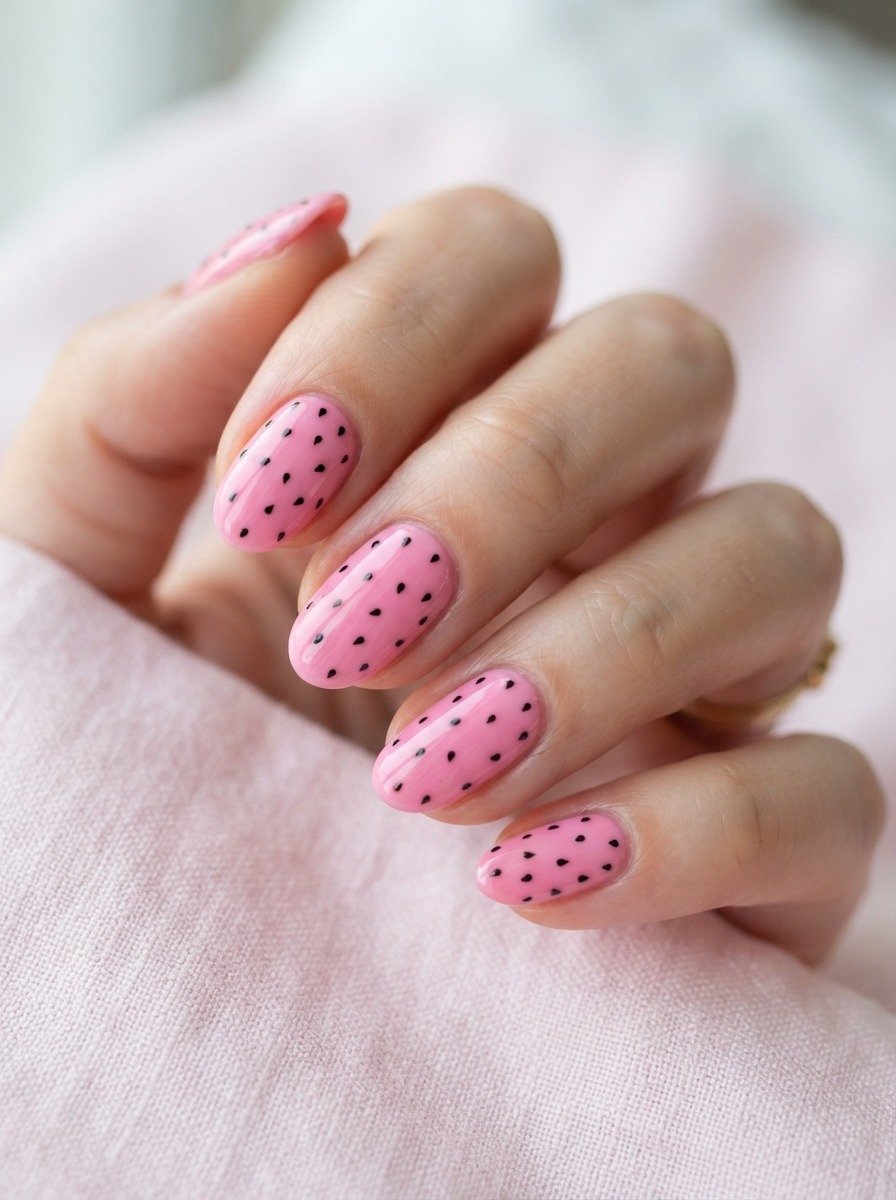
Sometimes less structure looks better than a precise slice pattern. Paint your nails a solid watermelon pink, then scatter black seed shapes randomly across the surface instead of lining them up. Vary the seed sizes slightly, some longer and thinner, others small ovals, to mimic how real watermelon seeds sit unevenly in the fruit. Budget tip: a fine detail nail art brush costs just a couple of dollars and gives you more control than a regular polish brush for these small shapes. If you don’t own one, the tip of a toothpick dipped in black polish works in a pinch. This design skips the green rind entirely, which makes it faster to complete since you’re only working with two colors. It’s a good option when you’re short on time but still want a clear watermelon reference. Try uneven placement instead of a grid pattern, since real seeds never line up perfectly, and the randomness actually makes the design look more natural and less like a sticker.
9.Watermelon Half-Moon Manicure
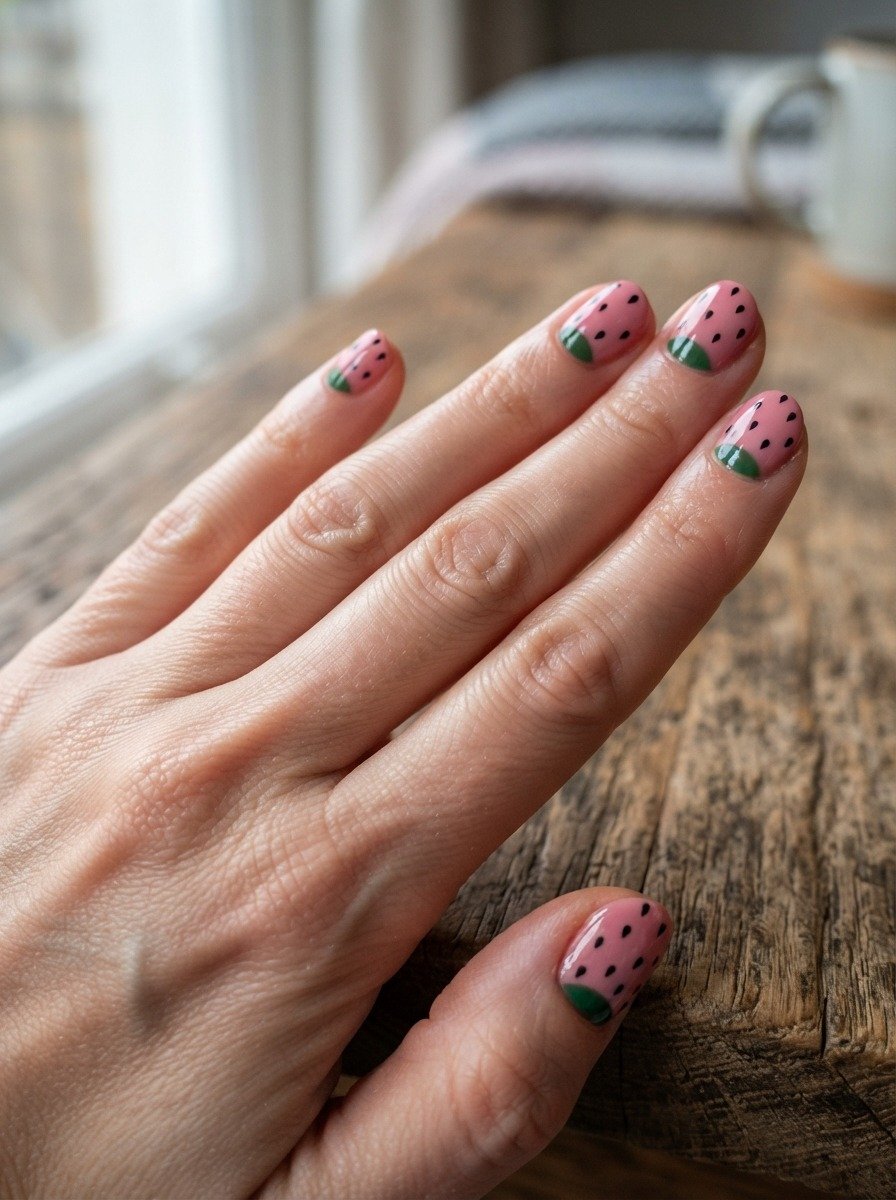
The half-moon manicure highlights the crescent shape at your cuticle instead of the tip. For a watermelon version, paint a green crescent at the base of each nail and fill the rest with pink polish, then add a few black seed dots scattered across the pink area. This design flips the usual attention point, making the cuticle area the visual anchor instead of the tip. Budget tip: a hole reinforcement sticker, the kind used for loose-leaf paper, makes a near-perfect crescent guide and costs just a few cents per sticker. Center it over your cuticle, paint the exposed crescent green, then peel it off and fill in the rest with pink once dry. This look works especially well on nails that have grown out a bit, since the crescent shape draws the eye toward the base rather than showing off tip growth. It also suits people who bite their nails or have shorter nail beds, since the design doesn’t depend on nail length to look complete.
10.Watermelon Marble Effect
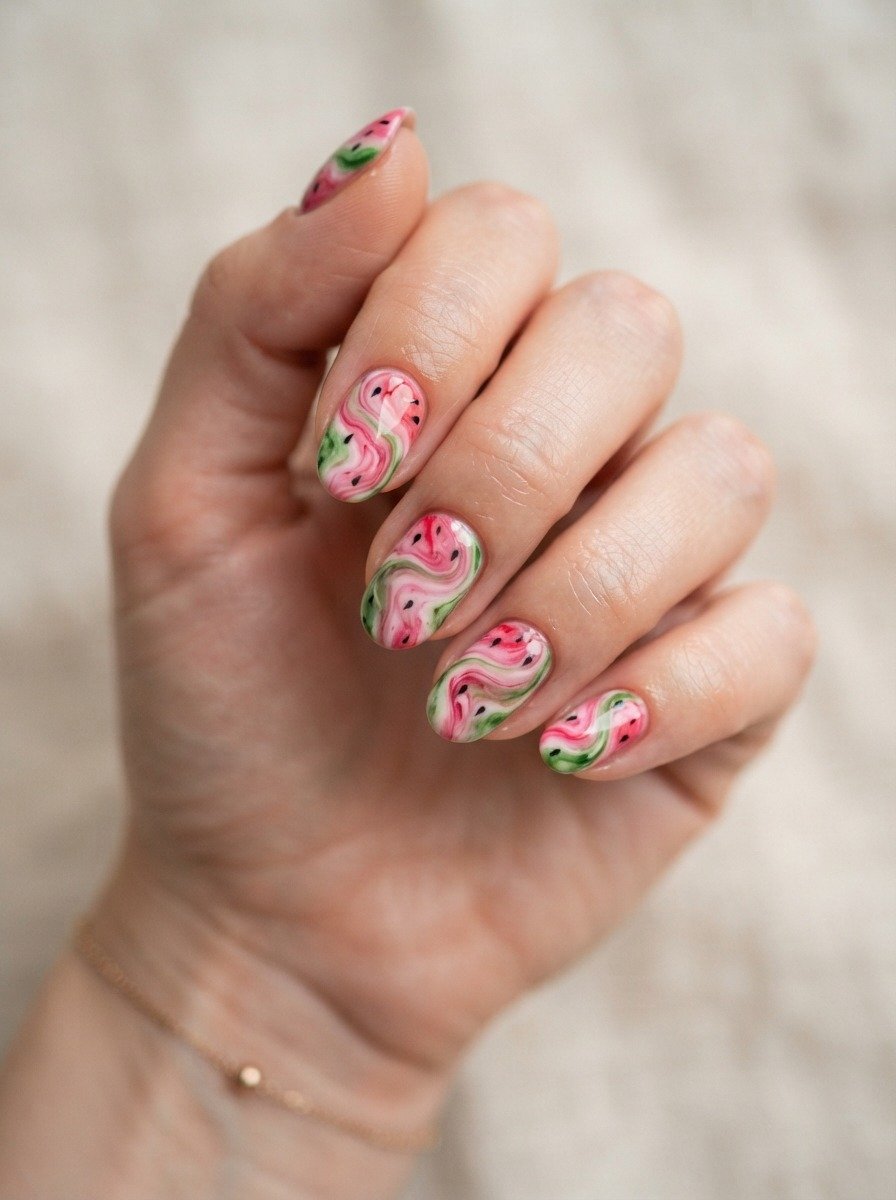
Marbling creates soft, swirled patterns instead of clean lines, and it happens to look a lot like the inside of a watermelon when you use pink, white, and green polish. Drop small amounts of each color onto a shallow dish of room-temperature water, swirl them gently with a toothpick, then dip your nail into the pattern and pull it out. The polish sticks to your nail in a marbled layer. Budget tip: this technique only needs water and polish you likely already own, no special tools required beyond a toothpick and some tape to protect your skin from stray polish. Marbling takes practice, so try it on a spare nail tip or even a piece of paper before committing to your actual nails. The pattern never comes out the same way twice, which is part of the appeal. Once dry, seal with a glossy top coat to make the colors pop. This design suits people who like an artistic, less structured look over a precise fruit illustration.
11.Watermelon Negative Space Nails
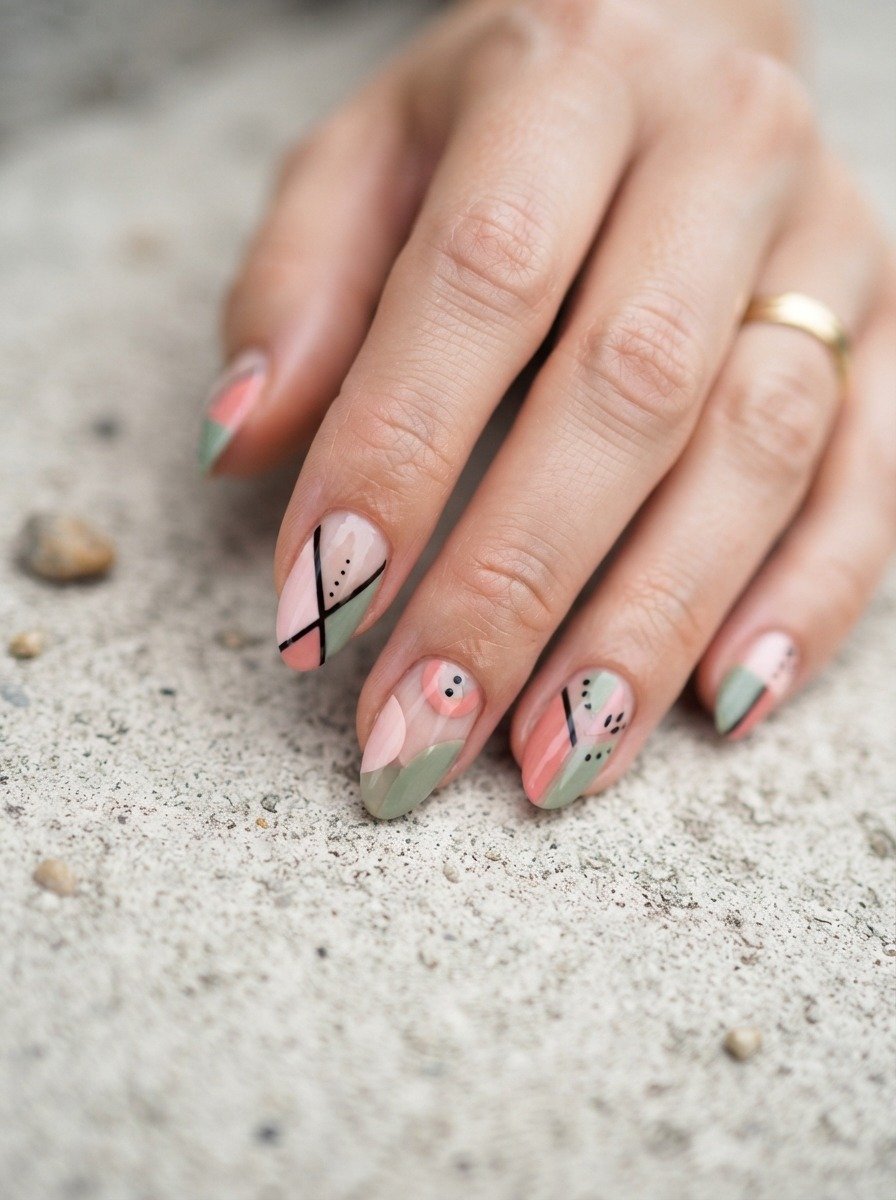
Negative space nail art leaves part of the natural nail bare instead of covering it completely. For a watermelon take, paint a pink triangle or wedge shape on part of the nail, leave a thin bare strip, then add a green edge and a few black seed dots within the pink section. The bare nail line acts almost like the white rind layer in a real watermelon slice. Budget tip: nail art tape or even regular painter’s tape, cut into thin strips, blocks off the bare section cleanly while you paint around it. Just make sure your base nail is buffed smooth before leaving it exposed, since negative space designs show every ridge or texture on unpainted areas. This style tends to look more modern and less literal than a full slice illustration, which appeals if you want the watermelon reference without it looking too on-the-nose. It also uses less polish overall since part of the nail stays bare, stretching your bottles further over time.
12.Watermelon Stiletto Nails
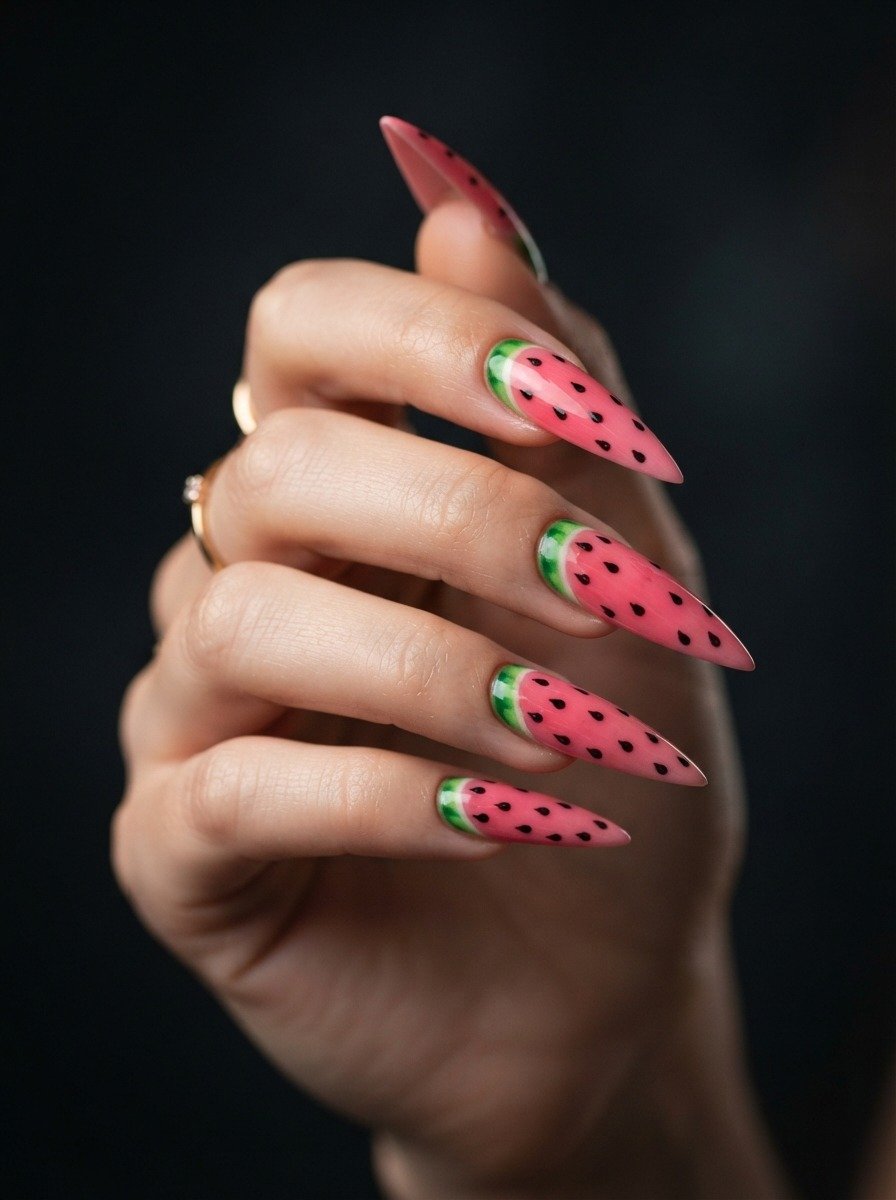
Stiletto nails have a long, pointed shape that gives you more surface area to work with than a rounded or square nail. For watermelon designs, this extra length means you can fit a full gradient, seeds, and rind border all on one nail without it looking cramped. Paint the base pink, add a green section near the tip point since stilettos narrow at the top, and scatter seeds through the middle. Budget tip: press-on stiletto nails from the drugstore cost far less than an acrylic salon set and let you practice the design off your hand first, which makes cleanup easier if you mess up. Paint the press-ons flat on a table, let them dry completely, then apply with adhesive tabs or glue. This shape suits people who already prefer longer nails and want a bolder, more dramatic version of the watermelon trend. Just keep in mind stiletto shapes need more nail strength or acrylic backing to avoid snapping, especially if your natural nails are thin.
13.Watermelon Almond Shape Nails
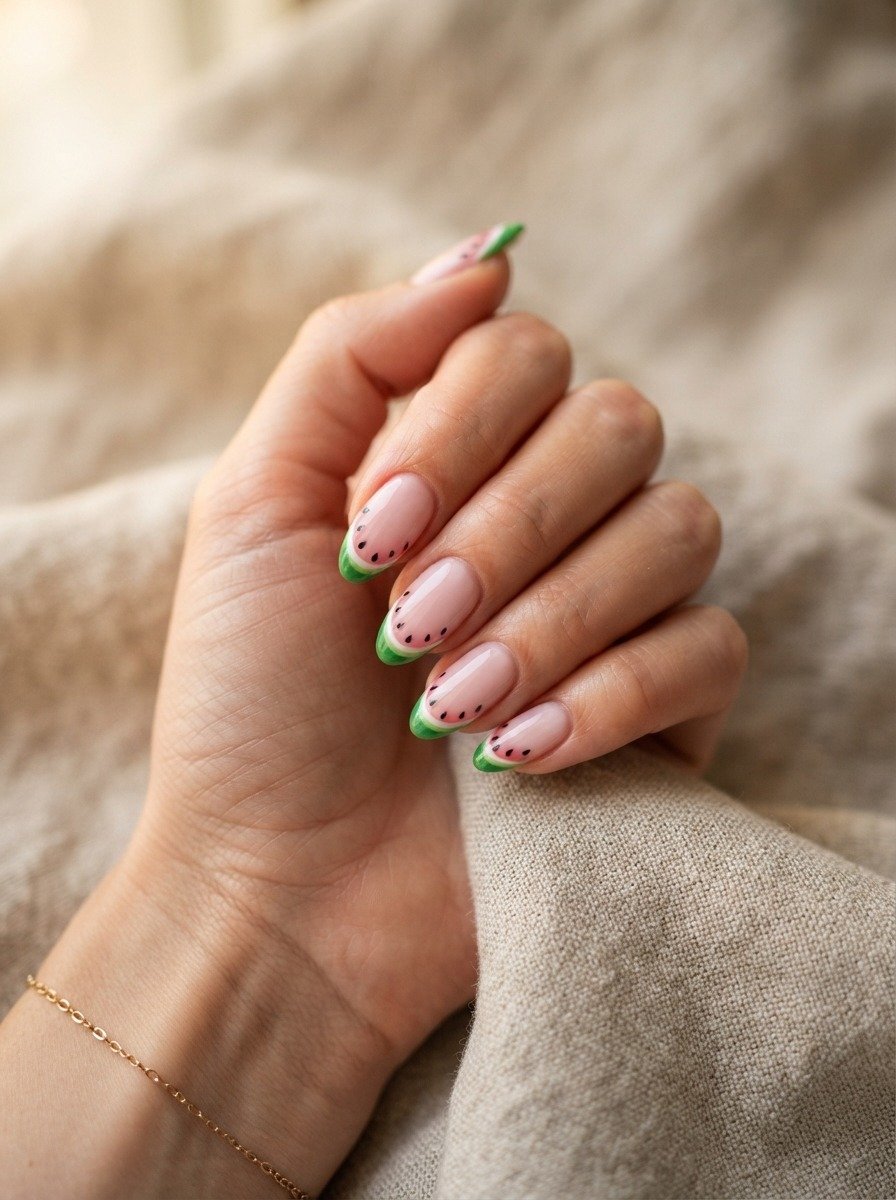
Almond-shaped nails taper to a soft point rather than the sharp angle of a stiletto, giving watermelon designs a gentler, more rounded feel. The tapered tip actually mimics the curve of a real watermelon slice pretty naturally, so a lot of people find this shape the easiest to design around. Paint the tip green, the middle white, and the base pink with scattered seeds, following the nail’s natural curve instead of straight lines. Budget tip: an inexpensive glass or ceramic nail file shapes nails into an almond form more precisely than cheap emery boards, and it lasts years instead of wearing down after a few uses. File in one direction only to avoid weakening the nail edge. This shape flatters most hand sizes and works whether your nails are short and growing out or already long. It also holds polish well since the smooth curve doesn’t have sharp corners where polish tends to chip first. Pair it with a strengthening base coat if your nails are on the thinner side.
14.Watermelon Coffin Nails
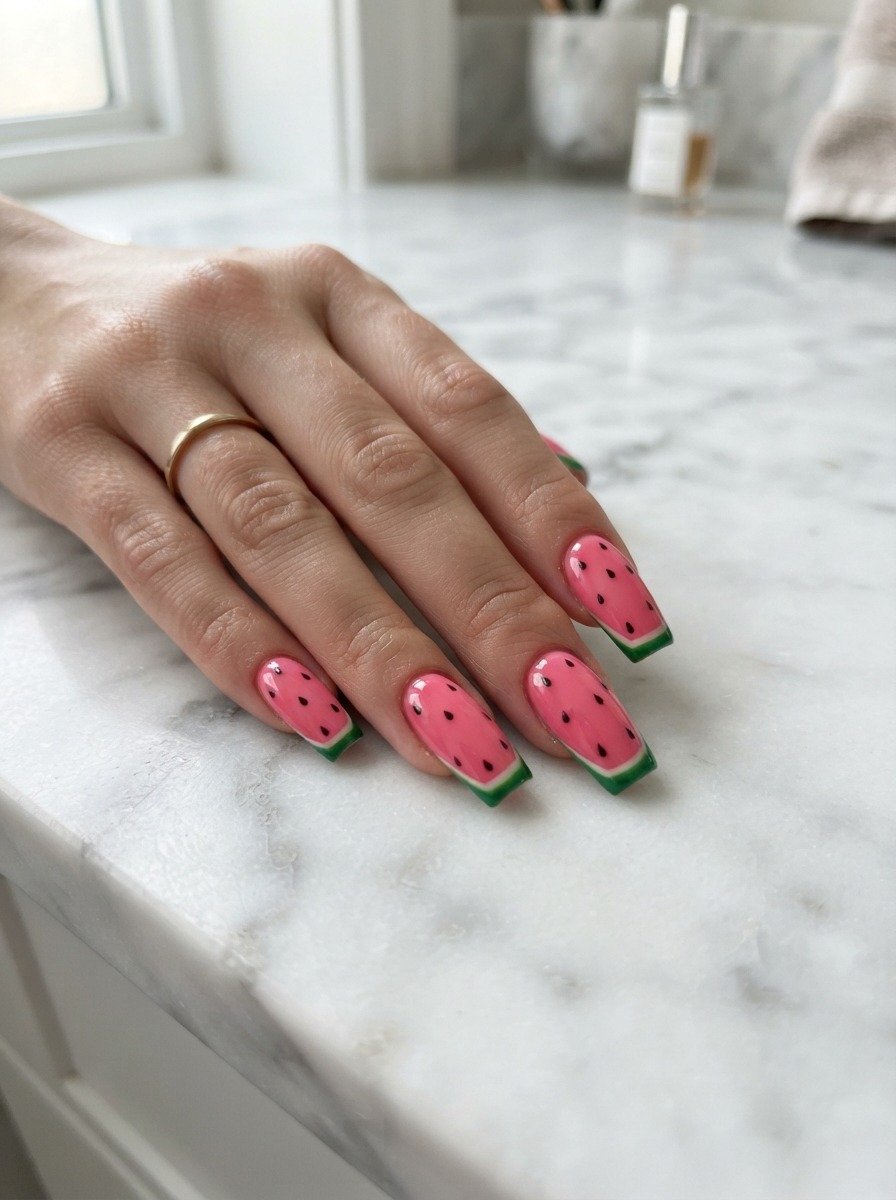
Coffin nails, also called ballerina nails, have a squared-off flat tip instead of a point. That flat edge gives you a clean canvas for a straight green line at the very top, almost like the flat rind edge of a cut watermelon slice sitting on a plate. Paint the flat tip green, add a thin white line beneath it, then fill the rest with pink and seed dots. Budget tip: if you’re not confident shaping your natural nails into a coffin form, press-on sets in this shape are widely available at drugstores for a low price and can be trimmed further with regular nail clippers to fit your nail bed. This shape pairs especially well with the classic watermelon slice design since the flat tip mirrors the flat edge of a real slice more closely than rounded or pointed shapes do. It’s a solid pick if you want your nails to look like a literal mini watermelon slice sitting at the end of each finger.
15.Watermelon Chrome Accent Nail
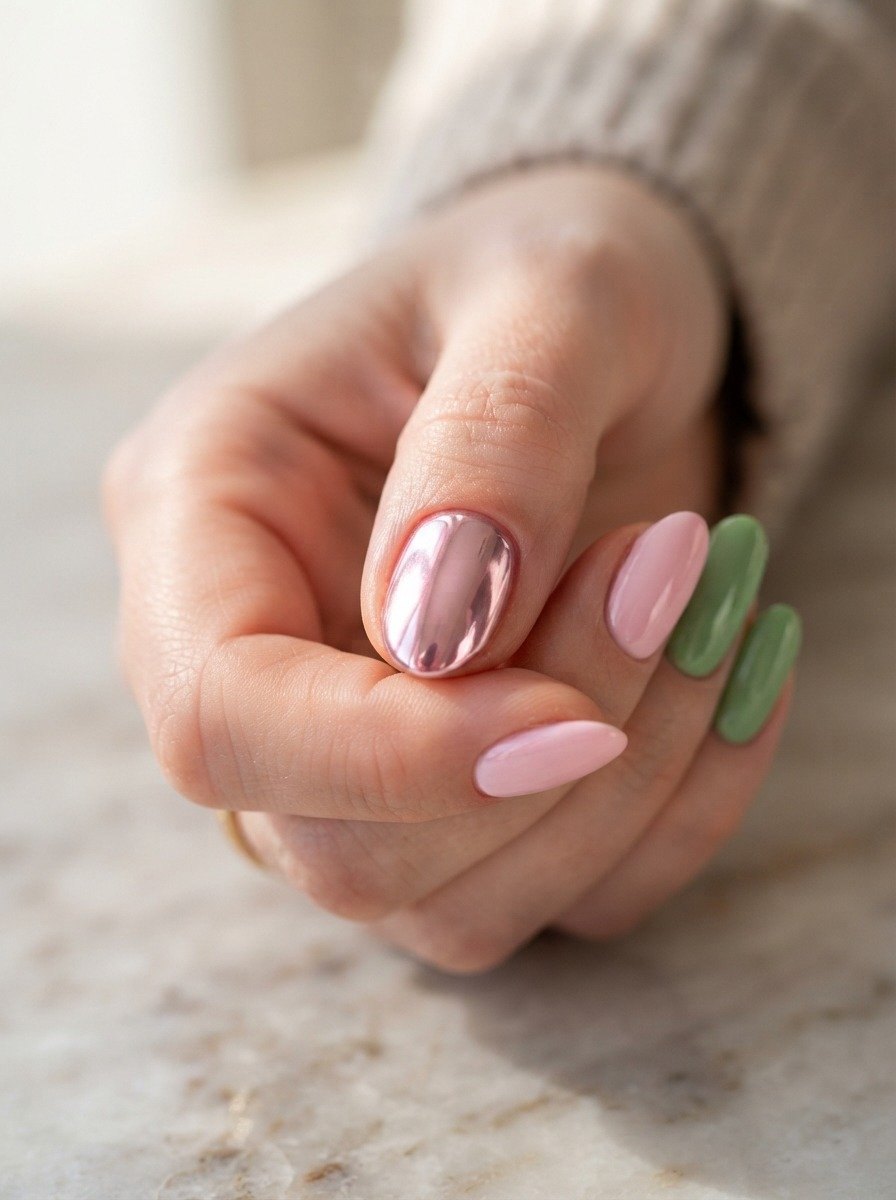
Chrome powder gives one nail a mirror-like shine that contrasts against the flatter finish of the rest of your watermelon manicure. Paint most of your nails with the standard pink and green slice design, then pick one nail, maybe your ring finger, and coat it with a pink or silver chrome powder instead. Buff the powder into a base coat with a soft applicator until it reaches full shine. Budget tip: chrome powder pots are small but last through many manicures since you only need a tiny amount per nail, making the cost per use lower than it looks on the price tag. This accent works well for special occasions since the shine catches light in photos. Keep the chrome nail simple, without seed dots or extra pattern, so it reads as a deliberate contrast rather than a cluttered design. If chrome powder feels like too much of an investment, a metallic pink polish gives a similar, though less mirror-like, effect for less money.
16.Watermelon Nail Wraps
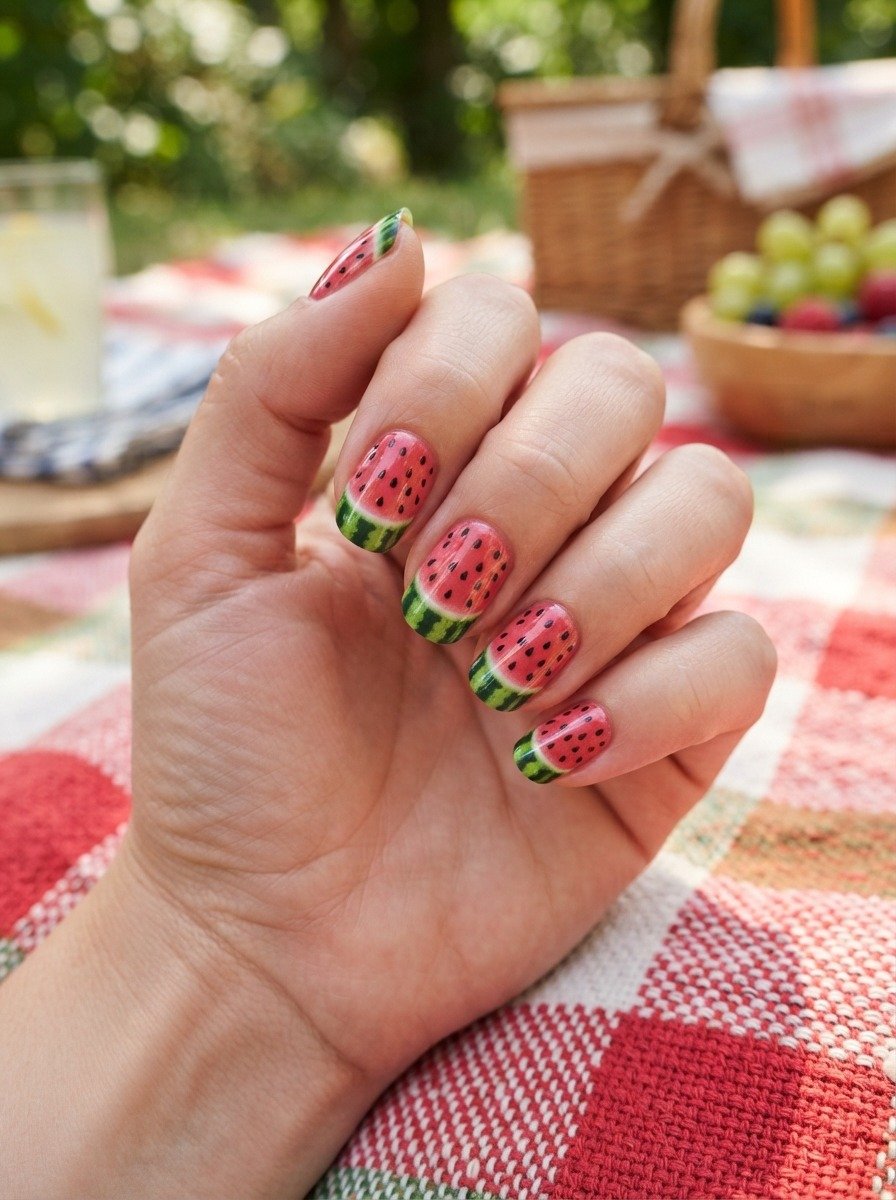
Nail wraps are pre-printed stickers cut to fit your nail shape, and they’re the fastest way to get a detailed watermelon design without any painting at all. Peel the wrap, press it onto a clean, dry nail, trim the excess with a small file, and seal with a top coat. The whole process per hand takes about ten minutes. Budget tip: a pack of nail wraps usually costs less than two bottles of specialty nail polish and covers several manicures depending on how many nails you use them on. This option suits anyone who wants the look without the skill or patience for freehand painting. It’s also useful for group activities, like a birthday party or bachelorette gathering, where not everyone feels confident painting nail art but still wants matching designs. Store leftover wraps in a sealed bag away from heat, since they can dry out or lose stickiness if left exposed to air for too long between uses.
17.Watermelon French Ombre Combo
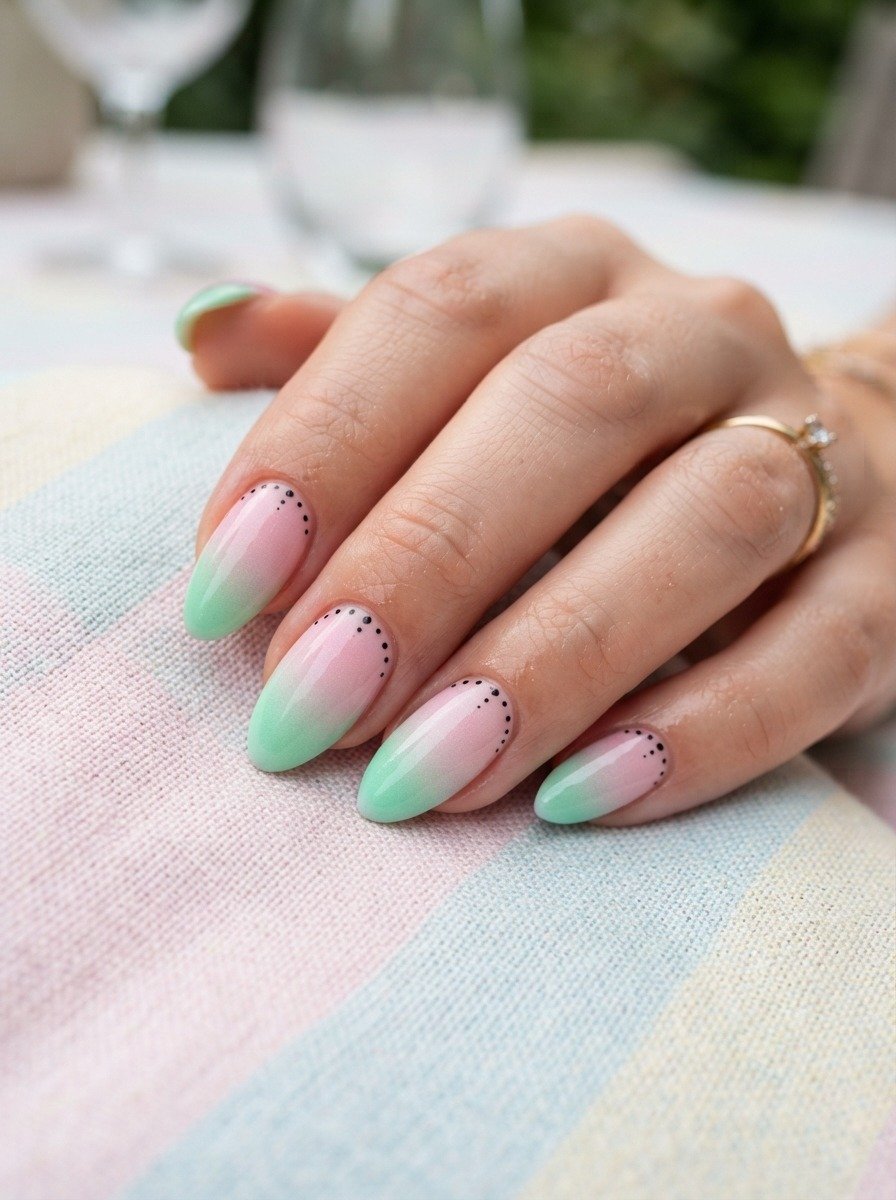
Combine two techniques here. Start with a French tip guide to shape a clean pink crescent at the top of your nail, then blend that pink into green using a makeup sponge before the polish fully dries, creating a soft gradient right at the tip instead of a sharp line. A few black seed dots near the pink section finish the design. Budget tip: this combo doesn’t require buying new tools if you already have French tip guides and a makeup sponge from other manicures, so it’s essentially free to try using supplies most people already own. The blended edge gives a more painterly look compared to a standard French tip, which some people find more visually interesting. Practice the sponge blending step on a paper towel first to see how much polish transfers before doing it on your actual nail. This design takes a bit more time than a basic French manicure, expect close to twenty minutes per hand, but the result looks more custom than a store-bought wrap.
18.Watermelon Nail Charms
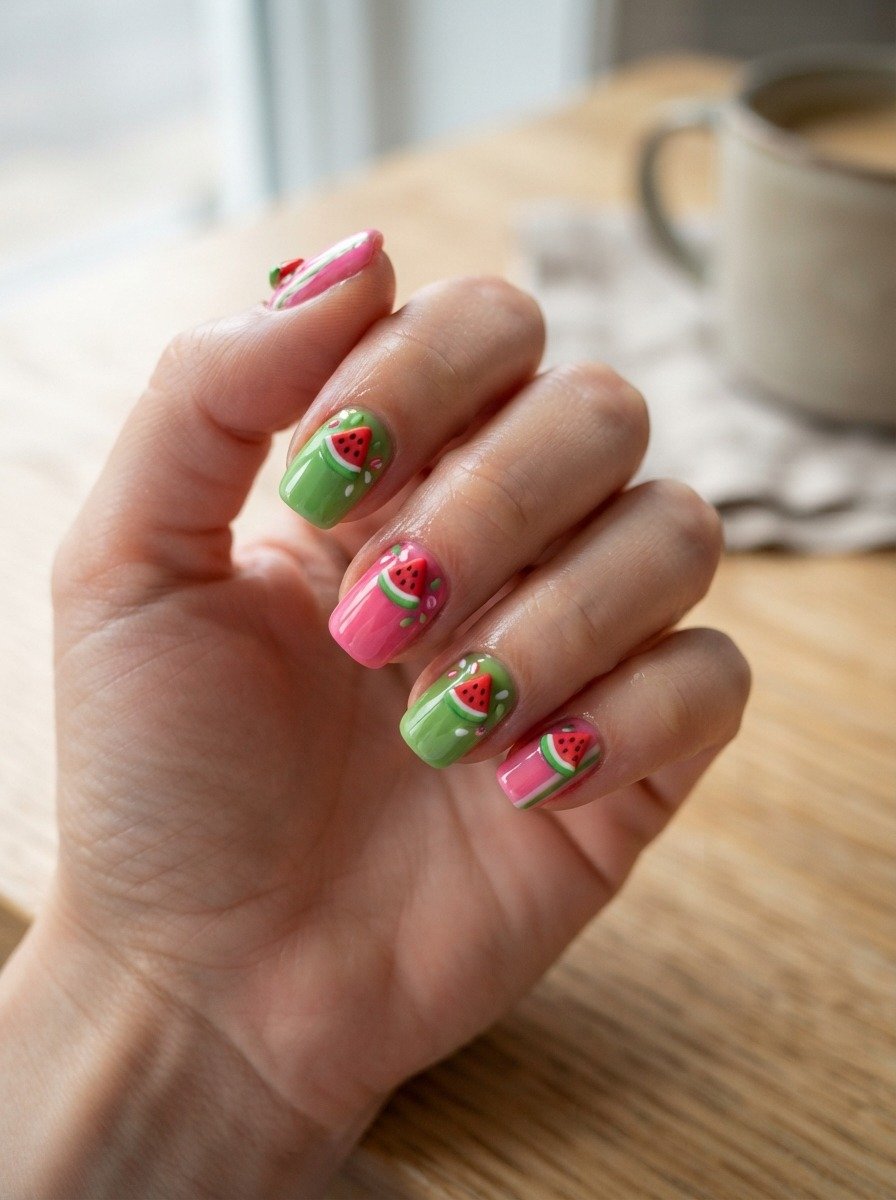
Small resin or metal charms shaped like watermelon slices add a three-dimensional element to an otherwise flat manicure. Paint your nails in a base watermelon color scheme, then use nail glue to attach a tiny charm near the cuticle of one or two nails. Seal around the edges of the charm with top coat so it doesn’t catch on clothing or hair. Budget tip: charm packs sold online or at beauty supply stores often include dozens of small pieces for a low price, giving you enough for several manicures rather than just one. Only apply charms to nails that won’t take heavy daily impact, like your ring or pinky finger, since charms on your dominant hand’s index finger tend to fall off faster from friction. This design adds texture and a bit of novelty without requiring any drawing skill, since the charm does the visual work for you. Just avoid overloading a single nail with too many charms, as it can look cluttered instead of intentional.
19.Watermelon Reverse French Tip
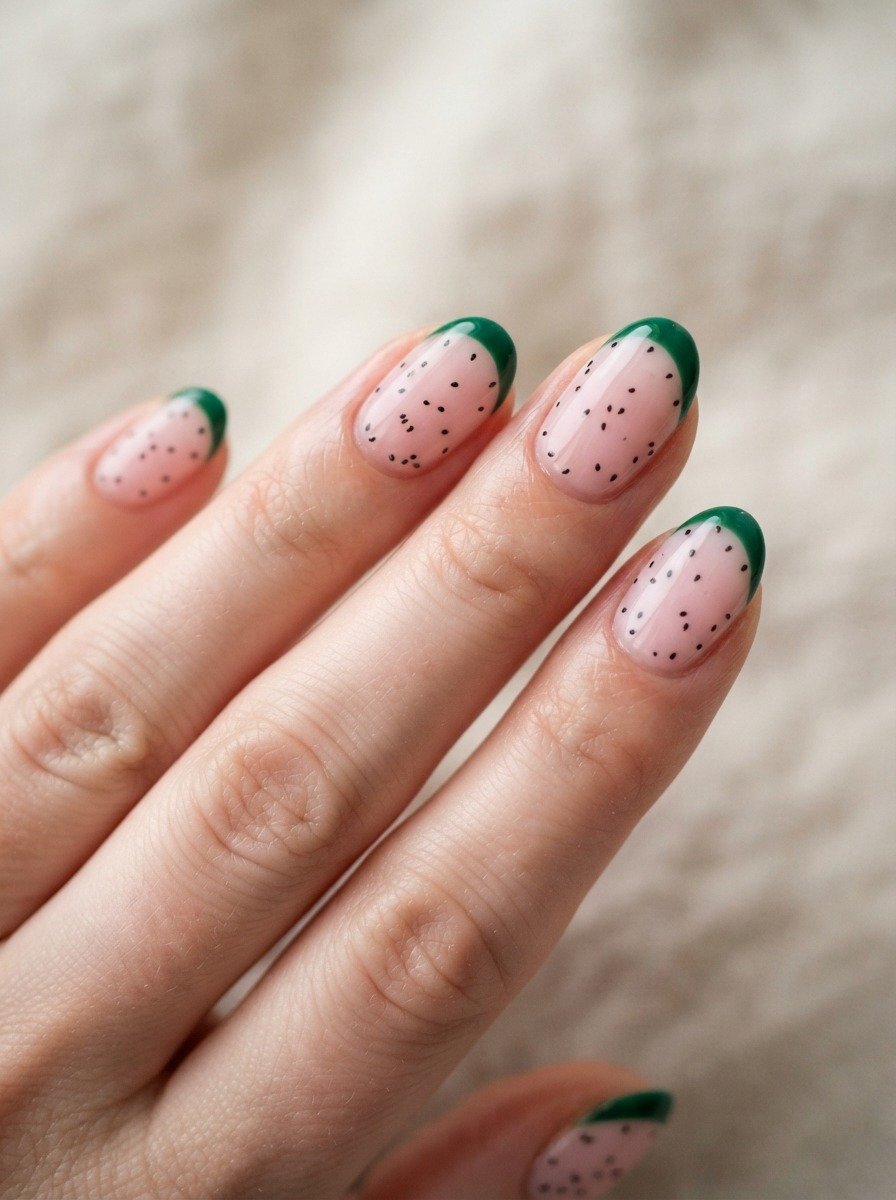
A reverse French tip flips the usual crescent shape so it curves downward from the tip instead of upward from the cuticle. For watermelon nails, paint a green crescent at the very top of the nail curving inward, then fill the rest with pink and scatter a few black seeds through the middle section. This creates a subtle rind reference at the tip without a full slice illustration. Budget tip: the same hole reinforcement stickers used for half-moon designs work here too, just flip them upside down at the tip instead of the cuticle to guide your crescent shape. This design reads as more understated than a full watermelon slice, making it office-friendly while still nodding to the summer trend. It also wears well over time since tip designs like this tend to grow out more gracefully than base designs, giving you a bit more time between touch-ups. Pair it with a glossy top coat for a clean, polished finish that catches light nicely in everyday settings.
20.Watermelon Squoval Nails
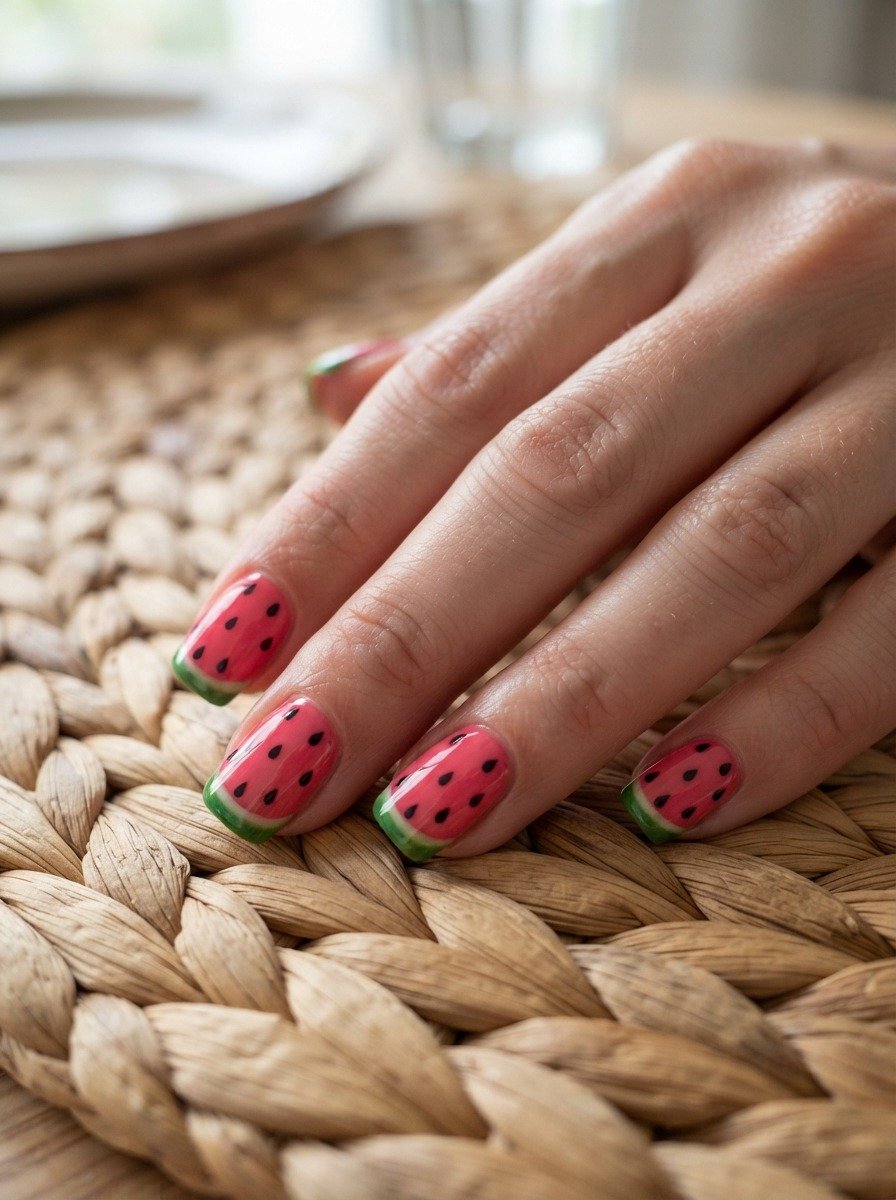
Squoval nails sit between square and oval, with flat sides but softened corners instead of sharp edges. This shape gives watermelon designs a wide, even surface to work with, which makes lining up seed dots or a straight rind border easier than on a narrower or more tapered shape. Paint the tip green in a straight line, add white beneath it, then pink with scattered seeds across the wider nail bed. Budget tip: shaping nails into a squoval form just takes a regular nail file, no special tools needed, and it’s one of the lower-maintenance shapes to keep up since it doesn’t require sharp filing at the corners that can weaken the nail over time. This shape suits people who type often or use their hands for detailed work, since the rounded corners snag less on fabric or hair compared to squared or pointed shapes. It’s also a practical pick if you’re new to nail art, since the flat surface makes freehand lines easier to keep straight.
21.Watermelon Nails With Rhinestones
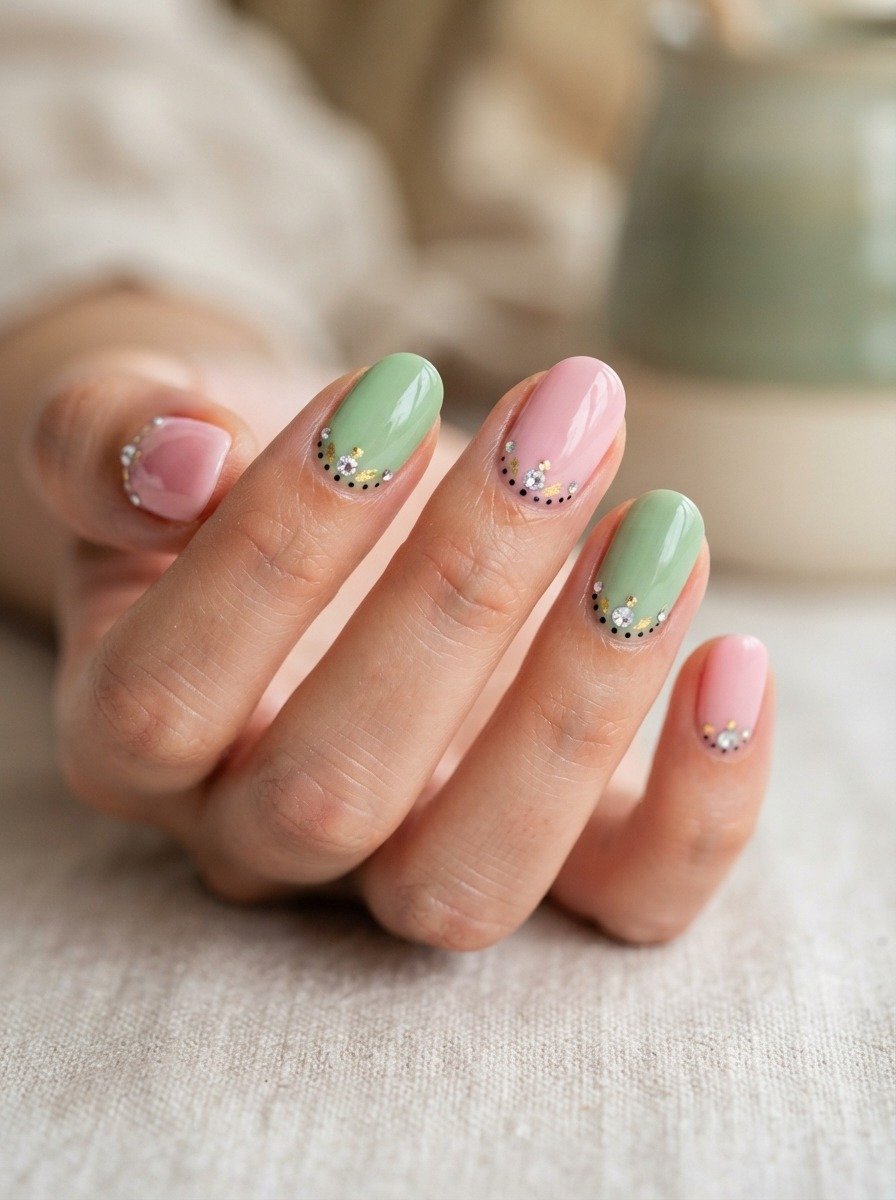
Rhinestones add sparkle without requiring glitter polish or chrome powder. Paint your watermelon design as usual, then use a small dot of nail glue to place one or two tiny rhinestones near the cuticle or along the green edge of the nail. Clear or pale pink stones tend to blend in nicely without overpowering the fruit pattern underneath. Budget tip: rhinestone packs sold for crafting or scrapbooking often cost less than those labeled specifically for nails, and they work exactly the same way. A toothpick dipped in a small amount of clear nail glue makes placement easier than trying to pick up tiny stones with your fingers. Keep the rhinestones to just one or two per nail, and only on nails less exposed to daily friction, so they don’t fall off within a day or two. This detail works well for a night out or a special event where you want a bit of shine, but it’s probably too delicate for everyday wear on your dominant hand.
22.Watermelon Nails for Short Natural Nails
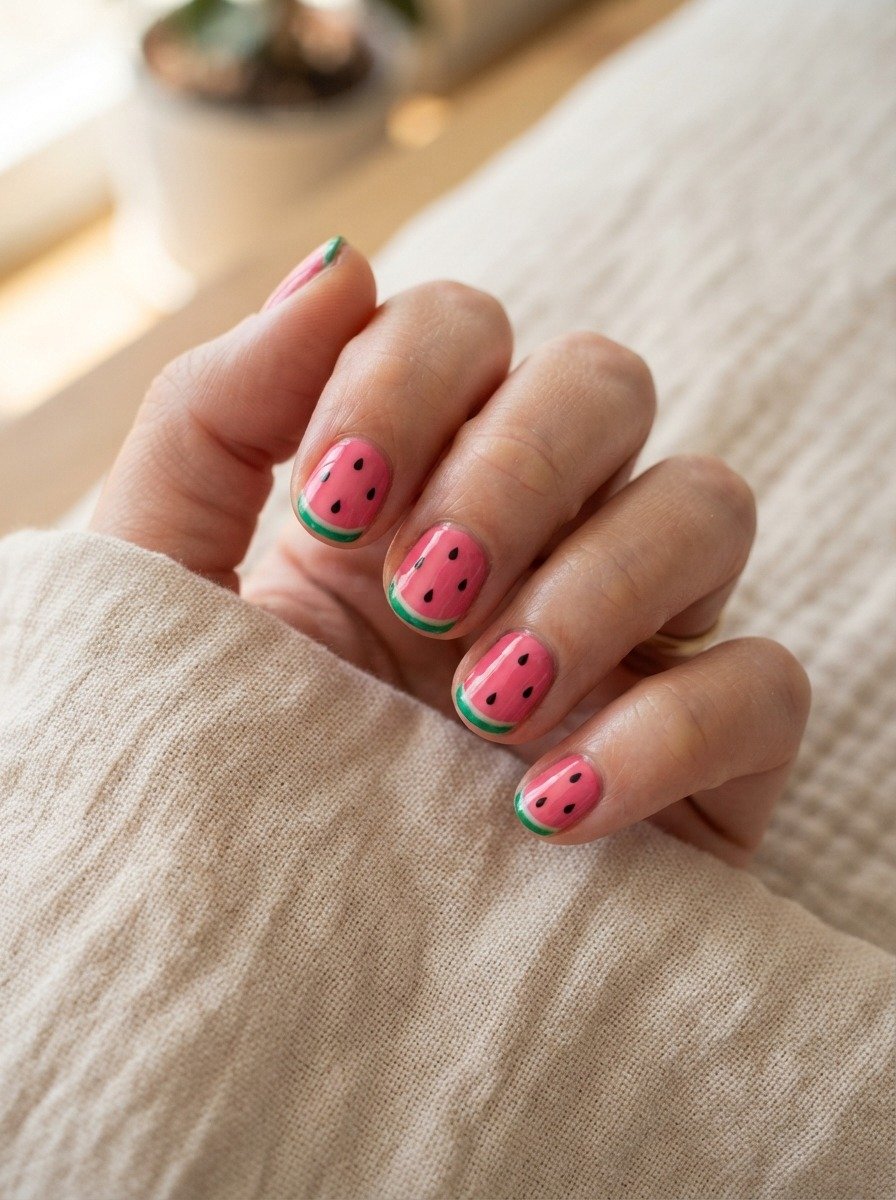
Short nails don’t have much surface area, so a full slice design with seeds, a white line, and a rind border can look cramped or messy. Simplify it instead. Paint the whole nail pink, add just a thin green line at the very tip, and place one small black dot near the center. That’s it. Budget tip: this stripped-down version uses less polish overall than a detailed design, so a single bottle of each color lasts through more manicures. It also takes less time, often under ten minutes for both hands, which suits anyone who doesn’t want to sit still for a long nail art session. Short nails also tend to hold polish better than very long nails since there’s less surface area prone to chipping at the tip. If you bite your nails or they break easily, this simplified design still gives you the watermelon look without needing length or a steady hand for detailed line work.
23.Watermelon Gel Polish Manicure
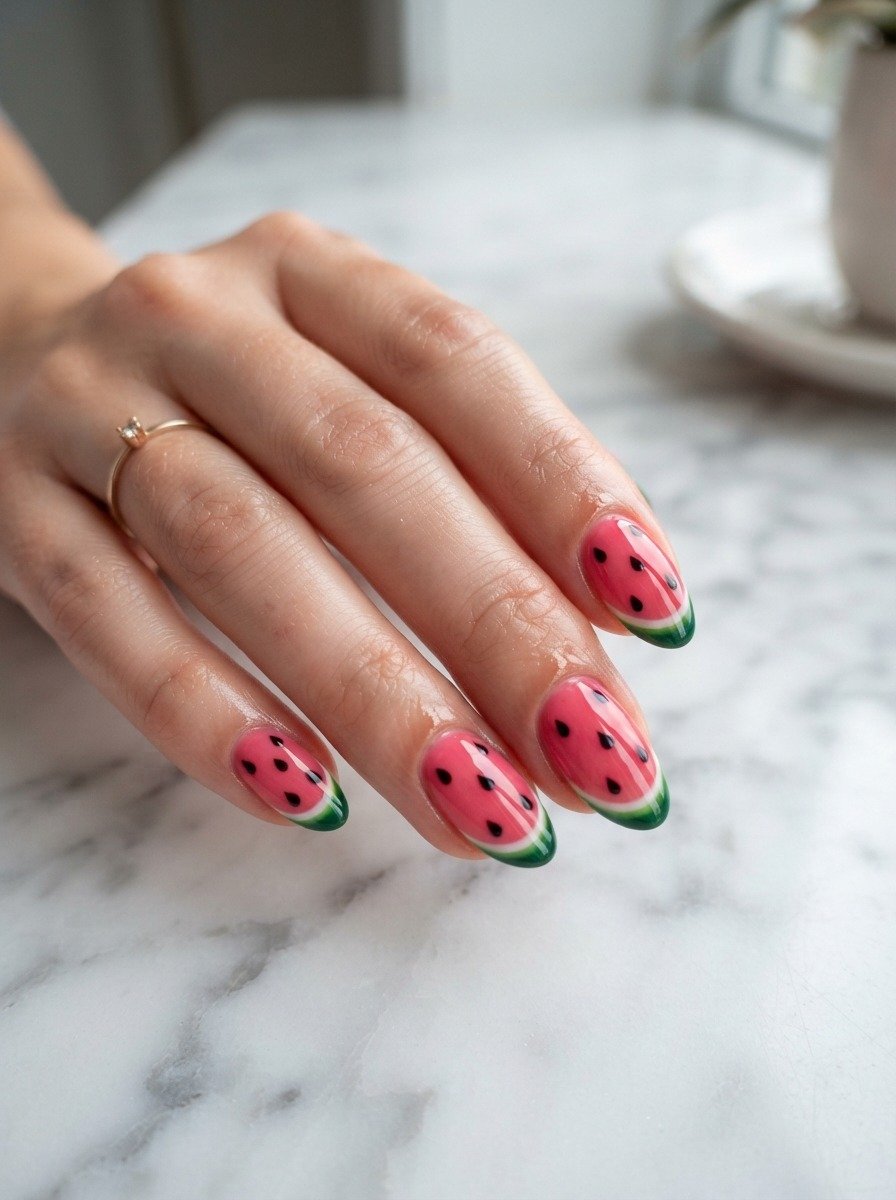
Gel polish lasts longer than regular polish and dries under a UV or LED lamp instead of air-drying, which means no smudging while you wait. Paint your watermelon design using gel-specific polish, curing each color layer under the lamp before adding the next. The finished look holds its shine and color for two to three weeks with normal wear. Budget tip: a basic UV lamp for home use costs less than a handful of salon gel manicures, so it pays for itself after just a few uses if you plan to keep doing gel manicures regularly. Gel polish itself costs slightly more per bottle than regular polish, but the extended wear time means you’re repainting less often, which balances out the cost over a few months. This option suits people with an active lifestyle, like frequent hand-washing at work or regular gym sessions, since gel resists chipping better than standard polish. Just remember gel removal needs acetone soaking, so avoid peeling it off, which can damage your natural nail underneath.
24.Watermelon Nails With Matching Pedicure
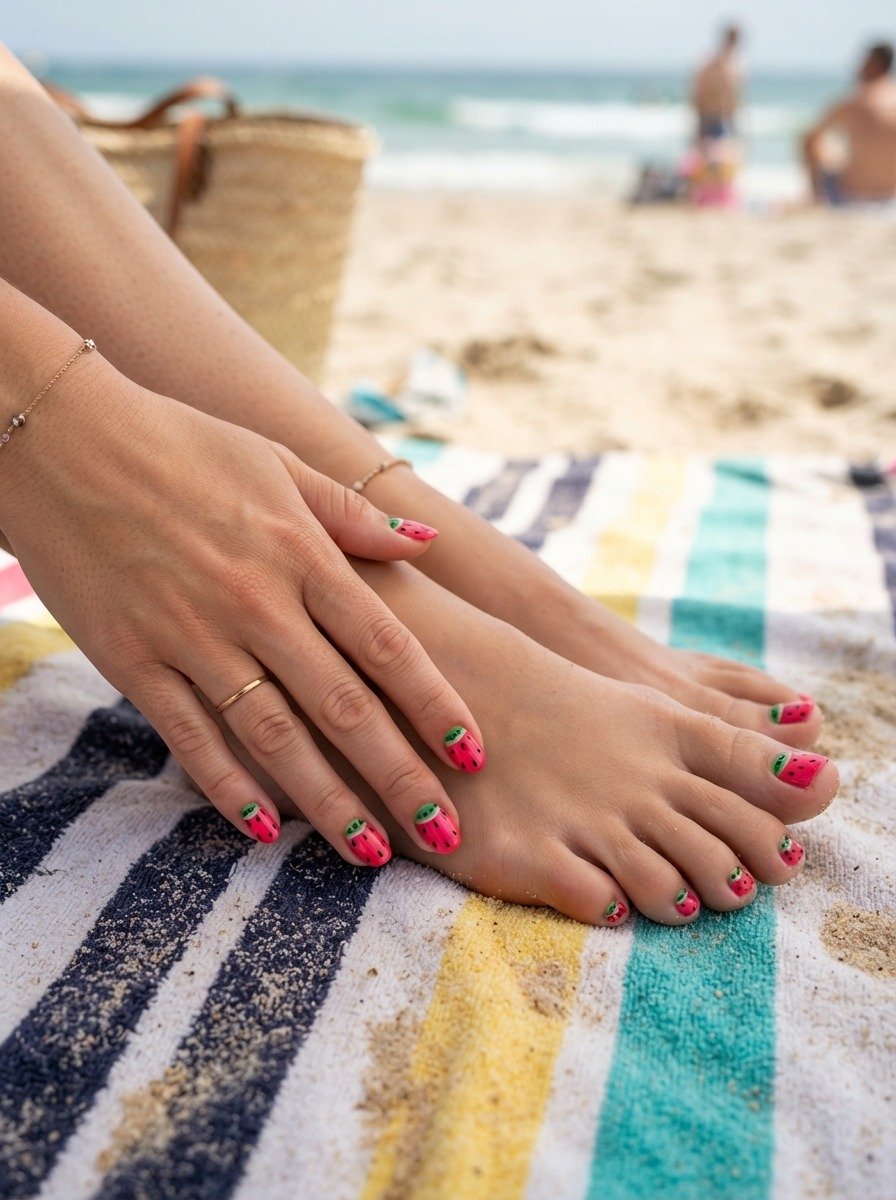
Matching your fingernails and toenails ties the whole look together, especially in summer when both are on display in sandals or at the pool. Paint the same watermelon slice pattern on both, keeping the color ratios consistent so they read as a set rather than two separate designs. Budget tip: buying one bottle each of pink, green, black, and white polish covers both a full manicure and pedicure, so you’re not purchasing separate products for hands and feet. Toenails are larger and flatter than fingernails, which actually makes detailed designs like seed dots and rind borders easier to paint accurately. Do your pedicure first if you’re new to nail art, since mistakes there are more forgiving and less noticeable than on your hands. This combo works especially well for vacation photos or beach days, where both your hands and feet are likely to show up in pictures together, giving your whole look a coordinated summer feel from head to toe.
25.DIY Watermelon Nail Art Kit for Beginners
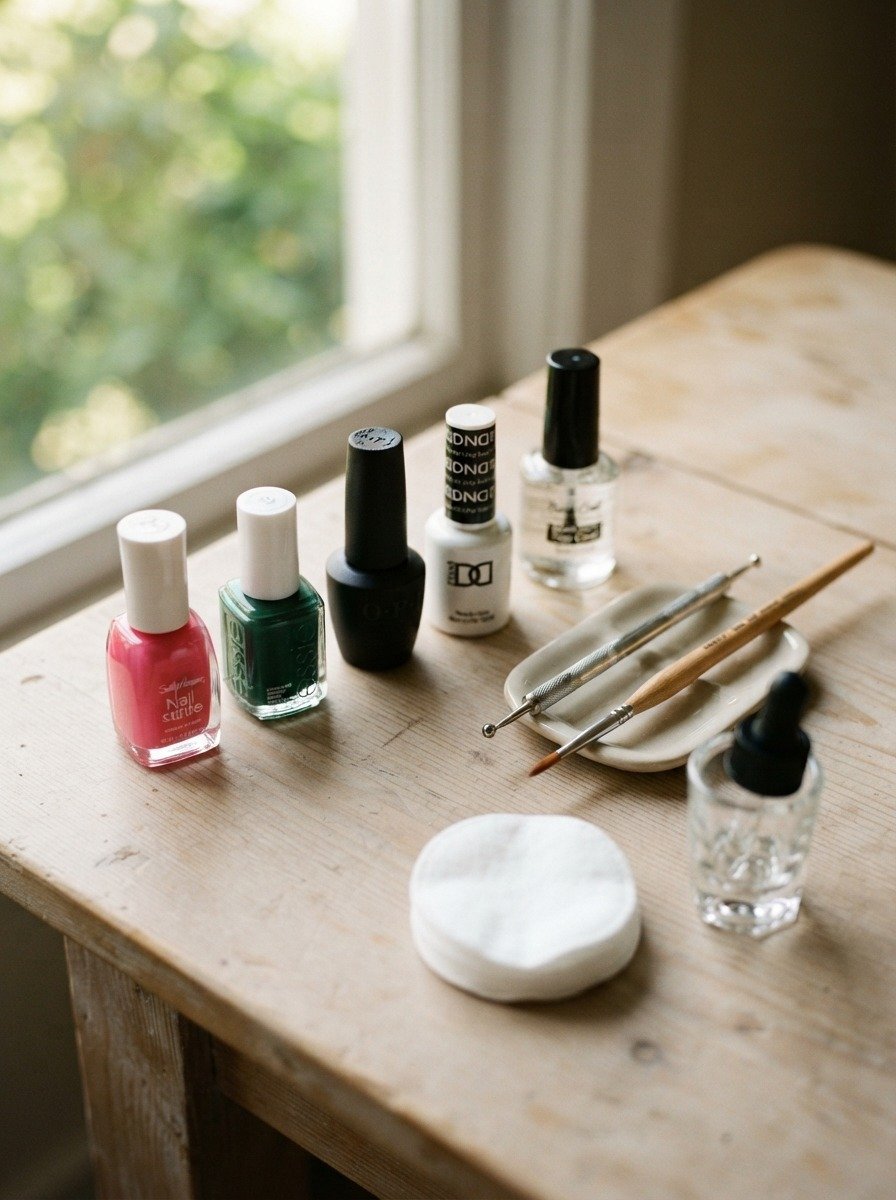
If you’ve tried a few designs from this list and want to keep experimenting, put together a small dedicated kit instead of digging through a full polish collection each time. All you really need is one pink, one green, one black, and one white polish, plus a dotting tool, a thin detail brush, and a base and top coat. Budget tip: most of these items together cost less than a single salon manicure appointment, and the kit lasts through dozens of at-home sessions since you only use a small amount of each polish per manicure. Store everything in a small pouch or box so it’s ready whenever you want to try a new design from this list without hunting for supplies first. Practice on paper or old nail tips before moving to your actual nails if you’re still building confidence. Over time, you’ll find which tools you reach for most, whether that’s the dotting tool for seeds or the detail brush for lines, and can build out your kit from there.
Conclusion
Watermelon nail art works because it’s flexible. You can go all in with a full slice on every nail, or keep it simple with one seed dot on a single accent finger. Either way, the designs on this list use polish, tools, and techniques you can find at any drugstore or beauty supply store, no salon visit required. Start with whichever idea matches your current skill level and nail shape, then build from there as you get more comfortable with a brush or dotting tool. Keep a base watermelon polish set on hand, pink, green, black, and white, so you’re ready to try a new look whenever the mood strikes. Pick one design from this list and give it a try on your next at-home manicure day.