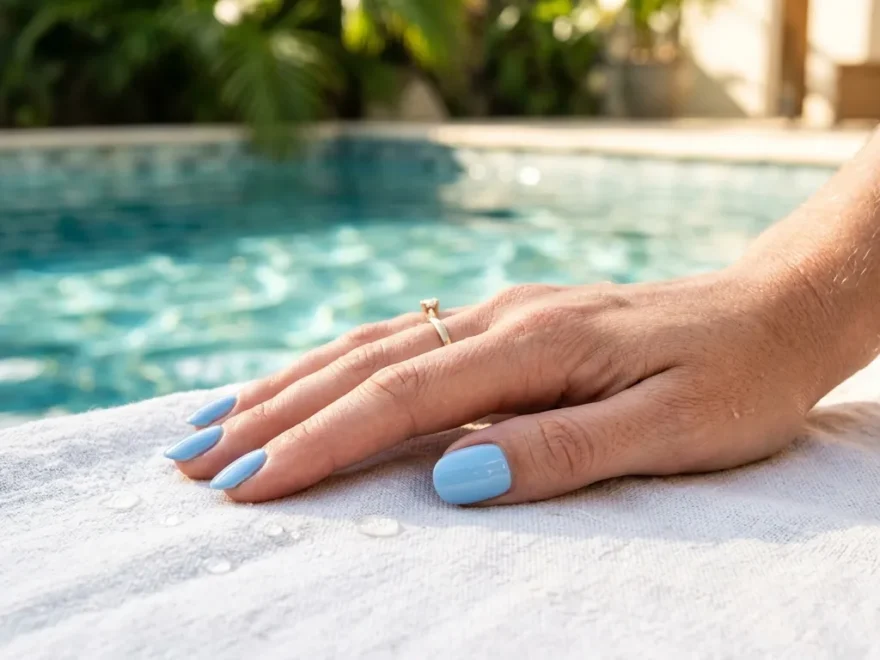
Summer calls for a manicure that feels light, cool, and easy to wear. Light blue nails give you that beachy, calm feeling without trying too hard. Whether you want a soft baby blue or a bold sky blue, this color works with almost every skin tone and outfit. Below you’ll find 21 simple ways to wear light blue nails this season, plus small tips to help you recreate each look at home without spending a lot of money. Grab your favorite polish and get ready to try something new for your next manicure. If you’re also looking for Tropical Vacation Nails Ideas, bright colors, palm leaf patterns, ocean-inspired designs, and playful tropical accents can help you create the perfect manicure for your next beach getaway or island adventure.
1. Classic Sky Blue Manicure
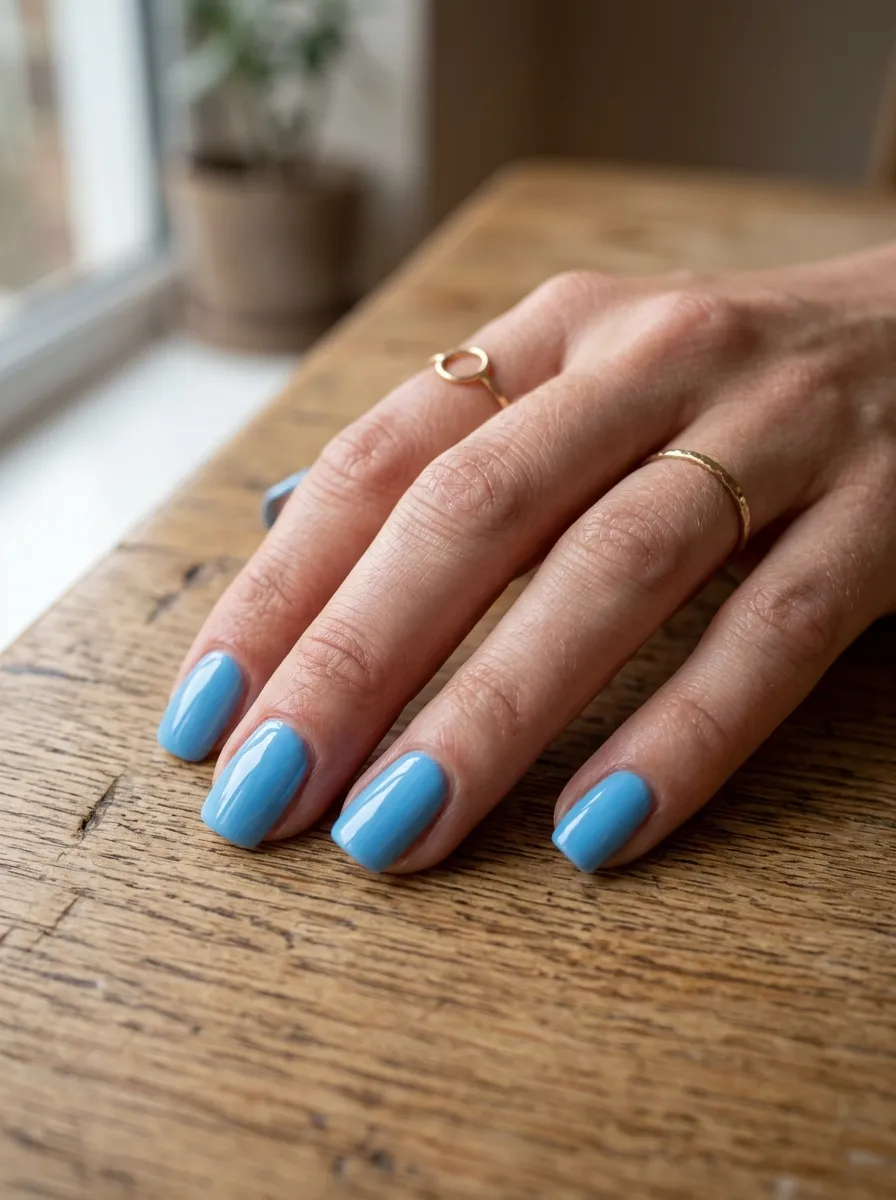
A classic sky blue polish is the easiest place to start. It works on short or long nails and pairs well with any outfit. Pick a shade close to a clear summer sky for the most calming effect. Two coats usually give full color without streaks. Let each coat dry for a few minutes before adding the next one. Finish with a clear top coat for shine and extra wear time. This look costs very little since most drugstore brands carry a light blue shade for under ten dollars. If you want to try it at home, use a base coat first to protect your natural nails from staining. A cotton swab dipped in polish remover cleans up any small mistakes around the cuticle. This style also works great for beginners since one solid color is simple to apply evenly. It’s a small change that makes your hands look put together for summer parties, beach days, or just everyday wear.
2. Light Blue French Tips
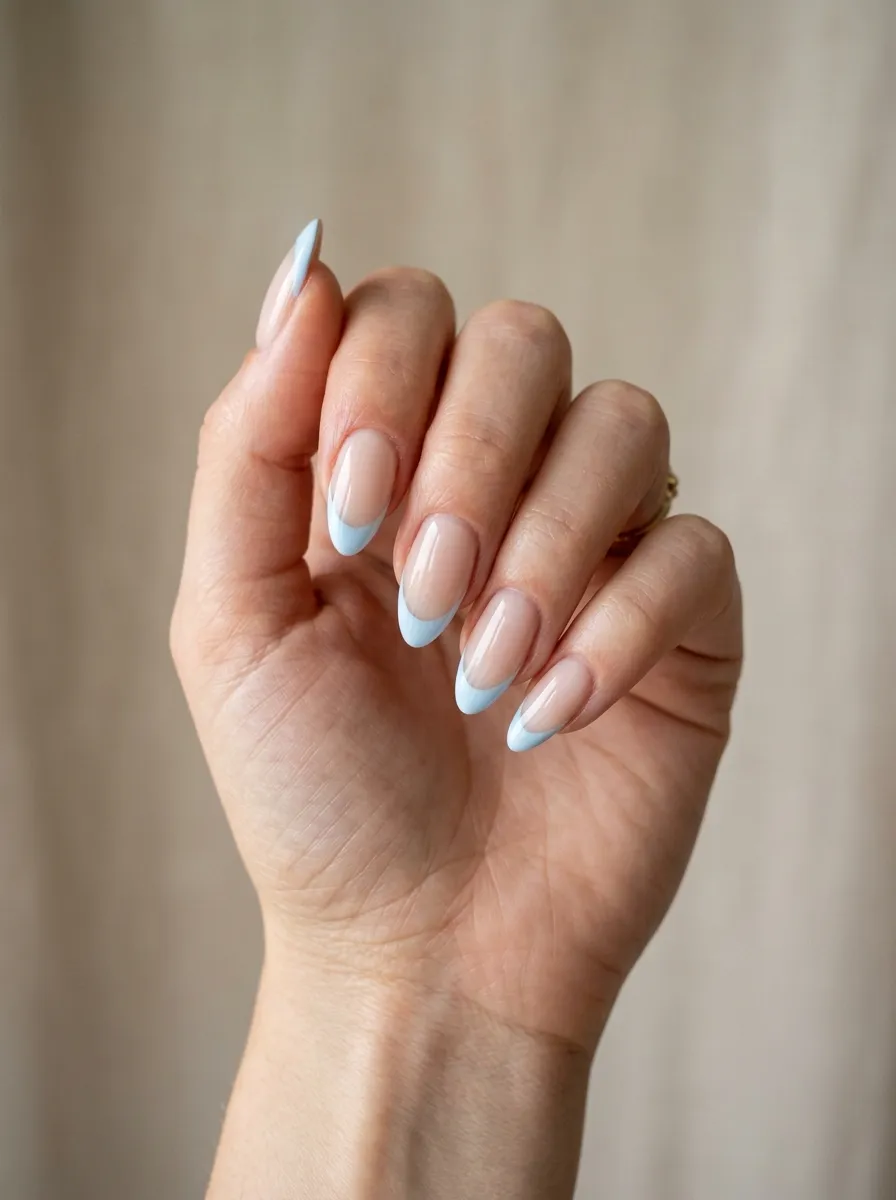
Swap the usual white tip for a pale blue one. It gives the classic French manicure a summer twist. Start with a sheer pink or nude base coat. Then use a thin brush or striping tape to paint a clean line near the tip. Light blue tips look soft and elegant on almond or oval shaped nails. You can buy French tip guides at most beauty stores for a few dollars if drawing a straight line feels tricky. Practice on paper first if you’re new to this technique. This style is a good choice for anyone who wants color without covering the whole nail. It also grows out more gracefully than a full color manicure, so you get more days of wear before you need a touch up. Pair it with a glossy top coat for a polished finish that catches the light. This is an easy weekend project you can do while watching a show at home.
3. Ombre Blue Fade
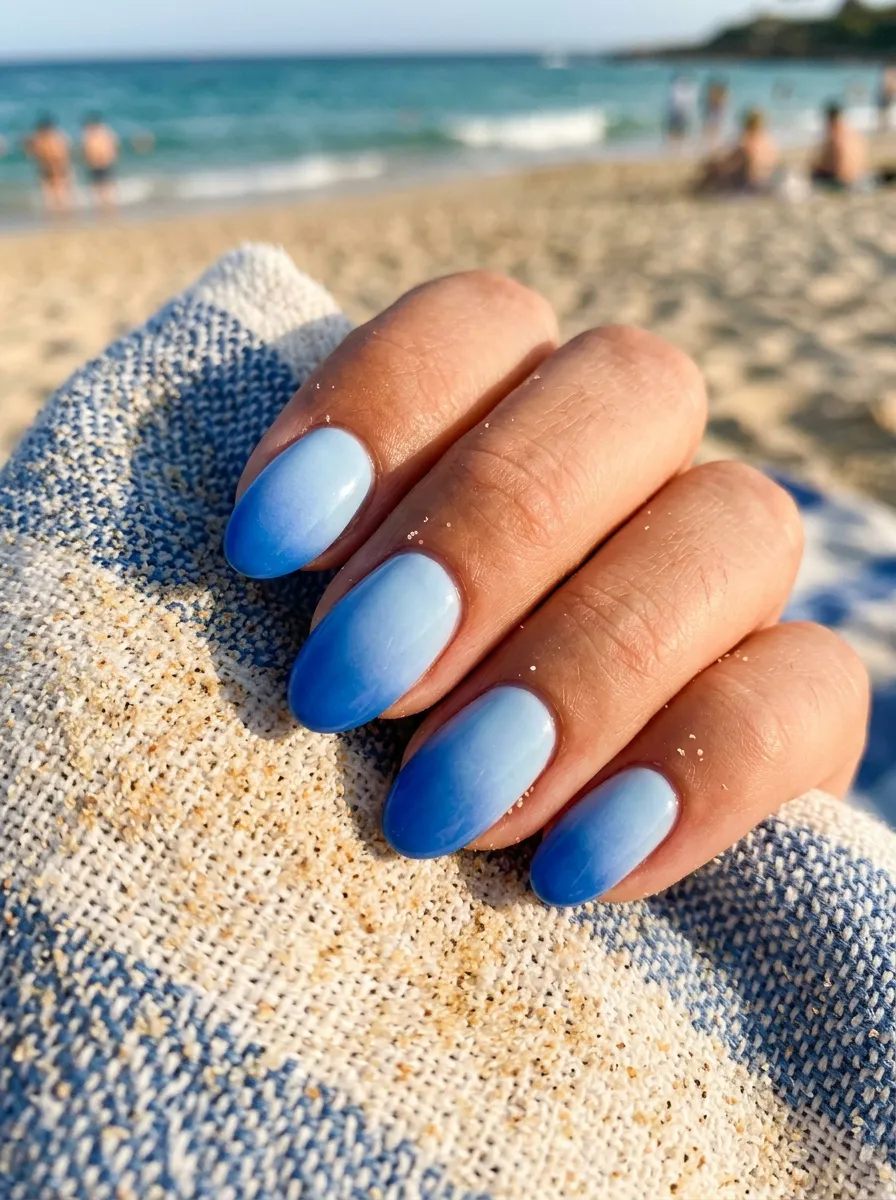
An ombre fade blends two or three shades of blue on one nail. It starts light near the cuticle and gets darker toward the tip, or the reverse. You can create this effect at home with a makeup sponge. Dab two polish colors onto the sponge, then press it onto the nail a few times. The sponge blends the colors naturally. Clean up the skin around the nail with a small brush dipped in remover. This technique works best with polishes that are similar in formula and drying time. Buy two bottles from the same brand for the smoothest blend. This is a low cost way to make a simple manicure look more detailed. It also hides small imperfections since the color shifts draw the eye across the whole nail instead of focusing on one spot. Seal it with a glossy top coat to lock in the blend and add shine that lasts through beach trips and pool days.
4. Pastel Blue with White Dots
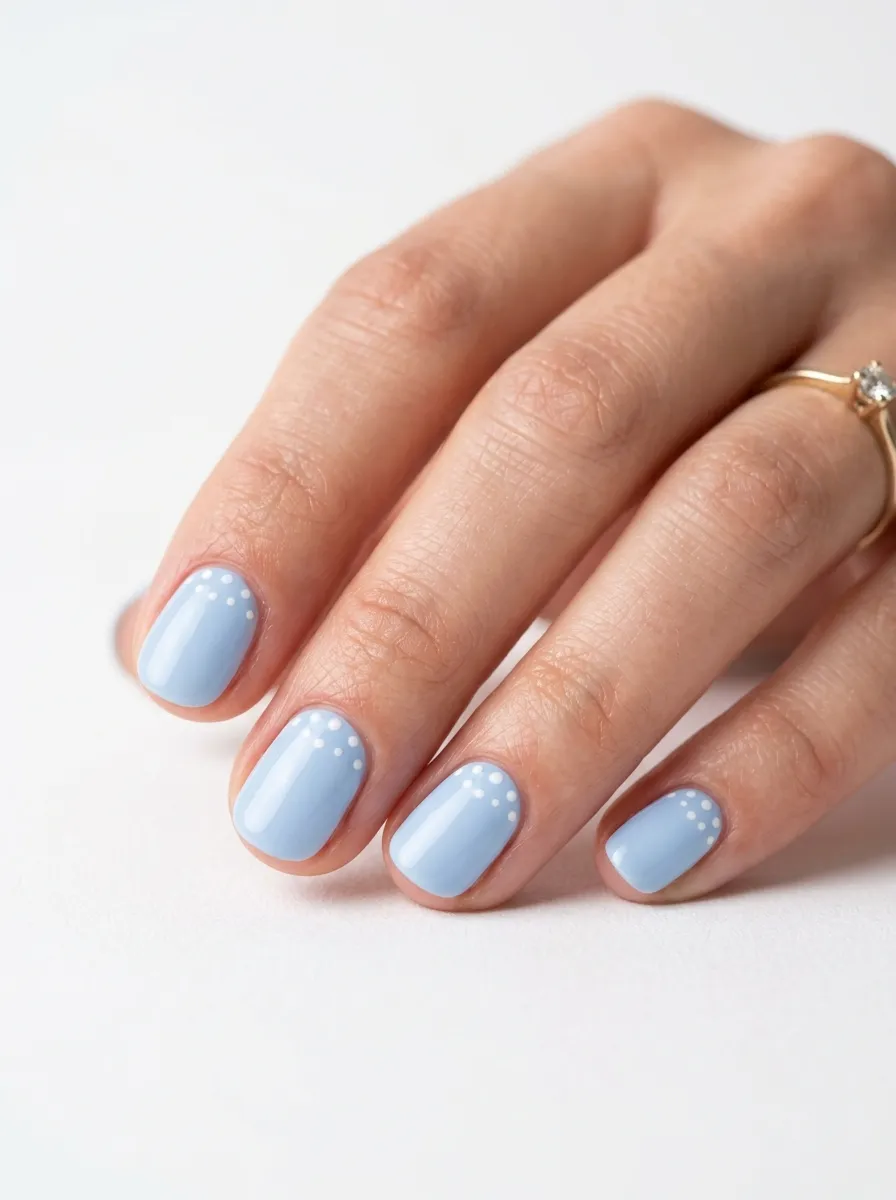
Small white dots on a pastel blue base bring a playful touch to summer nails. Use a dotting tool or the round end of a bobby pin dipped in white polish. Place a row of dots near the cuticle or scatter them across the whole nail for a different look. Let the blue base dry fully before adding dots so they don’t smear. This design works well on short nails since the dots stay small and neat. A dotting tool costs just a couple of dollars at most beauty supply stores, and one tool can create many nail art designs. Practice the dot spacing on a paper towel first if you want even results. This style feels cheerful and reminds people of clear skies with soft clouds. It’s a fun project for a weekend at home or a simple activity to do with a friend. Finish with a top coat to keep the dots from chipping early and to add a smooth glossy finish.
5. Glitter Accent Nail
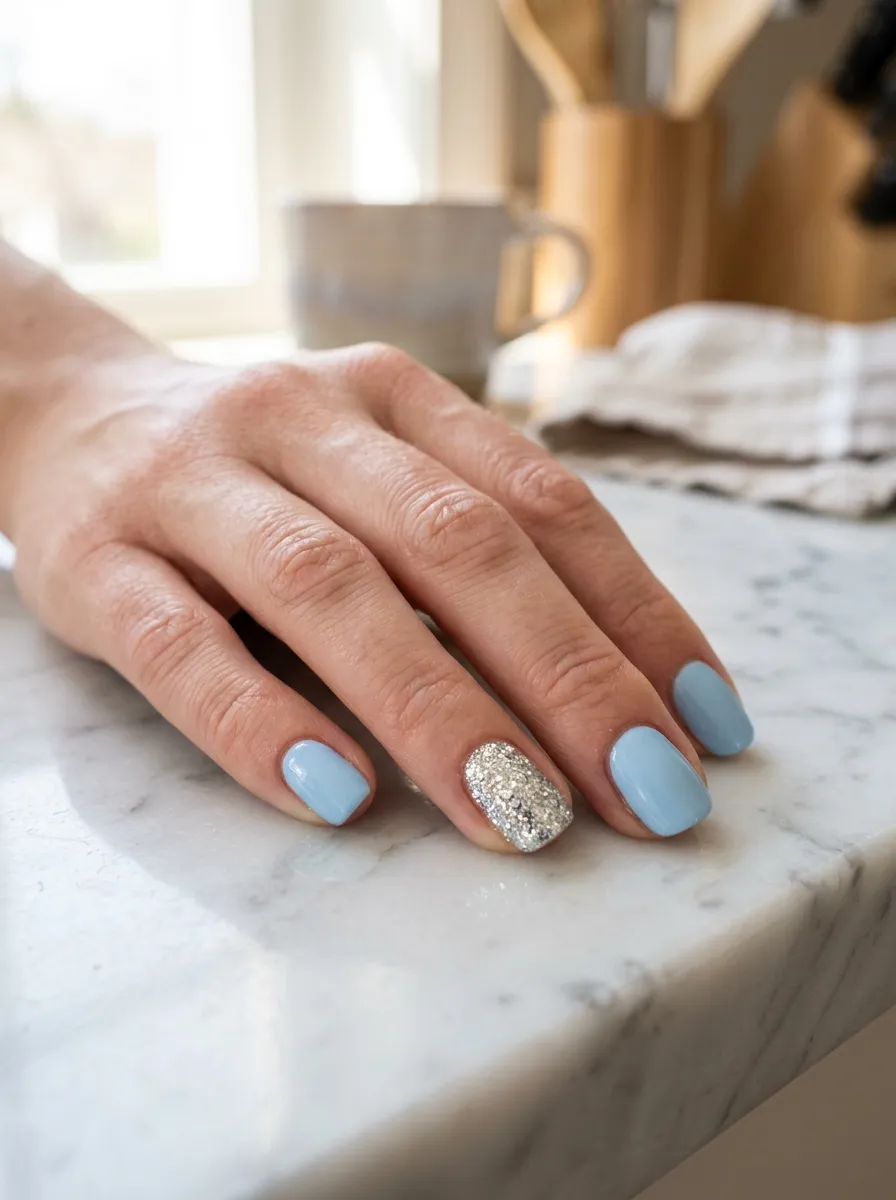
Pick one nail, usually the ring finger, and cover it in glitter while the rest stay solid light blue. This small detail adds sparkle without going overboard. Use a glitter top coat or loose glitter pressed onto wet polish for full coverage. A glitter top coat is the easier option for beginners since it applies just like regular polish. Let the base color dry completely first so the glitter doesn’t smudge into the wrong nail. This look is budget friendly since you only need a small bottle of glitter polish to update your whole manicure. It also works for any occasion, from a casual day out to a summer wedding. If the glitter feels rough under a top coat, add an extra layer of clear polish to smooth it out. This accent nail trick is one of the simplest ways to make a plain manicure feel special without adding much time to your routine.
6. Light Blue Marble Nails
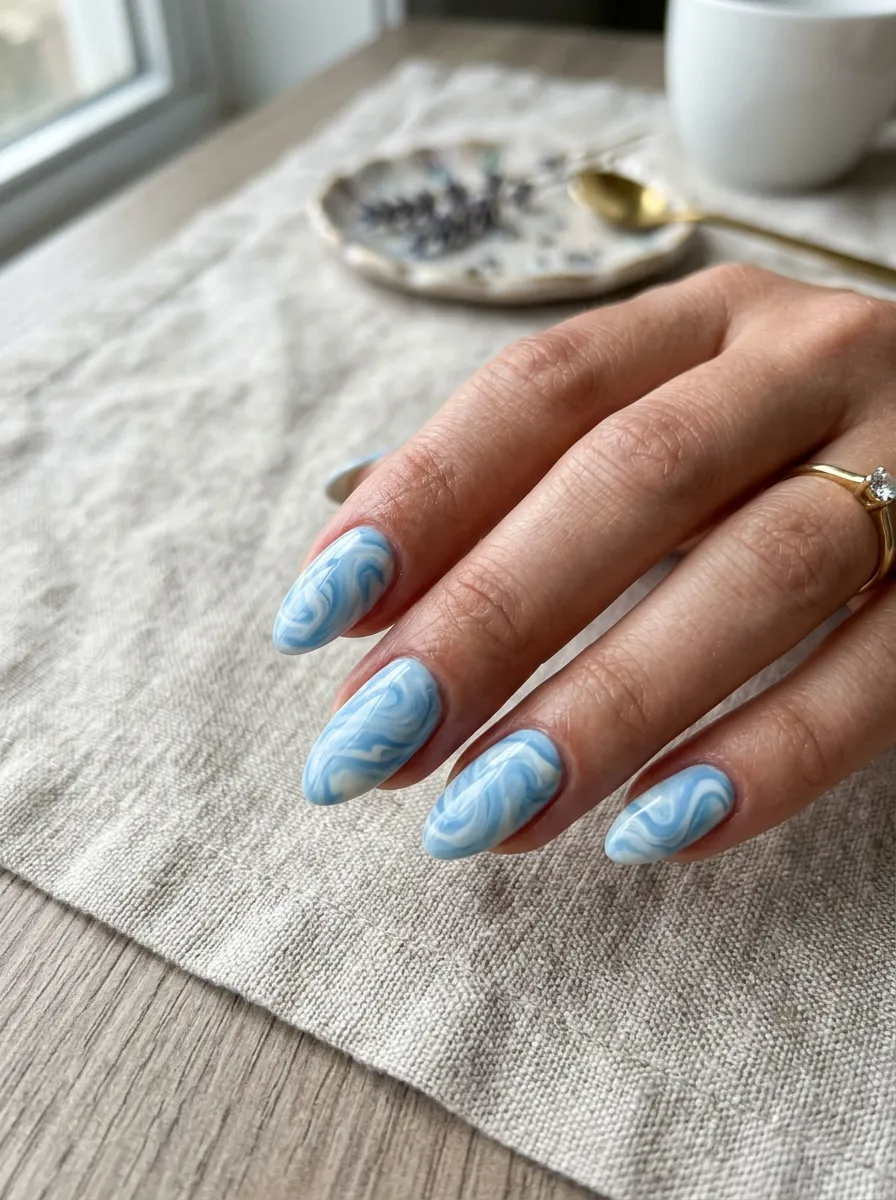
Marble nails mimic the look of stone with soft swirls of color. Drop a bit of light blue and white polish into a cup of room temperature water. Use a toothpick to swirl the colors together, then dip your nail into the pattern. Pull it out and let it dry before trimming off the extra polish around your finger with tape or a cuticle stick. This method takes practice but only needs polish you likely already own. Try it on a spare nail tip first to get comfortable with the swirl motion. Marble nails look detailed and unique, but the process itself is simple once you get the hang of it. Keep a bowl of warm water nearby for easy cleanup between colors. This design pairs well with neutral outfits since the pattern itself is already interesting to look at. A clear top coat gives it the smooth polished stone appearance that makes this style stand out at pool parties or brunch dates.
7. Matte Light Blue Finish
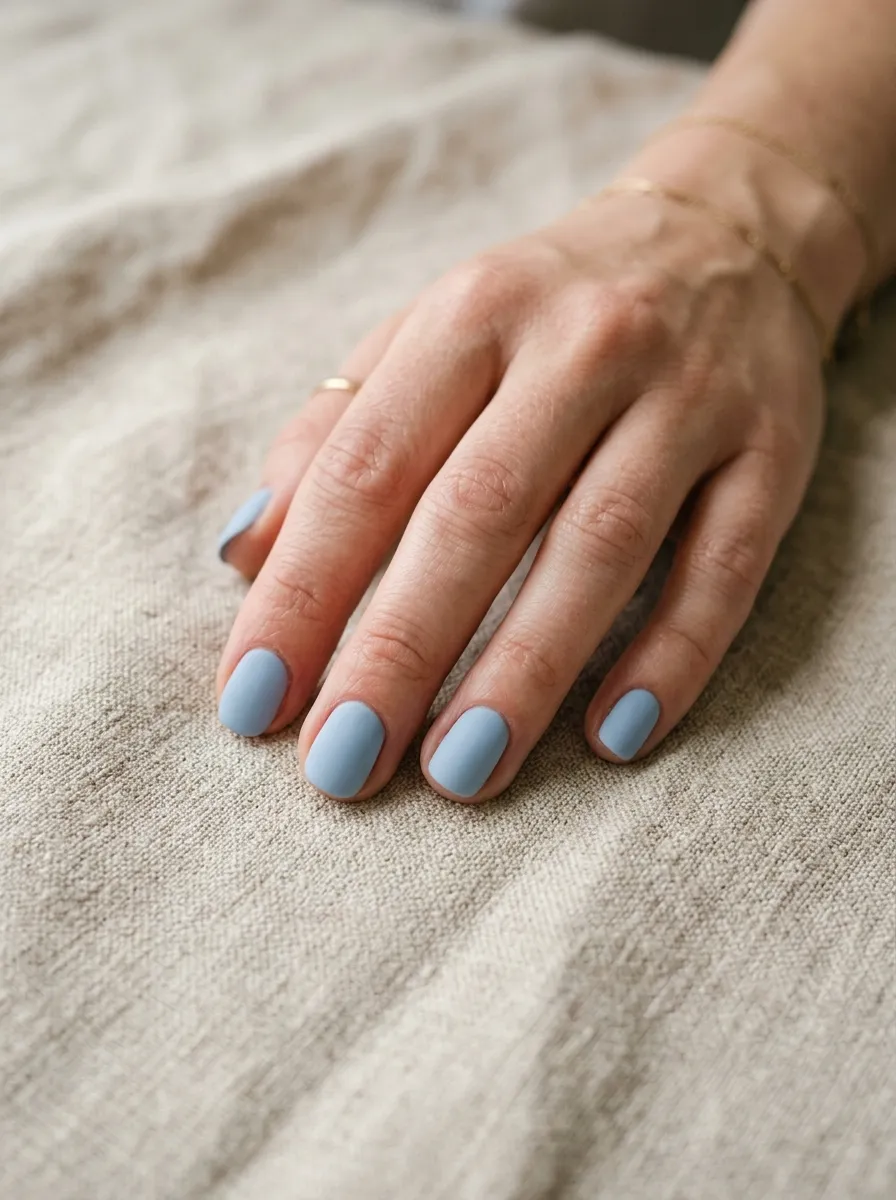
A matte finish changes the whole feel of light blue polish. Instead of shine, you get a soft chalky texture that looks calm and modern. Apply your usual light blue polish, then finish with a matte top coat instead of a glossy one. Matte top coats are sold at most drugstores for a low price and can be reused on many different manicures. This style hides small brush strokes better than glossy polish, which makes it forgiving for beginners. It also pairs nicely with simple outfits since the texture itself adds visual weight. If you don’t own a matte top coat, some people use a bit of cornstarch mixed with clear polish as a homemade version. Test this trick on one nail first to see if you like the texture. Matte nails tend to chip a little faster than glossy ones, so keep a small bottle of top coat on hand for quick touch ups throughout the week.
8. Blue and White Stripes
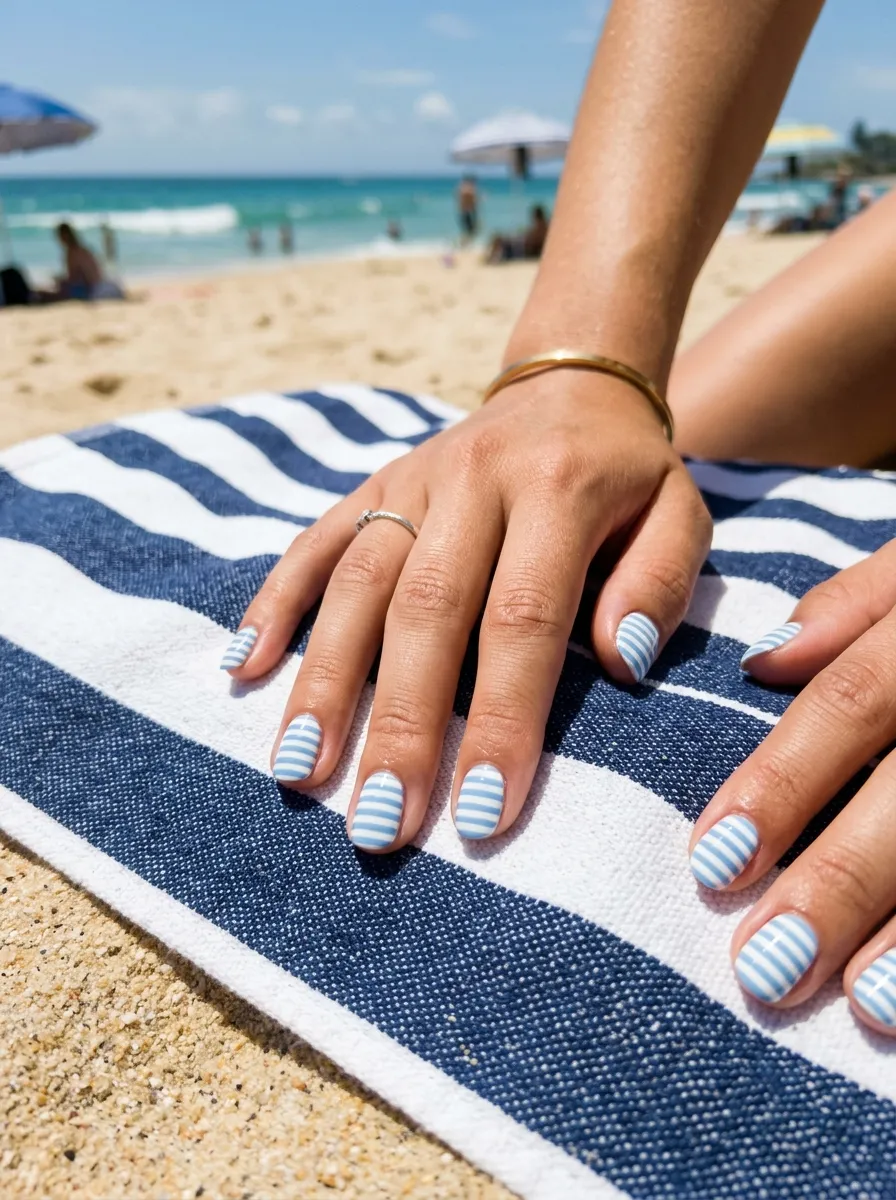
Thin stripes in light blue and white bring a nautical feel to your nails. Use striping tape to create clean lines, or a thin nail art brush if you want a more relaxed hand painted look. Start with a white base, let it dry, then add blue tape or lines on top in your chosen pattern. Horizontal stripes look playful, while vertical ones can make short nails appear longer. Striping tape is inexpensive and comes in rolls that last through many manicures. Peel the tape off carefully once the polish underneath is dry to avoid smudging your lines. This design pairs well with summer wardrobes that already lean toward stripes and simple prints. It’s an easy way to bring a coastal feeling to your hands without needing a vacation. Seal the design with a top coat for a smooth finish that helps the stripes last longer through daily activities like washing dishes or typing.
9. Light Blue with Gold Foil
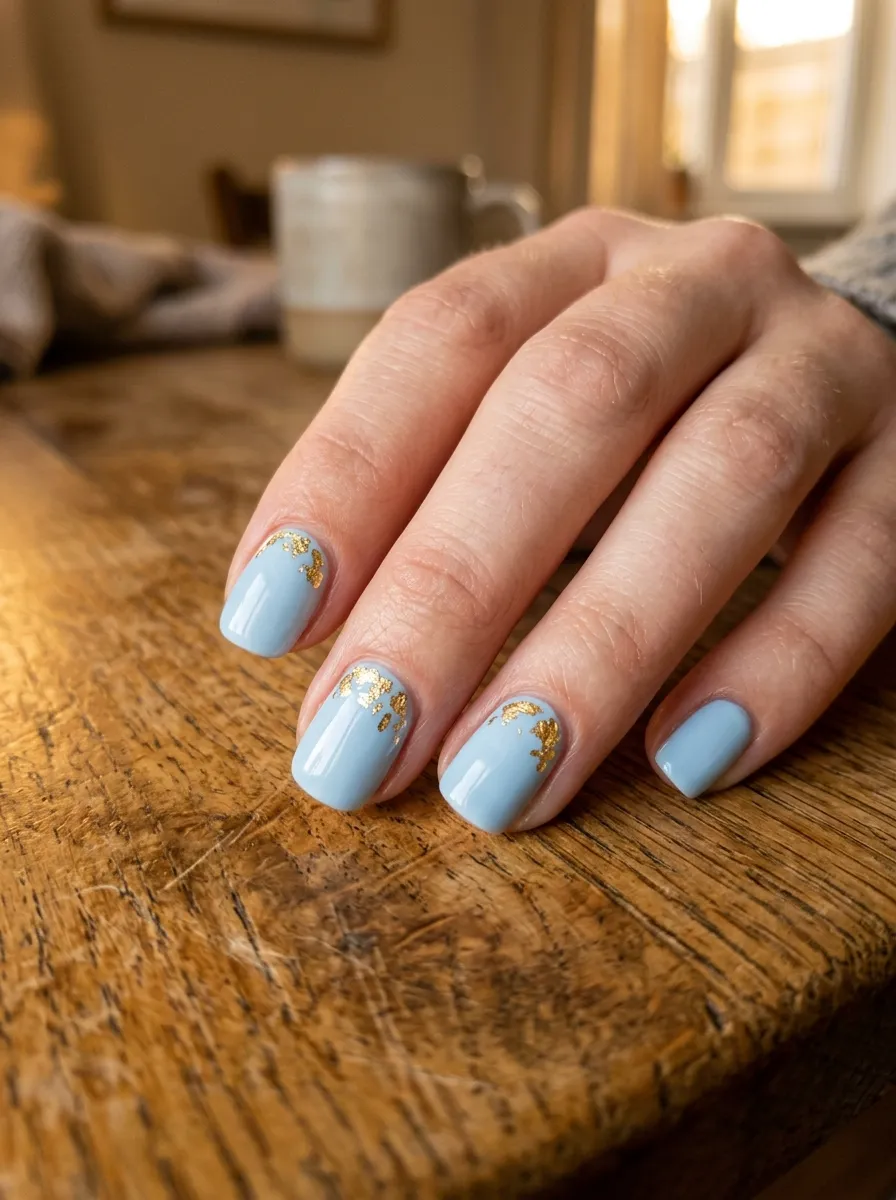
Gold foil flakes add a touch of shine to a soft blue base. Paint your nails light blue and let them dry completely. Apply a small amount of nail glue or clear polish where you want the foil, then press the foil sheet onto the wet spot and peel it away. Small flakes will transfer and stick to the nail. This creates a scattered, natural looking shine rather than a solid gold nail. Foil sheets are sold in packs online or at beauty supply stores and last through many manicures since you only need a tiny piece each time. This design feels special enough for a summer wedding or birthday dinner but is still simple to do at home. Focus the foil near the base of the nail or along one edge for a balanced look. Seal everything with a top coat to keep the foil in place and add extra shine that catches the light as you move your hands.
10. Baby Blue Almond Shape
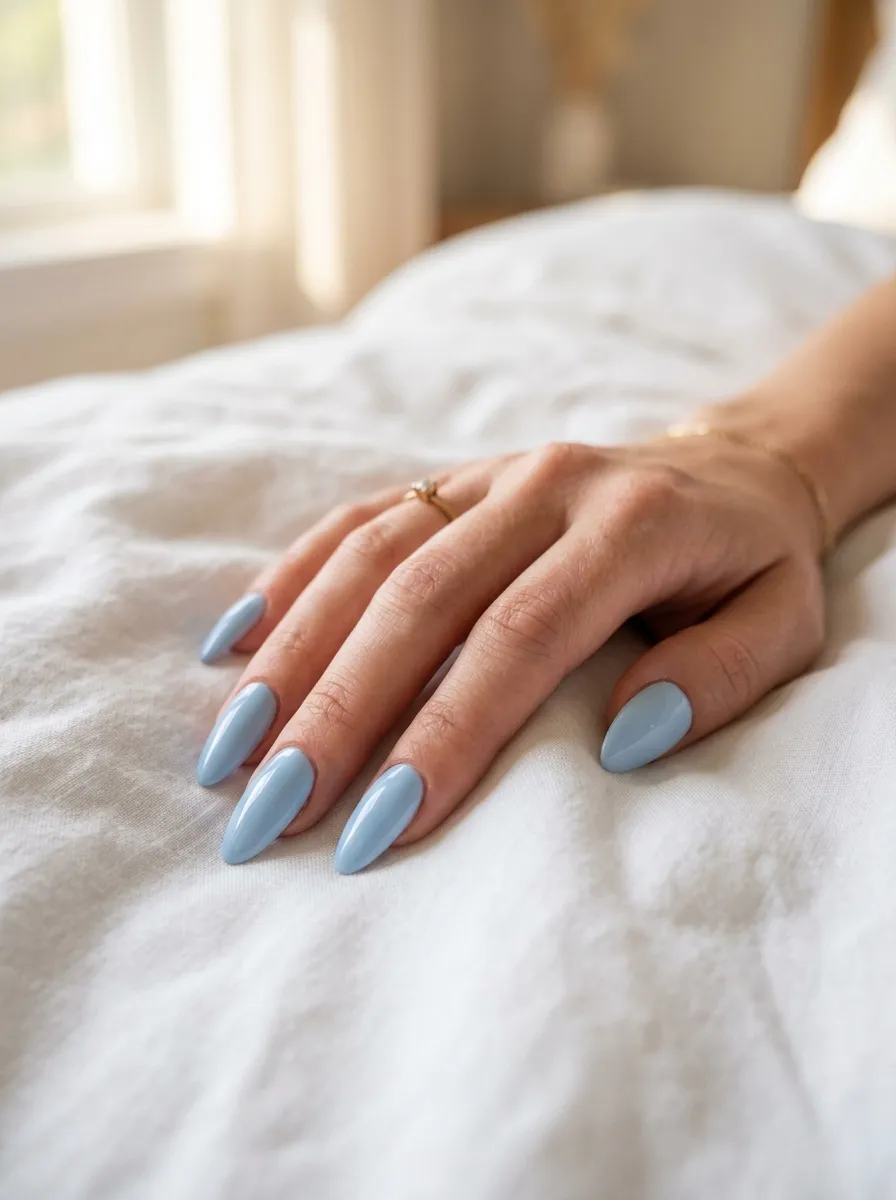
The almond shape gives nails a soft, tapered look that pairs beautifully with pale blue polish. If your nails are short, press on nails in an almond shape are a low cost way to try this look without waiting for natural growth. File your natural nails into a gentle taper if you want the real version, rounding the sides toward a soft point at the tip. Baby blue polish looks especially pretty on this shape because the color draws the eye along the curve. Two thin coats give the best color payoff without extra bulk. This look works for both casual days and dressier summer events. Filing takes just a few extra minutes compared to a square shape, and an emery board costs very little. Keep nails at a length that still feels comfortable for daily tasks like typing or cooking. A glossy top coat finishes the look and keeps the pale color looking clean for about a week with normal care.
11. Light Blue Chrome Nails
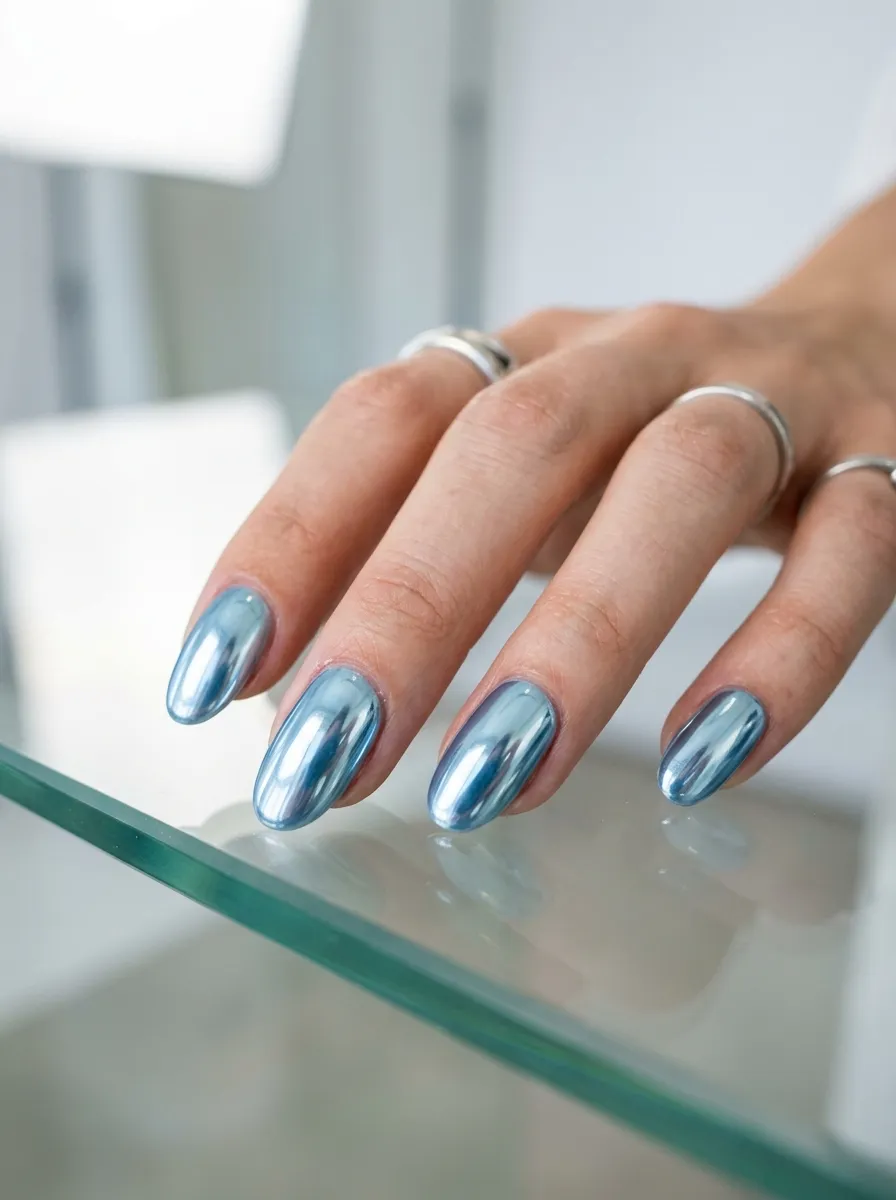
Chrome powder turns a simple blue manicure into something that looks like liquid metal. Paint your nails with a light blue gel or a polish made for chrome application, then rub the chrome powder on using a small sponge applicator once the base is fully cured or dry. The powder needs a very smooth, tacky, or gel surface to stick well, so check your polish instructions first. Chrome powder kits are sold online for a reasonable price and usually include enough powder for many manicures. This look catches light in a way that feels special for summer evenings out. If you don’t have gel polish, some chrome powders work over a sticky top coat made for this purpose. Practice on one nail to see how the powder reacts before doing all ten. Seal with a non wipe top coat to protect the shine, since regular top coats can dull the chrome effect if applied incorrectly.
12. Blue Daisy Nail Art
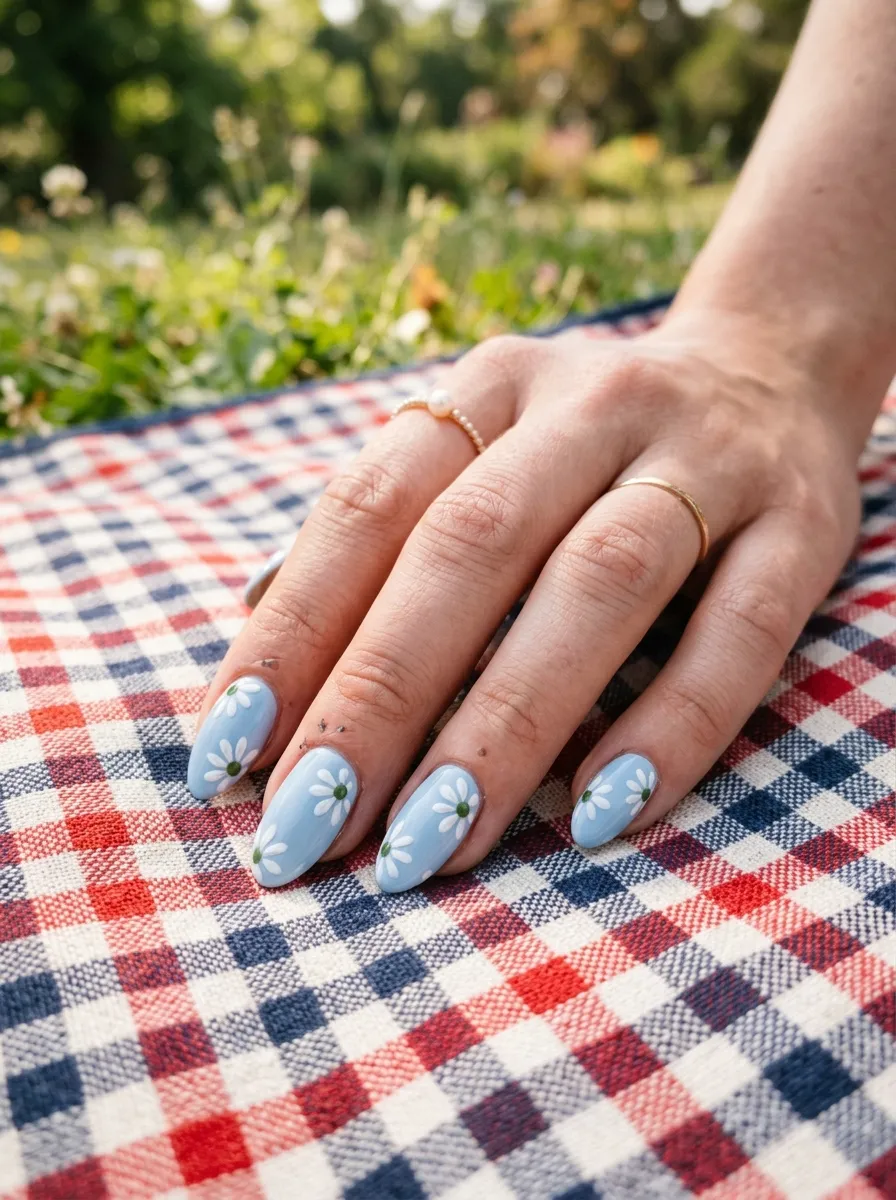
Tiny daisies painted on a light blue base bring a cheerful garden feel to summer nails. Use a thin nail art brush or a dotting tool to create small white petals in a circle, then add a yellow or green dot in the center. Keep the flowers small and simple, especially if you’re just starting out with nail art. Practice the petal shapes on paper before moving to your nails. A basic nail art brush set costs very little and works for many designs beyond just daisies. This look pairs well with sundresses and outdoor summer plans like picnics or garden parties. You don’t need to cover every nail with flowers. Try adding daisies to just one or two nails while the rest stay a solid light blue for a balanced, not overly busy look. Seal the design with a top coat to protect the small details from chipping during everyday activities like typing or washing your hands.
13. Denim Blue Nails
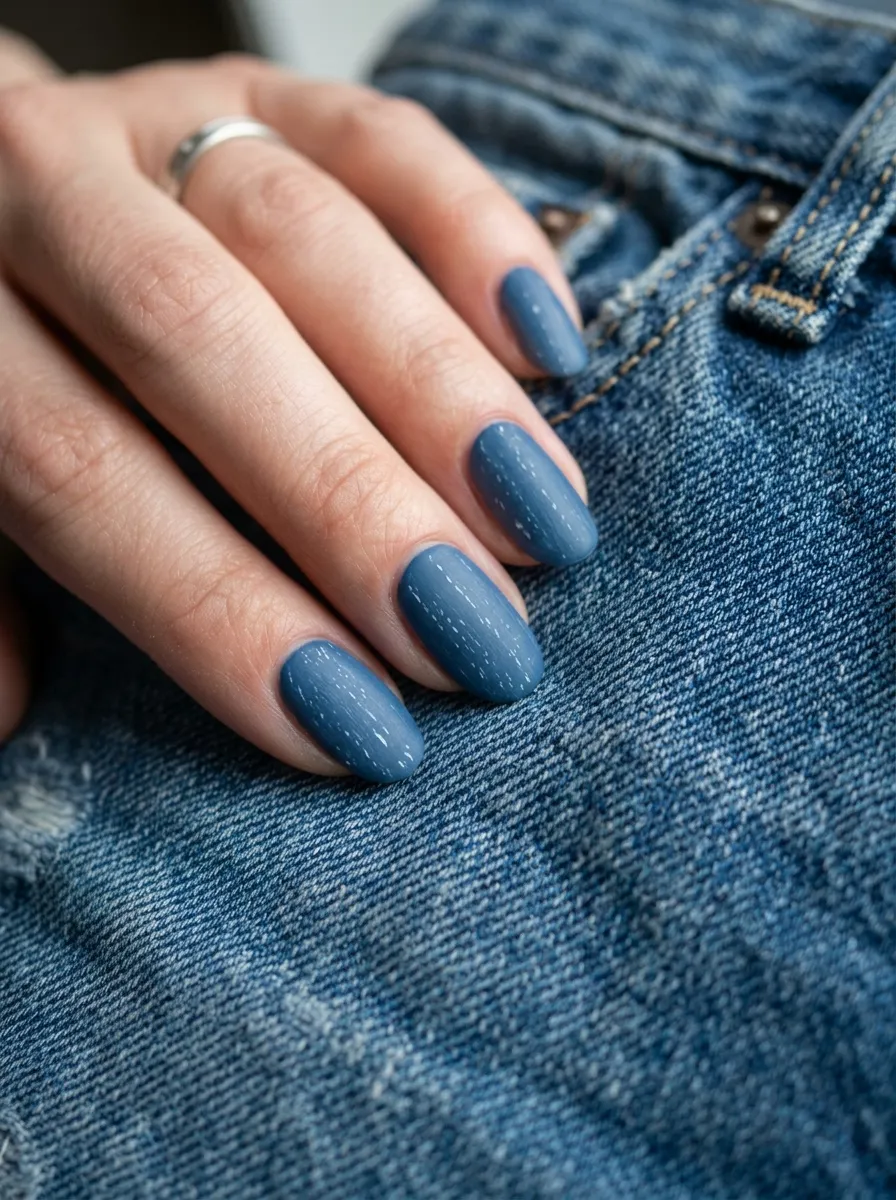
Denim blue polish looks like your favorite pair of jeans, slightly muted and easy to pair with everything. Choose a polish with a hint of gray in the blue for the most realistic denim tone. For extra texture, dab a thin white polish lightly with a dry brush over the blue base to mimic the look of worn denim fabric. This technique takes a little practice, so try it on a spare nail first. Denim blue works well for anyone who wants a summer color that still feels neutral enough for work or school. It pairs easily with gold or silver jewelry since the shade sits between blue and gray. This is a simple color swap that doesn’t require any special tools beyond polish you may already own. A glossy or matte top coat both work well with this shade depending on your preference. This look holds up nicely through a full week of regular activities.
14. Light Blue with Silver Glitter Tips
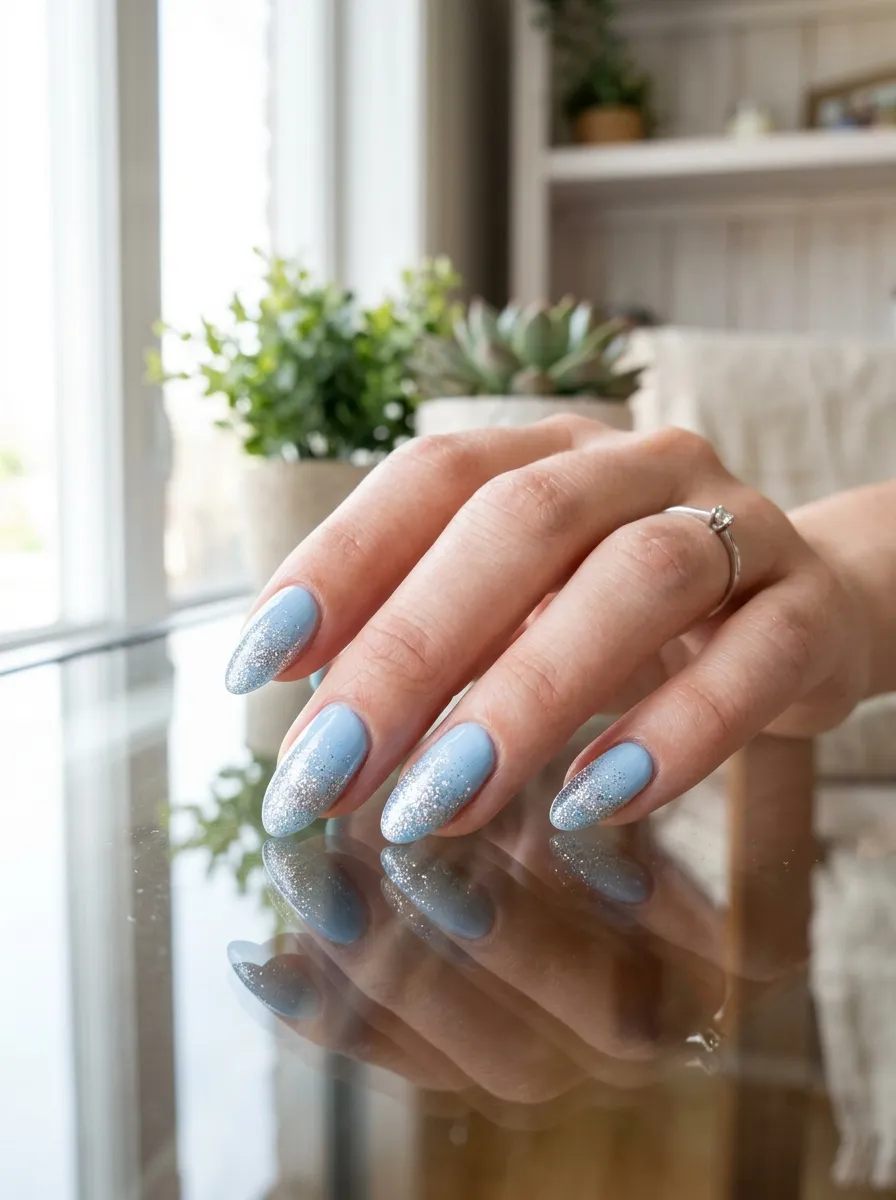
This design combines a soft blue base with glitter that fades in from the tip of the nail. Paint your base color first and let it dry fully. Then use a makeup sponge dabbed in silver glitter polish and press it lightly along just the top edge of each nail. Build up the glitter gradually for a soft fade rather than a hard line. This technique gives you sparkle without covering the whole nail in glitter, which also makes it easier to remove later. A small bottle of silver glitter polish lasts through many manicures since you only need a little each time. This look feels dressy enough for summer evening plans but still wearable for daytime. Clean up any stray glitter around your cuticles with a small brush dipped in polish remover. Finish with a top coat to smooth the glitter texture and help it catch the light as you move your hands throughout the day.
15. Sky Blue Squoval Nails
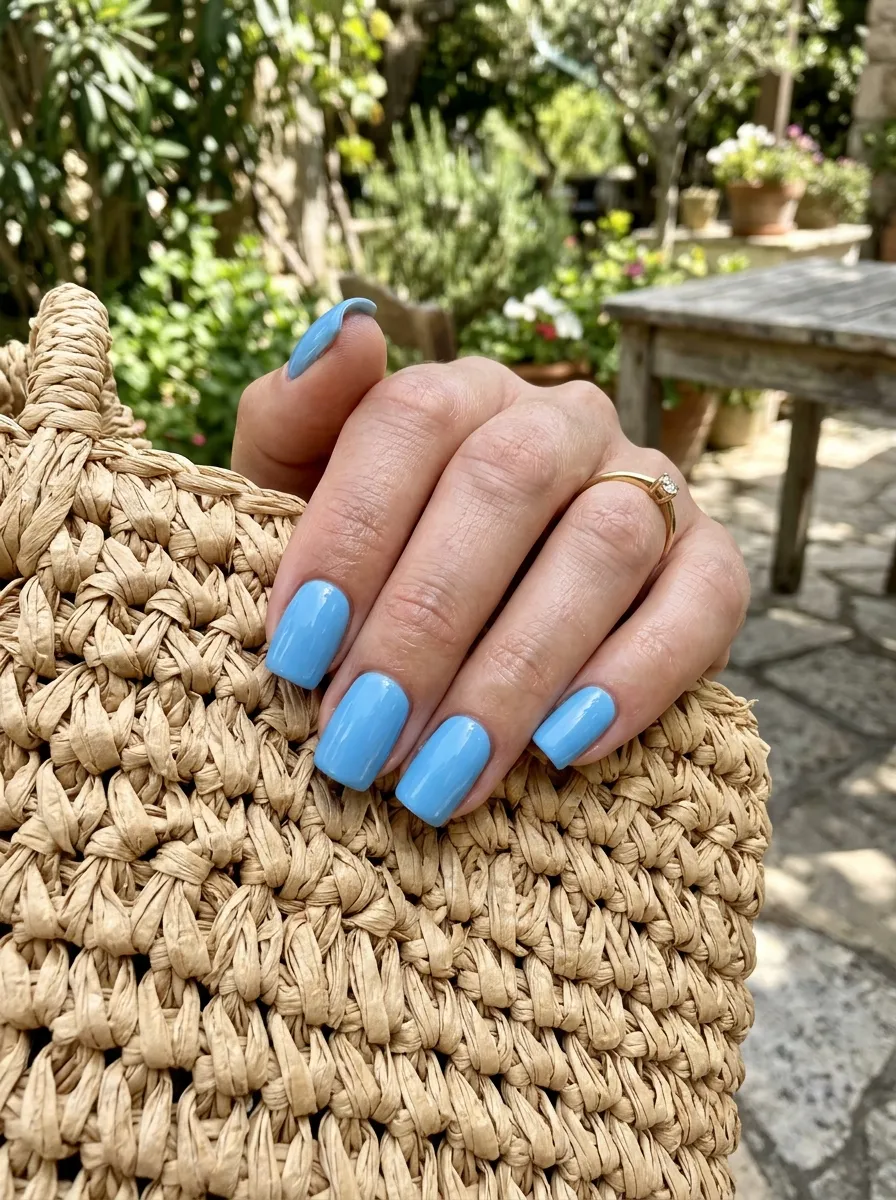
Squoval nails combine a square base with softly rounded corners, giving a shape that works for almost any nail length. Sky blue polish looks clean and simple on this shape, especially with two even coats. File your nails straight across first, then gently round just the corners with an emery board. This shape is durable and less likely to catch on clothing or hair compared to a fully square shape. It’s a practical choice if you use your hands a lot for work or daily chores. A basic filing tool costs very little and can shape nails in just a few minutes. This style pairs well with almost every summer outfit since the shape and color both feel understated. Add a glossy top coat for shine or a matte one for a softer finish. This is a low maintenance option for anyone who wants color without extra nail art or detailed technique.
16. Watercolor Blue Nails
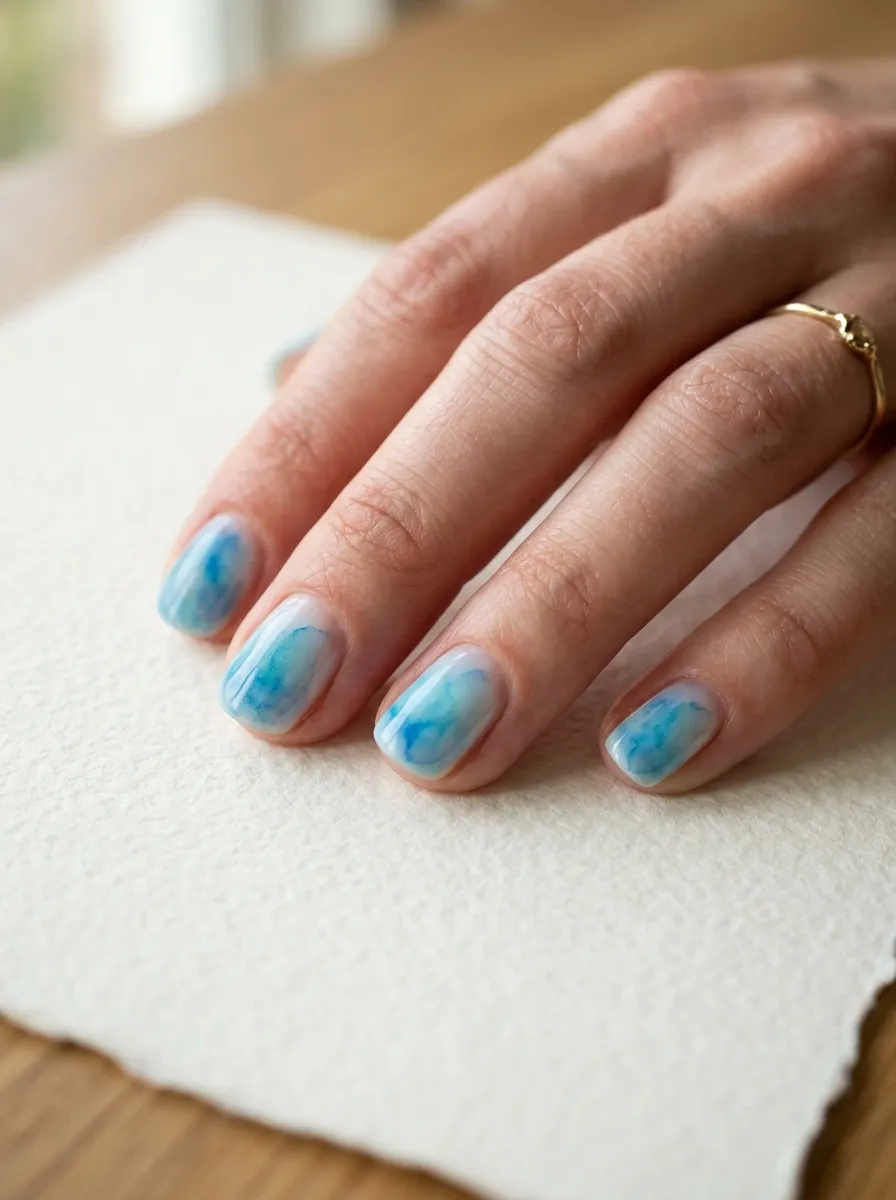
Watercolor nails give a soft, blended look similar to a painting. Start with a white or very pale base coat. While the polish is still slightly wet, use a thin brush dipped in light blue polish to dab color onto the nail in soft strokes. Blend the edges gently so the color fades rather than forming a hard line. This technique takes a bit of practice, so try it on paper or a spare nail tip first. You can use just one shade of blue or mix in a touch of purple or green for more depth. This design feels artistic and looks different on every nail, which adds a personal touch to your manicure. It doesn’t require special tools beyond polish and a thin brush, both of which are affordable at any beauty supply store. Seal with a top coat once the design is fully dry to protect the soft blended pattern from smudging during daily wear.
17. Light Blue Negative Space
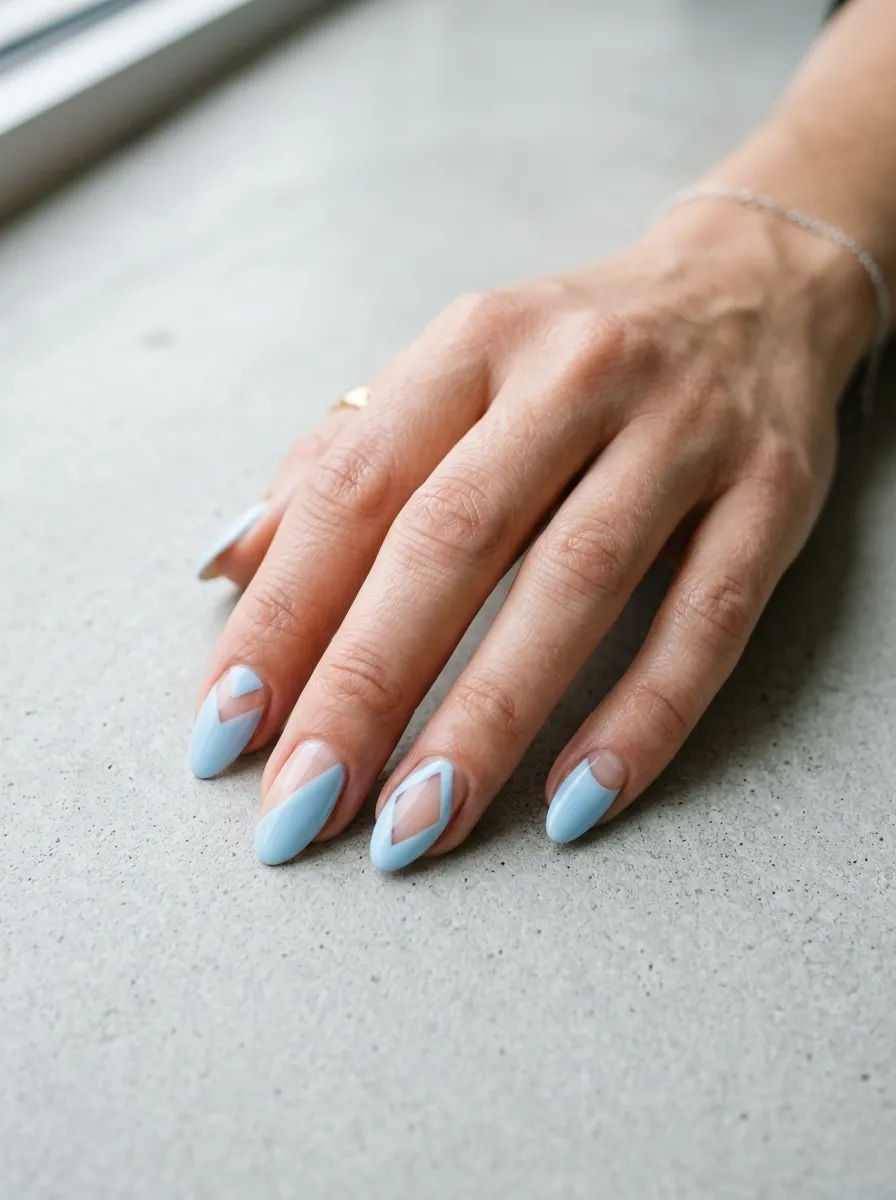
Negative space designs leave part of the natural nail bare while painting the rest in light blue. A common version paints a half moon shape near the cuticle in blue while the rest of the nail stays clear or has a sheer coat. Use tape or a bobby pin as a guide to create a clean curved line. This look feels modern and takes less polish than a full coverage manicure, which can help polish bottles last longer. It’s also easier to touch up since only part of the nail shows wear over time. This design works on any nail length and shape. Try practicing the curved line on one nail before doing the rest, since the shape takes a steady hand at first. A glossy top coat over both the polished and bare sections gives an even, finished shine. This is a simple way to wear color without a fully solid manicure.
18. Blue and Coral Combo
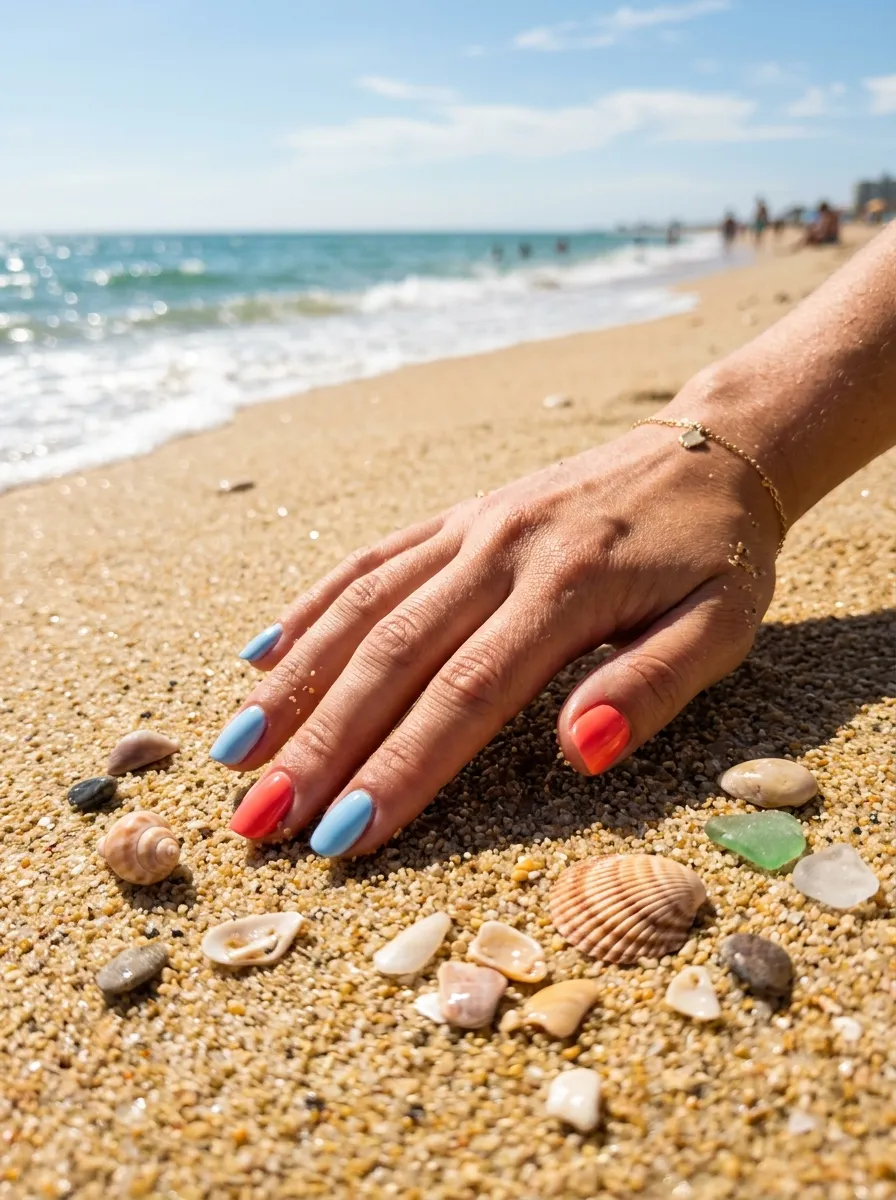
Pairing light blue with coral brings two classic summer colors together on one hand. Alternate the colors nail by nail, or paint most nails blue with just one or two in coral as an accent. These two shades sit opposite each other in warmth, so they naturally stand out against one another. This combo works well with tan skin from summer sun but looks good on any skin tone. Both polishes are usually available in the same brand lines at drugstores, making it easy to buy both without spending much. Apply two coats of each color for full opacity, letting one nail dry before moving to the next to avoid smudging. This look pairs naturally with beach outfits, sundresses, and sandals. It feels playful without needing any detailed nail art skills, since it’s simply about choosing and applying two solid colors well. Finish with a glossy top coat to tie both shades together with the same shine.
19. Pastel Blue Swirls
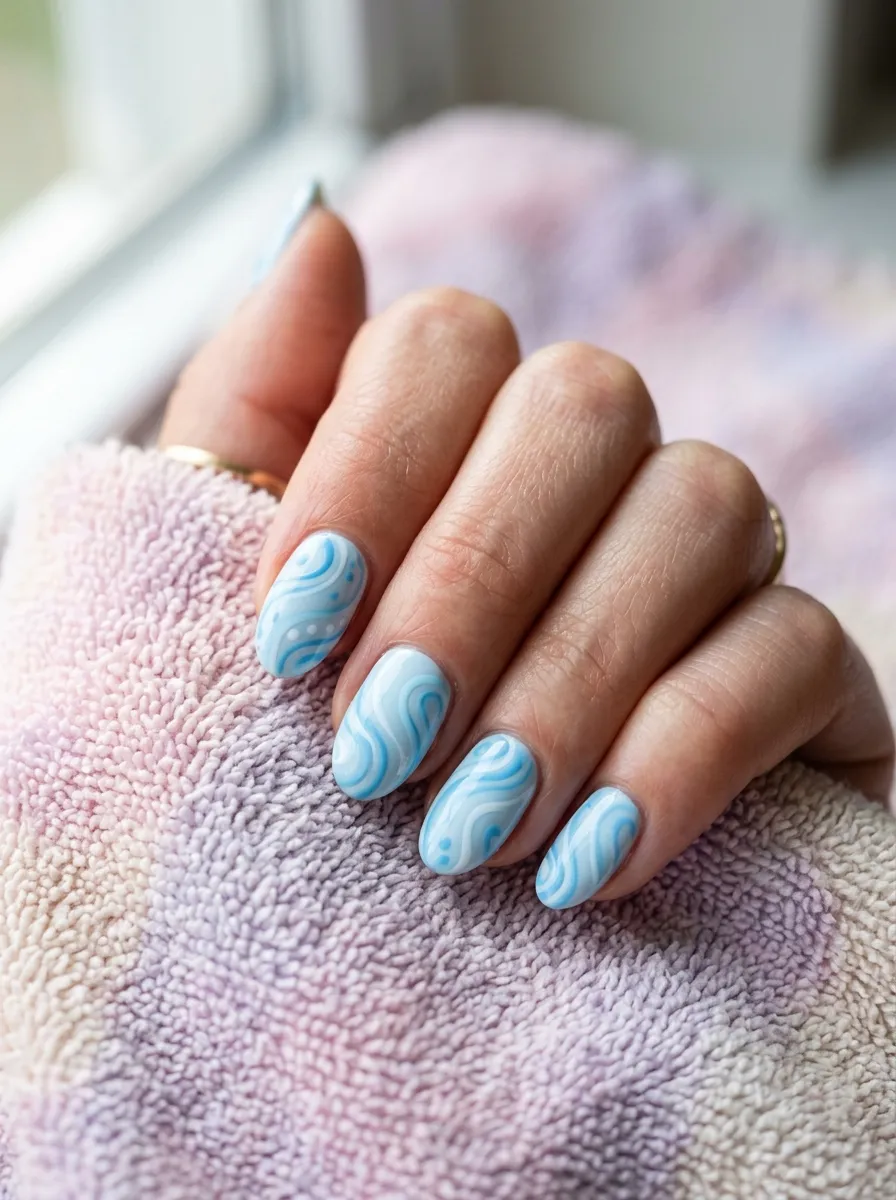
Swirl designs add movement to a simple pastel blue base. Use a thin nail art brush to paint loose, curved lines across the nail once your base color is dry. You can use a slightly darker or lighter blue for the swirls so they stand out just enough without looking too busy. Keep your wrist relaxed while painting to help the lines flow naturally instead of looking stiff. This design doesn’t need to be perfect. Uneven swirls still look intentional and artistic. Practice a few swirls on paper first if you want to get comfortable with the brush movement. A small nail art brush is inexpensive and works for many designs beyond this one. This look feels relaxed and hand crafted, which pairs well with a laid back summer style. Seal the design with a top coat once fully dry to protect the swirls from smudging during normal daily activities like getting dressed or driving.
20. Light Blue Short Nails
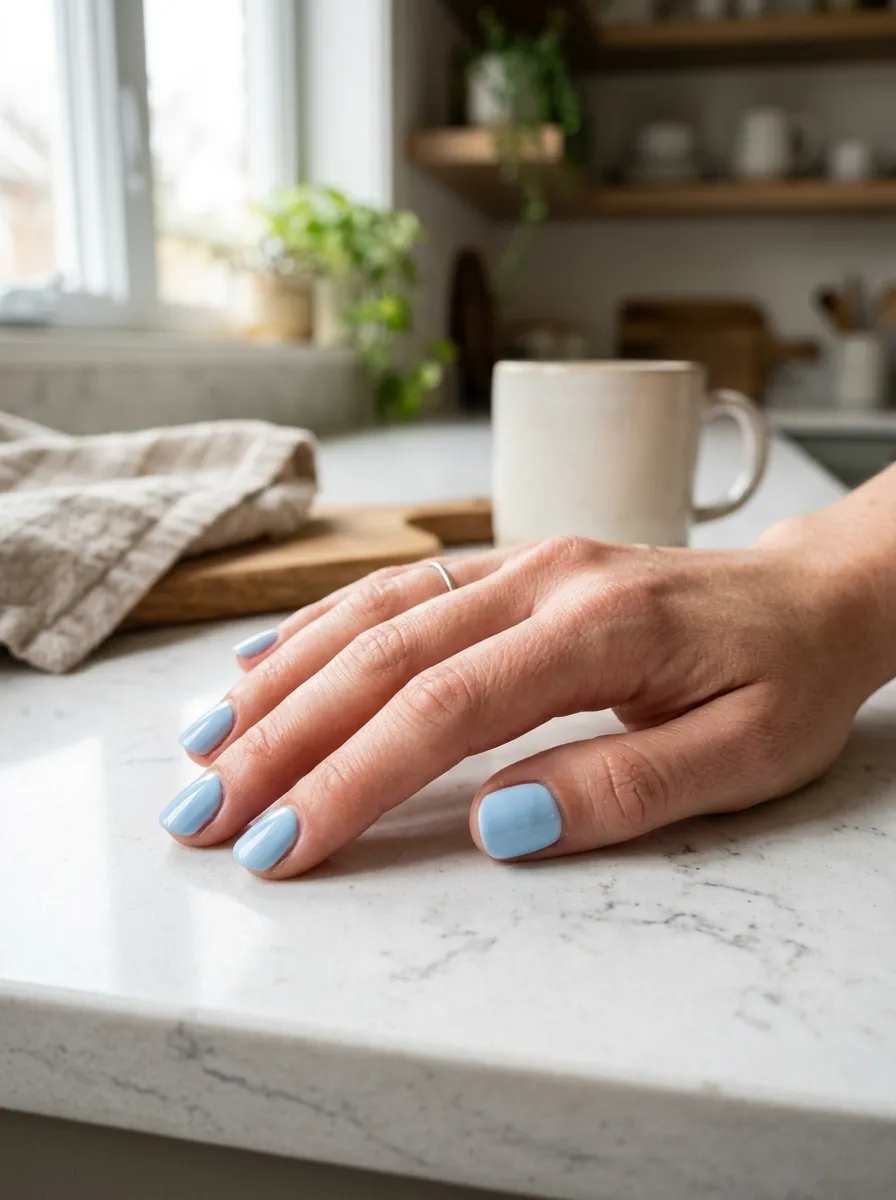
Short nails painted light blue give a clean, practical look for summer. This length works well for anyone who types often, cooks, or plays sports and wants color without extra length getting in the way. File nails into a soft square or round shape for the most comfortable everyday wear. Two coats of light blue polish give full color without needing a long drying time between layers. This style is one of the most budget friendly options on this list since it only needs polish, a base coat, and a top coat, no extra tools or nail art supplies required. Short nails also tend to chip less than long ones since there’s less surface area to catch on things throughout the day. This look feels fresh and simple, perfect for anyone who wants a quick manicure they can do themselves in under twenty minutes. A glossy top coat adds shine and helps the color last through a full week of normal wear.
21. Icy Blue Holographic Nails
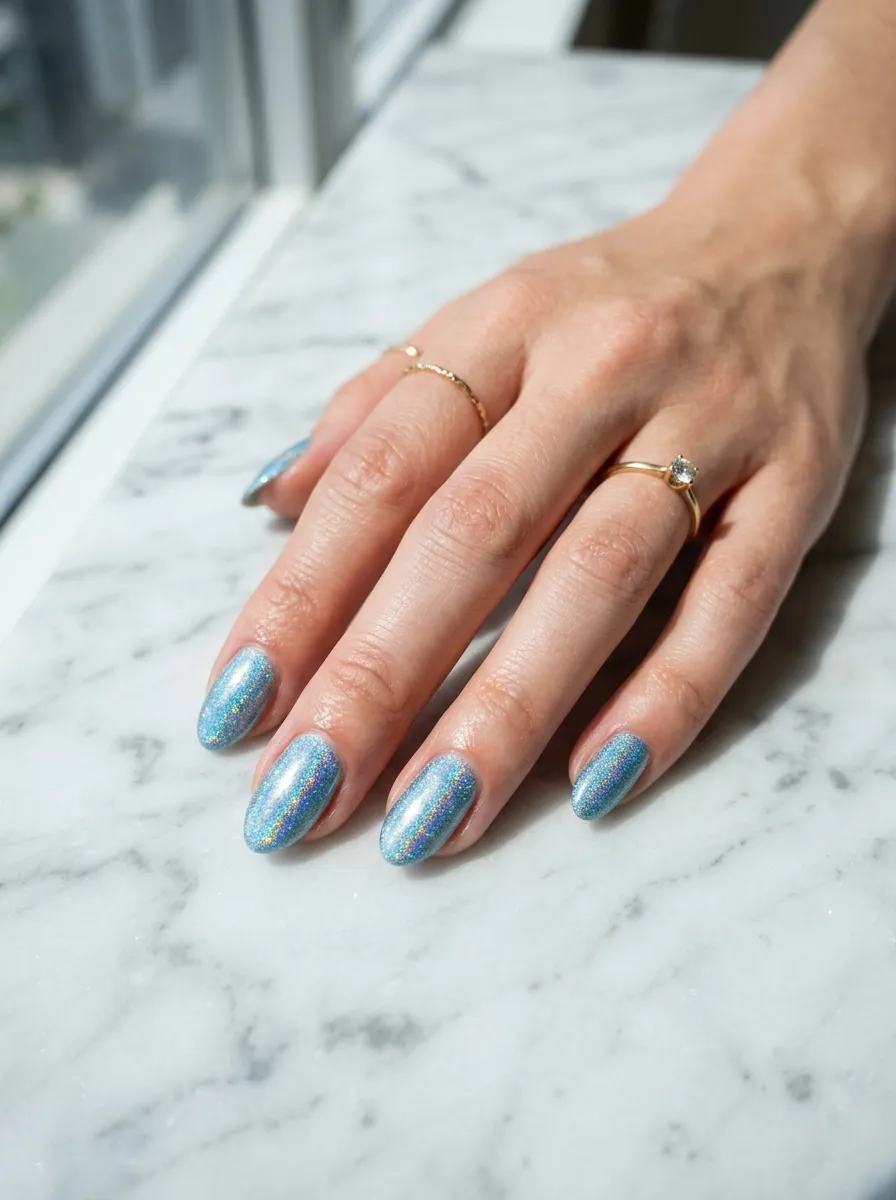
Holographic polish shows small flashes of rainbow color within an icy blue base, especially under direct light. Apply your light blue base color first and let it dry completely. Then apply a holographic top coat over each nail, which contains tiny reflective particles that catch light from different angles. This effect looks different depending on where you’re standing, which makes it a fun option for photos and evening outings. Holographic top coats are sold at most beauty stores for a low price and can be layered over almost any polish color you already own. This look pairs well with simple outfits since the nails themselves already bring a lot of visual interest. Apply the holographic coat in thin, even layers for the best sparkle without clumping. This design works for both short and long nails and holds up well through regular summer activities like swimming or beach trips, as long as you reapply the top coat every few days for lasting shine.
Conclusion
Light blue nails give you a simple way to bring summer energy to your hands, whether you like a solid color, a detailed design, or something in between. Most of these looks only need polish and basic tools you likely already own, which makes them easy on your budget. Start with one or two designs that catch your eye, practice at home, and build your skills from there. A great manicure doesn’t need a salon visit or a big budget, just a little time and the right shade of blue.