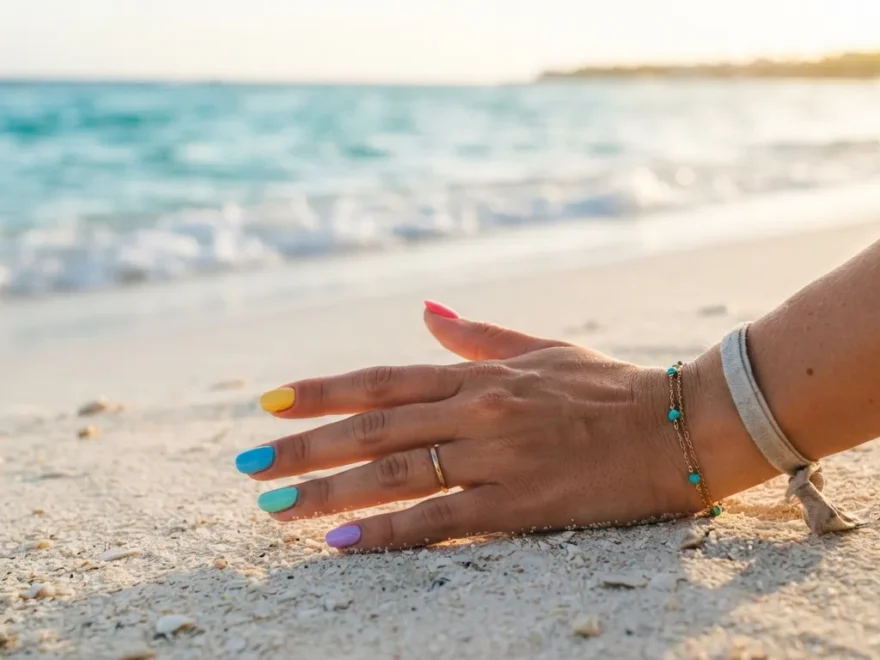
Packing for a beach getaway means choosing swimsuits, sandals, and sunscreen, but your nails deserve just as much planning. The right polish can turn a simple manicure into a small piece of vacation memory that lasts long after the tan fades. Whether you love bold color, soft pastels, or tiny hand painted details, there is a tropical nail style that matches your trip and your budget. This list gathers ideas anyone can copy at home with a basic polish kit or bring to a local salon for a quick upgrade. Grab your favorite shades and get ready to find the design that fits your island mood. If you’re also exploring Pink and Black Ombre Nail Ideas, this striking color combination creates a beautiful contrast that blends soft feminine tones with bold, edgy style, making it a versatile choice for both everyday wear and special occasions.
1.Sunset Ombre Nails
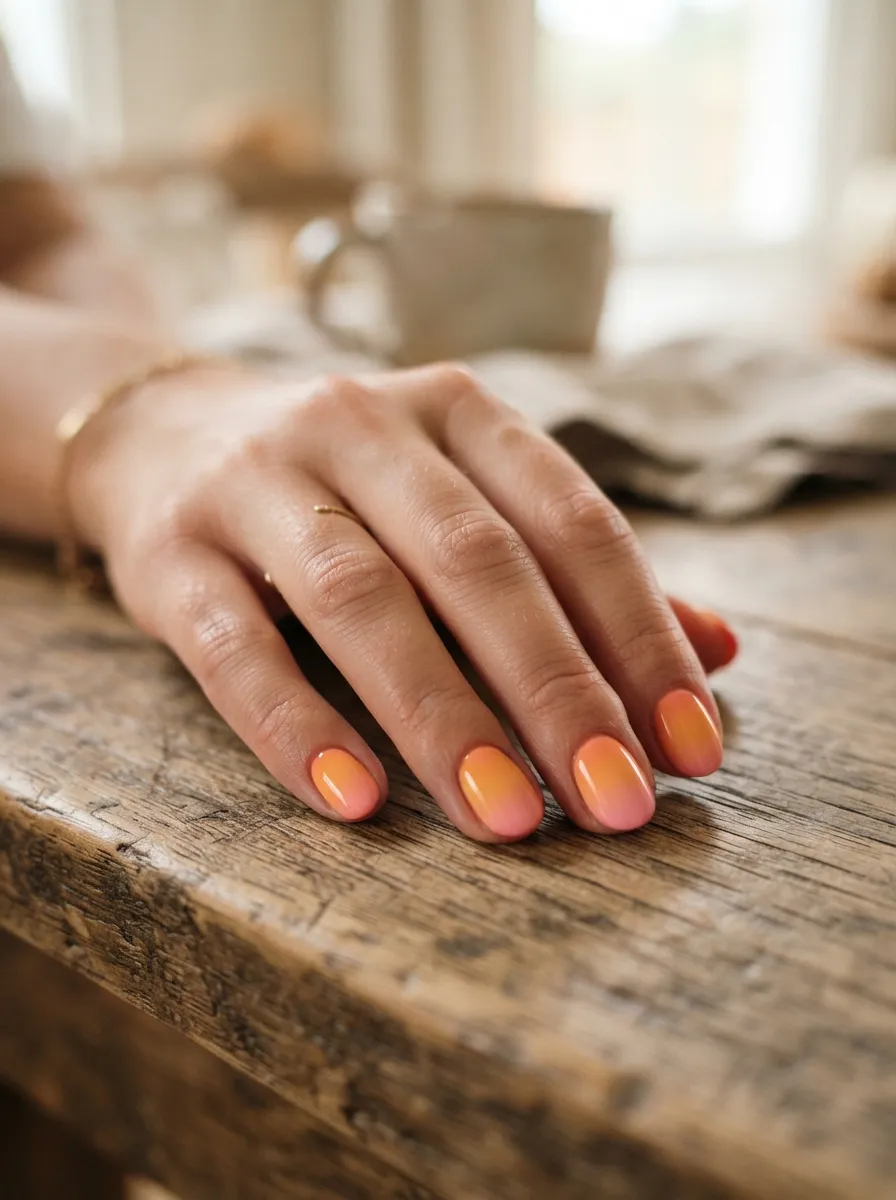
Sunset ombre nails copy the colors of the sky right before the sun dips into the ocean. Think orange, pink, and a touch of purple blended together. This look works on short or long nails and fits almost any skin tone. To try it at home, pick three polish shades that sit close together on the color wheel. Dab each color onto a makeup sponge in stripes, then press the sponge onto your nail. Repeat until the blend looks smooth. A budget tip: many drugstore polish brands sell mini sets under ten dollars that already include matching shades. If sponge blending feels tricky, start with just two colors instead of three. Seal the design with a clear top coat to keep the gradient glossy and to help it last through sandy beach days. This style photographs well against blue water, which makes it a favorite for vacation pictures. Keep your base nail short and rounded so the color transition stays visible without smudging at the tips.
2.Tropical Hibiscus Flower Accent
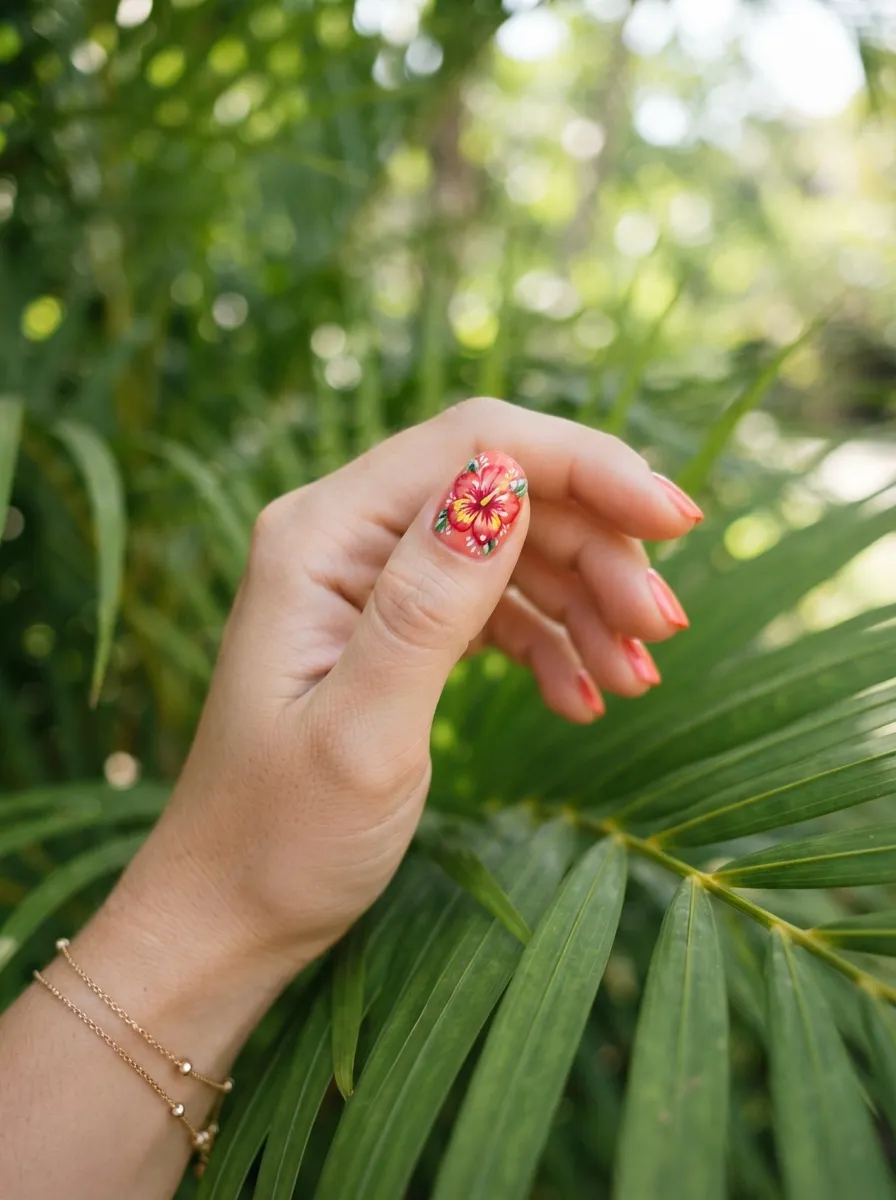
A hand painted hibiscus flower on one nail adds a resort feel without covering every finger in detail work. Pick your ring finger as the accent and keep the rest of your nails in a solid coral or cream shade. To paint the flower, use a thin nail art brush or even a bobby pin dipped in polish. Start with five small red or pink petals arranged in a circle, then add a tiny yellow dot in the center. Practice on paper first if you are new to nail art. A budget friendly option is to buy pre made flower nail decals online for a few dollars, which stick on and seal under top coat. This design suits both short and long nails and works well for weddings, luaus, or casual beach days. If your hand shakes, try a smaller flower or use a dotting tool instead of a brush for cleaner petal edges. Finish with a glossy top coat so the flower shape stays crisp during swimming and sun exposure.
3.Palm Leaf Silhouette Nails
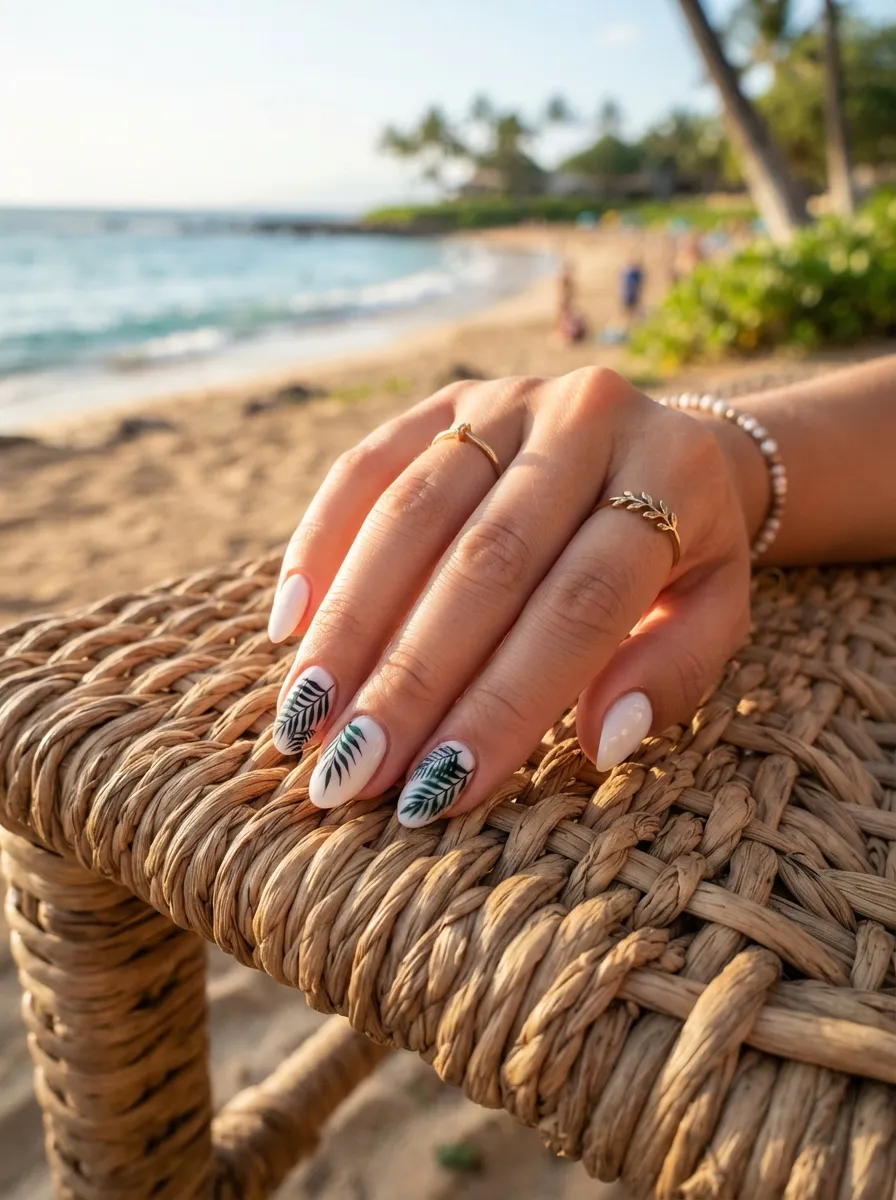
Palm leaf nails bring a calm, plant filled look to your hands. Paint your base in white, cream, or light blue, then add a few thin green leaf shapes on one or two nails. Use a small brush and short curved strokes to build each leaf, starting from a center line and adding smaller lines branching out. This design does not need to be perfect since real palm leaves are naturally uneven. A simple DIY trick is to use a striping brush, which many beauty stores sell for under five dollars. If painting freehand feels hard, search for palm leaf nail stickers, which apply flat and only need a top coat to seal. This style pairs nicely with neutral vacation outfits and works for both casual days and dinner reservations. Keep the rest of your nails plain so the leaves stand out. Short square nails show this pattern cleanly, while longer nails give more room for detail. Add a matte top coat for a soft finish or gloss for a shiny beach ready look.
4.Turquoise Wave Nails
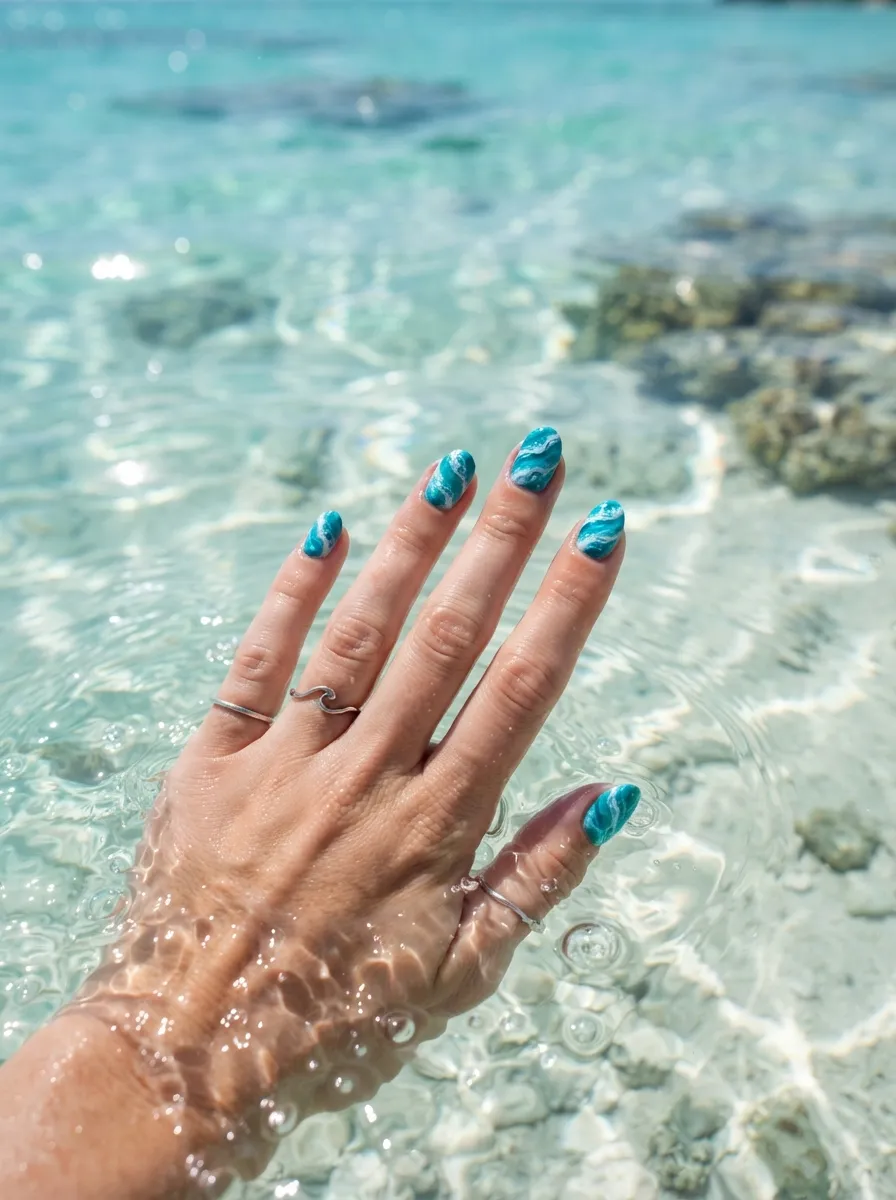
Turquoise wave nails mirror clear island water in a way that feels playful and cool. Paint a solid turquoise or teal base, then add white swirl lines using a thin brush to look like foam on moving water. Keep the lines loose and curved rather than straight for a more natural wave shape. If freehand swirls feel hard, try dragging a toothpick through wet white polish dots to create a marble effect instead. This shortcut still gives a wave like texture with less skill needed. A budget tip is to use one bottle of turquoise polish you may already own and a basic white polish for the design, keeping total cost near zero. This look suits short to medium nails best since the pattern reads clearly without too much curve. Add this design to just your accent nails if you want a subtle version, or cover all ten for a bold statement. Seal with a glossy top coat to mimic the shine of real water and to protect the design from pool chemicals.
5.Coconut Milk White Nails
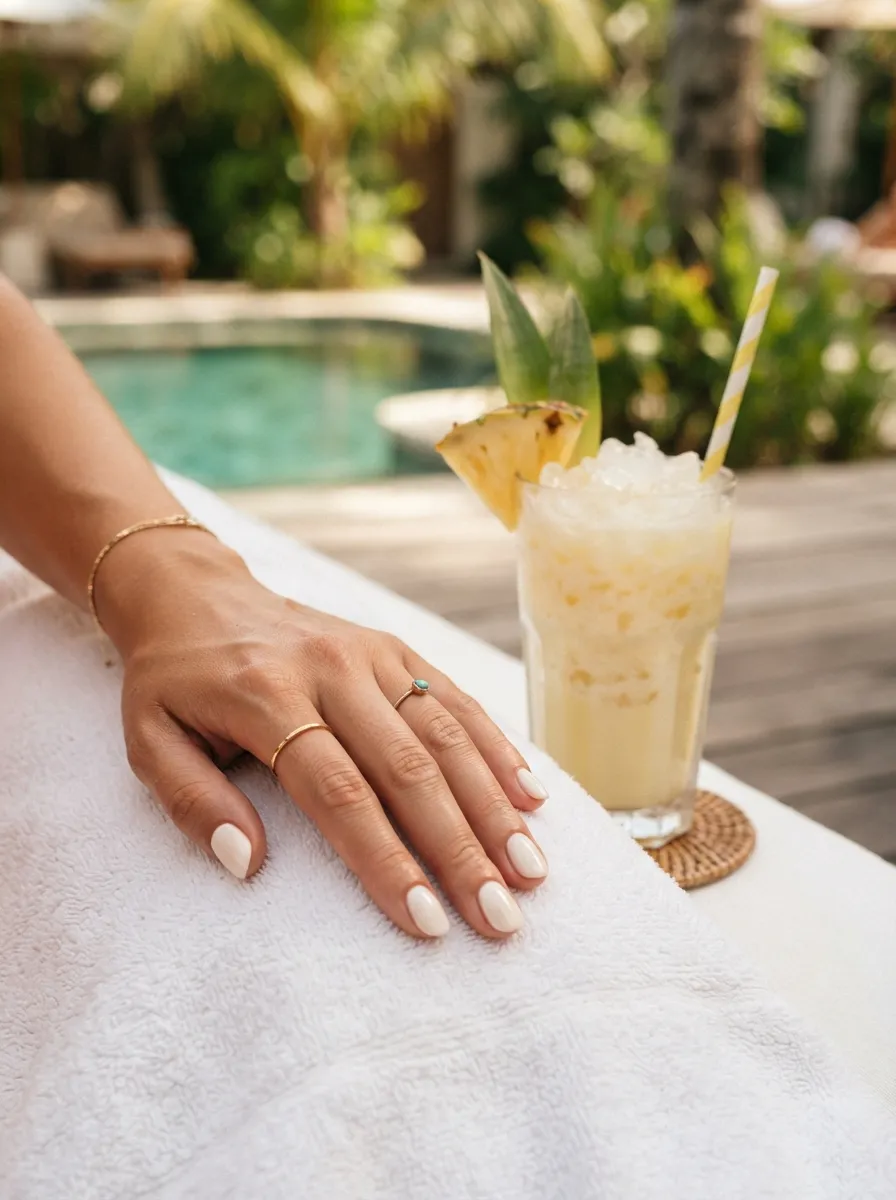
Coconut milk white is a soft, warm white that looks cleaner than stark white polish. It pairs with tanned skin and works for almost any vacation activity. This shade is a great low effort option if you want polished nails without a busy pattern. Apply two thin coats for full coverage, since white polish often needs extra layers to avoid streaks. A budget friendly trick is to apply a clear base coat first, which helps white polish glide on smoother and use less product overall. This color also works well as a base for other designs, like a thin gold line or a tiny shell sticker on one nail. Keep your nails short to medium length so the white looks fresh rather than harsh. Avoid painting right before heavy pool time, since chlorine can sometimes dull white polish faster than darker shades. A glossy top coat helps protect the color and adds shine. This shade suits daytime and evening outfits equally, making it one of the easiest tropical looks to pack for a trip.
6.Pineapple Print Accent Nail
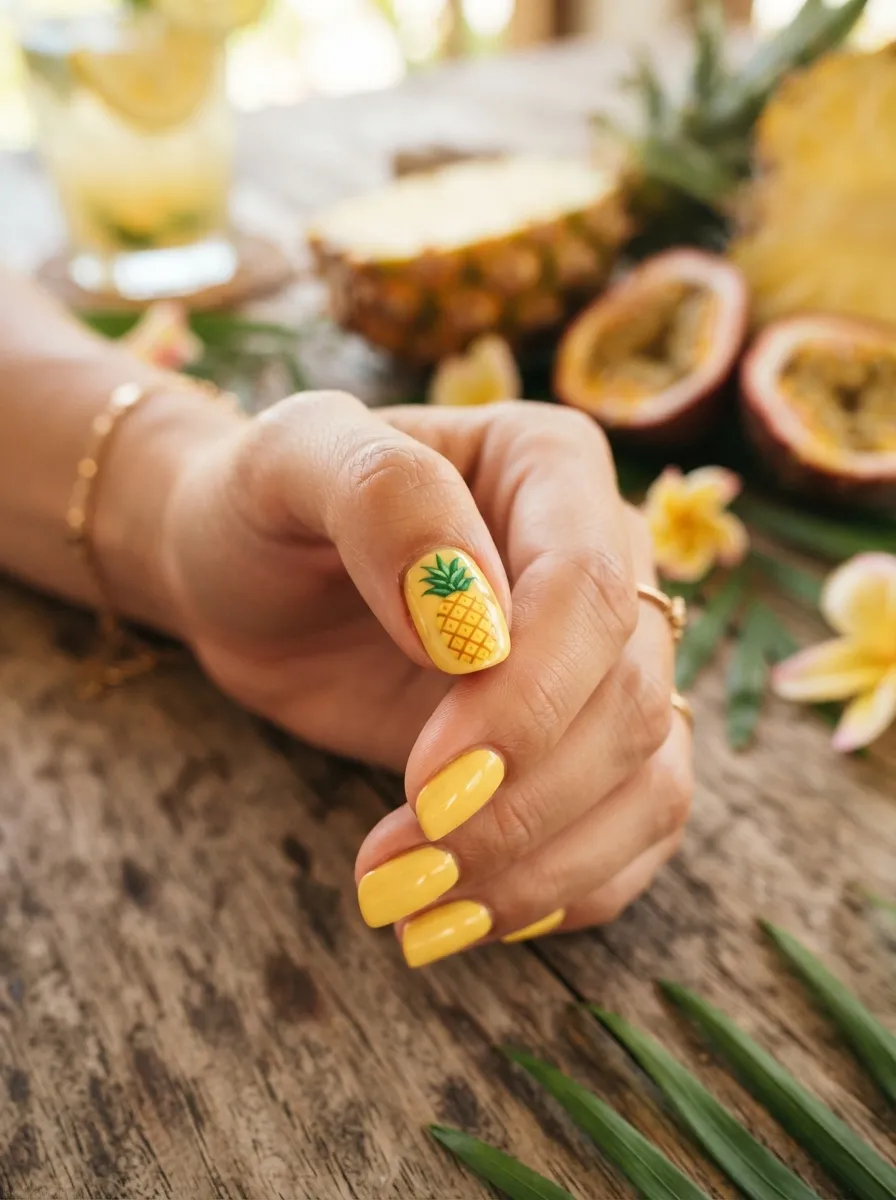
A tiny pineapple on one nail adds a fun, fruity detail without feeling childish. Paint your base nails in a soft yellow or nude shade, then use a small brush to draw an oval pineapple shape in golden yellow on your accent nail. Add short green triangle leaves on top and thin crisscross lines across the pineapple body using a fine tip brush or a toothpick. If freehand feels tricky, look for pineapple nail stickers, which many online beauty shops sell in packs for a few dollars. This design works great for pool parties, tropical themed weddings, or casual beach days. Keep the design on just one or two nails so it stays playful instead of overwhelming. Short round nails show this print best since the shape fits naturally within a smaller canvas. Finish with a glossy top coat to keep the tiny details sealed and shiny. This is a budget smart choice since it only needs a few polish colors you likely already have in your collection.
7.Coral Reef Inspired Nails
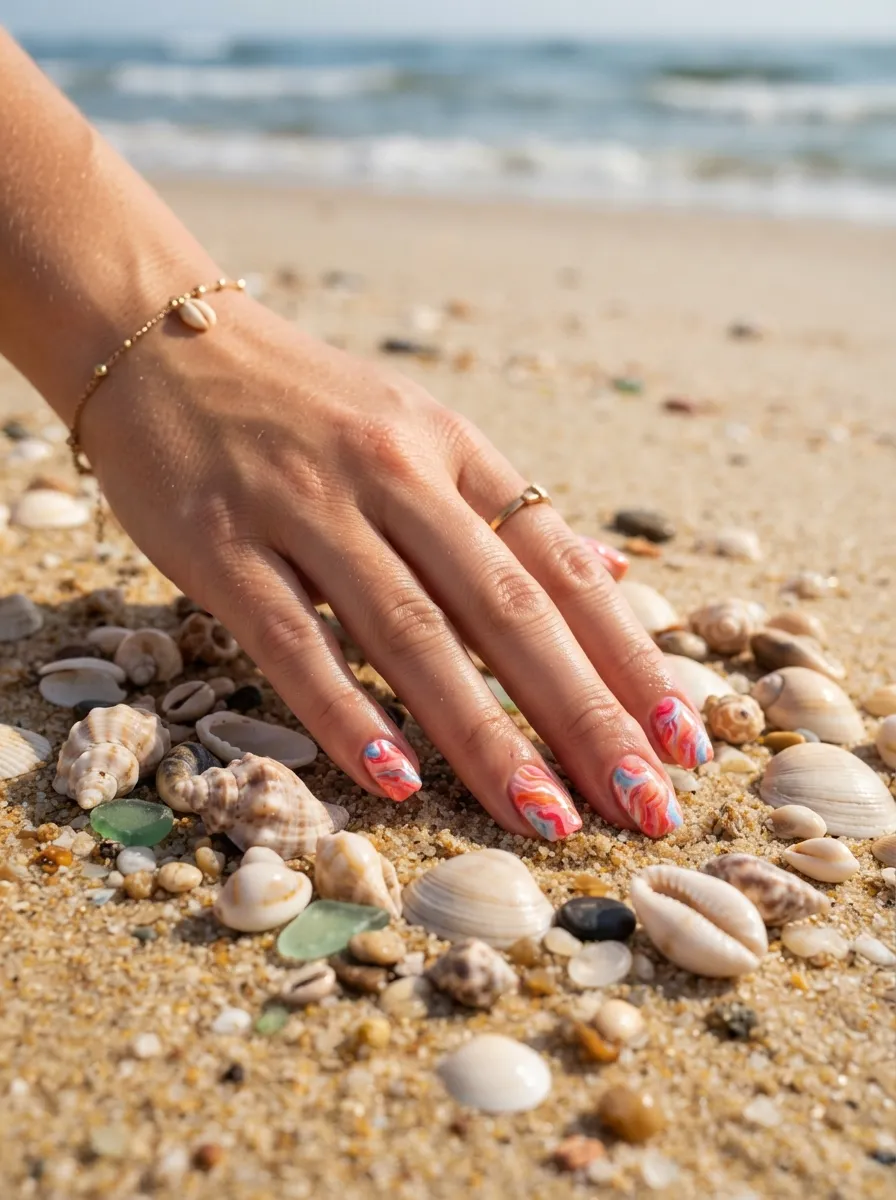
Coral reef nails mix coral pink, soft orange, and light blue in a marbled swirl pattern that mimics the colors under tropical water. Apply a light base coat, then drop small dots of each color onto the nail while still wet. Use a toothpick to swirl the colors together gently, creating a marble effect. Avoid over mixing, since a few swirls look more natural than a fully blended color. This technique works well for beginners because mistakes still look intentional. A budget tip is to reuse polish colors from other manicures instead of buying new bottles, since only small amounts are needed for the swirl. This design suits medium to long nails, giving more space for the marble pattern to show. Keep your cuticles clean before starting so the colors stay within the nail shape. Seal with a glossy top coat for a wet, reef like shine. This look pairs beautifully with gold jewelry and works for both daytime beach outings and evening dinners by the water.
8.Golden Sand Shimmer Nails
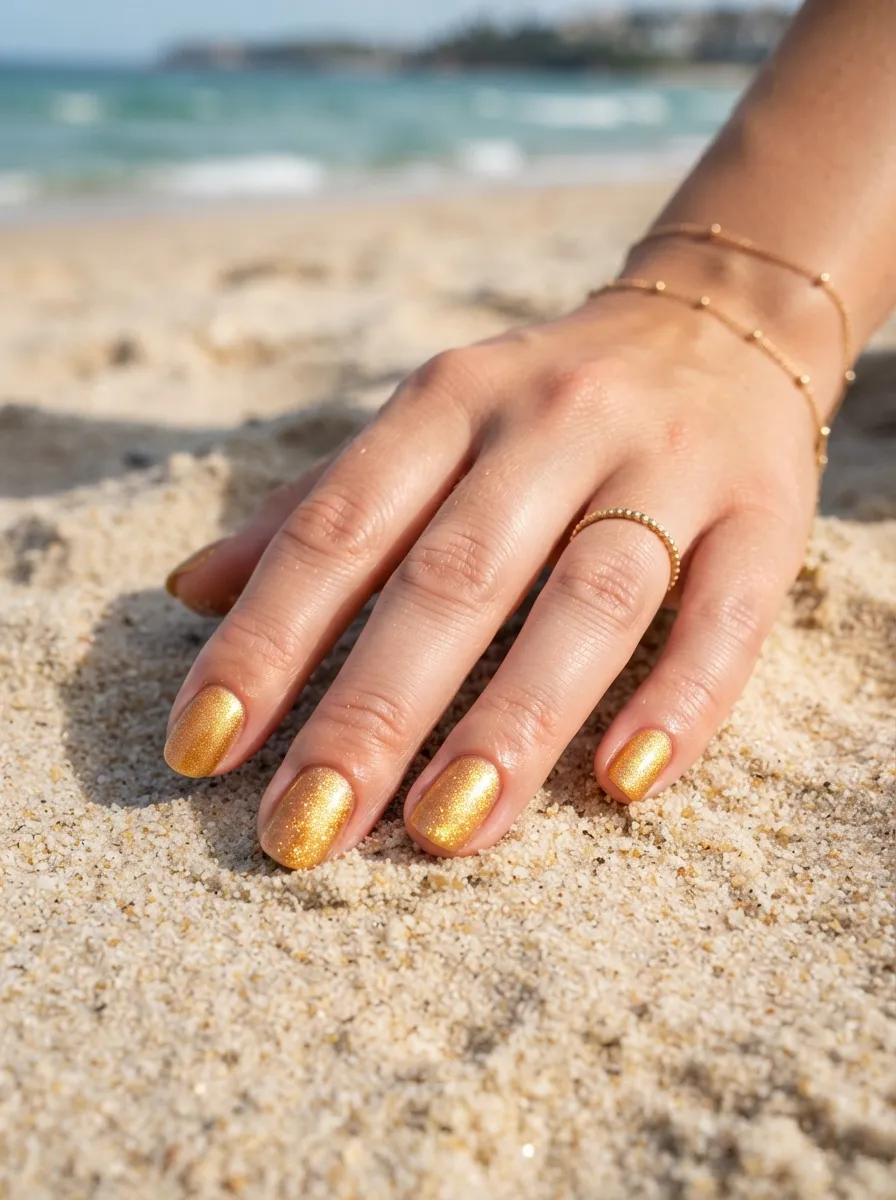
Golden sand shimmer nails capture the sparkle of sunlight hitting warm beach sand. Choose a polish with fine gold shimmer or glitter particles mixed into a beige or champagne base. Apply two coats for full shimmer coverage, letting each layer dry before adding the next. This shade works on its own or as an accent nail paired with a solid nude color on the other nails. A budget friendly trick is to layer a clear glitter polish over a plain beige shade you already own, which saves you from buying a new shimmer specific bottle. This style suits short and medium nails well since the shimmer catches light best on a smaller, rounded surface. Avoid thick glitter application, which can feel bumpy and chip faster. Seal with a strong glossy top coat to smooth out any texture and help the shimmer last through sandy activities. This look pairs nicely with gold sandals or jewelry and fits both casual beach days and dressier evening plans during your trip.
9.Mermaid Scale Nails
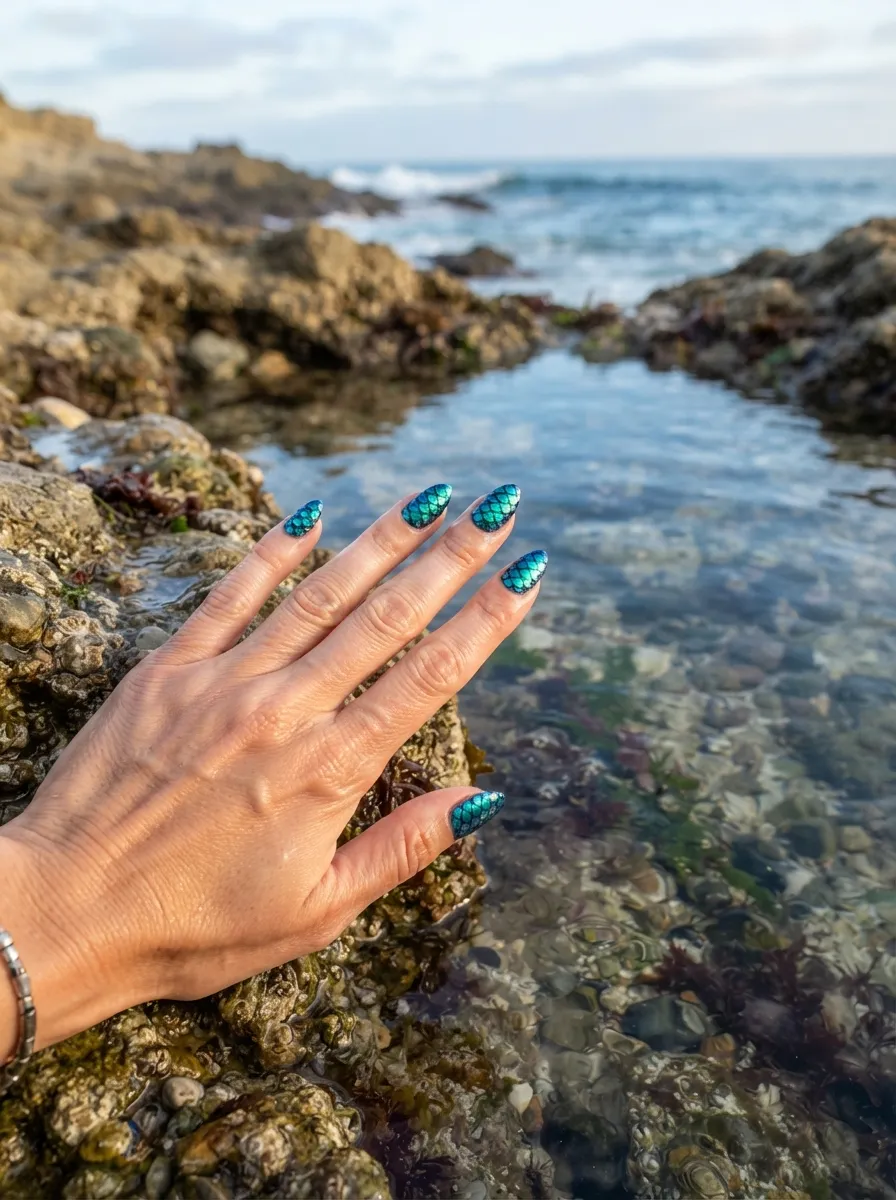
Mermaid scale nails use overlapping half circle shapes in blue, green, and purple to look like shimmering fish scales. Start with a solid teal or blue base coat. Then use a small dotting tool or the round end of a bobby pin dipped in polish to create half circle shapes in rows, slightly overlapping each row like real scales. Mix in a few purple or silver scales for extra shine. This design takes patience but does not require advanced skill, since the shapes are simple and repetitive. A budget tip is to practice the scale pattern on a spare nail wheel or paper before applying to real nails, which many beauty supply stores sell cheaply. This look suits medium to long nails best, giving more room for multiple scale rows. Keep the color palette to two or three shades so the pattern stays clean rather than busy. Finish with a glossy top coat for a wet, ocean like shine that makes the scales look like they are catching light underwater.
10.Watermelon Pink Nails
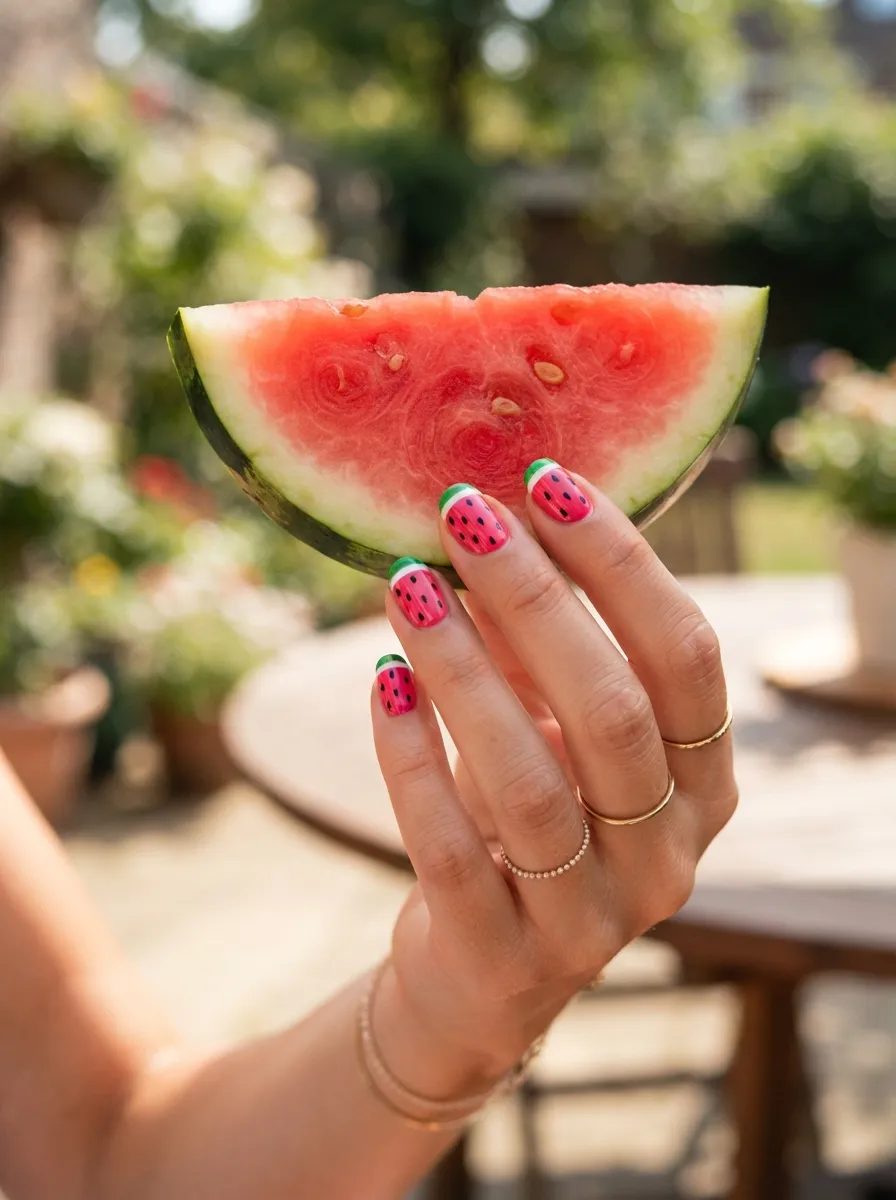
Watermelon nails are a playful summer classic that always feels fitting for a tropical trip. Paint the base of your nail bright pink, then add a thin green line near the tip to look like the rind. Use a fine brush or toothpick to add tiny black dots scattered across the pink area to mimic seeds. This design works best on short to medium nails, where the color blocks stay proportional. A budget friendly shortcut is to skip the green rind line if you are short on time, since the pink base with black seed dots alone still reads as a watermelon look. This style is easy enough for beginners since it only needs three polish colors and simple dot work. It pairs well with fruity vacation outfits and looks great in beach photos. Seal with a glossy top coat to keep the seeds crisp and to protect the color from fading in the sun. This is one of the most affordable tropical designs since most people already own pink, green, and black polish at home.
11.Tropical Fruit Salad Nails
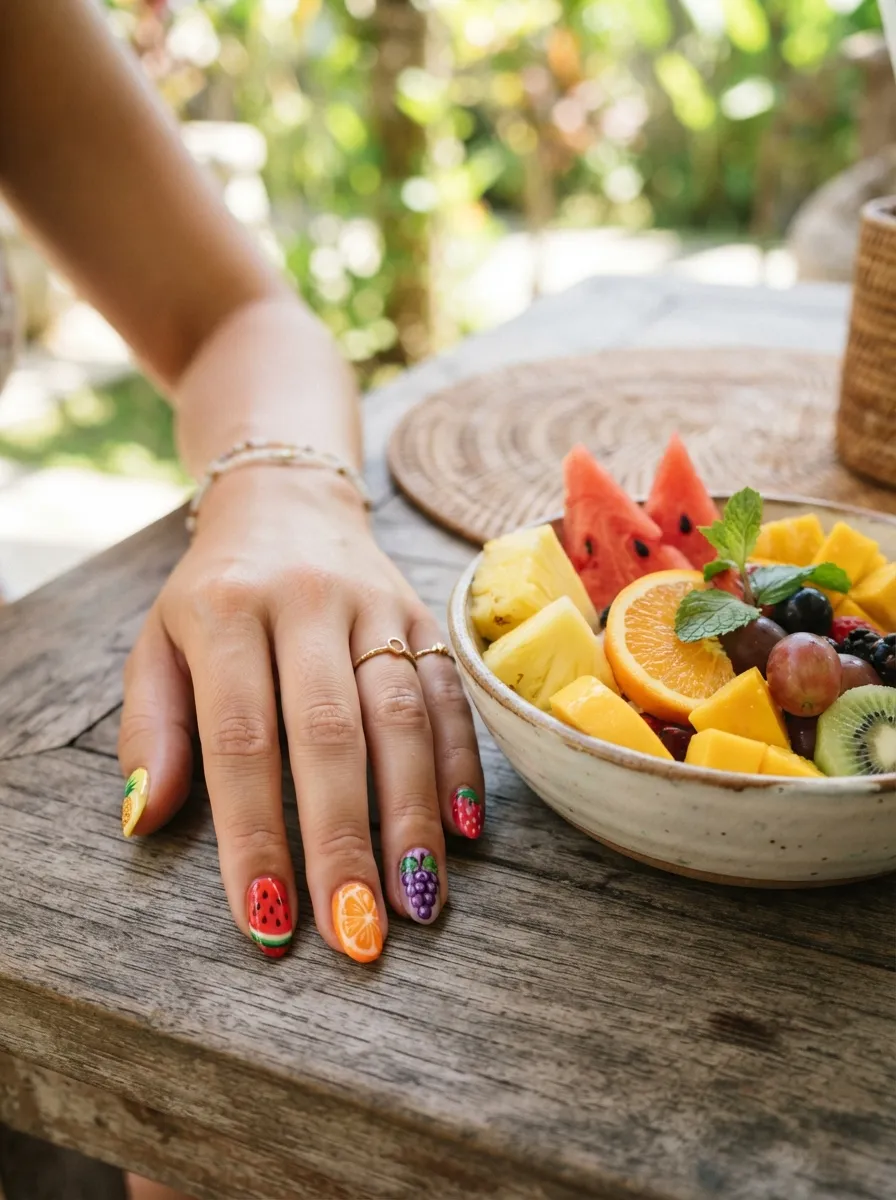
Fruit salad nails mix several small fruit designs across different fingers for a colorful, playful manicure. Paint each nail a different pastel base, then add one simple fruit shape per nail, such as an orange slice, a strawberry, or a small pineapple. Keep each design small and simple rather than detailed, since the fun comes from the variety rather than perfection. A budget tip is to use nail art pens instead of brushes, which are often easier to control and cost only a few dollars at drugstores. This look works best on short to medium nails so each fruit design stays neat. If freehand painting feels overwhelming, mix hand painted nails with a few fruit shaped stickers to save time. This style suits casual beach days, pool parties, and tropical themed events. Seal everything with a glossy top coat to protect the small details from chipping. This design is a fun option for kids on vacation too, since it is playful, colorful, and easy to recreate with basic polish colors.
12.Seashell Chrome Nails
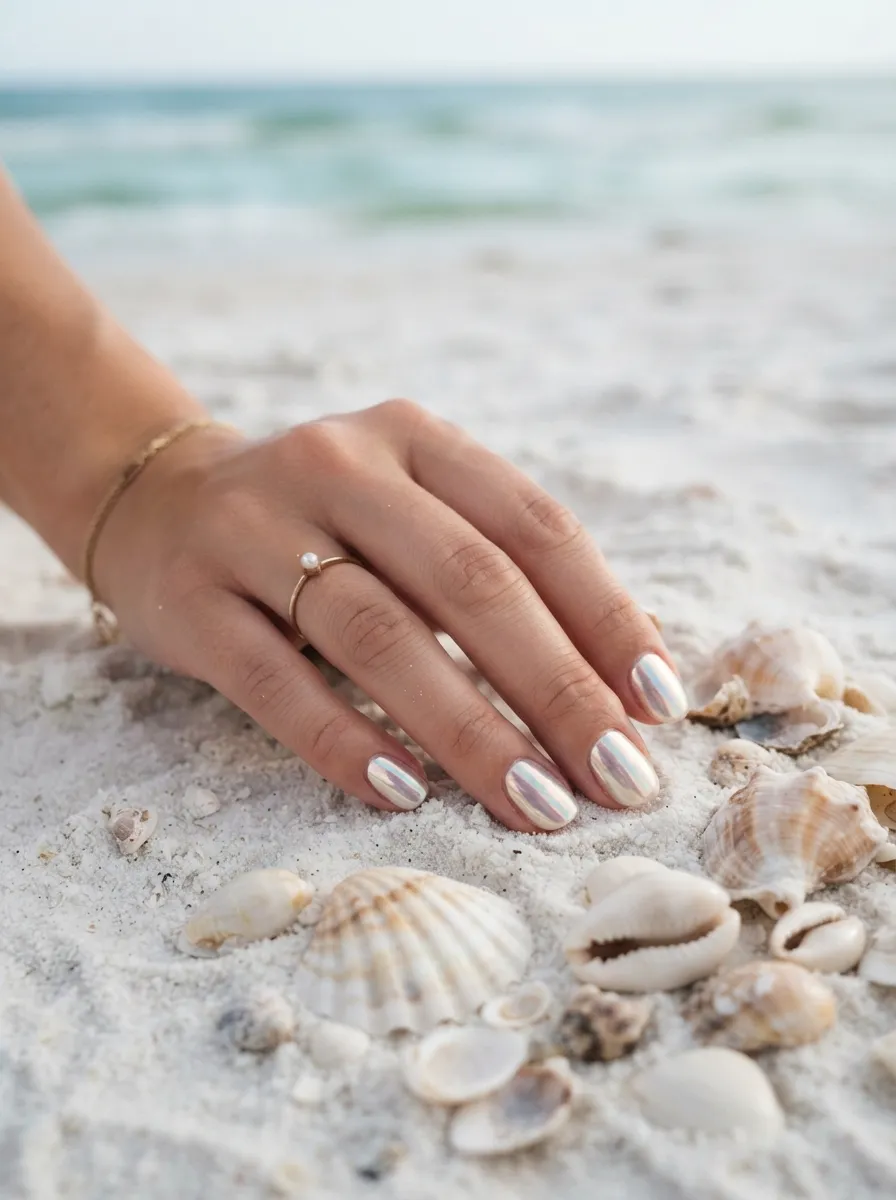
Seashell chrome nails use a pearl finish polish that shifts color slightly depending on the light, much like the inside of a real shell. Apply a white or light pink base coat first, then add a chrome powder or chrome polish on top following the product instructions. Many chrome powders come in affordable kits with a small application sponge included. This design does not require detailed art skills, since the shimmer effect does the visual work on its own. A budget friendly option is to buy a single chrome powder pot, which can be reused for several manicures over time. This look suits short to medium nails and works especially well for special dinners or evening events during your trip. Keep the rest of your look simple, like plain gold jewelry, so the shimmer stays the focus. Seal with a top coat made for chrome polish, since regular top coats can sometimes dull the shine. This design photographs beautifully in sunlight, making it a strong choice for vacation photos near the water.
13.Lime Green French Tips
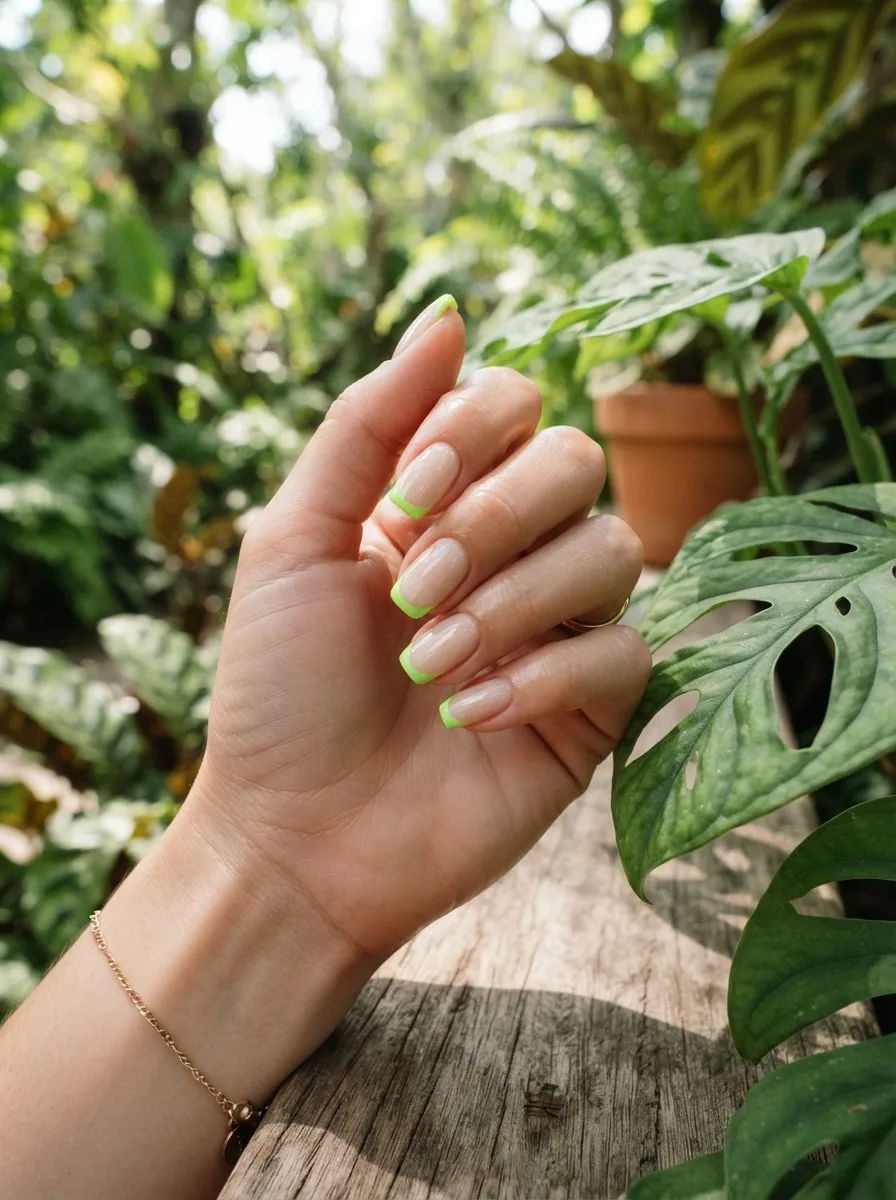
Lime green french tips swap the classic white tip for a bright, fruity green that feels made for summer. Paint a nude or soft pink base first, then use a thin brush or french tip guide sticker to add a clean green line across the top of each nail. Guide stickers are budget friendly and often cost only a few dollars for multiple uses. This design works well on short, squared off nails, which give the tip line a crisp, clean edge. If your hand is not steady, practice the tip shape on paper first, or use a thin striping tape to keep lines straight while painting. This look pairs nicely with both casual and dressy vacation outfits since the nude base keeps things simple. Seal with a glossy top coat to protect the tip color from chipping during pool days. This modern take on a classic style feels fresh for a tropical trip without needing detailed art skills or a large color collection.
14.Beachy Marble Nails
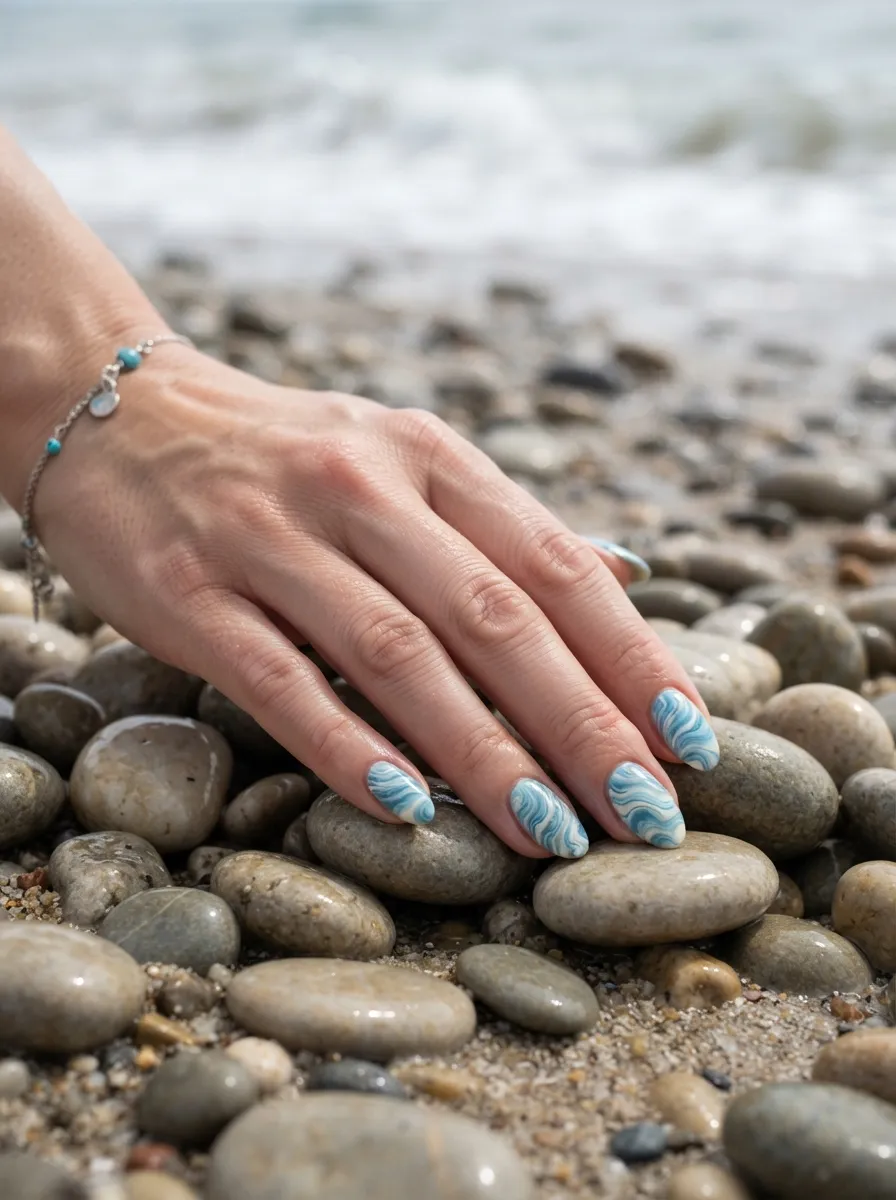
Beachy marble nails use soft blue and white swirls to look like moving ocean water. Start with a white base coat, then add small drops of light blue and sky blue polish while the base is still slightly wet. Use a toothpick to gently drag the colors into loose swirl patterns, keeping the movement light rather than heavy. This effect looks best when kept simple with only two or three shades. A budget tip is to practice the marble technique on a paper towel first to get a feel for how much polish to use before applying it to your nails. This style suits medium to long nails, giving more space for the swirl pattern to show clearly. Keep your cuticles clean beforehand so the color stays neat within the nail shape. Seal with a glossy top coat for a smooth, wet looking finish. This design pairs well with silver or gold jewelry and fits both relaxed beach days and dinner outings during your trip.
15.Flamingo Pink Accent
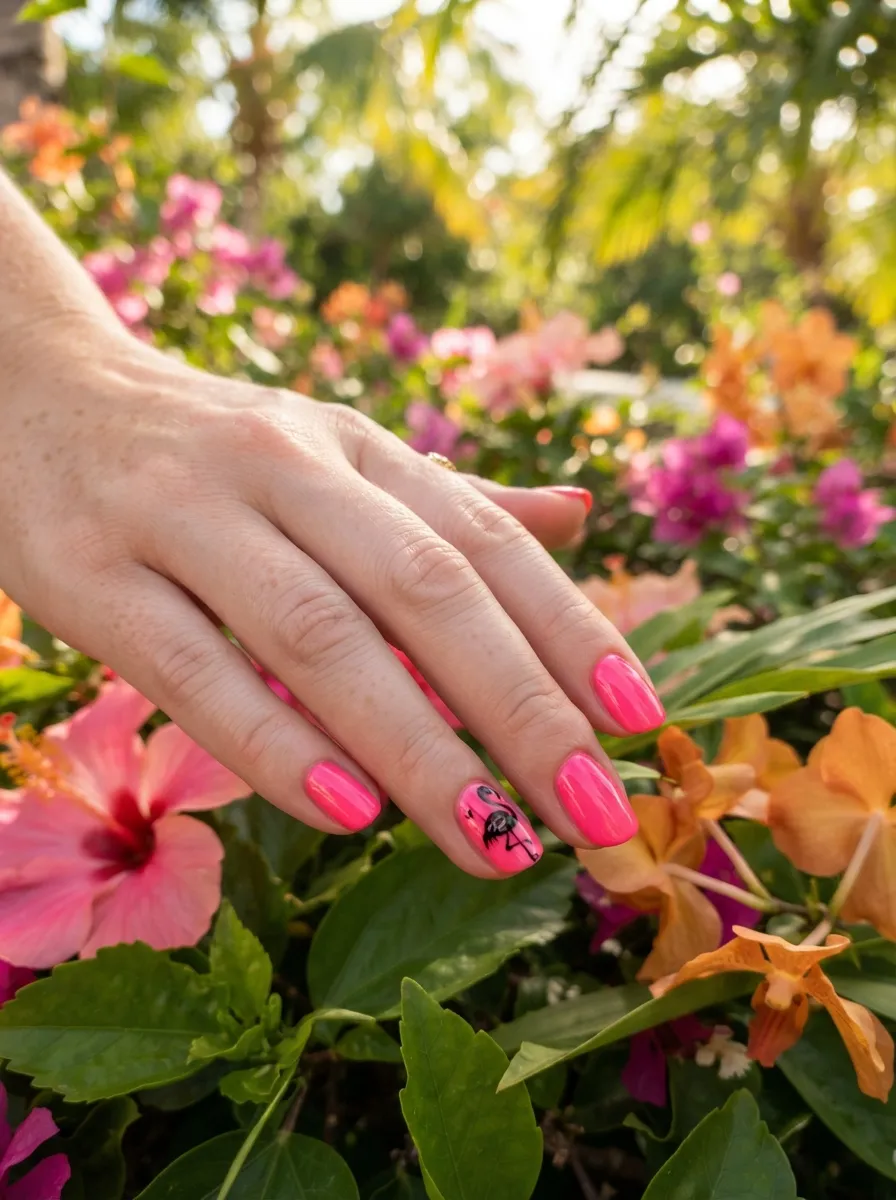
Flamingo pink nails bring a bold, cheerful color that stands out in vacation photos. Paint most nails in a bright pink shade, then add a small flamingo silhouette on one accent nail using a fine brush or a black or white polish outline. Keep the flamingo shape simple, just a curved neck line, oval body, and thin legs, since detail is not necessary for the design to read clearly. A budget friendly shortcut is to use a flamingo shaped nail sticker instead of freehand painting, which many online beauty shops sell affordably in packs. This look works best on short to medium nails so the bright pink color stays bold rather than overwhelming. Pair this design with neutral sandals and simple jewelry so the nails remain the statement piece. Seal with a glossy top coat to protect the color from fading during sun exposure. This style suits pool parties, beach days, and tropical themed events, and it photographs especially well against blue water or green plants.
16.Aloha Orange Sunset
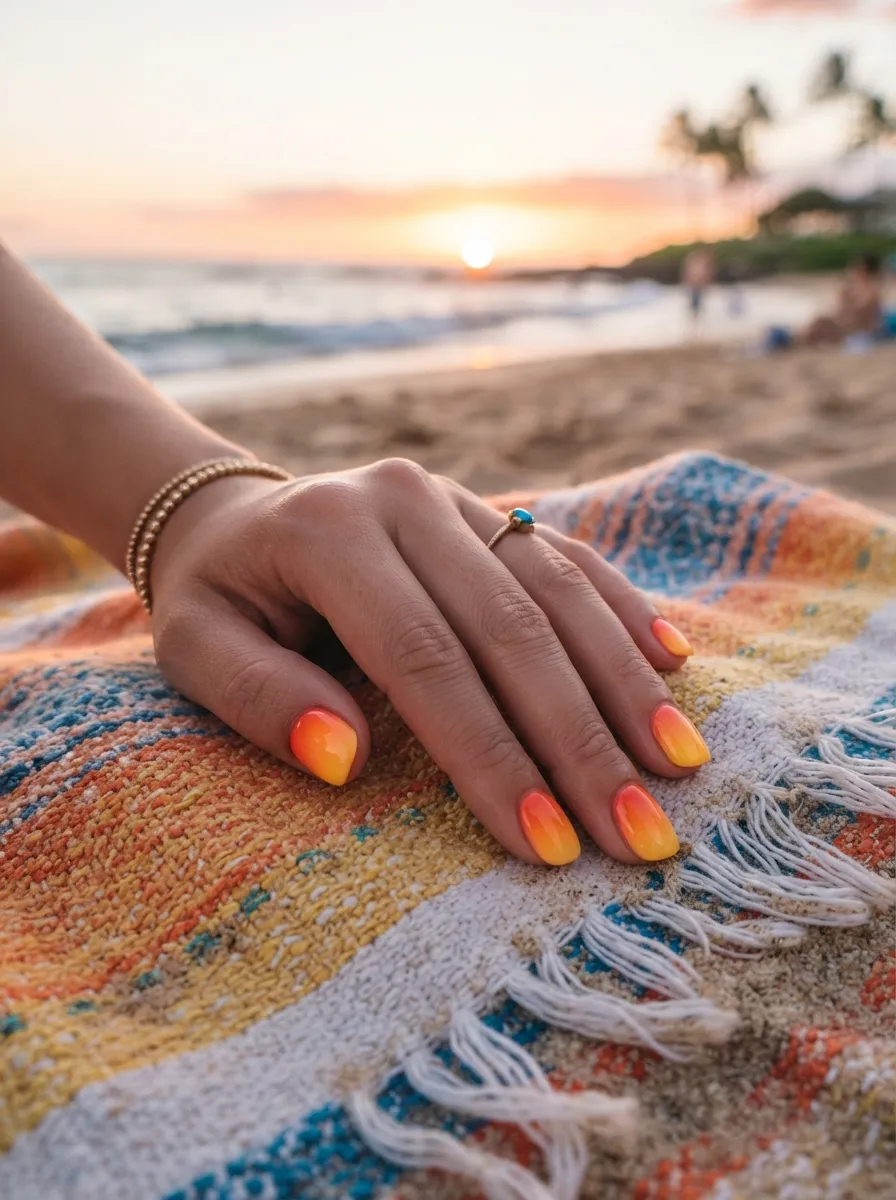
Aloha orange sunset nails use warm orange, yellow, and a touch of red to copy the glow of a tropical evening sky. Blend the colors using a makeup sponge, starting with yellow near the cuticle and orange or red near the tip. This creates a soft gradient effect without needing precise brush control. A budget tip is to use only two polish shades instead of three if you want a simpler, faster version of this look. This design suits short to medium nails and works well for evening events like beach bonfires or sunset dinners. Keep the blend soft rather than sharp for the most natural sunset effect. If the sponge method feels messy at first, practice on a spare nail tip before trying your full manicure. Seal with a glossy top coat to enhance the warm tones and add shine. This design pairs beautifully with gold jewelry and warm toned outfits, making it a strong choice for the golden hour photos most people want during a tropical trip.
17.Banana Leaf Green Nails
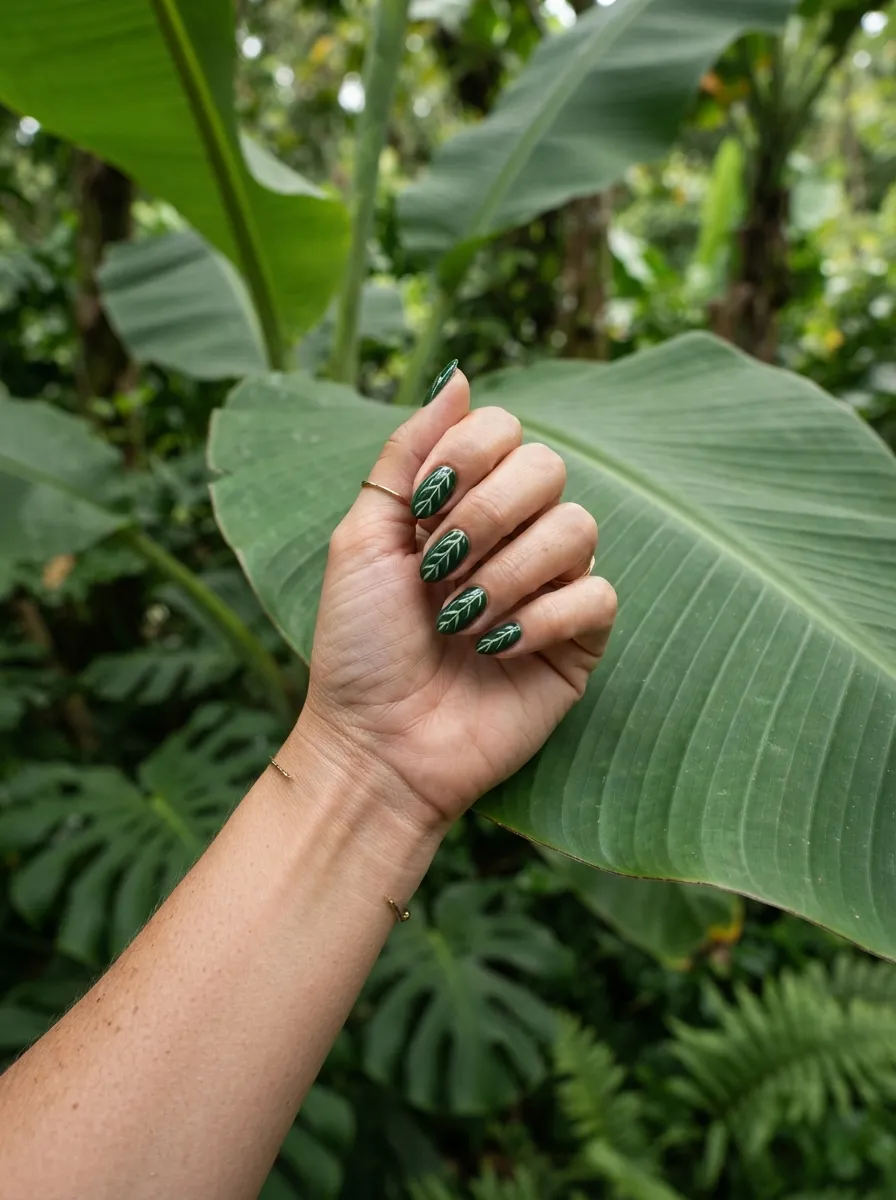
Banana leaf green nails use a deep, rich green shade paired with a simple vein line detail to mimic large tropical leaves. Paint your base nail in a solid forest or emerald green, then use a thin brush to add one curved line down the center of the nail, with small diagonal lines branching off like leaf veins. This detail is simple enough for beginners since it only requires steady, short strokes. A budget friendly tip is to use a fine liner nail art brush, which usually costs only a few dollars and works for many future designs. This look suits medium to long nails, giving more room for the vein pattern to show clearly. Keep the rest of your look neutral, like tan or white clothing, so the deep green nails stand out. Seal with a glossy top coat for a rich, healthy looking shine. This design feels earthy and calm compared to brighter tropical looks, making it a good choice for travelers who want color without high shine glitter or shimmer.
18.Bright Blue Ocean Gradient
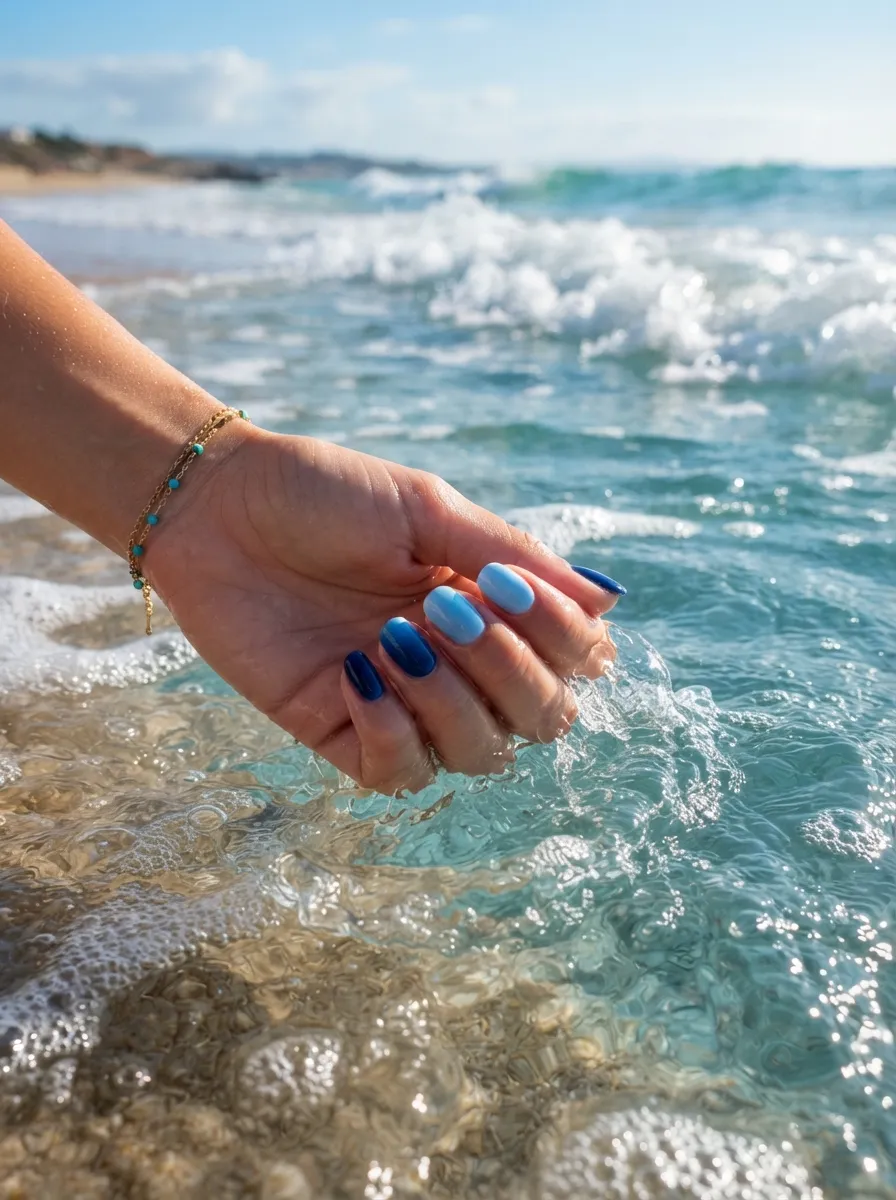
Bright blue ocean gradient nails blend light and dark blue shades to mimic the depth of tropical water. Start with a light blue base near the cuticle and blend into a deep navy or teal near the tip using a makeup sponge. This creates a smooth depth effect that looks complex but only takes a few sponge dabs to achieve. A budget tip is to buy a small blue polish set, which many drugstores sell in three to five shade packs for a low price. This design suits short to long nails and works for both casual and formal vacation events. Blend slowly and let each layer dry slightly before adding the next color to avoid muddy mixing. If you want a simpler version, use just two shades instead of three. Seal with a glossy top coat to mimic the shine of moving water. This look pairs well with silver jewelry and white or tan clothing, and it photographs beautifully during boat trips or beach walks.
19.Passionfruit Yellow Nails
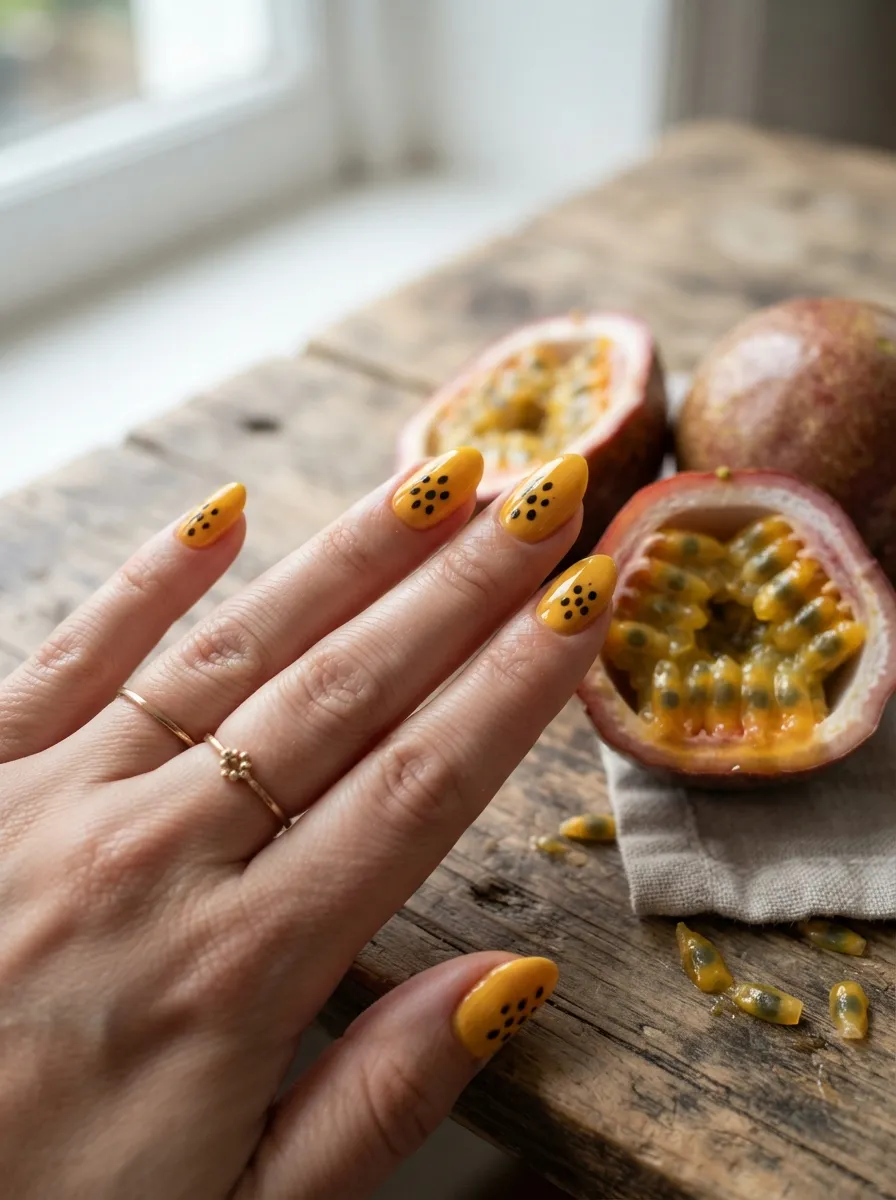
Passionfruit yellow nails use a warm golden yellow base with small black seed dots added to the center of each nail. This design mimics the inside of a sliced passionfruit and adds a playful detail without much extra effort. Paint your full nail yellow first, then use a toothpick or fine brush to add a small cluster of black dots near the center of each nail. A budget tip is to use a bobby pin dipped in polish instead of buying a dotting tool, which saves money while still giving clean, round dots. This design suits short to medium nails, where the seed cluster stays proportional to the nail size. Keep the yellow shade warm rather than pale for the most fruit like effect. Seal with a glossy top coat to keep the small dots sealed and shiny. This look pairs nicely with tropical print clothing and works well for casual beach days, brunch outings, or pool parties during your trip, giving a fresh, fruity feel to your overall look.
20.Starfish Glitter Accent
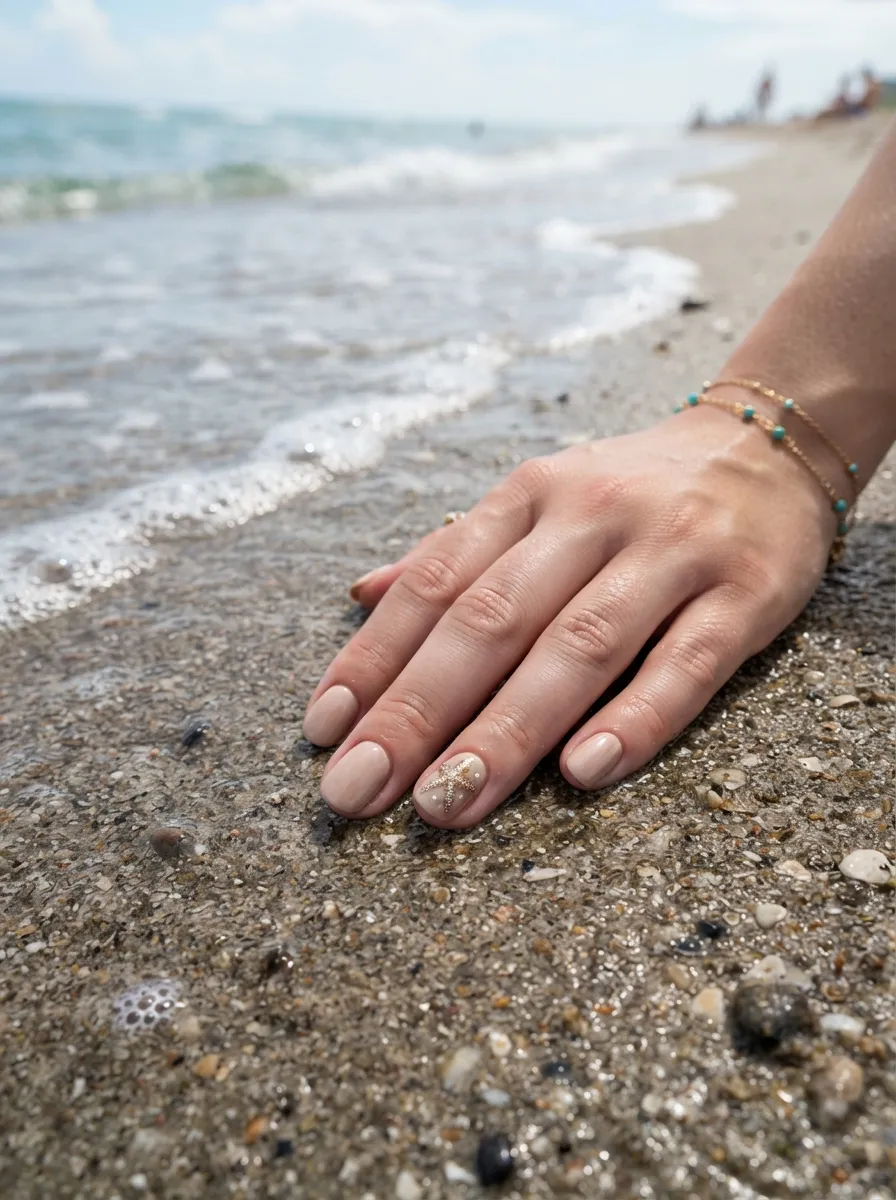
Starfish glitter nails add a small beach themed detail without covering the entire nail in a busy pattern. Paint your base nails in a soft beige or white shade, then draw a simple five point starfish shape on one accent nail using a fine brush. Fill the starfish shape with a chunky glitter polish for texture and shine. A budget friendly option is to buy a small glitter topper polish, which many stores sell for under five dollars and can be reused across multiple manicures. This design suits short to medium nails, keeping the starfish shape clean and recognizable. If freehand drawing feels difficult, use a starfish shaped nail sticker instead, then add glitter polish on top for texture. Seal carefully with a top coat, pressing gently over the glitter to avoid smudging the shape. This look pairs well with neutral vacation outfits and works for both daytime beach trips and evening plans. It adds a subtle sparkle that reflects light beautifully in outdoor photos near the water.
21.Tiki Bar Orange and Yellow
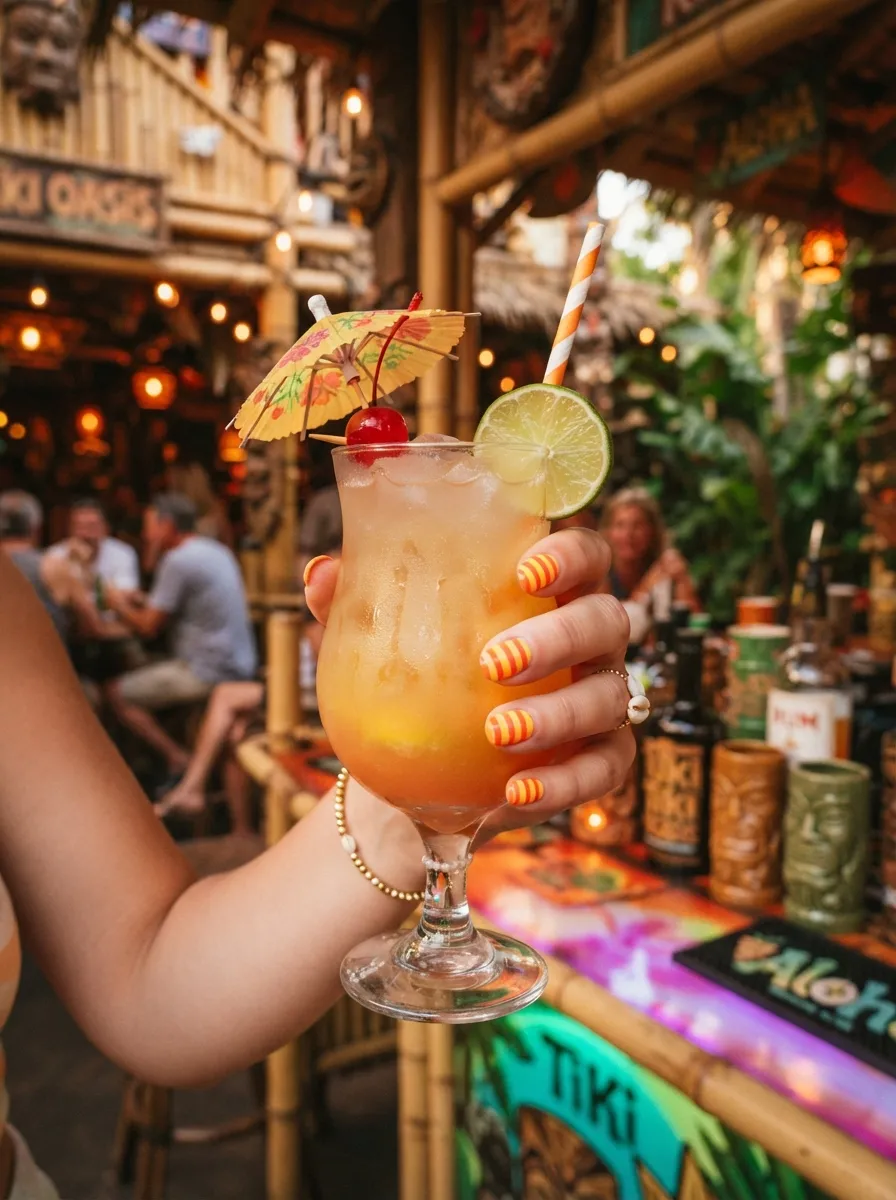
Tiki bar nails mix bold orange and yellow in alternating stripes or blocks for a cheerful, vacation ready look. Paint two or three nails in solid orange and the rest in solid yellow, or alternate colors on each nail for a bold checkerboard style effect. This design is simple since it mainly relies on clean color blocking rather than detailed art. A budget tip is to use painter’s tape to create sharp lines between colors, which many people already have at home for other projects. This look suits short to medium nails, where the bold color blocks stay clean and easy to manage. Keep your nail shape simple, like square or round, so the color blocks read clearly. Seal with a glossy top coat to make the colors pop under sunlight. This design pairs perfectly with tropical drinks, poolside lounging, and evening luau parties. It is an easy option for anyone who wants bold color without needing fine detail brushes or advanced nail art experience during their trip.
22.Papaya Peach Nails
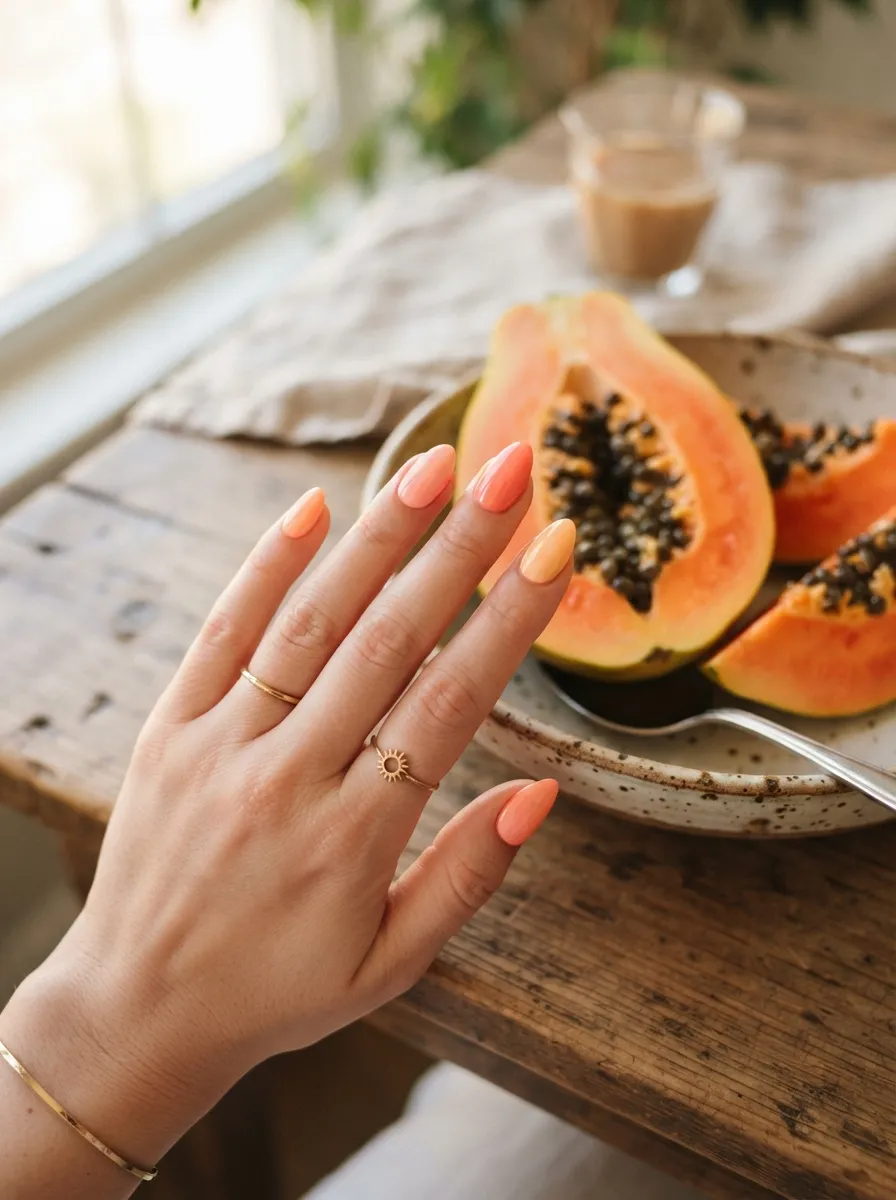
Papaya peach nails use a soft peach base blended lightly with coral near the tips to copy the warm inside color of ripe papaya fruit. Apply the peach shade first, then use a small makeup sponge to add light coral blending near the tip for a gentle gradient. This effect is soft and subtle, making it a good choice for travelers who want color without a bold or busy design. A budget tip is to mix two shades you already own instead of buying new polish, since peach and coral tones are common in most collections. This look suits short to medium nails and works well for both daytime and evening events. Keep the blending light rather than heavy for the most natural fruit like effect. Seal with a glossy top coat to enhance the warm glow of the color. This design pairs nicely with gold jewelry and white or tan outfits, and it offers a soft, wearable option for anyone who prefers subtle tropical tones over bright, bold colors.
23.Island Sunset Gradient
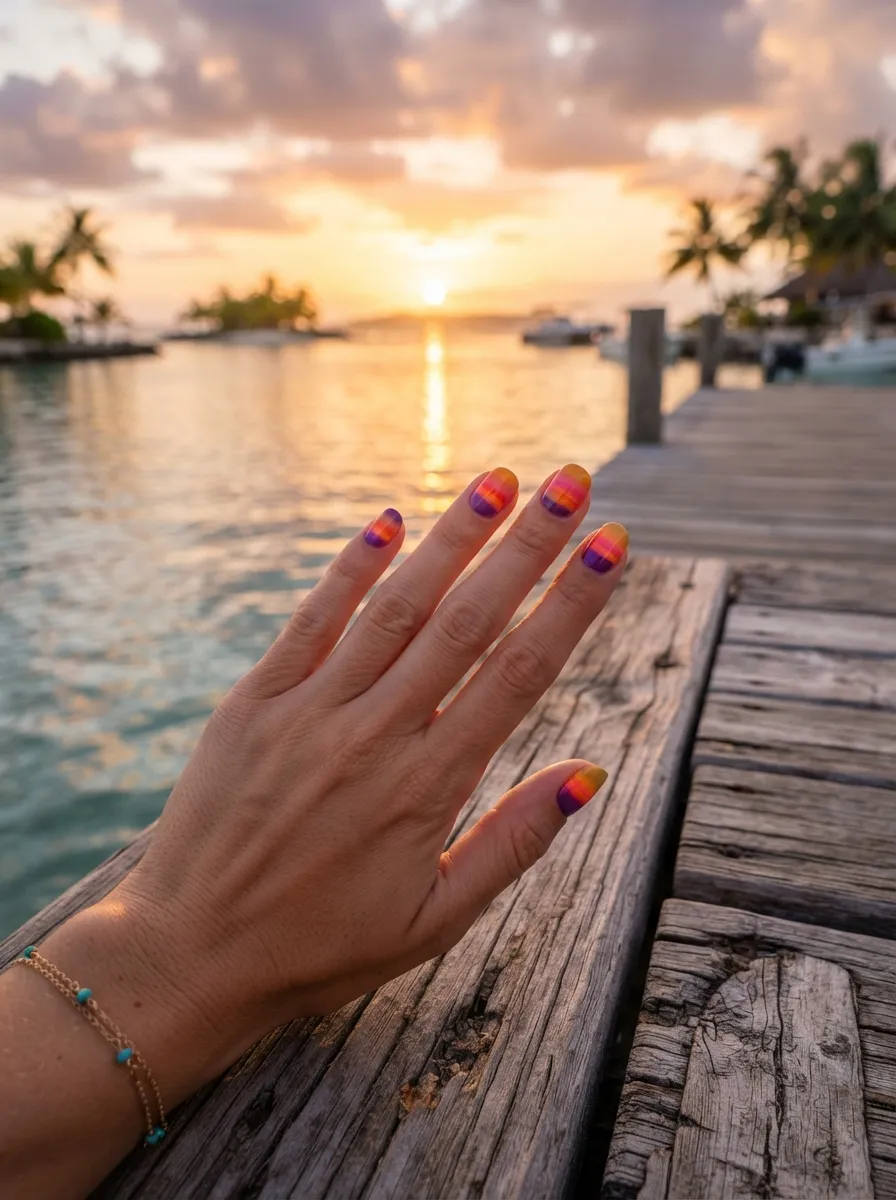
Island sunset gradient nails combine pink, orange, and purple in a soft blend to capture a full evening sky. Apply each color in small sections using a makeup sponge, starting with pink near the cuticle, orange in the middle, and a touch of purple near the tip. Blend gently where the colors meet so the transition feels smooth rather than sharp. A budget tip is to use polish samples or mini bottles, which many beauty stores sell cheaply and are perfect for gradient designs that only need a small amount of each shade. This look suits medium to long nails, giving enough space for three color transitions to show clearly. If blending three shades feels difficult, simplify the design to two colors instead. Seal with a glossy top coat to bring out the warm, glowing effect. This design pairs beautifully with vacation dinners, sunset boat rides, or beach bonfires, and it consistently photographs well thanks to its warm, layered color palette against evening skies.
24.Salt Water Taffy Pastels
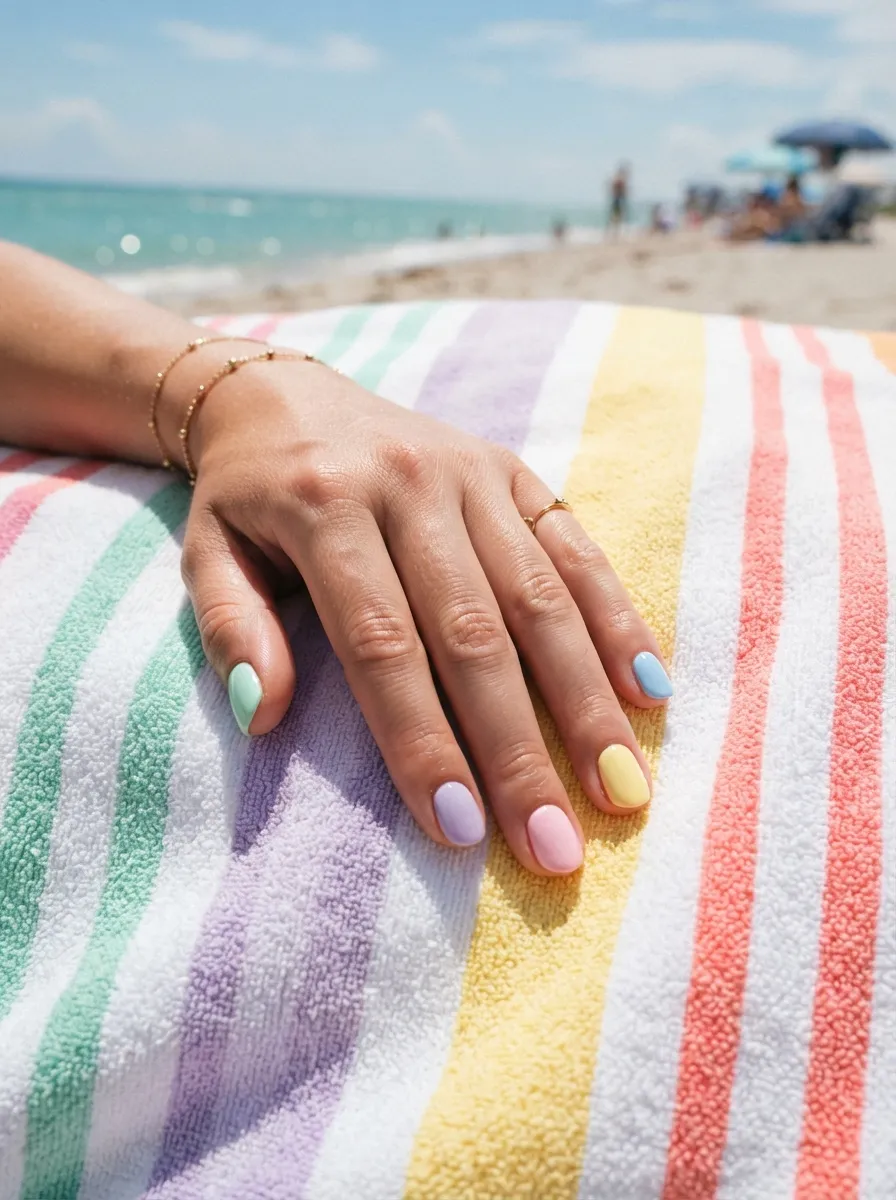
Salt water taffy nails use a mix of soft pastel shades across different nails for a playful, candy inspired look. Paint each nail a different pastel color, such as mint green, light lavender, soft pink, and baby blue. This design requires no detailed art skills since the fun comes from the color variety alone. A budget tip is to use polish colors you already own instead of buying a full new set, since most people already have a few pastel shades in their collection. This look suits short to medium nails, keeping the colors light and easy to manage. Keep your nail shape simple and rounded so the pastel colors feel soft and cohesive together. Seal with a glossy top coat to add shine and help the colors last through vacation activities. This design pairs well with white or light colored outfits and works for casual beach days, brunch outings, or relaxed evening plans. It is one of the easiest tropical looks to recreate quickly before a trip.
25.Tropical Butterfly Nail Art
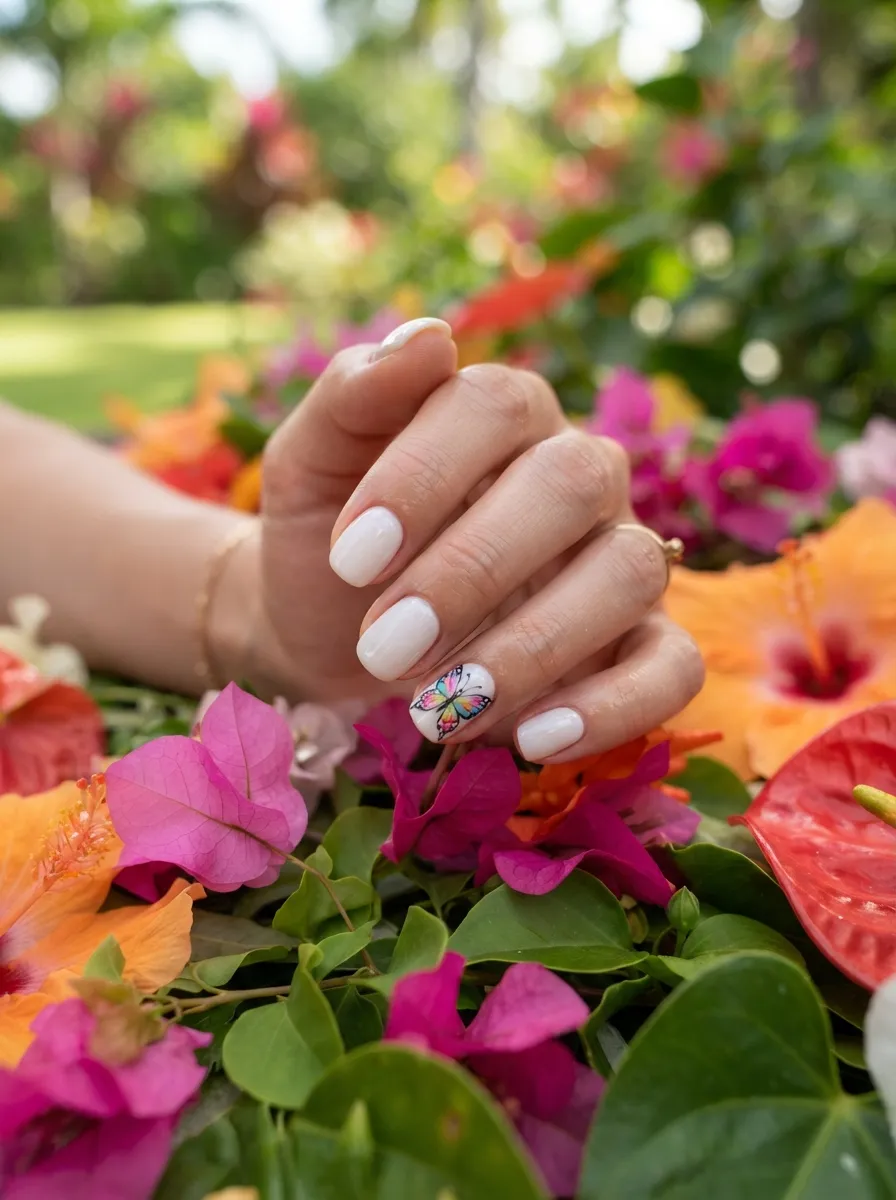
Tropical butterfly nails add a delicate, hand painted detail to an otherwise simple manicure. Paint your base nails in white or a light pastel shade, then draw a small butterfly shape on one accent nail using two teardrop shaped wings and a thin body line. Add small dots of color, like blue, pink, or yellow, onto the wings for a tropical feel. A budget friendly option is to use a butterfly shaped nail sticker if freehand painting feels too difficult, then seal it under a top coat for a smooth finish. This design suits short to medium nails, keeping the butterfly shape clean and easy to see. Practice the wing shapes on paper first if you are new to nail art, since symmetry matters most for this design. Seal with a glossy top coat to protect the small details. This look pairs beautifully with floral vacation outfits and works well for weddings, garden parties, or relaxed beach days where a soft, decorative detail feels fitting.
26.Rainbow Reef Nails
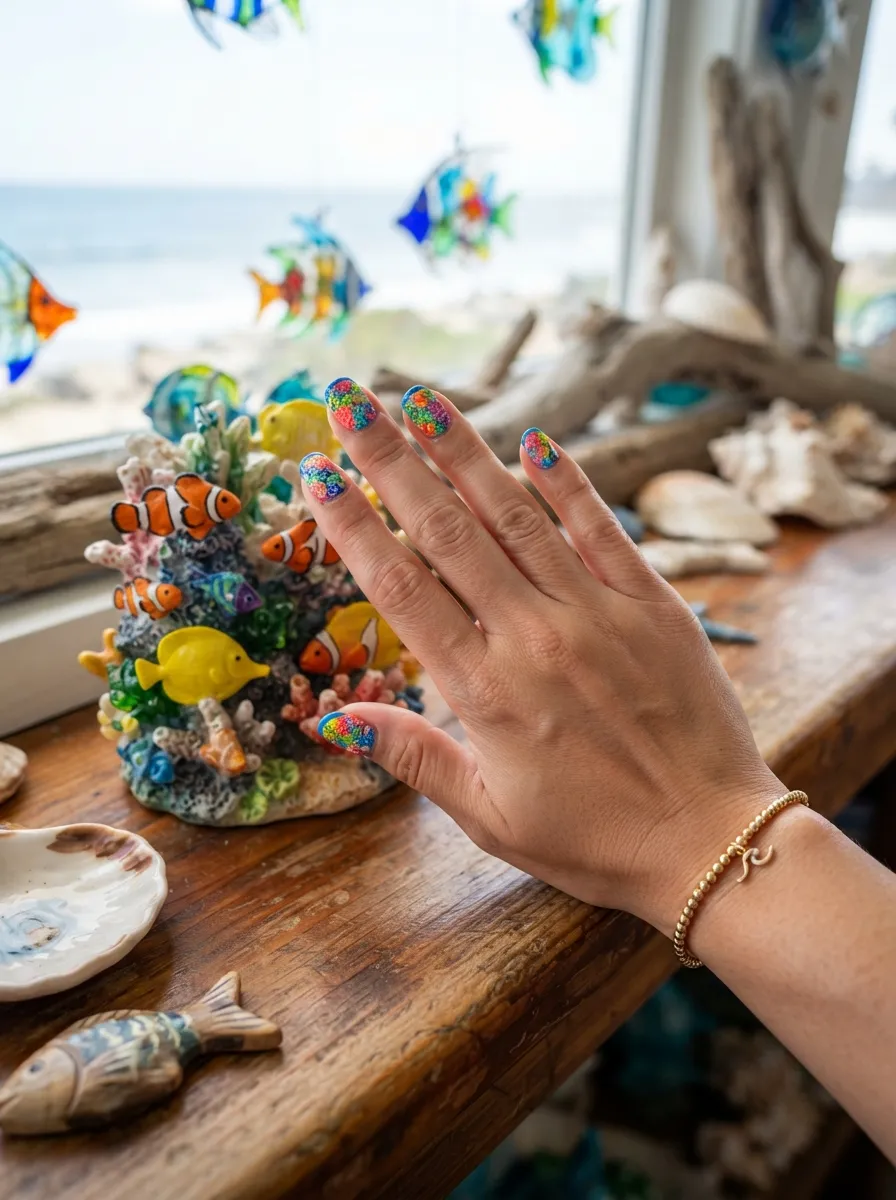
Rainbow reef nails mix small patches of bright color across each nail to copy the look of a busy, colorful coral reef. Paint a white or light base first, then use a fine brush to add small patches of pink, orange, yellow, blue, and purple in random shapes across the nail. This design does not need to be neat or symmetrical, since real reefs are naturally uneven and textured. A budget tip is to use polish samples or leftover drops from other manicures, since only tiny amounts of each color are needed. This look suits short to medium nails and works best as a bold statement design rather than a subtle one. Keep the color patches small so the overall look stays balanced instead of overwhelming. Seal with a glossy top coat to blend the colors together visually and add shine. This design pairs well with simple, solid colored swimwear so the nails become the main colorful focus, and it is a strong choice for anyone who wants a bold, playful vacation look.
27.Piña Colada Cream Nails
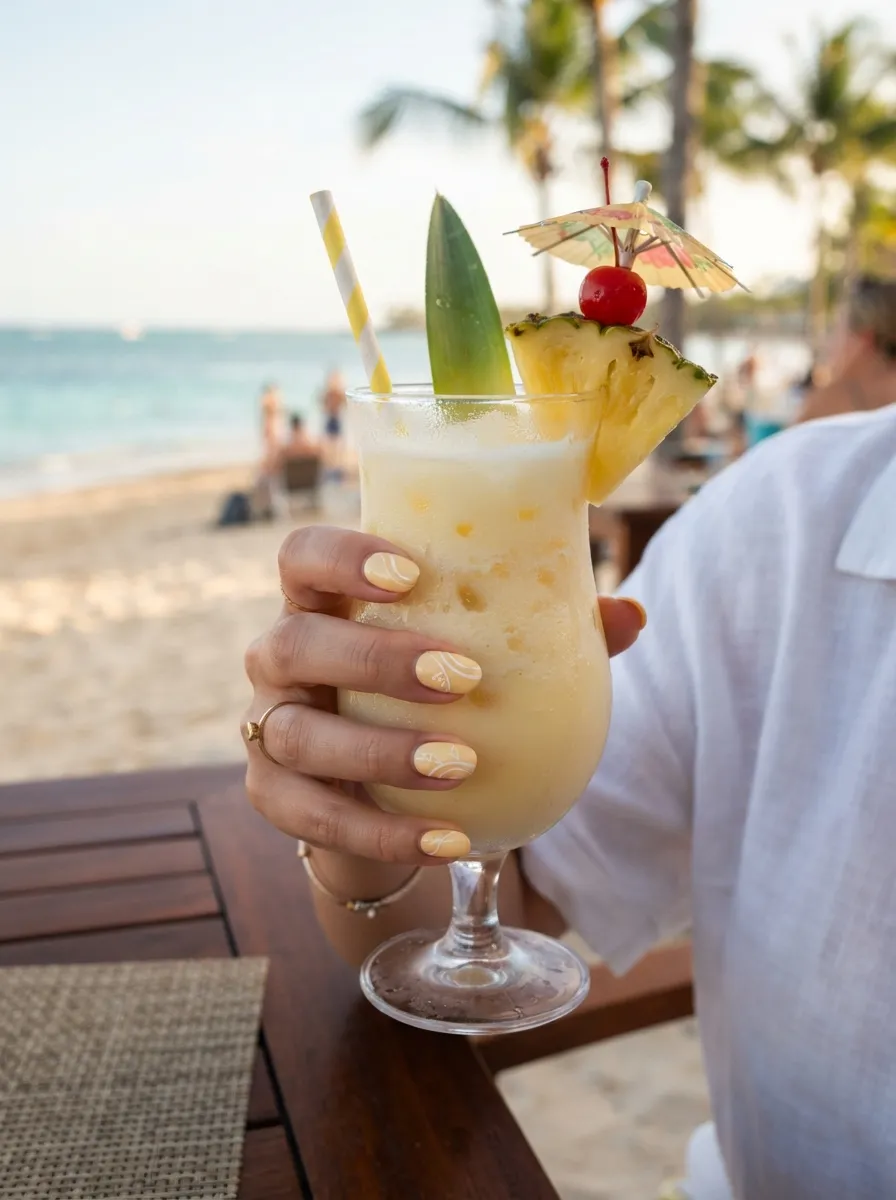
Piña colada cream nails use a soft, milky yellow shade with a light white swirl to copy the creamy texture of the popular tropical drink. Paint a base coat in pale yellow, then add a thin white swirl line using a fine brush or toothpick for a simple decorative touch. This design is soft and easy to wear for travelers who want a light, summery color without anything too bold. A budget tip is to mix a small drop of white polish into a pale yellow shade you already own to create this exact color at home instead of buying a new bottle. This look suits short to medium nails and pairs nicely with both casual and dressy vacation outfits. Keep the swirl detail light and simple rather than heavy for the most natural, creamy effect. Seal with a glossy top coat to enhance the smooth, soft look. This design works well for pool days, beach lunches, or relaxed evening dinners, offering a gentle tropical color that feels fresh and easy to match with sun kissed skin.
28.Bora Bora Blue French
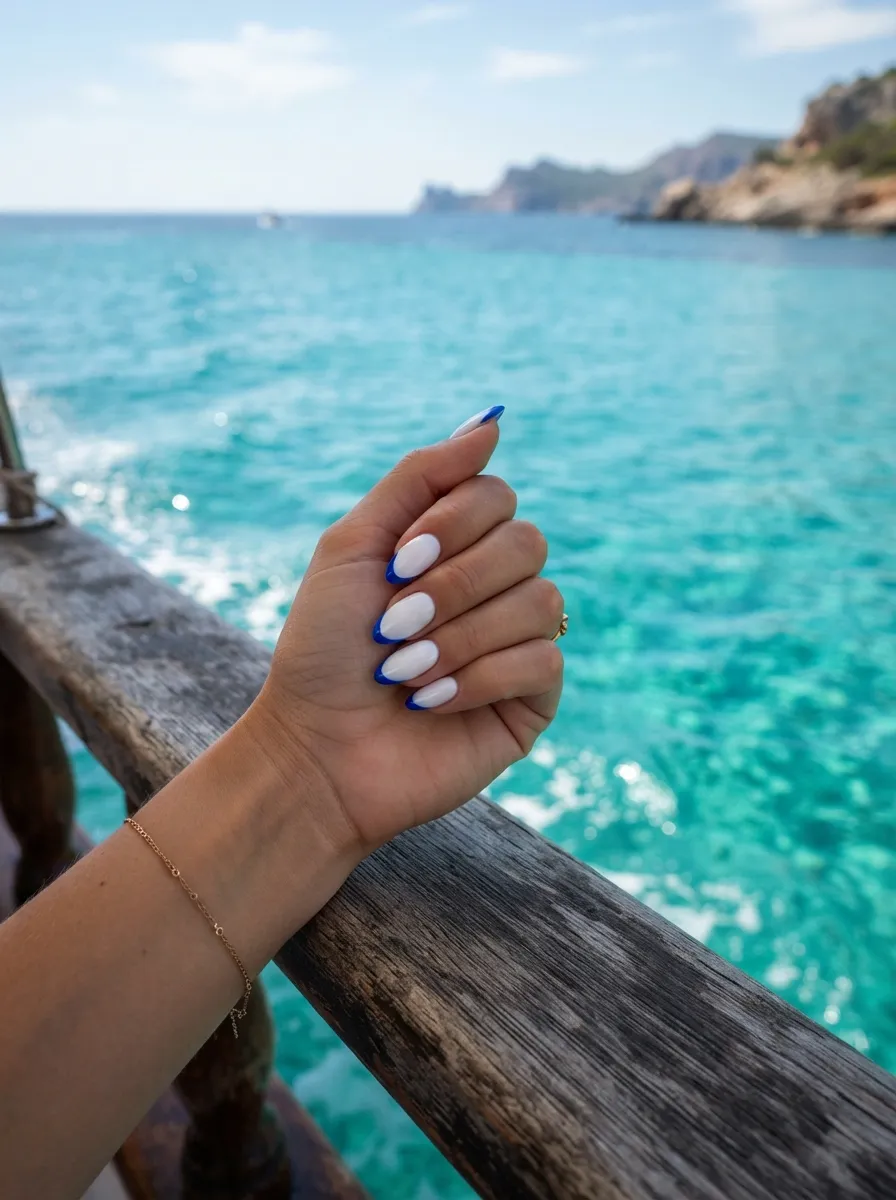
Bora Bora blue french nails update the classic white tip manicure with a bright turquoise or ocean blue line instead. Paint a white or sheer nude base first, then use a thin brush or french tip guide sticker to add a clean blue line across the top of each nail. Guide stickers make this design beginner friendly and are often sold cheaply in packs at drugstores. This look suits short, squared off nails best, giving the tip line a crisp, modern shape. If your hand is not steady, use thin striping tape to keep the blue line straight while painting, then remove it once the polish dries. This design pairs well with both casual and dressy vacation outfits, since the white base keeps the overall look clean and simple. Seal with a glossy top coat to protect the blue tip from chipping during pool or beach days. This modern french style feels fitting for tropical trips, offering a bright pop of color while still keeping a polished, classic manicure shape.
Conclusion
A tropical vacation is the perfect excuse to try nail colors and designs you might skip during a regular week at home. From soft pastel blends to bold hand painted fruit designs, there is a style here for every skill level and budget. Many of these looks only need polish colors you already own, a few basic tools like a toothpick or thin brush, and a little patience. Start with one or two designs that feel manageable, practice a few times before your trip, and remember that a glossy top coat can smooth out small mistakes and add shine to any manicure. Whether you paint your nails yourself the night before you leave or book a quick salon visit, your hands can carry a small piece of island color throughout your entire trip. Pack your favorite shades, pick a design from this list, and let your nails become one more fun detail in your tropical vacation story.