1. Classic Sky Blue Aura
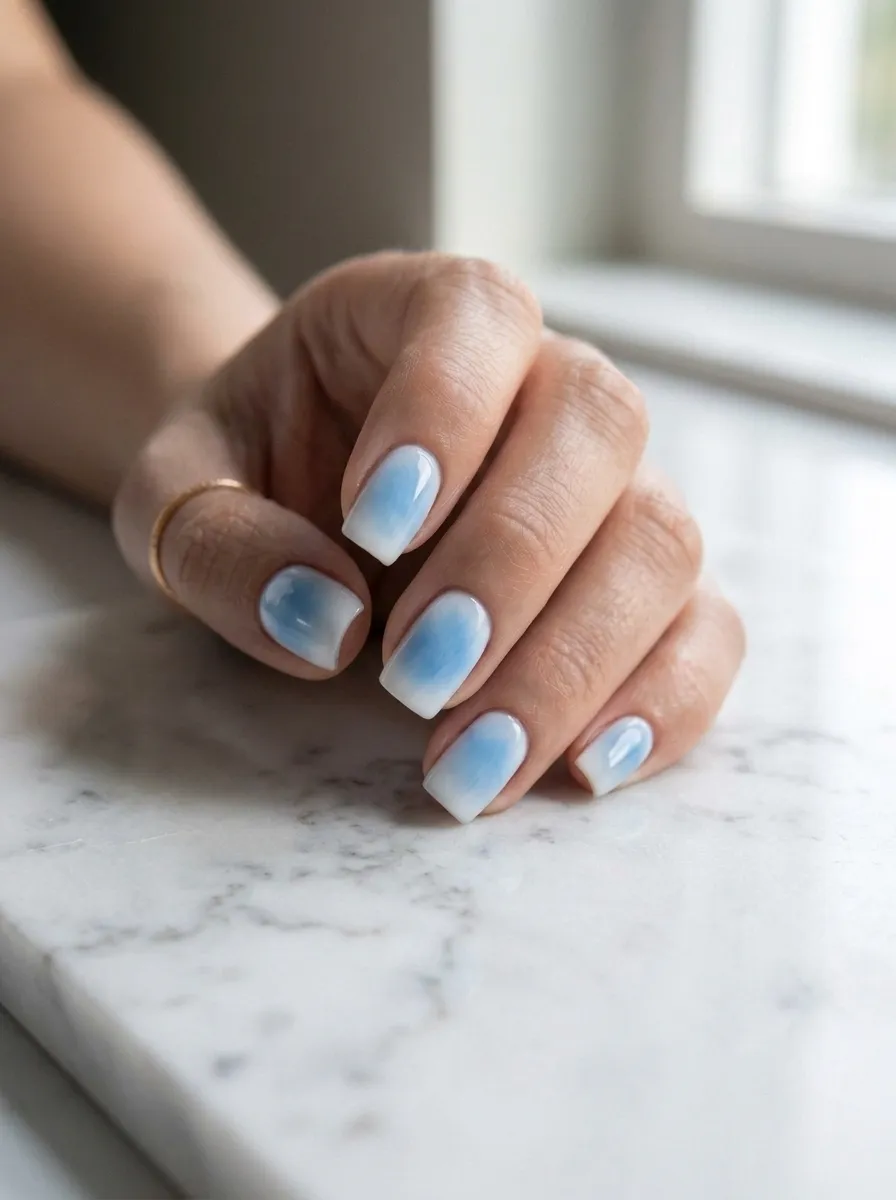
This is the design most people picture when they hear “blue aura nails.” A soft sky blue color sits in the center of the nail and fades gently into white near the base and tip. It looks like a small cloud sitting on your finger. To get this at home, use a makeup sponge to dab the polish on instead of a brush. Start with a white base coat, then add small dabs of light blue in the middle of the nail. Blend the edges with the sponge for a soft, misty look. A budget tip: cheap sponges from the dollar store work just as well as fancy nail sponges. Let each layer dry a little before adding more color so the blend stays soft instead of muddy. Finish with a clear glossy topcoat to lock in the shine. This style works for almost any occasion, from work to weekend brunch. It’s also forgiving for beginners since small mistakes blend into the soft cloud effect instead of standing out.
2. Deep Navy Aura Tips
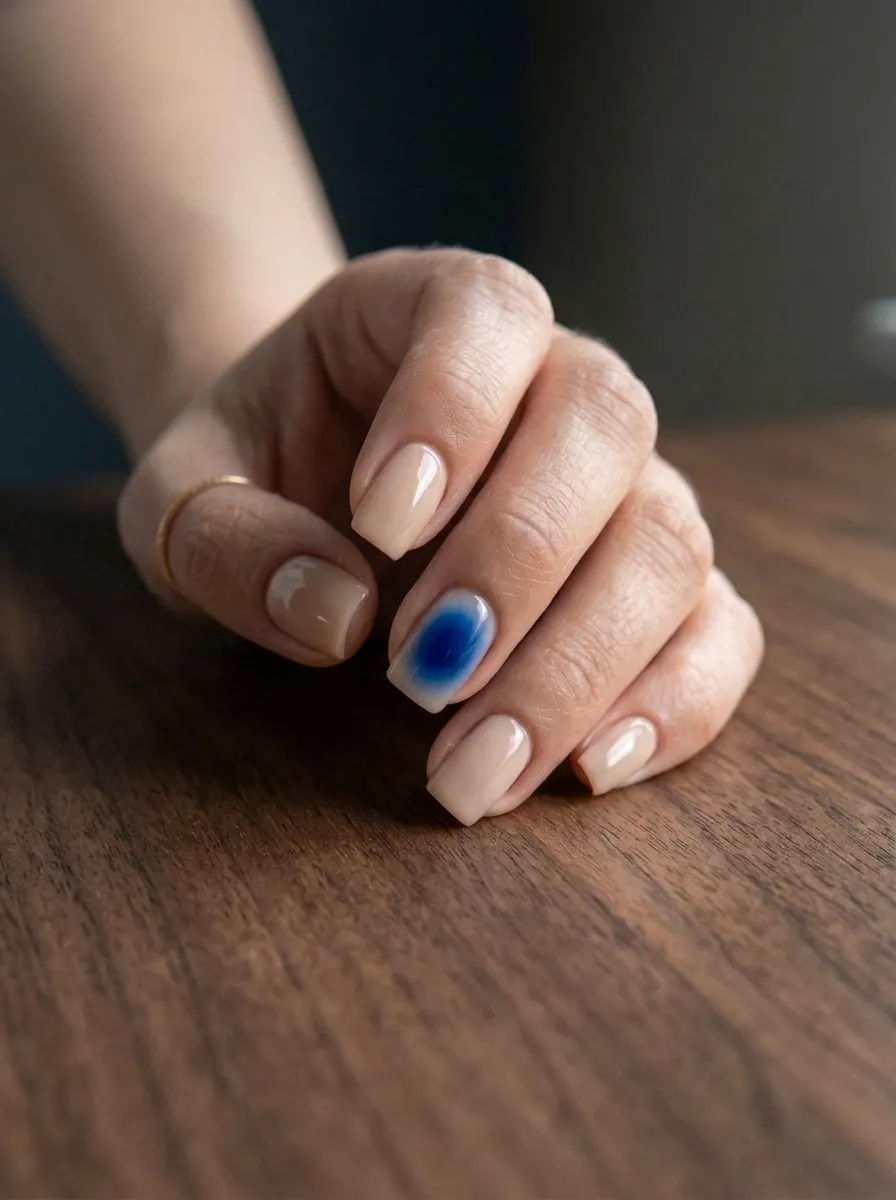
Deep navy brings a bolder, moodier version of the aura trend. Instead of soft pastel, you use a rich navy shade near the tips and let it fade into a nude or clear base. This look feels more formal and works well for evening events or fall and winter months. Start with your natural nail color or a light nude polish as the base. Then use a small makeup sponge to dab navy polish only near the tip of the nail. Blend downward gently so the color softens as it moves toward the middle. Budget tip: one bottle of navy polish can last through dozens of manicures if you only need a small amount per nail. Keep a spare sponge on hand since navy stains lighter sponges quickly. Seal with a glossy topcoat for extra depth and shine. This design pairs nicely with gold jewelry or a simple black outfit. It’s a great pick if you want something that still reads as blue aura but feels more grown-up and polished.
3. Baby Blue Glazed Donut Aura
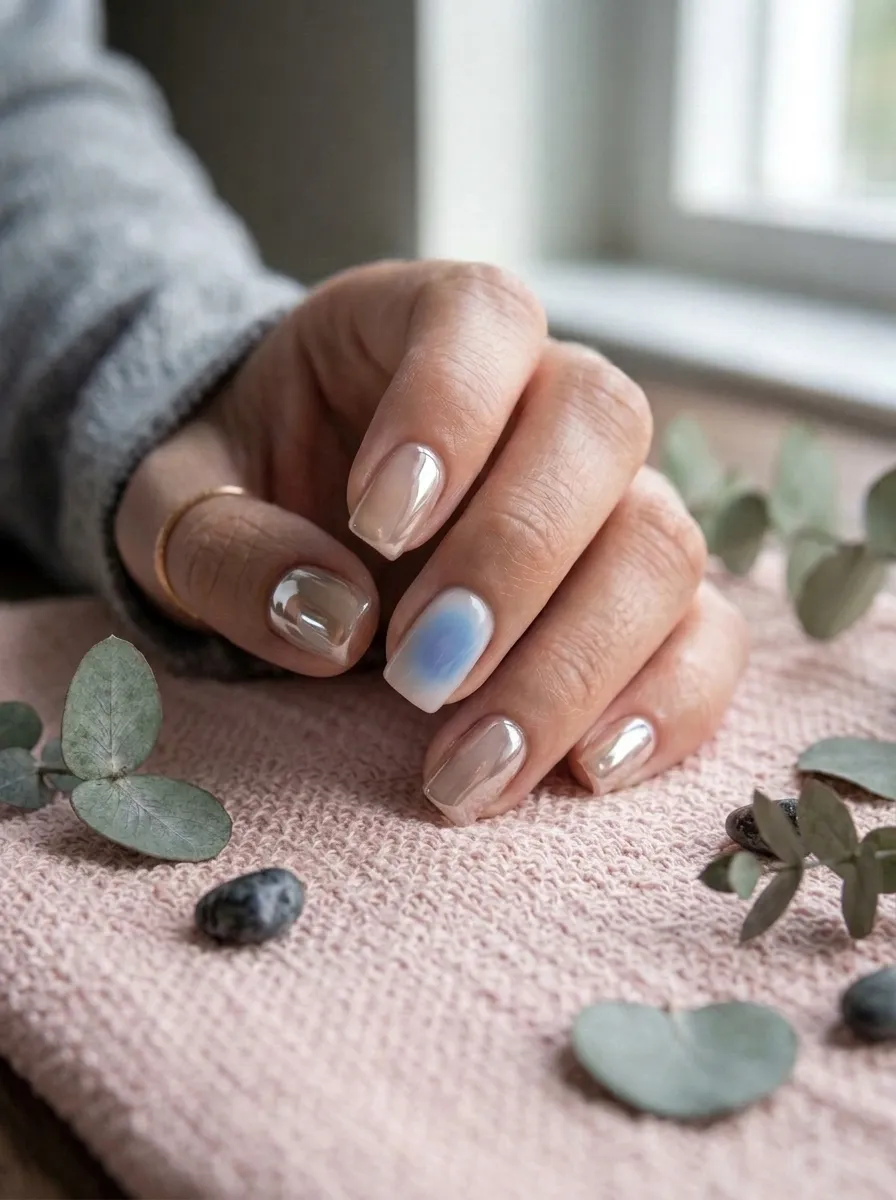
The glazed donut trend meets blue aura in this dreamy combo. You get soft baby blue clouds under a pearly, milky shine that looks almost glass-like. This works well if you already love chrome nails but want a little color mixed in. Start with a baby blue aura base using the sponge method from the first two ideas. Once fully dry, apply a pearl or chrome powder topcoat, or use a milky white shimmer polish over the top. Rub gently with a soft applicator if using powder for an even shine. Budget tip: chrome powder kits are often cheaper than salon add-ons and one small jar covers many manicures. If you don’t have chrome powder, a pearly white top coat gives a similar soft glow. This style catches light beautifully in photos and looks polished without needing extra nail art. It’s a great choice for weddings, parties, or anytime you want your nails to feel a little extra without much effort.
4. Two-Tone Blue Cloud Nails
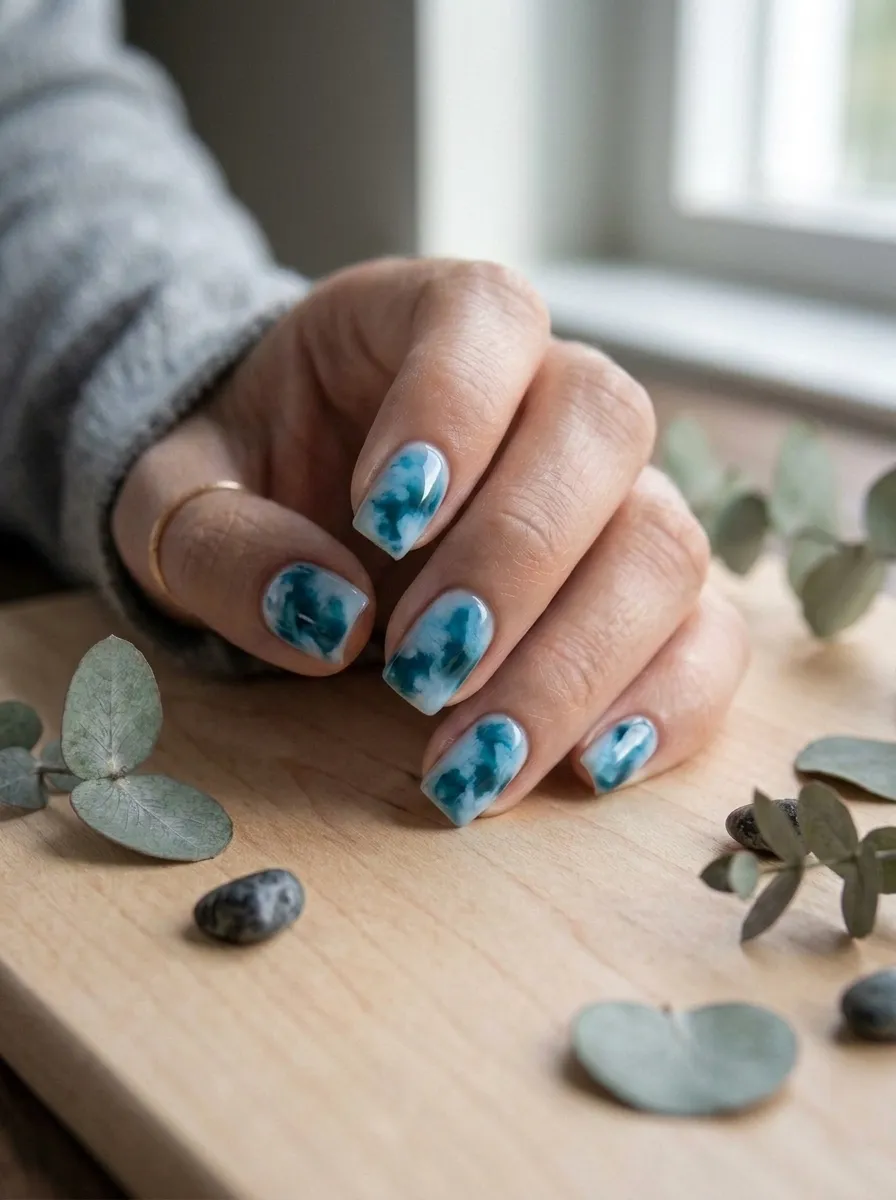
Two-tone aura nails use two different blue shades on the same nail for extra depth. Think light blue mixed with teal, or sky blue paired with a deeper cobalt. It gives the design more dimension than a single-color aura. Start with a white or clear base coat. Using your sponge, dab the lighter blue first in one section of the nail, then add the second darker shade nearby, letting the edges blend where they meet. Work quickly so the colors merge softly instead of forming a hard line. Budget tip: you likely already own two blue polishes at home, so this design often costs nothing extra. Practice on a spare nail wheel or paper first if you’re nervous about blending. Seal with a glossy topcoat once dry. This look works great for people who want something a little more detailed without full nail art. It photographs well and pairs nicely with silver or white jewelry for a cool, calm color story.
5. Blue Aura French Tips
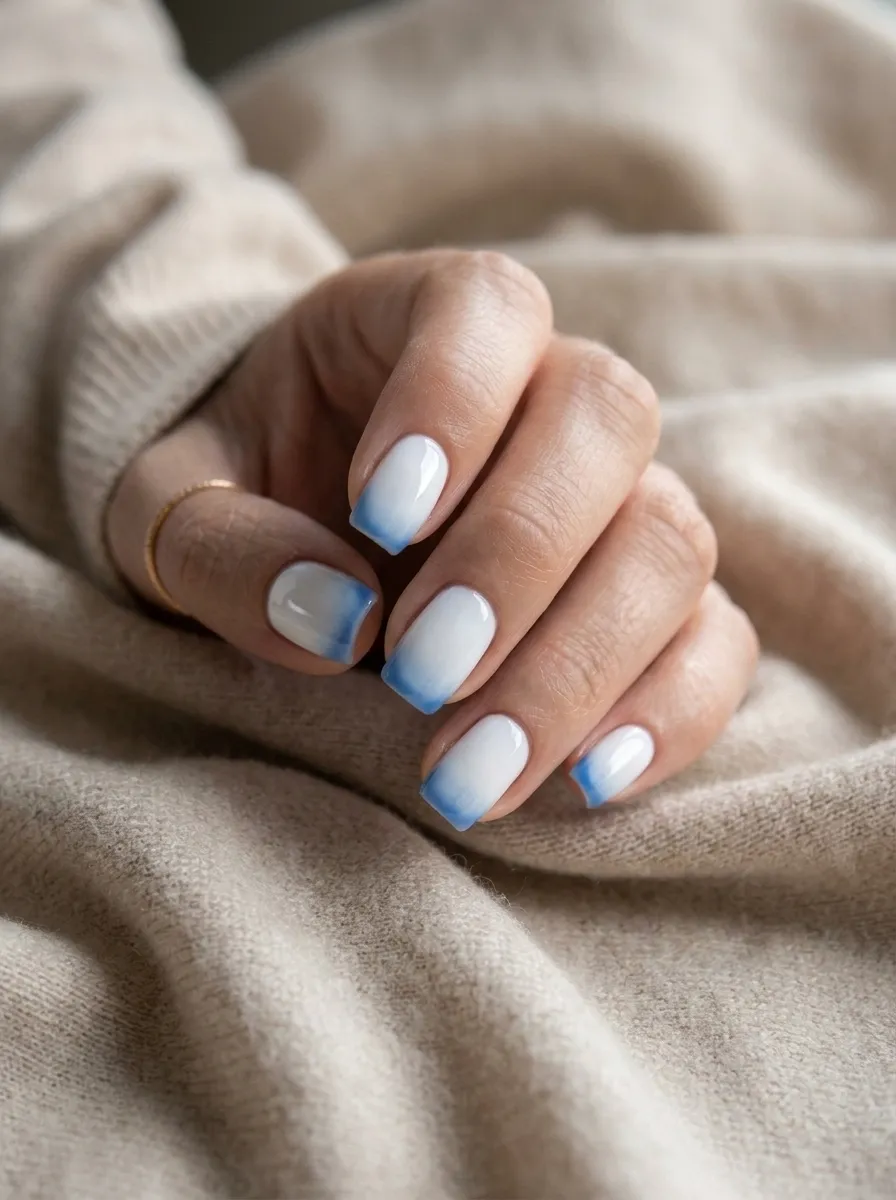
This design combines the classic French manicure with the soft blend of aura nails. Instead of a sharp white tip line, the blue color fades softly into the tip area, giving a cloudy, blurred edge. Start with a natural or sheer pink base coat on the whole nail. Then use your sponge to dab light blue polish only at the very tip, blending it downward so there’s no hard line. This creates a soft, modern twist on a familiar style. Budget tip: you don’t need a French tip guide sticker for this look since the blending naturally covers any uneven lines. This makes it beginner friendly and forgiving. Let it dry fully before applying a glossy topcoat. This design works for almost any setting, from job interviews to date night, since it still reads as a clean, classic manicure with a fun color twist. It’s a great in-between option if you want to try aura nails without going too bold.
6. Electric Blue Statement Nails
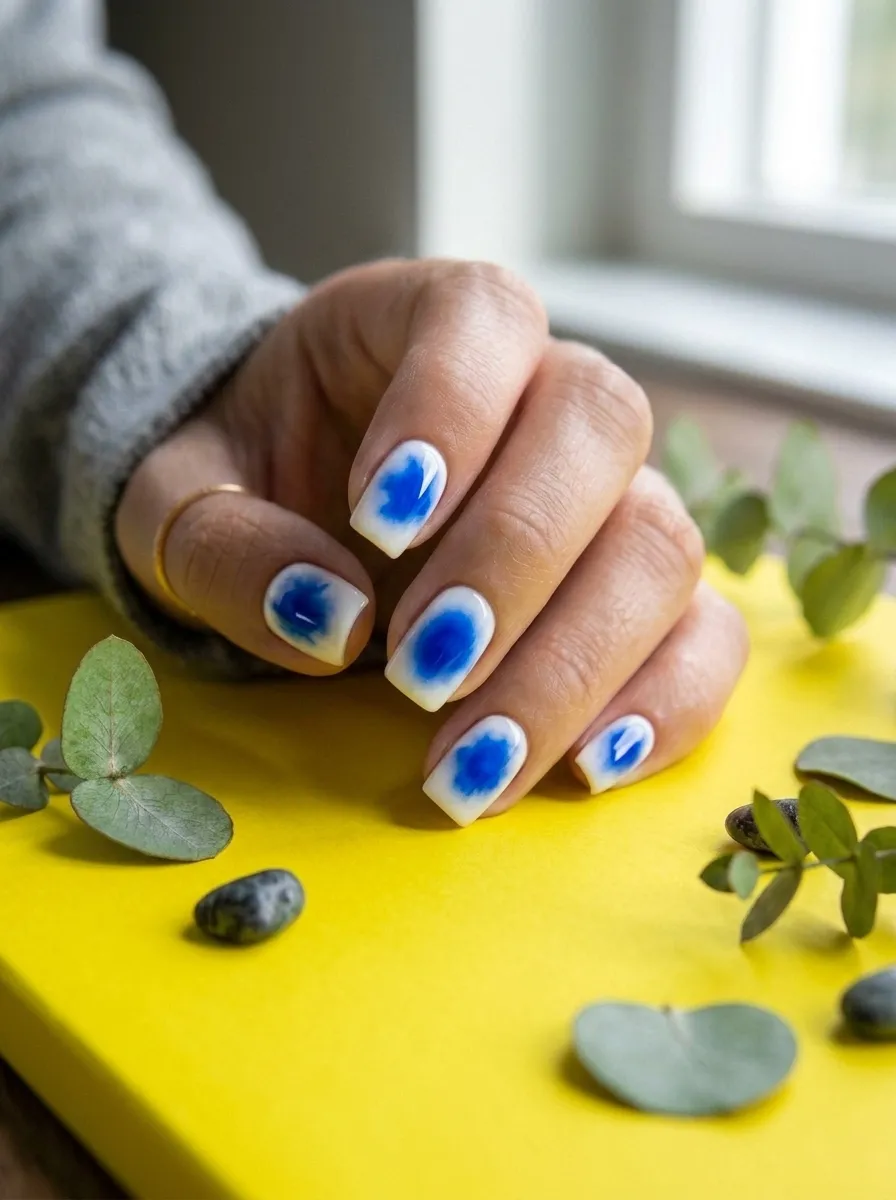
If soft pastels feel too quiet, electric blue brings the aura trend to life with bold, saturated color. This works best against a bright white base so the blue really pops. Apply two coats of white polish and let it dry completely. Then use your sponge to dab electric blue in the center of the nail, blending the edges lightly so it still has that soft cloud shape, just in a louder color. Budget tip: one bottle of bright blue nail polish, often found for a few dollars at drugstores, is enough for this whole look. Add a glossy topcoat to make the color shine even more. This design is perfect for summer, festivals, or anytime you want your hands to stand out in photos. Pair it with simple, neutral clothing so the nails stay the main focus. It’s also a fun way to use up a bright polish bottle that’s been sitting unused in your collection.
7. Teal Aura Ombre
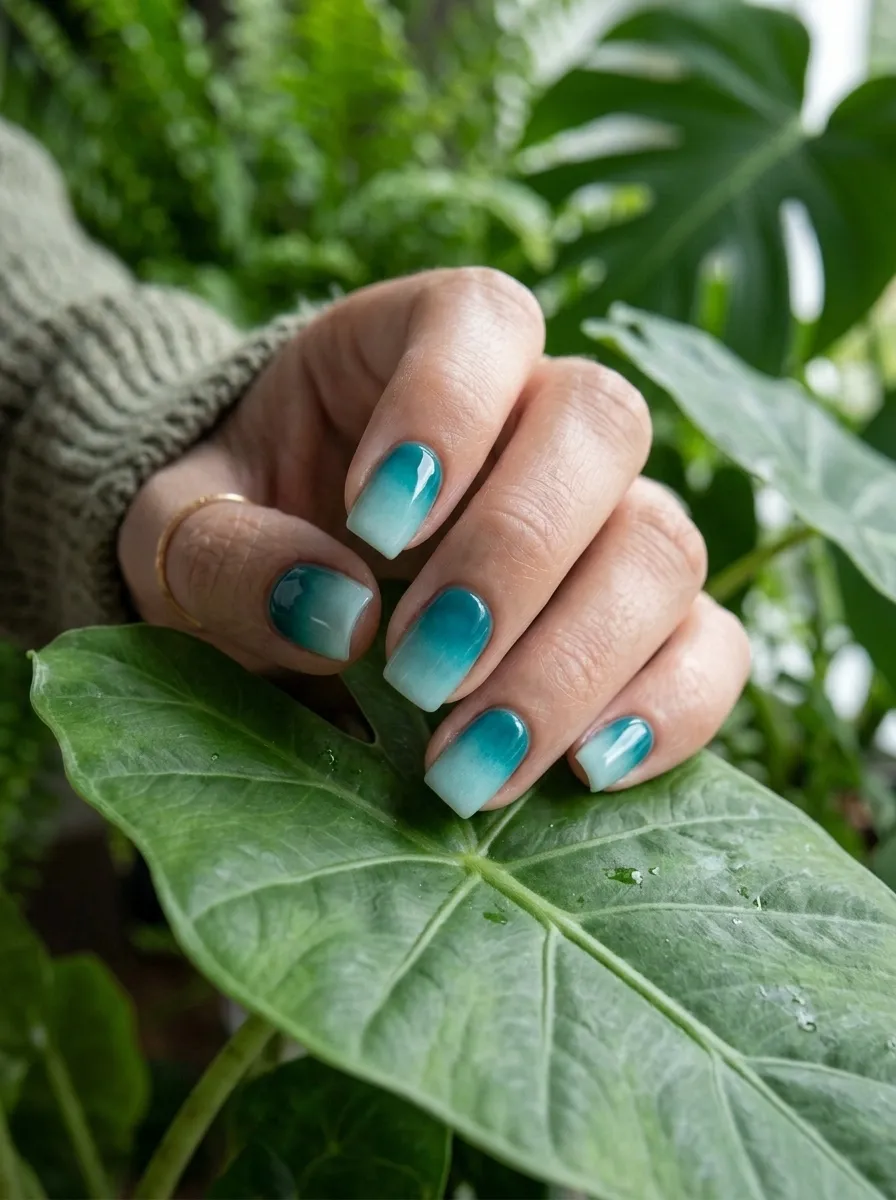
Teal sits between blue and green, giving this aura style a slightly different mood than a straight blue design. The ombre effect means the color gradually shifts from dark to light across the nail instead of staying in one cloud shape. Start with a white or clear base. Apply a small amount of dark teal polish near the base of the nail using your sponge, then a lighter teal or mint shade near the tip. Blend where the two colors meet by dabbing gently in the middle area. Budget tip: if you only own one teal shade, mix in a tiny drop of white polish on a spare surface to create a lighter version yourself. This saves you from buying a second bottle. Seal with a glossy topcoat once fully dry. Teal aura ombre pairs beautifully with gold rings and warm-toned outfits. It’s a slightly different take on the blue aura trend that still fits the same dreamy, soft category.
8. Blue and Lavender Aura Blend
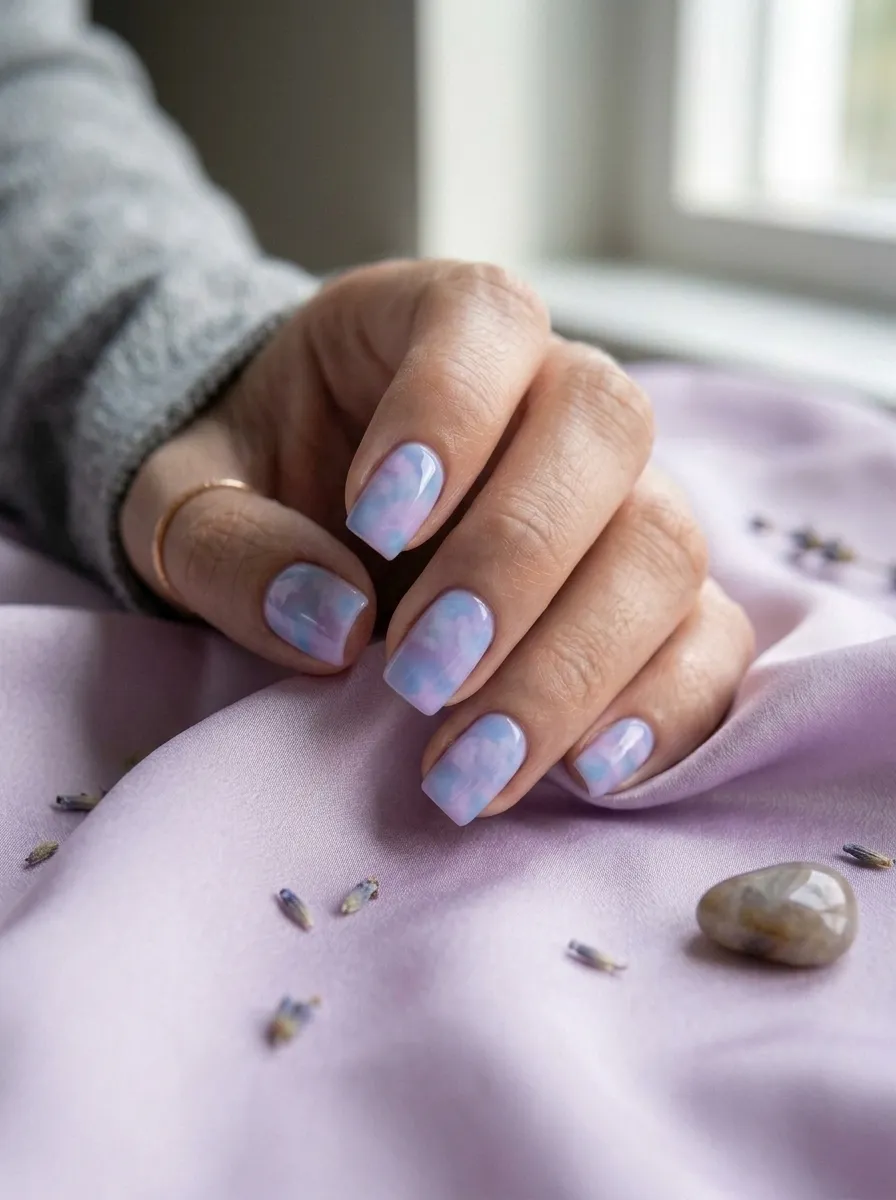
Blue and lavender create a soft, dreamy pastel combination that feels calm and a little bit magical. The two colors blend into each other on the nail, similar to a sunset but in cooler tones. Start with a white base coat. Dab light blue on one side of the nail and lavender on the other, letting them meet and blend in the middle with your sponge. Work in small dabs rather than big swipes for the softest effect. Budget tip: pastel polishes are often sold in mini bottle sets at drugstores, giving you several colors for a low price. These mini sizes are perfect for aura nails since you only need small amounts per manicure. Let the design dry fully, then finish with a glossy topcoat. This combination works well for spring and summer, and it pairs nicely with silver jewelry or a simple white outfit. It’s a gentle, pretty option if you want something soft but still a little different from plain blue.
9. Denim Blue Matte Nails
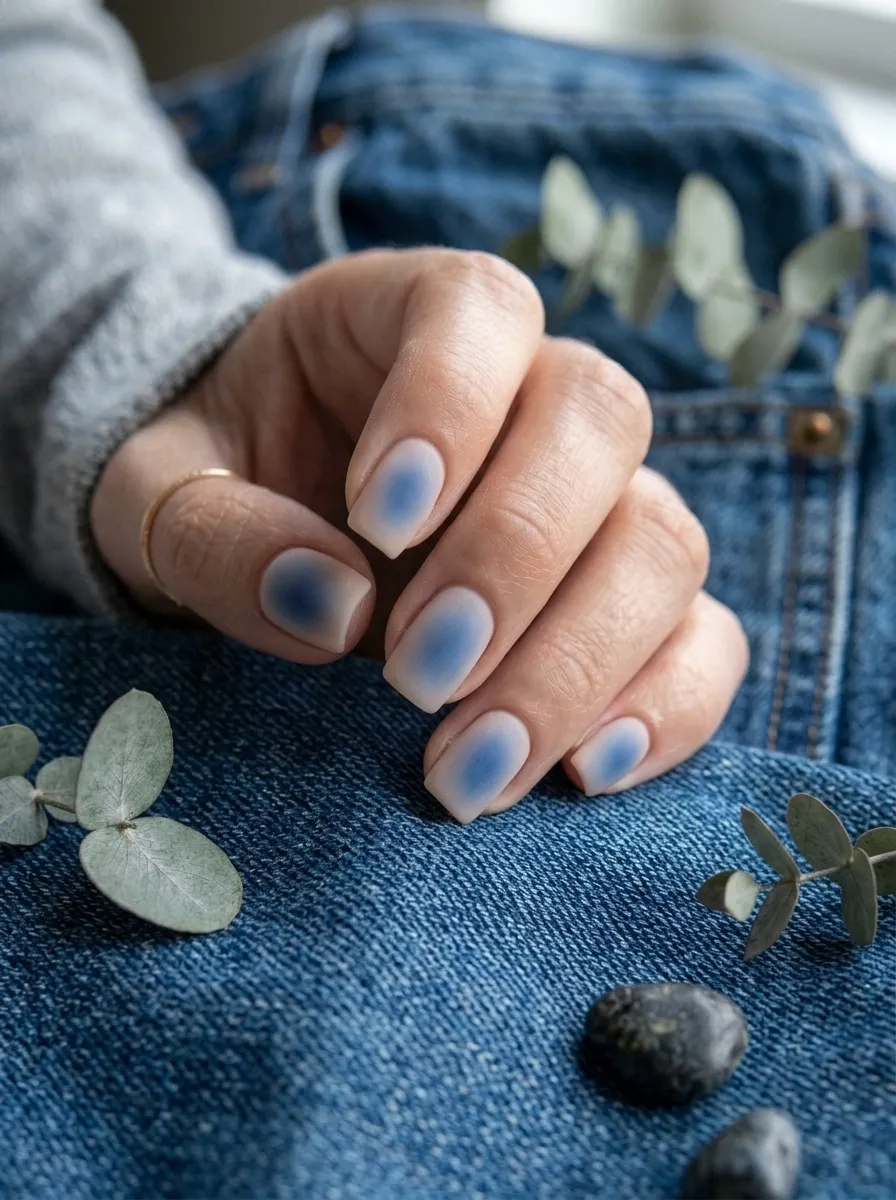
Matte finishes give blue aura nails a completely different feel compared to glossy versions. Denim blue in particular looks soft and a little worn-in, almost like the color of your favorite jeans. Start with your blue aura design using the sponge method, blending light and darker denim blue shades together. Once the color is fully dry, apply a matte topcoat instead of a glossy one. This changes the entire look from shiny and wet to soft and velvety. Budget tip: matte topcoats last a long time since you only need one thin layer per manicure, making them a smart one-time buy. If you don’t own one, some clear topcoats offer a matte finish option at a similar price to glossy ones. This style works well for casual, everyday wear since it feels more low-key than shiny nails. It’s also a great choice if your job doesn’t allow flashy nail art but still lets you wear color.
10. Blue Aura With Silver Foil Flecks
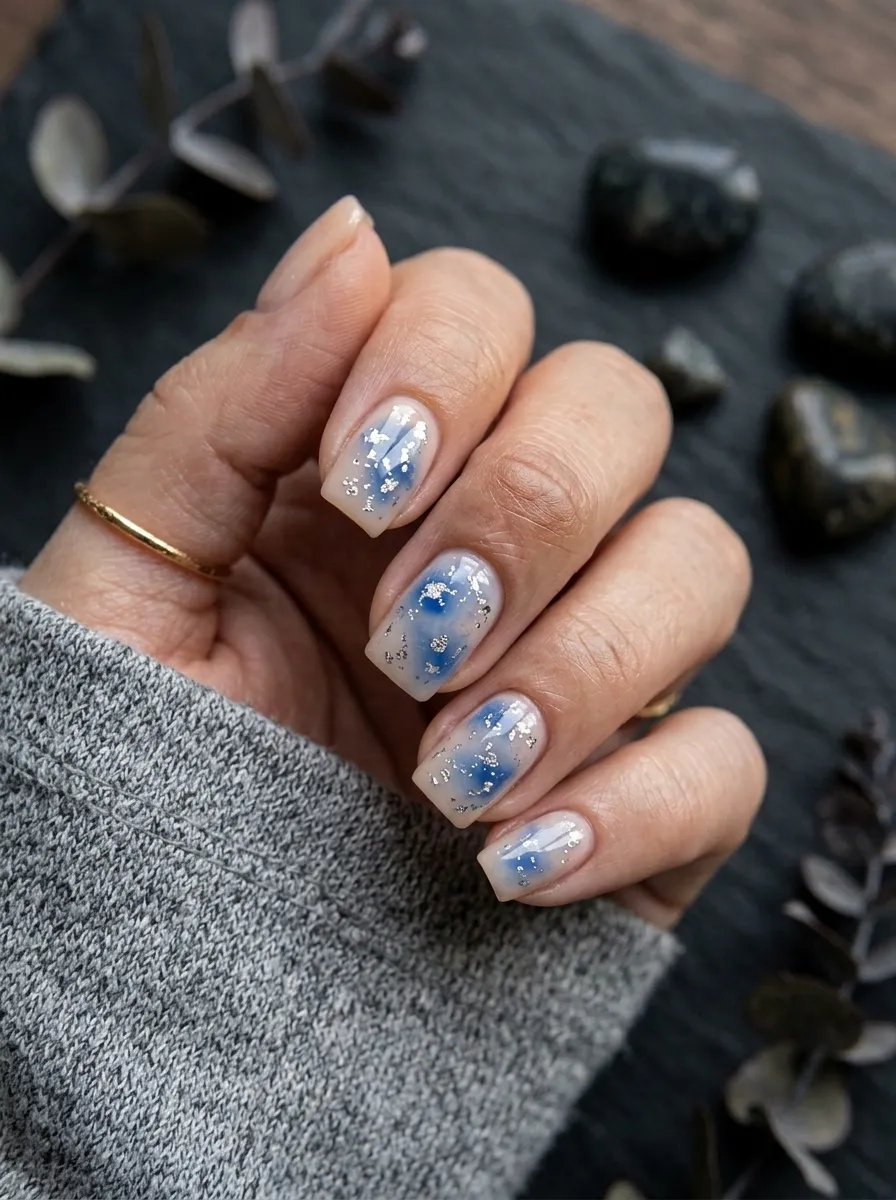
Adding silver foil flecks turns a simple blue aura design into something that catches the light beautifully. The small metallic pieces sit scattered across the nail like tiny stars. Start with your blue aura base using the sponge blending method. Once dry, use tweezers or the tip of an orange stick to place small pieces of silver foil onto the nail while the topcoat is still slightly tacky. Press gently so they stick. Budget tip: foil flecks are sold in small jars for just a couple of dollars and one jar covers many manicures. If you don’t have foil, small silver glitter works as a substitute. Seal everything with a thick glossy topcoat to lock the foil in place and smooth out the surface. This design works well for holidays, parties, or any time you want your blue aura nails to feel a little more special. It photographs especially well under warm indoor lighting.
11. Icy Blue Chrome Aura
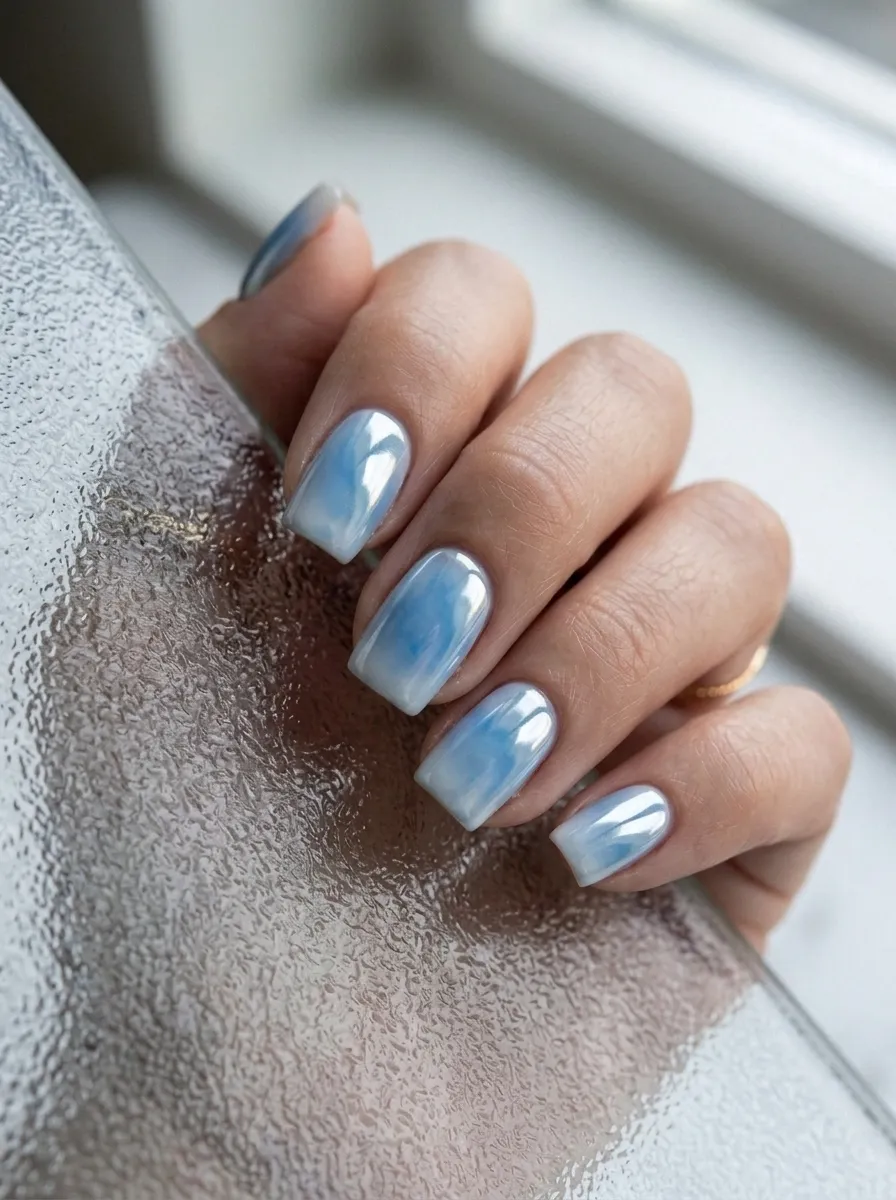
Icy blue chrome nails look like they belong in a winter wonderland. The mirror-like shine paired with cool blue tones creates a striking, almost metallic effect. Start with a white base coat and let it dry fully. Add icy blue aura clouds using your sponge, keeping the color light and soft rather than deep. Once dry, apply chrome powder with a soft applicator, rubbing it gently across the nail until you see the mirror shine appear. Budget tip: chrome powder kits often come with enough product for dozens of manicures, making the cost per use very low. If you don’t own chrome powder, a shimmery silver topcoat gives a similar icy effect for less effort. Seal with a glossy topcoat to protect the finish. This design works beautifully in winter months or for anyone who loves a cooler, more metallic take on the aura trend. It pairs well with silver jewelry and cool-toned outfits.
12. Blue Aura Half-Moon Nails
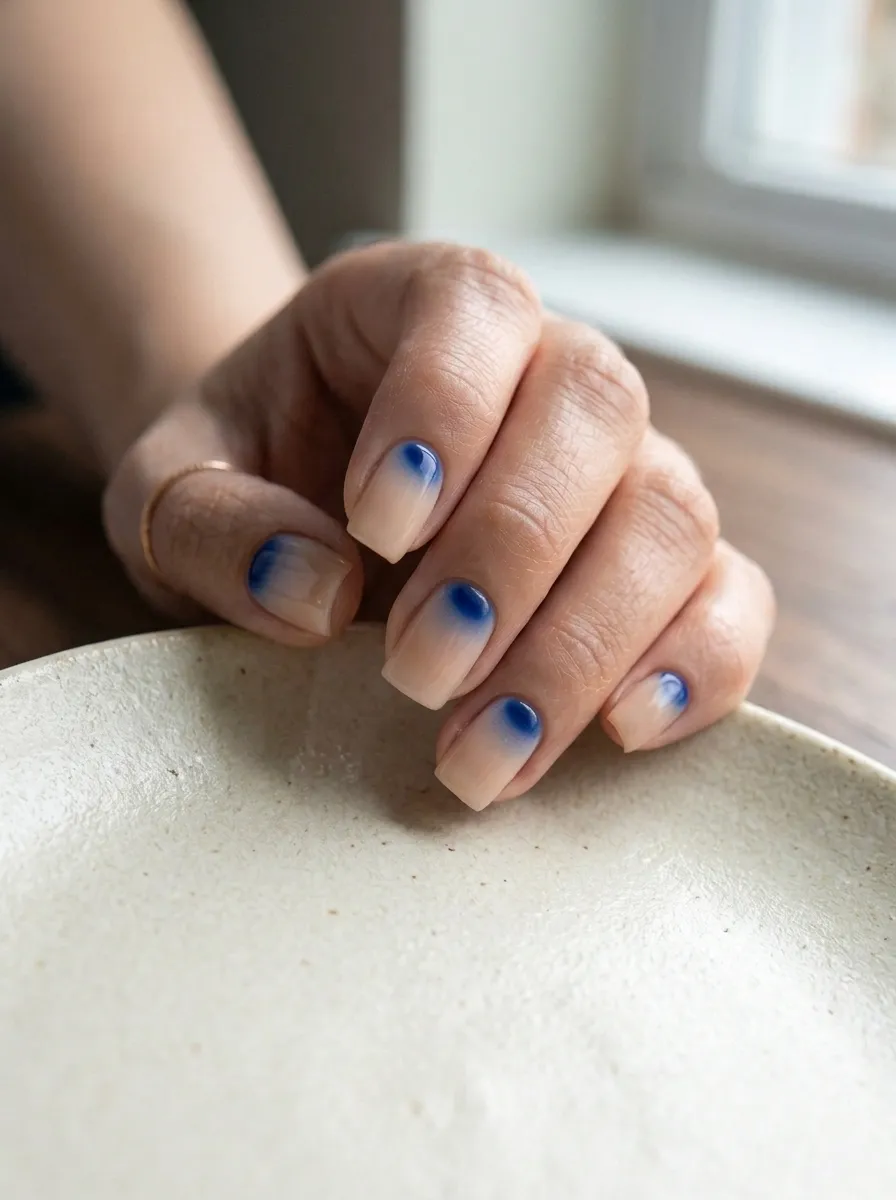
This design flips the usual aura placement by putting the blue cloud near the cuticle instead of the tip or center. It creates a soft crescent shape that peeks out at the base of the nail. Start with a clear or nude base coat covering the whole nail. Using your sponge, dab blue polish only in a small half-moon shape near the cuticle area, blending the top edge so it fades softly into the rest of the nail. Budget tip: you can use a small round makeup sponge cut into a smaller piece for more control over this precise placement. This helps beginners avoid getting color where it isn’t wanted. Let the design dry, then finish with a glossy topcoat. This style is more subtle than a full aura nail, making it a great pick for work environments or anyone who wants a hint of color without a bold statement. It also grows out nicely between manicures.
13. Blue Aura With Tiny White Dots
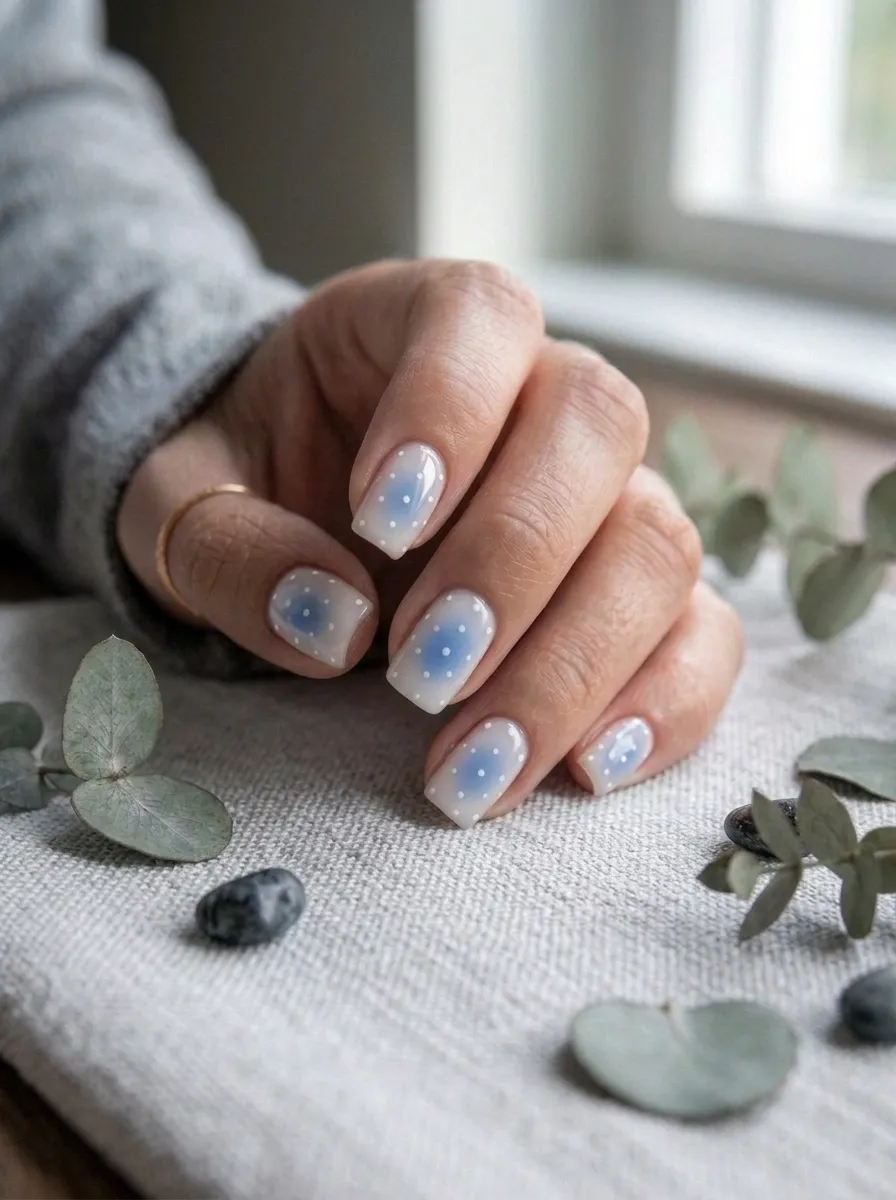
Small white dots add a playful, delicate touch to a blue aura base. They can look like little stars scattered across a cloudy sky, which fits the dreamy theme perfectly. Start with your blue aura design using the sponge blending method and let it dry completely. Then use a dotting tool, or the rounded end of a bobby pin, dipped in white polish to add small dots across the nail. Keep the dots random in size and spacing for a natural look. Budget tip: dotting tools are often sold for under a dollar at beauty supply stores, and household items like bobby pins or toothpicks work just as well if you don’t want to buy one. Let the dots dry fully before sealing with a glossy topcoat. This design adds personality without much extra effort or cost. It works well for any season and pairs nicely with simple, minimal outfits since the nails already carry visual interest.
14. Blue Aura Marble Swirl Nails
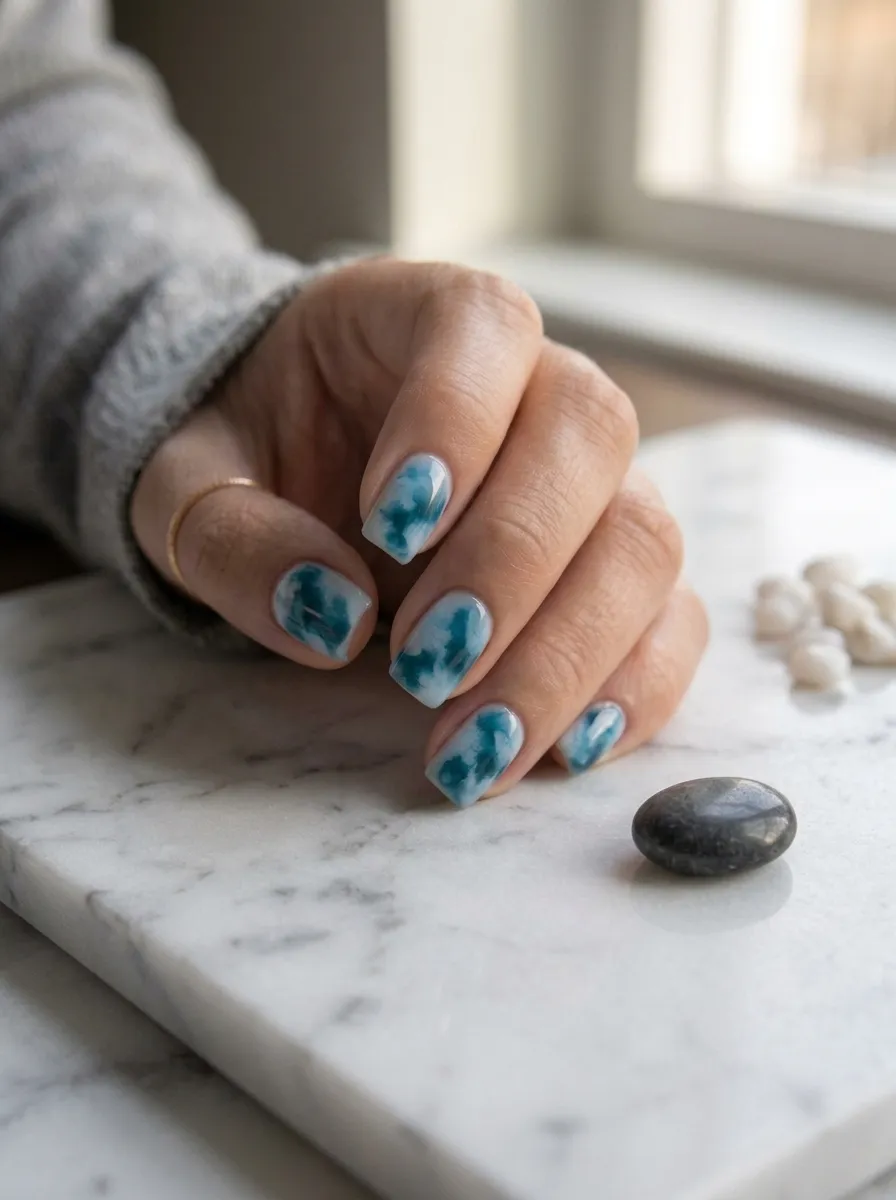
Marble nails bring a flowing, organic pattern that pairs beautifully with the soft blending style of aura nails. Instead of a cloud shape, you create thin, wavy lines that mimic real marble stone. Start with a white base coat. Using a thin nail art brush or a toothpick, drag small lines of blue polish across the wet white base in swirling patterns. Move quickly before the polish dries so the lines blend slightly at the edges. Budget tip: a bag of toothpicks costs almost nothing and works just as well as a specialty marbling tool. Practice the swirl motion on paper first if you’re new to this technique. Let everything dry fully, then seal with a glossy topcoat for a smooth, polished finish. This design looks more detailed than a basic aura nail but still keeps the same dreamy, soft color story. It works well for special occasions or anytime you want a slightly fancier manicure.
15. Pastel Blue Aura With Gold Accents
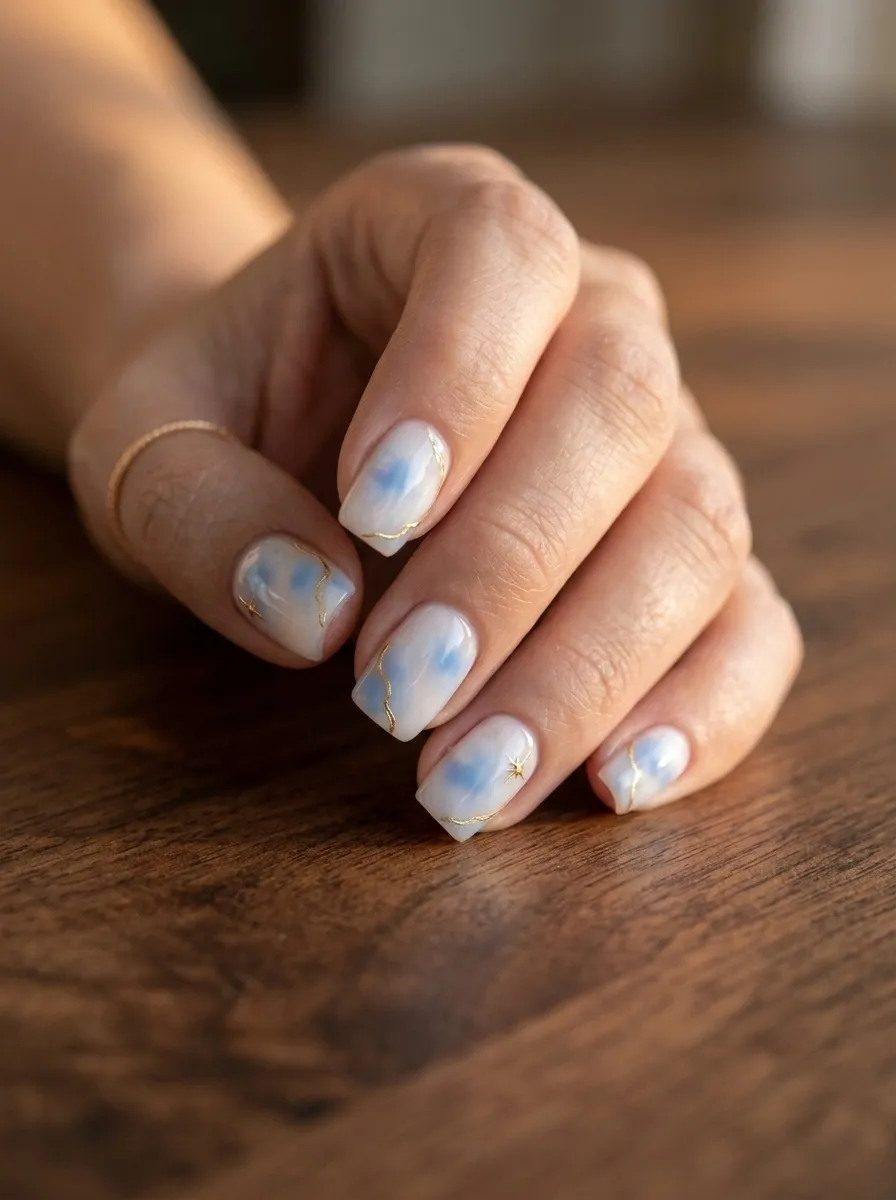
Gold accents add warmth to an otherwise cool blue design, creating a nice balance between soft and elegant. Start with your pastel blue aura base using the sponge method and let it dry completely. Then use a thin nail art brush or a gold striping tape to add one or two thin gold lines across the nail, either straight or slightly curved. Budget tip: gold striping tape is reusable across many manicures since you only cut small pieces at a time, making it a smart investment. If you don’t have tape, a metallic gold nail pen works well for freehand lines. Press the tape down firmly if using it, then trim any excess with small scissors. Seal everything with a glossy topcoat to smooth the surface. This design feels a little more polished and put-together, making it a great option for work events, dinners, or any time you want your nails to feel intentional rather than casual.
16. Blue Aura Negative Space Nails
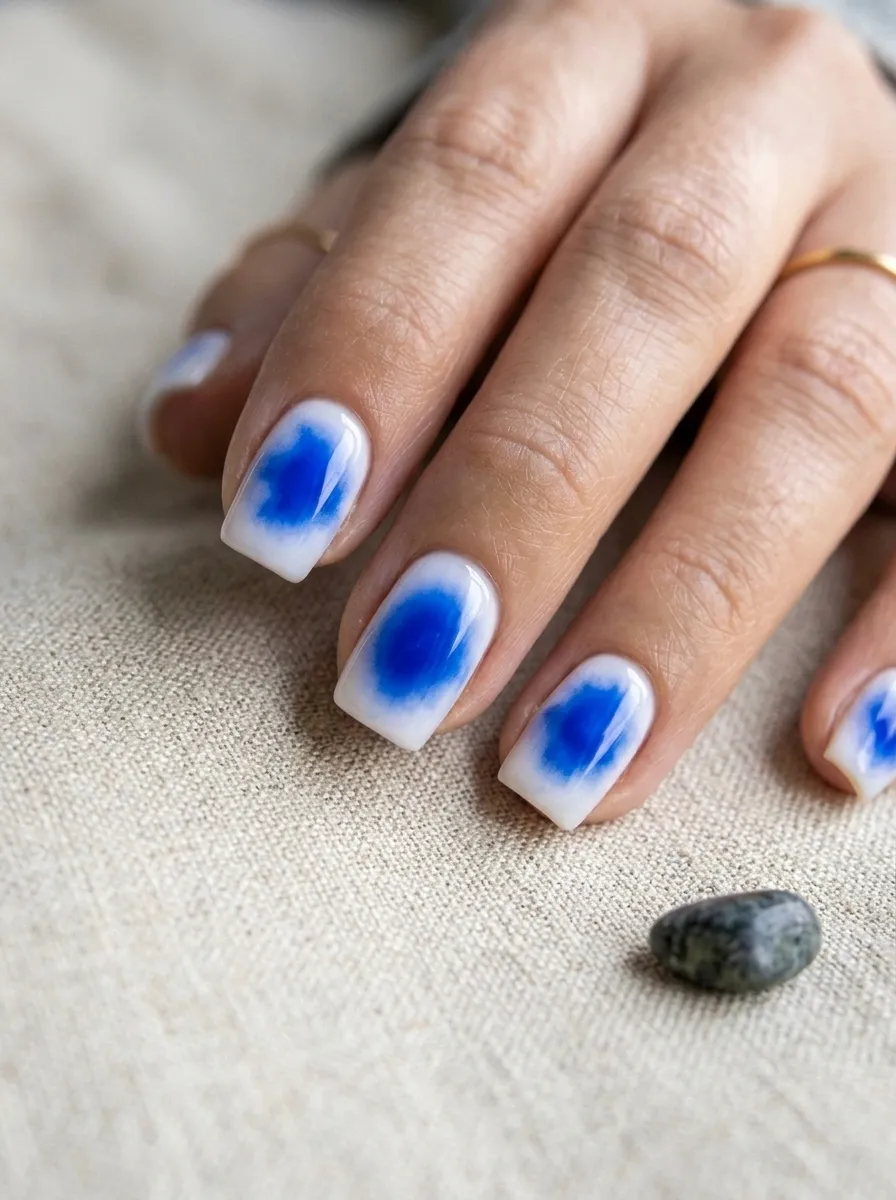
Negative space nails leave part of the natural nail bare, creating contrast against the painted sections. Combined with blue aura, this gives a modern, minimal look that still feels soft and dreamy. Start by deciding which part of the nail you want to leave bare, often the center or one side. Apply a thin strip of nail tape to mark that section before painting. Add your blue aura design around the taped area using your sponge, then peel off the tape once the polish is dry to reveal the bare nail underneath. Budget tip: painter’s tape from a hardware store works just as well as nail-specific tape and often costs less. Cut it into thin strips with scissors for clean lines. Seal everything with a glossy topcoat once the tape is removed. This design feels fresh and a little edgy compared to a full aura nail, and it’s a great option if you want something that looks more advanced without much extra skill.
17. Blue Aura Galaxy Nails
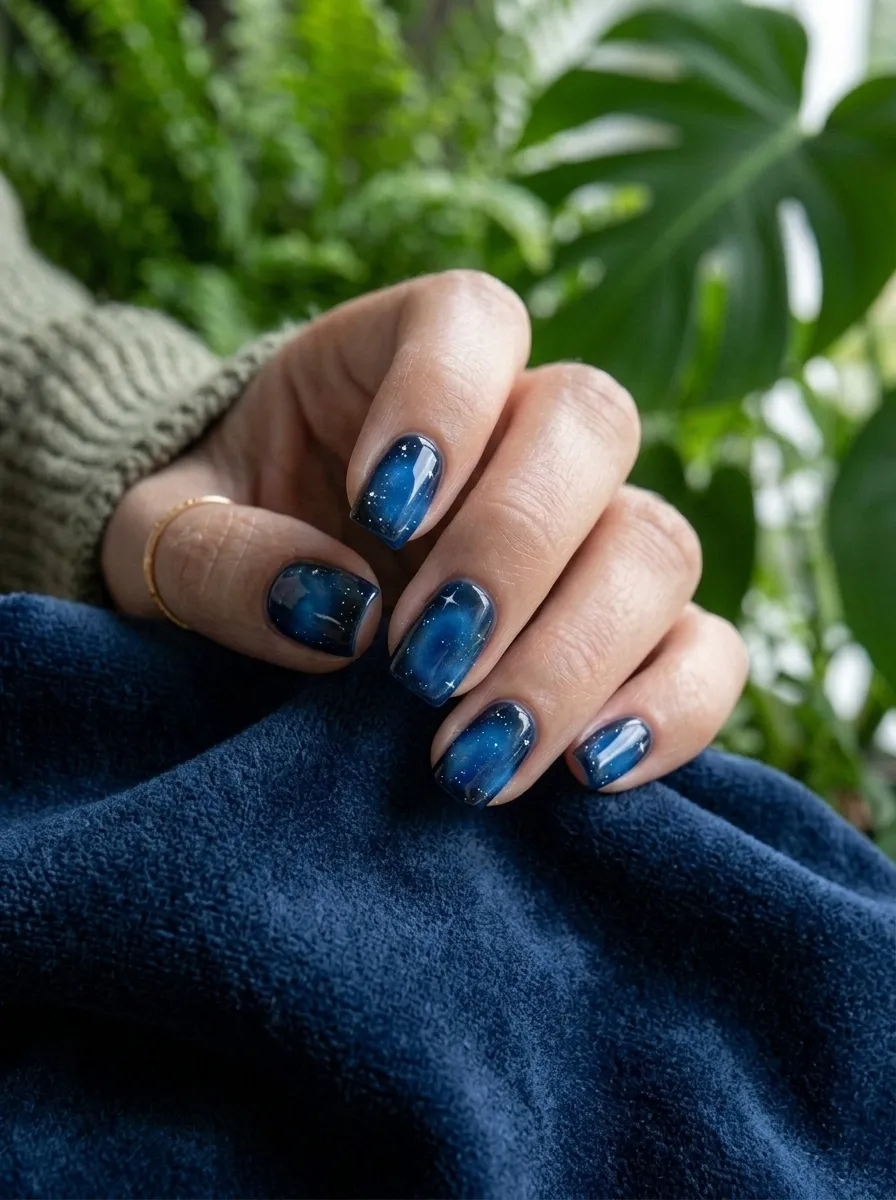
Galaxy nails combine deep blue and black tones with tiny white specks to look like a starry night sky. It’s a bolder, moodier version of the classic aura design. Start with a black base coat and let it dry fully. Using your sponge, dab deep blue polish in sections across the nail, blending softly with the black underneath. Once dry, flick tiny dots of white polish across the nail using a thin brush or an old toothbrush for a speckled star effect. Budget tip: an old toothbrush you were going to throw away works perfectly for flicking small dots, saving you from buying a special tool. Practice the flicking motion on paper first since it can be a little messy. Seal with a glossy topcoat once everything is dry. This design works well for fall and winter, or for anyone who wants a more dramatic, nighttime take on the blue aura trend. It looks especially striking with silver jewelry.
18. Blue Aura Accent Nail Design
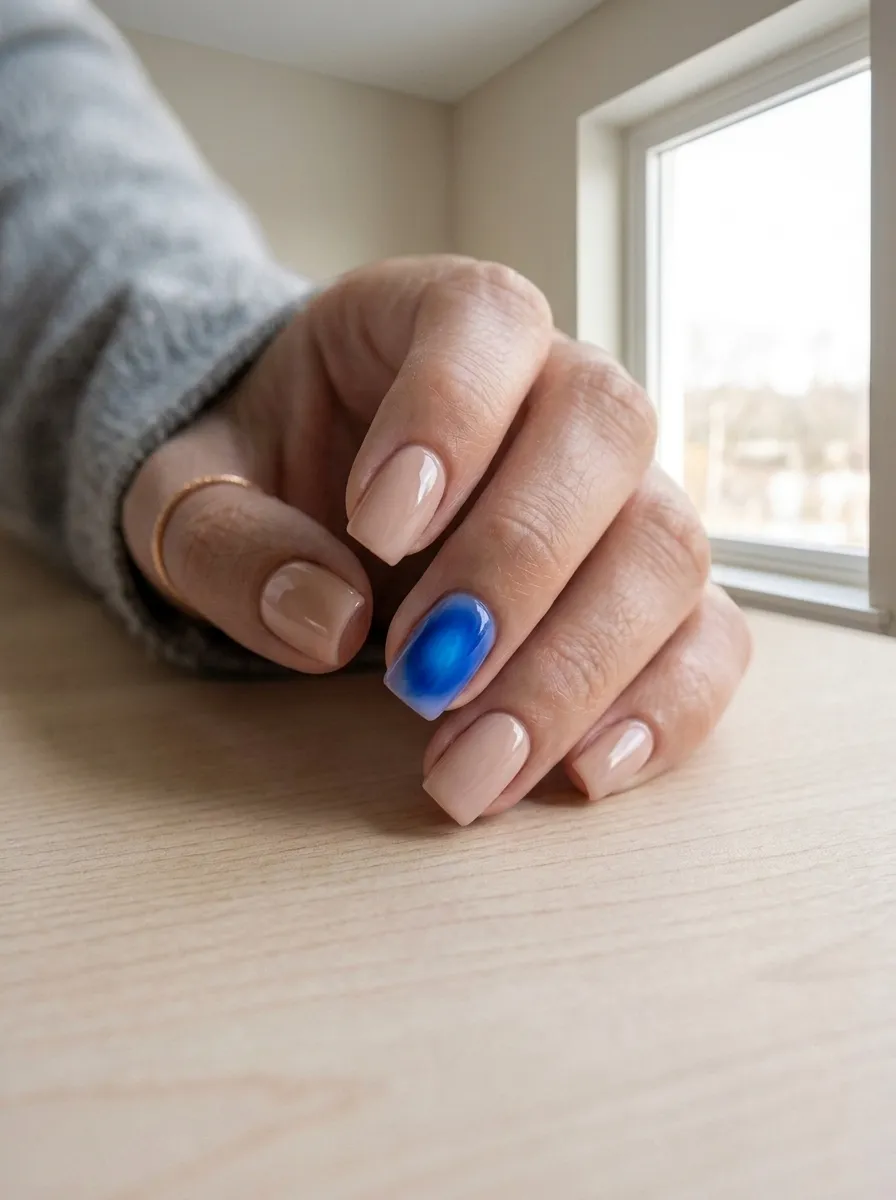
An accent nail lets you enjoy the blue aura trend without committing to it on every finger. Usually the ring finger gets the special design while the rest stay simple. Paint four nails a plain nude, white, or soft pink shade as your base. On the remaining nail, use the sponge blending method to create your blue aura cloud design. Budget tip: this approach uses far less blue polish than a full set, so one small bottle can last through many manicures. It’s also a great way to try out a new design before deciding if you want it on every nail. Let everything dry fully, then apply a glossy topcoat across all nails for a consistent finish. This style works well for anyone who wants something eye-catching but still simple enough for daily life, school, or work. It’s also a good beginner project since you only need to practice the blending technique on one nail instead of ten.
19. Blue Aura Ombre Fade Nails
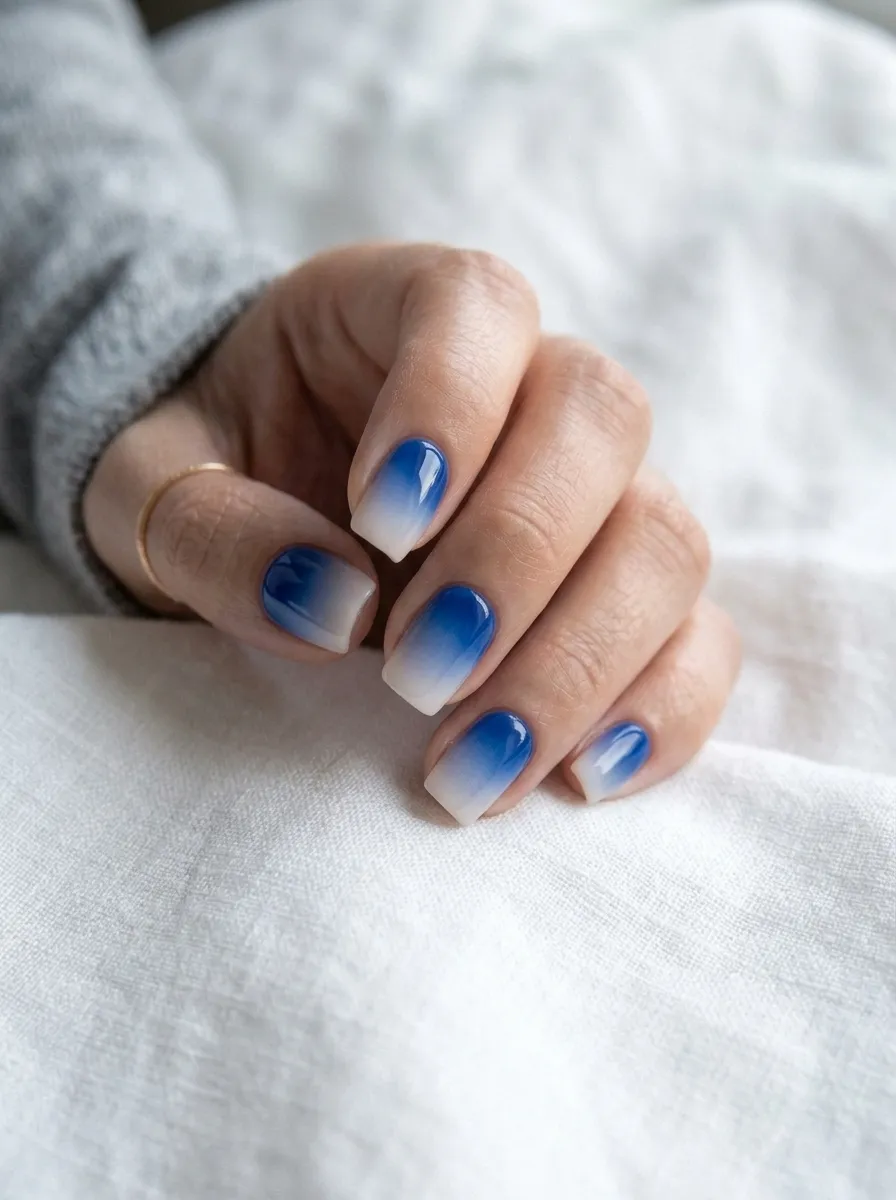
This design creates a smooth gradient from deep blue at the base to nearly white at the tip, giving the nail a calm, flowing look. Start with a white base coat. Apply your darkest blue shade near the cuticle area using your sponge, then gradually use lighter shades or dilute the polish with a touch of white as you move toward the tip. Blend each section into the next while the polish is still slightly wet. Budget tip: if you only have one blue polish, mix small drops with white on a piece of foil to create your own lighter shades instead of buying multiple bottles. This saves money and still gives you a full gradient effect. Let the design dry completely, then seal with a glossy topcoat. This style feels elegant and works well for weddings, graduations, or any event where you want a polished, put-together look that still fits the soft aura trend.
20. Blue Aura Nails With Rhinestones
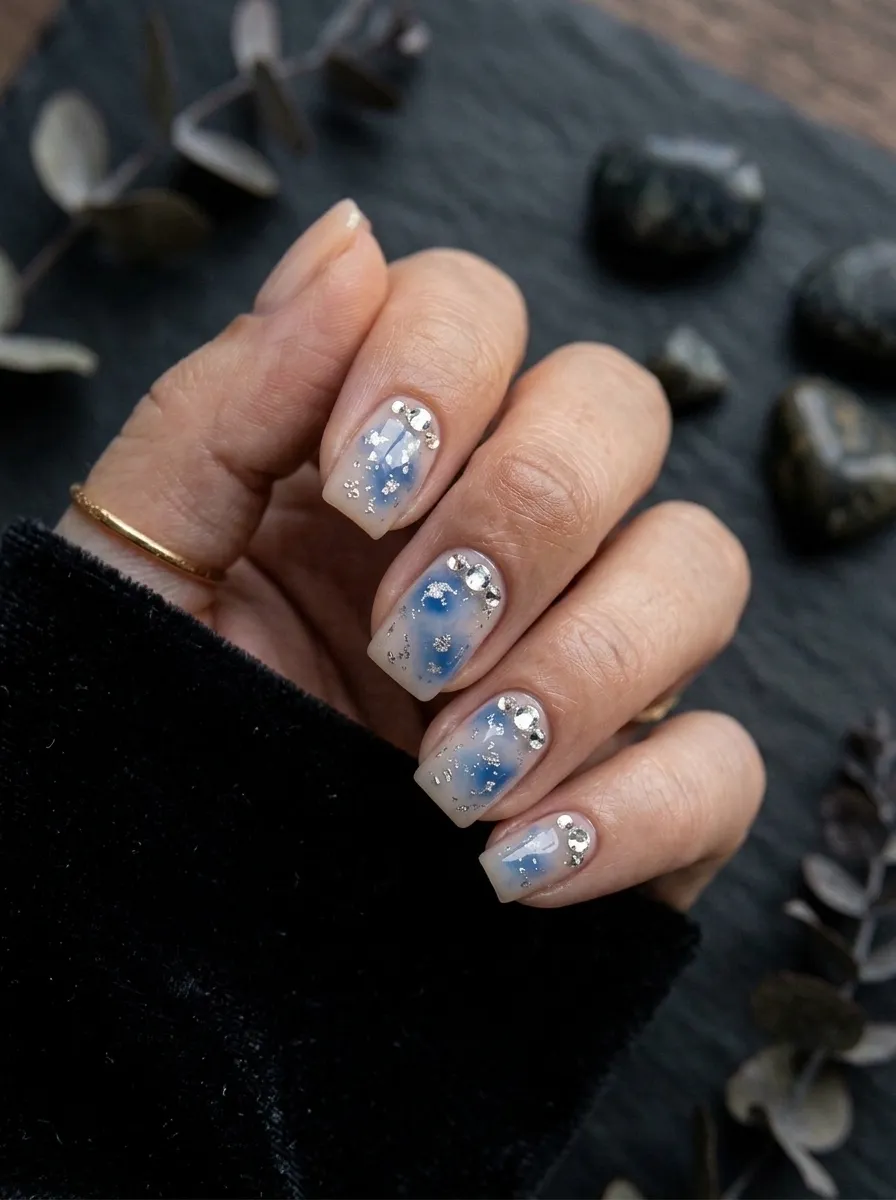
A few small rhinestones can turn a simple blue aura design into something that feels special and celebration-ready. The key is using just a couple of stones rather than covering the whole nail. Start with your blue aura base using the sponge method and let it dry fully. Apply a small dot of clear nail glue near the cuticle area, then use tweezers or a wax pencil to place one or two rhinestones onto the glue. Budget tip: rhinestone packs are inexpensive and one small pack can decorate many manicures since you only need a few stones per set of nails. Let the glue set completely before applying a topcoat around the stones, being careful not to cover them completely. This design works well for birthdays, holidays, or any event where you want your nails to sparkle a little without going overboard. It keeps the soft, dreamy aura feel while adding just a touch of shine.
21. Blue Aura Nails With Floral Accents
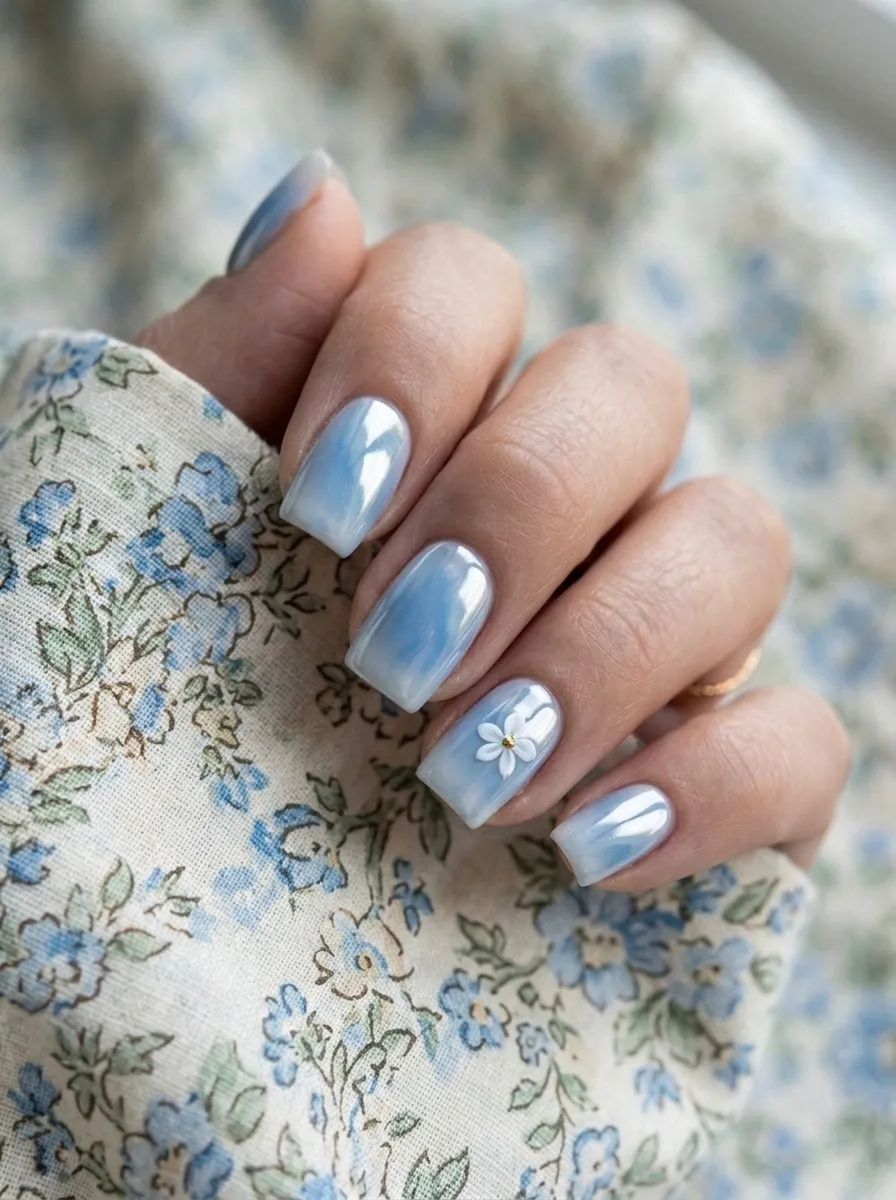
A small painted flower adds a soft, feminine touch to the blue aura trend without overwhelming the design. One flower on an accent nail is often enough to make a statement. Start with your blue aura base using the sponge method and let it dry completely. Using a thin nail art brush, paint a simple five-petal flower in white polish on one nail, keeping the shape loose and a little imperfect for a natural look. Add a small yellow or gold dot in the center once the petals dry. Budget tip: a cheap detail brush from a craft store works just as well as an expensive nail art brush, and one brush can be reused for years. Practice the flower shape on paper first if you’re nervous about freehand painting. Seal with a glossy topcoat once everything is dry. This design feels soft and romantic, making it a nice option for spring, garden parties, or anytime you want a gentle floral touch.
22. Blue Aura Nails With Line Art
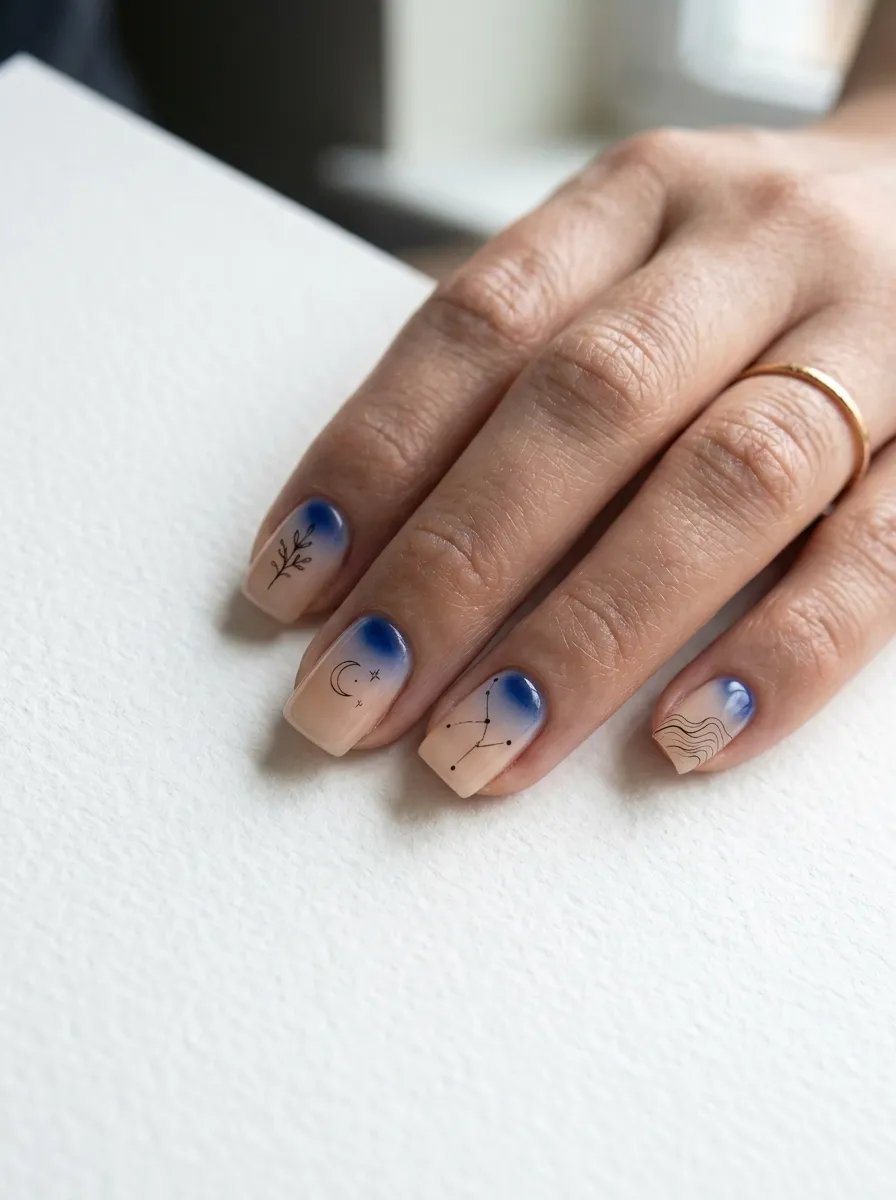
Thin black line art adds a modern, artistic edge to the soft blue aura background. The contrast between the soft cloud and sharp lines makes the design feel more detailed without much extra work. Start with your blue aura base using the sponge method and let it dry fully. Using a fine nail art brush or a black gel pen made for nails, draw simple thin lines across the nail, such as a curved line or a small geometric shape. Budget tip: a black gel pen is often cheaper than a full nail art brush set and gives similar clean results for beginners. Wipe off any mistakes immediately with a cotton swab dipped in a small amount of polish remover before they dry. Seal with a glossy topcoat once the lines are set. This design works well for anyone who likes a more modern, artistic manicure and wants to combine the soft aura trend with something a little more graphic and eye-catching.
23. Blue Aura Nails With Glitter Tips
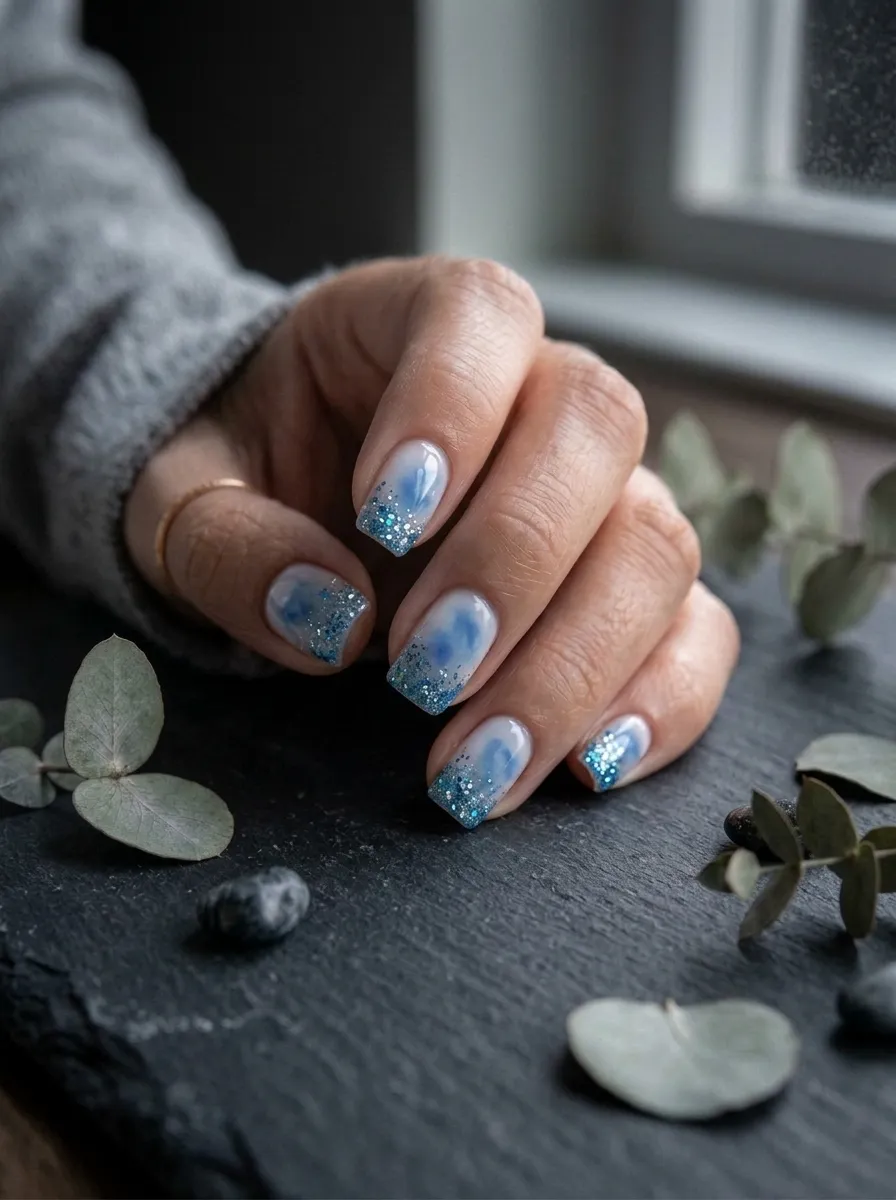
Glitter tips add sparkle exactly where it catches the most light, without covering the whole nail in shimmer. This keeps the soft aura base visible while still adding some shine. Start with your blue aura design using the sponge method and let it dry completely. Apply a small amount of clear polish only at the tip of the nail, then dip that section into loose glitter or pat glitter polish on with a brush before it dries. Budget tip: loose glitter in small jars lasts a long time since you only need a pinch per nail, making it one of the more affordable nail art supplies. Tap off any excess glitter over a paper towel to avoid mess. Seal everything with a thick glossy topcoat to smooth the glitter texture. This design works well for parties, New Year’s Eve, or any occasion where you want a little extra sparkle without a fully glittery manicure.
24. Blue Aura Milky Base Nails
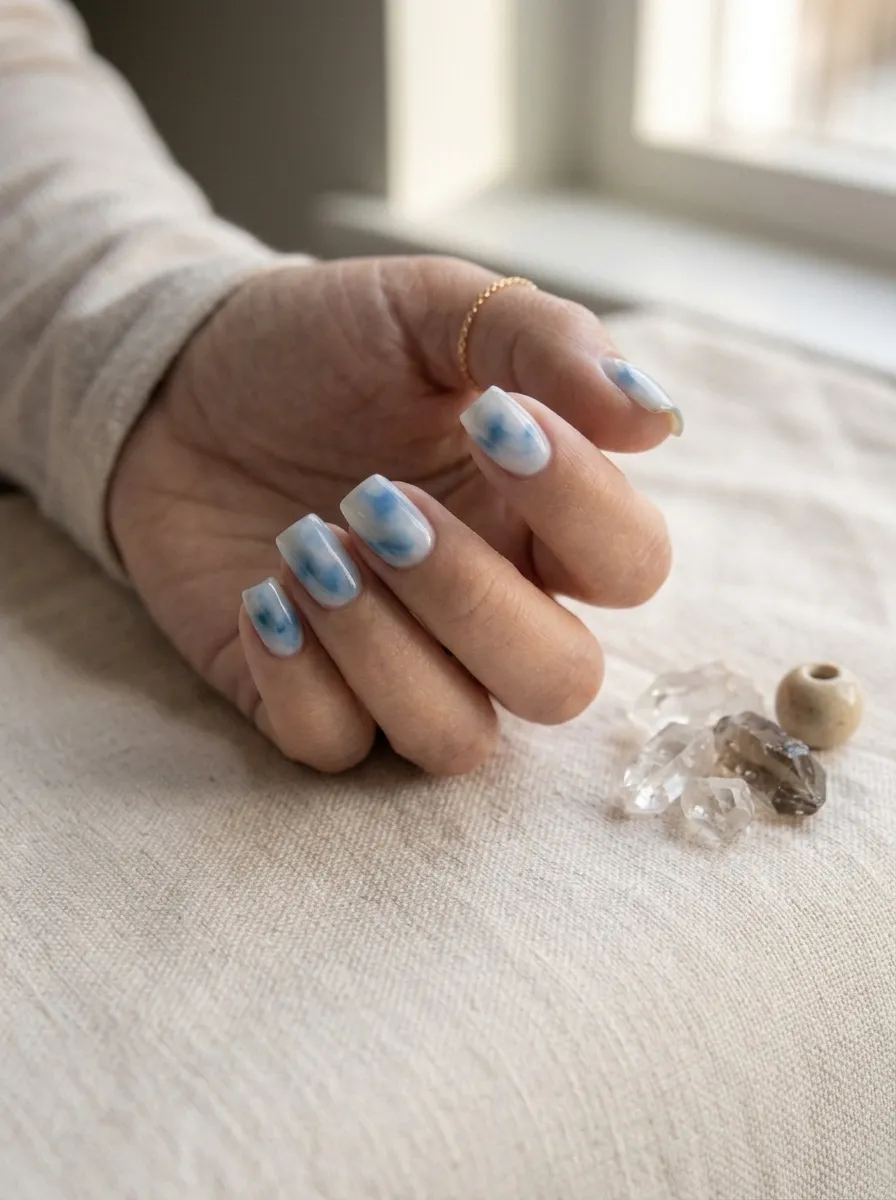
A milky white base gives blue aura nails a softer, more diffused look compared to a stark white background. The blue seems to float within the milky color instead of sitting sharply on top. Start by applying two thin coats of a sheer milky white polish, letting each layer dry before adding the next. Once the base is set, use your sponge to dab soft blue polish in the center or tip area, blending gently since the milky base already softens the overall look. Budget tip: sheer milky polishes are often sold as everyday nude shades, so you may already own one without realizing it works for this design. Let everything dry fully, then seal with a glossy topcoat. This style feels a little more subtle and grown-up compared to a bright white aura base. It works well for office settings, family events, or anytime you want color without anything too bold or attention-grabbing.
25. Blue Aura Nails With Sunset Gradient
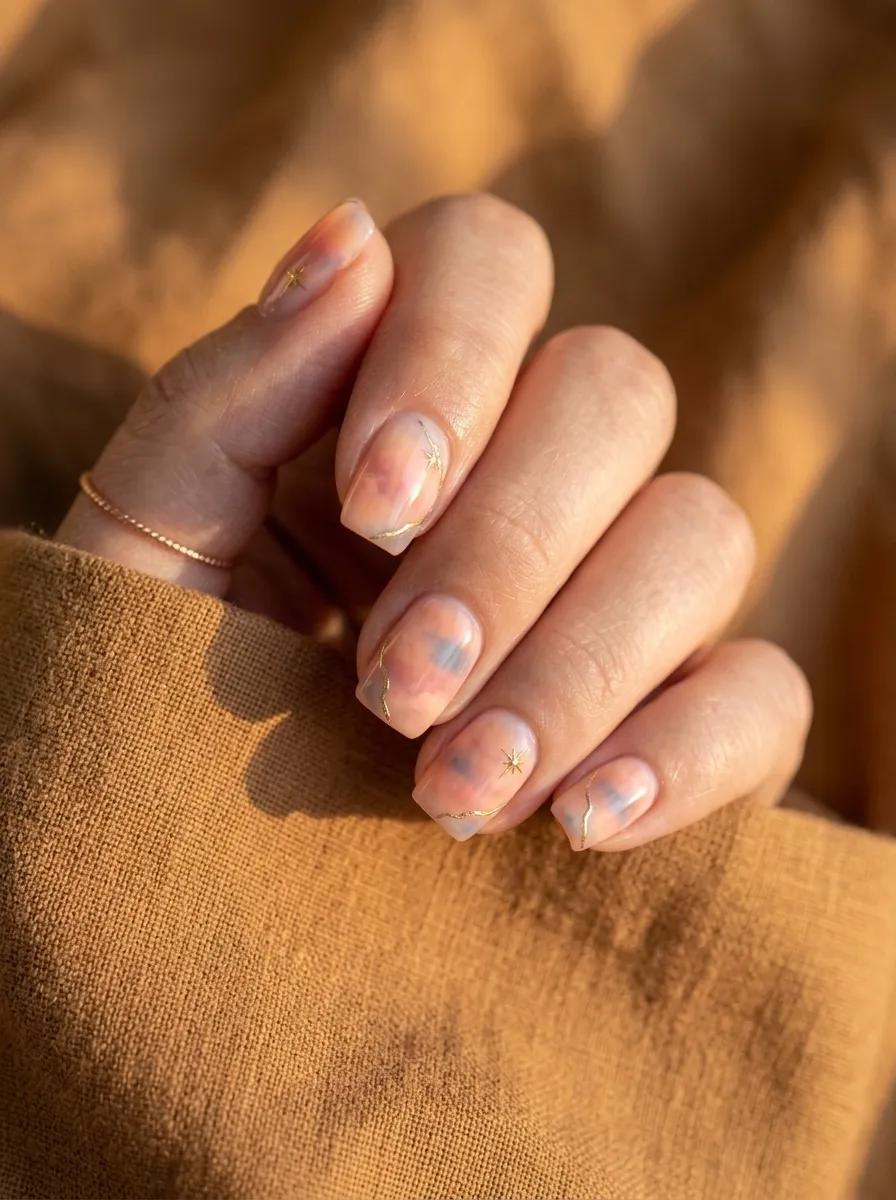
Mixing blue with warm sunset tones like peach and soft pink creates a design that feels like the sky changing colors. It’s a fun way to combine cool and warm shades in one manicure. Start with a white base coat. Use your sponge to dab blue on one side of the nail and peach or pink on the other, letting them meet and blend softly in the middle. Add a small touch of orange or yellow where the colors overlap for extra depth. Budget tip: mini polish sets with multiple pastel shades are often sold together at a low price, giving you everything needed for this design in one purchase. Let the design dry completely, then finish with a glossy topcoat. This style works especially well for spring and summer and photographs beautifully in natural light. It’s a great choice if you want something a little more colorful while still keeping the soft, blended aura style at its core.
26. Blue Aura Nails With Cloud Shapes
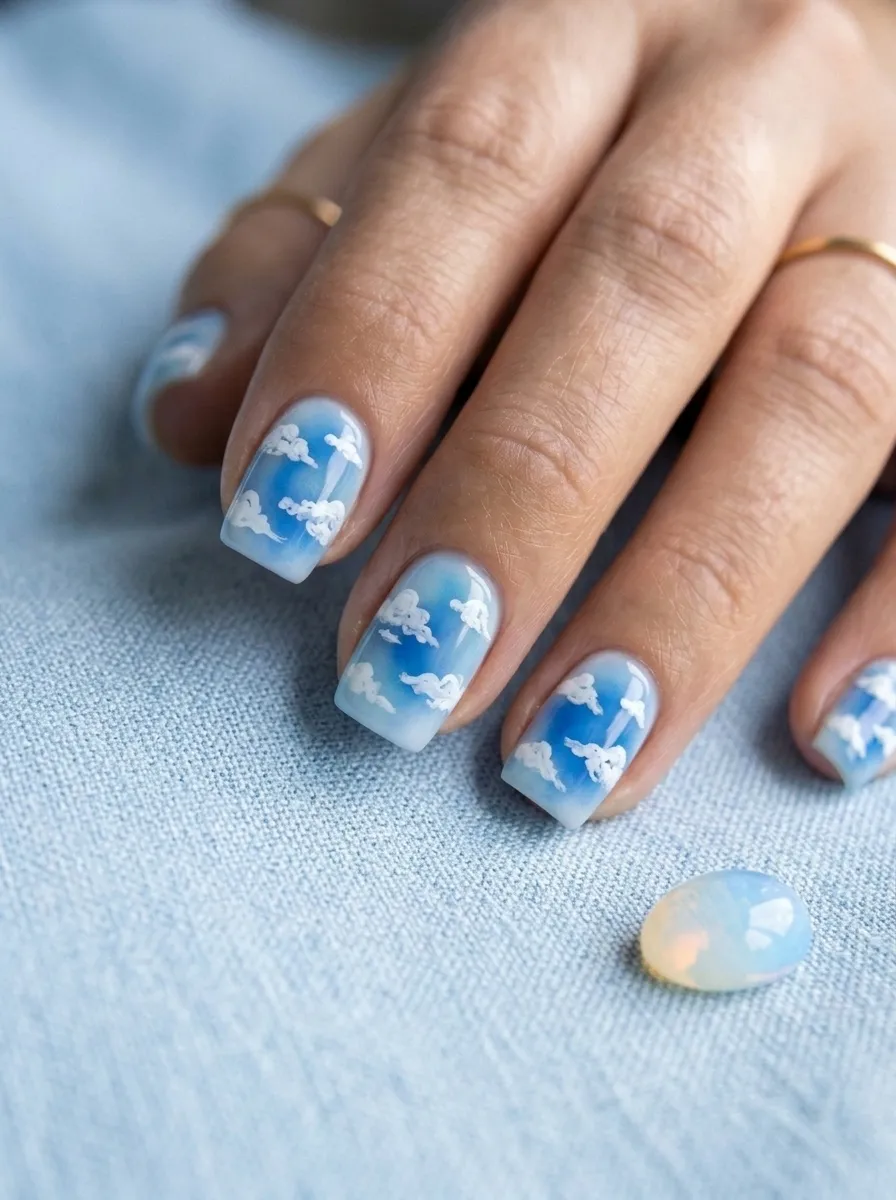
This design takes the aura trend literally by adding small painted cloud shapes on top of the blue background. It’s a playful, whimsical option that still fits the soft, dreamy theme. Start with your blue aura base using the sponge method and let it dry fully. Using a small detail brush and white polish, paint one or two puffy cloud shapes near the base or tip of the nail. Keep the shapes simple with a few rounded bumps rather than trying to make them too detailed. Budget tip: a small round brush from a kids’ craft set works just as well as a professional nail art brush for simple shapes like this. Let the clouds dry completely before sealing with a glossy topcoat. This design works well for anyone who wants their nails to feel a little more fun and literal, and it’s a great conversation starter. It also pairs nicely with light blue or white clothing for a coordinated look.
27. Blue Aura French Ombre Combo
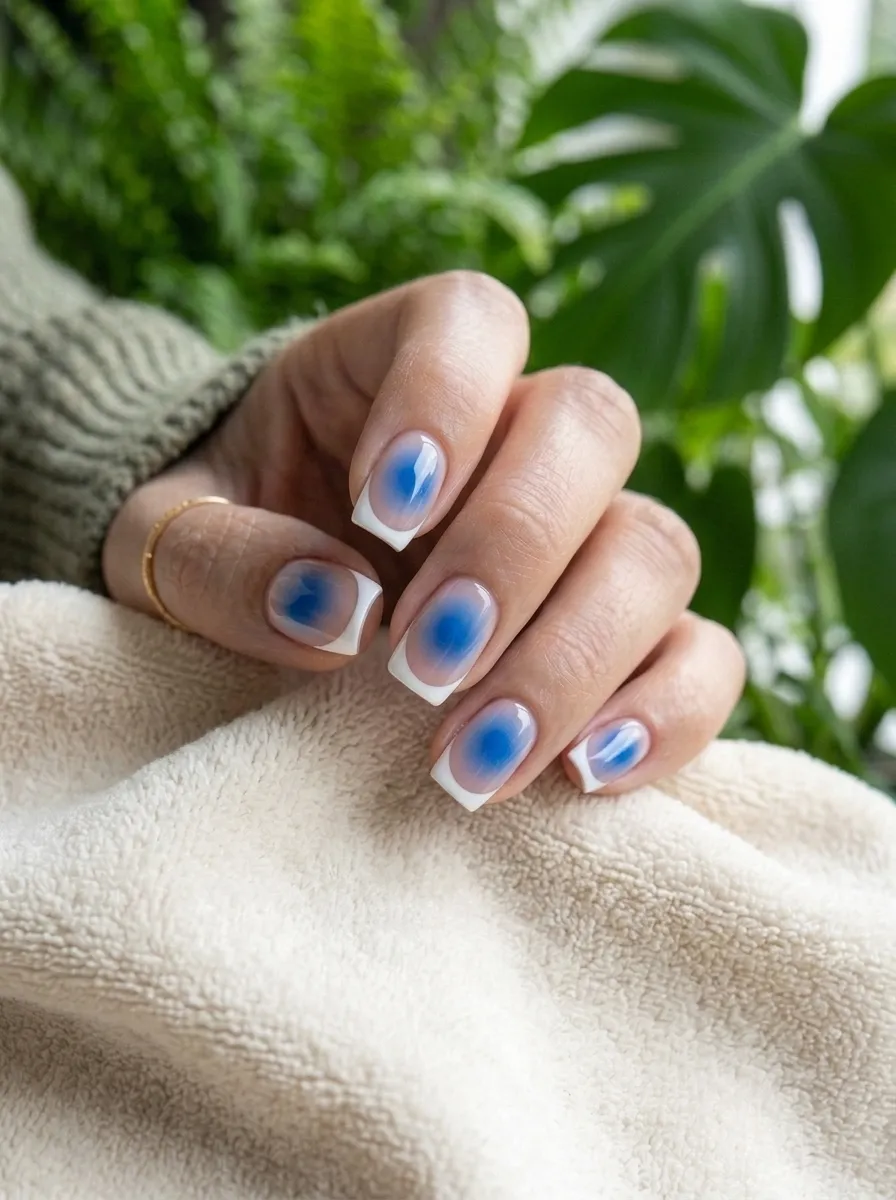
This design layers two popular styles together, giving you a French tip shape with a soft blue aura fade underneath it instead of a plain white base. Start with a nude or clear base coat. Use your sponge to add a soft blue ombre fade across the whole nail, keeping it light and subtle. Once dry, paint a thin white line across the tip of the nail using a striping brush to create the French tip shape on top of the faded blue. Budget tip: a striping brush is inexpensive and can be used for many different nail art designs beyond just this one, making it a good tool to add to your kit. Wipe away any uneven edges with a small brush dipped in polish remover before sealing. Finish with a glossy topcoat. This combo design feels more detailed and salon-worthy while still being doable at home with a little patience and a steady hand.
28. Blue Aura Nails With Silver Chain Charm
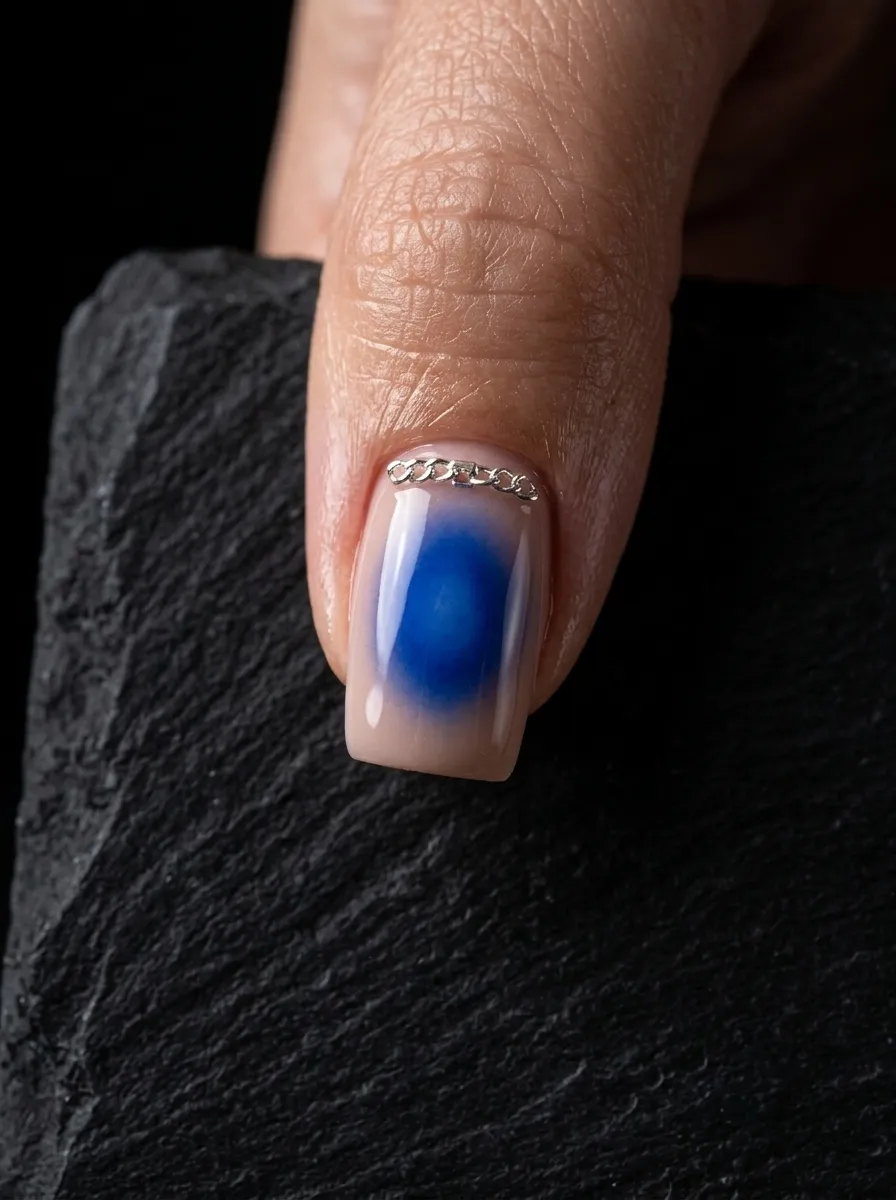
Nail charms add a small three-dimensional detail that makes a manicure feel extra special without much effort. A tiny silver chain near the cuticle looks delicate against a soft blue aura background. Start with your blue aura base using the sponge method and let it dry completely. Apply a small dot of strong nail glue near the cuticle, then place a small pre-made nail chain charm on top using tweezers for precision. Budget tip: charm packs are sold cheaply online or at beauty supply stores, and a single pack often contains enough charms for several manicures across many months. Let the glue set fully before sealing around the charm with a topcoat, avoiding covering the charm itself too heavily. This design works well for special occasions, birthdays, or anytime you want your nails to feel a little more like jewelry. It’s a small detail that makes a big difference in how finished the manicure looks.
29. Blue Aura Nails With Crescent Moon
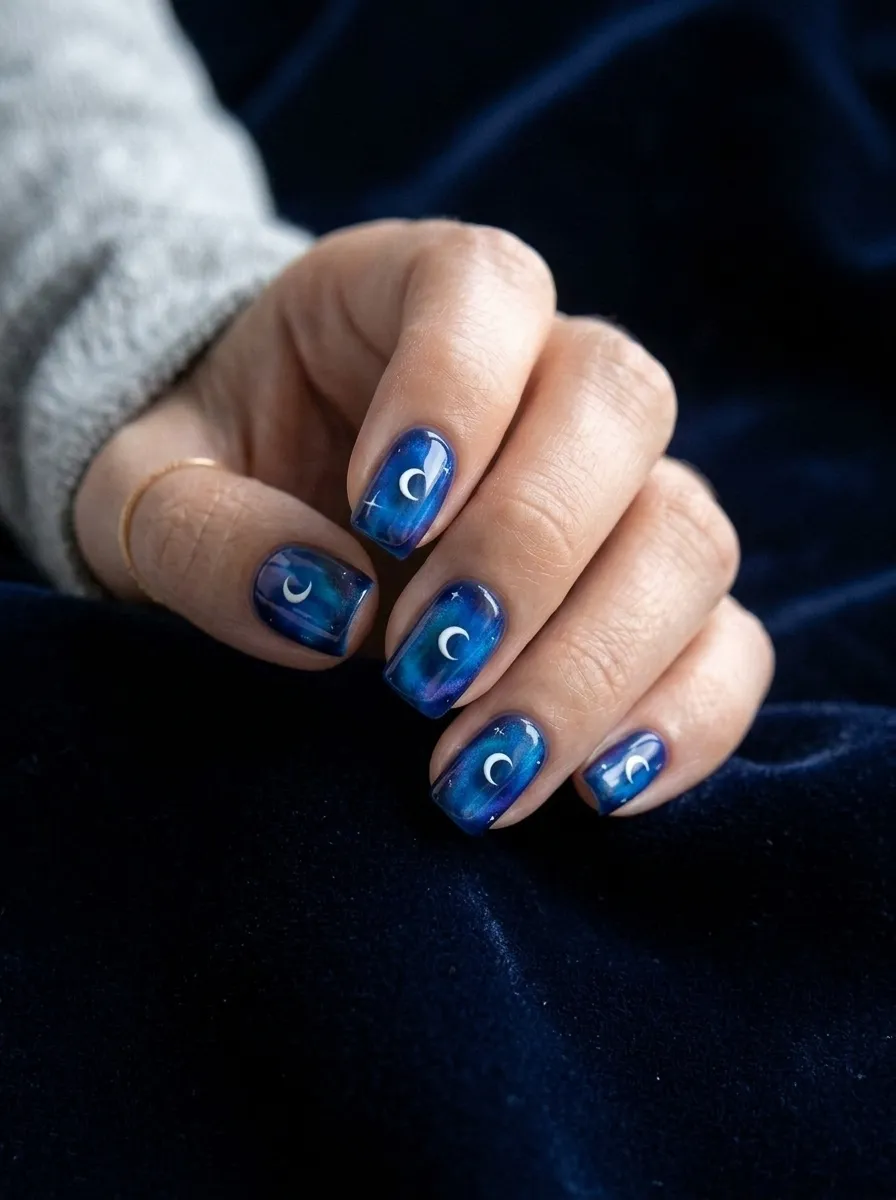
A small crescent moon painted on a blue aura background fits perfectly into the dreamy, celestial mood of this trend. It’s simple enough for beginners but still adds a nice detail. Start with your blue aura base using the sponge method and let it dry fully. Using a thin brush and white polish, paint a small curved crescent shape near the tip or side of the nail. Keep the shape simple, just two curved lines meeting at points. Budget tip: a fine detail brush costs very little and can be reused for other small designs like stars, dots, or lines in future manicures. If the shape doesn’t turn out right the first time, wipe it off with a cotton swab and try again before it dries. Seal with a glossy topcoat once finished. This design works well for anyone who loves celestial themes and wants a small, meaningful detail added to their otherwise soft and simple blue aura manicure.
30. Blue Aura Nails With Watercolor Effect
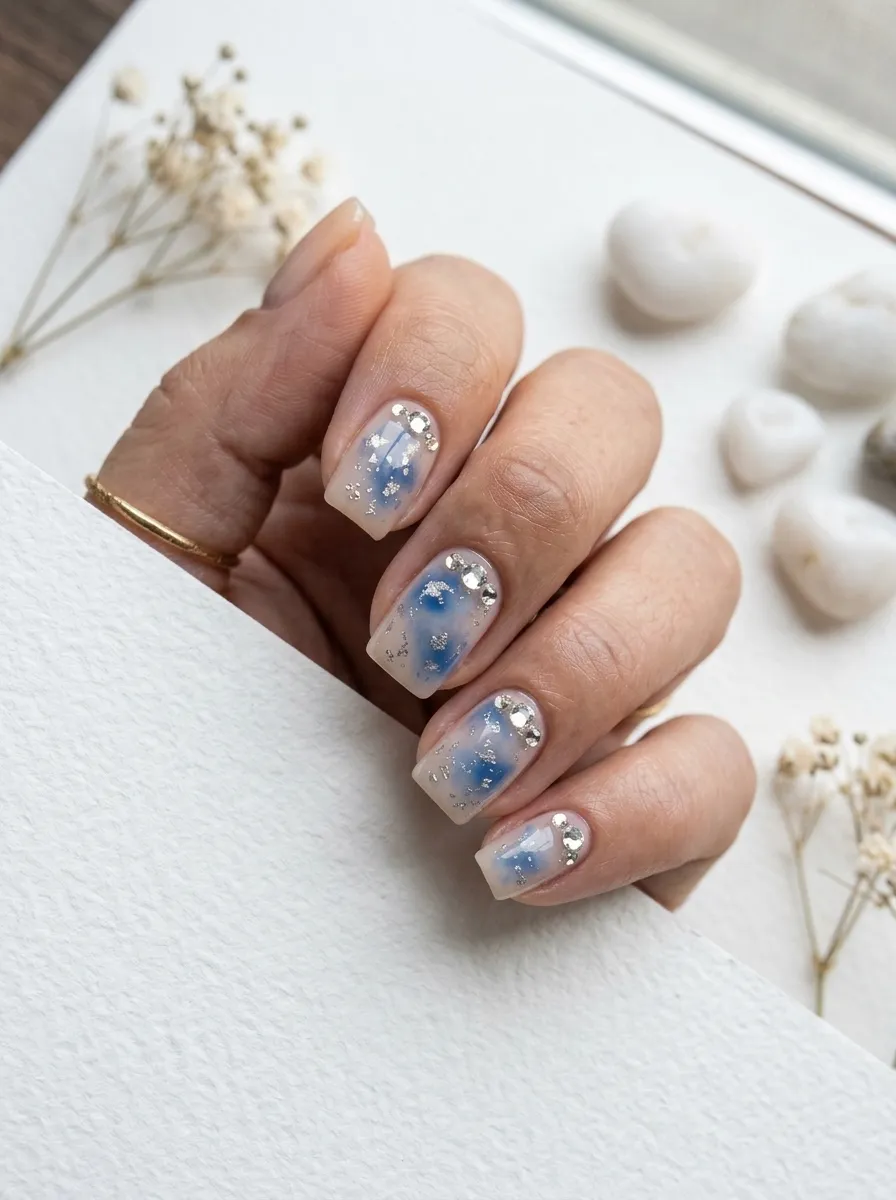
A watercolor effect gives blue aura nails a looser, more artistic feel compared to the usual smooth cloud blend. The color looks like it was painted with a wet brush rather than sponged on evenly. Start with a white base coat. Dip a thin brush in blue polish thinned slightly with a drop of polish remover, then apply it in loose, uneven strokes across the nail. Let some areas stay lighter and others darker for a natural watercolor look. Budget tip: thinning your existing polish with a small drop of remover means you don’t need to buy a special watercolor formula, saving money while still getting the effect. Work quickly since thinned polish dries faster than usual. Seal with a glossy topcoat once everything is dry. This design feels more artistic and unique compared to a standard aura nail, and no two nails will look exactly the same, which adds to its charm and one-of-a-kind appeal.
31. Blue Aura Nails With Ombre Glitter Fade
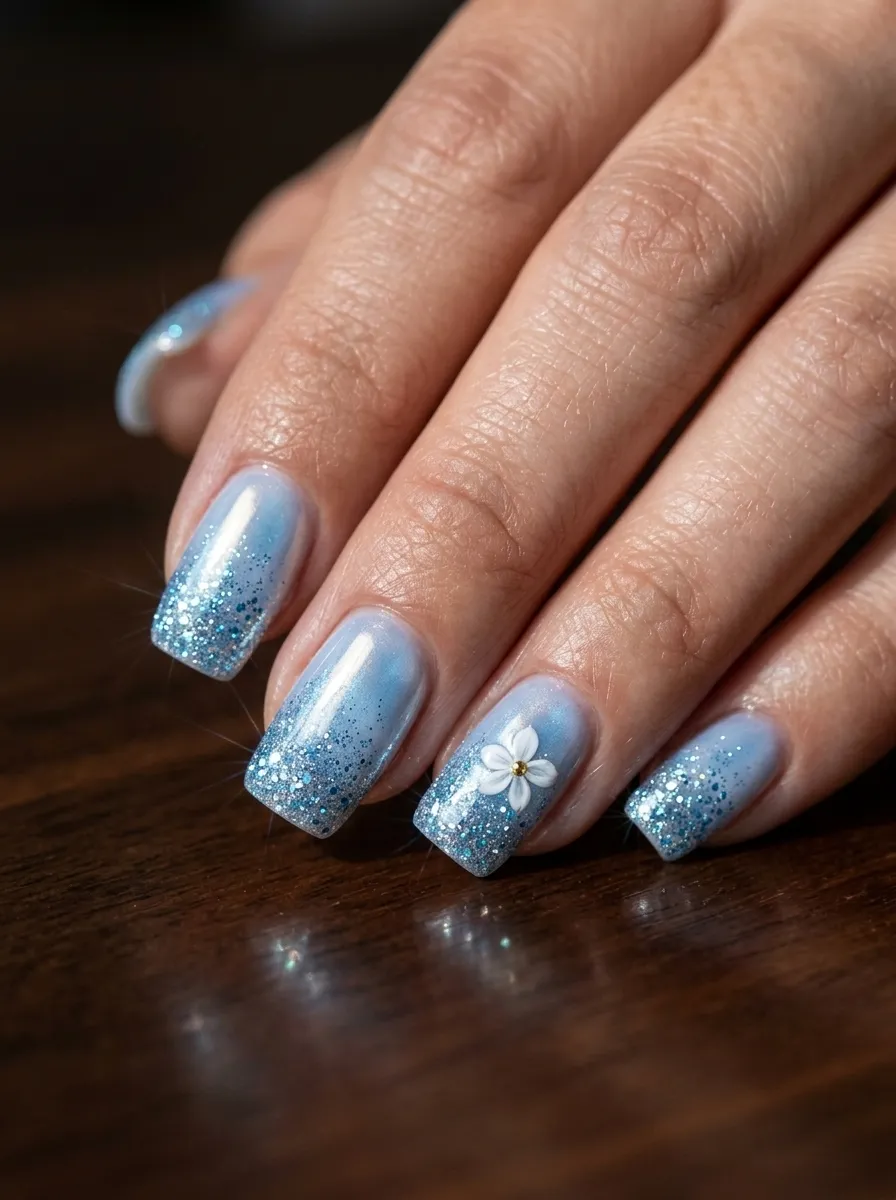
This design combines the soft blend of aura nails with a glitter fade that concentrates sparkle near the tips, similar to a glitter French manicure. Start with your blue aura base using the sponge method and let it dry completely. Using a small brush, apply glitter polish only in the upper third of the nail, near the tip, dabbing gently to build up sparkle gradually rather than all at once. Budget tip: a single bottle of fine glitter polish goes a long way since you only need thin layers to build the fade effect, making it last through many manicures. Let each glitter layer dry before adding more for a smooth buildup. Seal everything with a thick glossy topcoat to smooth the texture. This design works well for holiday parties, birthdays, or any time you want your nails to feel festive while still keeping the calm, soft blue aura base as the main focus.
32. Blue Aura Nails With Simple Geometric Shapes
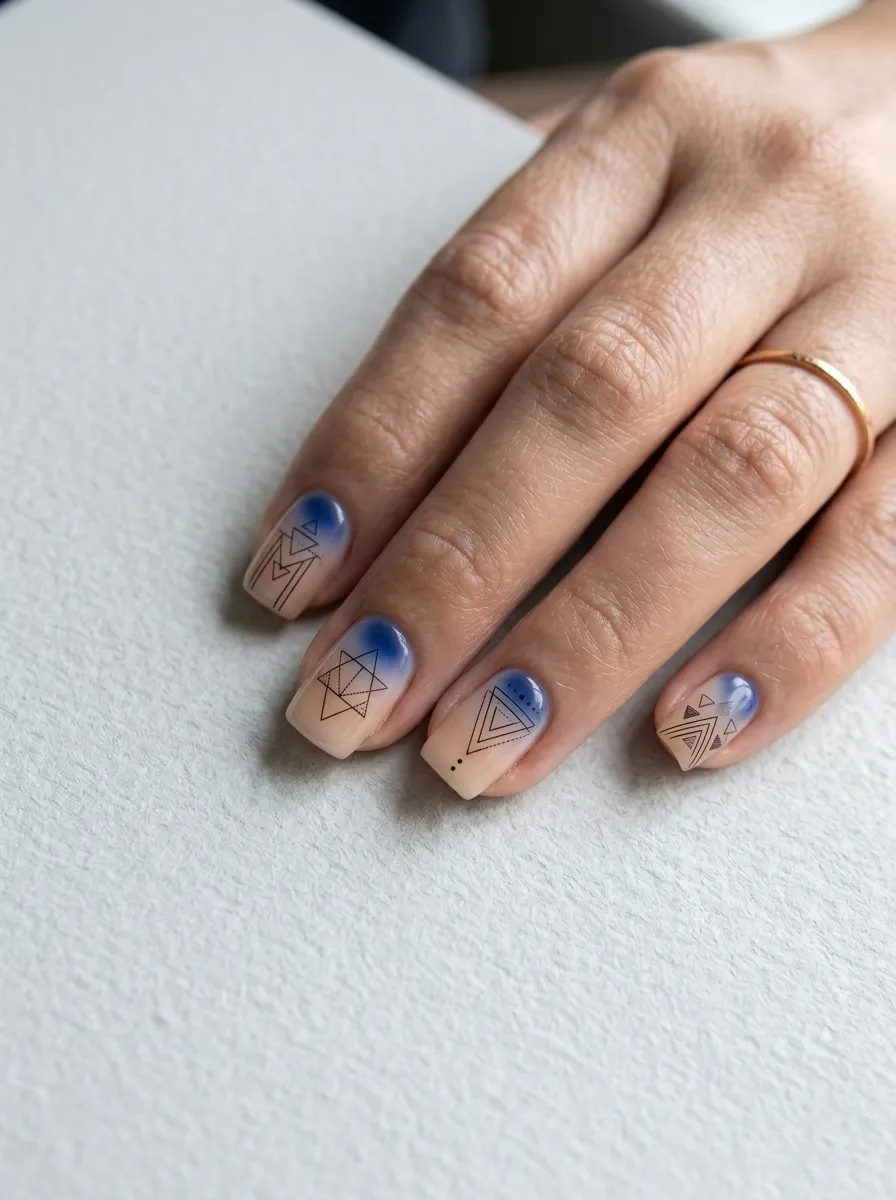
Adding small geometric shapes like triangles or thin lines gives blue aura nails a cleaner, more modern edge. It works well for anyone who likes minimal, structured designs. Start with your blue aura base using the sponge method and let it dry fully. Using a thin nail art brush or striping tape, add one or two small triangles or straight lines in white or black near the base of the nail. Keep the shapes small and simple rather than covering too much space. Budget tip: striping tape makes straight lines easy for beginners and can be reused across many manicures since only small pieces are needed each time. Peel the tape away carefully once the polish underneath is dry. Seal with a glossy topcoat to finish. This design feels a little more structured compared to other softer aura styles, making it a good choice for anyone who wants a blend of soft color and clean, modern lines in one manicure.
33. Blue Aura Nails With Jelly Finish
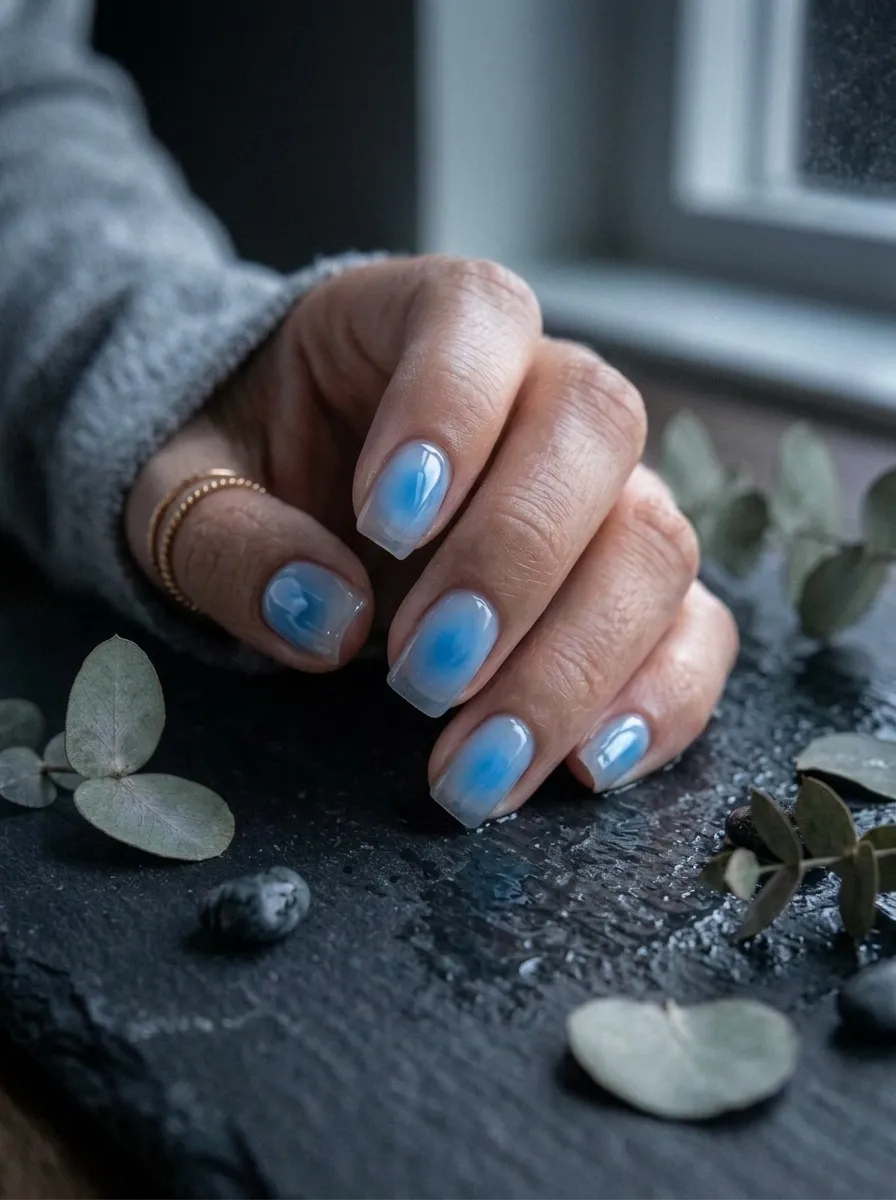
Jelly nails have a translucent, glass-like quality that looks completely different from a solid, opaque manicure. Combined with blue aura, it creates a cool, watery effect that feels light and fresh. Start with a clear base coat, then use a sheer or jelly-formula blue polish instead of a solid opaque one for your aura blending. Apply with your sponge as usual, but expect the color to look softer and more see-through than usual, letting your natural nail show through slightly. Budget tip: many regular polishes can be thinned with a drop of clear topcoat to create a jelly-like sheer effect if you don’t own a jelly formula already. Layer thin coats slowly to control the opacity level you want. Seal with a high-shine glossy topcoat to enhance the glass-like quality. This design works especially well for summer and feels lighter than more solid aura designs, making it a great pick when you want color without heaviness.
Conclusion
Blue aura nails offer more variety than most people expect, from soft pastel clouds to bold electric shades and detailed line art. The best part is that most of these designs use tools and products you likely already own, like makeup sponges, old brushes, and polish sitting in your drawer. Start with one or two ideas that match your style and comfort level, then build up your skills over time. Small budget-friendly touches like foil flecks, tiny dots, or a single rhinestone can turn a basic manicure into something that feels special. Pick a design from this list, gather your supplies, and give your nails a soft, dreamy update this week.