Bat nail ideas are one of the most talked-about dark nail art trends right now, and it is easy to see why. They sit right at the crossroads of spooky, artistic, and genuinely wearable. Whether you are obsessed with gothic aesthetics year-round or just want something dramatic for Halloween season, bat nail designs give your fingertips a personality that plain polishes simply cannot match. From tiny stamped silhouettes to full 3D sculpted wings, there is a bat nail look for every skill level and every budget. This guide walks you through the most creative and achievable bat nail ideas out there so you can find the one that fits your vibe perfectly. If you’re also exploring Freddy Krueger nail ideas, horror-inspired stripes, claw details, and burnt-skin effects can help you create a bold, edgy manicure that feels straight out of a classic slasher movie.
Solid Black Bat Silhouette Nails
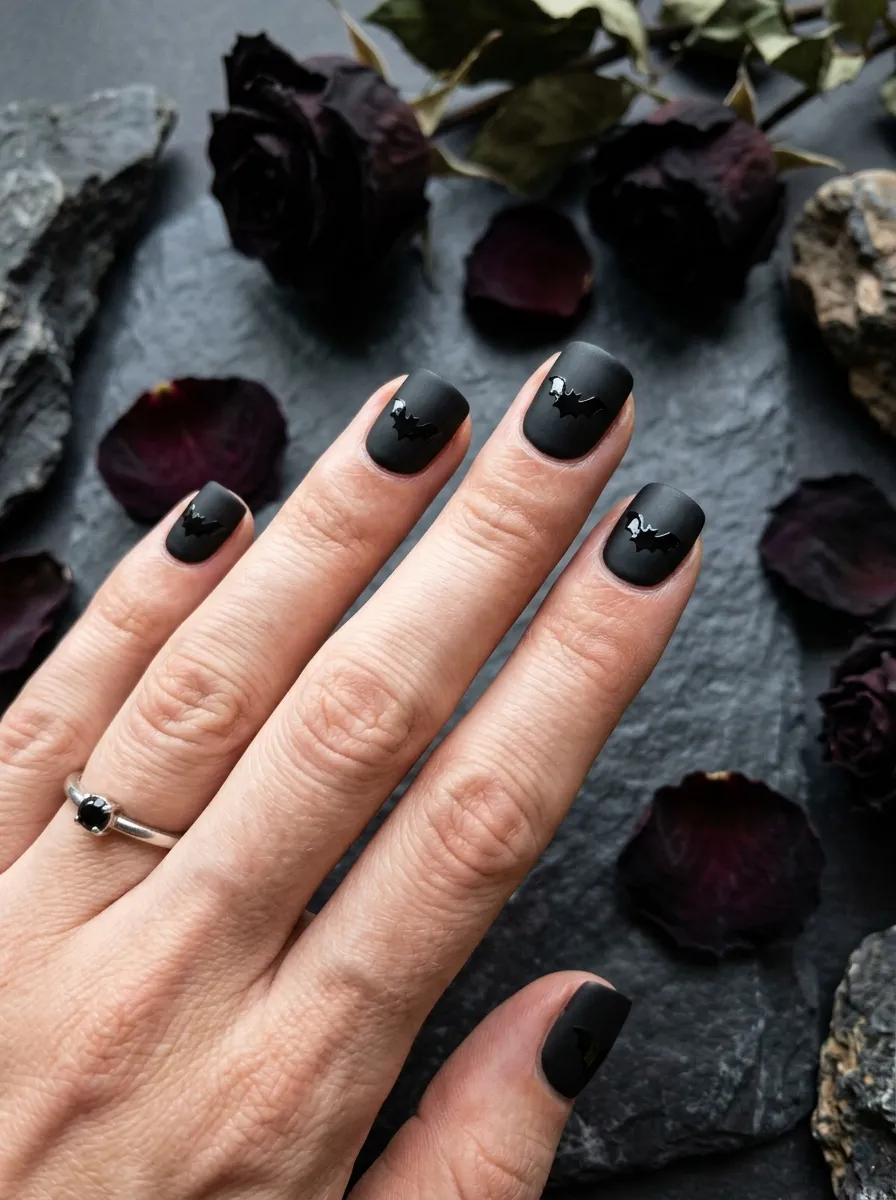
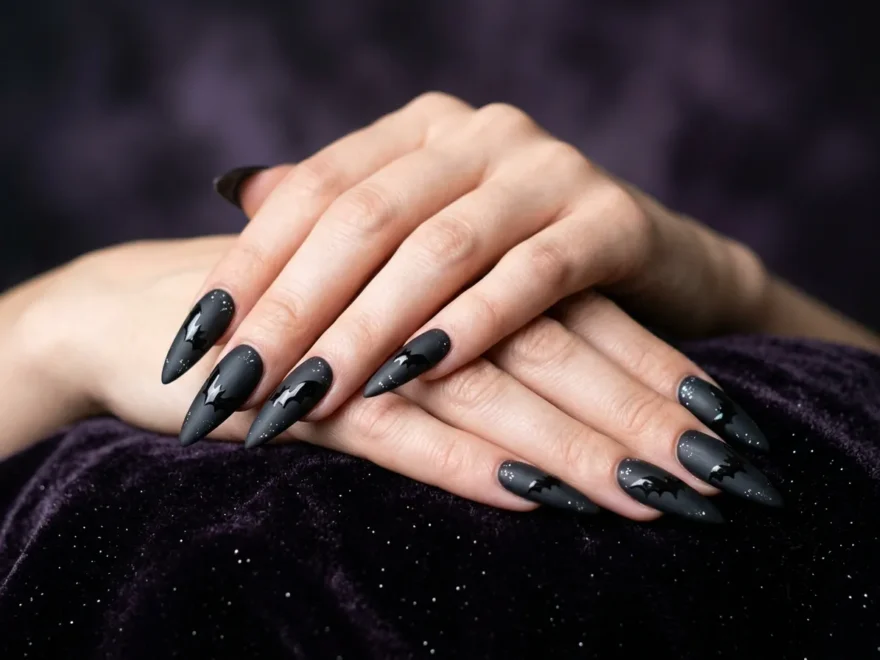
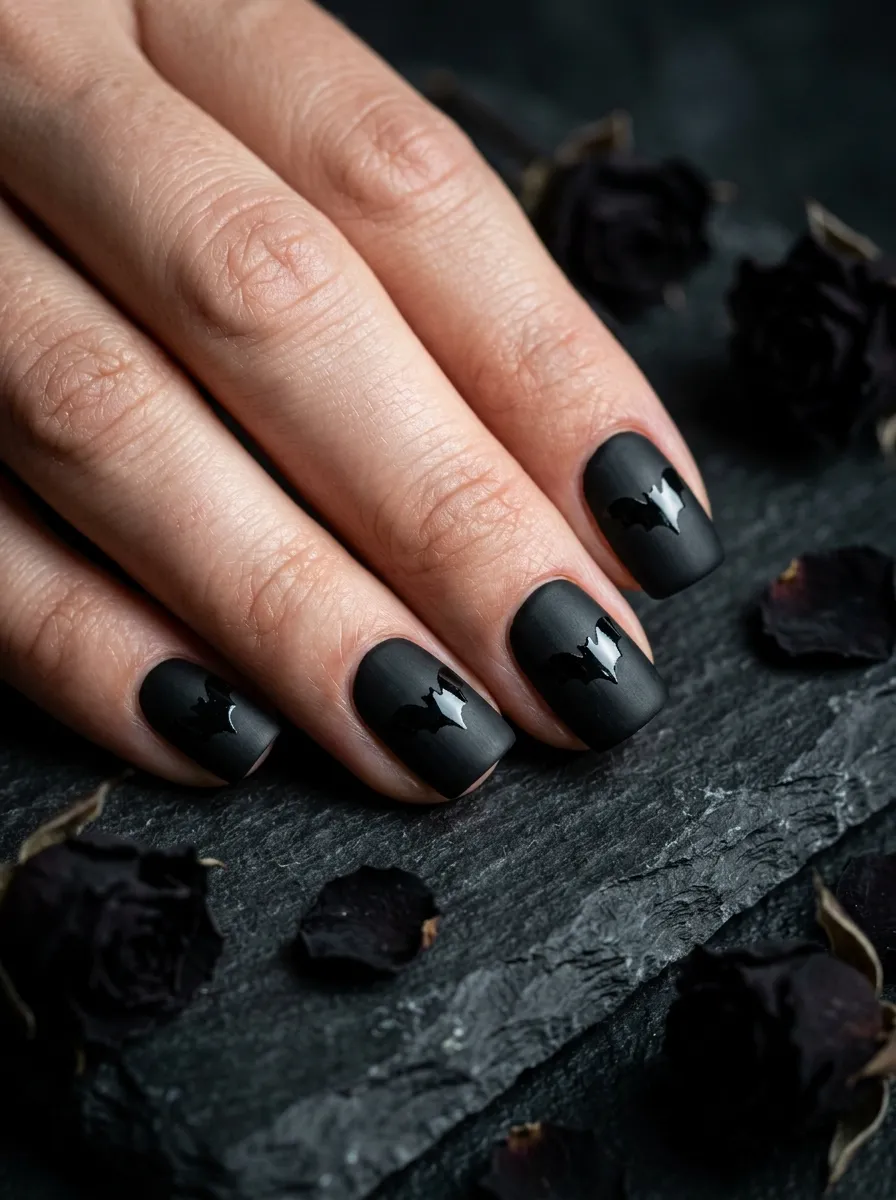
This is the most classic bat nail look and a perfect starting point for beginners. You paint your nails in a solid matte black base and then stamp or freehand a bat silhouette on top using glossy black polish. The result is a subtle tone-on-tone effect that looks polished and intentional without being over the top.
You do not need a nail art brush to pull this off. A bat nail stamping plate costs around three to five dollars online and gives you clean, repeated shapes every single time. Just load your stamper with a slightly darker or glossier polish than your base coat and press it firmly onto the nail.
For a budget approach, pick up a black stamping polish from any drugstore brand. These are more opaque than regular polish and transfer cleanly.
You can wear this design on all ten nails or just choose two accent nails on each hand. The ring finger is a popular choice for the accent nail. This look works beautifully on short nails too, so do not worry if you are not rocking long tips. It is simple, dramatic, and impossible to mess up badly. A topcoat in matte finish ties the whole thing together.
Gradient Purple and Black Bat Nails
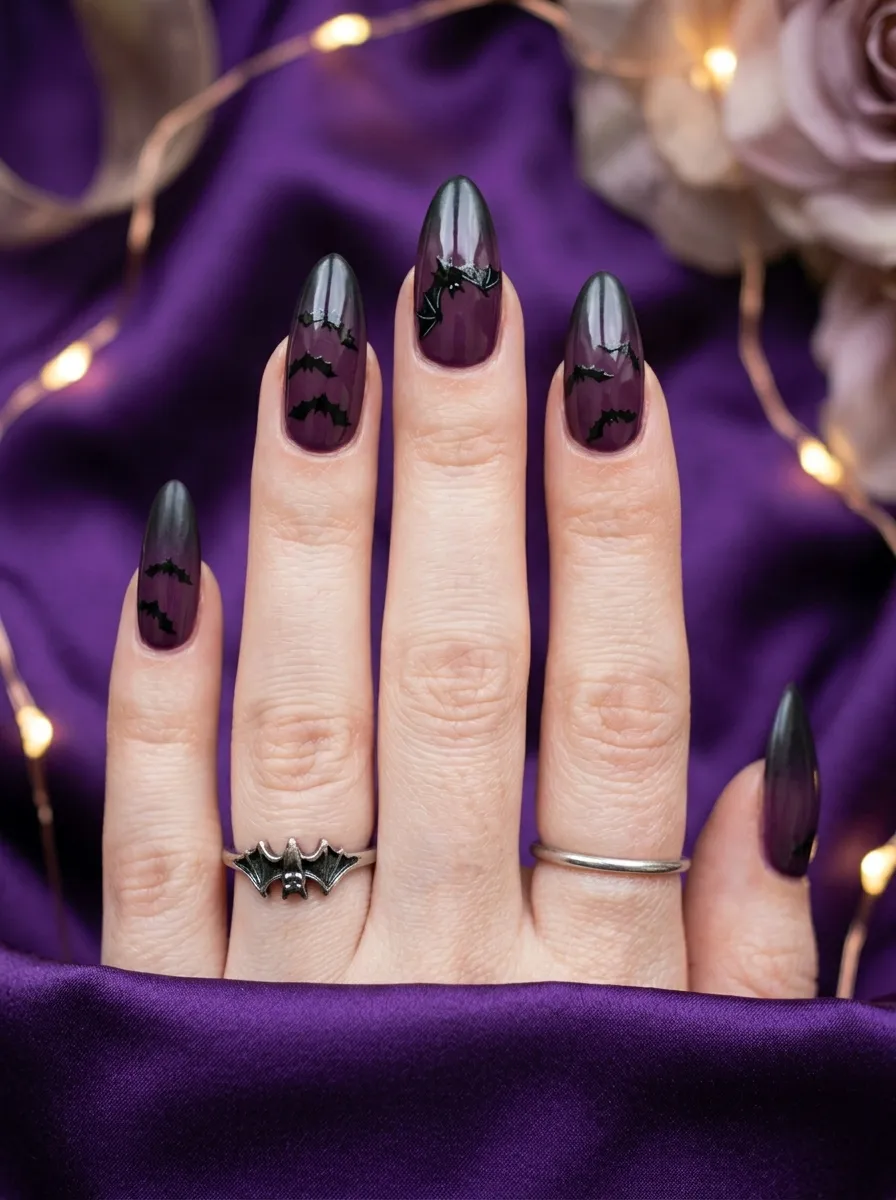
A purple to black gradient with bat silhouettes painted on top is one of the most stunning combinations you can try. The gradient gives your nails depth and drama before you even add a single bat.
To create the ombre effect at home, sponge the two colors onto a makeup sponge and dab it gently onto the nail. You repeat this two or three times and clean up the edges with a cotton swab dipped in acetone. It sounds complicated but after your first attempt you will be amazed at how quickly you get the hang of it.
Once the gradient is dry, use a thin nail art brush and black polish to paint small bat shapes near the tips. The bats look best when they appear to be flying upward toward the dark end of the gradient. You can buy a nail art detailing brush for about two dollars online, and it makes a huge difference in precision.
Purple shades like deep plum, midnight violet, or dusty mauve all work brilliantly here. If you want to keep costs low, one purple and one black polish from a budget brand is all you need. Finish with a glossy topcoat so the gradient really glows.
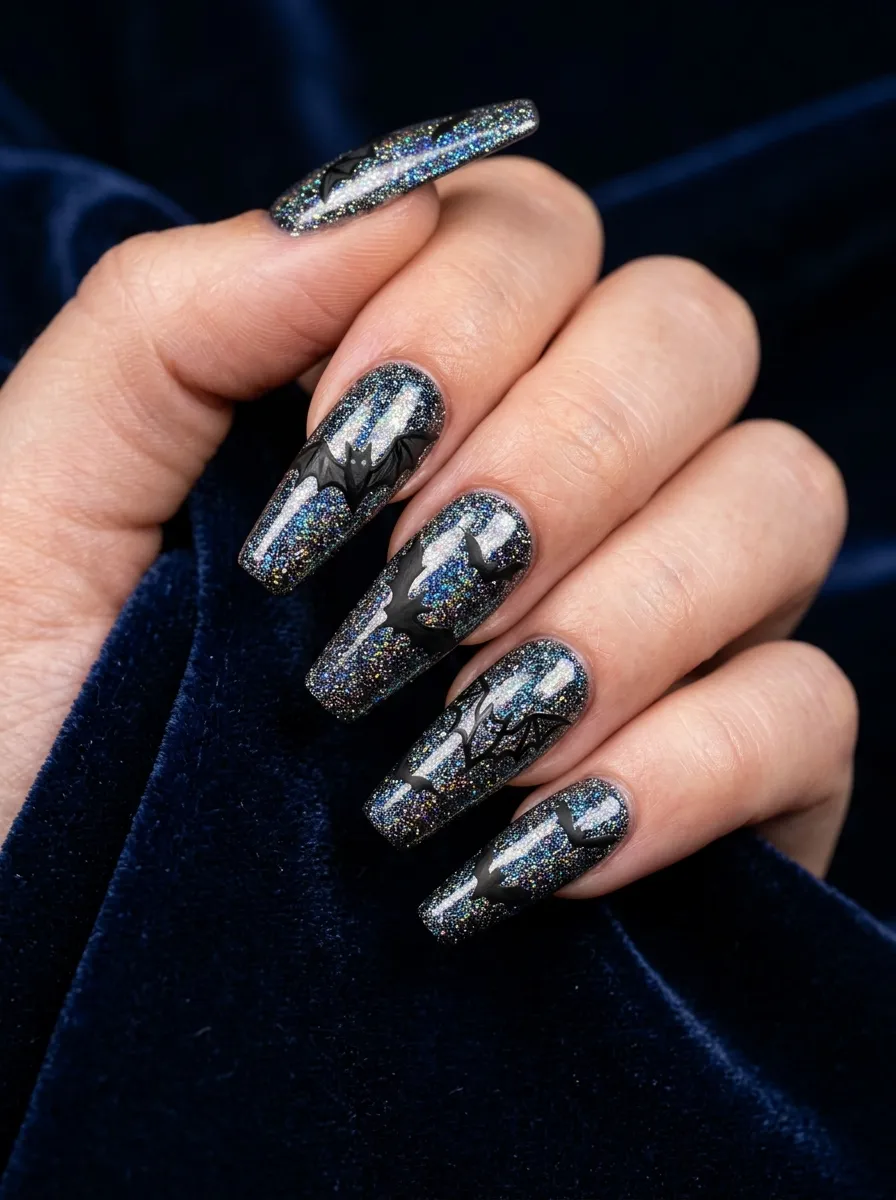
Glitter Galaxy Bat Nails
Glitter and bats together create a look that is dark and dazzling at the same time. This design works because the glitter reads as a night sky and the bats look like creatures flying through it.
Start with a black base coat. Once it is dry, pat a chunky holographic or silver glitter polish over the entire nail or just the top half. Then use a black polish and a thin brush to draw bat silhouettes over the glitter layer. The bats show up clearly because the glitter creates a texture that makes the solid black shapes pop.
You can find glitter nail polishes at dollar stores and discount beauty shops for very little money. Some craft stores sell loose cosmetic glitter that you can apply over tacky topcoat for an even more dramatic look.
This design photographs incredibly well, which makes it a great choice if you love sharing your nail looks online. The sparkle catches light from every angle and the bat shapes give it an artistic, handmade quality. Seal everything with at least two layers of topcoat because glitter nails tend to chip faster than regular polish and the extra protection keeps them looking fresh for longer.
Negative Space Bat Nails
Negative space nail art uses your bare natural nail as part of the design, and it is one of the most modern and graphic-looking styles you can try at home. For bat nails, you paint around the shape of a bat with black polish so the bat itself shows through as your natural nail color.
This sounds tricky but there is an easy cheat. Cut a small bat shape out of tape or a sticker and press it firmly onto your clean, dry nail. Paint over the entire nail with black polish, let it dry for about sixty seconds, and then carefully peel away the tape or sticker. The bat shape is left behind in your natural nail color.
Vinyl nail stickers in bat shapes are sold in craft stores and on budget nail art websites for a few dollars per sheet. These give you much cleaner edges than cutting tape yourself.
This design looks especially striking on longer nails where you have more surface area to work with. You can also reverse it by keeping the nail natural and just painting a solid black bat shape in the center. Either way the negative space effect creates a look that feels high-end and intentional without requiring any special skill at all.
3D Bat Nail Charms
If you want your bat nails to literally stand out, 3D charms are the way to go. These tiny metal or resin bat shapes sit on top of your nail and create a genuinely sculptural effect that catches attention from across the room.
You can buy bags of bat nail charms online for a very affordable price. A pack of twenty or more usually costs under three dollars and comes with various sizes. The small ones look delicate and elegant while the larger ones make a bold statement.
To apply them, paint your nails in any base color you like. While your topcoat is still tacky, use a toothpick or a clean tweezers to place the charm wherever you want it. Press gently, let it set, and seal with another topcoat. The charm will stay on for days without lifting if you do this correctly.
For extra drama, place one charm on the ring finger of each hand and keep the other nails simple with a plain black or deep burgundy polish. You can also surround the charm with tiny dots of white or silver polish to mimic stars around a bat in the night sky. This is one of the most wearable bat nail styles because it works for both casual days and dressed-up occasions.
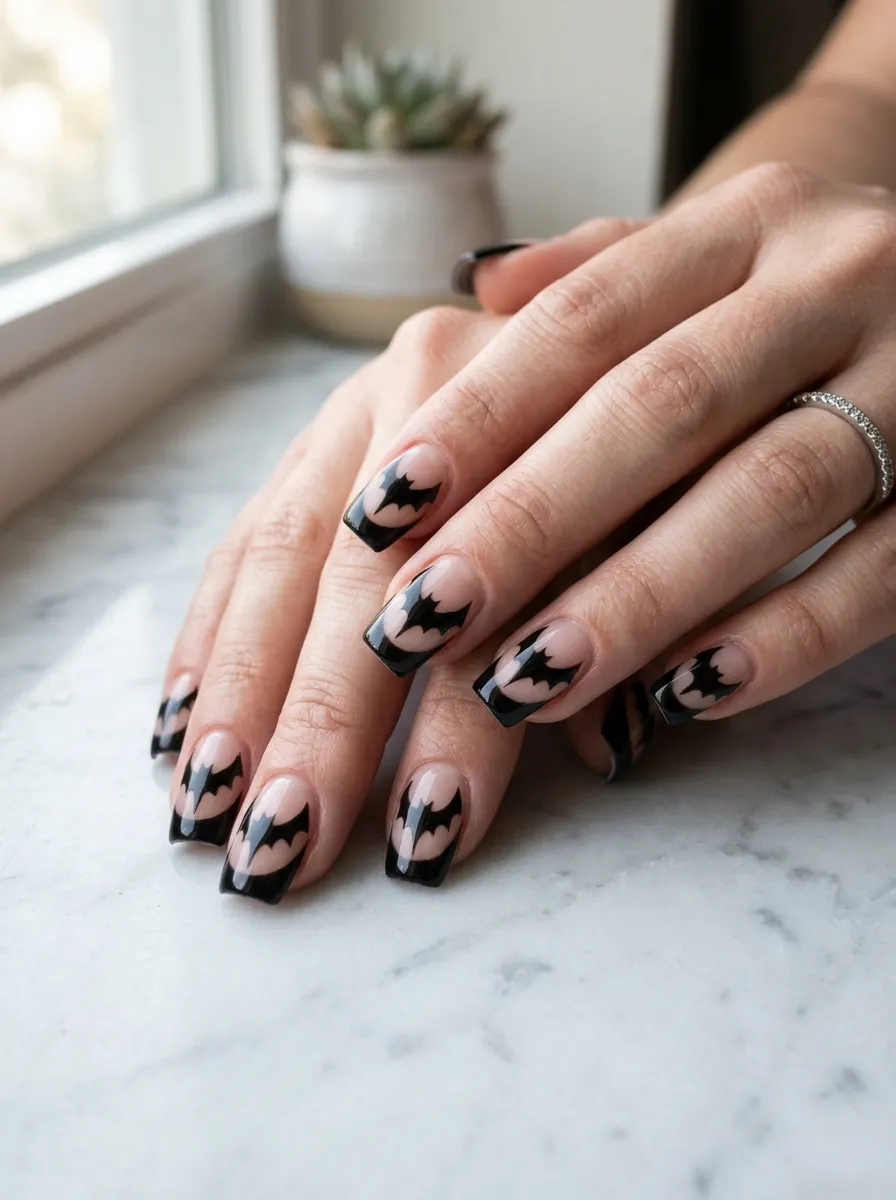
Bat Wing French Tips
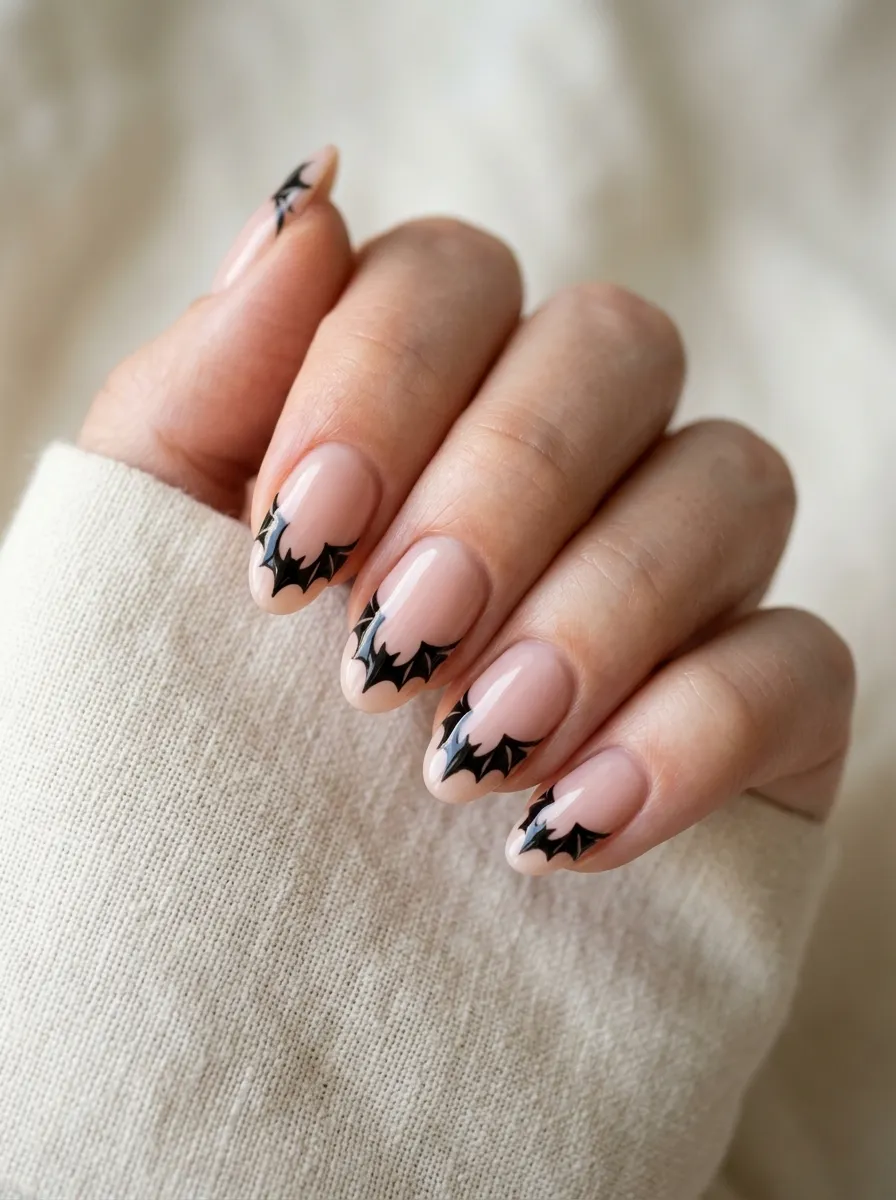
This idea takes the classic French manicure and gives it a completely dark makeover. Instead of a clean white tip, you paint bat wing shapes in black along the edge of each nail so the wings appear to stretch across the tip.
It is simpler to do than it looks. Use a thin nail art brush loaded with black polish and draw the body of the bat in the center of the tip. Then add curved wings extending outward toward each side of the nail. The shapes do not need to be perfectly identical. Slight variation between nails actually makes the design look more handmade and artistic.
If you are nervous about freehand, bat-tip nail stencils are sold in packs for just a couple of dollars online. Press them onto your dried base coat, paint over the exposed tip, and peel away for clean results every time.
This design works on short nails just as well as long ones. On shorter nails the bat wings look compact and cute. On longer nails they look dramatic and spread out. Either way the contrast between the pale nude base and the dark black bat tip creates a striking result. Finish with a matte topcoat for a cool contemporary look or glossy topcoat for a more polished feel.
Blood Red and Black Bat Nails
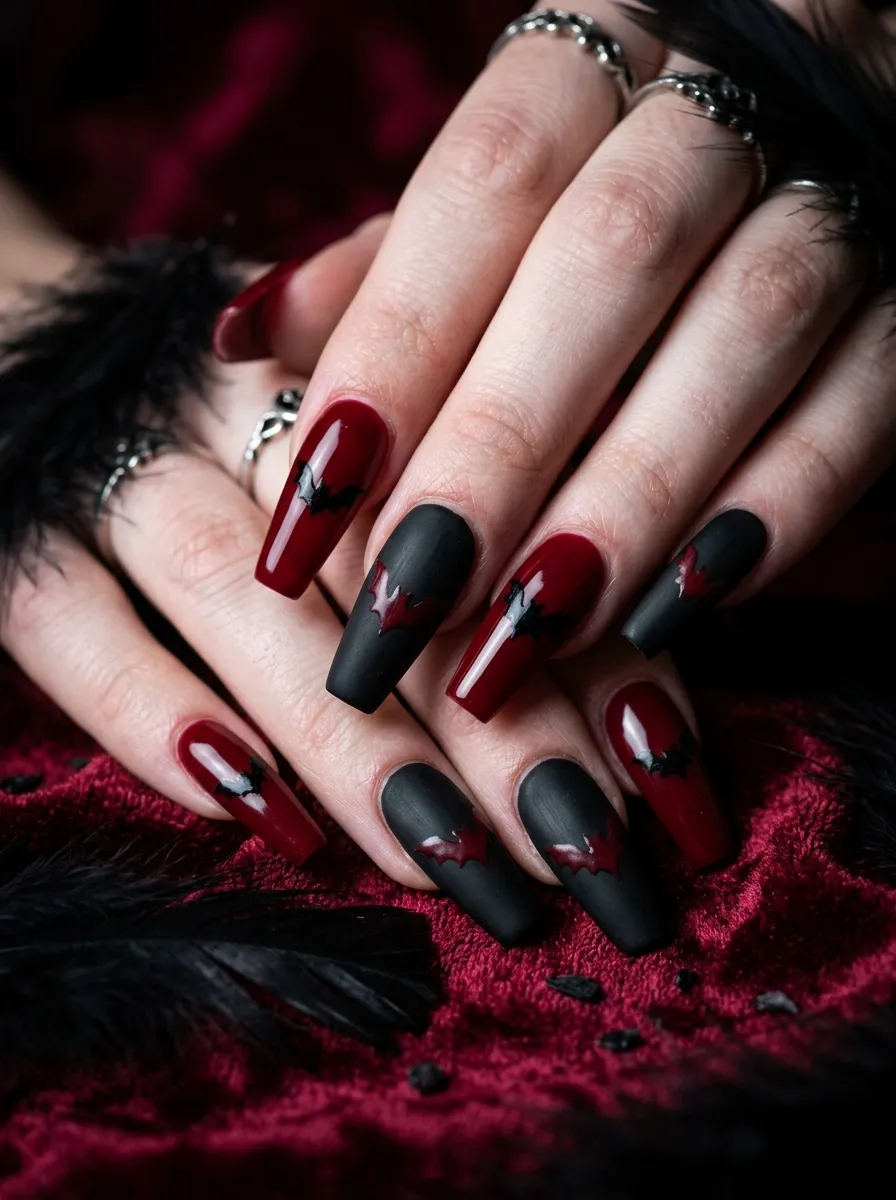
Red and black together create one of the most intense color combinations in dark nail art. Adding bat silhouettes to this palette gives the look a vampire-inspired, gothic-romance quality that is hard to ignore.
Try alternating your nails between deep blood red and matte black. On the red nails, paint small black bat shapes. On the black nails, paint bats in red. The alternating pattern creates visual rhythm and makes the design feel intentional rather than random.
You do not need expensive polishes to pull this off. A deep red and a true black from any drugstore brand work perfectly. The key is making sure both polishes are fully dry between coats so the colors stay clean and do not bleed into each other.
If painting freehand bats feels too difficult, try using a bat-shaped hole punch on black nail wraps or nail foil. Cut out the shapes and press them onto your tacky topcoat. The foil bats catch light differently than painted ones and add a bit of shimmer to the design.
This color combination also works brilliantly as a seasonal look. It reads as Halloween-ready in October but honestly looks great year-round for anyone who loves dark and dramatic aesthetics. Pair it with a deep red lip for maximum impact.
Watercolor Smoky Bat Nails
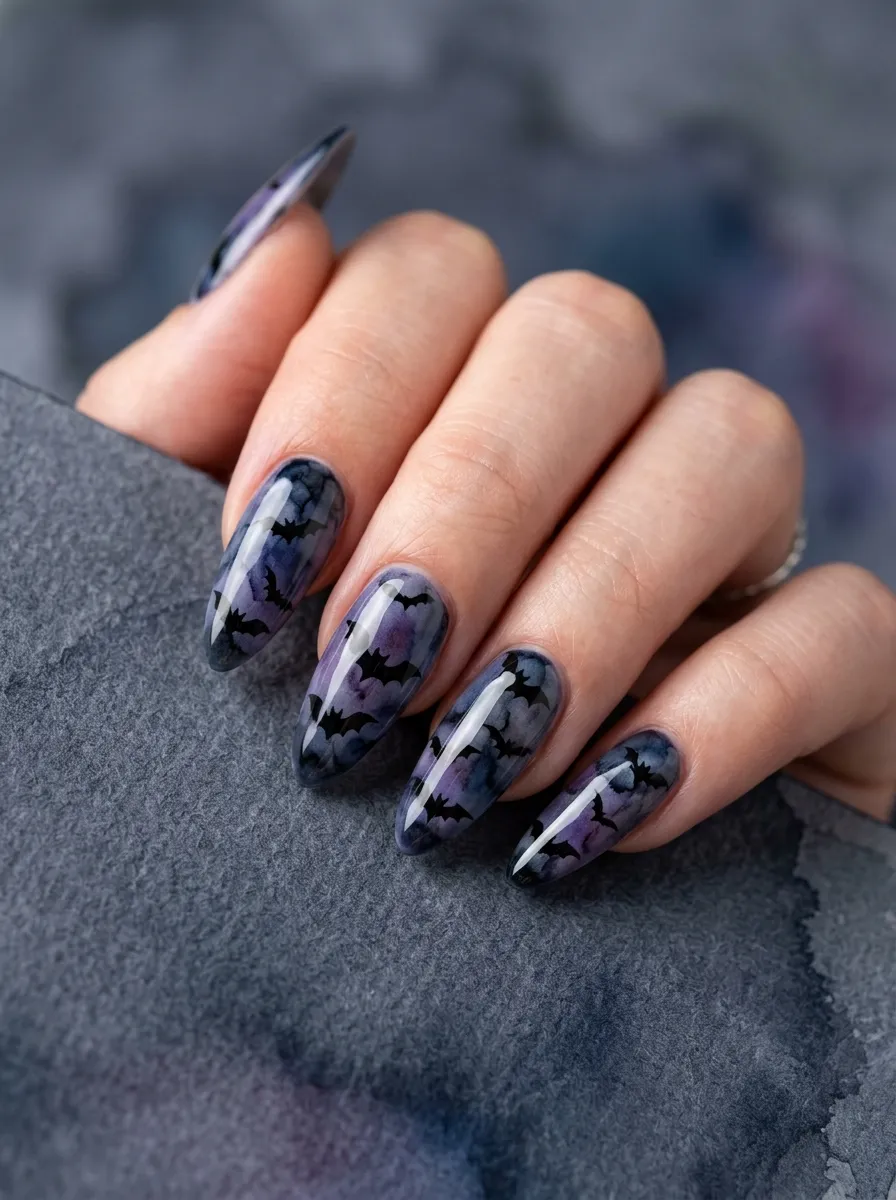
The watercolor nail technique creates a soft, painterly background that makes bat silhouettes look like they are flying through a moody evening sky. It is one of the most artistic-looking bat nail styles but it is actually quite achievable at home.
To get the watercolor effect, apply a thin layer of clear base coat and let it get slightly tacky. Then drop tiny amounts of dark grey, navy blue, and purple polish onto the nail and quickly spread them with a small brush before they dry. The colors should bleed into each other slightly to mimic the look of watercolor paint.
Work on one nail at a time so the polish does not dry before you blend it. Once the background is dry, use a thin black brush to add small bat silhouettes floating across the surface.
Budget tip: you can thin out regular nail polish slightly with a drop of nail polish thinner (not acetone) to make it spread more like watercolor. This gives you a more translucent, layered effect.
This design looks beautiful in photos and gets a lot of compliments in person. The organic, hand-painted quality of the background combined with the precise bat shapes creates a contrast that feels genuinely artistic. Seal with two coats of glossy topcoat to protect the design since the blended background can be fragile without proper sealing.
Glow-in-the-Dark Bat Nails
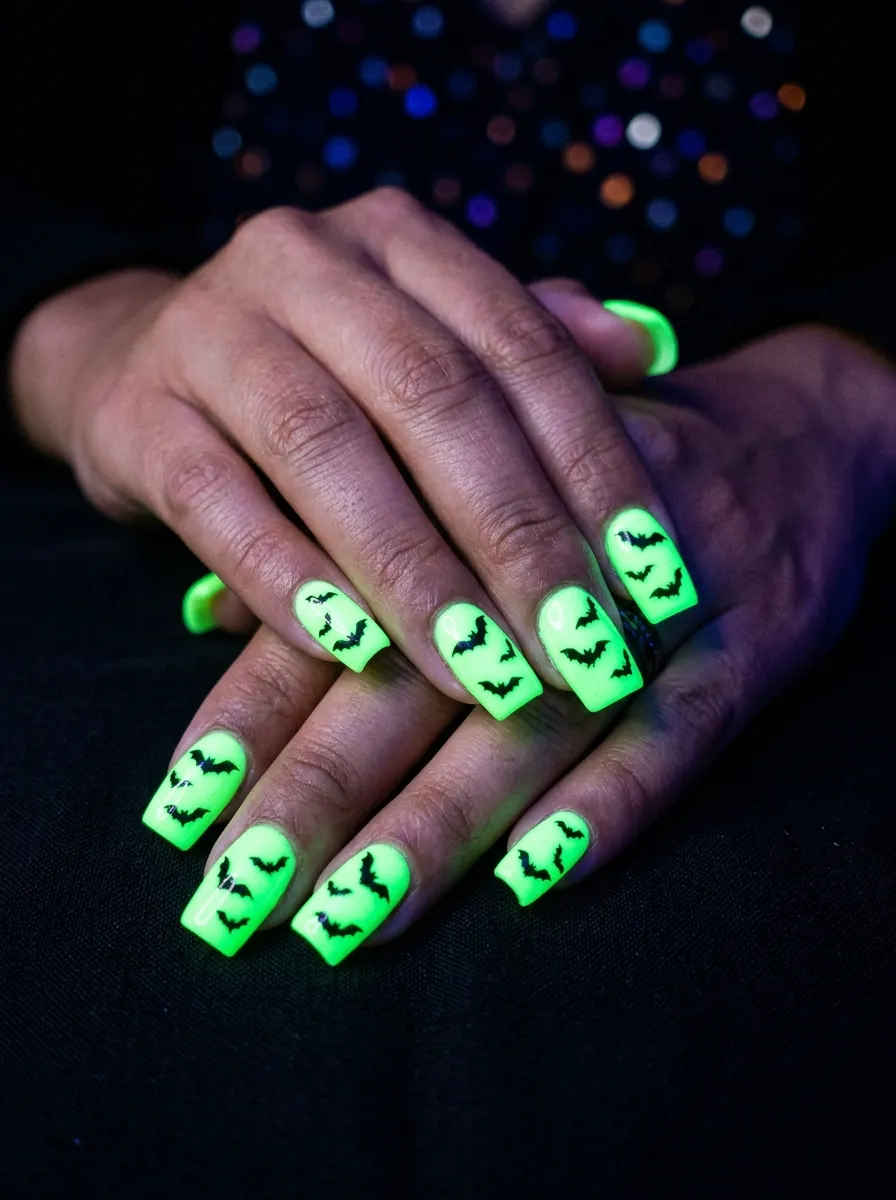
Glow-in-the-dark bat nails are genuinely thrilling to wear to concerts, clubs, or Halloween parties. Under normal light they look like classic black-on-white or pastel nails. Under UV blacklight or in the dark, the glow pigment activates and your bat nails suddenly look supernatural.
Glow-in-the-dark nail polishes are widely available online and in beauty supply stores for under five dollars a bottle. Apply two coats of the glow polish as your base. Let it dry completely, then paint black bat silhouettes on top using a thin nail art brush.
In daylight the glow base reads as an off-white or pale yellow-green, which makes the black bats stand out cleanly. In darkness or under blacklight, the base glows intensely while the solid black bats stay dark and create a dramatic negative effect.
You can supercharge the glow by charging the nails under a bright lamp or direct sunlight before going out at night. The longer you charge the polish, the brighter and longer it glows.
This is one of the most crowd-pleasing bat nail designs because the reveal moment, when someone sees your nails go from ordinary to glowing, is always a hit. It also photographs beautifully under blacklight for Instagram or social media content.
Coffin Bat Nails With Moon Details
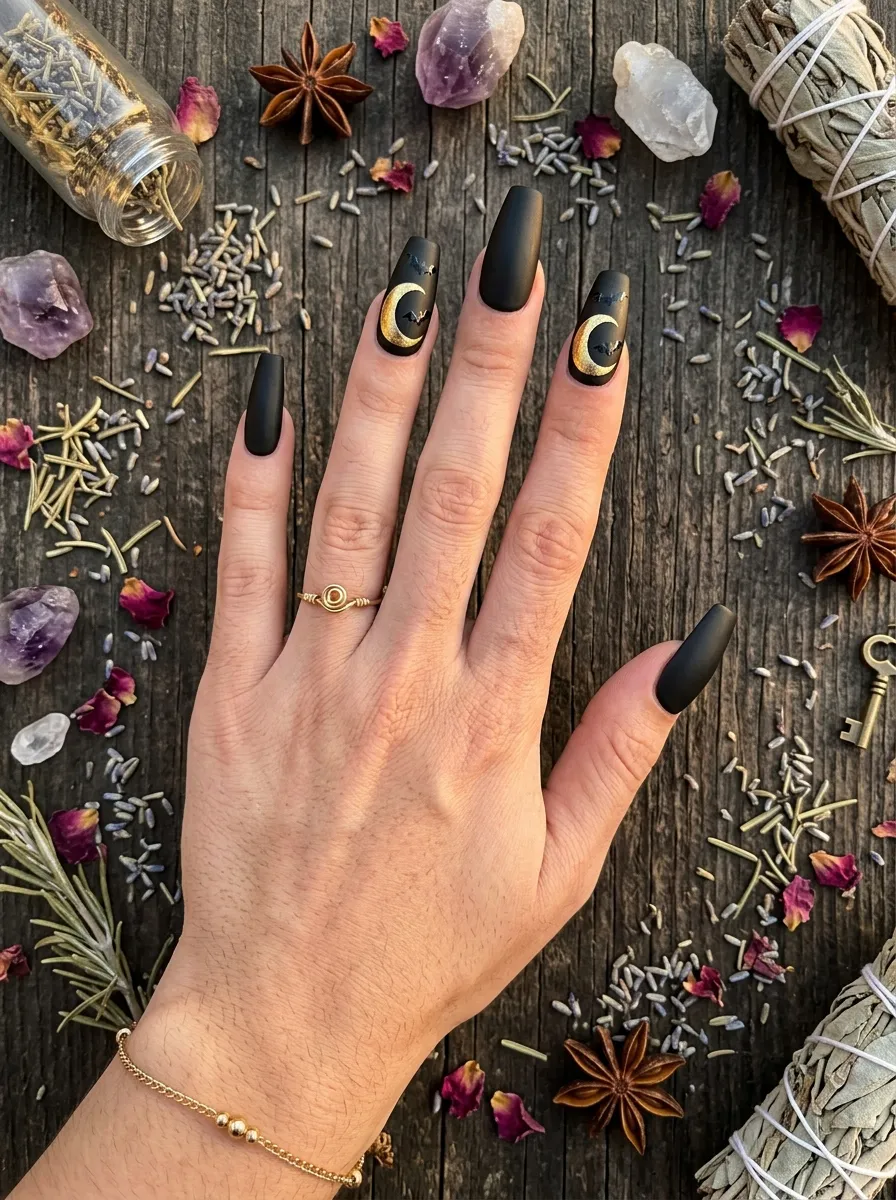
Coffin nails have a built-in drama to them because of their tapered, flat-ended shape. Adding bat silhouettes and a crescent moon to this nail shape takes things to a completely different level of gothic elegance.
Paint all nails in matte black as your base. On your ring finger or middle finger of each hand, paint a small crescent moon using a metallic gold or silver polish. A detail brush makes this easy but you can also use a dotting tool to draw the curved line. Then add a tiny bat flying just beside the moon as if it is circling it.
On the remaining nails, keep things simple with just the matte black base or add a single bat silhouette for consistency.
The moon and bat combination together carry a lot of symbolic weight in dark aesthetics. They are a natural pairing that looks like it was carefully designed even when assembled from very basic tools.
For a budget approach, use a gold nail art pen instead of a brush and polish. These pens are available for around two dollars and give you precise control for drawing the moon shape. The fine tip makes it easier to get clean curved lines without needing a steady hand or professional experience.
Spider Web and Bat Nail Combo
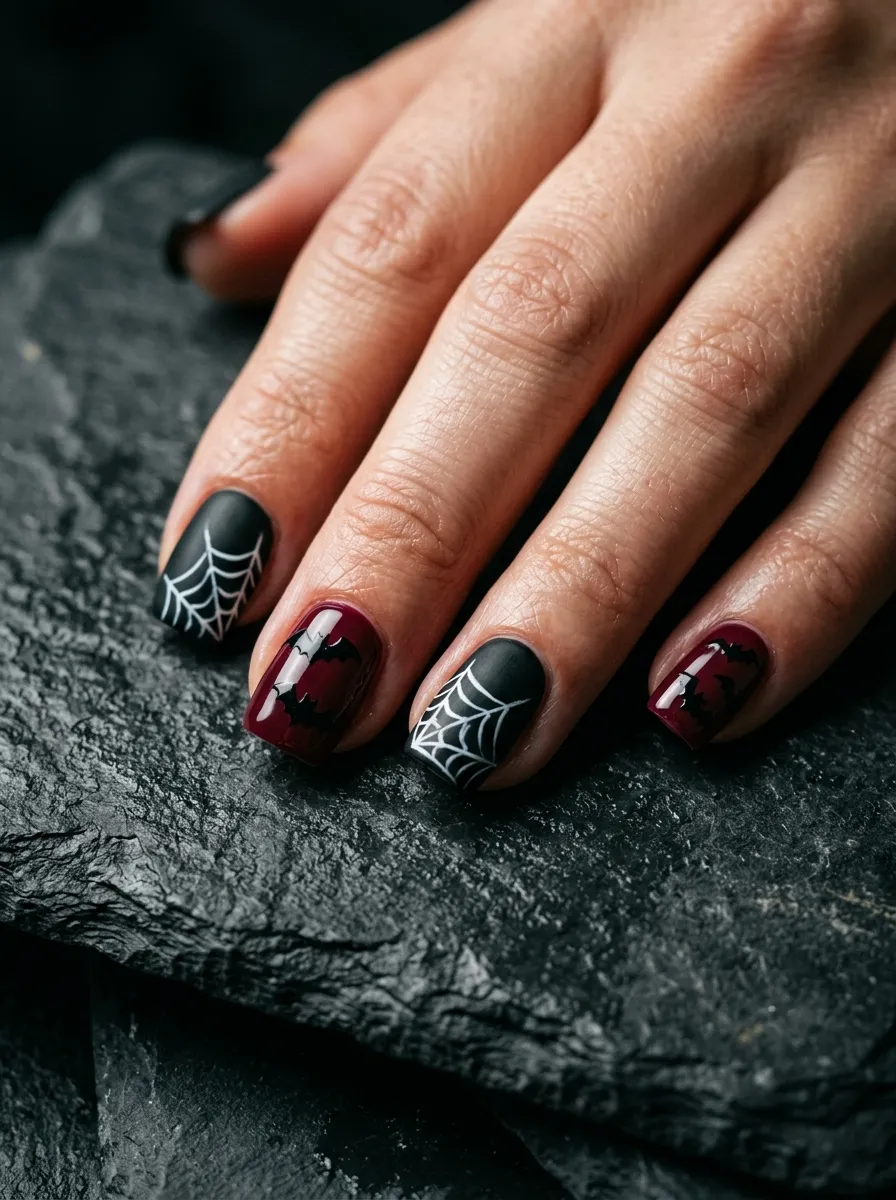
Pairing spider webs with bat silhouettes creates a fully haunted, textured look across your nails. The trick is to use the two designs on alternating nails so neither one overpowers the other.
On your black nails, paint a delicate spider web in white starting from one corner of the nail. Use a thin brush or a nail art pen and draw lines radiating from a single point, then connect them with curved lines to create the web structure. It takes a bit of practice but after two or three nails you will get a feel for the proportions.
On the alternating nails, paint bat silhouettes in a contrasting color like white, deep red, or metallic silver over a dark base. The contrast between the two detailed designs makes the full set look like a cohesive collection rather than a random mix.
You do not need to be perfectly neat. Spider webs and bats both read better when they have a slightly irregular, hand-drawn quality. Precision is not the goal here; personality is.
This design is a crowd favorite for Halloween but it can honestly be worn any time of year if dark aesthetics are your everyday style. Budget nail art pens in white and black are all you need along with two base polishes.
Minimalist Single Bat Accent Nail
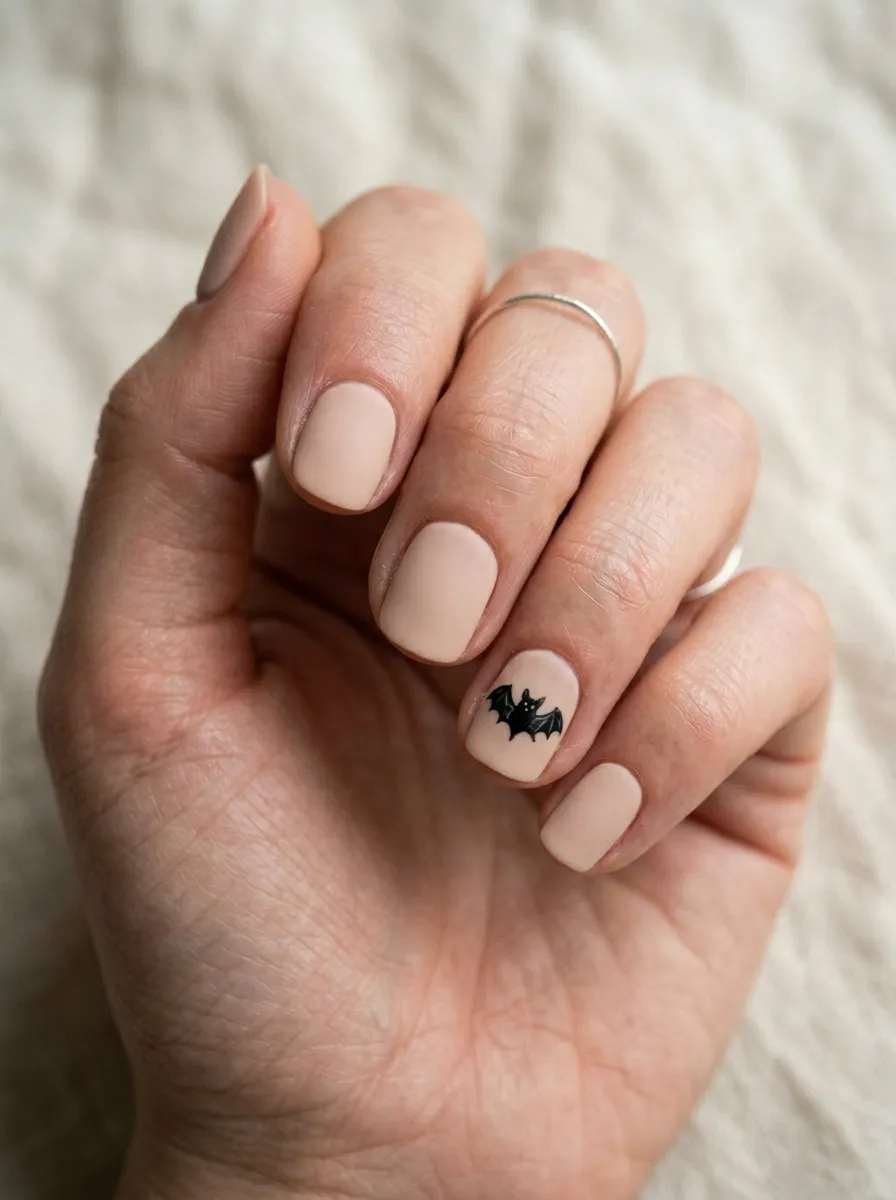
Not every bat nail look needs to be dark and dramatic from top to bottom. The minimalist approach places a single small bat on just one or two accent nails while the rest of the nails stay clean and simple. This is the most wearable version of bat nails for everyday life.
Choose a neutral or sheer base coat for your other nails. A light beige, a soft grey, or even just a clear coat all work perfectly. On your ring finger of each hand, apply one or two coats of the same neutral and then paint a single small bat in the center using a thin brush and black polish.
The bat does not need to be large. In fact, a tiny bat the size of a thumbnail is often more striking than a large one because it feels like a secret detail that people only notice when they look closely.
This approach is especially great for people who work in professional environments where elaborate nail art might not be appropriate. The overall look reads as tidy and understated at a glance, but the little bat gives it a personal edge.
You only need one nail art brush and one small bottle of black polish to do this design. It is genuinely one of the most affordable bat nail ideas on this list.
Foil Bat Nails
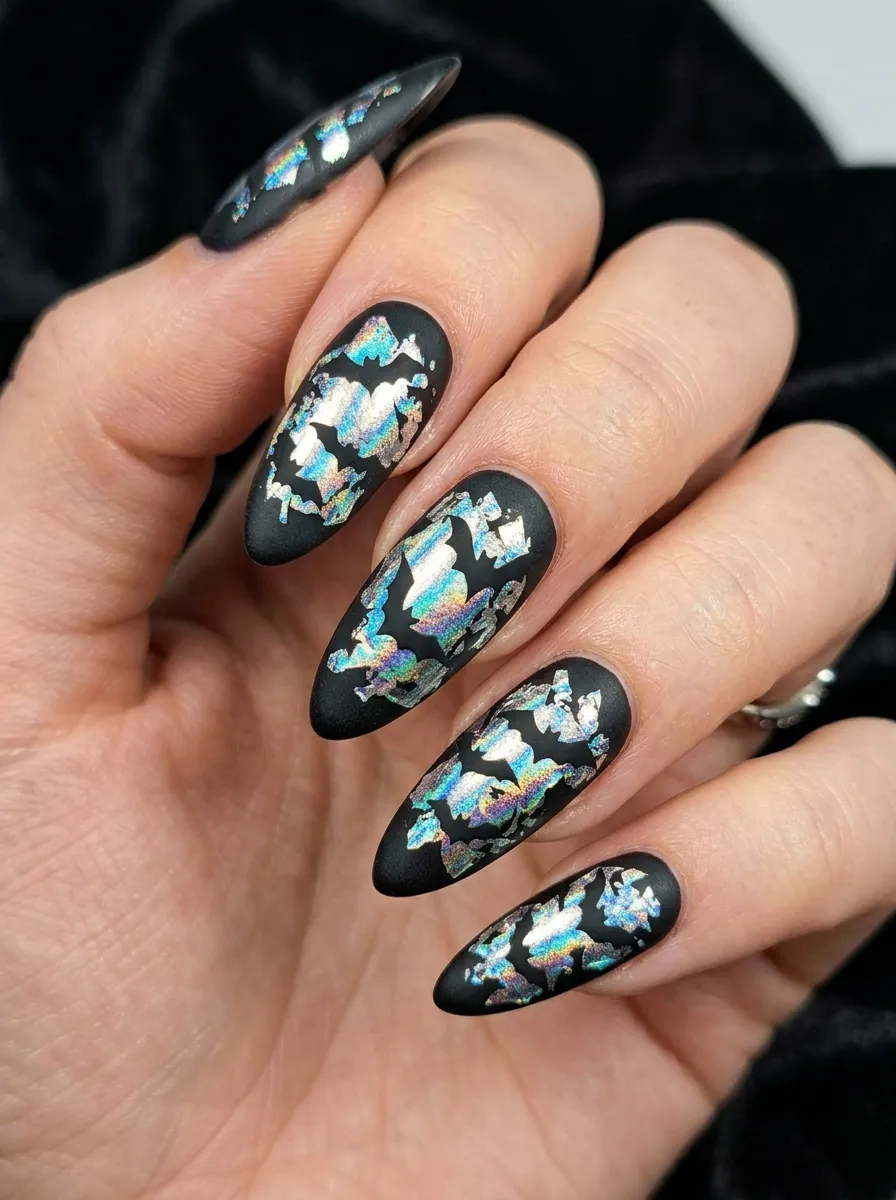
Nail foil creates a metallic, crinkled effect that is completely different from glitter. When you apply bat shapes over foil, the bats look like they are flying through a shattered mirror or a piece of the night sky caught in glass.
To apply nail foil at home, paint your nails in black and let them dry completely. Apply a thin layer of foil adhesive gel and let it get tacky (about sixty seconds). Press the foil sheet face-up onto the nail and peel back quickly. The metallic layer transfers onto the adhesive in patches and crinkles. You can apply it to the whole nail or just certain areas.
Once the foil is set and sealed with topcoat, use a fine brush and black polish to paint bat silhouettes on top. The contrast between the metallic foil and the flat black bat shapes creates incredible visual depth.
Nail foil sheets are extremely affordable. A multi-pack of different metallic and holographic foils typically costs under five dollars and gives you enough to do multiple full manicures.
Silver and gold are the most popular choices for this design but red and green foils give a more unexpected and unique result. This is one of the most photogenic bat nail designs you can do at home.
Dripping Blood Bat Nails
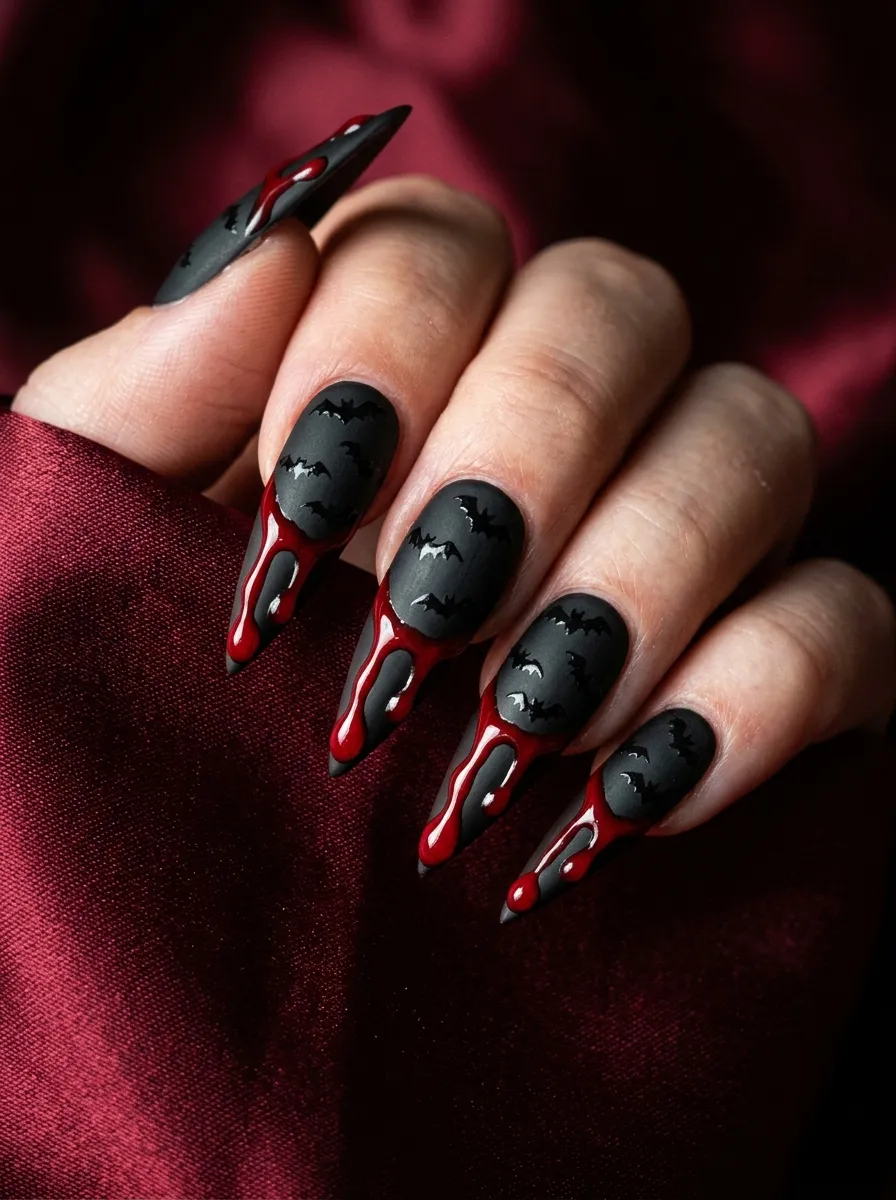
Dripping blood nails paired with bat silhouettes create a full gothic horror aesthetic that makes a real statement. The red drip starts at the tip of the nail and flows downward toward the cuticle while the bats rest on the black portion beneath.
To create the drip effect, paint your nails in matte black first. Once dry, load a thin brush with bright or deep red polish and paint a series of irregular drips starting from the tip area. Vary the lengths so some drips are long and others are short, ending in a teardrop shape at the bottom. This irregularity is what makes the drips look realistic.
Let the red dry completely, then add your bat silhouettes on the black base using a fine brush and black polish or a nail stamp.
The combination of red and black is naturally arresting and the drip detail adds a theatrical quality that makes people look twice.
For a budget version, skip freehand and use a red nail art pen to draw the drip lines. Nail art pens with fine tips are available for about two dollars and give you good control for the curved teardrop shapes at the bottom of each drip. Finish with a glossy topcoat over the red areas to give them a wet, fresh look that contrasts beautifully with the matte black base.
Bat Nails With Constellation Details
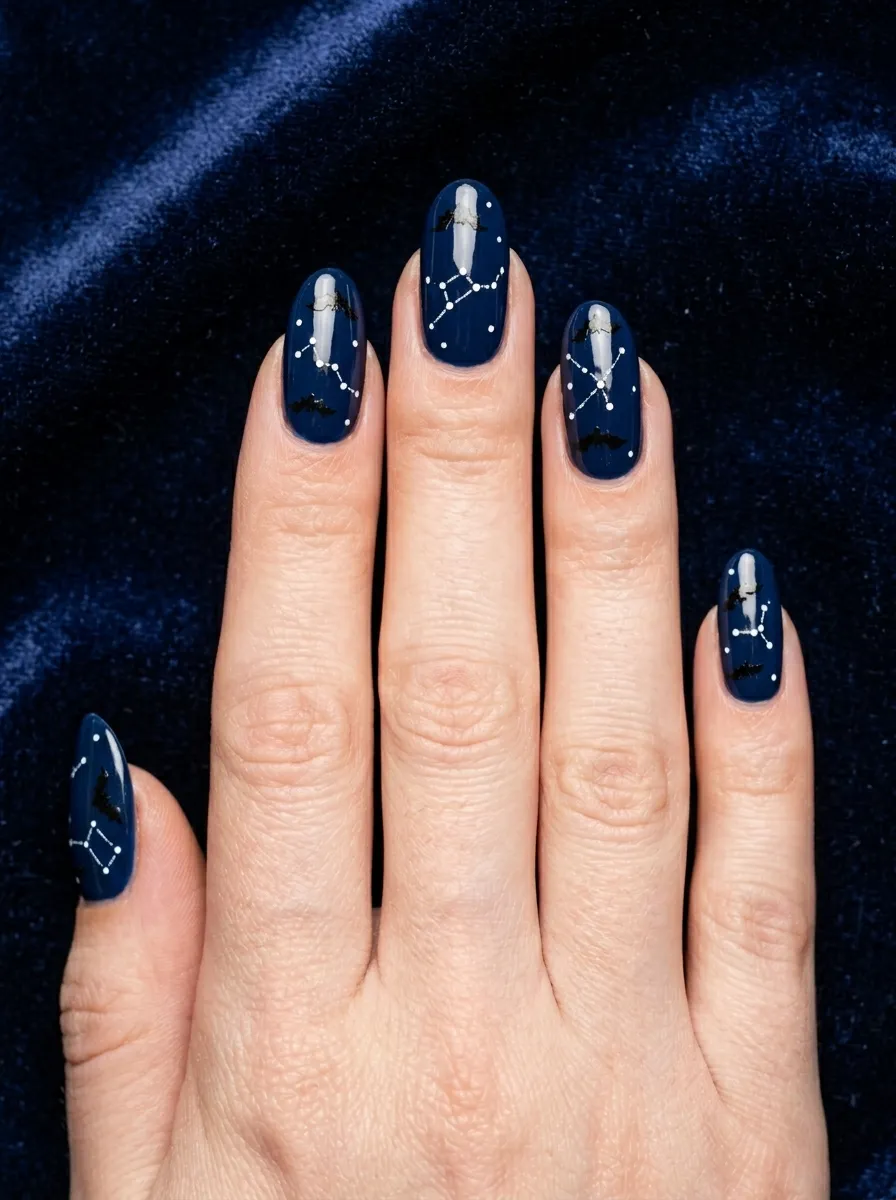
Constellation patterns alongside bat silhouettes give your nails a celestial, mystical quality that goes well beyond basic Halloween nail art. The stars and bats together suggest the kind of night sky scene you might find in a dark fairy tale.
Paint your nails in a deep navy blue or midnight blue base. Once dry, use a thin detail brush or a dotting tool dipped in white or silver polish to create tiny dots scattered across each nail. Group some dots in pairs or small clusters to suggest constellations rather than random stars.
Then add small bat silhouettes in black, positioned as if they are flying between the stars. Because the bats are the same dark tone as the base, they read as dimensional shapes emerging from the background rather than just painted on top.
A two-sided dotting tool is one of the most useful nail art tools you can own. The two different sizes let you make both large and small dots and they cost around one dollar to two dollars online or at craft stores.
This design works on any nail length and looks particularly beautiful on medium to long oval nails where there is enough surface area to fit both the constellation dots and the bat shapes without crowding. Deep navy, dark forest green, and charcoal grey all work as excellent base colors for this look.
Black and White Graphic Bat Nails
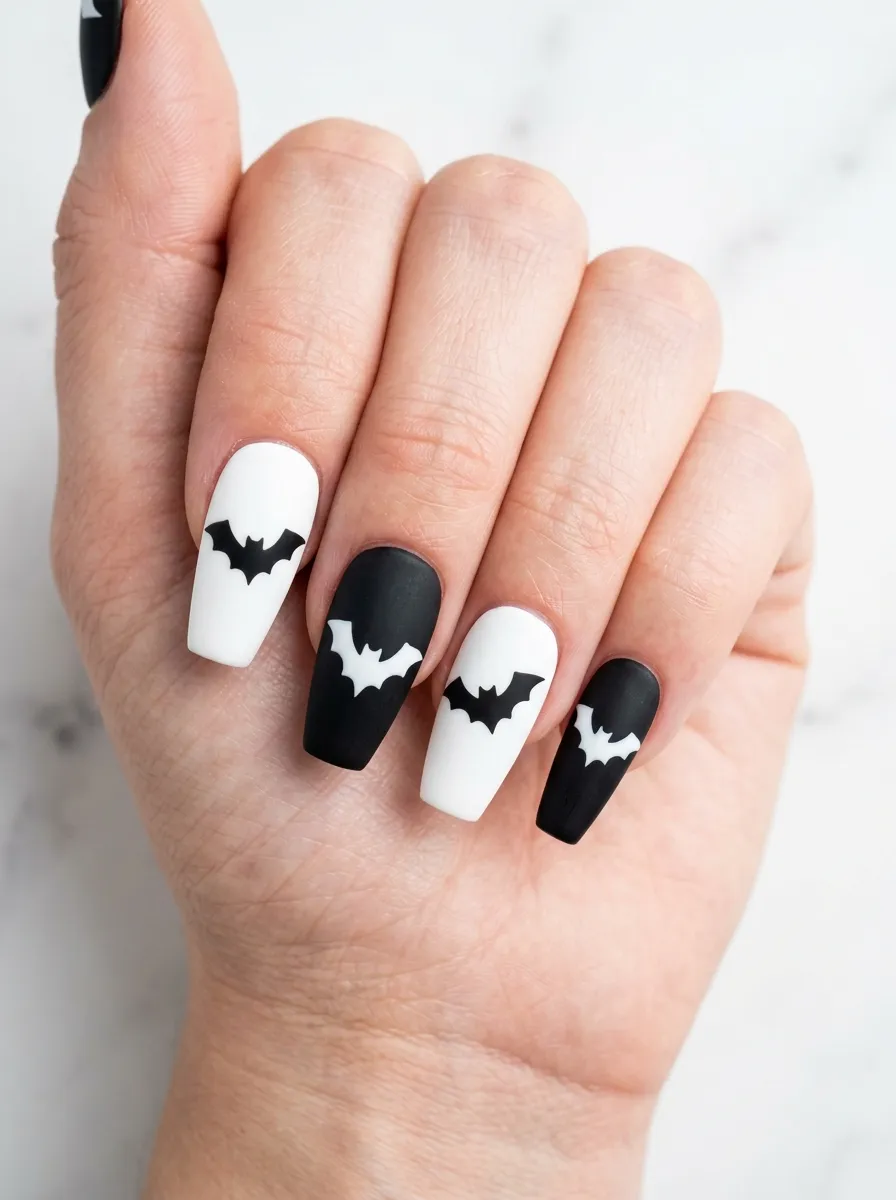
High-contrast black and white nail art has a graphic design quality that feels more fashion-forward than traditionally spooky. For bat nails, alternating between white and black nails with the opposite color bat on each creates a visually striking pattern.
Paint your thumb, middle finger, and pinky in solid white. Paint your index and ring fingers in solid black. On the white nails, paint bat silhouettes in black. On the black nails, paint bat silhouettes in white. The result is a repeated pattern that looks intentional and graphic.
White polish that is fully opaque can be difficult to achieve in one coat. Use two or three thin layers and let each dry fully for the best results. A good base coat helps the white stay bright and prevents staining.
This is one of the easiest bat nail designs in terms of color mixing because you only need two polishes. The challenge is in the painting itself, but a nail stamping plate with bat designs makes it effortless. Just use white stamping polish on black nails and black stamping polish on white nails.
The high-contrast result photographs beautifully and looks striking against all skin tones. This is a great design choice for someone who wants bat nails that feel editorial and stylish rather than strictly seasonal.
Neon Bat Nails on Black
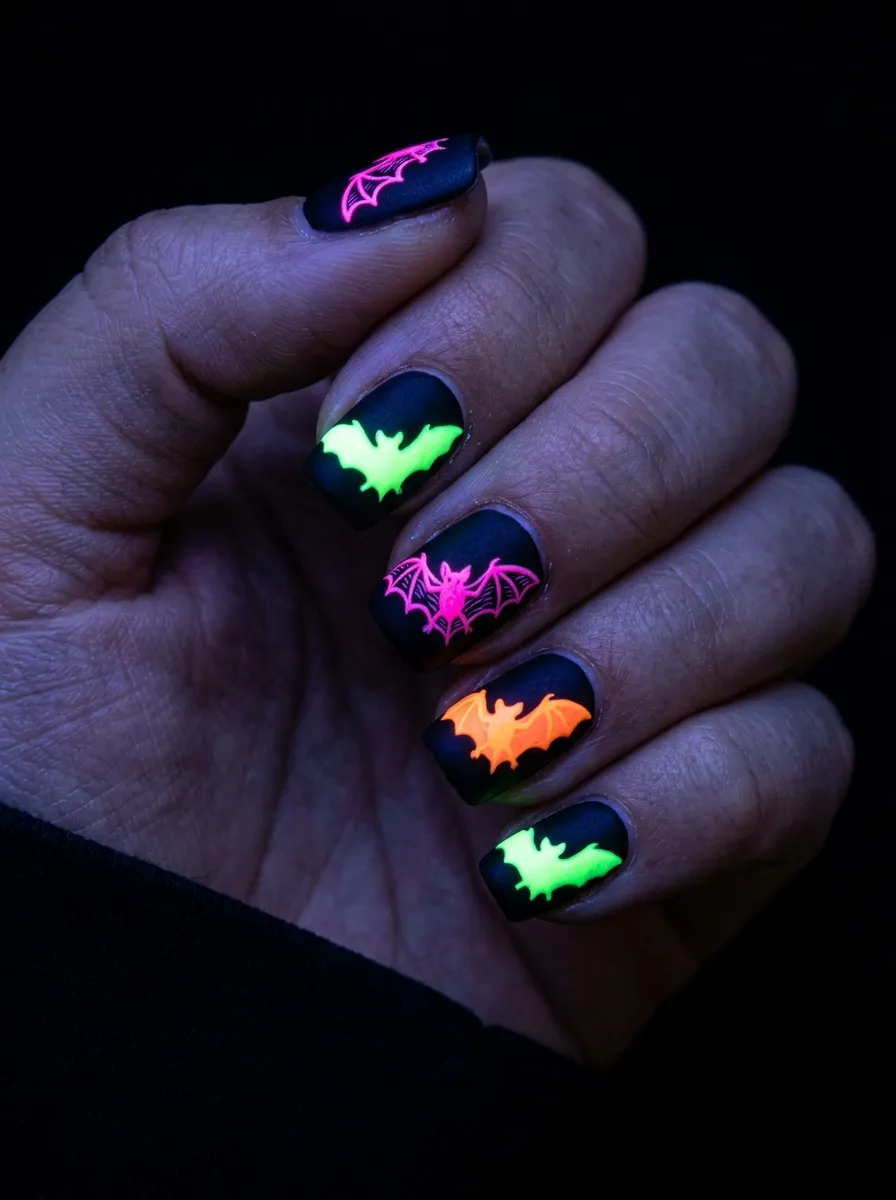
Neon colors against a black background create a look that is part goth, part rave, and entirely unforgettable. Painting bat silhouettes in neon green, hot pink, or electric orange on a matte black base completely flips the gothic bat nail concept into something energetic and unexpected.
Start with a matte black base on all nails. Once dry, choose two or three neon polish colors. Paint each bat on a different nail in a different neon color for a bold, collected look. Alternatively, use a single neon color across all nails for a more coordinated feel.
Neon polishes are widely available and often sold in value packs at discount beauty stores. They do need a white or pale base coat underneath to reach their full brightness on natural nails, but over black they read more as an artistic accent shade rather than a true neon. That contrast is what makes the design so interesting.
Under UV blacklight, neon polishes that contain fluorescent pigments will glow dramatically. This makes neon bat nails a fantastic choice for events with blacklights.
The combination of matte black and vivid neon is a look that bridges multiple aesthetics, from gothic to pop art, which makes it one of the most shareable and photographable bat nail designs on this list.
Vintage Halloween Bat Nails
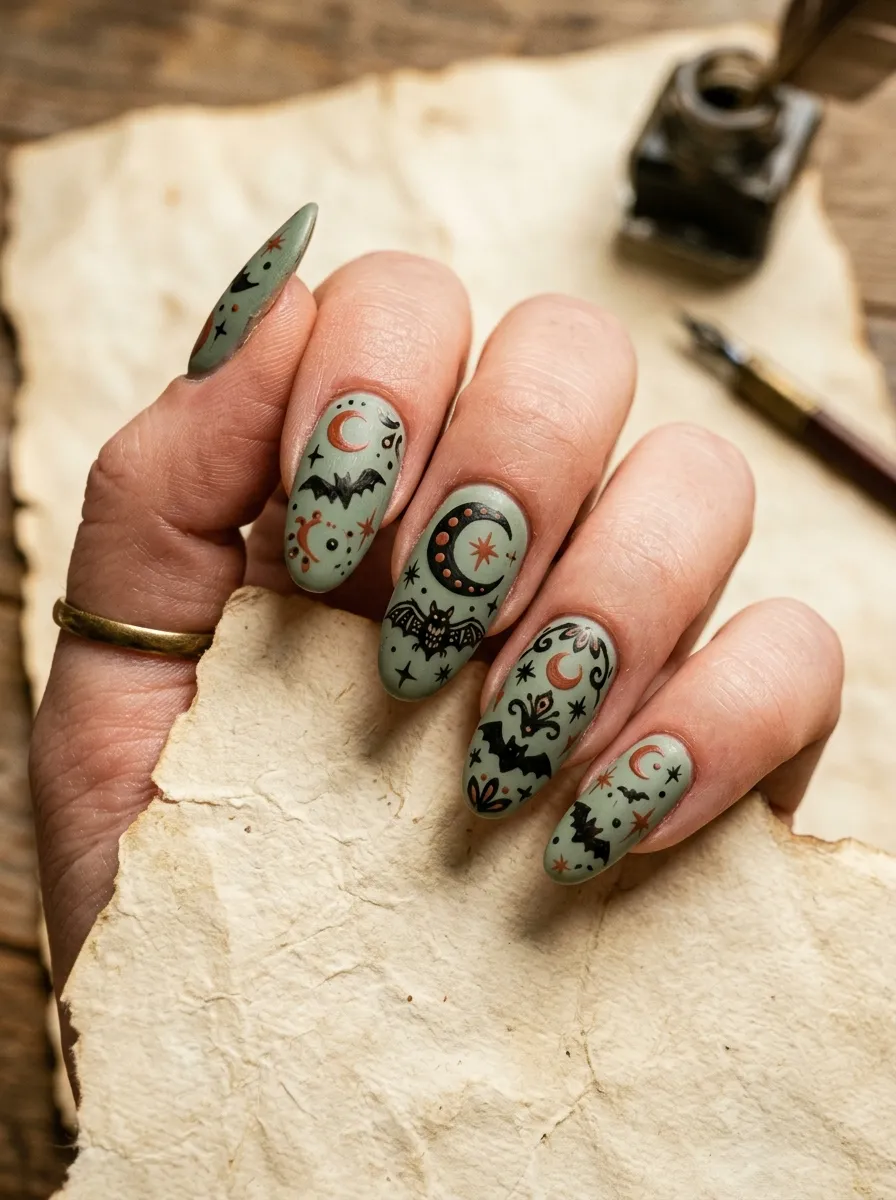
Not all bat nail art needs to be dark and brooding. The vintage Halloween aesthetic takes inspiration from old postcard illustrations and uses muted, earthy tones to create a charming and nostalgic bat nail look.
Think dusty sage green, terracotta orange, mustard yellow, and faded cream as your base colors. Paint each nail in a different muted shade and then add small hand-drawn bats in black or deep brown over each one. You can also add tiny stars, crescent moons, or pumpkin shapes alongside the bats for a full vintage Halloween vibe.
This design leans heavily on the hand-drawn, imperfect quality of the art. Do not stress about perfectly smooth shapes. Slightly wobbly bat wings and uneven stars actually add to the vintage, handmade charm of the look.
Budget tip: autumn nail polish sets with earthy and muted tones are sold in multi-packs during fall seasons at discount stores and drugstores for a very low price. You can often find sets of six or eight colors including all the shades you need for this design.
Finish with a matte topcoat rather than glossy to give the nails a flat, aged quality that really sells the vintage aesthetic. This is one of the most unique bat nail designs because it stands apart from the usual dark palette.
Lace and Bat Nails
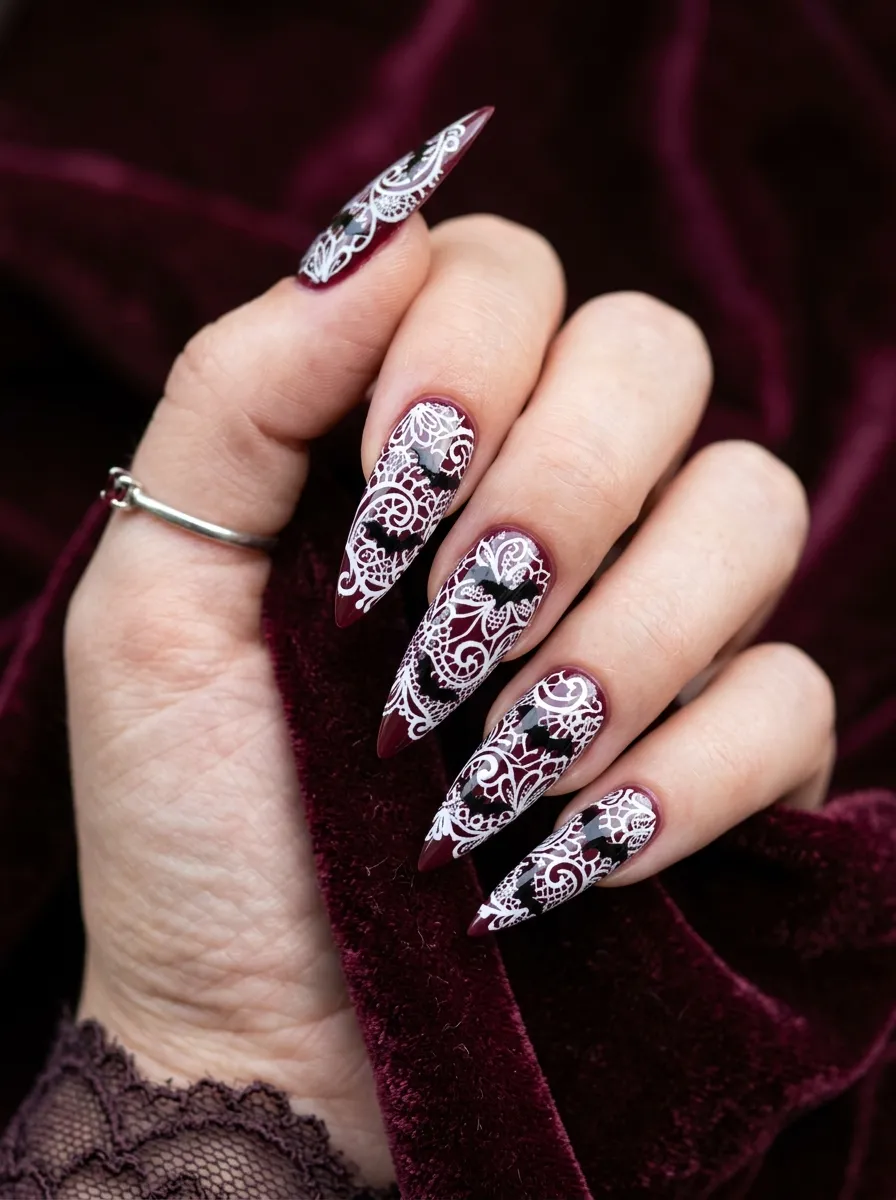
Lace nail art combined with bat silhouettes creates the perfect gothic romance aesthetic. The delicate white lace pattern against a dark base gives the nails a Victorian quality, and small bats placed within the lace pattern complete the dark fantasy look.
To create lace nails without advanced skills, look for lace-pattern nail stickers or nail wraps. These are sold online for just a few dollars per sheet and peel onto your nail like a sticker. Place them over your dried base color and seal with topcoat. Then add tiny bat silhouettes on top using a detail brush or a bat nail stamp.
If you want to freehand the lace, use a thin white nail art pen to draw loose floral shapes and connecting lines across the nail. It does not need to be technically perfect because lace by nature has a loose, organic structure.
Deep burgundy, black, and navy all work beautifully as the base color underneath lace patterns. The contrast between the dark background and the pale lace creates the kind of gothic elegance that lace has always carried in fashion and costume.
This design photographs incredibly well and looks extremely high-end despite being achievable with budget tools. It is one of the most impressive bat nail looks for anyone who wants to show off detailed nail art without spending a lot of money.
Ombre Bats with Rhinestone Accents
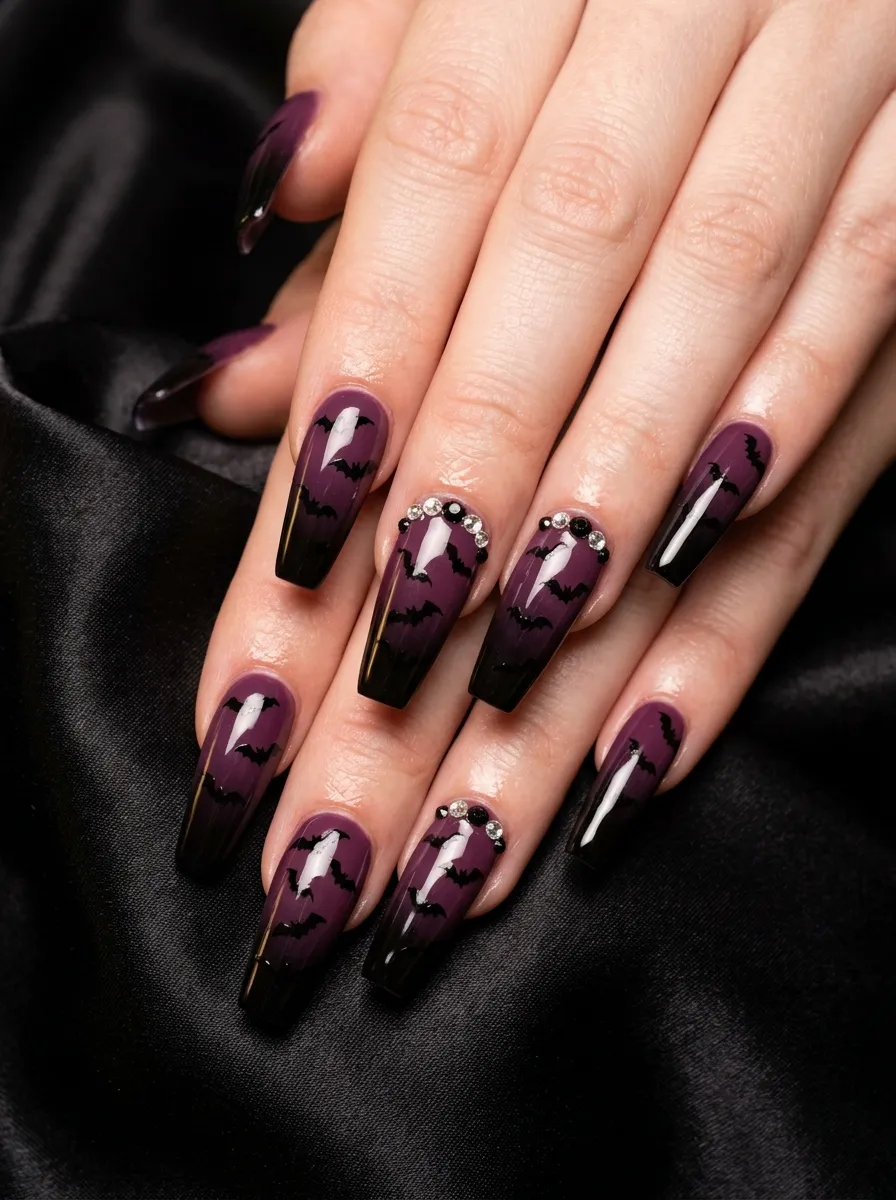
Adding rhinestones to bat nail art takes the design from cool to genuinely glamorous. The stones pick up light and create a jeweled quality that makes the dark bat aesthetic feel luxurious rather than just spooky.
Start with a deep ombre base using plum and black polishes blended with a sponge. Once dry, paint bat silhouettes across the nails. Then place a few small clear or black rhinestones along the cuticle edge or the base of one or two accent nails.
To place rhinestones, use a toothpick with a tiny dot of tacky topcoat on the tip. Touch the stone with the tacky toothpick, and it will pick up and transfer to your nail. Press it gently into a fresh layer of topcoat on the nail and let it set before applying a final sealing coat.
Rhinestones are very affordable when purchased in bulk. Small bags containing hundreds of mixed-size clear rhinestones cost just a dollar or two online. You can also find black, gold, and colored stones in the same price range.
This design looks like something from a professional nail salon but every component is budget-friendly and achievable at home. The rhinestones add just enough sparkle to balance out the darkness of the bat shapes and the deep ombre gradient beneath them.
Conclusion
Bat nails are one of those rare nail art styles that look genuinely impressive without requiring expensive tools or professional training. Whether you go for a simple stamped silhouette on matte black, a full glitter galaxy with painted bats flying through it, or a vintage-inspired folk art design in earthy tones, there is a bat nail look here that matches your skill level and your budget. Start with the design that excites you most, gather two or three basic polishes and a nail art brush, and give it a try. The beauty of nail art is that even if it does not come out perfectly, it grows back and you get another chance. Pick your favorite bat nail idea from this list, set aside thirty minutes, and let your fingertips do the talking.