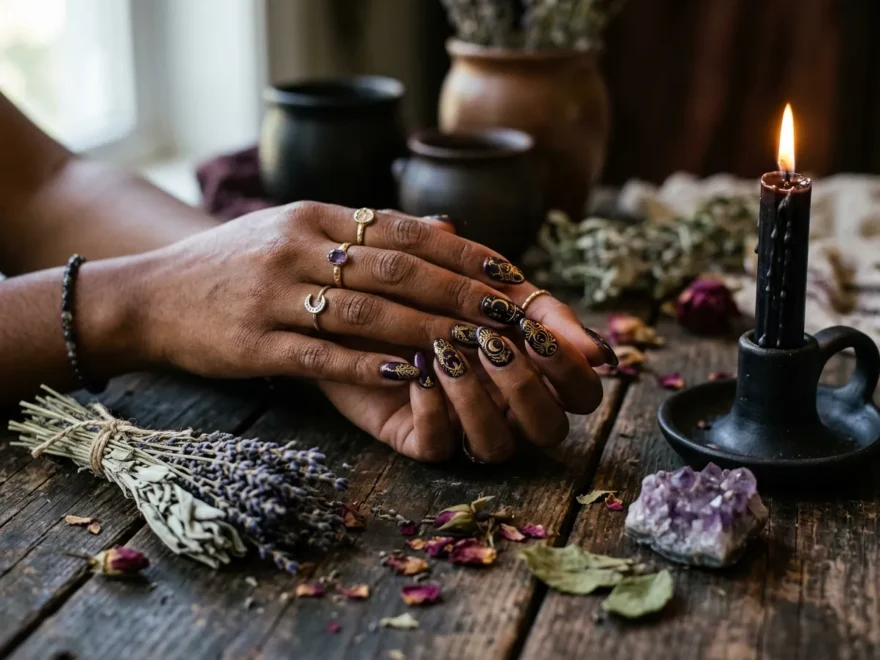
1. Midnight Black Coffin Nails
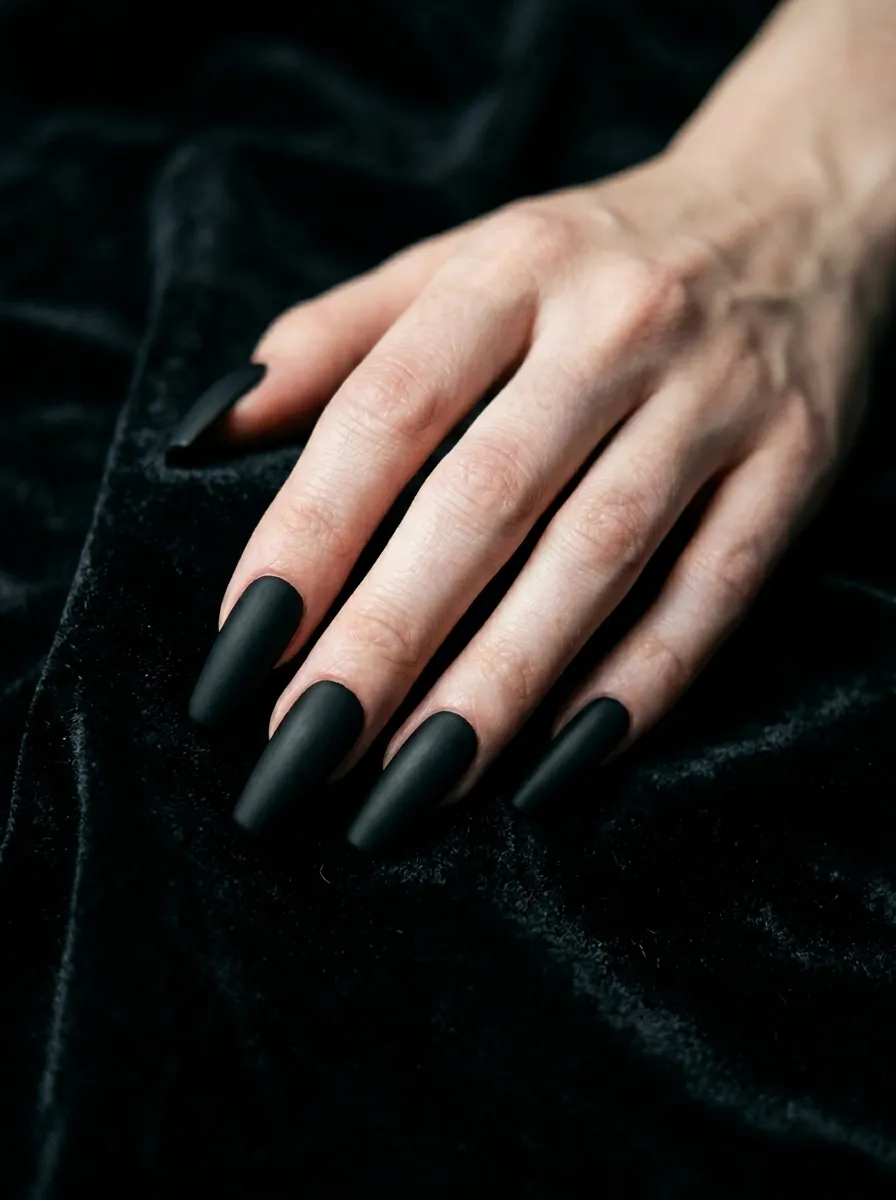
Matte black coffin nails are the foundation of the entire witchy nail universe. They are dramatic without being overdone. The coffin shape alone adds an edgy, angular energy that feels intentional.
Matte black polish is widely available and costs very little at drugstores. Brands like Sally Hansen or Sinful Colors carry great matte options under five dollars. You do not need a salon for this look.
To get a perfect matte finish at home, apply two coats of black polish and finish with a matte top coat. That is it. The shape is what makes the look.
If you already have long nails, ask your nail tech to file them into the coffin silhouette. If your nails are short, press-on coffin nails are a game changer. You can find full sets online for under ten dollars.
This look pairs well with a single silver accent nail or a tiny white moon stamped on the ring finger. Keep it simple and let the shape do the talking. Midnight black coffin nails never go out of style because they are not really a trend. They are a statement.
2. Crescent Moon Nail Art
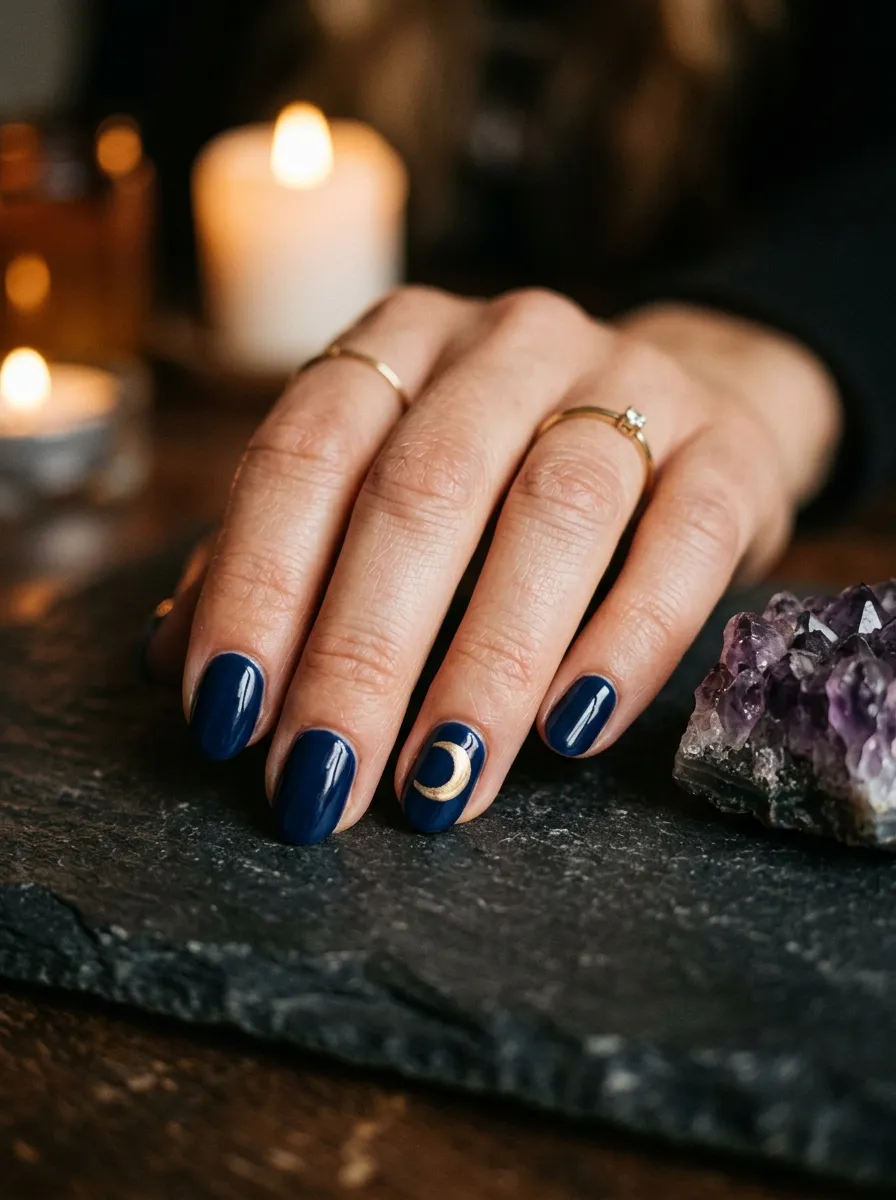
The crescent moon is one of the most recognized symbols in witchy culture. It represents cycles, intuition, and feminine energy. On nails, it looks effortlessly cool without requiring much skill.
A simple crescent moon design can be done at home using a thin nail art brush and gold or silver polish. Paint your base color first. Then use the brush to draw a curved arc near the base or tip of the nail.
You do not need to be an artist. Even a slightly wobbly moon looks intentional when done in metallic gold against a dark base. It reads as hand-painted and unique.
Try navy blue or forest green as your base with a gold moon. Or go reverse and paint a black moon on a silver base for something more modern and minimal.
Nail stamping plates also have moon designs if you want something more precise. A stamping kit costs around ten to fifteen dollars and is reusable for dozens of designs. One moon on one nail is enough to anchor the whole manicure. You do not need every finger to have detail. Let the crescent be the star of the set.
3. Spiderweb Tips
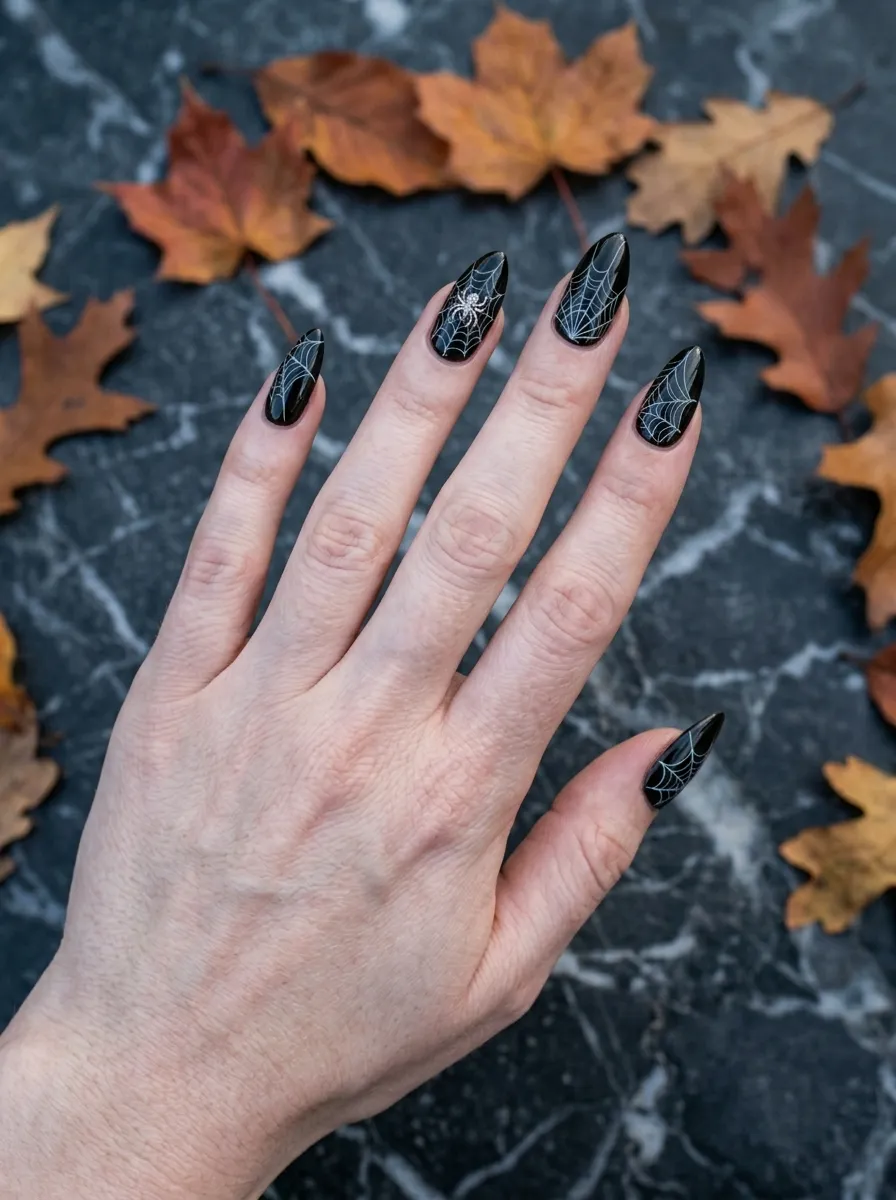
Spiderweb nail art has a playful edge that works beyond Halloween. When done on dark polish with fine white lines, it looks sophisticated and artistic.
The trick is using a dotting tool or a thin detail brush. Start with one dot in the corner of the nail. Draw straight lines radiating out from that center point like spokes on a wheel. Then connect them with curved arcs going from one spoke to the next. That is your web.
Practice once on paper before you do it on your nails. The technique comes quickly once your hand gets comfortable with the motion.
You can also find spiderweb nail stickers on Amazon or Etsy for a few dollars. These are a great shortcut that still looks polished and intentional.
Black base with white webs is the classic combo. But try a burgundy base with gold web lines for something warmer and more autumnal. Or use a nude base with black webs for a more wearable everyday version.
Spiderweb tips on just the ring and pinky fingers are especially effective. It keeps the design from feeling too busy while still delivering that witchy energy.
4. Smoky Purple Ombre Nails
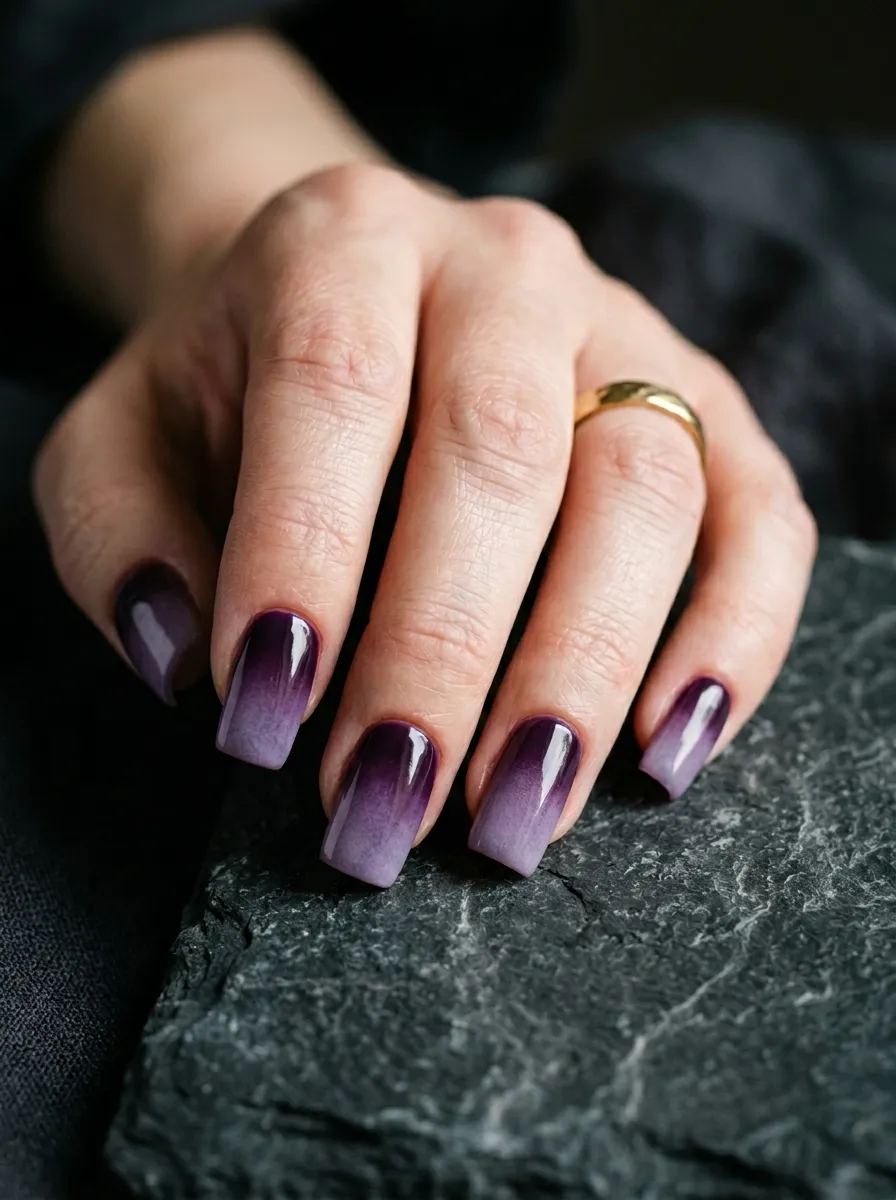
Purple ombre nails feel like fog rolling in over a dark forest. The color shift from deep to light creates a dreamy, ethereal quality that is very hard to achieve with a solid color alone.
Sponge ombre technique is the easiest way to do this at home. Paint two shades of purple onto a makeup sponge so they slightly overlap. Then press and dab the sponge onto your nail. Repeat until you get the coverage you want.
Clean up the edges around your nail with a small brush dipped in acetone. Then seal everything with a glossy or matte top coat depending on your preference.
Deep purple to lavender is the most popular combo for this look. But you can also try black to dark violet for something moodier, or deep plum to dusty pink for a softer witchy vibe.
This design works on any nail length and shape. Oval and almond shapes carry the ombre fade especially well because the curved tip makes the color blend look more natural.
This is a design that gets compliments constantly. And once you learn the sponge technique, you can apply it to endless color combinations well beyond purple.
5. Black Cat Nail Art
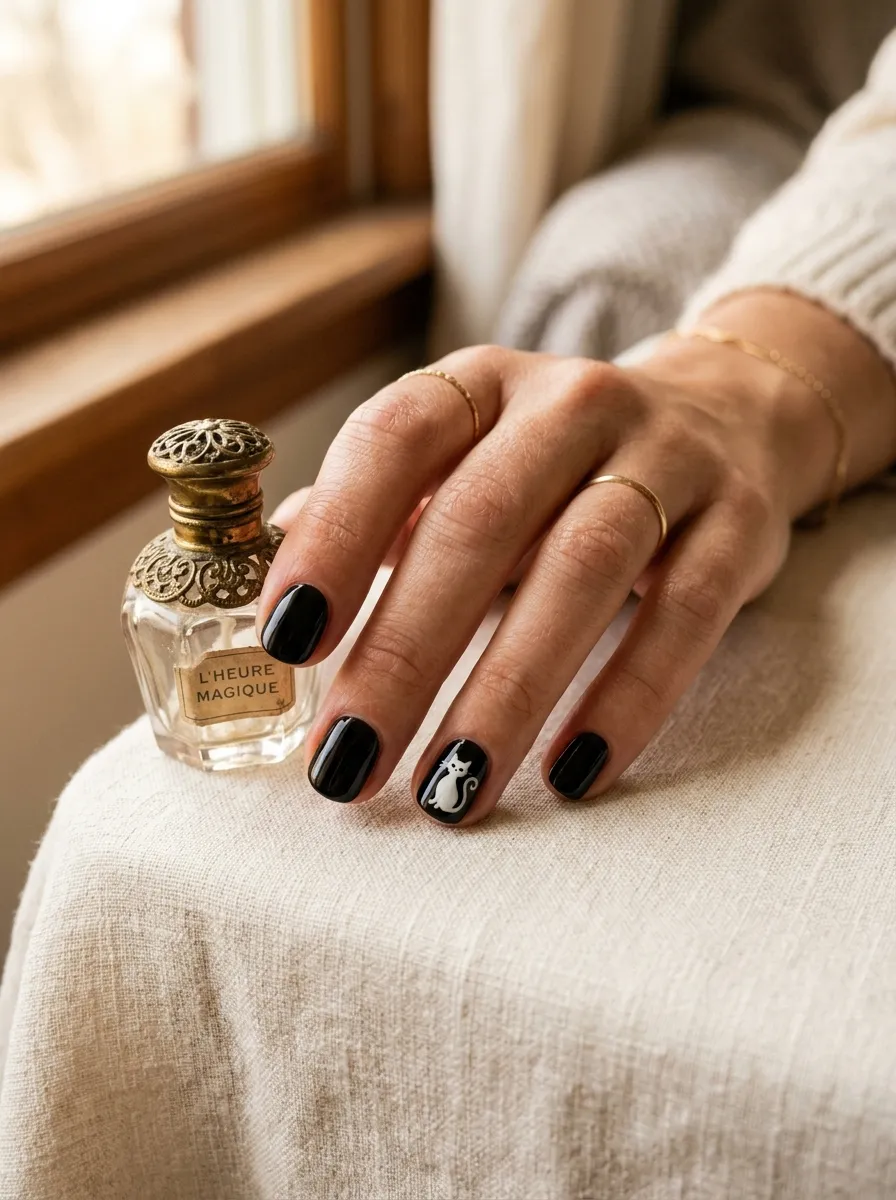
A tiny black cat silhouette on one accent nail is one of the sweetest witchy nail details you can add to any manicure. It is small, charming, and immediately recognizable.
You can paint a simple cat shape using a thin brush and white or black polish. The silhouette does not need to be detailed. A rounded body, pointed ears, and a curved tail are all you need to make it read as a cat.
Nail decals with cat designs are also widely available and incredibly easy to apply. Just cut the decal, place it on a dry nail, press it down, and seal with top coat. It takes under two minutes.
Black cats on a white or cream base look adorable. Black cats on a dark base in white are dramatic. Try a tiny sitting cat on the ring finger with solid color on the rest of the nails.
This design is friendly enough for everyday wear. It does not read as costume-y. It reads as playful and artistic, which makes it great for work environments that allow nail art.
If you want to push it further, try a crescent moon above the cat for a full witchy scene on one tiny nail. It sounds small but it makes a big impression up close.
6. Gold Foil Celestial Accents
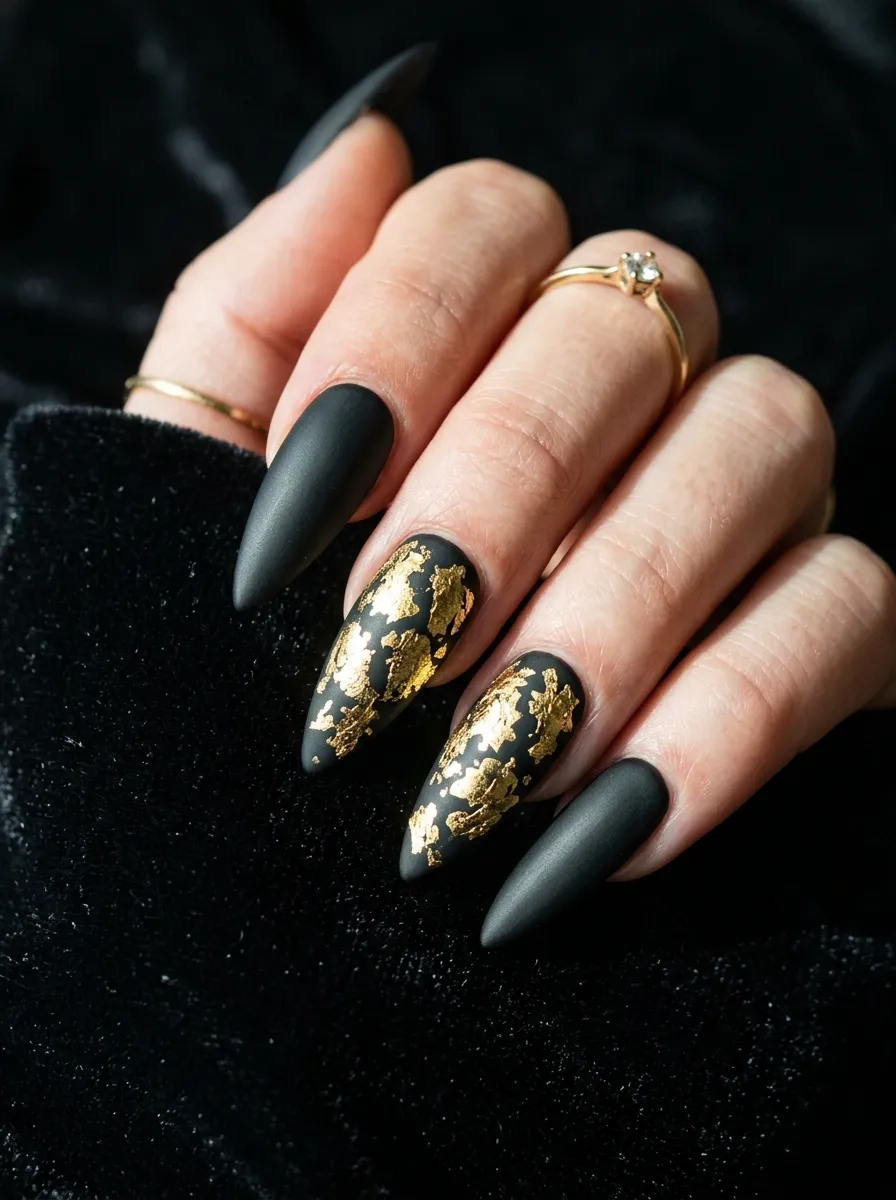
Gold foil on dark nails looks like something pulled from a celestial painting. The texture is irregular and organic, which makes it feel luxurious without looking overdone.
Nail foil transfer kits are cheap and easy to use. Apply a thin layer of foil glue to your dry base coat. Wait for it to become tacky. Then press the gold foil sheet against it and pull it away. The foil sticks to the glue in an uneven, artistic way.
You do not need to cover the whole nail. A partial foil accent near the base or scattered across the tip looks more interesting than a solid sheet.
This works best over black, dark green, or deep burgundy polish. The contrast between the dark matte and the shiny foil is what makes the effect so striking.
Foil kits are available at beauty supply stores and online for under ten dollars. One kit gives you enough foil for dozens of manicures.
Seal with a gel top coat if possible because regular top coat can sometimes dull the foil shine. Gold foil celestial accents can turn a simple black manicure into something that looks completely professional and salon-quality without the price tag.
7. Evil Eye Nail Design
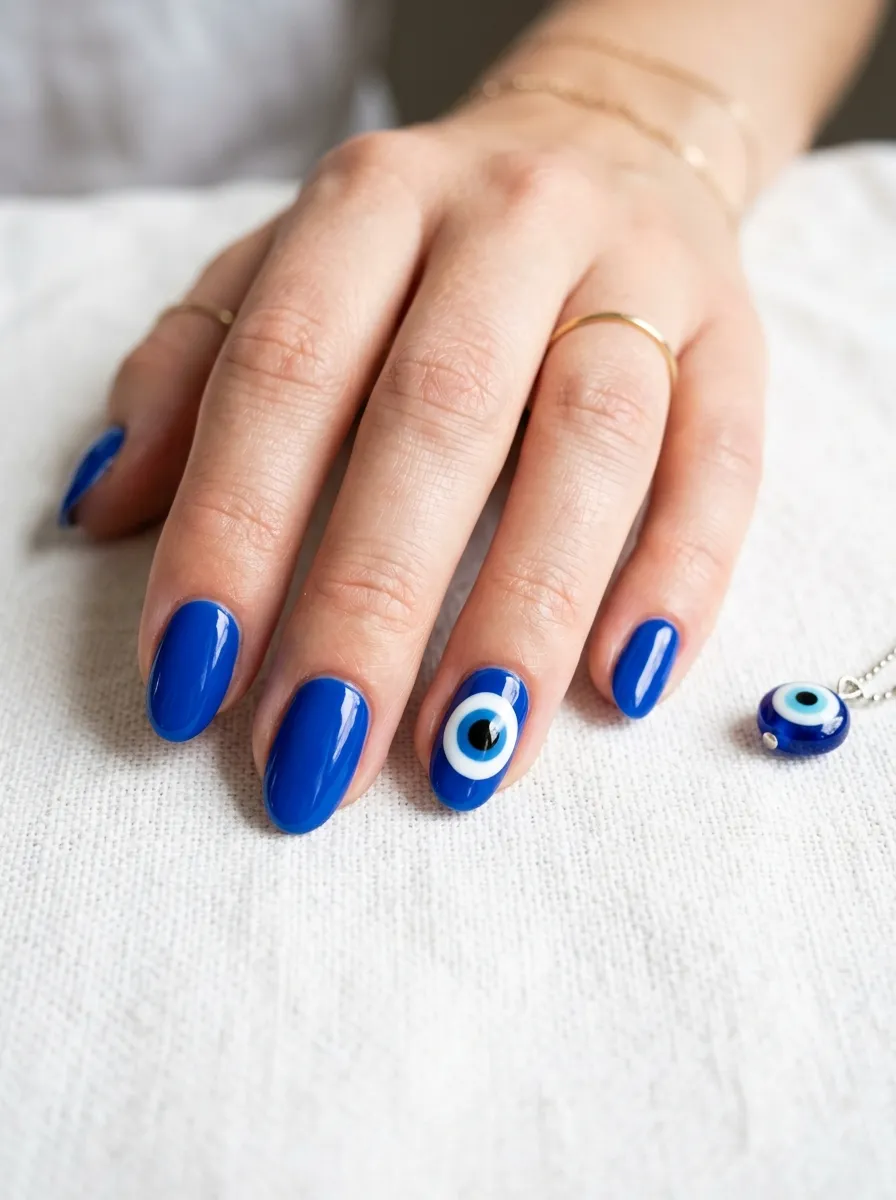
The evil eye symbol has deep roots in protective folklore. On nails, it looks geometric, striking, and full of meaning. It also photographs beautifully.
The classic evil eye uses concentric circles in cobalt blue, white, light blue, and black with a dark pupil and a white highlight dot. You can paint this freehand or use a dotting tool to keep the circles neat.
Start with the largest circle first and work inward. Each layer should be slightly smaller than the last. The dotting tool makes this much easier because it creates uniform dots and curves.
Nail stamping plates with evil eye designs also exist and give you crisp, consistent results. Look for stamping plates labeled with eye or mandala designs.
A cobalt blue base with an evil eye on the ring finger is a very popular combo right now. You can also place the eye on a nude or white base for something lighter and more delicate.
Evil eye nails are great for people who want meaningful nail art that does not feel too dark or gothic. It sits right on the edge between spiritual and stylish, which makes it one of the most wearable witchy designs on this entire list.
8. Dark Floral with Black Roses
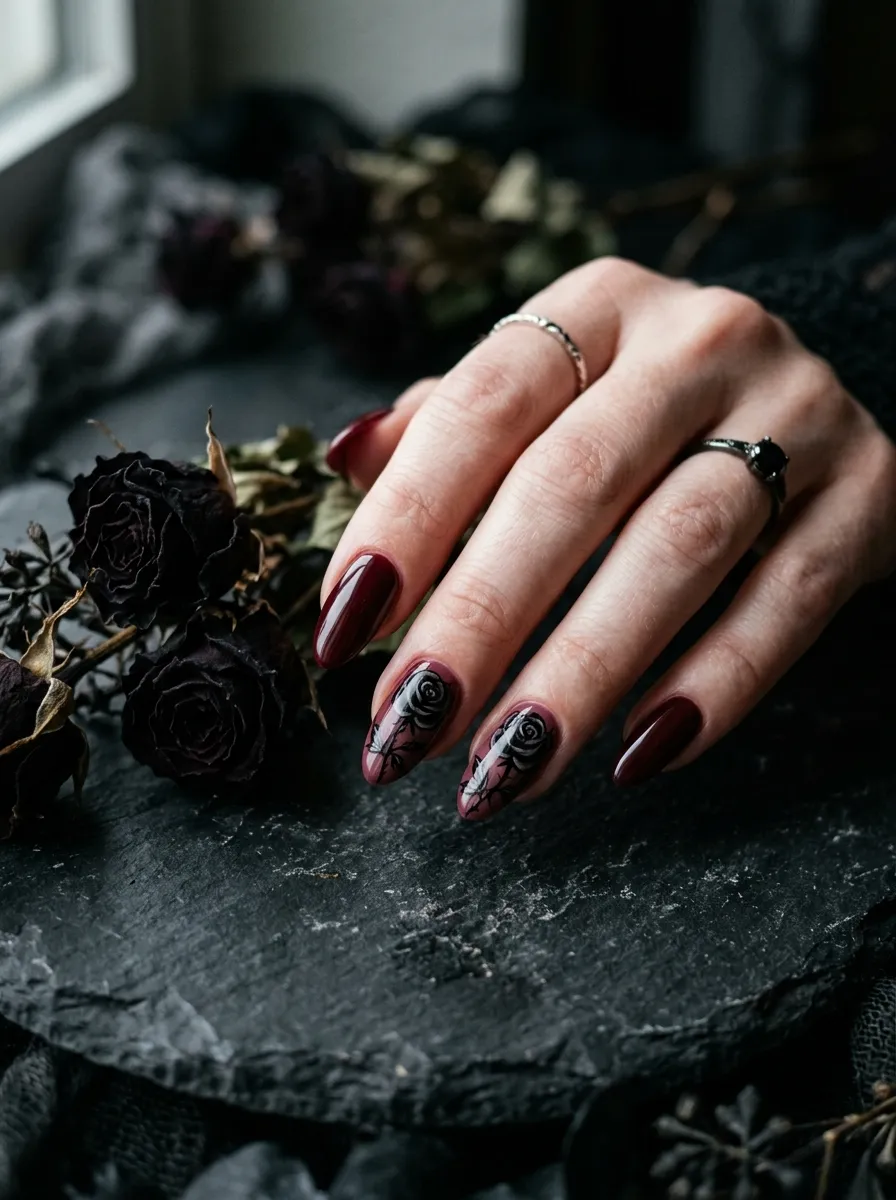
Black roses are one of the most romantic and dark symbols in gothic and witchy aesthetics. On nails, they feel dramatic, artistic, and completely timeless.
You can paint a simple rose using a small round brush. Start with a tiny spiral in the center and build petals around it in C-shaped strokes. It sounds complicated but with a little practice it becomes very natural.
Watch a few short nail art tutorials on YouTube first. Most people can paint a recognizable rose within one practice session. Use a very dark red or actual black polish for the petals.
For beginners, rose nail decals or water transfers are the easiest way to get this look without any painting skills. Water decal kits with rose designs are available for a few dollars online.
Place one or two roses on accent nails over a deep burgundy or forest green base. Let the other nails stay solid to keep the design balanced.
This look also pairs well with small leaves painted in olive or hunter green between the roses. A two-nail floral arrangement surrounded by solid dark nails is more than enough to create a stunning full set. Dark florals feel luxurious and are genuinely one of the most elevated witchy nail directions you can take.
9. Starry Night Galaxy Nails
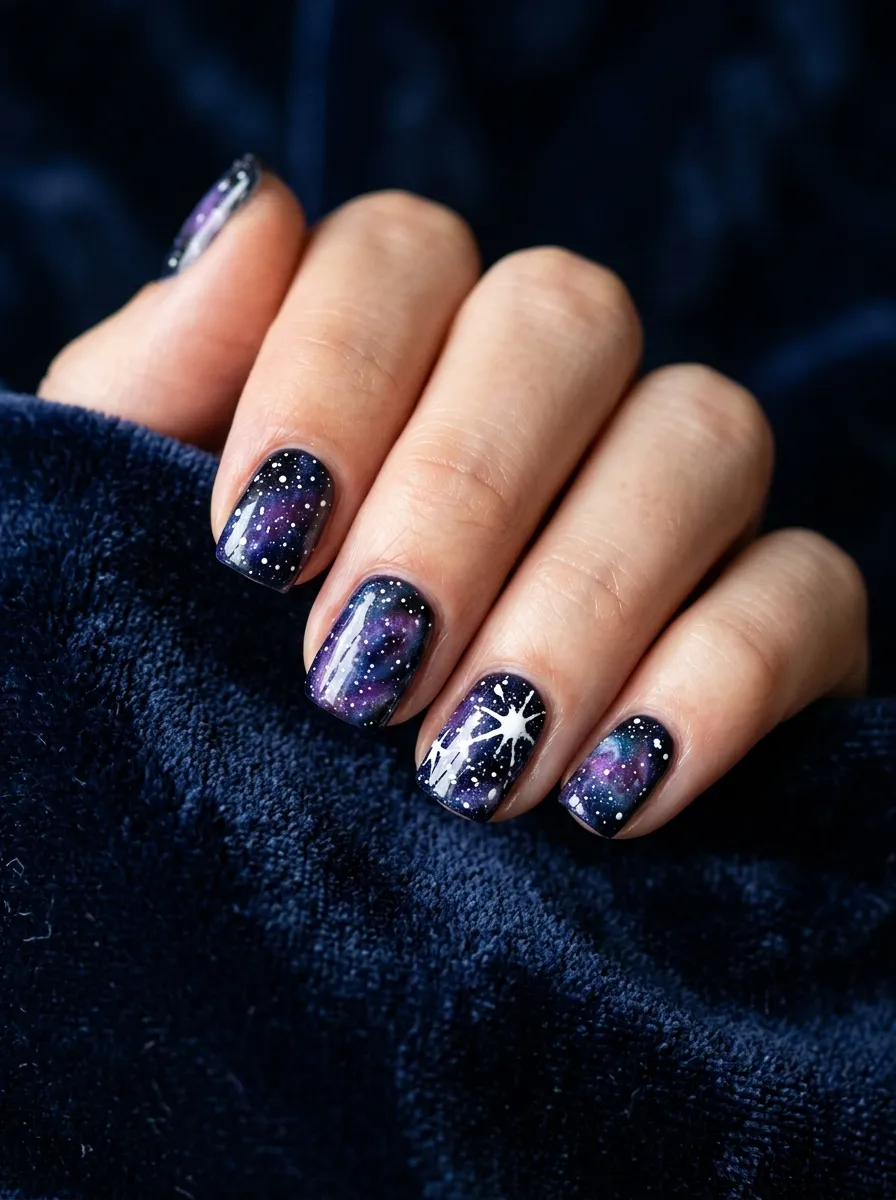
Galaxy nails feel like you are carrying a piece of the night sky on your fingertips. The color combinations are moody and atmospheric in exactly the right way for a witchy aesthetic.
The sponge technique works perfectly here. Use a makeup sponge to layer dark blue, purple, and a tiny bit of teal onto your nail, blending as you go. Work quickly before the polish dries.
Once your galaxy base is dry, use a fan brush or an old toothbrush to flick tiny dots of white polish across the nails to create stars. Keep your hand far from the nail so the dots land small.
This sounds messy but it is actually very forgiving. The irregular nature of the design means small mistakes just look like more galaxy texture.
Galaxy nails work on any length or shape. Short nails actually look great with this design because the compact space makes the colors feel more concentrated and intense.
You do not need special polishes for this. Any dark blue, purple, and black you have at home will work. A small bottle of white polish for the stars is the only extra item you need. This is a genuinely fun design to do at home on a quiet evening.
10. Witchy Green Potion Nails

Deep green nails have a witchy, apothecary energy that feels both mysterious and wearable. The right green polish looks like something bubbling in a cauldron and it photographs stunningly.
Jelly or glass finishes in dark green are especially beautiful because they have a translucent depth that makes the color look like liquid. Brands like ILNP and Sally Hansen both carry this finish.
Forest green, hunter green, and deep emerald are all excellent choices. Avoid neon or bright greens for this look. You want the color to feel saturated and shadowy, not bright.
Pair your green polish with gold foil accents or a single black nail for contrast. A glossy top coat is non-negotiable here because it amplifies the potion-like shine.
This color is also one of the most workplace-friendly witchy nail choices. Green reads as sophisticated and fashion-forward in a way that black sometimes does not in conservative settings.
You can take this further by adding a tiny cauldron or potion bottle design on one accent nail. Simple flat nail decals with potion bottle shapes are widely available online and are very easy to apply. This is an underrated witchy nail choice that deserves way more attention.
11. Pentagram or Sacred Geometry Accents
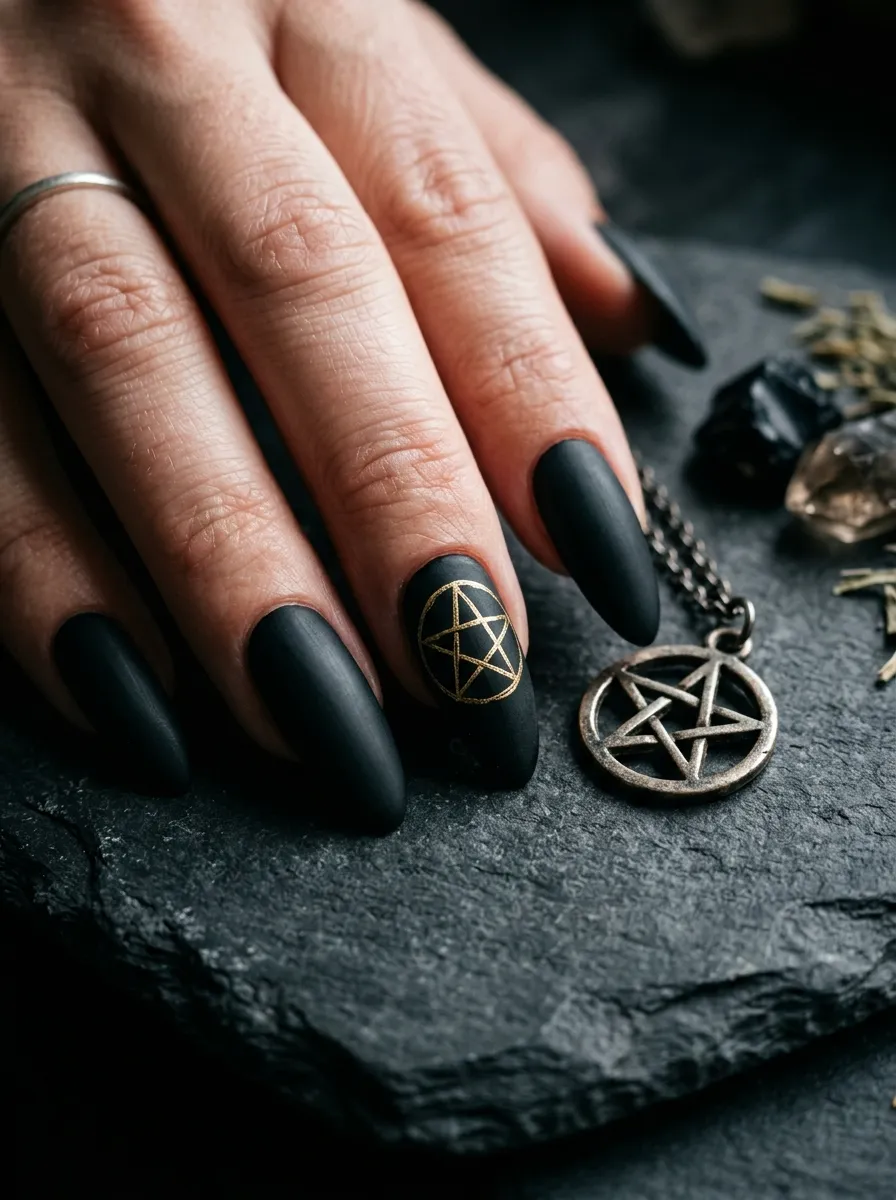
Sacred geometry and pentagram nail designs feel deeply intentional. They carry meaning and look like they came from an artist’s sketchbook rather than a nail salon.
A thin nail art brush and a gold or silver detail polish are all you need to draw a pentagram. The five-pointed star is a simple enough shape to practice. Draw the star in one continuous line for the cleanest result.
If freehand feels too challenging, search for pentagram nail stickers or decals. You can find them on Etsy from independent sellers for a few dollars. The detail on handmade decals is often stunning.
Sacred geometry designs like triangles, hexagons, and flower of life patterns also fall into this category. They pair beautifully with dark or jewel-toned bases.
Try a black base with a silver triangle on the middle finger and two smaller triangles on the thumb and pinky. That creates a cohesive geometric theme without covering every nail.
These designs communicate something about the wearer without being costume-like or aggressive. They feel like a personal signature. Someone who notices the detail will appreciate it quietly, and someone who does not will simply see a well-designed manicure.
12. Blood Moon Red Nails
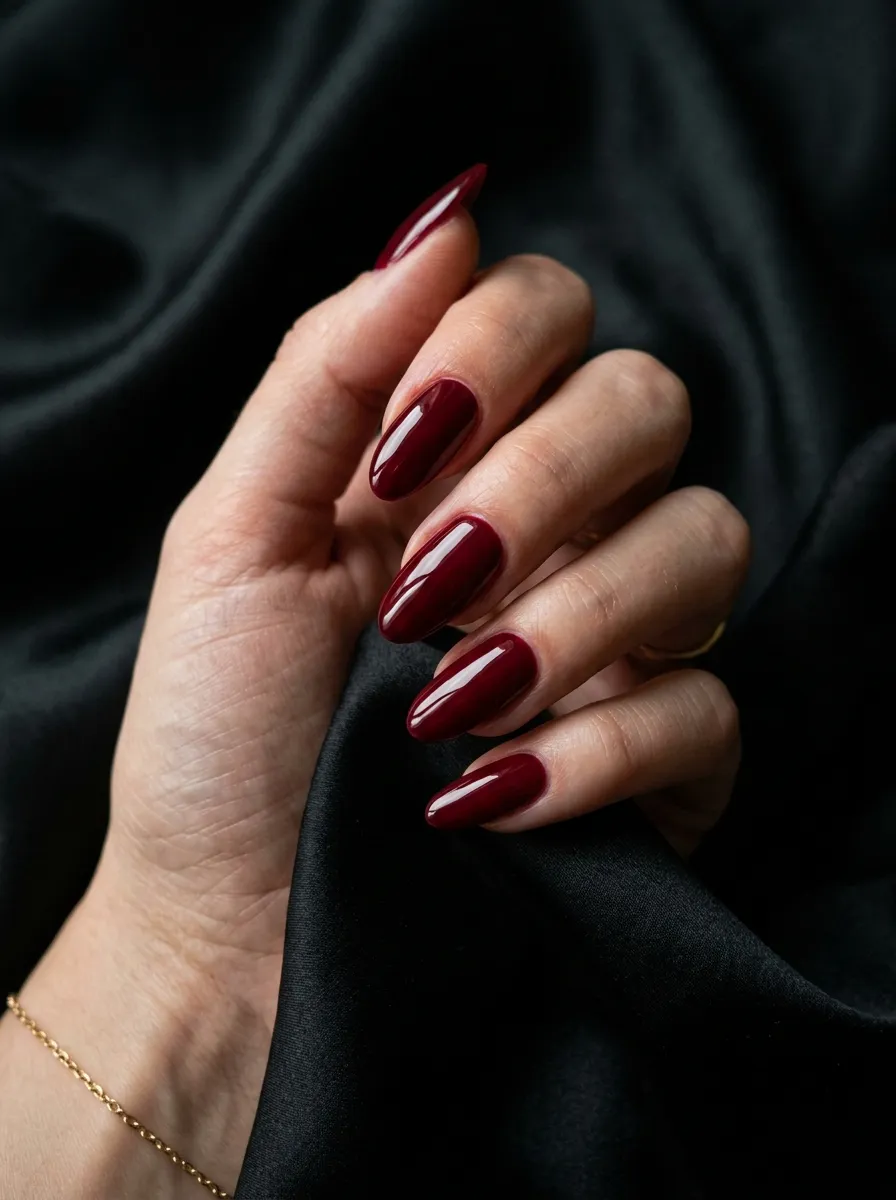
Blood moon red is not your average red manicure. The color you are looking for sits between crimson and oxblood, deep and saturated rather than bright and cheerful.
This shade has a dark, seductive energy that fits the witchy aesthetic without needing any extra nail art. The color does all the work on its own.
OPI’s Malaga Wine, Essie’s Bordeaux, and China Glaze’s Ravishing Ricca are all classic versions of this shade and cost under twelve dollars. Any deep, cool-toned red will work.
Apply two thin coats and finish with a high-gloss top coat. The reflective shine makes the color look even more rich and dimensional.
Blood moon red looks especially strong on almond, oval, or stiletto nail shapes. The pointed silhouette and deep color together create a very striking combination.
This is also one of the most universally flattering witchy nail options because deep reds complement almost every skin tone. If you want to add detail, a single black moon stamped in one corner of the accent nail is enough to tie it into a full witchy set without overcomplicating the design.
13. Tarot Card Nail Art
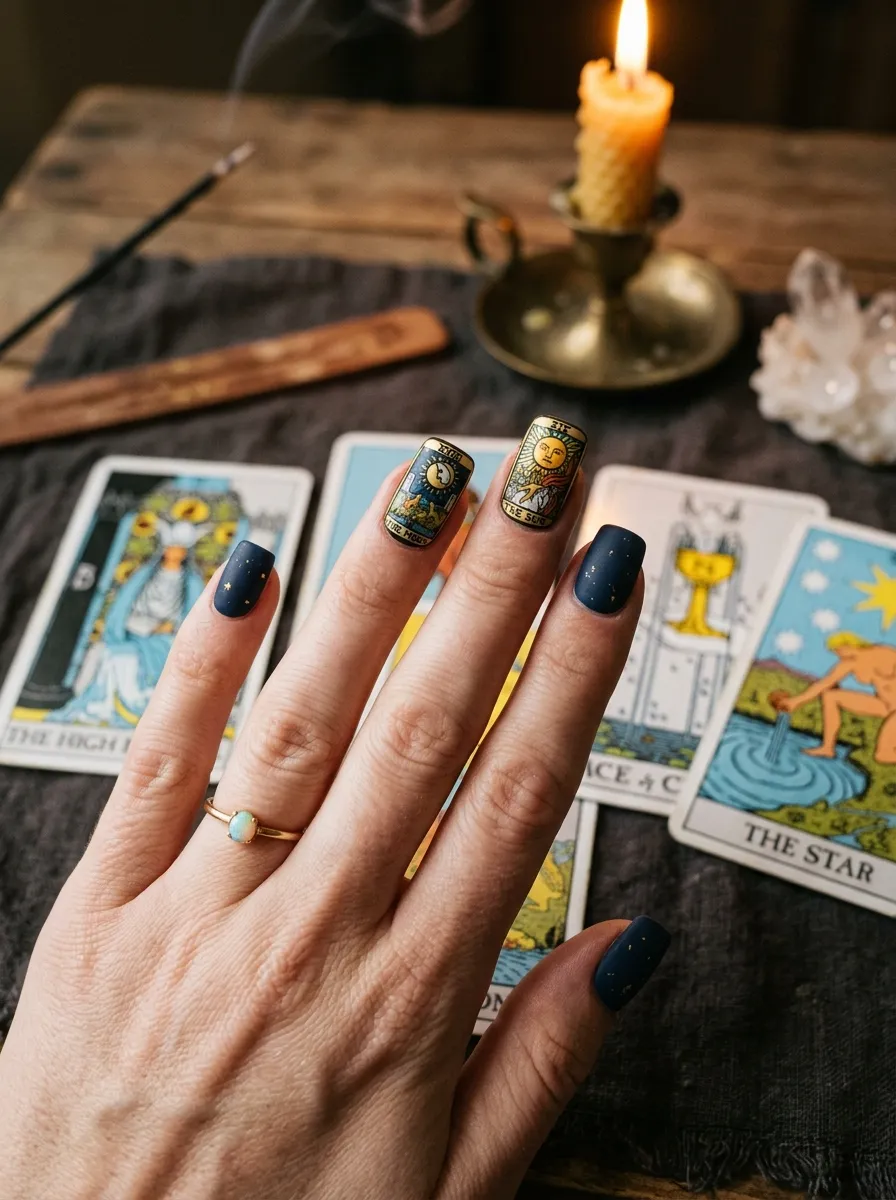
Miniature tarot card nail art is one of the most creative and detailed directions you can take with witchy nails. Each nail becomes a tiny canvas with its own symbolic image.
The simplest approach is choosing just one or two card symbols rather than trying to paint an entire full card illustration. A crescent moon for The Moon card or a sun burst for The Sun are both simple enough to paint freehand.
Use a thin nail art brush and a contrasting color to sketch the outline. Keep the shapes bold and simplified. On a small nail, less detail reads better than too much because fine lines tend to blur.
Tarot-inspired nail wraps and stickers are also available on Etsy and Amazon. Some sets include multiple card designs printed at nail size, which makes the whole process incredibly easy.
Place the tarot art on just one or two accent nails and keep the rest of the set in a solid color that ties into your card imagery. Deep gold, midnight blue, and warm ochre are all great base colors for this theme.
This design gets conversations started. People who know tarot will absolutely notice it, and people who do not will still appreciate the detailed tiny artwork. It is a truly personal and meaningful nail design.
14. Iridescent Holographic Dark Nails
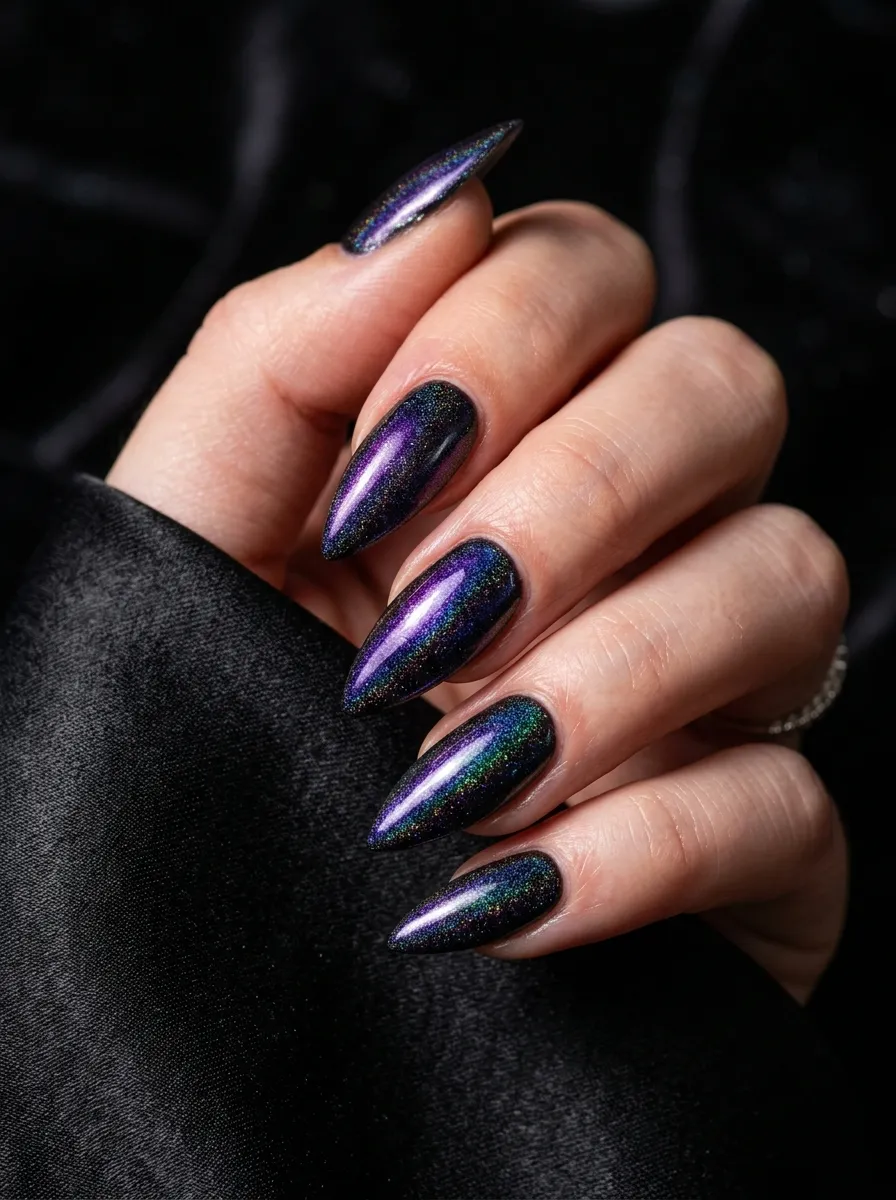
Holographic dark polish is like a dark sky full of shifting light. It looks solid from one angle and then erupts into color when it catches the light. The effect is genuinely mesmerizing.
Holographic polishes in black or deep purple are widely available from brands like ILNP, Born Pretty, and Kiara Sky. They range from about eight to fifteen dollars per bottle and last a long time.
Apply a base coat first, then two thin coats of your holographic polish. Finish with a glossy top coat to protect the holographic particles and amplify the color shift effect.
This look requires zero nail art skills. The polish itself is the entire design. All you are doing is applying it neatly and letting the formula do its thing.
Stiletto and coffin shapes show off holographic polishes especially well because the longer, tapered surface catches light from more angles as your hand moves.
This is a great choice for people who want something genuinely eye-catching and unique but do not want to spend time on nail art. The whole manicure takes under twenty minutes and looks like something that belongs on an editorial shoot. Dark holographic nails feel witchy, cosmic, and completely modern at the same time.
15. Dried Flower Pressed Nail Art
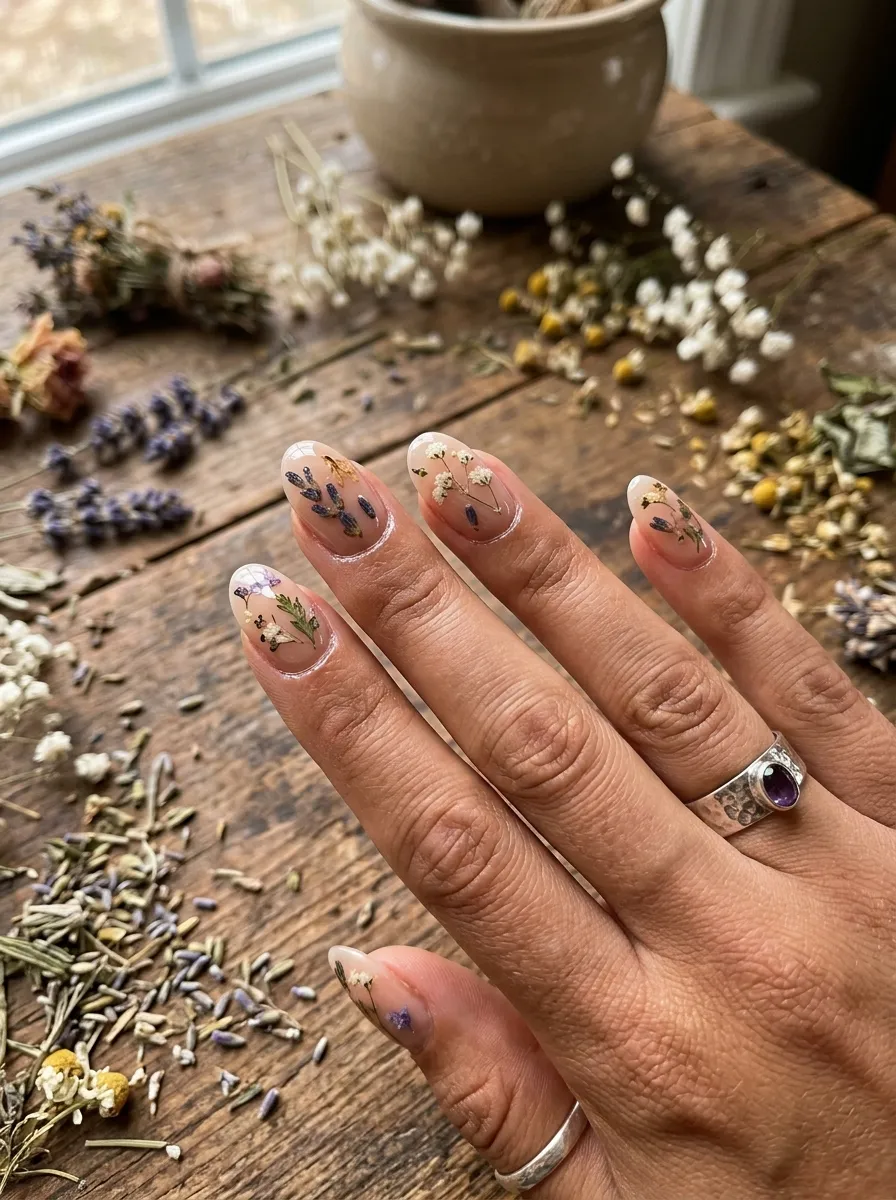
Pressed flower nails sit at the intersection of witchy and botanical. They look handmade in the most beautiful way, like something a hedge witch would wear while collecting herbs at dawn.
Real dried flowers work best for this. Baby’s breath, lavender, and chamomile are all tiny enough to fit on a nail and dry flat. You can buy dried florals from craft stores or dry your own at home.
Apply your base color and let it dry completely. Place your dried flower piece on the nail and press it down gently. Then seal it with a thick gel top coat or builder gel to encapsulate it. The flower needs to be completely sealed or it will lift.
Clear or nude bases work beautifully with this technique because the natural color of the flowers becomes the focal point. Dark bases can also be stunning if you use pale or white flowers that contrast with the background.
This look is genuinely unique because no two flowers dry exactly the same way. Every nail becomes a one-of-a-kind piece.
UV gel lamps are inexpensive and widely available online. If you do this technique at home, a basic starter kit costs around twenty to thirty dollars and gives you everything you need.
16. Black Lace Nail Design
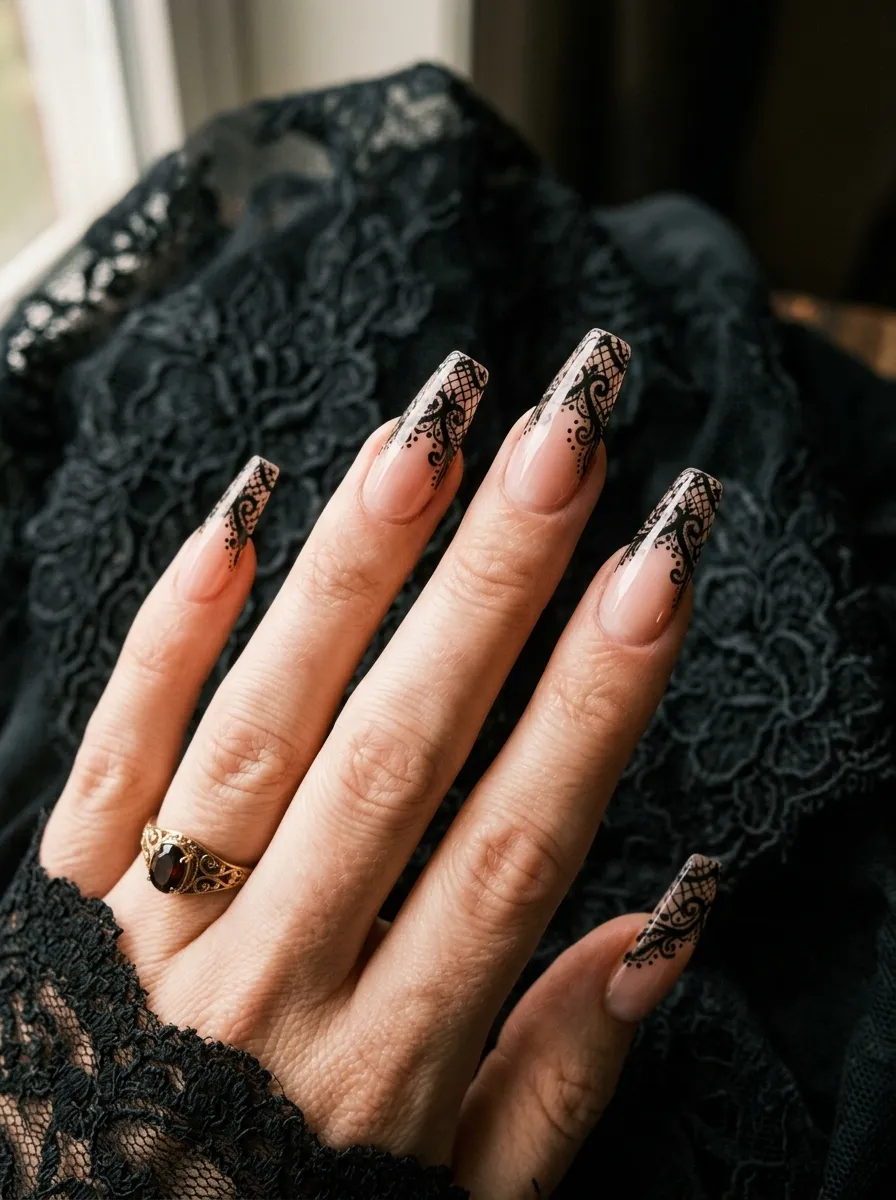
Black lace nail art is romantic and gothic at the same time. It looks incredibly detailed but is actually easier to create than it appears because lace patterns are forgiving by nature.
The basic technique involves a thin nail art brush and black polish on a nude or pale base. Draw irregular curved lines and add small dots between them to mimic the look of lace fabric. You do not need to create a perfect repeat pattern. The organic irregularity is what makes it beautiful.
Lace nail stickers and water decals are also a fantastic option. Printed lace decals come in full nail sizes and look genuinely realistic once sealed under a top coat.
This design is especially stunning on coffin or almond shapes because the long tapered surface gives you more room for the lace detail to breathe and show properly.
Try lace tips on all nails over a sheer pink or ivory base. Or place the lace only on the ring finger as a single statement accent. Either way, the result looks romantic, intricate, and absolutely intentional.
This is a popular choice for events like weddings or special dinners because it feels dressy and detailed without reading as costume-like or too dramatic. Black lace nails are witchy in the most elegant, subtle way possible.
17. Smoky Quartz Crystal Nails
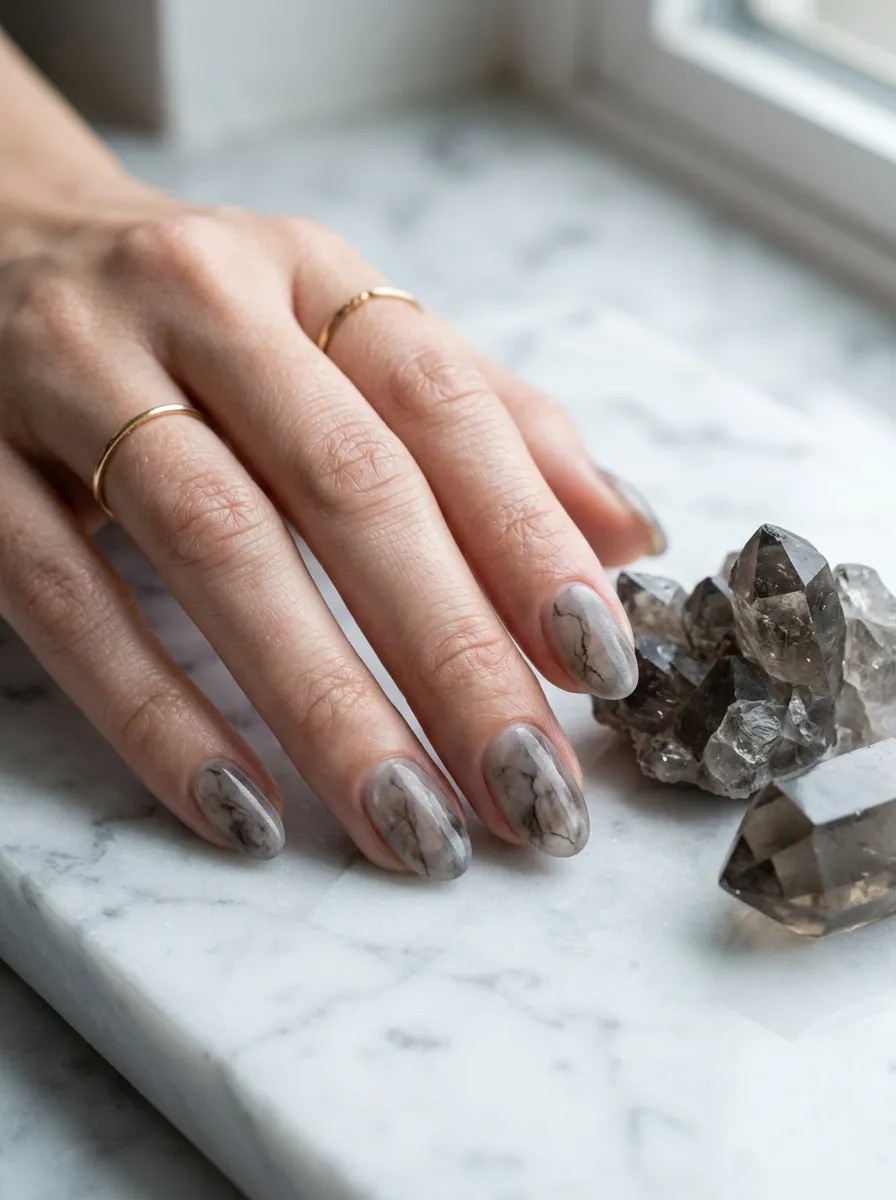
Smoky quartz nails capture the look of a real crystal on your fingertips. The color palette is cool, grey, and slightly translucent, which gives the nails a glassy, otherworldly quality.
The smoky quartz effect starts with a translucent grey or taupe base. Apply it over a clear base coat and leave it slightly uneven so some areas are more opaque than others. That variation mimics the cloudy depth inside a real crystal.
Add very thin grey or silver lines in random directions using a thin brush to suggest the natural veining inside smoky quartz. Keep the lines delicate and irregular rather than perfectly straight.
Finish with a glossy top coat to enhance the glassy, crystal-like illusion. The more reflective your top coat, the more the nails will resemble a polished gemstone.
This design works beautifully on short nails because real smoky quartz tends to be cut into small, rounded stones. Short oval or round nail shapes echo that natural crystal form very effectively.
The color palette is also incredibly wearable and subtle. Smoky quartz nails do not read as bold or costume-like. They feel like a piece of fine jewelry that happens to be on your nails. This is the perfect witchy design for someone who wants something meaningful and beautiful without drawing too much attention.
Conclusion
Witchy nail designs are one of the easiest ways to carry a piece of your personal aesthetic everywhere you go. From the deep simplicity of matte black coffin nails to the delicate detail of pressed botanicals sealed under crystal-clear gel, there is a witchy style on this list that fits every skill level, budget, and occasion. You do not need to spend a fortune at a salon or have years of nail art experience to pull these looks off at home. A few good brushes, some quality base polishes, and the confidence to try something different are all you really need. Pick one design from this list that excites you and start there. Practice it once, see how it feels, and build from that point. Your nails are a small but real way to express who you are and what you love. Make them count.