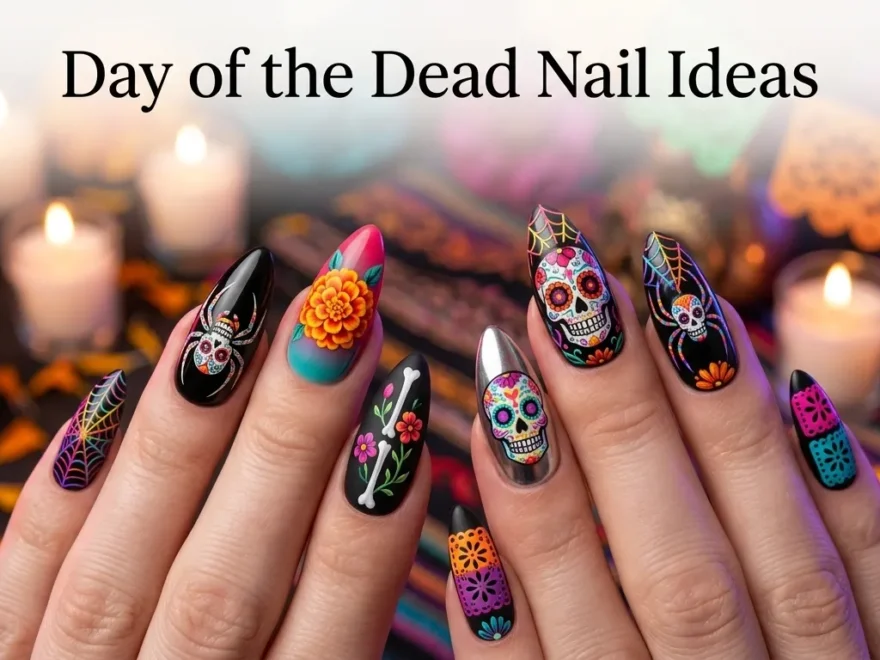
Day of the Dead nail ideas are one of those looks that stop people mid-scroll. The designs are bold, the symbolism runs deep, and the results are genuinely stunning, whether you pay a pro or do it yourself at home. These nails pull from a rich Mexican tradition, Día de los Muertos, where color, flowers, and skulls come together to celebrate life and honor those who’ve passed. And here’s the best part: you don’t need a salon budget or professional training to pull off these looks. With the right tools, a steady hand, and a little patience, you can wear art on your fingertips. Whether you’re heading to a Halloween party, a Día de los Muertos celebration, or just want something that stands out, this list has something for every skill level and every budget. If you’re also exploring Joker nail ideas, bold purple-and-green palettes, chaotic brush strokes, and dramatic comic-inspired details can help you create a striking, edgy manicure that feels theatrical and full of personality.
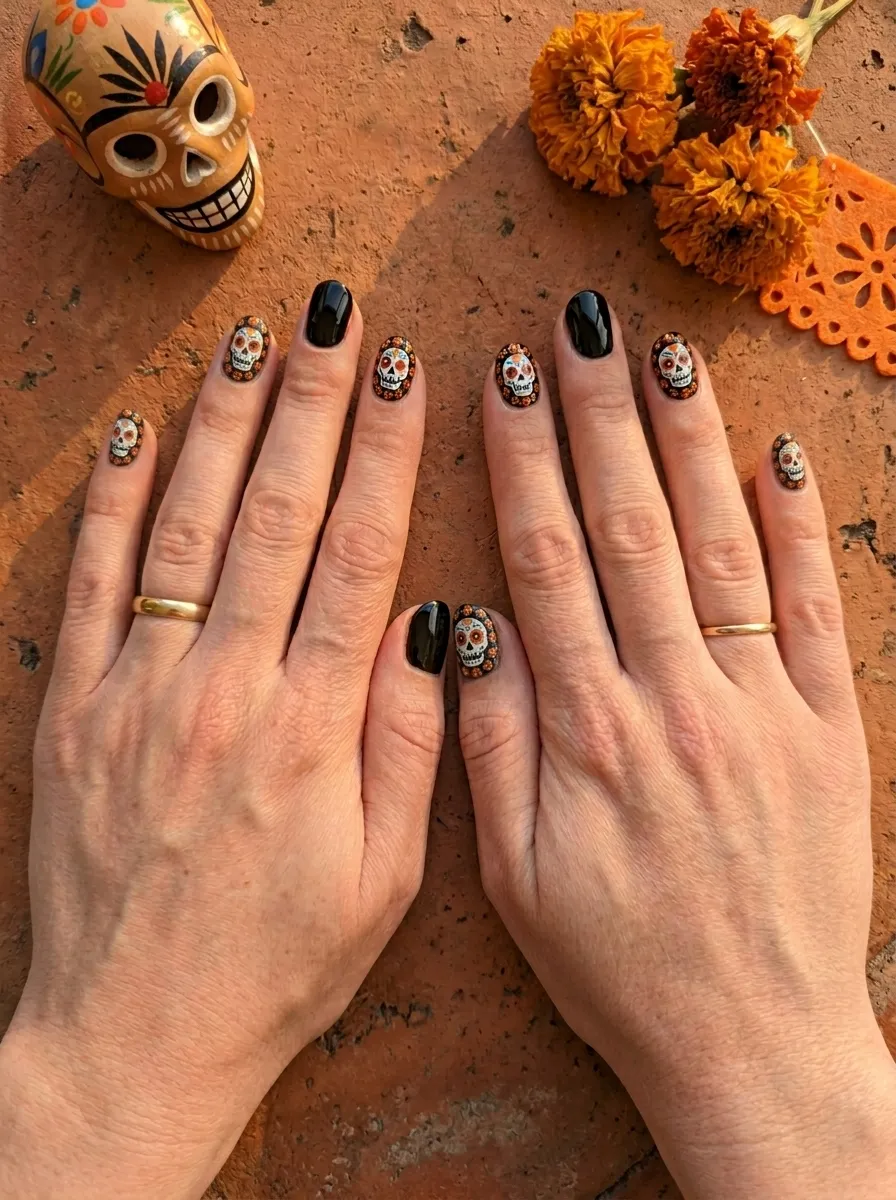
Classic Black and White Sugar Skull Nails
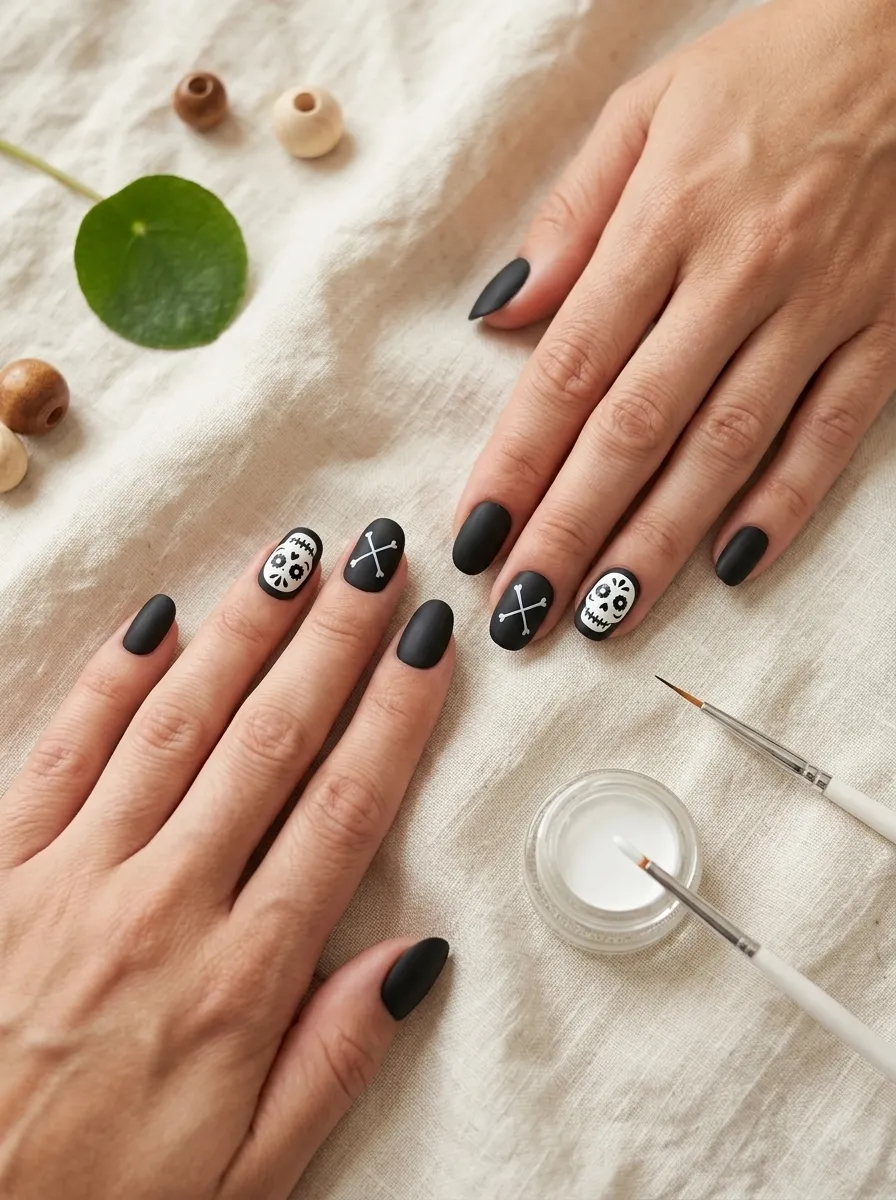
This is the look that started it all. Black and white sugar skull nails are timeless, recognizable, and easier to do than they look.
Start with a solid matte black base. Let it dry completely — this part matters more than people think.
Then use a thin nail art brush or a toothpick dipped in white acrylic paint to draw:
- Two oval eyes
- A small nose triangle
- A stitched or zigzag mouth
That’s your basic skull. Add small flowers around the eyes to make it more Día de los Muertos and less Halloween.
Budget tip: You can buy a set of nail art brushes for under $5 on Amazon or at your local dollar store. Acrylic craft paint works just as well as nail art paint for detail work — just seal it with a clear top coat.
Keep the accent nails simple. Solid black on the index and pinky fingers balances out the bold skull designs on your ring and middle fingers.
This look photographs beautifully and holds up well for about a week with a good top coat.
Marigold Flower Accent Nails
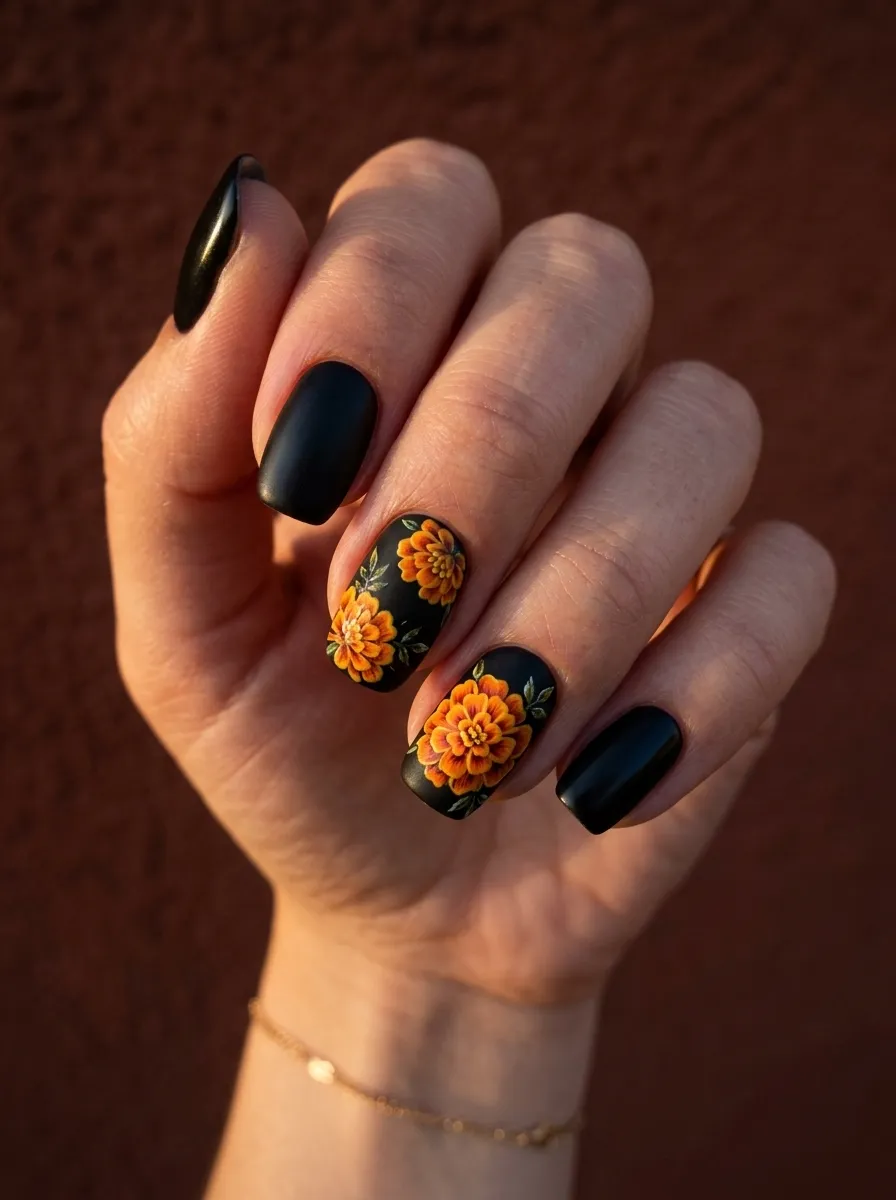
Marigolds are the flower of Día de los Muertos. They guide spirits home and fill altars with color. Putting them on your nails is a beautiful nod to the tradition.
You don’t need to be an artist to paint flowers. Here’s a simple method:
- Paint your base in black or deep burgundy
- Use a dotting tool (or the tip of a bobby pin) dipped in orange polish to dab five small dots in a circle
- Add a yellow dot in the center
- Done — that’s a marigold
Layer two or three of these at different sizes to fill the nail. The more you add, the richer it looks.
Budget tip: Orange and yellow nail polishes are everywhere during fall. Drug stores stock them cheap, and they work perfectly for this technique.
Mix these flower nails with solid black or deep orange nails on the other fingers. The contrast makes the flowers pop without overwhelming the whole hand.
This design works especially well on longer nails, but short nails carry it just fine too.
Colorful Calavera with Rainbow Florals

If black and white feels too minimal, go full color. Colorful calavera nails are loud, joyful, and exactly what Día de los Muertos is about.
Pick a different base color for each nail — think deep pink, cobalt blue, teal, and mustard yellow.
Then paint a simplified skull face in a contrasting color on each one. White works on dark bases. Black works on light or bright bases.
The trick is the flowers. Circle the eye sockets with tiny dots of multiple colors — pink, orange, blue, green. This gives the illusion of a detailed floral pattern without needing precision brushstrokes.
Keep each nail slightly different. One skull might have bigger eyes. Another might have a different mouth style. Imperfection actually makes it look more handmade and authentic.
Budget tip: Nail art stamping kits with skull designs cost around $8–$12 and cut your work time in half. You still add the color yourself, but the skull shape is already stamped.
Finish with a glossy top coat to make those colors really sing. This look gets the most compliments in a crowd.
Negative Space Skull Nails
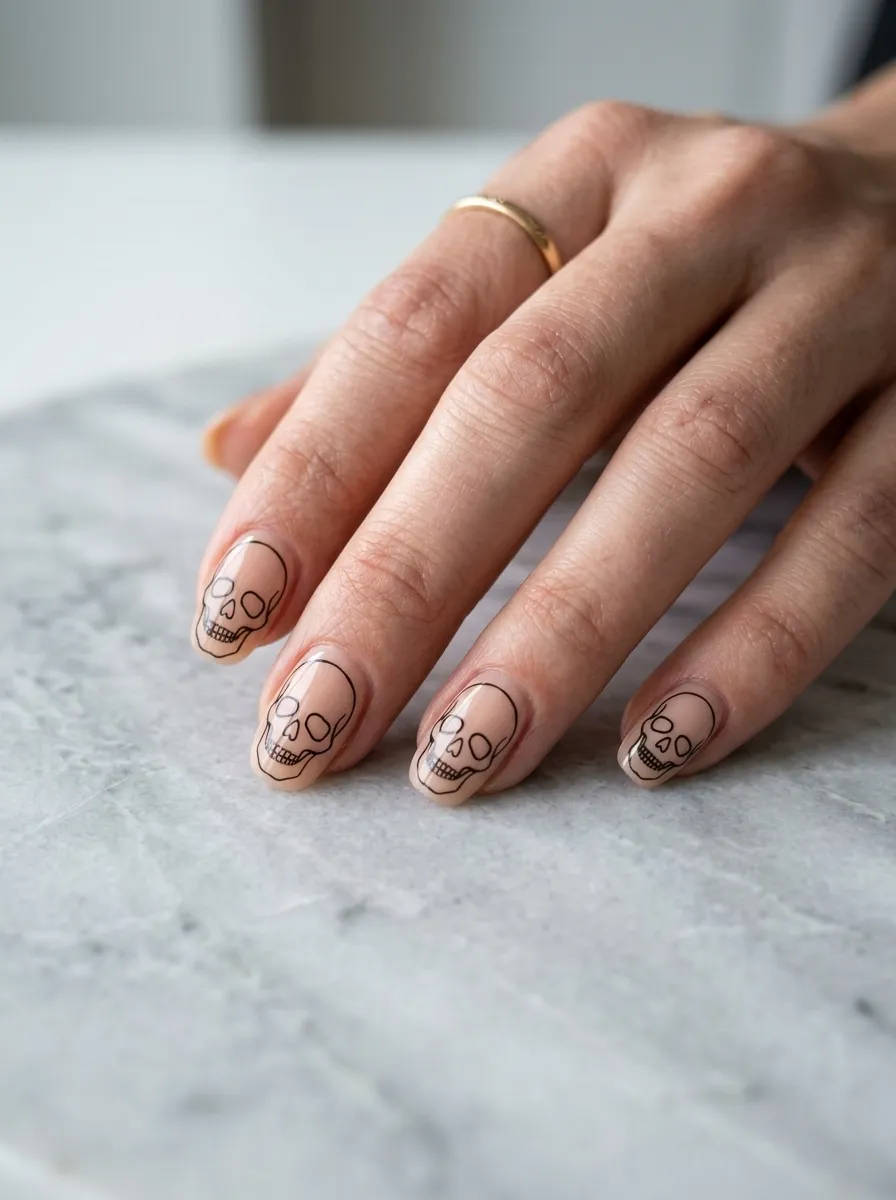
Negative space nail art uses your natural nail as part of the design. It’s modern, minimalist, and surprisingly striking.
Start with a clear or nude base coat. Let it dry.
Then use a thin brush and black nail polish to outline a skull shape — just the outer edges, the eye holes, and the nose. Leave the center of each feature empty so your natural nail shows through.
The result looks like a skull sketch or an X-ray image. It’s minimal but reads instantly.
Why this works for beginners: You’re not filling in color or layering details. You’re just drawing lines. Lines are easier to control than solid shapes.
Add one or two simple marigold outlines on the side nails to connect the look to the holiday without overloading the hand.
Budget tip: A thin black nail art pen (around $3–$5) makes this so much easier than a brush. Look for ones labeled “nail art liner” — they give you the control of a felt-tip marker.
Seal everything with a matte top coat for an editorial, high-fashion finish.
Deep Purple Gothic Skull Nails
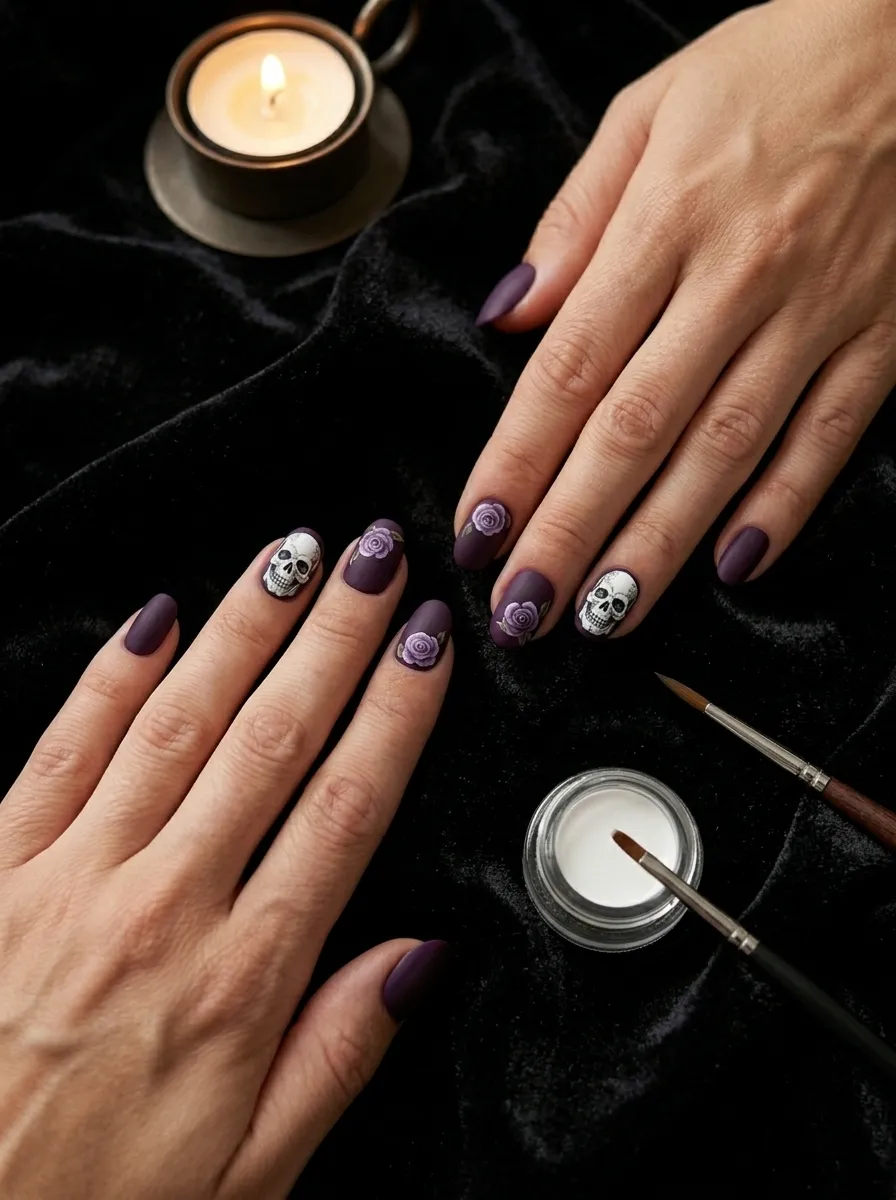
Gothic and Día de los Muertos go hand in hand. This design leans into the dark, dramatic side of the holiday.
Start with a deep plum or eggplant purple base across all nails.
On your ring fingers, paint white skull faces with purple shading in the eye sockets to add depth. On your middle fingers, add small white roses or gothic-style flowers.
Keep the other nails plain purple. The deep color does the work for you.
The purple-and-white contrast hits differently than the classic black-and-white because it feels more romantic and mysterious.
Pair this look with:
- Dark burgundy lip color
- Gold or silver jewelry
- Black lace accessories
Budget tip: Deep purple polishes are extremely common and affordable — OPI, Sally Hansen, and even dollar store brands all carry great shades. You’re not spending extra here.
This design photographs beautifully under warm or candlelit lighting. It’s a strong choice for evening events or Día de los Muertos altars photoshoots.
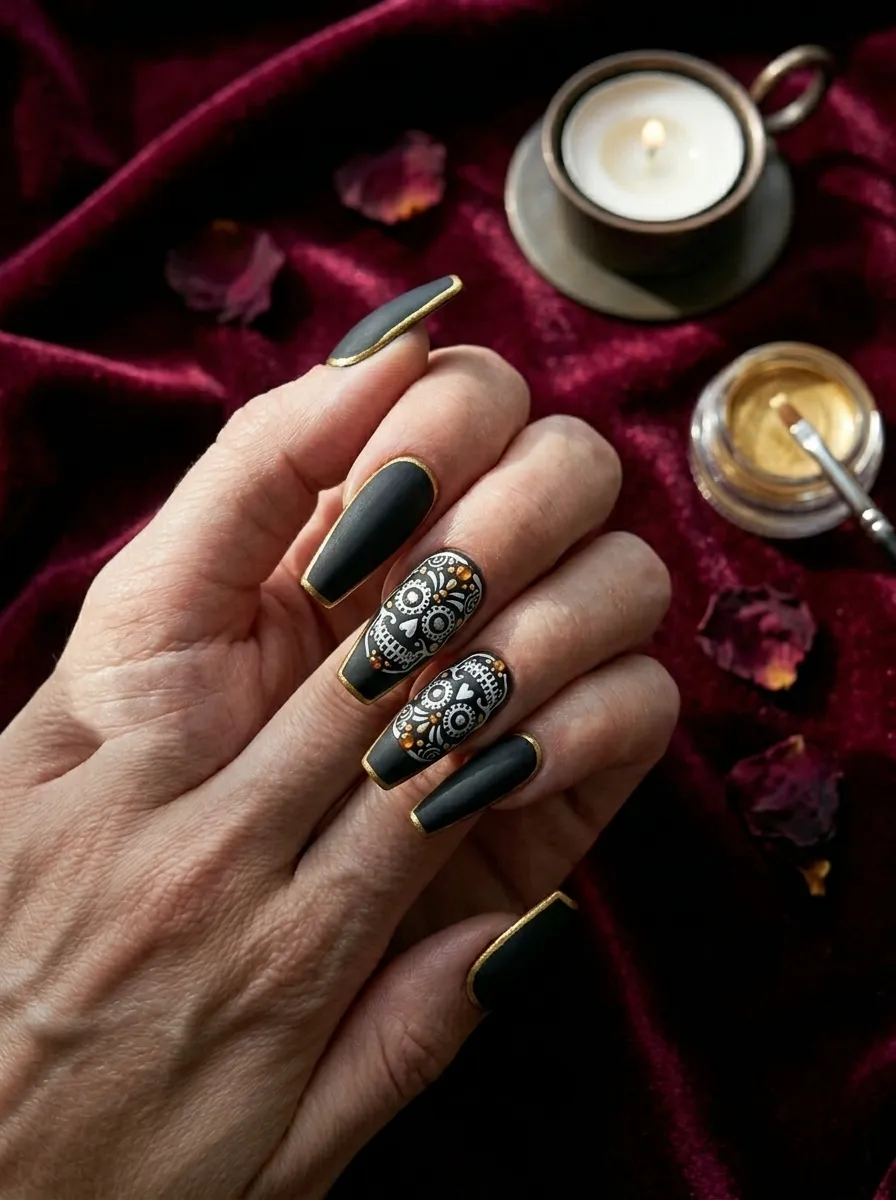
Gold Foil and Skull Detail Nails
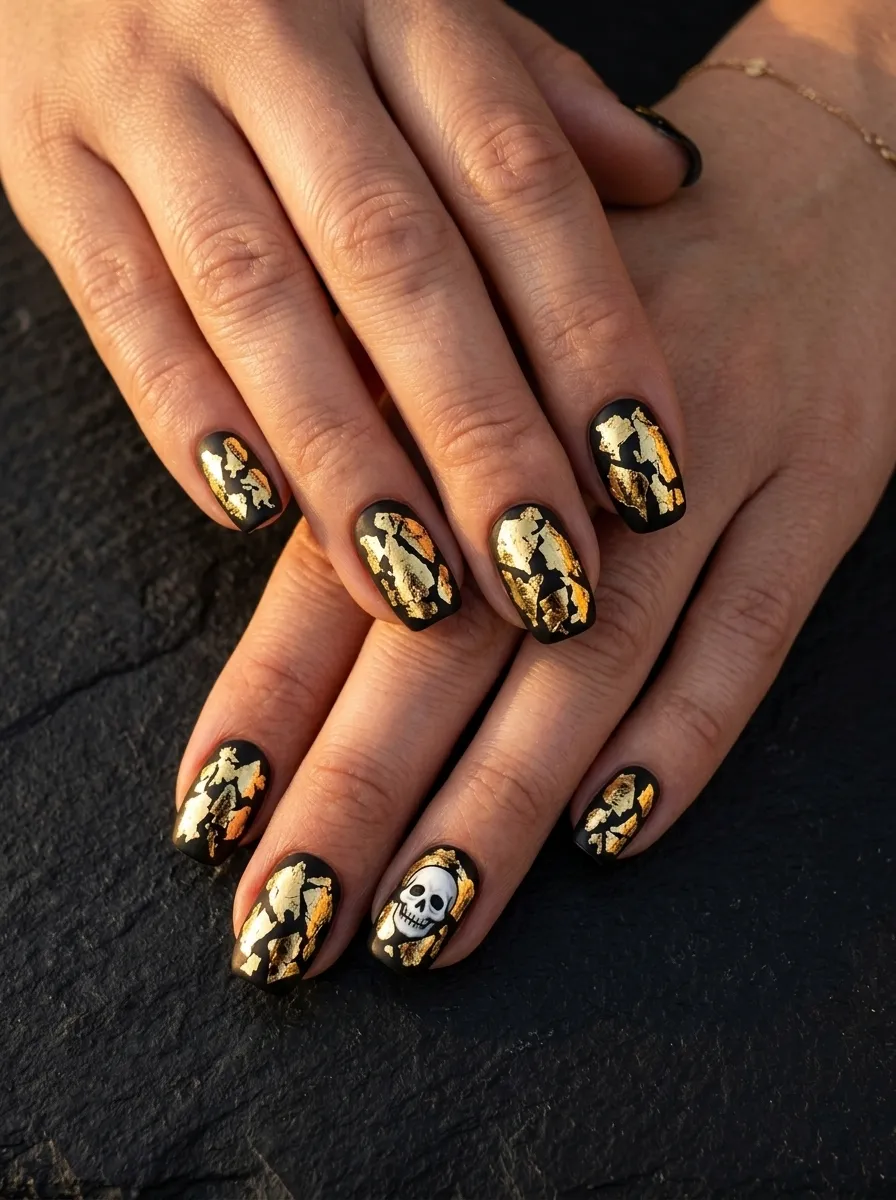
Gold foil is the shortcut to looking like you spent three hours at a salon. It catches the light, it’s dramatic, and it takes maybe 90 seconds to apply.
Here’s how it works:
- Paint your base coat in black
- Apply a thin layer of nail glue or peel-off foil adhesive to sections of the nail
- Press the gold foil sheet gently onto those spots
- Peel back slowly — the gold sticks where the glue was
- Add a simple skull face on top in white
The foil patches give the skull a metallic, cracked-wall look — like an ancient Mexican mural. It’s effortlessly cool.
Budget tip: Gold foil nail kits are available online for about $4–$7 and include enough foil for multiple full manicures. This is one of the biggest visual payoffs for the lowest cost in nail art.
Combine this with matte black on the other nails to keep the focus on the accent nail.
Seal with a non-wipe top coat — some top coats can smear the foil if you use the wrong kind.
Glitter Ombre with Sugar Skull Ring Finger
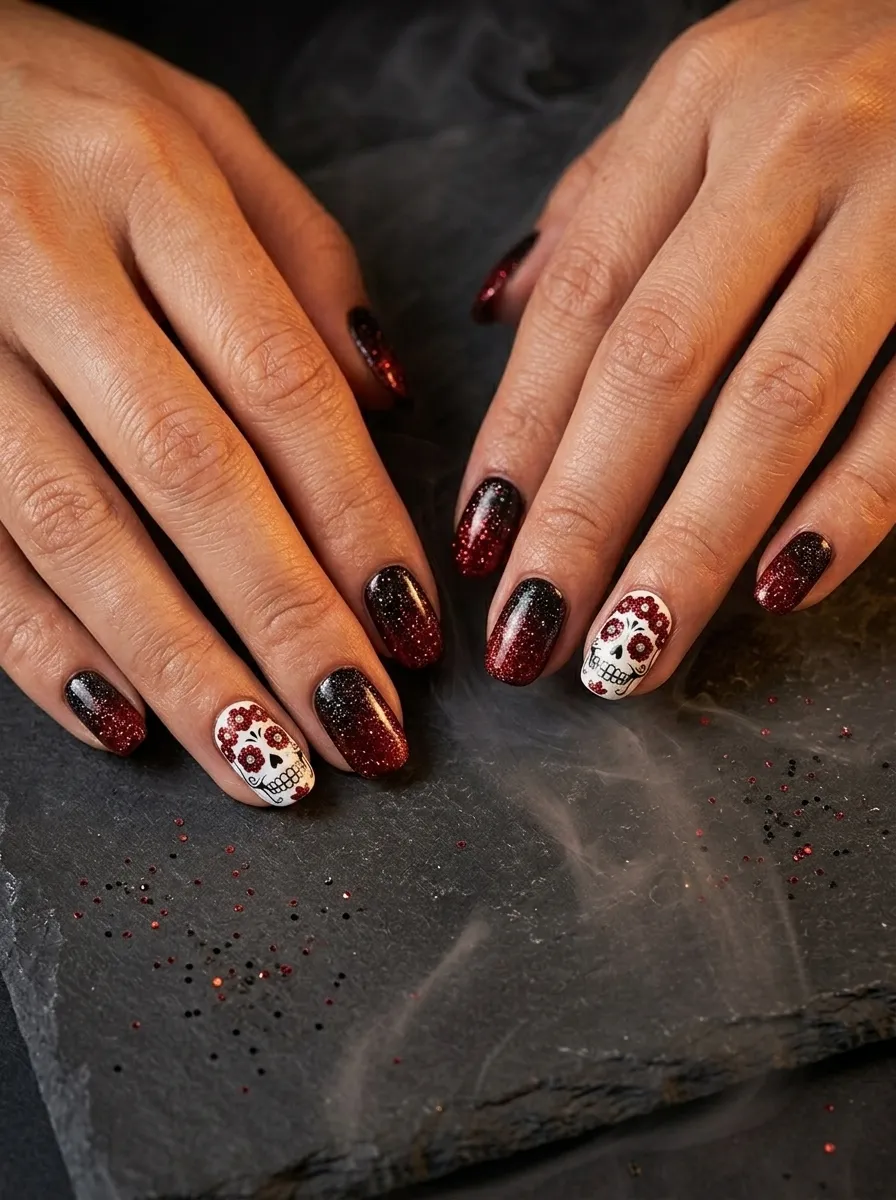
This design pairs a show-stopping accent nail with a wearable glitter gradient that works for everyday life.
Paint all nails with a black-to-red glitter ombre. This is easier than it sounds:
- Sponge black glitter polish at the base of the nail
- Layer red glitter toward the tip
- Dab and blend at the midpoint
- Seal and repeat for intensity
On your ring finger, skip the ombre entirely. Paint it solid black and add your sugar skull detail in white. Ring the skull’s eyes with tiny red glitter dots using a toothpick.
The glitter on the other nails frames the skull accent without competing with it.
Why this works: The ombre is forgiving. Slight blending mistakes just look intentional. You don’t need perfect edges.
Budget tip: Chunky glitter topcoats cost $2–$4 at craft stores and create the same effect as high-end glitter polishes. Layer a clear glitter topcoat over a regular colored base for even more options.
This look works year-round for anyone who loves dark, dramatic nails.
Pastel Day of the Dead Nails
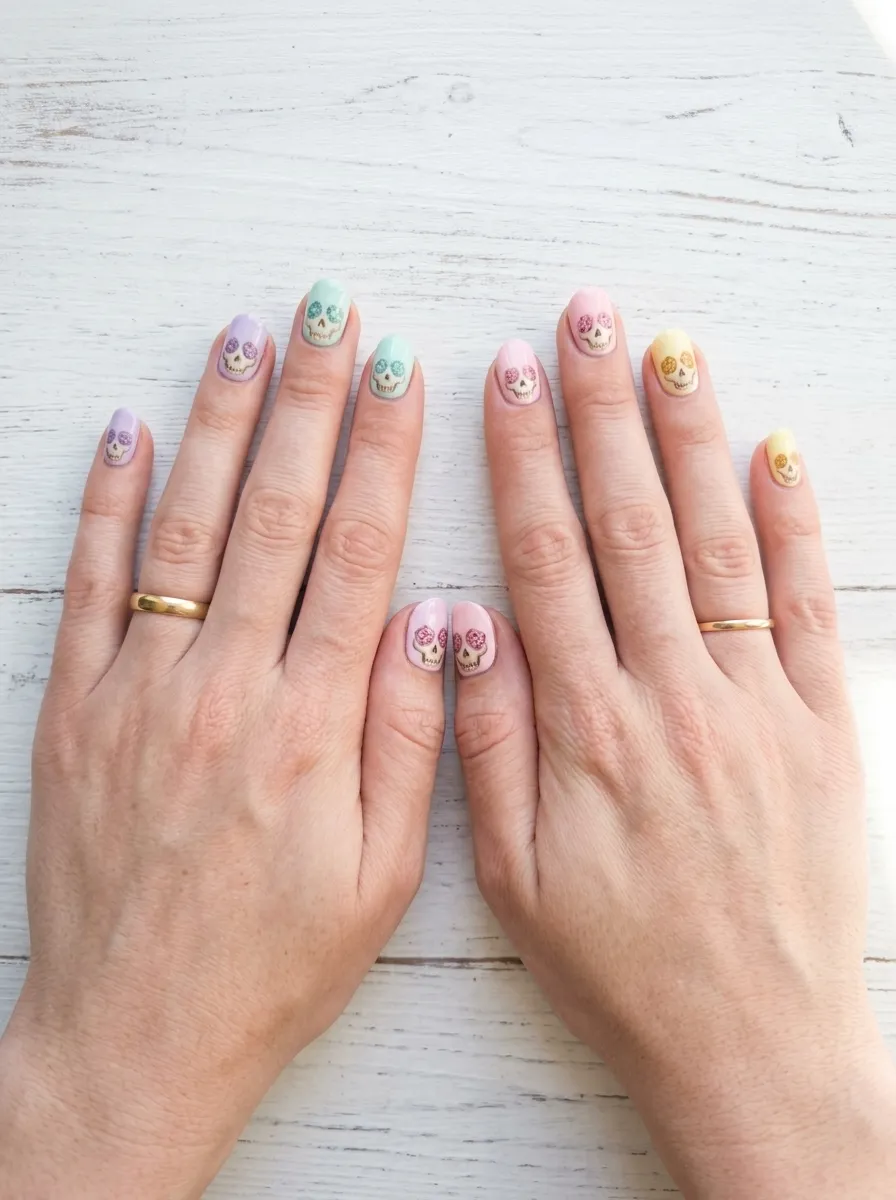
Not everyone wants dark nails. Pastel Día de los Muertos nails take all the same motifs and wrap them in a soft, feminine palette.
Use one pastel shade per nail — lavender, mint, baby pink, peach. Paint each one a different color so the full hand looks like a pastel rainbow.
Then add small skull faces in a slightly deeper version of each nail’s color. A lavender nail gets a soft purple skull. A mint nail gets a teal skull.
This tonal approach is cohesive without being matchy-matchy.
Add tiny white or cream flowers around each skull’s eyes. The flowers soften the skull shape and make the whole design feel sweet rather than spooky.
Great for: people who love the holiday but want nails they can wear to work or school without raising eyebrows.
Budget tip: Pastel polishes are everywhere in spring and summer. Stock up on a few shades when they’re on clearance — they work perfectly for this look in October.
Finish with a glossy top coat. The shine makes the pastels look rich and polished rather than washed out.
Spider Web and Skull Combo Nails
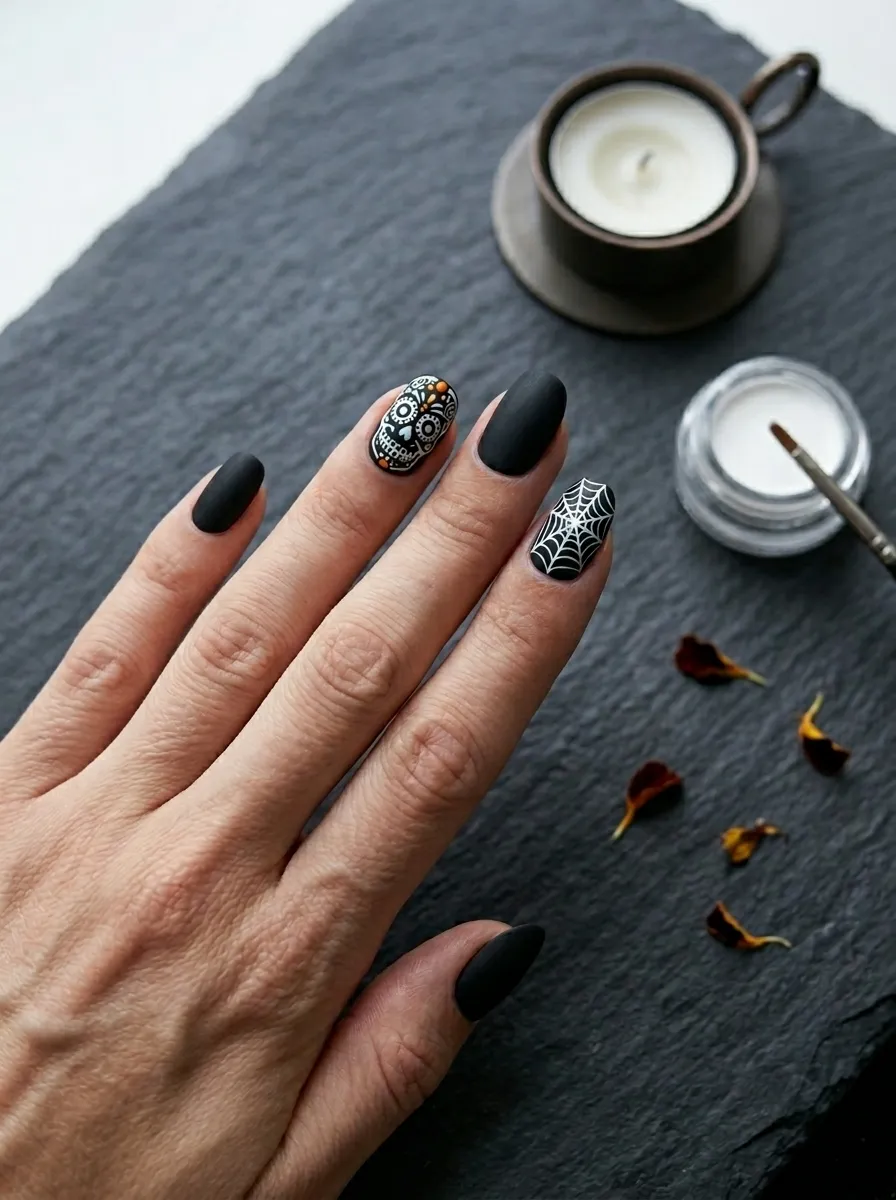
Spider webs and skulls share the same visual language — they’re both graphic, symmetrical, and easy to recognize. Combining them creates a cohesive Halloween-meets-Día de los Muertos set.
The web is simpler to draw than it looks:
- Start with a dot in one corner of the nail
- Draw 4–6 straight lines radiating outward from that dot
- Connect the lines with curved arcs at increasing distances from the center
That’s a full spider web. A thin white nail art pen makes this process much faster.
Pair one or two web nails with your sugar skull accent nail. Fill in the remaining fingers with solid black or a deep red.
Add a tiny spider: Draw a small oval body with eight lines for legs in one corner of the web nail. It takes 30 seconds and makes the design feel complete.
Budget tip: Nail art pens (around $3–$5 each) are your best friend for line work. They give you brush-pen control without needing art school training.
This combo is one of the most crowd-pleasing Día de los Muertos looks because it blends two popular aesthetics into one clean set.
Red Rose and Skull Nails
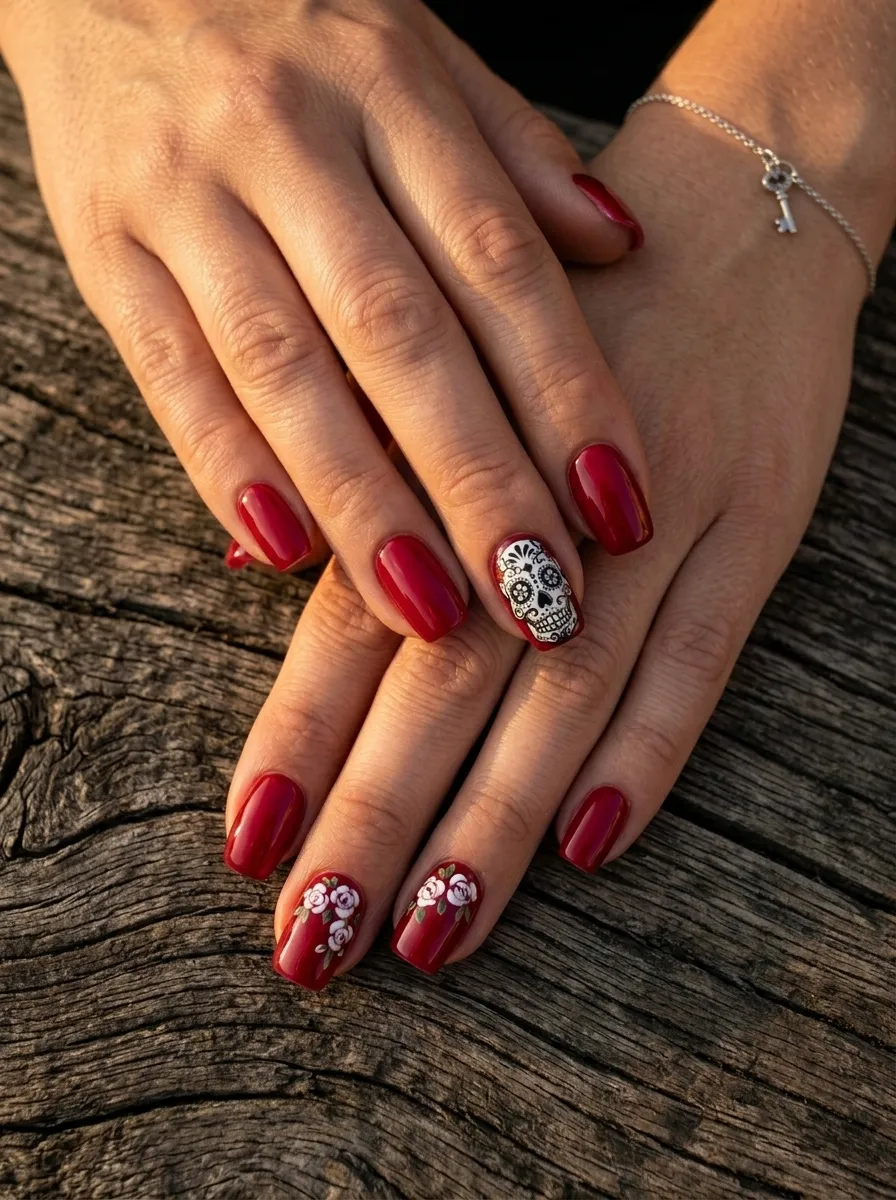
Red roses and skulls are an iconic pairing in Día de los Muertos imagery. Together they represent love, life, and memory.
Paint most nails in a deep crimson red. This base alone is striking and puts the holiday color front and center.
On two nails — usually the index and middle — paint small white roses. You can do this with a dotting tool using the five-petal method (five small ovals around a center dot).
On the ring finger, paint your skull in black and white over the red base.
The red-white-black color palette is cohesive and classic. Everything belongs together without needing to think too hard about coordination.
Make it feel intentional: Paint the nails in slightly different shades — maybe a matte red on some and glossy red on others. This adds subtle depth to an otherwise simple color scheme.
Budget tip: Red nail polish is the most universally available color out there. You likely already own a shade that works. If not, drugstore brands carry deep reds for $3–$5 that are fully opaque in two coats.
This look photographs beautifully on light skin tones and dark skin tones alike.
Teal and Gold Mandala Skull Nails
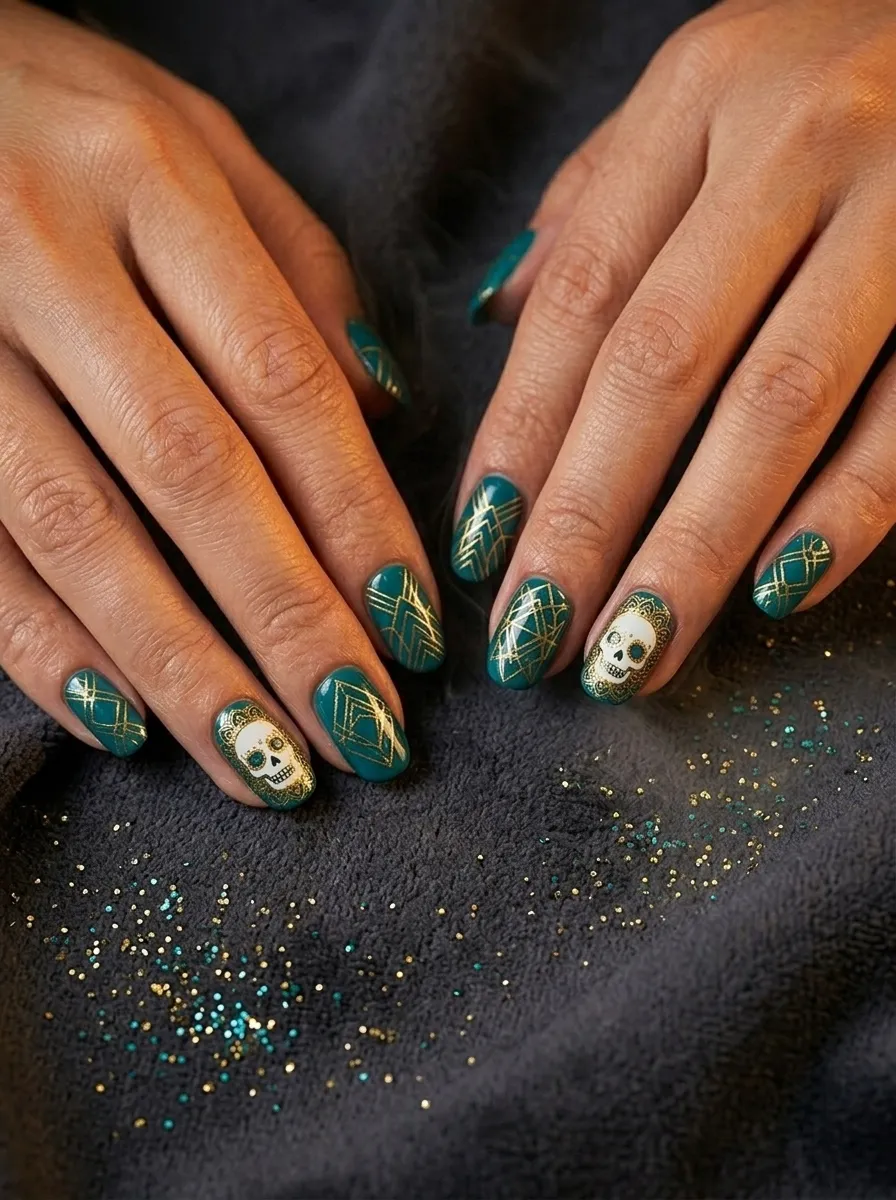
Mandala-style patterns add a sacred geometry element to Día de los Muertos nail art. Combined with teal and gold, the result is almost jewelry-like.
Start with a deep teal or peacock blue base on all nails.
On your ring and middle fingers, use a gold nail art pen or a thin brush dipped in gold acrylic paint to draw:
- Small concentric circles
- Radiating dots
- Petal shapes around a central point
On the ring finger, place your skull face in the center of the mandala design. The mandala becomes the skull’s decorative framework.
The other nails can carry simpler gold geometric details — single dots, thin lines, or small triangles.
Why teal and gold: These two colors create maximum contrast without looking harsh. They read as sophisticated and intentional rather than spooky.
Budget tip: Gold nail art pens or acrylic pens from craft stores cost $3–$6. One pen lasts for many manicures. Much more economical than buying a whole gold nail polish.
This is one of the more complex-looking designs on this list, but the individual elements are all achievable step-by-step.
Simple Stamped Skull Nails for Beginners
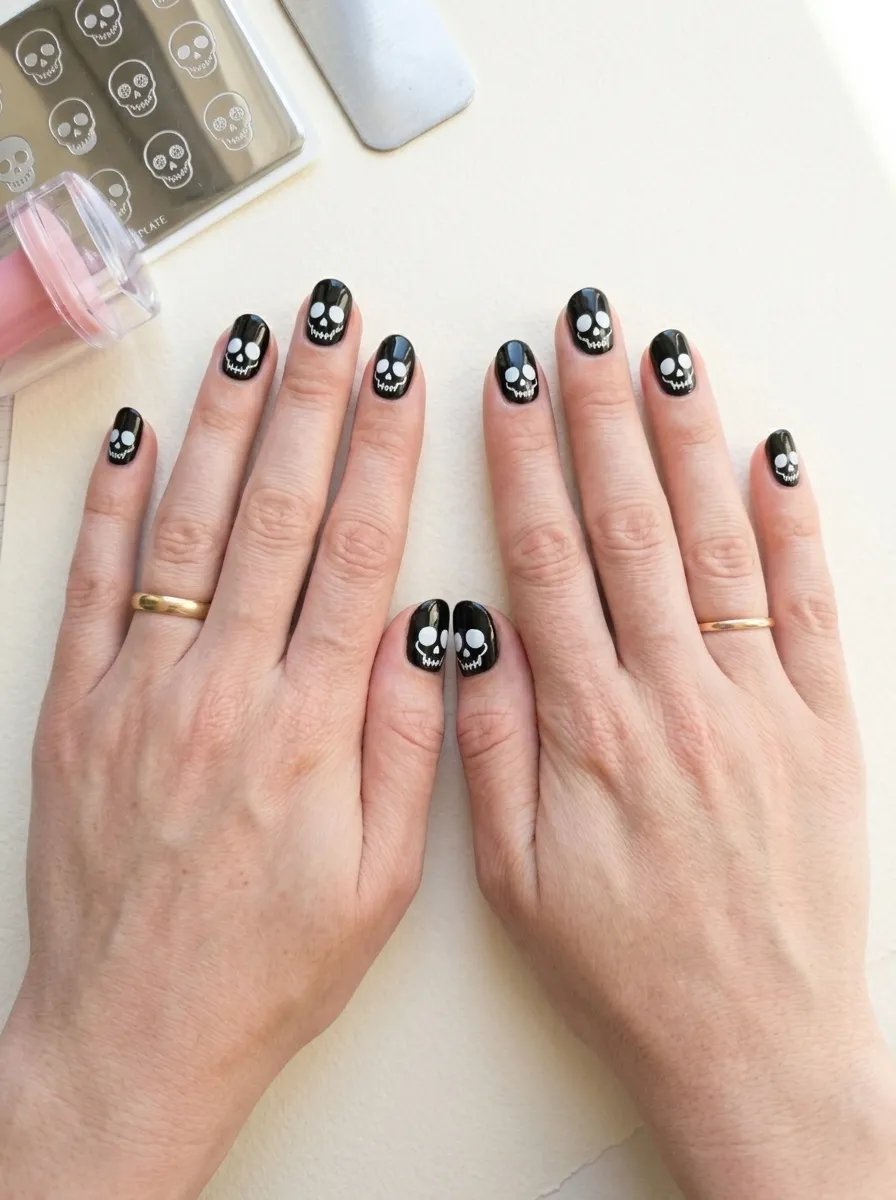
Nail stamping is the single biggest beginner cheat code in nail art. If you struggle with drawing freehand, this is your answer.
A stamping kit includes a metal plate engraved with designs (skulls, flowers, webs), a scraper, and a stamper. Here’s the basic process:
- Apply stamping polish over your design on the plate
- Scrape off the excess quickly
- Roll the stamper over the design to pick it up
- Press the stamper onto your nail
- Done
The result looks professionally precise every single time.
What to look for in a kit: Skull and floral plates are sold specifically for Día de los Muertos themes. Search “sugar skull nail stamping plate” — sets start at about $8–$12 and include multiple designs.
Use white stamping polish on black nails for the highest contrast and most dramatic results.
After stamping: Add tiny colored dots around the skull’s eyes with a toothpick dipped in nail polish for a handmade touch that makes your stamped design look original.
This method gives you consistent results across all ten nails in under 30 minutes.
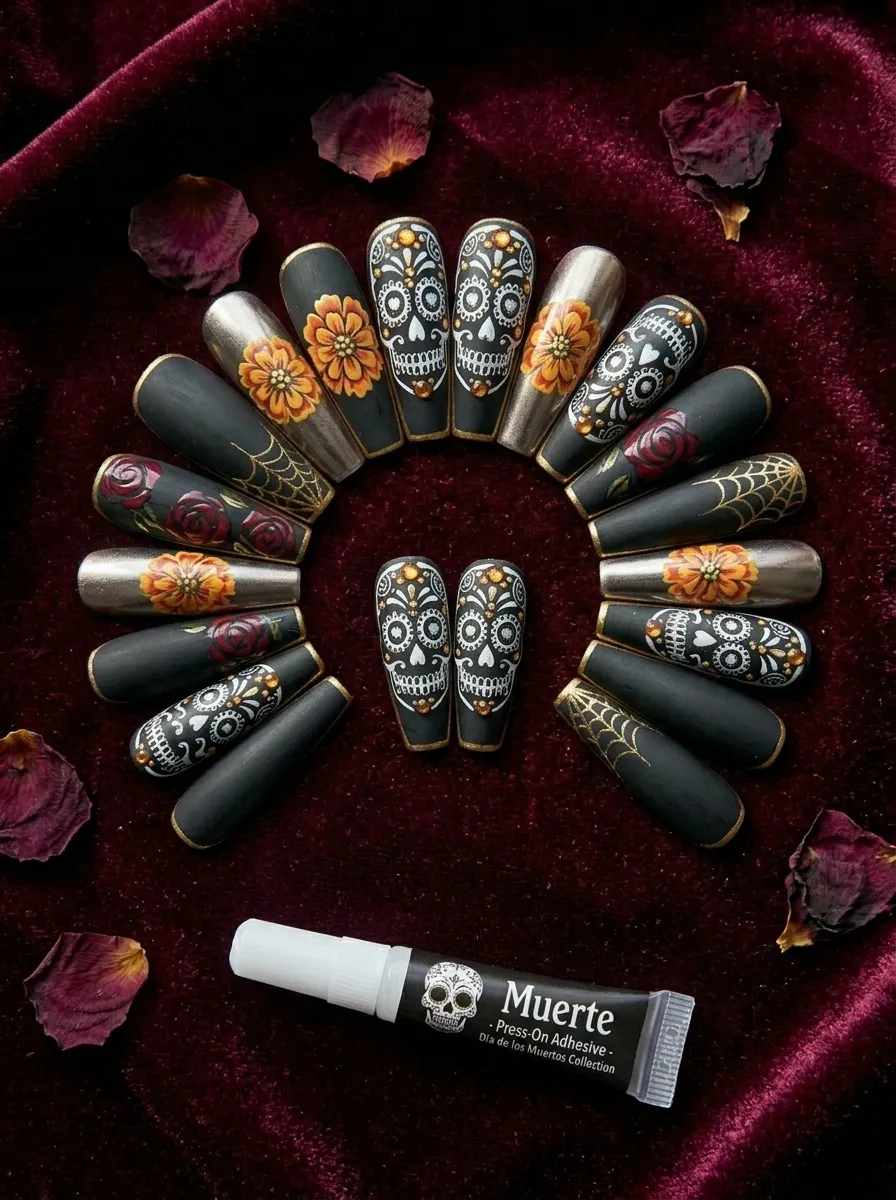
Coffin Shaped Skull Nails
Coffin-shaped nails (also called ballerina nails) have a flat, wide tip that gives you more canvas to work with. For skull art, this shape is ideal.
The flat tip means you can paint wider skulls with more detail — bigger eye sockets, more space for flowers, room for text or extra decorative elements at the tip.
If you’re getting your nails done at a salon, ask for coffin tips specifically. If you’re at home, press-on coffin nails are everywhere — Amazon, Target, and drugstore beauty aisles all stock them for $5–$10 a pack.
Apply your design to the press-ons before you apply them to your fingers. This gives you way more control and you can redo any nail that doesn’t look right without removing the whole set.
Design recommendation for coffin nails:
- Full skull face on ring fingers
- Marigold cluster on middle fingers
- Simple thin crossbones on index fingers
- Plain black on thumbs and pinkies
The longer shape creates a dramatic silhouette on its own. Your designs don’t need to be as heavy because the nail shape already makes a statement.
Neon Day of the Dead Nails
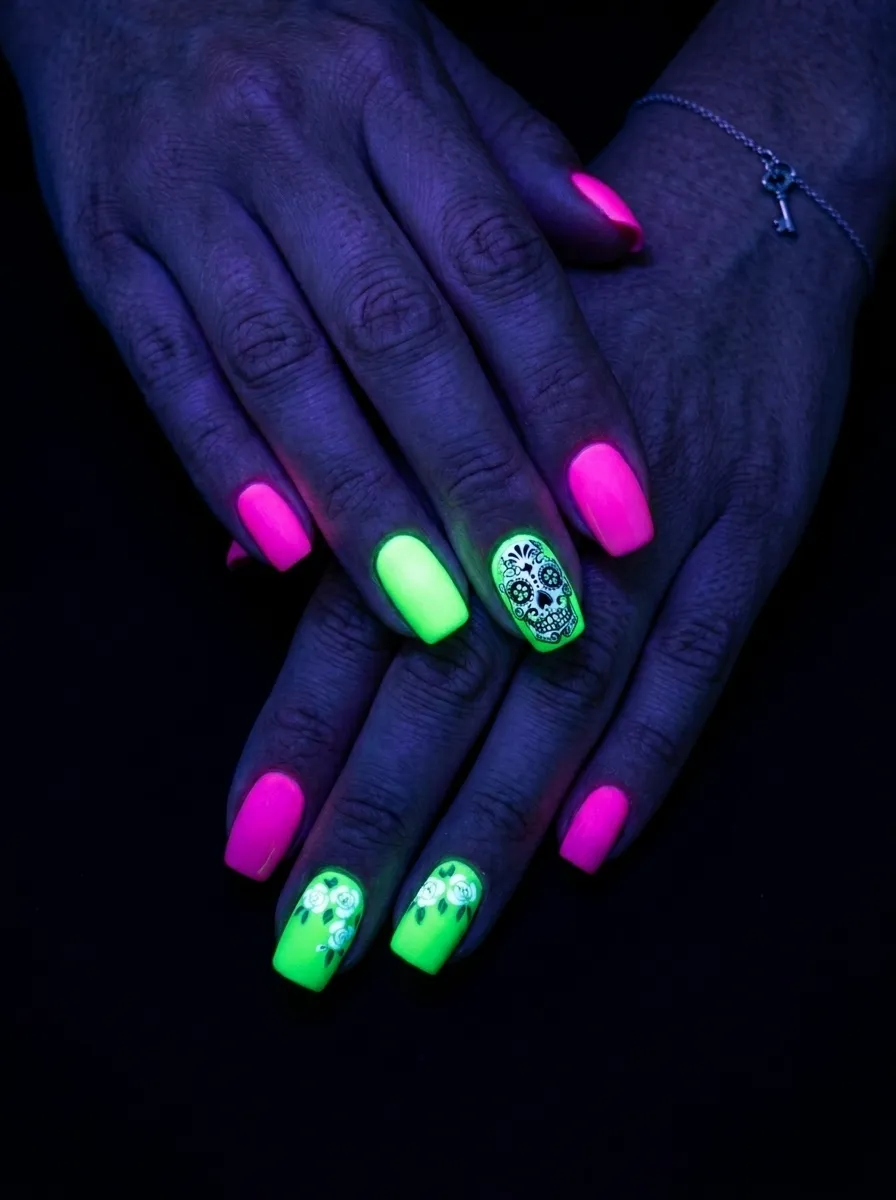
Neon takes Día de los Muertos nails in an entirely different direction — loud, electric, and party-ready.
Use neon pink, neon green, and electric blue as your base colors. Alternate them across your nails for a look that’s maximalist in the best way.
Paint skull faces in bright white over the neon bases. The contrast makes each skull jump off the nail.
Add neon orange and yellow flowers around the skull’s eyes for extra dimension.
Why this works for parties: Under UV or black light, neon polish glows. If you’re heading to a Día de los Muertos event with creative lighting, these nails become an actual light source in the crowd.
Regular neon polishes glow under black light without needing any special formula — test yours first to be sure.
Budget tip: Neon polishes are inexpensive at beauty supply stores and craft stores. Sally Hansen’s neon collection and similar drugstore options are around $4–$6 per bottle and give strong opacity.
Pair neon nails with an otherwise simple outfit. When your nails are this bold, the rest of your look doesn’t need to compete.
Watercolor Effect Skull Nails
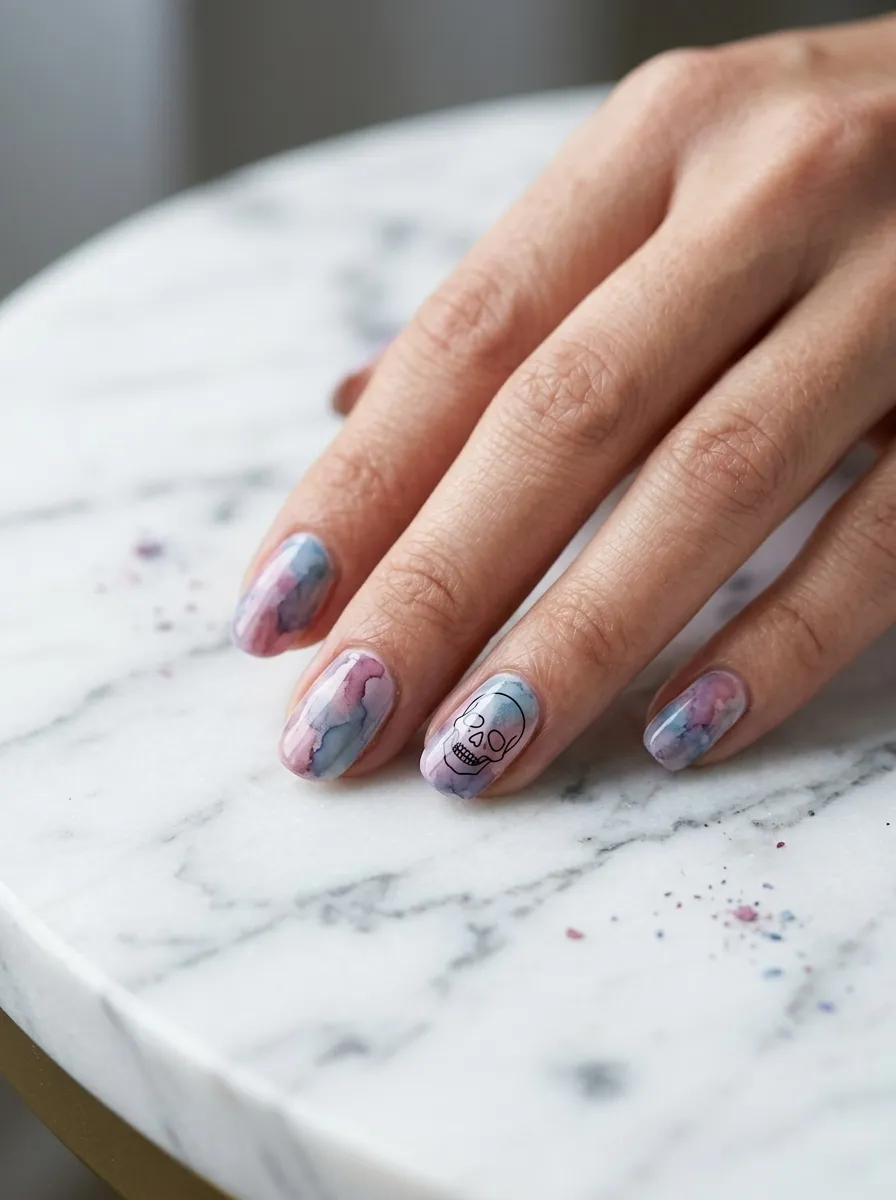
Watercolor nails look like you painted them with actual watercolors. The technique is approachable and forgiving, which makes it great for beginners.
Here’s how to get the effect at home:
- Start with a white or pale nude base
- Drop small amounts of 3–4 nail polish colors onto the nail (don’t let them dry)
- Use a small makeup sponge or your finger to gently tap and spread the colors together
- Work quickly before the polish sets
The colors will run into each other in soft, blended pools of color — that’s exactly what you want.
Once dry, add a simple black skull face on top using a nail art pen. The delicate line art against the watercolor background creates a beautiful contrast.
Colors that work well: Soft pink, lavender, teal, and white. Earth tones also work — terracotta, dusty rose, sage.
Budget tip: You’re using polish you likely already own. The sponge technique costs nothing extra. This is one of the most affordable designs on this list.
Finish with a glossy top coat to “lock in” the watercolor look and add depth.
Monarch Butterfly and Skull Nails
Monarch butterflies carry a deep connection to Día de los Muertos. Legend holds that they are the returning souls of ancestors. Including them on your nails is meaningful, not just decorative.
The butterfly wing pattern is actually easier to paint than a skull:
- Paint the nail in orange
- Add thick black veining lines using a nail art pen
- Add a few black dots near the top (the classic monarch pattern)
That’s a monarch butterfly wing. Two nails as wings + one nail as a skull creates a complete Día de los Muertos story on your hand.
Variations to try:
- Full butterfly on two nails, skull on the ring finger
- Butterfly wing halved across two adjacent nails
- Small butterfly silhouette inside the skull’s eye socket
Budget tip: Orange nail polish is inexpensive and everywhere in autumn. You’re likely spending no extra money on the base color.
Pair this set with black nails on the remaining fingers to let the orange-and-black combination carry the design.
This look has strong artistic intent behind it, which makes it a great conversation starter.
Press-On Day of the Dead Nail Kit
Press-on nails have completely changed the game. Modern press-ons look as good as salon sets, they last up to two weeks with the right glue, and they peel off without damaging your nails.
For Día de los Muertos, you have two options:
Option 1: Buy pre-designed sets Search “Day of the Dead press-on nails” on Etsy or Amazon. Small businesses sell hand-painted sets for $12–$25 that are genuinely gorgeous. You’re getting custom nail art without sitting in a salon chair.
Option 2: Paint your own press-ons Buy blank press-on kits (usually $3–$6 for a full set), paint your designs on them while they’re still flat on the table, and apply when dry. This gives you full control over the design without the stress of working on your actual nails.
Application tips for longer wear:
- Clean nails with rubbing alcohol before applying
- Use nail glue (not the sticker tabs for special occasions only)
- Press firmly for 30 seconds per nail
- Avoid water for an hour after application
Press-ons are the most stress-free way to get detailed Día de los Muertos nail art, especially if you want a design too complex to freehand.
Minimalist Single Skull Accent Nail
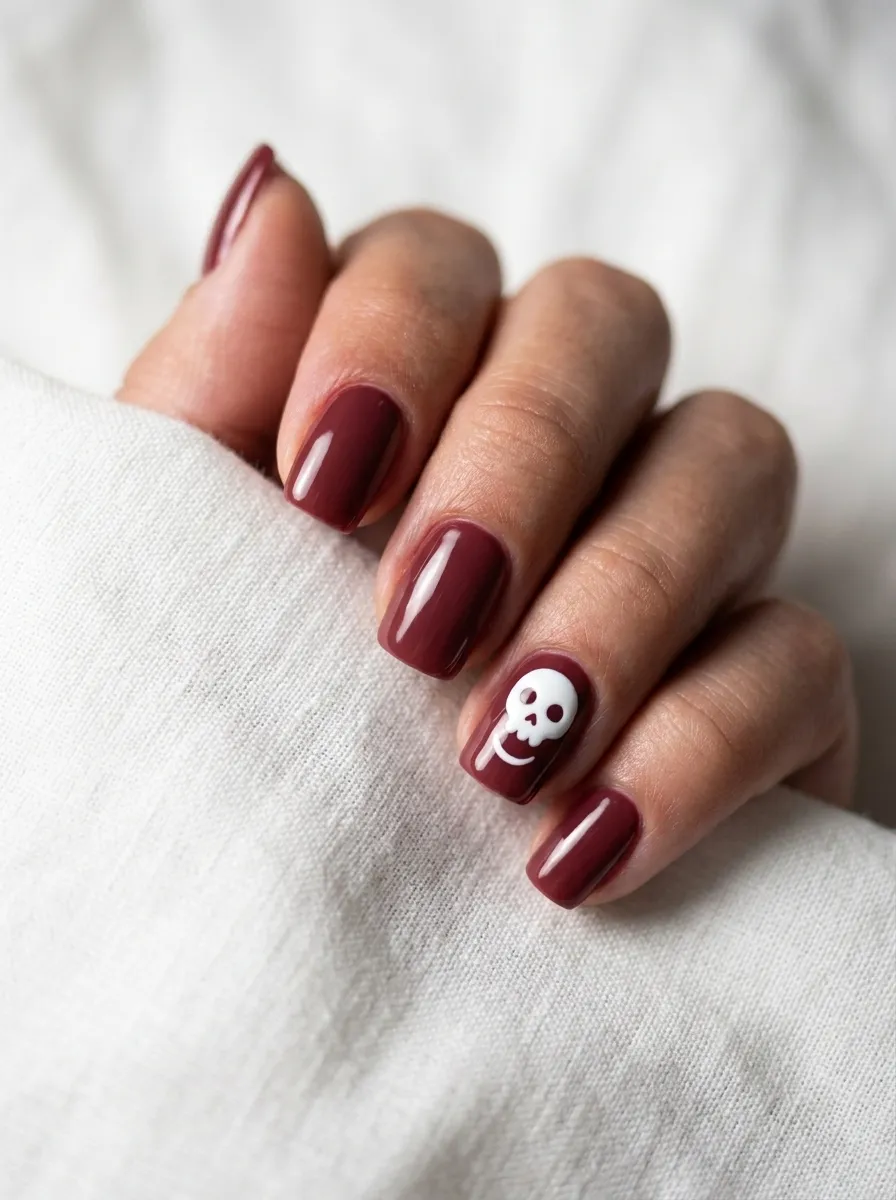
Sometimes less is more. A single skull accent nail on an otherwise plain set is a powerful, wearable choice.
Paint all ten nails in one rich color deep wine, black, burnt orange, or navy.
On only your ring finger, add a small, simple skull face in white. Keep the details minimal:
- Two small ovals for eyes
- A tiny triangle for the nose
- A thin line for the mouth with optional small cross-hatching
That’s it. The contrast between the plain nails and the single detailed nail draws the eye instantly.
Why this approach works for everyday wear: You can go to work, school, or dinner with this look and it reads as bold and intentional without being costume-level dramatic.
Great for: People who love the aesthetic but want something subtle enough for professional settings.
Budget tip: You only need two polishes your base color and white for the skull. Total cost could be under $5 if you already own a dark base.
This is the ideal Día de los Muertos nail design for first-timers. One skull, one accent nail, zero pressure.
Bone and Crossbone Pattern Nails
Crossbones are a stripped-down version of skull art that’s fast to execute and still reads clearly as Día de los Muertos.
The design itself is just two overlapping bone shapes a simple X made of curved rectangles with rounded ends.
Use a white nail art pen to draw:
- One horizontal bone across the nail
- One vertical bone crosses it in the center
That’s a crossbone. Add a small skull above or between the crossbones on an accent nail to connect the theme.
Make it more detailed: Add small circles at the ends of each bone. Real bones have knobby ends, and that detail makes the design look more finished.
This pairs well with the minimalist approach, crossbones on two nails, skull on one, plain black on the rest.
Budget tip: A white nail art pen or acrylic liner is all you need. You can do this entire set with one black base polish and one white detail tool. Total cost: under $8.
It’s clean, fast, and legible from across the room exactly what you want in a graphic nail design.
Full Hand Story-Set Nails
A story-set is when every nail tells a different part of the same visual narrative. The full hand together reads like a complete piece of art.
Here’s one way to build a cohesive 10-nail story set:
| Finger | Design |
|---|---|
| Thumb | Solid black or deep color |
| Index | Spider web |
| Middle | Marigold cluster |
| Ring | Sugar skull face |
| Pinky | Crossbones |
Repeat this pattern on both hands, or alternate designs for variety.
The key to keeping it cohesive: Use the same color palette across all nails. Black and white. Black, white, and gold. Black, white, and red. Pick three colors maximum and stick to them.
Variety in design + consistency in color = a set that looks planned, not random.
Budget tip: You can build this set with as few as three polishes — a base, a detail color, and white. Budget under $15 for the entire look.
This is the most rewarding Día de los Muertos nail set to put together because the final result is genuinely impressive. Take a photo. You earned it.