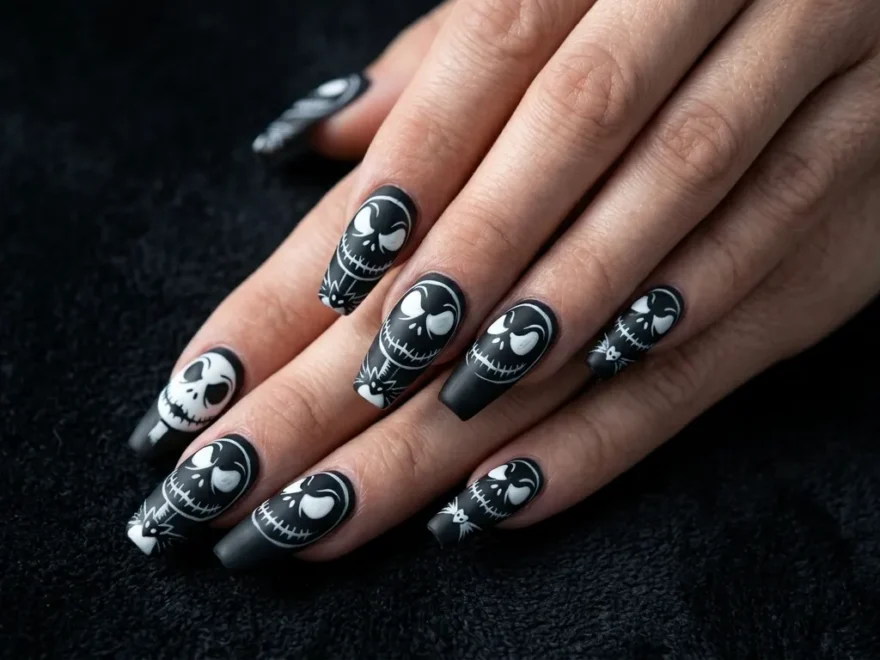
1. Classic Black and White Skull Face
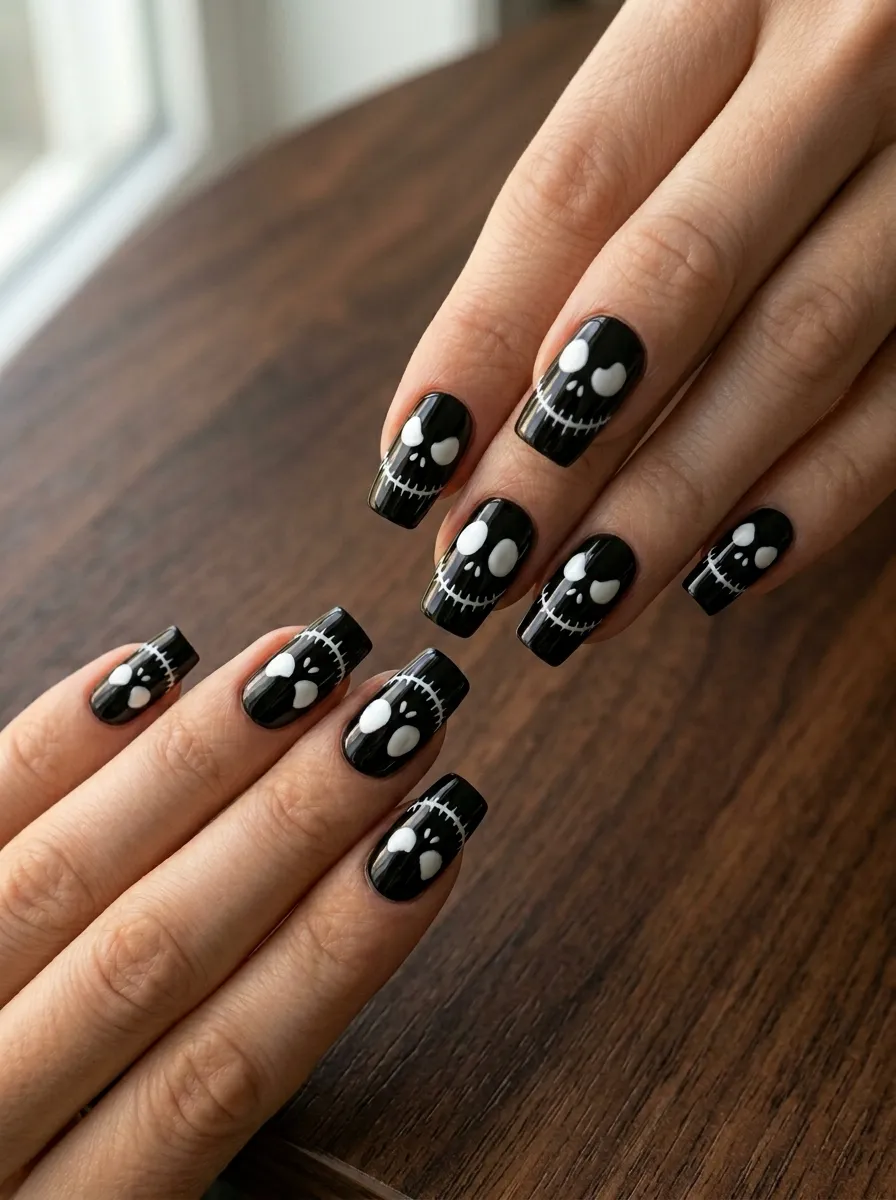
This is the design that started it all. Clean. Simple. Unmistakable.
You paint each nail black first. Let it dry fully. Then use a thin nail art brush or a dotting tool to draw Jack’s face in white.
Start with two white circles for the eyes. Add a wide oval mouth. Draw small vertical lines across it for the stitched grin look.
You do not need expensive tools. A toothpick works perfectly for the fine lines if you do not have a nail art brush.
Seal everything with a glossy top coat. This protects the design and makes the white pop even more.
Budget tip: Grab a black and white nail polish set from a dollar store. They work just as well for this design as premium brands.
This look works on short nails, long nails, and everything in between. It is the perfect starting point if you have never done character nail art before.
Practice the face on paper first. Once you feel confident, move to your nails.
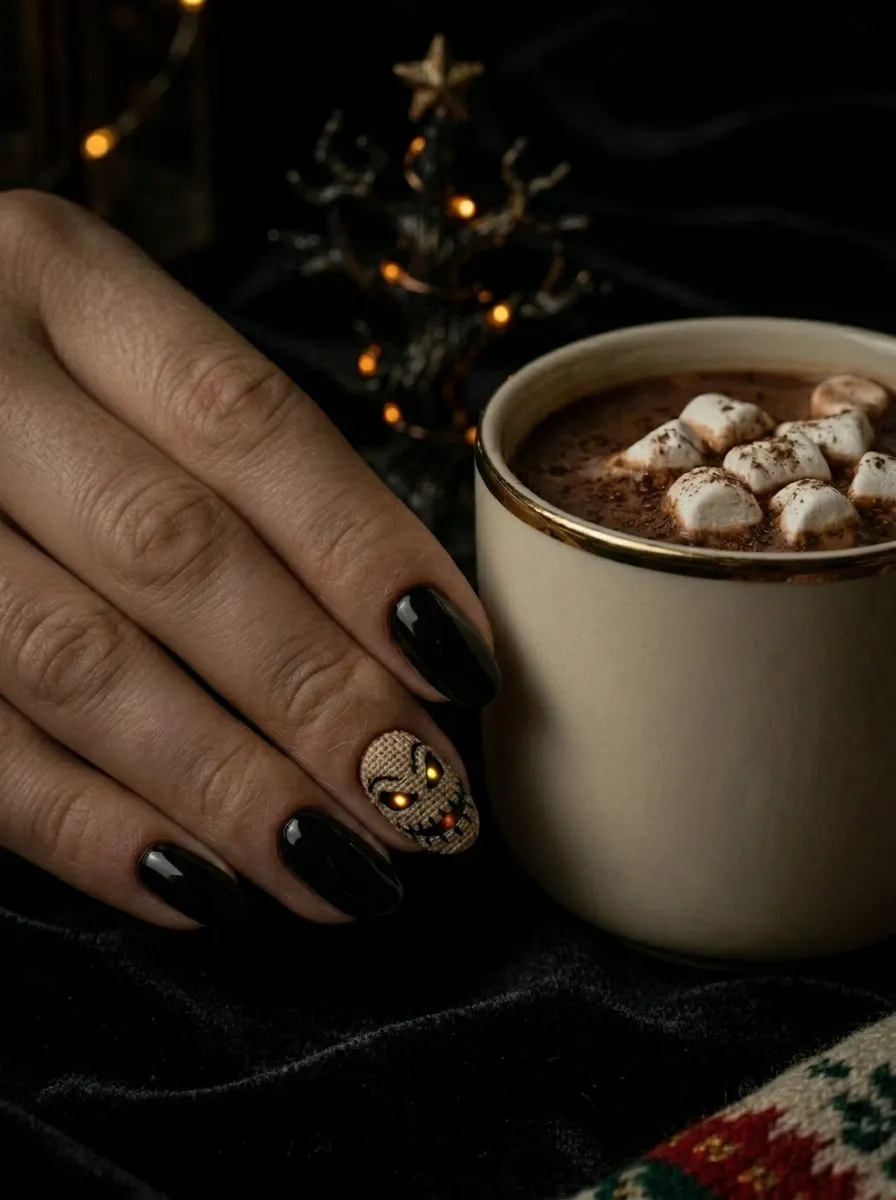
2. Oogie Boogie Accent Nail
Adding one accent nail changes the whole design.
Paint four nails in solid black with Jack’s skull face. Then on your ring finger or thumb, paint Oogie Boogie instead.
He uses a sandy tan or light khaki base. His face is drawn with rough, stitchy lines to mimic the burlap bag look.
The contrast between the dark and light nails is what makes this design stand out.
Use a beige or light brown polish as your base for his nail. Then use a dark brown or black thin brush to draw his round head, hollow eyes, and uneven stitching marks.
This is a great option if you want a design that tells a little story across your nails.
Budget tip: Mix a little white polish into a tan polish to get the right burlap color if you do not own one already.
You can find Oogie Boogie reference images easily online. Print one out and keep it beside you while you paint for easy reference.
This nail takes a bit more patience but the payoff is worth every second.
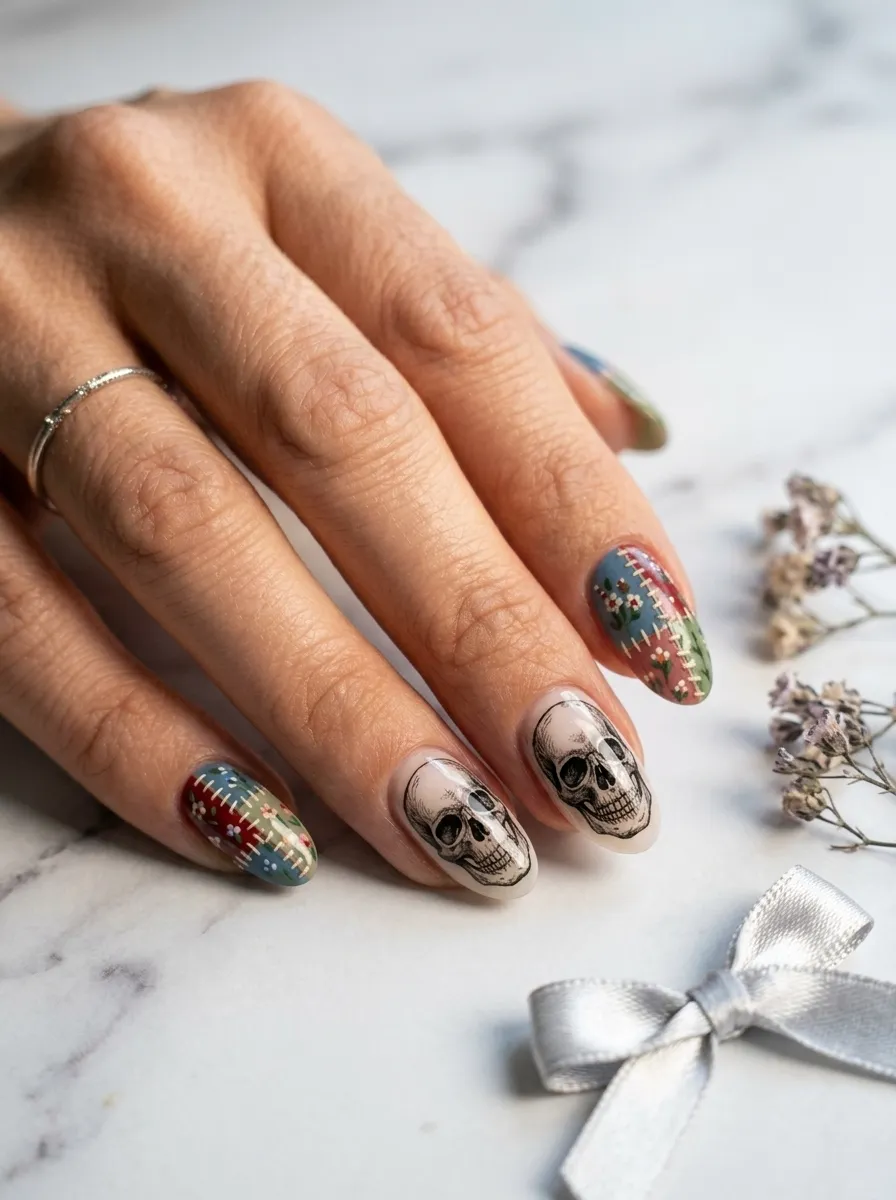
3. Sally Floral Detail Nails
Sally deserves her own nails too.
She is all about patchwork, muted colors, and delicate flowers. You can add her aesthetic to a Jack-themed set by including one or two nails with her signature look.
Choose two or three muted tones. Think dusty blue, faded red, and sage green. Paint each nail a different color and add small stitch lines along the edges using a thin brush and white or black polish.
Add tiny flowers on one nail to represent the flowers Sally gives Jack in the film.
Use a dotting tool dipped in white polish to make small five-petal flowers. Add a yellow dot in the center.
This gives your nail set a romantic, gothic feel that goes beyond just the skull motif.
Budget tip: This design works beautifully with drugstore polishes in muted or dusty tones. You do not need anything fancy.
Mix the Sally and Jack designs across both hands for a couple-themed look. It works perfectly for Halloween events or themed parties.
This is a wonderful option for people who love the love story at the heart of the film.
4. Spiral Hill Silhouette Nails
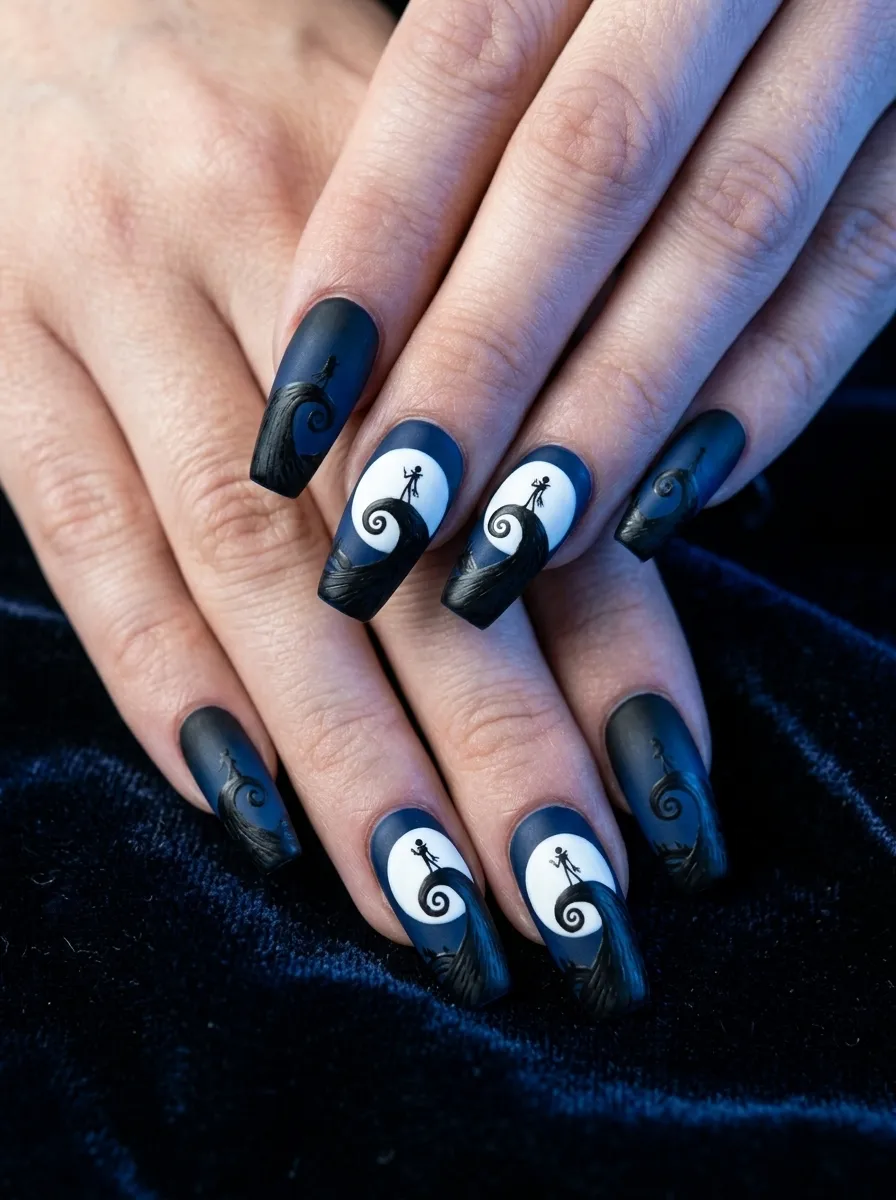
This design pulls directly from one of the most iconic images in the film.
Paint your nails in a deep navy or dark blue-black. While still wet or after drying fully, use white polish to paint a round moon shape on some nails.
Then add the swirling hill silhouette in black on top of the moon. Finish by placing a tiny Jack stick figure at the top of the spiral.
It looks like a tiny scene painted on each nail.
This is easier than it sounds. The hill is just a wavy S-shaped line that curves up. The figure is just a thin black oval for a head and two straight lines for legs.
Work slowly. Let each layer dry before adding the next one.
Budget tip: Use a fine-tipped black nail art pen instead of a brush. These cost around two dollars at most beauty supply stores and make the linework much easier.
This design looks stunning on longer nails where you have more space to work with but it can absolutely be simplified for shorter nails too.
5. Glitter Skull Accent
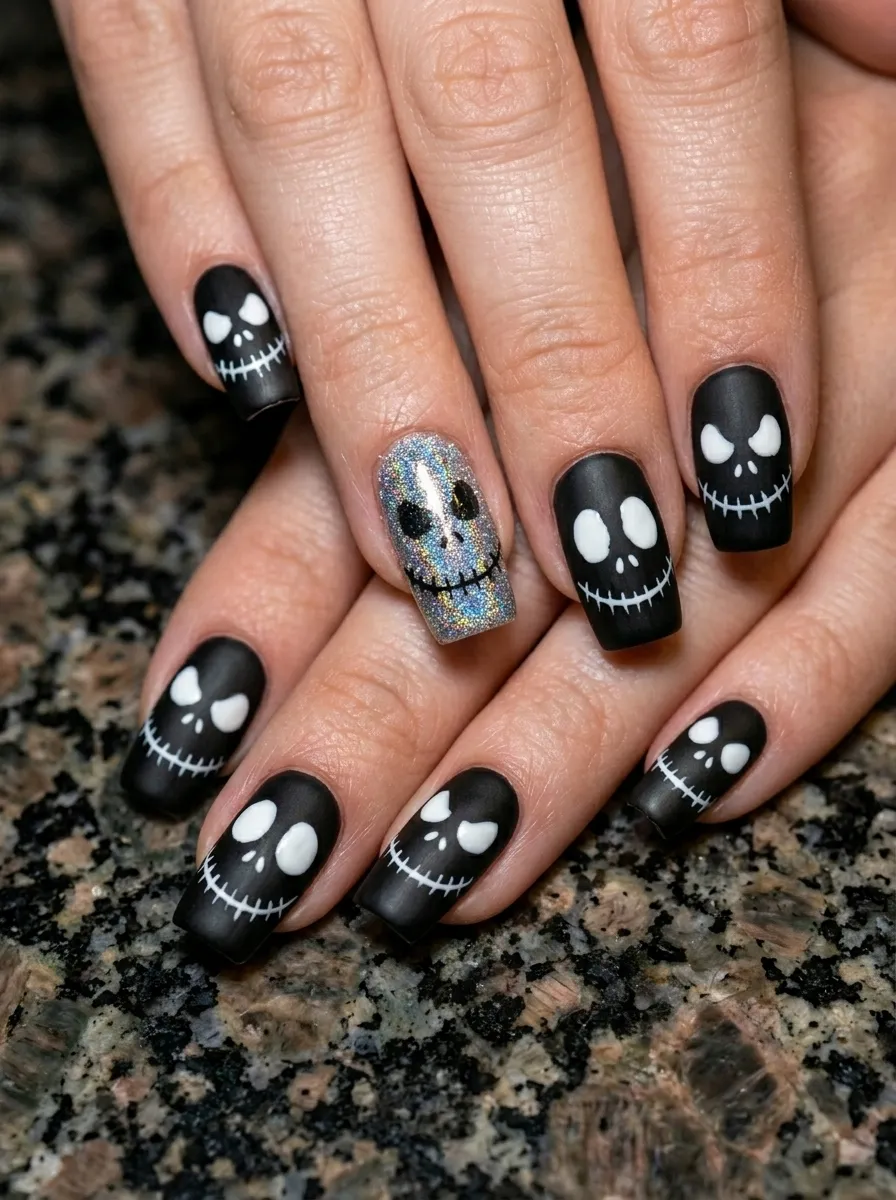
Sometimes one glittery nail is all you need to take a look from cool to unforgettable.
Paint all nails black. On your accent nail, apply a layer of silver or holographic glitter polish. While it is still tacky, use a dotting tool to place a clear outline of Jack’s skull face using a slightly darker glitter or black polish.
The sparkle makes the design feel festive without losing the gothic edge.
This works especially well for holiday nail sets worn in December when people celebrate a Nightmare Before Christmas Christmas aesthetic.
You can also reverse it: paint one matte black skull nail among several glitter nails for a different kind of contrast.
Budget tip: Glitter top coats from the dollar store work great here. You do not need a full glitter polish.
This is a five-minute addition that completely changes the feel of your set. Anyone who loves a little shimmer with their spooky will enjoy this option.
It also photographs beautifully under any lighting, making it perfect if you want to share your nails on social media.
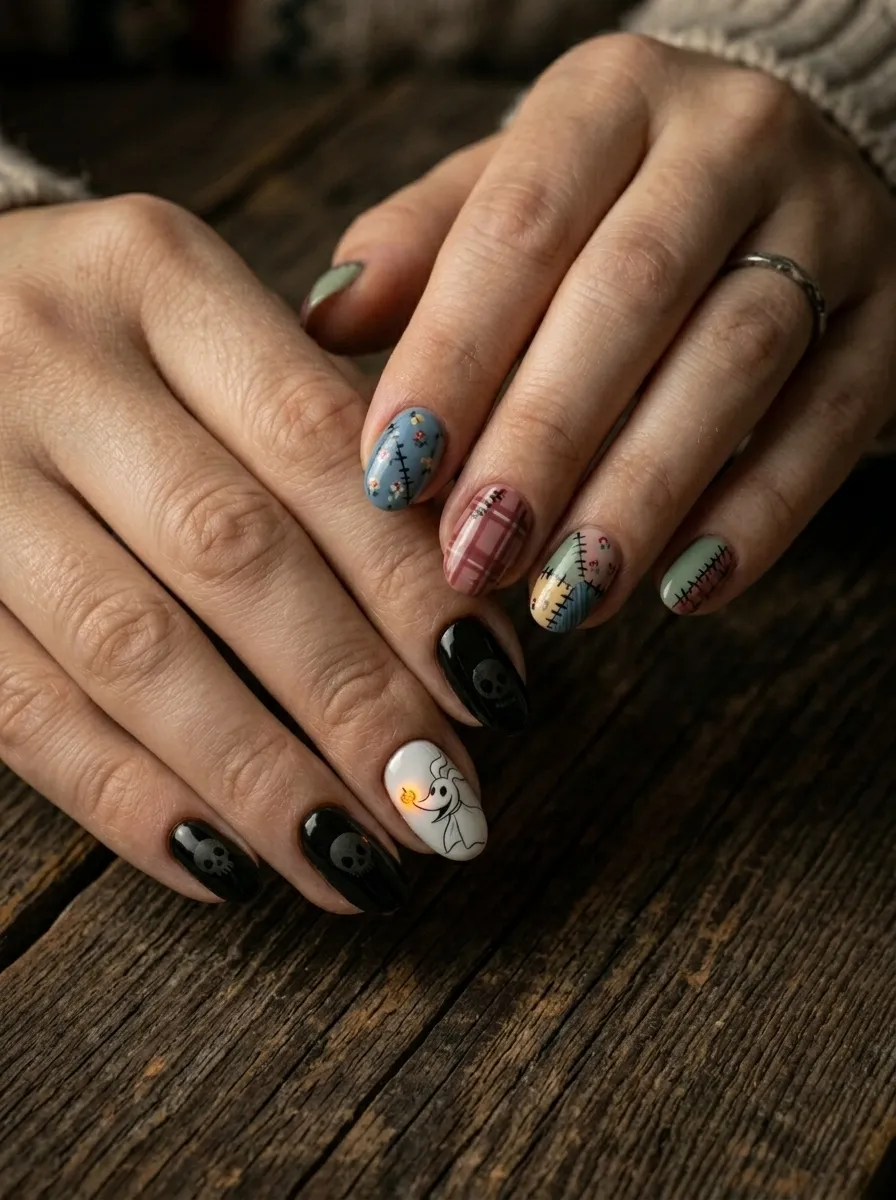
6. Zero the Ghost Dog Nails
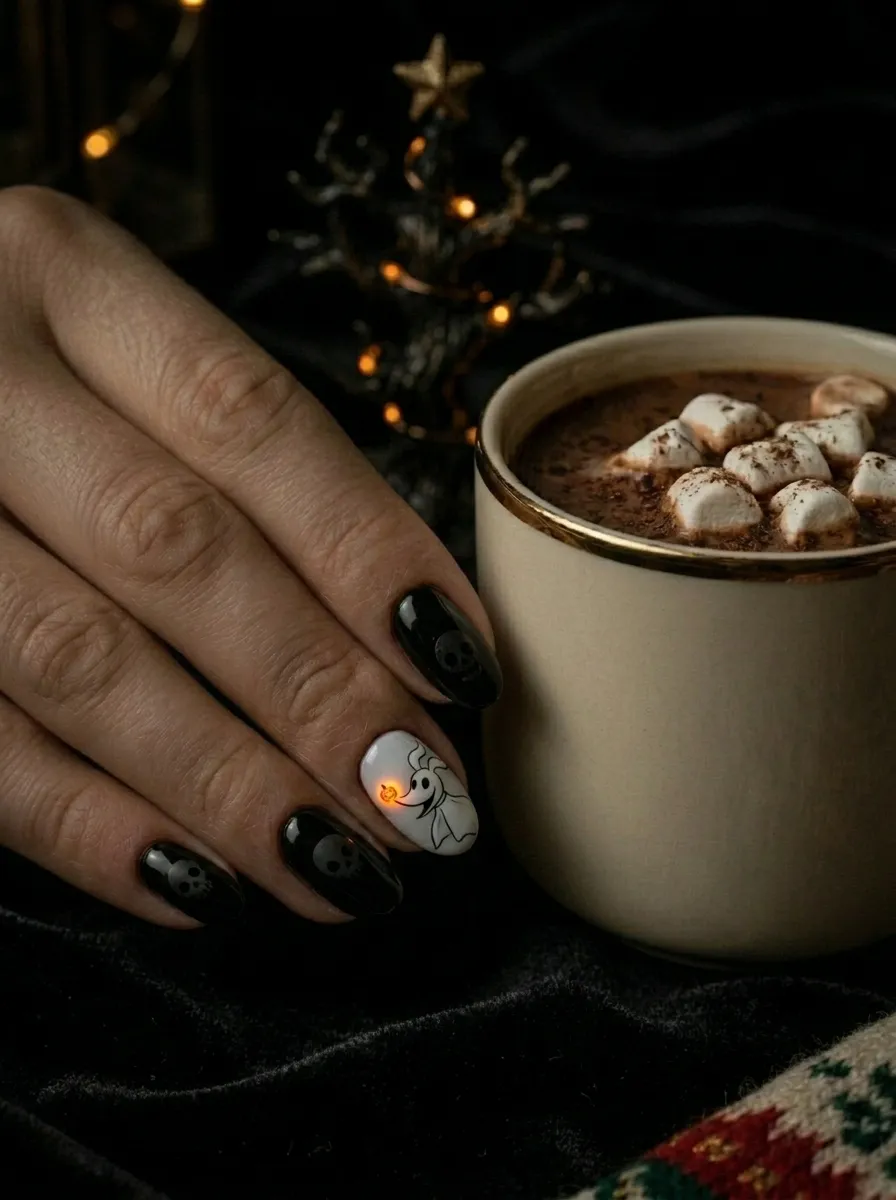
Zero is one of the most beloved characters in the film and he deserves a spot on your nails.
His design is simple. He is a small white ghost with a floppy ear, two dot eyes, and an orange pumpkin nose that glows.
Paint one nail white or pale gray. Use a thin brush to add his simple ghost shape outline in light gray. Add black dot eyes and a tiny orange dot for his nose.
This nail is sweet, simple, and easy enough for beginners.
Surround the Zero nail with black skull nails for contrast. The white nail pops beautifully against a black set.
You can also use a soft glow effect by dabbing a little orange polish around the nose with a sponge tip.
Budget tip: If you do not have orange polish, use a tiny yellow and red mix on a palette or piece of foil. Blend them together for a quick DIY orange.
Zero nails are perfect for people who want a Nightmare Before Christmas set that feels a little softer and less intense than all-black skull designs.
He is the perfect accent nail character.
7. Nightmare Before Christmas Watercolor Effect
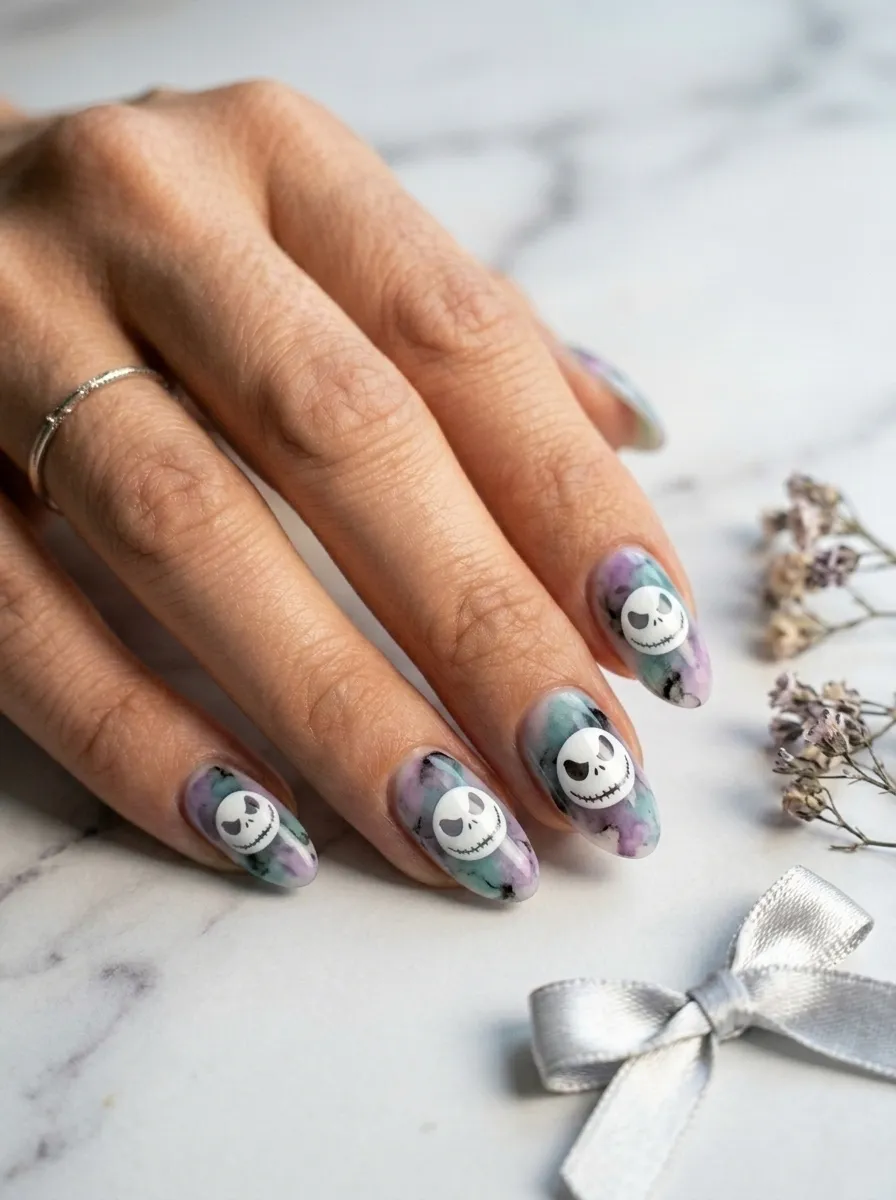
Watercolor nails look complex but they are actually one of the easiest styles to create.
You use nail polish thinner or rubbing alcohol to dilute your colors. Then you brush them across the nail quickly before they dry to create a soft, smeared effect.
Choose colors that match the moody film palette. Deep purple, smoky teal, dusty rose, and black work beautifully together.
Once the watercolor base dries, stamp or hand-paint a white Jack silhouette on top.
The contrast between the dreamy background and the sharp white figure looks stunning and artistic.
This design works best on longer or oval-shaped nails where the gradient has more space to breathe.
Budget tip: You do not need nail polish thinner. A drop of rubbing alcohol from a cotton swab gives the same blending effect.
Practice this on a nail tip or your own nail covered with tape first. The technique takes one or two tries to get right, but once you understand the timing it becomes easy and fast.
This is a great design to try when you want something more artistic and painterly.
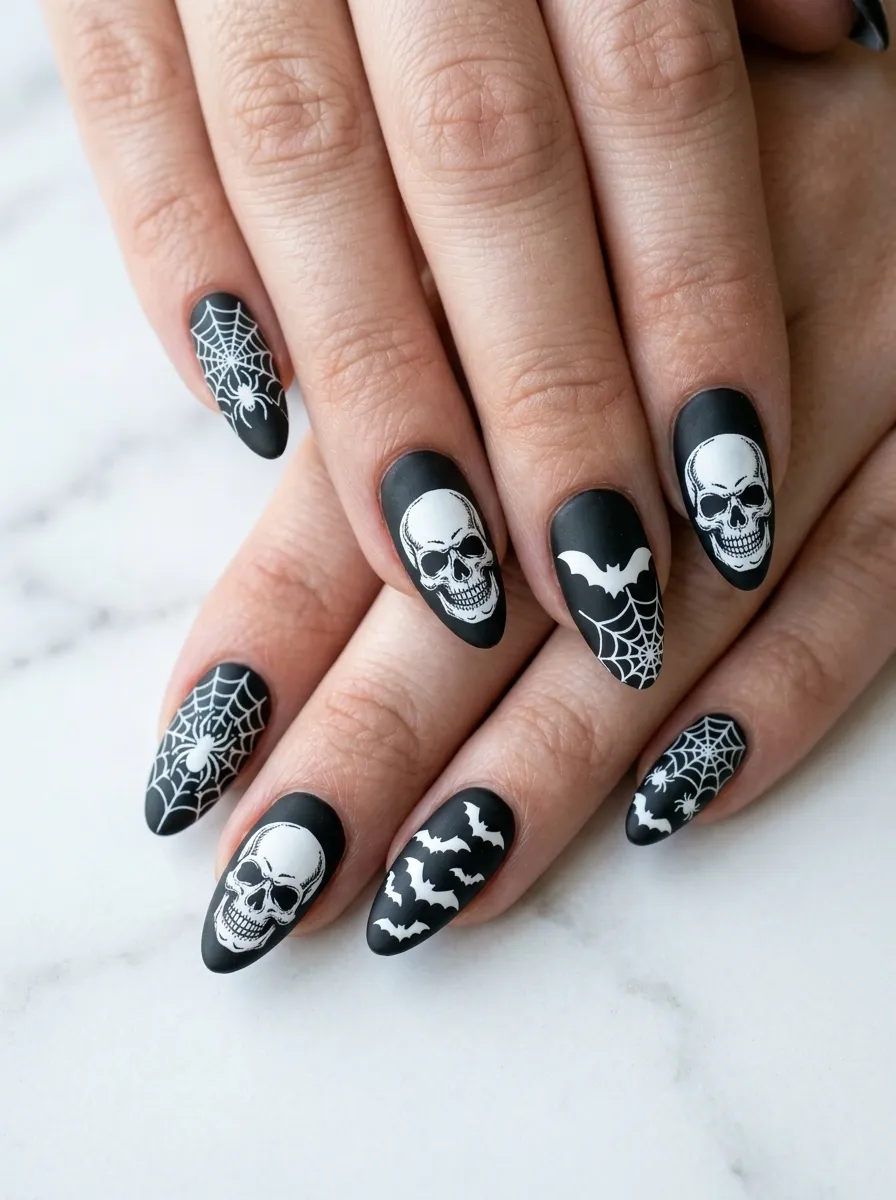
8. Matte Black with White Bat Details
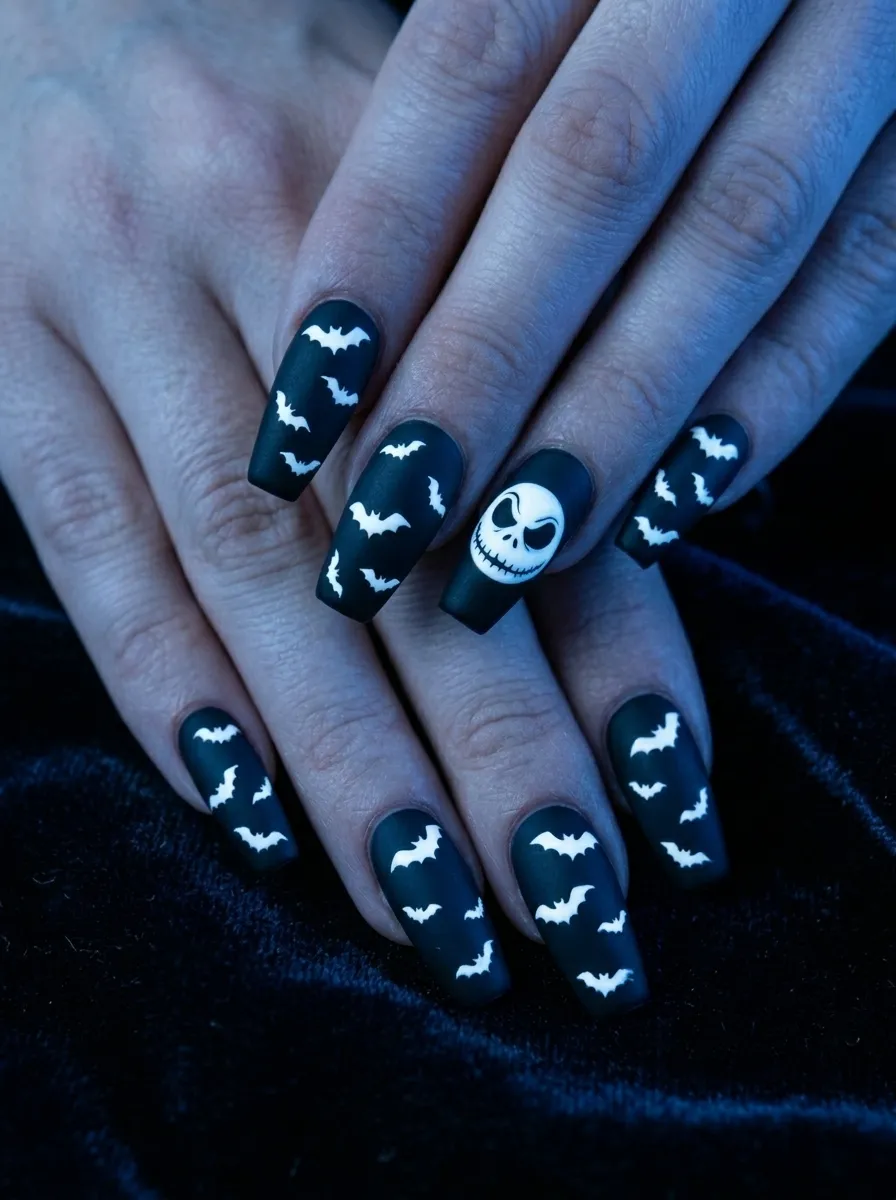
Bats are everywhere in Nightmare Before Christmas and they make a gorgeous nail detail.
Start with matte black nails. Use a matte top coat over your regular black polish once it dries to get that flat, moody finish.
Then use white polish and a thin nail art brush to paint small bat shapes. A bat is just a small M shape with a pointed body underneath.
Scatter two or three bats across each nail in different sizes for depth.
On your accent nail, paint Jack’s face in the center surrounded by flying bats. It looks like a movie poster on your finger.
Matte finishes photograph exceptionally well and they feel more elevated than regular shiny polish.
Budget tip: If you cannot find a matte top coat, lightly buff a shiny nail with a fine buffer after it dries. This removes some of the gloss and creates a semi-matte look for free.
This design works on all nail lengths and nail shapes. It is particularly dramatic on coffin or stiletto shapes.
The bat detail alone adds enough character to make this design special even without the skull face.
9. Ombre Skull Nails
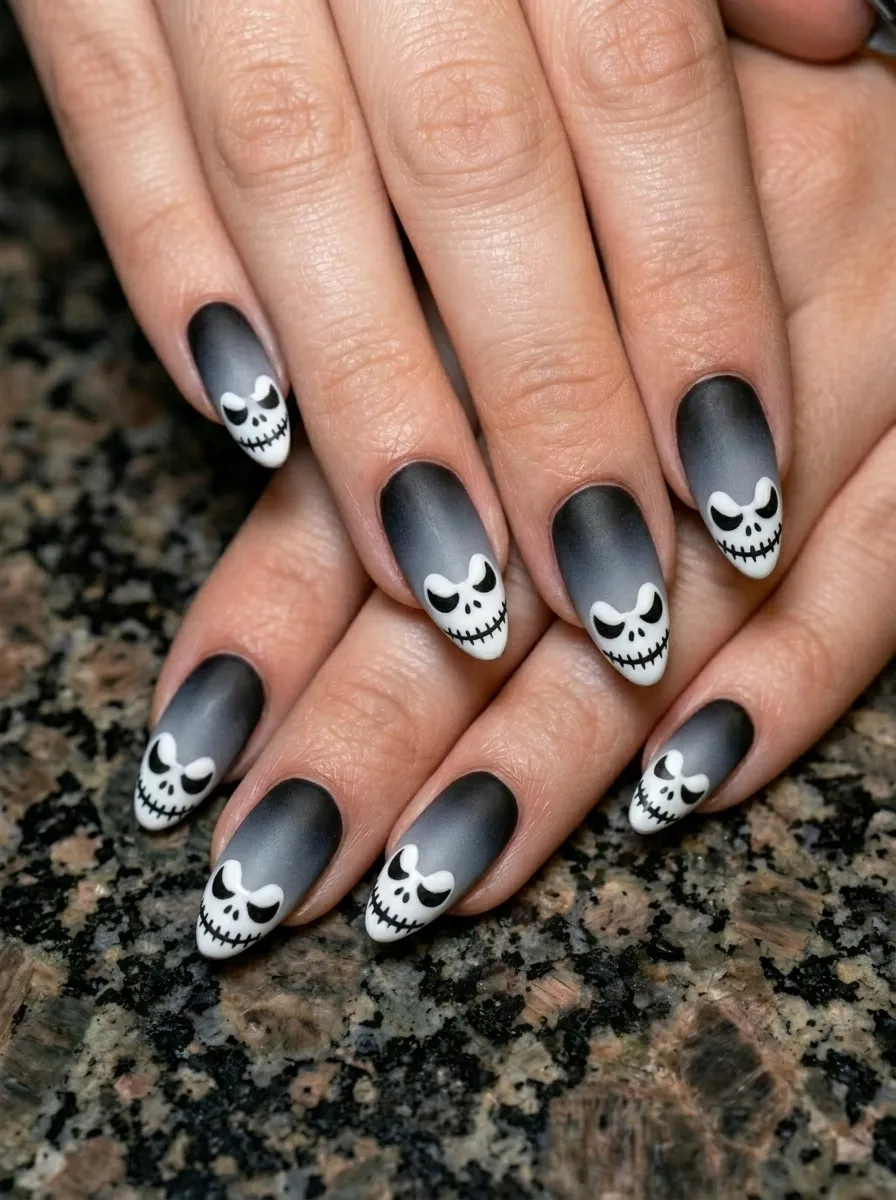
Ombre nails and gothic character art are a perfect match.
To create an ombre effect, you apply two colors to a makeup sponge side by side and dab it onto the nail. This blends the colors together naturally.
Use black fading into gray or dark purple fading into black. Both work beautifully under a Jack Skellington design.
Once the ombre base dries, add the skull face in white at the center or tip of each nail.
The gradient gives the design a smoky, dramatic background that makes the white skull pop even more than it would on a flat black base.
Apply two or three layers of the sponge gradient for a richer blend. Clean up the edges with a small brush dipped in acetone.
Budget tip: A cheap makeup sponge cut into small pieces works perfectly for this technique. You do not need special nail sponges.
This is a slightly more involved technique but the result looks genuinely professional. Even a beginner can achieve a nice fade on the first try with a little patience.
Ombre nails also look great in photos, making this a popular choice for nail art social media posts.
10. Jack and Sally Couples Nails
This idea is perfect for couples or for anyone who loves wearing themed nail sets on both hands.
One hand gets Jack. The other hand gets Sally.
The Jack hand uses black polish with white skull faces on each nail. The Sally hand uses patchwork-style nails in muted tones with small stitched edges and floral accents.
Together the two hands tell the whole love story of the film.
This works beautifully for Halloween parties, themed events, or even for a Nightmare Before Christmas fan who wants something more detailed than a standard matching set.
The key is choosing colors for Sally that complement the black of Jack’s nails. Dusty blue, muted red, faded green, and pale yellow all work well.
Budget tip: Use nail tape or striping tape to create clean patchwork edges on the Sally nails without needing a steady brush hand.
This design gets a lot of attention in person and in photos. People immediately recognize what the two hands represent when they are held together.
It is one of the most personal and creative ways to wear Nightmare Before Christmas nail art.
11. Spiderweb Tip Nails
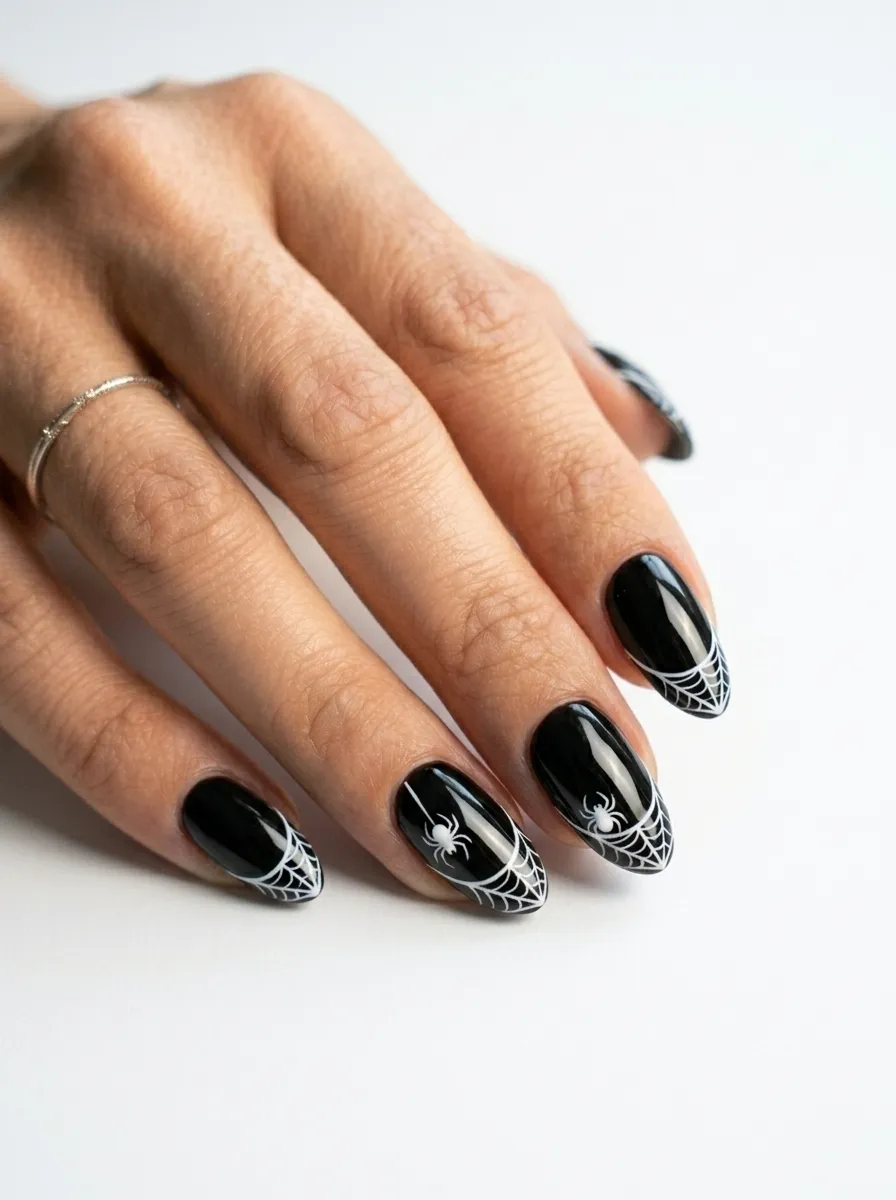
This design puts a gothic spin on the classic French manicure.
Instead of white tips, you paint spiderwebs at the tips of your nails. Start with a black base. Let it dry fully.
Use white polish and a thin brush to paint two crossing lines at the tip of each nail. Then connect them with curved lines going from the center outward to create the web shape.
Add a small round spider at the corner of the web on a few nails for extra detail.
This design looks incredibly clean and polished even though it is simple to execute.
It works especially well on square or rounded square nail shapes where the tip area is flat and easy to work on.
Budget tip: A fine-tip white nail art pen is the easiest tool for drawing webs. These cost under two dollars and make the process much faster and more controlled.
You can mix this design with a Jack Skellington accent nail. Put the skull face on your ring finger and webs on all the others.
This is a popular choice for people who want something spooky but still office-appropriate or wearable for everyday use.
12. Glow in the Dark Jack Nails
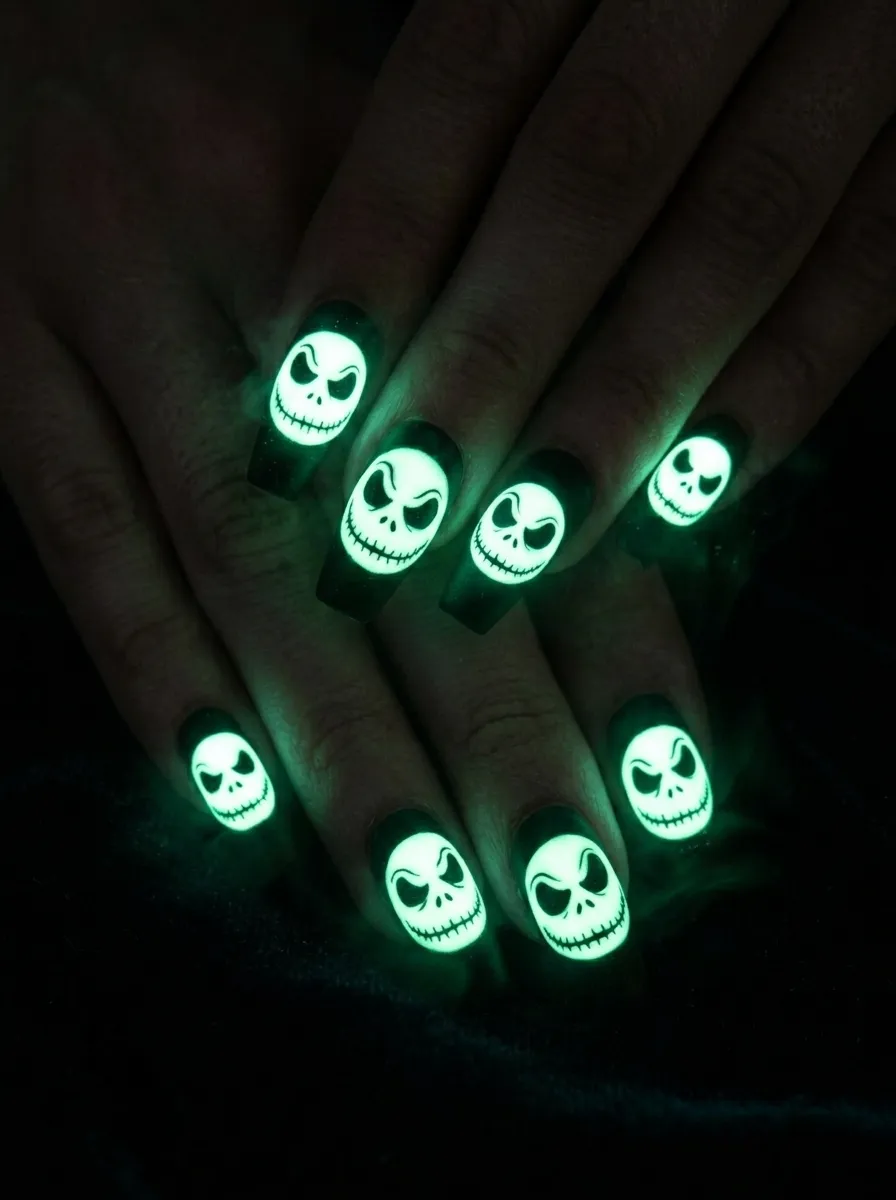
This design takes spooky nail art to a whole new level.
Paint your nails black as usual. Then use glow in the dark polish to paint Jack’s skull face over the top. In daylight, the face will appear slightly white or cream-colored. In the dark, it glows.
This is one of the most dramatic effects you can create with nail polish.
Glow in the dark polish is widely available and inexpensive. Most beauty supply stores and online retailers carry it for a few dollars.
Apply two or three coats of the glow polish to make the effect stronger. The more coats, the brighter the glow.
Charge the glow by holding your nails under a light source for thirty seconds before going into a dark room.
Budget tip: Glow in the dark nail polish sets from craft stores often include multiple colors at a low price. Look for sets rather than single bottles for better value.
This design is a major hit at Halloween parties and haunted events. People will ask you about your nails all night.
It is also genuinely fun to look at your own hands in the dark and see the skull faces glowing back at you.
13. Stamped Jack Nails for Beginners
Nail stamping is the number one technique for beginners who want detailed nail art without a steady brush hand.
You use a stamping plate with pre-engraved designs. Apply polish over the engraving, scrape off the excess, then roll a rubber stamper over the plate to pick up the image. Press it onto your nail.
The result is a clean, detailed print every time.
Look for stamping plates that include skulls, gothic patterns, or full Jack Skellington face designs. Many are available for two to five dollars online.
Use white or silver stamping polish for the best visibility on black nails. Regular polish is often too thin for crisp stamps, so grabbing a proper stamping polish makes a real difference.
Practice pressing straight down and rolling in one motion. After two or three tries it becomes second nature.
Budget tip: Beginner stamping kits on budget sites include a plate, stamper, and scraper for around five dollars total. This is enough to get started and create professional-looking nails.
This is honestly one of the best investments for anyone who loves detailed nail art but struggles with freehand painting.
14. Purple and Black Halloween Gradient

Black does not have to be the only dark shade in your Jack Skellington set.
Deep purple adds richness and a witchy quality that pairs beautifully with the Nightmare Before Christmas aesthetic.
Create a gradient using purple at the base of the nail fading into black at the tip. Use the sponge dabbing method mentioned earlier.
Once dry, paint Jack’s skull face in white over the darkest part of the nail.
The skull appears to float in darkness, which looks incredibly dramatic and cinematic.
This color combination also looks stunning under UV or black lights, making it perfect for nighttime Halloween events.
Budget tip: Mix regular blue and red polish together to create a custom deep purple if you do not own one. Start with red and add blue gradually until you reach the shade you want.
This gradient works on any nail shape but looks particularly striking on coffin and almond nails where the shape adds to the dramatic feel.
If you enjoy wearing gothic or witchy aesthetics year-round, this nail design works beyond Halloween season too.
15. Nightmare Before Christmas Full Story Nails
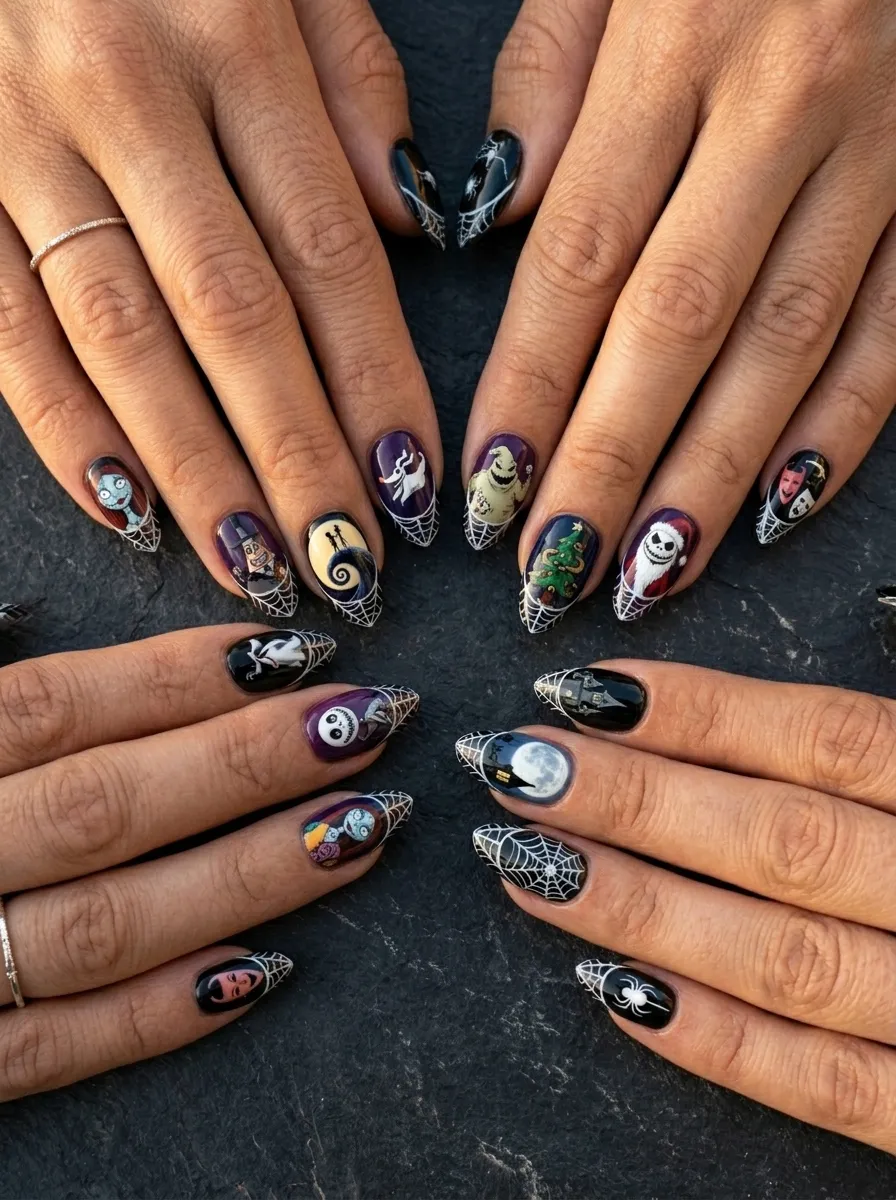
This is the ultimate Nightmare Before Christmas nail set.
Each nail tells a different part of the story. Jack on one nail. Sally on another. Zero on the next. Oogie Boogie. The Spiral Hill. A full moon. A graveyard. Spiderwebs.
You are essentially painting a tiny film poster across all ten nails.
This design takes the most time and planning. Start by sketching out which character or scene goes on which nail. Keep a reference image beside you while you paint.
Work nail by nail rather than trying to do everything at once. Let each nail dry before moving to the next.
Use a mix of freehand painting, dotting tools, and if needed, stamping plates for more detailed elements.
Budget tip: You only need black, white, and a handful of accent colors to pull this off. The designs themselves are all simple shapes and lines. The impact comes from the combination, not complexity.
This set is a real conversation starter. Wear it to a Halloween party, a themed event, or just because you love the film.
It is the kind of nail art that makes people stop and ask for a closer look every single time.
Jack Skellington nail art is one of the most rewarding styles you can try at home. The designs range from quick and simple to genuinely detailed, which means there is always something new to try no matter your skill level. You do not need an expensive salon visit or professional tools to wear these looks. A few polishes, a thin brush, and some patience are all it takes to create nails that get noticed. Start with the design that feels most manageable to you and build from there. Whether you go for a classic black and white skull, a full story set across ten nails, or something glowing in the dark, you will find that Jack Skellington nail art is worth every minute you spend on it.