There is something permanently cool about black nail ideas. They do not try to match anything, do not follow trends, and do not require explanation. A well applied black manicure communicates confidence with zero effort. Yet despite their simplicity, black nails offer more variety than most people realize the finish, shape, texture, and small design details you choose can make black feel completely different from one look to the next. This guide covers 25 effortless ways to wear simple black nails, from the bare minimum glossy coat to subtle creative touches that keep things interesting without losing that core, unfussy energy. If you’re exploring zombie nail ideas, black nails can also serve as the perfect base for creating creepy, dramatic, and Halloween-inspired designs like blood accents, cracked textures, and dark undead effects.
1. Classic Glossy Black Nails
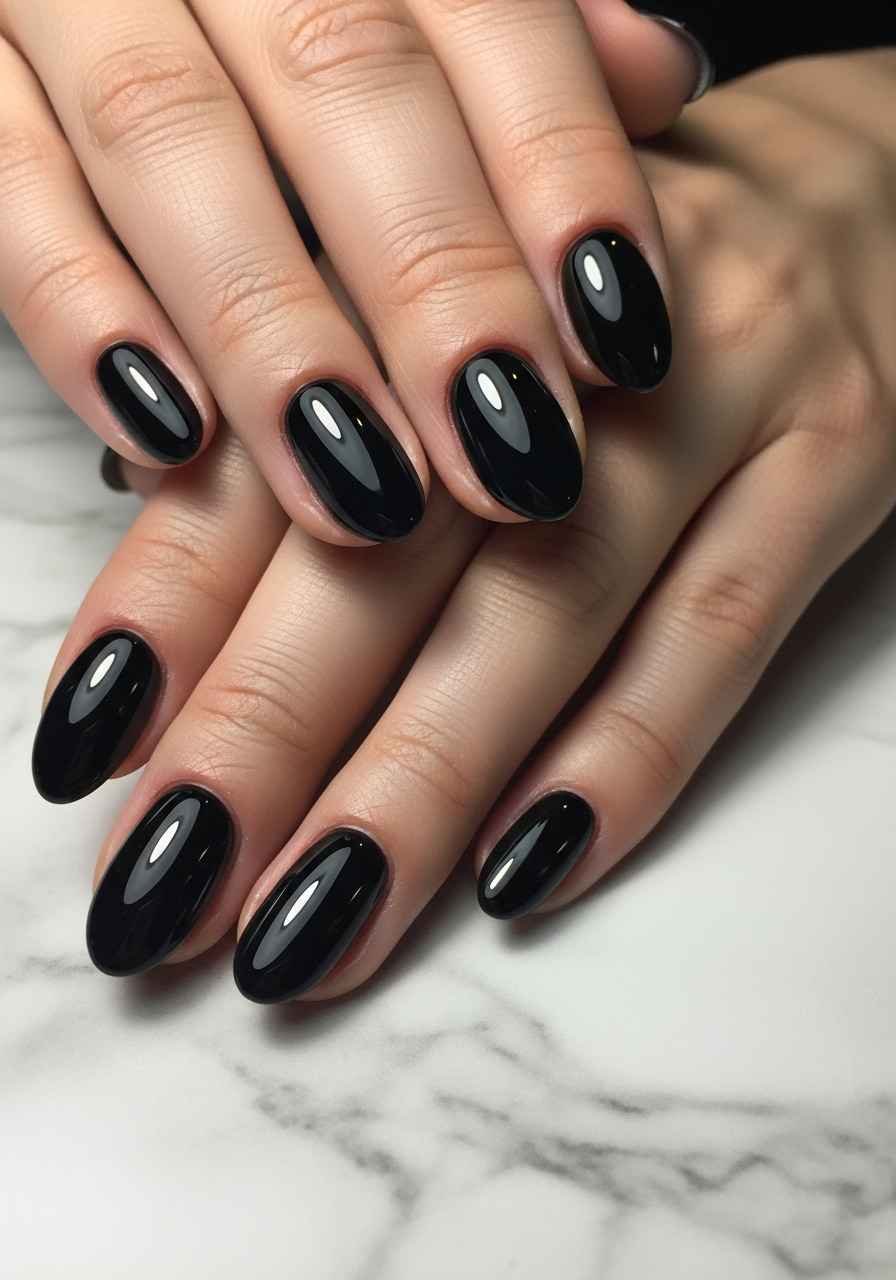
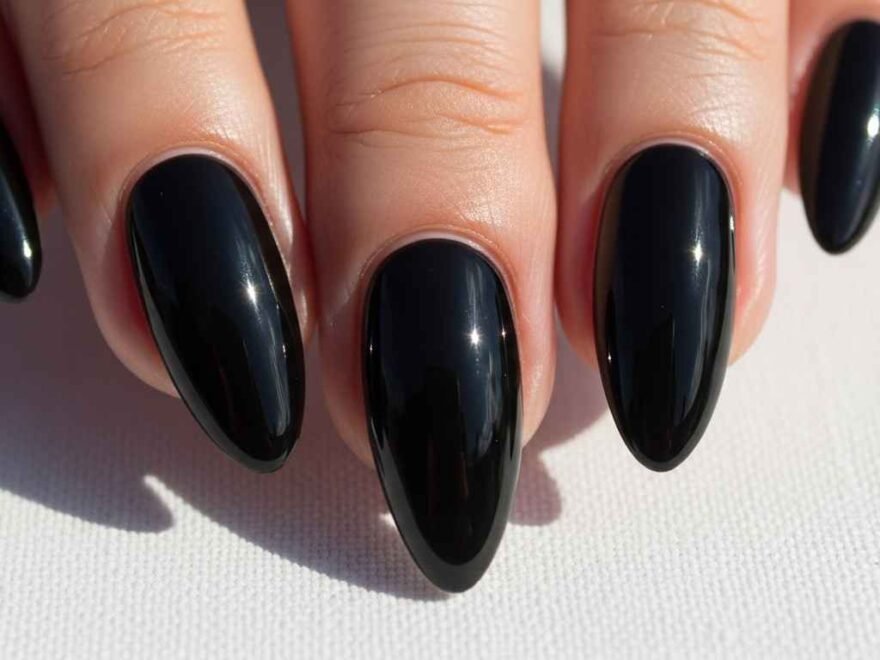
The most foundational black nail look needs no decoration or design a deeply saturated black in a high gloss finish is genuinely all you need. The gloss transforms black from flat and matte into something that looks lacquered, polished, and intentional.
Getting truly opaque black requires a specific approach. Thin coats are your best tool here two to three thin coats layered carefully give far better results than one thick coat, which drags, bubbles, and dries unevenly. Use a dark blue or black base coat underneath to fill any translucency in the black pigment.
A thick, high shine top coat applied every two to three days keeps the gloss at its peak and extends your manicure significantly. Black chips are very visible against the dark background the top coat refreshes prevent this. This look works on every nail shape but shines most on almond and oval where the shine catches and moves with the curved surface. Own it completely there is no half measure with glossy black.
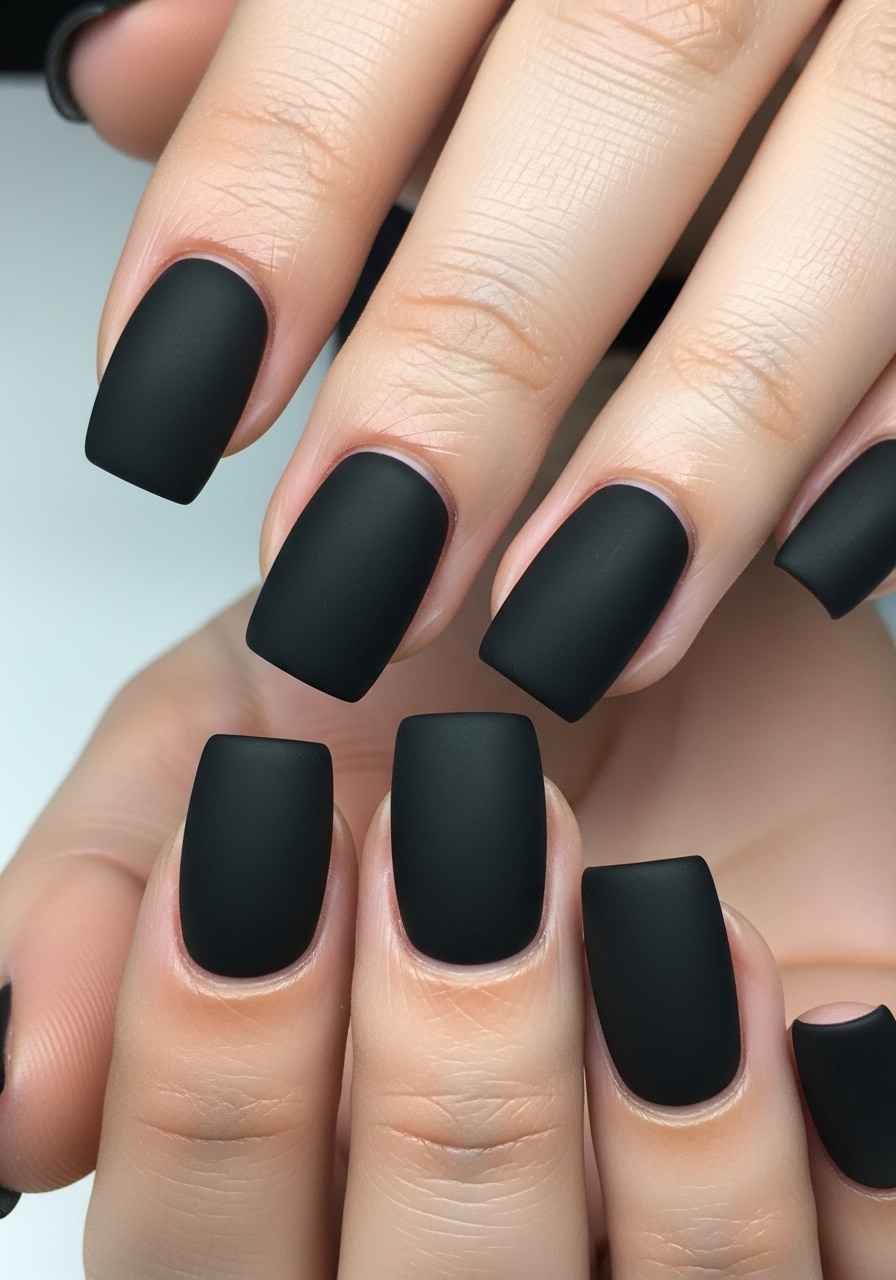
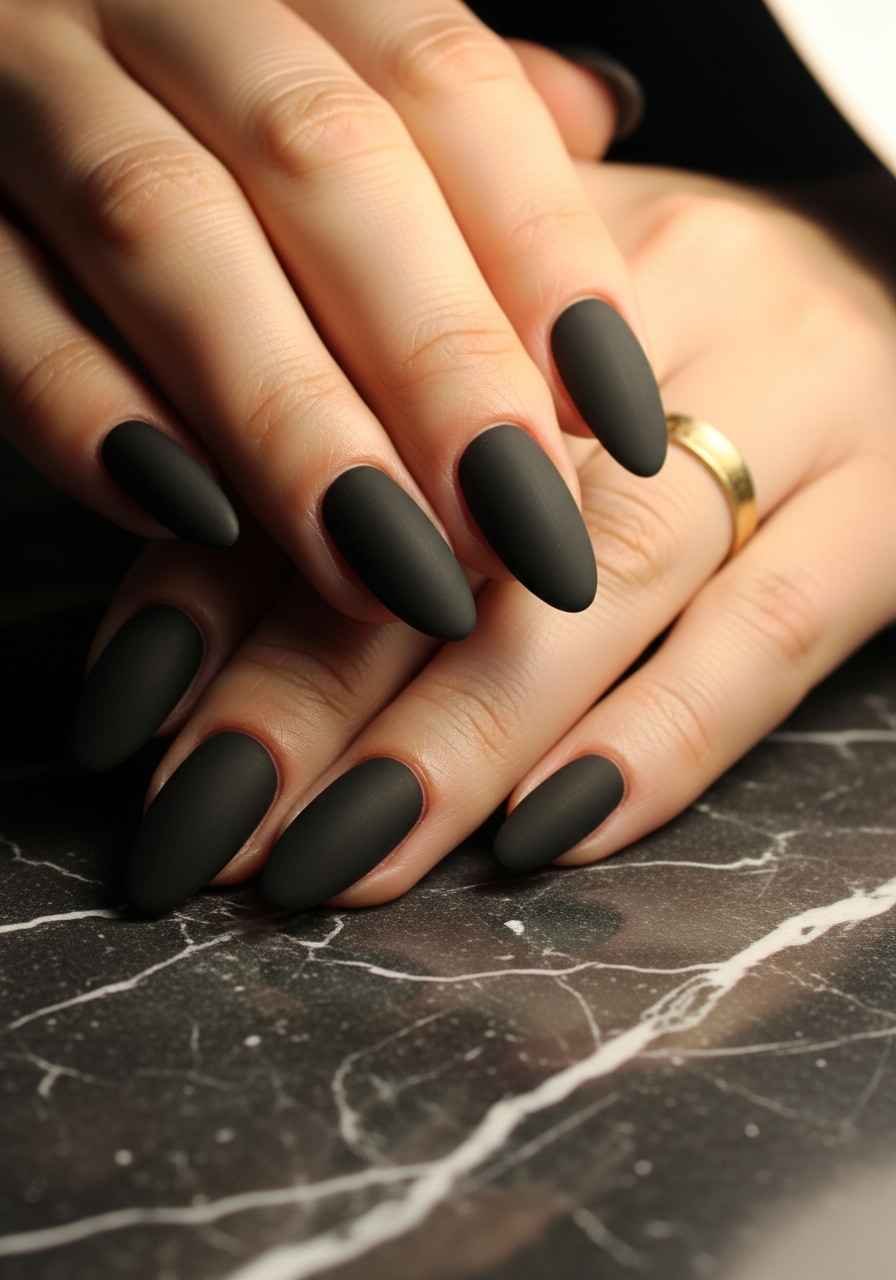
2. Matte Black Nails
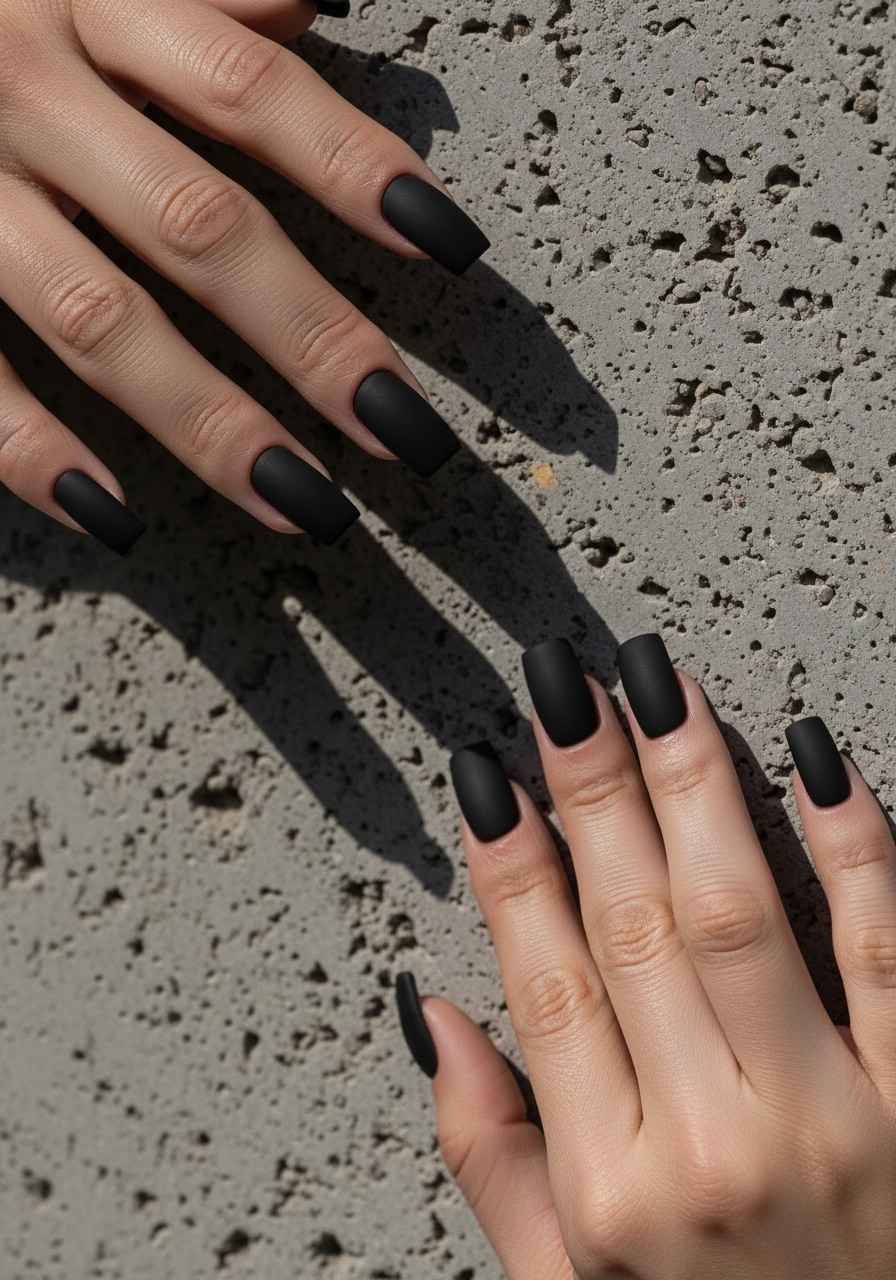
Matte black nails are the darker sibling of glossy black same color, completely different energy. Where gloss looks sleek and polished, matte looks raw, deliberate, and slightly rebellious. It is the finish that makes black nails look the most fashion forward.
Apply your black base in two thin coats as usual, then let it cure for at least ten minutes before applying the matte top coat. Applying matte over undried base creates streaks and an uneven surface. One slow, even pass of the matte coat per nail gives the best results resist the urge to go back and brush over areas you have already covered.
Matte nails show fingerprints, so be aware of touching surfaces in the first thirty minutes after application. Daily cuticle oil applied around but not on the nail keeps the surrounding skin healthy without affecting the matte surface. If the matte coat starts looking shiny or worn in specific areas after a few days, apply a fresh matte top coat over the top to restore the velvet finish.
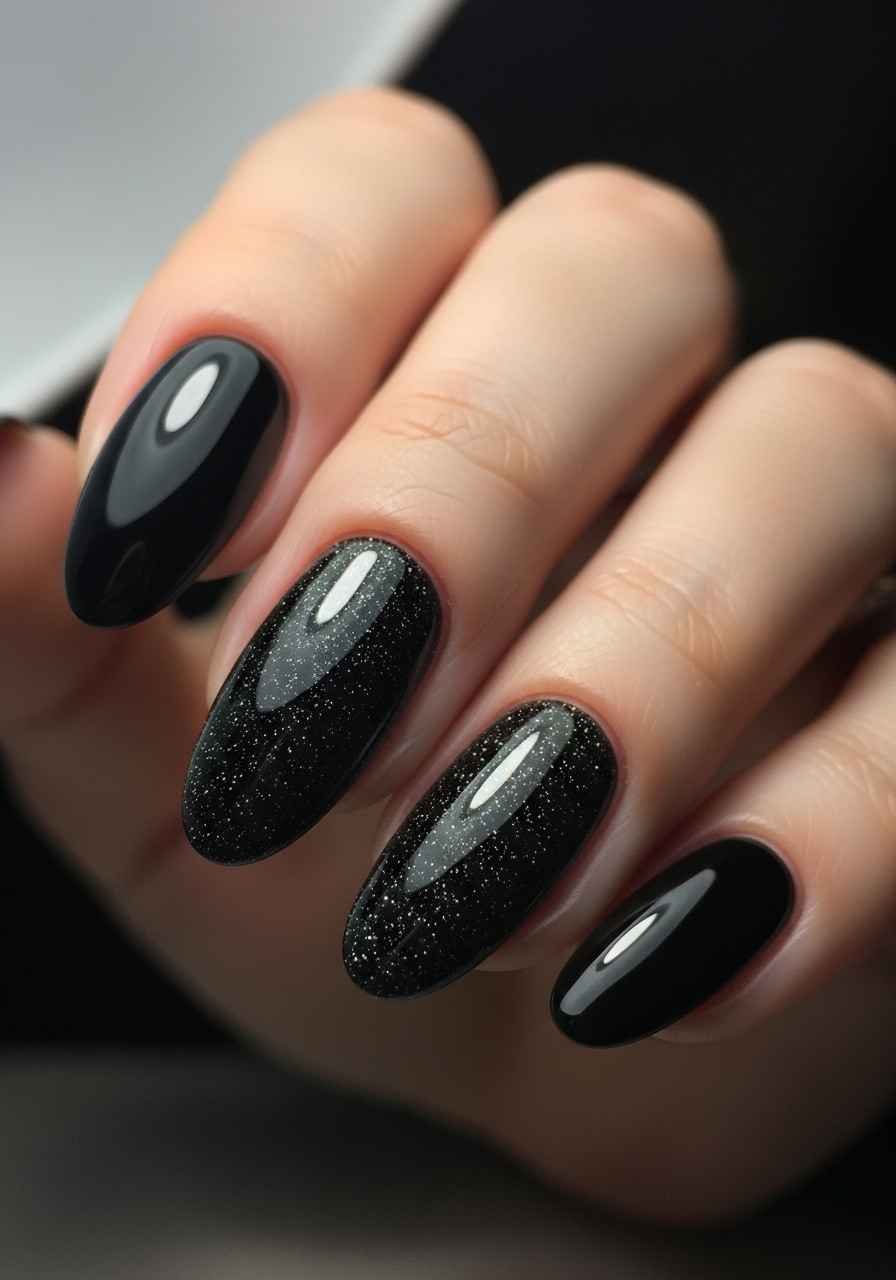
3. Black Nails with Subtle Shimmer
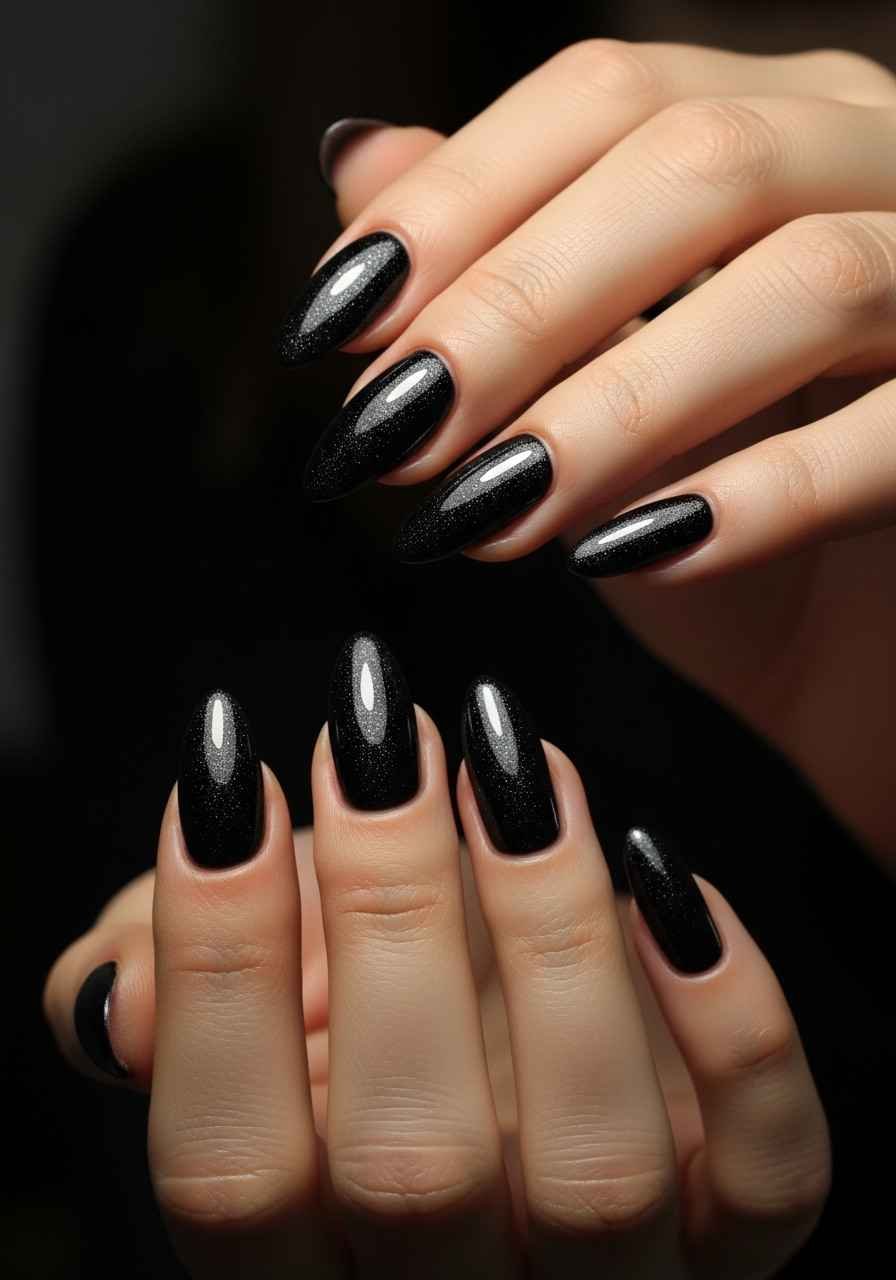
Black nails with subtle shimmer sit between solid black and glitter. The shimmer is fine enough that it only becomes noticeable when light hits the nail at a specific angle, catching in small silver or golden glints that disappear again as your hand moves. It is the most wearable kind of sparkle.
These are available as single polish formulas that include fine shimmer within the black pigment. Look for shades described as black galaxy, starry black, or black with silver micro glitter. The shimmer reads more dramatically under certain lighting a dark room with point source lighting makes the shimmer explode, while outdoor daylight makes it more subtle.
Apply in thin, even coats three coats is usually optimal for this type of formula. The shimmer distributes most evenly with slow, deliberate brush strokes rather than quick swipes. Finish with a glossy top coat to maximize the shimmer’s reflectivity. This is the perfect black nail for someone who feels plain black is slightly too quiet but full glitter is too much the subtle shimmer is the balanced middle.
4. Black French Tips on Natural Nails
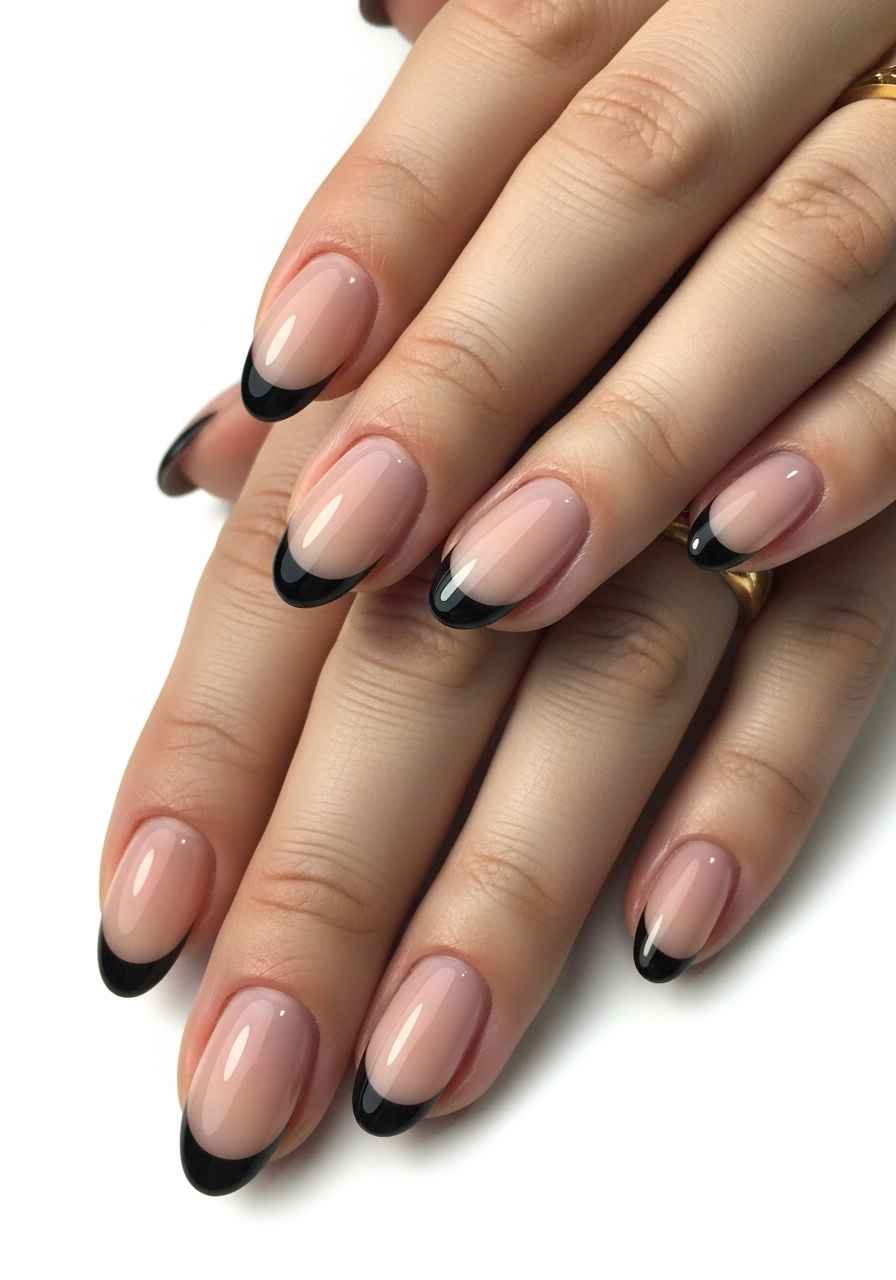
The black French tip is one of the most low commitment ways to wear black nails because most of the nail is nude or natural, the look is more wearable for those who find solid black too intense. Black French tips on natural nails are modern, graphic, and surprisingly versatile across workplace and social settings.
Use nail guide stickers or tape strips for a clean tip line. Apply your nude or sheer base first and let it dry fully. Press your tape or sticker along the smile line, paint the tip in black, let it set for thirty seconds, then remove the guide while the polish is still slightly tacky for the cleanest edge.
Very thin tips look more modern and refined than thick ones aim for two to three millimeters of black at the tip rather than the wider traditional French tip proportion. A glossy top coat over the entire nail unifies the base and tip into one smooth surface and prevents any raised edge at the tip line. This style works especially well on almond and stiletto shapes where the curved tip creates a naturally elegant setting for a dark tip color.
5. Black Nails with Single Gold Stripe
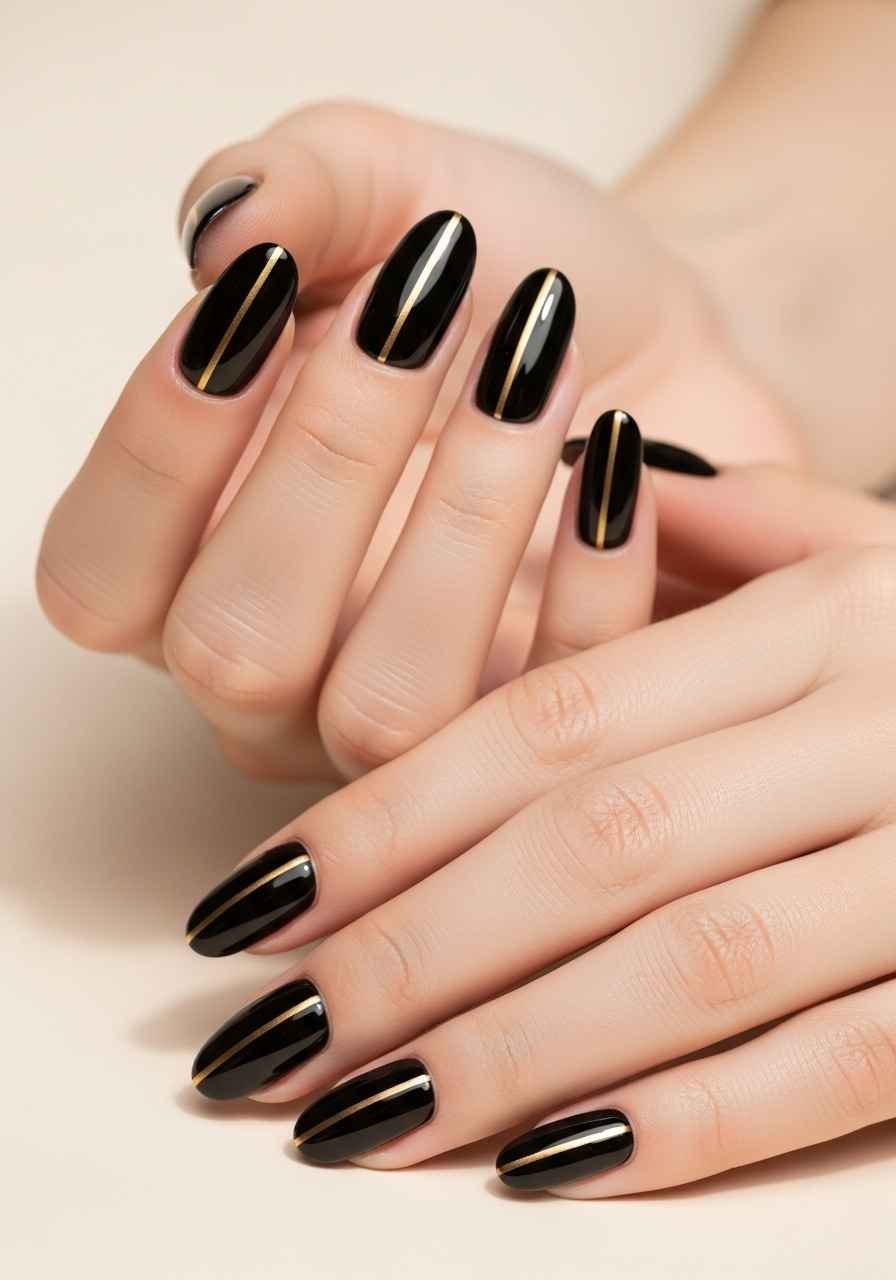
A single, precise stripe of gold on a black nail is one of the most graphic, intentional things you can do to a simple manicure. Black nails with a single gold stripe are minimal nail art at its most effective one element, perfectly placed, creates a completely different look.
A nail striping brush a long, thin brush designed specifically for drawing lines is the right tool for this. Practice the stroke once or twice on a piece of paper before applying to your nail. The key is a single, confident, continuous stroke from base to tip rather than multiple short strokes that create a broken, uneven line.
Gold nail art pens are also an excellent option for this design the ball point tip gives consistent line width and is easier to control than a brush for beginners. Draw the line down the center of each nail, or apply it only to two or three accent nails. A single stripe on just the ring finger and middle finger against three plain black nails is particularly striking. Seal with a top coat, flowing carefully over the stripe without smudging it. The gold stripe over black is a combination that feels simultaneously classic and current.
6. Short Black Nails with Matte Top Coat
Short nails and black polish work brilliantly together the shortness of the nail makes the dark color feel deliberate rather than dramatic, and the clean, precise edges of a short square or round nail shape give black polish a very polished base to work from.
Short black nails with a matte top coat are possibly the most straightforward nail look that consistently reads as intentional and stylish. There is no technique required beyond a careful application and a matte top coat. The restraint of short length combined with a flat, non shiny finish creates a confidence that more elaborate nail art sometimes lacks.
Keep your nail edges perfectly filed any unevenness in a short nail is immediately obvious on a solid dark color. A four sided nail file in fine grit gives the smoothest, most even edge. Apply base coat, two thin coats of black, and one coat of matte top coat. That is the complete process. Maintain with fresh matte top coat every three days to prevent any glossiness from creeping back in as the coat wears.
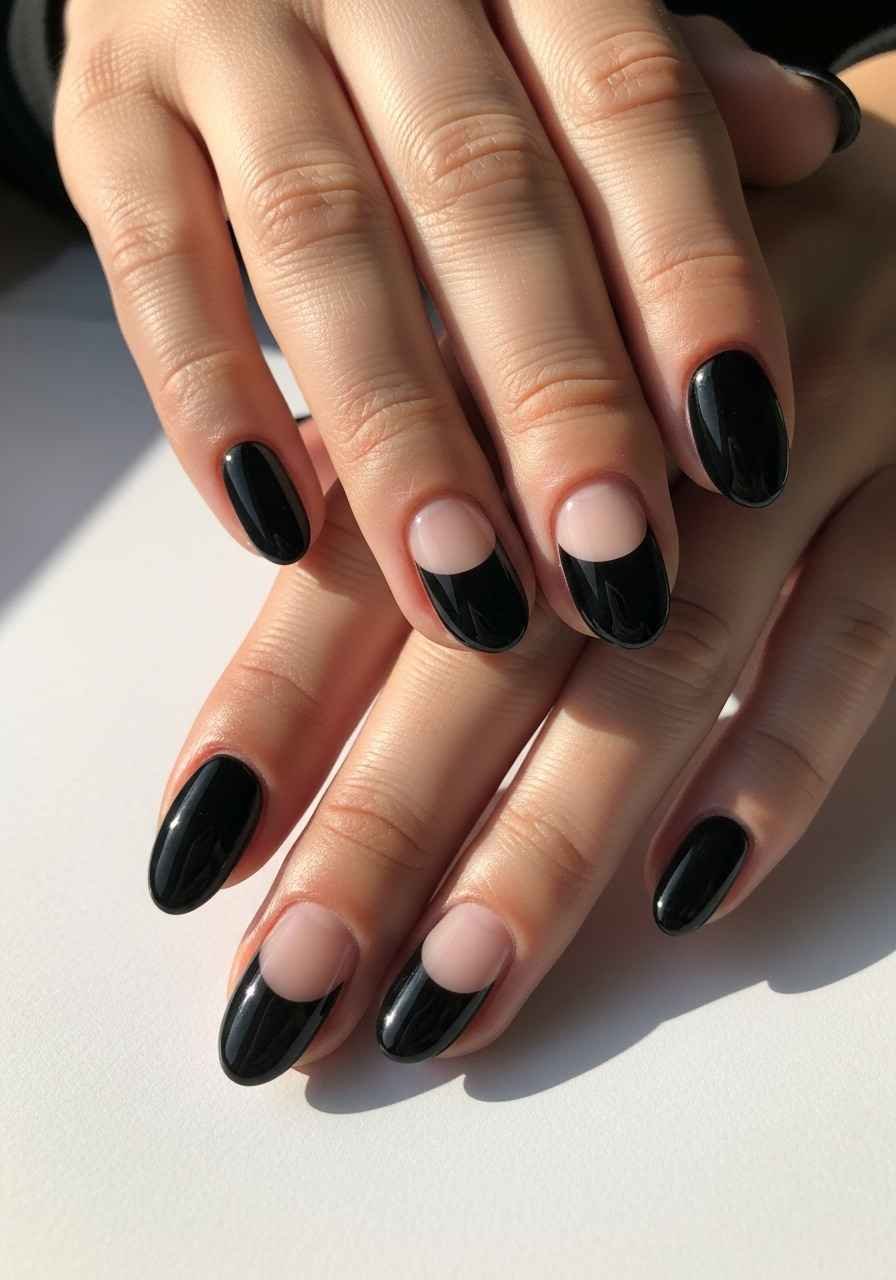
7. Black Nails with Negative Space Moon
Black nails with a negative space moon leave the crescent area at the base of the nail the lunula deliberately bare, framing the natural nail within a border of black polish. The contrast between bare nail and deep black creates a striking, graphic effect with zero design tools required beyond a round sticker or a hole punch reinforcement sticker.
Press the round sticker over your lunula area before painting. Apply your black polish over the rest of the nail, let it set briefly, then remove the sticker while the polish is still slightly soft. The round sticker peels away, leaving a clean crescent of bare nail.
The size of your negative space moon is a style decision a small, subtle crescent reads as refined and barely there, while a larger, more dramatic half moon becomes a real focal point of the design. Seal with a top coat that covers both the painted and bare sections for a uniform surface. The natural nail within the bare section actually benefits from the top coat layer, which keeps it healthy and moisturized while the black polish does its visual work on the rest of the nail.
8. Black Nail Polish with Nude Accent Nail
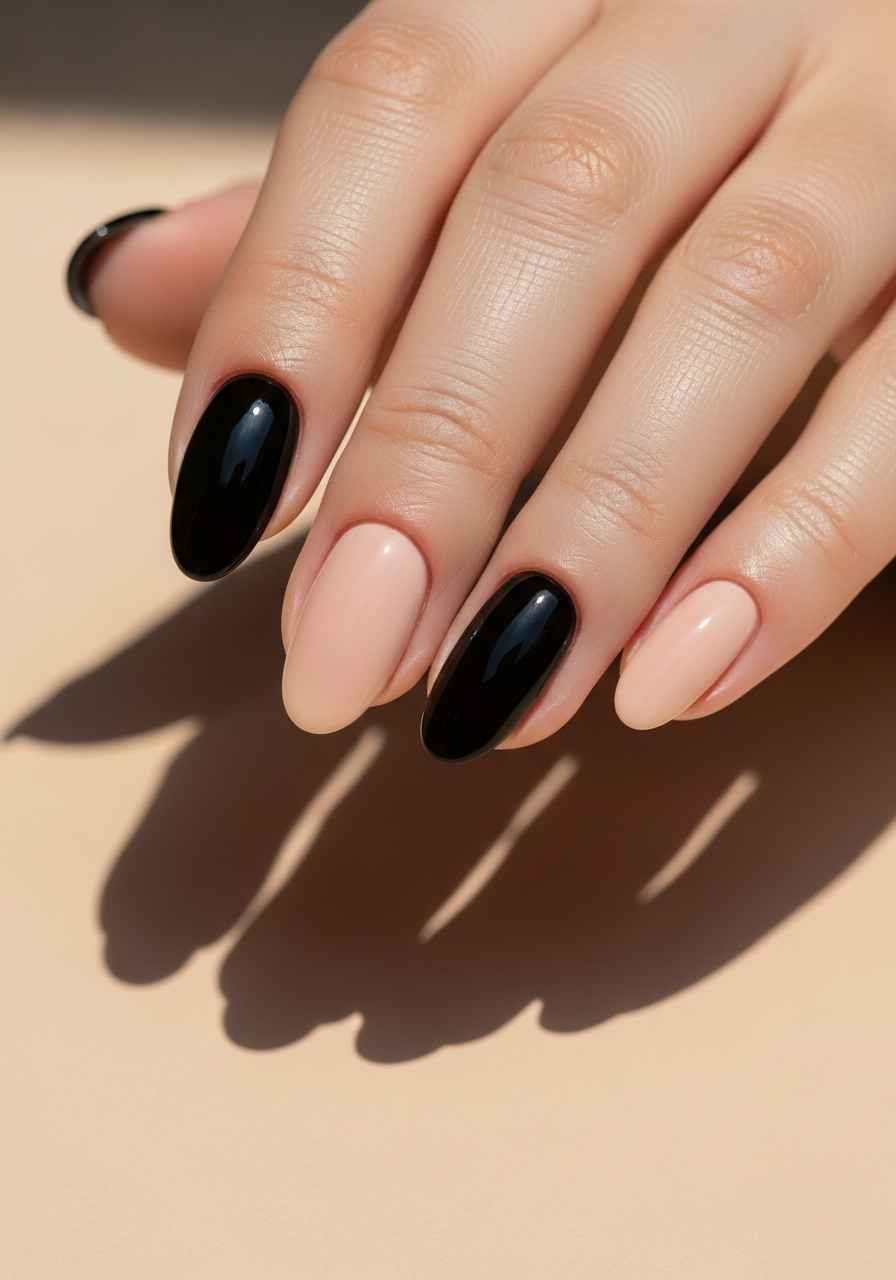
One nude nail among four black nails creates a quiet focal point without any nail art required. Black nail polish with a nude accent nail plays with the idea of the traditional accent nail but inverts the usual dynamic instead of making one nail more decorative, you make one nail simpler and lighter.
Choose a nude that is genuinely close to your natural skin tone not pink, not beige gray, but the shade that reads most like skin on your specific hand. This makes the nude nail look like a deliberately bare nail within a sea of black, creating a more interesting contrast than a colored accent nail would.
Apply black to all nails first and let the full set cure. Then apply the nude over your ring finger only or whichever finger you choose as your accent. Two coats of nude over a dry black base is sufficient. The top coat should be applied over all nails to create a consistent surface sheen across the two tone look. This is a genuinely effortless way to make your basic black manicure feel more considered and intentional.
9. Black Nails with Tiny Star Accents
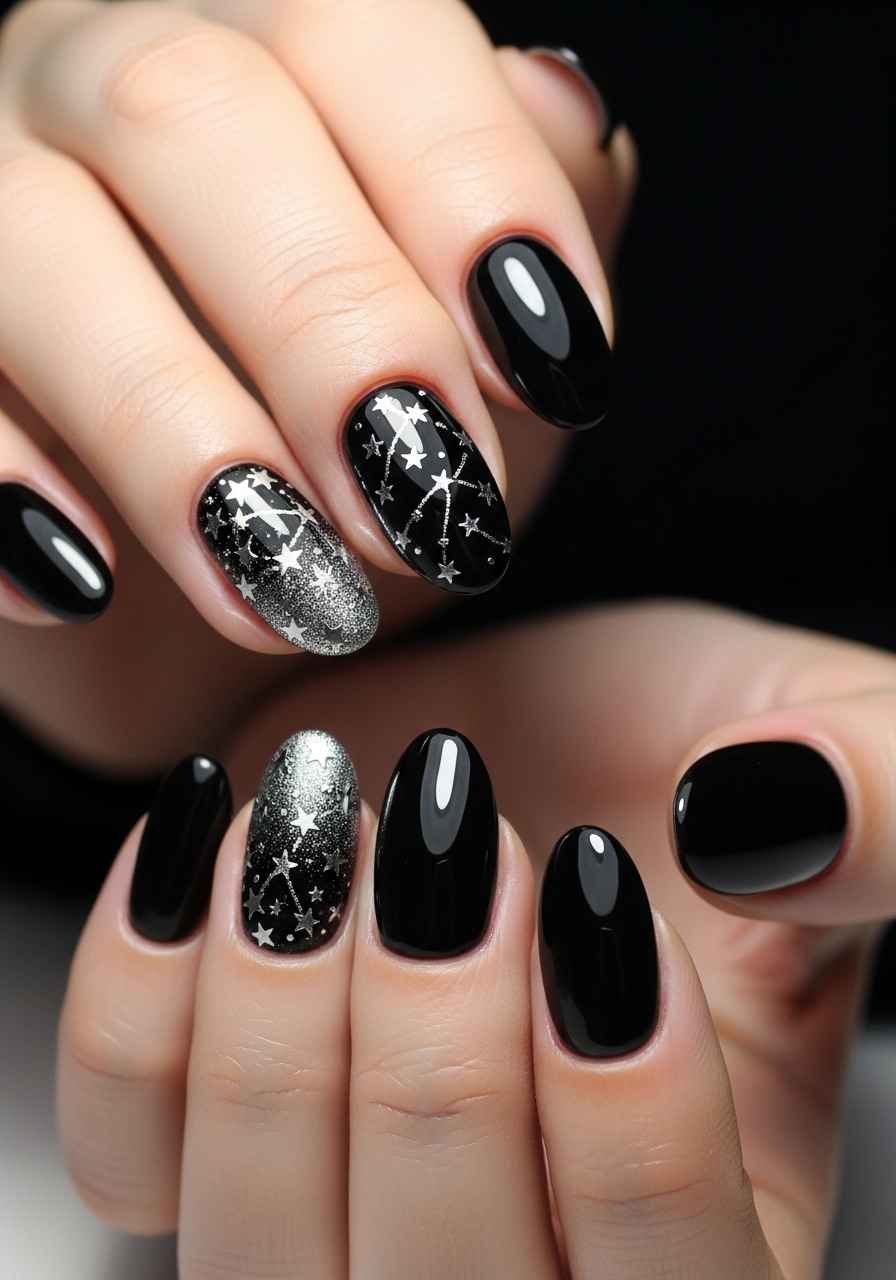
Black nails with tiny star accents use small star shaped rhinestones or nail stickers to create a night sky effect on the nail surface. The stars sit against the black background exactly as they would against a dark sky small, bright, precise points of light.
Star nail stickers are sold in sheets and apply directly onto dry, cured polish without any adhesive required simply press them flat with an orange stick and seal under top coat. Star rhinestones require a dot of top coat as adhesive on the nail surface before pressing each star into place.
Scatter three to five small stars across your ring finger and middle finger, leaving the remaining nails plain black. Avoid placing too many stars negative space between each star is what makes each one feel significant. Seal everything with two generous layers of top coat to prevent any star from catching on fabric or lifting at the edges. This look works best on a glossy black base where the contrast between the dark polish and the metallic stars is at its maximum. The design is playful and romantic at the same time genuinely unusual in the best way.
10. Satin Finish Black Nails
The satin finish sits between glossy and matte it has a slight sheen without any reflectivity, giving black nails a smooth, almost silky appearance. Satin finish black nails are for those who find full gloss too shiny and full matte too flat this is the comfortable middle ground.
Some brands make satin specific top coats. Alternatively, mixing a drop of matte top coat into your regular top coat and applying the blended coat creates an approximation of the satin finish. The result varies slightly between brands and mixing ratios experiment to find your preferred level of sheen.
The satin finish has the same maintenance considerations as matte it shows fingerprints and fine scratches more than gloss. Refreshing it with a new satin coat every few days keeps the surface looking clean. This finish photographs in an interesting way it looks flat in bright light but picks up subtle sheen in low light, giving black nails a slightly different character depending on when and where they are photographed.
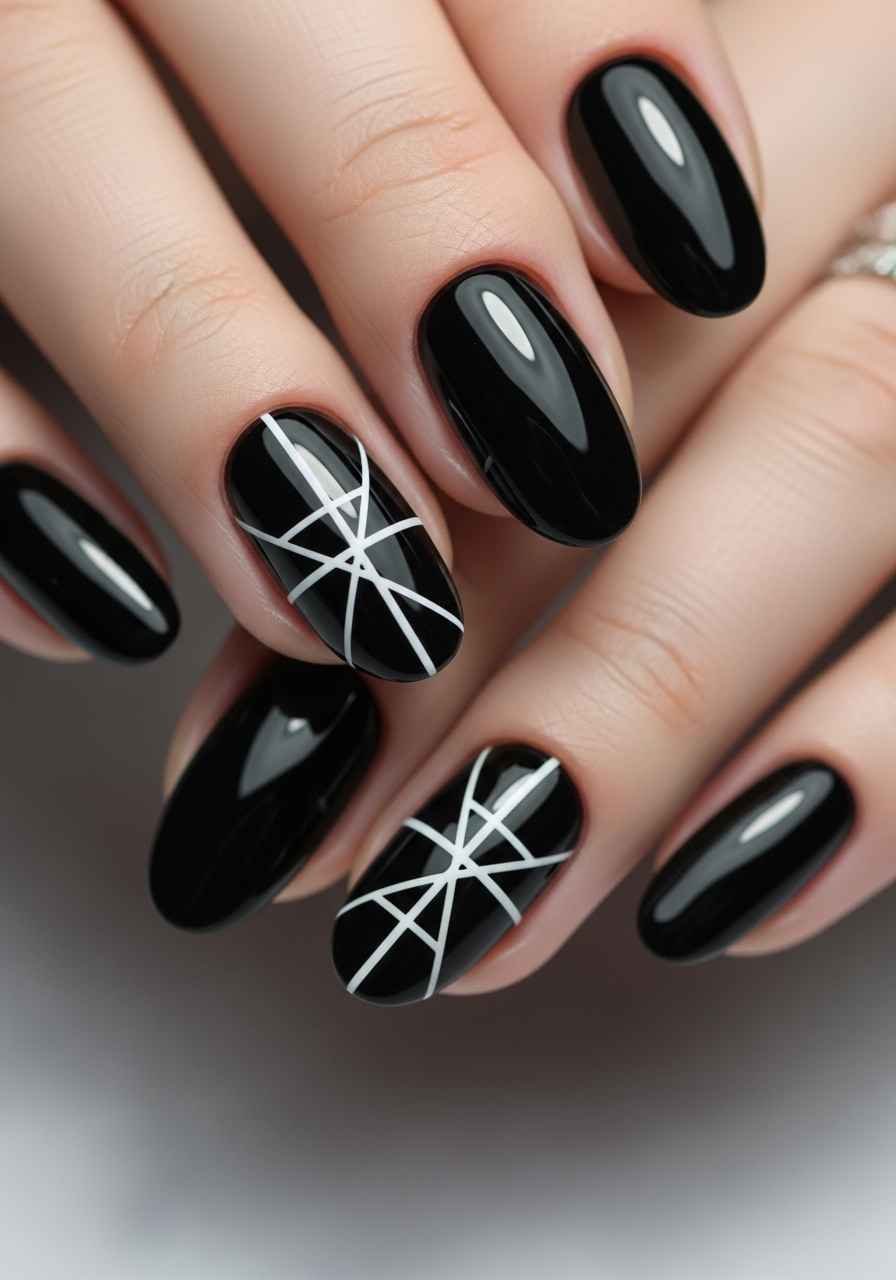
11. Black Nails with White Geometric Lines
Black nails with white geometric lines use a white nail art liner to create simple, precise shapes on one or two accent nails triangles, grids, diagonal lines, or abstract geometric patterns. The white against black creates maximum contrast, making even the simplest lines look bold and graphic.
A white nail art pen with a precision tip is the most beginner friendly tool for this. Practice your chosen shape on paper first to get the motion consistent before applying it to your nail. Simple is always better here one or two geometric elements per nail look more deliberate than a complex, crowded design.
Good options for beginners include a single diagonal line from corner to corner of the nail, two parallel horizontal lines across the center, or a simple outlined triangle at the nail tip. Each takes under ten seconds to draw once you have practiced the motion. Seal with a top coat that covers the white lines completely any uncovered white edge catches on fabric and lifts. Let the top coat dry slowly rather than applying more than necessary, which can drag the still wet white lines.
12. All Black Everything Black Base, Black Glitter Top Coat
Black on black sounds redundant until you try it. A black base under a black glitter top coat creates a look that is solid dark from a distance but reveals a glittering, multidimensional texture up close as light catches the suspended glitter particles within the clear top coat.
This technique uses a clear or lightly tinted top coat loaded with black or very dark micro glitter. Apply your solid black base, let it cure fully, then apply the black glitter top coat. The difference between the flat black base and the sparkly black overlay is subtle but genuinely interesting in person especially under low, warm lighting where the glitter becomes more visible.
This is the most understated, refined way to add texture and dimension to black nails. From across a room, they look like plain black nails. Up close, the sparkle becomes apparent. The layered black on black look suits formal events where you want something interesting on your nails without anything obviously decorative. Seal with a clear glossy top coat over the glitter coat for maximum depth and shine.
13. Black Nails with Cuticle Art

Cuticle art small decorative elements placed at the base of the nail near the cuticle line creates a different visual effect than the usual tip or center placement. On black nails with cuticle art, a tiny dot cluster, a thin crescent, or a delicate geometric element at the nail base creates a look that reveals itself gradually as you move your hands, appearing and disappearing as your fingers shift.
Gold or white elements over a black base provide maximum visibility. A thin gold crescent at the cuticle line on the ring finger is the simplest version draw a curved line following the natural curve of your cuticle using a fine nail art liner.
Alternatively, press three to five small rhinestones in a tight arc along the cuticle line of your accent nail the stones follow the natural curve of the nail base and frame the cuticle area like a piece of jewelry. This placement makes cuticle care especially important well pushed back, moisturized cuticles make the design look intentional, while overgrown or dry cuticles distract from it.
14. Black Nails with Rhinestone Edge

Placing rhinestones along the side edge of the nail rather than the center or base creates a different kind of nail jewelry effect. Black nails with rhinestone edge have a subtle, almost hidden sparkle that catches light from the side as your hands move, visible in profile but not obvious from straight on.
Apply small flat back rhinestones along the lateral edge of the nail using nail glue or a thick top coat as adhesive. Use a straight line of evenly spaced stones for a clean, architectural look, or vary the spacing slightly for a more organic, scattered feel.
Two to three accent nails with edge rhinestones against plain black nails on the remaining fingers creates the right balance. The edge placement is less common than cuticle or center placements, which gives this look a slightly more unexpected, original quality. Seal carefully with top coat around but not over the stones coating directly over rhinestones dulls their reflective surface. Check that all stones are fully adhered before sealing, pressing any loose ones down with an orange stick first.
15. Black Nails with Colored Tips
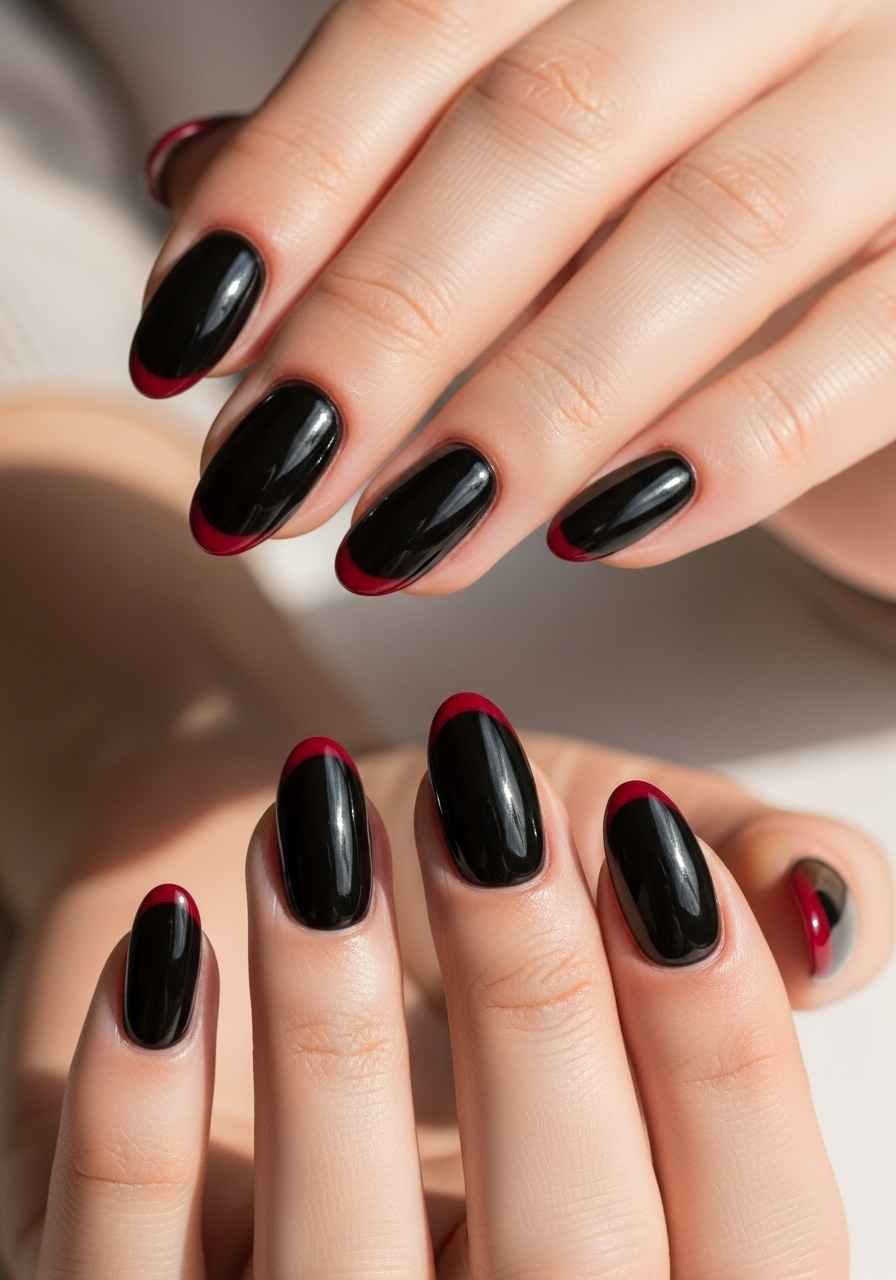
Black nails with colored tips flip the conventional French tip concept instead of a light tip on a dark base, this look applies a pop of color to the very tip of an already dark nail. The result is unexpectedly striking because the color is concentrated at the point of the nail where it catches the most light.
Deep red, cobalt blue, emerald green, or metallic gold all work as tip colors over a black base. Apply the base black first and let it cure completely. Then use tape or nail guide stickers to create a clean tip line, apply your chosen color, and remove the guide while still slightly tacky.
The tip should be thin two to three millimeters rather than wide. A wide tip on a dark base can look heavy and dated. A thin, precise line of color is more current and more graphic. Seal the entire nail in top coat to smooth the tip line and create a unified surface. This is a five minute upgrade to a basic black manicure that makes it feel completely new and more considered.
Conclusion
Black nails consistently outperform expectations. They are simpler to apply than most colored polishes because the deep pigment covers the natural nail in fewer coats, they match everything you own, and they carry an effortless, confident quality that requires no explanation or occasion. Whether you choose plain glossy black, add a single gold stripe, scatter some rhinestones, or press a star sticker onto an accent nail, the foundation of black always anchors the look in something solid and reliable. These 25 ideas prove that simple does not mean boring especially when the base is this good.