Pirate nail ideas are one of those nail art themes that never gets old. Whether you love dark, moody colors or want to go all-in with tiny skulls and anchor charms, there is a look here for every skill level and budget. You do not need a salon or expensive tools to pull these off. A steady hand, a few nail polishes, and some inspiration are all it takes. These ideas range from subtle and wearable to full-on theatrical, so you can pick whatever matches your vibe. Get ready to set sail with your fingertips. If you’re also looking for Chocolate Brown Nail Ideas, deep cocoa and espresso shades can blend beautifully with pirate-inspired nail art, creating a rich, dramatic look that still feels stylish and wearable.
1. Classic Skull and Crossbones
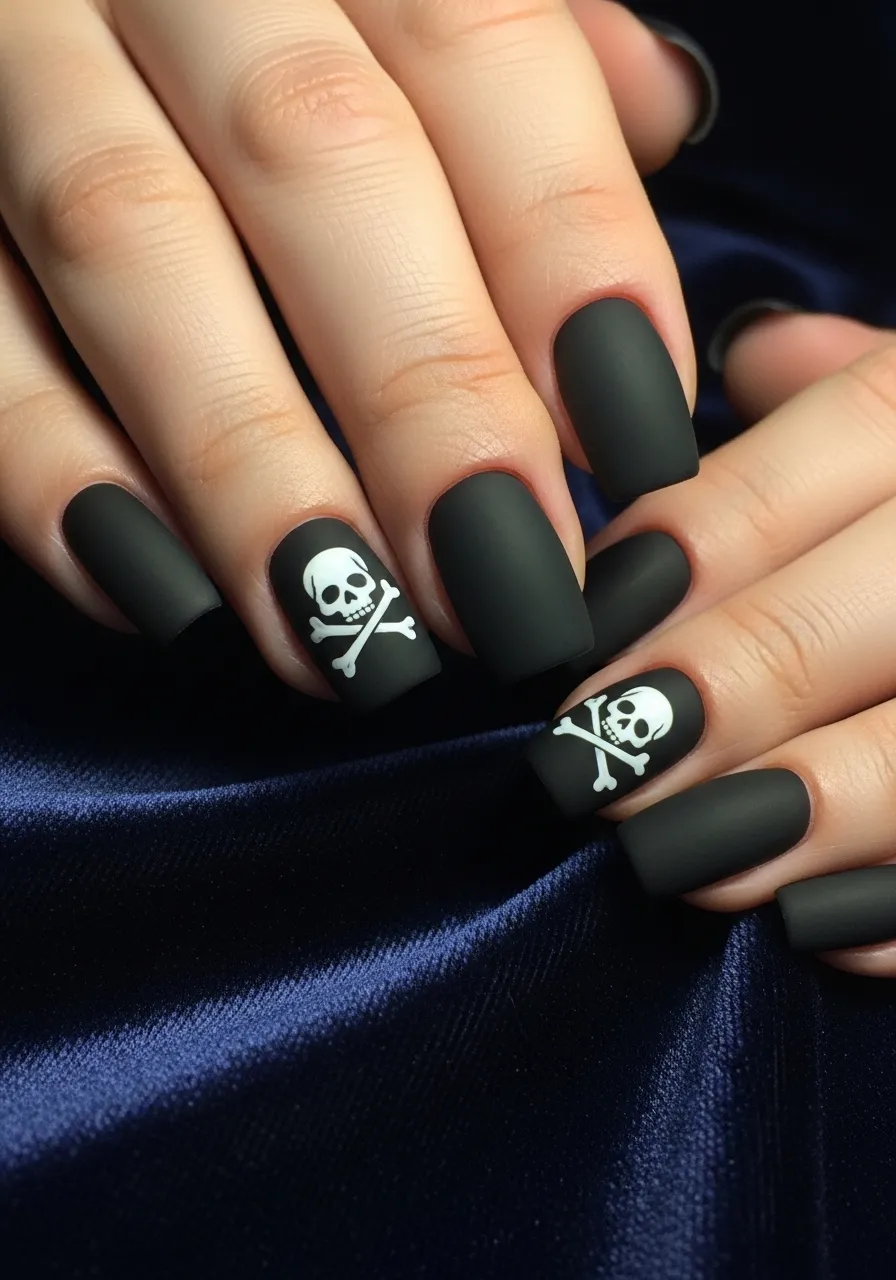
Nothing says pirate like the classic skull and crossbones. This is the foundation of the whole theme.
Start with a solid black base. Let it dry completely before adding the skull design.
You can use a thin nail art brush dipped in white polish to draw the skull freehand. If that feels tricky, a dotting tool works great for the basic skull shape.
Keep the design simple. Two dots for eyes, a curved line for the nose, and a few horizontal lines for teeth is all you need.
Add the crossbones beneath using two thin white lines in an X shape.
Budget tip: A thin nail art brush from a dollar store works just as well as expensive sets. Pair it with any white nail polish you already own.
Apply a glossy or matte topcoat depending on your mood. Matte gives it a more edgy, old-school feel. Glossy makes the details pop and shines like treasure.
This look works on any nail length and any skin tone. It is bold without being over the top, making it perfect for everyday wear or a costume event.
2. Treasure Map Nails
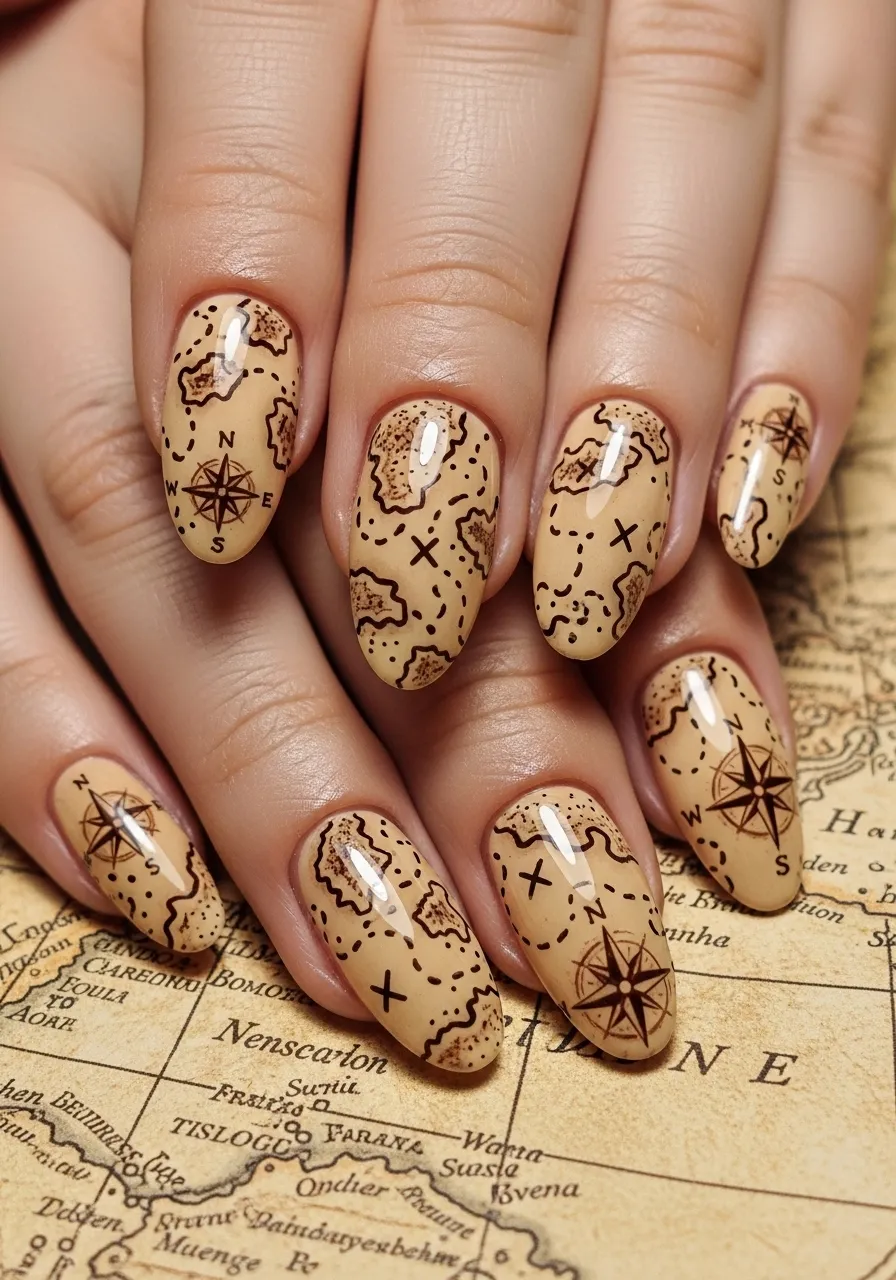
Treasure map nails are storytelling on your fingertips. The aged, parchment look makes them feel like a real adventure.
Start with a warm beige or tan base coat. This mimics old paper perfectly.
Once dry, use a fine brush dipped in brown polish to draw dotted paths, tiny X marks, and small mountain shapes. You do not need to be precise. Rough, imperfect lines actually look more authentic.
Add a small compass rose on your ring or thumb nail. A simple four-pointed star shape does the job.
DIY trick: Dilute brown polish slightly with a drop of nail polish thinner to create a more ink-like consistency. This makes it easier to draw thin lines.
Finish with a matte topcoat. It seals the design and gives that dry parchment texture.
You can add tiny red dots with a dotting tool to mark the “treasure spots.” Little details like that bring the whole map to life.
This design looks amazing on medium to long nails where you have more canvas to work with. Keep the background nails plain beige so the map details on accent nails stand out. The result is wearable art that looks like it came straight from a treasure chest.
3. Deep Ocean Navy Base
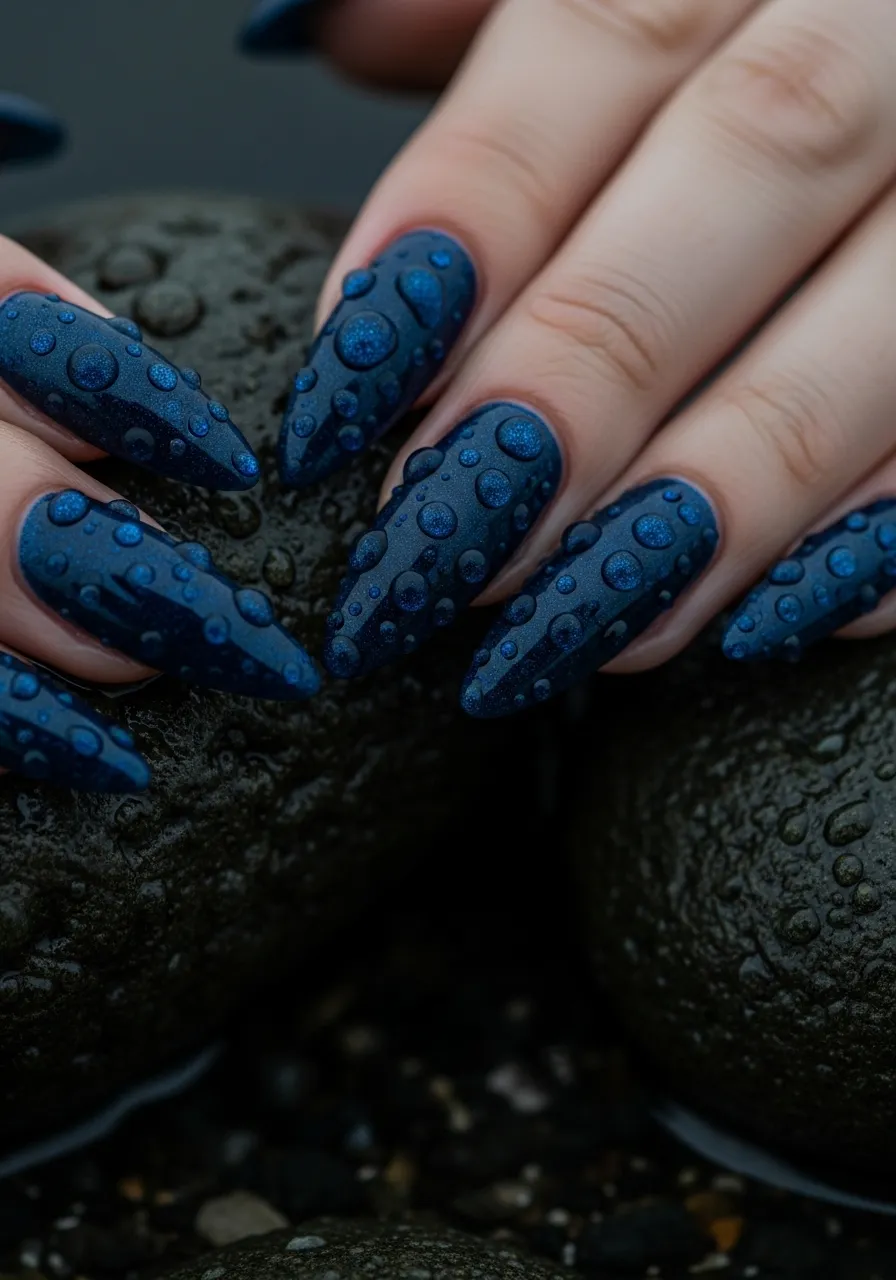
Sometimes the best pirate nail look is all about the color. Deep navy is the color of the ocean at night, and it carries the whole pirate vibe on its own.
Pick a rich, dark navy polish with a subtle shimmer. The shimmer adds that underwater depth without being flashy.
Two clean coats give you full, even coverage. Let each coat dry before adding the next.
Navy works on every nail shape but looks especially striking on almond or coffin shapes.
Affordable option: Drugstore brands like Sally Hansen or Sinful Colors carry excellent navy shades for under five dollars.
You can leave it as a solid color for a clean, sophisticated look. Or add a single accent nail with a small gold anchor or star detail.
A high-gloss topcoat makes the navy look even richer. It reflects light and gives your nails a polished, deep-sea feel.
This is a great option when you want pirate energy without committing to heavy artwork. The color alone tells the story. Pair it with dark clothing or gold jewelry to complete the aesthetic. It works for casual days, night outs, and even office settings where you still want to feel a little rebellious.
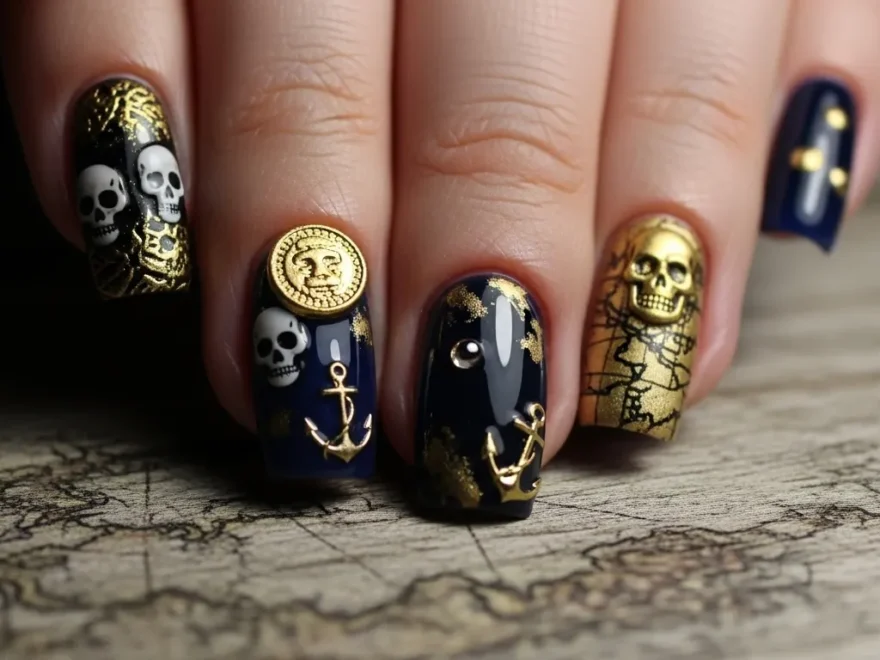
4. Gold Coin Accent Nails
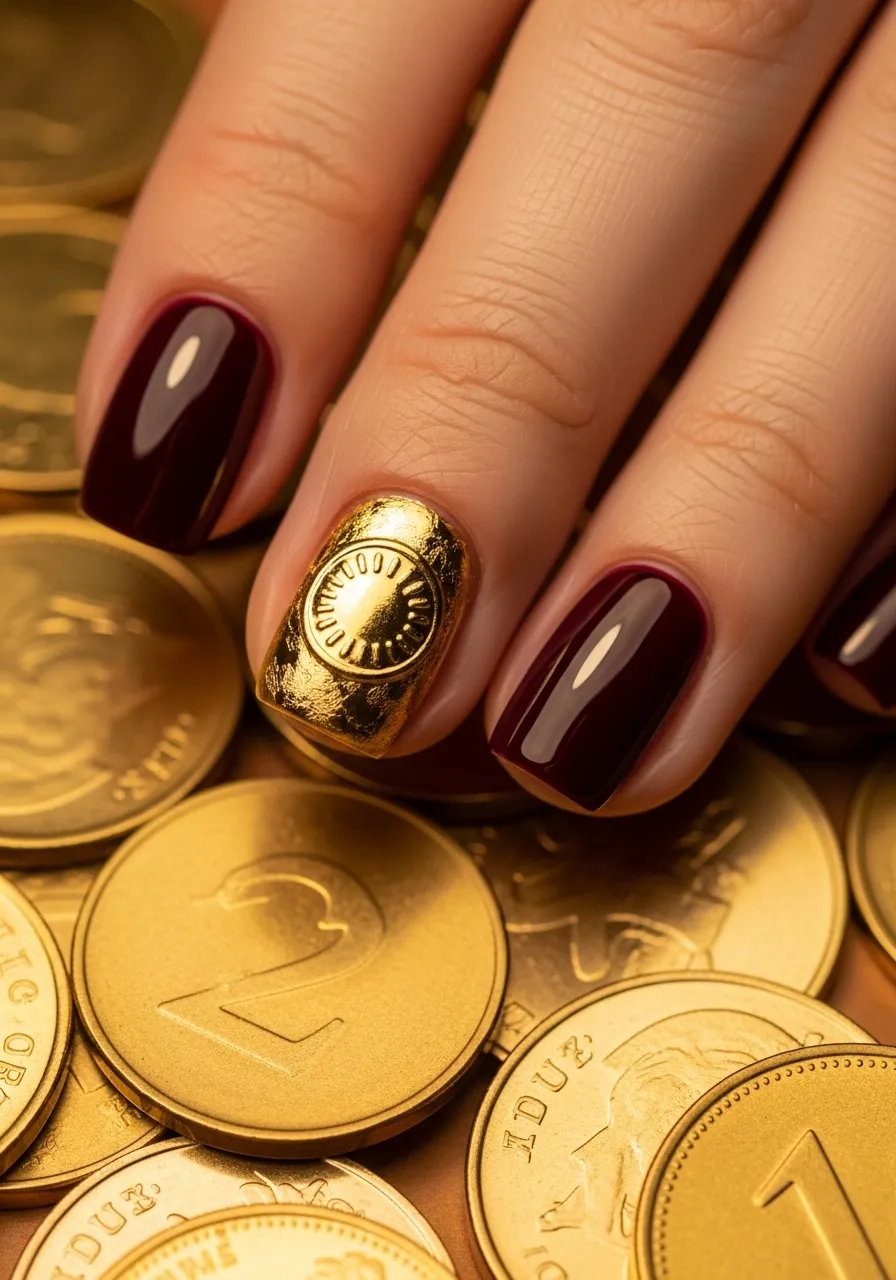
Every pirate needs gold, and gold coin accent nails are a simple way to bring that treasure energy to your look.
Paint most of your nails in a deep color like black, burgundy, or navy. These dark bases make the gold pop.
On your ring finger or thumb, apply a gold foil or metallic gold polish as the base. Let it dry fully.
Use a fine brush to draw thin circular lines to create the “coin” look. Add small dots or a cross pattern in the center to mimic engraving details.
Budget tip: Gold nail foil transfers are very affordable online and give a more convincing metallic effect than regular gold polish alone.
Press a small piece of foil onto a tacky base coat for instant gold texture. No drawing required.
Seal everything with a thick topcoat to prevent the foil from peeling.
This accent nail idea is great for beginners because most of your nails stay one solid color. You only need to focus the effort on one or two nails.
The contrast between dark polish and bright gold creates a bold, treasure-filled statement that fits any pirate theme. It is also subtle enough to wear on regular days without looking like full costume makeup.
5. Anchor Nail Art

Anchors are one of the most iconic maritime symbols, and they translate beautifully into nail art.
Start with a clean white or cream base. The light background makes the anchor design stand out clearly.
Use a thin brush dipped in navy blue to draw the anchor shape. Start with a vertical line, add a horizontal bar near the top, a curved bottom, and small loops at the ends.
It does not need to be perfect. A slightly rough, hand-drawn look gives it a charming vintage feel.
Easy alternative: Anchor nail stickers or stamping plates are available online for just a few dollars and give clean, consistent results without any freehand skill.
Add a small rope looped around the anchor shank for extra detail. A few curved lines in brown or tan polish do the trick.
Finish with a matte or glossy topcoat depending on your preference.
This design works beautifully as an all-over pattern or as an accent nail on a solid navy or black base.
Anchors also pair well with rope details, sailor stripes, and small wave patterns. Mix and match these elements across different nails to create a full nautical story on your hands. It is clean, classic, and wearable for everyday use.
6. Black and White Stripe Nails
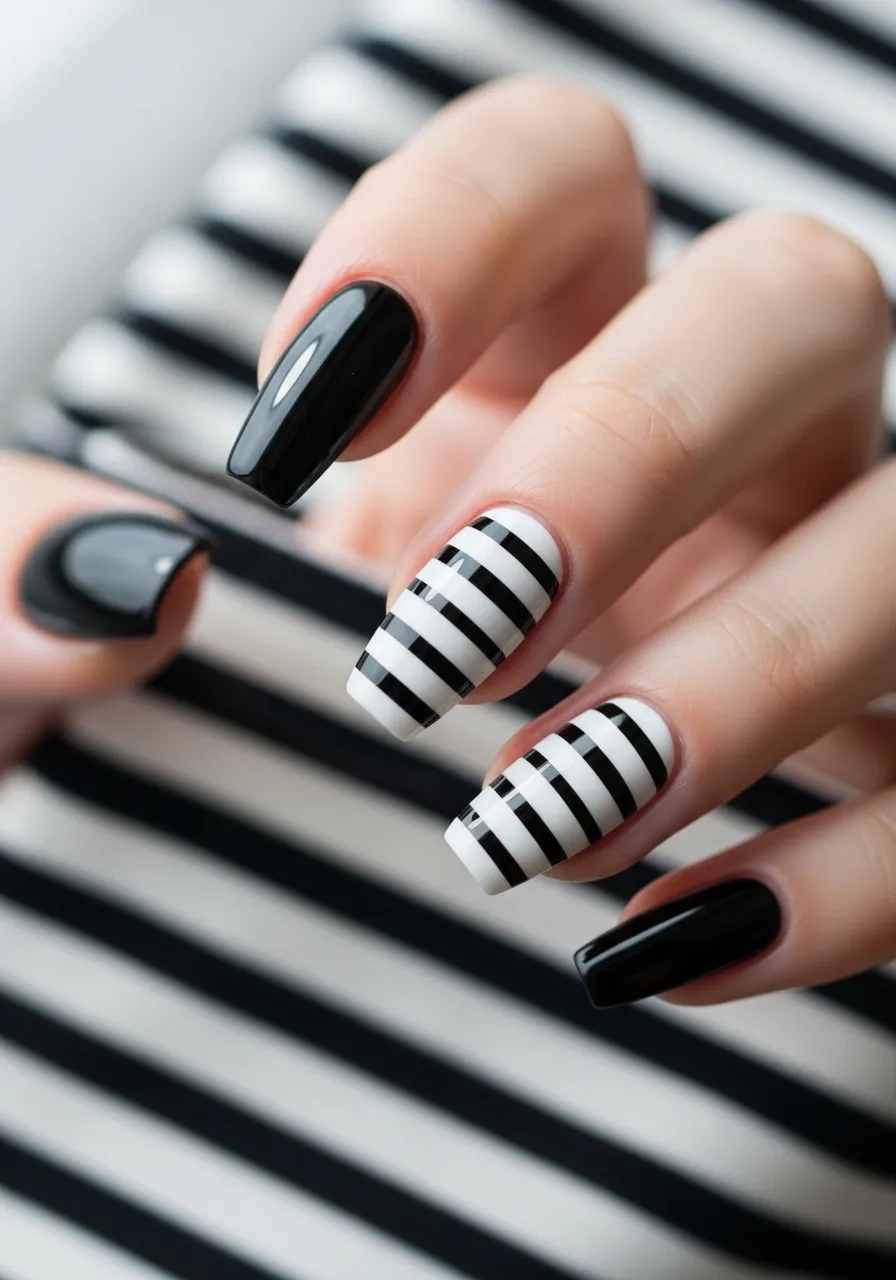
Stripes are a pirate staple, and black and white versions feel bold and timeless.
Use striping tape or thin scotch tape to create clean lines. Apply your base color first and let it dry completely.
Press the tape down in horizontal strips across the nail. Paint over the exposed nail with the second color. Peel the tape off while the paint is still slightly wet for the sharpest edges.
Alternate between full-stripe nails and solid nails for a balanced look.
Budget trick: Striping tape from a nail art shop costs very little and makes clean lines that are nearly impossible to achieve freehand.
For a pirate feel, keep the stripes uneven or slightly thick. That imperfect look mimics old-school sailor clothing.
You can add a small skull on one accent nail to tie the pirate theme together.
Black and white stripes are classic enough to wear anywhere. They feel edgy without being too costume-like. This is a great option for people who love the pirate aesthetic but want a look they can wear to school, work, or casual outings without getting too many questions. Simple, strong, and unmistakably nautical.
7. Red and Black Pirate Flag Nails
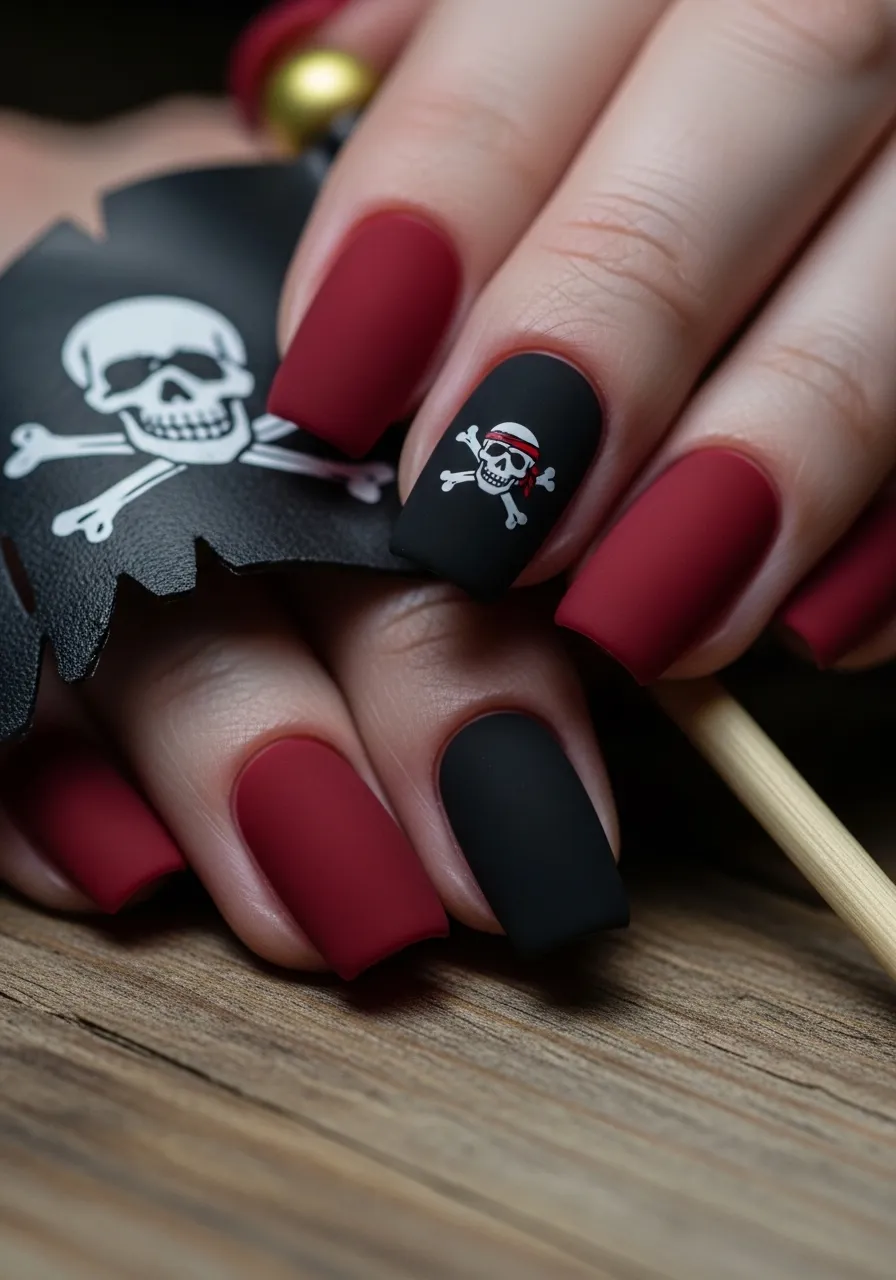
The Jolly Roger traditionally came in red as well as black, and red pirate nails feel fierce and powerful.
Paint alternate nails in deep crimson red and matte black. The contrast is dramatic and striking.
On the black accent nail, add a small white skull using a dotting tool and thin brush. Keep it simple.
Color tip: Choose a red that leans dark rather than bright. Burgundy or wine reds feel more pirate and less Valentine’s Day.
Red and black together create a look that feels theatrical without going fully into costume territory.
Add a tiny red drip detail along the tip of one nail for extra drama. Use a thin brush and slightly diluted red polish to create that drip effect.
Seal with a matte topcoat on the black nails and glossy on the red ones. The contrast in finishes adds another layer of visual interest.
This color pairing is perfect for Halloween, themed parties, or anytime you want your nails to make a statement. It also photographs extremely well, which makes it popular for nail art content creators. Bold, dramatic, and very pirate.
8. Glittery Treasure Chest Nails
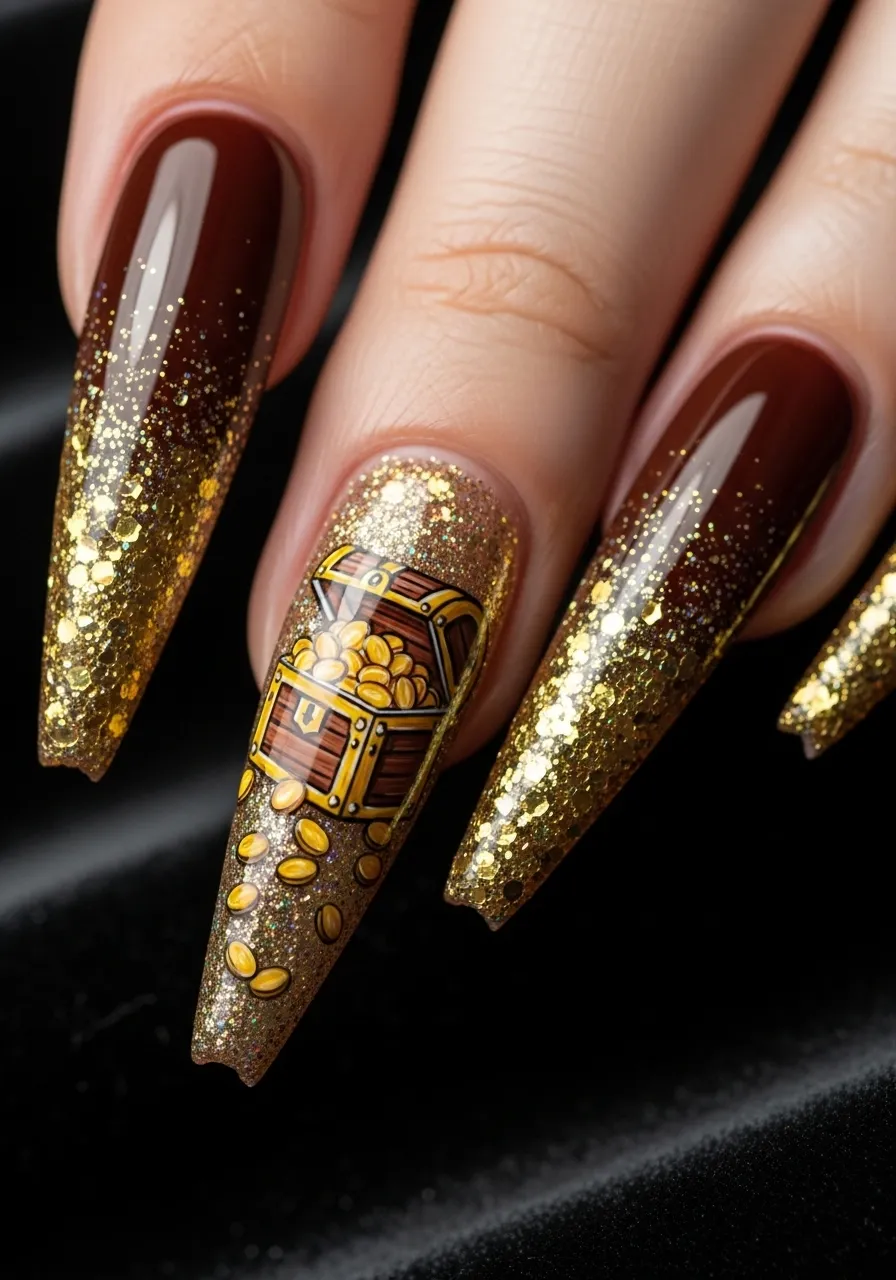
Treasure chests overflow with gold and jewels, and this nail look captures exactly that energy.
Start with a deep brown or mahogany base on most nails to represent the chest itself.
On the tips, apply chunky gold glitter polish. Build it up near the edge so it looks like gold coins spilling out.
Affordable option: Glitter nail polishes from budget brands work perfectly here. You want chunky, gold-toned glitter for the most realistic effect.
On one accent nail, draw a simple treasure chest. A rectangle with a curved top, a small lock shape in the center, and thin horizontal lines is all you need.
Add tiny red or green glitter dots to suggest rubies and emeralds scattered among the gold.
Finish with a thick topcoat to seal all the glitter in place and smooth out any rough texture.
This look is playful and glamorous at the same time. It works especially well for parties, performances, or any event where you want your nails to be a conversation starter. The glitter catches light as you move your hands, creating a constantly changing sparkle effect. It feels rich, fun, and full of adventure without taking hours to create.
9. Mermaid and Pirate Crossover Nails
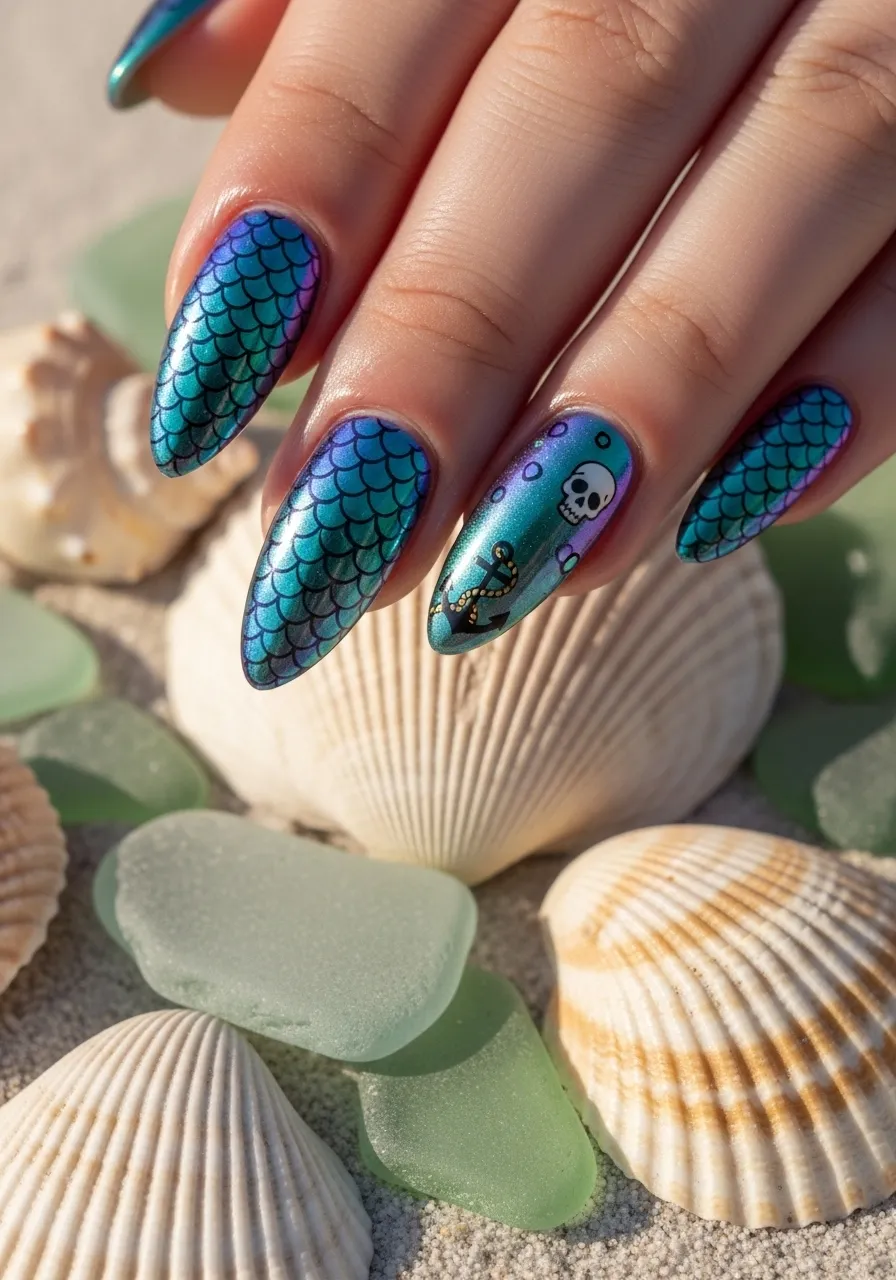
Pirates and mermaids share the same ocean, so why not combine both worlds on your nails?
Use an iridescent or duochrome teal polish as the base. This shade shifts between blue, green, and purple depending on the light, mimicking fish scales perfectly.
Add a subtle scale pattern using a small curved stamp or a fish scale stamping plate over the top. This gives dimension without heavy painting.
On accent nails, add tiny pirate details like a skull or anchor in black or deep navy polish.
Budget tip: Iridescent nail powders are very affordable and can be rubbed over a sticky topcoat to create a duochrome effect without buying expensive specialty polish.
The combination of mermaid shimmer and pirate boldness creates a fantasy ocean look that feels completely original.
Finish with a glossy topcoat to make the scales catch the light.
This design photographs beautifully and works well for themed events, coastal vacations, or any time you want nails that feel like an underwater adventure. The contrast between the soft, shimmery base and the sharp black pirate details creates a look that is both delicate and tough at the same time.
10. Ship Silhouette Nails
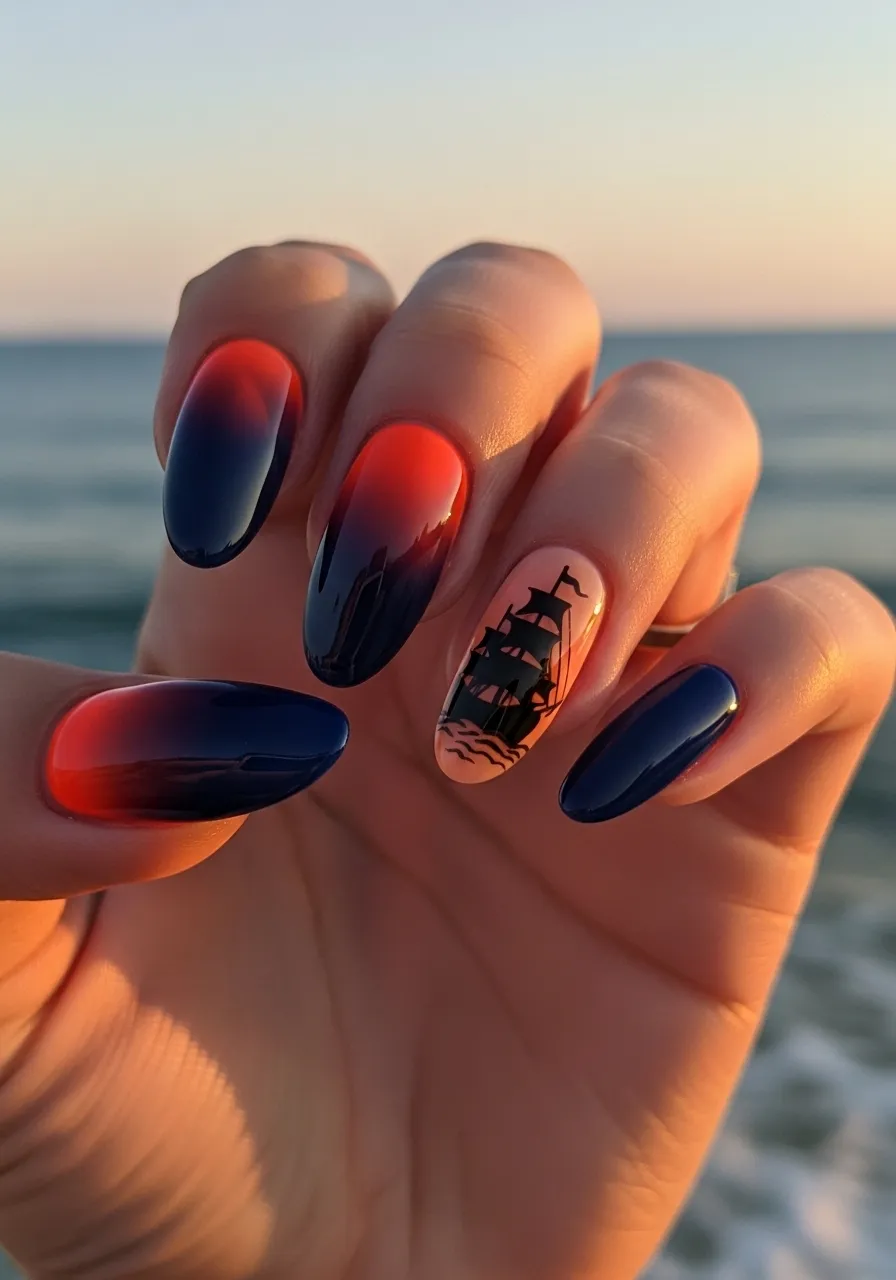
A pirate ship silhouette is one of the most dramatic nail art ideas in this theme.
Start with a gradient background on your nails. Blend orange at the base into deep navy at the top to create a sunset-over-ocean effect. A small cosmetic sponge dabbed with both colors does this easily.
Let the gradient dry fully before adding the ship.
Use a thin nail brush dipped in black polish to paint the ship silhouette on your accent nail. The silhouette approach means you only need to paint the outline and fill it in black, no detail work required.
Simple ship shape: Draw a hull curve at the bottom, add a vertical mast line, and place two or three horizontal crossbars on it. Add simple triangle sail shapes.
The black silhouette against the colorful gradient background creates a cinematic effect that looks complex but is achievable in under 30 minutes.
Seal with a glossy topcoat to make the gradient glow.
This design works beautifully as an accent nail paired with solid navy or black on the remaining fingers. It is artistic and wearable, and people will constantly ask how you did it.
11. Vintage Compass Rose Nails
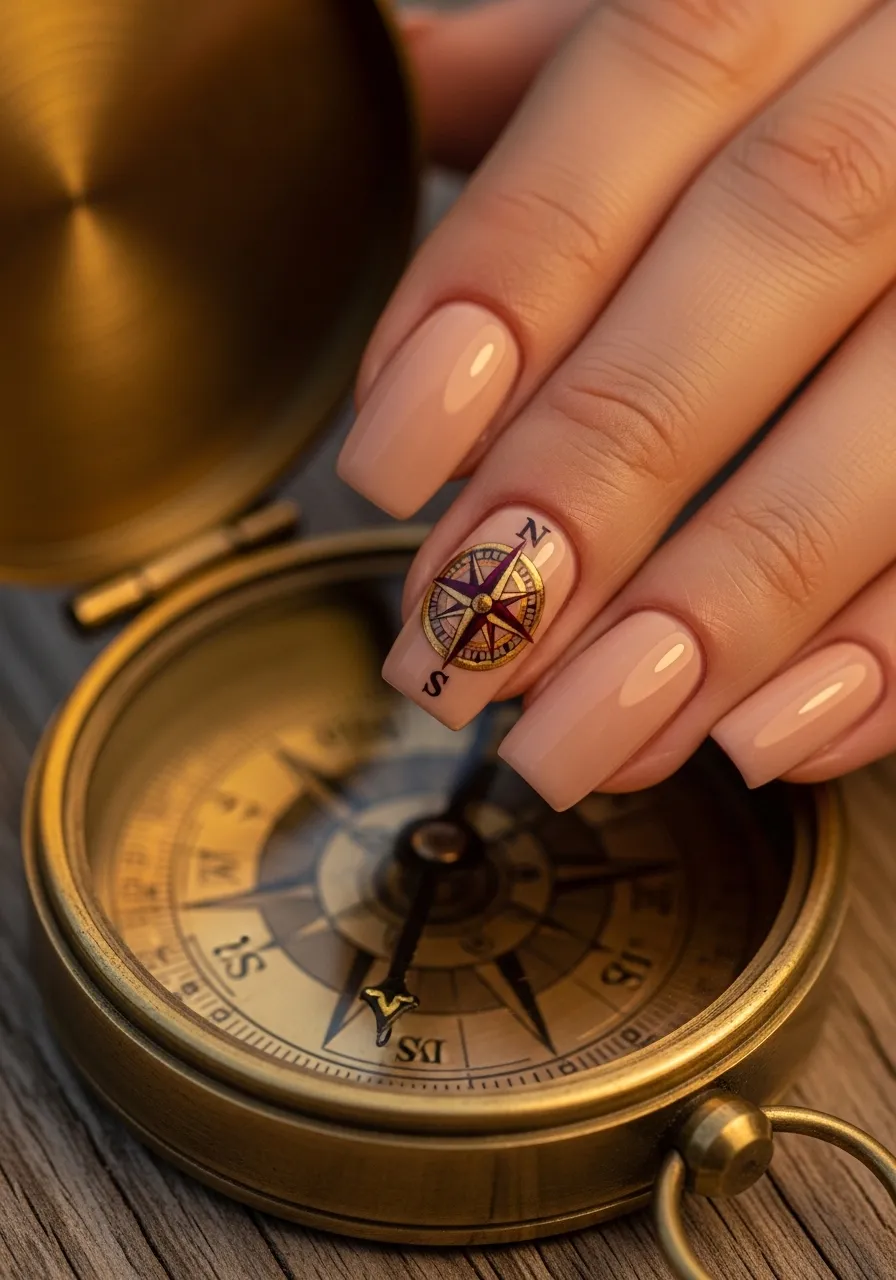
A compass rose is a symbol of direction, adventure, and the open sea. It makes for stunning nail art.
Choose a nude or cream base for the background. This keeps the focus on the compass design itself.
Use a fine liner brush to draw the compass rose on your accent nail. Start with a large X shape, then add a smaller X rotated 45 degrees on top to create eight points.
Add tiny arrow tips at the end of each point. Mark the four main directions with small N, S, E, W lettering if your nail is large enough.
Shortcut: Compass rose nail stamps are widely available and give you perfect symmetry with no freehand skill needed.
Use a mix of deep burgundy and gold polish for the design. The combination feels rich and antique.
Outline the finished compass with a very thin gold border to make it look like an engraving.
Seal with a matte topcoat for an aged, map-like quality.
This design works best on longer nails where there is enough space for the compass details. Pair it with plain cream or gold nails on the other fingers to let the compass take center stage.
12. Dark Teal Kraken Nails
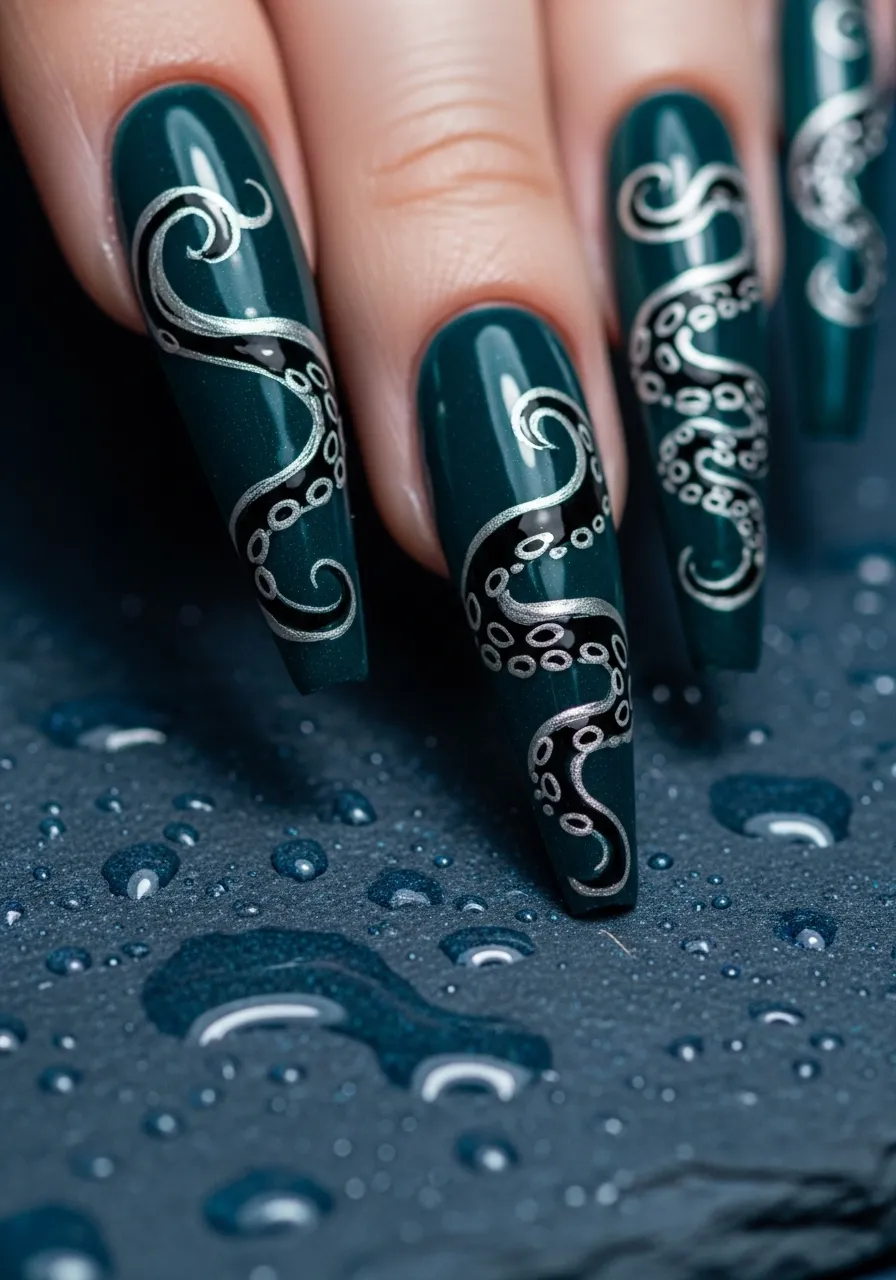
The Kraken is the ultimate sea monster of pirate legend, and translating it into nail art is surprisingly fun.
Use a dark teal or deep sea green as your base color. It captures that cold, deep-ocean feeling.
Once dry, use a thin black brush to paint tentacle shapes wrapping around each nail from the tip downward. The tentacles should look like they are creeping up from below.
Add small suction cup circles along the tentacles using a dotting tool dipped in silver or lighter teal.
Easy approach: You do not need to paint a full Kraken. Just tentacle tips peeking over the edge of each nail create an eerie, effective look.
Use silver chrome powder lightly over the topcoat to add a wet, deep-sea shine to the whole nail.
Add a subtle glow effect by blending a tiny bit of neon green at the very tip of each nail before the tentacles.
This design feels dramatic and original. It works especially well for Halloween, costume events, or whenever you want your nails to be completely unlike anyone else in the room. Dark, moody, and deeply nautical.
13. Pearl and Pirate Nails
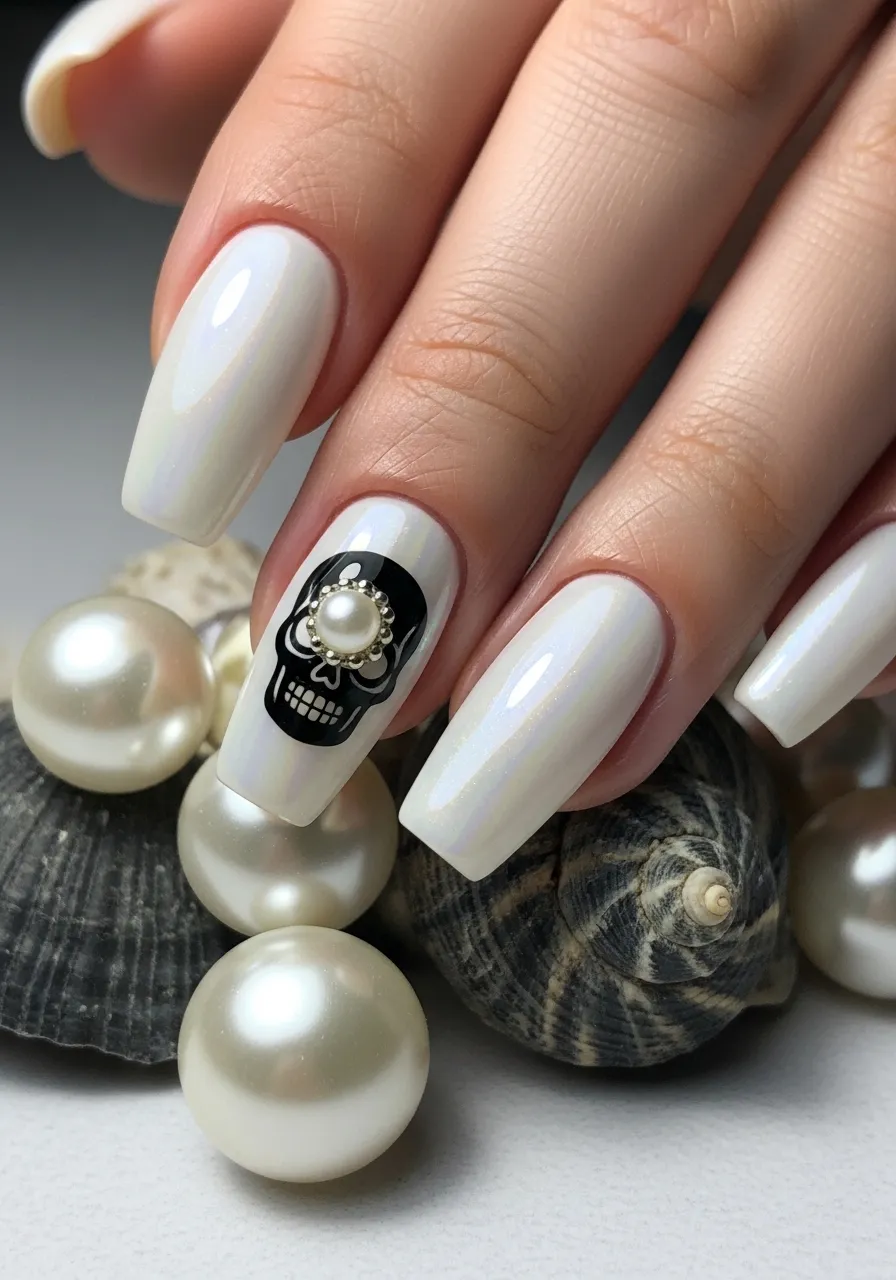
Pirates were known for stealing pearls from merchant ships, and pearl-inspired nails carry that stolen luxury energy perfectly.
Start with a creamy white or off-white base. Apply two thin coats for full coverage.
Brush a pearl shimmer topcoat over the white base. These topcoats are available at most drugstores and create a beautiful opalescent finish.
On your accent nail, apply a flat pearl bead at the center using nail glue. Surround it with a tiny hand-painted black ring to frame it.
Affordable option: Small pearl nail charms are sold in packs online for very little money. They add instant elegance with no painting skill required.
Add a small black skull detail on one nail to keep the pirate edge in the design.
Finish with a glossy topcoat everywhere except the accent nail.
This look balances elegance and edge beautifully. It is feminine without being soft, and edgy without being heavy. It works for formal occasions, bridal parties, or everyday wear when you want something that feels luxurious and a little unexpected. The pearl and skull combination is genuinely striking and draws the right kind of attention.
14. Weathered Wood Grain Nails
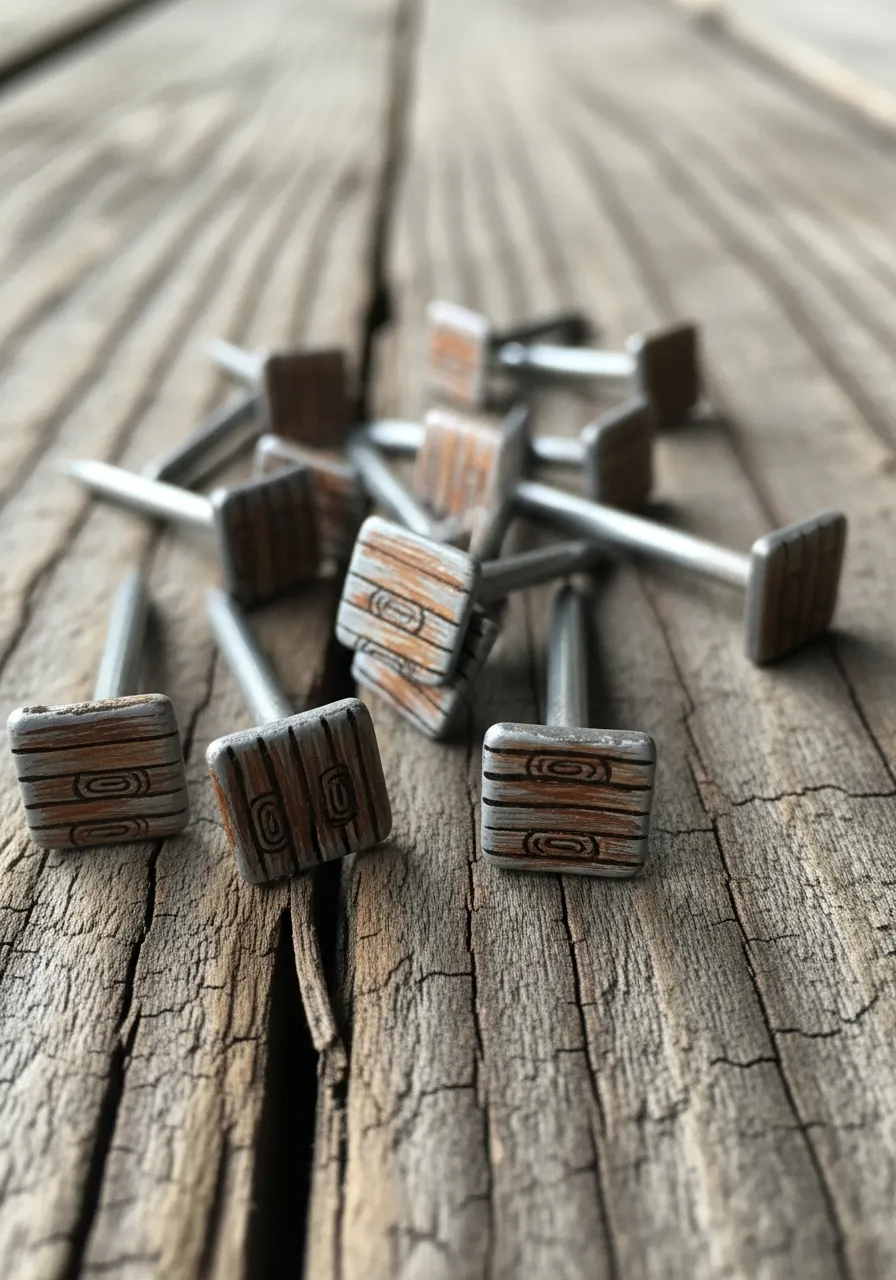
Weathered ship wood is part of the pirate aesthetic that most people overlook, and it makes for a surprisingly realistic nail design.
Start with a warm gray-brown base. Think the color of driftwood or old ship timber.
Use a thin fan brush or a dry-brush technique to drag darker brown and amber lines down the length of each nail. Do not lift the brush, drag it from cuticle to tip in long strokes.
Vary the pressure slightly as you drag to create natural-looking grain variation.
Brush tip: A stiff, flat brush from a craft store works better than a nail art brush for this technique. The stiffer bristles create more realistic texture.
Add occasional darker knot shapes using a dotting tool for the wood grain circles.
Seal with a matte topcoat to give it that dry, unvarnished wood appearance.
This is a design that impresses people because it looks so unexpected and realistic. It is conversation-starting without being loud. Pair it with gold or bronze metal jewelry to reinforce the nautical theme. It also pairs beautifully with anchor or skull accent nails on one or two fingers for a full pirate deck aesthetic.
15. Starry Night Sea Nails
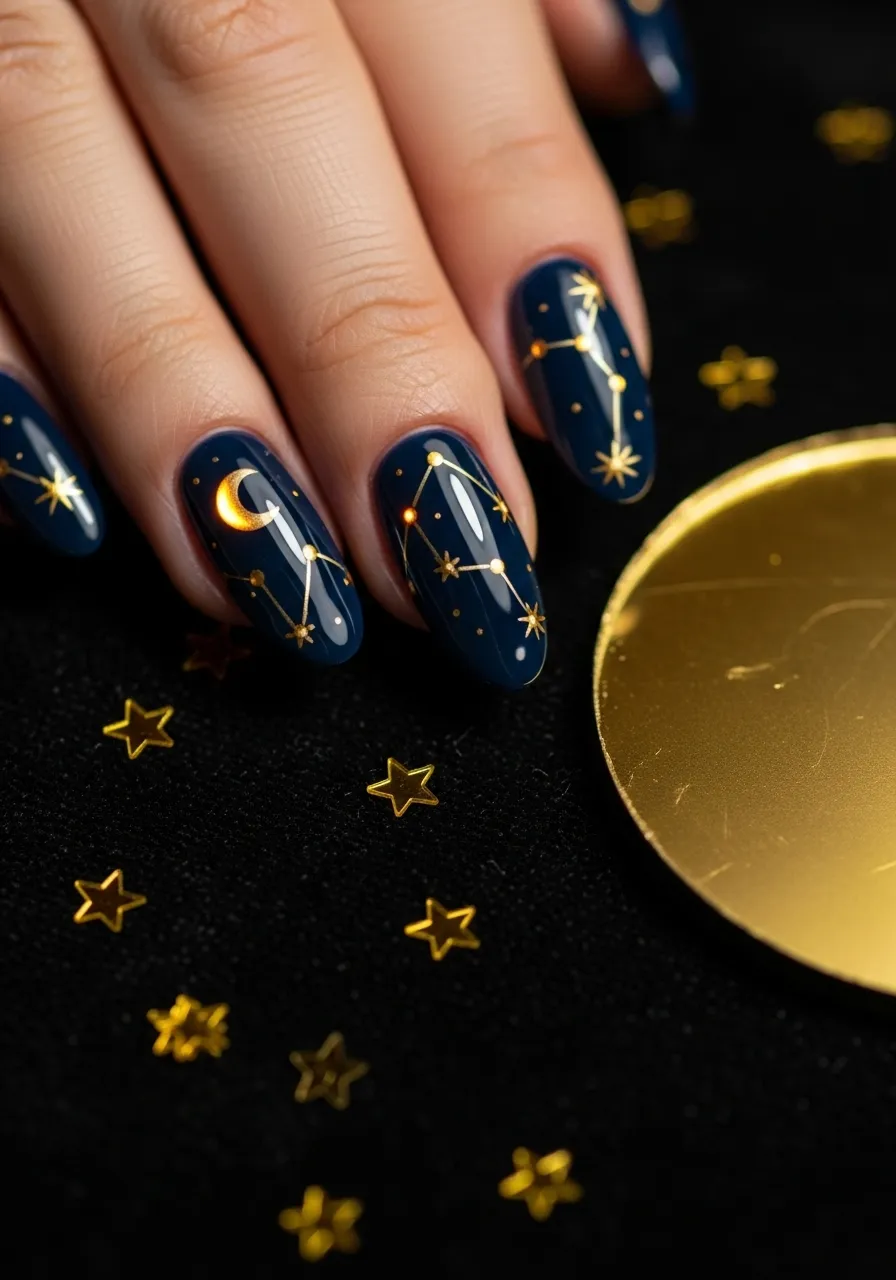
Pirates navigated by stars, and a starry night nail design captures that romantic, seafaring spirit.
Use a deep navy or midnight blue as your base across all nails.
Once fully dry, dip a thin brush or dotting tool in gold polish to place tiny star dots scattered across each nail. Vary the size of the dots to mimic real constellations.
Connect a few dots with thin lines to create actual constellation shapes on your accent nail.
Easy shortcut: Gold star stickers from a craft store can be applied directly to dried polish for instant results without any freehand work.
Add a small crescent moon on your ring finger or thumb nail in gold polish.
Use a fine brush to add a subtle shimmer wash of silver or iridescent topcoat over the whole nail. This gives the night sky that atmospheric glow.
Seal with a glossy topcoat to make the gold pop against the dark background.
This design is romantic, beautiful, and deeply pirate in its storytelling. It works year-round and is subtle enough for everyday wear. The gold stars catch light constantly as you move your hands, creating a twinkling effect that feels truly magical and adventurous.
16. Spiderweb and Skull Nails
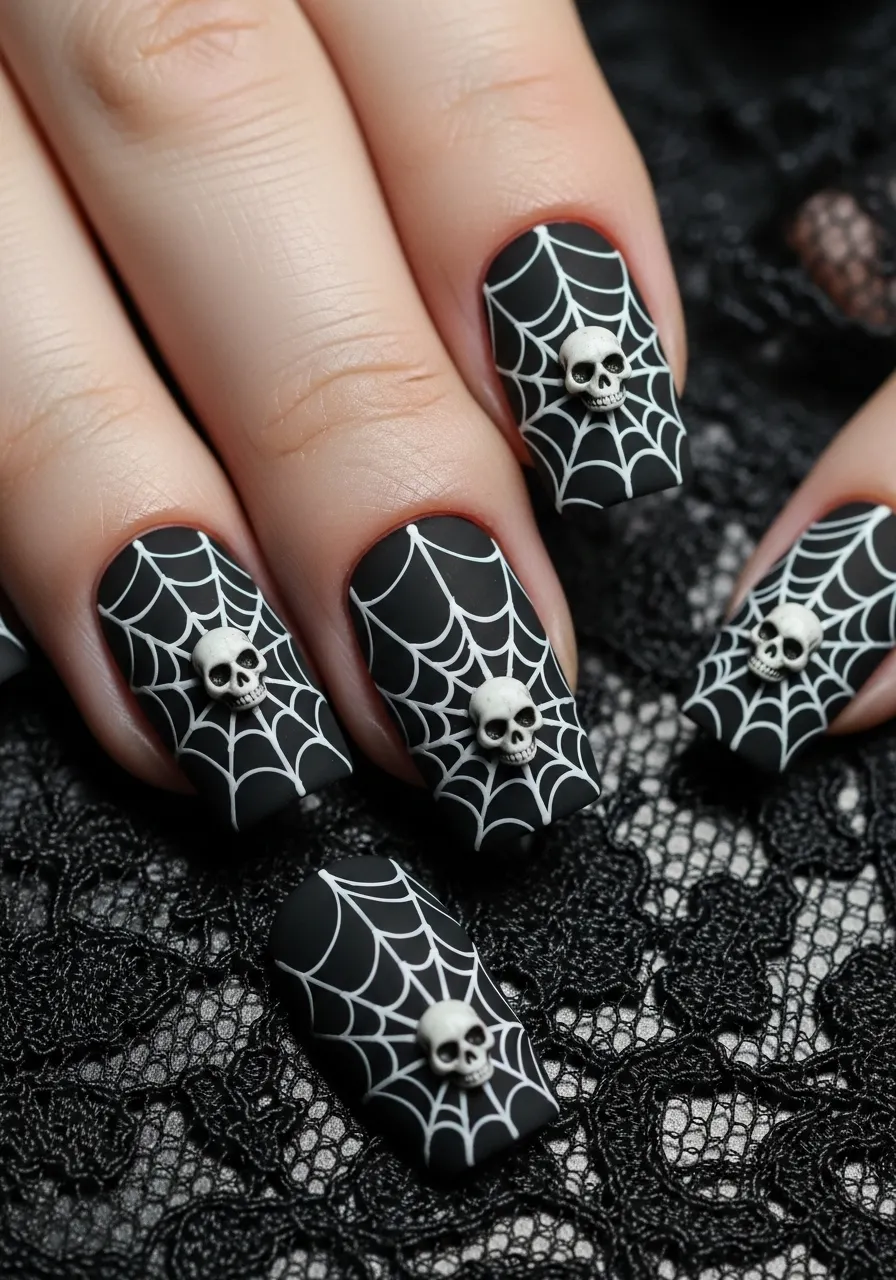
Spiderwebs on nails are a gothic touch that fits the darker, more mysterious side of pirate culture.
Paint all nails matte black as the base. Let dry completely.
Use a thin brush or a toothpick dipped in white polish to draw the spiderweb. Start with a small dot in one corner, then draw straight lines radiating out from it like sun rays.
Connect the radiating lines with curved lines looping between them. This creates the web structure. Keep the lines thin for the best effect.
Budget tip: A toothpick dipped in white polish makes surprisingly fine lines and costs almost nothing.
Add a small white skull at the center of the web on your accent nail.
Use a matte topcoat on everything to keep the gothic, moody atmosphere intact.
This design is perfect for Halloween but honestly looks great year-round if you love dark aesthetics. The spiderweb and skull combination reads as pirate-gothic, which is its own very cool aesthetic category. Keep the rest of your nails solid matte black to avoid visual clutter and let the web designs stand out on two or three accent nails.
17. Rope Knot Nails
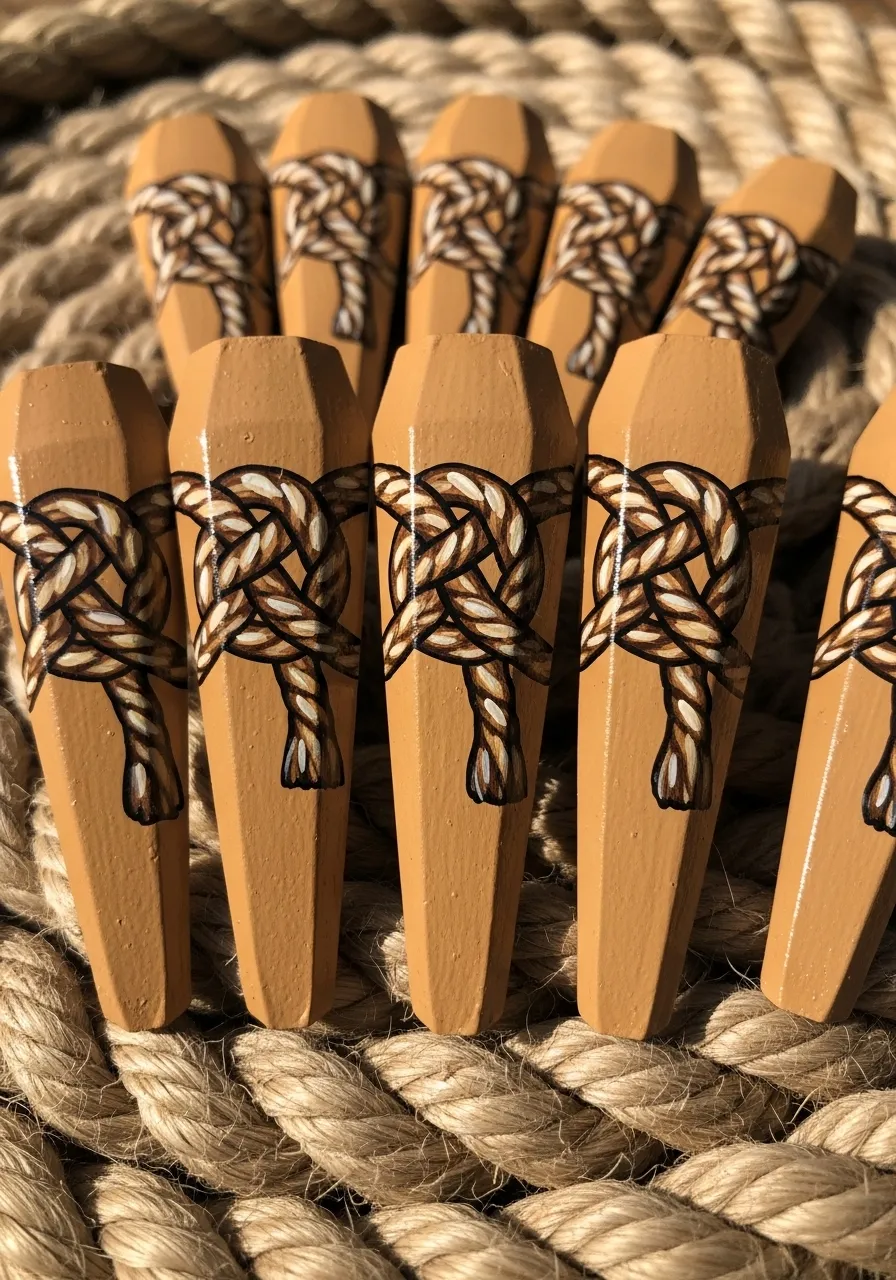
Rope is one of the most recognizable pirate and nautical symbols, and rope knot nail art looks incredibly detailed when done right.
Start with a warm tan or sand-colored base. This simulates rope fiber naturally.
Use a fine brush with brown and ivory polish to paint a rope design. The key is drawing two diagonal lines that twist around each other in alternating directions across the nail.
Add thin parallel lines along the rope strands for texture. This creates the illusion of actual woven fiber.
Simplest approach: Draw just the rope crossing pattern, which looks like an infinity symbol or two overlapping circles. Fill in with alternating light and dark brown.
Use a small amount of gold polish on the very tips to suggest rope ends dipped in lacquer, a traditional sailor detail.
Seal with a matte topcoat for a more realistic fibrous texture.
Rope knot nails work as an all-over pattern or as accent details on a solid navy background. They feel very specific and thoughtful as a design choice, which makes them impressive to anyone who notices. Pair them with anchor or ship details on other nails to build out a full nautical story across your hands.
18. Faded Tattoo Style Nails
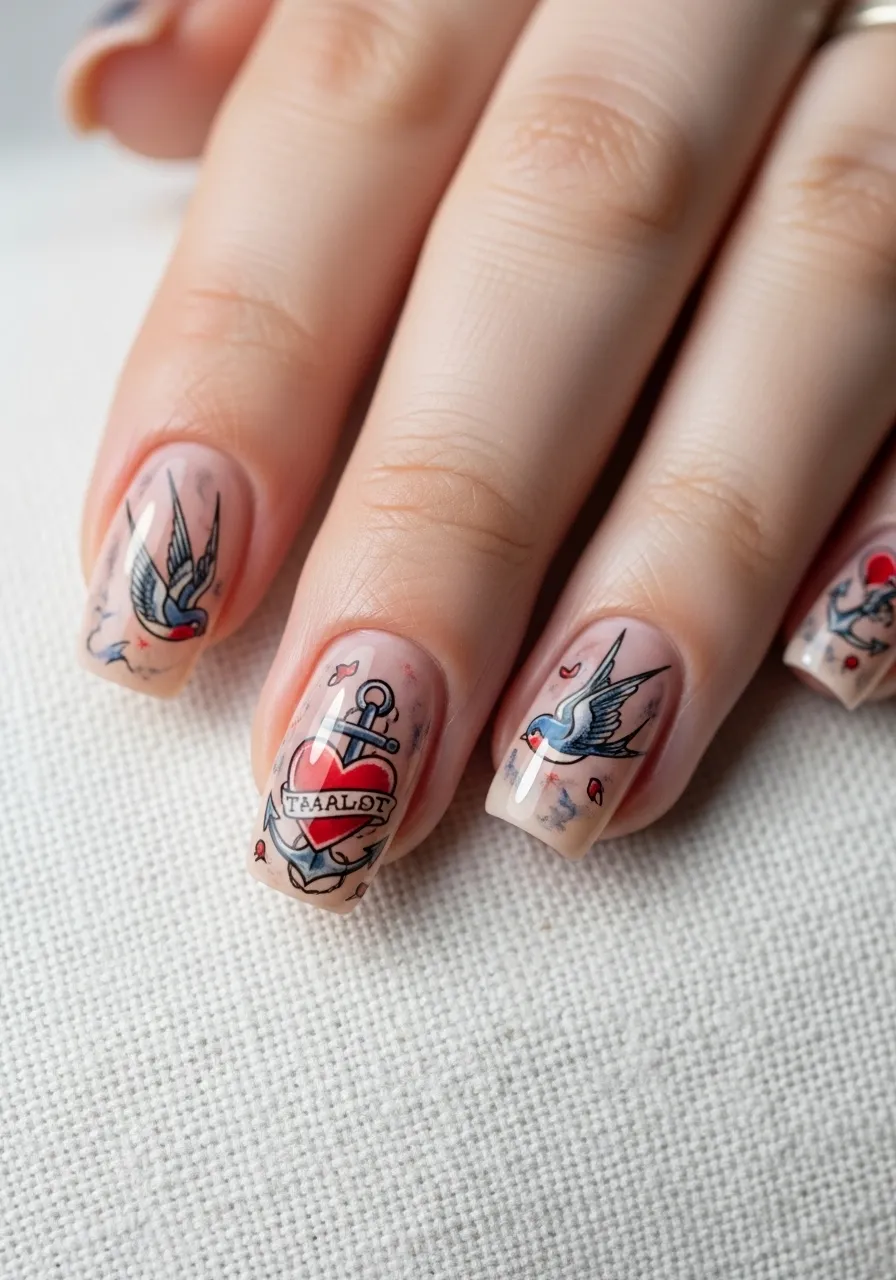
Old sailor tattoos have an iconic look, and translating that style onto nails creates something genuinely original and artistic.
Use a warm nude or skin-tone base to mimic the look of actual skin.
Paint classic sailor tattoo motifs in muted, slightly faded colors. Think old blue, dusty red, and faded green rather than bright primaries.
Designs to try include a small swallow, a simple anchor, a heart with a banner, or a small dagger.
Color tip: Mix a tiny drop of white polish into your colored polish before painting to instantly create that faded, vintage tattoo quality.
Keep the designs small and slightly imperfect. Sailor tattoos were done by hand with rough tools, so imperfect lines actually enhance the authenticity.
Apply a light matte topcoat to finish. It reinforces the aged, organic feel of real skin and faded ink.
This design is one of the most wearable in this list because it looks like wearable art rather than costume makeup. It draws the right crowd and starts great conversations. It is also deeply personal because you can choose which sailor symbols resonate most with you. This is nail art that tells a story.
19. Dark Emerald Pirate Nails
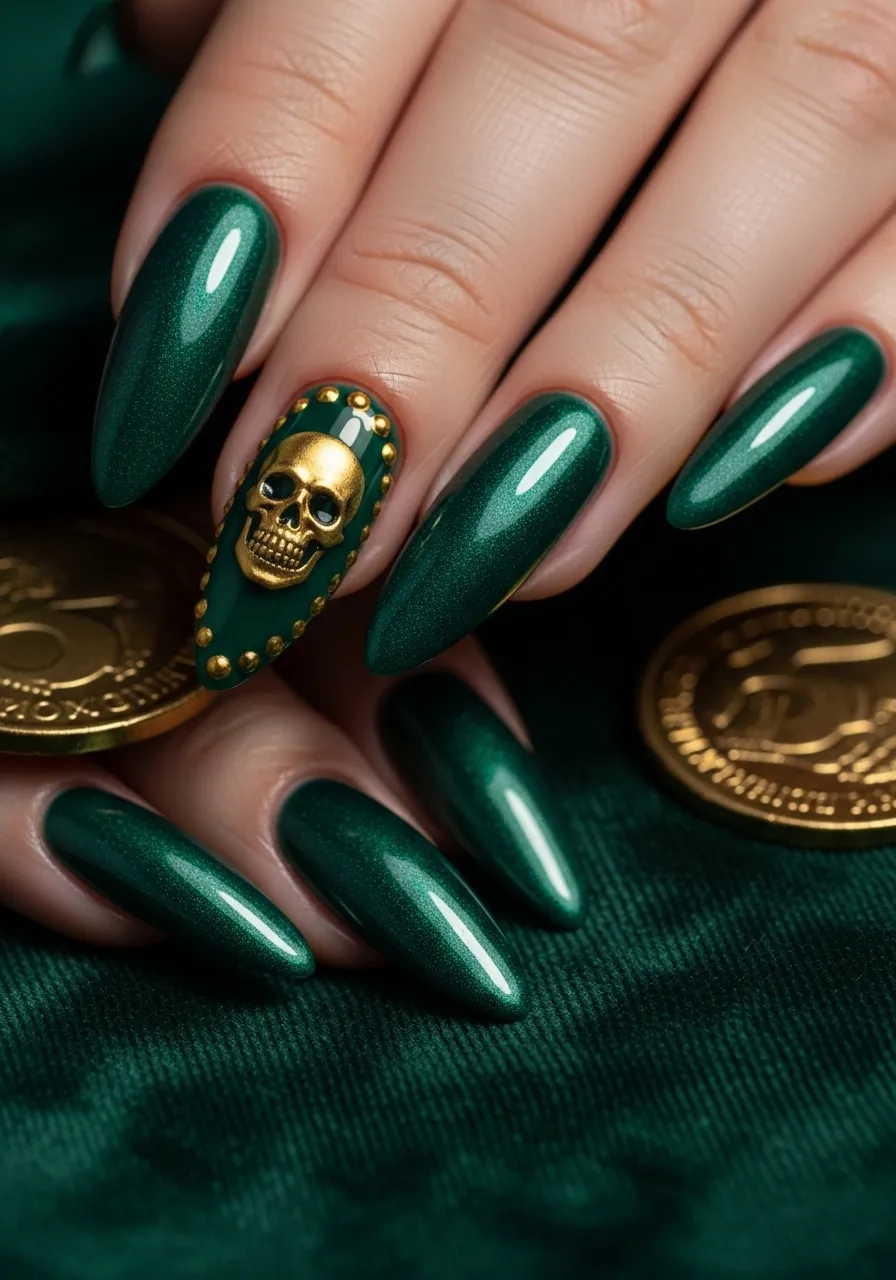
Emerald green is the color of sea glass, jungle islands, and stolen jewels. It fits the pirate world perfectly.
Choose a deep, rich emerald polish with a slight metallic or foiled finish. This adds depth and richness without being glittery.
Apply two coats for full coverage and let dry completely.
On your accent nail, use a fine brush with gold polish to paint a small skull or anchor design. The combination of emerald and gold looks genuinely luxurious.
Budget pick: Many drugstore brands carry gorgeous emerald shades in their holiday or limited collections. Check for these during fall and winter seasons when jewel tones are popular.
Add tiny gold dot accents around the skull using a dotting tool for a finished, decorative look.
Use a high-gloss topcoat to make the emerald gleam like a real gemstone.
Dark emerald nails feel elegant enough for formal occasions and adventurous enough for themed events. The color is powerful on its own, and the gold pirate details make it feel intentional and thematic rather than just a basic manicure. This is a great choice for someone who wants pirate nails that also feel grown-up and polished.
20. Distressed French Tips
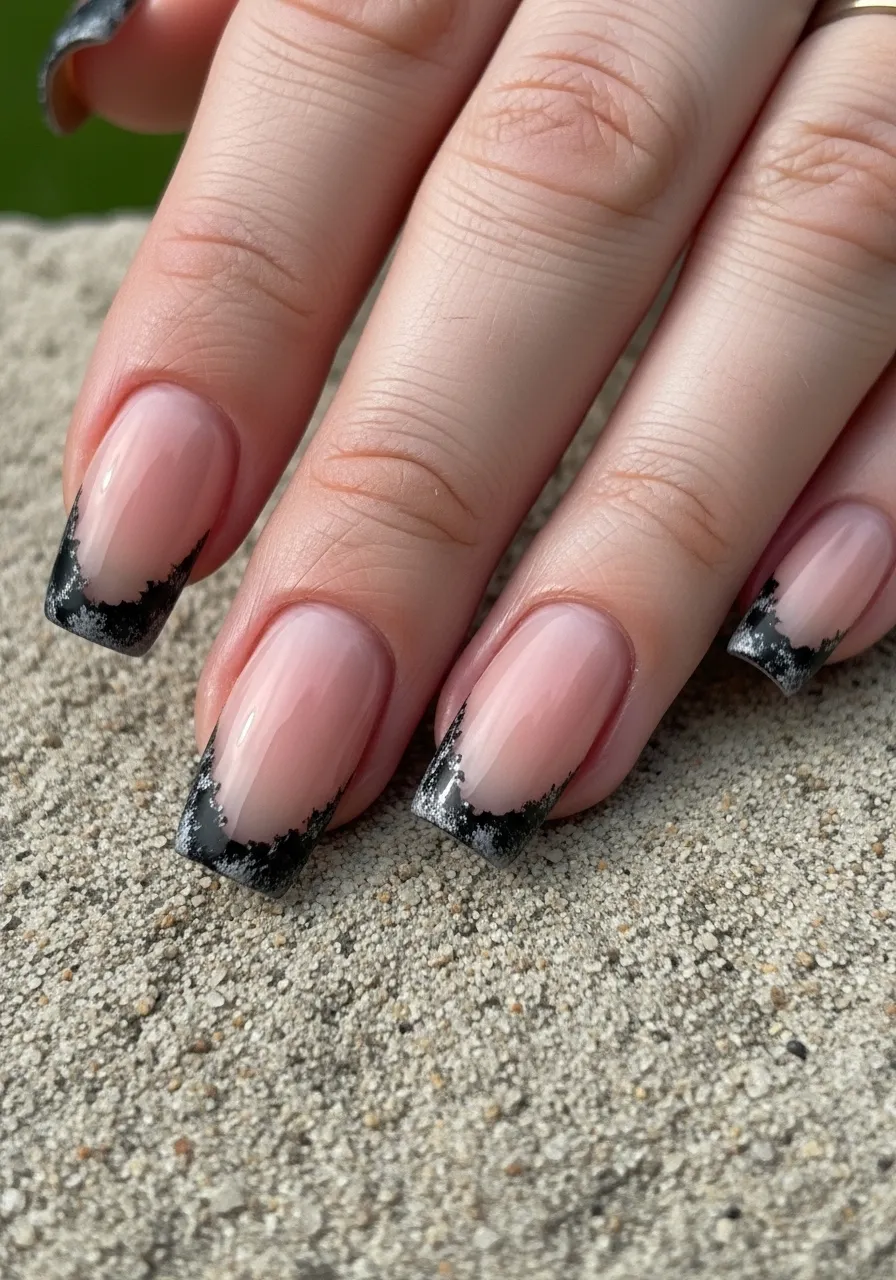
A distressed French tip takes the classic French manicure and gives it a pirate makeover.
Start with a sheer pink or natural base, just like a classic French manicure.
Instead of painting a clean white tip, use black or dark navy polish and apply it unevenly. Dab it on with a torn piece of makeup sponge rather than a brush.
The goal is a rough, chipped-looking edge rather than a crisp line. This mimics the look of worn-down, battle-worn nails.
Technique tip: Use a torn sponge edge to stamp the dark color along the tip. The irregular edge of the sponge naturally creates an uneven, distressed effect.
Add a few fine cracks or chip lines using a toothpick dipped in dark polish just above the tip area.
Seal with a matte topcoat for an even more worn, unpolished look.
This design is subtle enough that people may not immediately recognize it as pirate-themed, but the edge gives your nails a toughness and rawness that fits the aesthetic beautifully. It is also easy to achieve, making it a great starting point for anyone new to nail art who wants something more interesting than a basic manicure.
21. Skeleton Hand Nails
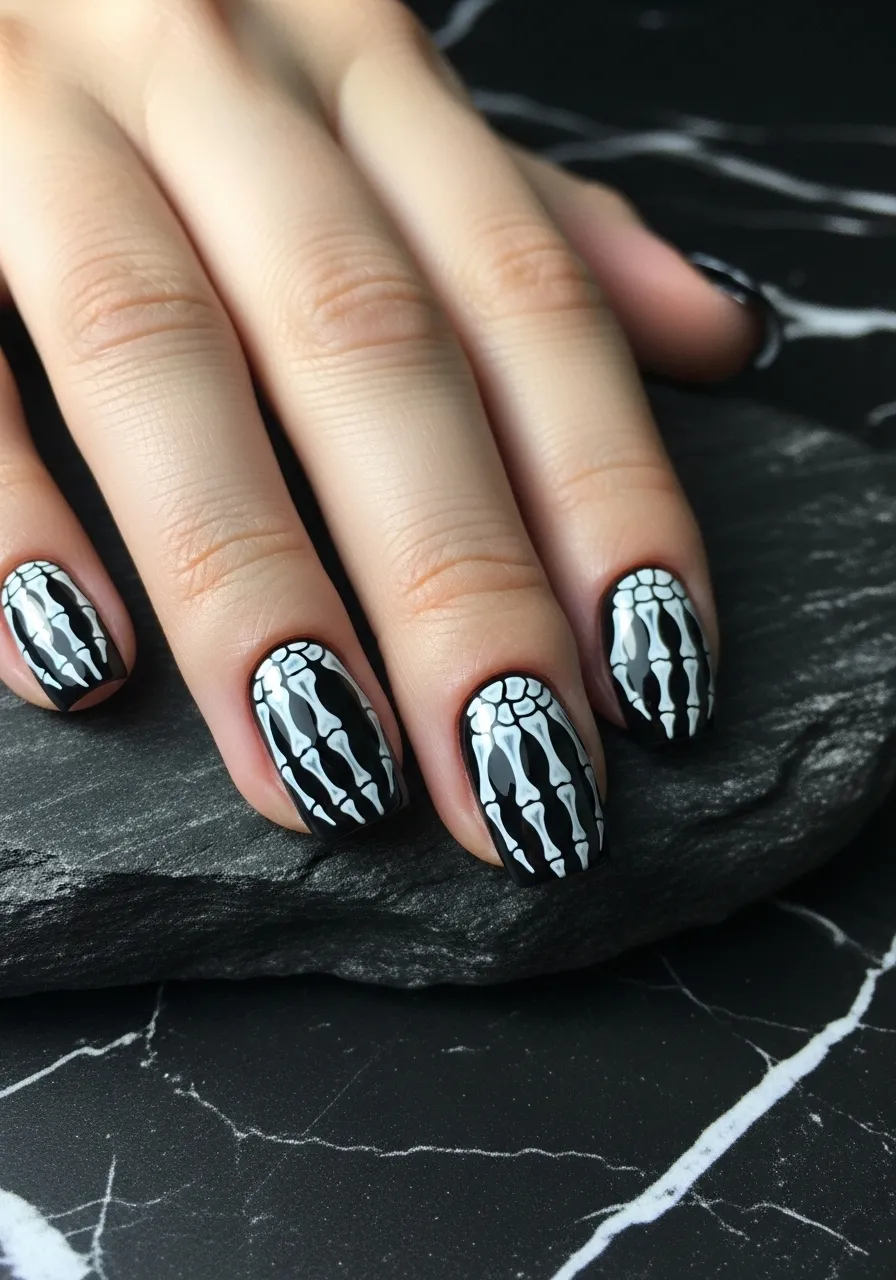
Skeleton hand nails are a bold full-nail illustration that turns your actual hand into part of the art.
Paint all nails matte black as the base.
Use a fine brush with white polish to draw bone shapes on each nail. The goal is to make it look like you are seeing through to the skeleton hand beneath.
Draw the knuckle joints at the base of each nail and the long metacarpal bone running up the center toward the tip.
Simplified version: You only need three lines per nail to suggest bones. Two outer lines for the sides of the finger bone and one central line with small circles at the knuckles.
Add tiny detail lines along the bone edges to give a sense of three-dimensionality.
Seal with a matte topcoat for a flat, illustration-like finish.
This design gets a strong reaction from everyone who sees it. It is theatrical and dark, fitting perfectly into pirate, Halloween, or gothic aesthetics. When you place your hand flat on a table, the effect is especially striking as the nail art aligns with your actual finger joints. It is one of those designs that makes your whole hand the artwork.
22. Ocean Wave Tips
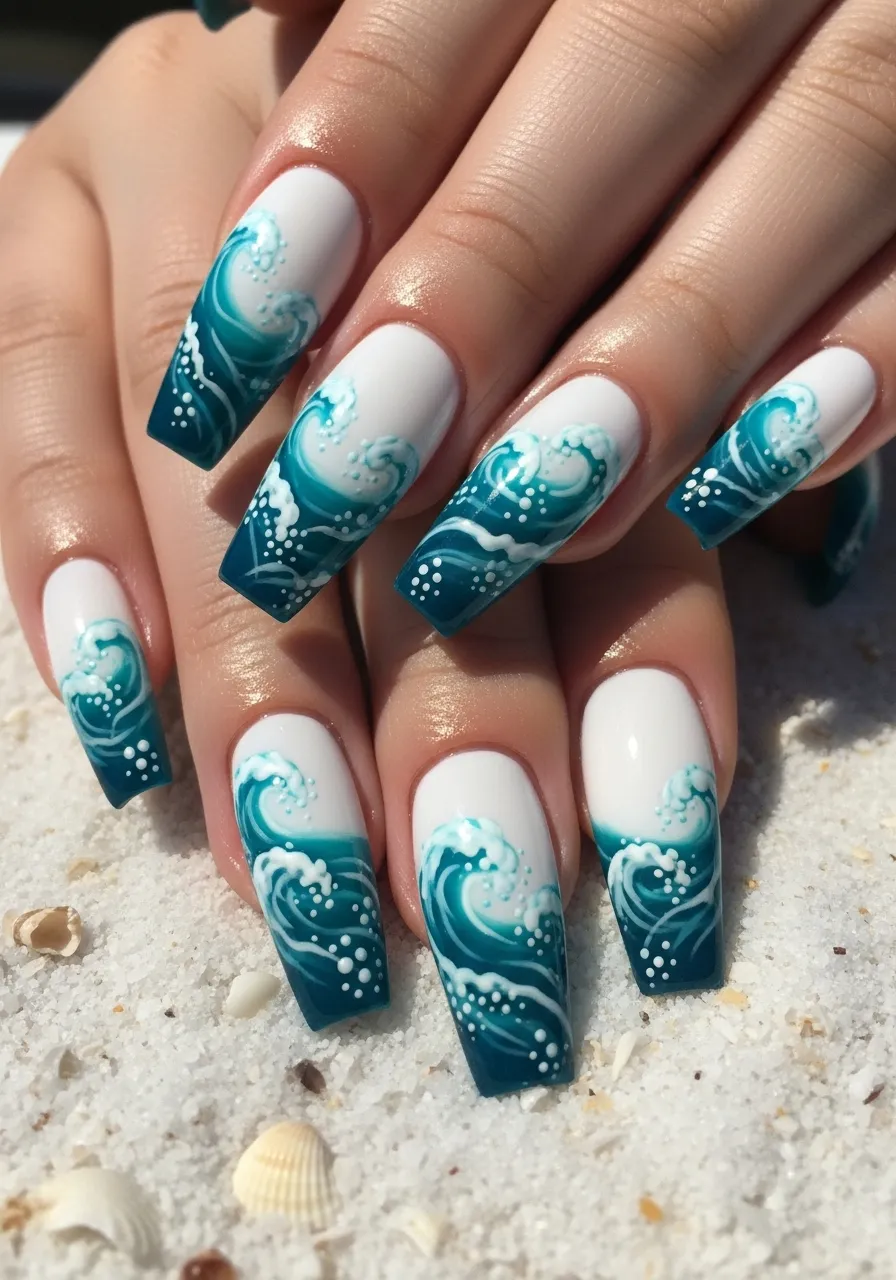
Ocean waves on nails are calming, beautiful, and deeply nautical without being overtly pirate.
Start with a white or very pale blue base across all nails.
Use a thin brush and deep teal or ocean blue polish to paint a curved wave along the tip of each nail. The wave should be irregular and slightly asymmetrical for a natural look.
Add a thin white line just above and below the wave line to suggest foam and spray.
Shortcut: Wave nail art stamps are widely available and give you consistent, professional-looking waves every time with zero freehand skill.
Use a small dotting tool to add tiny white foam dots scattered above the wave for a sea spray effect.
Blend a bit of lighter blue into the wave using a small brush while the polish is still wet to create a gradient within the wave itself.
Seal with a glossy topcoat to make the waves look wet and alive.
This design is peaceful and beautiful and works for everyday wear or beach vacations. It is the gentler side of pirate nails, capturing the sea rather than the ship or the skull. Pair one or two nails with a small anchor or ship detail if you want to push it more toward the pirate theme without disrupting the overall calmness of the design.
23. Full Pirate Scene Nails
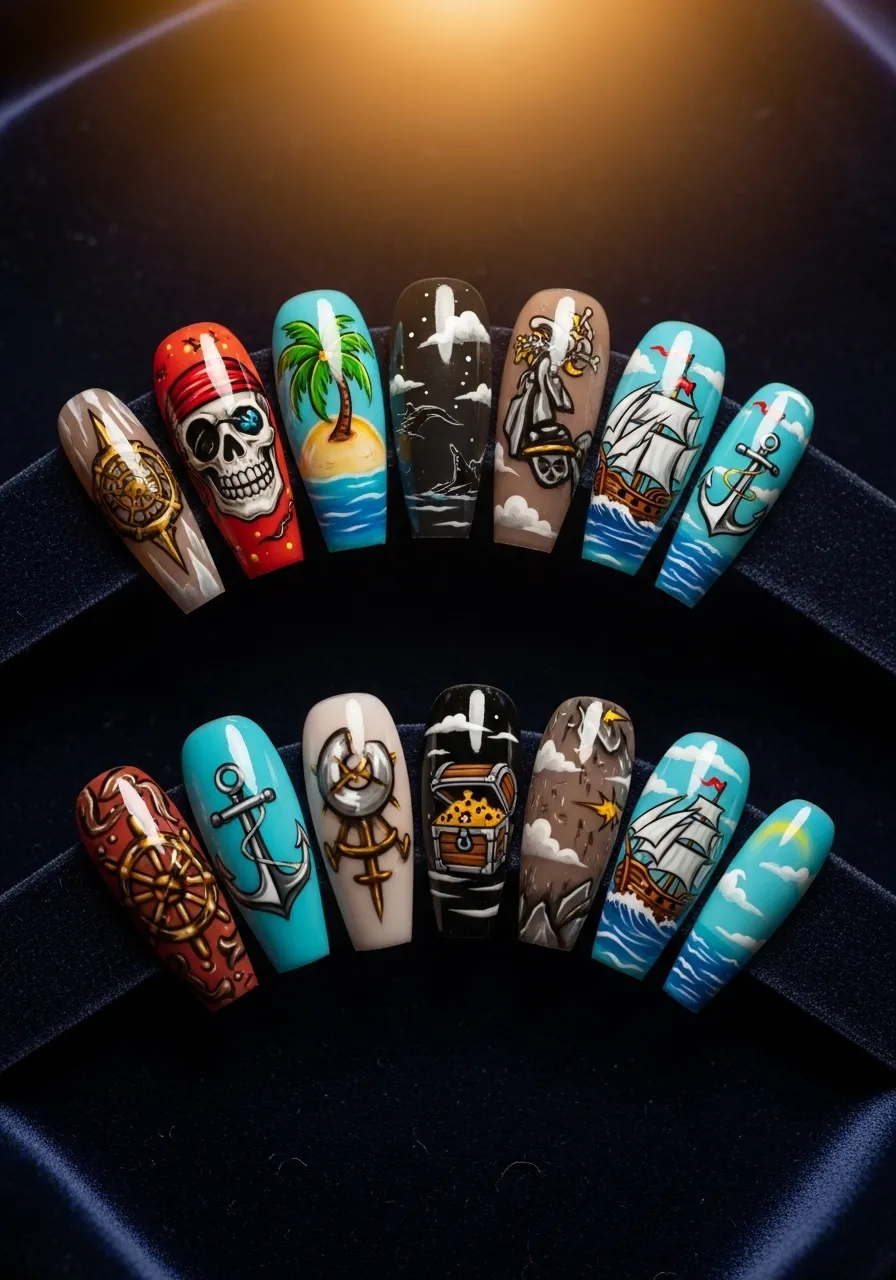
If you want to go all the way, a full pirate scene across all ten nails is the ultimate expression of this theme.
Each nail tells a different part of the story. Assign a scene or symbol to each nail before you begin.
Suggestions for each nail: a ship on the sea, a treasure chest, a skull and crossbones, a treasure island with a palm tree, a compass, an anchor, ocean waves, a mermaid, a pirate flag, and a starry sky.
Use a consistent color palette across all nails so the different scenes feel connected. Deep navy, gold, black, and white work well together.
Planning tip: Sketch your designs on paper first. Just simple thumbnail sketches help you plan placement and avoid repeating similar compositions.
Work from the simplest design to the most complex, building confidence as you go.
Use a fine liner brush for all detail work and let each nail dry before moving to the next.
Seal everything with a glossy topcoat for a polished, finished look.
This is a weekend project, not a quick manicure. But the result is extraordinary. Your nails become a complete piece of wearable art. It photographs beautifully, impresses everyone who sees it, and tells a full story from start to finish. Take your time and enjoy the process.
Setting Sail With Your Style
Pirate nails are more than just a Halloween look. They are a way to carry a spirit of adventure, toughness, and creativity with you every day. From a single skull on a matte black base to a full ten-nail story told in miniature, the range of options here means there is genuinely something for every skill level and every budget. Start with one idea that excites you most. Try the gold coin accent nail or the navy shimmer base if you are a beginner. Move toward the treasure map or skeleton hand designs as your confidence grows. The best nail art is the kind you actually do, so pick your favorites from this list, gather your tools, and get started. Your next adventure is just a coat of polish away.