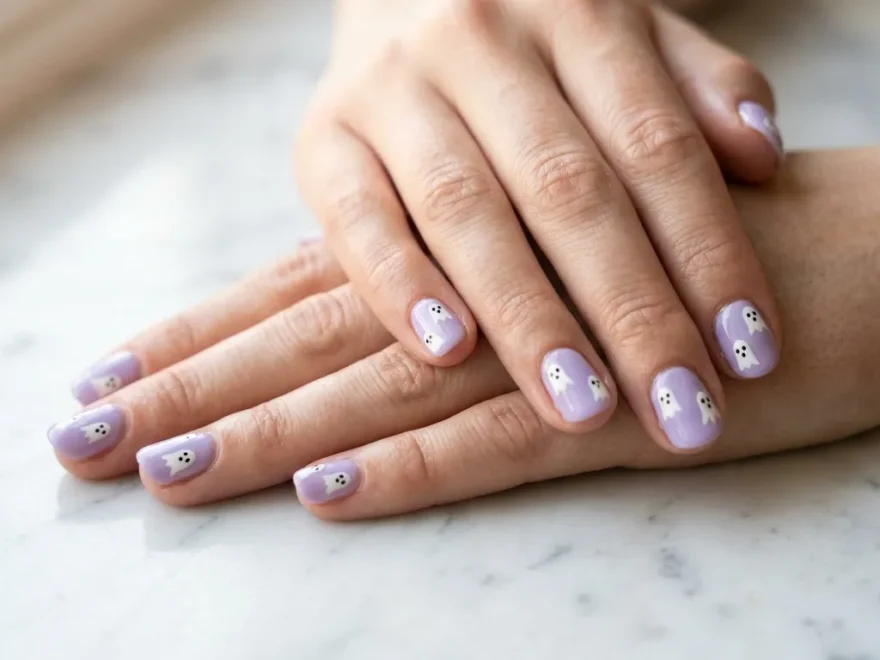
Ghost nails are having a serious moment, and it is easy to see why. Whether you are prepping for Halloween or just love a spooky aesthetic year-round, ghost nail ideas give you so much creative freedom. You can go cute and minimal or full-on haunted house glamour. These designs work on short nails, long nails, acrylics, and even press-ons from the dollar store. You do not need a salon visit or a huge budget to pull them off. A steady hand, a thin brush, and a few nail polishes are all it takes to get started. This list covers 28 ghost nail ideas that range from beginner-friendly to impressively detailed, so there is something here for every skill level. If you’re also looking for Ghostface Nails Ideas, iconic mask artwork, dripping blood accents, black and white color schemes, and horror-inspired details can create a bold, spooky manicure that perfectly captures the chilling vibe of classic slasher films.
Classic White Ghost on Black
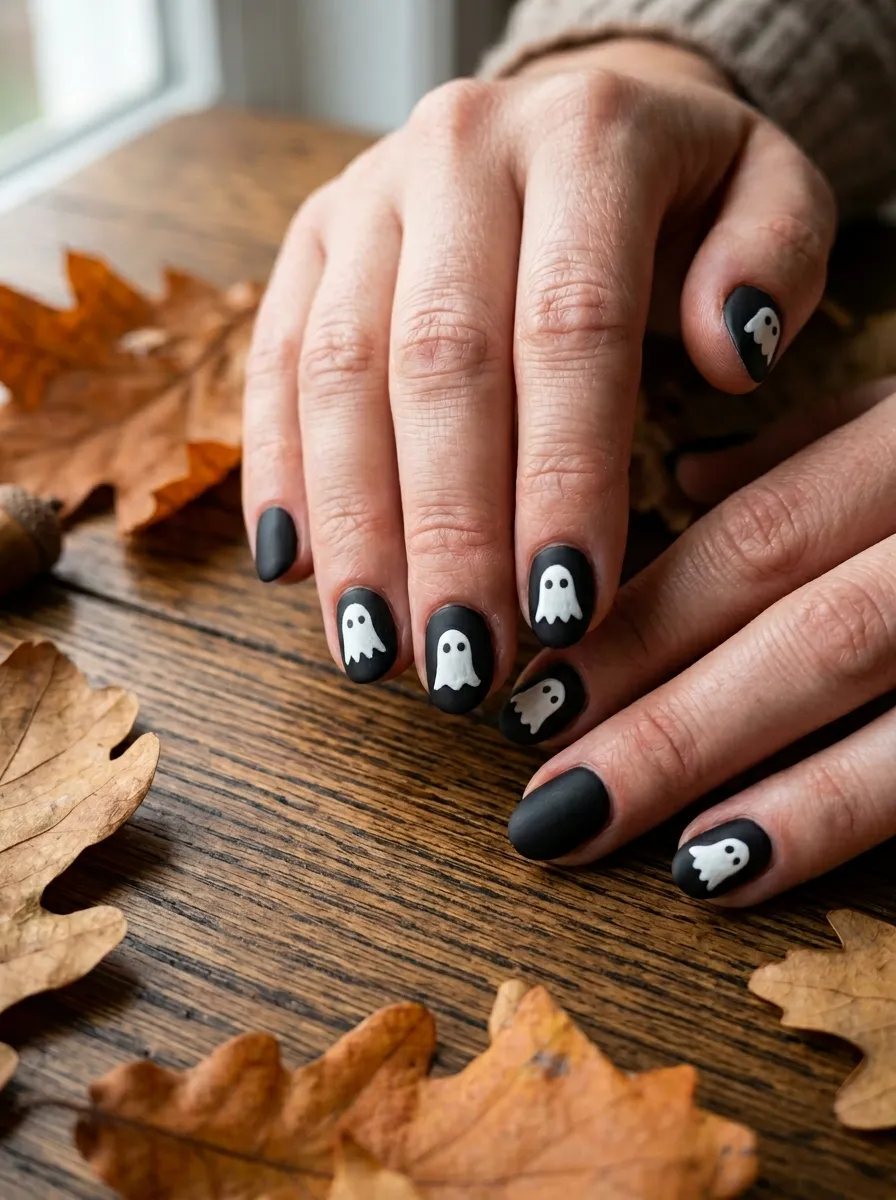
This is the design that started the ghost nail trend and it is still one of the best. The contrast between a matte black base and a white ghost figure is bold, simple, and immediately recognizable.
To recreate this at home, paint your nails with two coats of matte black polish. Once fully dry, use a thin nail art brush dipped in white polish to draw a rounded head, two small arm bumps on the sides, and a wavy hemline at the bottom. Add two tiny black dots for eyes using a dotting tool or the tip of a bobby pin.
This design works on any nail length and any nail shape. Oval and round nails give the ghost a softer look. Square nails make it feel a little more graphic and modern.
Seal everything with a matte topcoat to keep that crisp finish. You can find matte topcoats at most drugstores for under five dollars. This whole design costs almost nothing if you already have black and white polish in your collection.
Pastel Ghost Nails for a Soft Spooky Look
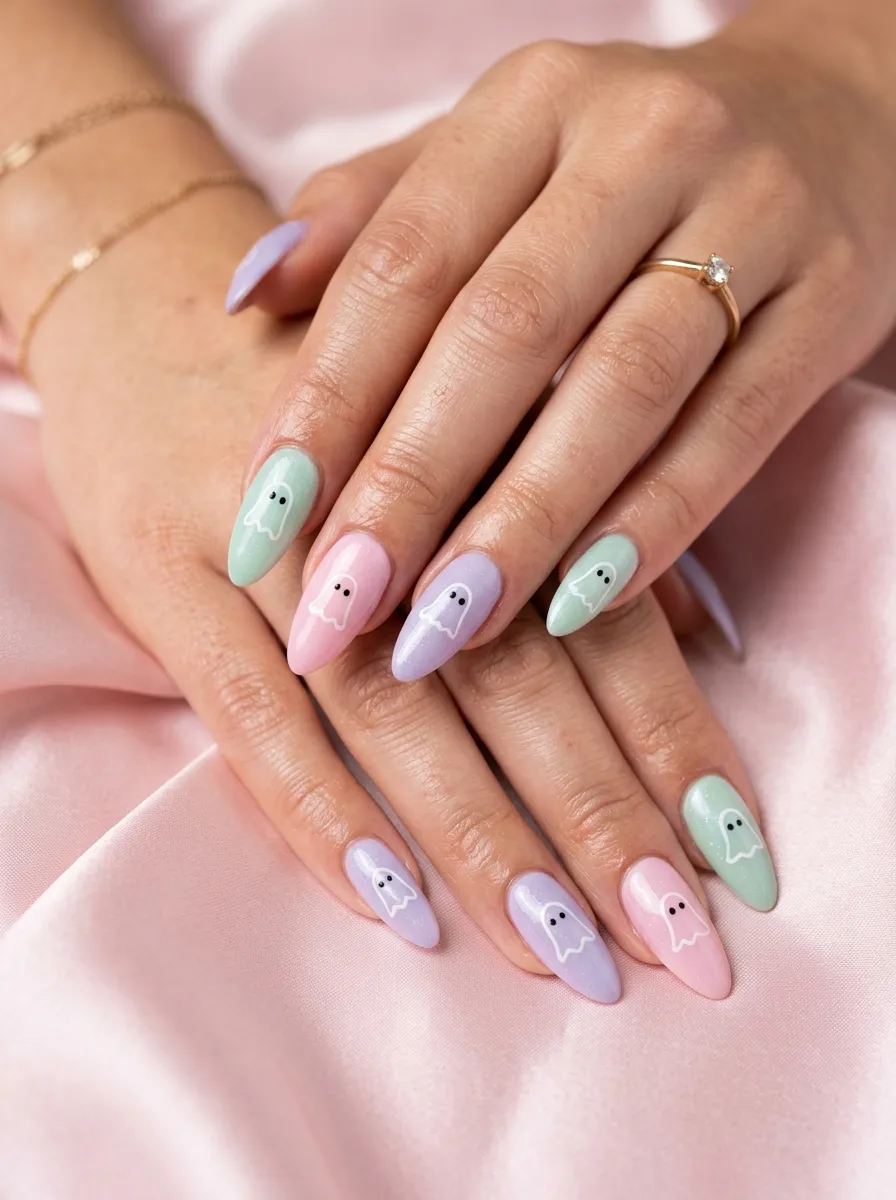
Not everyone wants their Halloween nails to feel dark and dramatic. Pastel ghost nails give you all the spooky charm in a soft, wearable palette that works beyond October.
Choose a base coat in lavender, mint, blush pink, or baby yellow. These colors make the white ghosts pop without feeling too intense. Paint each nail a different pastel shade for a playful mismatched set.
Once the base is dry, use a thin brush or a white nail art pen to draw small ghost outlines. Keep the ghosts simple with a round head, tiny arms, and wavy base. A nail art pen from a beauty supply store gives you great control and usually costs around three dollars.
Finish with a glossy topcoat to make the colors look more vibrant. This style is perfect for people who want Halloween-inspired nails that still feel office-appropriate or school-friendly. It also photographs beautifully in natural light because the soft colors catch the glow without being harsh.
Ghost French Tips
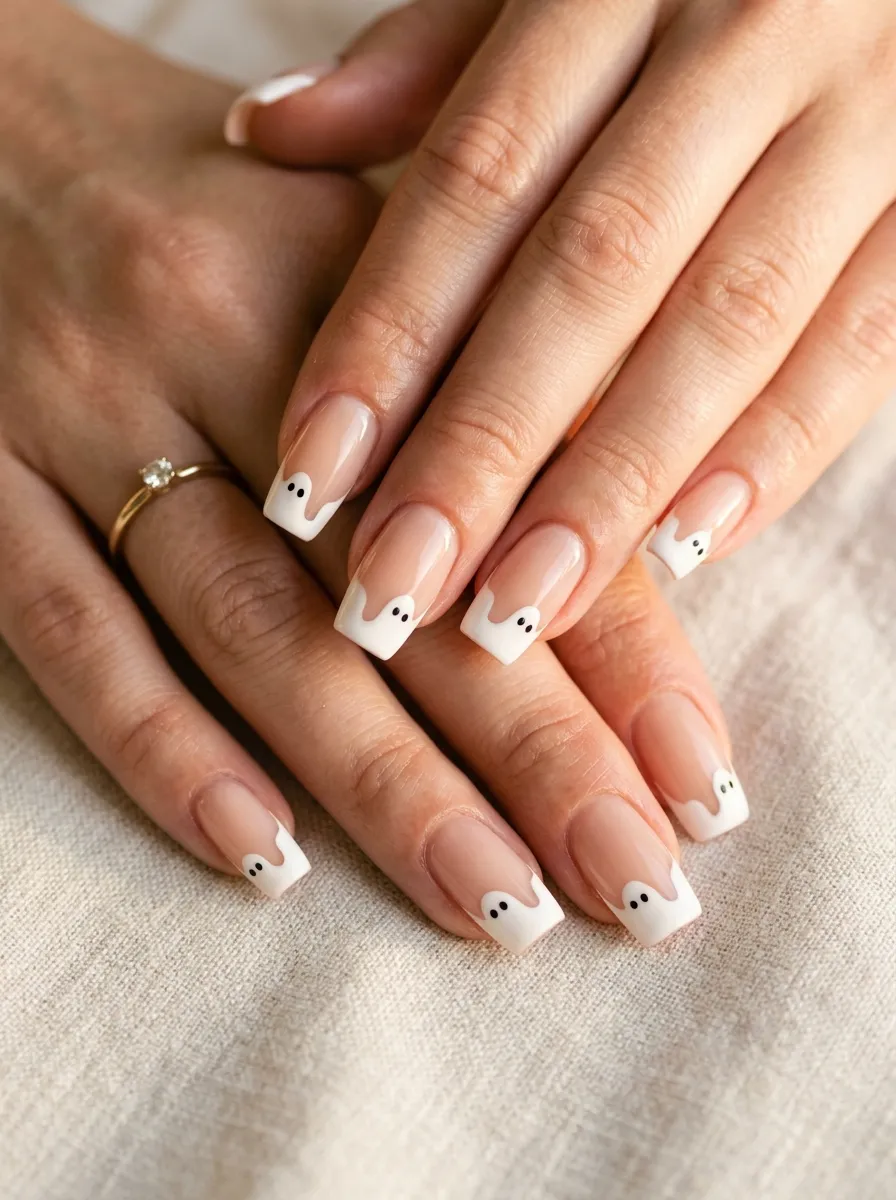
This design is clever because it takes something classic and gives it a Halloween twist that is still polished enough for everyday wear.
Instead of painting a straight white French tip, shape the tip into a ghost silhouette. This means the white section has a rounded top and a wavy or scalloped bottom edge rather than a flat line. Add two tiny dot eyes just below the white section and you have a French tip ghost peeking out from the nail edge.
To get a clean ghost tip shape, use nail tip guides as a rough stencil and then freehand the wavy bottom with a thin brush. You can also use white nail tape to block off the base and then cut a wavy edge before removing it.
This design looks great on square, squoval, and coffin nail shapes. The longer the nail, the more room you have to make the ghost expressive. Use a sheer pink or nude base to keep the overall look fresh and wearable for any occasion past spooky season.
Glitter Ghost Nails
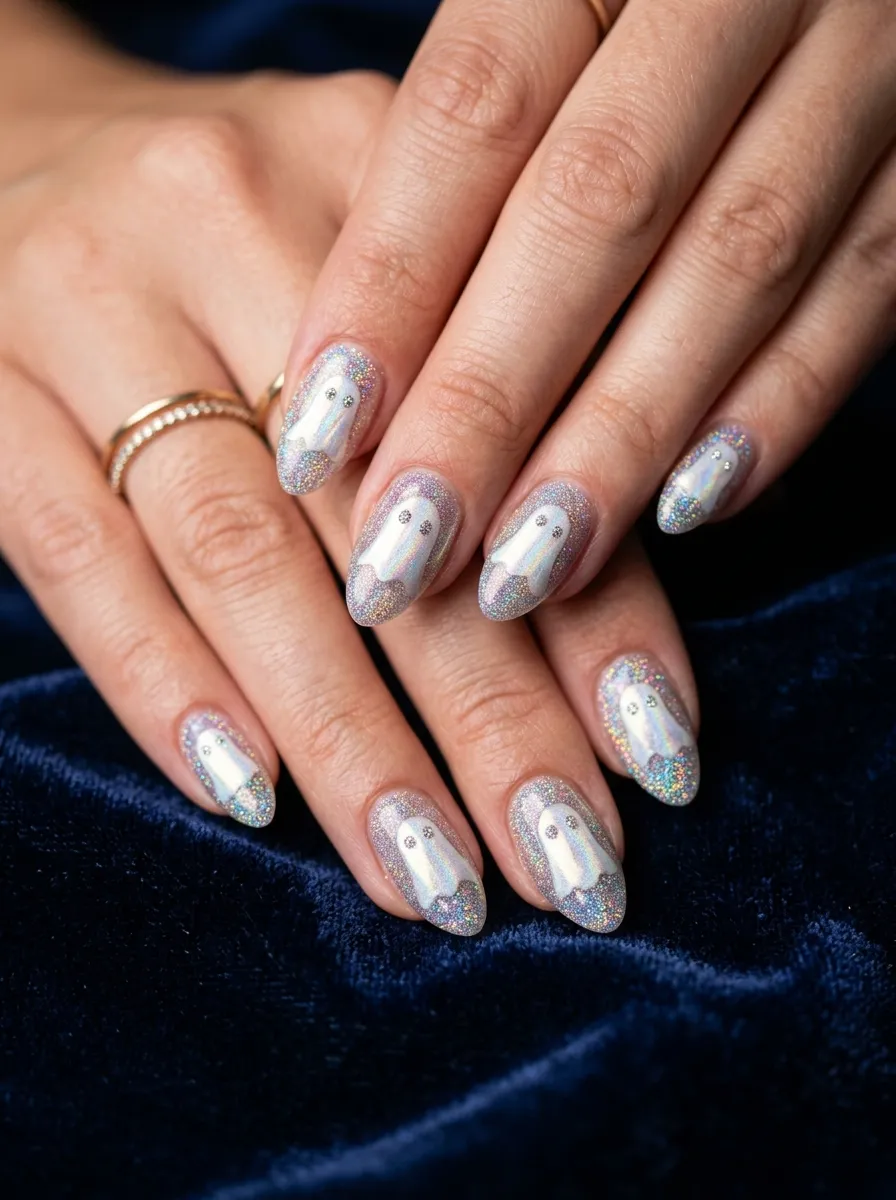
Glitter makes everything better, and ghost nails are no exception. This version adds sparkle to the classic ghost design so your nails shine in the light.
Start with a holographic or fine silver glitter base painted over a white or sheer nude polish. You can also use a glitter topcoat layered over any base color. Once the glitter is dry, paint your ghost shape in white or iridescent polish on top.
For extra shimmer, mix a tiny bit of loose glitter into clear nail polish before painting the ghost body. This gives the ghost itself a glittery texture that looks incredible under party lights or candlelight.
Glitter ghost nails are great for Halloween parties, concerts, or festivals. They feel festive without being too costume-heavy. You can get a glitter topcoat at the drugstore for around four dollars. The iridescent version from the nail section of most beauty stores gives the best effect for this kind of design.
Ghost Nail Stamping Design
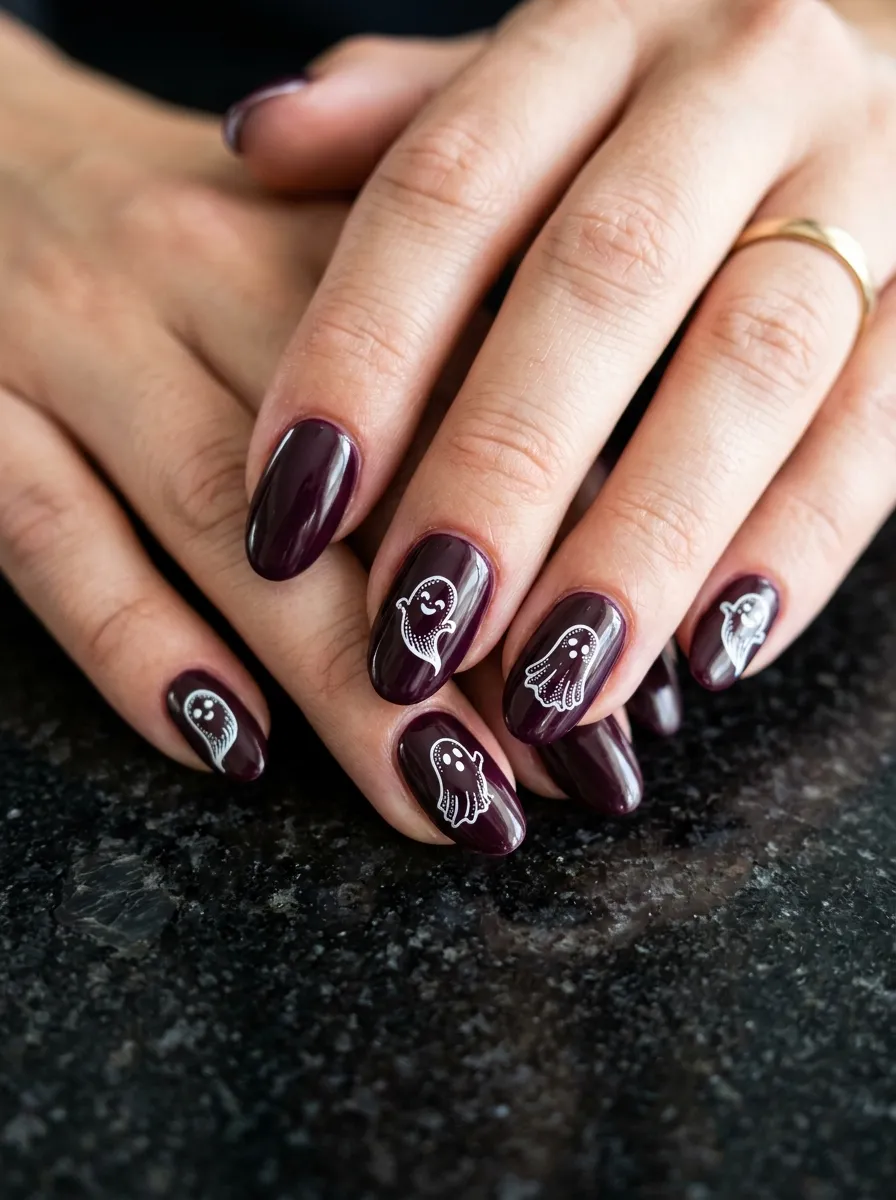
Nail stamping is one of the easiest ways to get consistent, detailed nail art without needing artistic skills. Ghost stamping plates are widely available around Halloween season and many are sold year-round online.
A nail stamping kit typically includes a stamping plate with etched designs, a scraper, and a stamper tool. You apply stamping polish to the plate, scrape off the excess, press the stamper onto the design, then roll it onto your nail. The whole process takes about two minutes per nail once you get the hang of it.
Ghost stamping plates are sold at most nail supply shops and online marketplaces for around ten to fifteen dollars. That gives you a reusable tool you can use every year. Pair a dark base like burgundy, navy, or black with white stamping polish for maximum contrast.
This method is perfect for beginners who want detailed nail art without freehand painting. It is also great for doing multiple nails quickly when you are short on time before a Halloween event.
Glowing Ghost Nails with Glow-in-the-Dark Polish
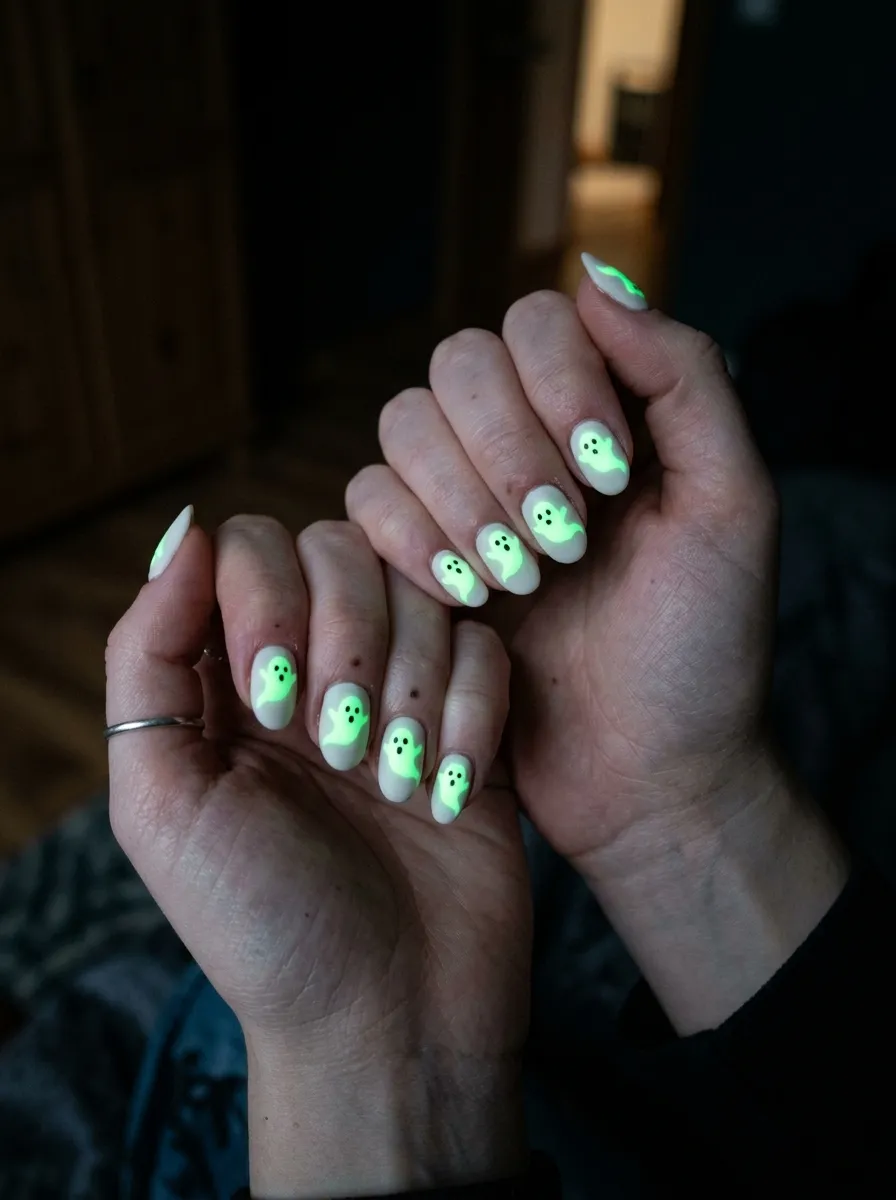
Glow-in-the-dark ghost nails are such a fun conversation starter at Halloween parties. When the lights go out, your nails literally glow.
Use a glow-in-the-dark nail polish as either the base or the ghost design itself. Most glow polishes look white or slightly milky in regular light and then emit a green or blue glow in the dark. You can paint ghost shapes using the glow polish over a black or dark base so the ghosts are nearly invisible during the day and dramatic at night.
Charge the polish under a UV lamp or bright window light for about thirty seconds before going into a dark space for the best glow effect. Glow-in-the-dark polish is sold at Halloween seasonal stores and online for around five to eight dollars.
This design is especially popular with kids doing their own nails at home. It is simple enough for beginners, requires no special tools, and delivers a wow factor that is hard to match with regular polish. A glossy topcoat protects the glow layer and extends the wear.
Minimalist Ghost Line Art Nails
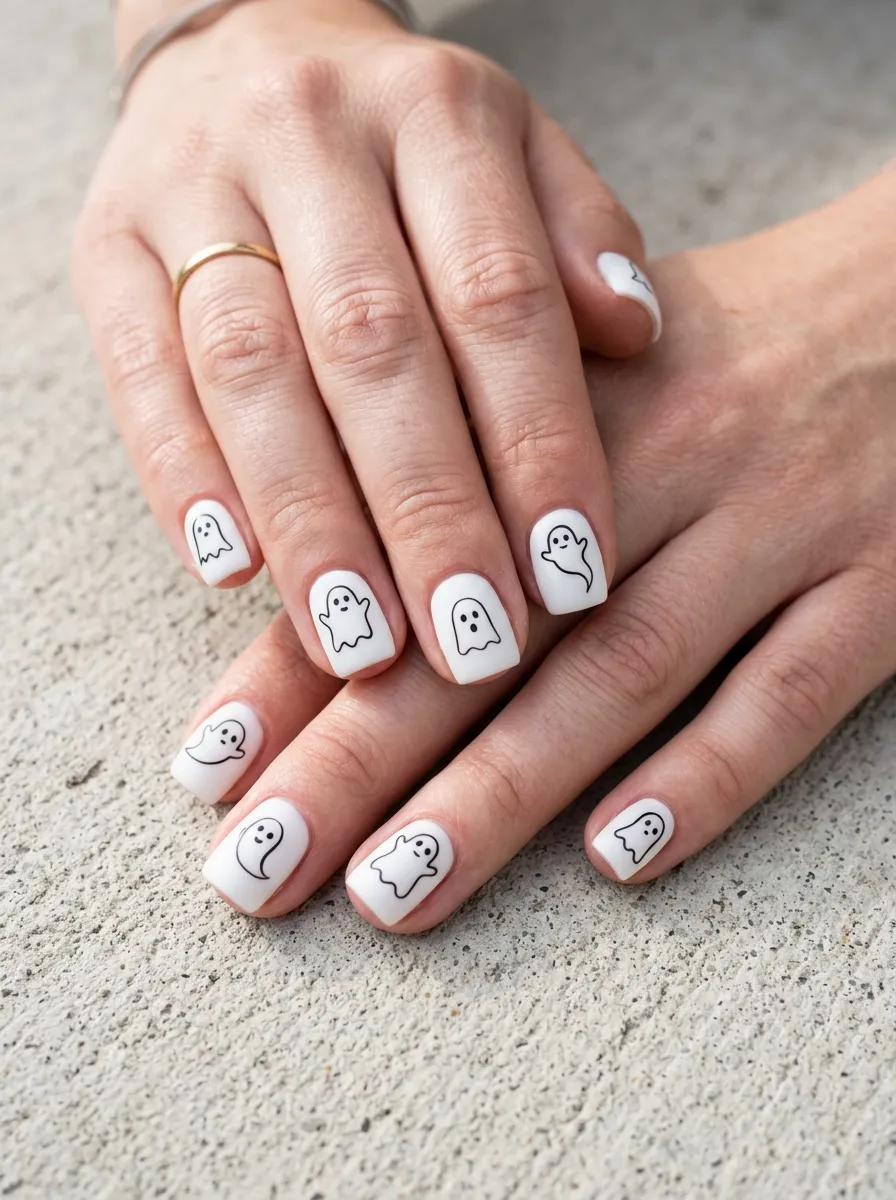
Less is more with this ghost nail style. The minimalist line art approach gives you a modern, artistic look that feels intentional rather than costumey.
Paint your nails with a clean white or nude base coat and let it dry completely. Using a thin liner brush or a black nail art pen, draw the ghost outline only, without filling it in. The ghost becomes a graphic doodle shape with open space inside it.
You can vary the ghost expressions across different nails. Make one look surprised, one look mischievous, and one look friendly. This keeps the set interesting without being overwhelming. A nail art pen from the beauty supply aisle costs about three dollars and makes linework much easier than trying to use regular polish with a brush.
This design works beautifully on shorter nails because the simplicity suits the smaller canvas. It also photographs really well on flat surfaces for social media because the high contrast between the white base and black lines reads clearly in photos.
Ghost Nail with Tiny Pumpkin Friends
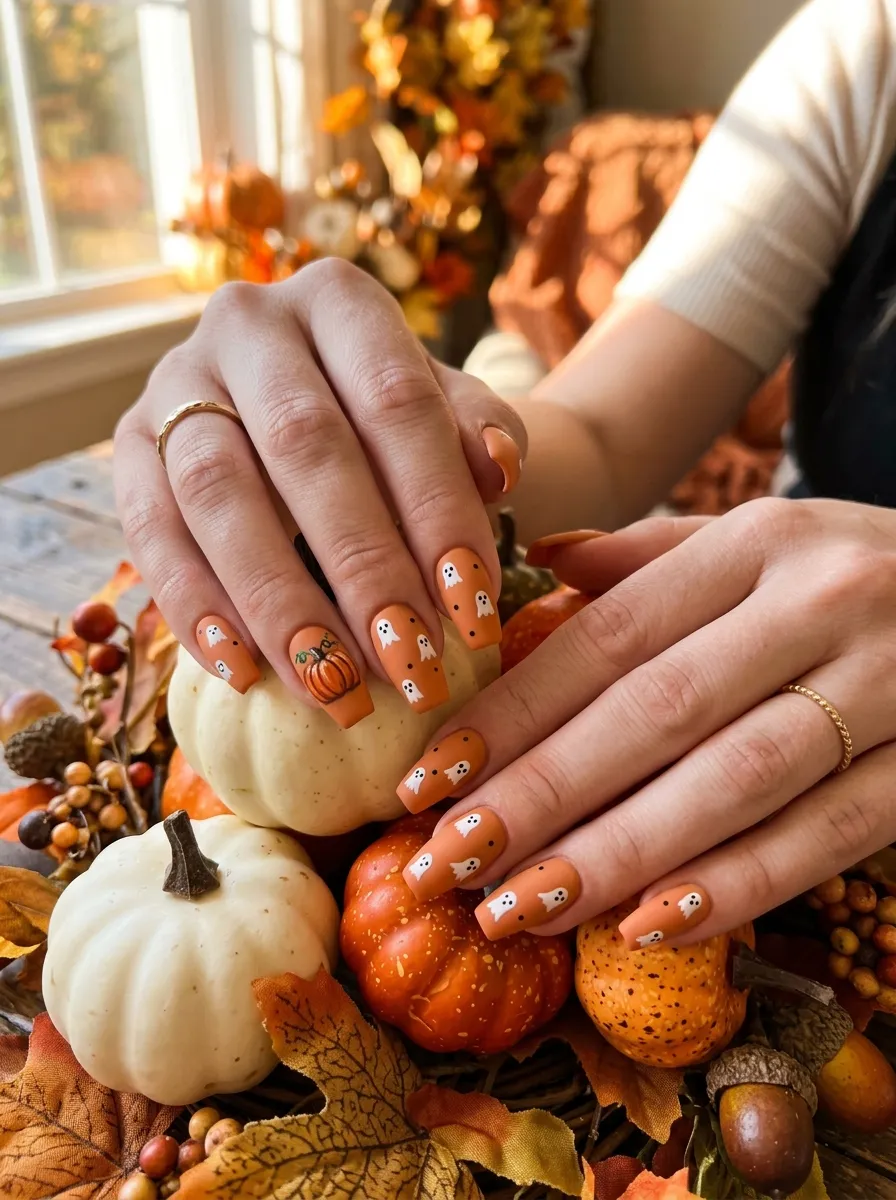
Mixing ghosts with tiny pumpkins gives your Halloween nail set a festive, storybook quality. It feels cohesive without being one-note.
Paint most of your nails with white ghost designs on a black or dark base. On your ring finger or accent nail, switch it up with a small orange pumpkin. The pumpkin becomes the focal point while the ghost nails frame it.
To paint a simple pumpkin, use orange polish to make a small rounded oval, then add thin dark brown curved lines to suggest the pumpkin ridges. A small green dot or line at the top makes the stem. This takes about five minutes and requires only orange, brown, and green polish.
You can also reverse the theme by putting the ghost on the accent nail and pumpkins on the others. Either way, the combination of orange and white on a dark base feels classic and Halloween-appropriate. This design is a great choice for people who want their nails to tell a tiny story.
Watercolor Ghost Nails
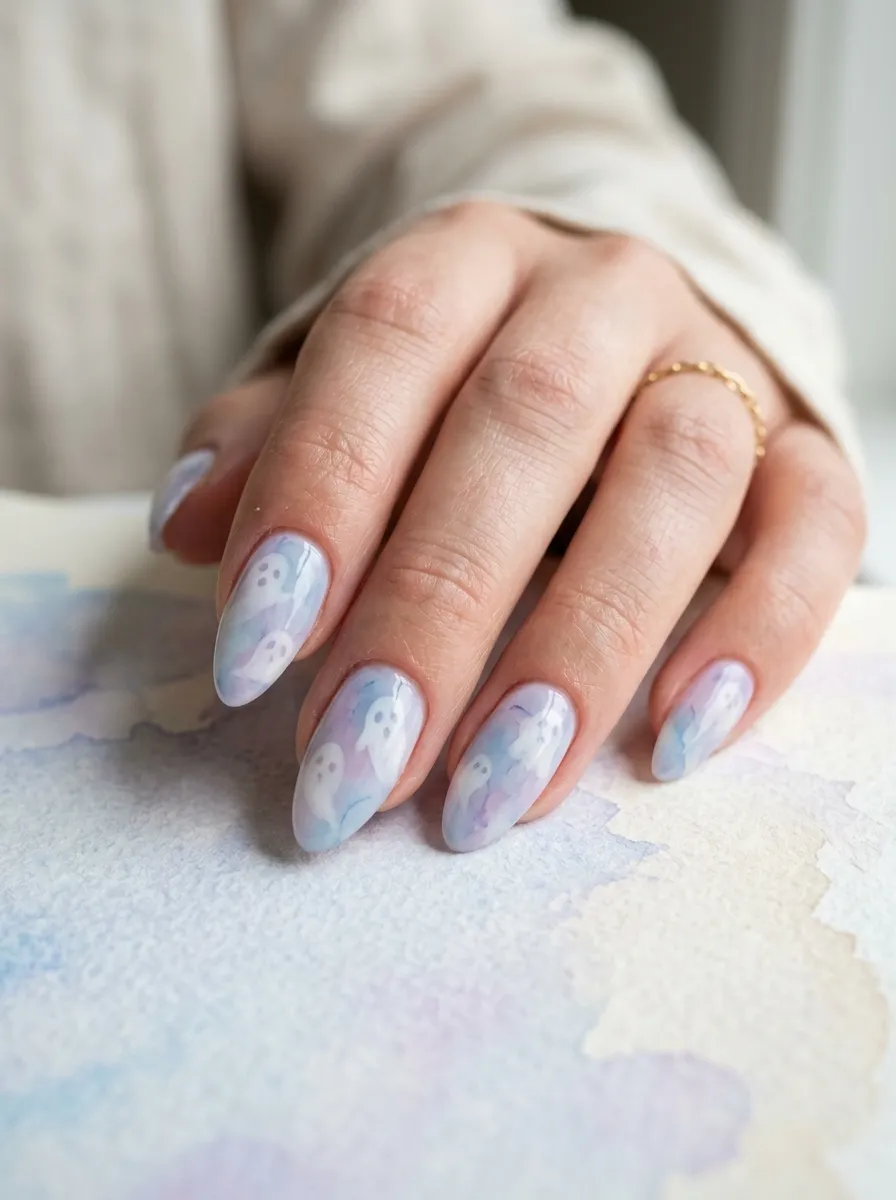
Watercolor nail art has a dreamy, hand-painted quality that looks expensive but is actually doable at home with a few simple tricks.
To get the watercolor effect, thin out your nail polish slightly by adding a drop or two of polish thinner or rubbing alcohol to the brush before applying. Then layer thin, translucent washes of pale blue, soft purple, and blush pink over a white base. Let each layer dry before adding the next.
Once the watercolor background is set, paint simple white ghost shapes on top. The ghost will blend into the background in a soft, layered way that looks artistic and intentional. You can also paint the ghost first and add the watercolor washes around it for a slightly different effect.
This style works best on medium to long nails where there is enough surface area to appreciate the layered colors. A glossy topcoat is essential here to protect the delicate washes and bring out the depth of the color layering.
Ghost Nail Decals and Stickers
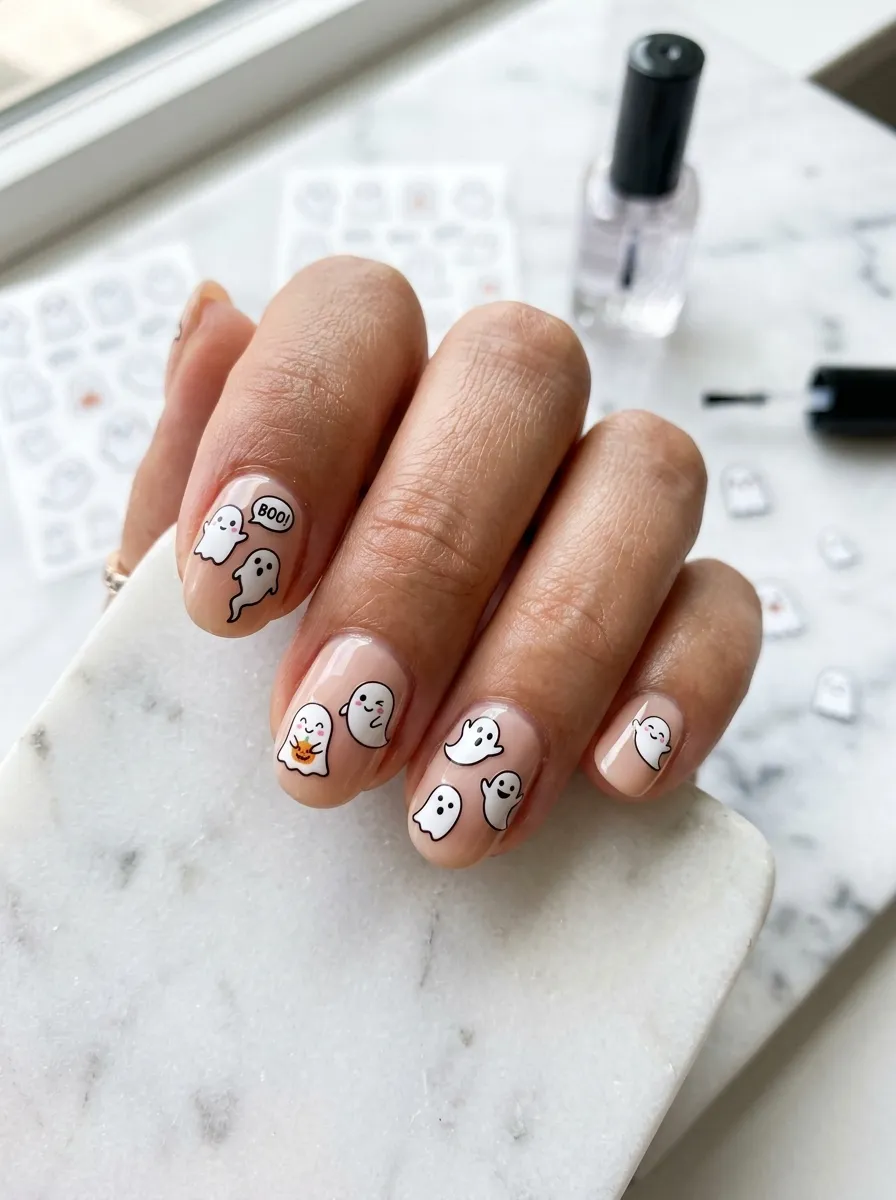
Nail stickers and decals are a lifesaver when you want great nail art without any painting skills whatsoever. Ghost-themed nail stickers are sold at drugstores, dollar stores, and online shops every fall.
Look for ghost nail decals in the seasonal nail section of your local beauty supply store. They come in sheets with multiple designs and usually cost between two and six dollars. You can also find them on online marketplaces year-round if you search ghost nail stickers.
Apply a base coat in any color you like, let it dry, peel the sticker from the sheet, press it onto the nail, and smooth it down with a clean finger or orange stick. Seal with a topcoat to extend the wear and prevent peeling.
The beauty of stickers is that you get consistent, detailed designs on every nail without any skill required. You can mix ghost stickers with other Halloween-themed stickers like stars, moons, or bats for a more layered look. This is also one of the most budget-friendly options on this list.
3D Ghost Nail Art
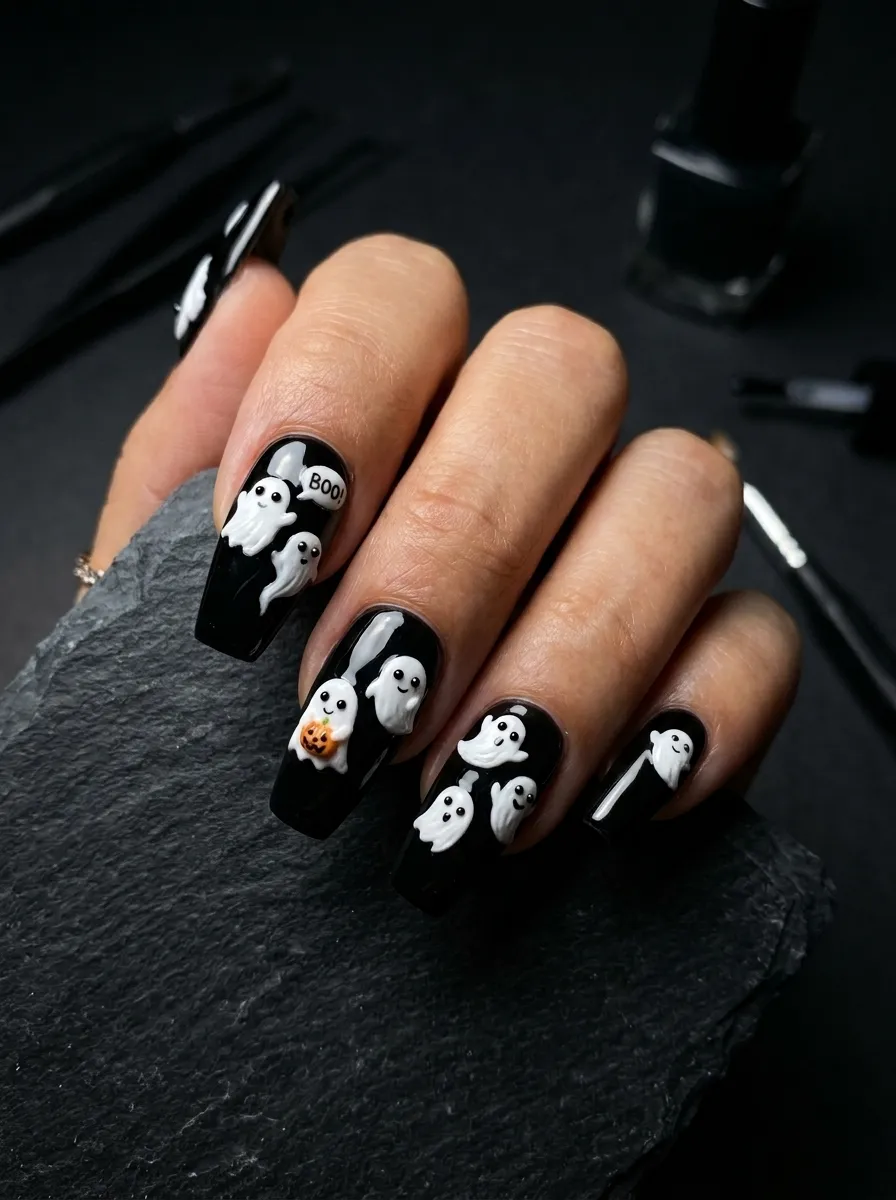
3D nail art takes ghost nails to a whole new level of detail and texture. These nails are conversation starters because people literally cannot stop looking at them.
You can create 3D ghost effects using acrylic powder, gel building products, or nail art clay that is available at beauty supply stores. Use a small ball of white acrylic or nail clay to sculpt a tiny round ghost body directly on the nail. Add tiny dots of black polish or small black rhinestones for the eyes.
If sculpting feels intimidating, look for pre-made 3D nail charms shaped like ghosts. These are sold in packs online and at nail supply stores for very affordable prices. You press them into a small dot of nail glue or uncured gel to secure them.
3D ghost nails work best on longer nail shapes like coffin or stiletto because the extra length provides more space to anchor the charm without it getting in the way. Add a glossy topcoat around the 3D pieces to seal the base.
Ghost Eyes Negative Space Nails
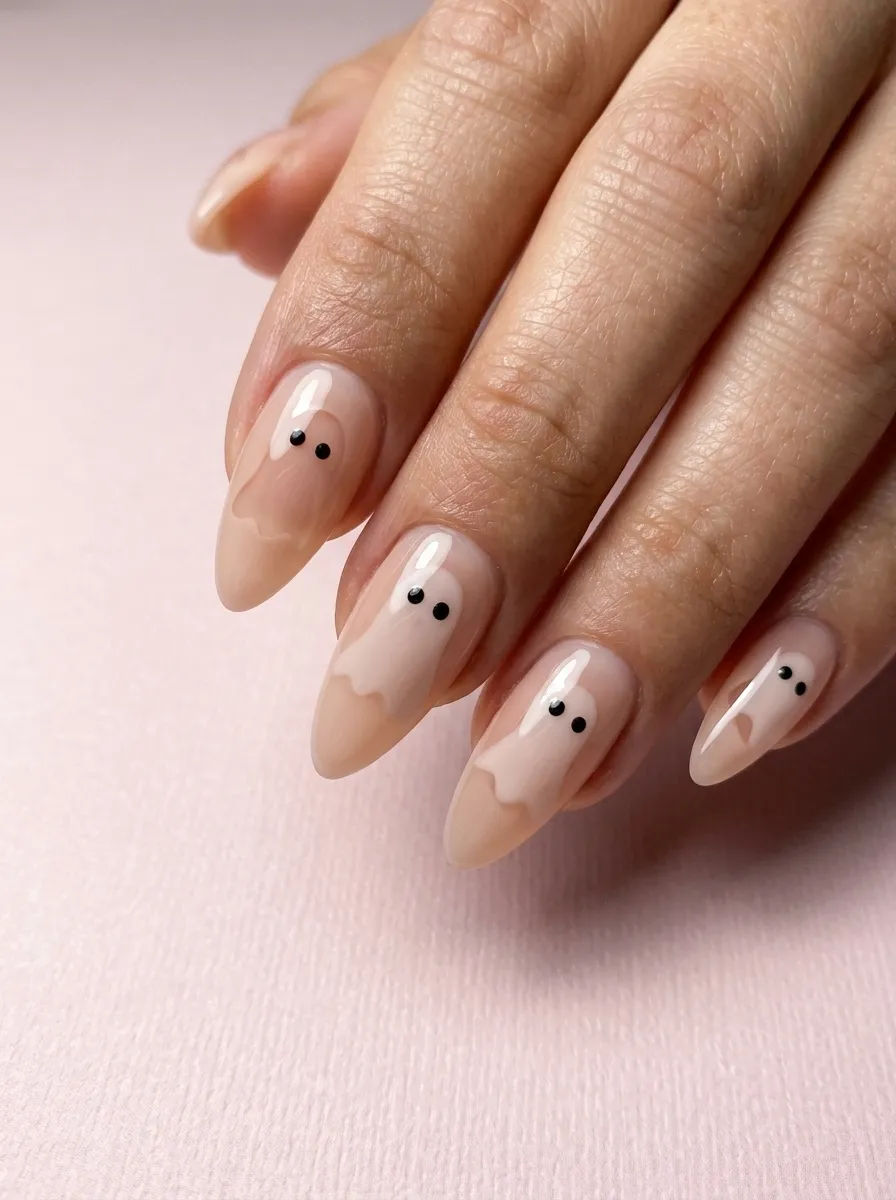
Negative space nail art is one of the most modern approaches to nail design, and using it for ghost shapes is brilliantly simple.
Leave a ghost-shaped section of your nail bare by applying striping tape around the ghost outline before painting. Once you remove the tape, the ghost shape shows your natural nail or base coat through the unpainted space. Add two tiny dot eyes inside the negative space and you have a ghost that feels minimal and editorial.
You can also reverse this by painting only the ghost shape itself in white while leaving the rest of the nail bare or in a neutral base. The contrast between the painted ghost and the unpainted nail creates a graphic effect that looks high-end.
Striping tape is available at beauty supply stores and online for a few dollars and is one of the most useful nail art tools you can own. Practice the placement on a piece of paper first to get the ghost shape right before committing to your actual nail.
Ghost Ombre Nails
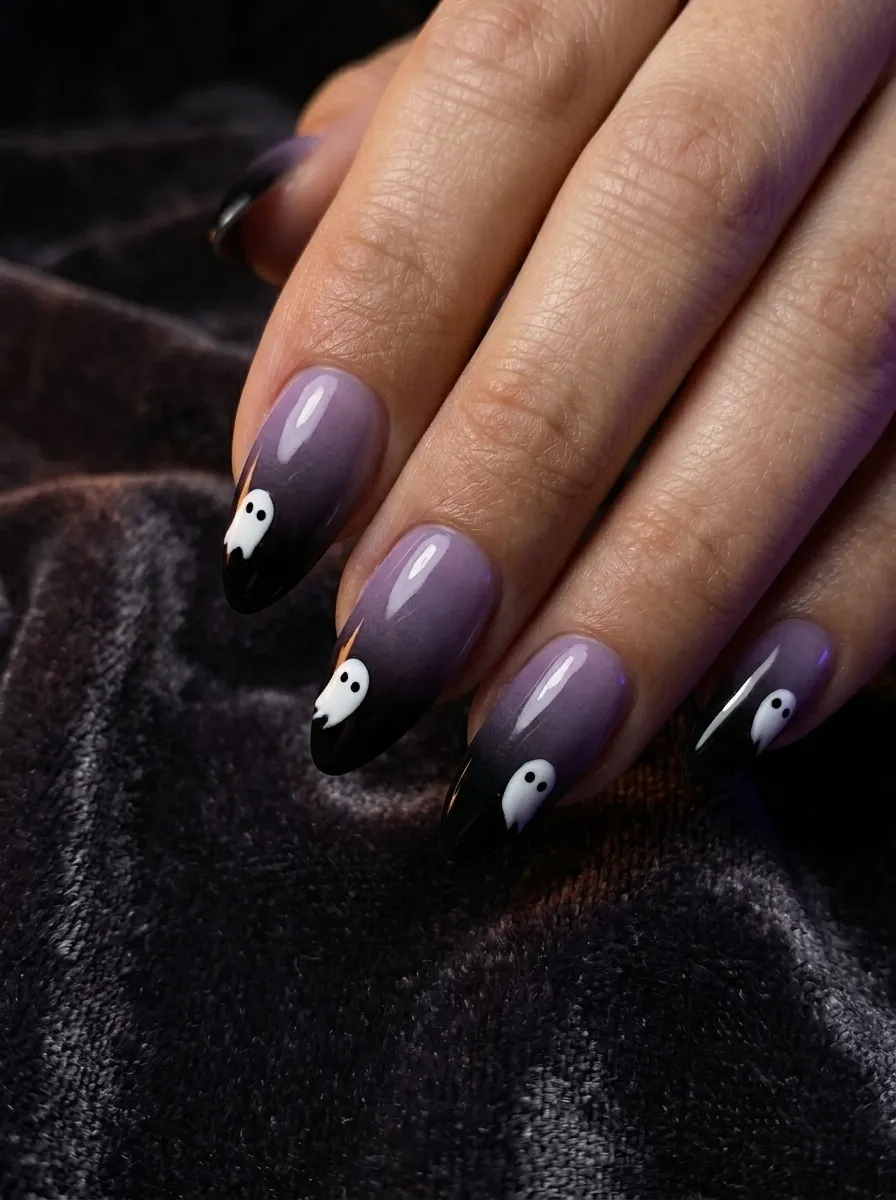
Ombre nails have a soft, gradient finish that provides a beautiful backdrop for ghost designs. The blended colors make simple ghost paintings look much more sophisticated.
To create a purple-to-black ombre base, apply a dark purple at the tip and blend it into black toward the cuticle using a small makeup sponge. Dab the sponge lightly over the nail where the two colors meet to create a seamless fade. Remove excess polish from the skin with a small brush dipped in acetone.
Once the ombre is set, paint a small white ghost near the tip or center of each nail. The ghost stands out beautifully against the gradient background because of the strong color contrast. A glossy topcoat seals everything and deepens the richness of the ombre colors.
Makeup sponges for ombre nails are free if you cut up a cheap beauty blender or foam sponge from the cosmetics aisle. This technique takes a little practice but becomes easy after one or two tries.
Cute Ghost Face Nails
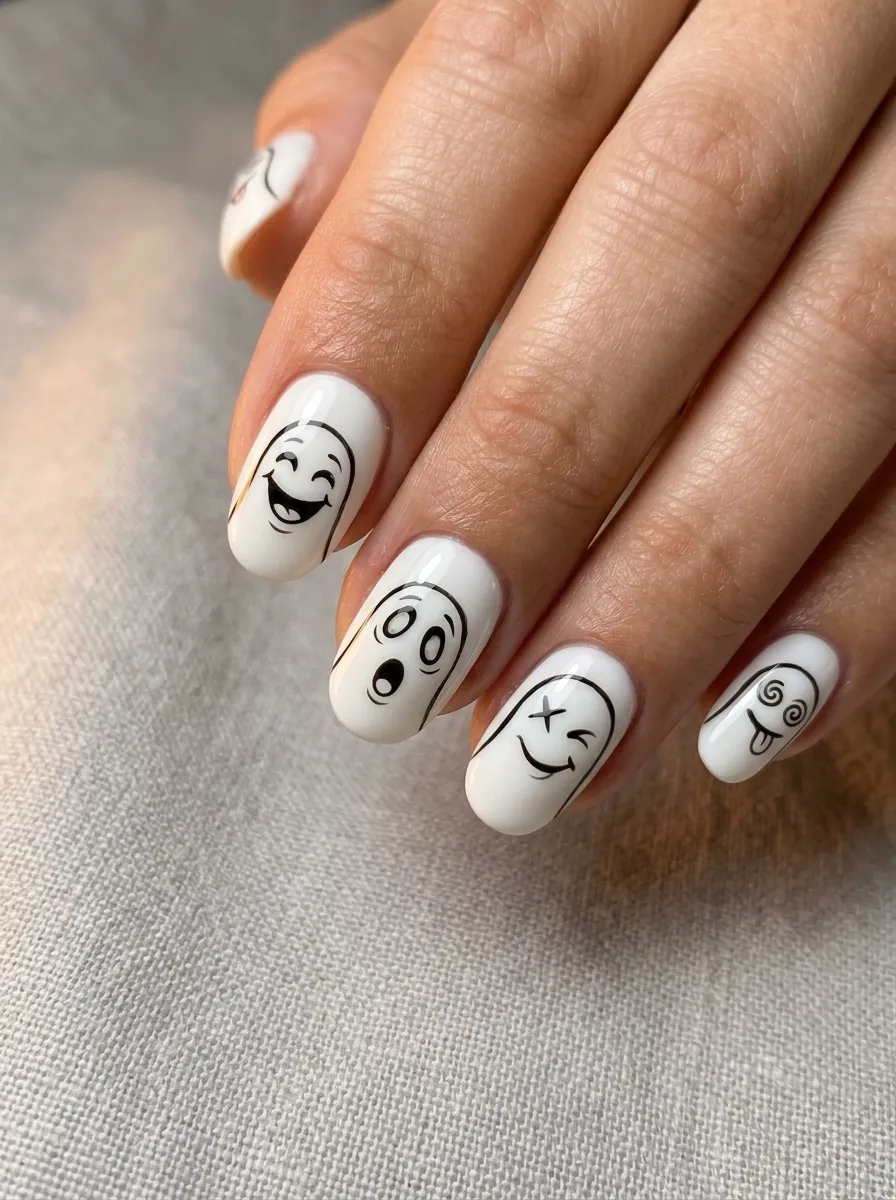
These ghost nails lean into the cute and cartoonish side of the trend. Each nail becomes its own tiny character with a unique facial expression.
Paint all nails with white polish as the base. Once dry, use a black nail art pen or thin liner brush to draw different ghost faces on each nail. Give one ghost a big happy smile, another a surprised open mouth, one a cheeky wink, and one a sleepy expression. The variety across the nails makes the full set feel playful and personal.
You can also give your ghosts accessories. A tiny bow on top of the ghost head, a small party hat, or a mini bow tie made from a few brush strokes all add personality without being too complicated.
This design is a hit with kids and teens especially, but adults love it too because the cuteness factor is undeniable. It costs almost nothing to recreate since you only need white polish and a black nail art pen.
Holographic Ghost Nails
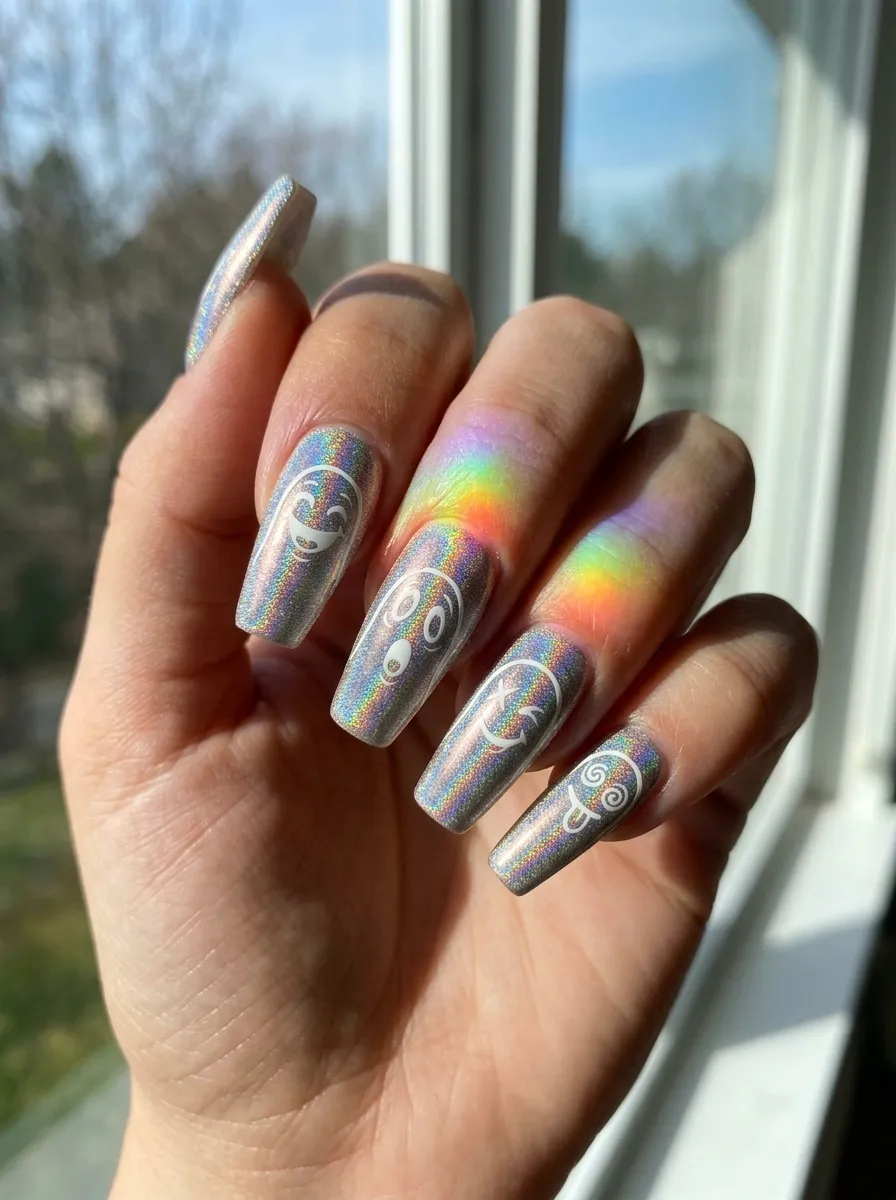
Holographic polish is one of those finishes that looks extraordinary in photographs and even better in person. When you add ghost designs on top, the result is almost mesmerizing.
Apply a holographic silver or rainbow polish as the base. These polishes shift through pink, green, and blue depending on how the light hits them. Let it dry completely before adding anything on top.
Use a white nail art pen or white stamping polish to draw ghost outlines or full ghost shapes over the holographic base. The ghosts will be slightly translucent over the shimmery surface, which gives them an almost ethereal appearance.
This nail look photographs extremely well because cameras love the light-reactive finish. Share it on social media or use it as part of a Halloween costume look for an extra polished result. Holographic polishes are sold at beauty stores for around five to eight dollars and are worth adding to your collection because they work with so many seasonal themes.
Ghost Nail with Moon and Stars
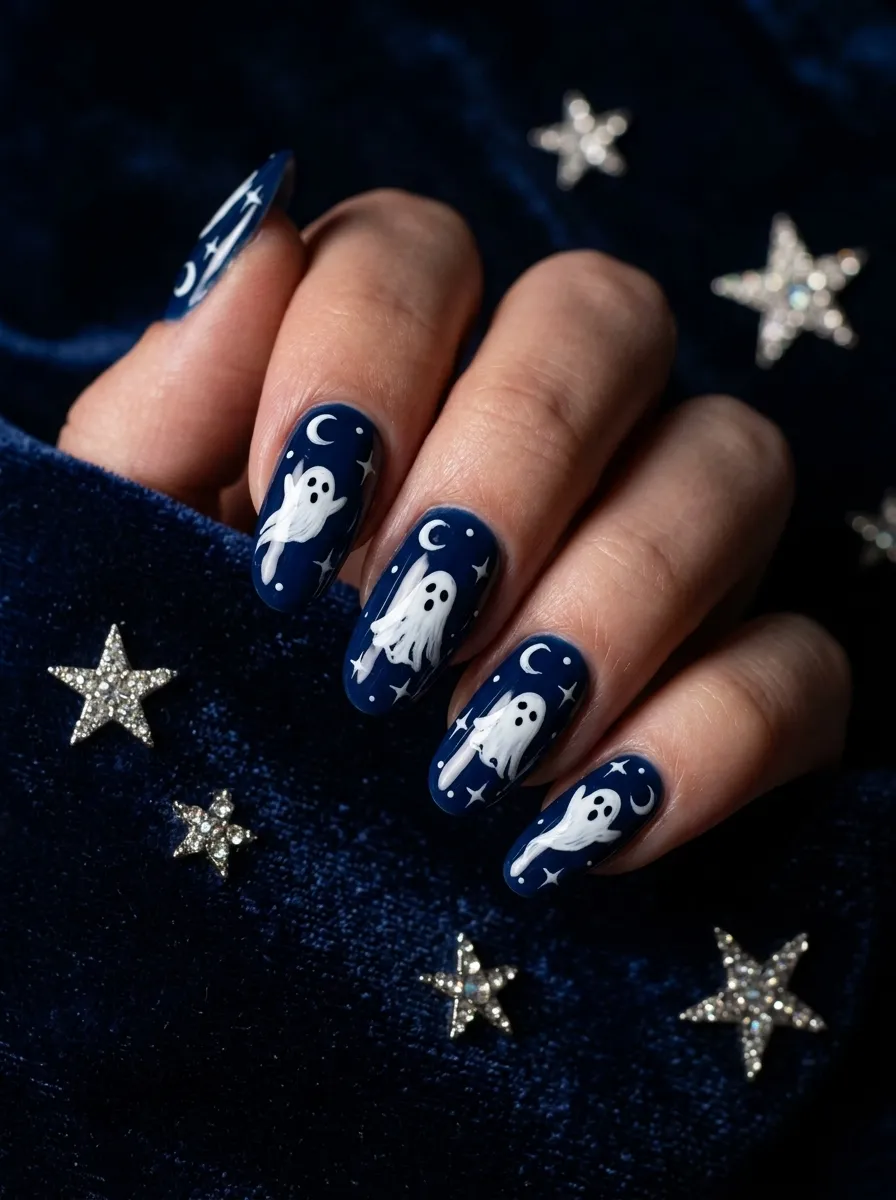
Adding moons and stars to your ghost nail design creates a complete night sky scene that feels magical and atmospheric rather than just spooky.
Start with a deep midnight blue or dark navy base coat on all nails. Once dry, use white polish or a white pen to add a small ghost to one or two nails. On the remaining nails, paint tiny crescent moons and scattered star dots using the same white.
You can also paint the ghost against a full moon backdrop by first painting a large white circle on the nail and then placing the ghost silhouette in front of it in a slightly darker white or off-white shade for contrast.
Small rhinestone star gems pressed into the wet topcoat add a dimensional sparkle that makes the design feel luxurious. These gems are sold in bags of hundreds for just a few dollars at nail supply or craft stores. A set of stars-and-moons ghost nails looks like it came straight from a high-end nail salon.
Ghost Nails with Red Eyes
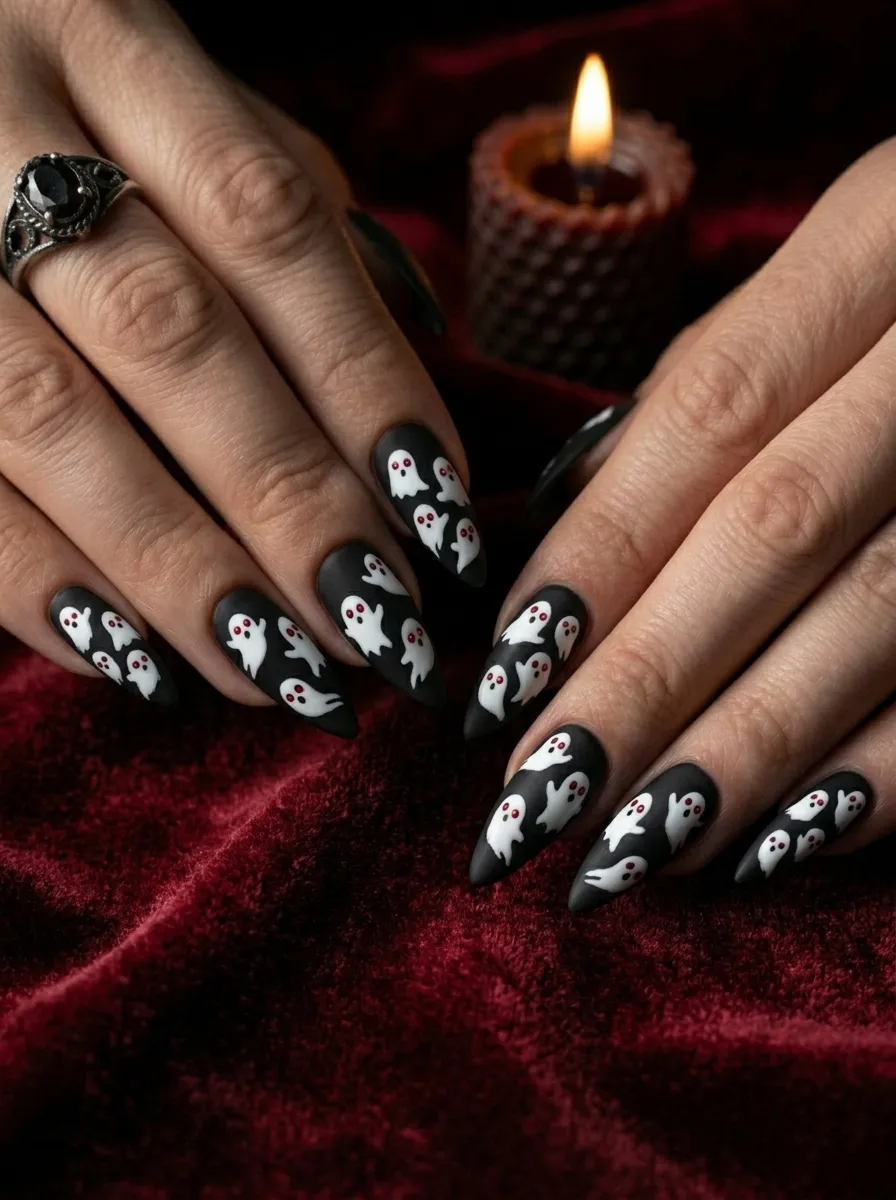
Swapping the traditional black eyes for red ones immediately changes the mood of the ghost from cute to slightly menacing. This is a great choice if you want your ghost nails to feel more Halloween-dramatic.
Use the classic ghost design on a dark base but replace the black dot eyes with tiny red dots. You can use red nail polish applied with a dotting tool, a bobby pin, or a toothpick for precision. Red rhinestones also work beautifully for an elevated version of this detail.
The red eyes create a striking contrast against the white ghost body and dark background. They draw the eye directly to the ghost’s face and give the whole design a more sinister energy without needing to change anything else.
This small detail upgrade takes less than a minute per nail and requires only one additional polish color. If you want to take it further, paint the whites of the eyes with tiny red veins using a liner brush for a truly creepy effect.
Ghost Nails with Cobwebs
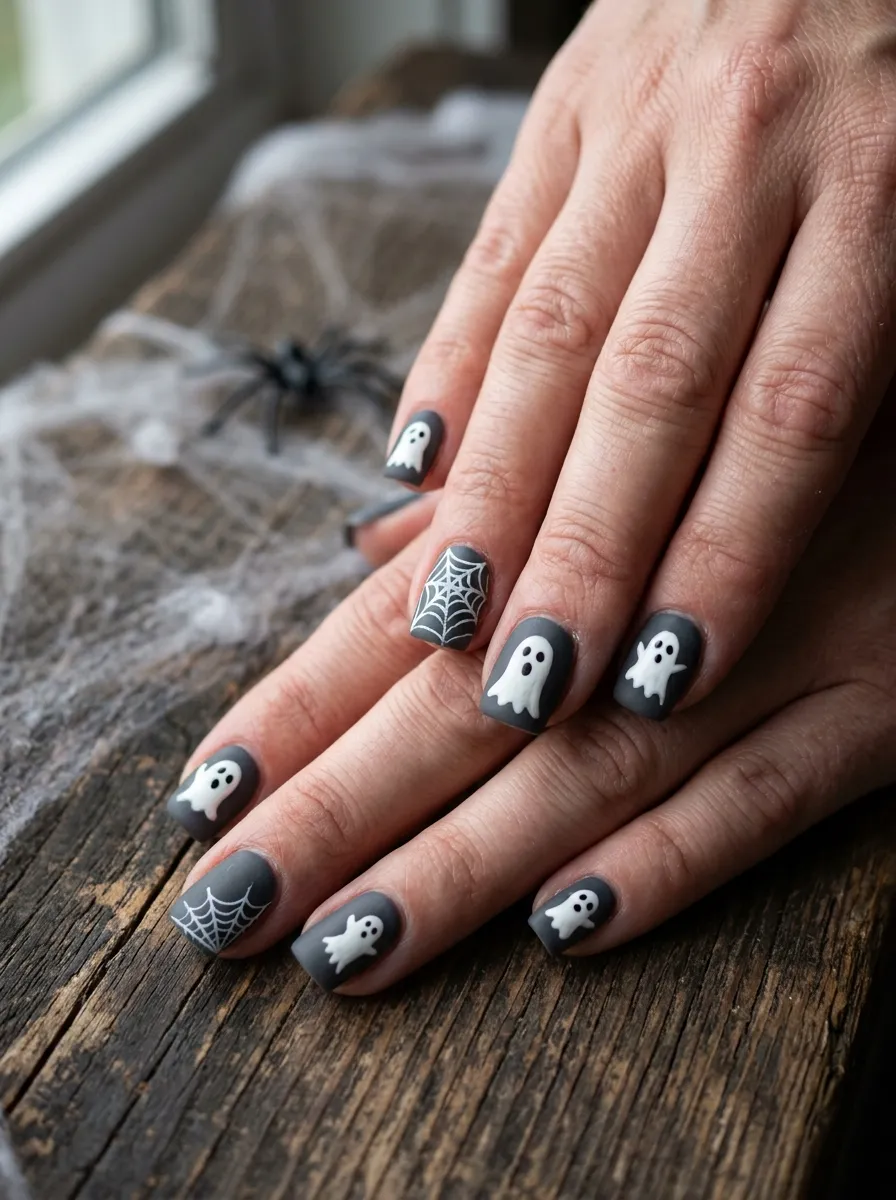
Pairing ghost designs with cobwebs creates a full haunted house scene across your nails. The cobweb is one of the most satisfying nail art designs to paint once you learn the basic technique.
To paint a cobweb, start with a dot in the corner of your nail. Draw three or four straight lines radiating outward from that dot. Then connect those lines with curved arcs, starting close to the center and working outward. This creates the classic cobweb grid shape. Use a thin liner brush for the best results.
Paint ghost designs on the other nails using the same white polish so the set reads as cohesive. A dark grey, black, or deep purple base pulls the whole design together.
The cobweb technique looks complicated but is actually one of the more beginner-friendly nail art designs once you understand the basic structure. Practice it on paper first to build confidence. The overall set looks elaborate and thoughtful without requiring hours of work.
Ghost Nail Tape Art
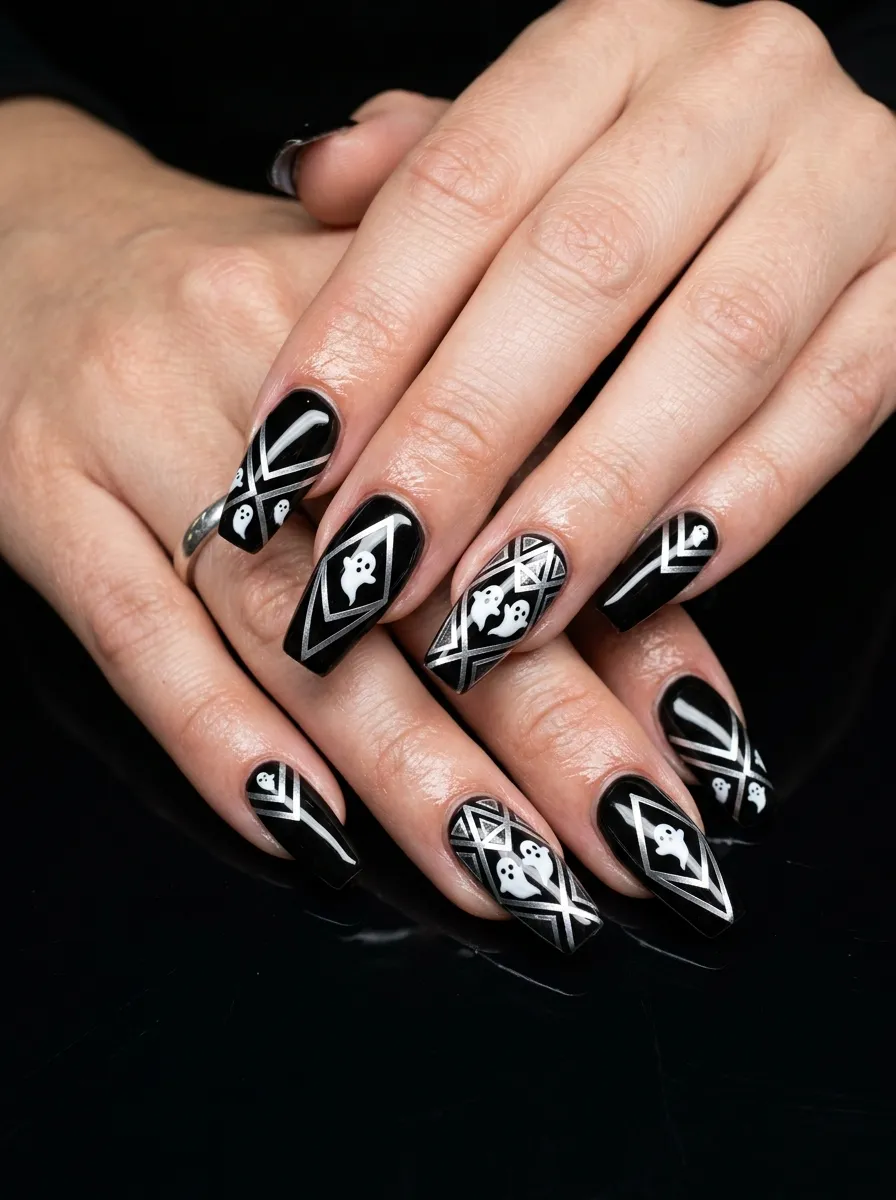
Nail tape creates perfectly straight lines and sharp geometric shapes that look incredibly professional even if you have never painted nail art before.
Apply your base coat and let it dry. Then lay striping tape across the nail in geometric sections. Paint each section a different color or shade of white, grey, and black. Before the paint dries, remove the tape to reveal crisp, clean lines. Once the base is set, add ghost designs within specific sections of the geometric layout.
This creates a modern, graphic look that incorporates the ghost in a more stylized way. The ghost becomes part of the geometric composition rather than just a character painted on a plain background.
Nail striping tape is sold in rolls at beauty supply stores for around two dollars. It is thin, flexible, and easy to work with. This technique also works well for creating color-blocked ghost nails where each nail is split into two contrasting color zones with the ghost painted along the dividing line.
Ghost Nail Art with Bats
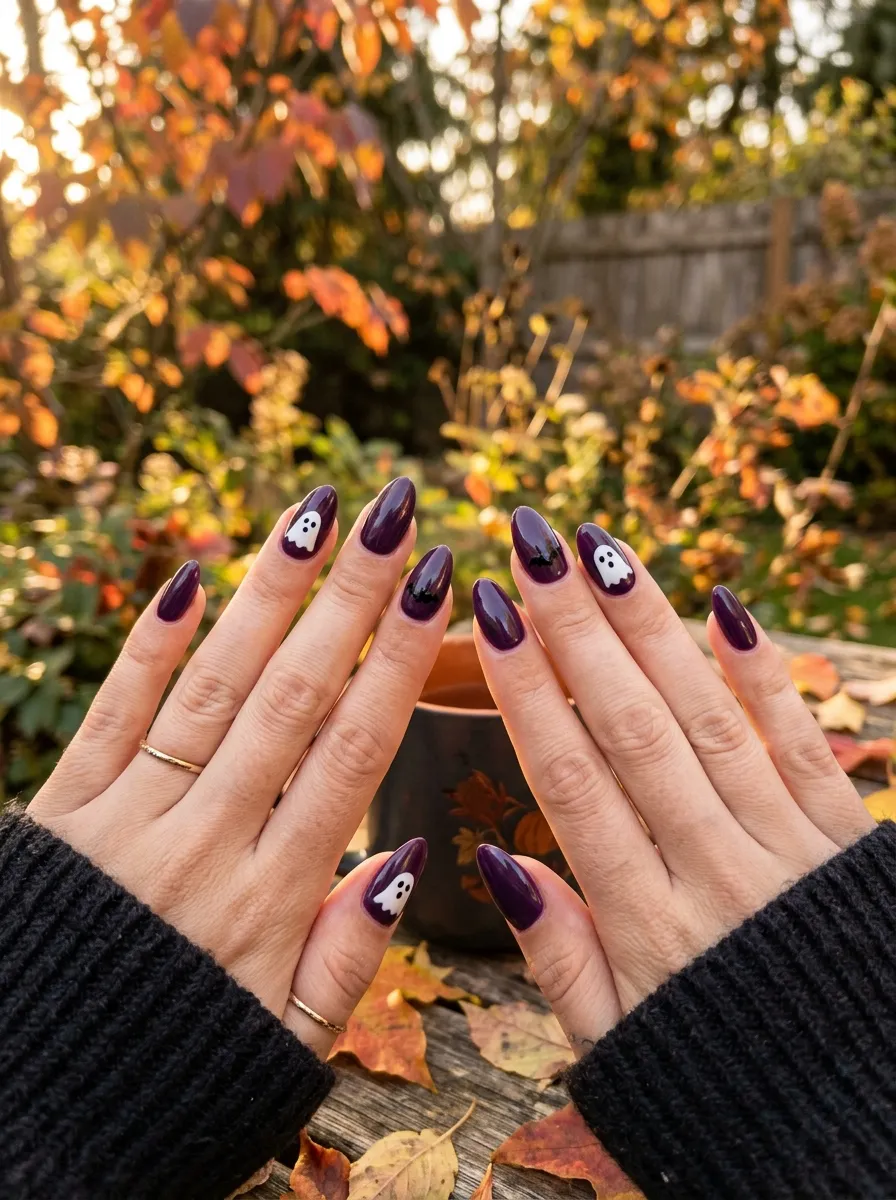
Bats and ghosts are natural Halloween companions. Combining them across a set of nails creates a scene that feels full and festive without being cluttered.
Paint alternating nails with ghost designs and bat silhouettes over a dark base. A deep purple or dark plum base color works well because both white ghosts and black bats stand out clearly against it. You can also do three ghost nails and two bat nails on each hand for a slightly ghost-dominant set.
Bat silhouettes are simple to paint. Draw a small V-shape for the body, then add a scalloped edge on each side of the V for the wings. Add two tiny triangles on top for the ears and two white dots for eyes. The whole bat takes about thirty seconds once you practice the shape.
This design is one of the most crowd-pleasing Halloween nail sets because it incorporates two iconic symbols in a balanced, harmonious way. It works at any nail length and pairs well with a Halloween costume.
Iridescent Ghost Nails
Iridescent ghost nails have a ghostly quality even before you add the actual ghost design. The color-shifting finish makes the nail itself look otherworldly.
Use an iridescent or duochrome polish as your base. These polishes shift between two or three colors depending on the angle and the light source. Popular combinations include white-to-pink, pink-to-blue, and green-to-purple. Apply two coats for full opacity.
Once dry, use a white gel pen or white nail art pen to draw ghost outlines or filled ghost shapes on each nail. Against the iridescent base, the white ghosts create a subtle, layered effect rather than a high-contrast graphic look.
This style photographs beautifully in natural light near a window. Move your hands slightly and the colors shift in every frame. Iridescent polishes are widely available now at drugstores and beauty supply stores and typically cost between five and ten dollars. The color-shifting effect looks far more expensive than it actually is.
Ghost Nails with Dripping Effect
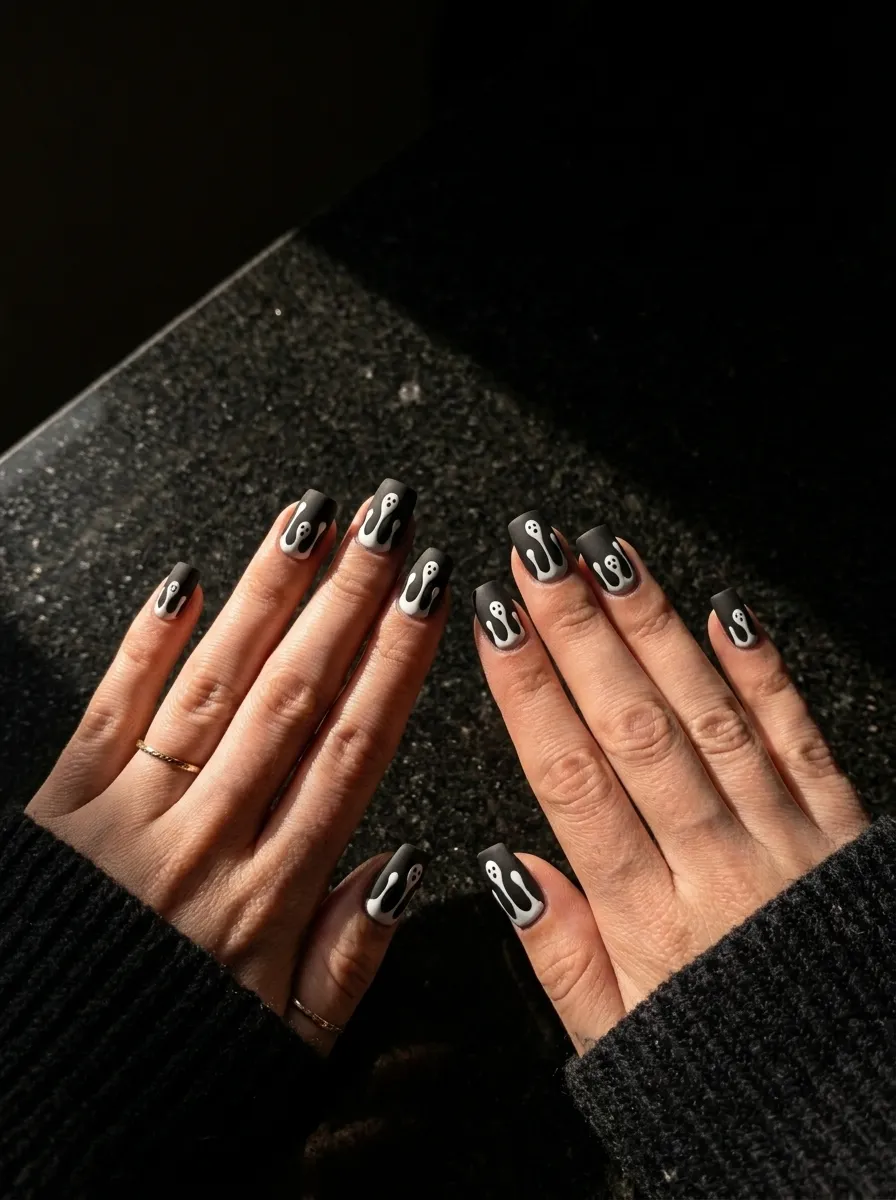
The dripping effect on ghost nails creates the impression that the ghosts are melting or oozing down the nail surface. It is dramatic, creative, and surprisingly easy to achieve.
Start with a matte black base on all nails. Using a thin liner brush dipped in white polish, paint a thick rounded ghost head at the very top edge of the nail near the cuticle. Then draw elongated drip lines extending downward from the ghost body. The drips should vary in length to look natural rather than uniform.
At the tip of each drip line, add a tiny oval or teardrop shape to suggest a falling drip. You can also paint small ghost faces at the bottom of each drip for extra detail.
This design is one of the more original takes on ghost nails because it plays with dimension and movement. It looks like the ghost is actively doing something on your nail rather than just sitting there. Seal with a matte topcoat to keep the dramatic dark background looking sharp.
Ghost Nails with Jack-o-Lantern Accent
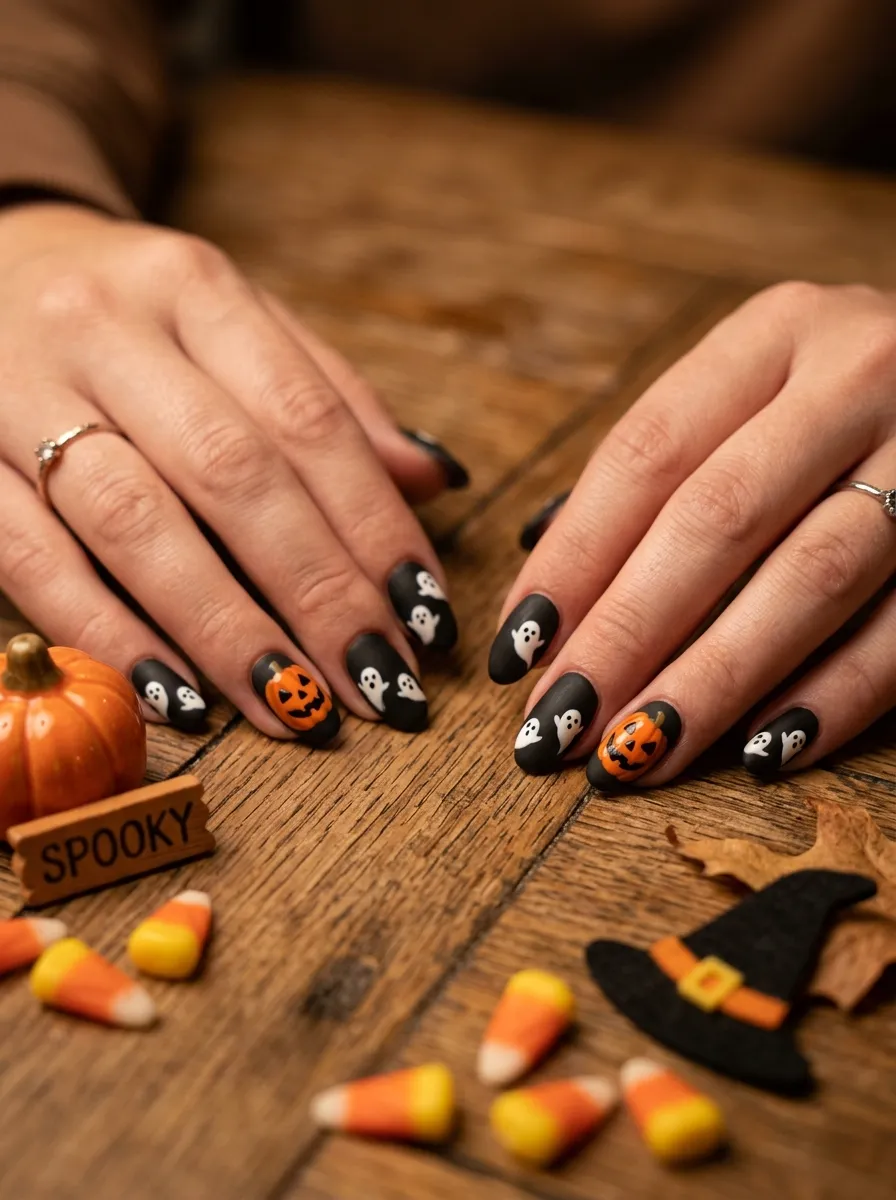
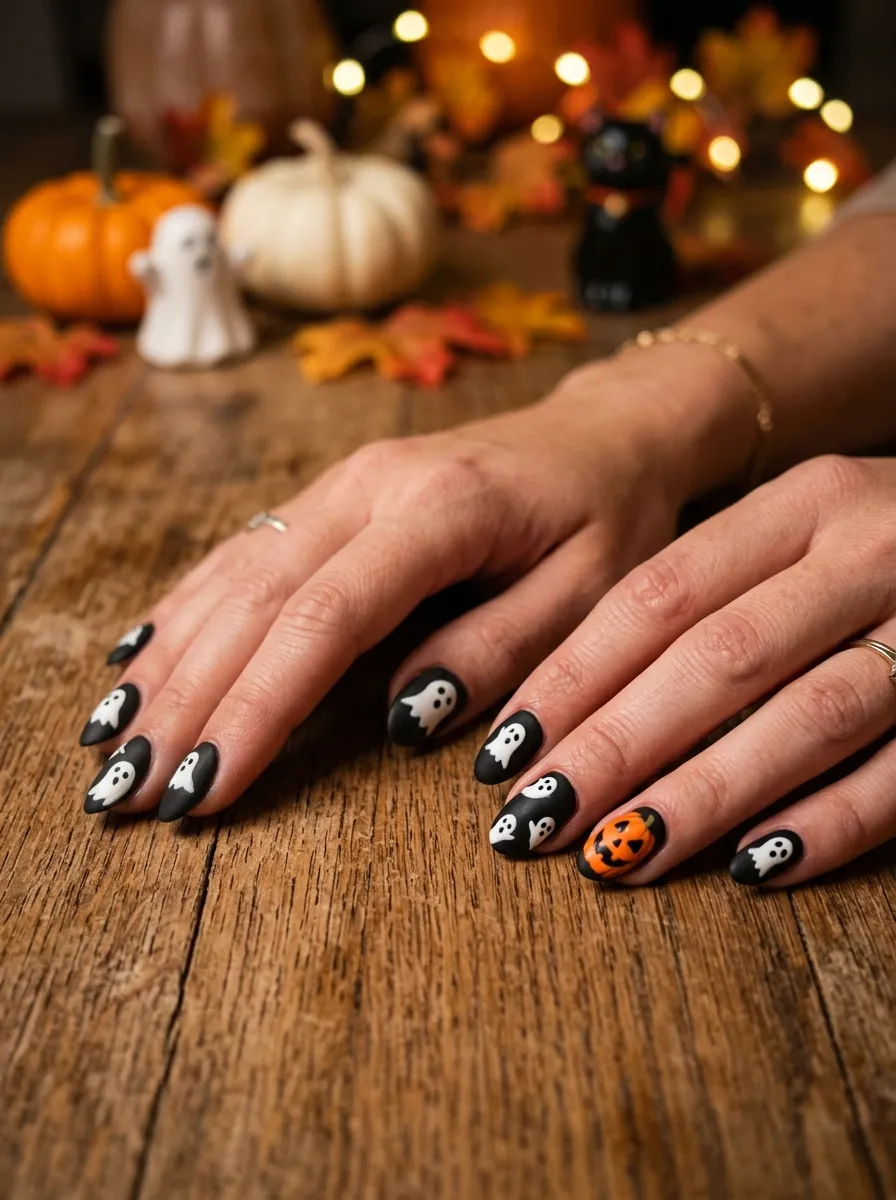
Ghost nails and jack-o-lanterns are the perfect Halloween pair. Adding one accent nail with a carved pumpkin face balances the cool white of the ghosts with a warm pop of orange.
Paint four nails with white ghost designs on a dark base. On your accent nail, apply an orange base coat and use a black nail art pen to draw a classic jack-o-lantern face. Triangle eyes, a triangular nose, and a jagged grin are all you need. The simpler the better.
The orange and white on a dark background gives the set a classic Halloween color palette that is immediately recognizable. You can swap the accent to the thumb nail instead of the ring finger if that feels more comfortable with your nail shape.
This combination is one of the most photographed Halloween nail designs because the contrast between the orange pumpkin and white ghosts is so visually pleasing. It works on short and long nails equally well.
Rainbow Ghost Nails

Rainbow ghost nails bring a joyful, maximalist energy to Halloween nail art. Each nail is a different bold color from the spectrum with a matching ghost design on top.
Paint each nail a different rainbow color: red, orange, yellow, green, blue, and purple. For a hand with five nails, skip one color or double up on a favorite. Once each color is fully dry, paint a small white ghost on every nail with the same simple rounded shape and dot eyes.
You can make each ghost slightly different in expression or size to add variety. The rainbow background makes the ghosts feel playful and happy rather than spooky, which is perfect for kids’ Halloween nail art or if you want a more cheerful take on the ghost trend.
This design is fully achievable with basic polish colors that most people already own. It also works wonderfully on press-on nails if you want to prep the designs in advance and apply them on Halloween morning.
Ghost Nails with Mummy Wrap Design
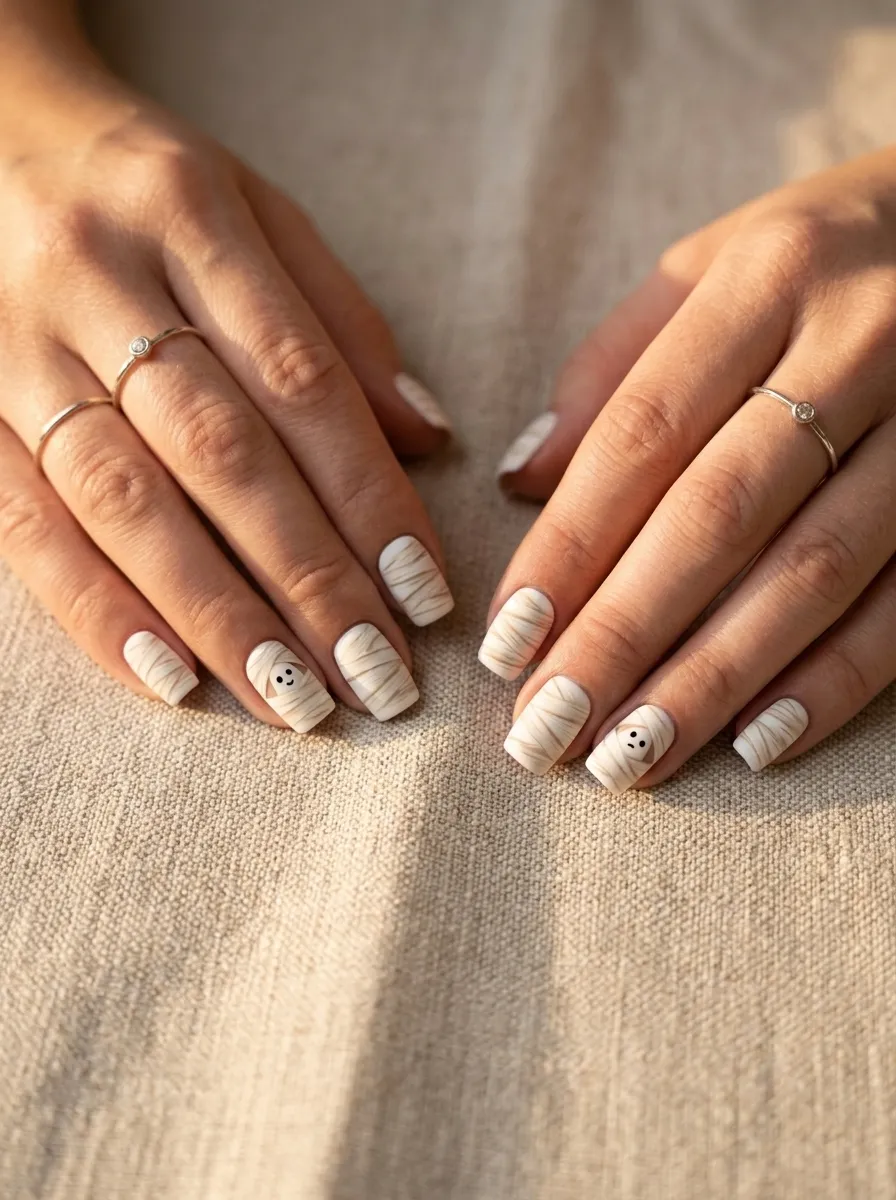
Mixing a ghost with a mummy wrap design gives your Halloween nails a layered, storytelling quality that feels more elaborate than the technique actually requires.
Paint a white or off-white base on all nails. Once dry, use a thin liner brush dipped in beige, tan, or light grey to paint thin horizontal lines across each nail at slight angles to each other, suggesting mummy bandage wrapping. Leave small gaps between the lines.
On your accent nail, skip the mummy lines and paint a ghost face peeking out as if it has shed its wrapping. This creates a narrative connection between the ghost nails and the mummy nails.
The color palette for this design is very neutral, which makes it more wearable beyond October. A darker shadowed version of this same design using grey and white on a black base creates a moodier take that feels more supernatural.
Ghost Nails with Purple Smoke Effect
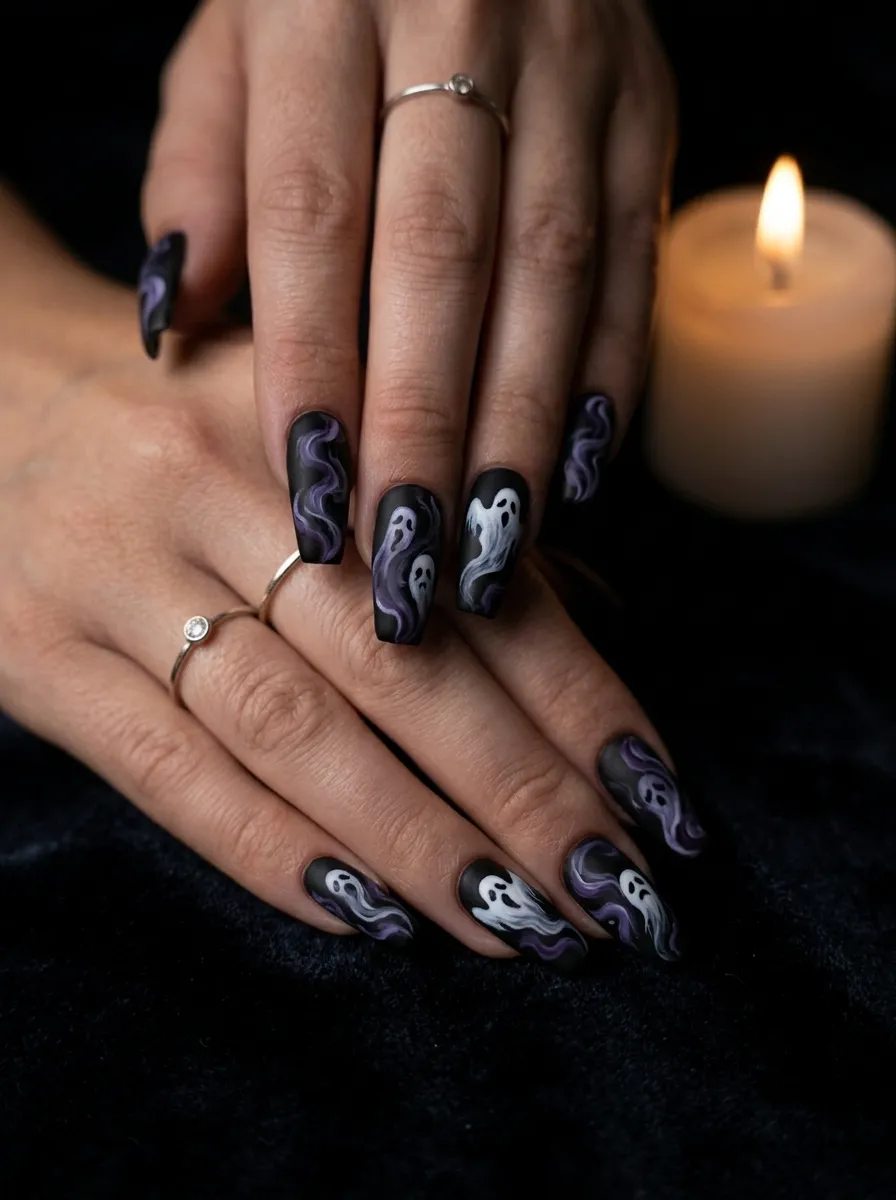
The smoke effect adds a haunted, atmospheric quality to ghost nails that makes them look like a professional artist painted them.
After painting a matte black base, use a thin liner brush dipped in white and then slightly loaded with purple to paint swirling, wispy lines around your ghost figure. The key is to use a very light hand and thin, curving strokes that taper at the ends. These strokes should spiral away from the ghost like trails of smoke or mist.
Layering white and purple strokes creates depth. Start with lighter strokes in white and add purple strokes slightly offset from them to suggest shadow and dimension. The ghost sits in the center of the swirling smoke as if it just materialized.
A matte topcoat finishes this design without flattening the swirling linework. This is a more advanced design that rewards practice, but even a first attempt will look more impressive than a basic ghost because the smoke effect hides any imperfections.
Skeleton and Ghost Combined Nails
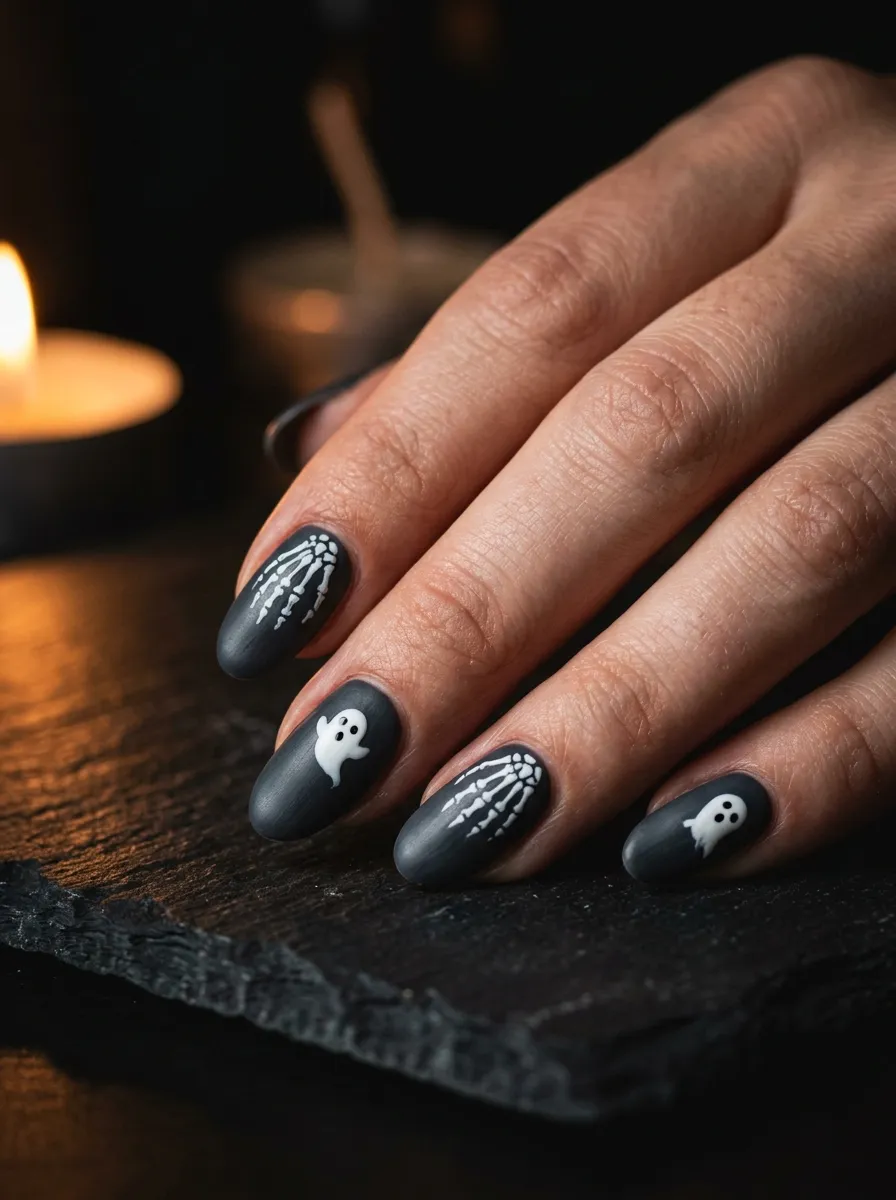
Combining skeleton imagery with ghosts creates a Halloween nail set that covers two of the most iconic spooky symbols in one cohesive look.
Paint alternating nails with ghost designs and skeleton hand motifs over a dark charcoal or black base. The skeleton hand is painted by drawing a white wrist at the base of the nail and extending five thin finger bones upward toward the nail tip. Add small curved knuckle marks on each finger.
The ghost nails use the simple rounded ghost shape with dot eyes. Both designs use white on a dark base so they feel unified as a set.
This combination photographs particularly well because of the variety across the nails. It tells a fuller Halloween story than ghost nails alone and looks sophisticated enough for adults while still being festive. The skeleton hand on a dark base is one of the most recognizable nail art designs and pairs naturally with the ghost theme.
Ghost Nails with Haunted House Silhouette
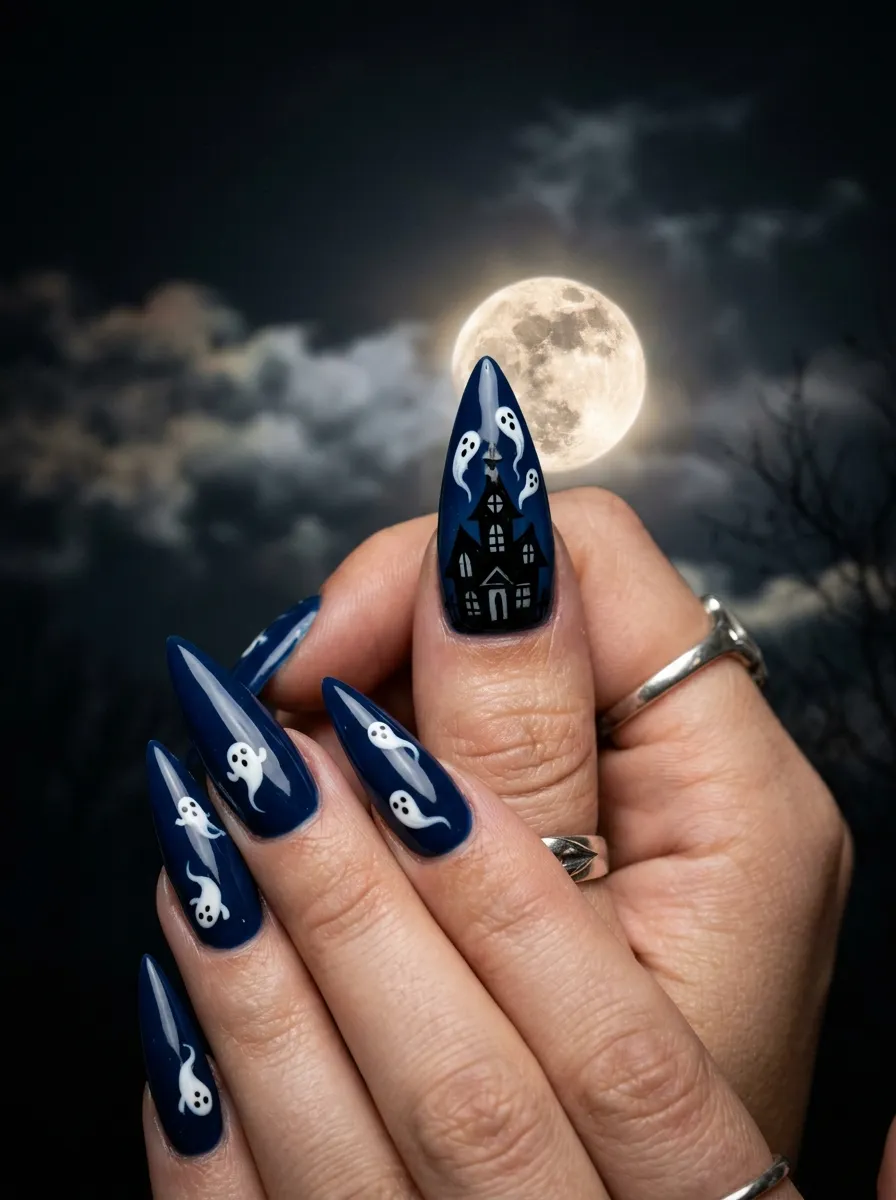
The haunted house silhouette nail takes ghost nails into true miniature illustration territory. It transforms one nail into a tiny Halloween scene.
Use the thumbnail for the haunted house because it has the most surface area. Paint a deep midnight blue or black base on all nails. On the thumb, use a thin brush and black or dark grey polish to paint a small house silhouette at the lower portion of the nail. Include a pointed rooftop, a few rectangular windows with tiny yellow dots of light inside, and a bare tree branch to one side.
Above the rooftop, paint two or three small white ghost outlines floating upward. The ghosts should be small enough to feel like they are rising from the house rather than overshadowing it.
The remaining nails use simple standalone ghost designs to tie the set together. This nail design looks intricate but breaks down into very simple geometric shapes. The house is just rectangles, triangles, and straight lines.
Conclusion
Ghost nail ideas give you a creative playground that works across every skill level and budget. Whether you reach for a nail sticker sheet and a drugstore black polish or spend an afternoon hand-painting swirling smoke and iridescent ghosts, the result is always a nail set that sparks joy and gets compliments. The best part about ghost nails is that you can make them as cute, spooky, or artistic as you want without committing to an expensive salon visit. Start with the designs that feel approachable, build your skills over a few tries, and do not be afraid to mix ideas from this list to create something that is completely your own. Halloween only comes once a year, but ghost nail art is honestly charming enough to wear any time you feel like adding a little eerie flair to your everyday look.