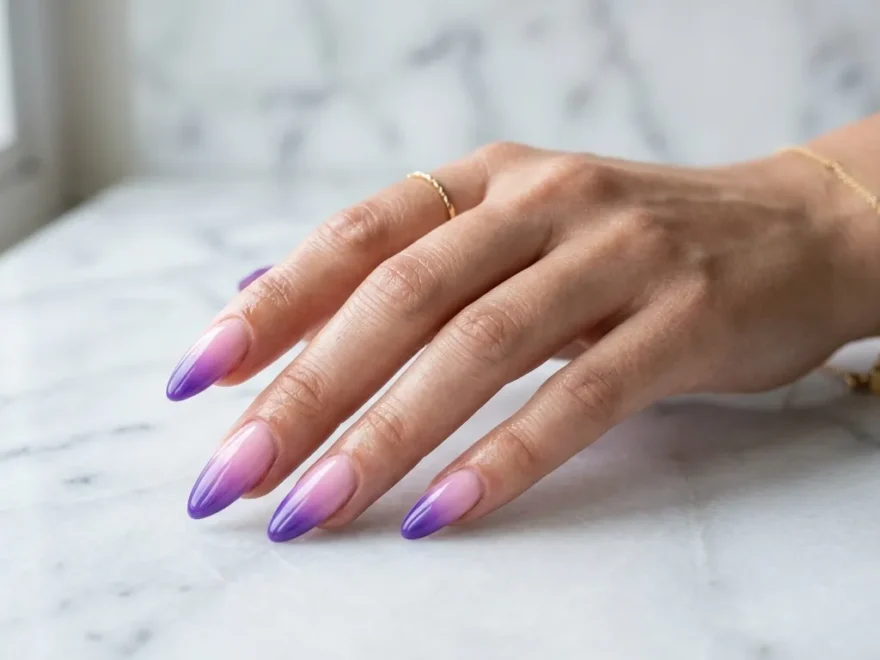
Pink and purple ombre nails are one of those looks that never go out of style. The way these two shades melt into each other creates something that feels soft, dreamy, and just the right amount of bold. Whether you want something subtle for daily wear or a more dramatic look for a special event, this color combination works for every mood and every season. You do not need to spend a lot of money at a salon to pull this off. With the right tools and a little patience, you can recreate most of these looks right at home. From pastel whispers to deep jewel tones, these 30 ideas will give you all the inspo you need to find your perfect pink purple moment. If you’re also looking for Pink and White Ombre Nail with Glitter Ideas, blending soft pink and white tones with sparkling glitter accents can create a timeless, elegant manicure that feels romantic, versatile, and perfect for everything from everyday wear to special celebrations.
1. Soft Baby Pink to Lavender Ombre
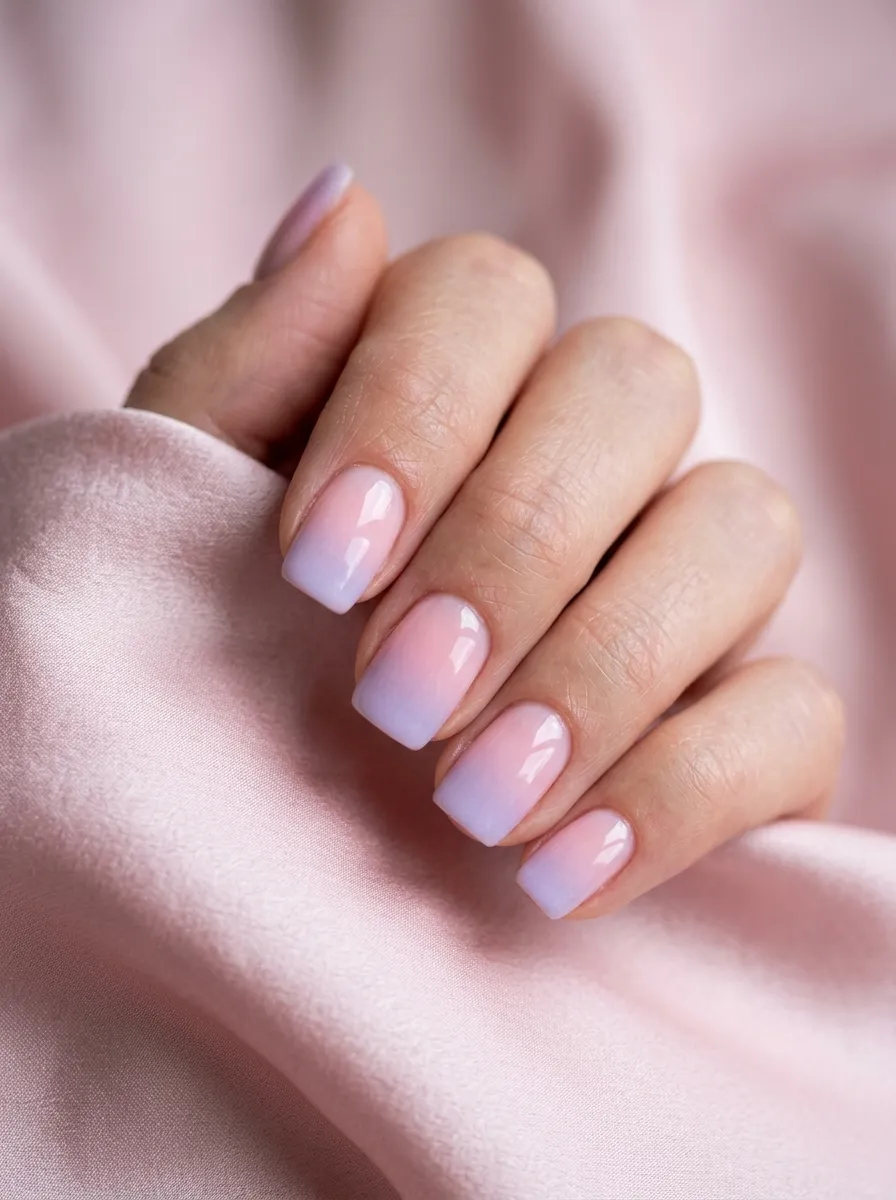
This is the most wearable version of the pink purple ombre trend. It is soft, quiet, and works with literally every outfit.
The baby pink base gives you that clean, fresh nail look that feels polished without trying too hard. As it fades into lavender at the tips, the whole effect feels almost like a pastel sunset painted on your nails.
How to get this at home: Pick up a sheer baby pink and a soft lavender polish from any drugstore brand. Apply two coats of the pink as your base. Then take a small makeup sponge, dab the lavender onto it, and gently press it onto the top third of each nail while the base is still slightly tacky. Blend the middle section by pressing lightly. Finish with a glossy topcoat to seal everything and smooth out the gradient.
This look works beautifully on short nails. You do not need length for it to look polished. It suits office settings, casual days, and even weddings as a guest. The color payoff is subtle enough for people who prefer understated nails but still want that pretty ombre effect without it feeling too loud or dramatic.
2. Hot Pink to Deep Purple Ombre
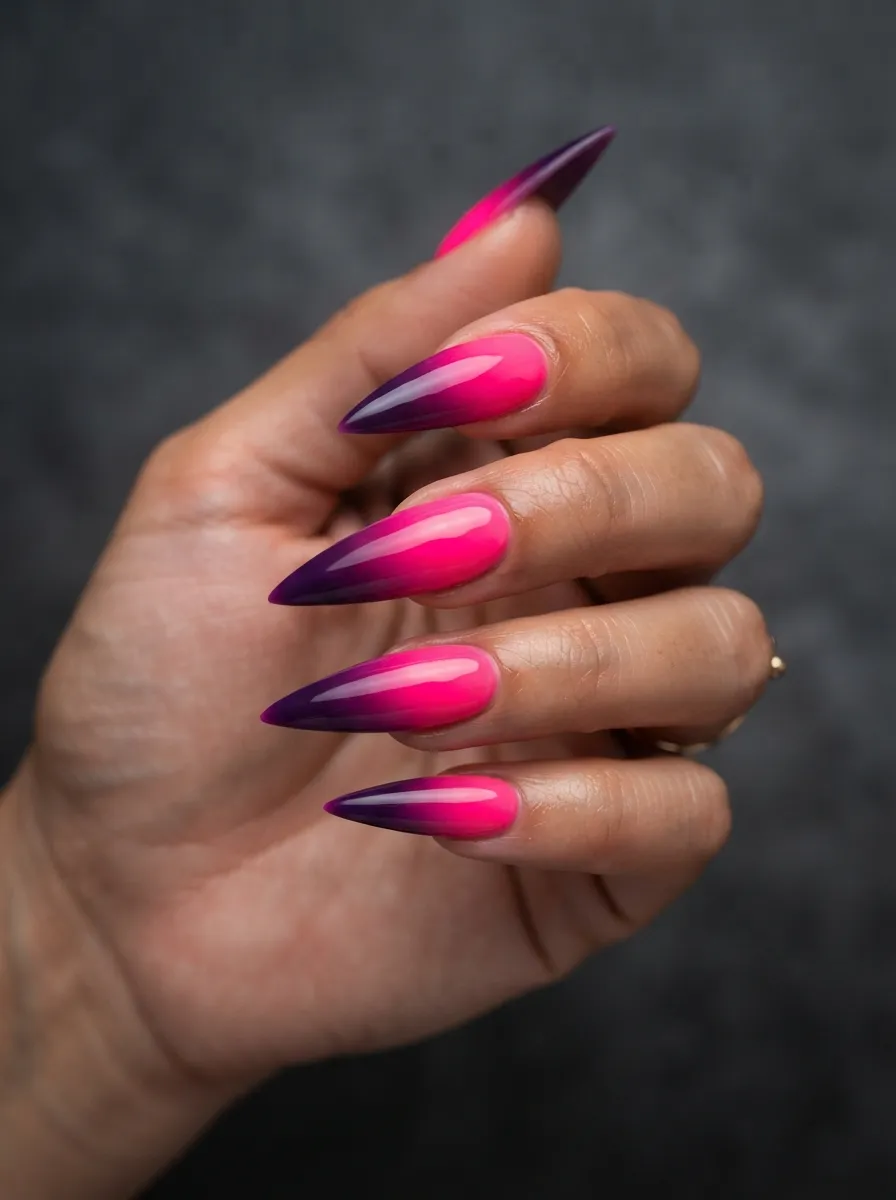
If subtle is not your thing, this is the version that makes a statement the moment you walk into a room.
Hot pink is one of those shades that demands attention. Pair it with a deep, moody purple and you get a gradient that feels dramatic, confident, and fun all at once.
This look works best on longer nail shapes like stiletto, coffin, or almond. The length gives the gradient more room to transition and creates a more striking visual impact.
Budget tip: Brands like NYX, Sinful Colors, or Essie carry bold hot pinks and deep purples for under four dollars each. You do not need expensive gel polishes to get this effect.
Use a sponge technique starting with hot pink at the base and layering the deep purple at the tips. The key is building the color slowly with multiple light sponge presses rather than one heavy application. This prevents the colors from looking muddy at the meeting point.
Add a matte topcoat instead of a glossy one for a completely different vibe. The matte finish makes the colors look almost velvety and gives the nails a very editorial, high-fashion feel that photographs beautifully.
3. Dusty Rose to Mauve Ombre
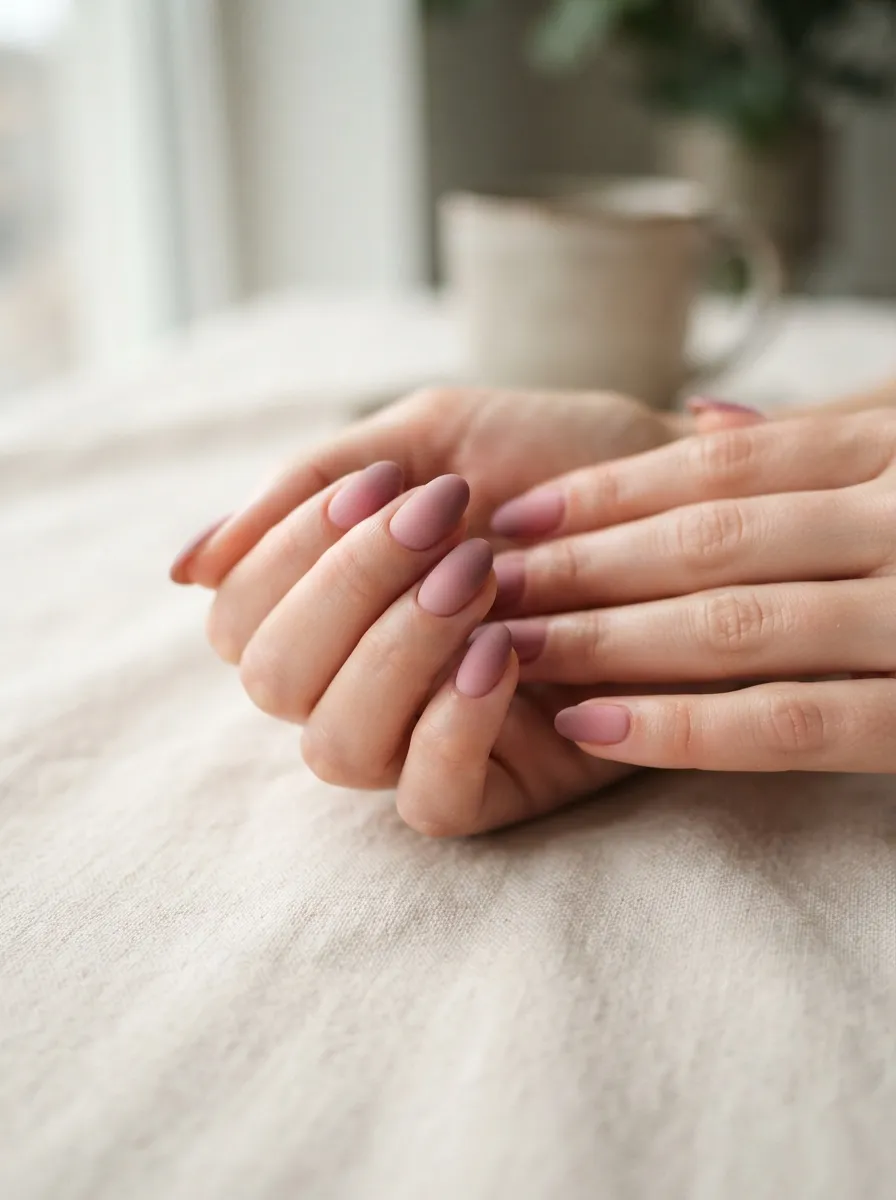
Dusty rose and mauve are two of the most grown-up shades in the pink purple family. This ombre version feels sophisticated, earthy, and completely timeless.
The tones are muted enough that this look never feels overdone. It is the kind of nail color that gets compliments from people who do not even follow nail trends. It just looks refined and intentional.
Who this works for: This is a great pick if you work in a professional environment but still want interesting nails. The colors are subdued enough to feel office-appropriate while still being more interesting than plain nude or pale pink.
For a DIY version, look for polish descriptions that include words like “dusty,” “muted,” “greige pink,” or “antique rose.” These finishes naturally lean into that soft, dusty quality you want.
Oval and round nail shapes complement this color palette well. The rounded edges echo the softness of the shades themselves. Apply your dusty rose as the full base coat, then sponge the mauve onto the tips. Blend carefully in the middle third. Seal with a satin topcoat rather than a full gloss to keep that soft, muted quality that makes this look so special.
4. Neon Pink to Violet Ombre
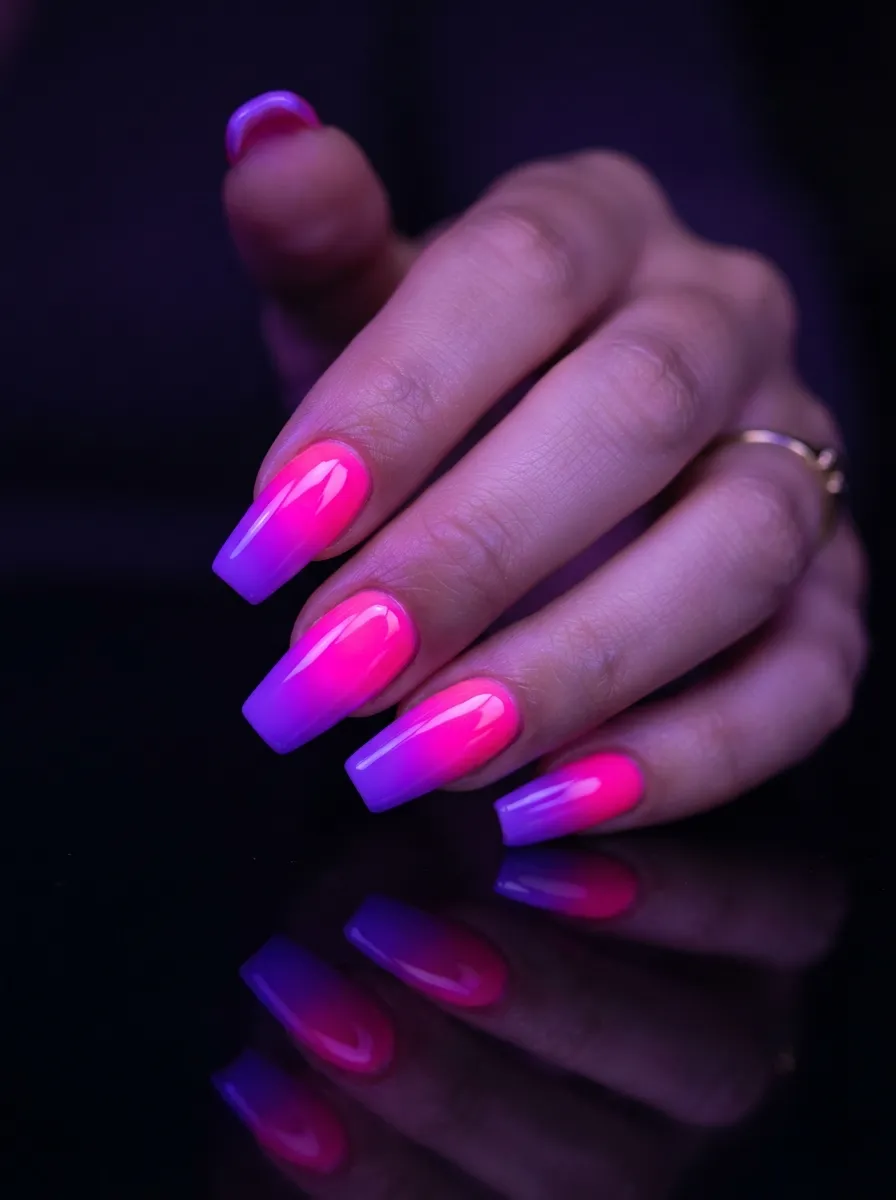
Neon pink to violet is summer in nail form. It is energetic, playful, and completely unapologetic.
This look is made for festivals, beach days, birthday parties, and any occasion where you want your nails to be part of the outfit. The neon pink grabs light like nothing else, and the violet adds just enough depth to keep it from looking too simple.
Tip for making neons pop: Always apply a white base coat before your neon polish. Neon shades are naturally sheer, and without a white base, they can look washed out and dull. Two coats over white and your neon will look vibrant and fully saturated from the very first stroke.
This gradient looks especially good in direct sunlight. The colors shift slightly depending on the light, which makes your nails look different and interesting throughout the day.
Coffin nails are the most popular shape for this look. The flat square tip gives the violet somewhere to really land and spread, making the whole gradient read clearly. If you are doing this at home, work quickly with your sponge because neon polishes tend to dry faster than standard colors.
5. Blush Pink to Soft Lilac Ombre
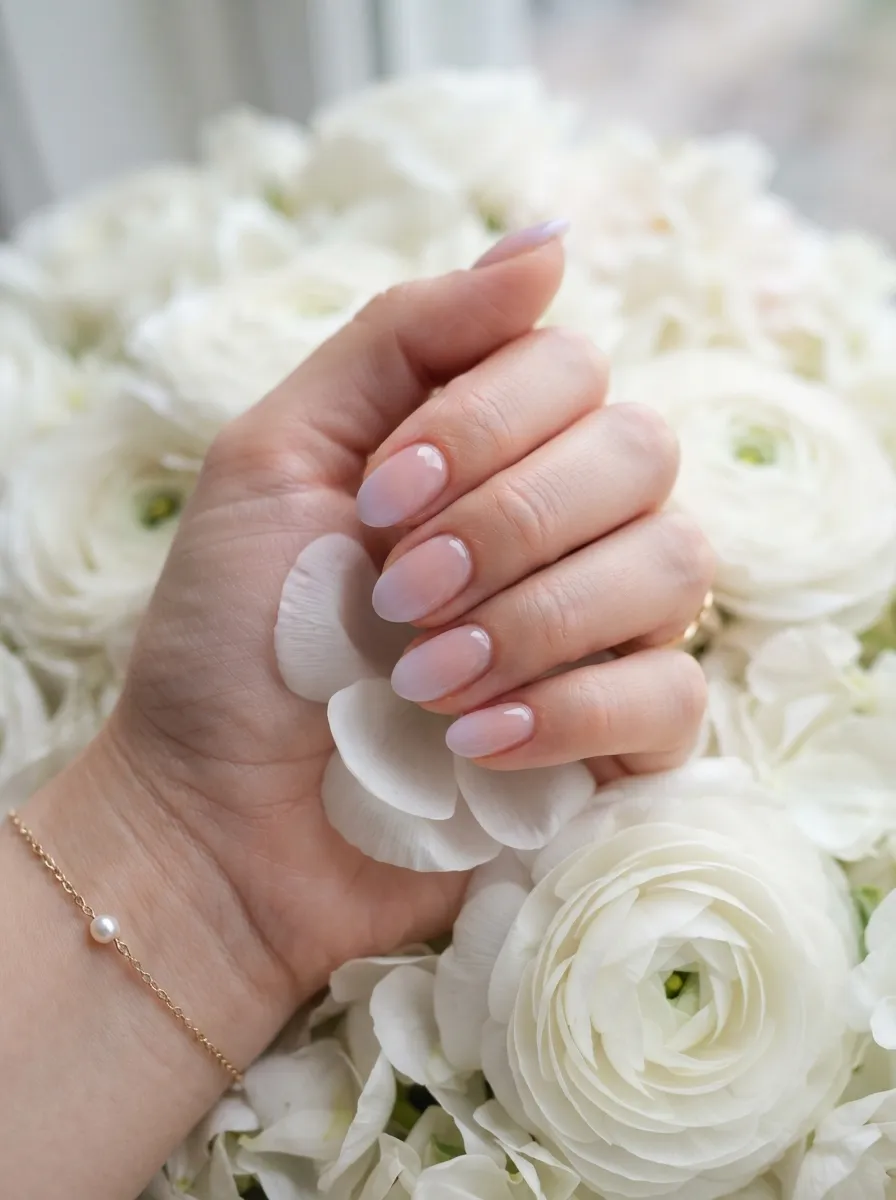
Blush and lilac together is basically the nail equivalent of a spring morning. It is gentle, romantic, and quietly beautiful.
This is the kind of ombre that looks like you were born with perfect nails. The colors are close enough in tone that the gradient reads as a soft glow rather than a hard color shift.
Perfect for: Weddings, engagement photos, baby showers, or any spring and summer occasion where you want nails that feel effortlessly pretty without drawing too much attention away from everything else.
For this look, less is more. You actually want the gradient to be subtle. If the color difference between your pink and lilac is too strong, the whole vibe is lost. Look for a blush that leans slightly peachy-pink and a lilac that leans toward pale gray-purple. That specific combination creates the softest, most natural-looking melt.
Apply your blush as a sheer base, using two thin coats. Then use a very lightly loaded sponge with the lilac. Press it gently at the tips only and barely touch the middle section. The goal is for someone to look at your nails and think they might just have a natural gradient, not that you spent time doing nail art.
6. Magenta to Royal Purple Ombre
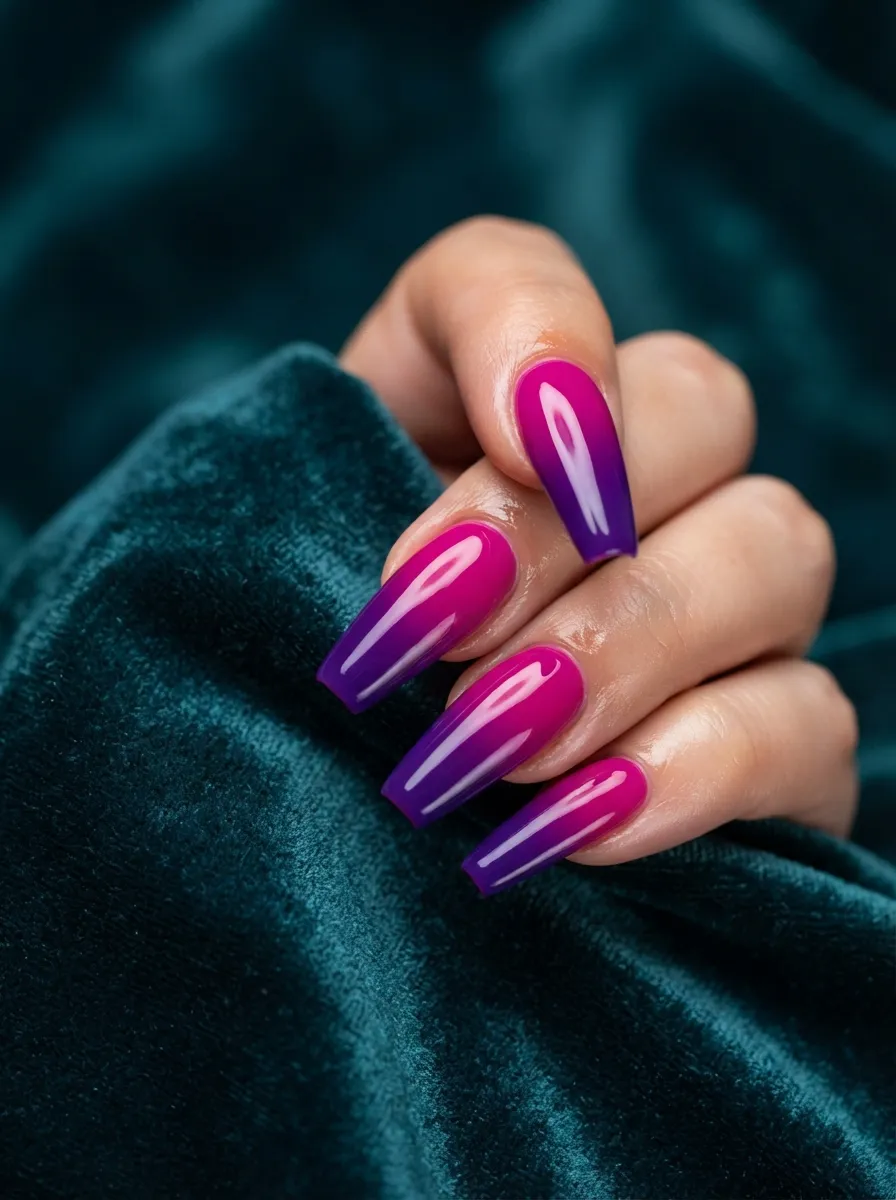
Magenta to royal purple is one of the most color-rich combinations in the entire pink purple spectrum. These are saturated, jewel-toned shades that look incredible together.
This is a fall and winter favorite because it matches the deeper, moodier colors of those seasons. Think burgundy boots, plum coats, and velvet accessories. Your nails will fit right in.
The key to pulling this off is saturation. Both colors need to be fully opaque and richly pigmented for the gradient to read as luxurious rather than muddy. Do not skimp on coats.
Budget-friendly picks: OPI, Zoya, and Sally Hansen all carry deeply pigmented magentas and purples that are widely available at drugstores and beauty supply stores. You do not need a salon-exclusive brand for this look.
Apply three thin coats of magenta across the whole nail for full coverage. Then sponge the royal purple from the tip downward, pressing multiple times to build color intensity. The blending zone should sit right in the middle of the nail. Finish with two coats of glossy topcoat. The shine makes the jewel tones look even richer and more dimensional.
7. Pink Glitter to Purple Ombre
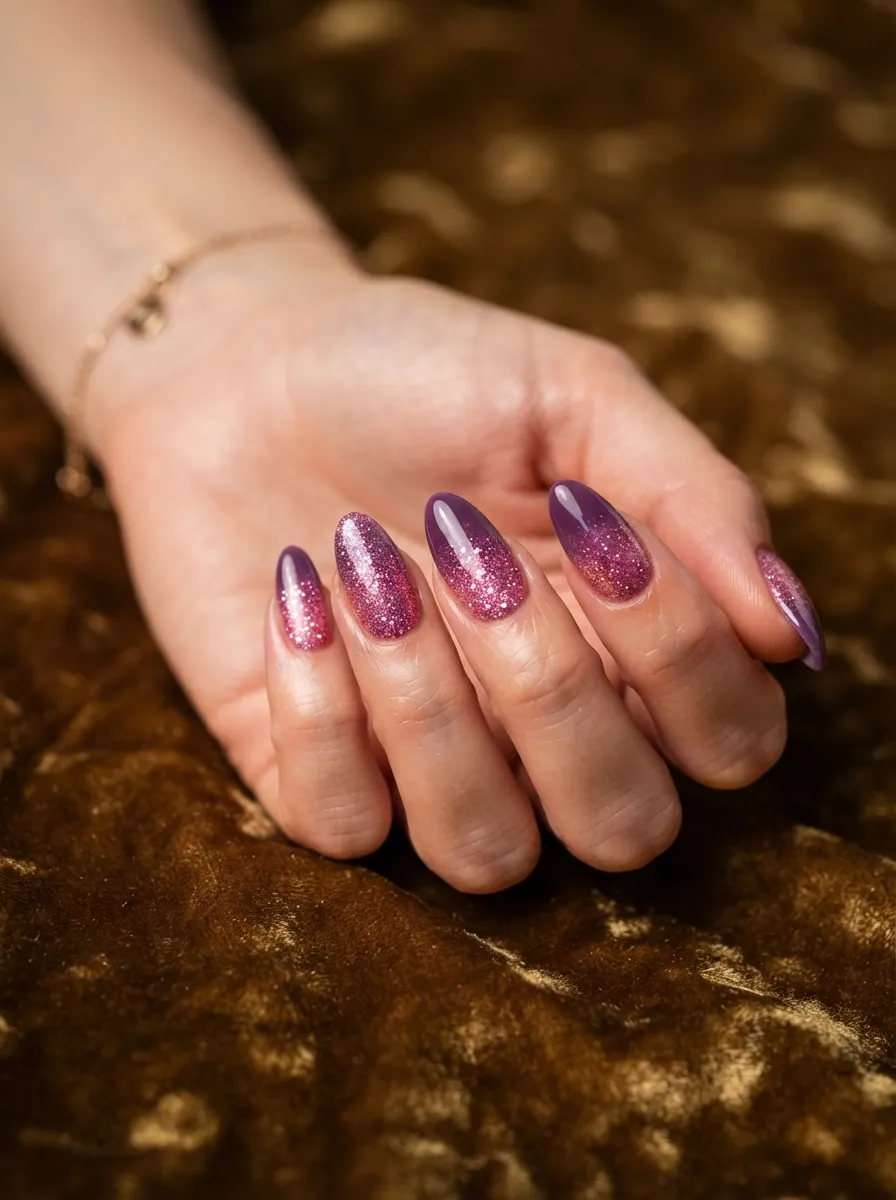
Glitter ombre is the party version of this trend, and it is so much easier to do than it looks.
Instead of blending two solid colors, you start with a glitter polish near the cuticle and let it fade into a smooth purple at the tip. The glitter acts as its own gradient because it naturally gets lighter as you move away from where you applied it.
Easy DIY method: Apply two coats of a pink glitter polish across the entire nail. While it is still slightly wet, press a sponge loaded with purple on the tips only. The purple will sit over the glitter and create a gradient while the glitter underneath still shows through around the edges. It looks like the nail is glowing from the inside.
This look is perfect for New Year’s Eve, holiday parties, or any event where you want nails that catch light from across the room.
You can also flip it and put the glitter at the tips over a solid pink base. Either direction works beautifully. The glitter-at-the-tips version feels more like a French ombre, which is a big trend right now and photographs incredibly well.
8. Rose Gold Pink to Amethyst Ombre
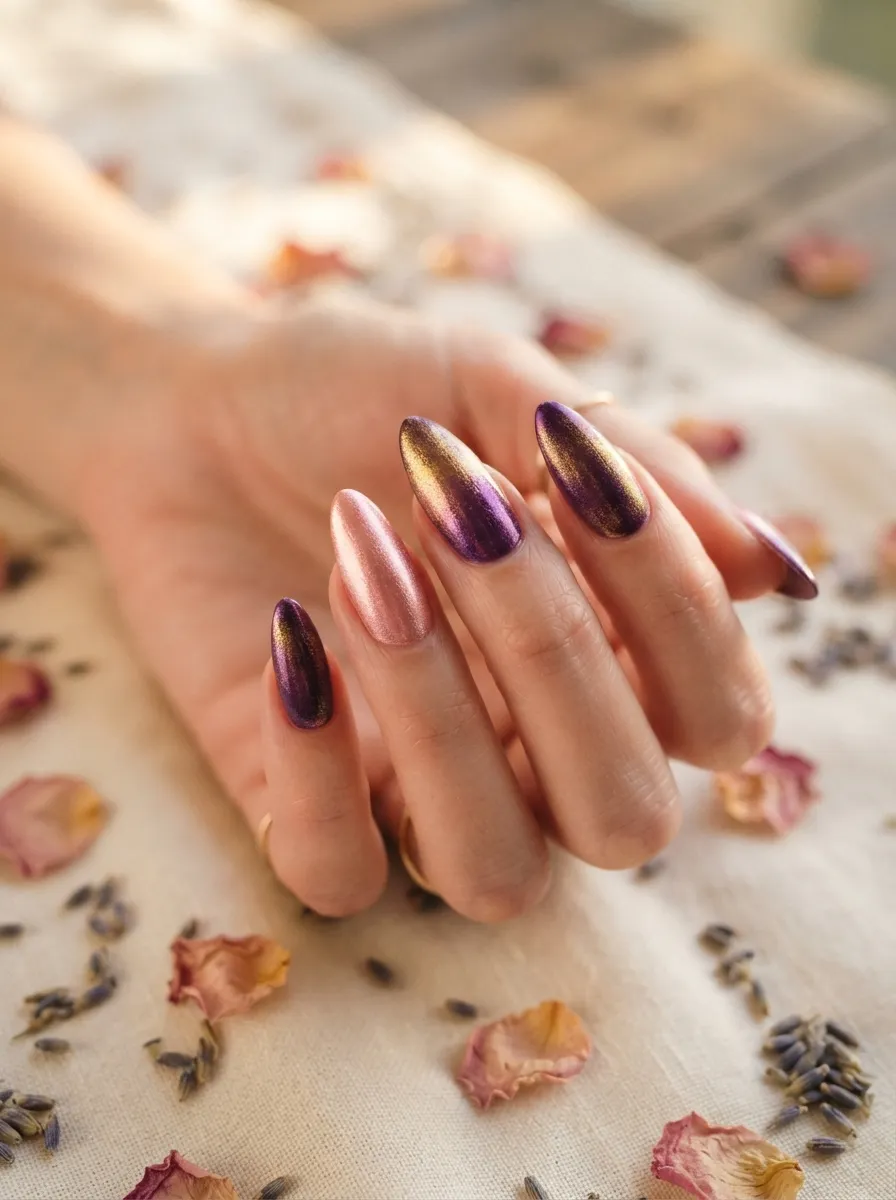
Rose gold and amethyst together feel incredibly luxurious. The warm metallic undertone in both shades creates a harmonious gradient that looks expensive and deliberate.
This color combination works especially well for autumn. The warmth of the rose gold echoes the season’s overall palette, and the amethyst adds a gemstone-inspired richness.
Finding the right shades: Look for a pink polish with a copper or gold shimmer in it rather than a flat pink. Then find an amethyst or deep purple with a similar metallic or shimmer finish. Matching the finish type across both colors is what makes the gradient look cohesive.
Both colors being metallic means the gradient almost blends itself. The shimmer particles catch light from every angle, which naturally disguises where one color ends and the other begins.
This is one of the more forgiving ombre looks to attempt at home because small imperfections in the blending get hidden by the shimmer. Apply both colors with a sponge, working from the outside in, and the metallic finish will do most of the work for you. Seal with a gel-effect topcoat for maximum shine.
9. Pastel Pink to Periwinkle Ombre
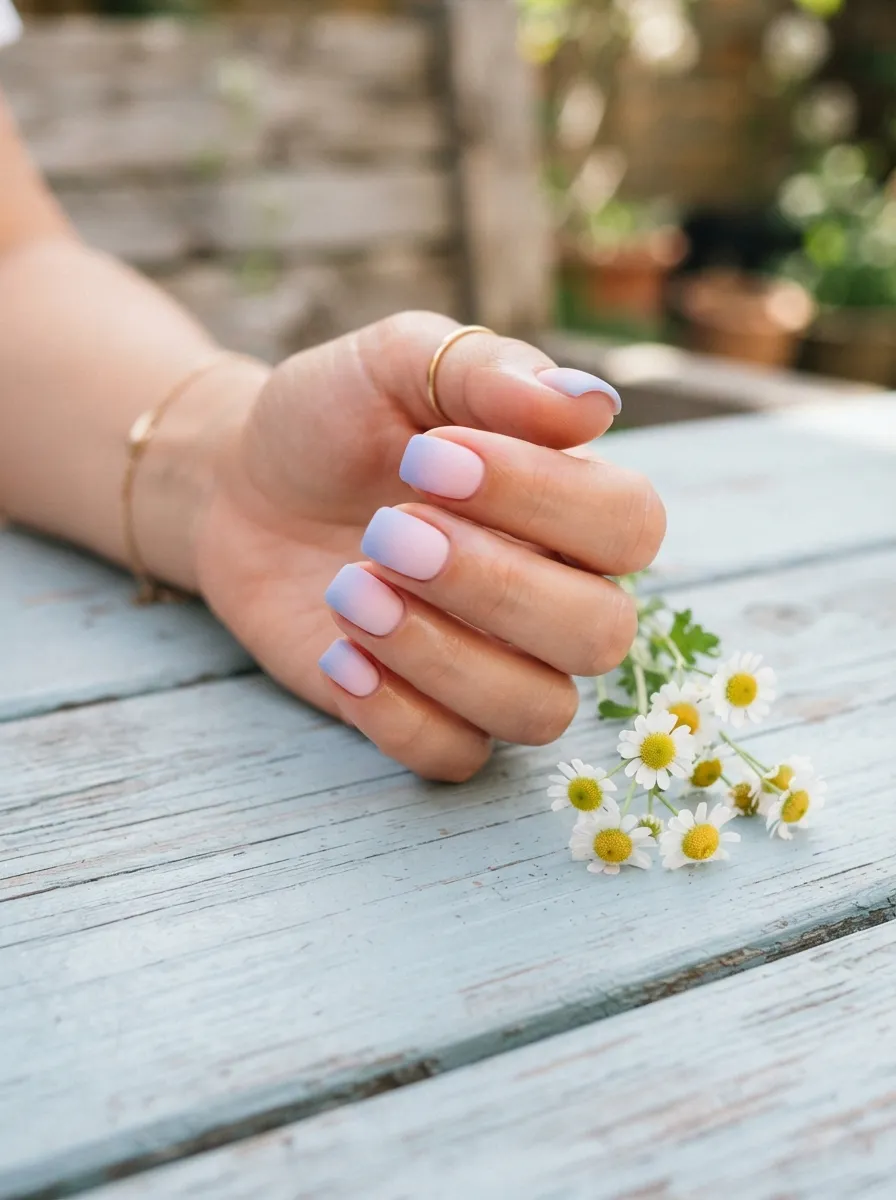
Periwinkle sits right at the crossroads of blue and purple, which makes it a surprising and beautiful partner for pastel pink.
This combination feels very spring and early summer. It is cooler and brighter than traditional pink-purple ombres, which makes it feel distinctive and a little unexpected.
The periwinkle adds a hint of blue coolness to what would otherwise be a warm pink look. That contrast is what makes this particular ombre feel so interesting and modern.
Color tip: Periwinkle polishes are sometimes labeled as “lavender blue,” “cornflower,” or “forget-me-not.” The key is finding a purple that leans clearly blue rather than warm or red-leaning.
This look works beautifully on very short nails. Even on barely-there lengths, the color shift is visible and creates a pretty effect. It is also a great option for younger nail art fans or for people trying the ombre technique for the first time because the pastel shades are very forgiving when blending.
Apply your pastel pink all over and then use a light hand with the periwinkle on the tips. Build it up gradually with multiple light sponge presses and you will have a smooth, airy gradient that feels perfectly springlike.
10. Deep Pink to Plum Ombre
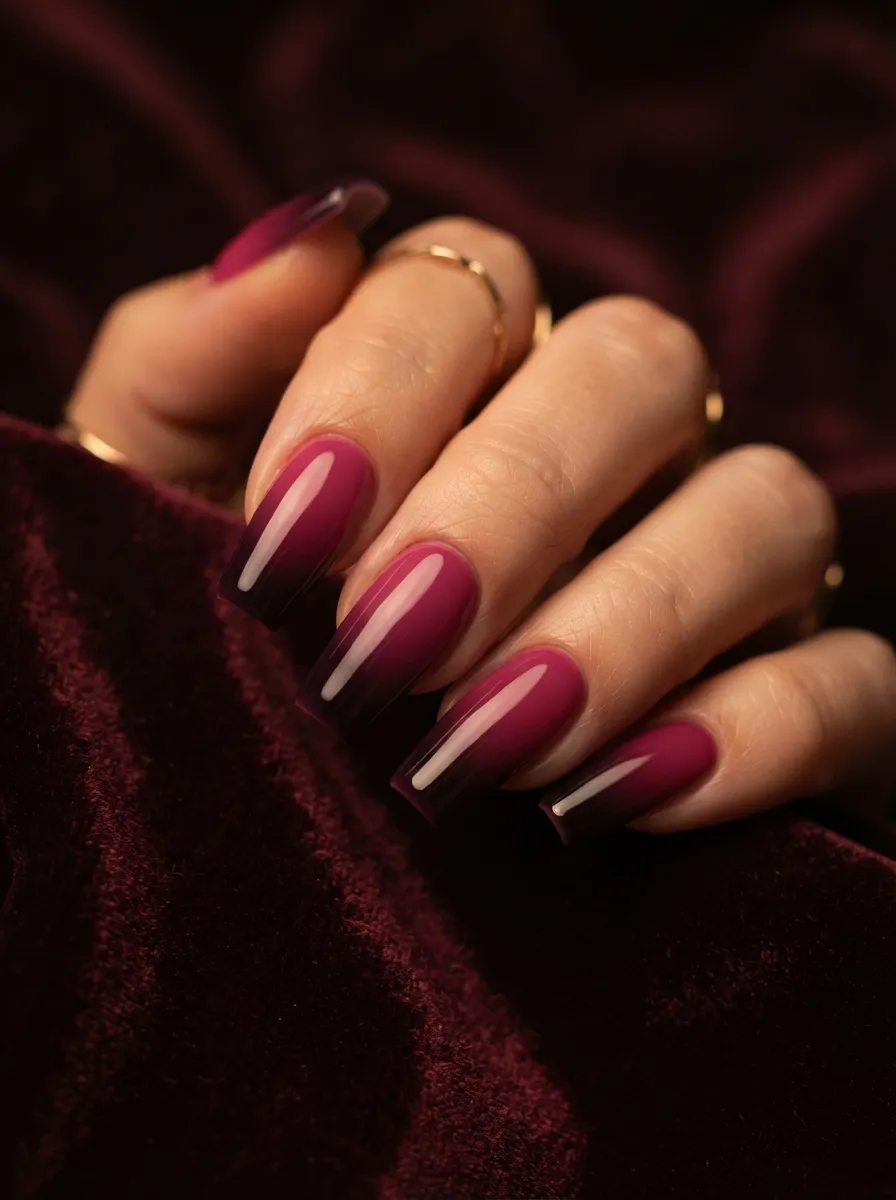
Deep pink to plum is the darkest and most moody version of this trend. It is dramatic, edgy, and absolutely stunning.
The plum at the tips is deep enough to almost read as black in certain lights, which gives your nails that mysterious, gothic-adjacent quality that is incredibly popular right now.
This look is perfect for fall and winter. It pairs beautifully with dark clothing, leather jackets, and bold eye makeup. It is also a great choice for anyone who loves dark nail colors but wants something slightly more dimensional than a single shade.
For a true at-home gel look: Apply a gel-effect base coat before your polish layers. This creates that slightly thickened, ultra-glossy finish that makes dark nail colors look like they came straight from a nail bar. Finish with a gel-effect topcoat for the full salon effect.
The sponge technique is especially effective here because the meeting point of deep pink and plum can easily turn muddy if you are not careful. Build the plum up slowly from the tips, pressing lightly multiple times rather than loading a lot of color at once. The gradual build prevents muddiness and keeps both colors looking rich and distinct.
11. Chrome Pink to Holographic Purple Ombre
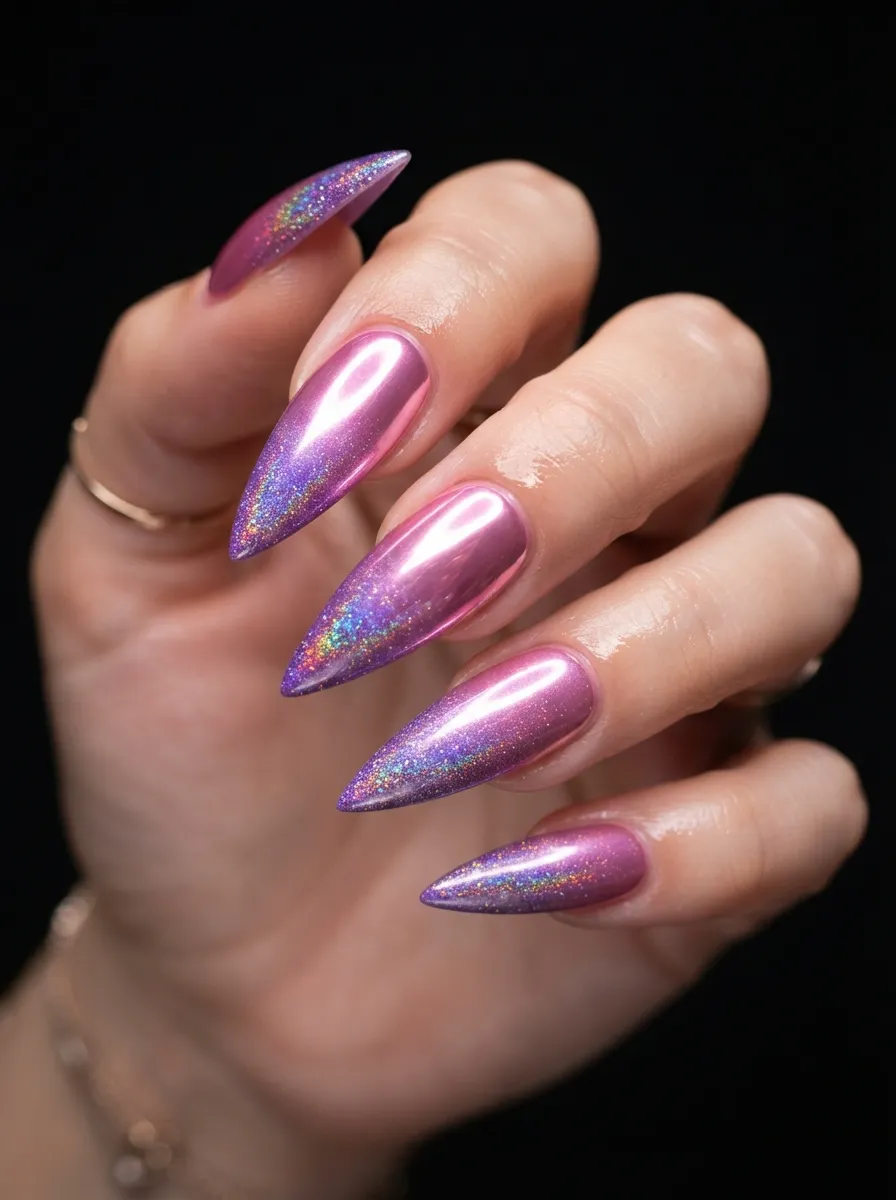
Chrome and holographic finishes together create one of the most futuristic nail looks available right now.
The chrome pink reflects light like a mirror, while the holographic purple scatters it into a rainbow. Together, they create nails that look genuinely otherworldly and completely unlike anything you can buy ready-made in a bottle.
This is a more advanced look, but it is more accessible than you might think. Chrome nail powder is available online for very low prices, and holographic topcoats are carried by brands like Sally Hansen and Color Club at most drugstores.
How to get chrome at home: Apply a base color close to pink, cure it if using gel, and then rub chrome powder onto the nail with a sponge applicator using circular motions. The chrome effect only works on gel or gel-effect polishes because it needs a slightly tacky surface to adhere properly.
Then apply a holographic topcoat over the tips, blending it gently into the chrome section. The two finishes interact beautifully because both scatter light, just in different ways. Seal everything with a no-wipe gel topcoat for maximum longevity. This look gets the most attention of any nail art on this list.
12. Bubblegum Pink to Grape Purple Ombre
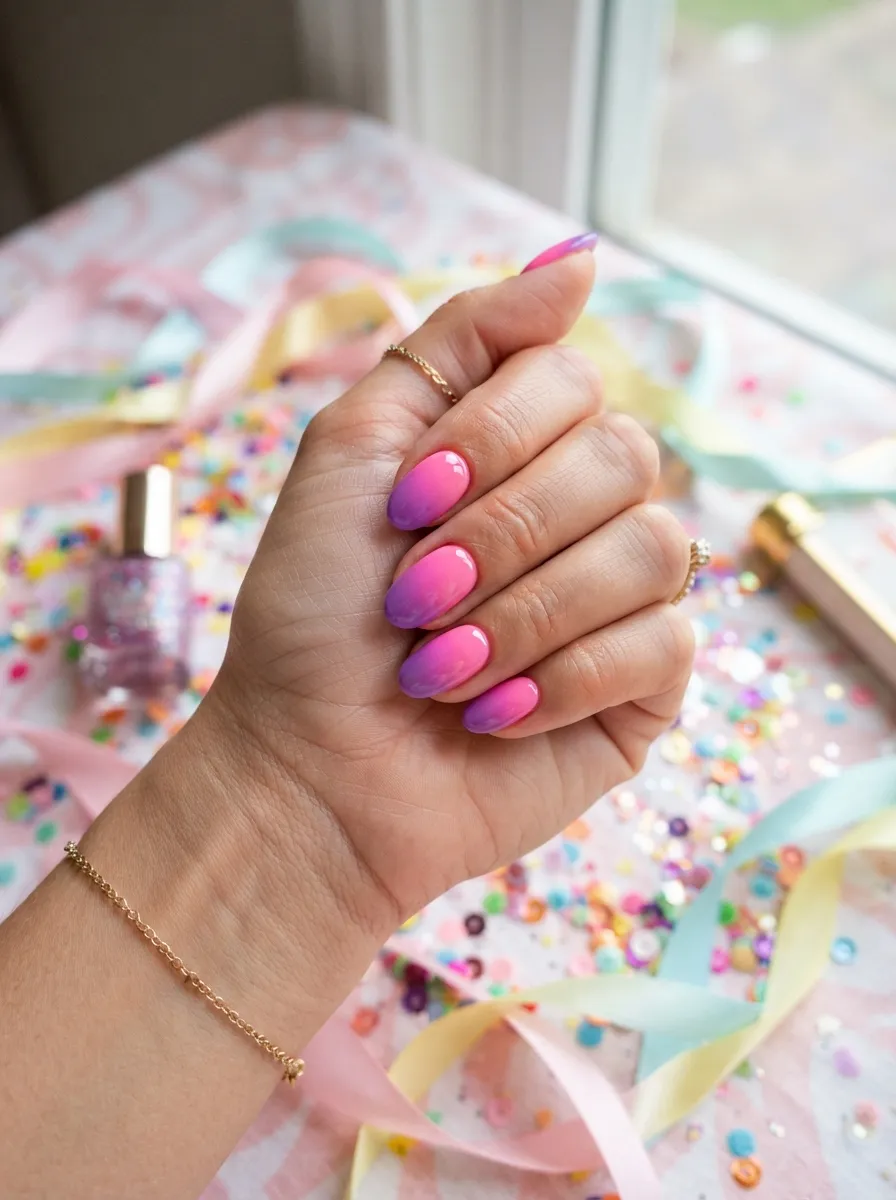
Bubblegum and grape are the fun, carefree, playful cousins of the pink purple family. This look feels young, joyful, and completely unapologetic about being colorful.
It is a great choice for summer, birthdays, and really any occasion where the vibe is celebratory and relaxed. It pairs perfectly with bright summer outfits, colorful accessories, and a generally happy mood.
The key to keeping this from looking too childish is the application quality. Clean lines, smooth gradient, and a high-gloss topcoat are what separate a polished nail look from something that looks accidental.
Inexpensive picks: Wet n Wild, Orly, and Revlon all carry bright, saturated pinks and purples that punch well above their price point. You can get both shades for under six dollars total and still get a professional-looking result.
Apply your bubblegum pink in two full coats across the entire nail for solid coverage. Let it dry completely before sponging the grape purple onto the tips. This is one of those looks where letting the base dry fully really matters. Wet layers underneath will make the sponge drag and smear instead of blend. Take your time and the result will be smooth and candy-bright.
13. Dusty Pink to Cool-Toned Violet Ombre
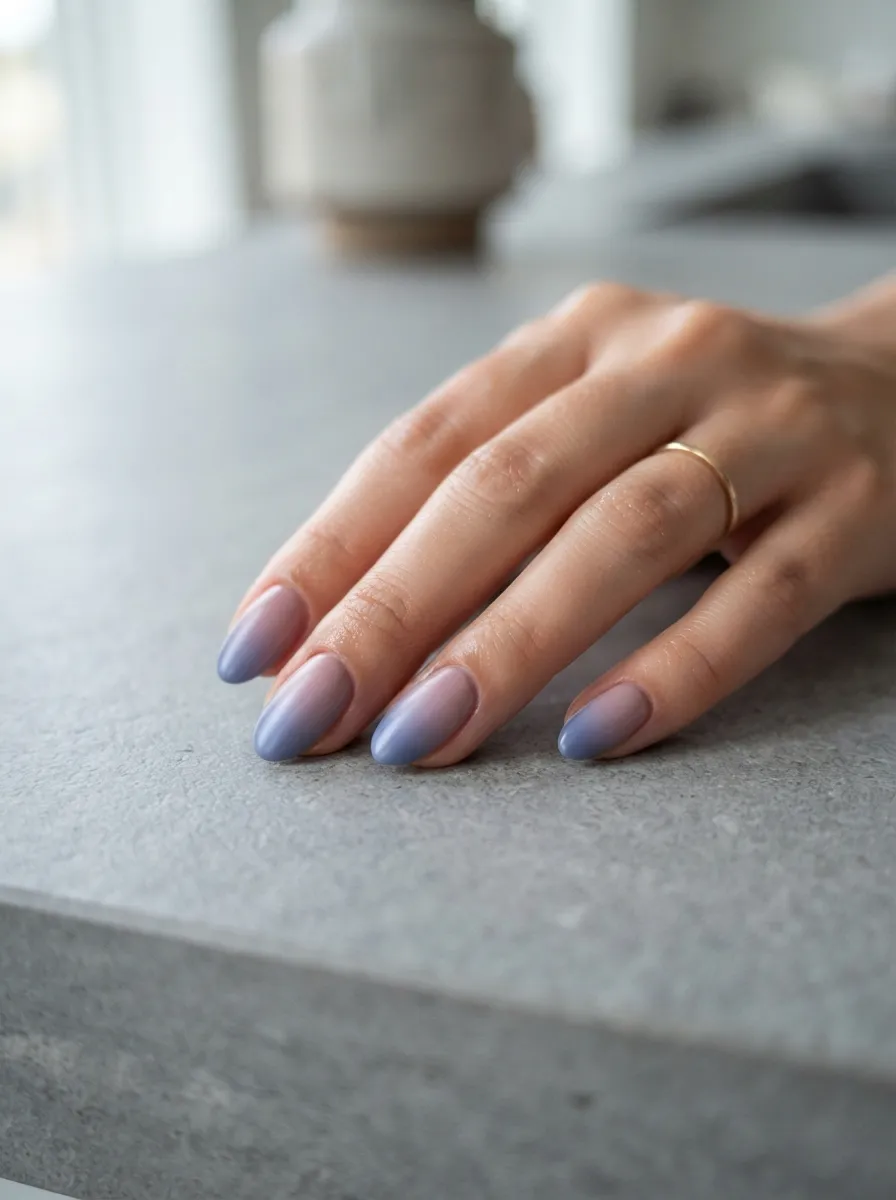
Cool-toned violet has a slightly blue-leaning quality that separates it from warmer purples. When paired with dusty pink, the result is incredibly sophisticated.
This particular combination photographs beautifully because the cool tones read clearly on camera without washing out or shifting. It is a great choice if you are doing a photo shoot or want your nail look to be part of a styled content shoot.
The color contrast here is interesting because dusty pink is warm and soft while cool violet is sharp and slightly edgy. That tension between warm and cool is what makes the gradient look intentional and styled rather than random.
Who should try this: People who like minimalist aesthetics, cool color palettes, and fashion-forward looks. This is not a loud nail look, but it is one that people who pay attention to details will notice and appreciate.
For the cleanest result, use a makeup sponge that has been cut into a thin wedge shape. This gives you better control over exactly where the violet lands and how far it extends down the nail. Build the color in four or five light layers rather than trying to achieve opacity in one or two heavy ones.
14. Pink Nude to Deep Orchid Ombre
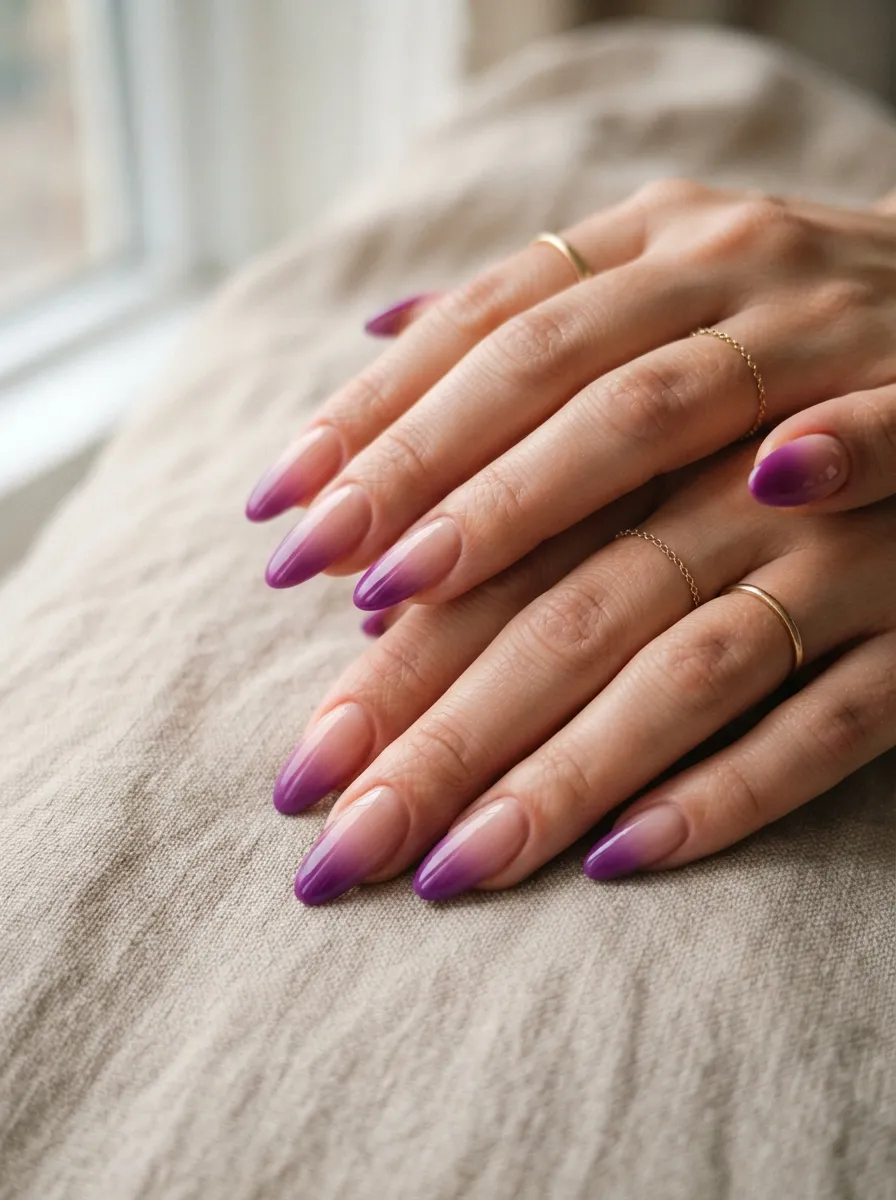
Starting with a pink nude that matches your skin tone and bleeding it into a deep orchid creates one of the most elegant nail illusions possible.
The nude base essentially disappears into your skin, making the orchid tip look like it is floating. This is what makes it look so polished and unusual compared to standard ombre looks.
This style is known as a “floating tip” effect and it is loved by people who want dramatic color without the fullness of a colored nail from cuticle to tip.
Choosing the right nude: The nude you pick matters a lot here. It should be within one or two shades of your actual skin tone, slightly pink-leaning. If the nude is too far from your skin tone, the illusion is lost and it just looks like a regular ombre.
The orchid can range from a bright medium purple to a deep, wine-adjacent purple depending on how dramatic you want the look. A medium orchid reads as elegant and daytime-appropriate. A deep, dark orchid leans more evening and formal.
Seal this look with a high-gloss topcoat to make the color pop of the orchid look even more deliberate and striking.
15. Pink to Purple Ombre with Gold Foil Accents
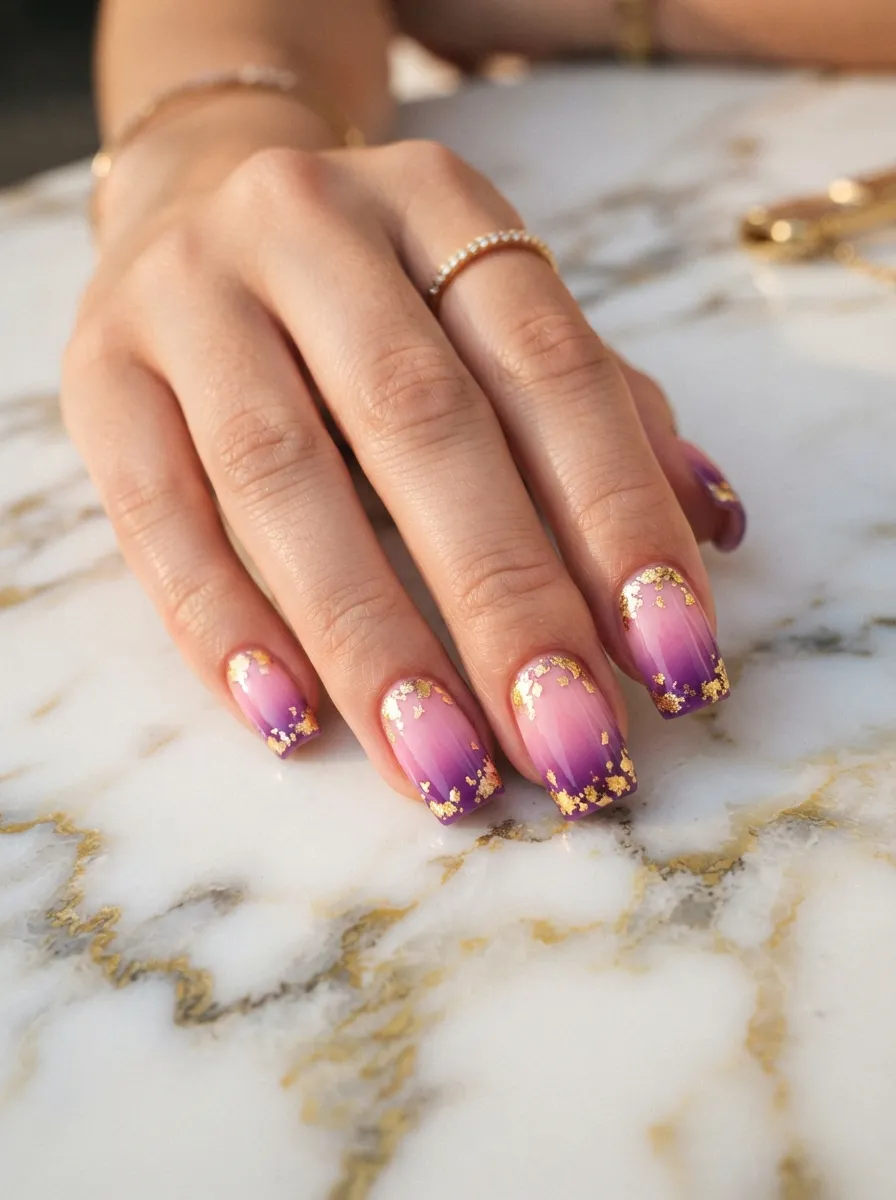
Adding gold foil to an ombre look takes it from pretty to genuinely luxurious without a huge amount of extra effort or cost.
Gold foil nail sheets are available online for very little money and they press onto tacky nail polish to create that crinkled, irregular metallic look that looks expensive and handmade at the same time.
The trick is to use the foil sparingly. You do not want to cover the whole nail because then you lose the ombre effect underneath. Instead, press small irregular pieces onto the cuticle area and the very tips, letting the gradient still show through the middle section of each nail.
How to apply foil at home: Apply your full pink to purple ombre first and let it cure under a UV lamp if using gel, or let it dry completely if using regular polish. Then apply a small amount of nail glue or a tacky adhesive layer to the areas where you want foil. Press the foil sheet down firmly, then peel it back quickly. The foil sticks to the adhesive and creates that irregular crinkled texture. Seal with topcoat immediately to prevent lifting.
This look photographs incredibly well and is a fantastic choice for special events.
16. Watercolor Pink to Purple Wash Ombre
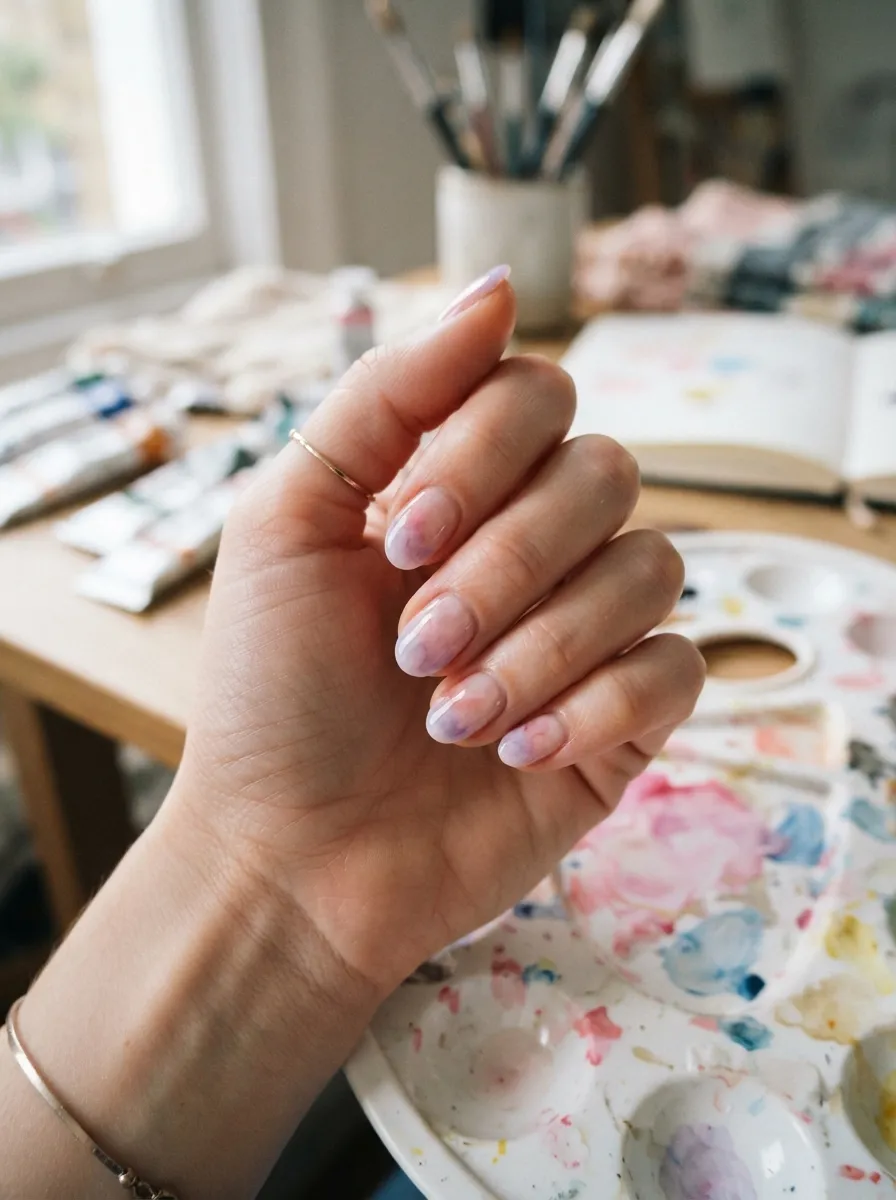
The watercolor effect is achieved by using sheer, translucent polish rather than fully opaque colors. The result looks like your nails were painted with actual watercolor paint.
This is one of the most artistic-looking nail trends and it requires very little skill to pull off because the translucency naturally creates soft, organic transitions.
How to create this at home: Mix a tiny drop of fully pigmented pink polish with a clear base coat in a ratio of about one part color to three parts clear. Apply this diluted mixture across the nail. Repeat with your purple shade at the tips. The translucency means the gradient happens naturally without sponging because there is no hard edge to blend out.
Build up two or three layers of the diluted polish for a slightly more pigmented look while still keeping that sheer, painterly quality.
This is an especially beautiful look on shorter nails because the smallness of the canvas makes the watercolor effect look very intentional and artistic. It also dries incredibly quickly because of the high clear polish content, which makes it a great option when you are short on time.
17. Ombre French Tips: Pink to Purple
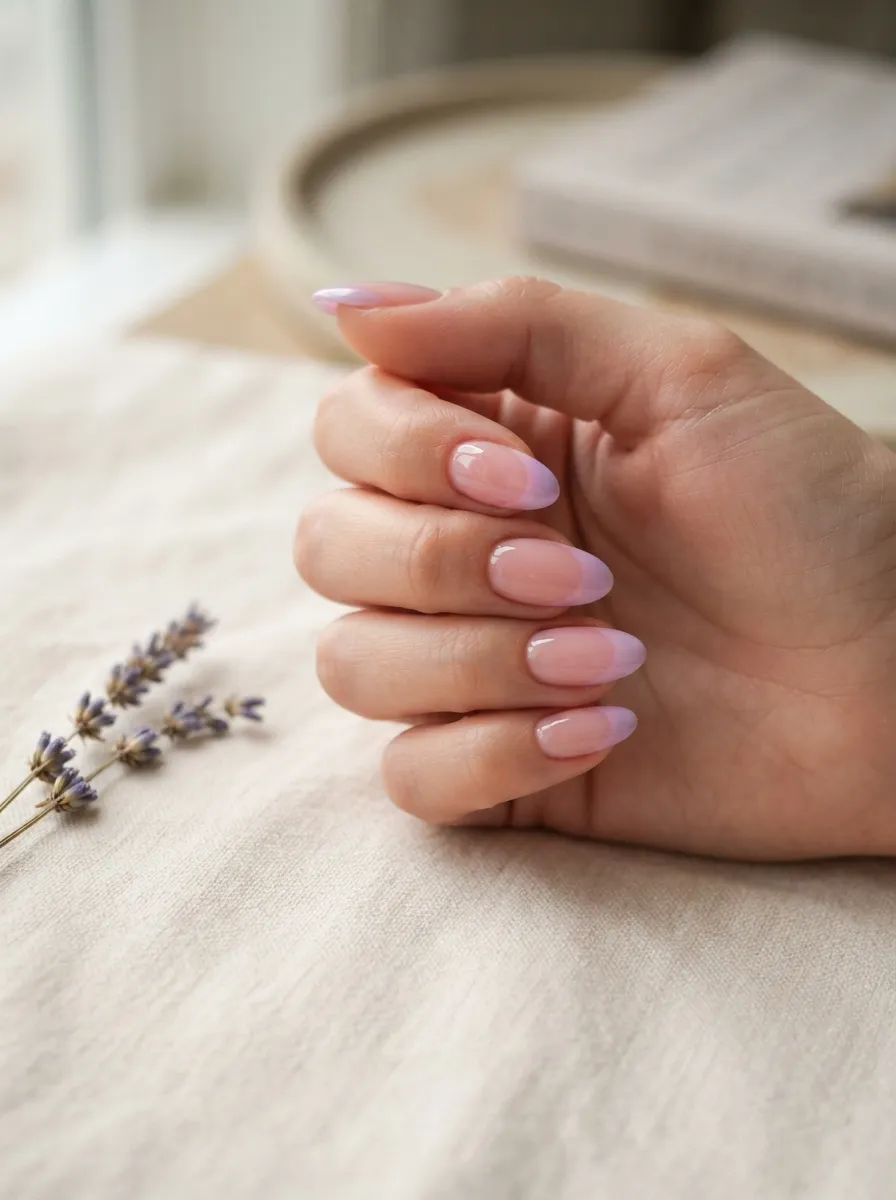
The French tip manicure got a serious upgrade. Instead of the classic white tip, the tip itself is a gradient from pink to purple.
This is one of the biggest nail trends right now and it is surprisingly easy to recreate at home once you understand the technique.
The base of the nail stays a clean, sheer, natural-looking pink. The tip is where all the action happens. The gradient within the tip goes from soft pink on the inner edge of the tip to a deeper purple on the outer curved edge.
DIY method: Apply a sheer pink base coat across the whole nail. Let it dry. Then take a sponge and apply the pink shade to the inner portion of your nail tip. Then apply the purple to the outer curved edge of the tip only. Use the sponge to blend where the two colors meet within the tip area. The blending zone is tiny so you need a fine-tipped sponge or even a small eyeshadow brush.
This look is polished enough for professional settings but modern enough to feel current and on-trend. It is a strong everyday nail choice for people who love the French tip aesthetic but want something slightly more interesting.
18. Coral Pink to Purple Ombre
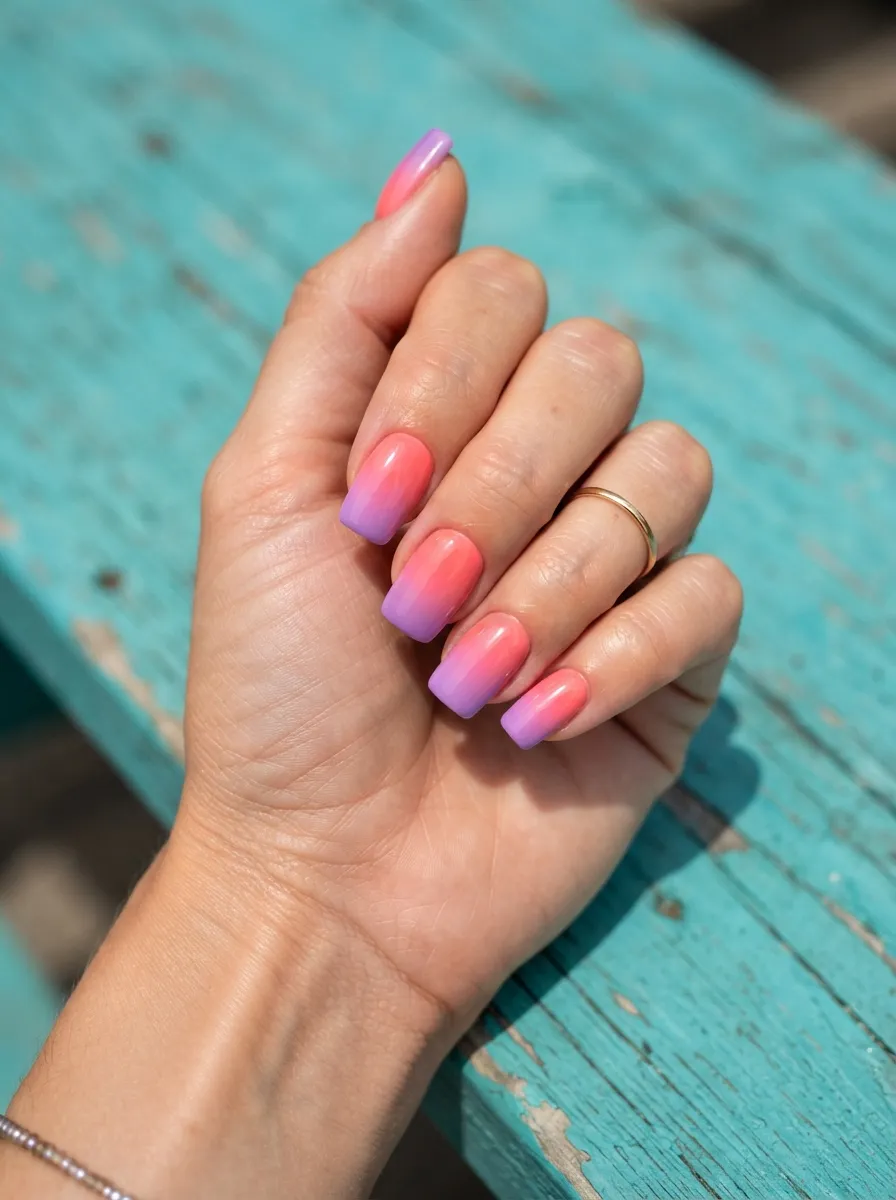
Coral pink sits at the warmer, more orange-leaning end of the pink spectrum. When it fades into purple, the color journey is longer and more visually interesting because you are moving from warm to cool across the nail.
This combination feels tropical, summery, and energetic. It works beautifully with sun-kissed skin and bright summer outfits.
The warmth of the coral makes the purple at the tips read slightly cooler by contrast, which creates a really satisfying visual tension across each nail.
Color picking tip: The coral you pick should lean clearly toward orange-pink rather than classic pink. A true coral will have enough warmth to create that interesting warm-to-cool journey as it meets the purple. If the pink is too cool or too neutral, the gradient will not have the same energetic quality.
Medium-length nails work best for this look because the nails need enough length to show the full transition from coral to purple. On very short nails, the gradient can look compressed and the distinct coral and purple zones get lost. Square and rounded square shapes both work well with this color story.
19. Pink to Purple Ombre with Rhinestone Accents
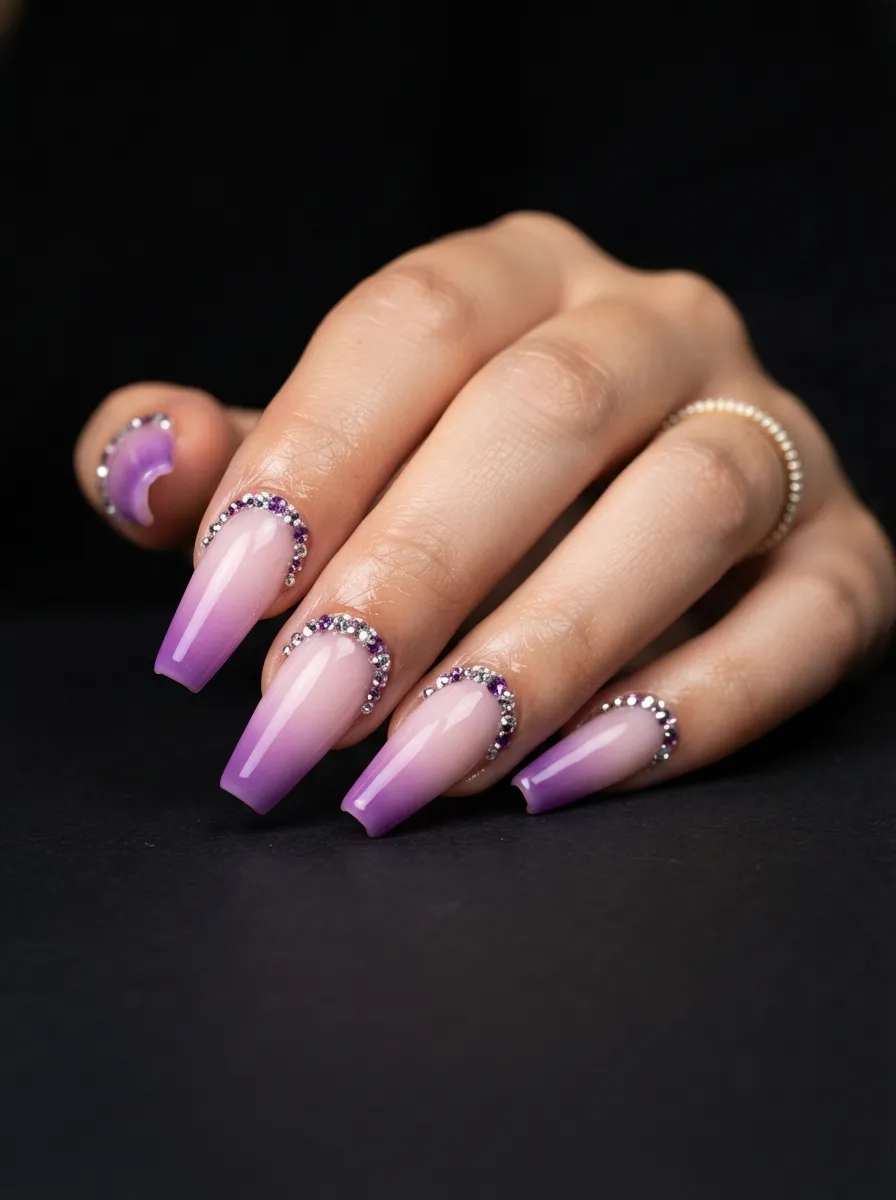
Rhinestones take any nail look to the next level, and on a pink to purple ombre base, they look absolutely spectacular.
The placement strategy matters a lot here. A single curved line of rhinestones along the cuticle edge creates a crown effect that is incredibly elegant. A scattered pattern across the top half of the nail creates a starry, more playful look.
Getting rhinestones to stay: This is the number one challenge with rhinestone nail art at home. The best approach is to apply a small drop of gel nail glue exactly where you want the stone, place the rhinestone immediately using a dotting tool or the tip of a wet toothpick, and then press gently for about ten seconds. Seal the finished nail with a thick topcoat but avoid pressing the topcoat brush directly over the stones as this can knock them loose. Instead, flood the sides with topcoat and let it flow over the tops.
Rhinestones are available on websites like Amazon in bulk packs for under five dollars, which gives you thousands of stones for multiple nail sets. Clear, pink, and purple stones all look beautiful on this ombre base.
20. Matte Pink to Glossy Purple Ombre
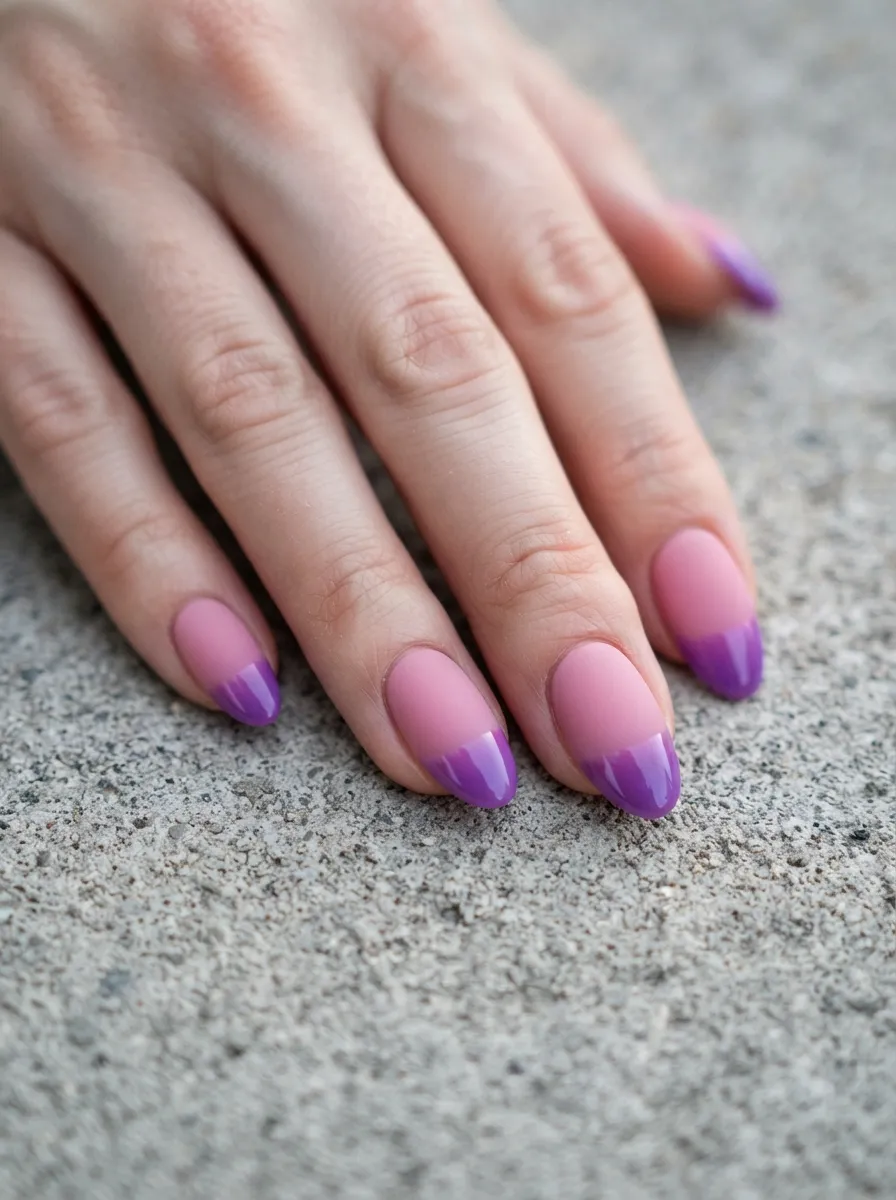
Using two different finishes on the same nail is one of the most creative things you can do in nail art right now. This look uses matte on the pink and gloss on the purple to create a finish gradient that mirrors the color gradient.
The textural contrast is what makes this look so striking. Your eye is drawn to the transition point not just because of the color change but because of the simultaneous change in surface quality.
How to achieve this at home: Apply your full pink to purple ombre as normal, finishing with a glossy topcoat on the whole nail. Once dry, apply a matte topcoat only to the pink half of each nail, using tape to create a clean edge right at the blending point. Remove the tape while the matte coat is still slightly wet for the cleanest line.
Alternatively, start with a matte topcoat on the whole nail, then apply a glossy topcoat only over the purple section. Both methods work and both give you that satisfying dual-texture effect.
This look photographs extremely well and creates a very deliberate, fashion-forward impression. It is one of those nail styles that makes people look twice and ask how it was done.
21. Soft Pink to Smoky Purple Ombre
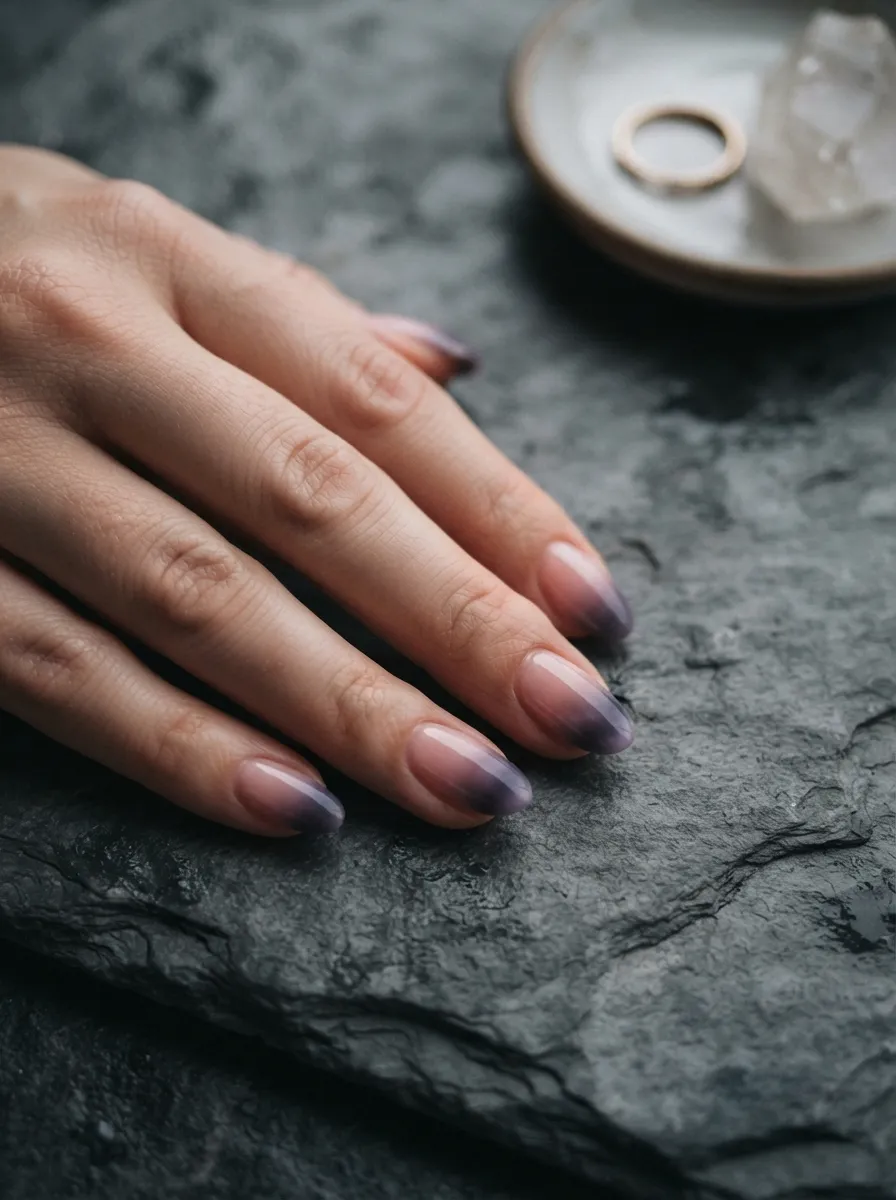
Smoky purple is what happens when you add a hint of gray or charcoal to a standard purple. It takes the color from bright and sweet to something more mysterious and complex.
Paired with soft pink at the base, the smoky purple tip creates a nail look that feels like it belongs on a fashion runway rather than a typical nail bar menu.
This is a great option for people who love purple but find most purple nail shades too sweet or too predictable. The smoky quality adds maturity and edge.
How to mix a smoky purple at home: If you cannot find a smoky purple ready-made, you can mix your own by adding one or two drops of a medium gray polish into your purple on a piece of foil. Mix them together with a nail art brush before sponging. The gray dulls the purple just enough to give it that atmospheric smoky quality without turning it into a gray polish.
This look is particularly beautiful in autumn and winter. It pairs well with camel coats, gray knitwear, and burgundy accessories. It is moody without being aggressive, which makes it appropriate for a wide range of settings and occasions.
Conclusion
Pink and purple ombre nails offer something genuinely exciting regardless of your budget, skill level, or nail length. Whether you are drawn to the softest pastel gradients that barely whisper color or the most dramatic jewel-toned transitions that command attention from across the room, there is a version of this look made for you. The beauty of ombre nails is that imperfection is built into the technique. Slight blending variations and soft edges are exactly what make each set look unique and handmade rather than cookie-cutter. Start with one of the simpler looks on this list, like the baby pink to lavender or the blush to lilac, to build your confidence with the sponge technique. Once you have that foundation, you can work your way toward the more detailed styles like marble veining, rhinestone accents, or chrome finishes. Your nails are a small but very visible part of how you present yourself every day. A fresh set of pink purple ombre nails is one of the easiest and most affordable ways to add something beautiful and intentional to your daily look. Pick your favorite idea from this list and give it a try this weekend.