Clown nail ideas are not for the faint of heart. They are bold, dramatic, and just creepy enough to make people do a double take. Whether you love horror-themed aesthetics or just want to wear something that turns heads at Halloween, clown nail art delivers a look that is genuinely unsettling in the best way possible. These designs pull from classic horror clown imagery, carnival color palettes, and dark fantasy elements. You do not need to spend a fortune at a salon to pull them off. Many of these looks are totally doable at home with affordable nail polishes, stamping kits, and a steady hand. From dripping blood red smiles to full-face clown portraits on each nail, there is something here for every level of nail artist. Get ready to scare and impress at the same time. If you’re also exploring Skeleton nail ideas, minimalist bone outlines, gothic monochrome designs, and full spooky skeleton art can help create a bold yet stylish Halloween manicure that stands out instantly.
1. Classic Red and White Clown Stripes

Red and white stripes are the foundation of classic clown aesthetics. They are instantly recognizable and surprisingly easy to recreate at home.
Start with a clean white base coat. Let it dry fully before painting thin red vertical lines using a fine nail art brush or striping tape for straight edges.
Striping tape is your best friend here. Press it down on the white base, paint over it in red, then peel it off before the polish dries for razor-clean lines.
Finish with a glossy topcoat to make the stripes pop. Add a tiny black teardrop under one nail for that creepy clown detail.
This design works on short and long nails equally well. It photographs beautifully under bright light.
You can buy a set of striping tapes for under two dollars online. Pair them with any drugstore red and white nail polish.
The result looks professionally done without the salon price tag. It is one of the most affordable starting points for clown nail art beginners.
2. Black Teardrop Clown Eyes

The clown teardrop is one of the most haunting details in clown makeup history. Recreating it on nails gives an instant eerie effect.
Paint each nail with a white or pale base. Once dry, use a thin nail art brush to paint a simple black teardrop shape near the tip or center of each nail.
For beginners, a black nail art pen works better than a brush. These pens give you more control and are available at most beauty supply stores for about three dollars.
You can keep it minimal with just one teardrop per nail or go dramatic with three or four overlapping teardrops.
Add a tiny dot of red at the tip of each teardrop to suggest a blood effect. This small detail makes the whole look feel more sinister.
The beauty of this design is its simplicity. It takes about fifteen minutes to complete once your base is dry.
It pairs well with an all-black outfit or a full Halloween costume. Even on its own, these nails make a strong statement without needing additional decoration.
3. Dripping Smile Mouth Nails
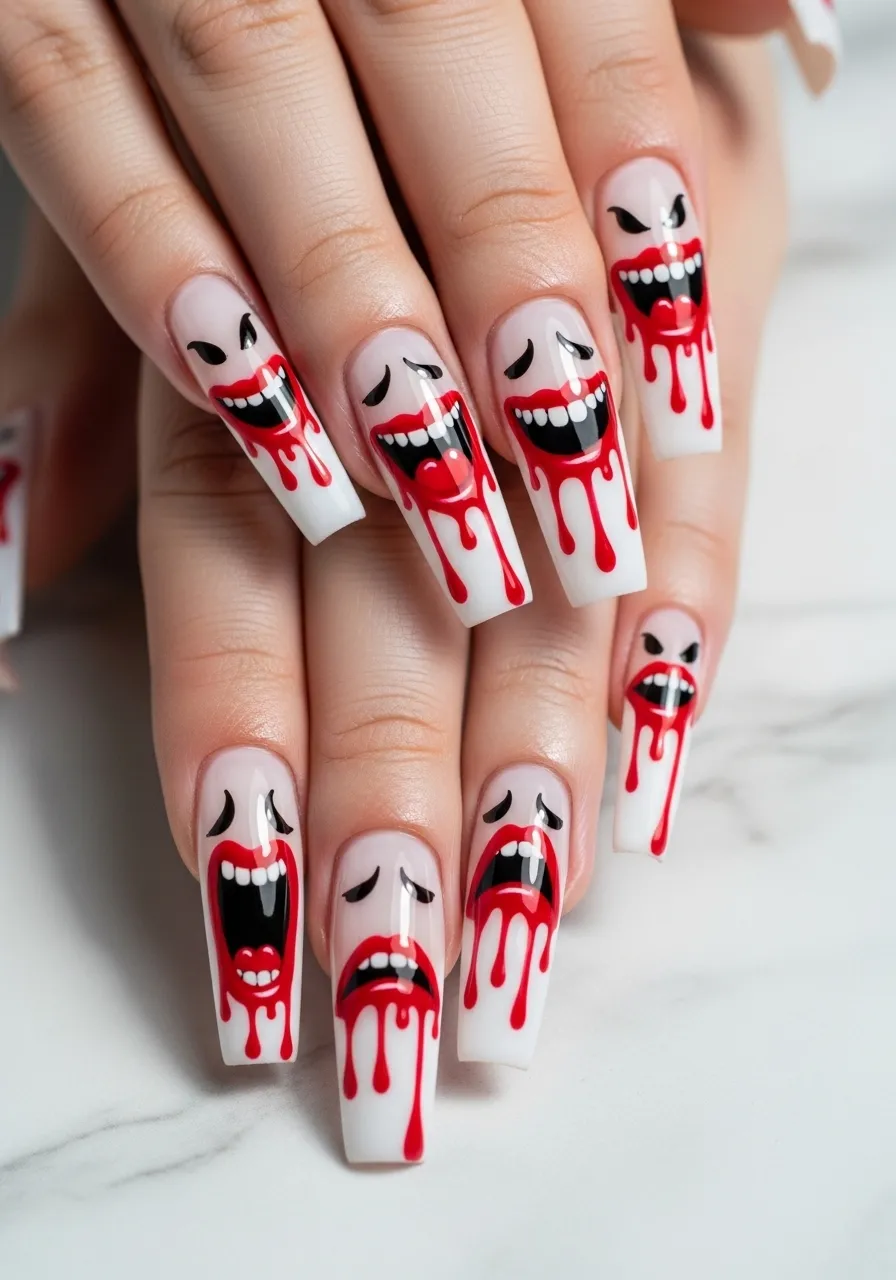
A painted clown mouth on each nail is genuinely unsettling. The dripping version takes it one step further.
Start with a white base coat. Use a red nail art brush or pen to draw a curved smile across the center of each nail. Make the edges curve upward with jagged or uneven ends for that unhinged look.
Then add thin red drips falling down from the smile toward the nail tip. These do not need to be perfect. Imperfect drips actually look more realistic and creepy.
You can vary the expressions across your nails. One nail can show a grin, another a frown, and one or two can have an open-mouthed screaming expression.
Use a toothpick to pull the wet red polish downward for natural-looking drips. Wipe the toothpick between strokes for clean lines.
Seal everything with a glossy topcoat to make the red shine like fresh paint.
This design works especially well on medium to long nails where you have more canvas space. On short nails, stick to one simple smile per nail to avoid crowding the design.
4. Sinister Clown Face Portrait Nails
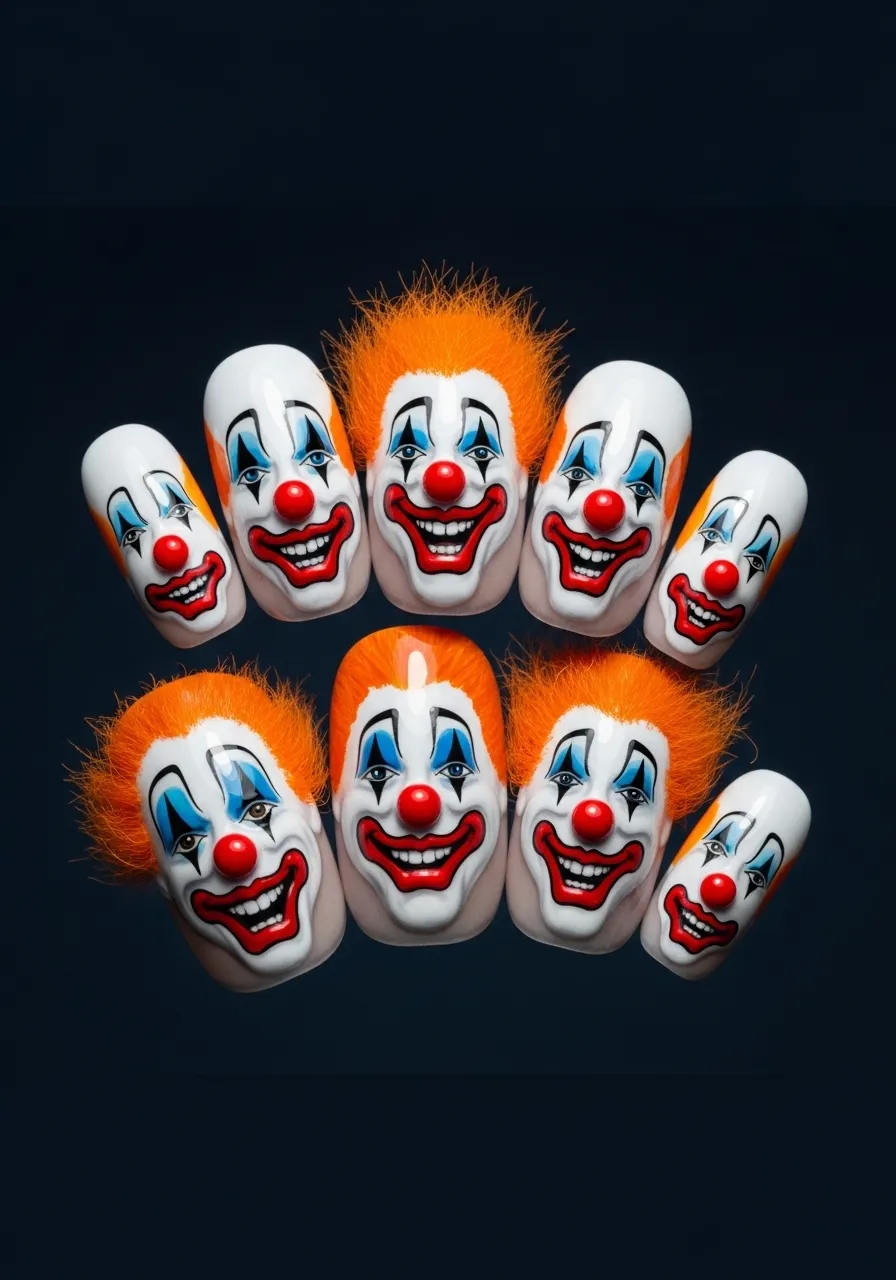
Painting a full clown face on each nail sounds intimidating but is very achievable with the right tools.
Use a white base coat first. Then build up the face using a thin detail brush. Start with the eye shapes using black polish, then add red triangle noses and wide painted mouths.
A dotting tool makes adding perfectly round red noses much easier. These tools cost about two dollars and make a huge difference in clean dot placement.
Orange or green hair painted across the top of the nail completes the portrait. Keep the strokes loose and wild to mimic frizzy clown hair.
You do not need to be a professional artist. Clown faces are meant to be exaggerated and imperfect. The goofier or creepier it looks, the better it works.
Each nail can show a different emotion. One nail can look happy, one sad, one angry, and one screaming. This storytelling detail impresses everyone who looks closely.
Seal with a matte topcoat for a painted canvas effect or a glossy coat for a more polished finish. Either works beautifully with this style.
5. Neon Carnival Color Blocking
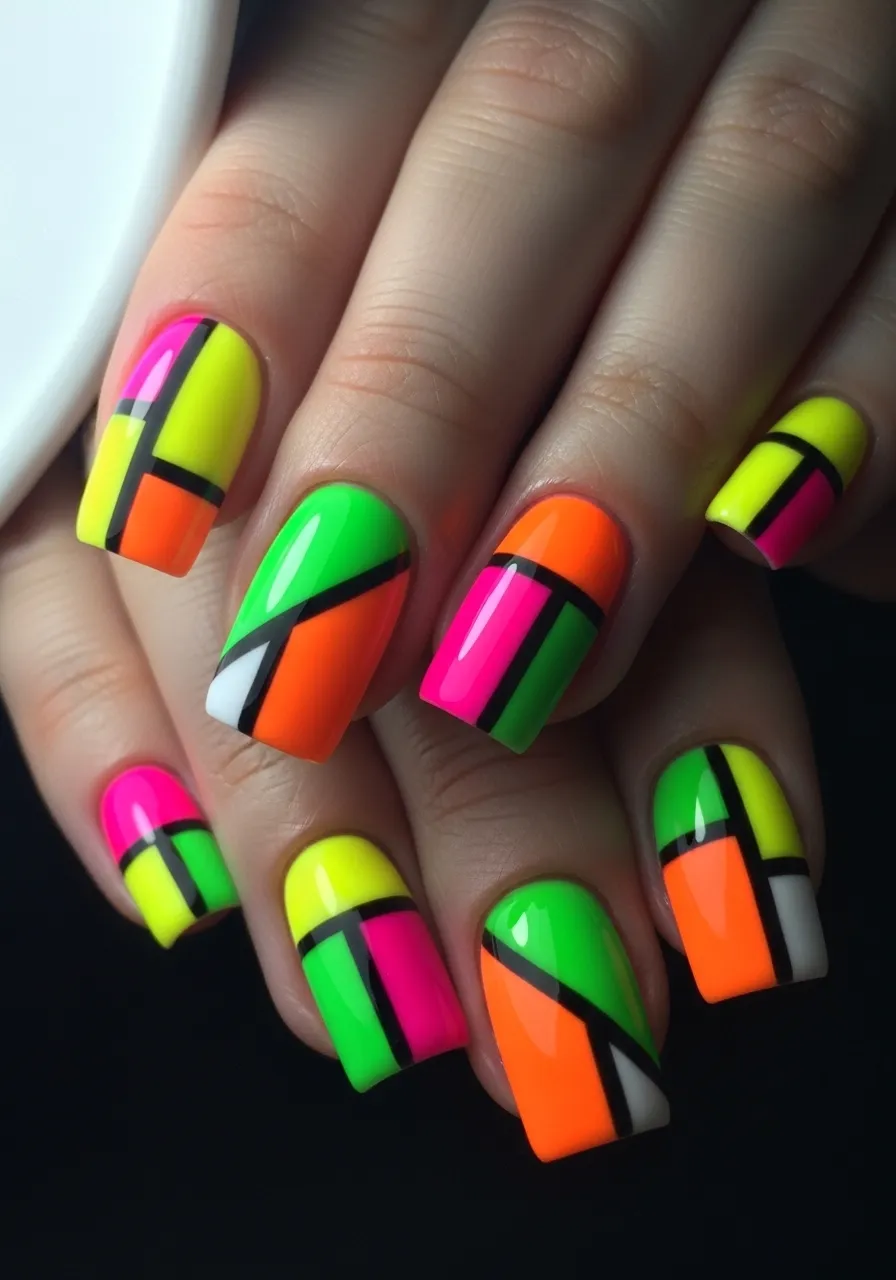
Clown nails do not always have to be dark. The neon carnival version is bright, chaotic, and deeply unsettling in its own way.
Choose four to five loud neon colors. Think hot pink, electric yellow, lime green, and vivid orange. Paint each nail with one color as the base.
Then divide the nail into geometric sections using thin black lines. This creates a color block effect that looks like stained glass or a circus tent.
A black nail art pen makes drawing dividing lines much easier than using a brush. Run lines diagonally, horizontally, or in random directions across each nail.
No two nails should match. The chaotic mismatched look is intentional and very on-theme for clown aesthetics.
This style is great for people who love bright colors but still want something slightly unnerving. The combination of neon shades and black geometric lines creates a visual tension that reads as creepy carnival energy.
For a budget approach, pick up neon nail polishes from the dollar section at craft stores. Many craft stores stock these during Halloween and summer seasons at low prices.
Finish with a glossy topcoat to make the neons really vibrate against the black lines.
6. Bloody Handprint Clown Nails
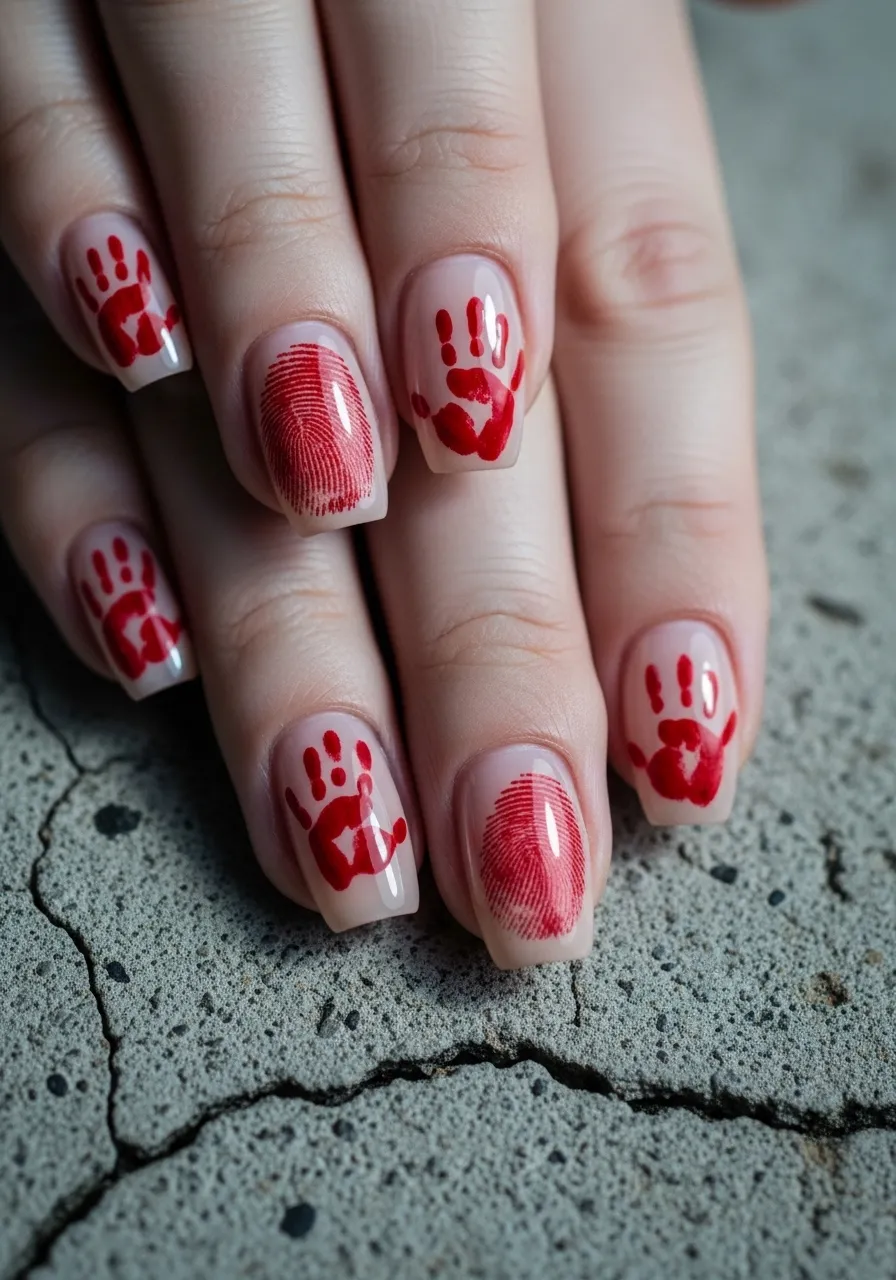
This design is one of the most genuinely terrifying options on this list. Tiny bloody handprints on pale nails look like something out of a horror film.
Start with a pale pink, nude, or white base. Let it dry completely.
Mix a tiny bit of red nail polish with a drop of clear polish to thin it slightly. Then use your pinky fingertip or a small foam sponge to stamp irregular red handprint shapes across each nail.
Press lightly and twist slightly as you lift for a smeared, realistic handprint effect. Imperfection is the point here.
You can also use a toothpick to drag the wet red polish outward from the print, creating a smear trail.
This design looks incredible on longer nails but still reads clearly on shorter ones. The horror effect works at any nail length.
No special tools are needed beyond nail polish and a toothpick. The total cost is just whatever you spend on the base and red polish.
Pair this look with a dark Halloween costume or pale gothic outfit for full effect. Seal with a matte topcoat to keep the smeared paint illusion looking less like nail art and more like something genuinely disturbing.
7. Pierrot Sad Clown Aesthetic
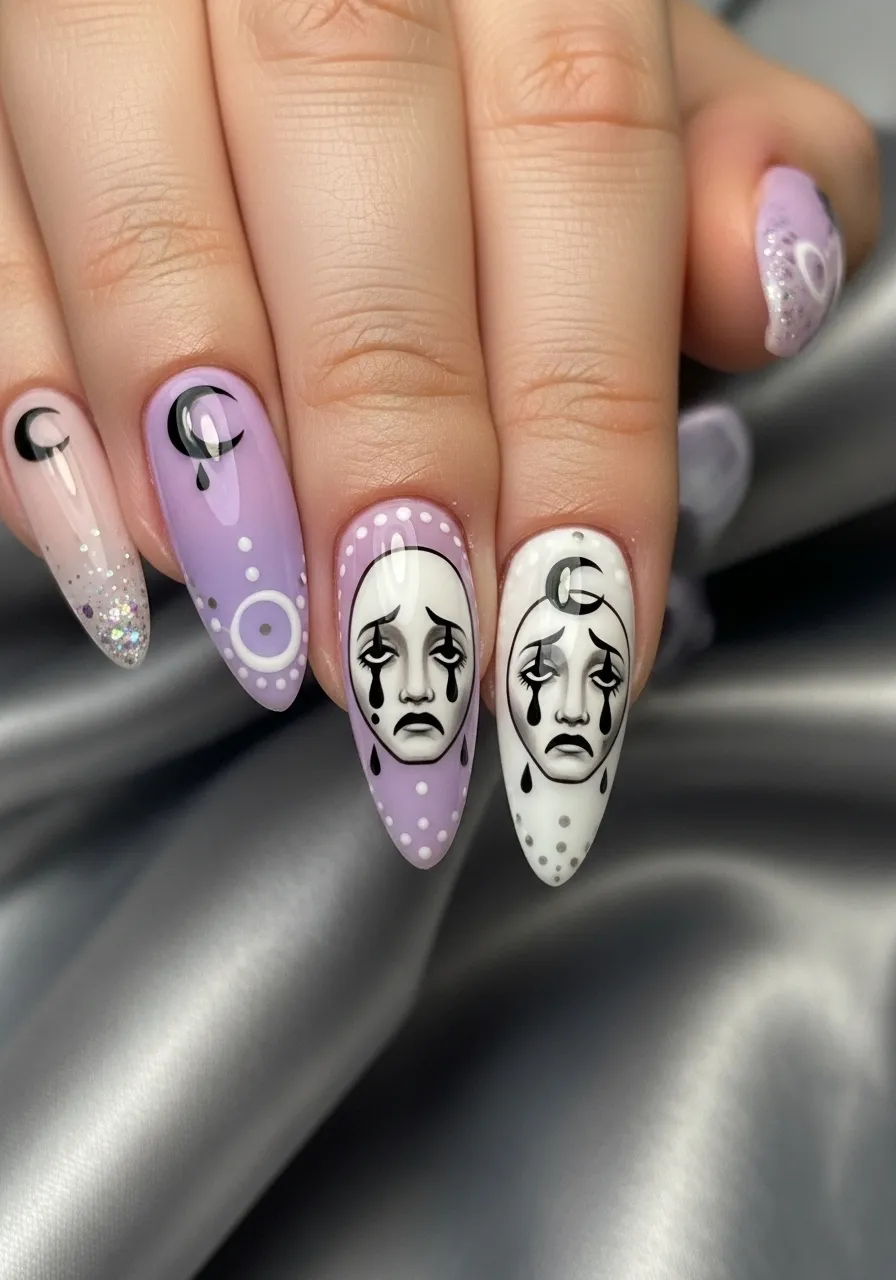
The Pierrot clown is the sad, romantic version of clown iconography. This aesthetic leans more melancholy than scary, but it still has an eerie quality that makes people feel unsettled.
Use pale lavender, white, or soft grey as your base. This color palette immediately reads as ghostly and theatrical.
Paint a simple sad face on one or two accent nails using a thin black nail art pen. Add a single teardrop and arched downturned brows for the classic Pierrot expression.
Crescent moon and star details scattered across the other nails tie the look together without overcrowding.
Add a fine glitter to the nail tips for a faded theatrical shimmer. This suggestion of old stage makeup adds depth to the overall design.
The Pierrot look is great for people who love clown aesthetics but prefer something more subtle than full horror imagery. It reads as artistic and dark rather than purely scary.
This style suits long almond or oval-shaped nails particularly well. The elongated shape mirrors the dramatic proportions of theatrical Pierrot costume design.
Affordable pale nail polishes are easy to find at any drugstore. Combine them with a two-dollar nail art pen and you have everything you need for this design.
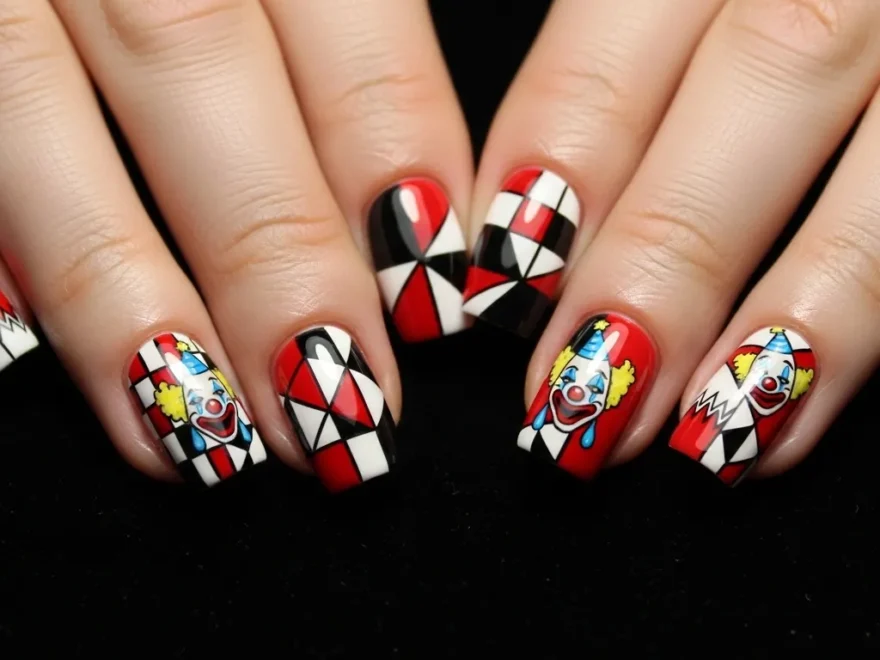
8. Diamond and Harlequin Pattern Nails
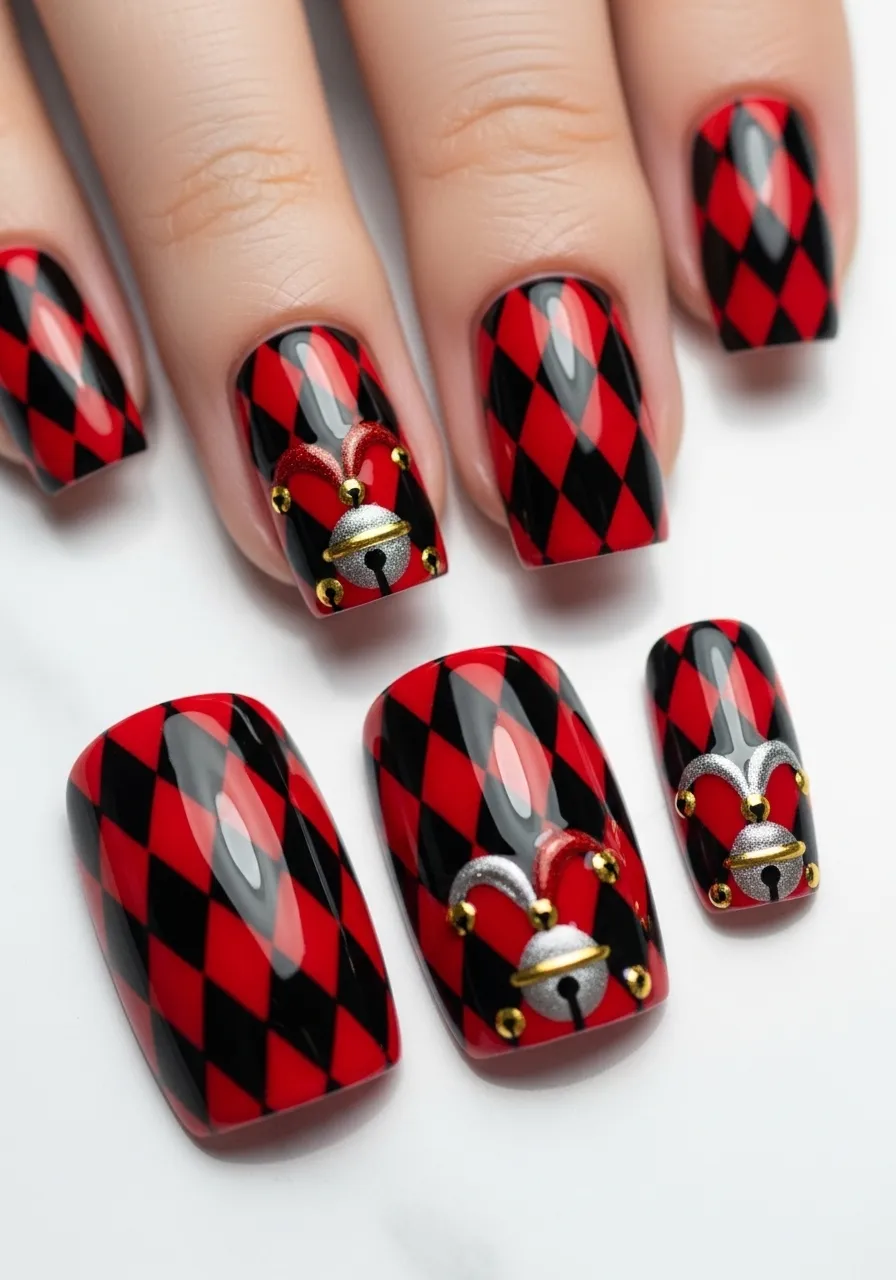
Harlequin diamonds are one of the oldest clown patterns in history. On nails, they look graphic, clean, and quietly menacing.
Use a white or red base coat. Cut small diamond shapes from tape or use nail vinyls to mask off the pattern. Paint the exposed sections in black or the contrasting color.
Nail vinyls shaped like diamonds are sold in packs online for just a few dollars and make this process much faster.
Once the paint dries and you remove the vinyls, the contrast between colors creates a perfectly sharp geometric pattern.
For a more hand-painted version, draw the diamond grid freehand using a black nail art pen over a white base. The hand-drawn version has a more raw and unsettling quality.
Add tiny gold or silver dots at each diamond intersection to mimic jester bell details. This small touch elevates the overall look significantly.
This design photographs very well and looks impressive even from a distance. It works on any nail shape or length.
It is a good option for people who want a clown-themed nail but work in environments where very graphic horror designs are not appropriate. The pattern reads as artistic rather than purely horror-themed.
9. Cracked Porcelain Clown Doll Nails
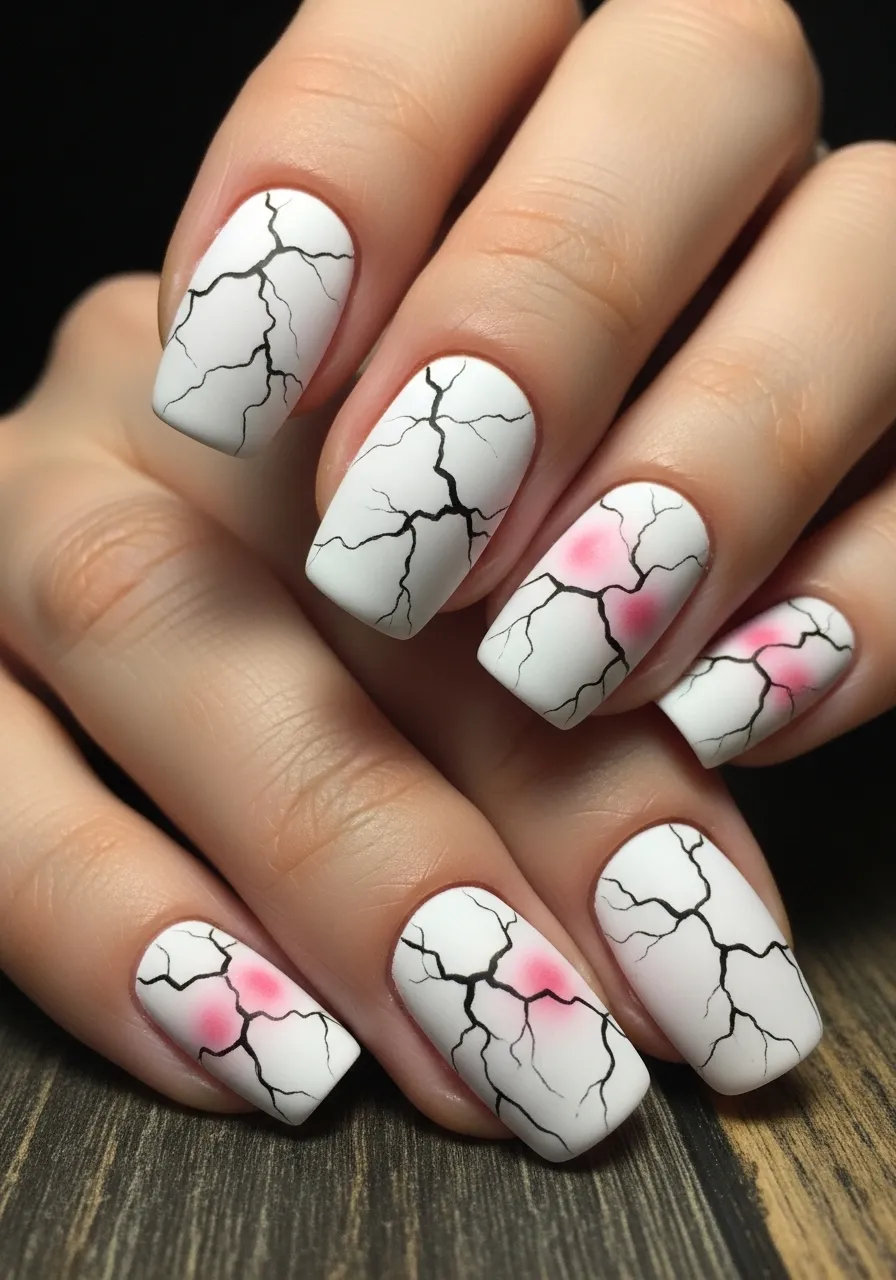
Cracked porcelain nails reference the unsettling aesthetic of antique clown dolls. They look fragile and broken at the same time.
Start with a pale white or ivory base coat. Seal it with a matte topcoat.
Using a very thin nail art brush or pen, draw irregular crack lines radiating outward from one point on each nail. Think spider web cracks, like a broken china plate.
Vary the thickness of your lines. Start thicker near the center point and taper toward the nail edges for a realistic crack effect.
On one or two accent nails, add tiny painted red or pink circles to mimic the rosy cheeks of a painted clown or doll face.
This design is incredibly effective in its simplicity. You are essentially painting broken lines, which requires no advanced nail art skills.
The matte finish is key to selling the porcelain illusion. A glossy topcoat reads as regular nail art, but matte finish makes the nails look like actual cracked paint.
The whole look can be achieved with a white polish, matte topcoat, and a single black nail art pen. Total cost is typically under five dollars if you shop smartly.
This design pairs beautifully with vintage or Gothic Halloween costumes.
10. Clown Core Smiley Face Nails
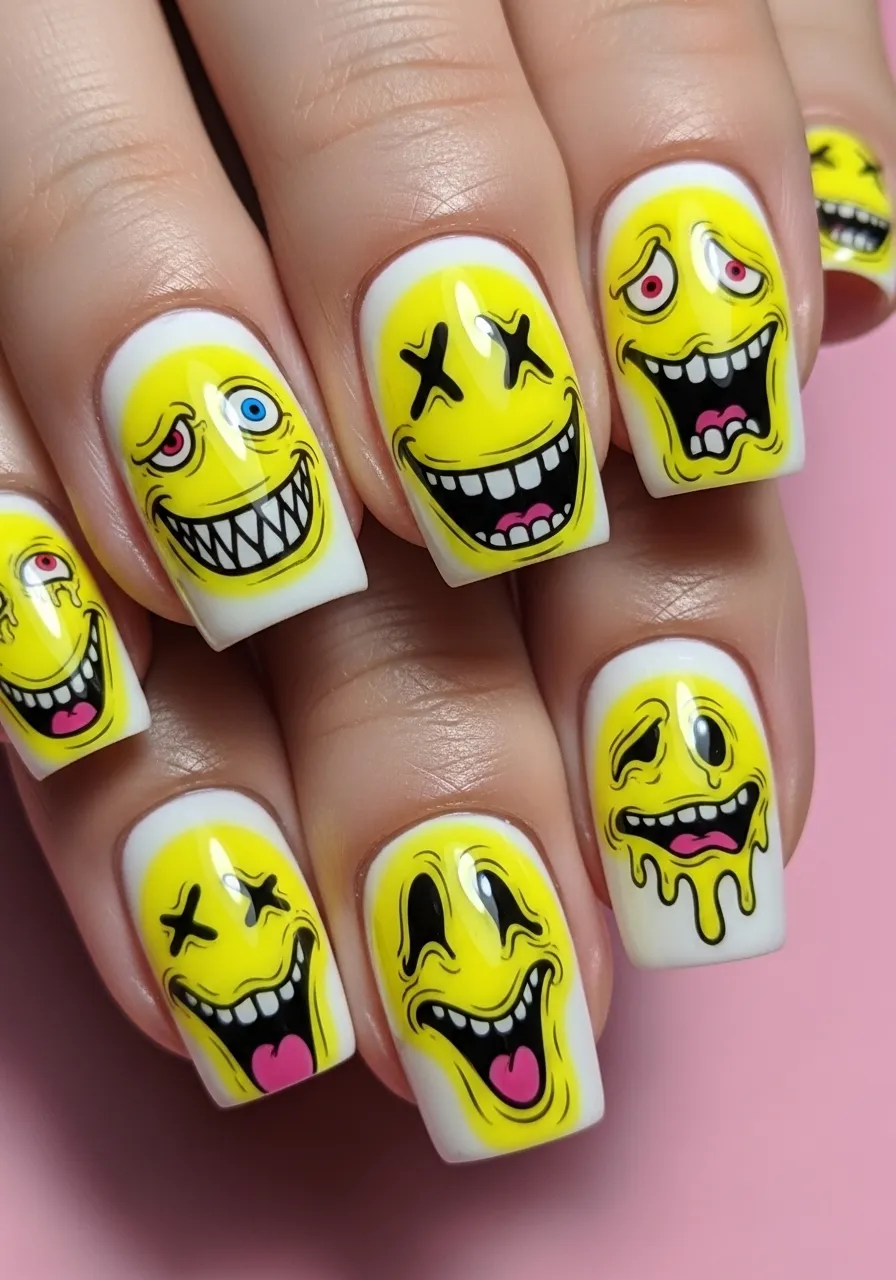
Clown core smiley faces walk the line between cute and deeply unsettling. The secret is making the expressions slightly off.
Paint a white or pastel base. Then draw yellow circles on each nail using a nail art brush. Fill them in completely or leave them as outlines depending on your style preference.
Add eyes that do not match. One larger than the other, or one round and one cross-shaped. This mismatch is what gives the design its creepy quality.
Draw the smile too wide. Extend it past the edges of the face shape. Add too many teeth or make the curve too sharp at the corners.
These tiny details of wrongness make the smiley faces feel genuinely disturbing rather than cheerful.
You can also add additional features like stitched mouths or spiral eyes on accent nails to break up the pattern.
This look is perfect for someone who loves the internet clown core aesthetic. It blends humor and horror in equal parts.
Use bright yellow and black nail polishes, which are both common and inexpensive. A nail art pen handles the fine detailing easily.
Finish with a glossy topcoat to make the yellow faces appear almost luminous. It amplifies the uncanny effect.
11. Horror Clown Dripping Red Balloons

Red balloons are one of the most iconic symbols of horror clown imagery. On nails, they are instantly recognizable and very effective.
Paint a white base on each nail. Once dry, use a red nail art pen or fine brush to draw a simple balloon oval shape near the top of each nail.
Add a twisted string curling downward from the balloon knot. The twisted line detail makes the balloon read as three-dimensional.
Then add red drips falling from the balloon base toward the nail tip. This transforms a cute balloon into something menacing.
You can scatter tiny black dots around the balloon to suggest popped confetti or add a faint shadow beneath each balloon in grey.
Some nails can show the balloon floating while others show it deflating or mid-pop. This variation across all ten nails tells a horror story.
This design works especially well on long coffin-shaped nails where the balloon and drip have space to breathe visually.
Use a fine nail art pen for the balloon outlines and a thin brush loaded with red polish for the drip effects. Both tools are widely available and affordable.
The finished look references classic horror imagery in a way that is immediately understood by anyone who sees it.
12. Black and White Mime Clown Nail Ideas
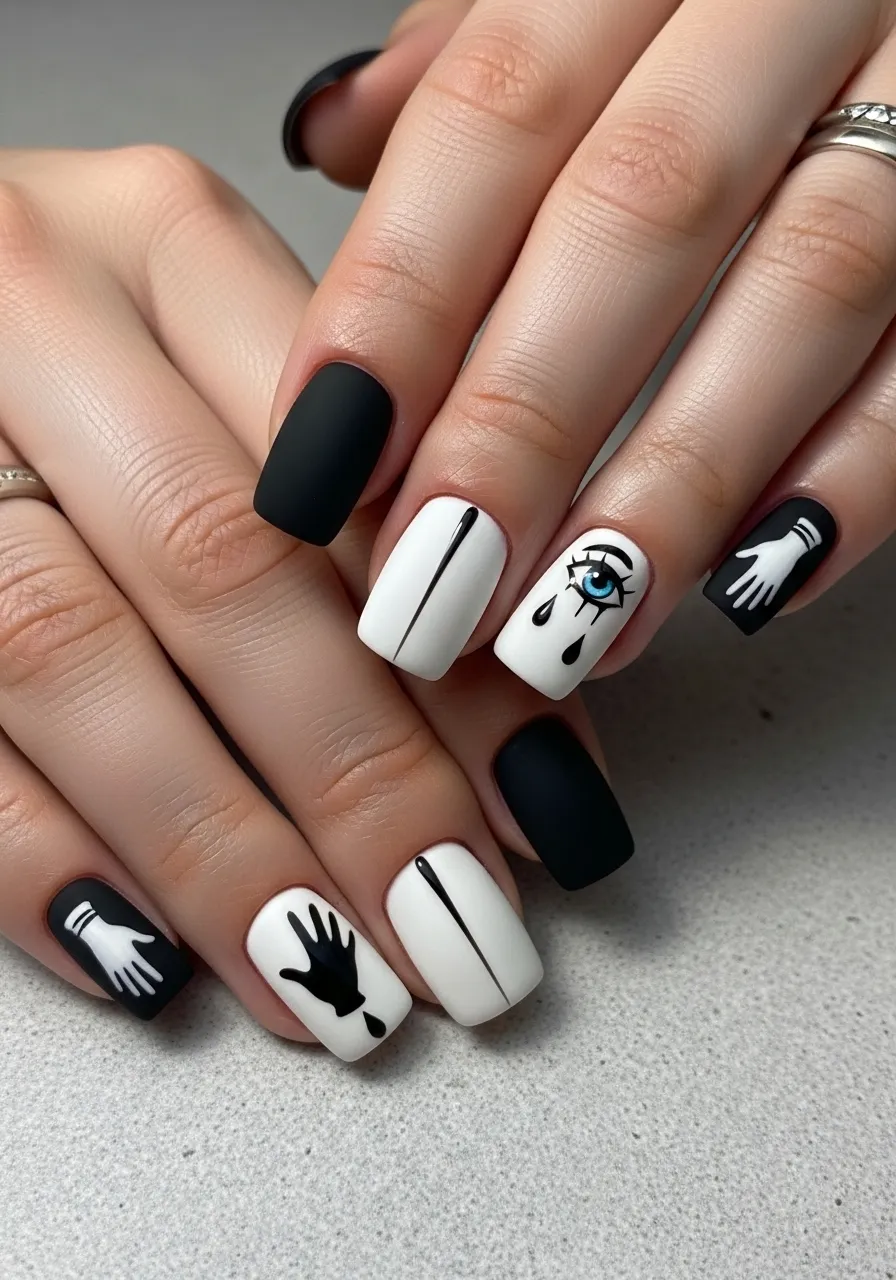
Mime clown aesthetics are quieter and more theatrical than full horror clown looks, but they carry a deeply unsettling quality all their own.
Alternate nails between matte black and stark white polish. This high-contrast base is the foundation of the entire look.
On the white nails, use a black nail art pen to draw diamond eye shapes, teardrops, or thin arched eyebrows. These face makeup details reference classic mime facial painting.
On the black nails, draw small white gloved hands using a fine brush loaded with white polish. The miniature gloved hands are one of the most effective details in this design.
Add a thin white stripe down the center of each black nail to mimic the classic vertical stripe of mime costume makeup.
This look is very graphic and photographs extremely well in black and white or color. It has an editorial quality that stands out from more common nail designs.
The entire design uses only black and white polish plus a matte topcoat. Three products total, all available at any beauty supply or drugstore.
Despite the minimal color palette, this design reads as highly skilled and intentional. The mime reference adds a theatrical layer that people find both artistic and quietly creepy.
13. Jester Hat Geometric Nail Art
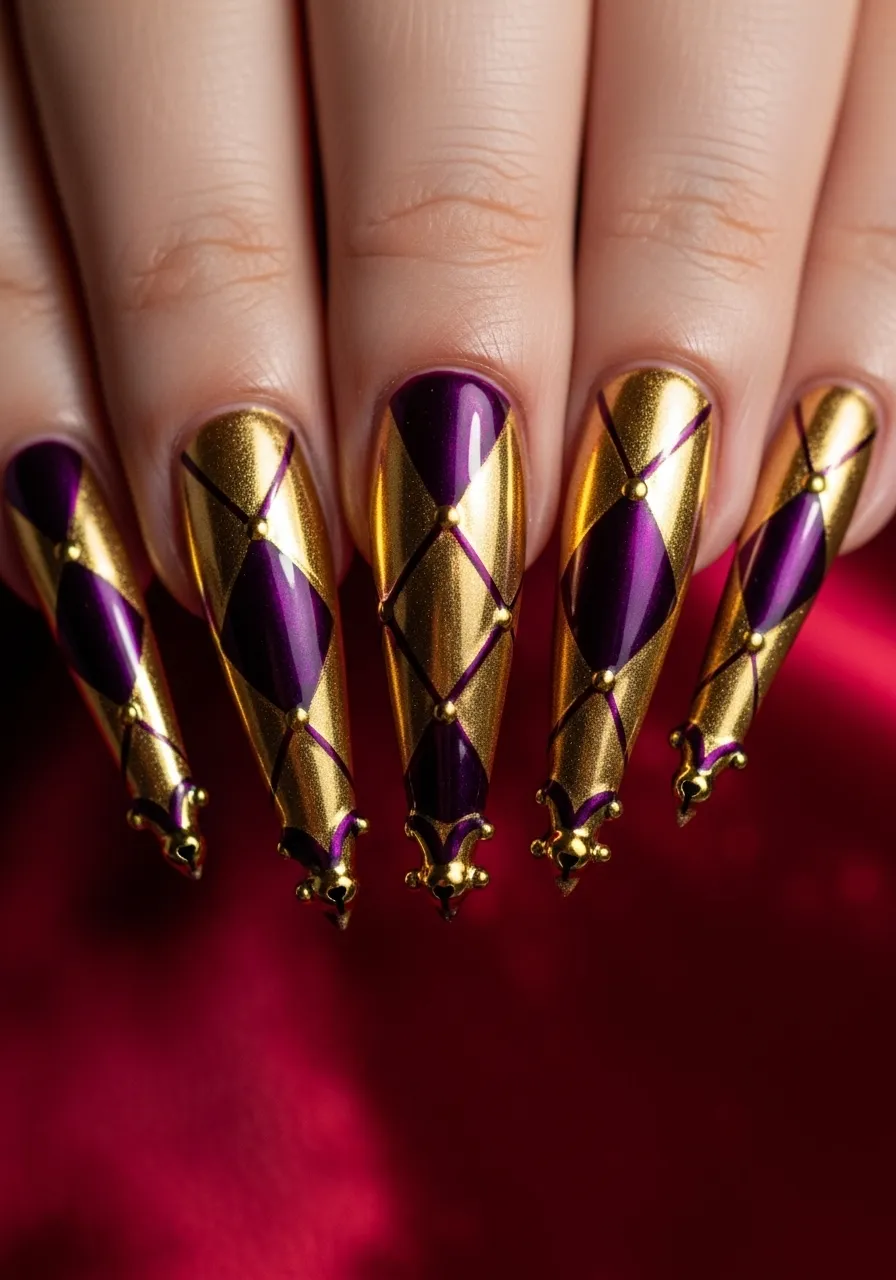
Jester nails take the harlequin aesthetic and push it into more theatrical villain territory. Deep jewel tones make this look feel luxurious and threatening.
Choose two rich contrasting colors. Deep purple and gold work perfectly. So does emerald green and black, or crimson and silver.
Divide each nail diagonally in half. Paint one side the first color and the other side the second. Use tape or a steady hand for a clean dividing line.
At the nail tip, add a tiny painted bell shape in a metallic color. This single detail signals jester costume without needing any additional elements.
You can scatter tiny diamond shapes across the nail surface within each color section to add extra visual texture.
Long stiletto nails suit this design best because the pointed tip naturally mirrors the shape of a jester hat. However, it works on coffin and oval shapes too.
For the metallic sections, use a chrome nail powder or a metallic polish. Chrome powder pressed over a gel base gives a mirror effect that looks incredibly high-end.
If budget is a concern, a basic metallic polish from a drugstore delivers a strong enough shine effect for this design at a fraction of the cost.
14. Creepy Circus Tent Nails
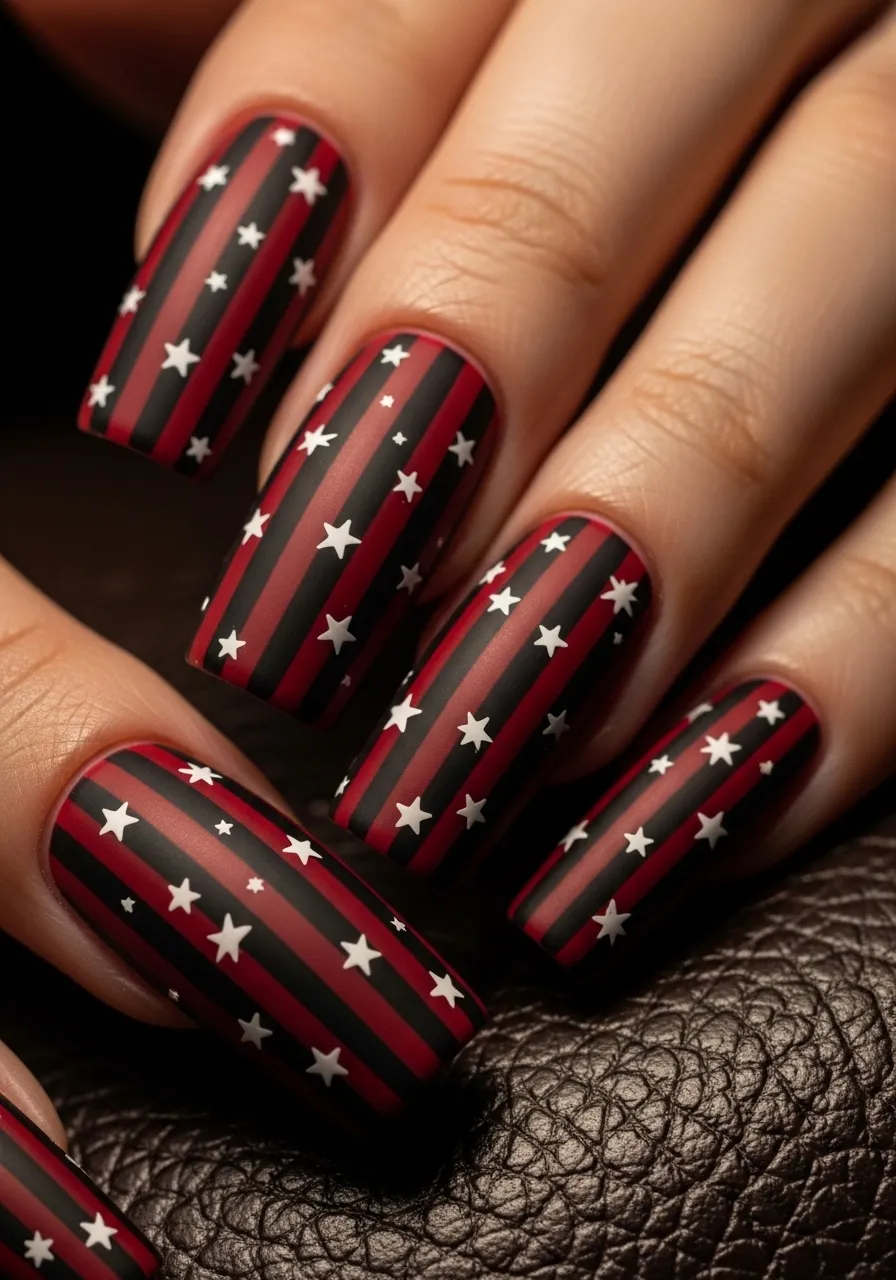
Circus tent stripes in dark colors create a moody, ominous version of classic carnival imagery. This is the night circus aesthetic in nail form.
Use dark red or deep crimson as your stripe color and true black as the base or alternating stripe. Unlike bright carnival stripes, these dark tones read as threatening.
Apply stripe tape over a dry black base. Paint the exposed sections in dark red. Peel the tape carefully while the polish is still slightly wet.
The result is a set of clean vertical stripes that look exactly like vintage circus tent fabric.
On two accent nails, skip the stripes and paint small scattered stars using a dotting tool and gold or white polish. This variation prevents the look from feeling too repetitive.
Seal with a matte topcoat. Matte finish makes the dark stripes look like heavy canvas fabric rather than shiny nail polish.
This is a great design for Halloween costumes referencing circus or carnival themes. It works as a standalone nail look or as part of a full clown or ringmaster costume.
The cost is minimal. Dark red and black polishes are among the most commonly stocked colors at any drugstore or beauty supply.
15. Funhouse Mirror Distorted Face Nails
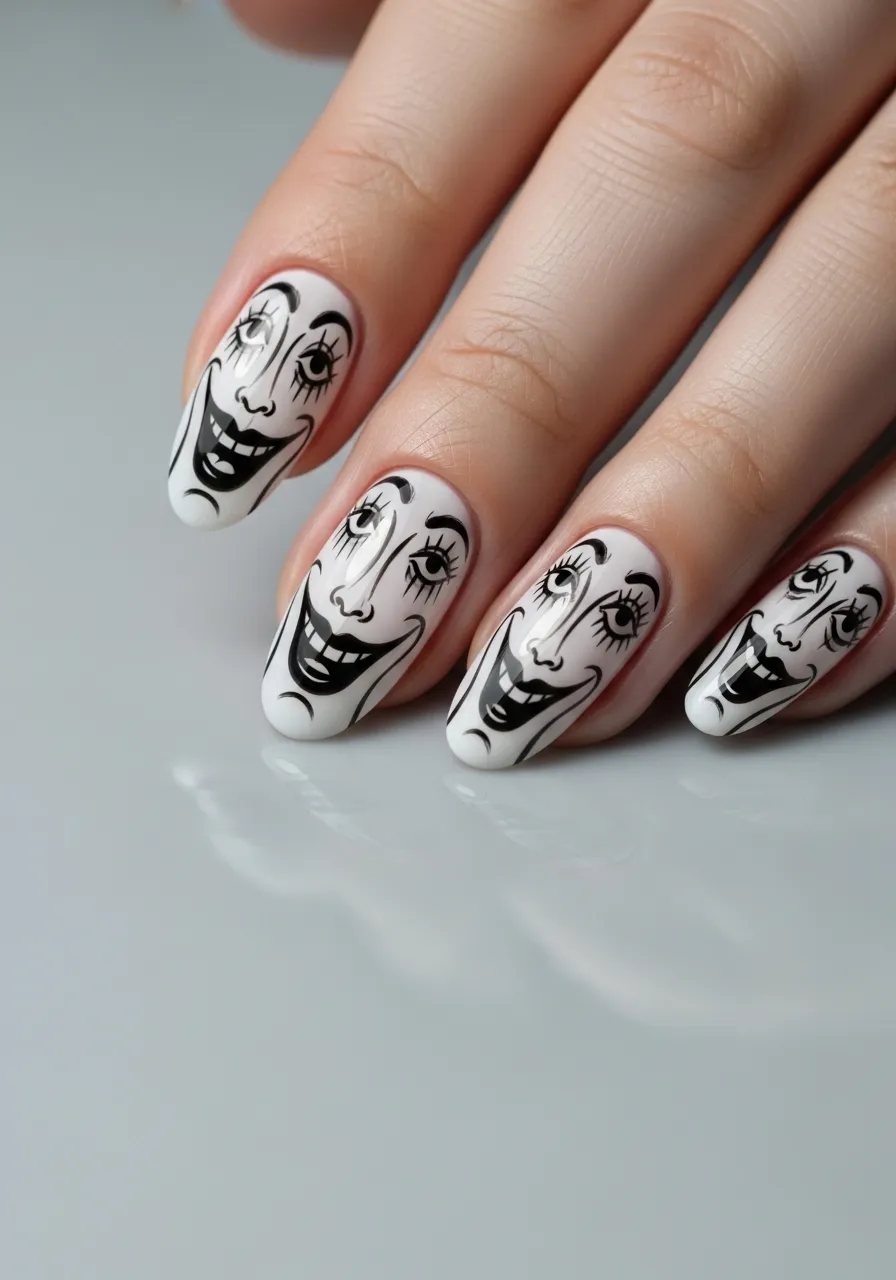
Funhouse mirror nails take the clown face concept and distort it into pure abstraction. The faces appear stretched, compressed, or warped as if seen through a carnival mirror.
Start with a white or pale base. Use a thin black nail art brush to draw face outlines that are deliberately wrong in their proportions.
Stretch the eyes into long horizontal ovals. Make the mouth too wide or too narrow. Draw a nose placed too high or too low on the face.
The distortion does not need to be precise or planned. That spontaneous wrongness is exactly what makes this design work.
Each nail should show a different level of distortion. One nail can show a relatively normal face, another can be maximally warped and stretched.
This design references the long tradition of funhouse carnival mirrors and creates a set of nails that looks like a horror art installation.
Use a single thin brush and black polish over a white base. Nothing else is needed. The skill here is in the intentional imperfection of each face drawing.
This is a good project for nail artists who want to push their freehand painting skills. There are no rules. The worse the proportions look by conventional standards, the better they work for this design.
Finish with a glossy topcoat to give the black line work extra definition.
Clown nails are one of the most expressive categories in nail art. They let you combine color theory, illustration, horror aesthetics, and costume history into something you wear on your fingertips. Whether you chose a single teardrop detail or committed to full hand-painted clown portraits, you now have 15 directions to take your next nail look. The best part is that most of these designs cost very little to achieve at home. A few nail art pens, some striping tape, and drugstore polish are genuinely all you need for most of them. Start with the simplest design that appeals to you and build from there. Your nails are a small canvas, but as these ideas show, small canvases can hold genuinely terrifying things.