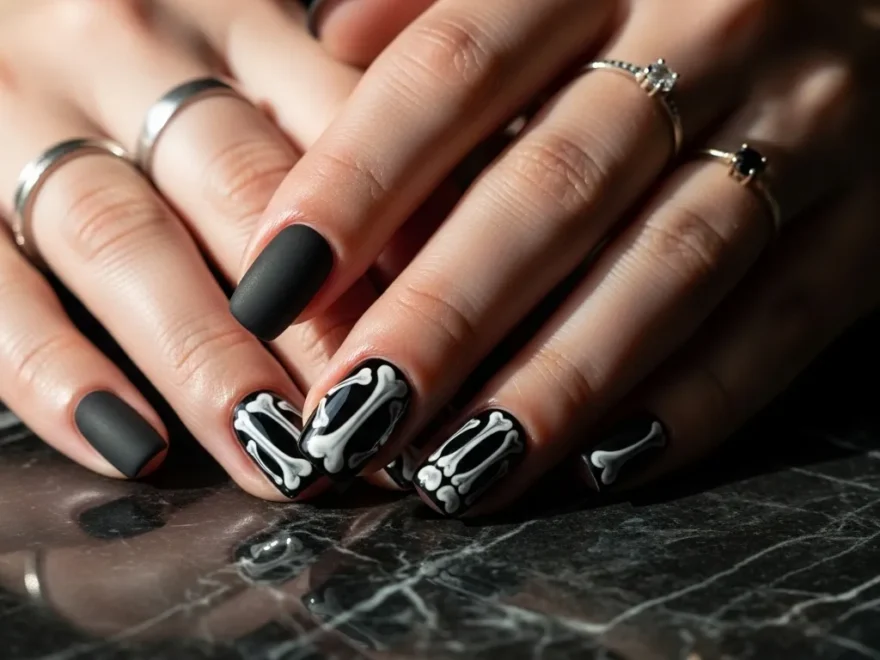
Skeleton nail ideas have moved way beyond Halloween. They show up on runways, at weddings, and on everyday nails all year long. The look can be bold or subtle, dramatic or minimal. Whether you love gothic aesthetics or just want something different, skeleton nail art gives you endless ways to express yourself. From simple bone outlines to full skull scenes, there is a skeleton design for every skill level and budget. You do not need a salon to pull these off. A steady hand, a thin brush, and a little patience go a long way. This guide walks you through 17 stunning skeleton nail ideas with tips to make each one work for you. If you’re also exploring Skull nails ideas, bold gothic designs, detailed hand-painted skulls, and edgy black-and-white contrasts can help you create a striking manicure that feels both dramatic and stylish.
1. Classic White Bone Outlines on Black
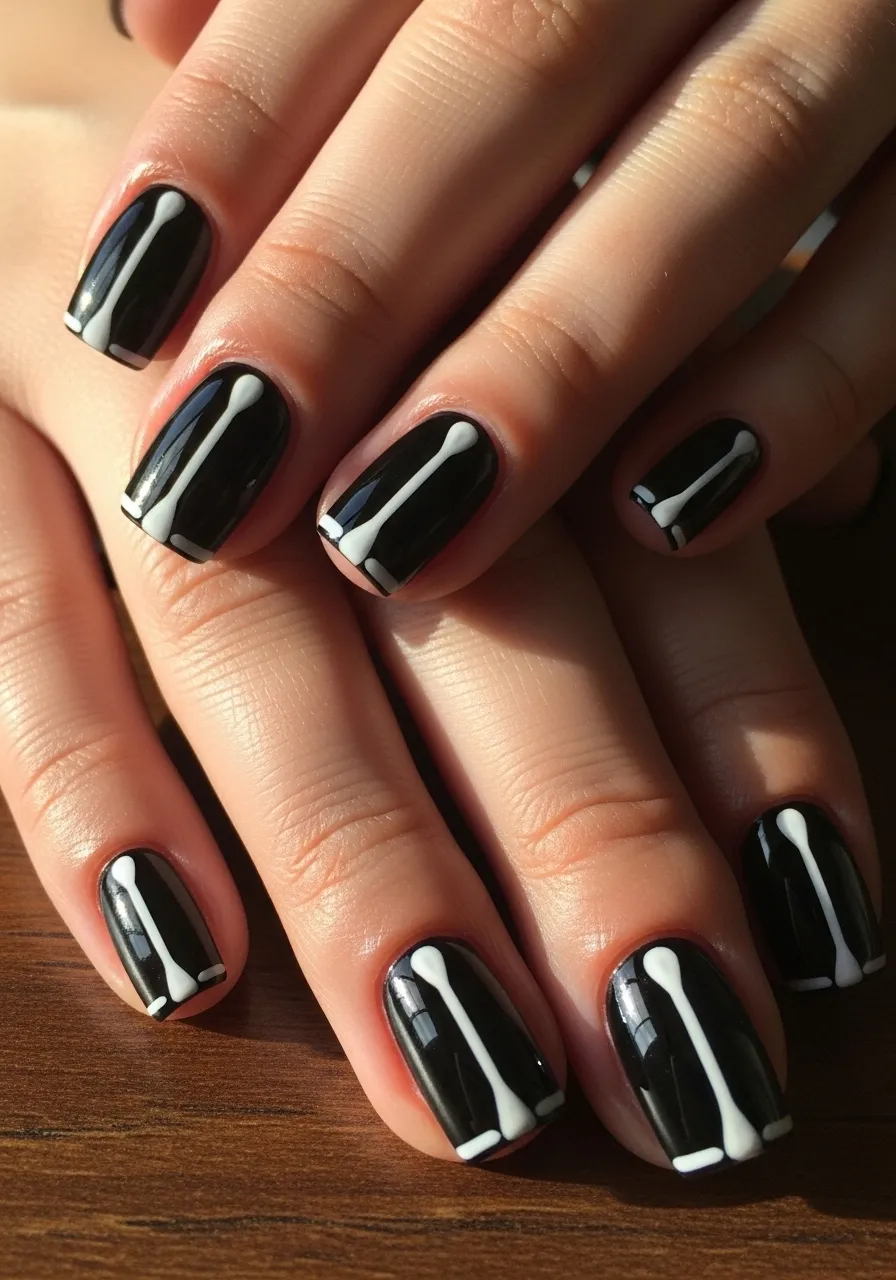
This is the original skeleton nail look. It is clean, simple, and endlessly wearable.
Start with two coats of matte or glossy black polish. Let it dry completely. Then use a thin nail art brush or a toothpick dipped in white polish to draw small oval joints at the knuckle area of each nail. Connect them with short lines to mimic finger bones.
You do not need perfect lines. Slightly imperfect strokes actually look more organic and hand-drawn.
Budget tip: A thin nail art brush from a dollar store works just as well as expensive tools for this design. White nail polish from any drugstore brand is perfect.
Seal everything with a clear topcoat to protect your work. This design lasts well because it is minimal and not prone to chipping at the edges.
This look works on short nails and long nails equally. It reads as edgy but polished at the same time. Pair it with all-black outfits or use it to add some contrast to a colorful look. It is a crowd-pleaser that never goes out of style.
2. Nude Base with Skeleton Overlay
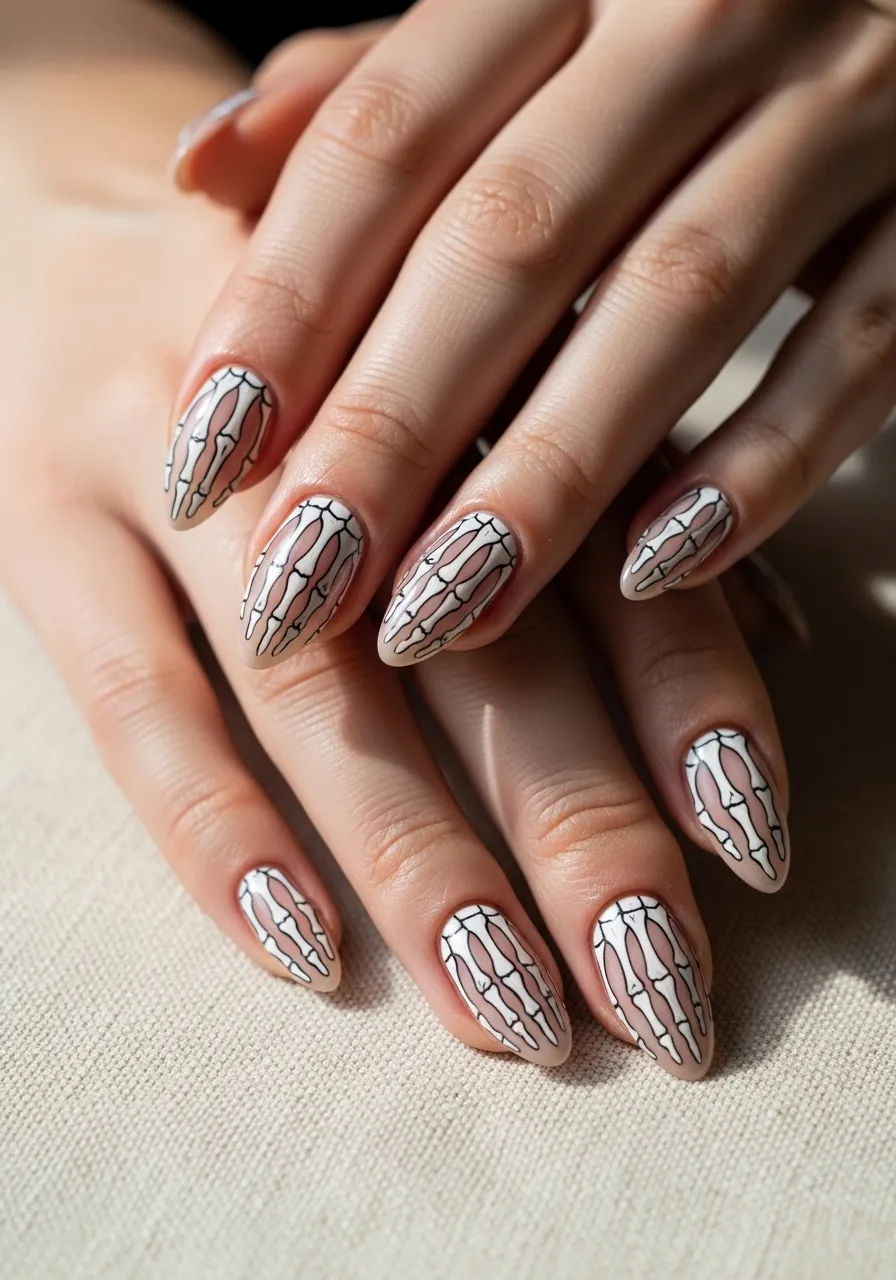
This design feels softer and more wearable than black-based skeleton nails.
Choose a nude or blush base color that matches your skin tone closely. This makes the skeleton overlay look like it is sitting right on your skin, almost like an X-ray of your hand.
Use white or light grey polish to draw bone structures. Focus on the phalanges (finger bone shapes) running vertically across each nail. Add small circles at each joint for a realistic feel.
This version looks especially striking on longer nails where you have more surface area to work with.
DIY tip: Print out a simple skeleton hand image from the internet. Use it as a reference while painting. You do not need to be an artist to follow basic bone shapes.
The nude base makes this design work for offices, events, and casual outings. It is subtle enough to not feel costumey but detailed enough to turn heads.
Finish with a matte topcoat for an understated editorial vibe. Or go glossy if you want the lines to really pop. Either way, this version of skeleton nails feels wearable every single day of the year.
3. Glow-in-the-Dark Skeleton Nails
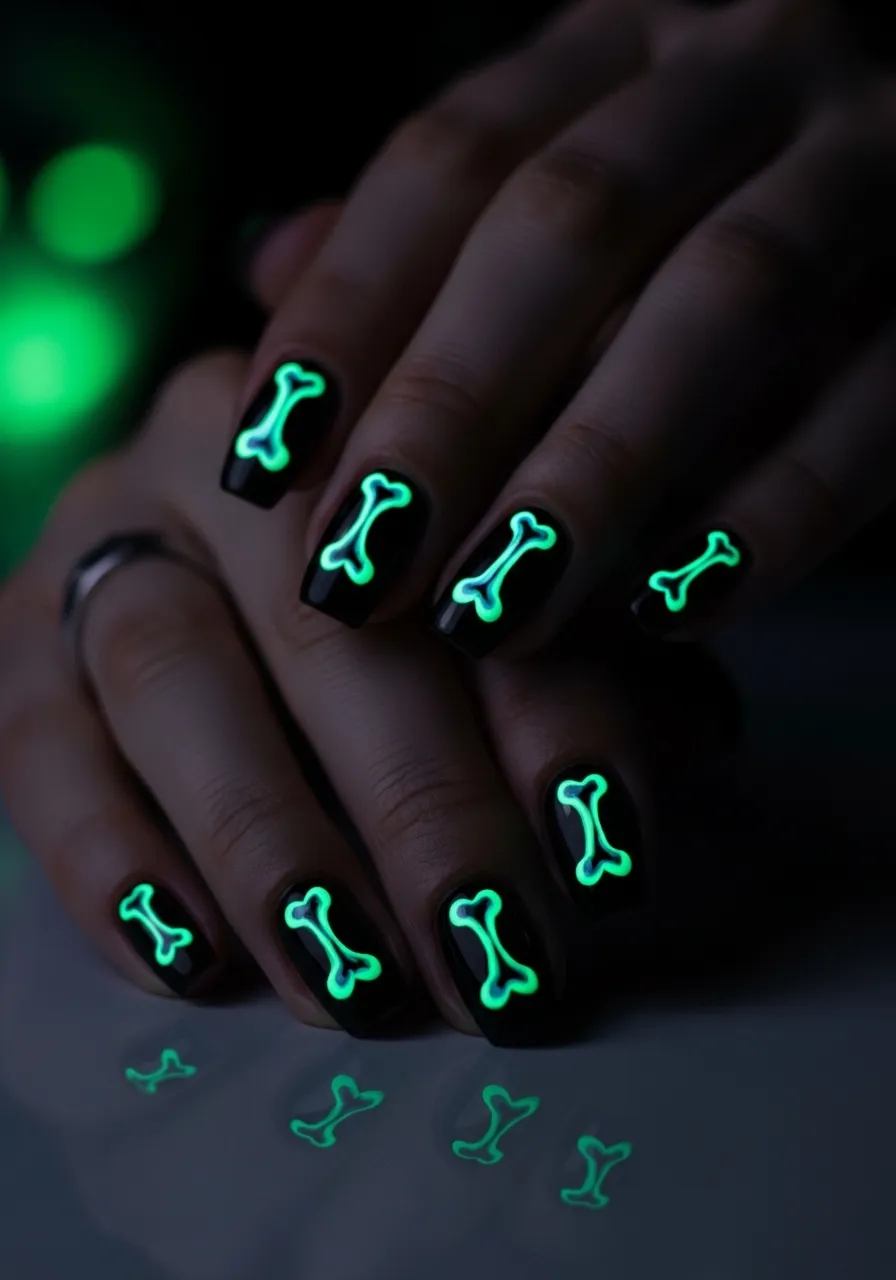
Glow-in-the-dark skeleton nails are a game changer for nighttime events and Halloween parties.
Start with a black or dark purple base. Apply a glow-in-the-dark nail polish or gel in white or green tones on top. Draw your skeleton design using the glow polish as your main color. Under normal light, it looks like a standard skeleton nail. In the dark, it lights up.
You can find glow-in-the-dark nail polish at most beauty supply stores or online for under $10.
Pro tip: Apply two layers of the glow polish to make the luminous effect stronger. The thicker the layer, the longer and brighter it glows.
This look works perfectly for concert-goers, rave attendees, or anyone who loves dramatic nail art.
During the day, it reads as a standard skeleton design. At night, it becomes a full-on statement. The contrast is what makes it so exciting.
Keep the rest of your nails simple and let one or two accent nails do all the glow work if you want a more restrained version. This is one of those designs that photographs incredibly well and always surprises people when the lights go down.
4. French Tip Skeleton Nails
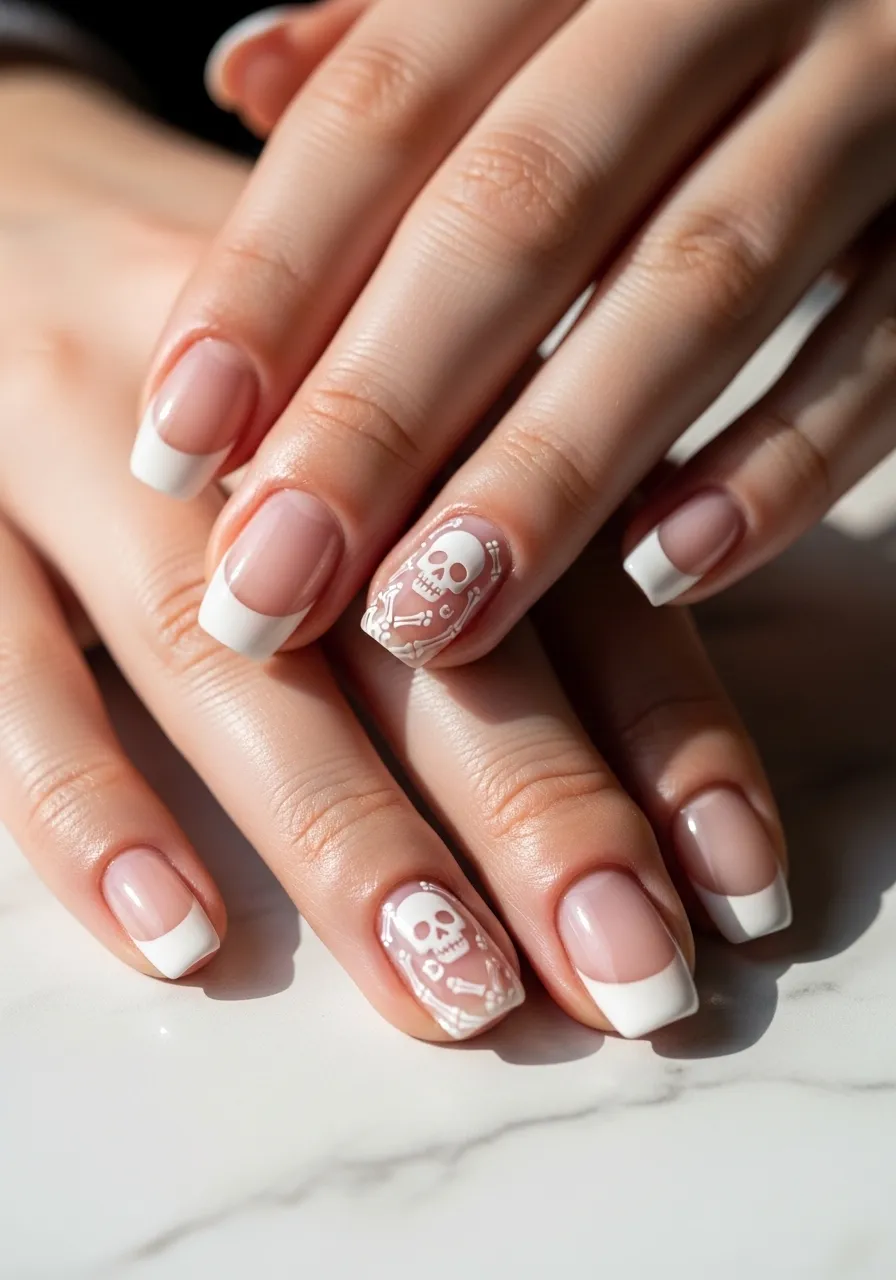
The French tip gets a gothic makeover with this skeleton version.
Keep the classic sheer or nude base of a traditional French manicure. Instead of a plain white tip, paint small skull faces or bone details along the tip line. Use a thin detail brush for precision.
You can also extend the bone designs slightly down the nail for a more dramatic effect.
Budget tip: Use white nail art pens instead of a brush and polish. They cost around $3 to $6 and give you more control on the small tip area.
This design is beloved because it looks refined from a distance. People who do not look closely just see a classic French manicure. Those who do look closely get a delightful surprise.
It works beautifully for events where you want to look polished but still show some personality. Weddings, corporate settings, and dinner parties are all great fits for this style.
Try adding a tiny gemstone inside each skull eye socket for a bit of sparkle. It takes the design from cool to absolutely stunning with minimal extra effort. Short and long nails both carry this look well.
5. Half-Moon Skeleton Design

The half-moon design is a nail art classic. Add skeleton details and it becomes something truly special.
Paint your nails in black or deep burgundy. Leave the lunula (the small crescent at the base of each nail) unpainted or paint it in white. From that white crescent, extend thin bone lines upward along the nail.
This creates the illusion that the skeleton is emerging from beneath your nail. It is a subtle but striking optical effect.
You can use reinforcement stickers (the small ring stickers used in office supplies) to mask the half-moon area while you paint. Peel them off once the base coat dries for a perfectly clean crescent shape.
Cost saver: Those office reinforcement stickers cost almost nothing and make nail masking incredibly easy and precise.
This look photographs beautifully and works on any nail length. Medium or longer nails give you more room to extend the bone lines, but even short nails carry the half-moon accent elegantly.
Pair with a dark outfit and minimal jewelry for the full effect. The design is sophisticated enough to wear to formal events while still carrying that unmistakable edge that skeleton nail lovers appreciate.
6. Skull Accent Nail
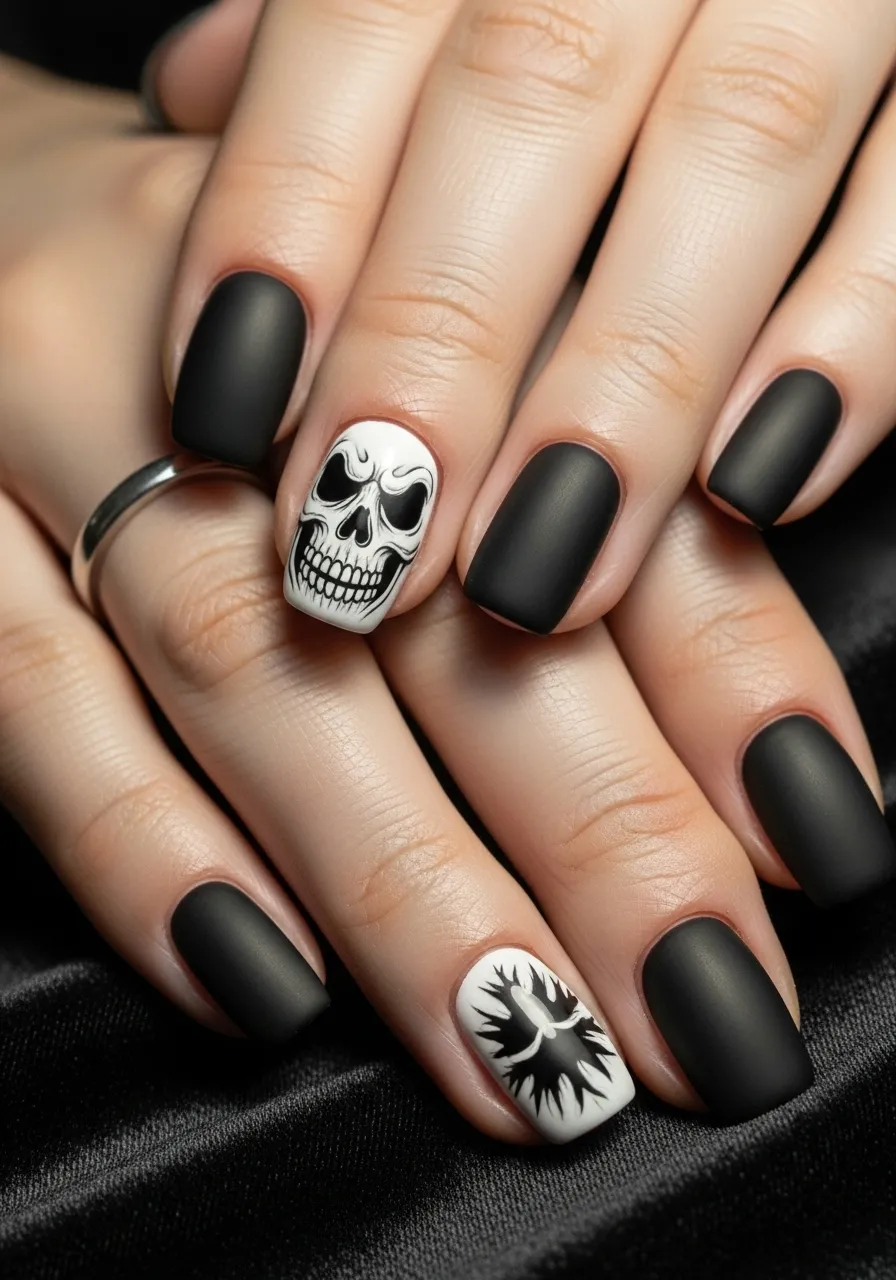
Not every nail needs a full skeleton. Sometimes one accent nail does all the heavy lifting.
Paint all your nails in a solid color like black, deep red, or forest green. On one nail (the ring finger works best), paint a detailed skull face. Include hollow eye sockets, a nose cavity, and a grinning row of teeth.
This is perfect for beginners. You only need to nail one design instead of ten.
Use a dotting tool for the eye sockets. A thin brush handles the teeth and jaw details. If painting freehand feels too hard, use a skull nail sticker on the accent nail and solid polish on the rest.
Budget tip: Nail art stickers with skull designs are widely available online for $1 to $3 per sheet and look surprisingly realistic.
The accent nail approach lets you wear skeleton art in a low-key way. It does not feel like a costume. It feels like a stylish detail.
You can also do two accent nails (ring fingers on both hands) for a balanced look. Add a rhinestone in one eye socket to make it feel more glamorous than gothic. This design adapts to any season and any occasion with the right color choices.
7. Watercolor Skeleton Nails
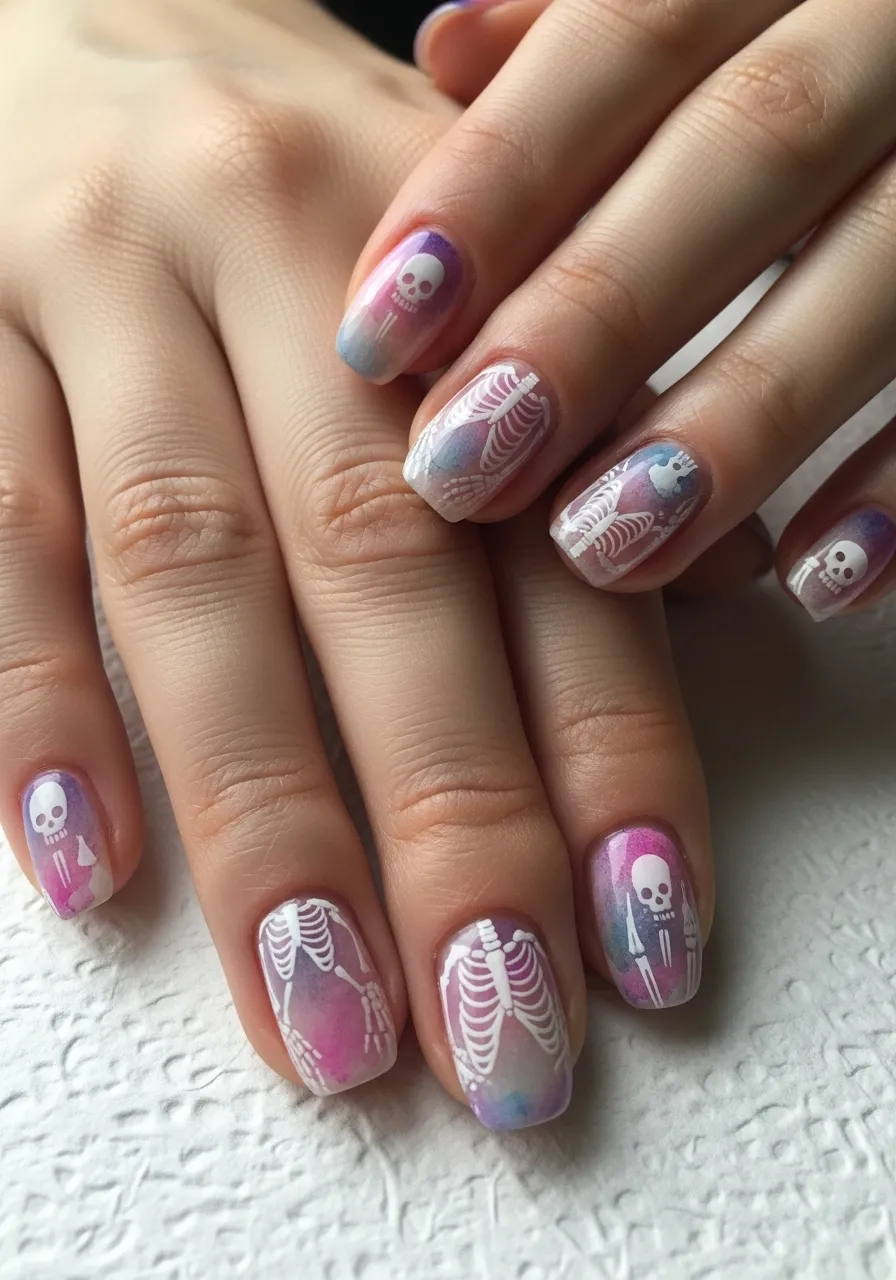
Watercolor skeleton nails are for those who love art and unexpected combinations.
Use pastel or watercolor-effect polishes in soft colors like lavender, blush, or pale blue as your base. While the base is slightly tacky (not fully dry), drop small amounts of a slightly darker shade to create that washed, bleeding color effect. Let it dry. Then paint white or light grey skeleton details on top.
The result looks like someone painted bones over a watercolor painting. It is stunning and completely unique.
DIY tip: You can mimic watercolor effects using regular polish thinned slightly with nail polish remover. Apply it loosely and unevenly for that organic look.
This design bridges spooky and feminine in the best way. It feels artistic rather than scary. People who would normally avoid skeleton nails are often drawn to this version.
It works especially well in spring and summer when darker skeleton nails might feel too heavy. The pastel base keeps it light while the skeleton details keep it interesting.
Finish with a glossy topcoat to make the colors look deeper and more saturated. This is a design that looks like it came from a high-end nail salon but can absolutely be done at home with a little creativity.
8. Gold Foil Skeleton Nails
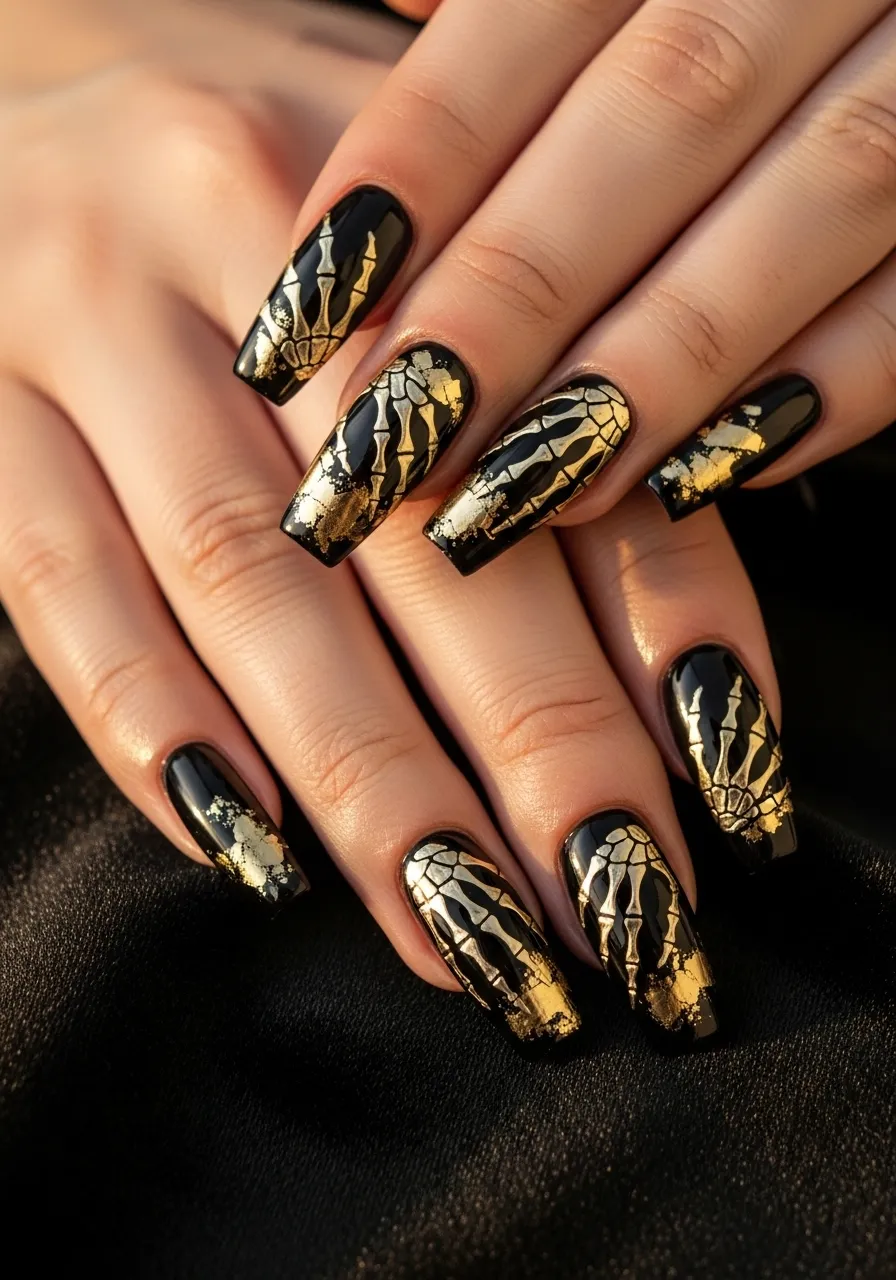
Gold foil turns skeleton nails into something luxurious.
Apply a matte or glossy black base. Once dry, use nail foil glue (or a peel-and-stick foil transfer) to add gold metallic accents. Draw skeleton bones using a thin brush dipped in gold chrome powder mixed with a gel top coat. Alternatively, use gold foil transfers in bone and skull shapes.
The combination of black and gold has a high-fashion feel that goes far beyond Halloween.
Budget option: Nail foil kits with adhesive are available for under $10 online. You get sheets of metallic foil you can cut into shapes or apply as-is for an abstract effect.
This look photographs beautifully under warm lighting. The metallic shimmer catches the light in ways that regular polish cannot replicate.
Wear this to parties, concerts, or any event where you want your hands to be noticed. Long coffin or almond-shaped nails carry the gold foil detail especially well because you have more surface area to work with.
Seal the foil under a thick gel topcoat to prevent lifting or peeling. With proper sealing, this design can last up to two weeks without significant wear.
9. Red and Black Skeleton Roses
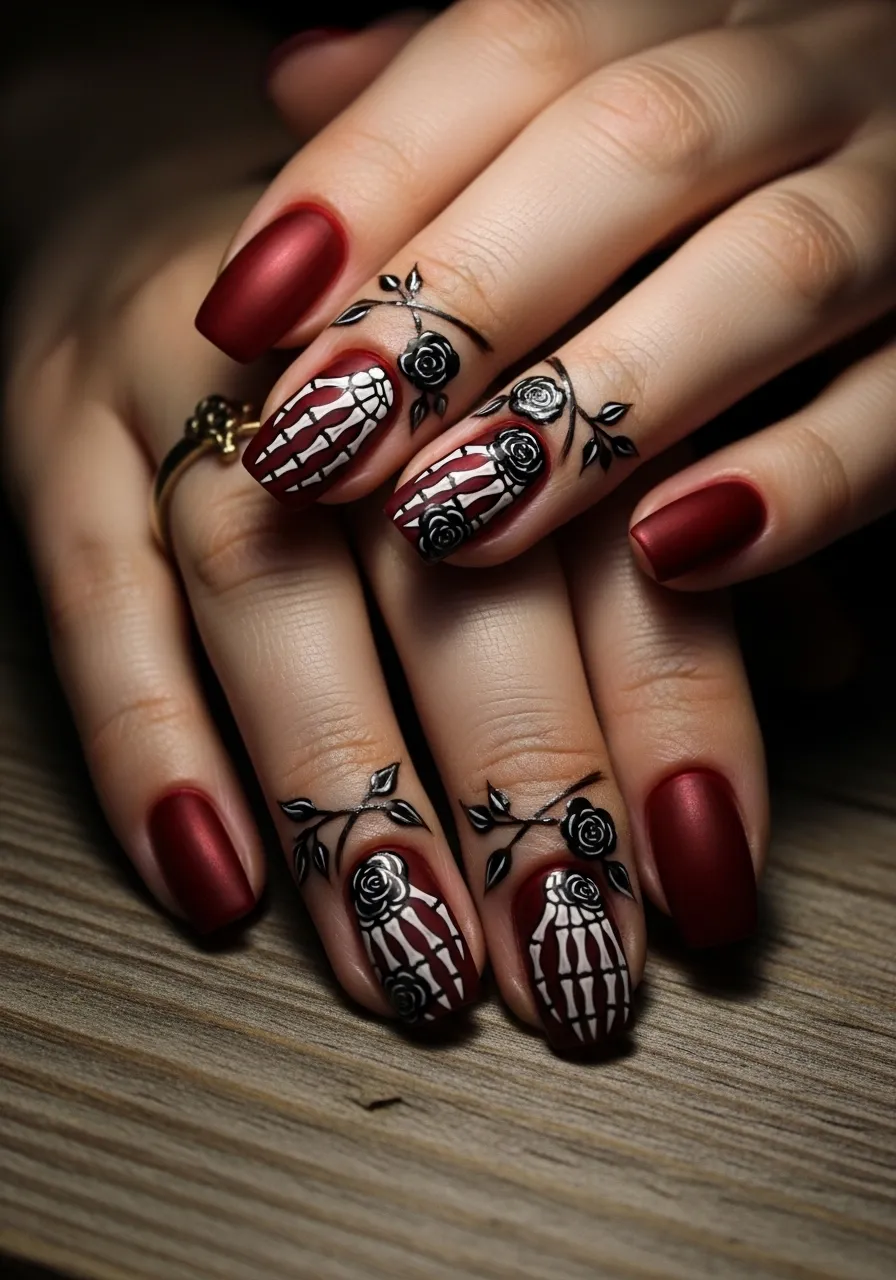
Skeleton meets florals in this romantic gothic design.
Use deep red as your base. Paint black skeleton hand or bone outlines across the nails. Add small black roses woven between the bones using a thin detailing brush. The red and black combination is inherently dramatic and romantic.
This is the nail design for lovers of dark romance aesthetics. Think Tim Burton films, gothic literature, and Victorian mourning fashion.
Beginner shortcut: Use black rose nail stickers alongside painted skeleton outlines. You do not need to paint every detail by hand. Mixing stickers and hand-painted elements still produces a gorgeous result.
The roses soften the skeleton element and make the design feel less stark. It is still clearly gothic but there is a warmth and beauty to it that plain skeleton nails do not always carry.
This works year-round. In October it feels like the perfect Halloween look. In February it becomes a dark Valentine’s Day statement. In the summer it pairs beautifully with bold red lip looks.
Long stiletto or almond nails give this design the most drama. But even short square nails look great with one rose and one bone detail per nail. The red base ties everything together effortlessly.
10. Minimalist Single Bone Nail Art
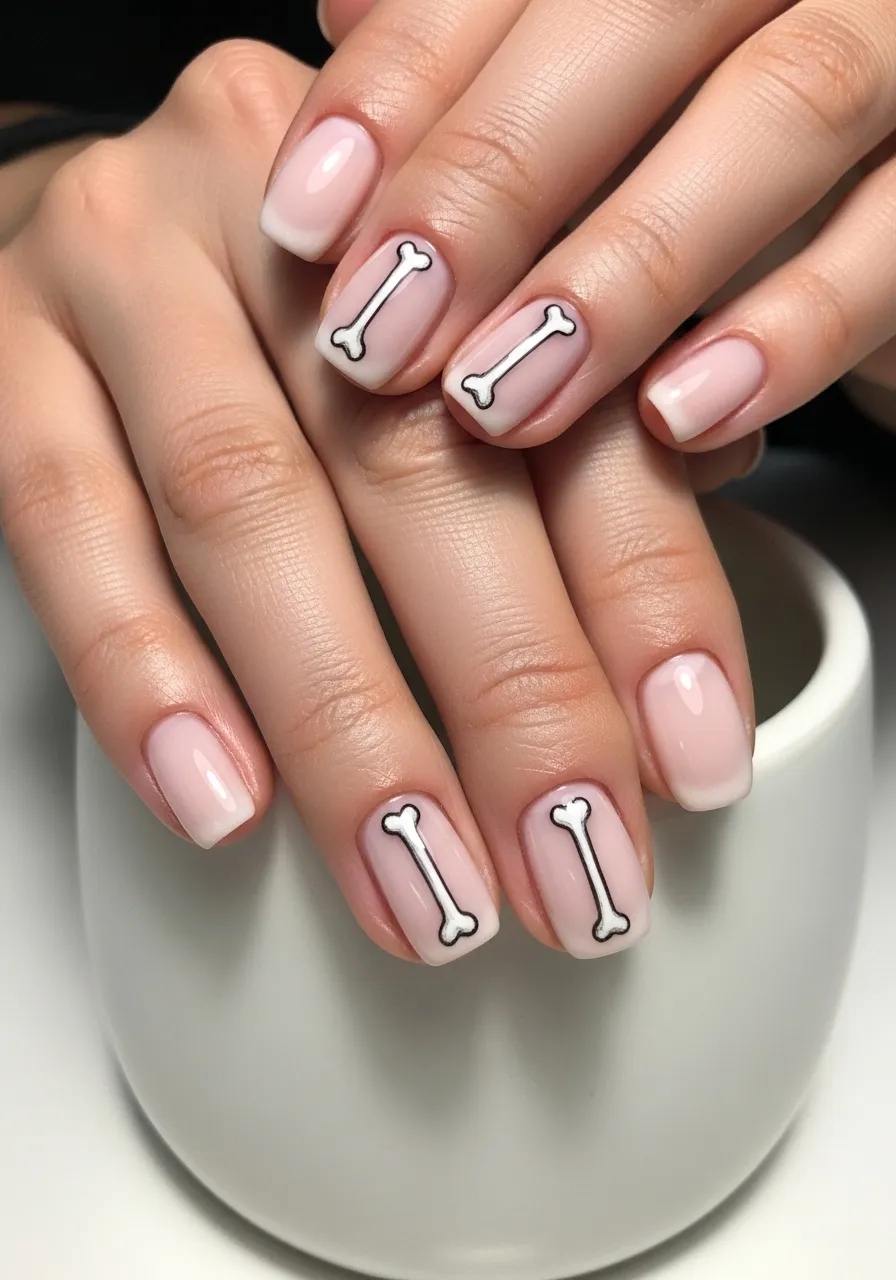
Less is more with this stripped-down skeleton design.
Choose a bare, nude, or white base. Down the center of each nail, paint a single thin bone shape. Just two small rounded ends connected by a slim center bar. That is it. No skulls, no complex layouts, just one clean bone per nail.
This is the most wearable skeleton nail idea for workplaces and everyday life.
Cost: This literally only requires two polishes. A base color and a contrasting color for the bone. Total cost under $5 if you use budget brands.
The minimalist approach is also the most accessible for beginners. One bone shape is manageable even if you have never done nail art before. Practice on paper first to get the shape right before touching your nails.
This design pairs with everything. Casual jeans, smart office wear, going-out outfits. It is skeleton nail art that does not announce itself loudly but rewards the people who notice.
Try it in different color combinations too. White bone on black. Black bone on beige. Gold bone on deep plum. Each combo feels like a completely different design despite using the same basic shape.
11. Ombre Skeleton Nails
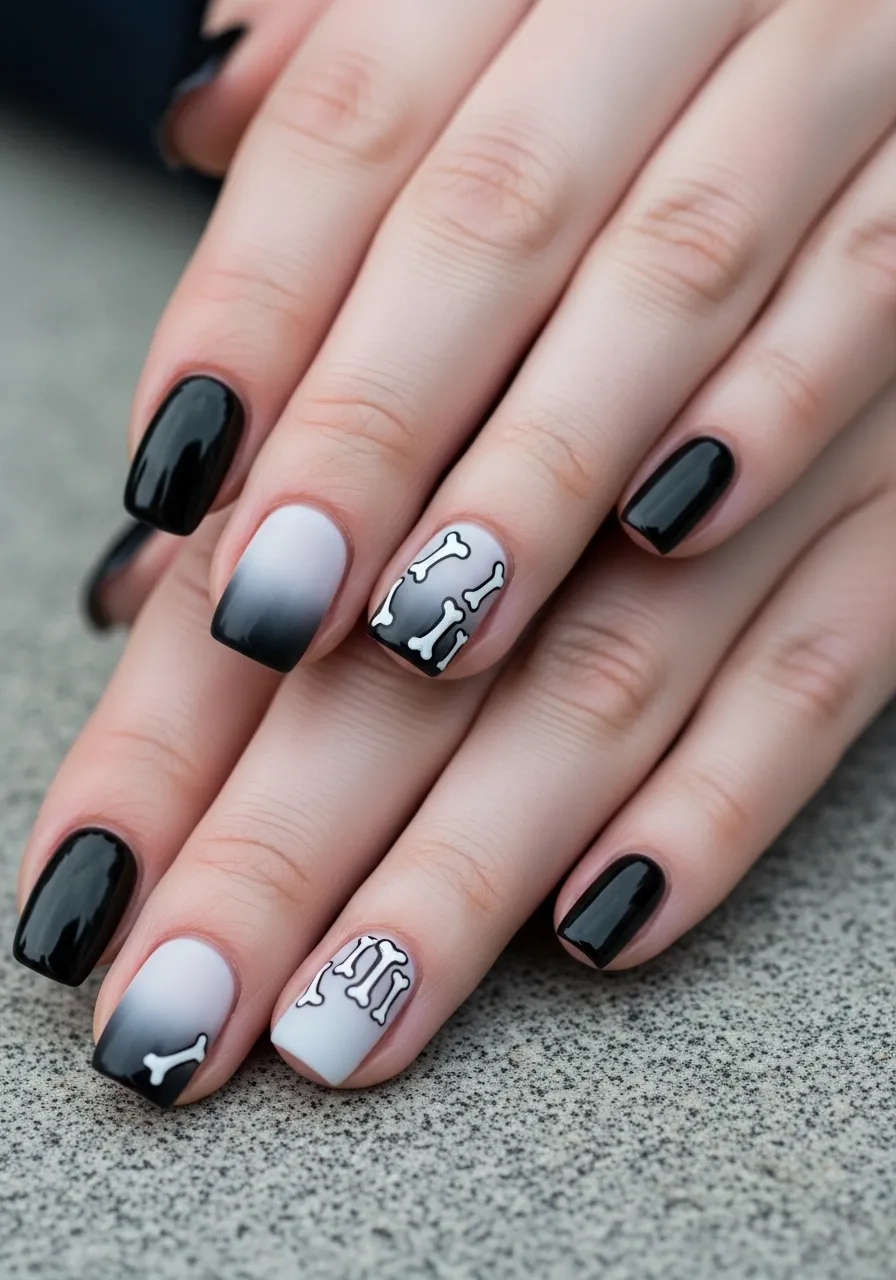
Ombre and skeleton art together make for a dramatic and dimensional look.
Create an ombre effect from black at the base fading to grey or white at the tip. You can do this using a makeup sponge. Apply both colors to the sponge and dab it onto the nail in layered passes. Clean up the edges with a small brush dipped in acetone.
Once the ombre is dry, paint skeleton details in white along the lighter portion of the nail. The bones appear to emerge from the gradient, which adds a sense of depth.
Sponge tip: Regular kitchen sponges work fine for nail ombre. Cut a small piece and use it as your gradient tool. It costs nothing if you already have sponges at home.
This design looks like it required professional skills but is very manageable at home with a bit of practice. The key is doing thin, layered passes with the sponge rather than one heavy application.
Ombre base plus skeleton overlay feels like a complete artistic composition on each nail. It is one of those designs that looks different in different lighting, sometimes showing the bones prominently and sometimes letting the gradient steal the show.
12. Pastel Rainbow Skeleton Nails
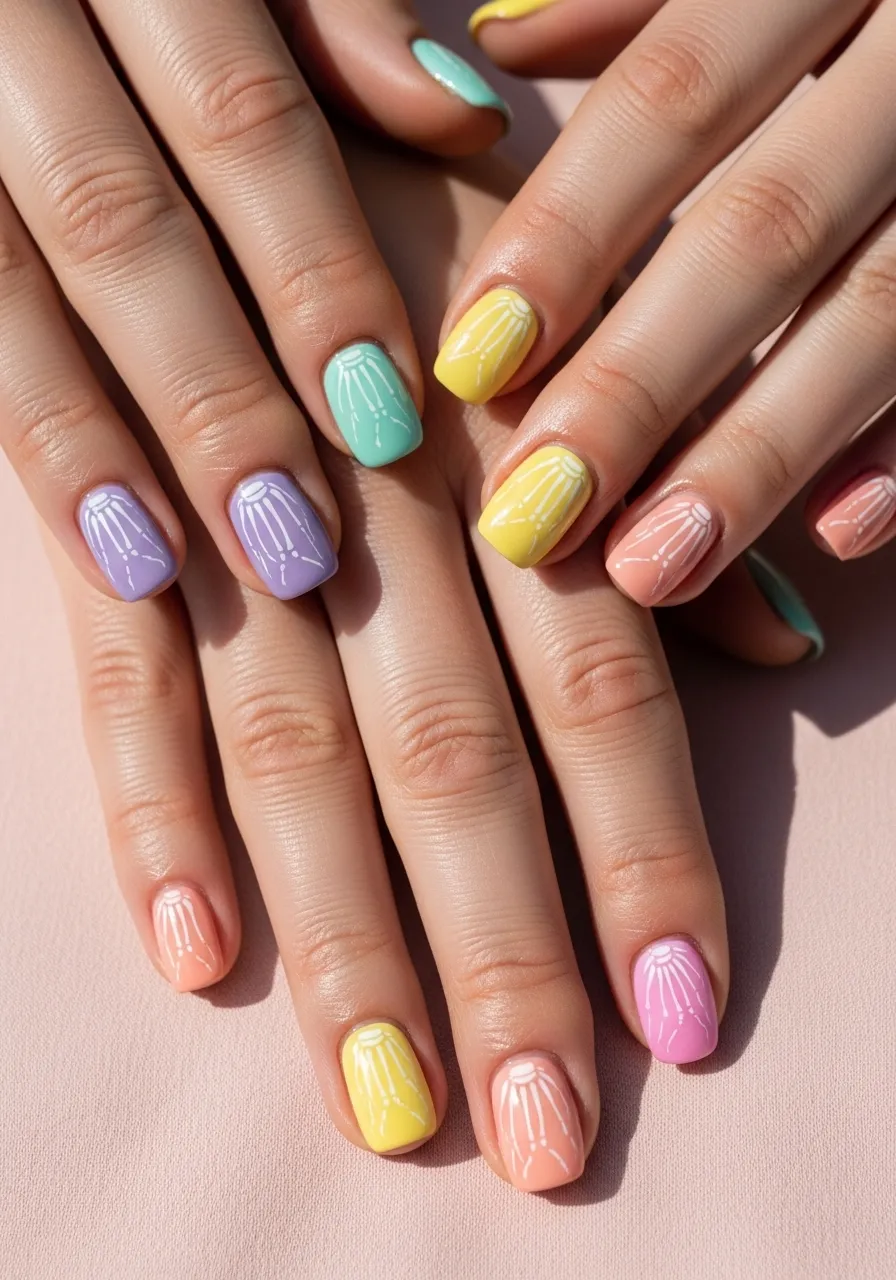
This design makes skeleton nails feel playful and fun rather than dark.
Paint each nail a different pastel color. Lavender, mint green, baby yellow, soft coral, pale blue. On top of each pastel base, paint white skeleton or bone details. The contrast between sweet pastels and skeleton imagery is what makes this so charming.
It is unexpected. It is joyful. And it is completely DIY-friendly.
Time-saving tip: Use press-on nails in pastel colors as your base. Paint or stamp skeleton designs on them before pressing them on. This gives you more control and no dry time stress.
This look is popular for spring and summer festivals. It also works for anyone who loves skeleton art but does not want the look to feel heavy or dark.
Kids and adults alike are drawn to this colorful version. It sparks conversations and compliments everywhere it goes.
You can do all ten nails or just do your dominant hand for a half-rainbow effect. Mix in one or two darker accent nails if you want to bring in a bit more edge. The pastels carry the skeleton detail beautifully at any length.
13. 3D Skeleton Nail Art
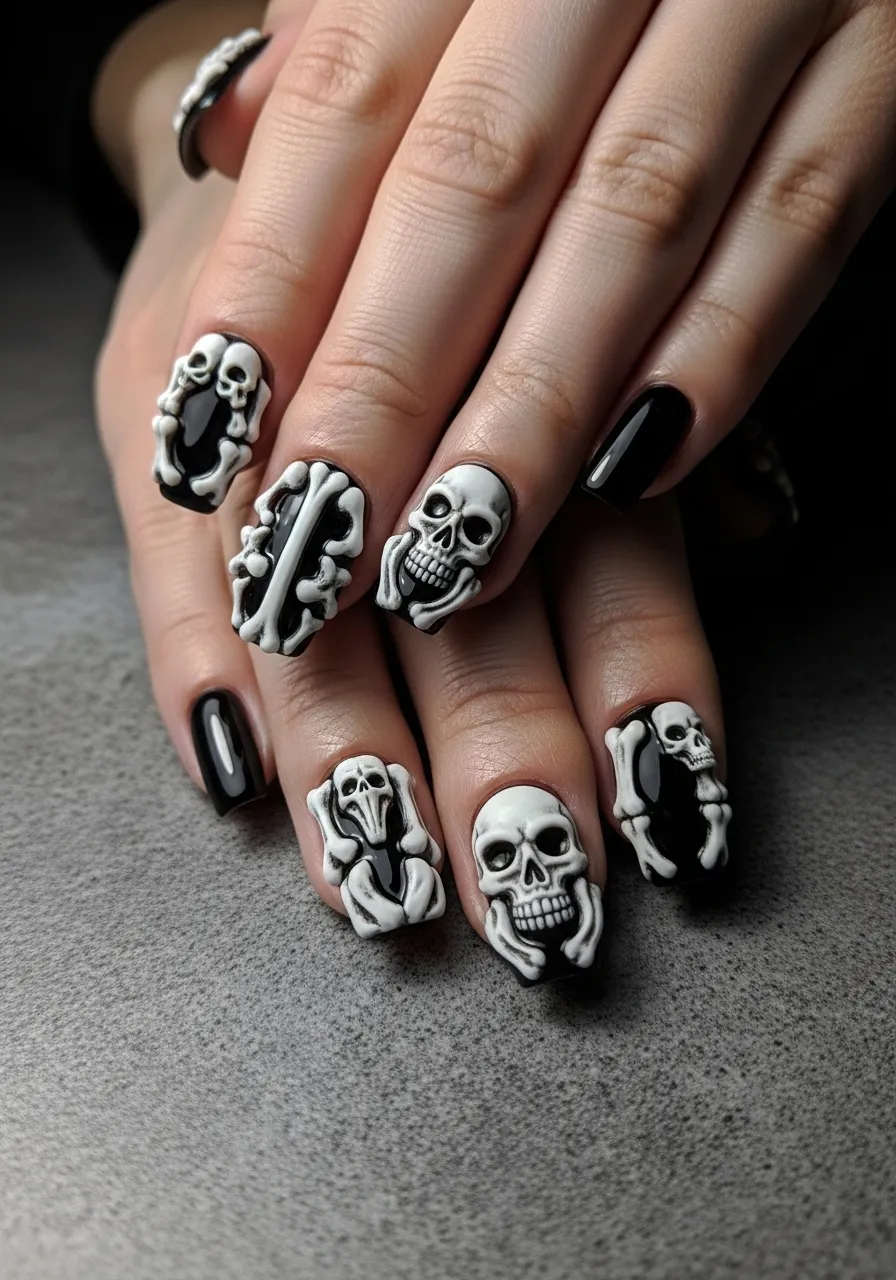
Three-dimensional skeleton nails add a sculptural element that flat designs cannot match.
Use acrylic powder or nail gel to build raised bone shapes directly on the nail surface. Small rounded knuckle shapes and thin bone ridges can be sculpted and then painted white. This creates actual texture and dimension you can feel with your fingertip.
This technique requires slightly more skill than flat nail art but is very achievable with practice.
Beginner version: Use pre-made 3D nail charms in skull and bone shapes. These are available online for just a few dollars per pack. Apply them with nail glue or gel and seal with topcoat. The result looks just as impressive as hand-sculpted work.
3D elements do catch and lift more easily than flat designs, so a thick sealing topcoat is important. Reapply topcoat every two to three days to keep charms secure.
Long nails work best for 3D skeleton art because there is more surface to anchor the elements. But accent nails in 3D on shorter hands look equally good.
This is the design you bring out when you want maximum impact. It is bold, textural, and completely unforgettable. Save it for special occasions or any day you want your hands to be a full conversation starter.
14. Skeleton Nails with Jewel Eyes
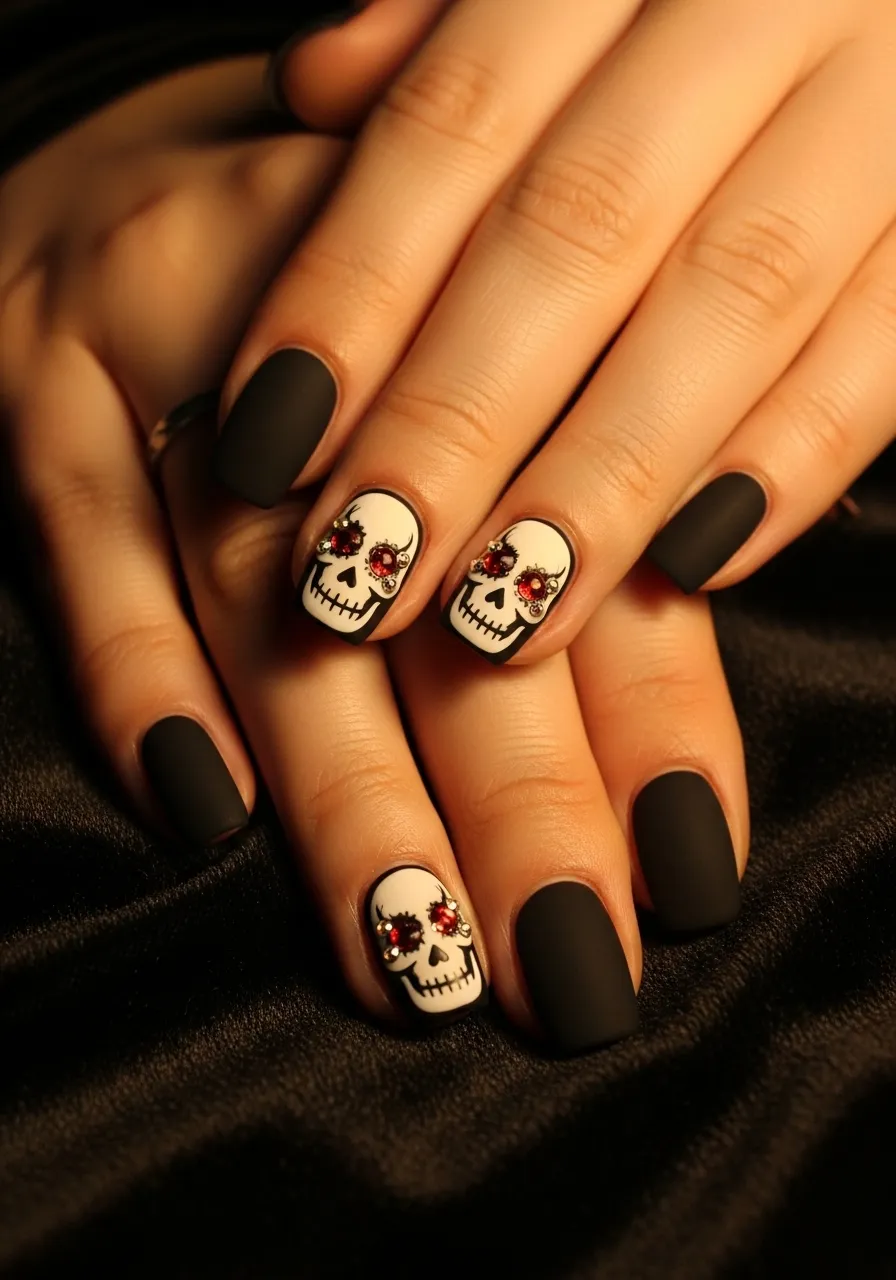
Adding rhinestones to skull eye sockets transforms skeleton nails into something glamorous.
Paint skull faces on one or more nails. Classic white on black works perfectly. Once the skull design is dry, use a dotting tool or orange stick with a tiny bit of clear nail glue to place small rhinestones inside each eye socket. Red stones feel dramatic. Clear stones feel icy. Green or purple stones give a supernatural look.
This small addition completely changes the feeling of the design from flat art to jeweled statement.
Budget source: Rhinestone packs with hundreds of mixed sizes cost $2 to $5 on most online marketplaces. One pack lasts for dozens of manicures.
The key to keeping rhinestones in place is sealing them well. Apply a generous layer of gel topcoat or a thick clear polish over and around each stone. Do not put topcoat directly on top of the stone as this can cloud its clarity.
This design works beautifully for evenings out, parties, and photoshoots. The stones catch light in ways that make your nails look like tiny works of art.
Combine this with a coffin or stiletto nail shape for maximum elegance. The combination of skull imagery and sparkling gems is the perfect definition of spooky chic.
15. Black Lace and Skeleton Nails
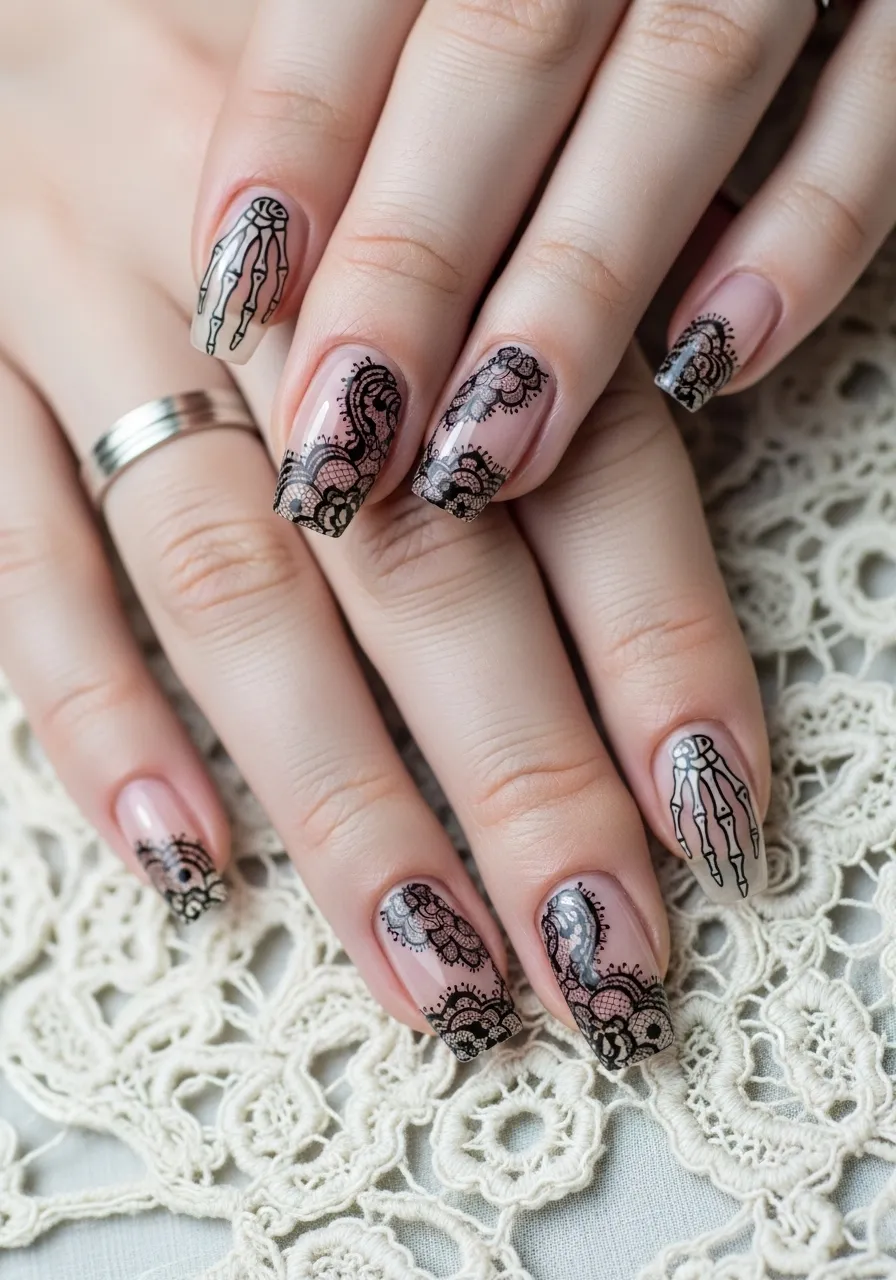
Lace patterns combined with skeleton details create a Victorian gothic masterpiece.
Use a nude or white base. With a very thin brush or a nail art pen, draw delicate lace patterns across the nails. Think fine nets, small floral shapes, and dot borders. On top of or woven through the lace, add skeleton bone outlines in black or deep grey.
The lace softens the skeleton element. The skeleton gives the lace an unexpected edge.
Easy method: Lace nail stamping plates are widely available and inexpensive. Apply stamp designs in black polish over a nude base. Then add a few skeleton details by hand or with a sticker to complete the look.
This design has a bridal gothic feel that has become increasingly popular in alternative weddings and editorial photo shoots.
It is detailed without being overwhelming. The colors are restrained, usually black on nude, so the intricacy of the pattern does the work rather than bold color contrast.
Medium to long nails show off the lace detail most effectively. But even shorter nails look refined with a partial lace design framing the outer edges. Seal with a matte topcoat to keep the delicate feel of the design intact.
16. Comic Book Style Skeleton Nails
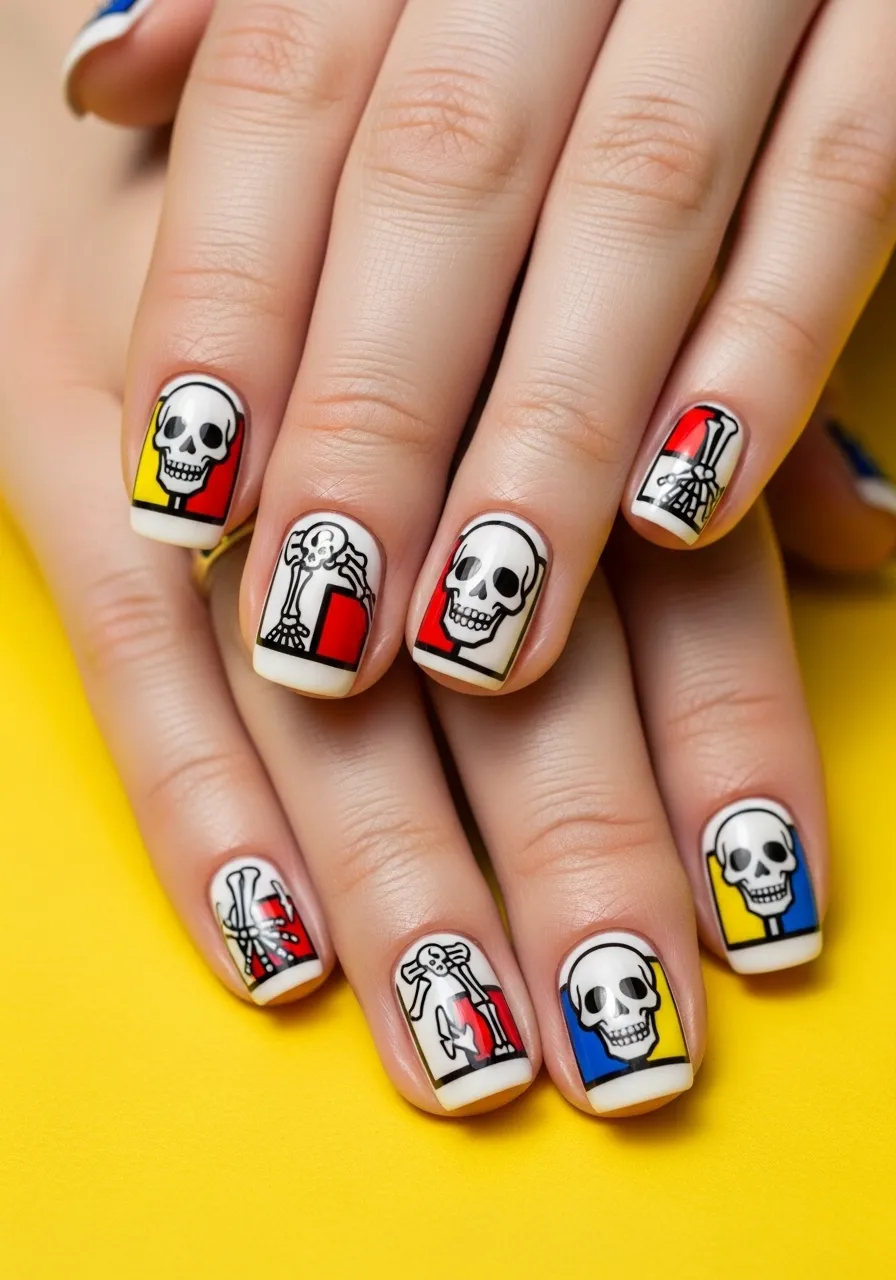
Bring skeleton nails into the world of pop art with bold comic book styling.
Use a white base. Draw skeleton faces and bone designs with bold, thick black outlines in a graphic art style. Add blocks of flat primary color inside the outlines, bright red, yellow, or blue. Add small dots in the background of each nail to mimic the classic Ben-Day dot printing style.
This interpretation is fun, graphic, and far from scary.
Nail art pen tip: Black nail art pens with a fine tip are perfect for bold outlines. They are easier to control than a brush for thick clean lines and cost around $3 to $5.
This design is great for people who love art history, comics, or street art aesthetics. It is skeleton nail art filtered through a graphic design lens.
The high-contrast black and white with pops of primary color photographs extremely well. It looks striking against both light and dark clothing.
Keep nail shapes simple, square or round, to match the clean graphic style of the design. An elaborate nail shape can compete with the bold artwork. Let the graphic patterns be the main event and keep the nail shape as simple and clean as possible.
17. Full Hand Skeleton X-Ray Nails
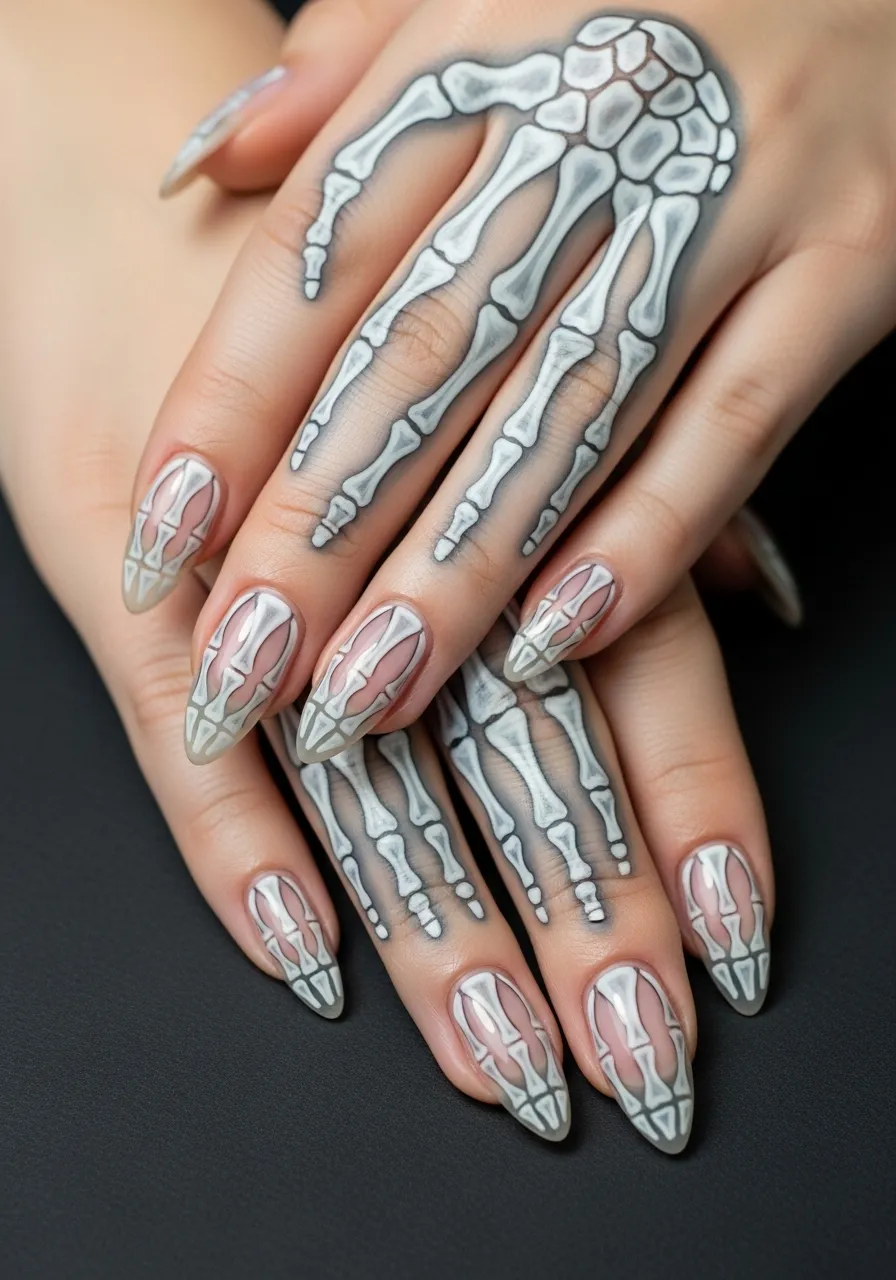
This is the most ambitious and jaw-dropping skeleton nail design of them all.
The goal is to paint a continuous skeleton hand design that spans across all ten nails when you hold your hands together. Each nail carries the portion of the skeleton that corresponds to that finger. When the hands are placed side by side, the complete skeleton hand image appears.
This requires planning before you paint. Sketch out the design on paper first. Map out which bone segment belongs on which nail.
Planning tip: Trace your hand on paper. Draw the skeleton inside the traced hand. Then cut out each finger section to use as a reference for each nail.
This design is a full commitment. It takes time and patience. But the payoff is unlike any other nail art. It looks like an actual X-ray of your hand and never fails to completely stop people in their tracks.
Use a nude or slightly translucent base to enhance the X-ray illusion. Grey and white tones work better than stark white for the bone outlines. Soft edges feel more realistic than hard lines.
This is a design worth getting done at a nail salon if DIY feels too ambitious. Show this article to your nail technician and they will understand exactly what you are after. The result is a true wearable work of art.
Make Your Skeleton Nail Ideas Last
Skeleton nails deserve to be shown off for as long as possible. A few simple habits keep your design looking sharp.
Always apply a base coat before your color. This protects your natural nail and helps polish adhere longer. After your design is complete, seal with two coats of topcoat. Reapply topcoat every two to three days to maintain shine and prevent chipping.
Keep your nails away from harsh chemicals like cleaning products without gloves. Moisture and heat break down polish faster than anything else.
Affordable topcoat recommendation: Seche Vite is a widely loved fast-dry topcoat that costs around $8 and genuinely extends wear by several days.
If a small section chips, do not repaint the entire nail. Just dab a tiny amount of matching polish over the chip, let it dry, and seal with topcoat again.
Skeleton nails are one of the most rewarding nail art styles to wear because they spark reactions from everyone who sees them. Whether you go minimal with a single bone outline or bold with a full-hand X-ray design, you are making a statement about your personality and your eye for the unexpected. Pick one idea from this list, gather your supplies, and get started. Your most spooky chic nails are closer than you think.