Skull nail ideas are not just a Halloween thing anymore. They have moved far beyond seasonal trends and landed permanently in the world of bold, expressive nail art. Whether you love gothic aesthetics, rock and roll energy, or simply want your manicure to make a statement, skull nail designs give you that edge without saying a word. They work on short nails, long acrylics, coffin shapes, and everything in between. From simple hand-painted skulls to full 3D nail art, there is a skull design for every skill level and budget. This list covers 28 of the most creative, fierce, and wearable skull nail ideas you can try right now at home or take to your nail tech. If you’re also exploring Frankenstein nail ideas, bold green tones, stitched details, and spooky monster-inspired accents can create a playful yet striking Halloween manicure.
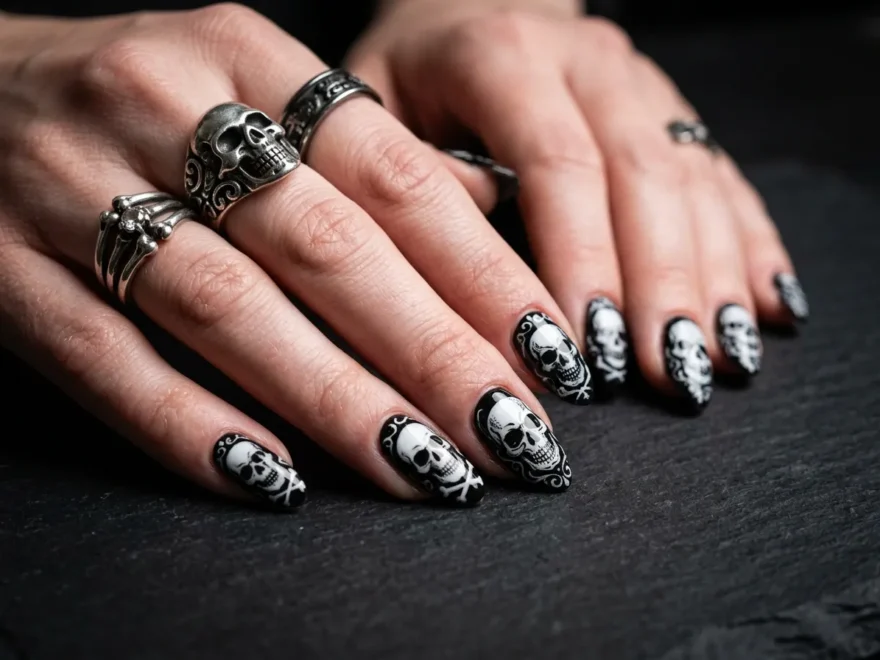
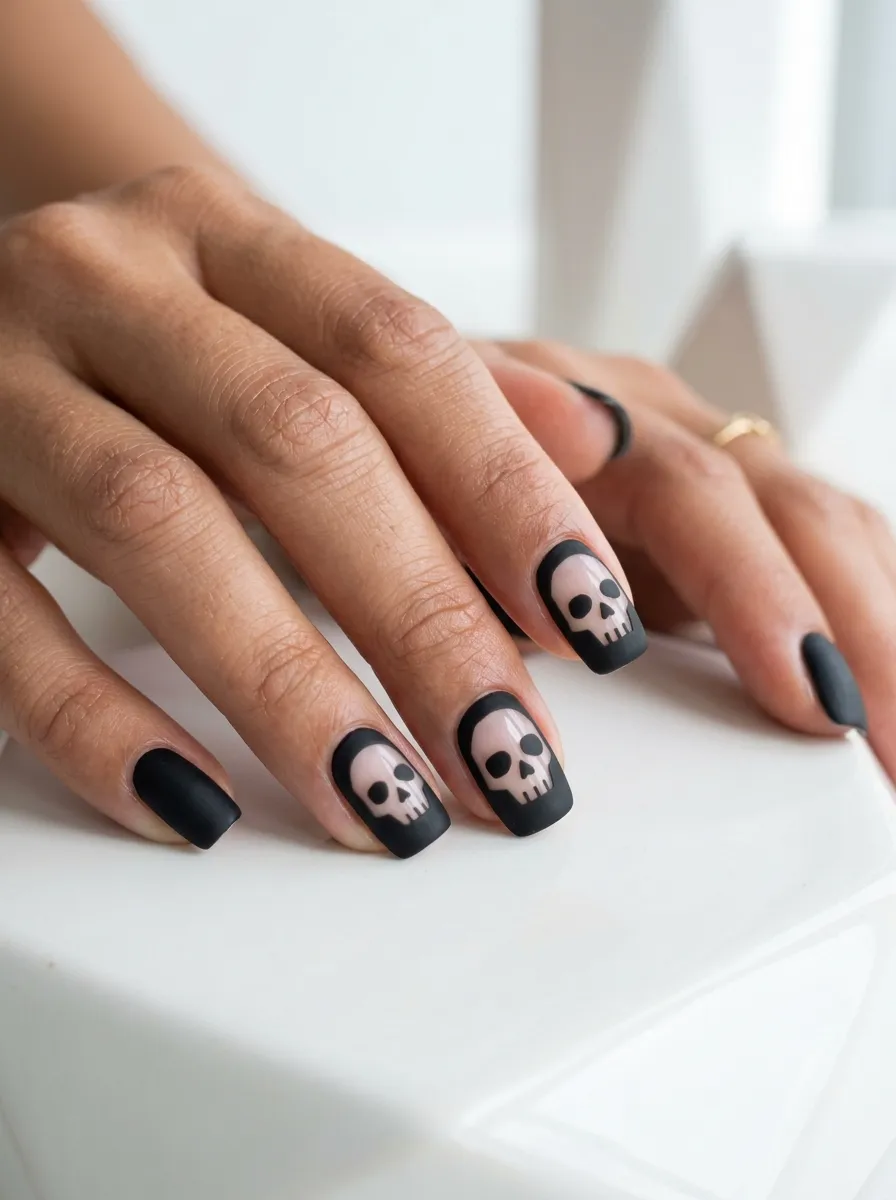
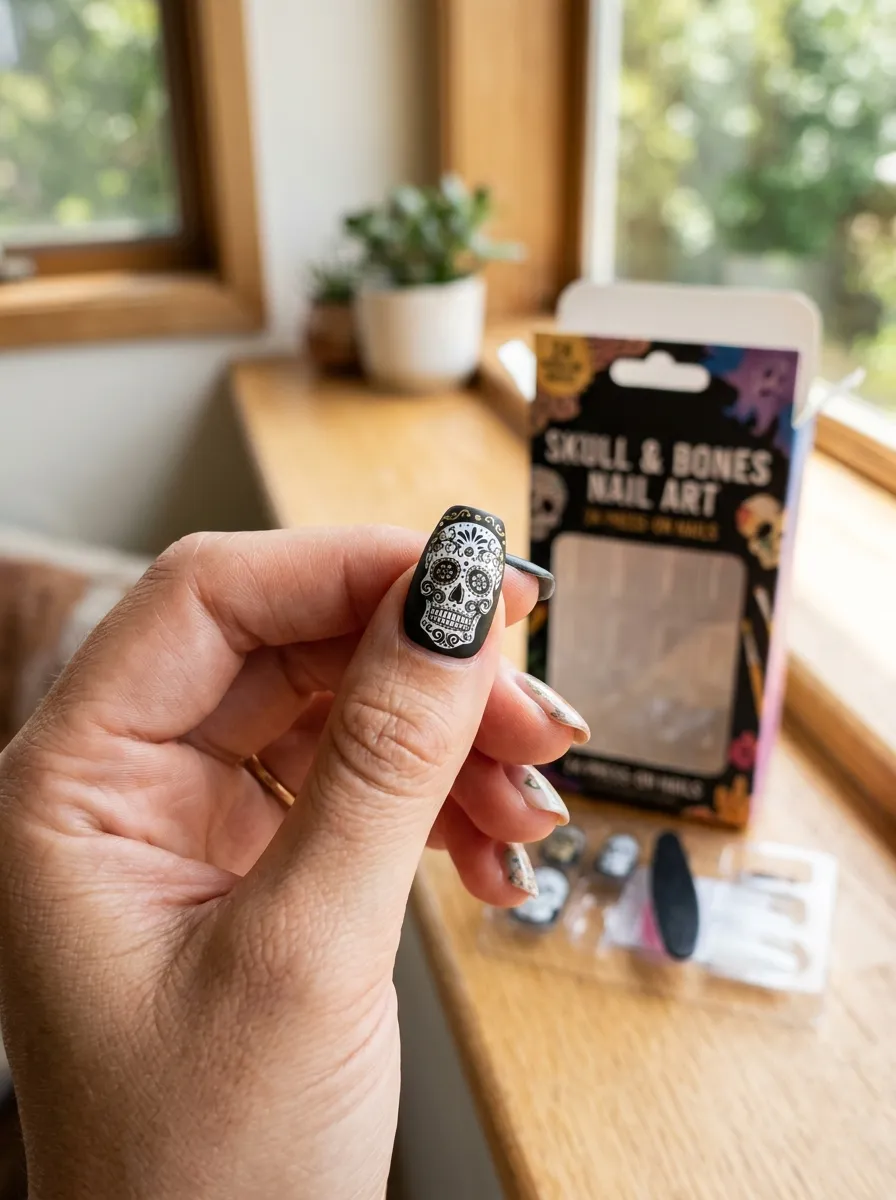
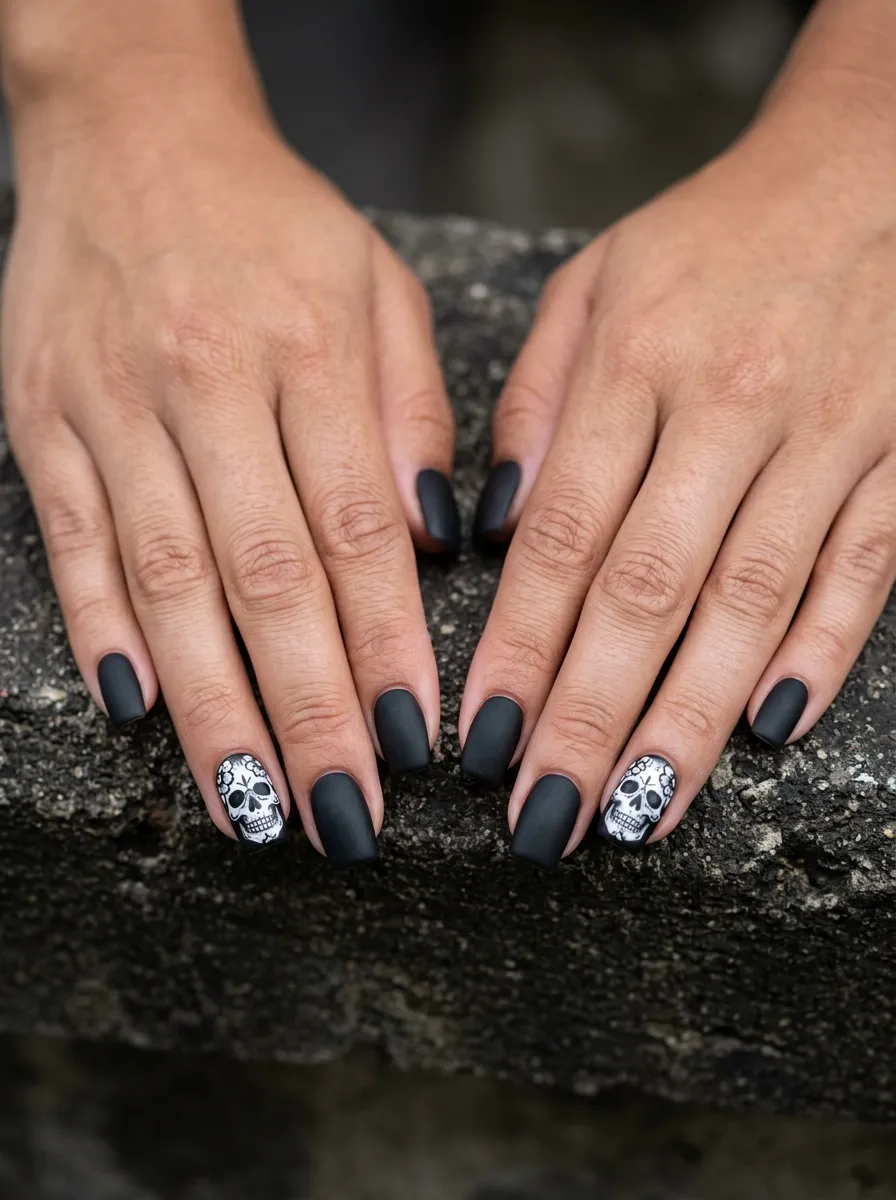
1. Classic Black and White Skull Nails
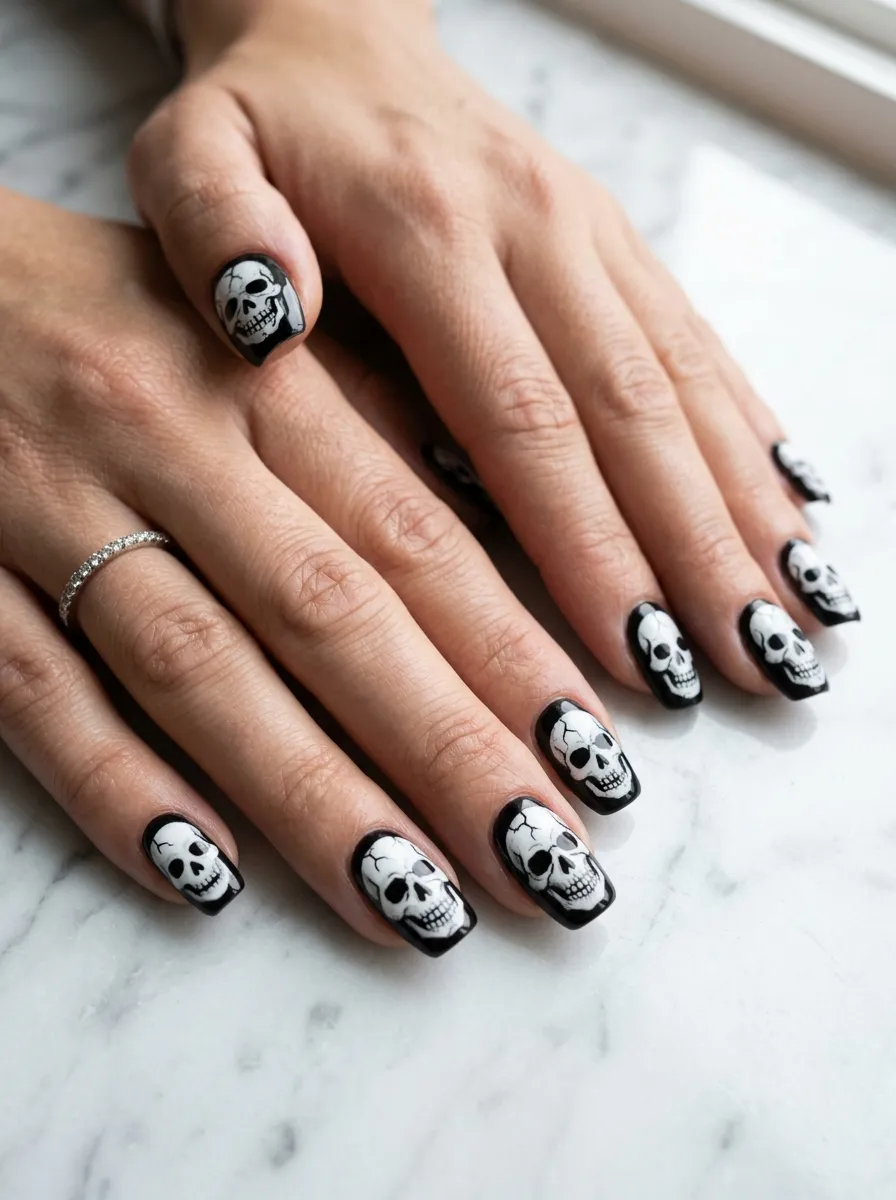
Classic black and white skull nails are the foundation of this whole aesthetic.
They are clean, bold, and instantly recognizable. You do not need a lot of supplies to pull this off at home.
Start with a white base coat on all nails. Once dry, use a thin nail art brush or a toothpick dipped in black nail polish to draw two oval eyes, a small triangular nose, and a row of teeth at the bottom of each nail.
That is your skull. Simple as that.
If you are not confident in freehand painting, grab a skull nail stamp kit from Amazon or a beauty supply store. These cost around $5 to $10 and make the process much easier.
Finish with a glossy top coat to make the design pop.
This look pairs well with chunky silver rings and matte black outfits. It works on any nail length, but medium to long nails give the skull face more room to shine.
You can keep it uniform across all ten nails or do accent skulls on the ring fingers only for a more subtle approach. Either way, the result is sharp and fierce.
2. Sugar Skull Nail Art
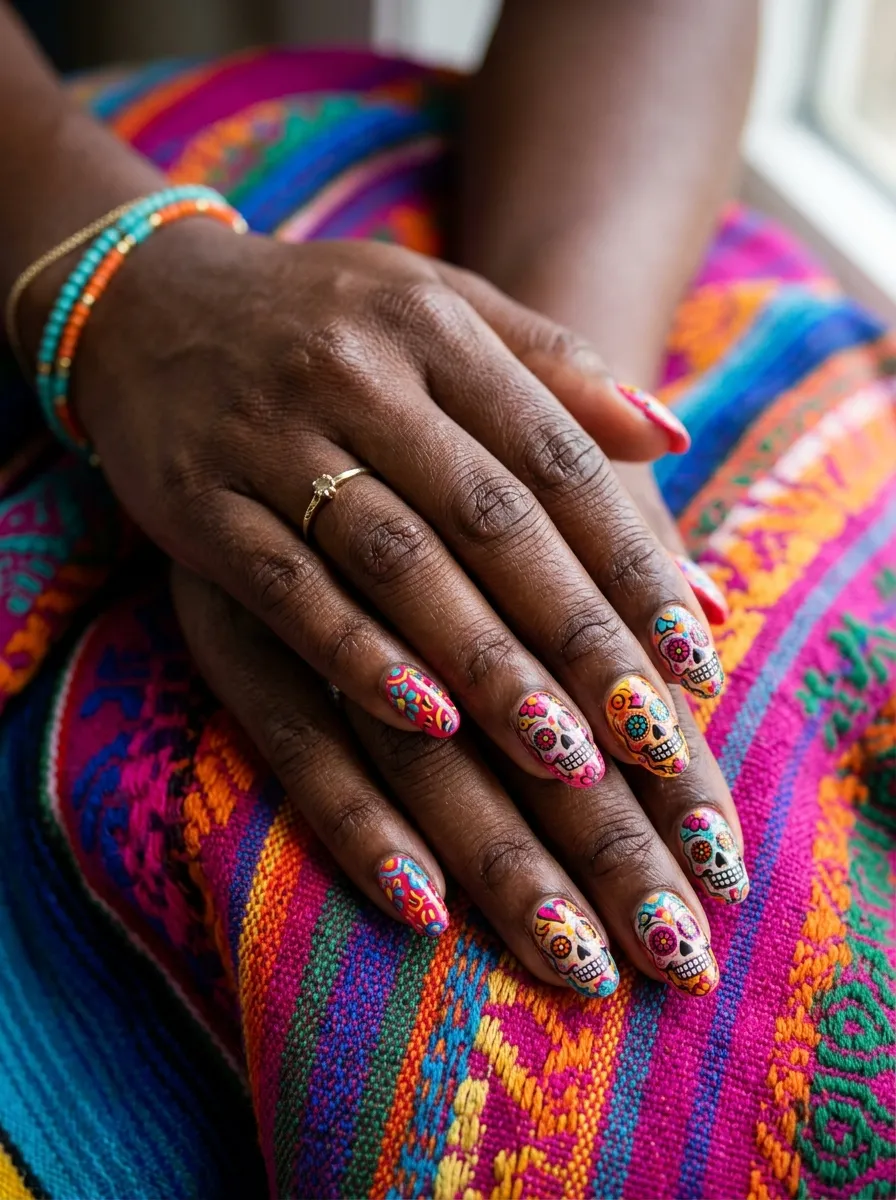
Sugar skull nails bring color and culture into your manicure in the most striking way.
Inspired by Dia de los Muertos art, these designs use bright colors like pink, turquoise, orange, and yellow layered with floral details, decorative dots, and swirling patterns around the skull face.
The look is festive, artistic, and deeply expressive.
You do not need to be a professional artist to try this at home. Start with a black base coat. Use dotting tools and thin brushes to add colored accents around the skull.
Focus on the eyes first. Sugar skulls typically have large, ornate eye sockets filled with flowers or geometric shapes. Use a dotting tool with white polish to add dots around the eyes for a quick decorative effect.
Nail wraps and stickers are a great shortcut here. Several brands sell sugar skull nail wraps for under $8 that look incredibly detailed with zero painting skills required.
This style works best on longer nail shapes like almond or coffin. It is a celebration of boldness and tradition packed into a small canvas. Every nail becomes a tiny piece of art you can wear every day.
3. Glitter Skull Nails
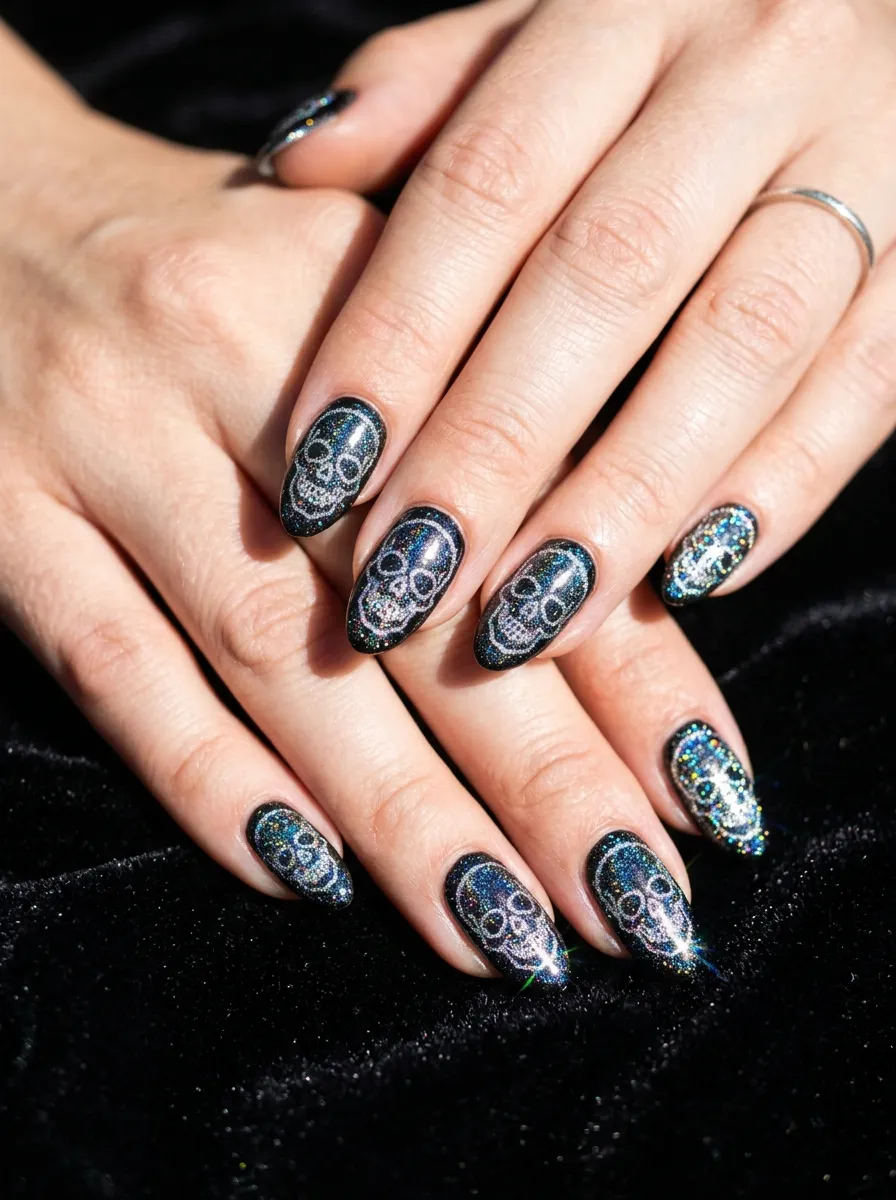
Glitter skull nails prove that edgy and glamorous can absolutely coexist.
This design takes the classic skull concept and wraps it in fine glitter or holographic shimmer for a look that catches light from every angle.
It is especially popular for night events, concerts, and holiday parties.
You can create this at home with a black polish base and a small bottle of loose glitter or glitter nail polish. Apply the skull outline using a thin brush, then dust glitter over the wet polish before it dries.
Seal everything with a no-wipe gel top coat or a thick clear gloss to keep the glitter from flaking.
For a more polished version, use chunky silver glitter on the skull outlines only, leaving the rest of the nail matte black. The contrast between the flat black and sparkling skull is stunning.
You can also reverse this by painting the skull in matte black over a glitter base. Both approaches work beautifully.
Budget tip: glitter nail polish from brands like NYX or Sinful Colors is under $4 and gives excellent coverage without needing loose glitter powder.
This is one of the easiest skull designs to pull off with impressive results.
4. Red and Black Skull Nails
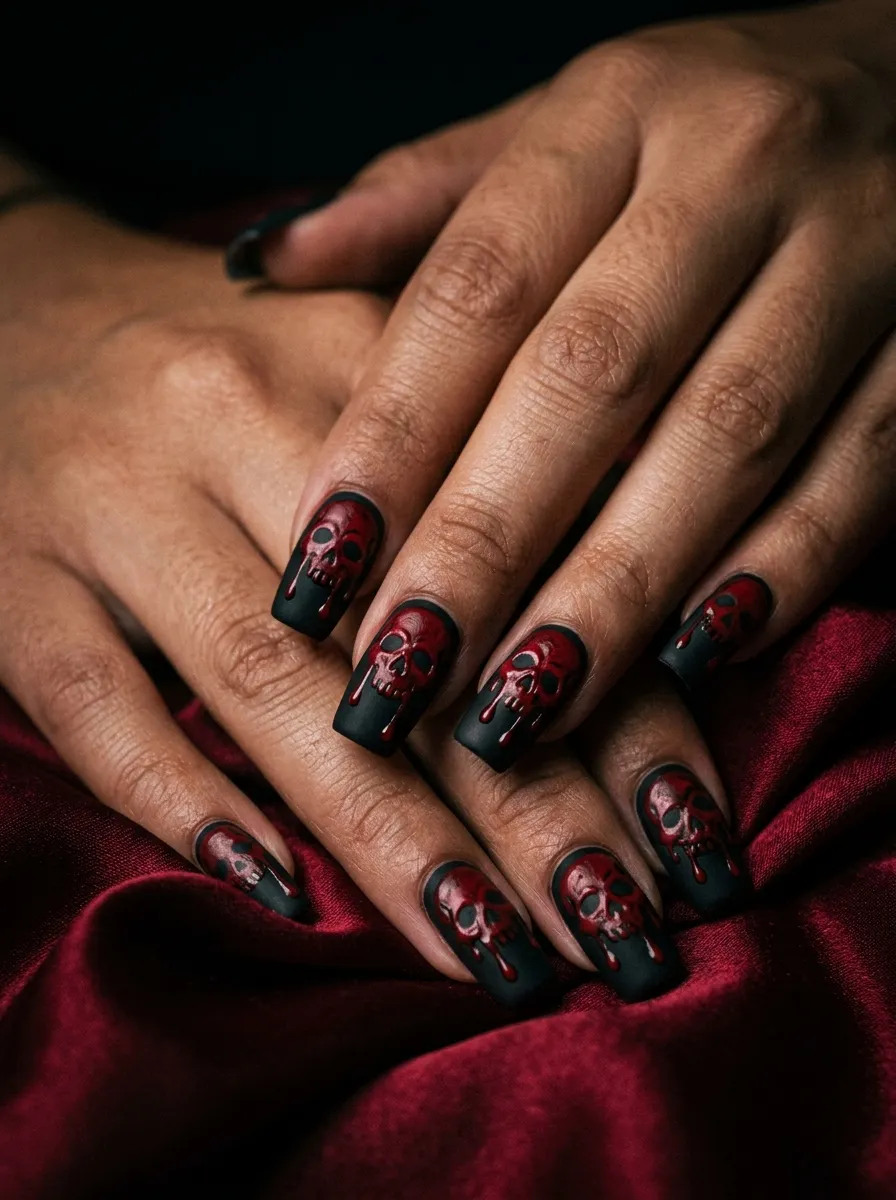
Red and black skull nails are pure drama on a small canvas.
This color combination screams power and intensity. It is one of the most popular skull nail pairings because both colors work perfectly together without competing.
The deep red on black creates a rich, gothic feel that looks expensive even when done with drugstore polish.
To get this look at home, paint all nails in glossy black. Then use a thin nail art brush to paint skull shapes in red. Add small red drip details beneath the eye sockets for a blood-drop effect that takes the design to the next level.
You can also do the reverse: paint nails red and outline the skulls in black. This creates a bolder, more visible skull on lighter backgrounds.
For accent nails, try painting two nails solid red with a black skull and leaving the remaining nails matte black. This gives a balanced look that is not too overwhelming.
Nail art pens in red make this DIY process much easier than using a regular polish brush. They are available at most beauty supply stores for around $3 to $5.
This style works beautifully for date nights, Halloween, or any time you want your hands to do the talking.
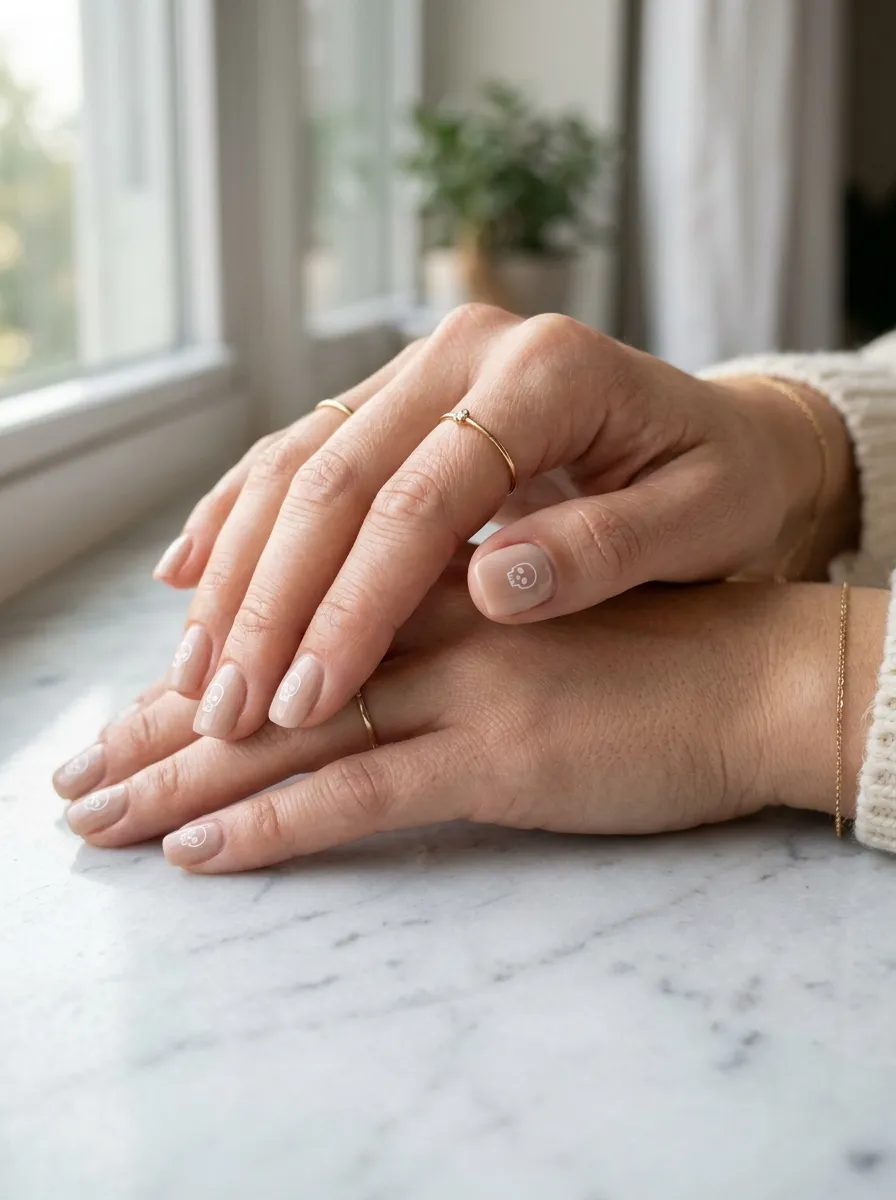
5. Skull French Tips
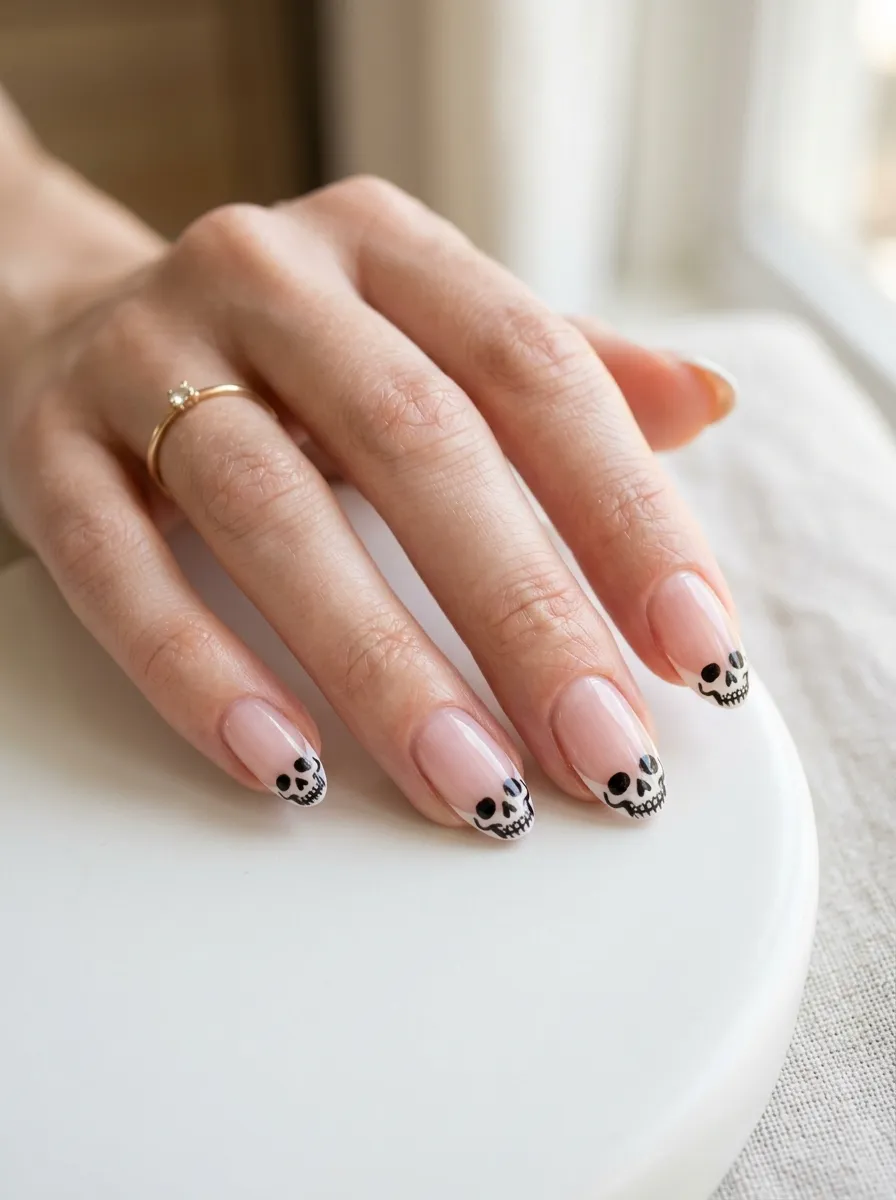
Skull French tips are proof that you can be edgy and polished at the same time.
This design keeps the traditional pink or nude base of a French manicure but swaps the classic white tip for a small painted skull face. It is subtle enough for workplaces with looser dress codes but fierce enough to turn heads up close.
To do this at home, start with your usual French manicure. Let it dry completely. Then use a very thin brush or a toothpick to paint a tiny skull face in black along the tip area.
Keep the skull simple: two small dots for eyes, a tiny triangle for the nose, and a few horizontal lines for teeth. It does not need to be detailed to look great.
For a cleaner version, use skull nail decals cut to fit just the tip area. Apply them before your top coat and seal everything in.
This design works best on medium to long nails where the tip area is large enough to show off the skull. Short nails can still pull it off with an even simpler skull shape.
It is a great option for someone who wants skull art but still needs to keep things somewhat professional. The subtlety is part of the charm.
6. 3D Skull Nails
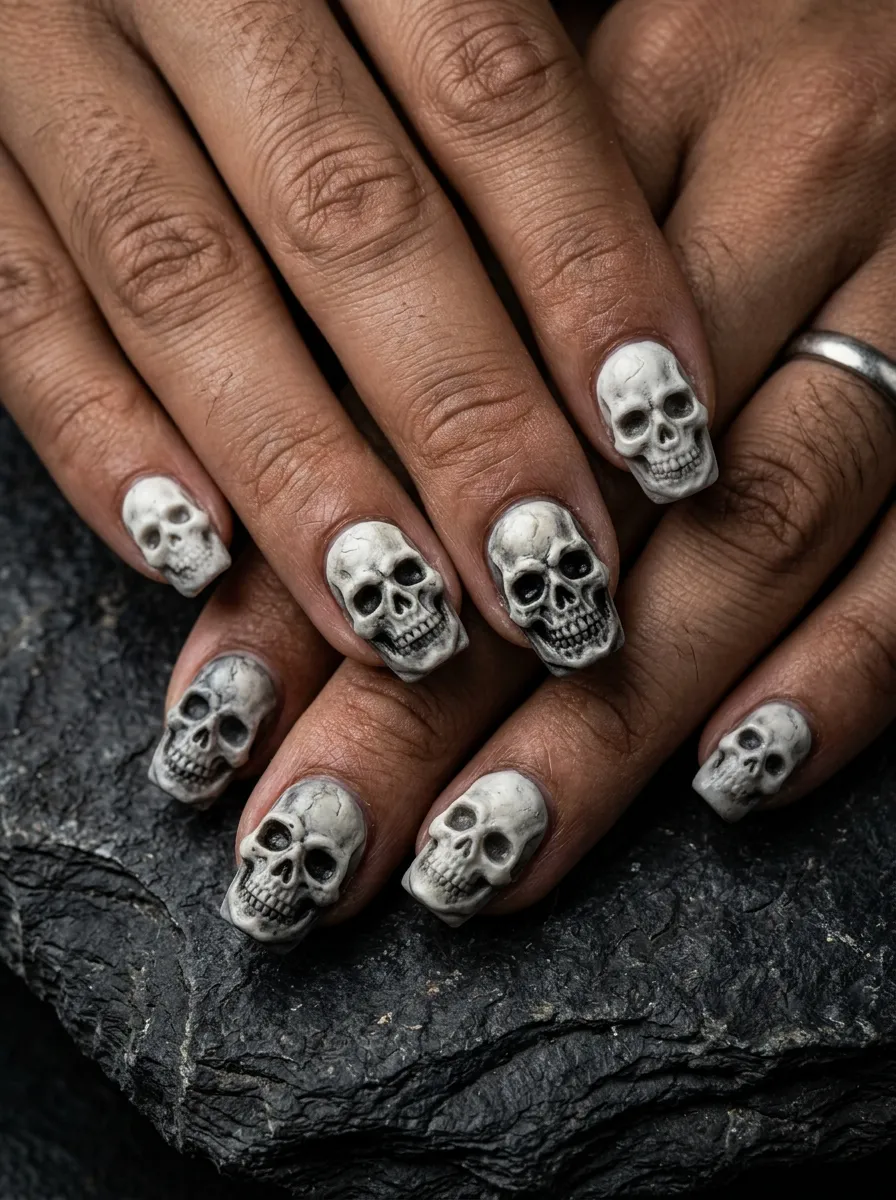
3D skull nails take nail art from flat to sculptural.
These are nails with actual raised skull shapes built on top of the nail surface using acrylic powder, gel, or nail putty. The result is a look so dramatic that people will do a double take when they see your hands.
This is best done at a nail salon by a skilled nail tech. The cost typically runs between $60 and $100 depending on detail level, but the results are salon-quality and long-lasting.
If you want to try a DIY version at home, look for pre-made 3D skull charms on platforms like Shein or Amazon. These tiny metal or resin skulls can be pressed into wet gel or glue-on nails before sealing.
Apply a thick layer of builder gel to one nail, press the skull charm into it, then cure under a UV lamp. Seal with top coat.
The charm approach gives you a 3D look without the need for sculpting skills. It is one of the most accessible ways to achieve this dramatic effect at home.
3D skull nails work best on longer, stronger nail shapes like coffin or square to support the added dimension.
7. Skull Ombre Nails
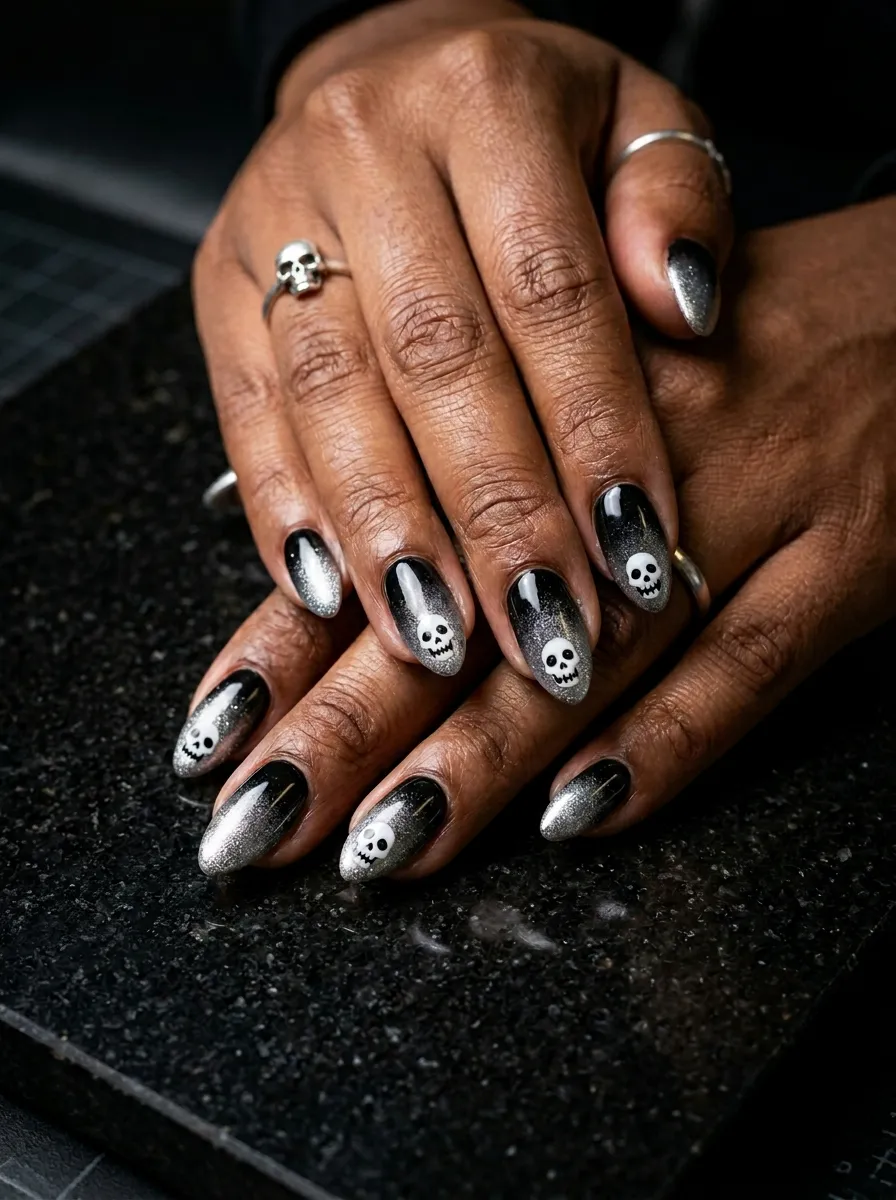
Skull ombre nails combine two of the most popular nail techniques into one fierce look.
The gradient fade from dark to light or one color to another creates a soft, dreamy background that makes the skull design stand out even more sharply.
Popular ombre color combinations for skull nails include black to grey, black to red, black to purple, and even black to gold.
To create ombre at home, you will need a makeup sponge. Paint two polish colors side by side on the sponge, then press the sponge onto your nail and dab lightly. Repeat two or three times for full coverage.
Once the ombre base is dry, add your skull design on top using a thin brush or nail art pen.
Sponging can be messy, so apply petroleum jelly or liquid latex around your nails before starting. This makes cleanup much easier.
For a faster shortcut, use ombre nail wraps as your base and paint or stamp the skull on top. This saves time without sacrificing the gradient effect.
This look is especially stunning under colored or strobe lighting at events. The gradient shimmers and the skulls add a dark, dramatic contrast that photographs beautifully.
8. Skull Coffin Nails
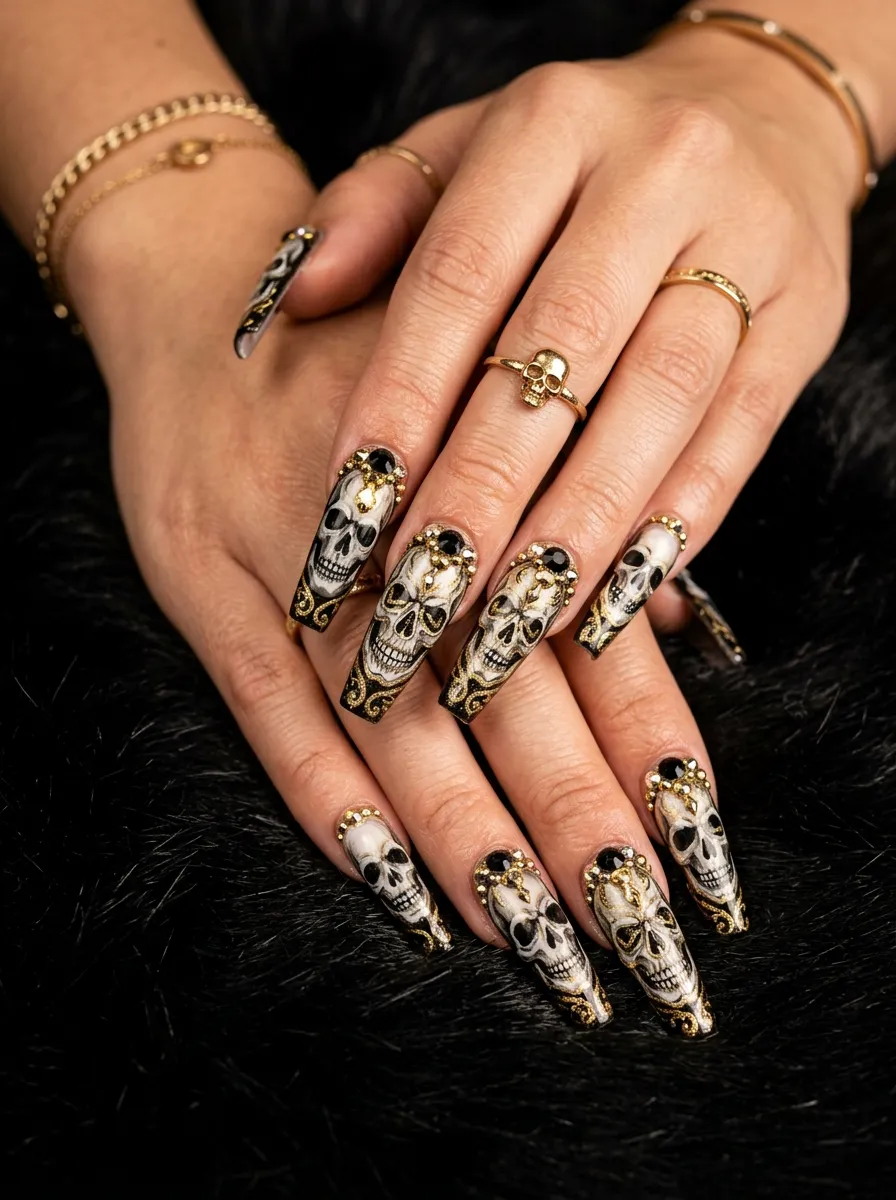
Coffin nails and skull designs were made for each other.
The long, tapered coffin shape gives you a large canvas to paint detailed skull artwork. The shape itself is edgy and dramatic, which perfectly complements the skull aesthetic.
On coffin nails, you can go full coverage with skulls painted across the entire nail surface, not just the tip. Large skull faces, crossbones, and detailed shading all have room to breathe on this shape.
To get coffin nails, you will either need acrylics, gel extensions, or press-on coffin nails. Press-ons from brands like imPRESS or Kiss are affordable at around $8 to $12 and come in coffin shapes that you can paint yourself before applying.
Once your coffin shape is set, use a black base and paint detailed skull art with a fine brush. Add gold foil accents or rhinestones at the cuticle area for a luxurious finish.
The combination of the elongated coffin silhouette with fierce skull artwork creates one of the most dramatic nail looks available.
This is the style you see on celebrities and nail artists on Instagram. It commands attention and photographs beautifully from every angle.
9. Pastel Skull Nails
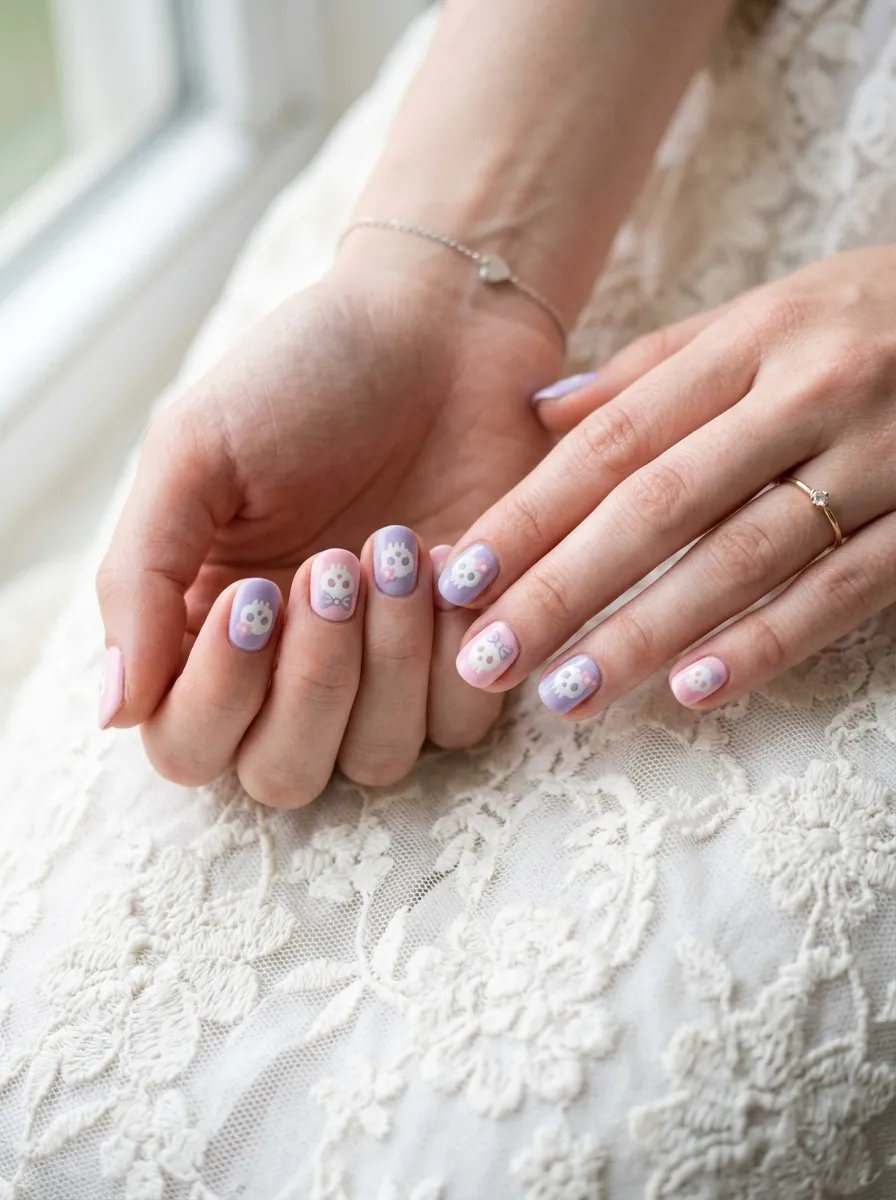
Pastel skull nails are the perfect way to be fierce without going full dark gothic.
This design uses soft, muted colors like lavender, mint, baby blue, or blush pink as the base, then adds white or light-colored skull designs on top. The contrast between sweet and edgy is what makes this look so interesting.
It is a great option for people who love the skull aesthetic but work in environments where very dark nail looks are not suitable.
To create pastel skull nails at home, start with your favorite pastel polish. Let it dry fully. Then use a white nail art pen or thin brush dipped in white polish to draw simple skull faces on each nail.
Keep the skull design light and minimal to match the soft base color. Avoid black outlines here as they can feel too heavy against pastel tones.
Pastel nail wraps with skull patterns are available online and are a great beginner-friendly option. They require zero painting and look polished right out of the box.
This look works year-round, not just in spring. Pastel skull nails challenge the idea that dark themes require dark colors. They are playful, ironic, and completely unique.
10. Skull and Rose Nails

Skulls and roses together create one of the most iconic visuals in gothic and tattoo art.
On nails, this combination is absolutely stunning. The dark skull face surrounded by soft rose petals creates a tension between death and beauty that is deeply striking.
You can approach this design in several ways. One option is to paint the skull on one nail and the rose on the next, alternating across all ten fingers. Another approach is to paint the skull and rose together on the same nail, with petals growing out from the eye sockets.
The second option is more complex but creates a more dramatic, tattoo-like effect.
For a DIY version, start with a black base. Paint your skull first, then add simple rose shapes around it using a dotting tool. You do not need perfectly detailed roses for this to look great. Even simple swirls and small curved lines suggest a rose convincingly.
Red and black is the classic color choice, but deep purple roses on a dark base also look incredible for a more unique take.
Skull and rose nail stickers are widely available and make this design completely beginner-friendly without any brush skills required.
11. Gold Skull Nails
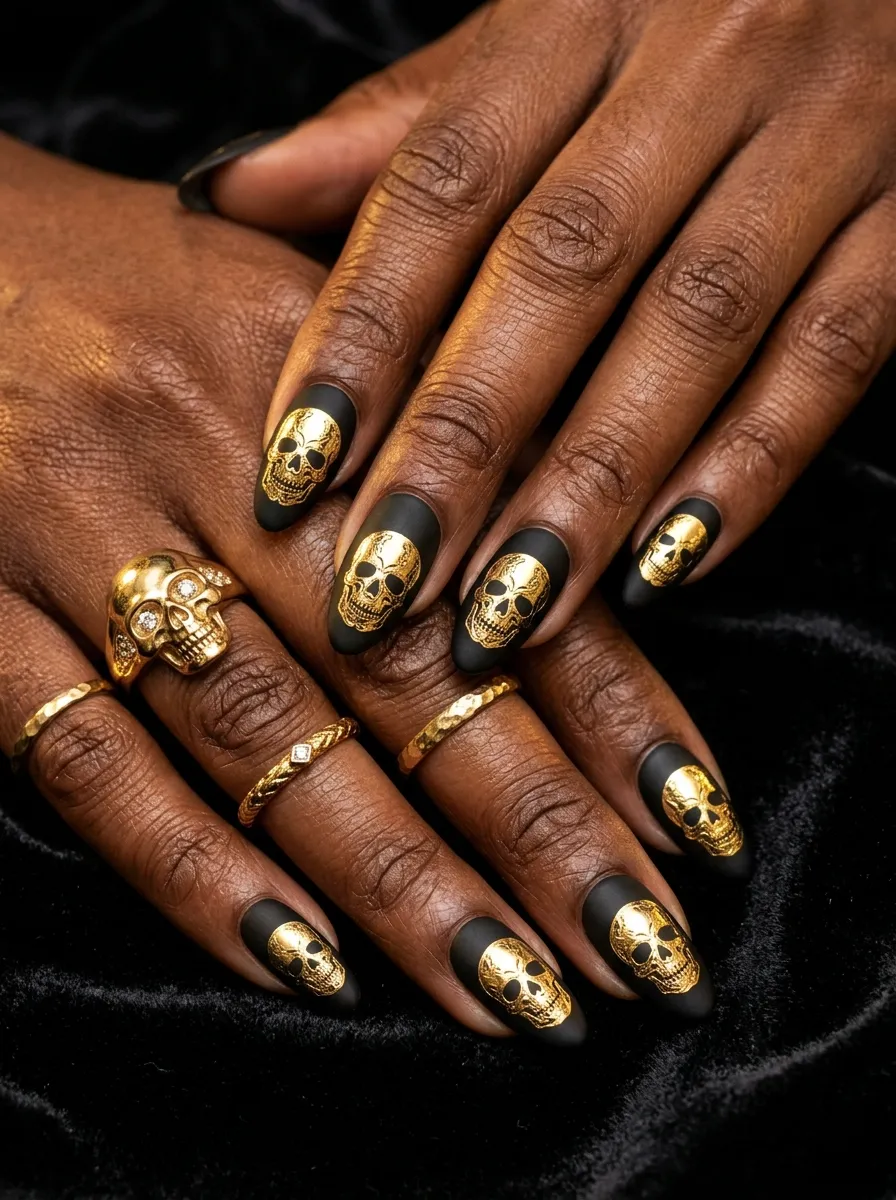
Gold skull nails take the edgy concept and pull it into luxury territory.
The combination of matte black and metallic gold is one of the richest color pairings in nail art. When you add skull designs in gold over a black base, the result feels expensive and editorial.
This look is popular for fashion events, galas, and nights out where you want something dramatic but still refined.
To create gold skull nails at home, start with a matte black base coat. Once fully dry, use a thin brush dipped in gold metallic polish or gold acrylic paint to draw skull shapes across each nail.
Gold nail art pens are especially helpful here because they give you fine control without the mess of regular polish brushes.
For extra glamour, apply a small piece of gold nail foil to create a shimmering skull shape. Press foil over a tacky layer of gel or foil adhesive, then peel back to reveal the metallic effect.
Finish with a matte top coat over the black and a glossy coat just over the gold skull to create a contrast between flat and shine.
This two-finish technique adds visual depth that makes the design look far more complex than it actually is.
12. Skull Nail Stamps

Skull nail stamps are the secret weapon for anyone who loves detailed nail art but cannot paint freehand.
Nail stamping kits consist of a metal stamping plate engraved with skull designs, a scraper to remove excess polish, and a clear silicone stamper to transfer the image to your nail.
The whole kit usually costs between $8 and $15 and can be reused hundreds of times.
To use a nail stamp, apply a thick, opaque polish directly onto the skull design on the plate. Scrape away the excess quickly, then press the stamper onto the plate and immediately roll it onto your nail.
The image transfers in about one second.
Practice a few times on paper or a spare nail before attempting it on a full manicure. Stamping has a learning curve but once you get the hang of it, you can do an entire set of nails in under 10 minutes.
White or metallic polishes work best for stamping because they show up clearly over any base color.
There are dozens of skull stamping plate designs available, from simple cartoon skulls to detailed anatomical versions and sugar skull patterns.
This technique is perfect for beginners who want professional-looking skull nail art without the skill requirement.
13. Skull Nail Wraps
Skull nail wraps are one of the easiest ways to get detailed nail art at home with zero talent required.
Nail wraps are thin adhesive strips pre-printed with designs that you press directly onto your nail, trim to size, and seal with a top coat. They look like they were professionally painted.
The entire application process takes about 20 minutes for a full set.
Skull nail wraps are widely available on platforms like Etsy, Amazon, and Beauty Bay. Prices range from $5 to $15 per set, and many sets include enough wraps for two full manicures.
To apply them, start with clean, dry, oil-free nails. Peel the wrap from its backing, press it firmly onto your nail starting at the cuticle, smooth out any air bubbles, then fold the excess over the tip and file it away.
Seal with a gel or regular top coat for durability.
Nail wraps typically last 7 to 14 days depending on your activities and how well you seal the edges.
One benefit of wraps is the print quality. The skull designs on wraps are often far more detailed than anything most people can paint by hand. You get crisp lines, shading, and intricate patterns with no effort.
They are a perfect option for events, holidays, or any time you want a quick statement look.
14. Skeleton Hand Nail Art

Skeleton hand nail art is a full-concept design that turns your entire manicure into a cohesive visual statement.
Instead of painting a skull face on each nail, this design mimics the bones of your hand by painting skeletal finger structures across each nail. When viewed together, your hands look like an X-ray.
It is one of the most creative and conceptually striking skull-adjacent nail designs available.
To create this at home, use a dark grey or black base coat. Then use a white nail art pen or thin brush to paint simplified bone shapes along each nail. The middle of each nail represents the finger bone, with small joint marks at the sides.
You do not need perfect anatomy here. Simplified lines and curves are enough to suggest the skeleton effect convincingly.
For the thumb nail, add a small skull face at the base of the nail to represent the wrist bone for extra drama.
This design is very popular on Halloween but looks incredibly cool year-round for people who love gothic or dark art aesthetics.
Nail art pens make this design much easier than regular polish brushes because you need fine line control for the bone details.
15. Neon Skull Nails

Neon skull nails are for the person who wants to be seen from across the room.
These designs use bright neon colors like electric green, hot pink, acid yellow, or UV orange for the skull artwork on a black or dark base. The contrast is blinding in the best way.
Neon skull nails are especially popular in festival, rave, and punk communities because they photograph so intensely and look incredible under UV lighting.
To create this at home, start with a matte black base coat. Let it dry completely. Then paint your skull shapes using neon polish or neon acrylic paint.
Many neon polishes are more transparent than regular polish, so you may need two or three coats of the neon color to get full opacity over black.
Neon nail art pens are widely available and make fine skull details much easier to paint in neon colors.
For the most intense effect, use a UV top coat over your design. This makes the neon colors glow brilliantly under black lights.
Finish with a glossy clear top coat to seal everything and add shine.
This look works especially well as an accent design where two nails are done in neon skulls and the rest are matte black. The restraint makes the neon nails pop even harder.
16. Minimalist Skull Nails
Minimalist skull nails prove that less really is more sometimes.
This design strips the skull down to its simplest form. A small, clean skull outline on a nude or white base is all you need. The design is subtle enough for almost any setting but still has enough personality to be interesting up close.
Minimalist skull nails are great for people who want to express the aesthetic without committing to a full dark look.
To create this at home, start with a nude or pale pink base coat. Once dry, use a thin nail art pen or fine brush to draw a tiny skull outline on one or two accent nails.
Keep the skull simple: an oval outline, two small oval eyes, a tiny triangle nose, and a few dots or lines for teeth. That is all you need.
Place the skull in the center of the nail or near the tip for different placements that change the feel of the design.
You can also do a ghost skull version by painting the skull in the same color as your base but with a slight sheen difference. This creates a barely-there effect that is incredibly sophisticated.
Minimalist skull nails are perfect for workplaces, school settings, or any occasion where you want to keep things quiet but still personal.
17. Chrome Skull Nails
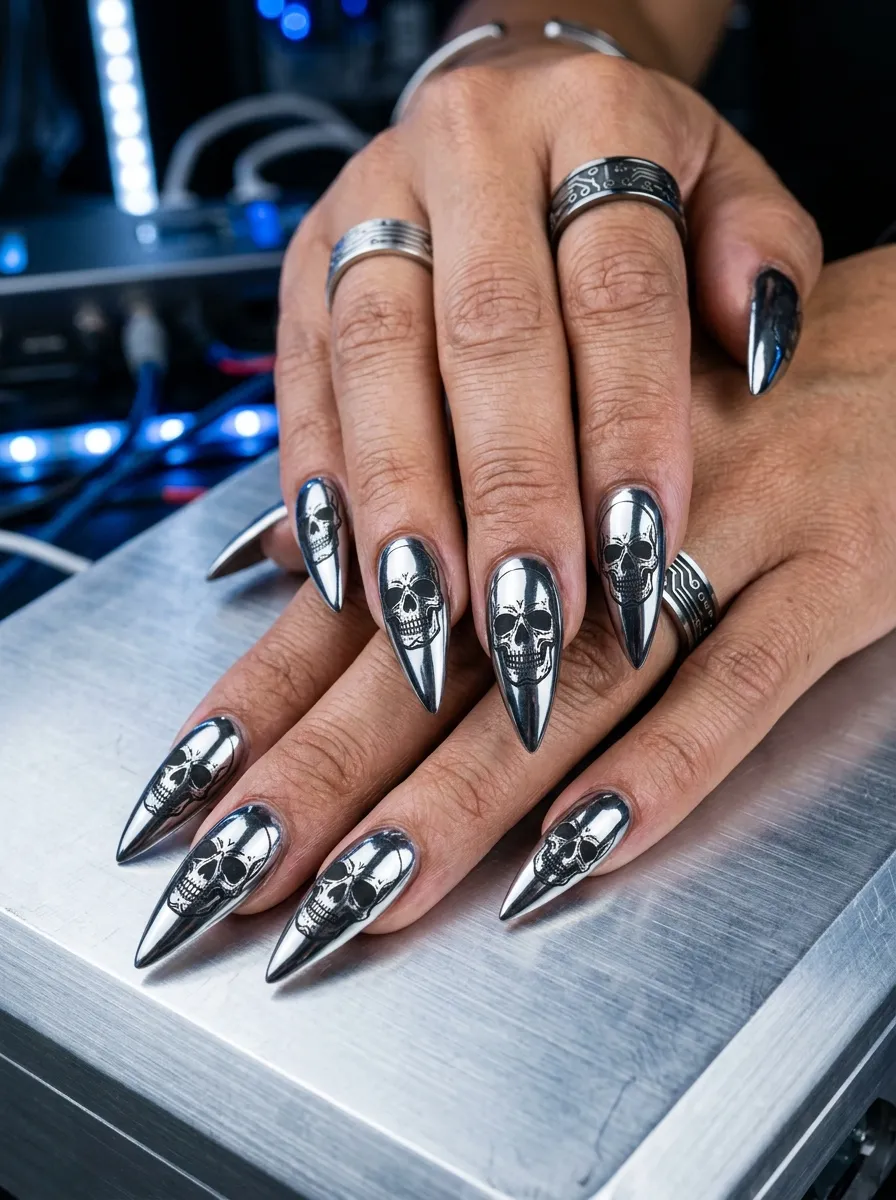
Chrome skull nails are the most futuristic and high-fashion option on this list.
The mirror chrome finish creates a reflective surface that looks almost liquid. When you add skull designs on top in matte black or contrasting colors, the result is incredibly striking and modern.
Chrome nails became hugely popular in recent years and skull designs were a natural pairing for the trend.
To get the chrome effect at home, you need a gel base coat, chrome powder, and a UV lamp. Apply your gel base, cure it, then rub chrome powder over the tacky layer using a silicone applicator. The powder bonds to the gel and creates the mirror effect.
Once your chrome base is set, paint skull designs on top using a thin brush and black gel polish or black acrylic paint.
If you do not have gel supplies, some regular chrome nail powders work over regular top coat, though the effect is slightly less intense.
For a simpler version, use chrome nail wraps as your base and add skull art on top with a nail art pen.
Chrome skull nails look especially stunning on coffin or stiletto shapes where the reflective surface gets full visibility. They photograph beautifully and look completely unique on every nail.
18. Gothic Lace Skull Nails
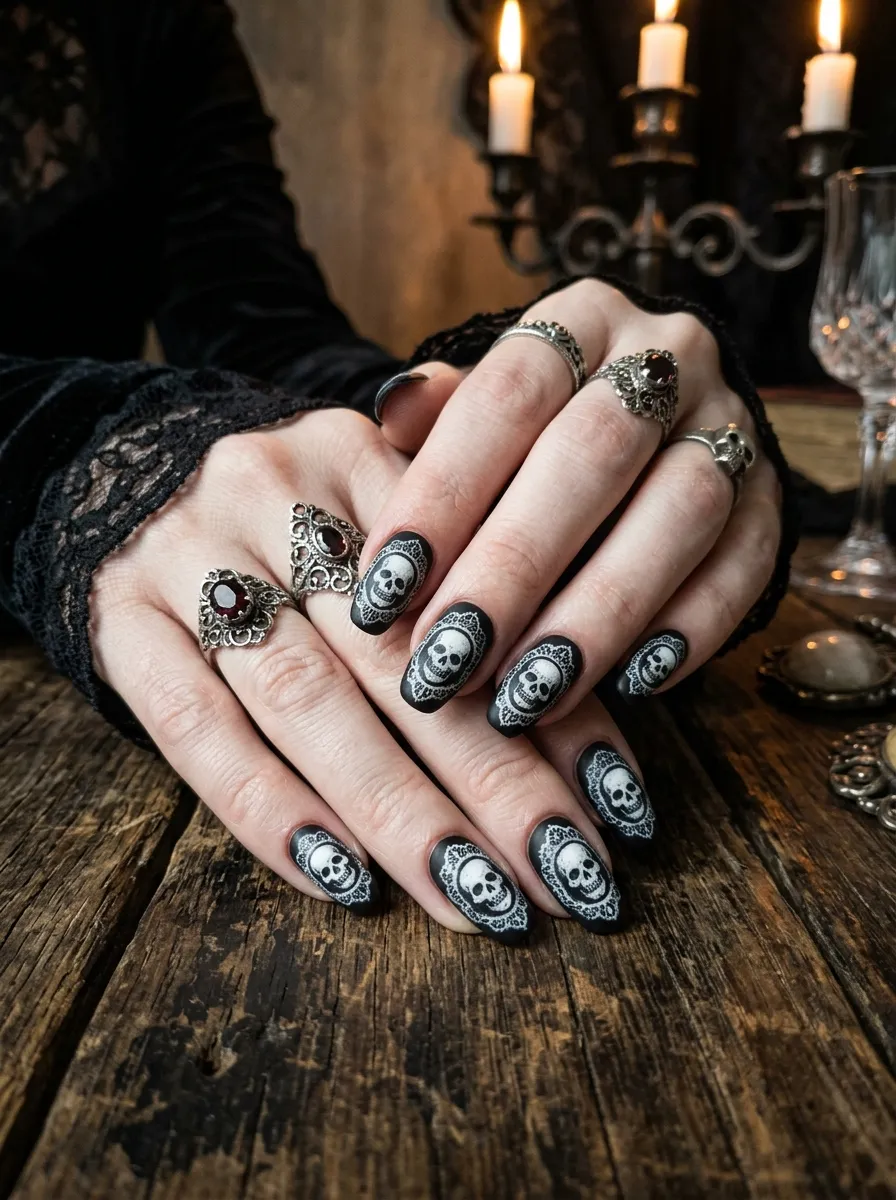
Gothic lace skull nails combine two dark aesthetics into one deeply detailed design.
The fine lace pattern surrounding or overlaid on a skull face creates a Victorian gothic feel that is dramatic and beautiful at the same time. This design takes inspiration from dark romance, antique textiles, and classic horror imagery.
It is one of the more complex designs on this list, but there are accessible shortcuts.
The easiest approach is to use lace nail stickers or nail wraps with gothic lace patterns. Layer these over a black base, then add a pre-made skull sticker on top as the focal point of each nail.
This combination requires no painting skills and creates a layered, textured effect that looks incredibly sophisticated.
For those comfortable with a brush, paint the skull first in white on a black base. Then use a very fine detail brush to add tiny lace-like patterns around the skull: delicate curves, dots, and geometric shapes that suggest lace without needing to be perfectly realistic.
Nail art pens in white or silver are the best tools for adding lace-like details because they allow fine line control.
This design works best on longer nails where the lace and skull both have room to coexist without competing for space.
19. Watercolor Skull Nails
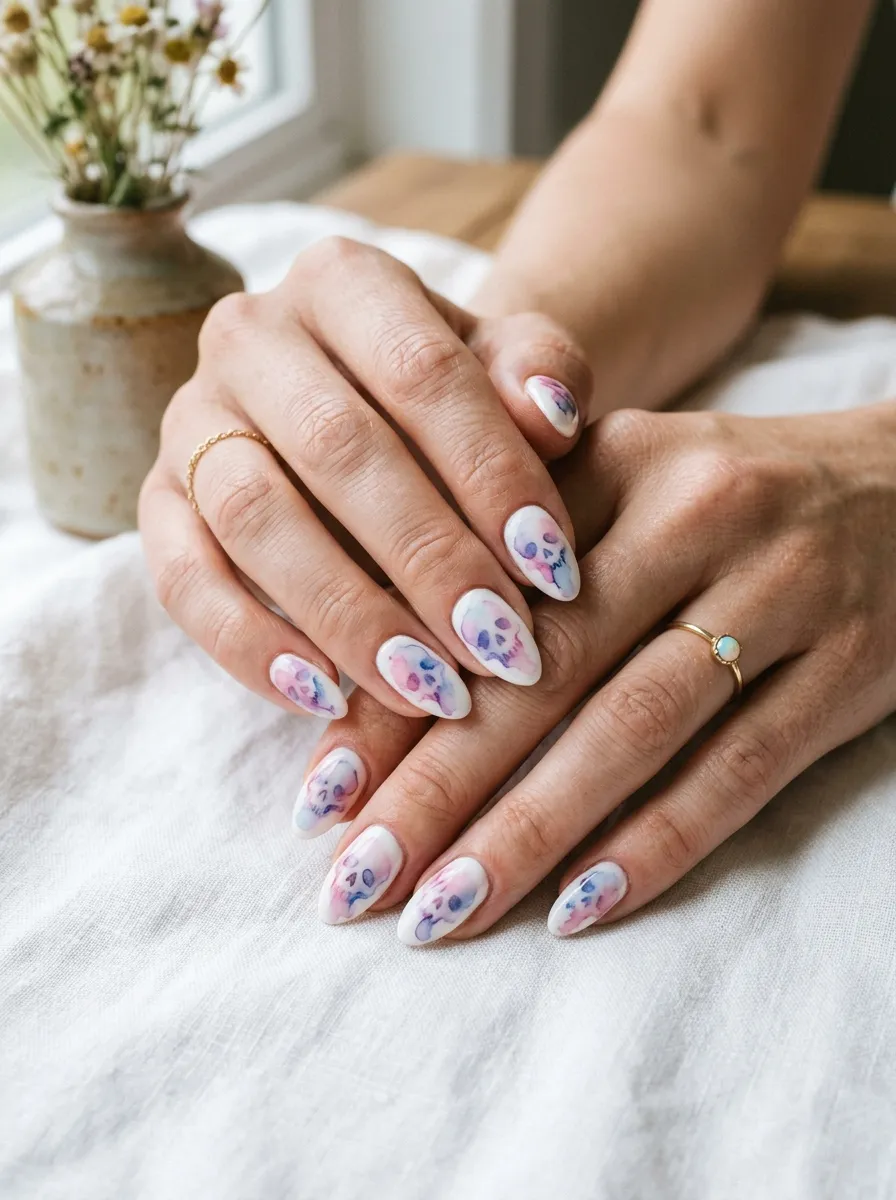
Watercolor skull nails are a beautiful contradiction. They are soft and painterly, yet the skull shape keeps things fierce.
This design uses diluted polish or alcohol ink to create a bleed and wash effect on the nail surface, mimicking the look of watercolor paint. The skull is either outlined within the wash or revealed through it.
The result is artistic, dreamy, and completely unique.
To create watercolor nails at home, start with a white base coat. While it is still slightly tacky or after applying a peel-off latex barrier around the nail, use a thin brush dipped in very diluted nail polish (thin it with acetone on a palette) and dab washes of color across the nail.
Let colors overlap and bleed together naturally.
Once the watercolor background is dry, add a skull outline in black or dark grey using a thin brush or nail art pen.
Alcohol inks work even better than diluted polish for this technique. They spread beautifully and create more vibrant, fluid color effects.
Seal with a glossy top coat to protect the delicate watercolor appearance.
This style is perfect for someone who wants skull art but prefers a softer, more artistic aesthetic rather than a harsh dark look.
20. Halloween Skull Nails
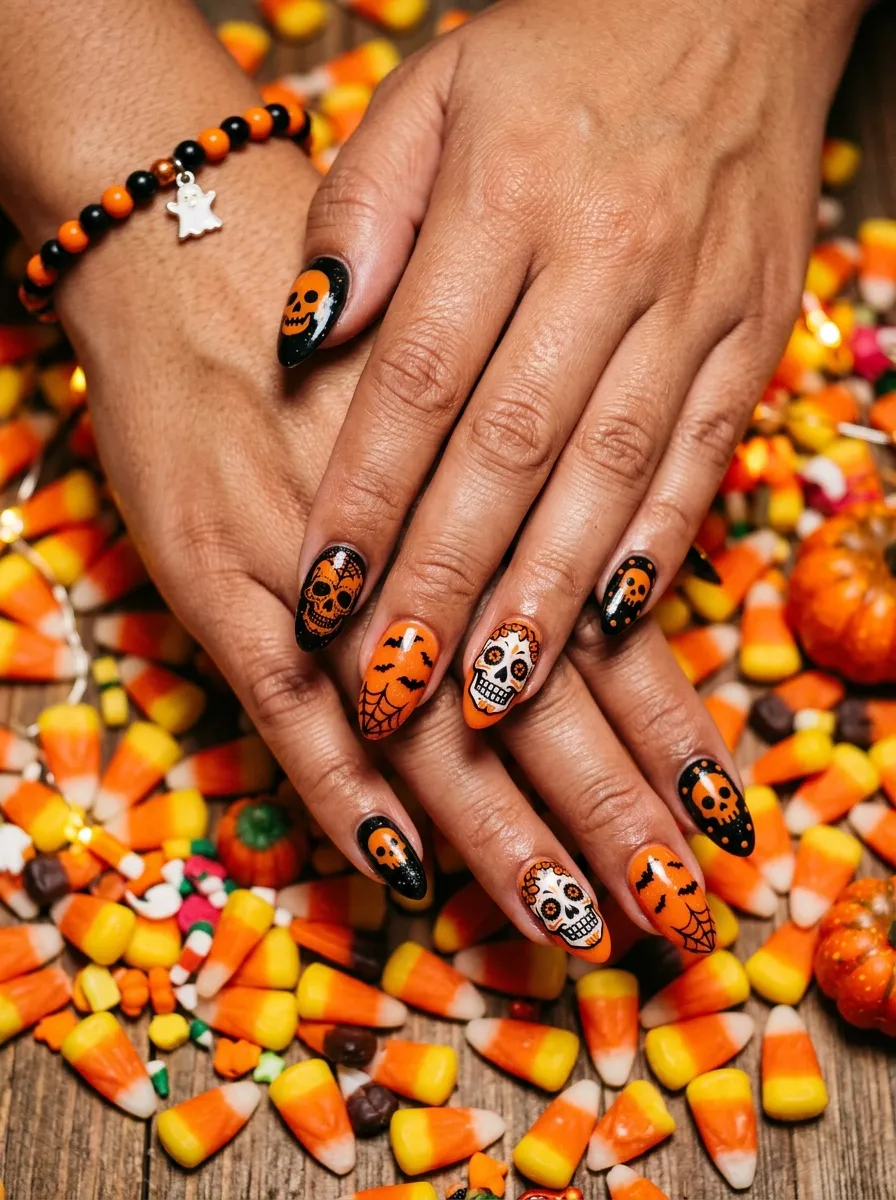
Halloween skull nails are a seasonal classic, and for good reason.
The combination of orange, black, and white in skull designs is instantly festive and iconic. Whether you go full horror or fun and cartoonish, Halloween skull nails are always a hit during the October season.
You have a lot of creative freedom here. Cartoon skulls with X eyes are playful and fun. Hyper-realistic skulls in black and grey are properly scary. Sugar skull styles add a cultural richness to the holiday aesthetic.
To create Halloween skull nails at home, use orange as your base color on some nails and black on others. Alternate across all ten fingers for a color-blocked foundation.
Then add skulls on the orange nails using black polish and skulls on the black nails using white polish.
Fill accent nails with spider webs, bats, or full moon details painted in contrasting colors.
Nail sticker packs specifically for Halloween are sold in every dollar store and drugstore from September onward. They typically cost $1 to $3 and include skull, bat, and pumpkin designs.
This is the most beginner-friendly option on this list because the seasonal design is forgiving and does not need to be perfect to look great.
21. Skull and Diamond Nails
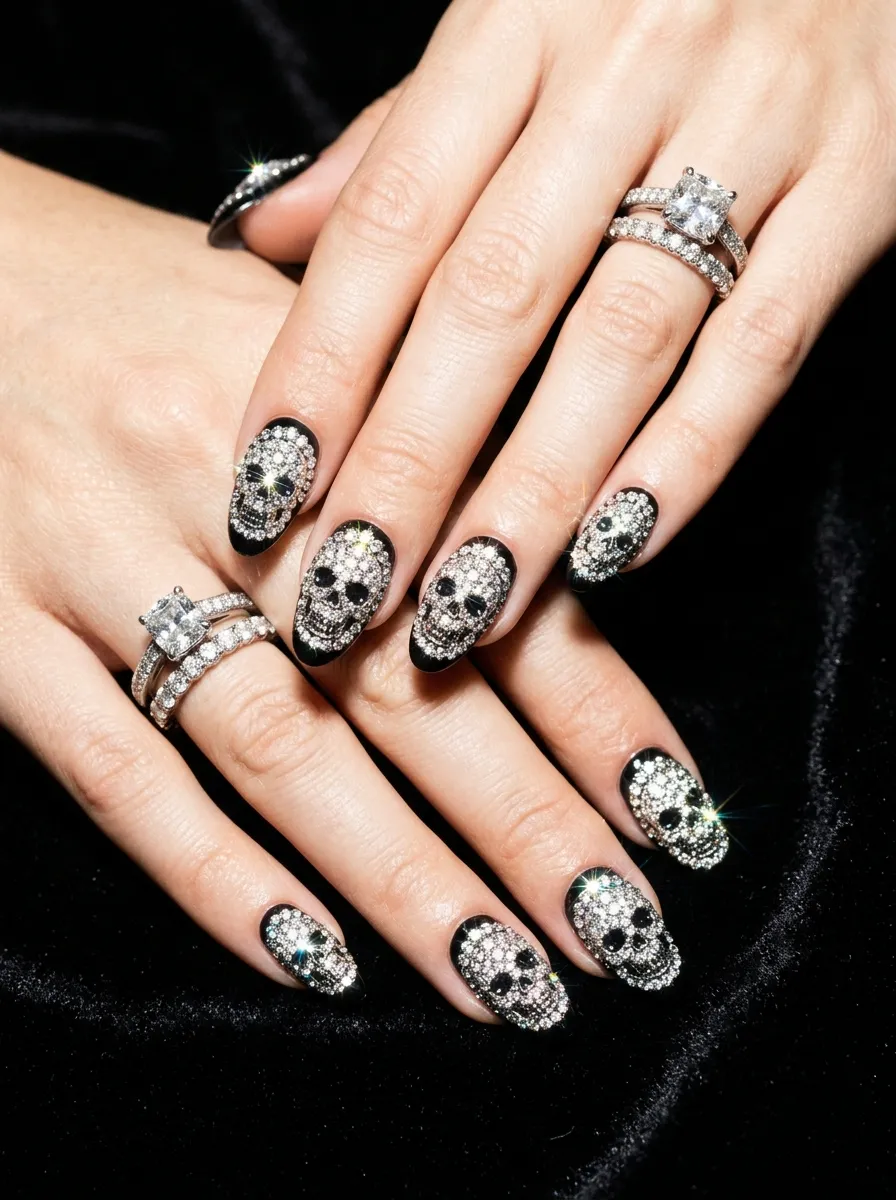
Skull and diamond nails prove that the most unexpected combinations create the most stunning results.
Adding crystal rhinestones or nail gems to a skull design transforms something edgy into something that belongs on a fashion week runway.
The rhinestones can be placed inside the eye sockets of the skull, clustered around the crown, or scattered across the entire nail for maximum sparkle.
To create this at home, start with your skull design on a dark base. Before the polish dries fully, use a rhinestone picker tool or a toothpick to place individual rhinestones onto the nail surface.
Press each gem gently into the polish so it sits flush. Once set, seal everything with a no-wipe gel top coat to keep the gems secure.
Rhinestones for nail art are available in bulk on Amazon or Shein for very little money. A bag of 1,000 mixed-size rhinestones typically costs under $5 and will last you dozens of manicures.
For extra security, apply a small dot of nail glue under each rhinestone before placing it. This keeps gems from falling off during daily activities.
The combination of dramatic skull art and glittering diamonds creates a look that is equal parts fierce and luxurious. It works especially well for formal events and special occasions.
22. Skull Negative Space Nails
Negative space skull nails are one of the most clever design concepts in nail art.
Instead of painting a skull on top of your nail, this technique uses the bare nail itself as the skull shape. The area around the skull is painted in a contrasting color, leaving the skull unpainted and defined only by its outline.
The effect is graphic, modern, and requires no actual skull painting skills.
To create this at home, apply peel-off liquid latex to the nail in the shape of a skull. Let it dry completely. Then paint black or any dark polish over the entire nail, covering the latex.
Once the polish dries, peel away the latex to reveal the bare skull shape underneath.
Alternatively, use skull-shaped nail tape or stickers as your masking tool. Apply the sticker, paint over it, remove it while the polish is still slightly wet, and you get a perfect negative space skull.
This technique works in any color combination. Black polish with a nude or pale pink negative space skull is classic. But you can also use colored polishes for more unexpected results.
The design looks incredibly sophisticated and is a conversation starter because people often need a moment to understand how the skull is formed within the design.
23. Skull Gel Nails
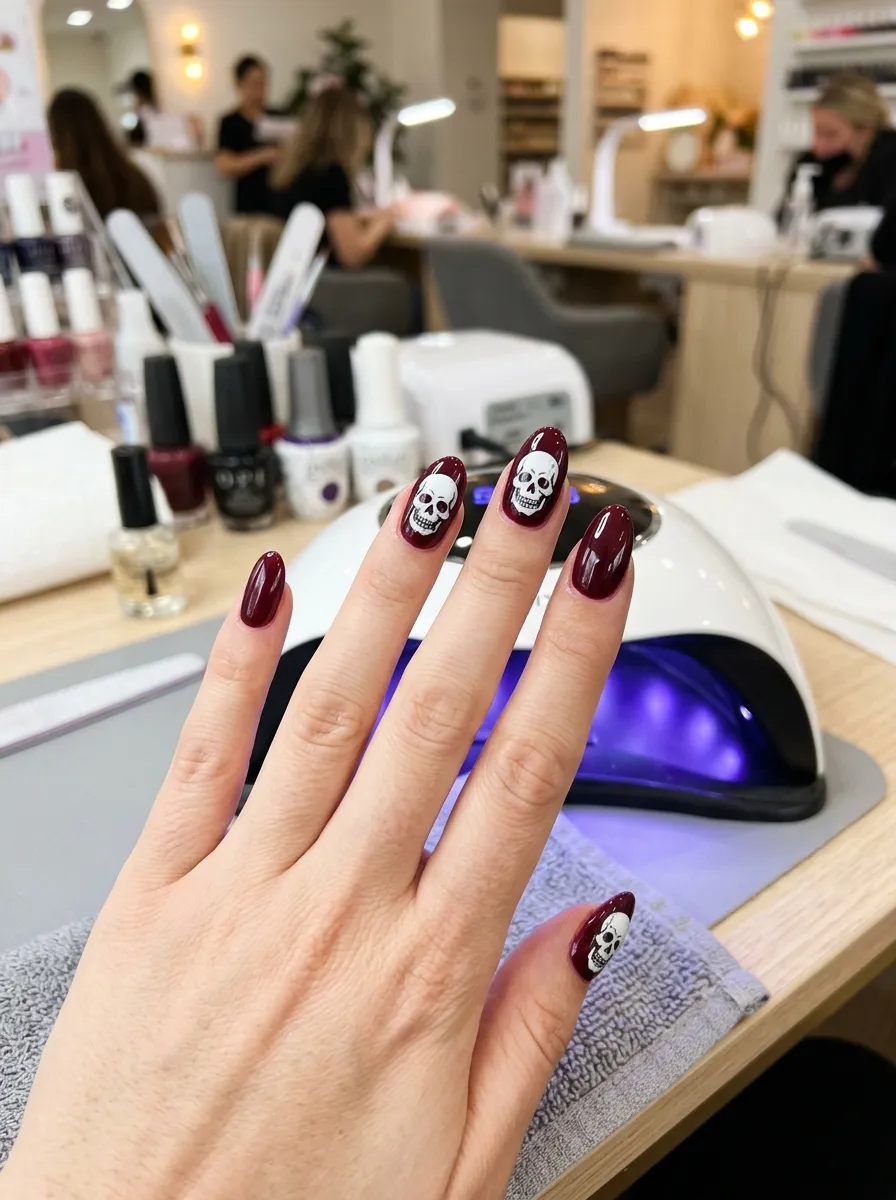
Skull gel nails offer everything you want: durability, glossy finish, and a design that lasts for weeks.
Gel nails cure under a UV or LED lamp to create a hard, chip-resistant surface that outlasts regular polish by a significant margin. When you add skull art to gel nails, you get a design that can stay looking sharp for two to three weeks.
If you go to a salon, ask your nail tech for gel skull nail art. Bring reference images on your phone so they know exactly what style you want. Costs vary by complexity, but basic skull gel art runs about $40 to $70.
For home gel application, you need a UV or LED nail lamp, gel base coat, gel color, and gel top coat. Starter kits are available from brands like Beetles or Modelones for around $30 to $50 and include everything you need.
Paint your base gel color, cure it, then add skull details using gel nail art paint and cure again. Finish with a gel top coat for that signature high-gloss finish.
Gel skull nails are ideal for people who work with their hands because the gel surface is far more resistant to chipping and peeling than regular polish.
The longevity makes the investment in a home gel kit very worthwhile if you do your nails regularly.
24. Skull Press-On Nails
Skull press-on nails are the fastest and most affordable way to get a fierce skull manicure instantly.
Press-on nails are pre-shaped, pre-designed, ready-to-wear nails that you glue onto your natural nails in minutes. No polish, no drying time, no special skills needed.
Skull press-ons come in every style imaginable: classic black and white, chrome, glitter, 3D, coffin-shaped, square, and more. You can find them in drugstores, beauty supply stores, on Amazon, and on Etsy where small businesses create incredibly detailed custom designs.
Prices range from $5 for basic drugstore packs to $25 for handcrafted artisan designs on Etsy.
To apply press-ons, size each nail first by laying the press-ons next to your nails to find the best fit. Apply nail glue to your natural nail, press the press-on down firmly for 10 to 15 seconds, and you are done.
For longer wear, apply nail primer to your natural nail before the glue. This helps the bond last longer.
Press-on skull nails can last five to ten days with proper application and care. Avoid soaking your hands in water for prolonged periods, which weakens the bond.
When you are ready for a change, soak nails in warm water for a few minutes and gently pry the press-ons off from the sides.
25. Skull Accent Nails
Skull accent nails are a strategic approach to skull nail art.
Instead of covering all ten nails in skull designs, you choose one or two accent nails to feature the skull artwork and keep the rest simple. It is a balanced, wearable look that highlights the skull design without overwhelming the overall manicure.
The ring finger is the most popular choice for accent nails because it naturally draws attention.
Paint all your nails in one solid color, usually black, dark red, or deep navy. Then apply your skull design only to the ring finger nails on both hands.
The contrast between the simple base nails and the detailed skull accent creates a focused, curated look.
You can also do the reverse accent: paint all nails with skull designs and leave just one or two nails as a contrasting solid color. This creates a visual break that actually makes the skull nails stand out more.
Accent nails are ideal for anyone new to skull nail art because they reduce the amount of painting required while still delivering a strong visual statement.
They also work well for people in professional environments where heavy nail art on every finger might not be appropriate. The accent approach lets you express your aesthetic while keeping the overall look polished.
26. Skull and Web Nails
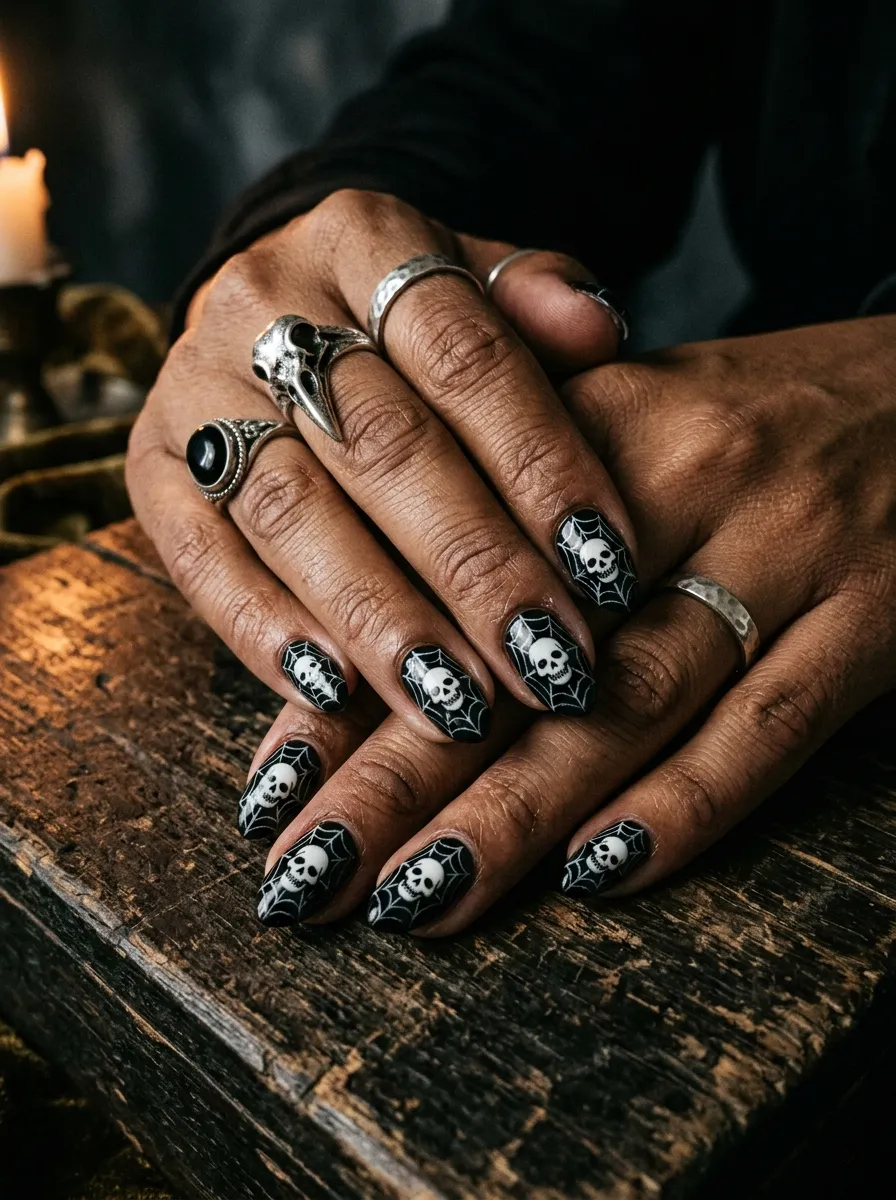
Skull and web nails are a dark, gothic combination that never goes out of style.
The spiderweb radiating outward from a skull face creates a powerful visual that references both gothic imagery and classic horror aesthetics. It is one of the most cohesive skull nail combinations because the web and skull share the same visual language.
To create this at home, start with a black or very dark base coat. Use a white or silver nail art pen to draw a small skull in the center or lower portion of the nail.
Then draw thin lines radiating outward from the skull in all directions, like spokes on a wheel. Connect the spokes with curved lines moving from one to the next, working your way outward from the skull. This forms the web.
The web does not need to be perfect. Slight irregularities actually make it look more realistic and organic.
For easier results, use a web stamping plate for the web portion and add a skull sticker or freehand skull on top.
You can place the skull in the center of the web or at the corner where the web converges, which creates a more asymmetric, interesting composition.
This design works well for Halloween but looks equally great year-round for anyone with a gothic or dark aesthetic preference.
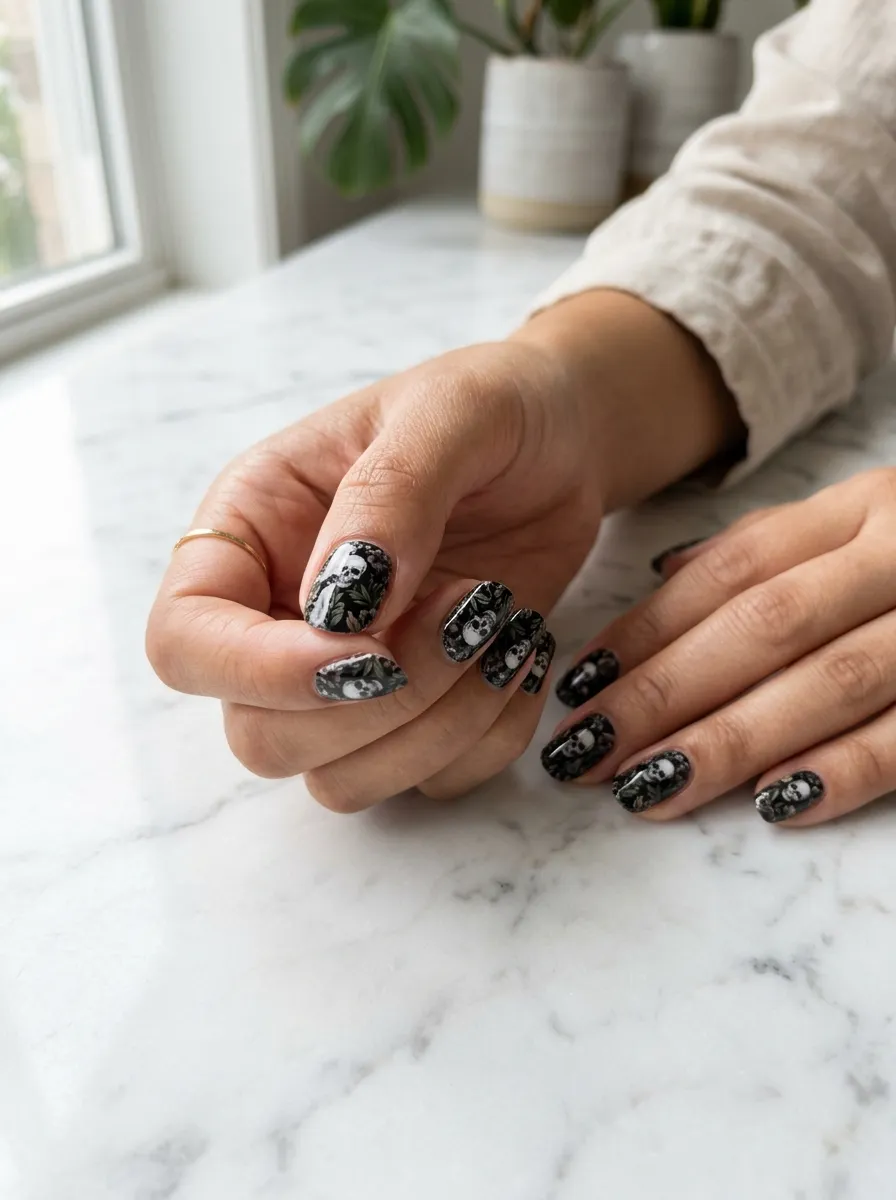
27. Skull Marble Nails
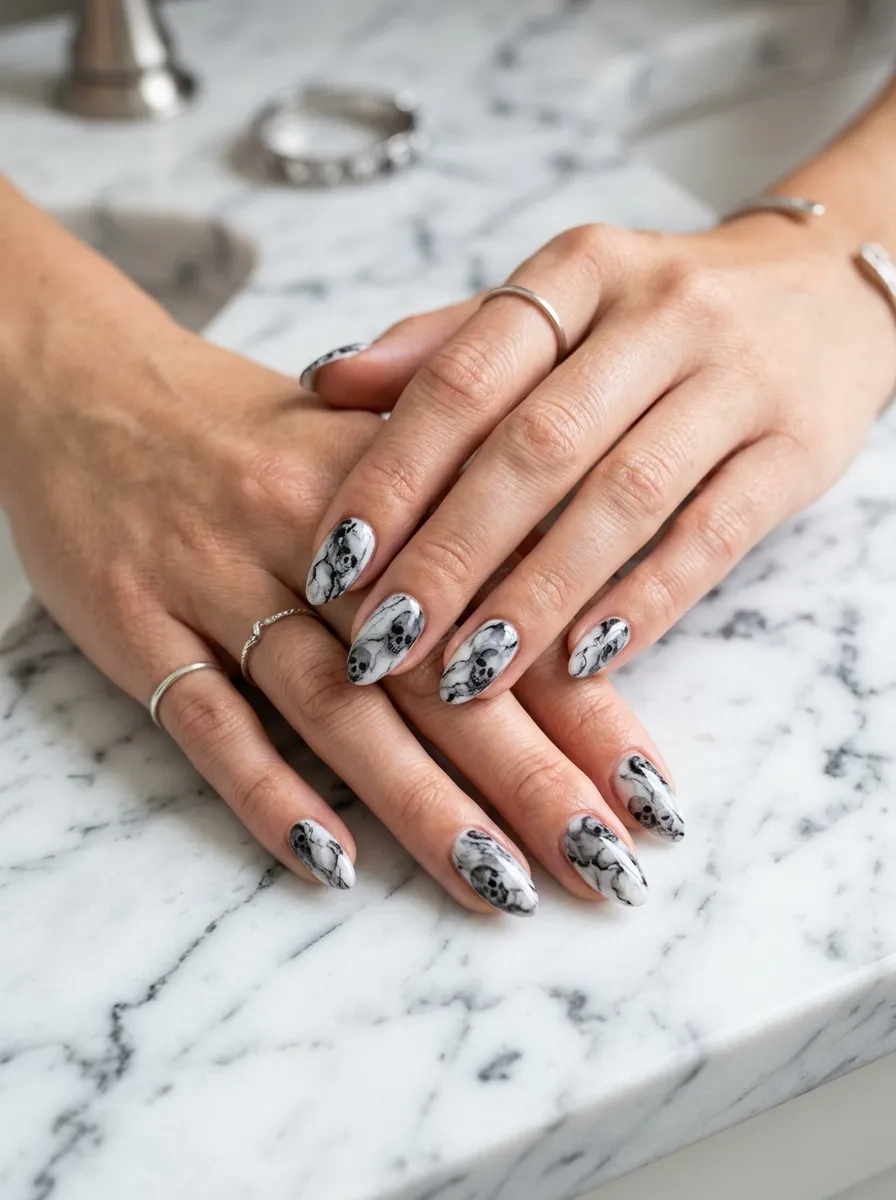
Skull marble nails are a sophisticated design that blends two high-fashion aesthetics into something truly original.
The marble effect uses flowing veins of black, grey, and white across the nail surface to mimic natural stone. When skull shapes are hidden within the veining or incorporated into the marble pattern, the result is artistic and visually complex.
This is a design where the skull is discovered rather than immediately obvious, which makes it even more interesting.
To create marble nails at home, apply a white base coat. While wet, use a thin brush or needle tool to drag thin lines of black and grey polish across the surface in irregular patterns.
A fan brush dipped lightly in black polish and dragged across the white creates realistic marble veining easily.
Once you have your marble base, use a fine brush or nail art pen to incorporate skull outlines into the existing veining, making them look like part of the marble pattern rather than painted on top.
Alternatively, draw the skull clearly on top of a finished marble base as an accent element.
Marble nail kits with step-by-step tools are available for around $10 to $15 and make the marble base much easier to achieve at home without experience.
This design photographs exceptionally well and looks genuinely luxurious.
28. Rainbow Skull Nail Ideas
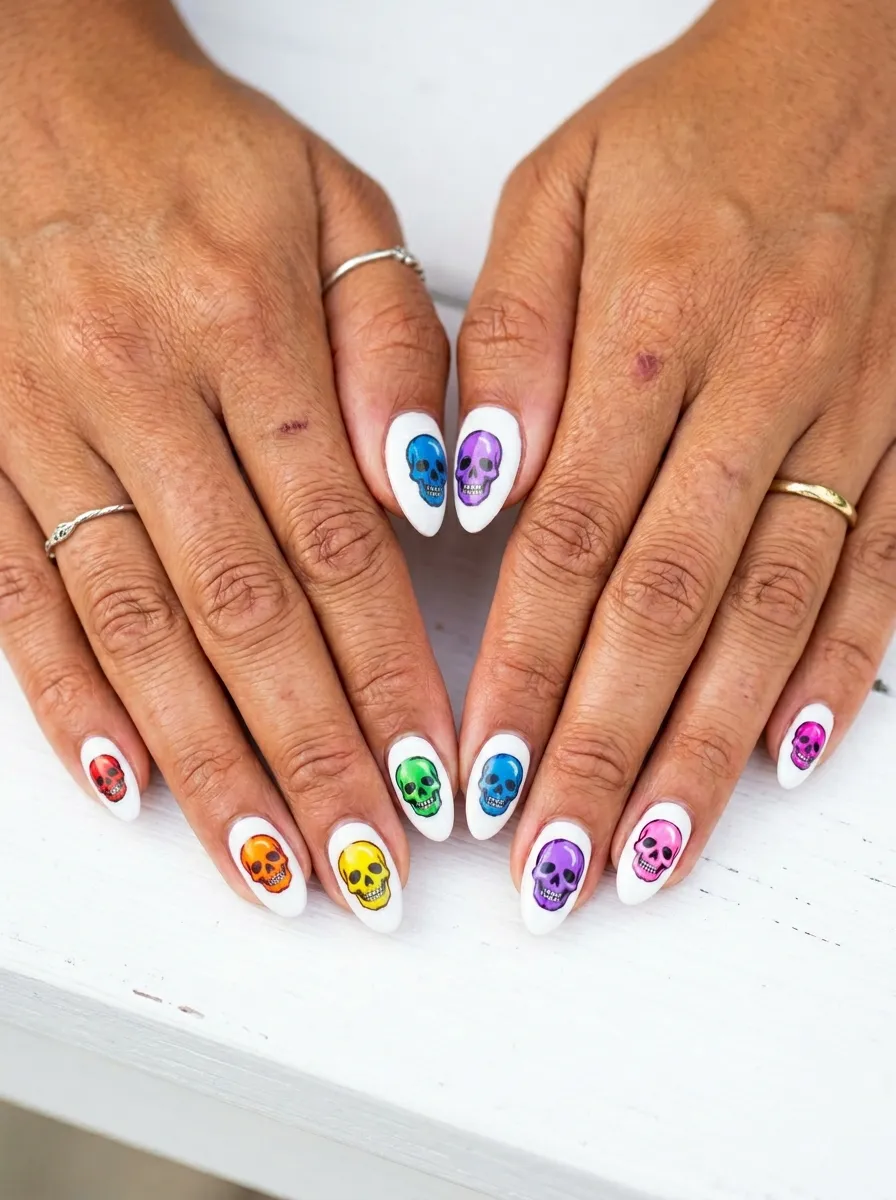
Rainbow skull nails end this list with maximum energy and color.
This design paints each nail’s skull in a different color of the rainbow, progressing from red to orange, yellow, green, blue, indigo, and violet across all ten fingers. The result is playful, fierce, and completely joyful.
It challenges the idea that skull nails have to be dark. Rainbow skull nails say that you can love bright colors and still be edgy as anything.
To create rainbow skull nails at home, start with a white or nude base coat across all nails. Then use a thin brush or nail art pen to paint the skull on each nail in a different rainbow color.
Keep the skulls the same simple design on every nail so the only variable is the color. This creates a cohesive rainbow sequence without visual chaos.
If painting ten different colored skulls feels like too much, do a simpler version: paint alternate nails in rainbow colors and add a black skull sticker on top of each one.
Acrylic craft paint works beautifully for this design because it comes in every rainbow color for very little money. Use it with a fine brush over a dry nail polish base and seal with top coat.
Rainbow skull nails are perfect for Pride events, festivals, and any occasion where bold self-expression is the goal.
Conclusion
Skull nails have earned their place as one of the most expressive and enduring styles in nail art. From simple hand-drawn designs on a budget to elaborate 3D salon creations, there is a skull nail style for every person, every skill level, and every occasion. Whether you gravitate toward dark and gothic, soft and pastel, or bright and colorful, the skull motif adapts to your personal style in ways that few other nail art themes can. The 28 ideas in this list are your starting point. Pick the one that speaks to your aesthetic, gather your supplies, and get started. You do not need a professional setup or an expensive salon appointment to wear skull nails that turn heads. A steady hand, a good nail art pen, and a willingness to try is all it takes to go from plain nails to a fierce, unforgettable manicure that is completely yours.