Pink and orange nail ideas are one of those combinations that just work. Whether you are heading to a beach day, a brunch with friends, or just want something fun on your fingertips, this color duo delivers every single time. The warmth of orange paired with the playfulness of pink creates a look that feels sunny, bold, and totally wearable. From soft peachy fades to vibrant color blocking, there are so many ways to wear this palette. You do not need to spend a fortune at a salon either. Many of these looks are totally doable at home with a few drugstore polishes and a steady hand. If you’re also exploring Hocus Pocus nail ideas, witchy themes, spellbook details, cauldron-inspired art, and magical Halloween accents can help you create fun, spooky, and creative nail designs with a seasonal twist.
- Peachy Pink Ombre Nails
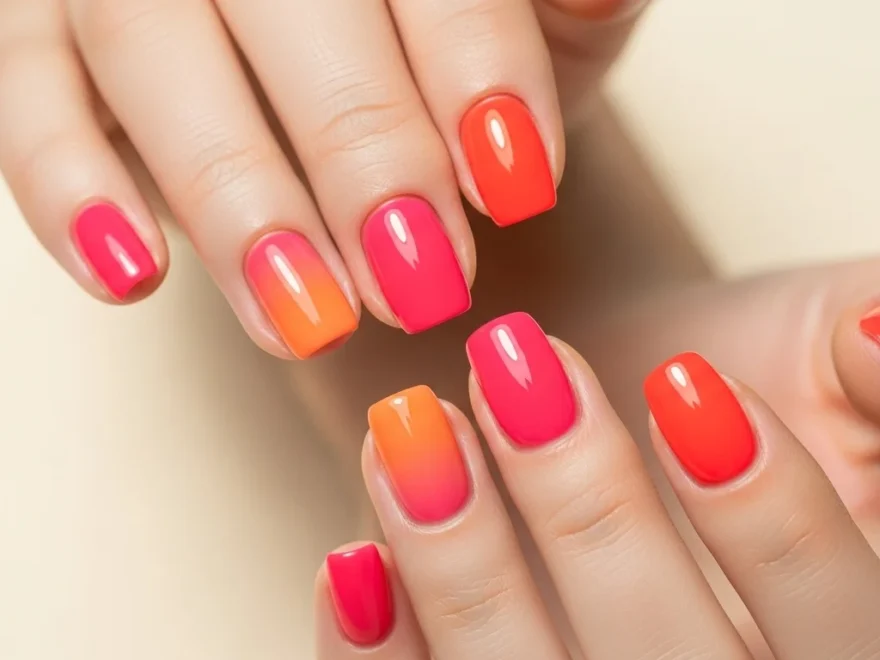
Ombre nails look expensive but they are actually one of the easiest DIY styles to try at home. For this look, you need a soft bubblegum pink and a light peach or coral orange.
Apply your base coat first. Then dab both colors onto a makeup sponge side by side. Press and roll the sponge lightly over your nail. Repeat a few times until the colors melt together.
Clean up the edges with a small brush dipped in acetone. Seal everything with a shiny top coat.
The key is to work fast before the polish dries on the sponge. You can redo any nail that does not look right. Practice on one nail first.
This style suits every nail shape. It works on short nails just as well as long ones. The peachy tone is especially flattering on warm and medium skin tones.
Budget tip: Sally Hansen and Essie both have great soft pink and peachy coral shades that cost under $5 each. You really do not need high-end brands for this one.
- Hot Pink and Burnt Orange Color Block
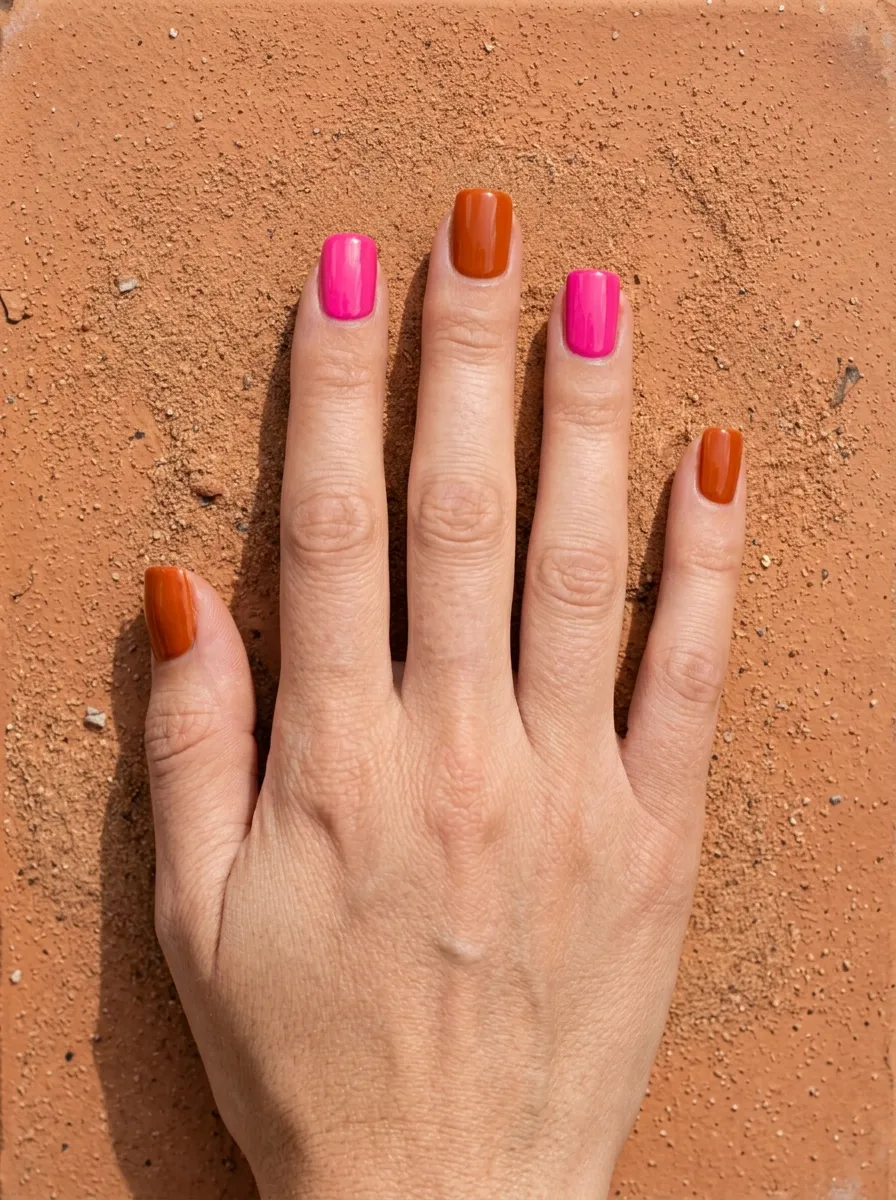
Color blocking is one of the most striking nail styles you can do at home. The idea is simple. Some nails get one color, the rest get another.
For this look, paint your thumb and ring finger in hot pink. Paint the rest in burnt orange. You can also do alternating nails if you prefer a more even split.
Use tape along the edges of each nail if you want super clean lines. Peel it off before the polish fully dries.
This style is very forgiving. You do not need to be precise. Even slightly imperfect lines look intentional with bold colors like these.
The contrast between hot pink and burnt orange is eye-catching. It reads as playful and confident without being too loud.
Pair this look with neutral outfits. A white tee or beige dress lets the nails stand out.
This is a great starting look if you are new to nail art. No tools required. Just two polishes and a steady hand.
Budget tip: Wet n Wild and NYX both carry hot pink and burnt orange shades for under $3 each. Totally affordable and good quality.
- Neon Orange Tips with Pink Base
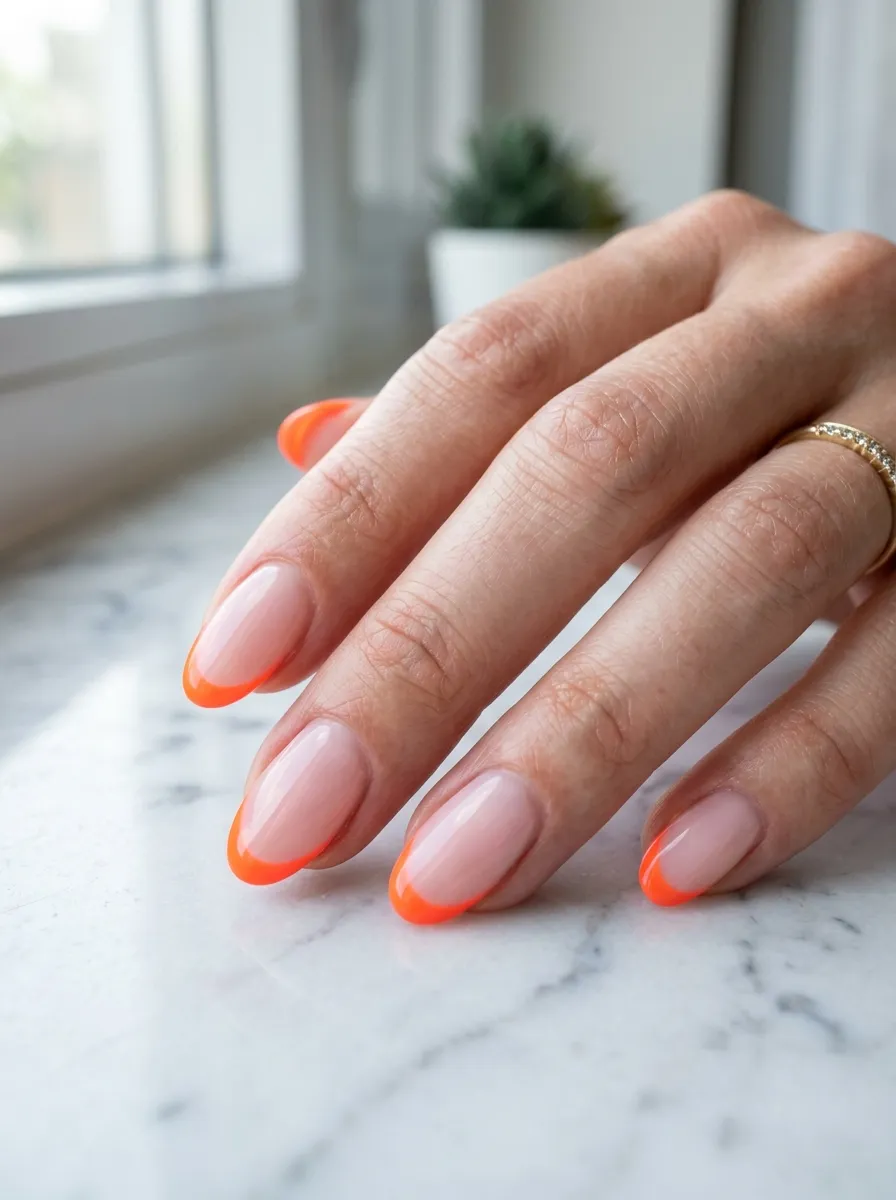
This is a modern spin on the classic French manicure. Instead of white tips, you go bold with neon orange. Pair that with a sheer pink base and you have something that feels current and fun.
Start with two coats of a sheer or translucent pink. Let it dry fully. Then use a thin nail brush or French tip guides to paint the tips in neon orange.
If your hand shakes, do not worry. A clean-up brush with acetone fixes everything. Just go slowly along the tip line.
This look is especially cute on oval and squoval shapes. The curved tip makes the orange pop even more.
Neon orange is a statement color. It grabs attention immediately. But because the base is soft pink, the overall look stays balanced.
Wear this to outdoor events, poolside days, or summer parties. It photographs beautifully in natural light.
Neon polishes often need a white base coat underneath to really pop. Apply a coat of white before your sheer pink if the neon seems muted.
Budget tip: Sinful Colors has an excellent neon orange for under $2. It is bright, opaque, and dries fast.
- Watercolor Pink and Orange Abstract Nails
Watercolor nails look like tiny paintings. The colors are sheer and soft, almost like they were brushed on with a watercolor brush. This style is artistic but actually very easy to pull off.
Start with a clean white base. Let it dry completely.
Then thin out your pink and orange polishes slightly by leaving the brush cap open for a few seconds. Dab and swipe the colors loosely over the white base. You are not trying to cover the white fully. You want it to show through.
Let the colors bleed into each other a little. That soft, blended edge is exactly what you want.
Seal with a matte top coat for a soft artistic finish. Or use a glossy coat if you prefer something more polished.
This style is very low pressure. There is no wrong way to do it. Every nail ends up looking slightly different, and that is the whole point.
It looks stunning on longer nail shapes like coffin or almond. But it works on shorter nails too.
Budget tip: Water down regular polish slightly with nail polish thinner if needed. Do not use regular nail polish remover as a thinner because it will ruin the formula.
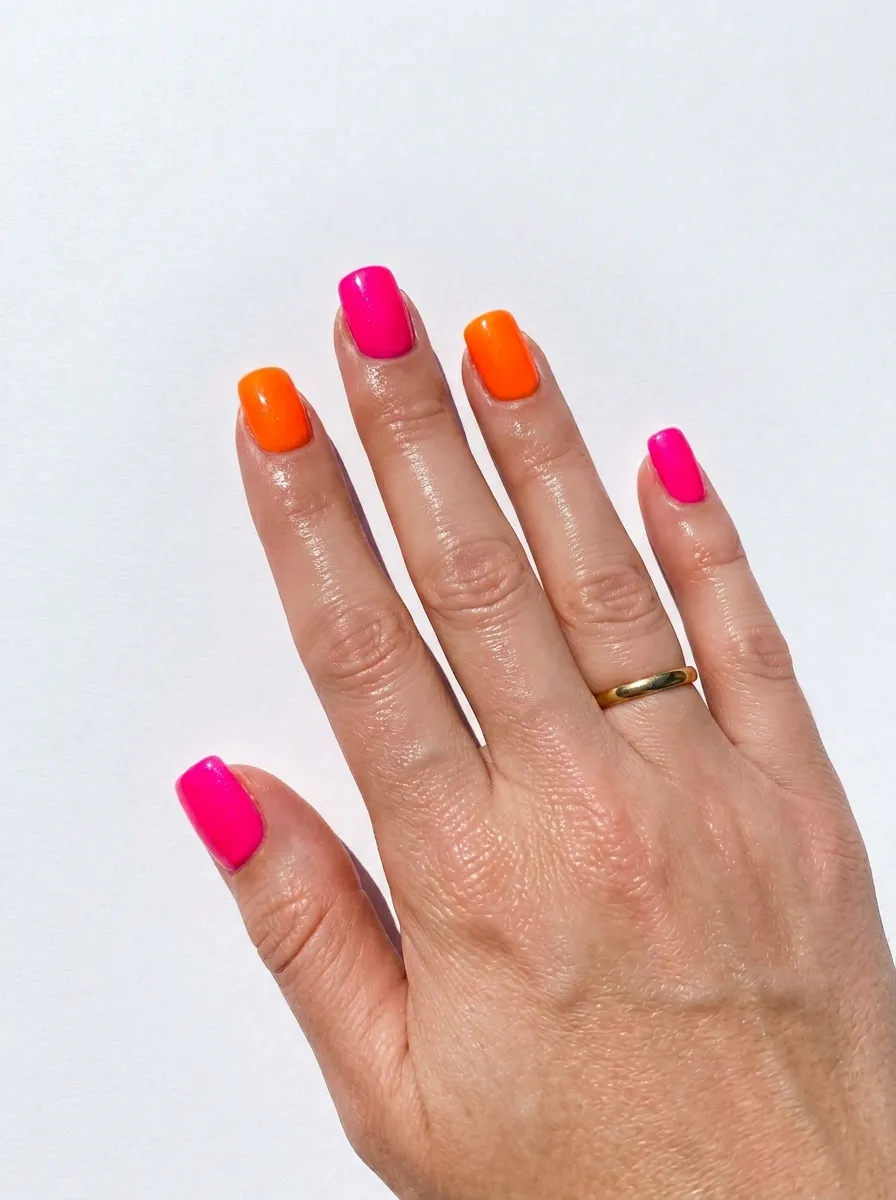
- Hot Pink Nails with One Orange Accent Nail
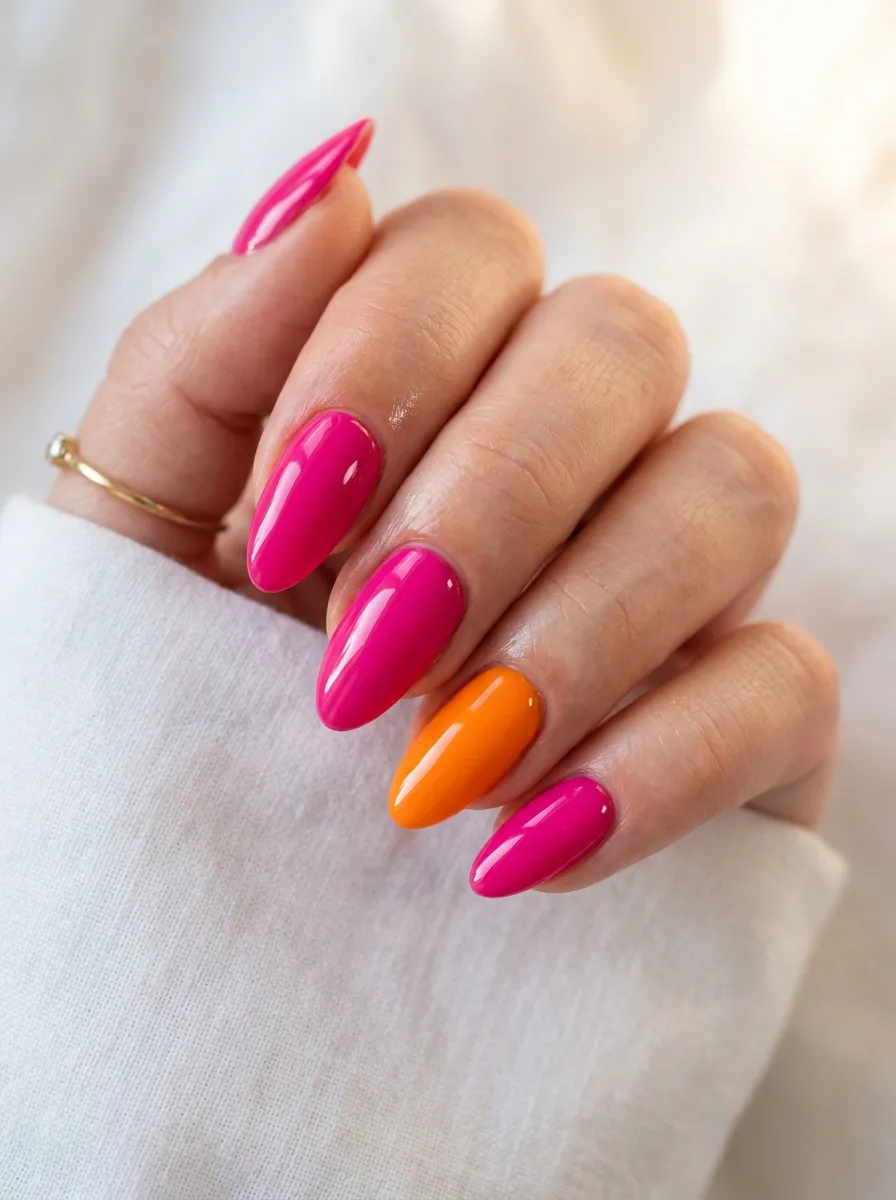
The accent nail trend never goes out of style. It is one of the easiest ways to make a simple manicure feel more interesting.
Paint all your nails in hot pink. Then choose one nail, usually the ring finger, and paint it in a bright solid orange.
That one orange nail immediately makes the whole look feel intentional and put together. It adds just enough contrast without being overwhelming.
You can also flip it. Orange on all nails, one hot pink accent. Either way works beautifully.
This is a great option if you love one color but want to add a little something extra. It takes two minutes more than a regular manicure.
The ring finger is the traditional accent nail, but try the middle finger for a bolder feel.
This style suits every nail shape and length. It is also really easy to maintain. When one nail chips, you only need to touch up that one color.
Budget tip: Buy one shade you already own and just pick up one new color as your accent. You do not need to buy a whole new set.
- Coral Pink Swirl Nails
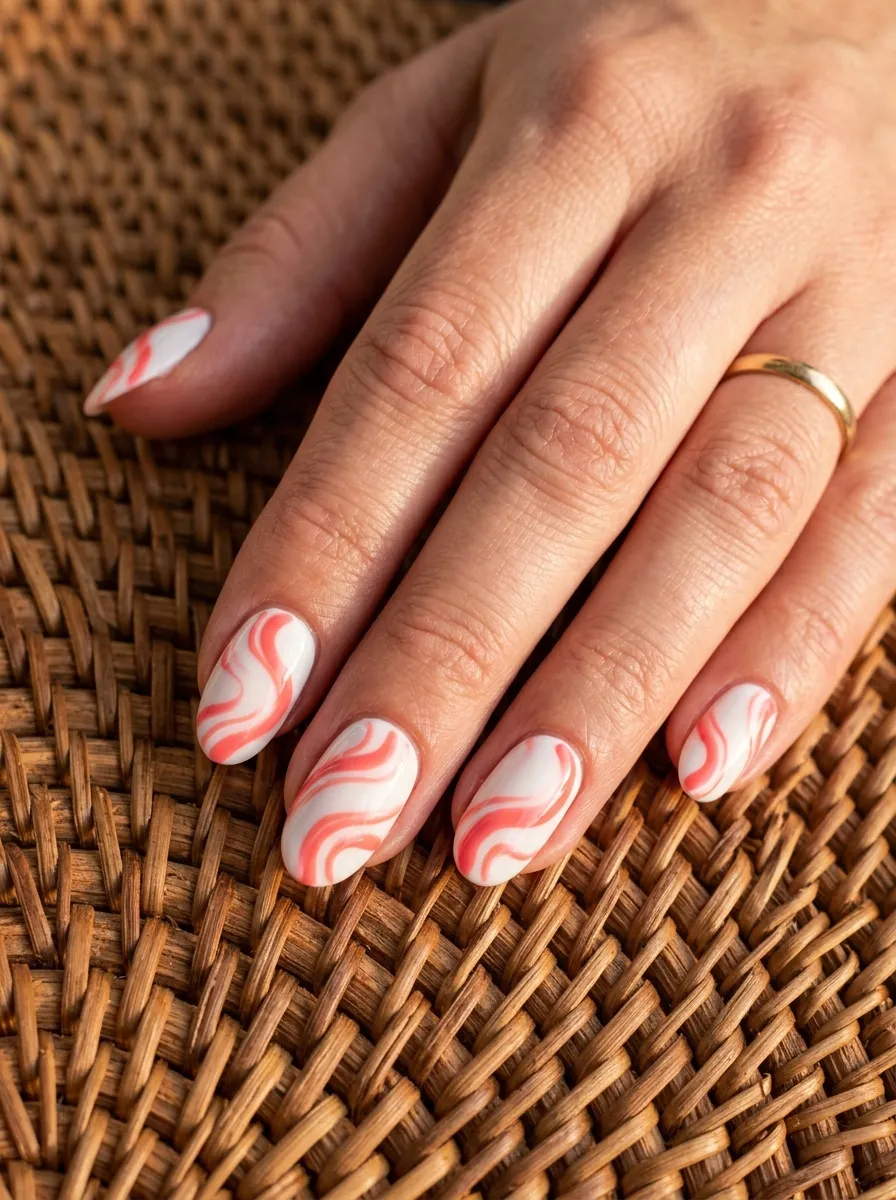
Swirl nails are everywhere right now and they look way harder to do than they actually are. All you need is a thin nail art brush and a little patience.
Start with a white or cream base. Let it dry fully. Then load a thin brush with coral pink polish and draw loose, organic swirls across each nail.
Do not try to make them perfect. Imperfect swirls look more natural and artsy. Think of it like doodling.
You can do one big swirl per nail or a few smaller ones. Mix it up on different fingers for more variety.
The coral pink color is a natural mix of pink and orange tones, so it fits perfectly into this palette.
Use a dotting tool or toothpick if you do not have a thin brush. Both work surprisingly well for swirl details.
Finish with a glossy top coat to make the swirls really stand out.
This nail look suits every shape but looks especially striking on long oval or stiletto nails.
Budget tip: Nail art brushes from Amazon or beauty supply stores cost around $3 for a whole set. You do not need expensive tools for this.
- Pink and Orange Geometric Nail Art

Geometric nail art is clean, modern, and super eye-catching. It uses straight lines, triangles, and shapes to create a graphic look.
The easiest way to achieve this at home is with striping tape. Paint your base color first. Let it dry. Then lay strips of tape across the nail in whatever pattern you like. Paint over the tape with your second color. Peel the tape off immediately while the polish is still wet.
Use pink and orange in different combinations on different fingers. Some nails can be mostly pink with an orange triangle. Others can be the reverse.
This style looks clean and intentional even when done at home. Striping tape is the secret weapon here. It creates lines that a brush simply cannot match.
You can find nail striping tape on Amazon for about $3 for a full roll. It is one of the best investments for DIY nail art.
Geometric designs work best on flatter nail shapes like square or squoval. They give you more surface area to work with.
Budget tip: You can also use thin strips of regular tape in a pinch. Just make sure the base coat is fully dry before you apply the tape or it will peel.
- Dusty Rose and Terracotta Nails
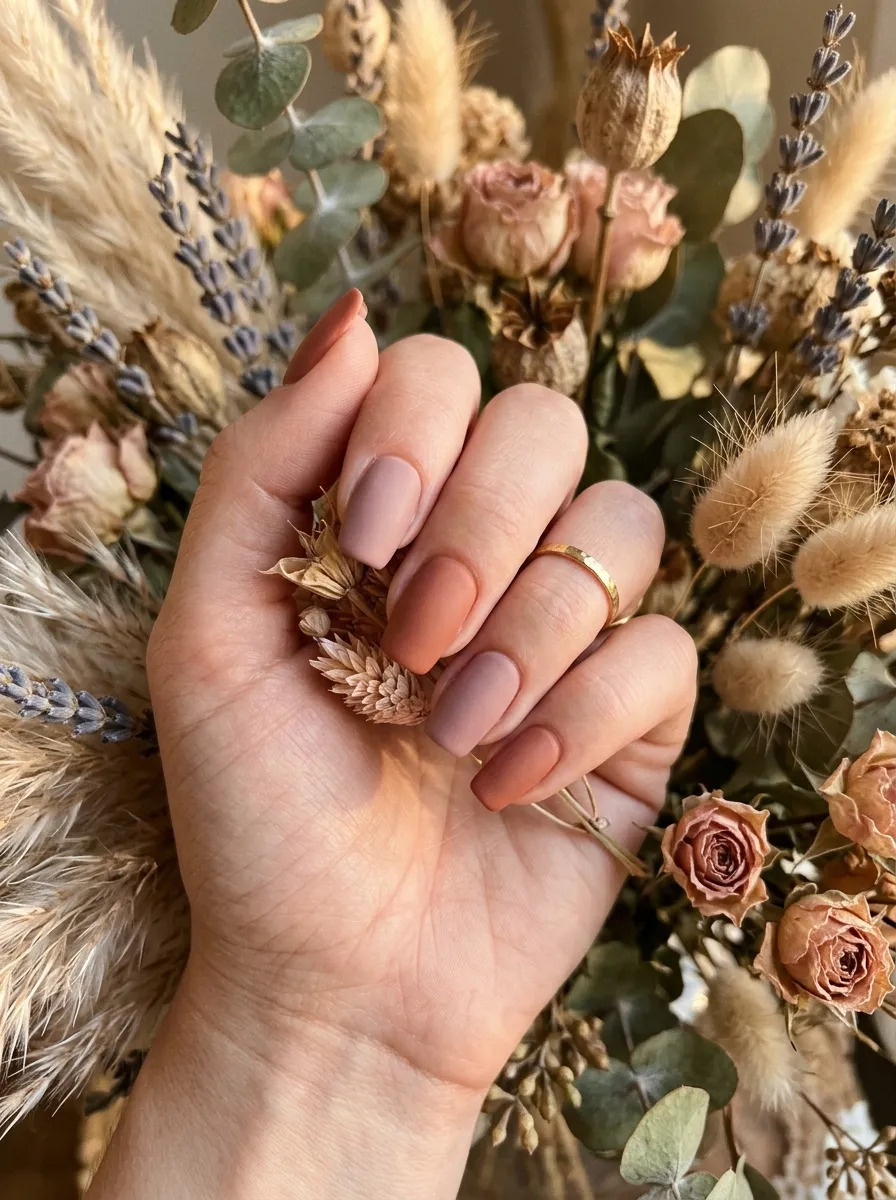
Not all pink and orange nails have to be loud. This version is soft, earthy, and very grown-up. Dusty rose and terracotta are muted, warm tones that look beautiful together.
Paint alternating nails in each color. Or do three nails in one shade and two in the other.
A matte top coat is the finishing touch that makes this look really sophisticated. It turns two simple polish colors into something that looks high-end.
This palette works especially well in autumn and winter. But honestly, it looks great year-round.
Terracotta is basically a brownish orange, which pairs with dusty rose in a very warm, earthy way. It feels like a desert sunset on your fingertips.
This style is also office-friendly. The colors are rich but not overly bright. They are professional enough for work but still personal and interesting.
Budget tip: OPI and Zoya have great muted terracotta and rose shades, but also check drugstore brands like Essie. Their earthy tones are often just as good and cost half the price.
- Pink French Tips with Orange Accents
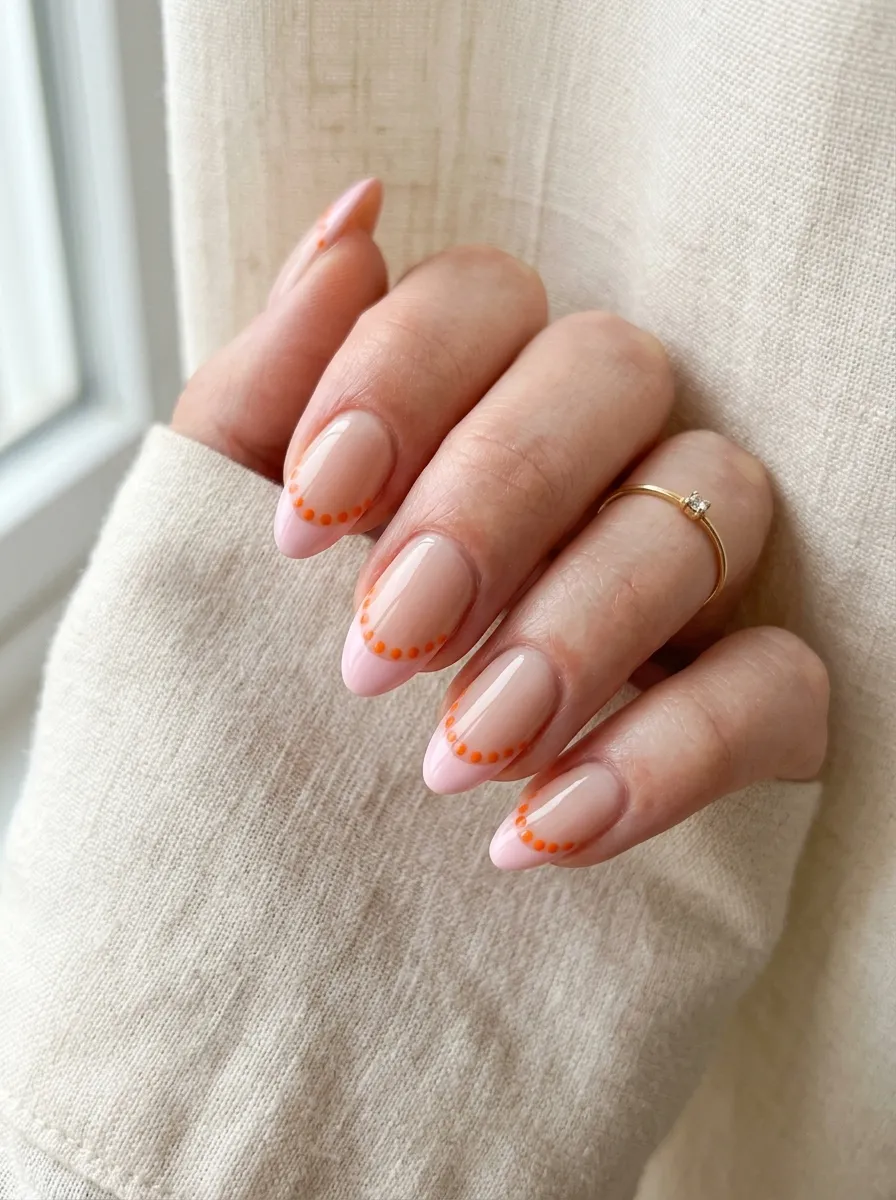
French tips get a fun makeover here. Instead of plain pink tips, you add tiny orange details along the smile line. It is delicate, detailed, and really pretty.
Start with a nude or sheer base. Paint the tips in soft pink. While that dries, load a dotting tool or toothpick with orange polish.
Place small orange dots right along the bottom edge of the pink tip. Space them evenly. You can do four or five dots per nail.
You can also do a thin orange line just below the pink tip instead of dots. Both versions look great.
This style is subtle enough to wear anywhere. It is not loud, but it is interesting. People will notice it up close.
This look works best on longer nails where the tip area is more visible. But medium nails can pull it off too.
The detail makes your nails look like they were done at a nail bar. Nobody needs to know you did it yourself.
Budget tip: A box of toothpicks from your kitchen works just as well as a fancy dotting tool. Use the pointed tip for small dots and the flat end for larger ones.
- Sunset Gradient Nails
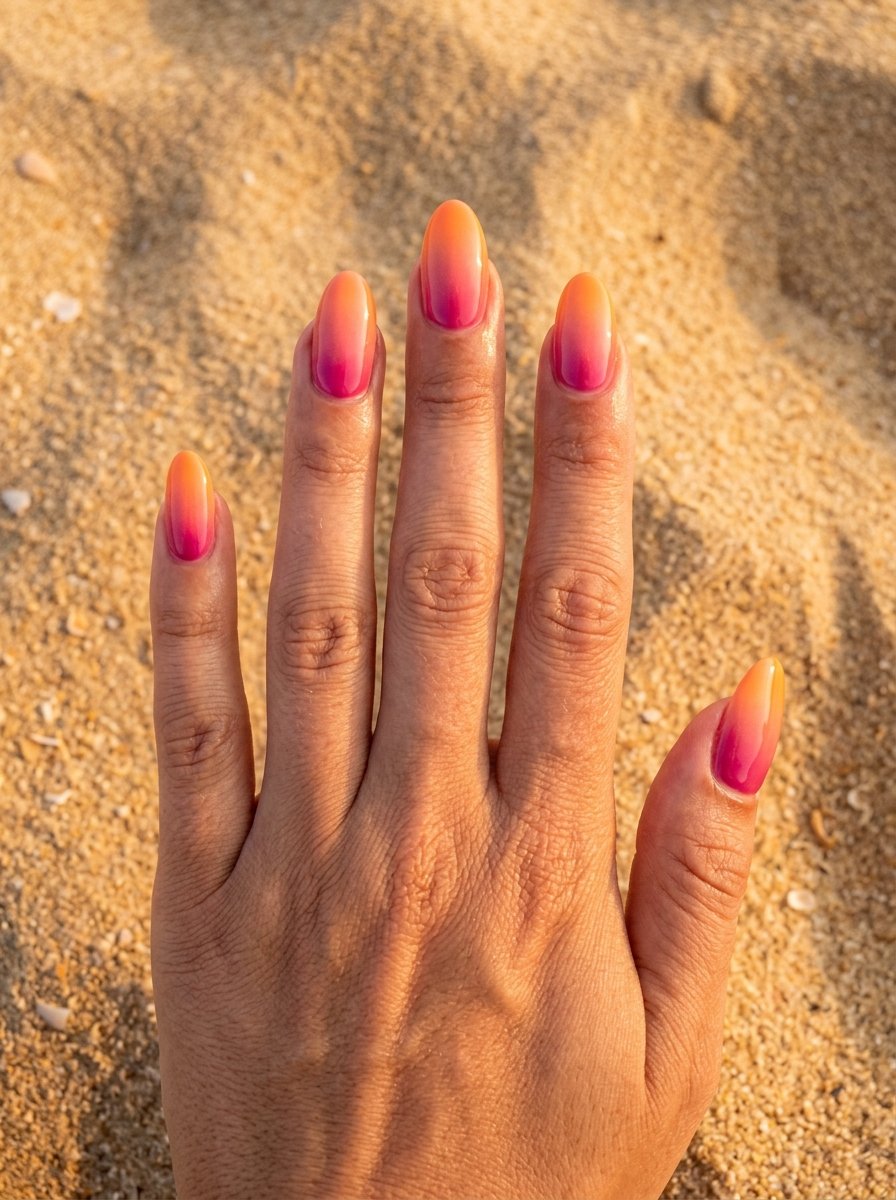
Sunset nails capture that magical hour when the sky turns pink, orange, and gold. This gradient uses three or more shades that fade from dark to light or light to dark.
Pick three shades: a deep fuchsia or hot pink, a coral, and a bright orange or peach. Line them up in order from darkest to lightest.
Use the sponge method. Apply each color to a different section of the sponge and dab it across your nail. Work from one end to the other.
Layer it a few times until the colors are rich and the fade looks smooth.
This look photographs incredibly well. In sunlight, it literally looks like a sunset on your nails.
The more layers you apply, the more vivid and saturated the gradient becomes. Do not stop at just one or two passes.
Finish with a shiny top coat to make all the colors pop.
This style suits longer nails best. The extra length gives the gradient room to breathe and show all three colors clearly.
Budget tip: You do not need special gradient polish sets. Just three regular polishes in a similar tonal family work perfectly.
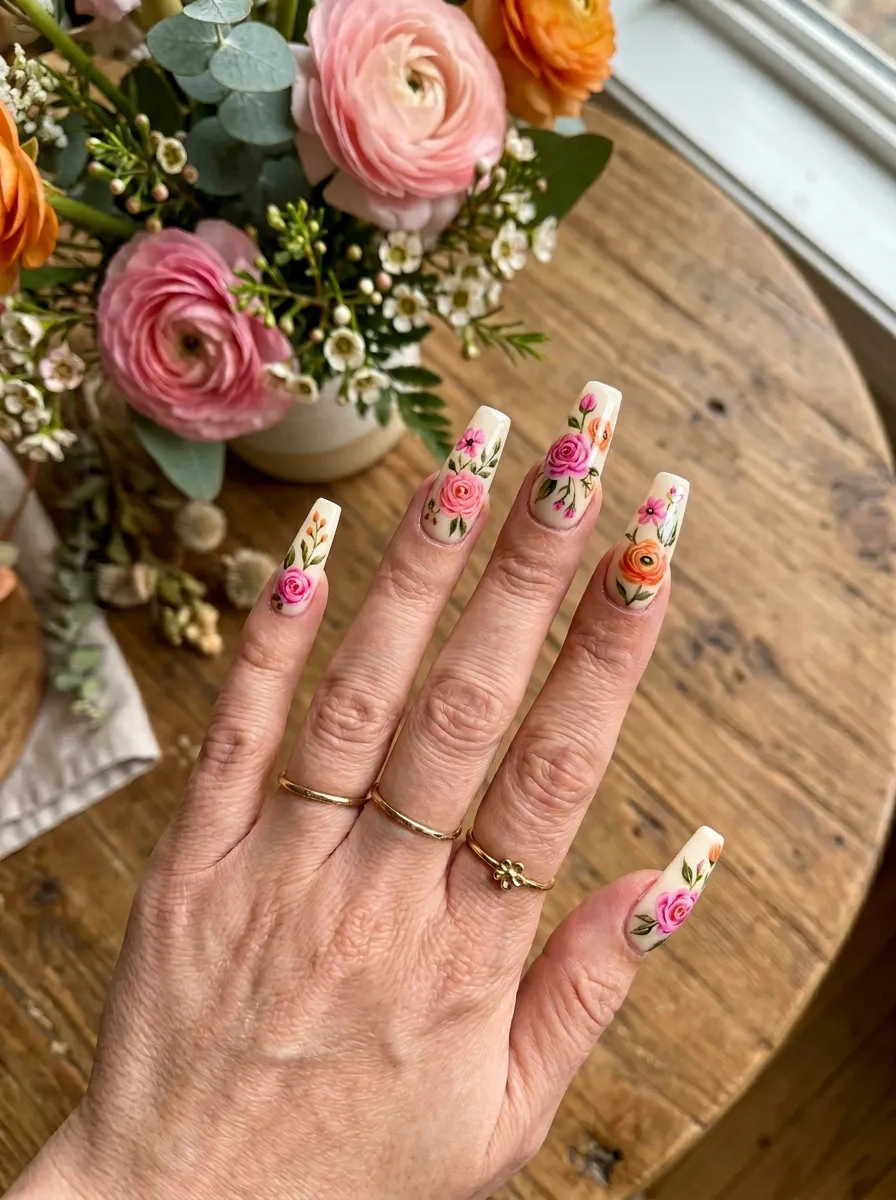
- Orange Nails with Pink Floral Designs
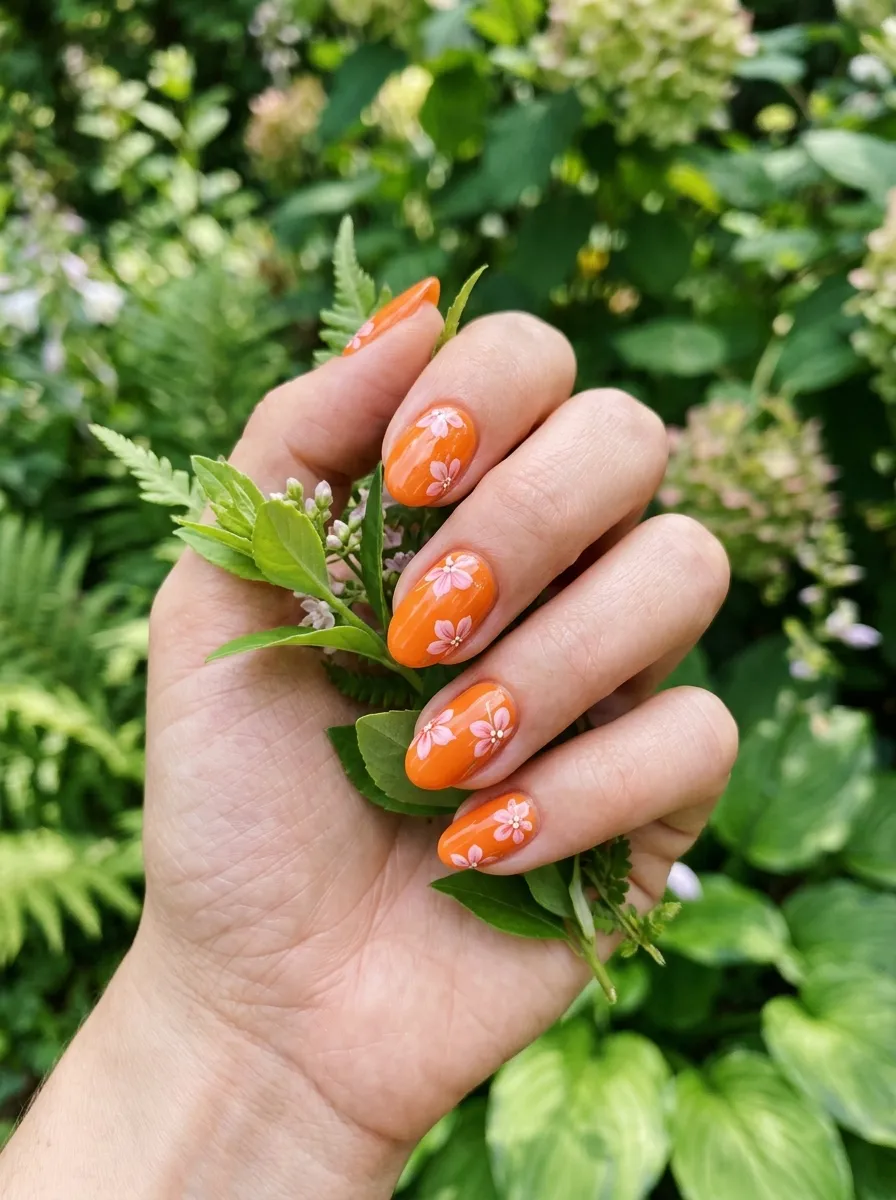
Flowers on nails are timeless. On a bright orange base, small pink flowers look absolutely stunning.
Paint your nails in a solid bright orange. Let it fully dry. Then use a thin nail art brush or a dotting tool to create small five-petal flowers in pink.
Make each petal with a small oval stroke. Then add a tiny white or yellow dot in the center.
You do not need to be a nail artist to do this. Simple, small flowers with slightly uneven petals look charming and handmade.
Do flowers on two or three accent nails and leave the rest plain orange. That balance prevents it from looking too busy.
Pink on orange sounds bold, but in practice it looks beautiful because the pink reads softer against the warm orange base.
This is a great spring and summer nail look. It also works well for weddings, garden parties, or any floral-themed event.
Budget tip: Thin nail art brushes make this easier, but a toothpick dipped in pink polish makes surprisingly clean small petals. Try it before investing in tools.
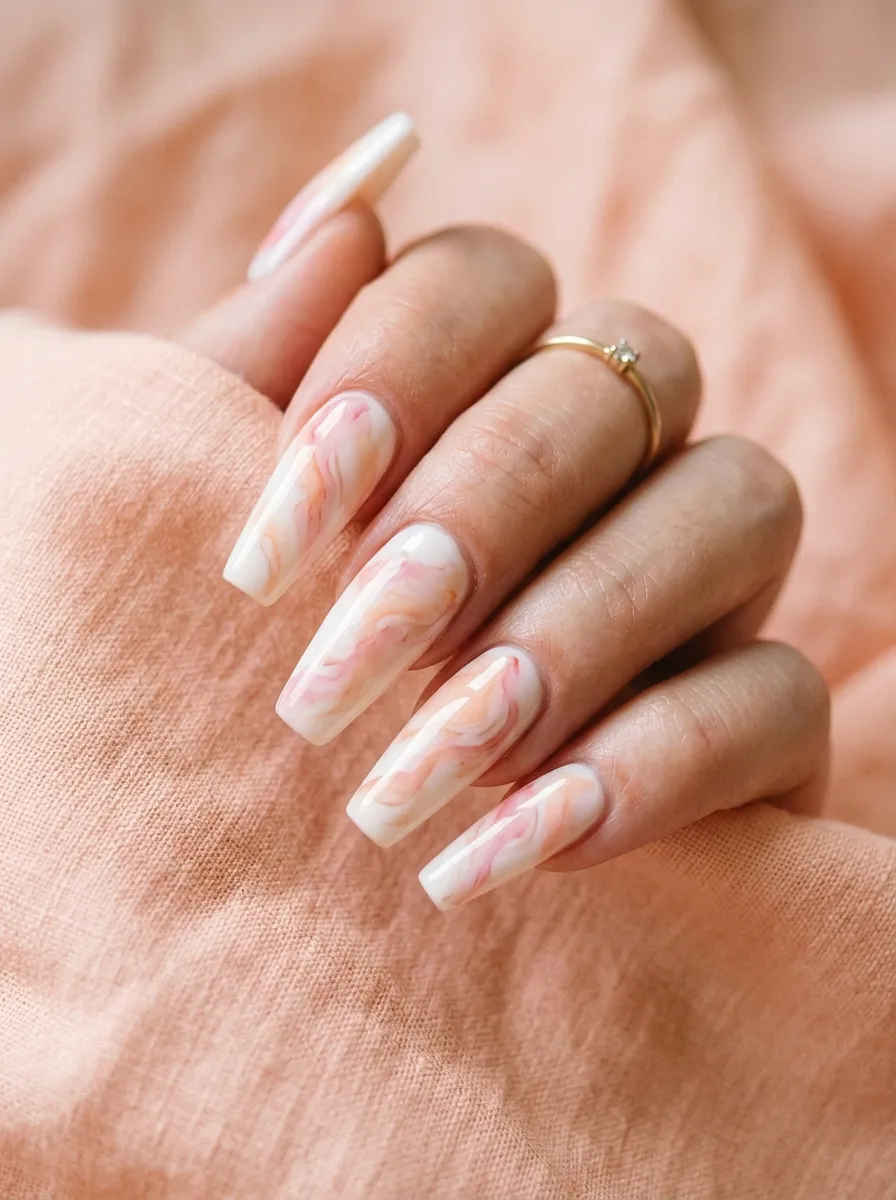
- Pink and Orange Marble Effect Nails
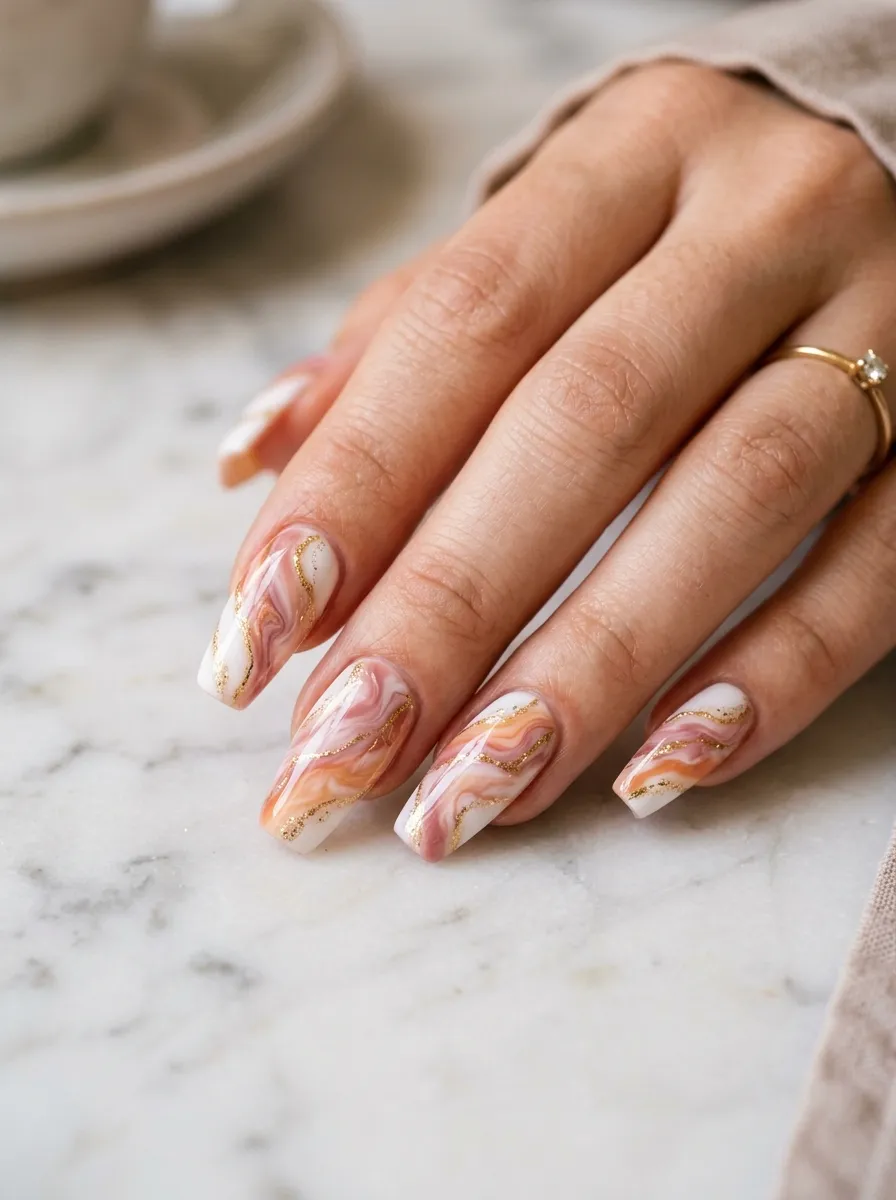
Marble nails look incredibly luxurious but they are not as hard to create as they seem. The trick is to use a thin brush and keep your strokes organic and irregular.
Start with a white base. Let it dry. Then use a thin brush dipped in pink to draw wobbly, irregular veins across the nail. Think of cracked stone, not straight lines.
Repeat with orange or gold tones to add depth. The veins should intersect and branch off naturally.
Add a few thinner lines in a lighter shade for extra detail. Then blur the edges very slightly with a dry brush before they fully dry.
Seal with a glossy top coat. The shine really brings out the marble effect.
Gold veins are an optional extra step that makes this look feel really high-end. You can use a gold nail art pen or a thin brush dipped in gold glitter polish.
This nail style looks best on longer, flatter shapes like coffin or square. The surface area lets the marble pattern shine.
Budget tip: Practice on paper first to get comfortable with your vein lines. It takes only a few minutes and saves you from redoing your nails.
- Candy Pink and Tangerine Stripe Nails
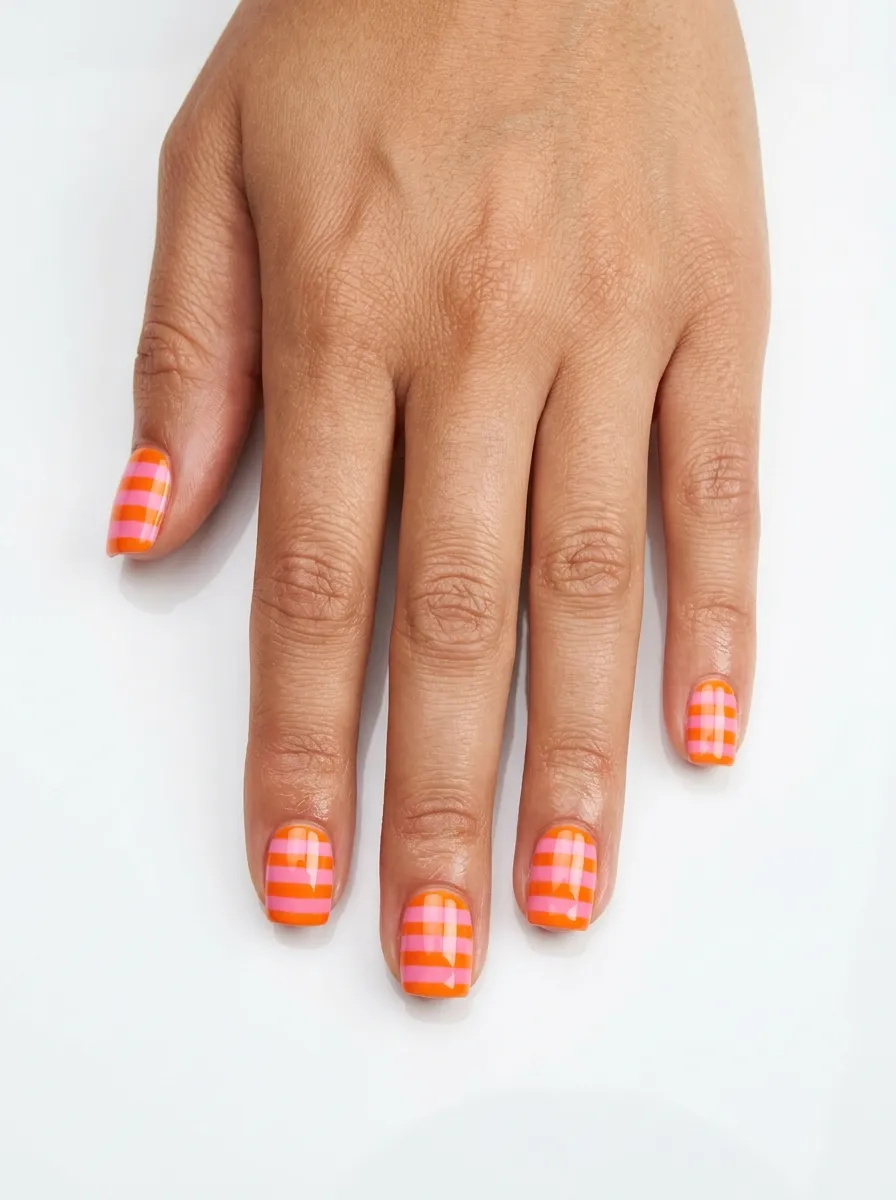
Stripes are bold, graphic, and super fun. This version uses candy pink and tangerine in horizontal bands across the nail.
Use nail striping tape to create even, clean stripes. Apply your first color, let it dry, then lay strips of tape across the nail horizontally. Paint your second color over the entire nail. Peel the tape immediately.
You will be left with clean pink stripes on an orange background or vice versa.
Vary the number of stripes per nail. Some can have two wide stripes, others can have four or five thin ones.
Thinner stripes create a more dynamic, optical illusion effect while wider stripes look bolder and more graphic.
This is a great look for people who love retro or pop art vibes. It has an energetic, playful quality that suits casual outfits really well.
Pair it with solid-colored clothing so your nails do the talking.
Budget tip: Regular scotch tape cut into thin strips works as nail striping tape if you do not have the real thing. Cut strips as thin as possible for best results.
- Pink Glitter Nails with Orange Base
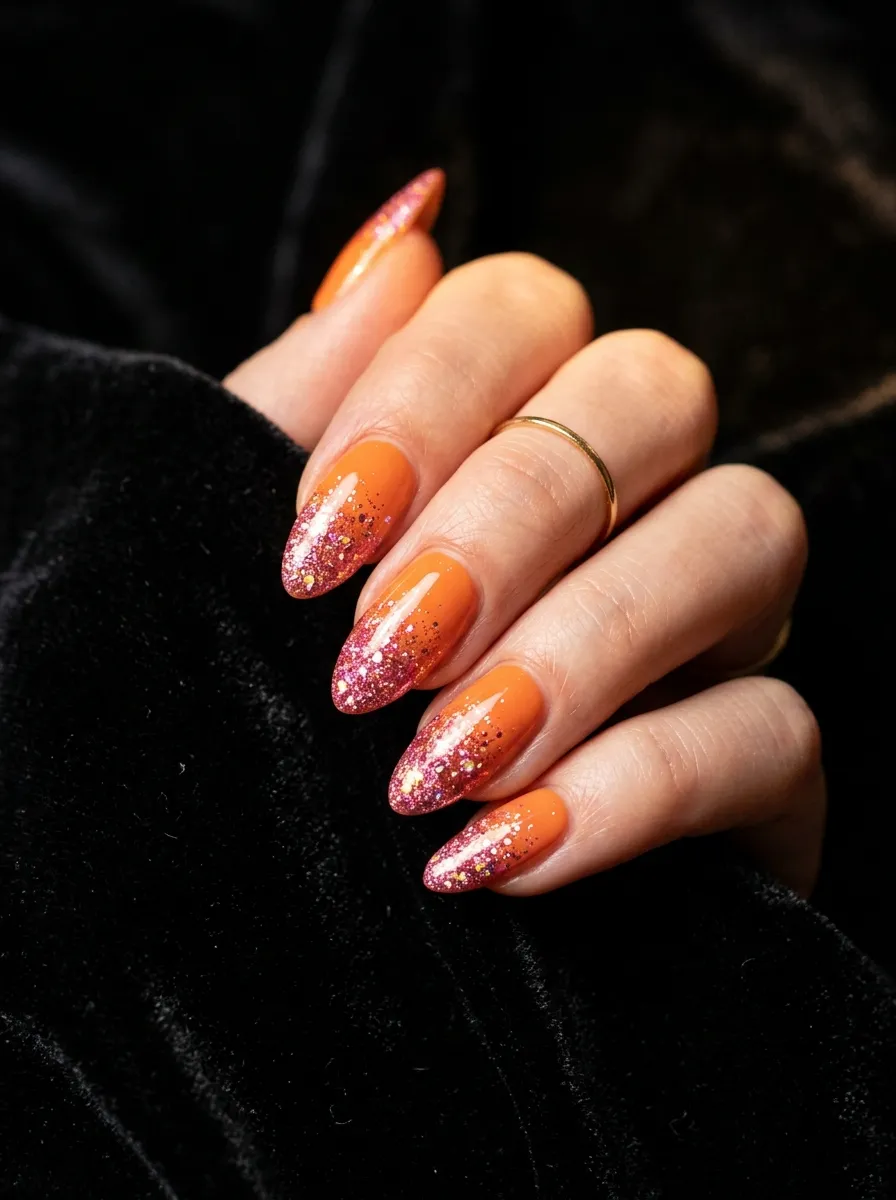
Glitter makes everything better. On a warm orange base, a pink glitter gradient looks glamorous and festive.
Paint your nails in solid orange first. Let them dry fully. Then take a flat eyeshadow brush and dab chunky or fine pink glitter polish near the tips.
Use a back-and-forth dabbing motion rather than brushing. This builds the glitter up at the tip and fades it toward the base naturally.
Layer two or three coats of glitter near the tip for maximum sparkle.
Seal with a generous layer of glossy top coat. Two coats is better than one here because glitter can feel rough.
This look works for parties, nights out, holiday events, and even weddings with a fun dress code.
You can also do the reverse by applying the glitter at the base near the cuticle and fading it upward.
This style is very forgiving. Glitter hides small imperfections in the base coat, so it is great for beginners.
Budget tip: Glitter top coats are different from chunky glitter polish. For a gradient, chunky glitter polish gives more control. Look for it at any beauty supply store for around $3 to $5.
- Baby Pink and Orange Chrome Nails
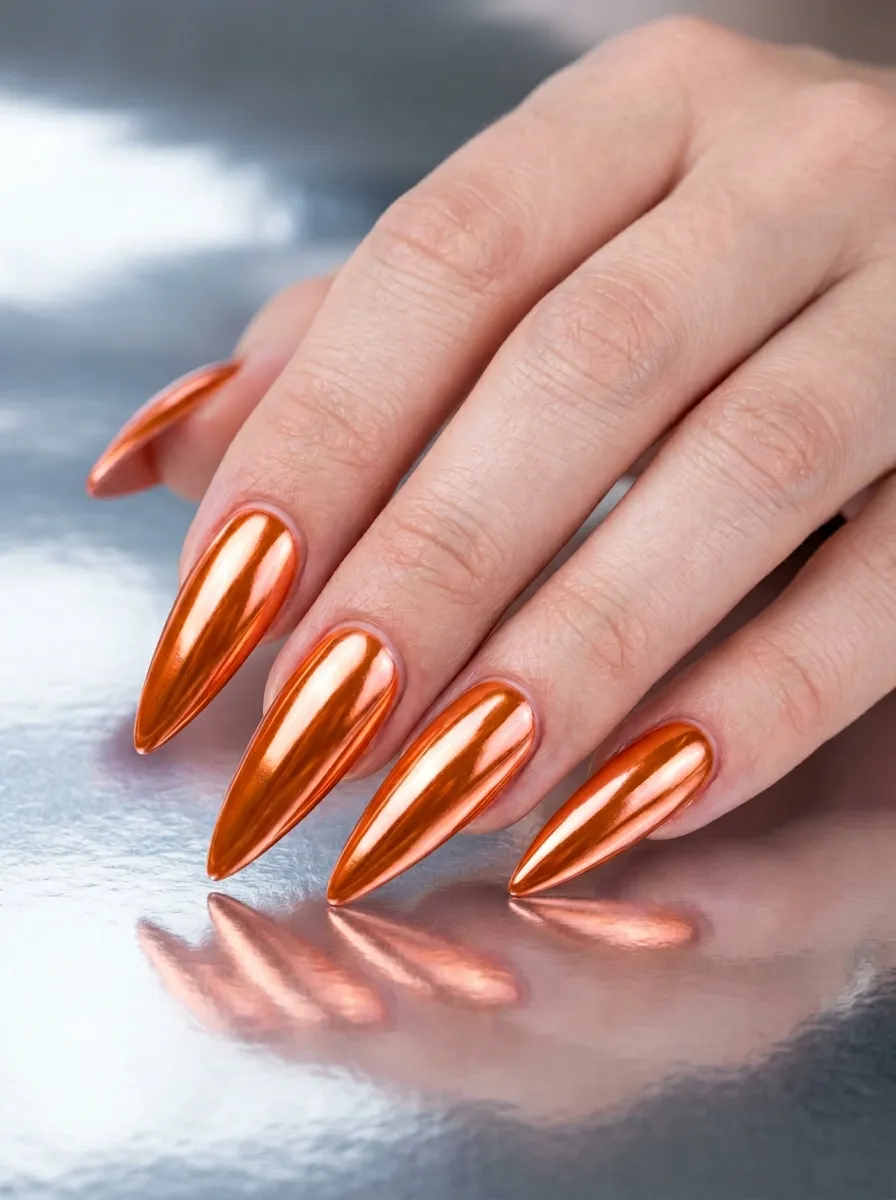
Chrome nails have that futuristic, mirror-like finish that looks like liquid metal. Combining baby pink and orange chrome gives you something that is bold and beautiful.
You can do all nails in the same chrome or alternate between pink chrome and orange chrome on different fingers.
Chrome powder is applied over a gel base coat with a silicone applicator. If you do regular polish at home, chrome-effect polishes from brands like Sally Hansen or Essie give a similar shine without needing a UV lamp.
The finish is incredibly reflective. It catches light in a way that regular polish simply cannot match.
Baby pink chrome is subtle and elegant. Orange chrome is bold and dramatic. Together they create a high-contrast, futuristic look.
This nail style photographs extremely well. Even a simple phone camera will capture the shine beautifully.
Pair this look with minimal jewelry so the nails stay the focus.
Budget tip: Chrome powder kits can be found on Amazon for around $10. They come with the applicator included. Make sure to use them over gel polish for best adhesion.
- Pink and Orange Tie-Dye Nails
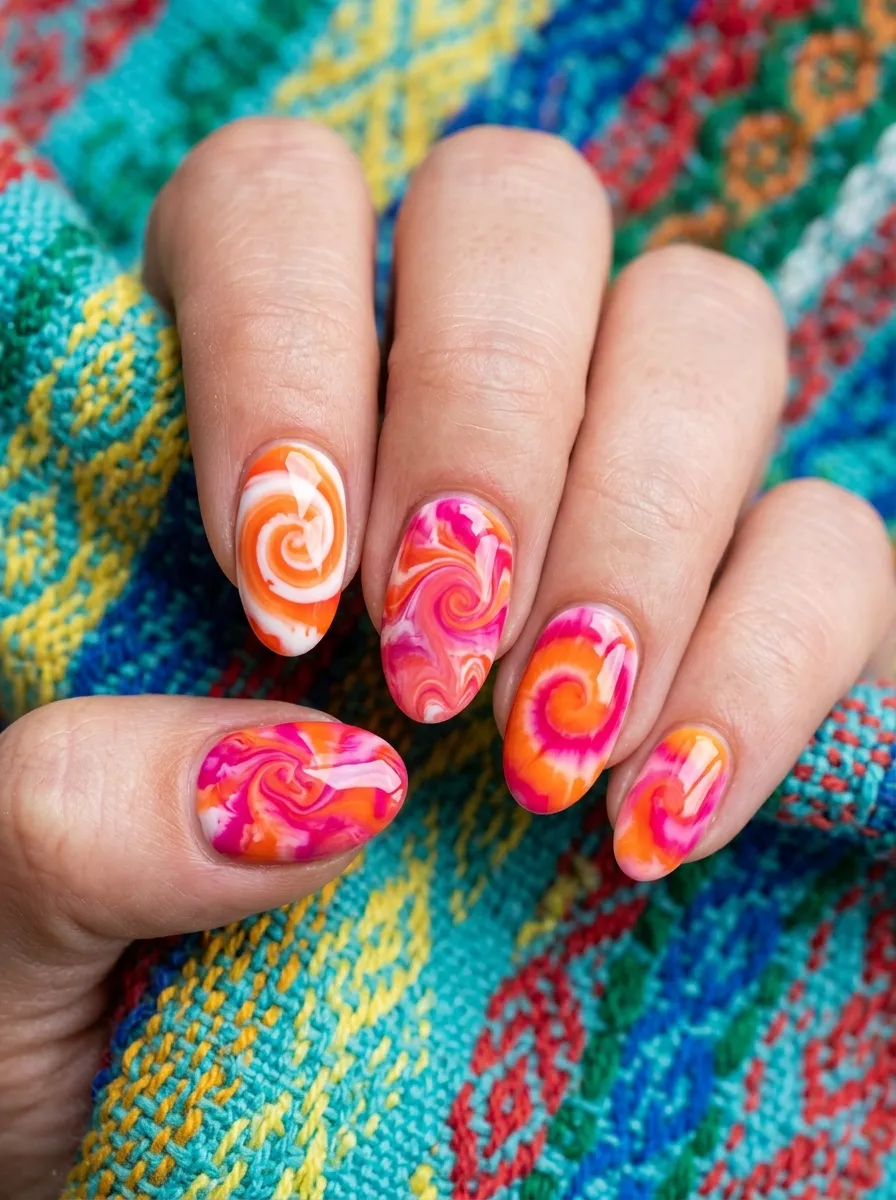
Tie-dye nails look wild and fun. The good news is they are actually easy to recreate at home with a little water.
This uses a technique called water marbling. Fill a small cup with room temperature water. Drop pink and orange nail polish into the water one drop at a time. The polish will spread across the surface.
Use a toothpick to swirl the colors. Dip your nail into the design. Clean up the edges with acetone.
The result is a totally unique swirly pattern on every nail. No two nails will ever look the same, which is part of the charm.
Nail polish that is older or thicker may not spread well on water. Use newer polish for best results.
This technique takes a little practice but once you get the hang of it, you can do a full set in under 30 minutes.
Finish with a top coat to lock in the design and smooth out any uneven texture.
Budget tip: You only need basic drugstore polish for water marbling. The simpler the polish formula, the better it spreads on water.
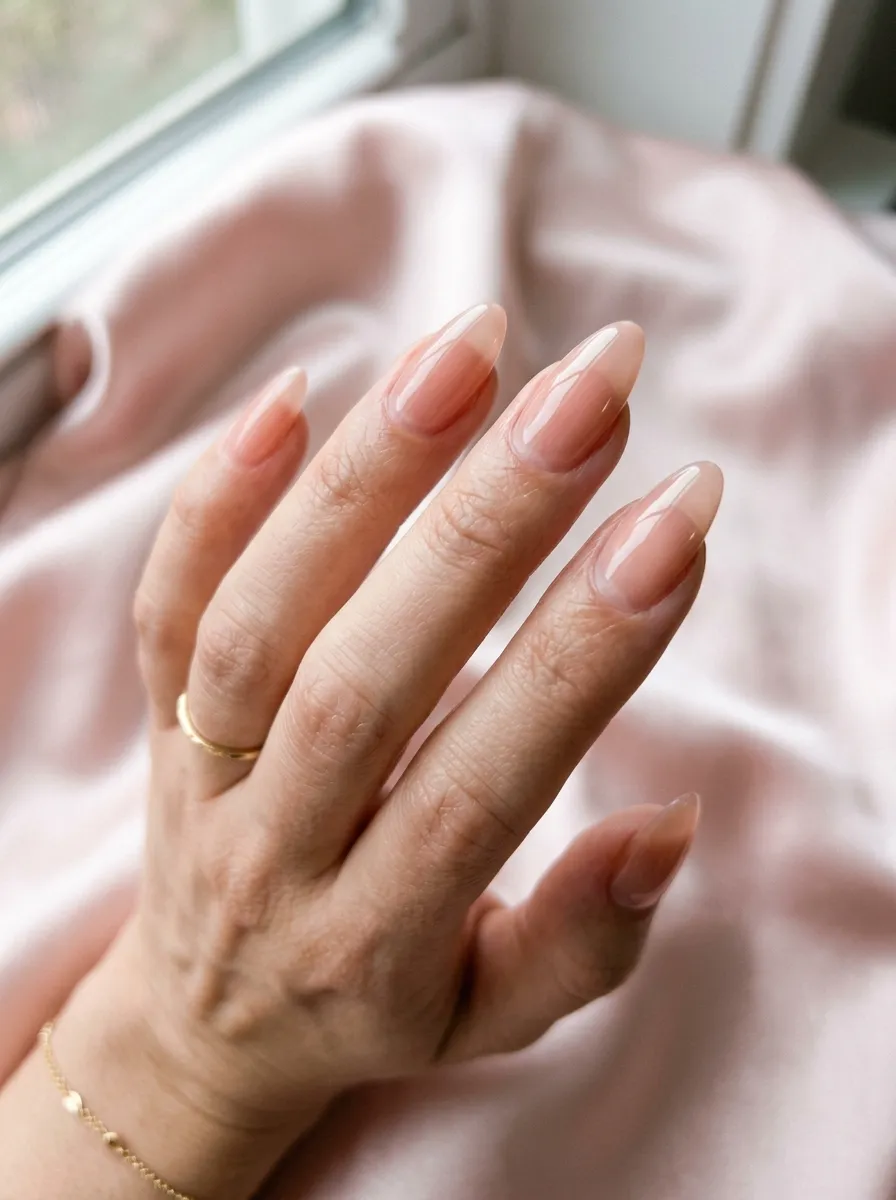
- Pastel Pink and Peach Minimalist Nails
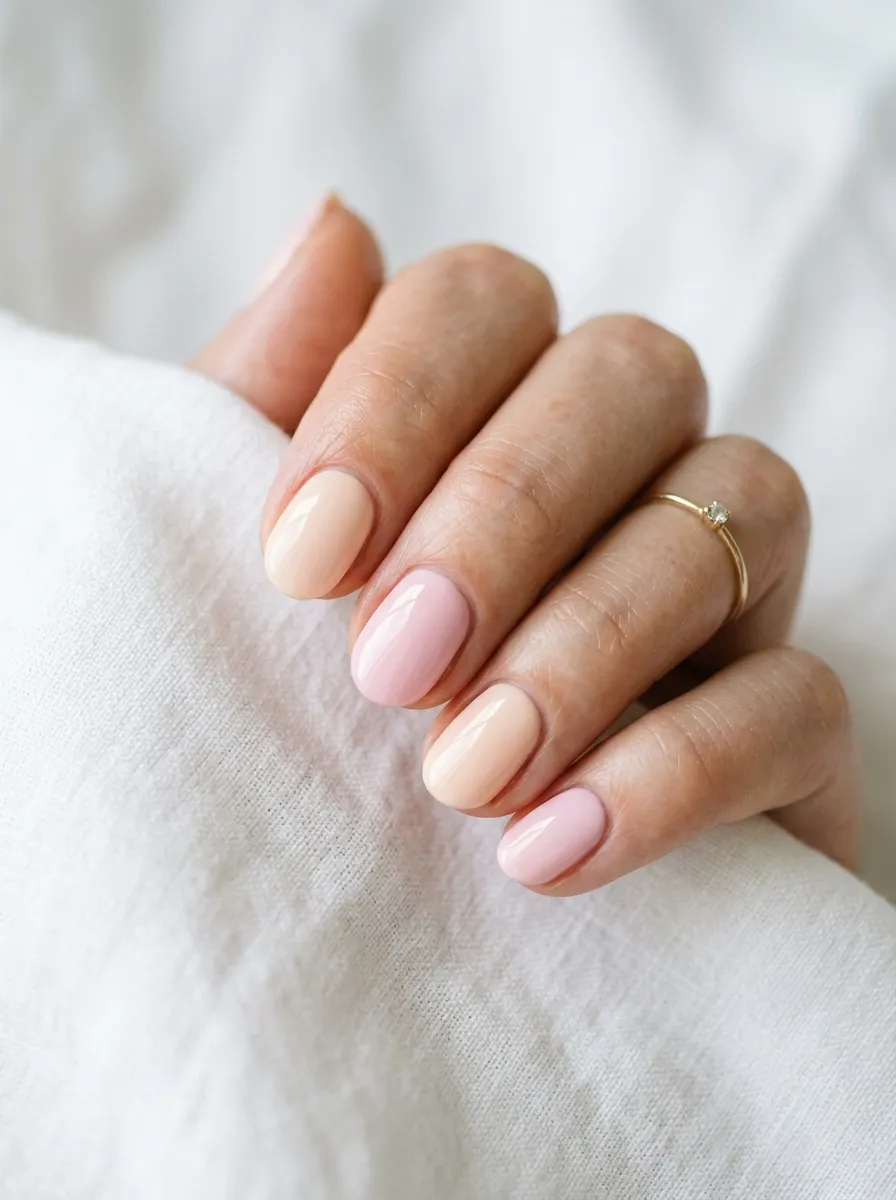
Sometimes less is more. This minimalist version of the pink and orange palette is soft, subtle, and quietly beautiful.
Use a pastel pink and a pale peach, which sits right between pink and orange. Alternate them across your nails or keep all nails the same shade with just one or two as a slightly different hue.
No nail art needed. Just clean, well-shaped nails with a perfect polish application.
A glossy top coat is the only decoration this look needs. It makes even the simplest sheer polish look polished and intentional.
This is the perfect nail style for people who want to look put together without drawing too much attention. It is quiet, elegant, and works for every setting from the office to a formal dinner.
The soft pastel tones also look beautiful on all skin tones. Both warm and cool complexions suit this palette.
This style is also incredibly easy to maintain. Light colors show fewer chips and last longer between touch-ups.
Budget tip: Essie Ballet Slippers is a cult-favorite sheer pink and costs around $9. Pair it with any light peachy polish from the drugstore.
- Orange Nails with Pink Negative Space Design
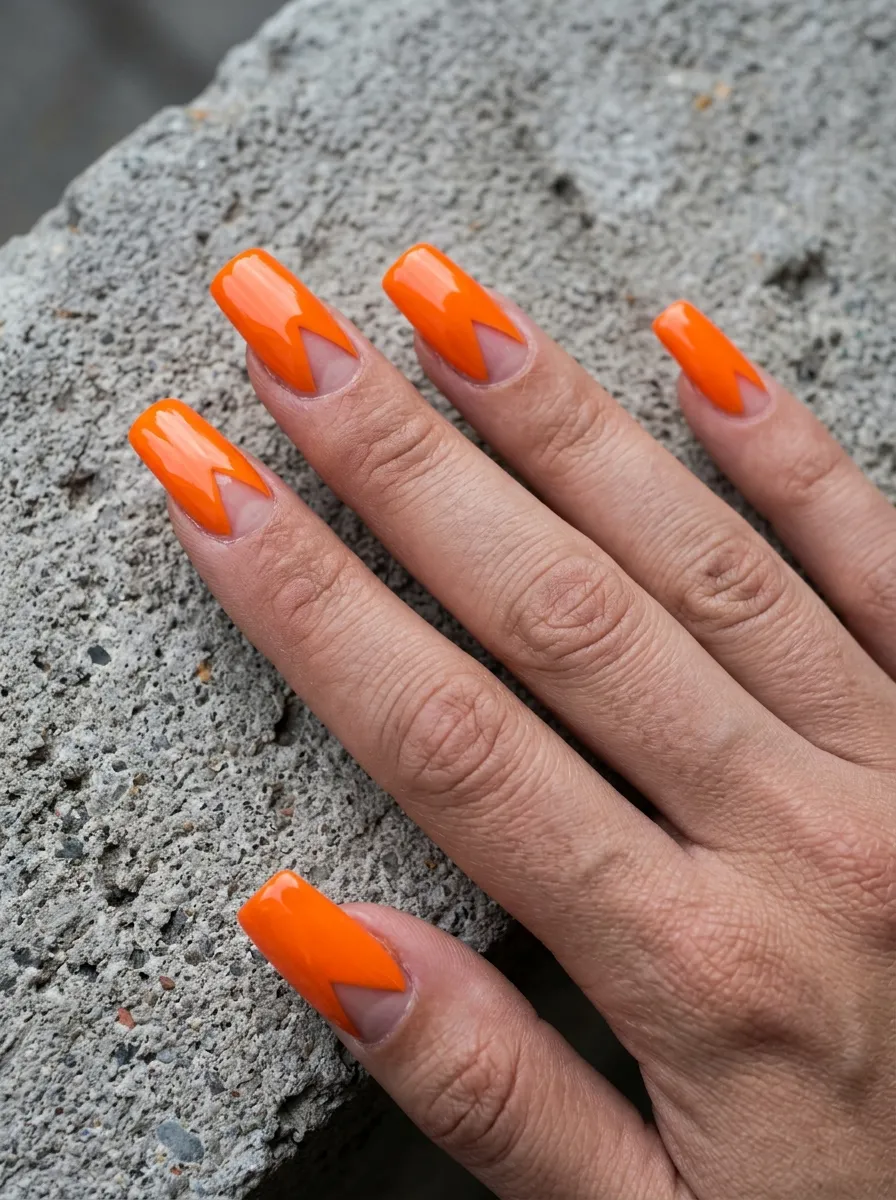
Negative space nail art uses the bare nail as part of the design. Instead of covering every inch in color, you leave certain areas unpainted.
Paint the majority of your nail in orange. But before painting, place small pieces of tape in a shape near the cuticle area. After painting and removing the tape, you are left with a clean geometric cutout showing your natural nail.
The contrast between the orange polish and the bare nail is striking.
Try a triangle, a thin horizontal band, or a small diamond shape.
This style looks very high-end and intentional. It is graphic, modern, and totally unique.
Pink polish can be used in the unpainted sections instead of leaving the bare nail. Just paint the section pink after removing the tape.
This design works best on square or coffin shapes where flat surfaces give you more room for geometric lines.
Budget tip: Tape is your best friend here. Masking tape works better than regular tape because it peels off cleanly without dragging the polish.
- Hot Pink Nails with Orange Foil Accents
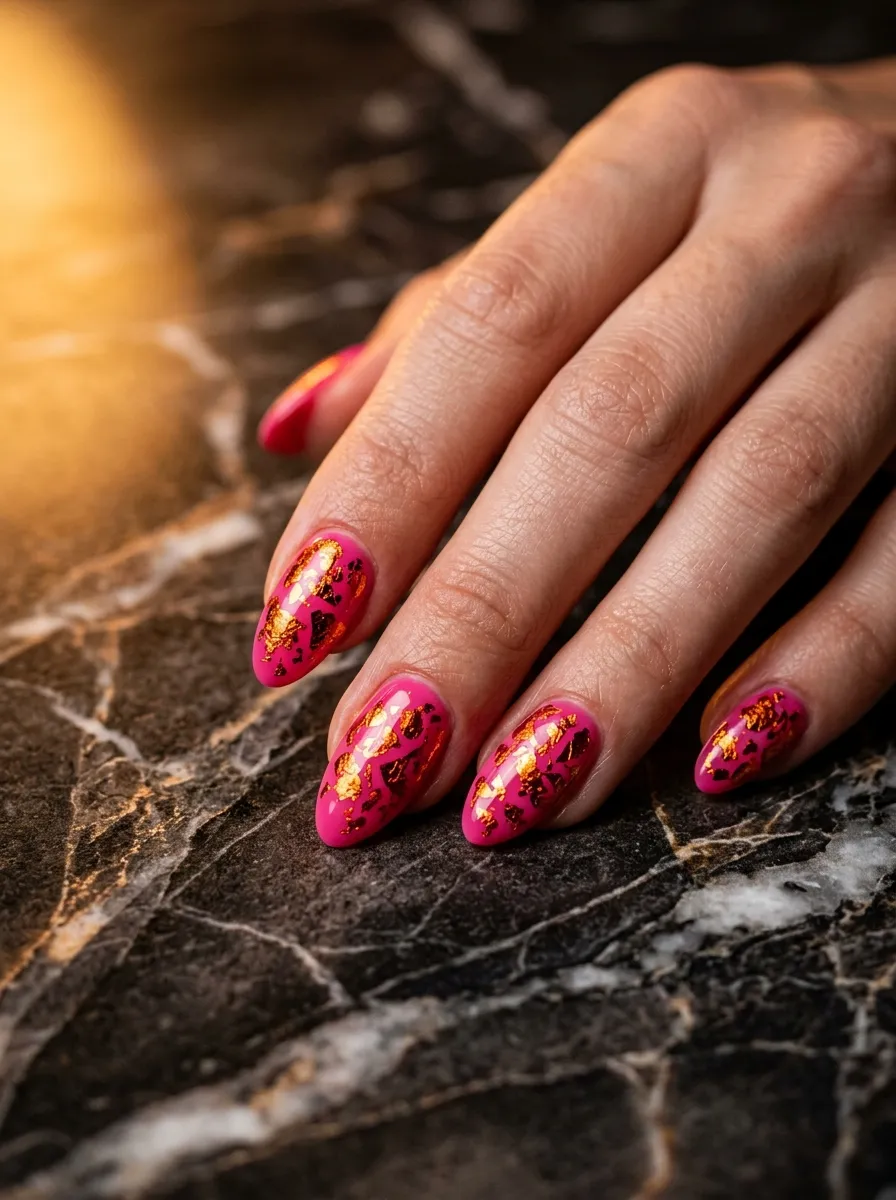
Nail foil gives your manicure a crinkled metallic texture that looks expensive and editorial. On a hot pink base, orange foil creates a sunset-inspired effect.
Paint your nails in hot pink. While the polish is still slightly tacky (not fully dry), press small pieces of orange nail foil onto random sections of the nail. The foil adheres to the tacky surface.
You do not need to cover the whole nail. Partial foil coverage looks more artistic and intentional.
Pull the foil sheet away slowly and the metallic pieces will transfer.
Nail foil kits usually include a special adhesive glue that you apply first, but the tacky-polish method also works surprisingly well.
Seal everything with a thick top coat so the foil does not peel or lift.
This look suits evening events, parties, and photoshoots really well. It is bold but not overwhelming because the foil adds texture rather than extra color.
Budget tip: Nail foil kits are available on Amazon and at beauty supply stores for around $5. You get a huge roll that will last you dozens of manicures.
- Pink and Orange French Ombre Nails
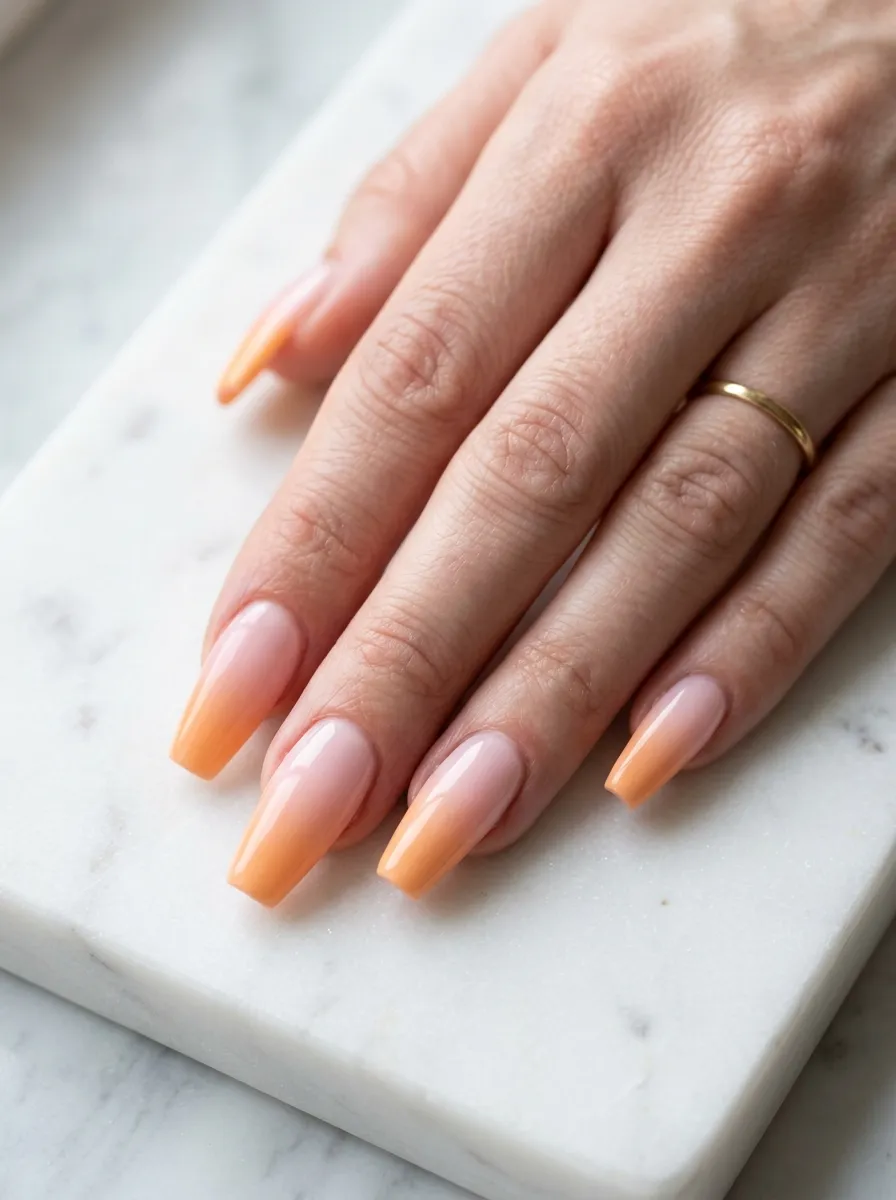
This style is a combination of two popular techniques: the French manicure and the ombre fade. Instead of a sharp line at the tip, the color melts from pink into orange in a soft gradient.
Start with a sheer or pale pink base. Let it dry. Then use a sponge to apply a warm coral or orange toward the tip, feathering it outward so it blends.
The result is a French tip with soft, diffused edges instead of a hard line.
This is more flattering than a standard French tip because the soft edge is gentle and feminine rather than rigid.
It works on all nail lengths but looks especially elegant on medium to long coffin or oval shapes.
This style photographs beautifully in natural light. The soft color shift is visible in photos without being too dramatic.
It is also a great choice for events like weddings, graduations, or baby showers where you want something pretty but not too loud.
Budget tip: Pink and peach polish doubles as both your base and your fade color. You may not even need to buy anything new if you already own a few shades in this range.
- Neon Pink and Orange Mixed Nails
If subtlety is not your thing, go full neon. Neon pink and neon orange together are loud, vibrant, and absolutely joyful.
Simply alternate the colors across your nails. Index and ring finger in neon pink, the rest in neon orange. Or do all five in one color and the other hand in the second color for maximum impact.
Apply a white base coat under both neons first. Neon polish is often sheer and needs the white underneath to look fully opaque and bright.
You will likely need three coats of neon to get the full effect.
Neon nails look incredible in daylight and even better under blacklight. They are a great choice for festivals, beach days, and summer parties.
This is one of the boldest options in this list and it requires no skill at all. Just clean application and enough layers.
Seal with a glossy top coat to protect the color and add extra shine.
Budget tip: Sinful Colors and Orly make excellent neon shades for under $4. They are highly pigmented and long-lasting for the price.
- Pink and Orange Abstract Brush Stroke Nails

Abstract brush stroke nails look like a piece of art on your fingertips. They are expressive, imperfect by design, and incredibly easy to do.
Load a regular nail brush with pink polish. Make a wide, confident stroke across the nail in one direction. Do not overthink it.
Then do the same with orange on top or beside the pink stroke. Let them overlap in places.
Leave some of the white base showing through. The white space is part of the design.
There are no rules with abstract strokes. The more spontaneous your marks, the better the final result looks.
Every nail will look different, which is exactly the point. This style celebrates imperfection.
Finish with a glossy top coat to unify all the strokes and make the colors pop.
This is a great style for people who love art but feel intimidated by detailed nail work. You cannot do this wrong.
Budget tip: This style actually looks better with cheaper, thicker polish because the brush strokes stay more defined and expressive. Save your expensive polishes for solid color looks.
- Pink Polka Dots on Orange Nails
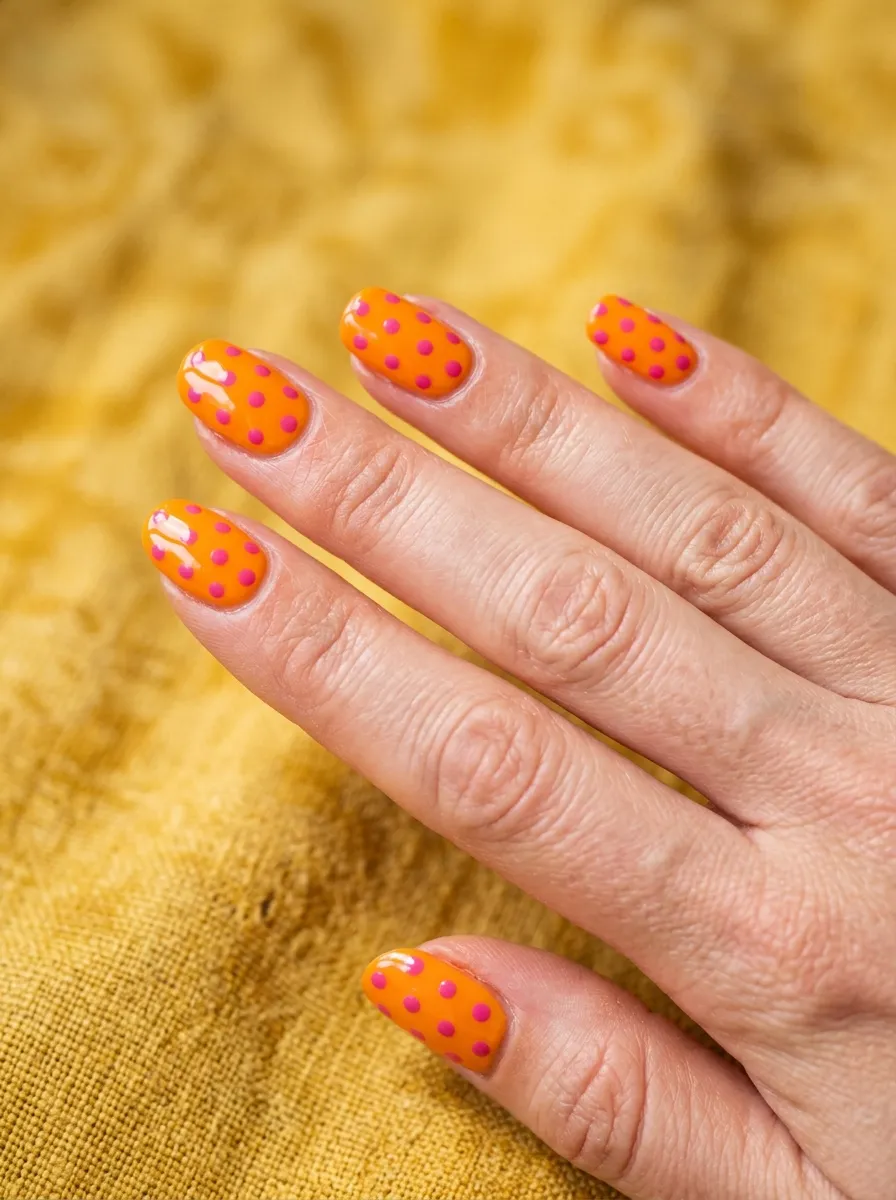
Polka dots are classic, fun, and very easy to make at home. On an orange base, pink dots have great contrast and a retro feel.
Paint your nails in solid bright orange. Let them fully dry. Then dip a dotting tool or the rounded end of a bobby pin into pink polish. Press it gently onto the nail.
Repeat across the nail in a regular grid pattern or scatter them more randomly.
Large dots give a retro 1960s feel. Small, tightly packed dots look more delicate and modern.
Try mixing dot sizes for more visual interest. A few large dots surrounded by smaller ones looks very dynamic.
You can also do the reverse: pink base with orange dots. Both versions work beautifully.
Seal with a top coat as soon as the dots are dry to prevent smudging.
This is a genuinely beginner-friendly nail art style. If you mess up a dot, wipe it off with a toothpick dipped in acetone before it dries.
Budget tip: A bobby pin or a pencil with a rubber eraser tip makes a perfect makeshift dotting tool. You probably already have one.
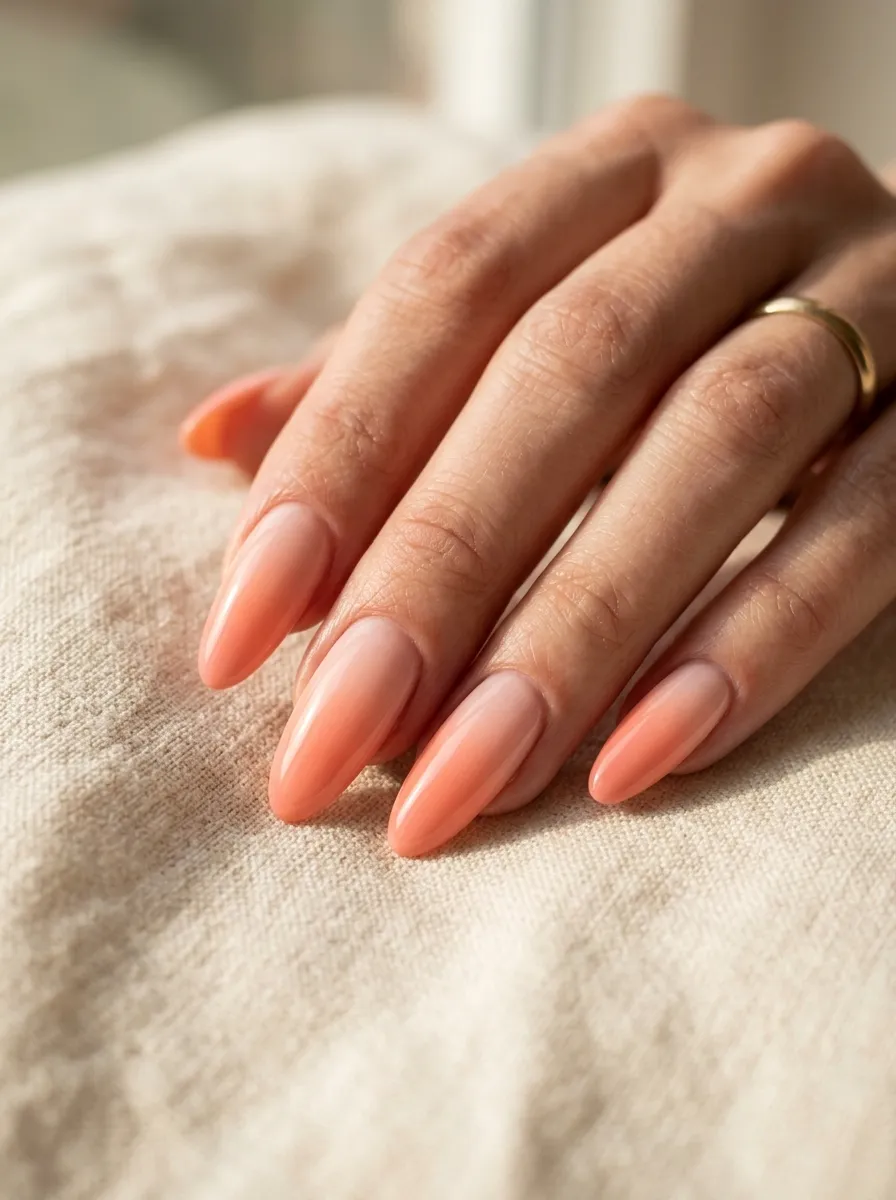
- Peachy Pink Jelly Nails
Jelly nails are exactly what they sound like. The polish is sheer and translucent, like a piece of colored glass or candy. They have a soft, dreamy quality.
To get the jelly effect, apply thin coats of a sheer peachy pink polish. The key is thin layers. Three to four coats, each very sheer, will build up a glassy depth.
You should be able to see your natural nail through the color. That slight transparency is what makes jelly nails so unique.
Finish with a high-gloss top coat for the full glass-nail effect. The more shine, the more jelly-like they look.
This style suits every nail length and shape. It is especially beautiful on longer nails where the depth of color really shows.
Peachy pink sits exactly between pink and orange in the color spectrum, so it is the perfect blend of both.
This look is subtle, elegant, and surprisingly professional. It is one of those styles that looks effortlessly done.
Budget tip: Sheer polishes cost the same as regular ones. Just look for words like “sheer,” “translucent,” or “jelly” on the label. Kiss has a great budget jelly nail range.
- Pink and Orange Floral Press-On Nails
Press-on nails have come a long way. Today they look just like a professional gel manicure. And you can get beautiful pink and orange floral designs for very affordable prices.
Look for press-on sets on Amazon, Etsy, or at your local beauty supply store. Search for “pink orange floral coffin press-ons” and you will find dozens of options.
They apply in minutes. You clean your nails, apply the adhesive tab or glue, press and hold for 30 seconds. Done.
The key to long-lasting press-ons is proper nail prep. Push back your cuticles, lightly buff the nail surface, and wipe with rubbing alcohol before applying. This removes oils that cause early lifting.
With proper prep, press-ons can last one to two weeks.
This is the easiest way to get a detailed pink and orange floral design without any nail art skill. You are buying the design ready-made.
Budget tip: Impress and Static Nails both make beautiful press-on kits for around $8 to $12. Etsy handmade sets can be found for under $15 and often look even more detailed.
- Coral and Hot Pink Split Nail Design
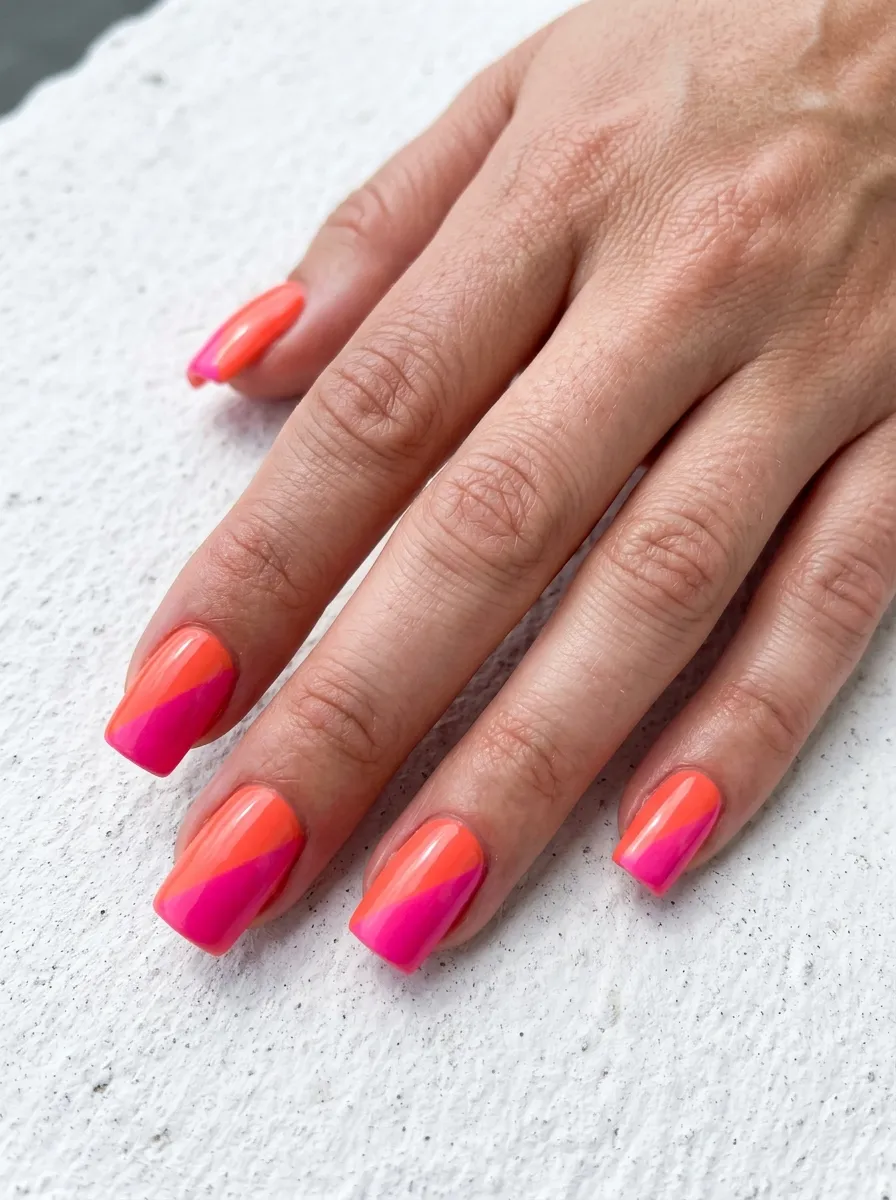
The split nail design is one of the most striking modern nail styles. Each nail is divided into two halves with two different colors. It looks like a professional nail bar technique but is totally doable at home.
Apply your first color, let it dry. Then lay a piece of tape diagonally across the nail. Apply your second color over the entire nail. Peel the tape immediately.
You will be left with a clean diagonal split between coral and hot pink.
Try different diagonal angles. Steep diagonals look edgier. Gentle diagonals look more elegant.
Make sure your first color is completely dry before taping over it. If it is still wet, the tape will pull the polish off.
You can also alternate which side gets which color on different fingers. This adds more variety to the look.
This style is very bold and graphic. It suits square and coffin nails best.
Budget tip: The only supplies you need are two polishes and tape. Nothing else is required. Total cost can be under $10 if you shop at the drugstore.
- Pink and Orange Leopard Print Nails
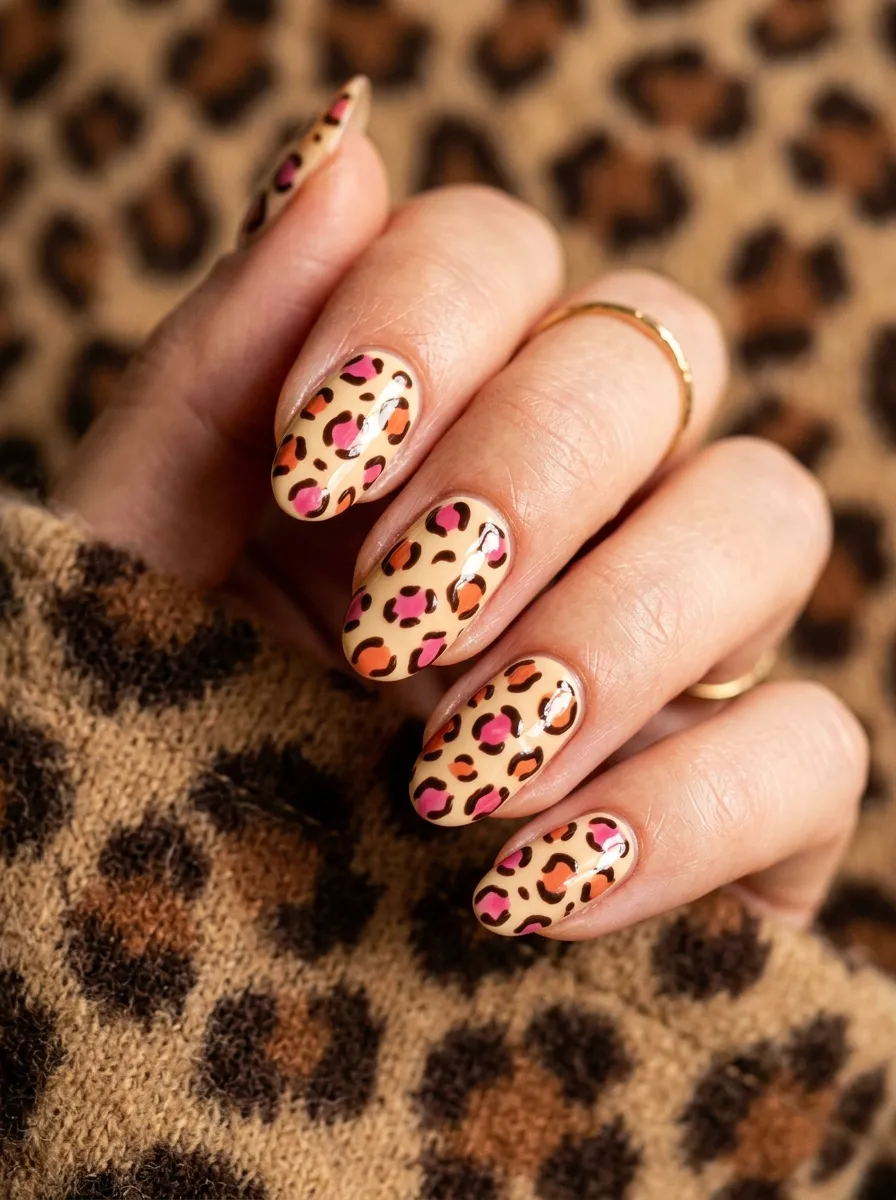
Leopard print on nails is fun, fierce, and very fashionable. The pink and orange color version is softer than the traditional brown version but still bold.
Start with a cream or beige base. Let it dry. Then use a medium dotting tool to place irregular oval shapes in orange across the nail. While those dry, go back and add slightly smaller irregular shapes in pink around or overlapping the orange ones.
Use a thin brush dipped in dark brown or black to outline the spots. Do not trace them perfectly. Irregular outlines look more natural.
The imperfection is what makes leopard print look realistic. No two spots should look exactly the same.
Do leopard print on two or three accent nails and keep the others solid orange or pink for balance.
This is a fun look for casual days, nights out, or any time you want your nails to make a statement.
Budget tip: Thin nail art brushes for the outlines cost around $3 on Amazon. One set lasts for years if you clean the brushes after each use with nail polish remover.
- Pink Gloss with Orange Glitter Tips
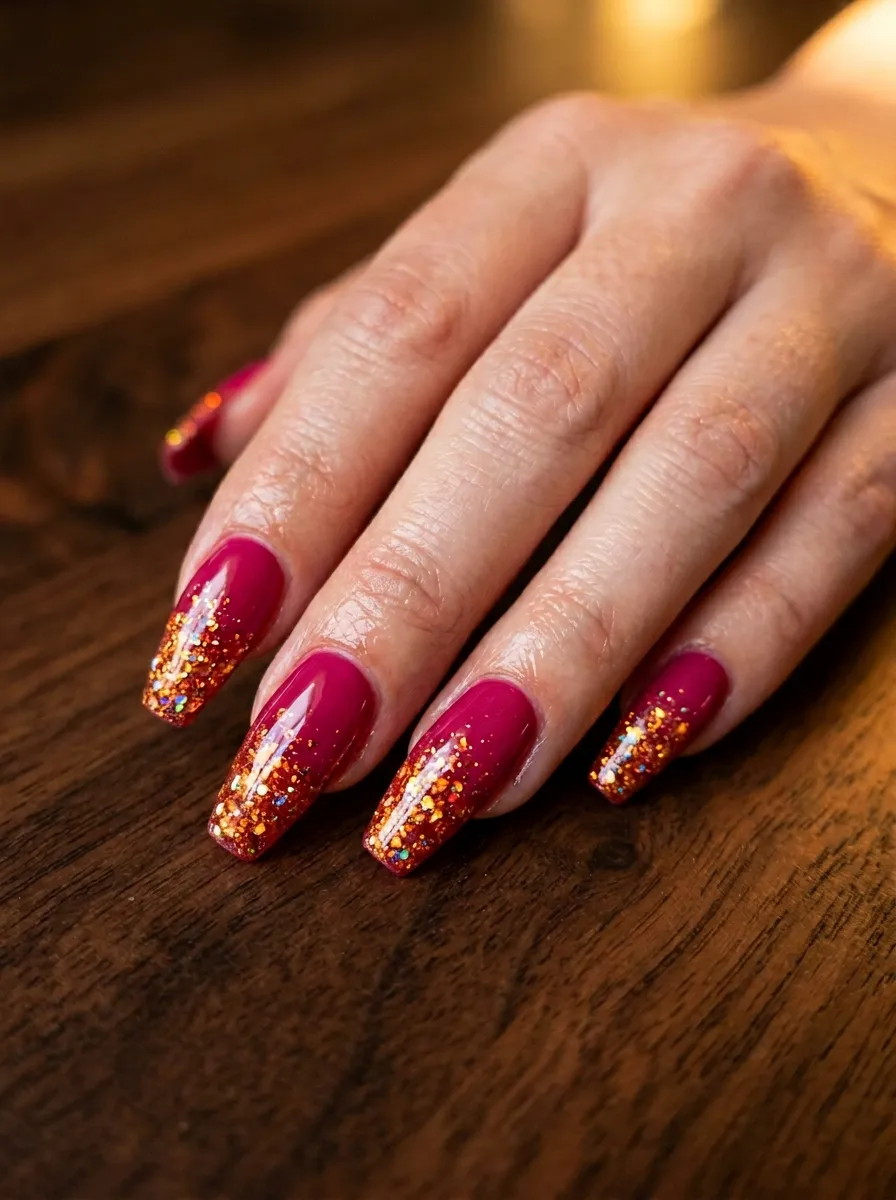
This is the glamour version of the pink and orange nail story. A rich, glossy pink base with orange glitter piled on at the tips feels festive and bold.
Paint your nails in a deep, glossy pink. Let them dry. Then dab chunky orange glitter polish only onto the tip of each nail. Build up layers until the glitter is dense and sparkly.
Blend the glitter edge slightly downward so it fades rather than ends abruptly. This creates a more polished look.
Holographic orange glitter catches light and shifts color, which makes the tips look even more dynamic.
Seal with at least two layers of top coat. This smooths the glitter texture and prevents snagging.
This is a gorgeous option for holidays, New Year’s Eve, Christmas parties, or any event where you want to dress up.
Budget tip: OPI and China Glaze both make excellent glitter polish, but drugstore brands like LA Colors also carry chunky glitter in orange for under $3.
- Full Nail Orange-to-Pink Reverse Ombre
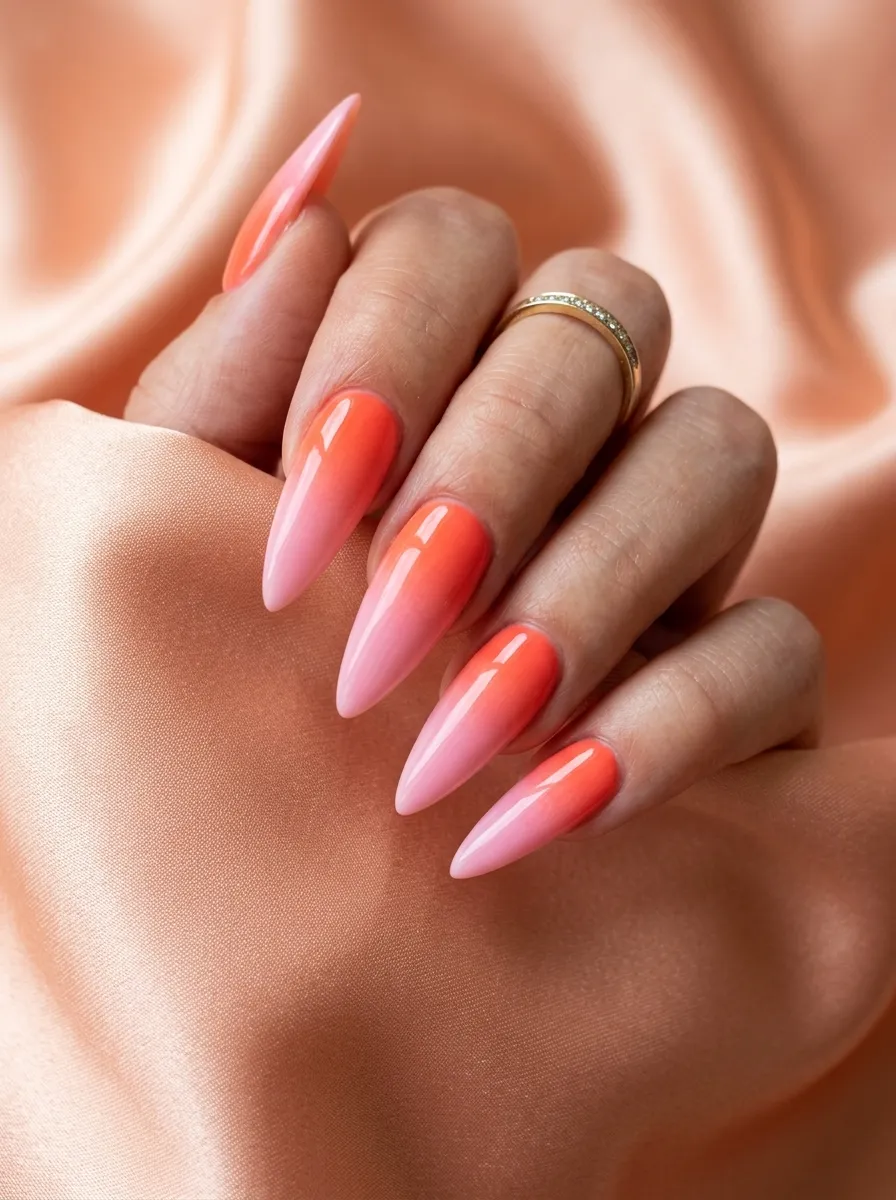
This is the grand finale of the pink and orange nail world. The reverse ombre starts deep and bold at the base and fades into something soft and dreamy at the tip.
Apply a vivid orange near the cuticle end of your nail using a sponge. Then fade that into a bubblegum pink toward the tip. The color moves from warm and intense to light and soft as it reaches the end of the nail.
This is the opposite of most ombre directions, which go from light at the base to dark at the tip. The reversal makes it feel unexpected and artistic.
On longer stiletto or coffin nails, the gradient has more room to breathe and looks especially dramatic.
Use the sponge method and layer it multiple times for a smooth, seamless result.
This nail style is a real head-turner. It looks complex but takes no more effort than a regular ombre.
Budget tip: The reverse ombre requires the same two polishes as a regular ombre. Just flip the sponge. No additional cost, totally new look.
Pink and orange nails offer something for every mood, occasion, and skill level. Whether you love bold neons, soft pastels, intricate nail art, or simple solid shades, this color combination delivers. You have seen 29 completely different ways to wear it, from peachy jelly finishes to sunset gradients to leopard print. The best part is that most of these looks are achievable at home with affordable drugstore polish and basic tools like toothpicks and tape. Start with one look that speaks to you, try it out, and see how it feels. Nail art is one of those things that gets easier and more fun the more you practice. Pick your two favorite shades from the list, grab them on your next shopping trip, and give your nails the colorful upgrade they deserve.